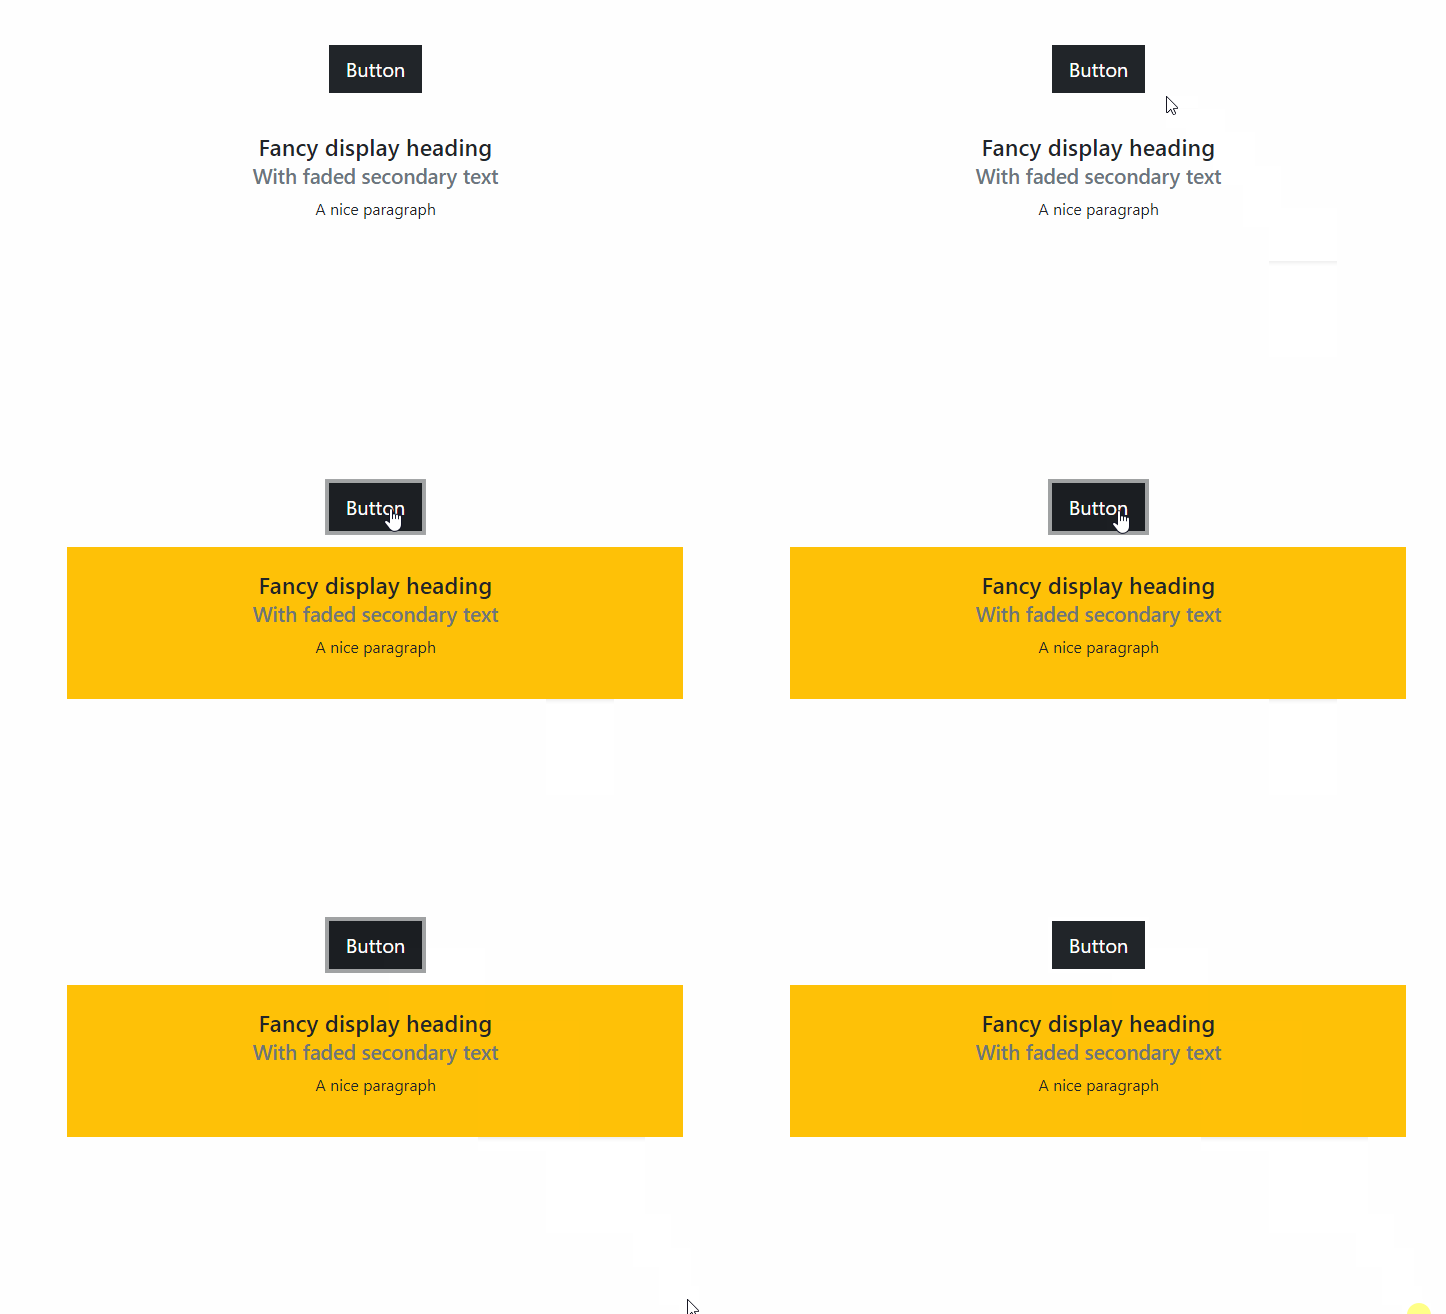
Using the Toggle Component
Intro The тoggle component is a simple, but quite handy component. It can be used to toggle visibility, styling, classes of the elements on your pages. In this tutorial we will show you a couple of ex
The тoggle component is a simple, but quite handy component. It can be used to toggle visibility, styling, classes of the elements on your pages.
In this tutorial we will show you a couple of examples - toggling visibility and toggling a class.
Toggle Component Overview
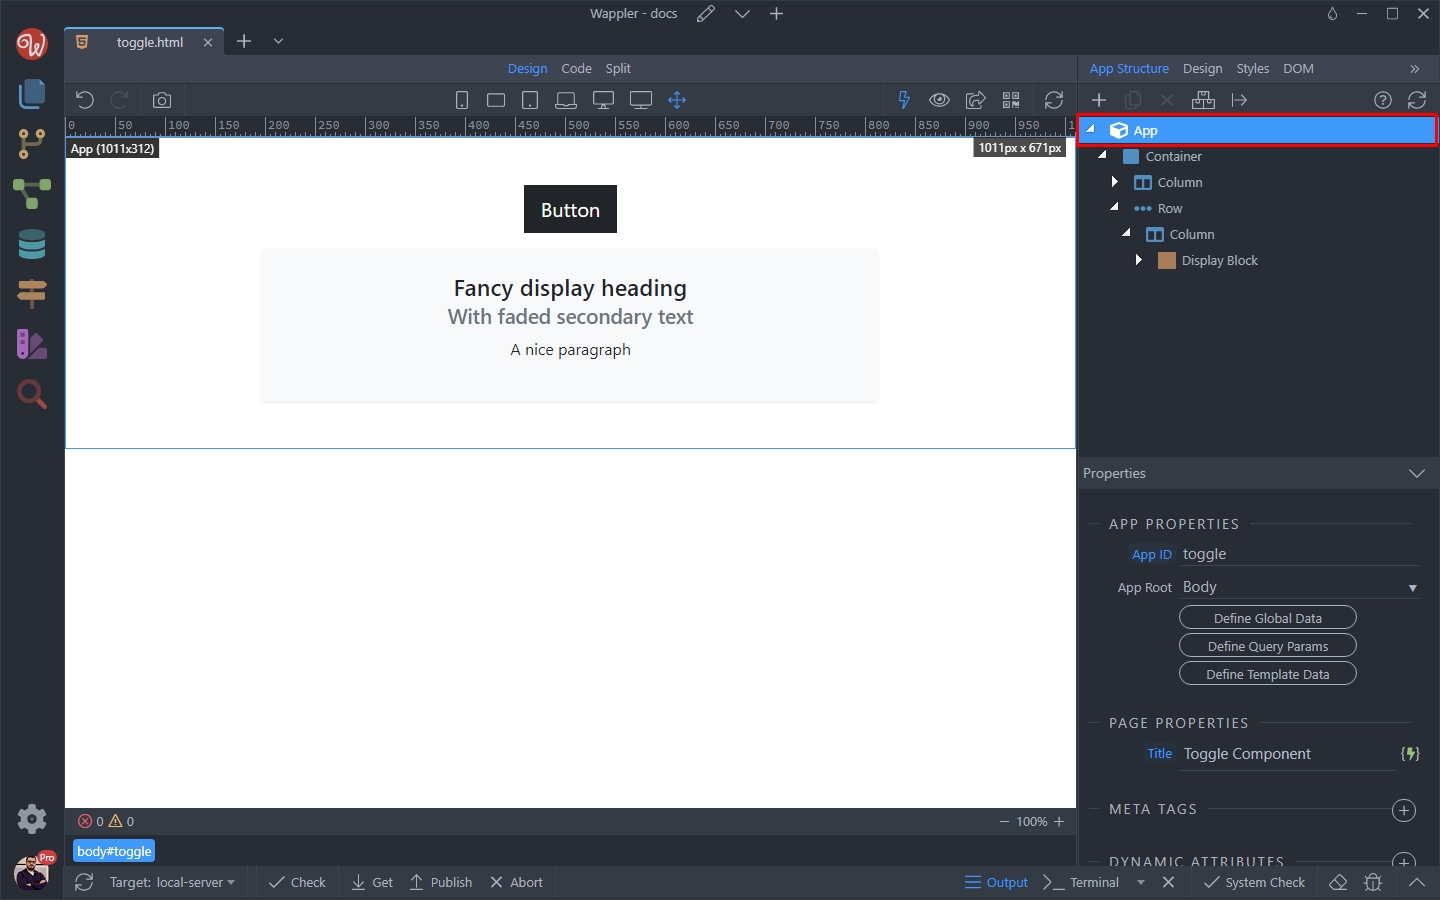
Section titled “Toggle Component Overview”As all the App Connect components, the toggle component should be added in the App Structure, before you can use it. Right click App:
Then select Data > Toggle:
Section titled “Then select Data > Toggle:”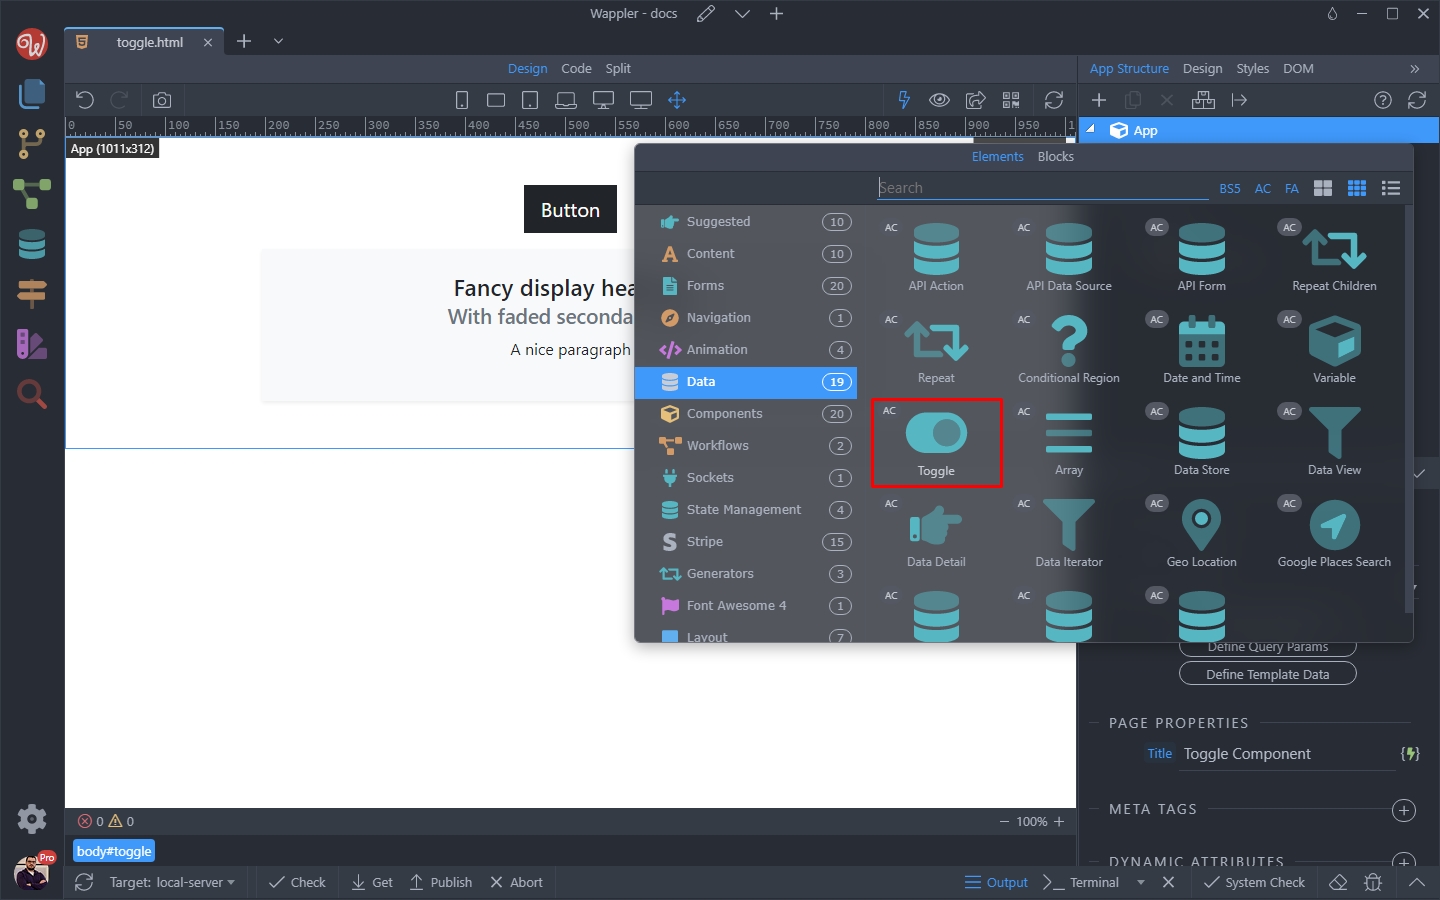
The toggle component has been added to your page:
Section titled “The toggle component has been added to your page:”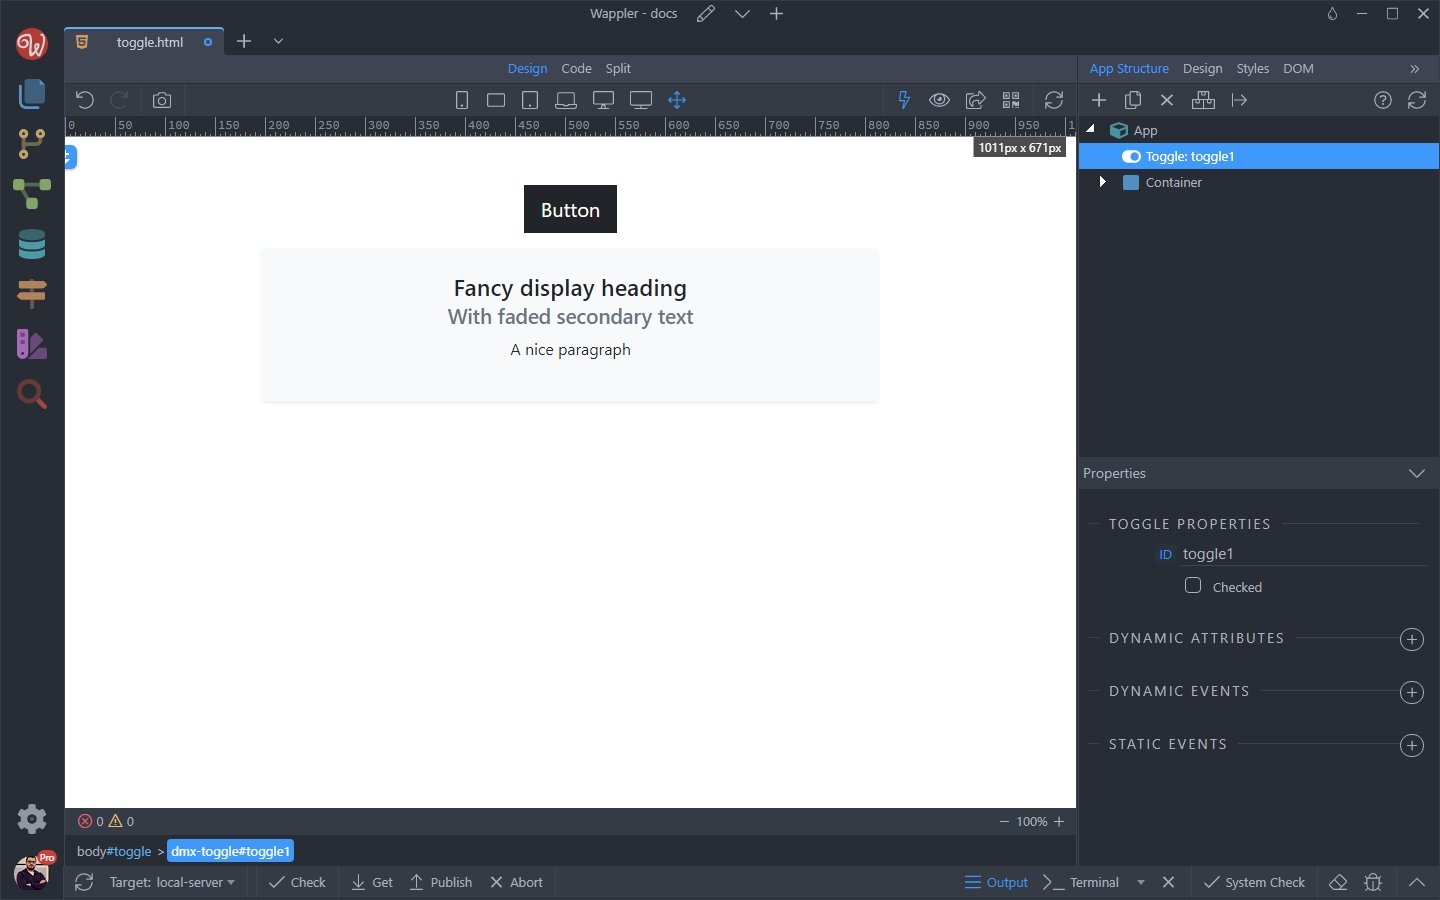
Step 6
Section titled “Step 6”The way the toggle component works is quite simple. It has two states - checked and not checked`
Its state can be changed using the dynamic events.
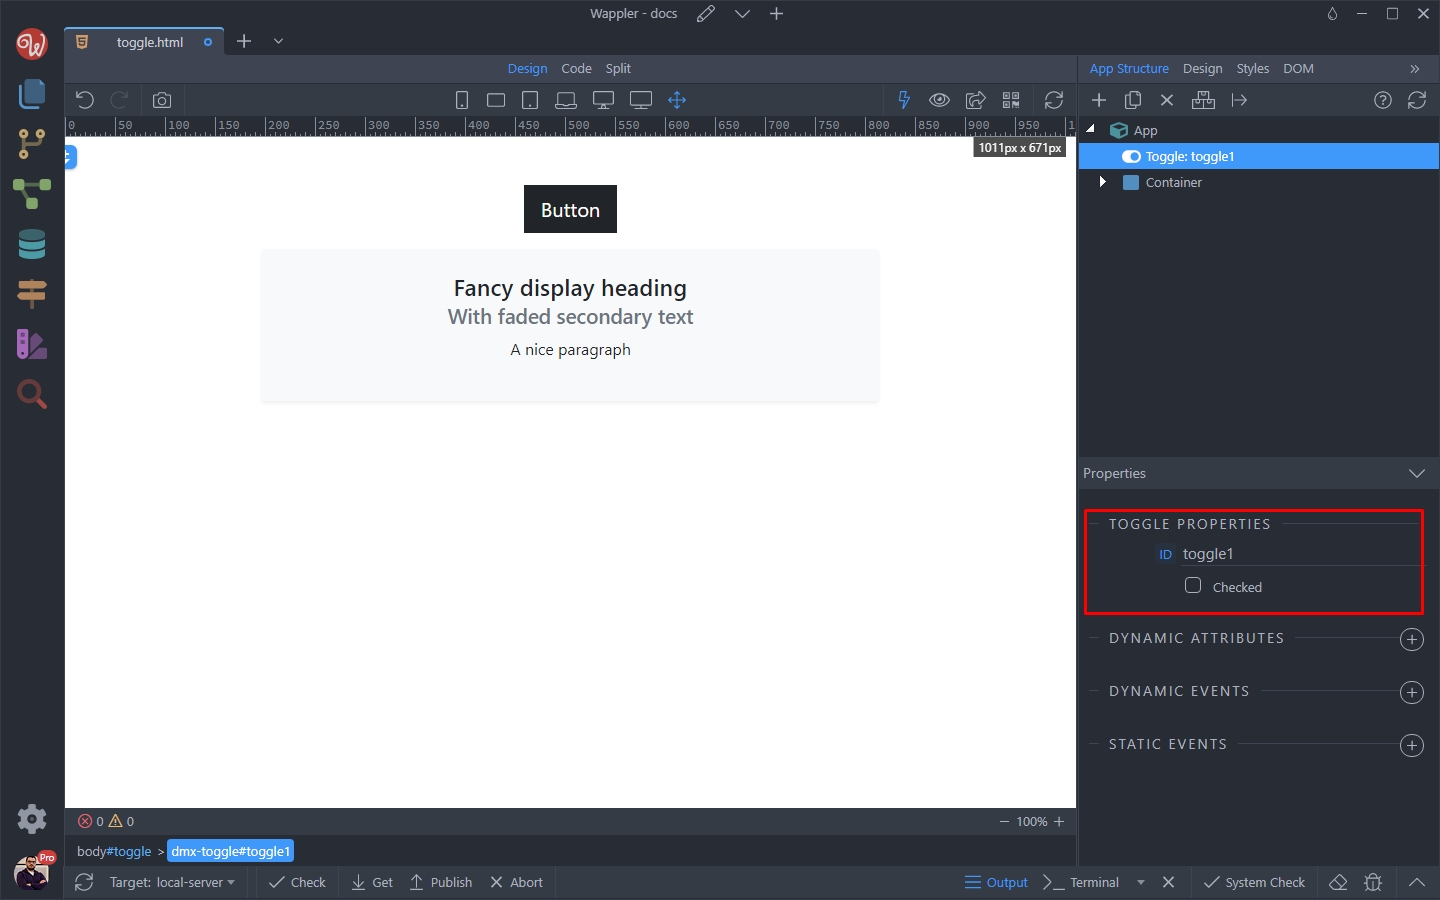
The properties of the toggle component are also quite simple. Its default state is unchecked, but you can also change it to checked in the properties:
Toggling Visibility
Section titled “Toggling Visibility”You can easily toggle the visibility of any element using the toggle component. We’d like to toggle the visibility of a div block on our page, when clicking the button:
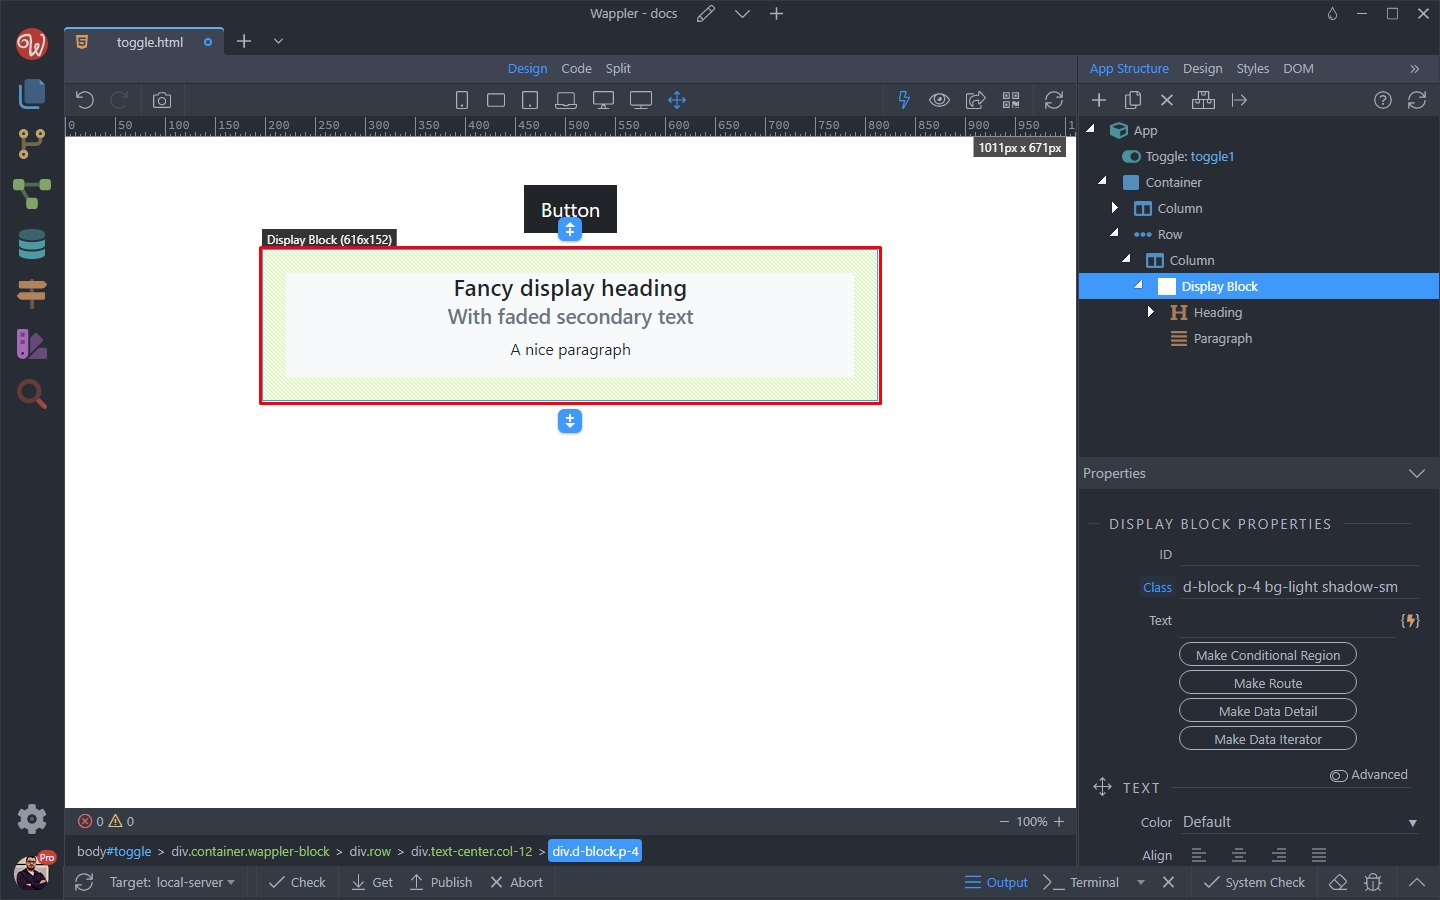
So select the element and add new dynamic attribute:
Section titled “So select the element and add new dynamic attribute:”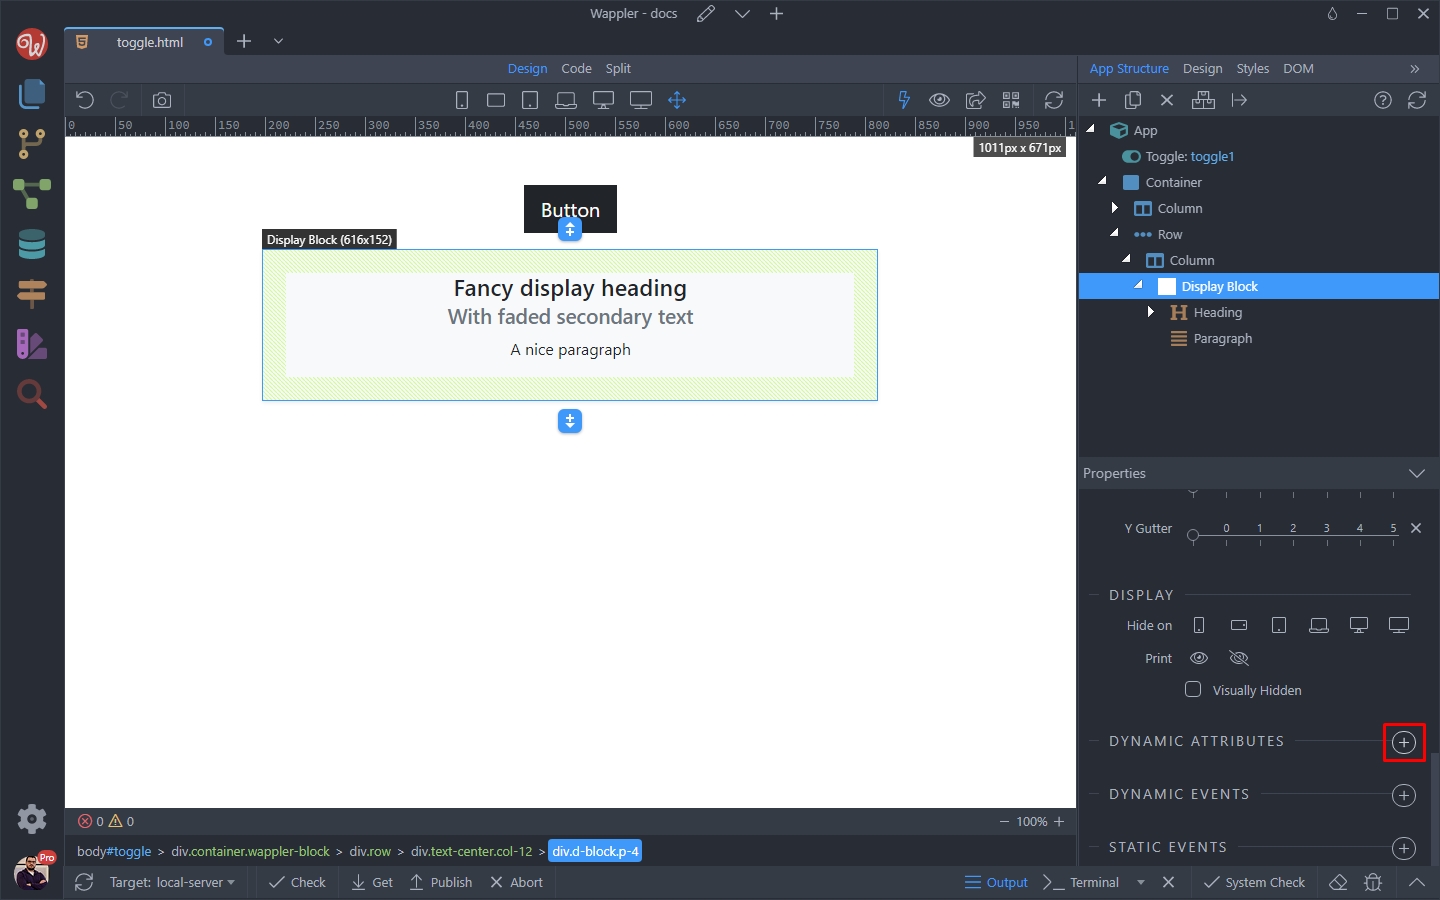
Select Display > Show:
Section titled “Select Display > Show:”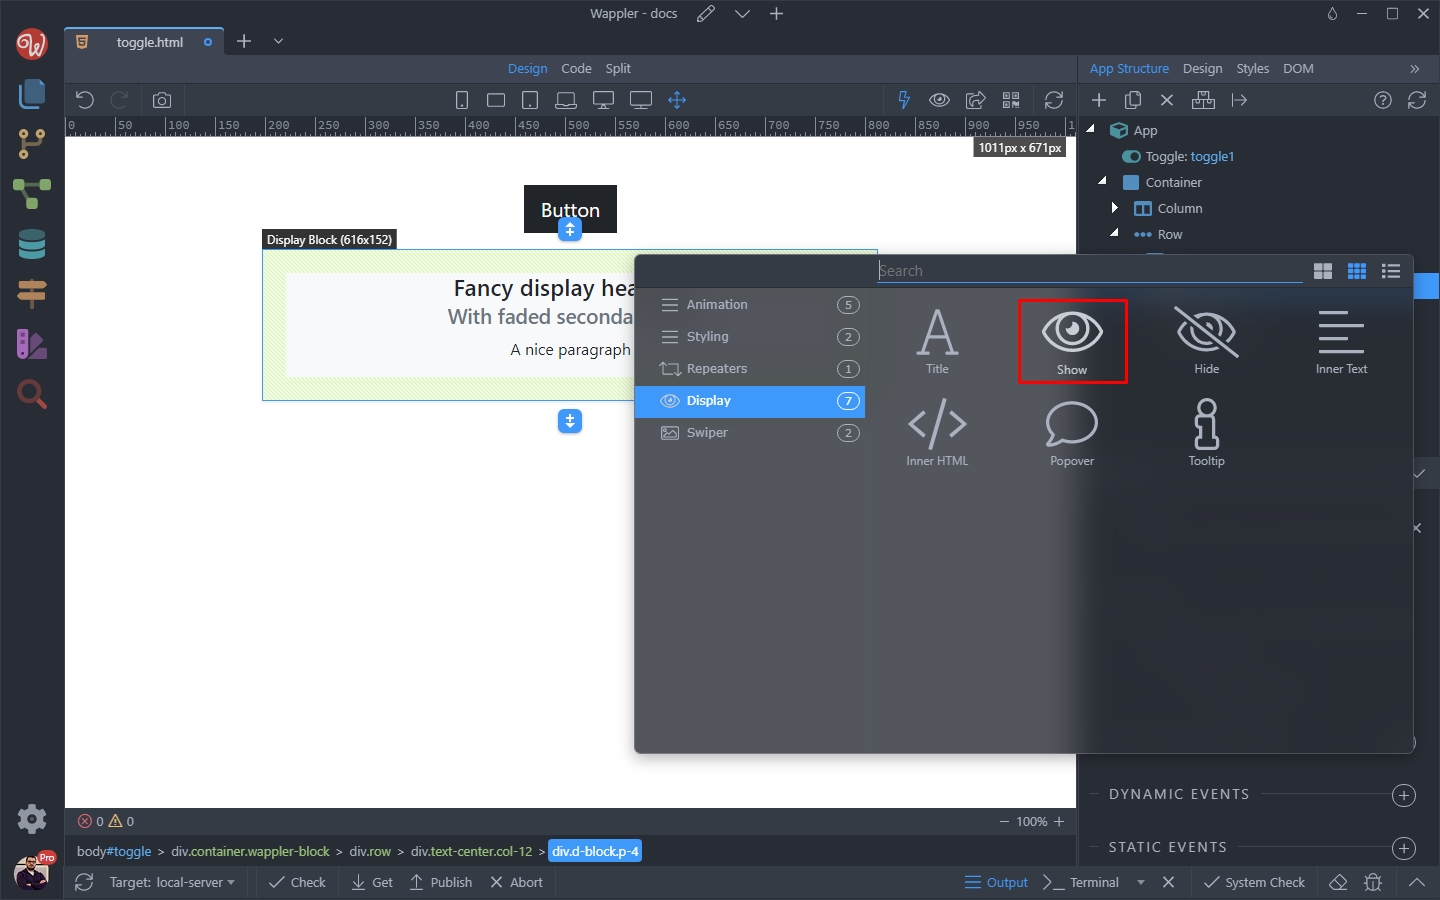
Click the dynamic data picker to select when to show the element:
Section titled “Click the dynamic data picker to select when to show the element:”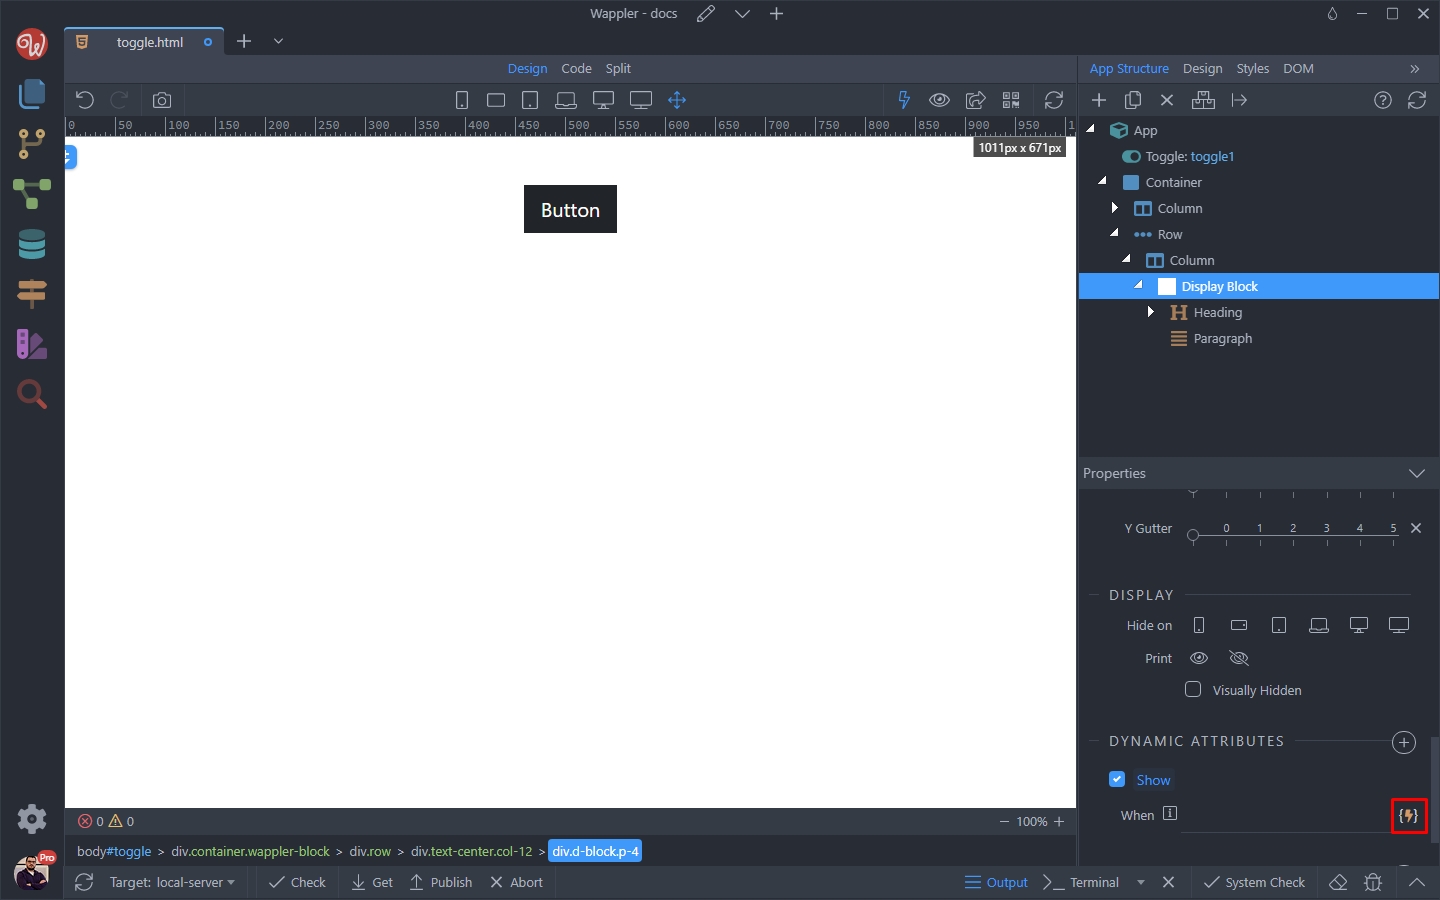
And select Toggle > Checked
Section titled “And select Toggle > Checked”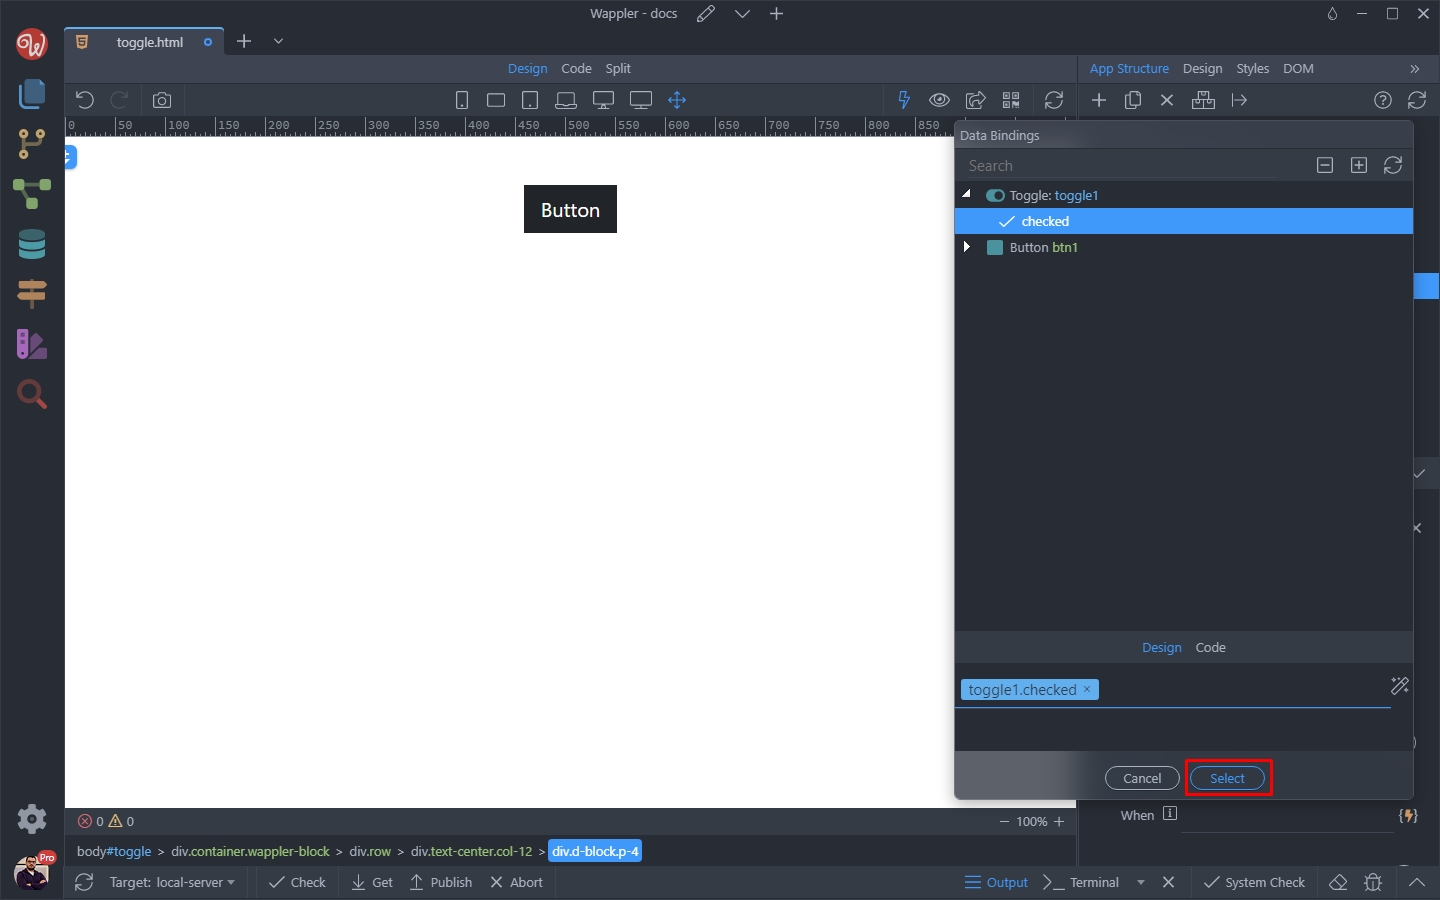
Now, let’s setup the button. Select the button or the element you want to use to control the toggle with:
Section titled “Now, let’s setup the button. Select the button or the element you want to use to control the toggle with:”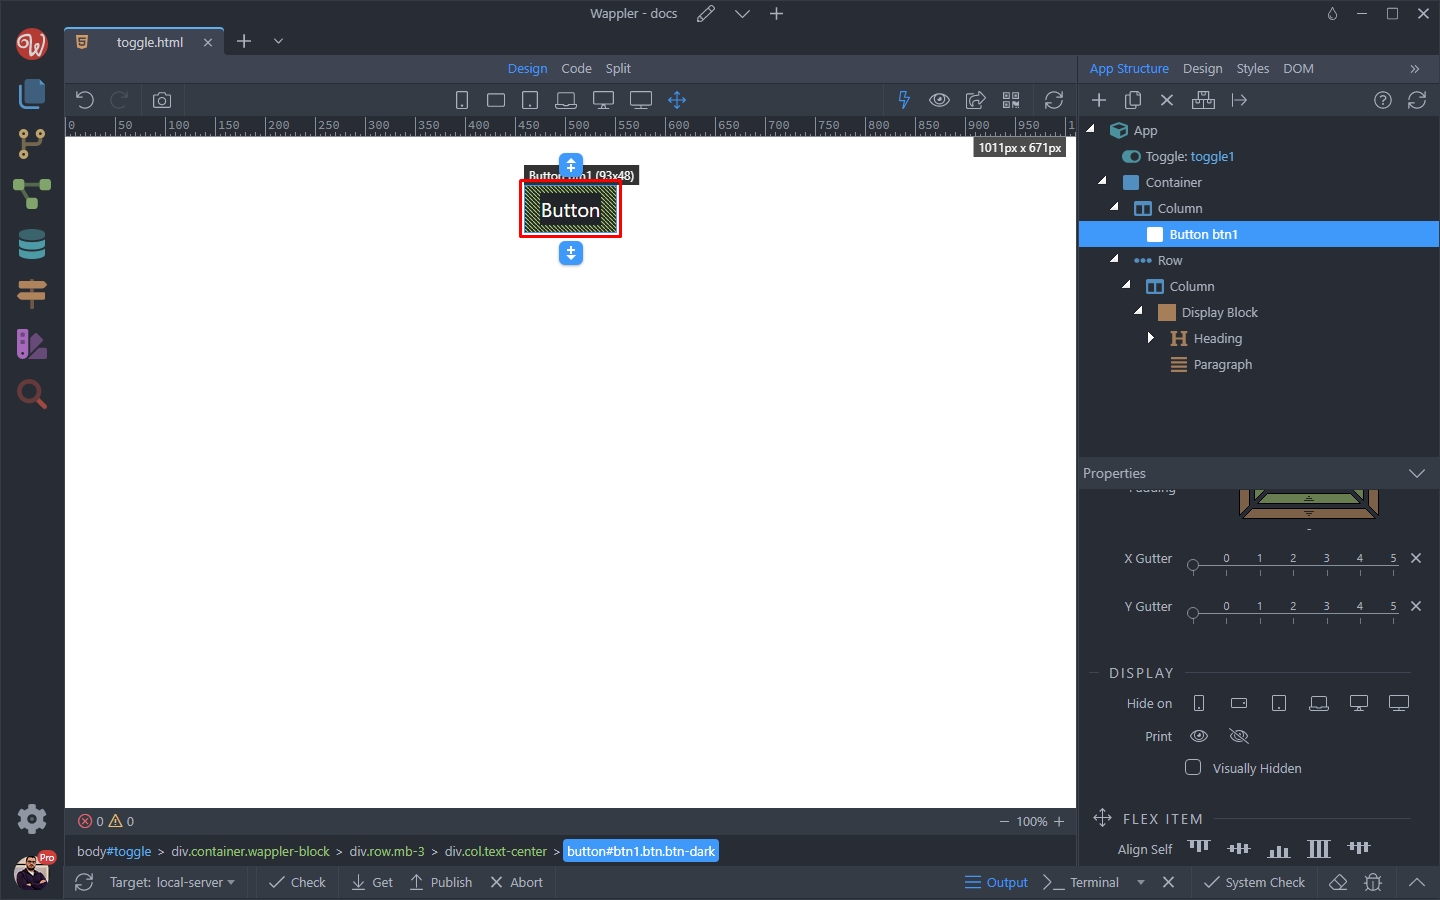
Add new dynamic event:
Section titled “Add new dynamic event:”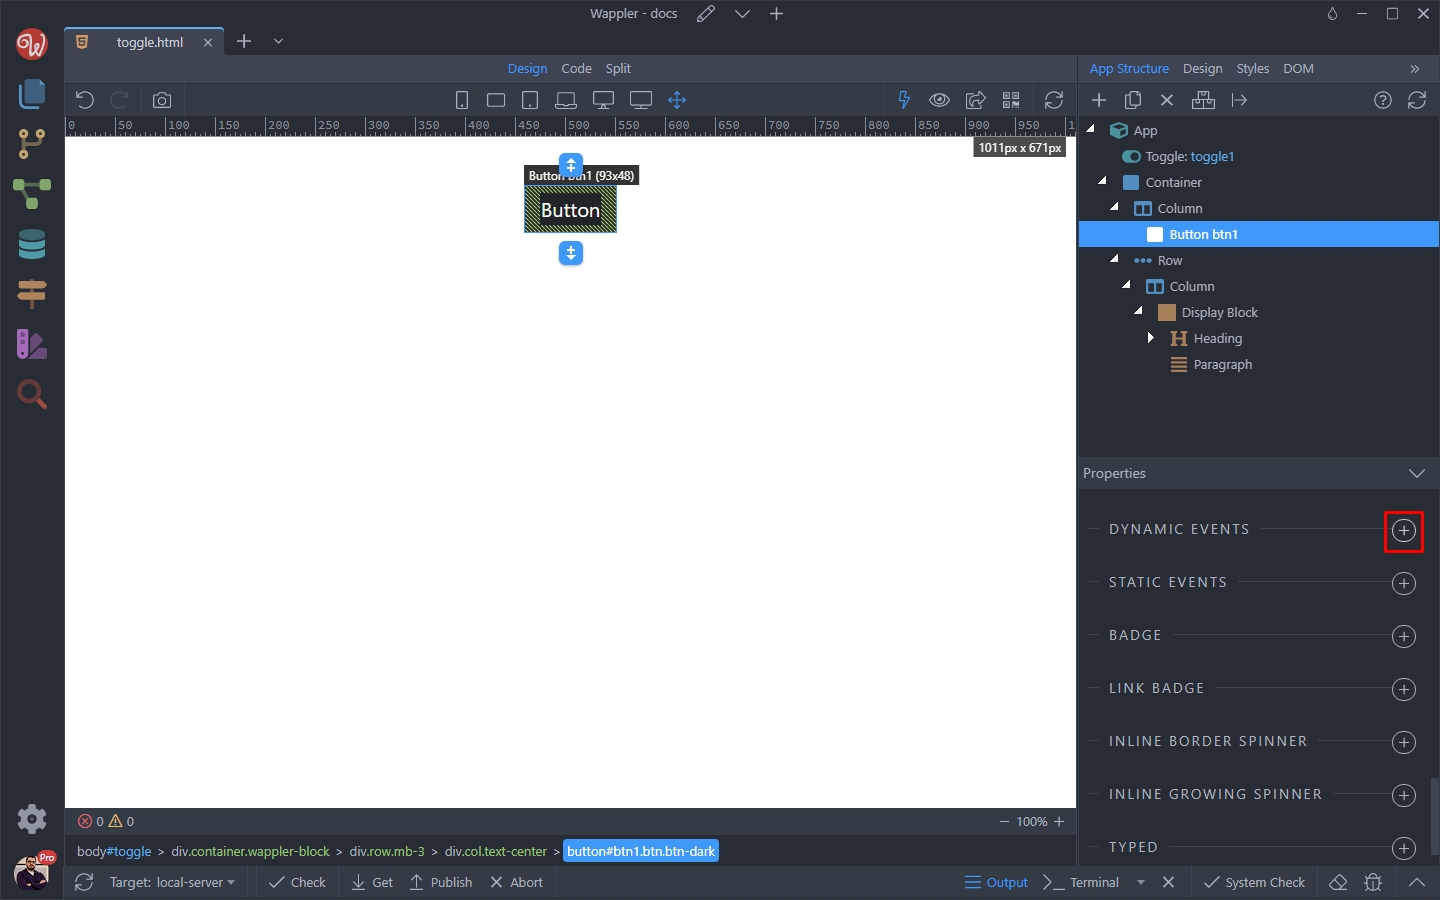
And select Mouse > Click:
Section titled “And select Mouse > Click:”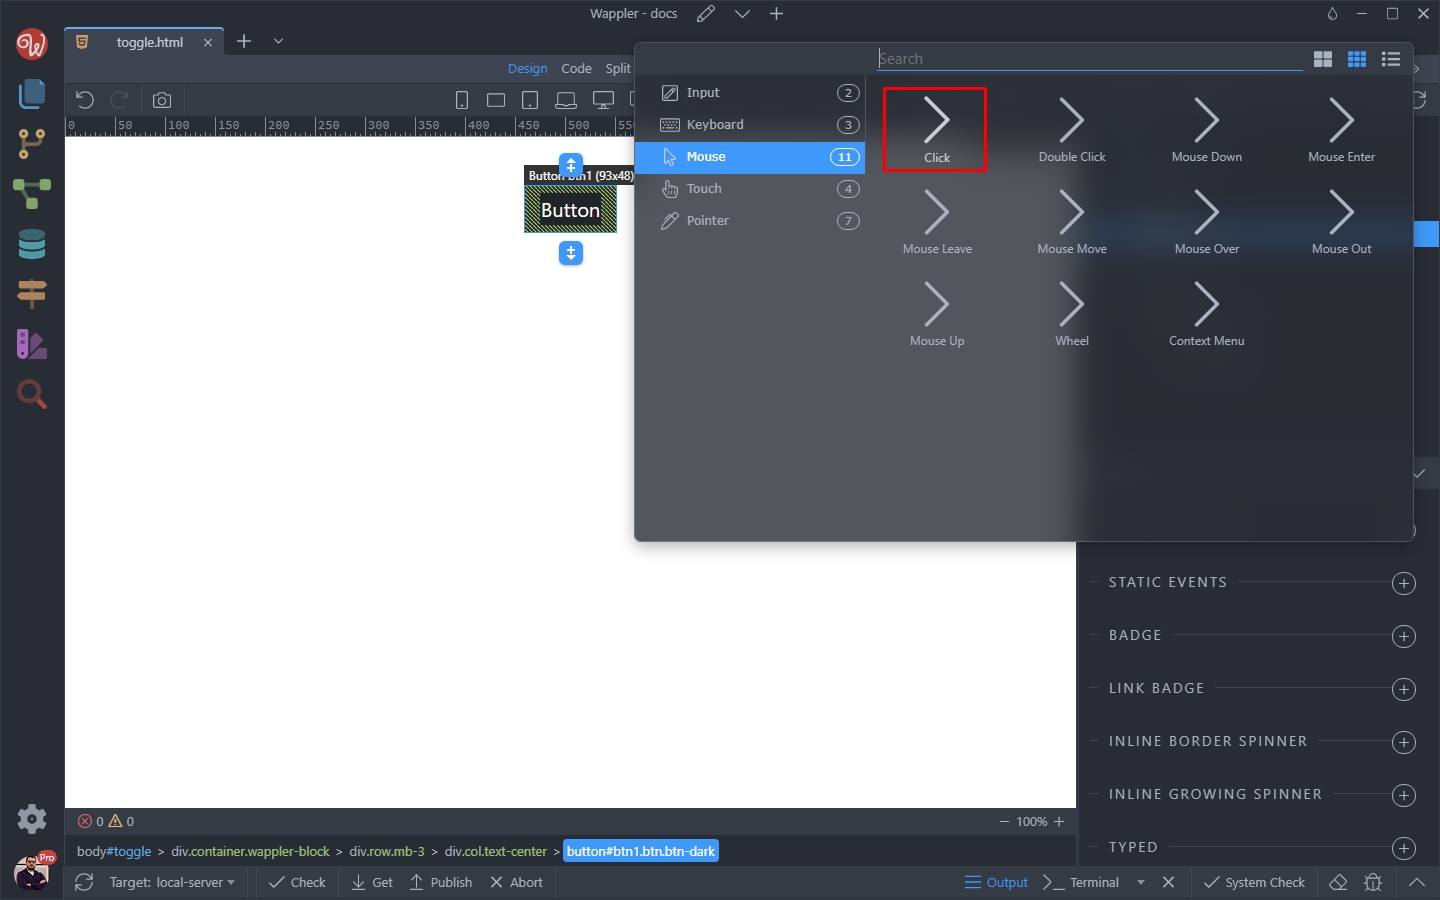
Then click the dynamic event picker icon to select the action for this event:
Section titled “Then click the dynamic event picker icon to select the action for this event:”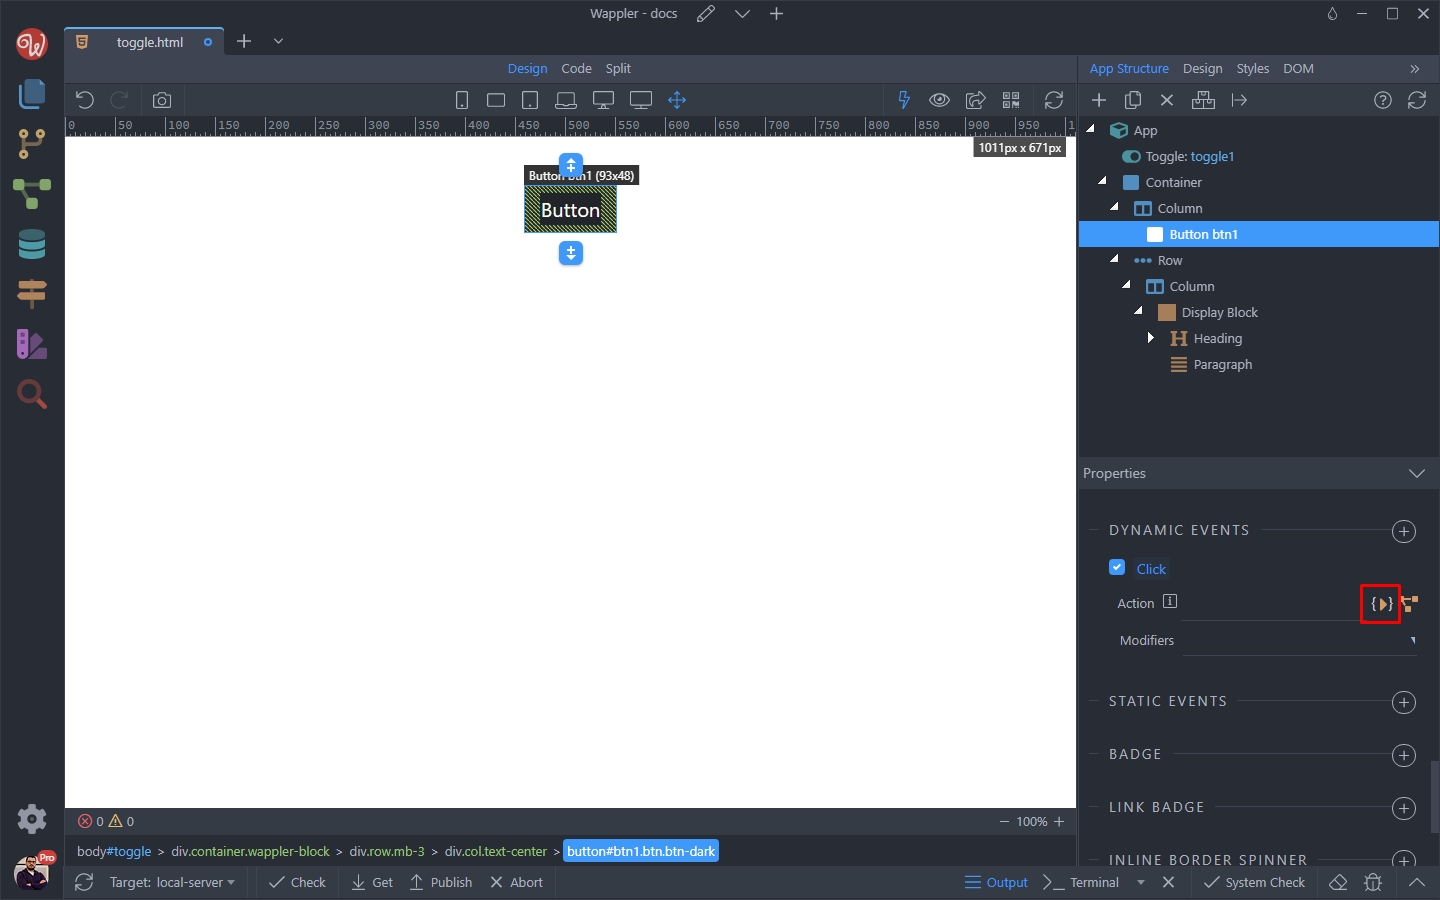
Select the toggle action, under the Toggle Component:
Section titled “Select the toggle action, under the Toggle Component:”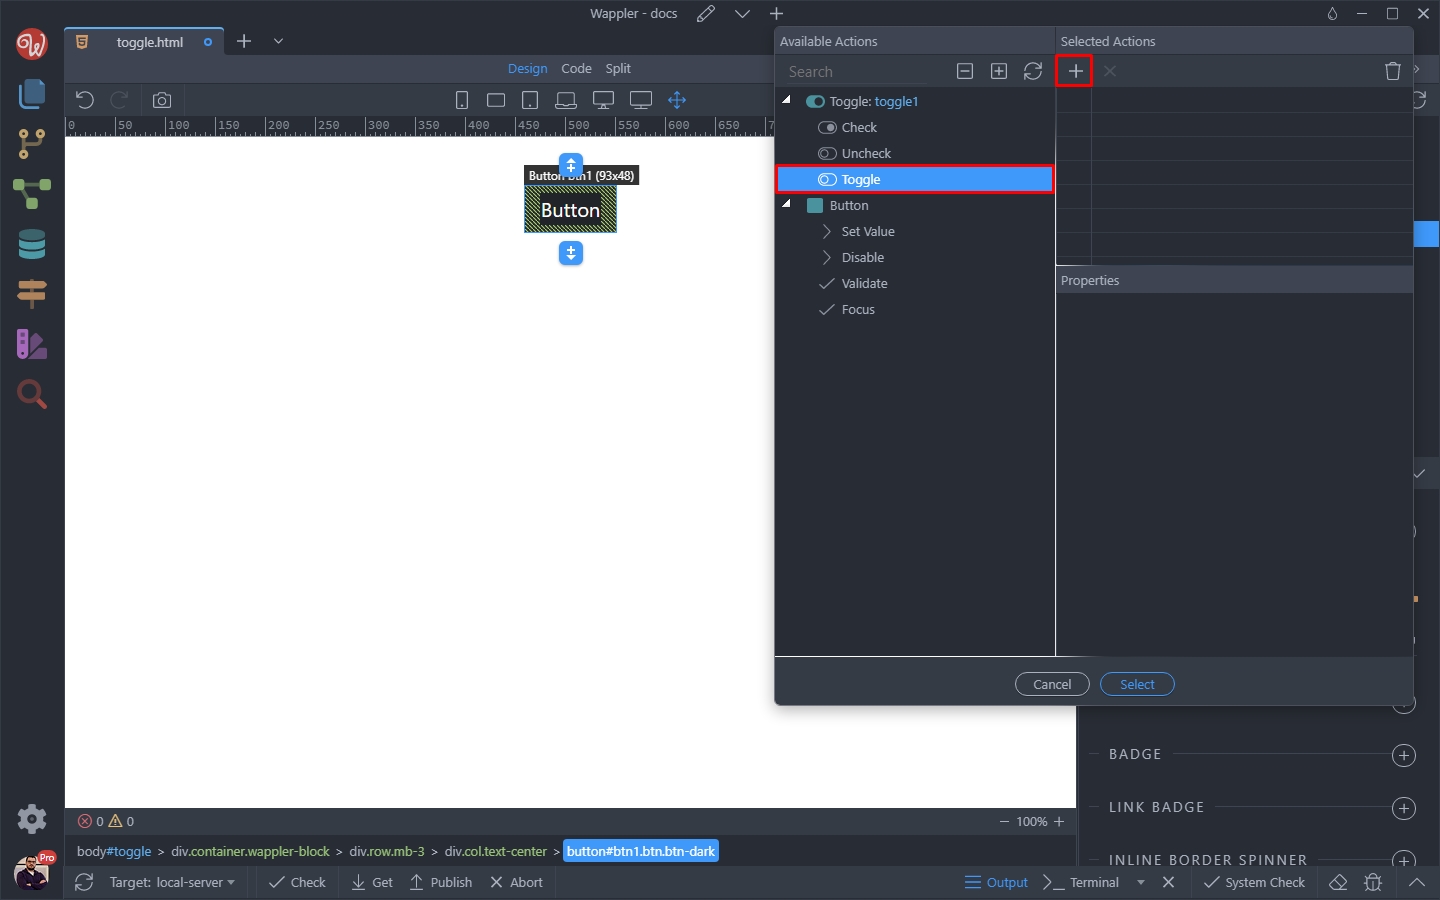
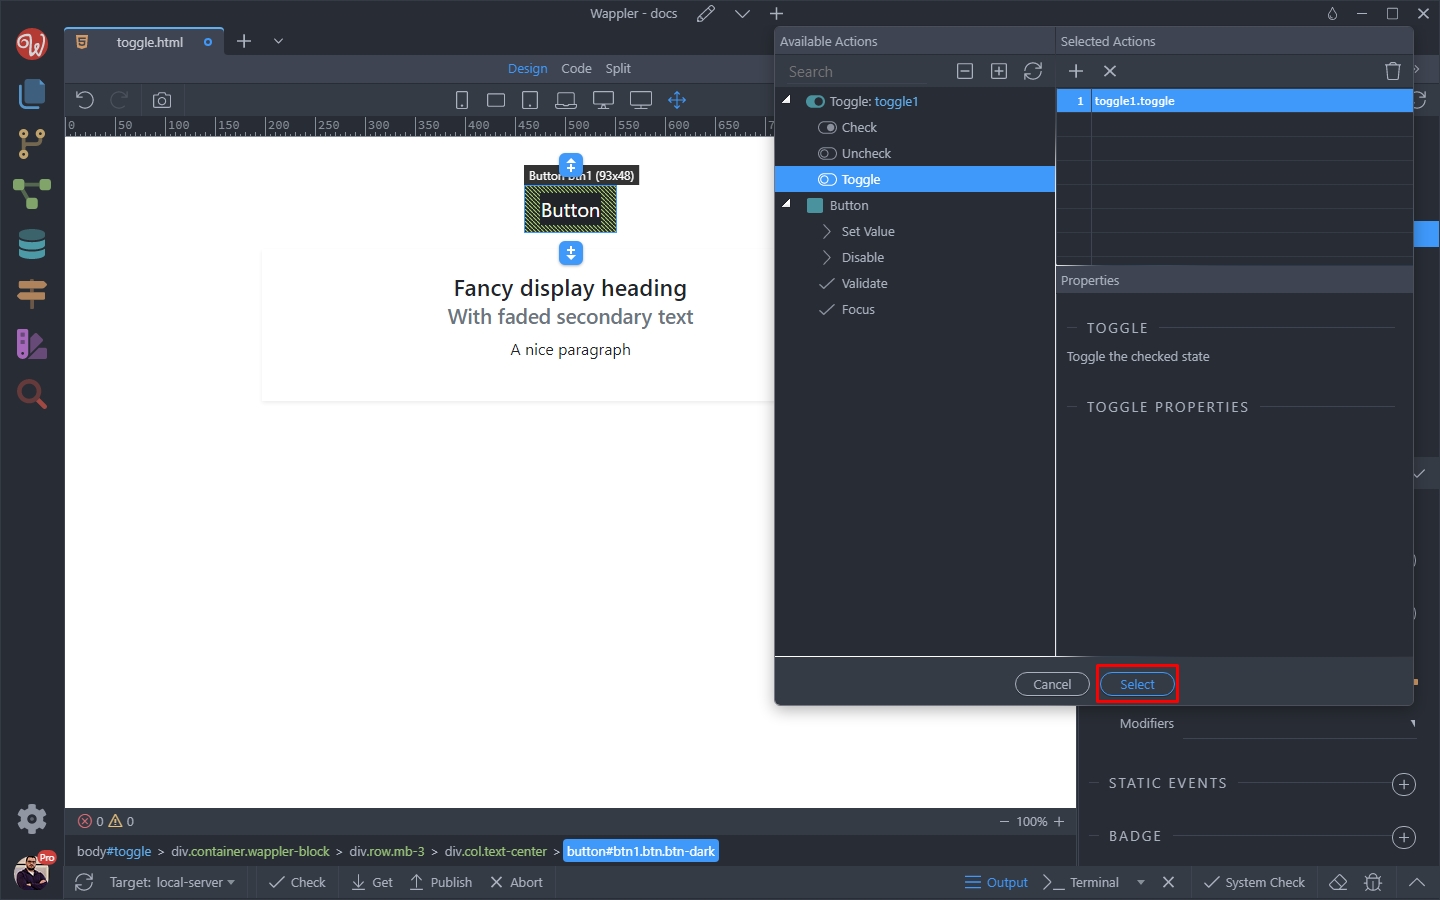
This will toggle the component state from checked to not checked and vice versa. Click Select:
Section titled “This will toggle the component state from checked to not checked and vice versa. Click Select:”This will toggle the component state from checked to not checked and vice versa.
Click Select:
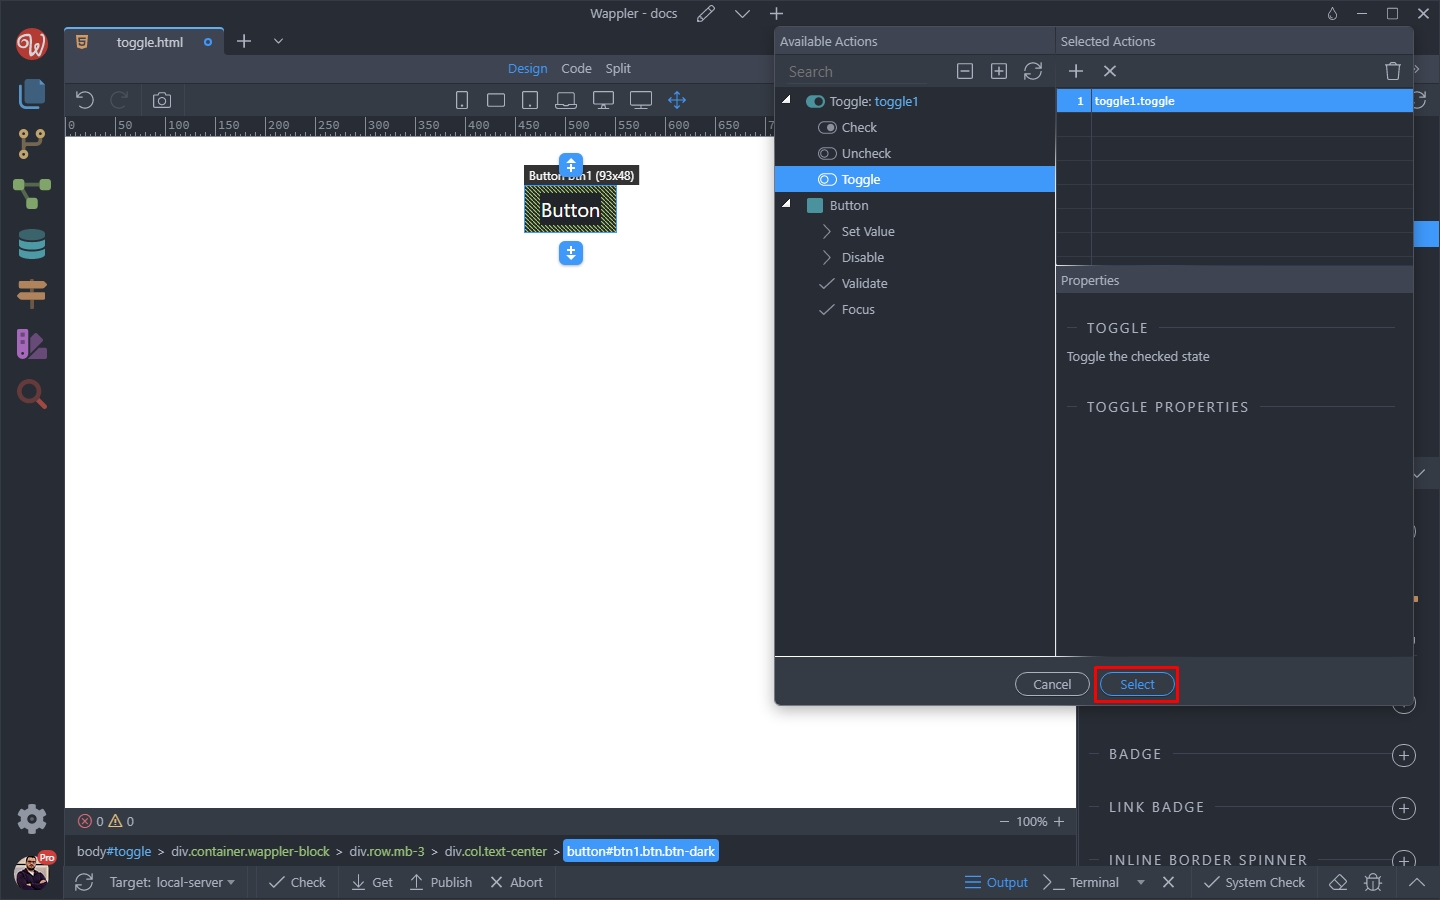
Step 19
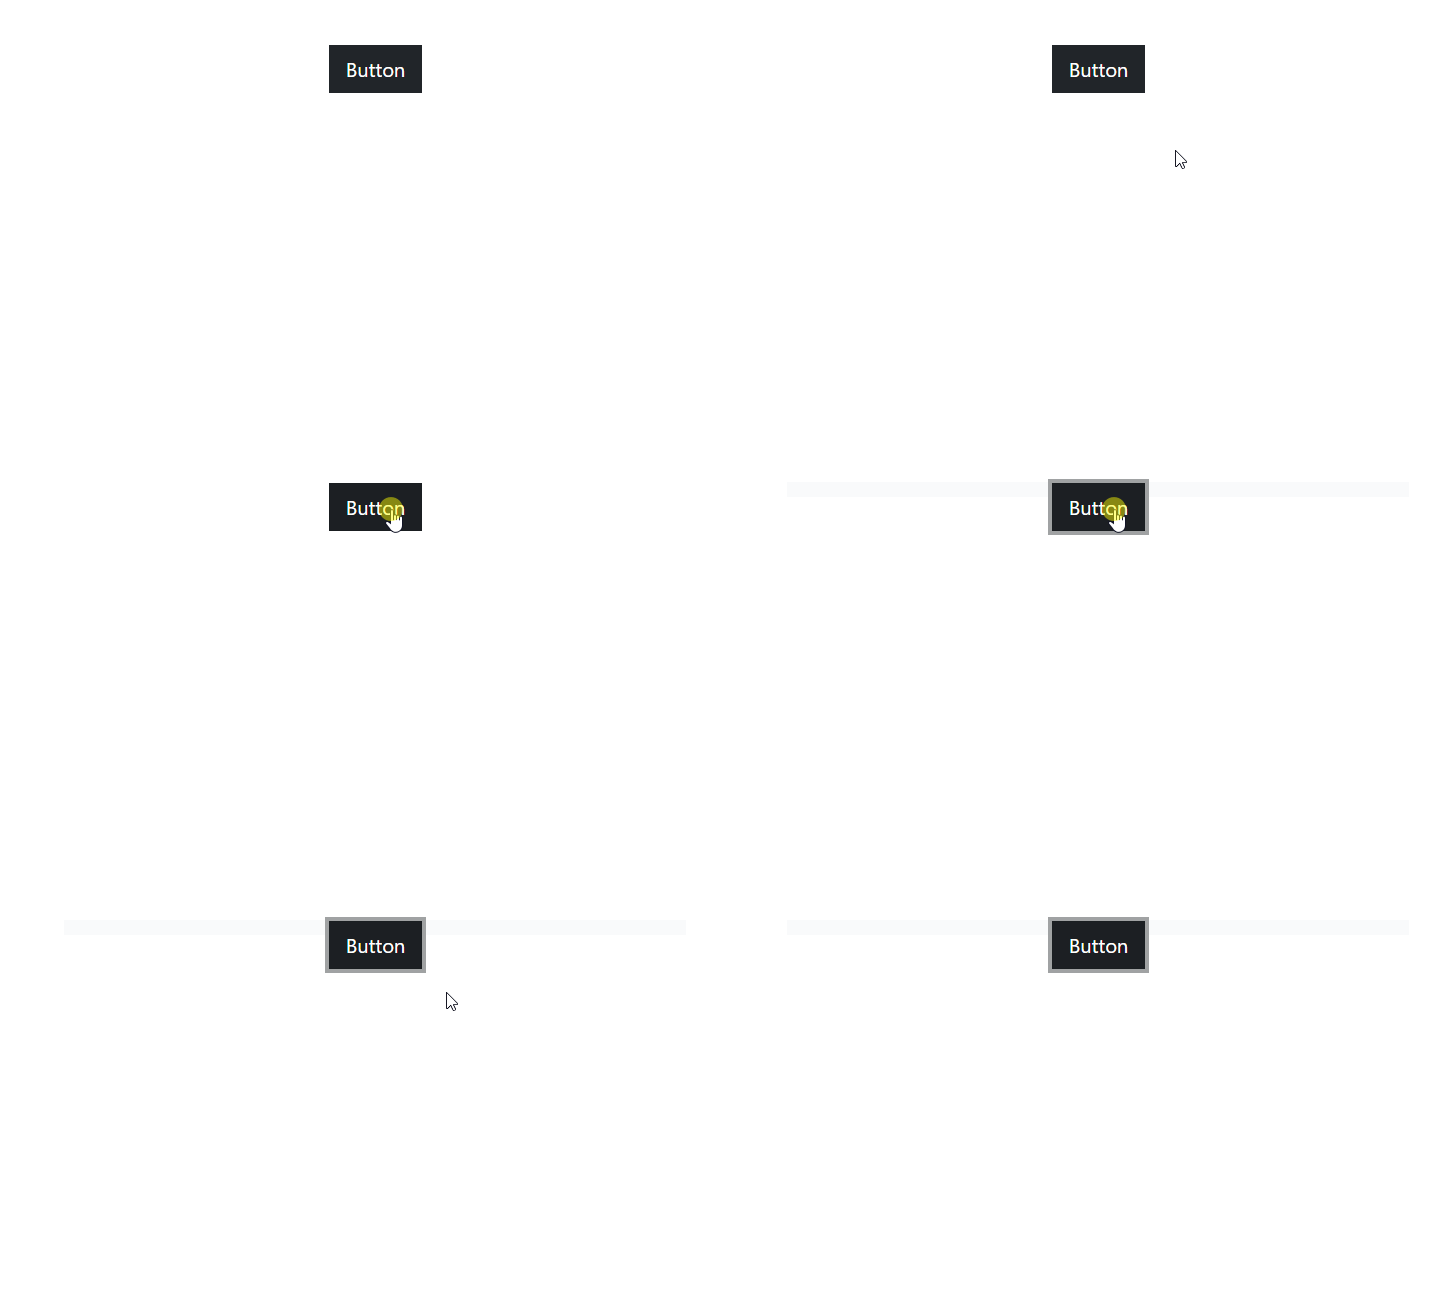
Section titled “Step 19”Save your page and preview the results. You can see that clicking the button toggles the visibility of the div:
Toggling CSS Classes
Section titled “Toggling CSS Classes”You can use the toggle component, to toggle CSS classes for the elements on the page. We want to change the class of a div block on our page, when the button is clicked:
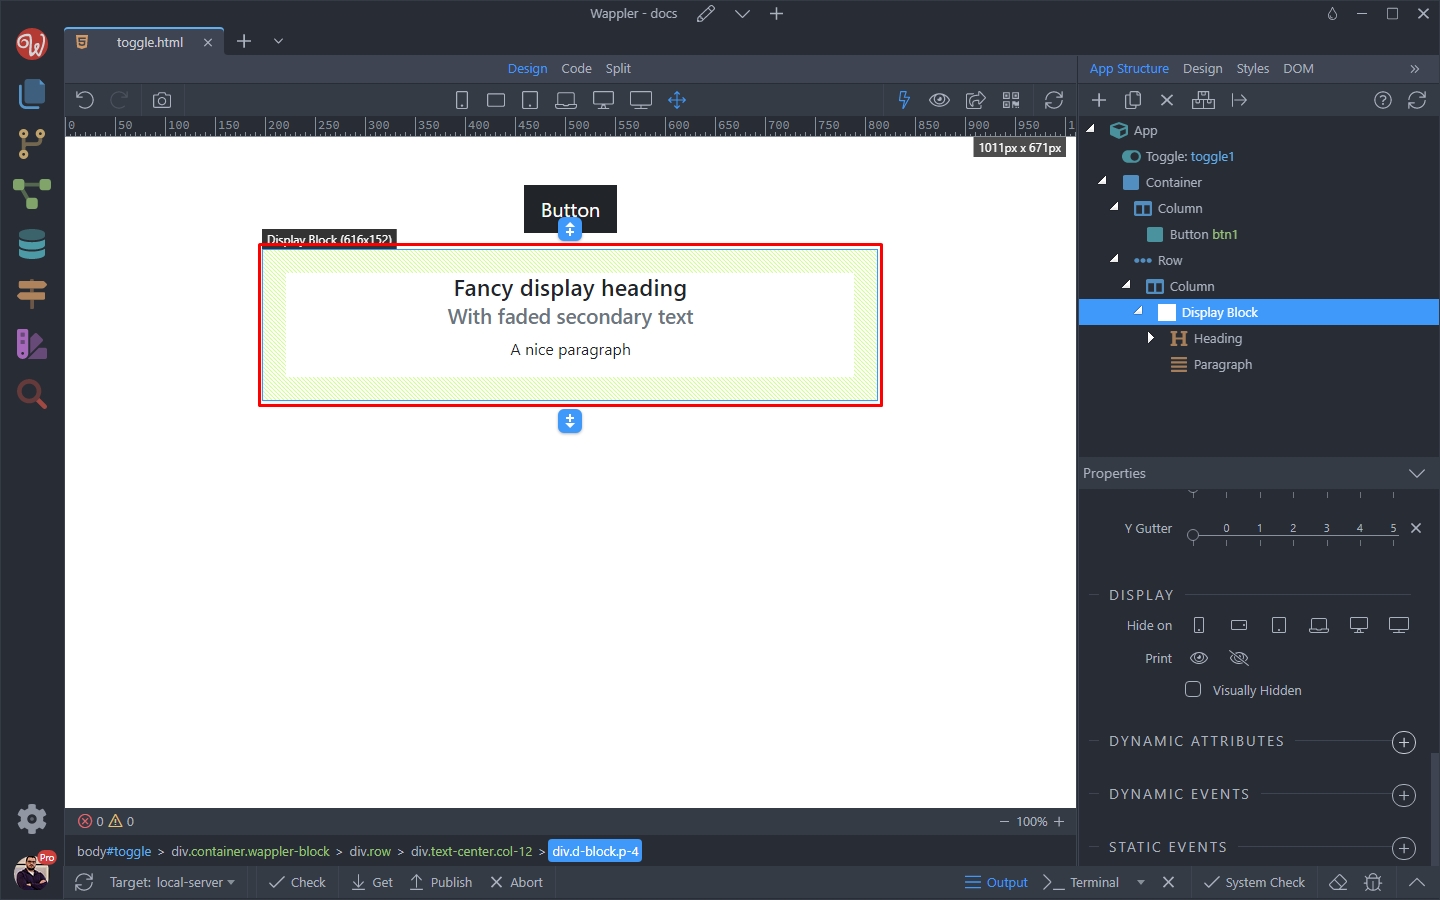
Select the div and add new dynamic attribute:
Section titled “Select the div and add new dynamic attribute:”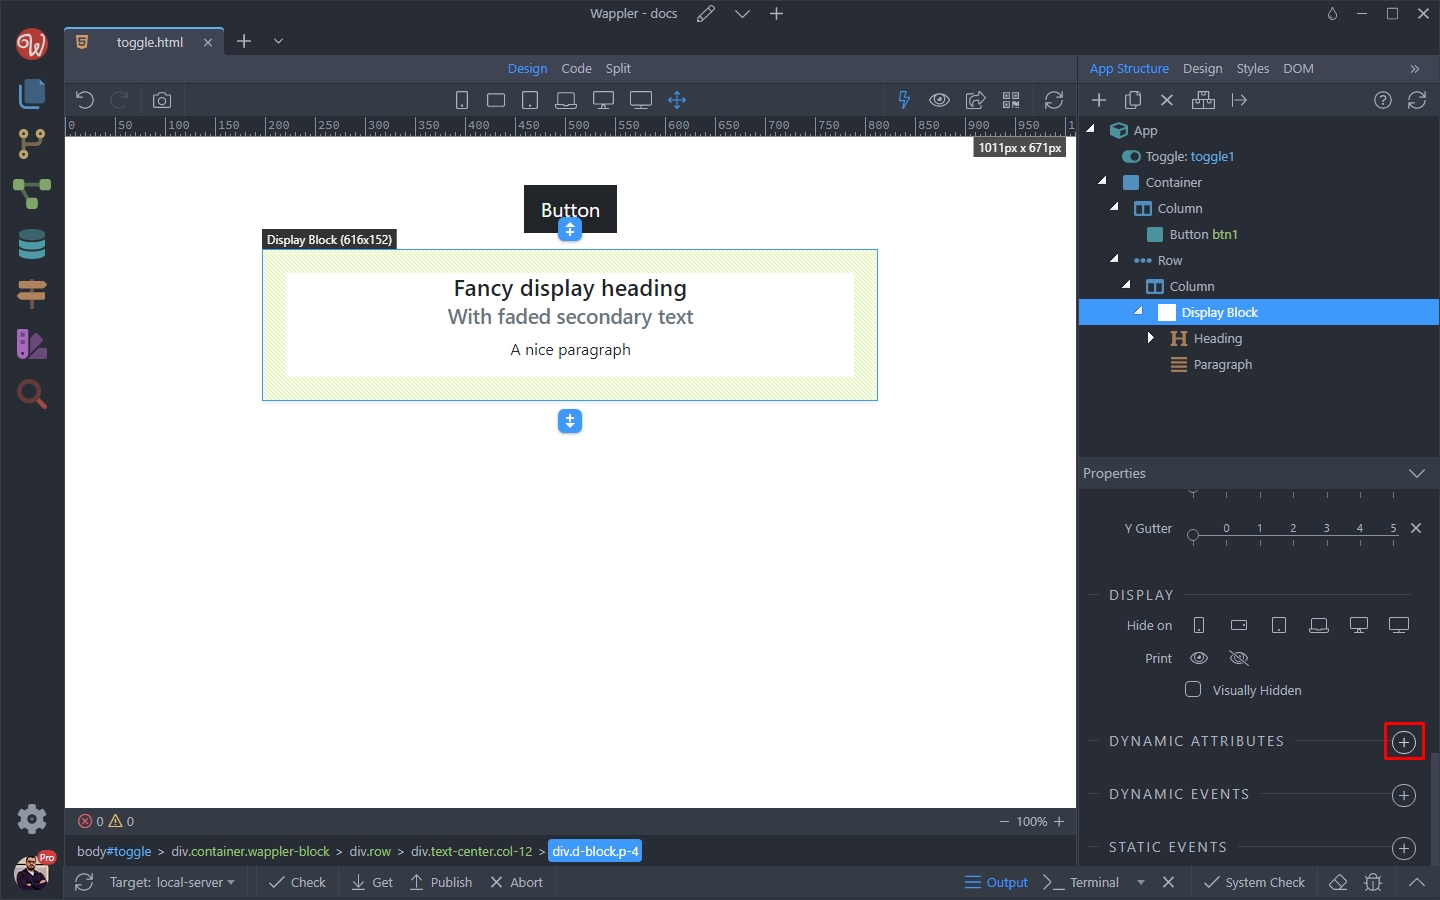
Select Styling > Class toggle:
Section titled “Select Styling > Class toggle:”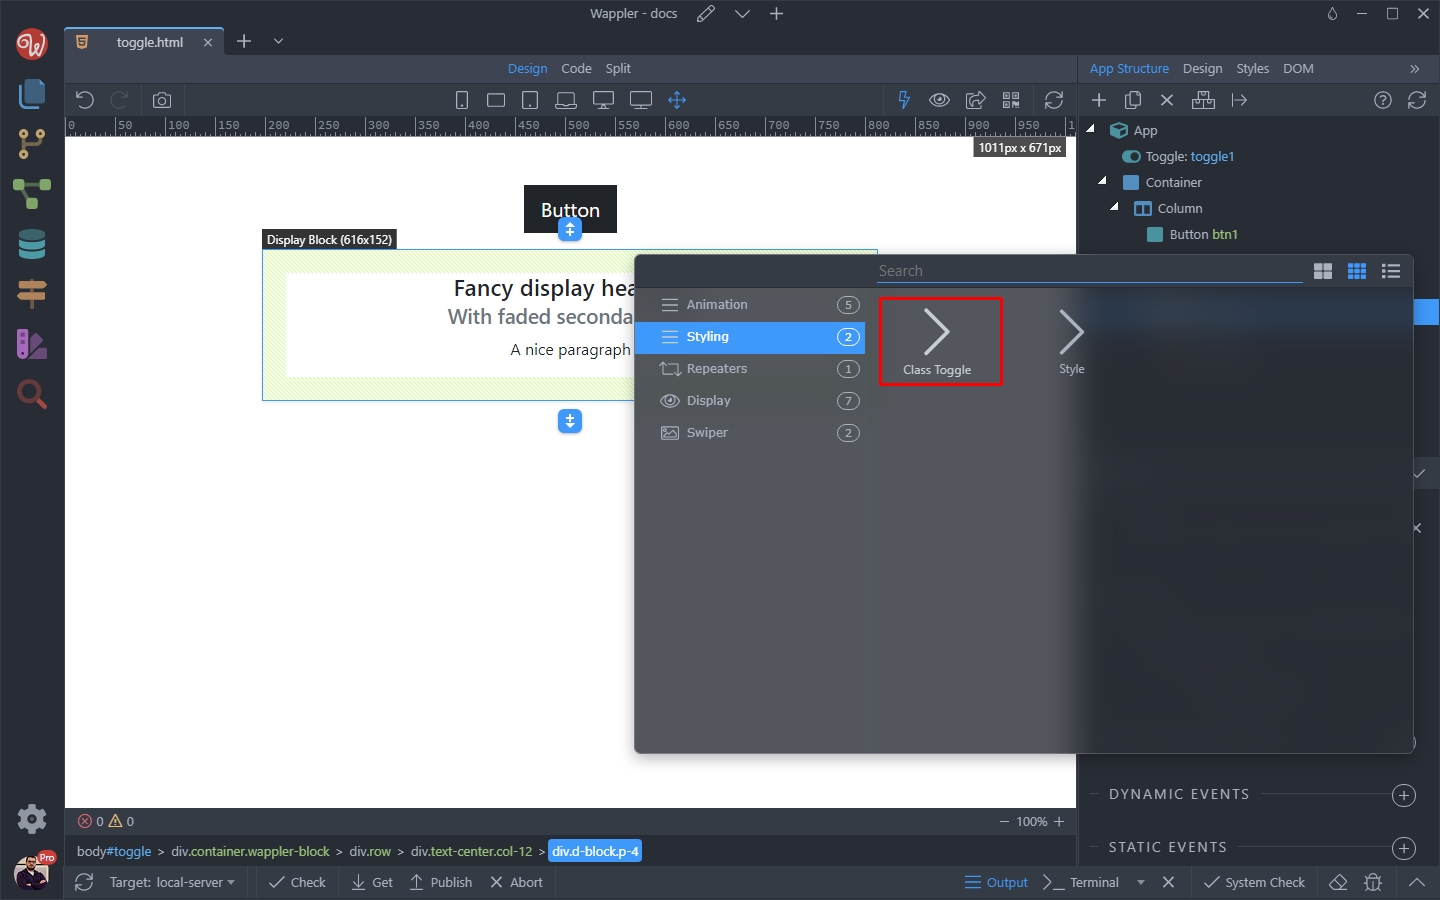
Step 24
Section titled “Step 24”And enter the name of the class you want to toggle. We enter one of the standard Bootstrap classes bg-warning, which will make the background color yellow:
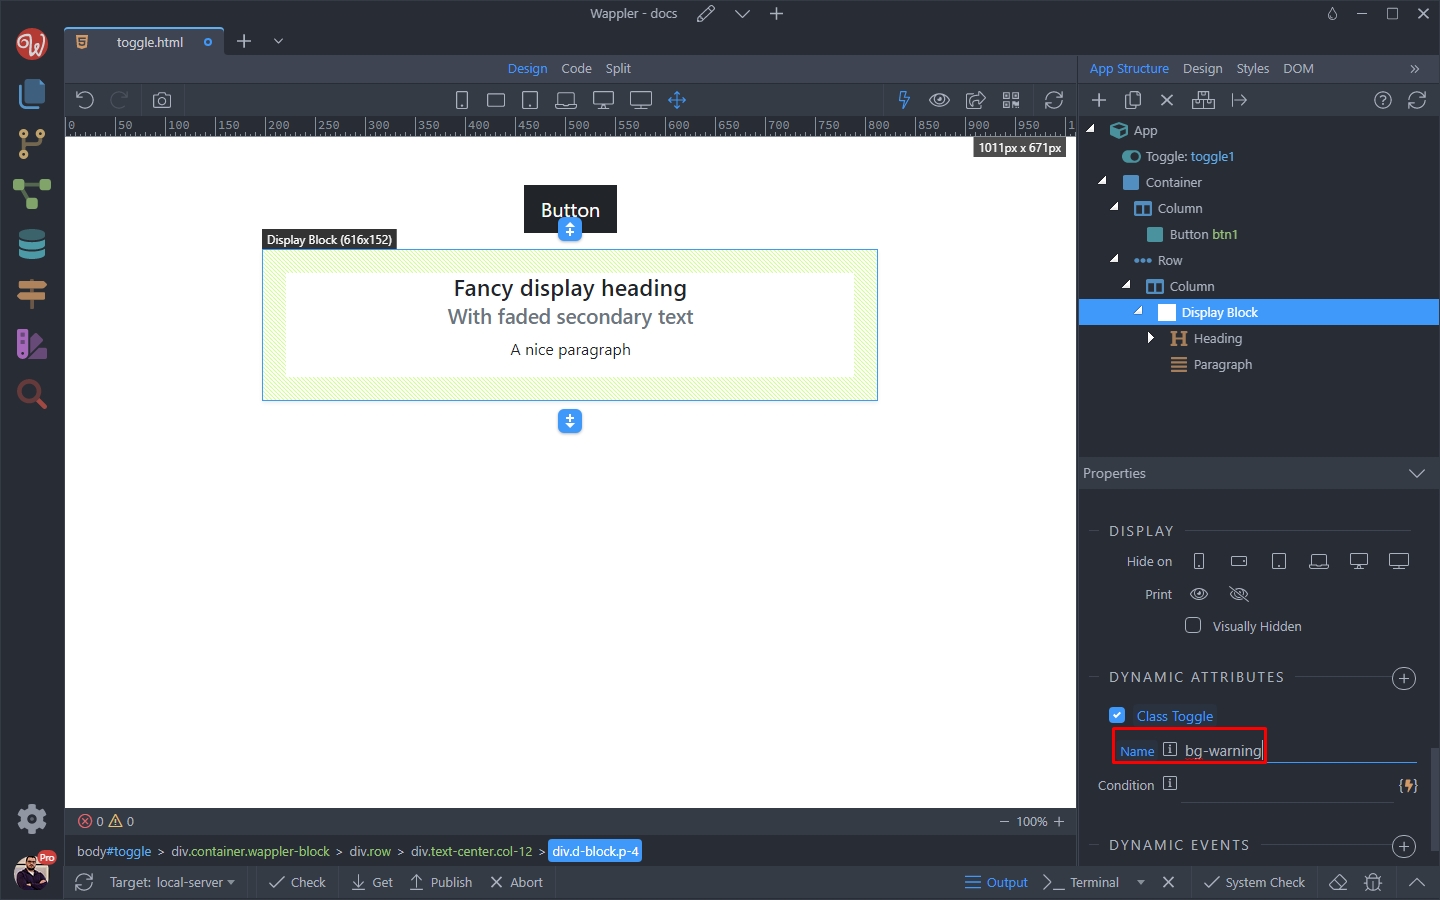
Then click the dynamic data picker, to select when to apply this class:
Section titled “Then click the dynamic data picker, to select when to apply this class:”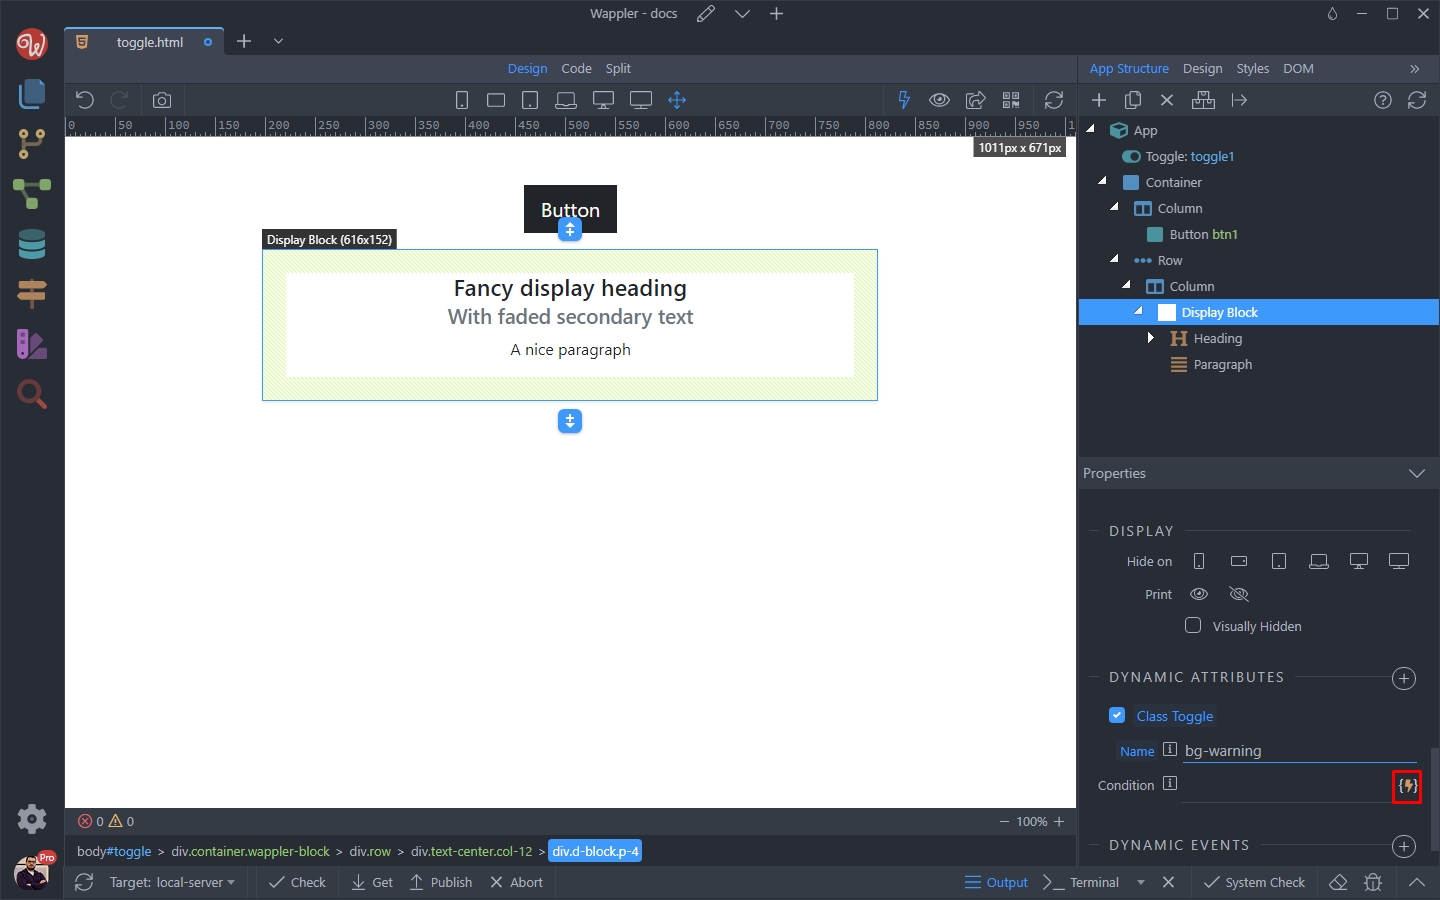
And select Toggle > Checked. So the class will be applied when the toggle component state is checked:
Section titled “And select Toggle > Checked. So the class will be applied when the toggle component state is checked:”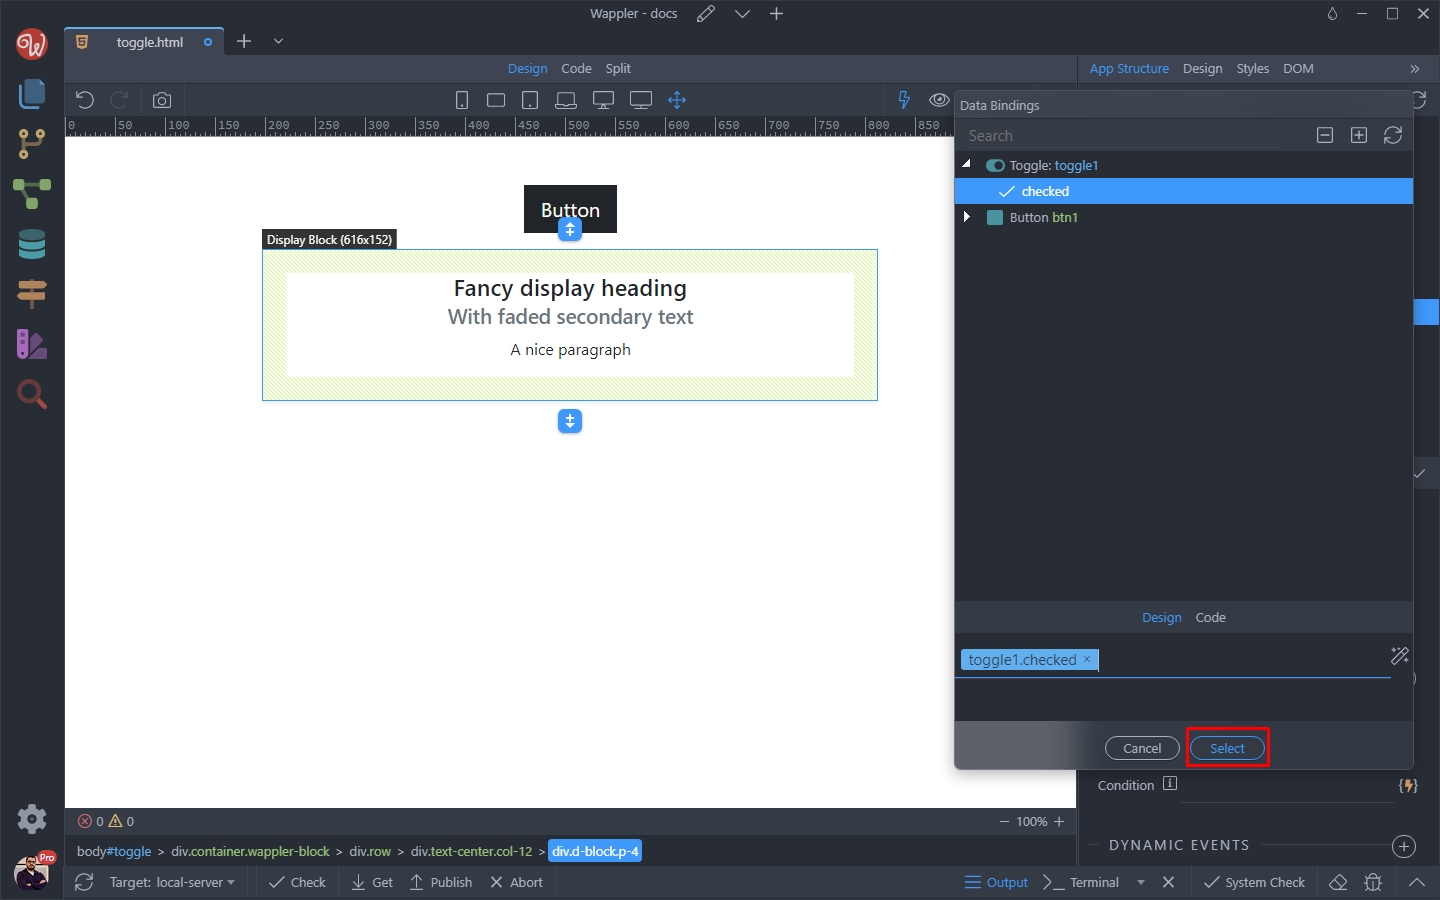
Now, let’s setup the button. Select the button or the element you want to use to control the toggle with:
Section titled “Now, let’s setup the button. Select the button or the element you want to use to control the toggle with:”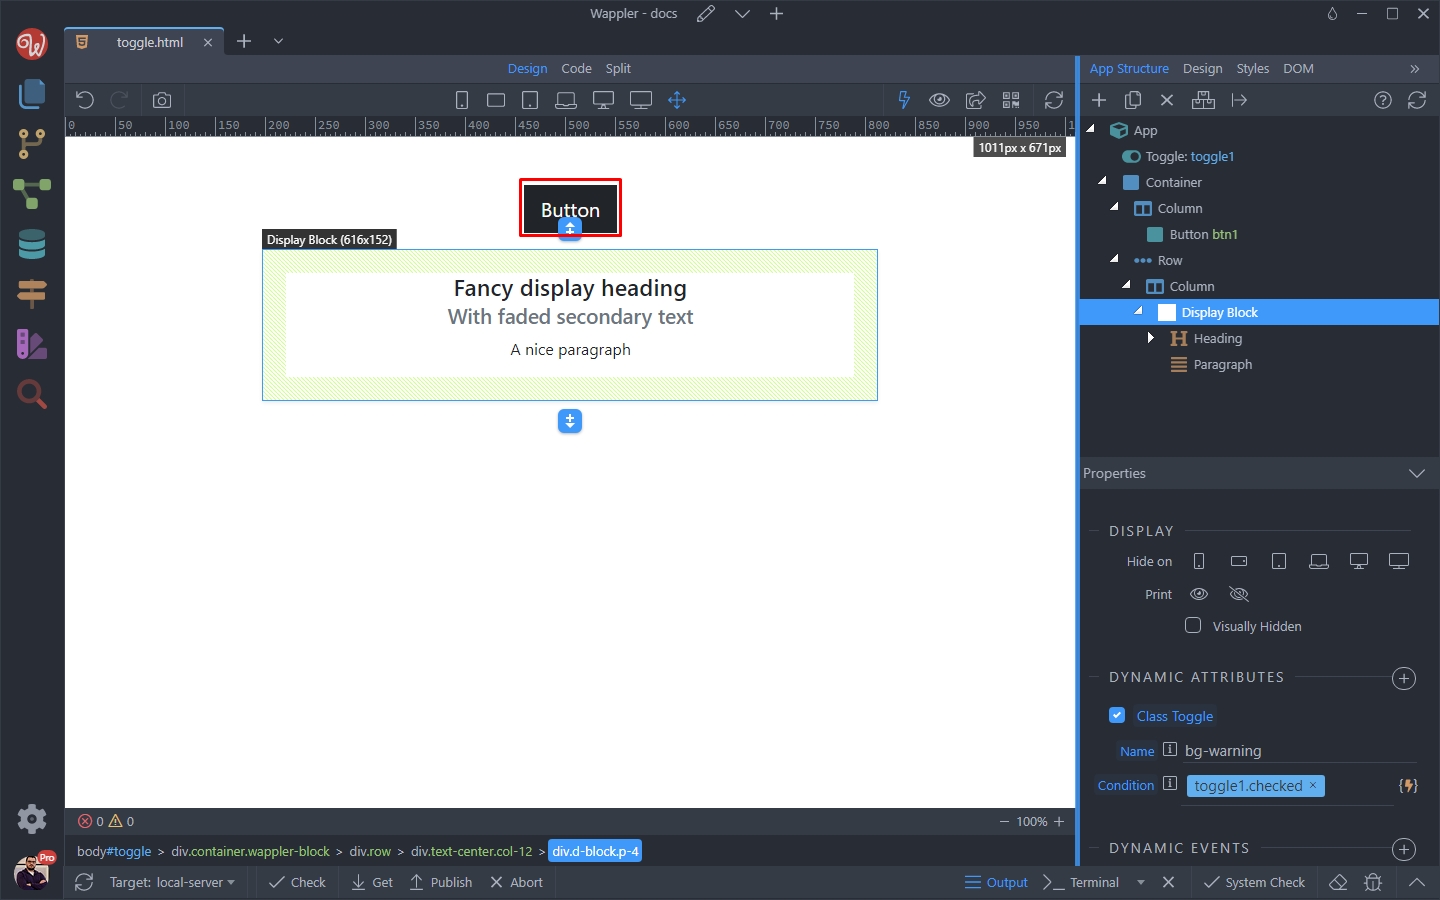
Add new dynamic event:
Section titled “Add new dynamic event:”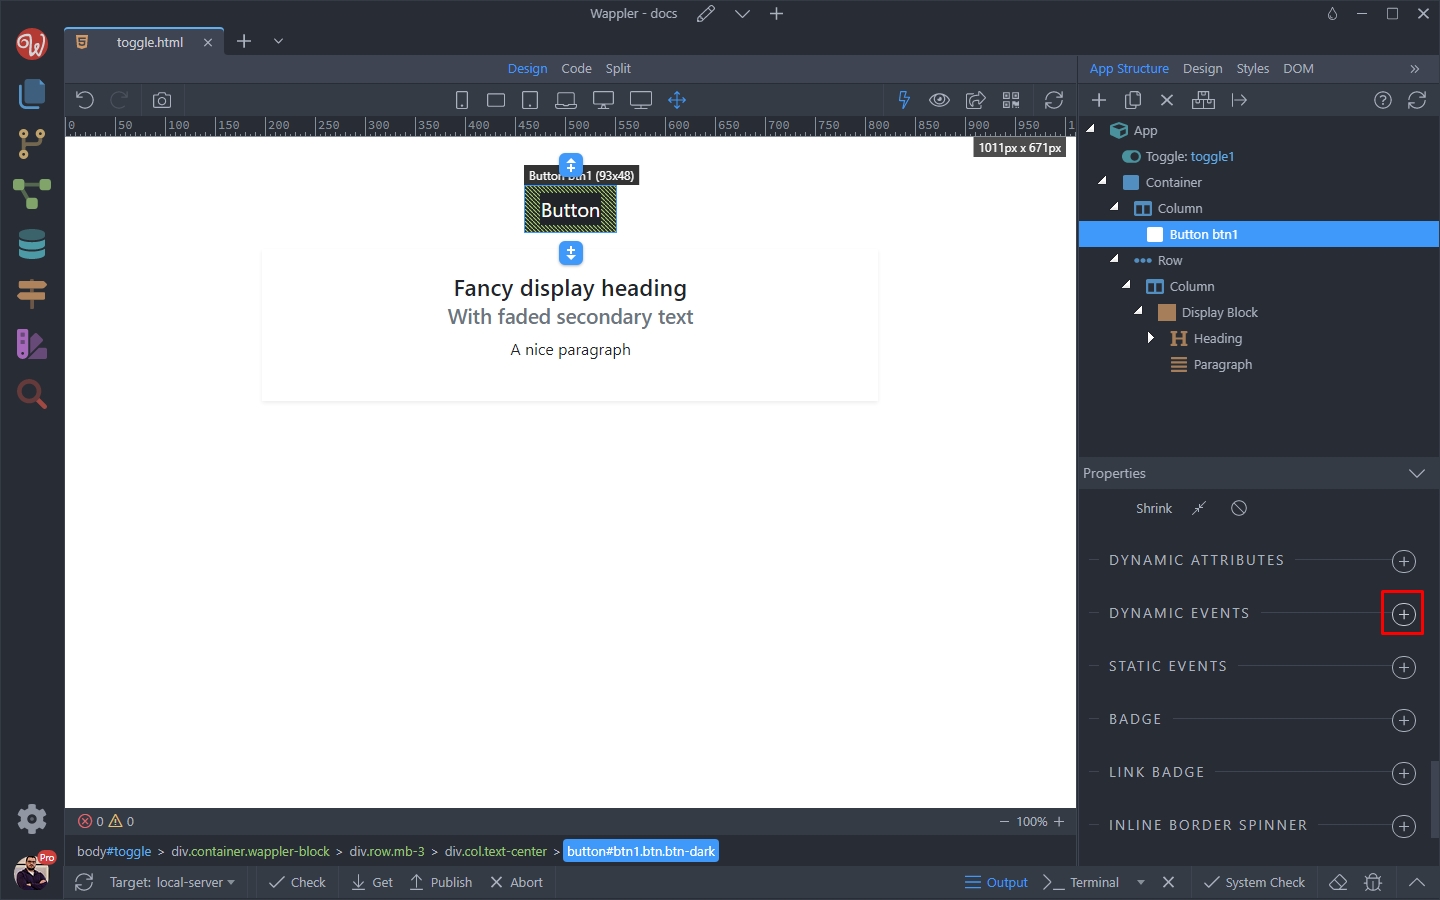
And select Mouse > Click:
Section titled “And select Mouse > Click:”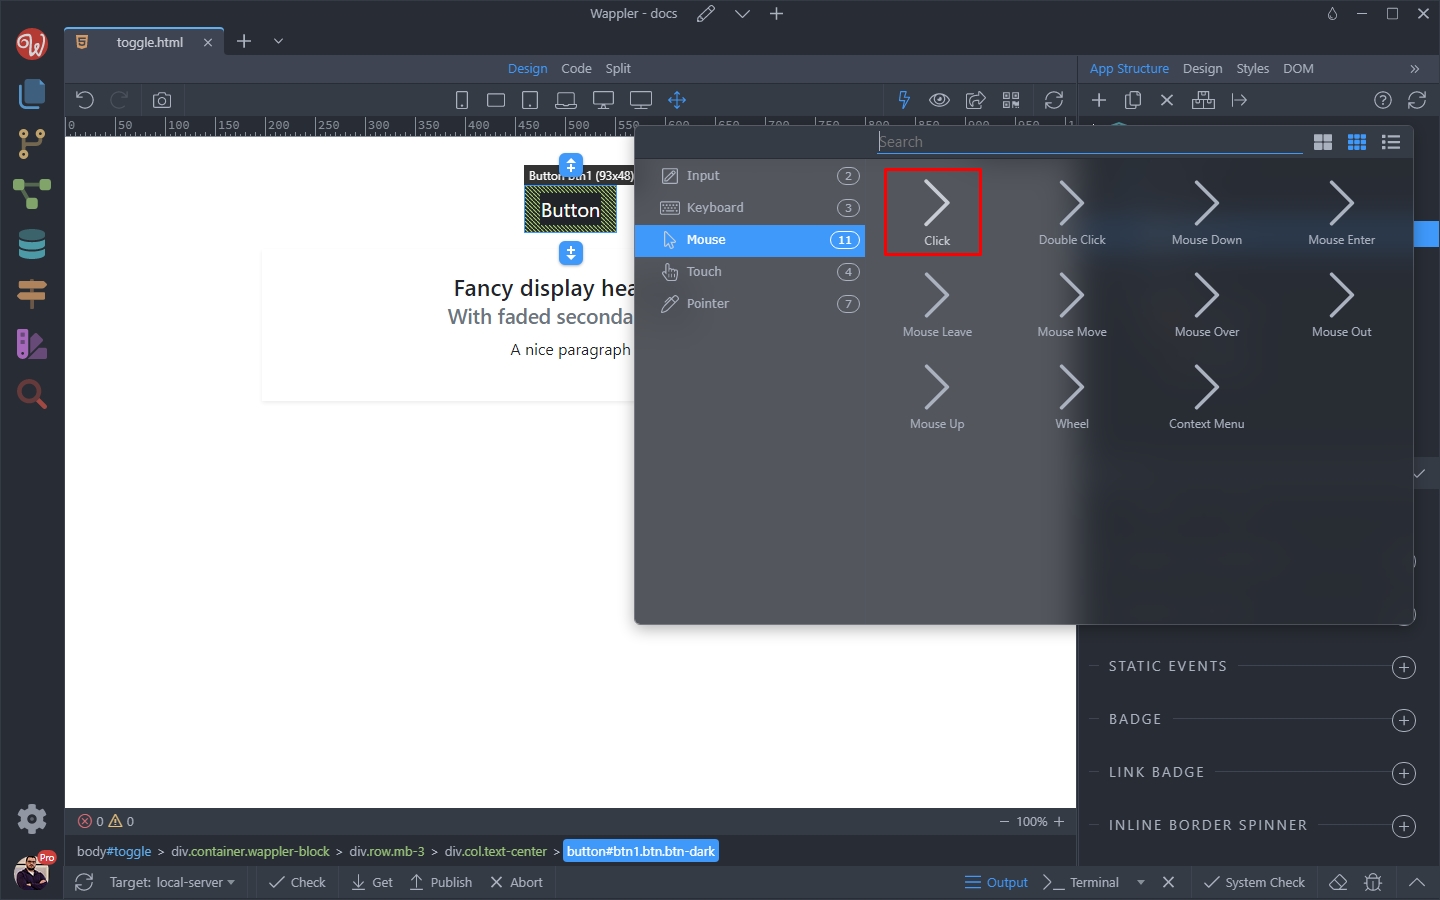
Then click the dynamic event picker icon to select the action for this event:
Section titled “Then click the dynamic event picker icon to select the action for this event:”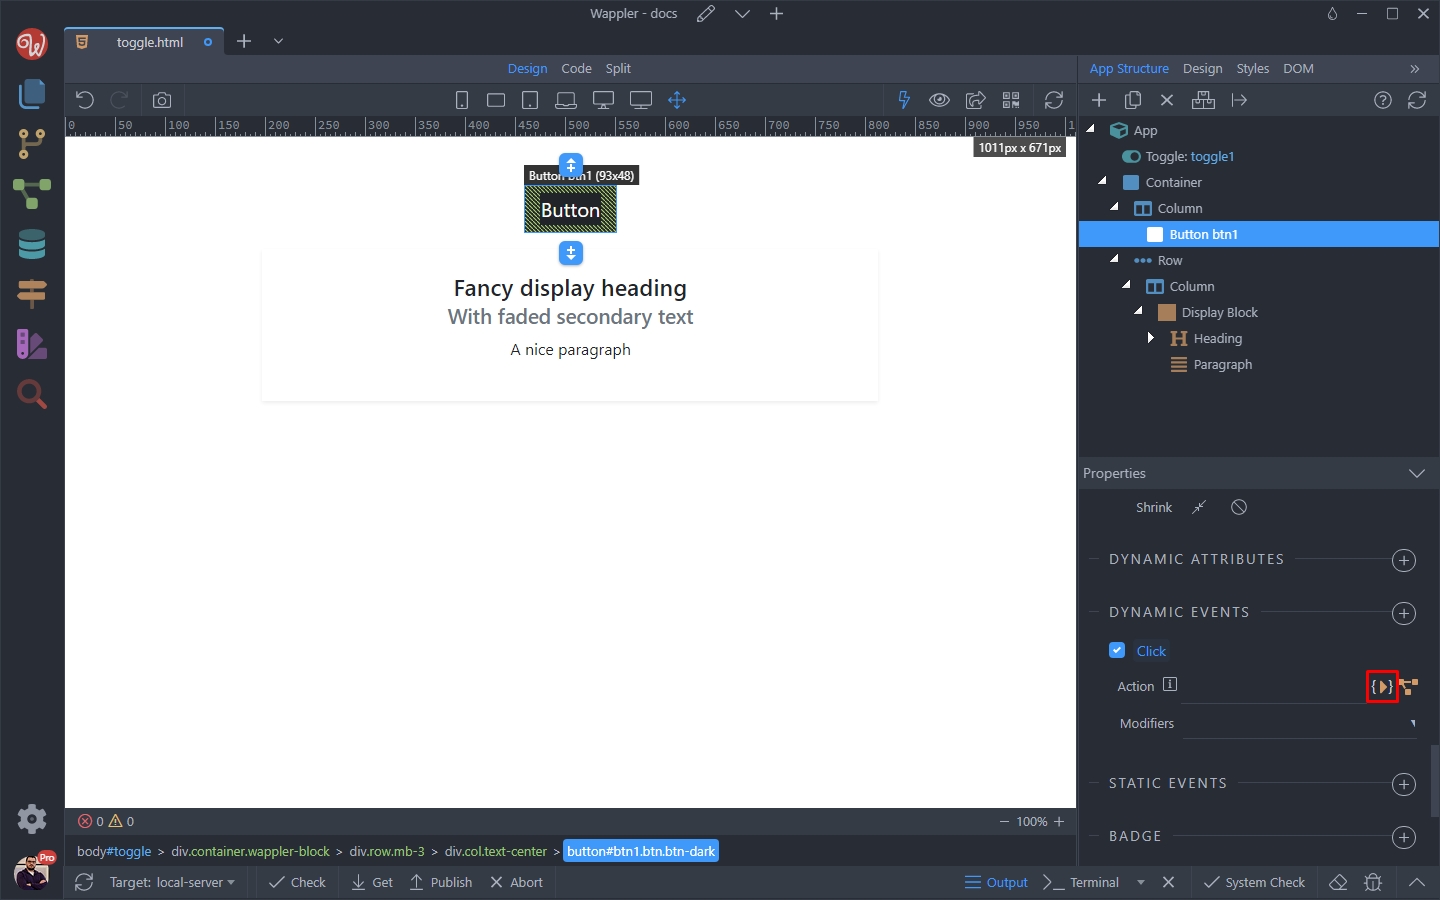
Select the toggle action, under the Toggle Component:
Section titled “Select the toggle action, under the Toggle Component:”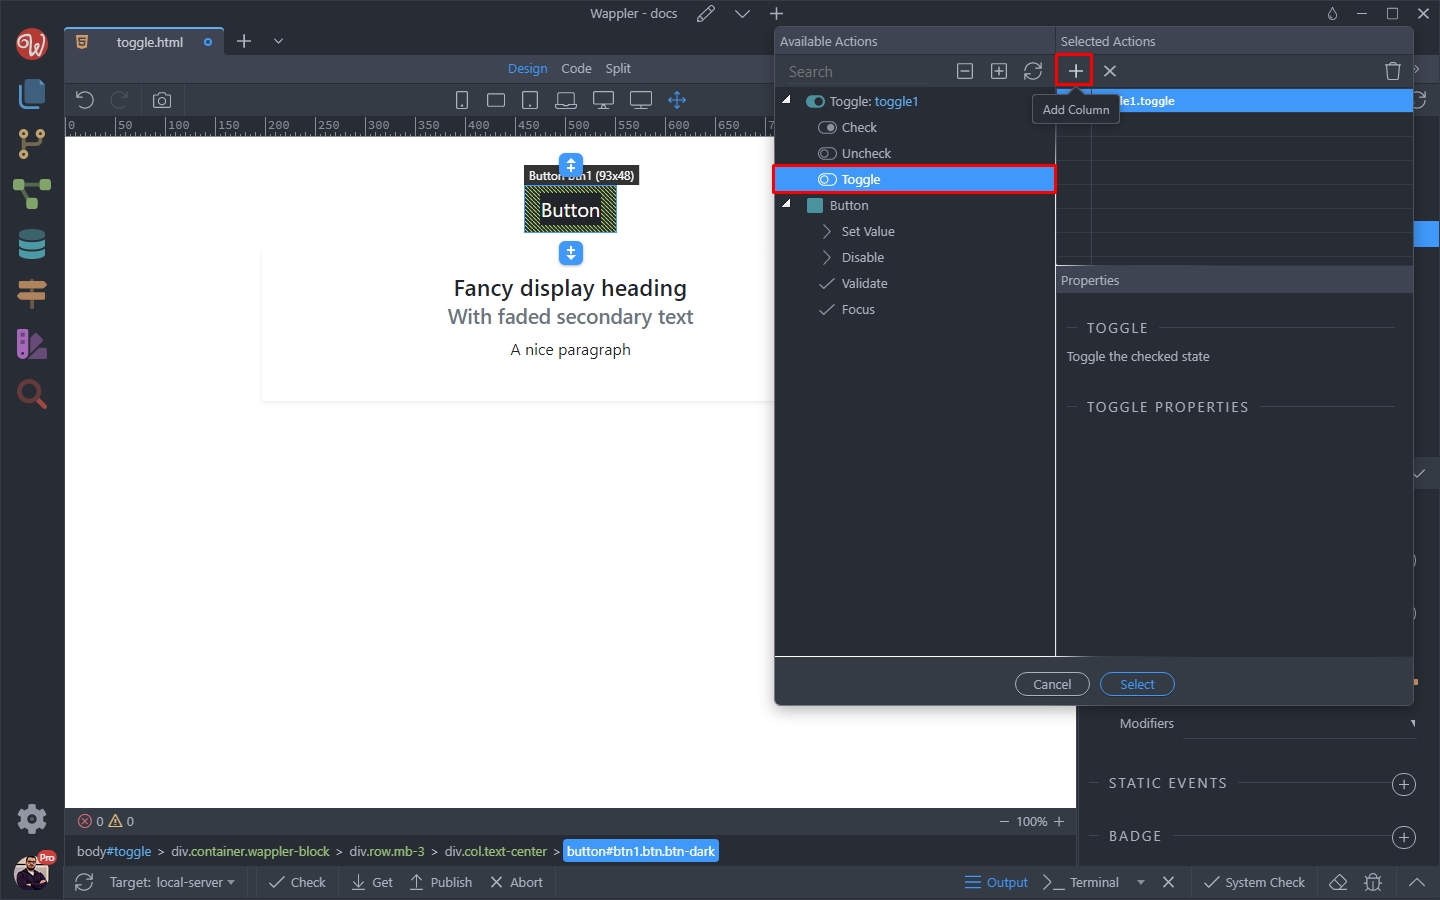
This will toggle the component state from checked to not checked and vice versa. Click Select:
Section titled “This will toggle the component state from checked to not checked and vice versa. Click Select:”This will toggle the component state from checked to not checked and vice versa.
Click Select:
Save your page and preview the results. You can see the bg-yellow class is being toggled on button click:
Section titled “Save your page and preview the results. You can see the bg-yellow class is being toggled on button click:”