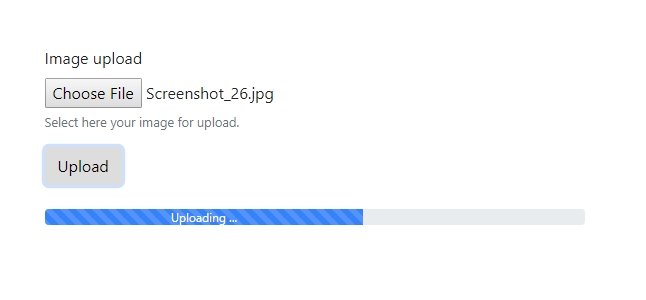
Adding Progress Bar to Upload Form
You already know HOW TO CREATE AN UPLOAD FORM and upload files to your server. Sometimes, for large files it is useful to have some kind of indication, that the file is uploading. The progress bar com
We’d like to add the progress bar, below our upload form, so we select add after:
Section titled “We’d like to add the progress bar, below our upload form, so we select add after:”You already know HOW TO CREATE AN UPLOAD FORM and upload files to your server. Sometimes, for large files it is useful to have some kind of indication, that the file is uploading.
The progress bar component is really useful here!
We’d like to add the progress bar, below our upload form, so we select add after:
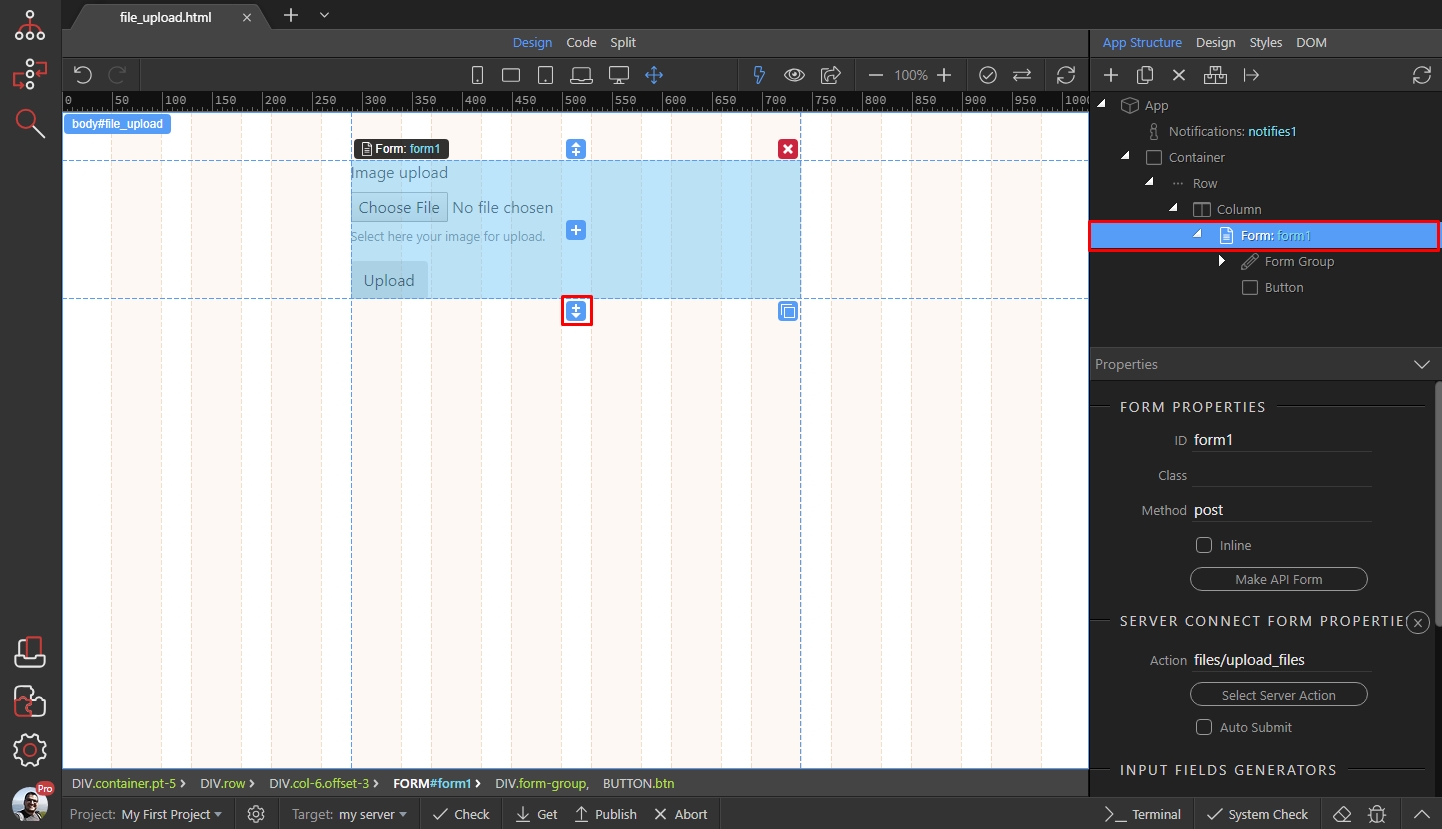
And in the content category we select Progress:
Section titled “And in the content category we select Progress:”
Select the progress bar, in the App Structure:
Section titled “Select the progress bar, in the App Structure:”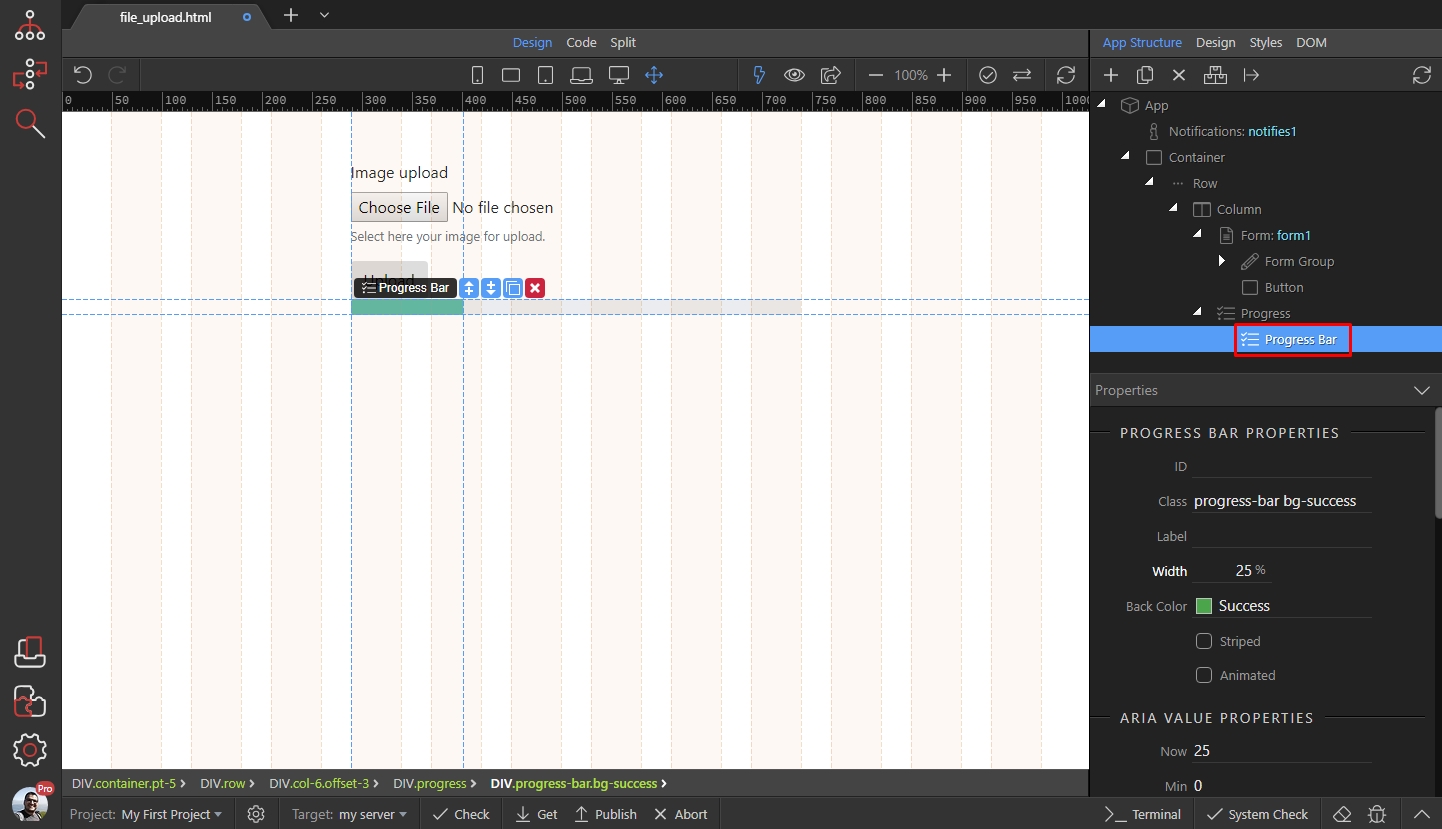
You can add a label inside it, we add the following text Uploading...
Section titled “You can add a label inside it, we add the following text Uploading...”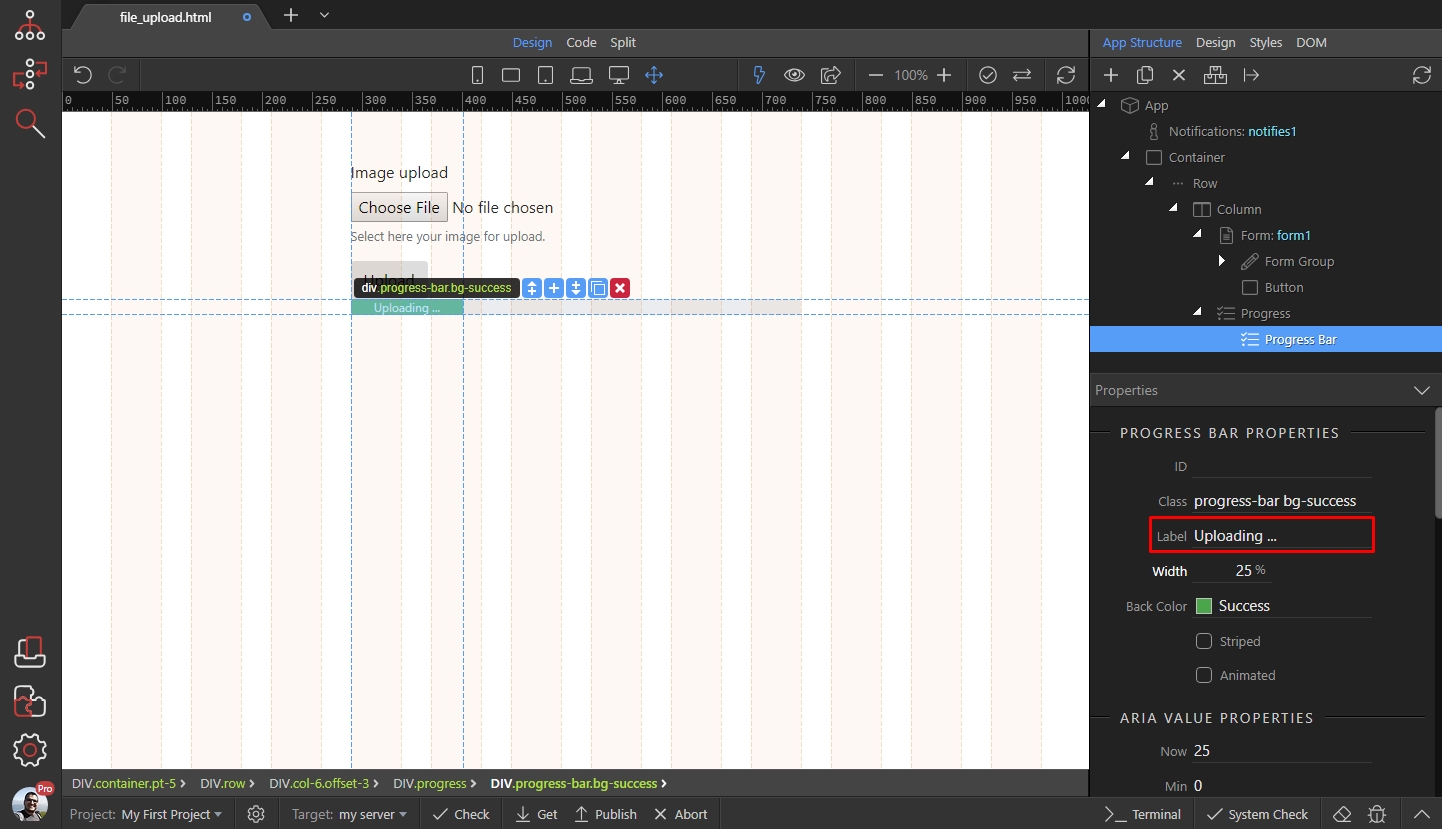
Then, we set the default width to 0, as we are going to use dynamic width:
Section titled “Then, we set the default width to 0, as we are going to use dynamic width:”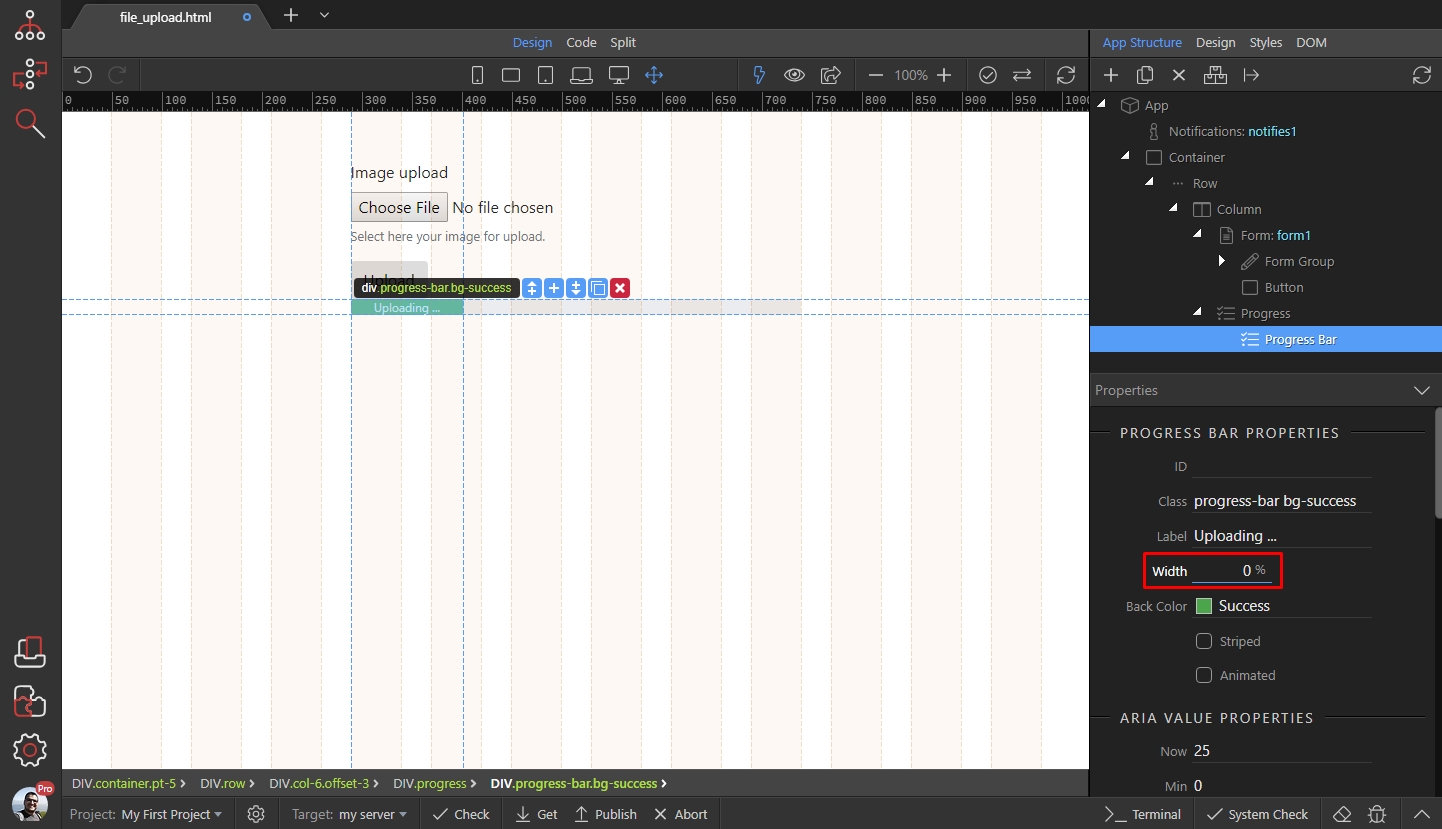
Then select the style. We set it to primary as blue is our favorite color:
Section titled “Then select the style. We set it to primary as blue is our favorite color:”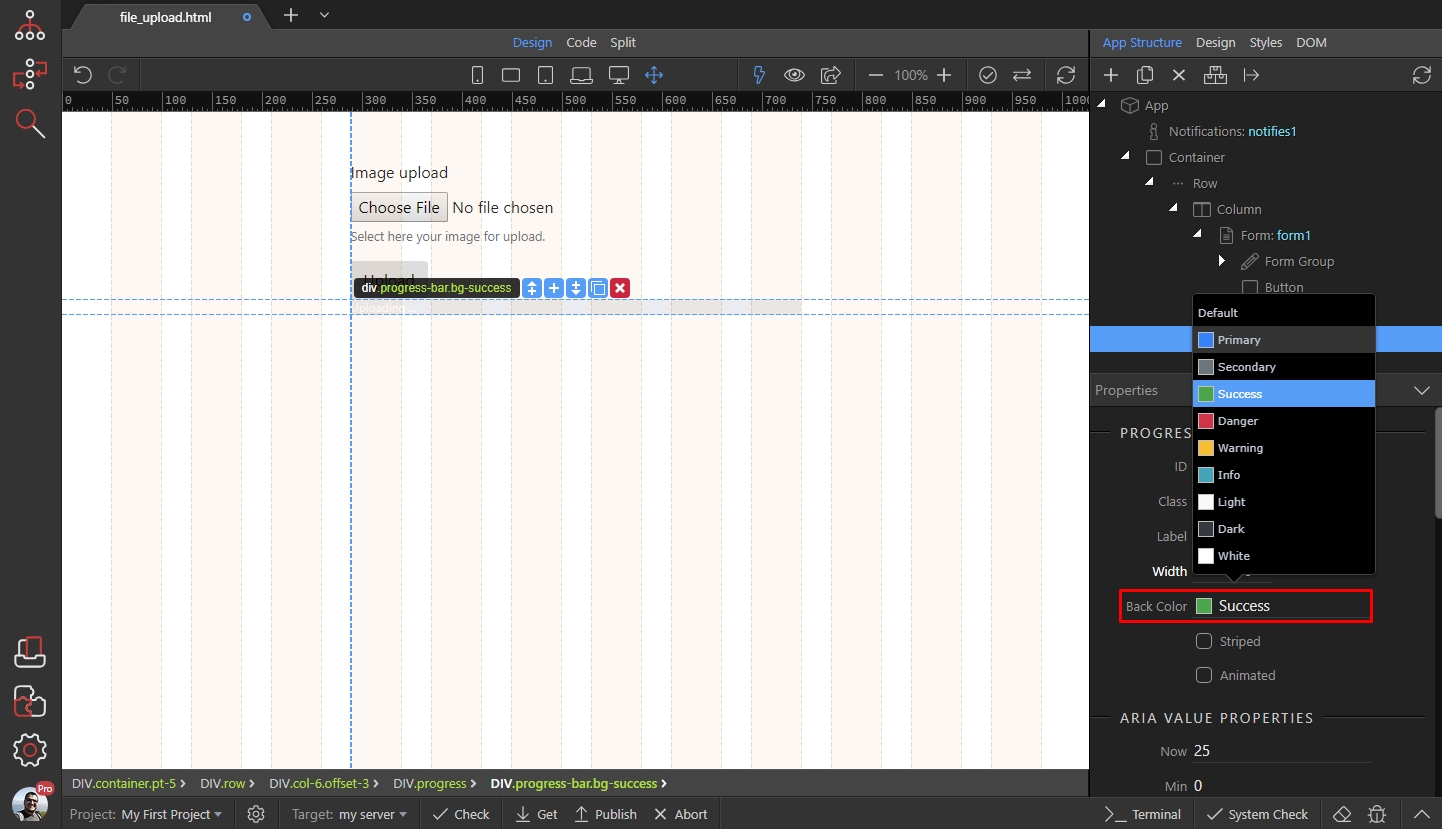
Enable the striped and animated options if you want tour progress bar to be animated and striped:
Section titled “Enable the striped and animated options if you want tour progress bar to be animated and striped:”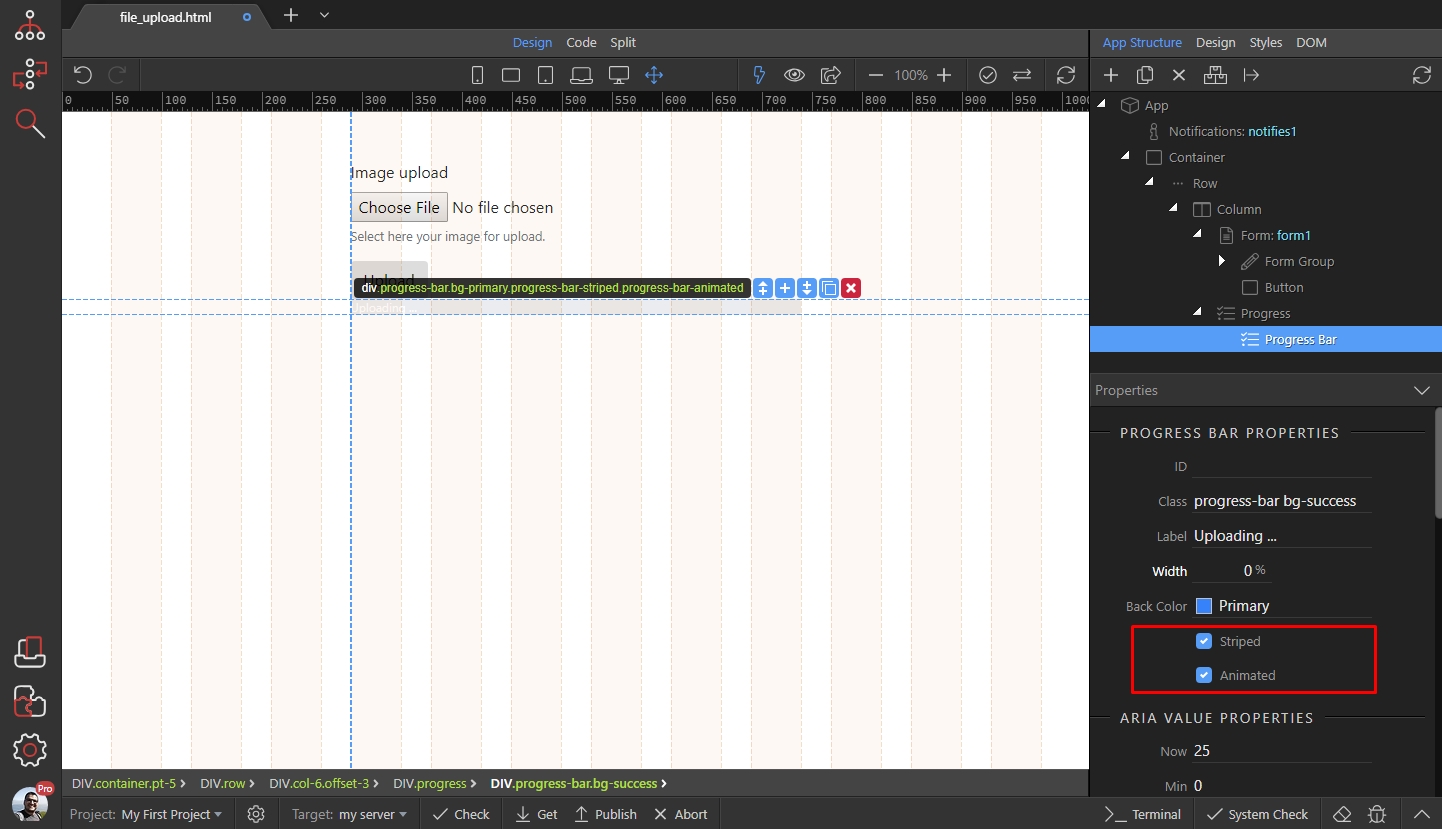
Then add new dynamic attribute:
Section titled “Then add new dynamic attribute:”
In the styling menu, select style:
Section titled “In the styling menu, select style:”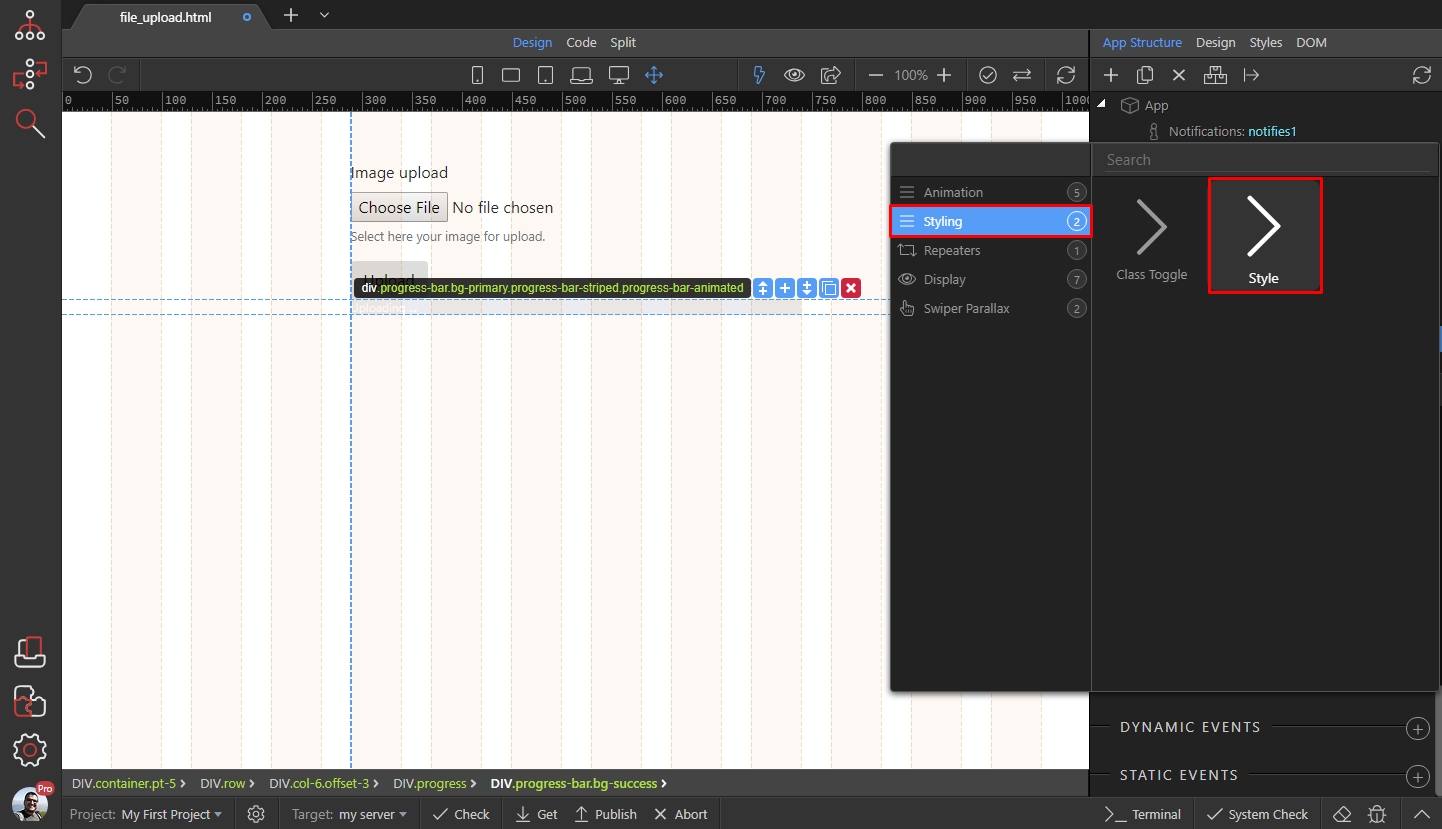
We’d like to animate the width of the progress bar, so we enter the width css property:
Section titled “We’d like to animate the width of the progress bar, so we enter the width css property:”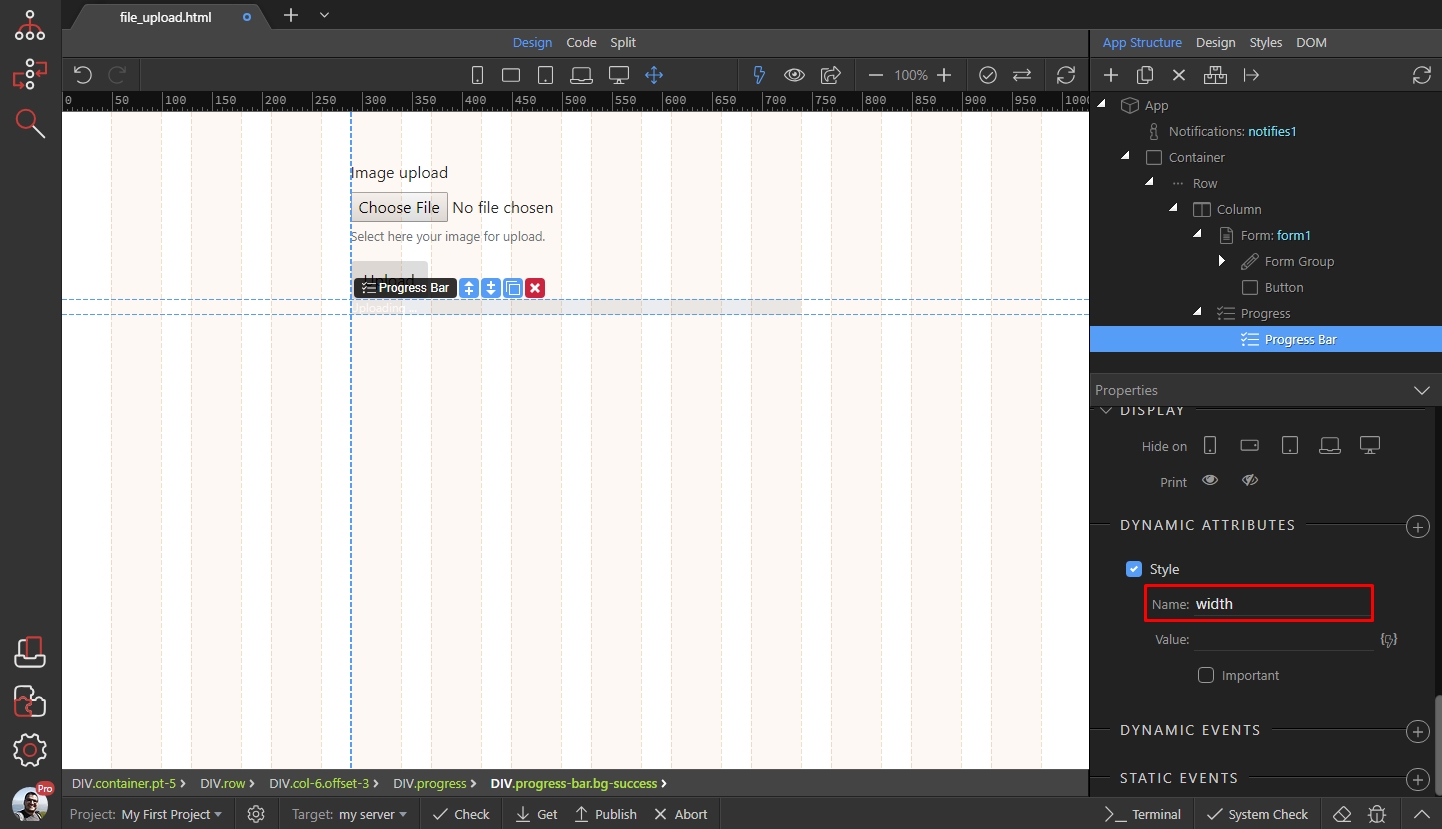
And select a dynamic value for it:
Section titled “And select a dynamic value for it:”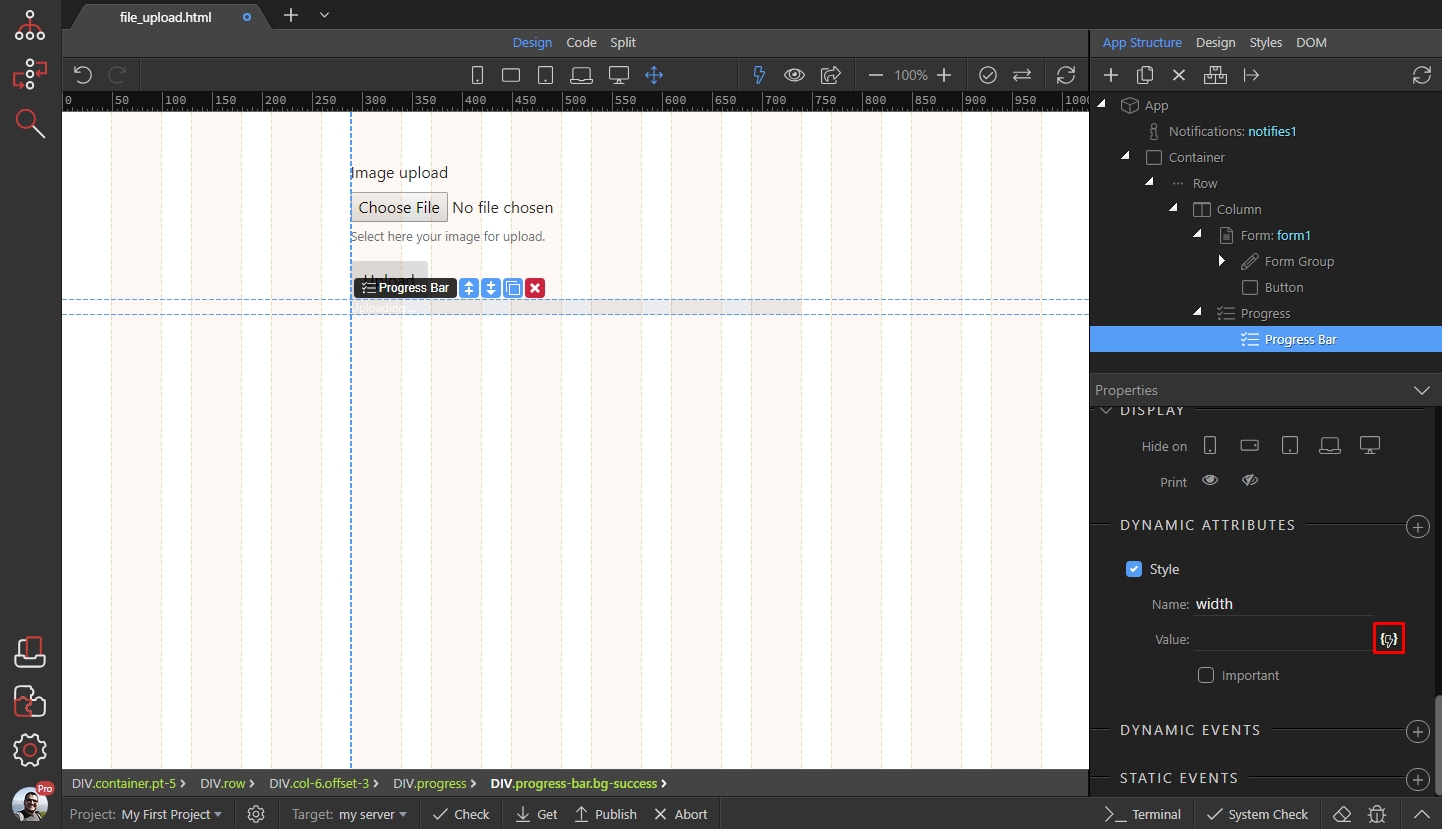
Under your upload server action form, open uploadProgress and select percent:
Section titled “Under your upload server action form, open uploadProgress and select percent:”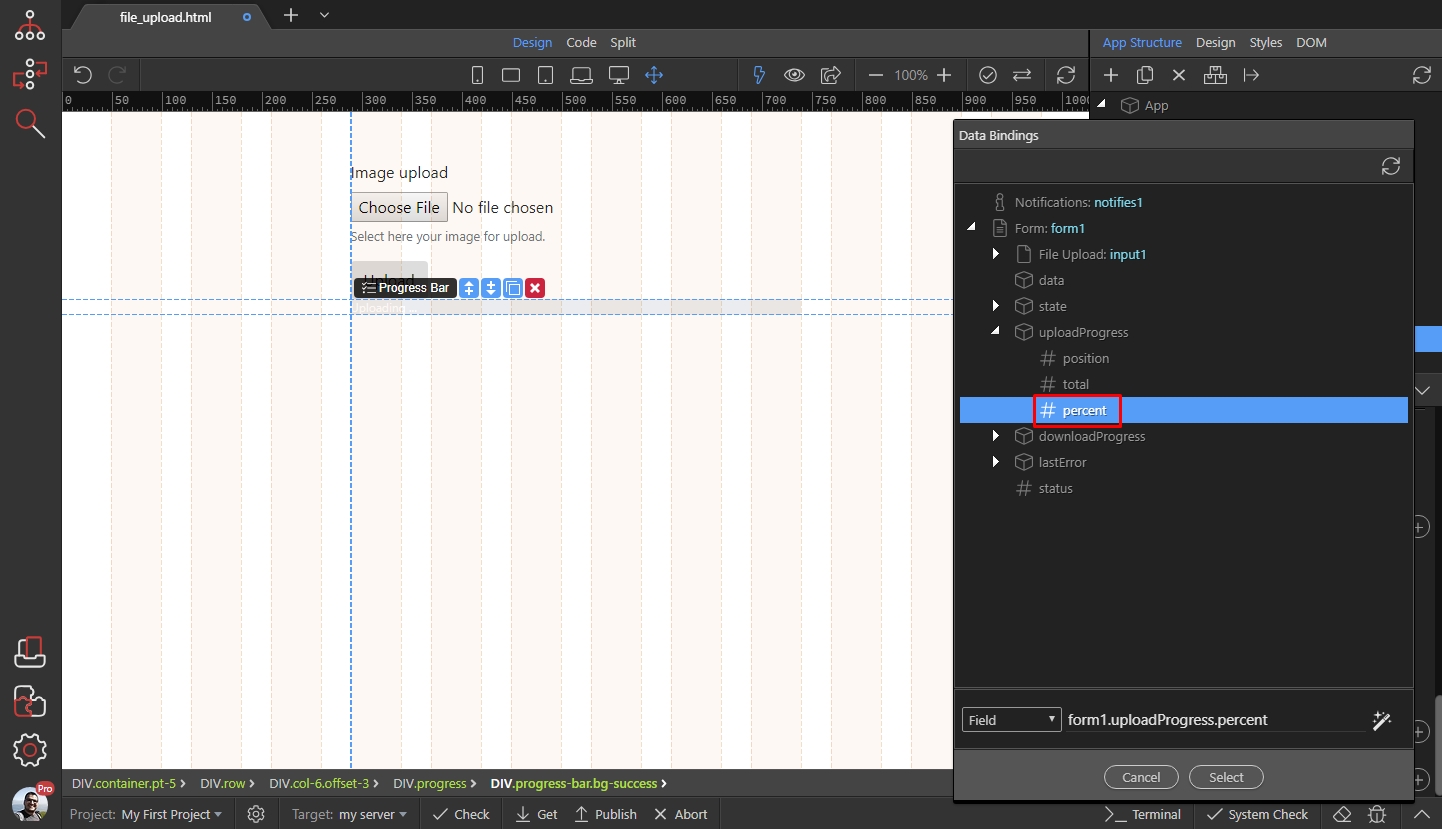
Step 13
Section titled “Step 13”This sets the dynamic value for the width, but the width property expects the value to be followed by an unit. In our case the unit is % so we just add +'%' to the expression. This is required and the progress bar won’t work if you don’t add it:

Step 14
Section titled “Step 14”Then - we want to show the progress, only when the upload server action runs (nobody likes an empty progress bar) 
So, select the Progress component in the app structure and add new dynamic attribute:
Step 15
Section titled “Step 15”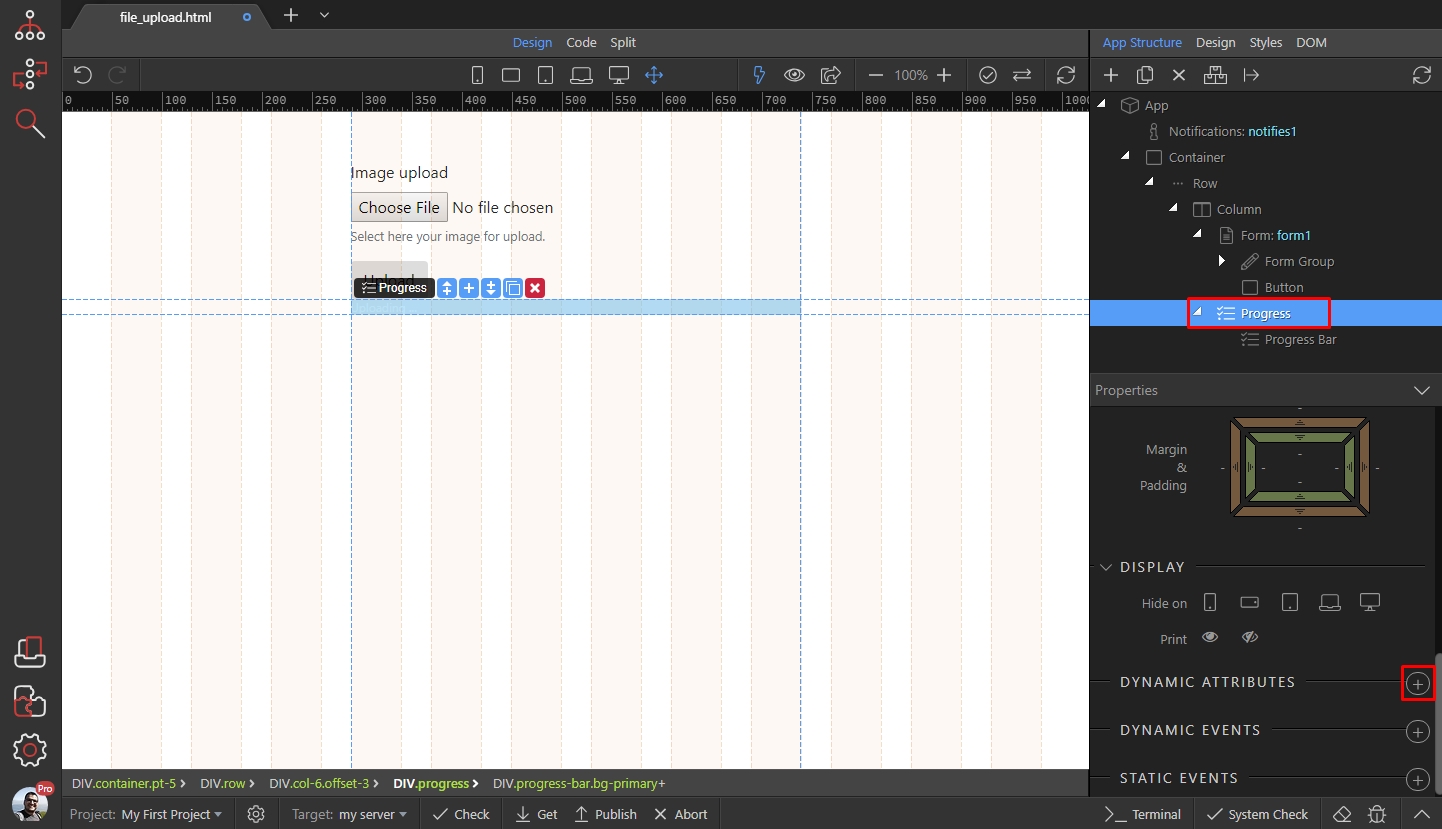
Open display and select Show:
Section titled “Open display and select Show:”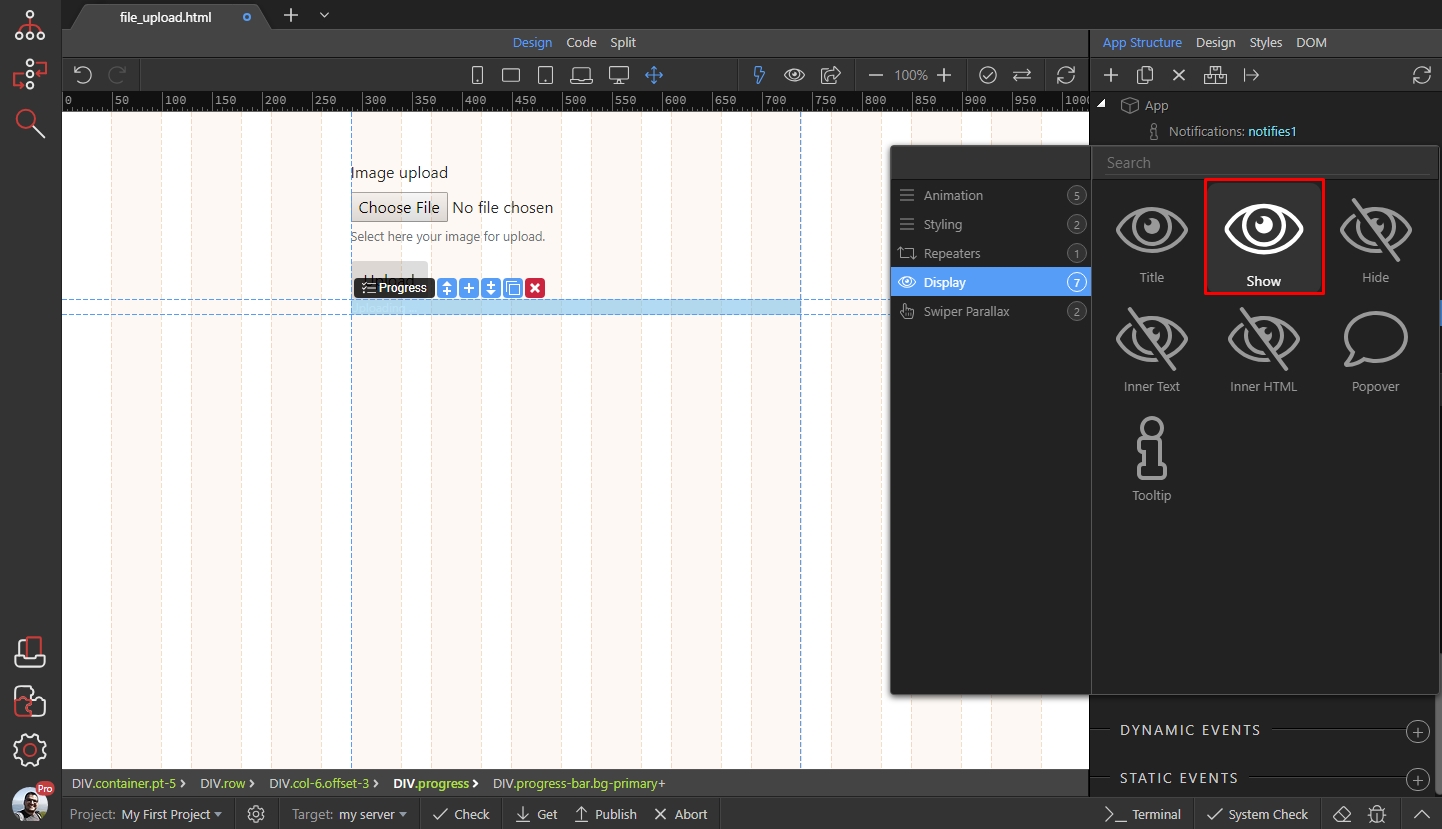
And click the dynamic data picker button, to select when to show the progress:
Section titled “And click the dynamic data picker button, to select when to show the progress:”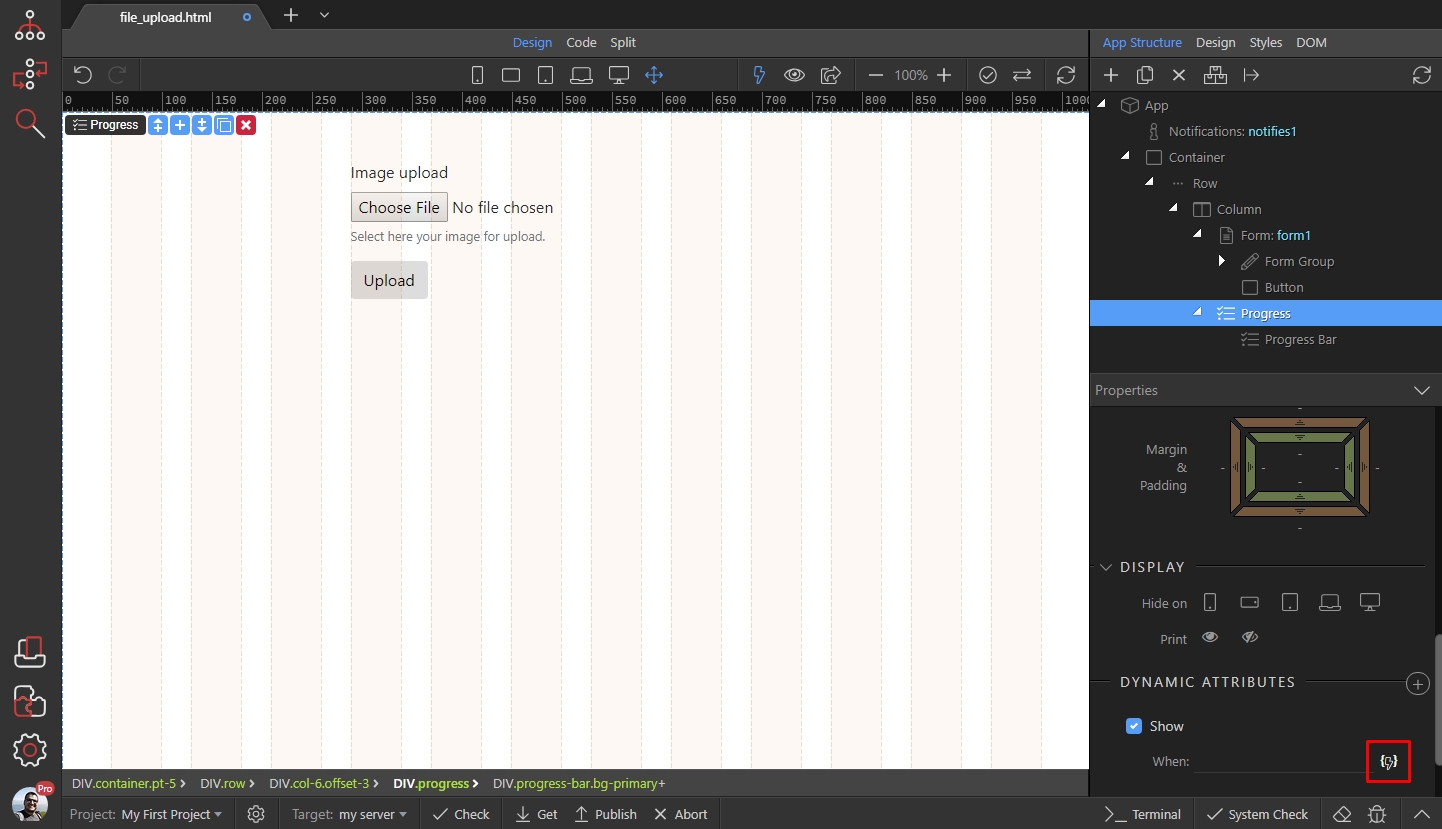
Step 18
Section titled “Step 18”We’d like to show it, when the server action is executing, so under your upload server action form open state and select executing:
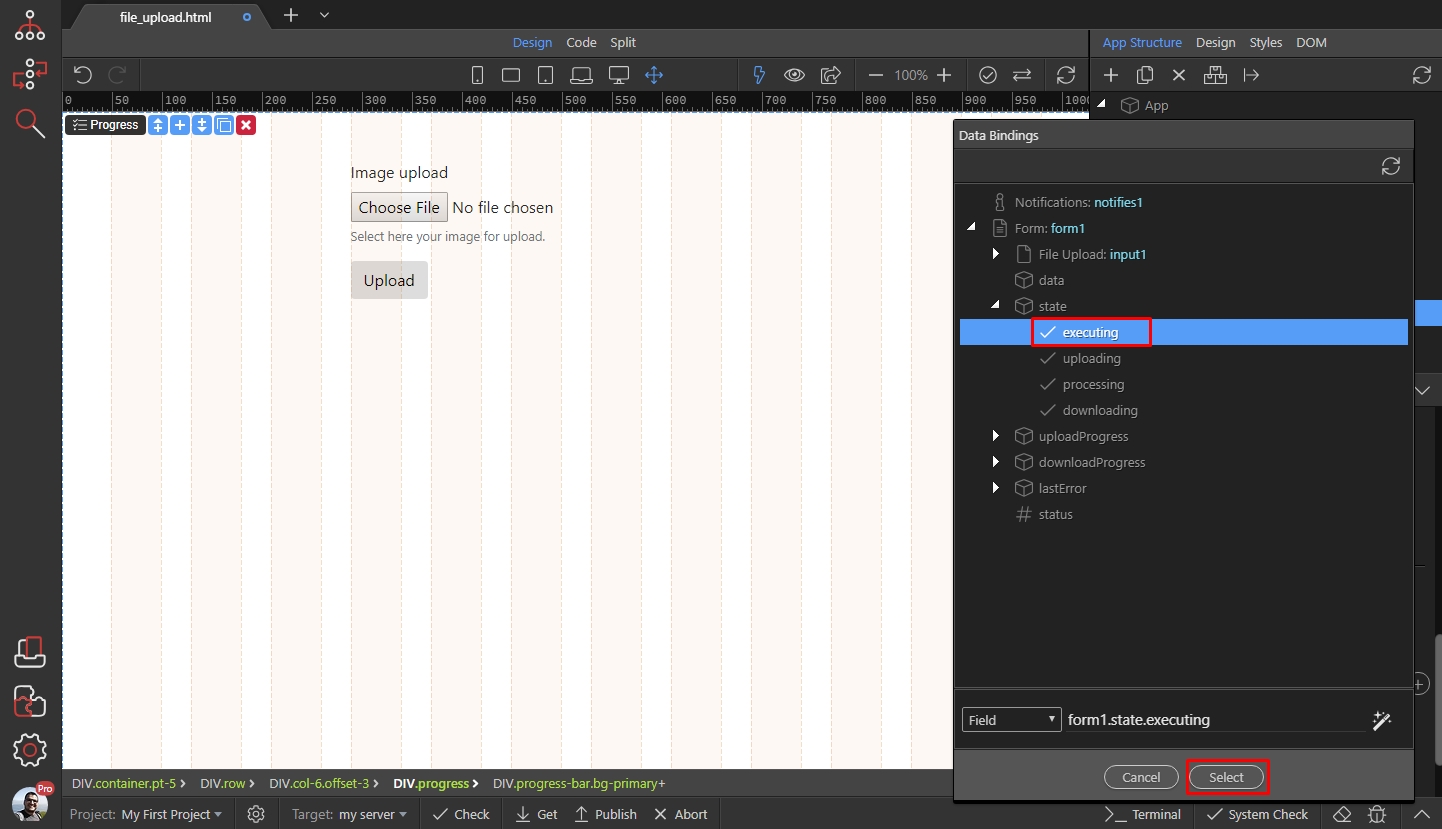
And you are done. Now you will see a nice, animated progress bar when you upload your files:
Section titled “And you are done. Now you will see a nice, animated progress bar when you upload your files:”