
Setting Up a Lightweight Dev Environment with NodeJS and SQLite
Intro You don’t need to install and configure any local servers to run your dynamic Wappler web app or site. You can use the powers of the integrated in Wappler NodeJS server in combination with a SQL
You don’t need to install and configure any local servers to run your dynamic Wappler web app or site. You can use the powers of the integrated in Wappler NodeJS server in combination with a SQLite database to quickly setup a development environment in just a couple of minutes.
That’s the easiest and fastest way to get started with web apps/sites using dynamic data in Wappler.
SQLite a small, fast, self-contained, full-featured, SQL database engine. As it’s self contained, this means you don’t have to run any database server locally, which makes it really easy to use.
In this tutorial we will show you a simple example, which explains how to setup your project, create a database, add some data in the database and then display the data from the database on your page.
Project Setup
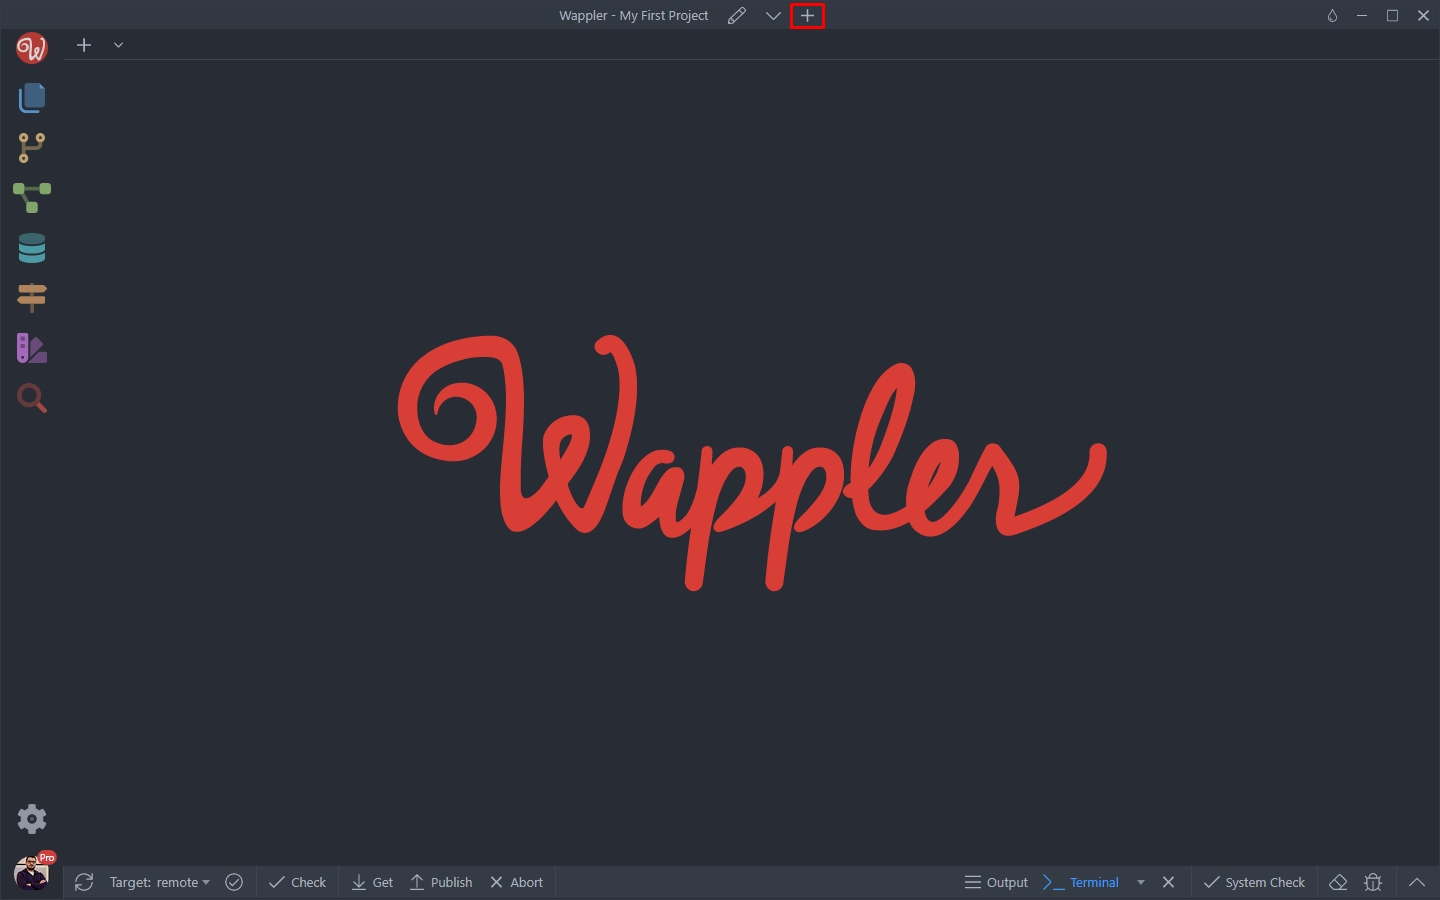
Section titled “Project Setup”First we need to set up a project in Wappler. Click the Add New Project button:
Select Web > Blank:
Section titled “Select Web > Blank:”
Add a name for your project:
Section titled “Add a name for your project:”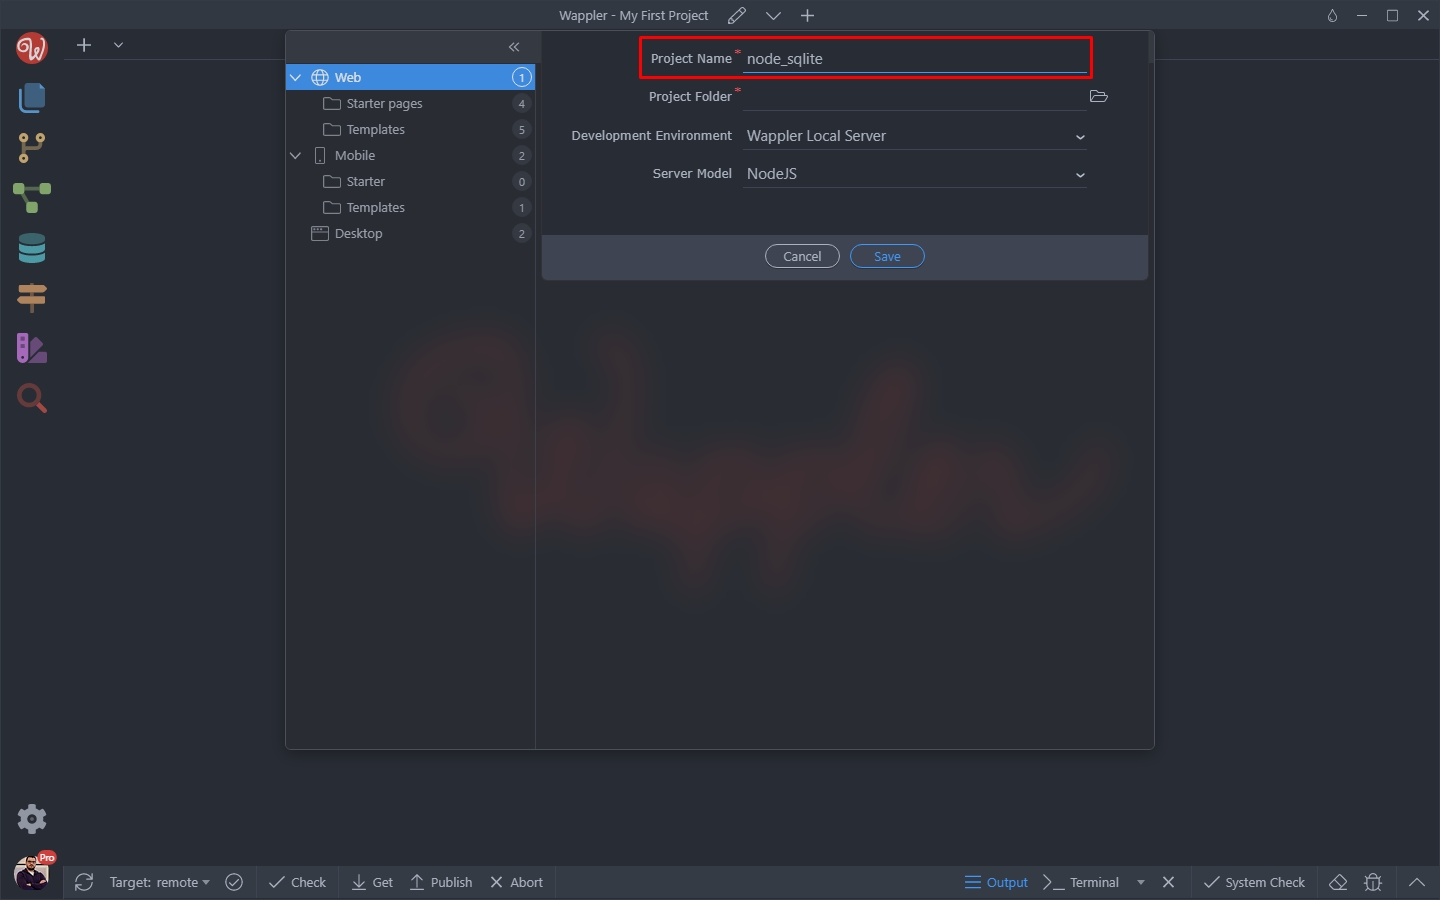
Then select a path on your hard drive, where the project and all its files should be created:
Section titled “Then select a path on your hard drive, where the project and all its files should be created:”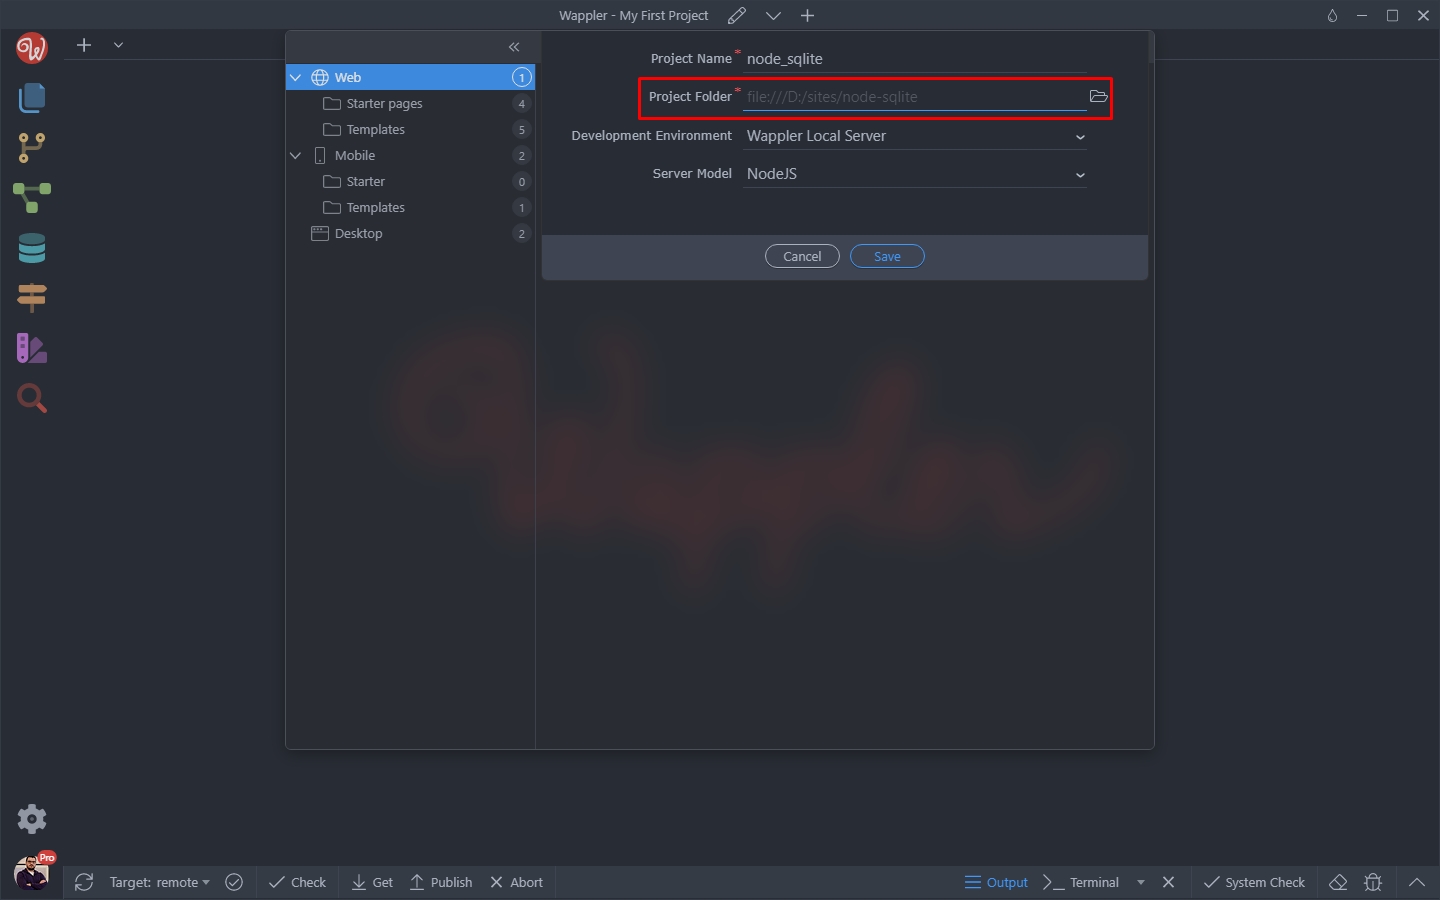
Set the Development Environment to Wappler Local Server:
Section titled “Set the Development Environment to Wappler Local Server:”
And select NodeJS as a server model:
Section titled “And select NodeJS as a server model:”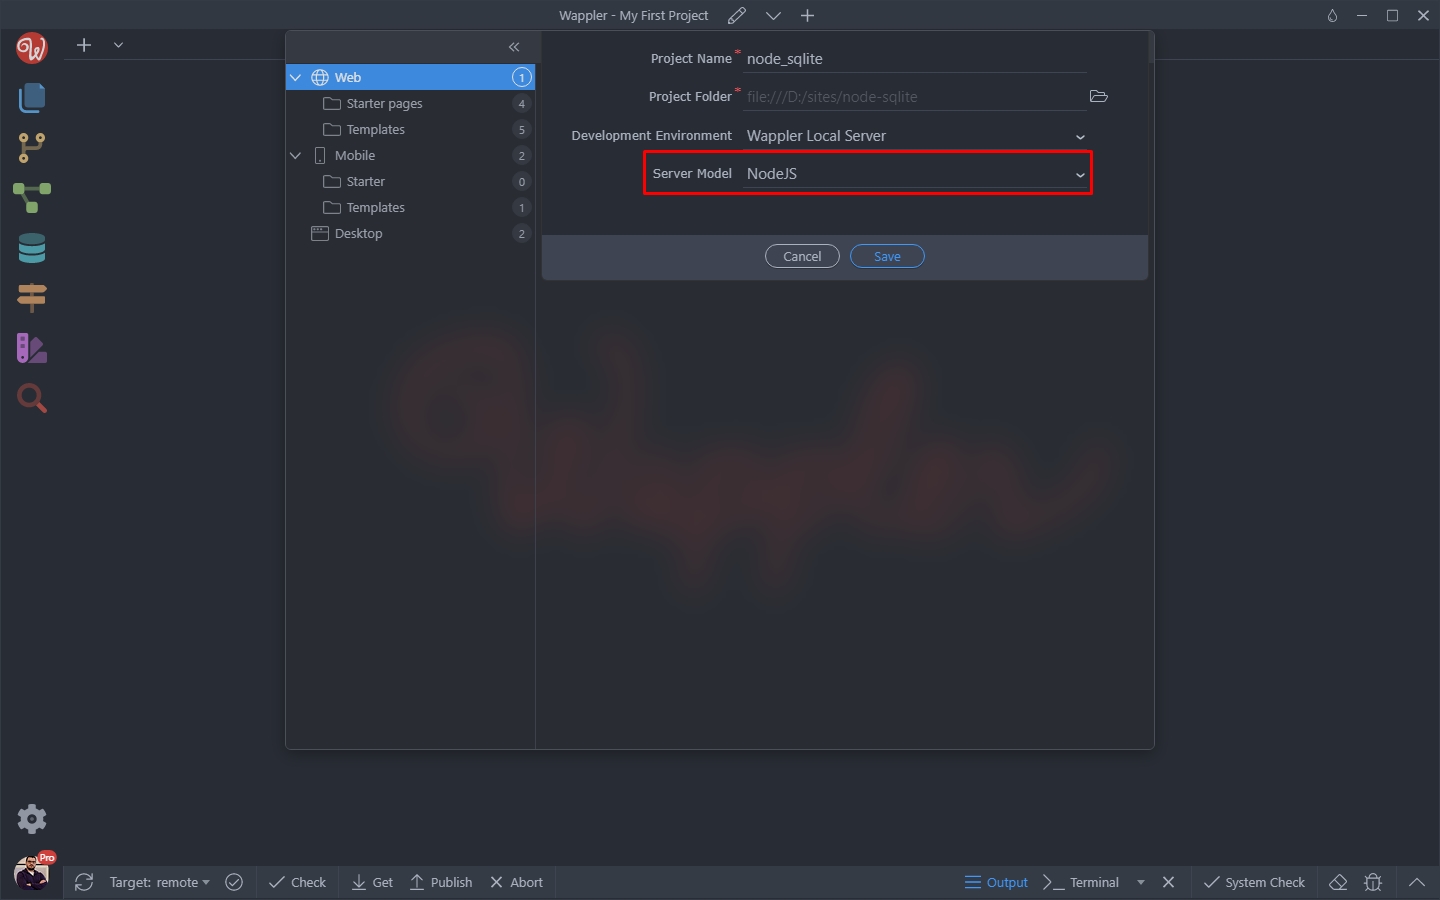
And click Save:
Section titled “And click Save:”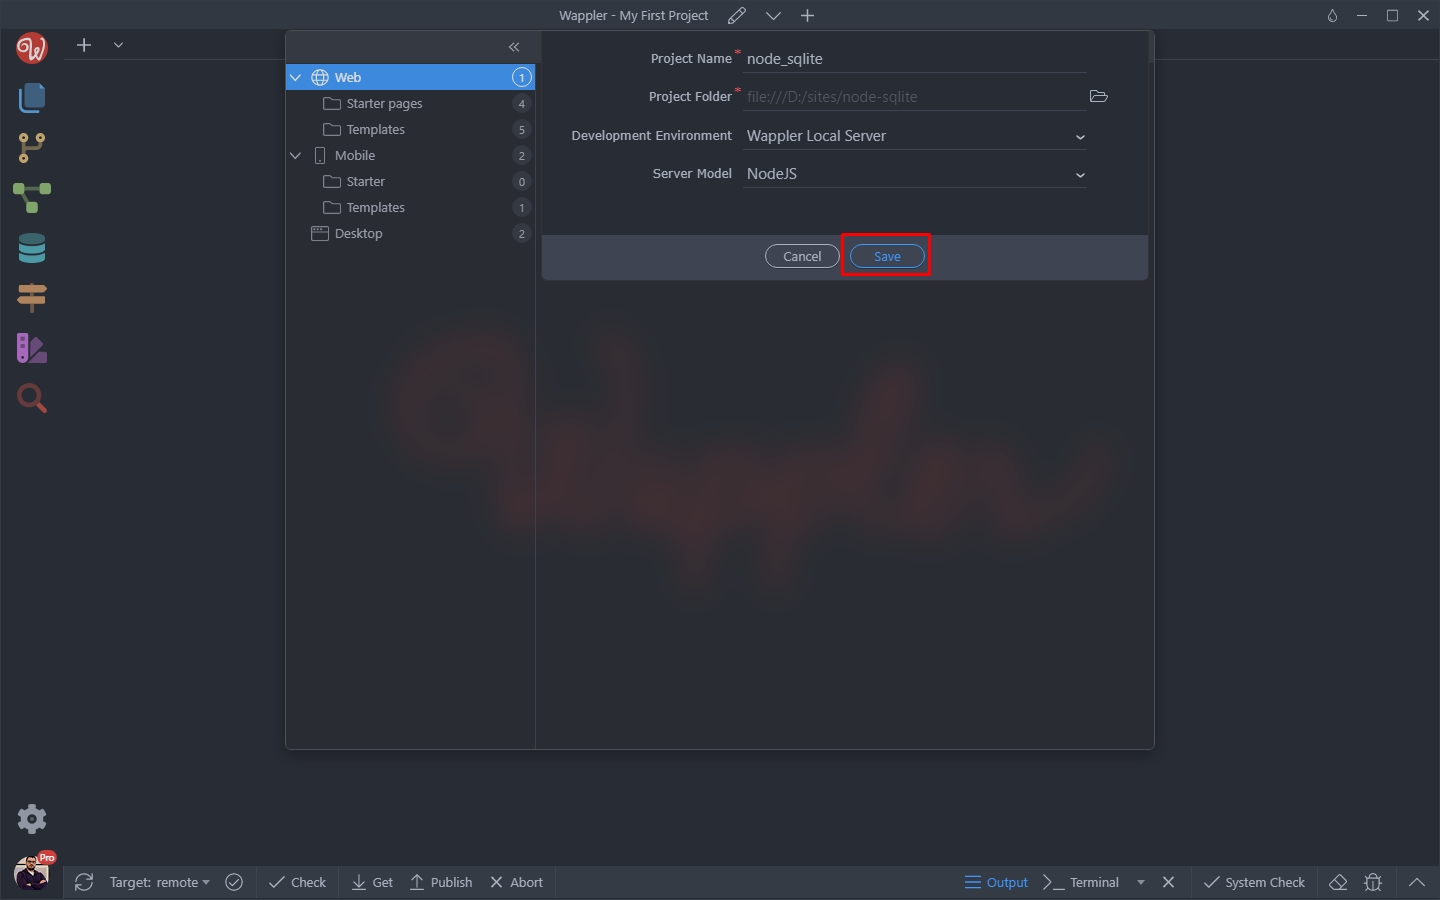
The next step is to setup our SQLite database.
Section titled “The next step is to setup our SQLite database.”You are done setting up your project. You don’t need anything else to be installed or configured, your Local Node server is up and running.
Note: If you want to use custom node modules or run an external NodeJS Server, make sure to select Own Server as a Development Environment.
The next step is to setup our SQLite database.
Database Setup
Section titled “Database Setup”Thanks to the database manager in Wappler, it’s really easy to setup a SQLite database, create tables and add data to the tables.
Creating the SQLite Database
Section titled “Creating the SQLite Database”Open the Database Manager:
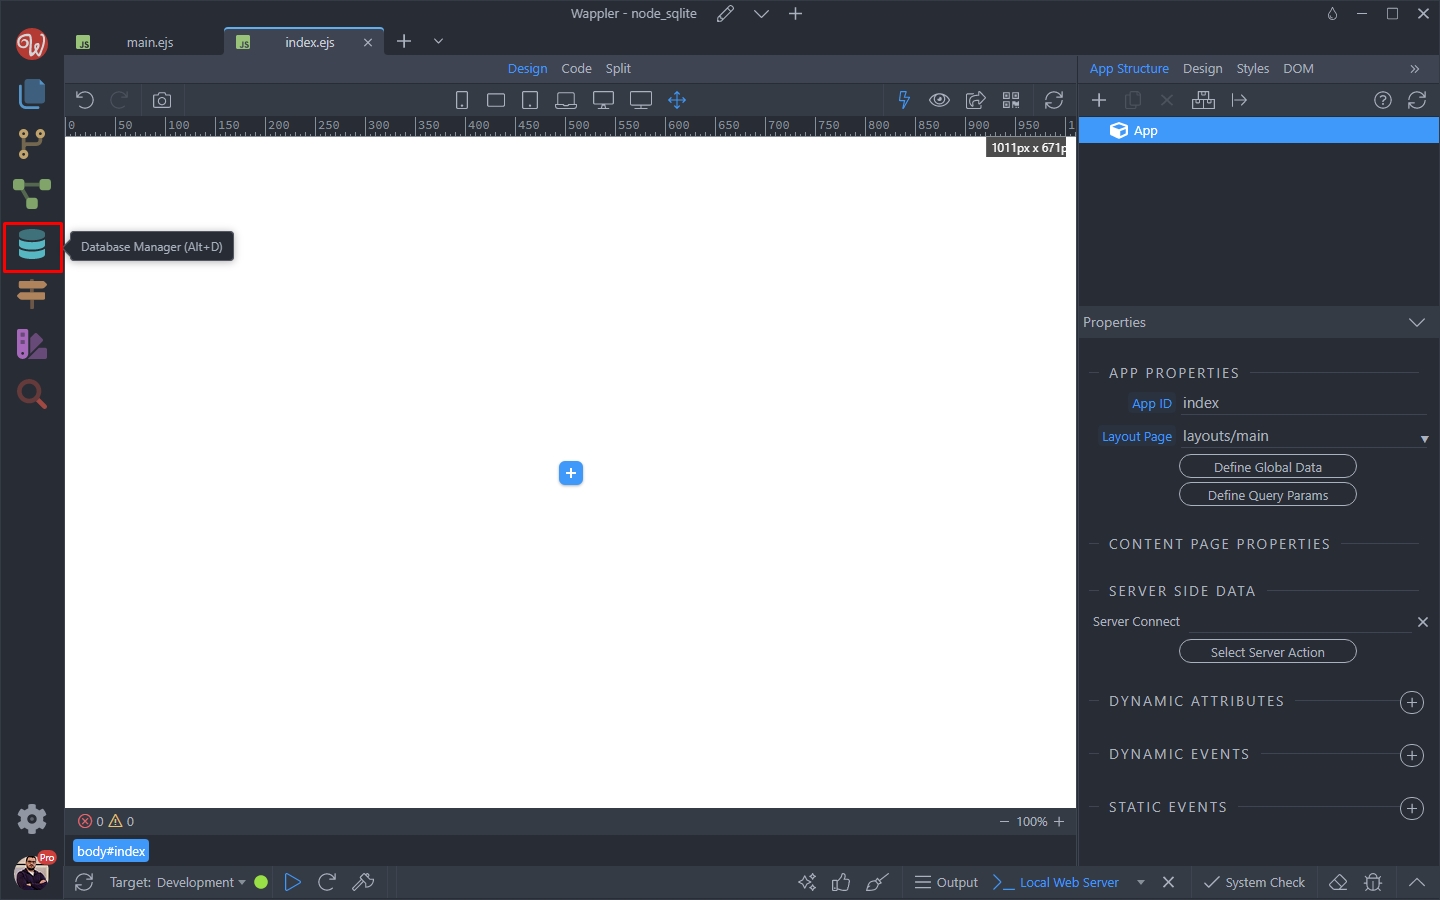
Right click Database Connection:
Section titled “Right click Database Connection:”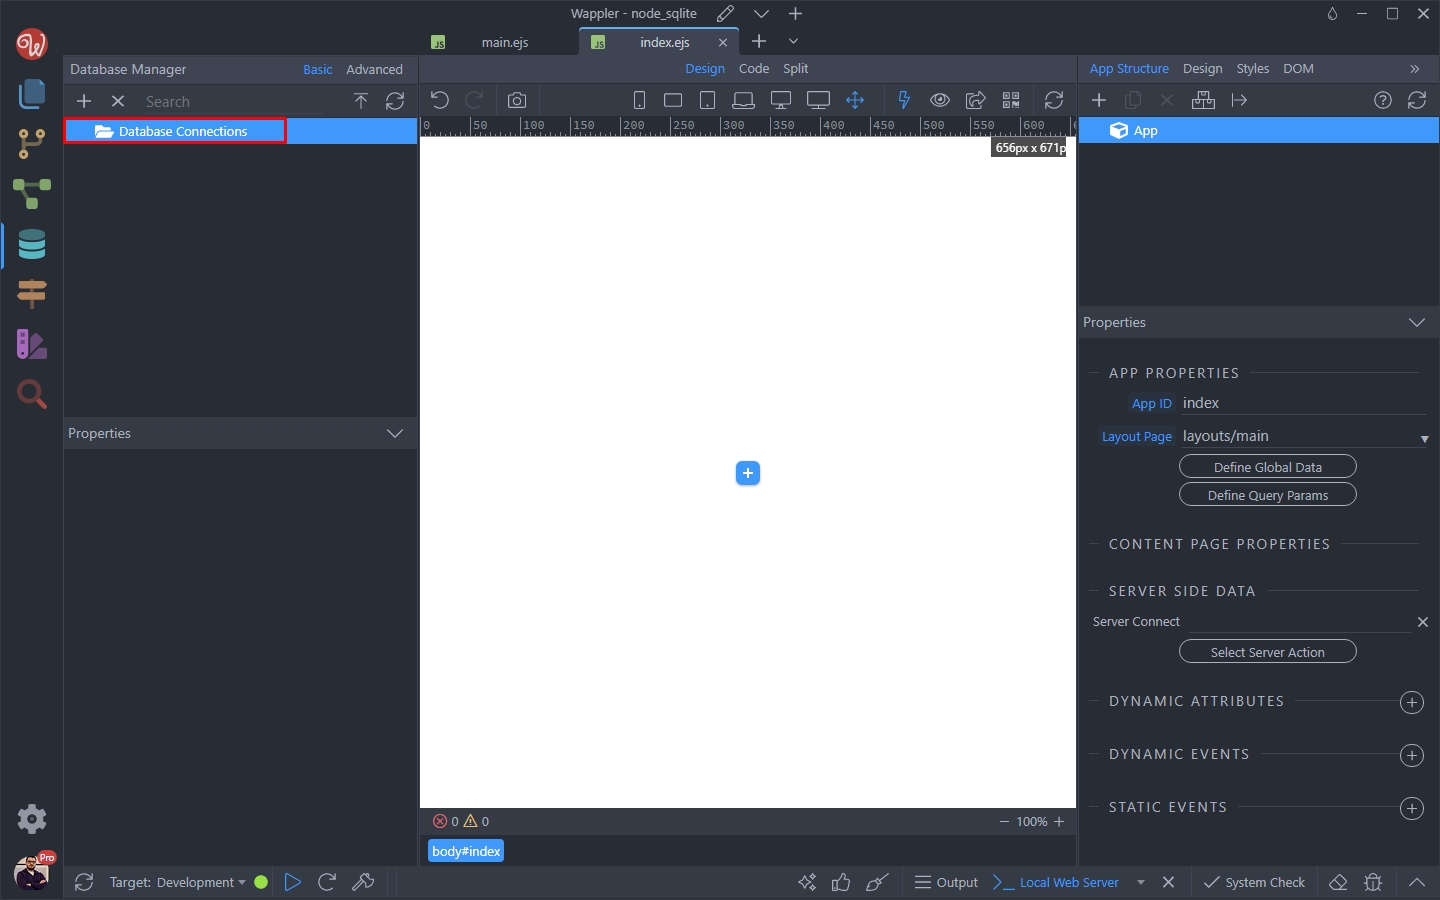
And select New Connection:
Section titled “And select New Connection:”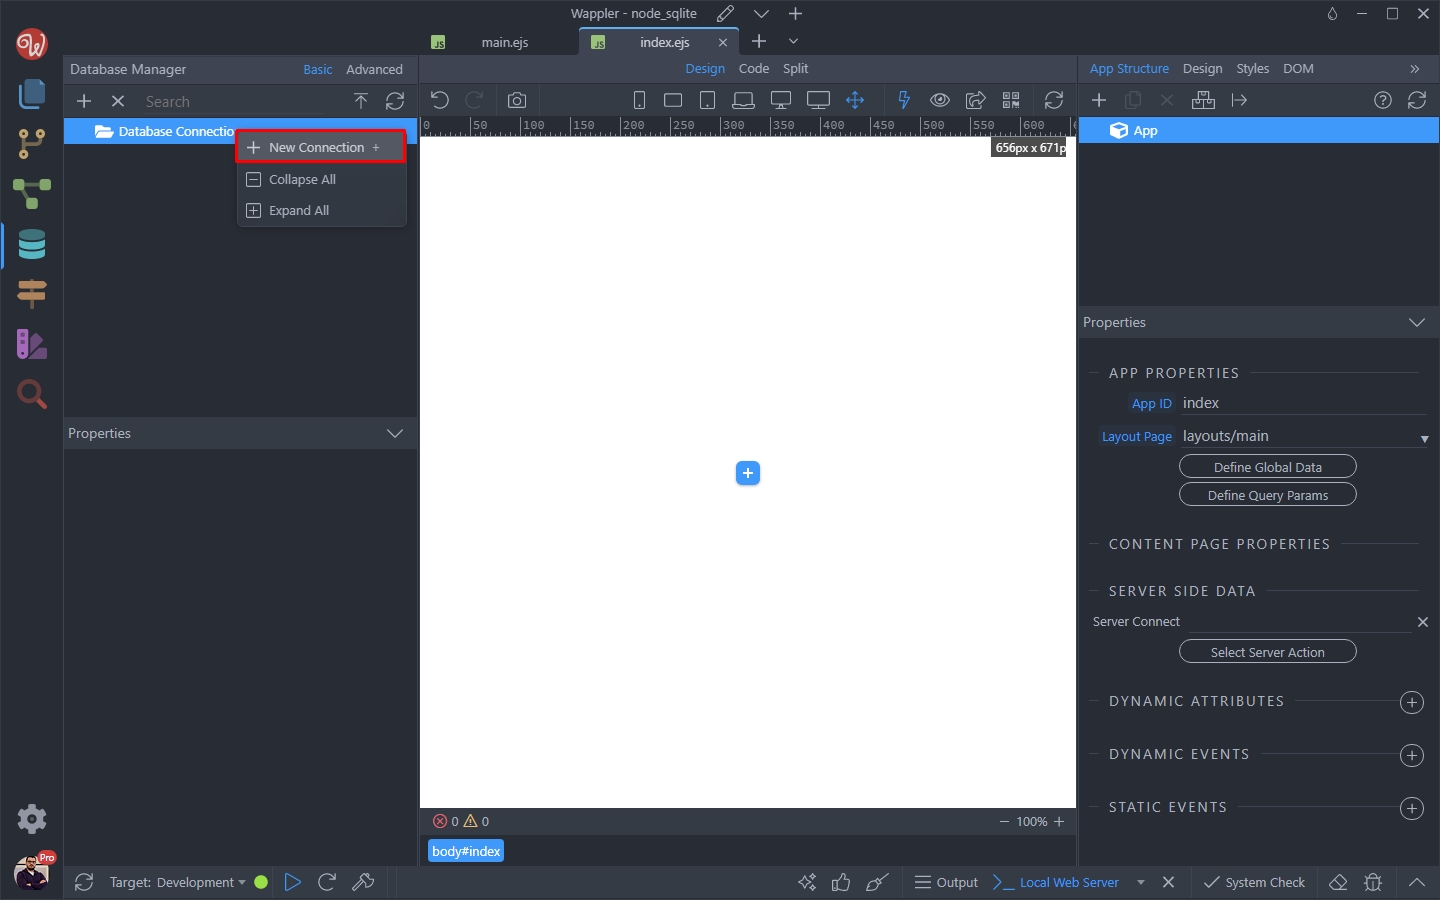
Step 15
Section titled “Step 15”Add the name db to your database connection. This is required so you can later apply changes easily to a remote docker target for example:
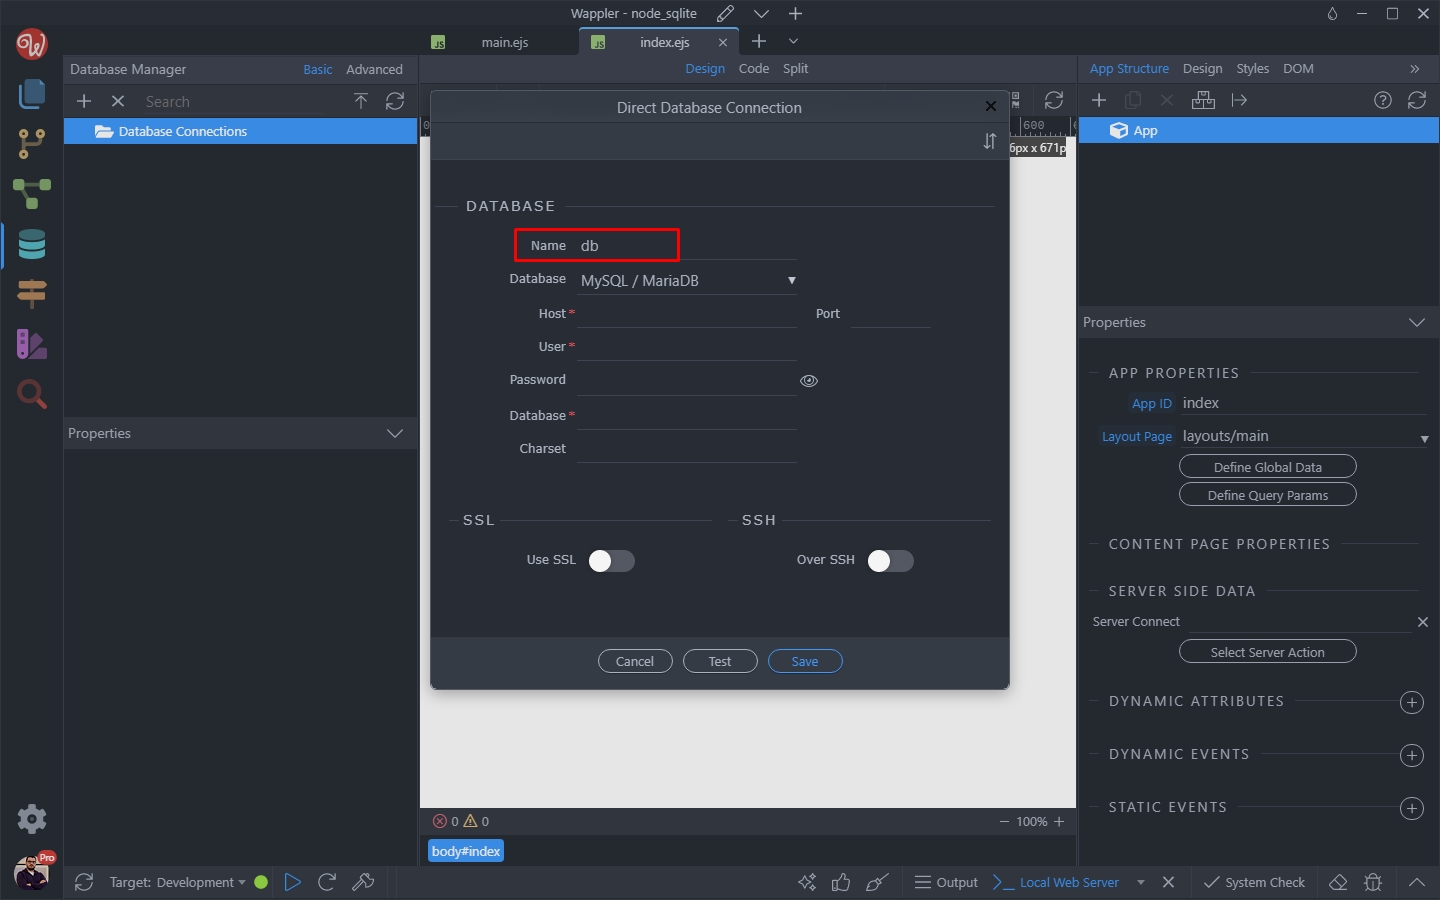
Select SQLite in the Database menu:
Section titled “Select SQLite in the Database menu:”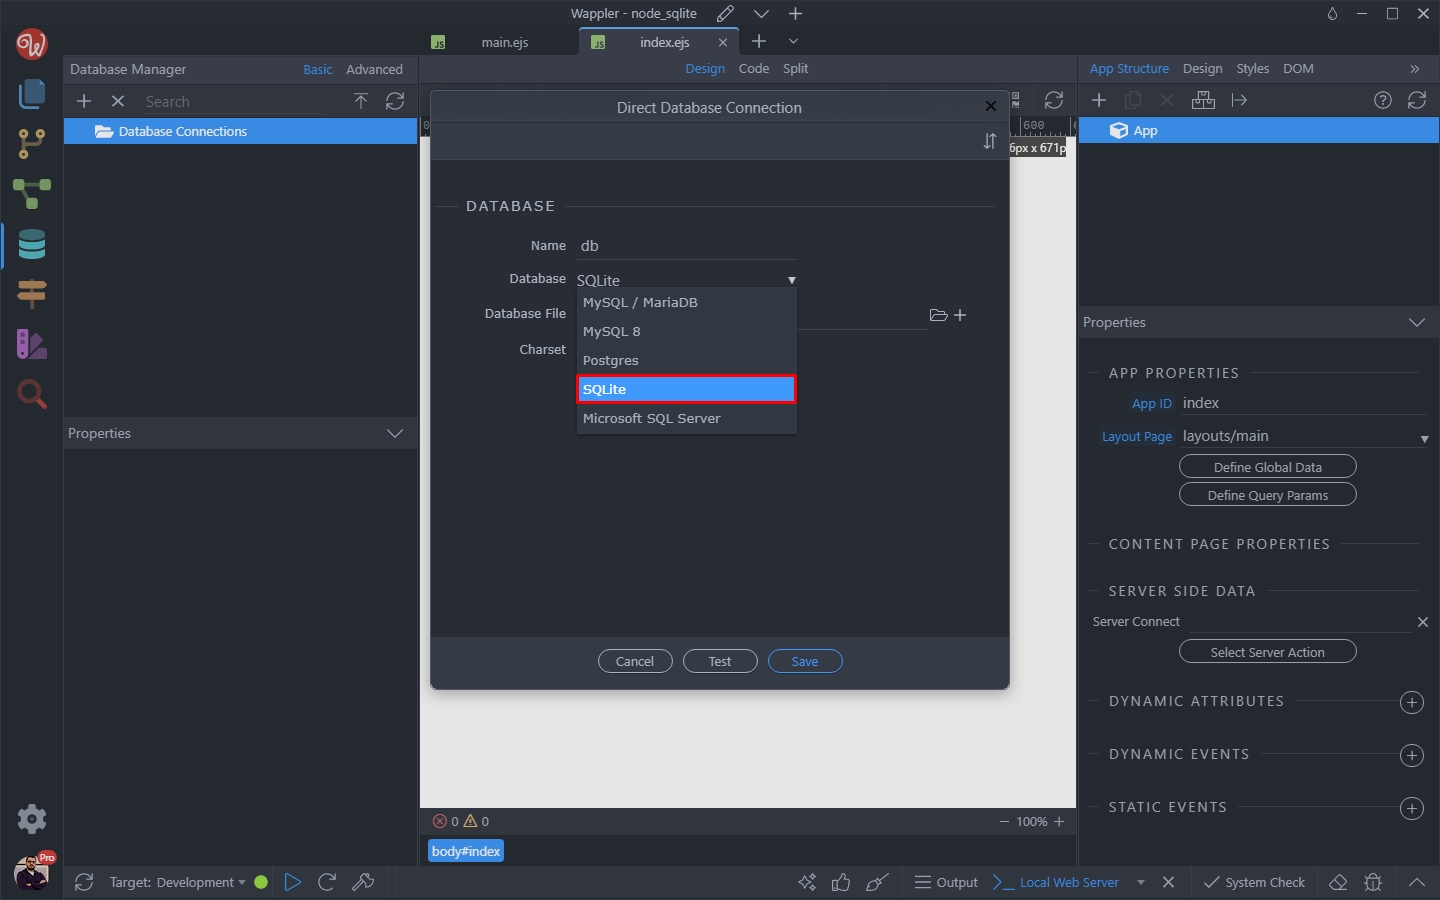
And click the Add New button, in order to create the SQLite database file:
Section titled “And click the Add New button, in order to create the SQLite database file:”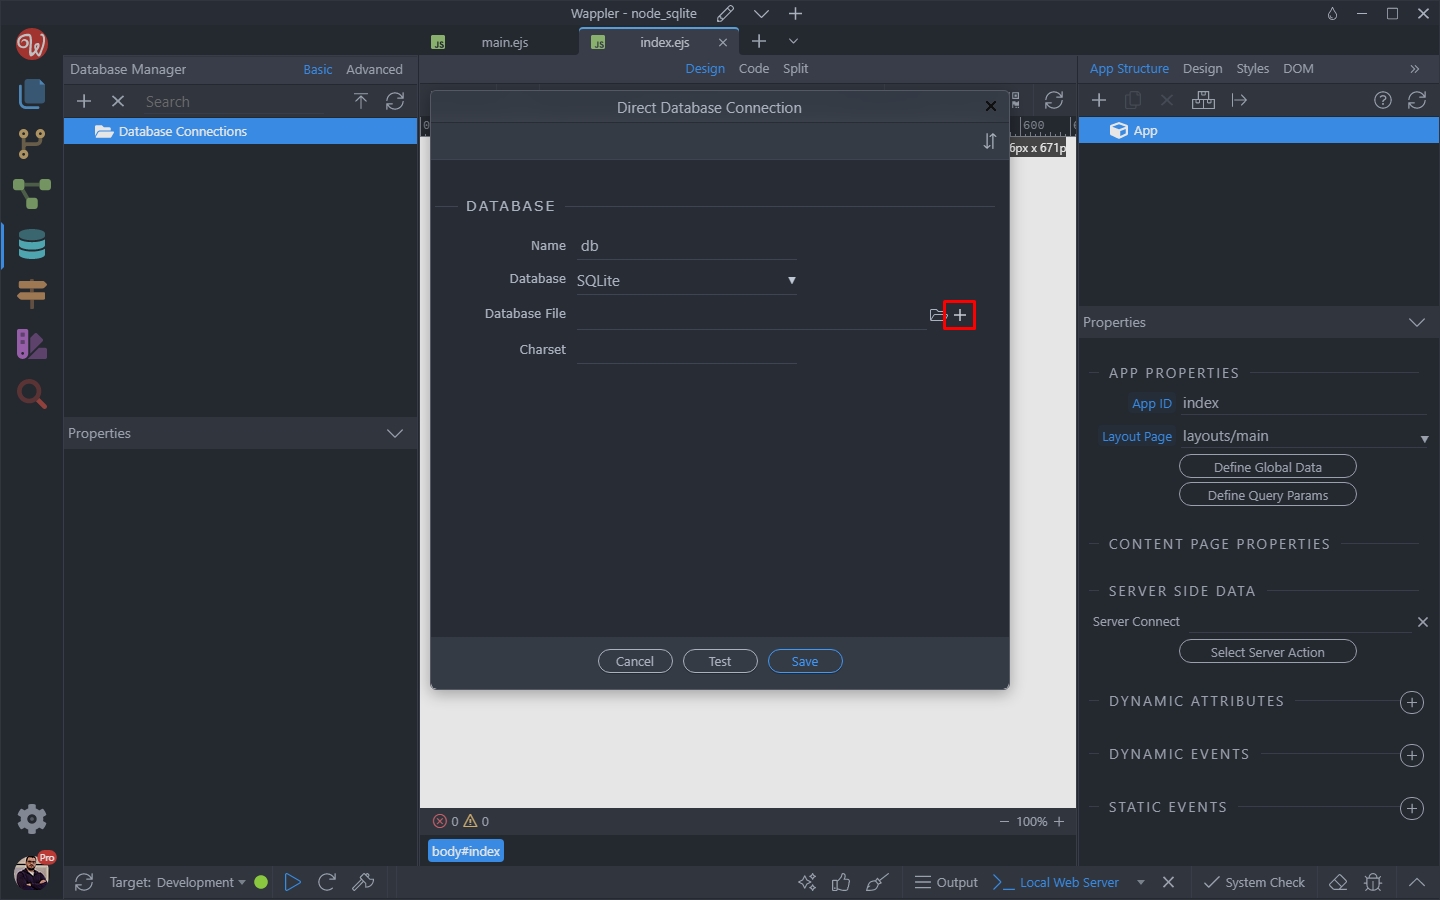
Step 18
Section titled “Step 18”Add a name for your database and save it in your project root (and make sure not to place it in the public folder!):
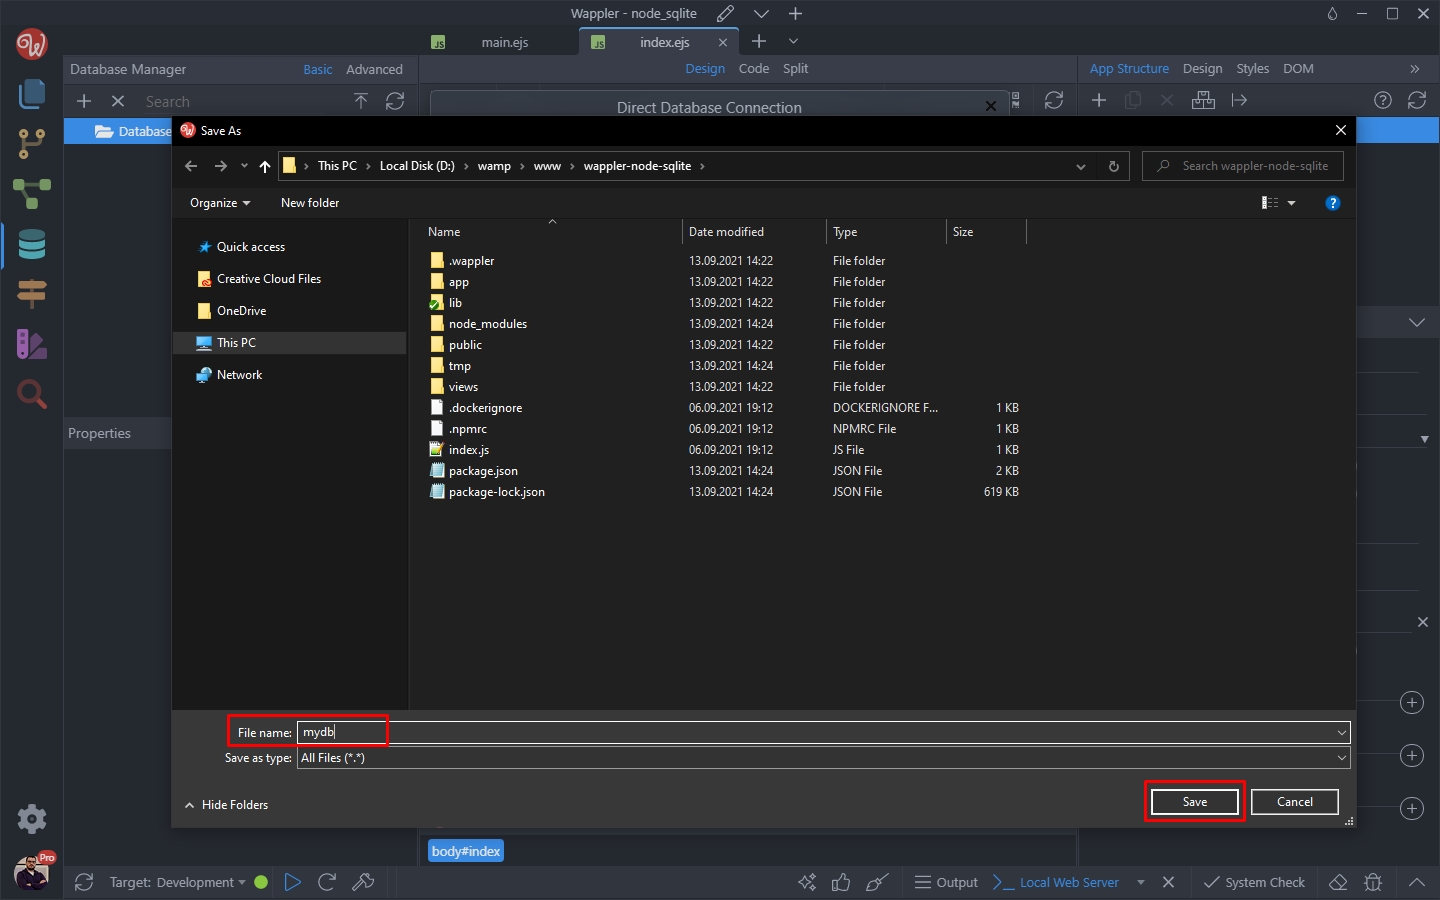
Click Save:
Section titled “Click Save:”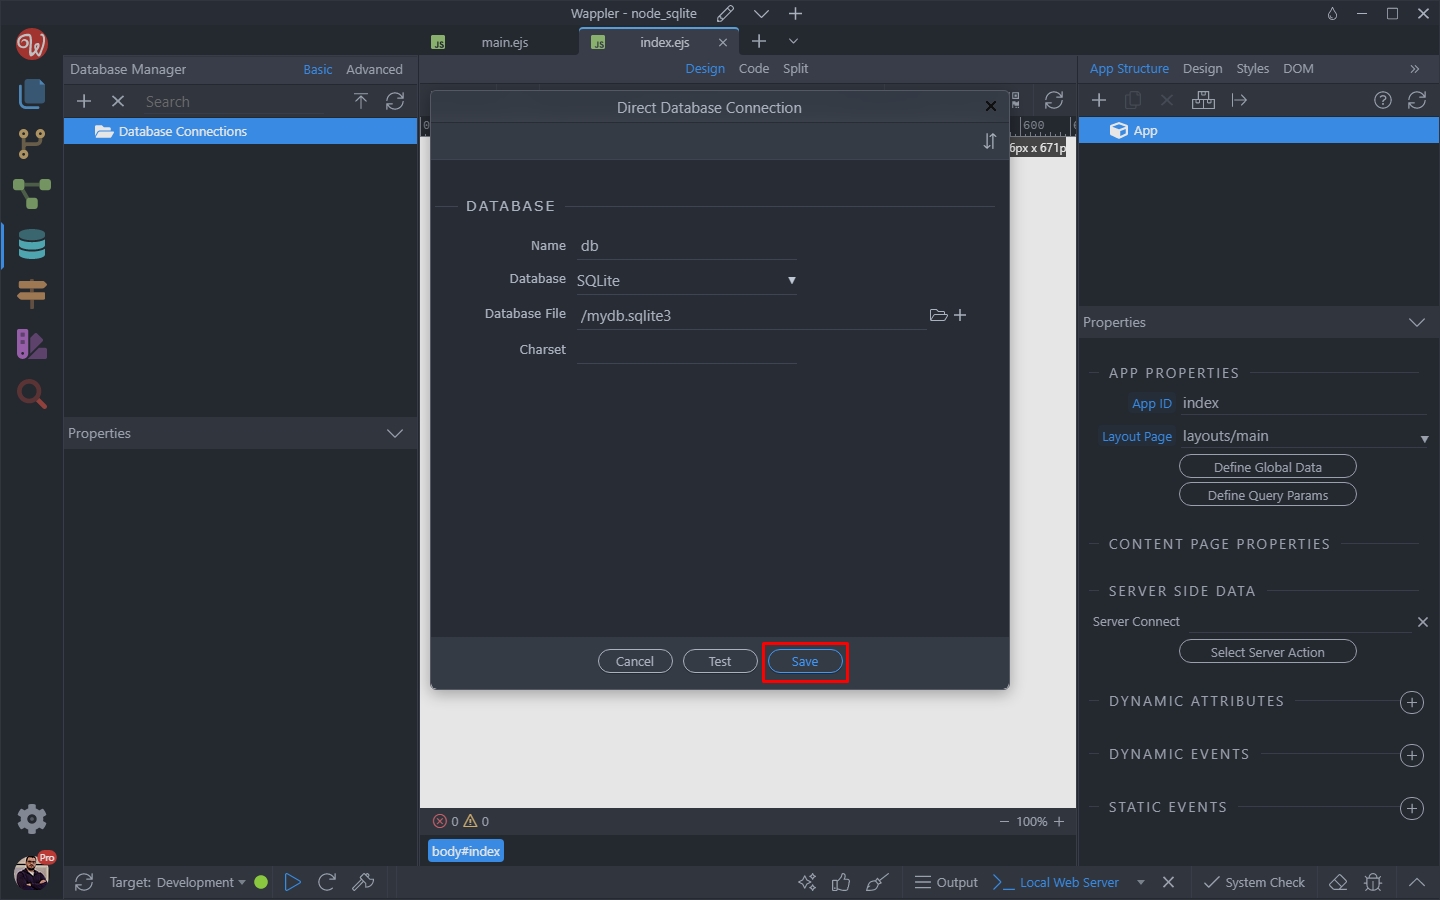
And you are done! Your database is now ready to be used.
Section titled “And you are done! Your database is now ready to be used.”Creating Tables in the Database
Section titled “Creating Tables in the Database”Now let’s create a table in our SQLite database. Right click Tables under the db connection in the Database Manager:
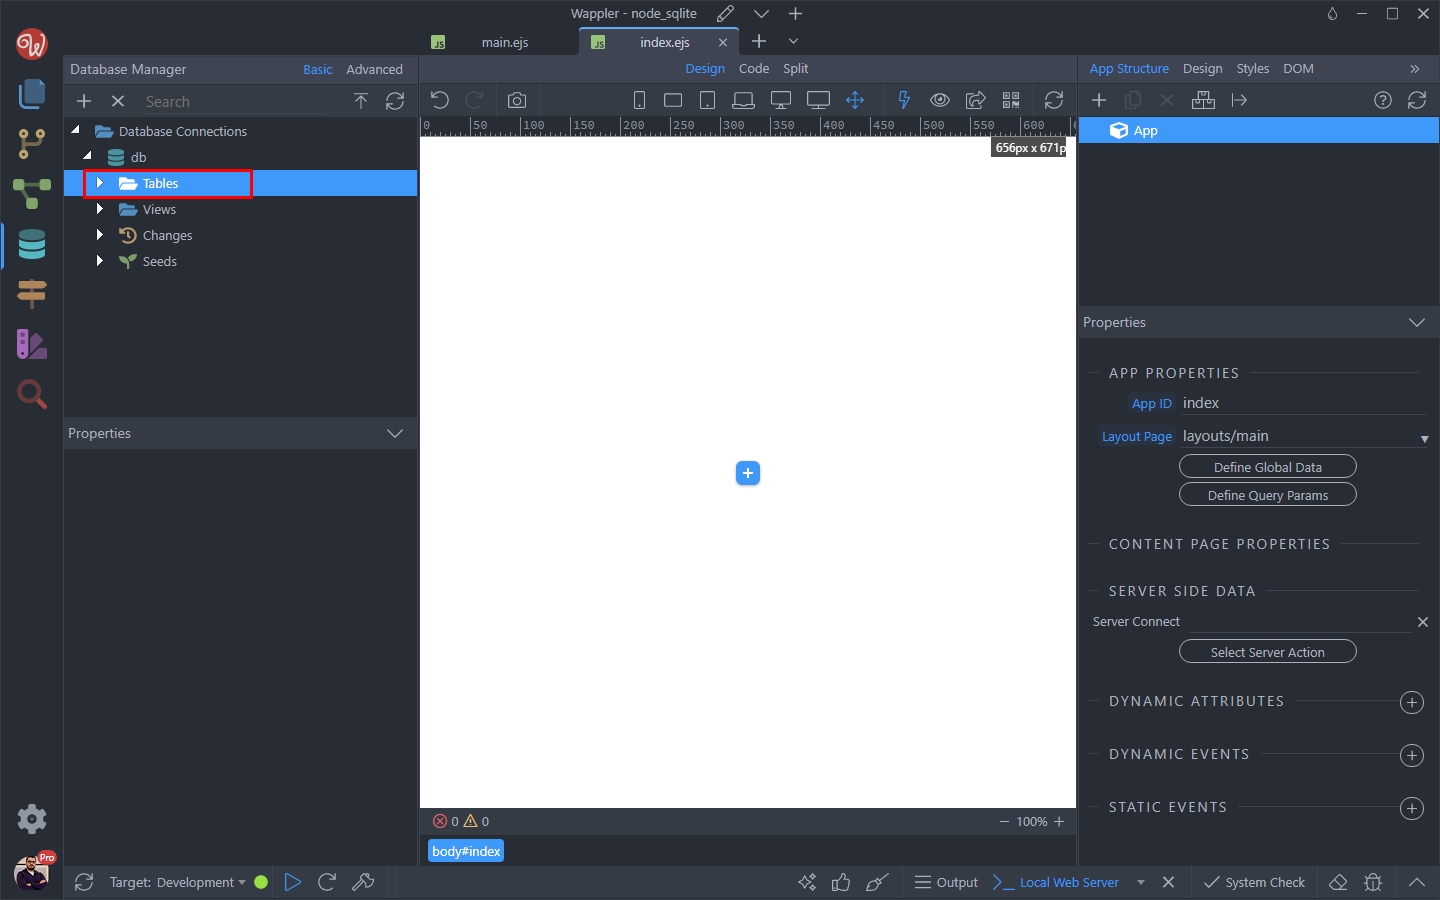
And select New Table:
Section titled “And select New Table:”
Let’s call this table users:
Section titled “Let’s call this table users:”
Step 24
Section titled “Step 24”The Database Manager automatically creates an id column for you. It’s type is increments, this is the identity column of your database, which auto increments its values:
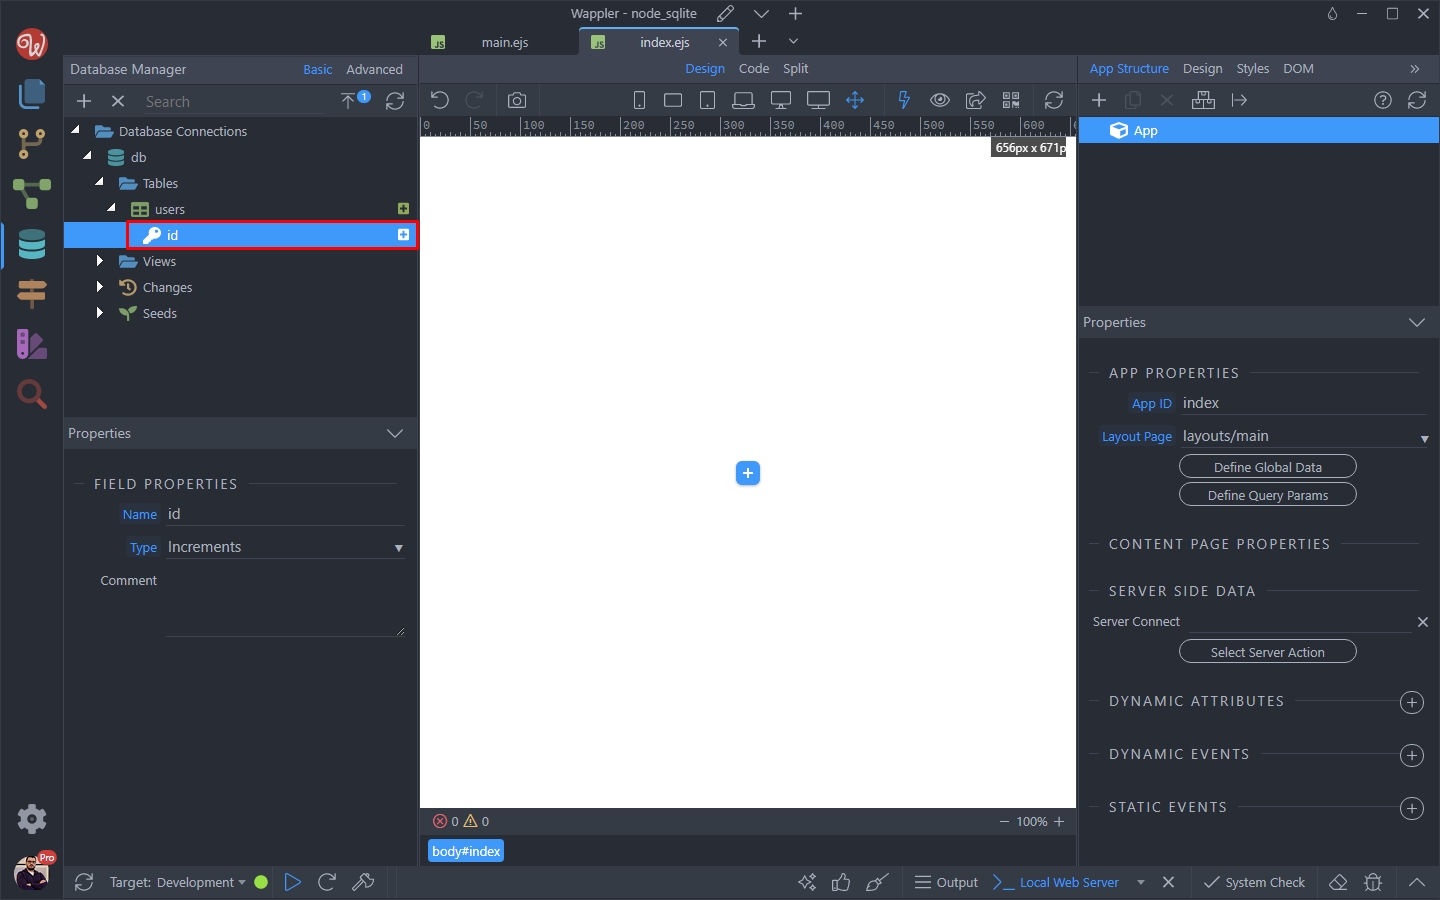
Right click the users table and click New Field:
Section titled “Right click the users table and click New Field:”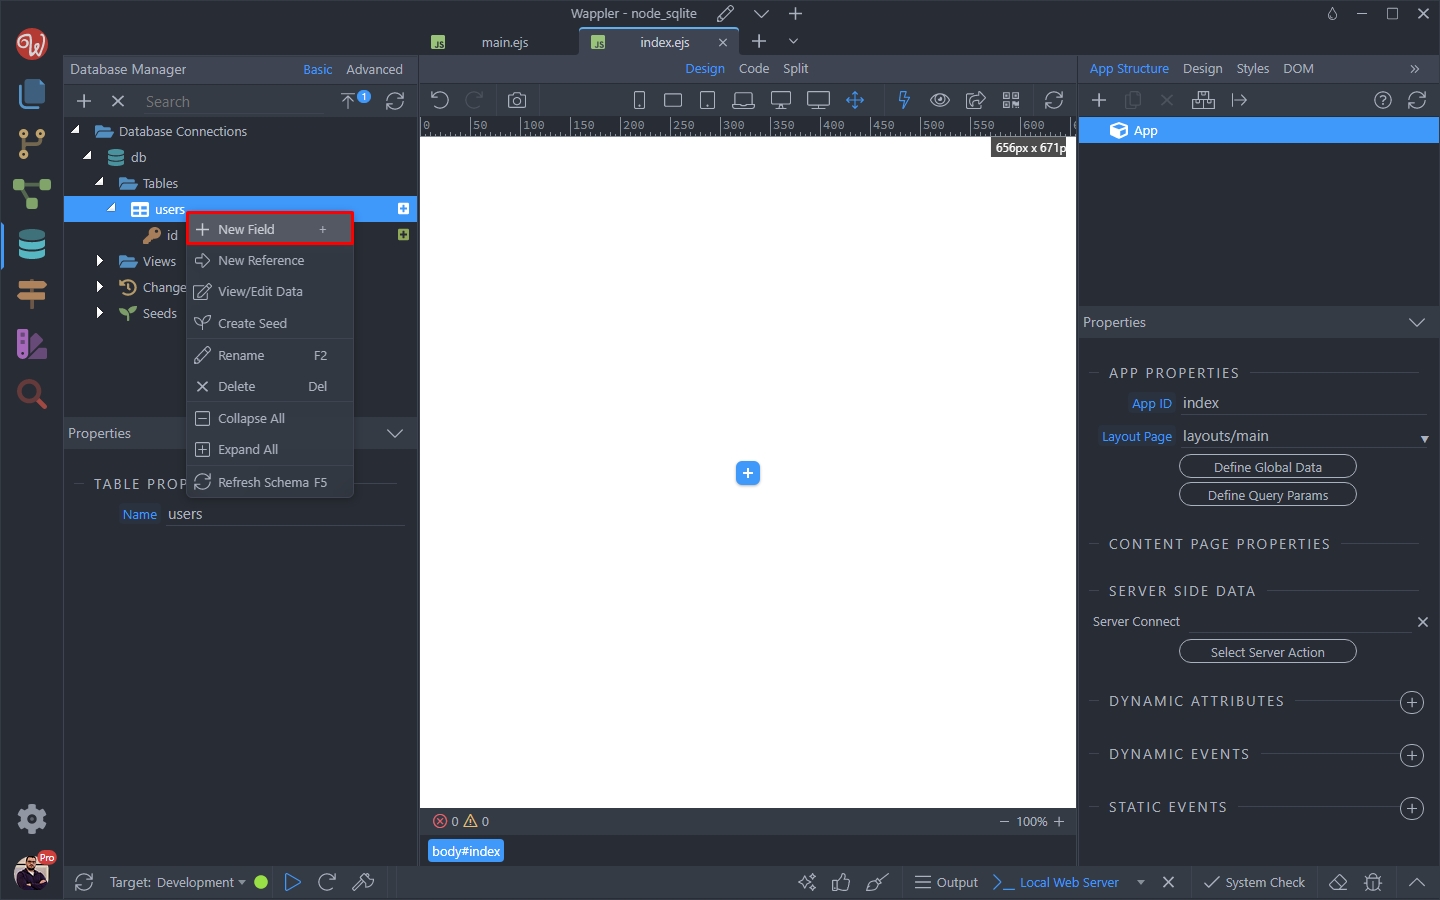
We call this new column first_name and set its type to string as it will store the users’ first names:
Section titled “We call this new column first_name and set its type to string as it will store the users’ first names:”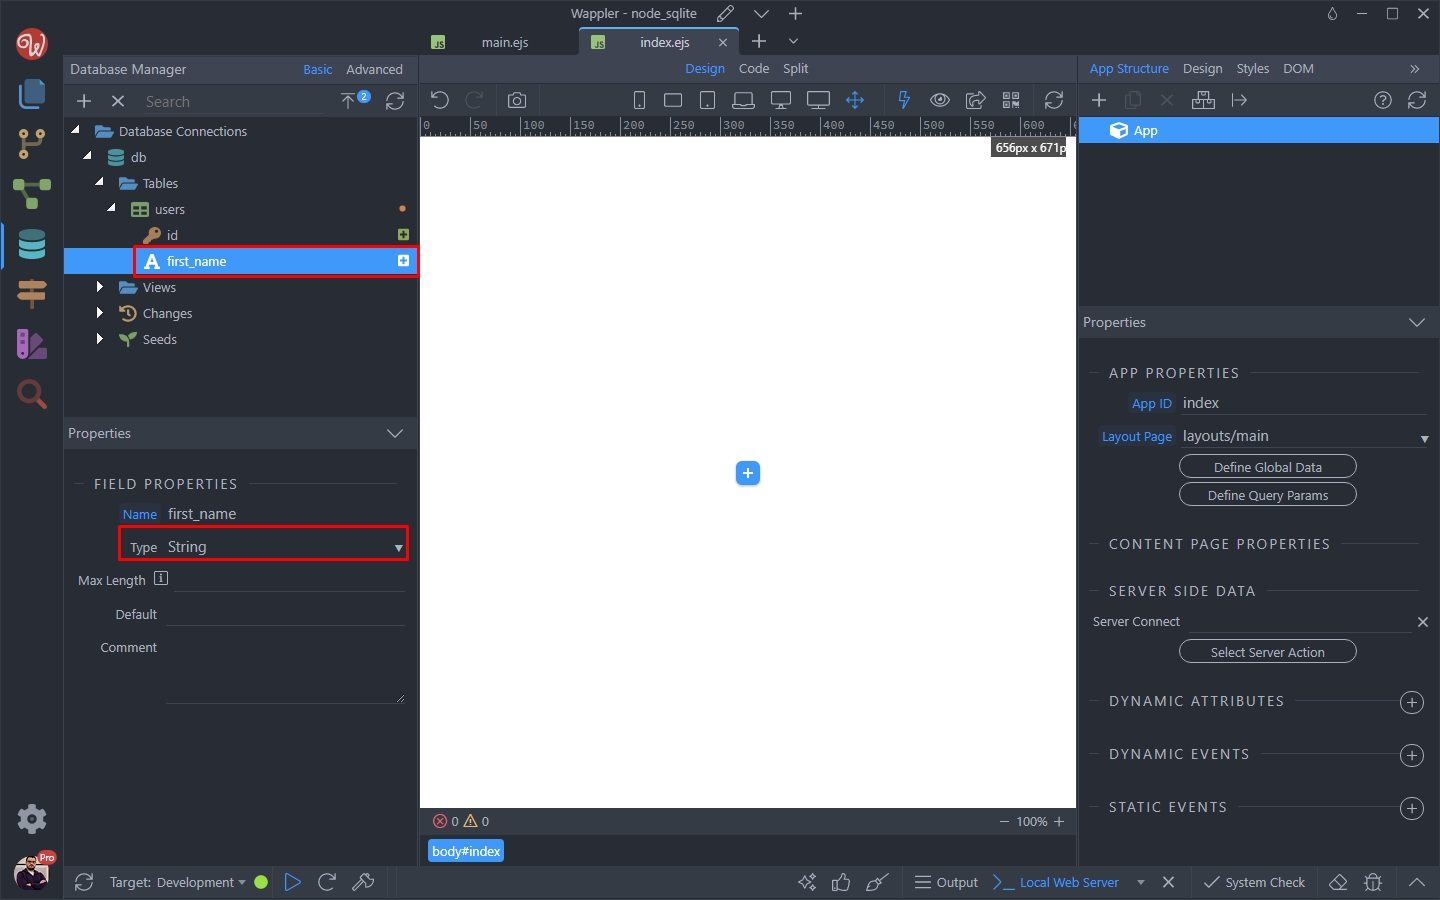
We add 2 more columns called last_name and email and also set their types to string:
Section titled “We add 2 more columns called last_name and email and also set their types to string:”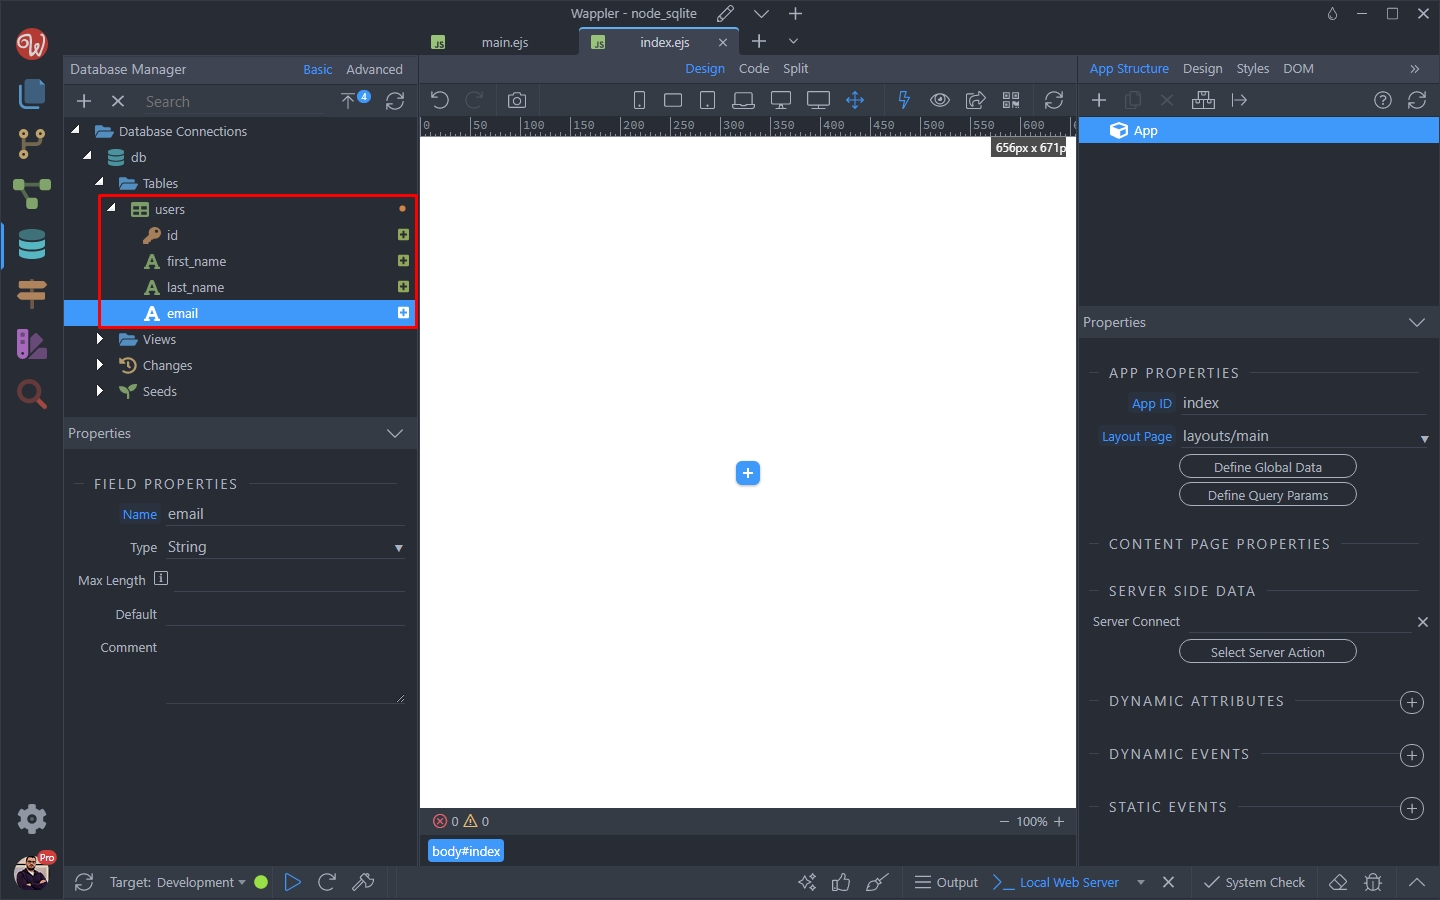
Step 28
Section titled “Step 28”Now this is our database table structure. We need to apply these changes to the database so they are stored there. Click the Apply Changes button:
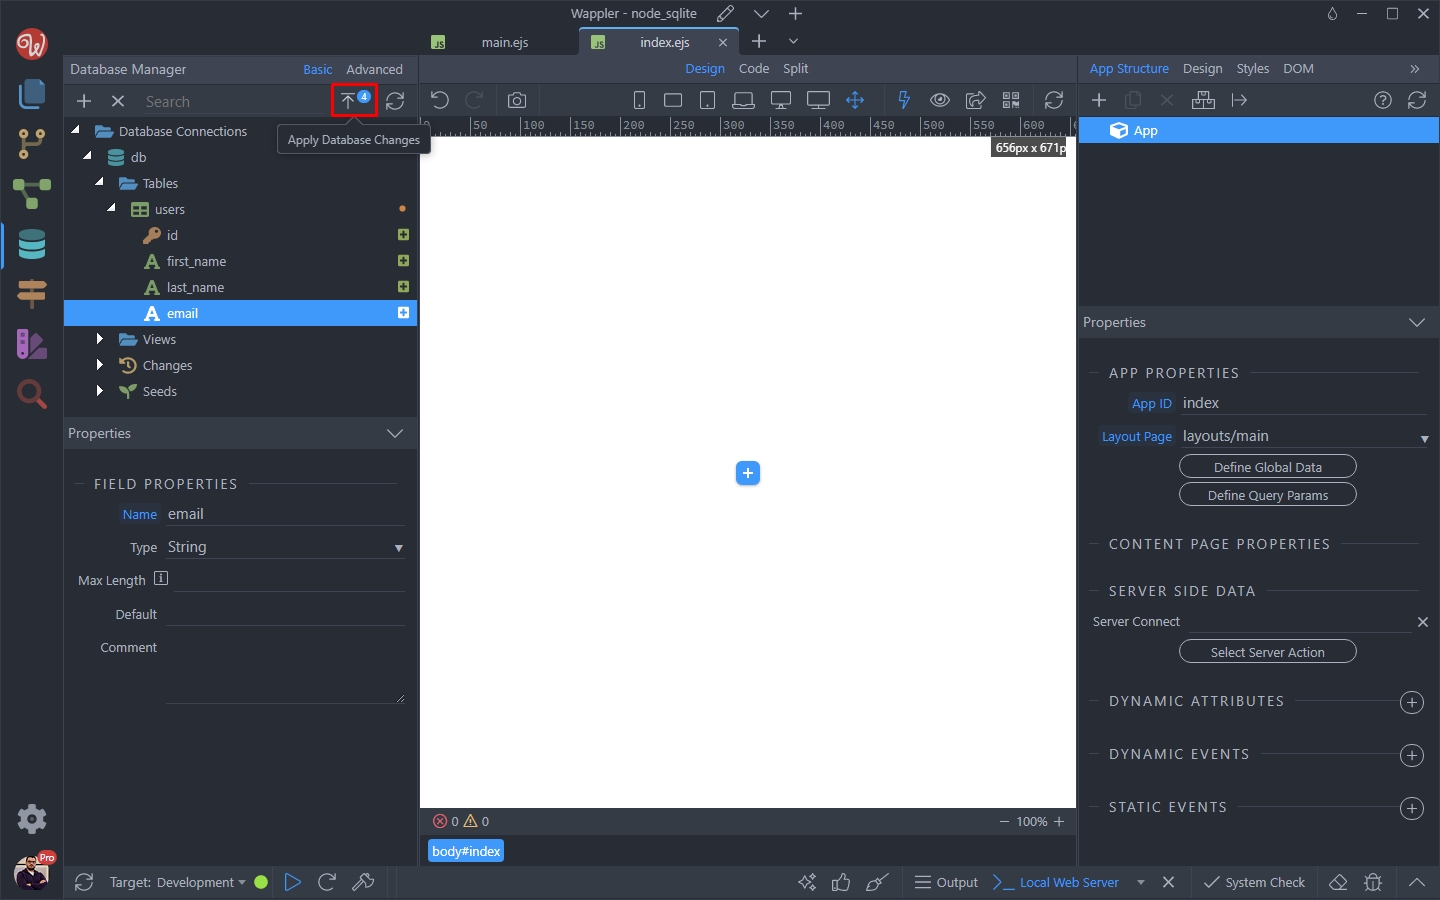
We enter an informative text in the changes message dialog and click OK:
Section titled “We enter an informative text in the changes message dialog and click OK:”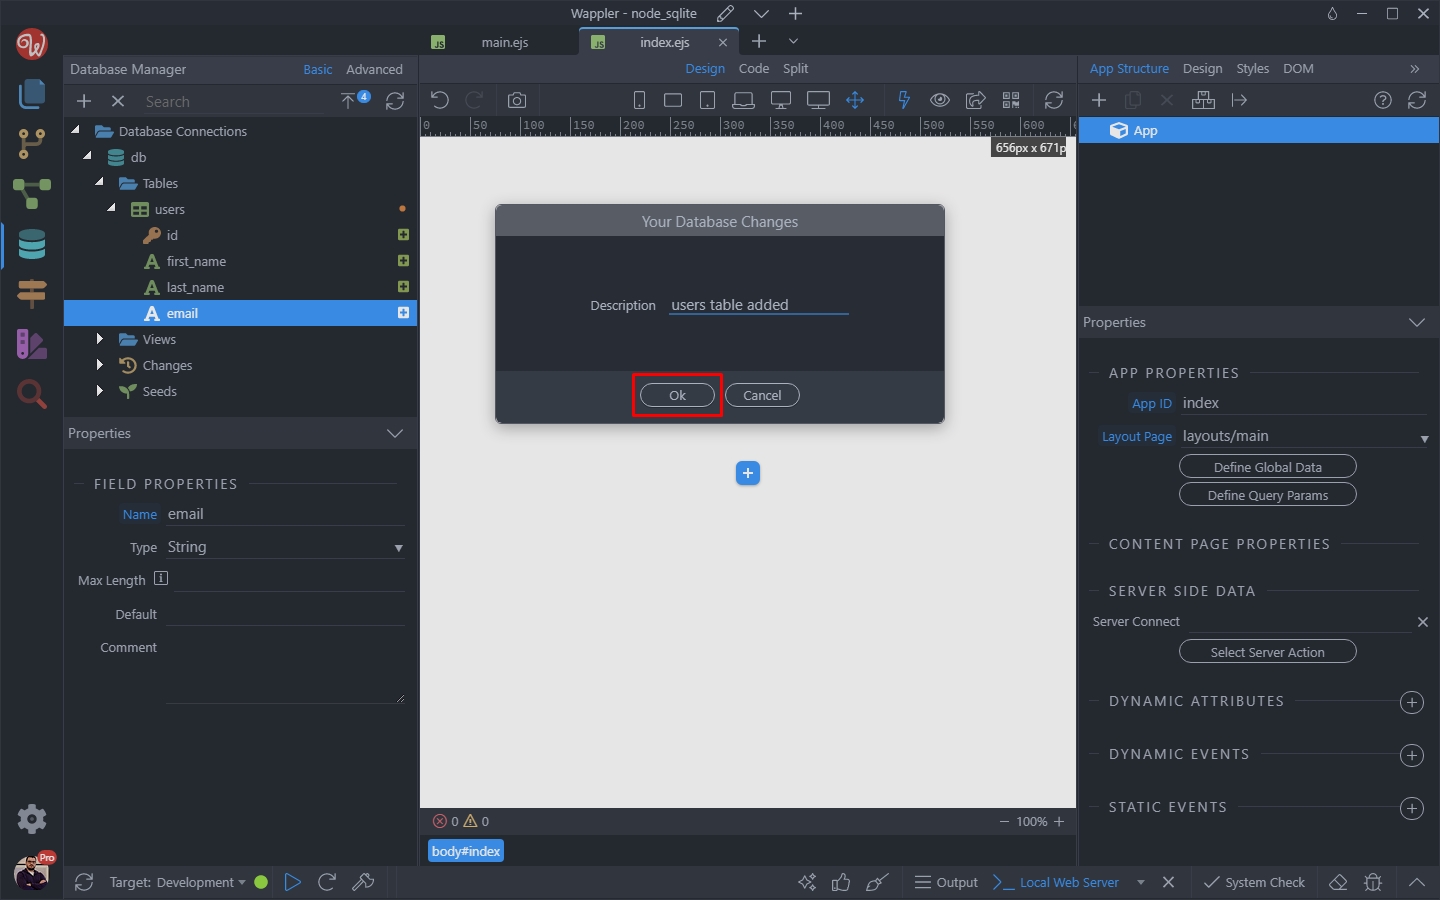
Our changes are now saved to the database and the users table with its structure are saved.
Section titled “Our changes are now saved to the database and the users table with its structure are saved.”The next step is to add some data in our database.
Adding Data to the Dabase
Section titled “Adding Data to the Dabase”Right click the users table in the Database Manager:
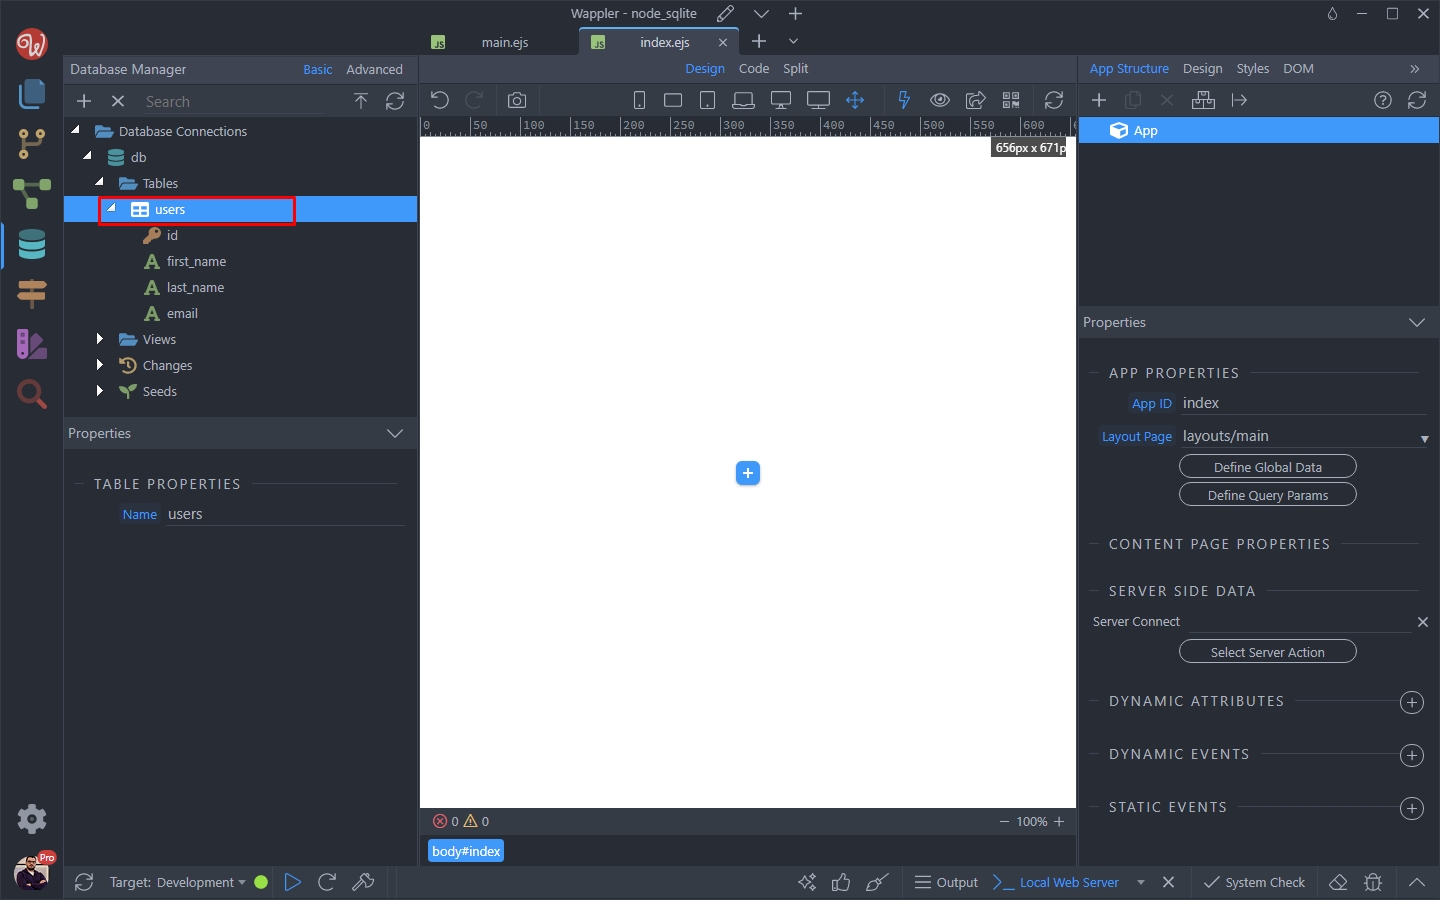
And select View/Edit Data:
Section titled “And select View/Edit Data:”
Click the Add New button:
Section titled “Click the Add New button:”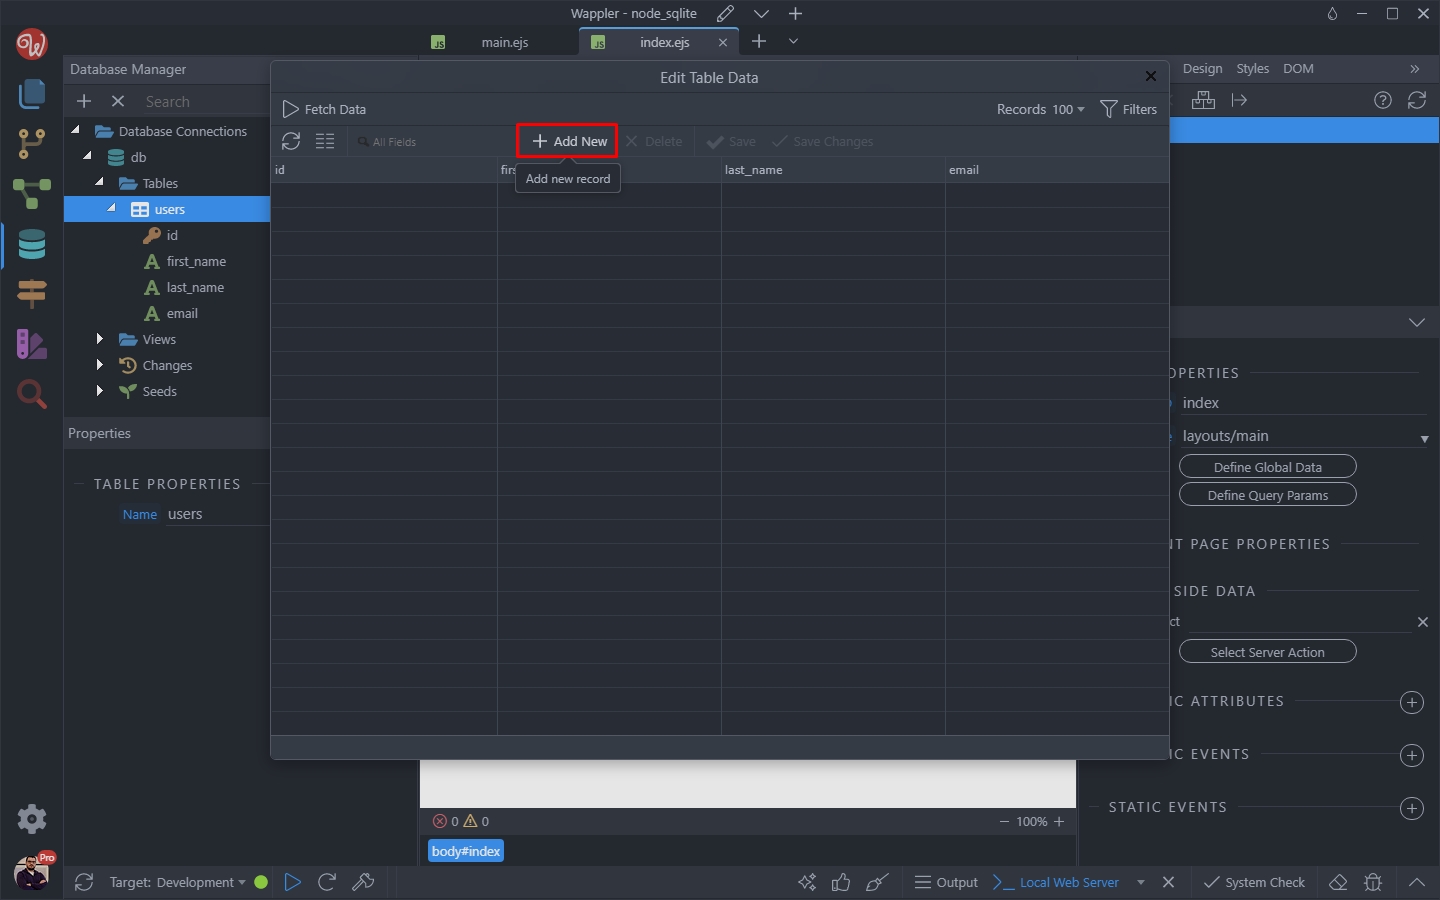
Step 34
Section titled “Step 34”You can see that the cursor is in the second column - user_name. That is perfectly fine, as the identity column is handled automatically by the database so you don’t have to worry about this.
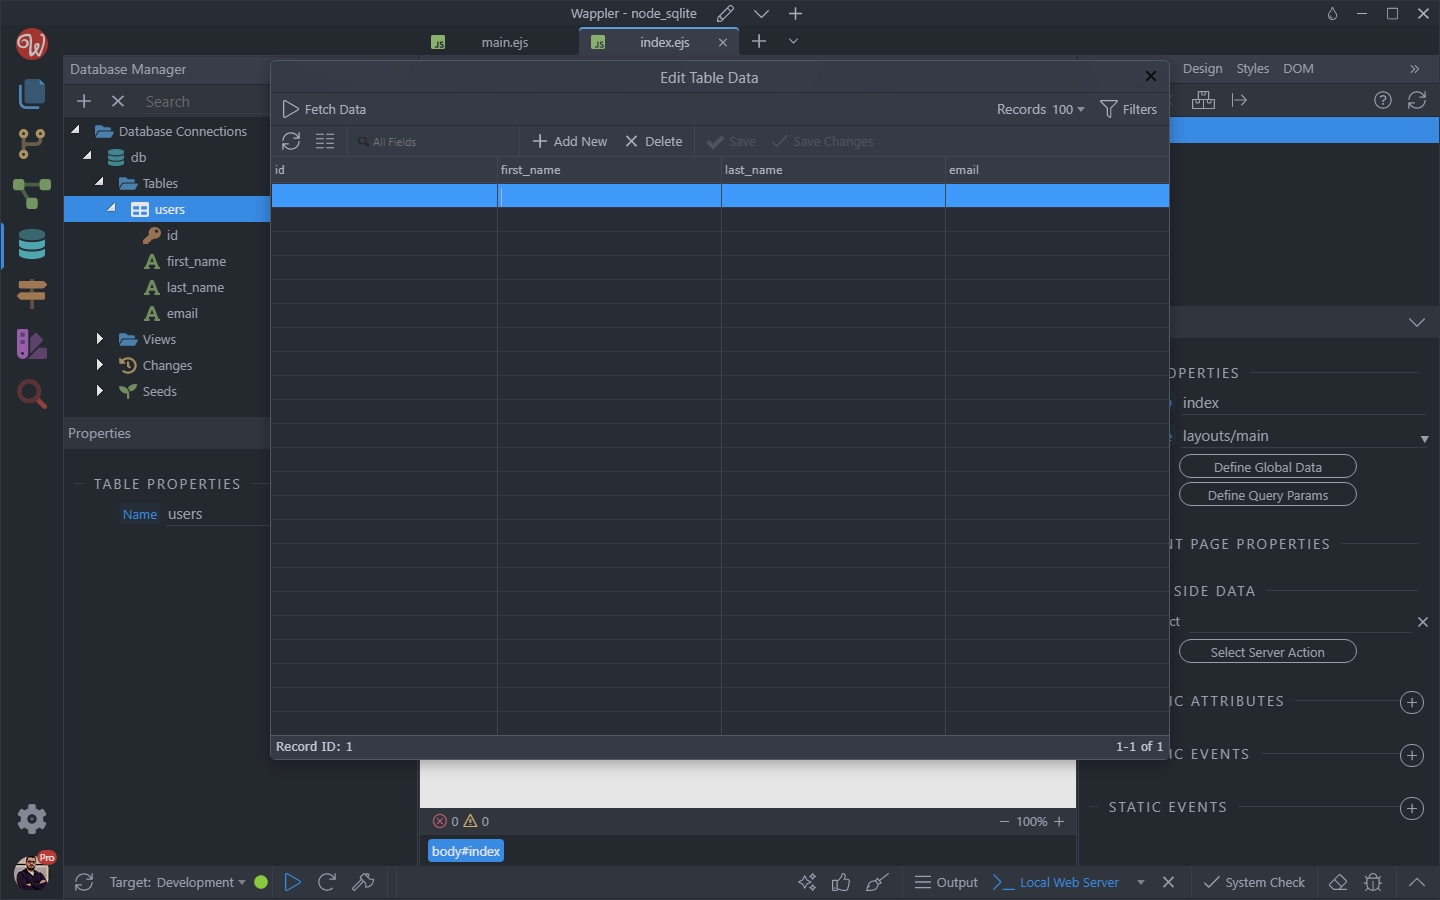
We enter the first name, last name and email of the first used in the table:
Section titled “We enter the first name, last name and email of the first used in the table:”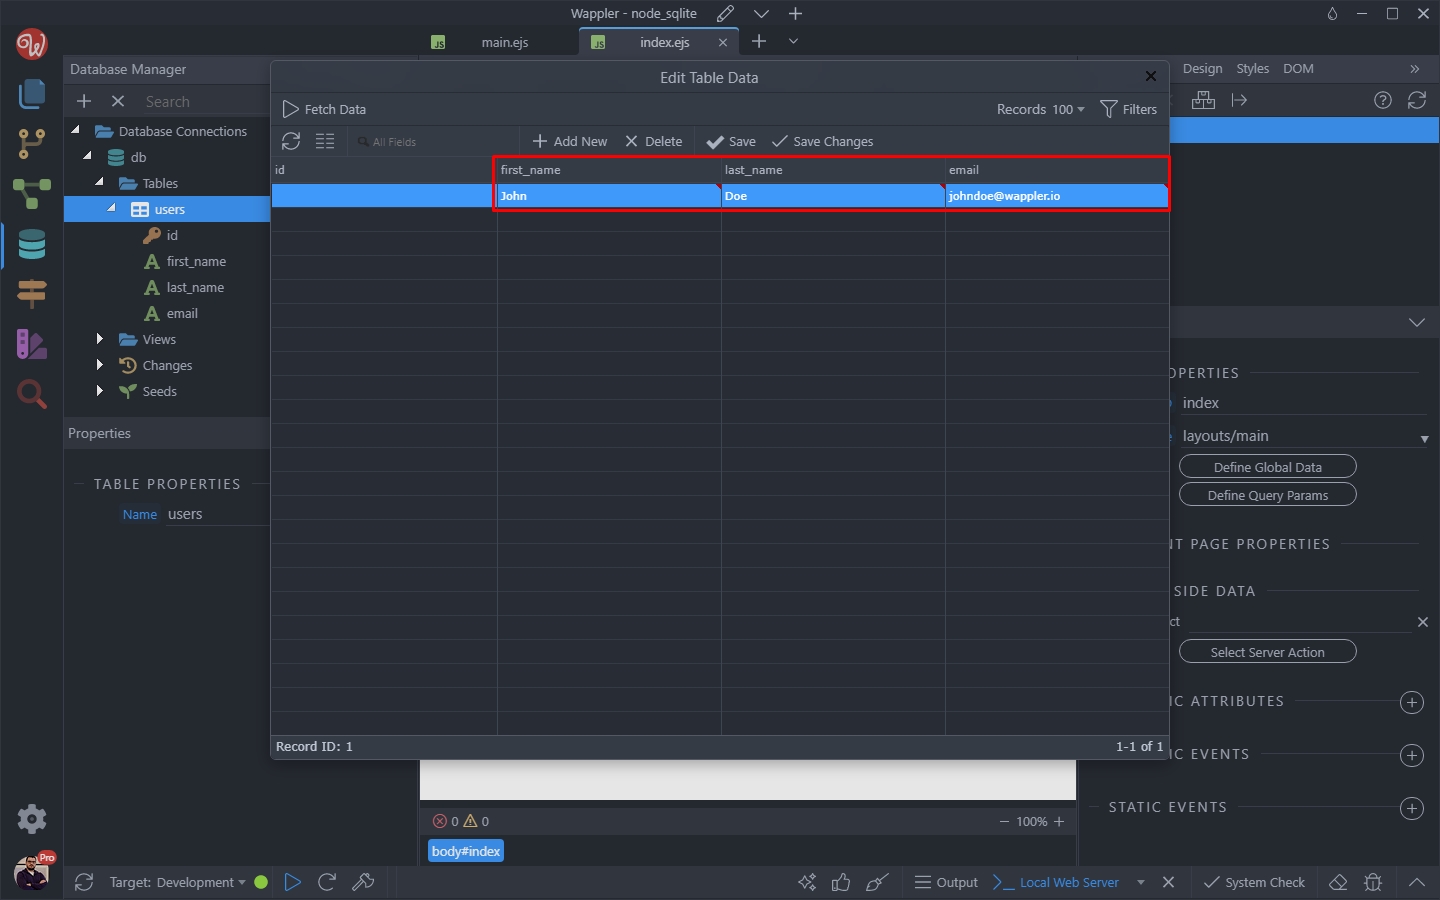
We add a few more records the same way and then hit the Save Changed Records button:
Section titled “We add a few more records the same way and then hit the Save Changed Records button:”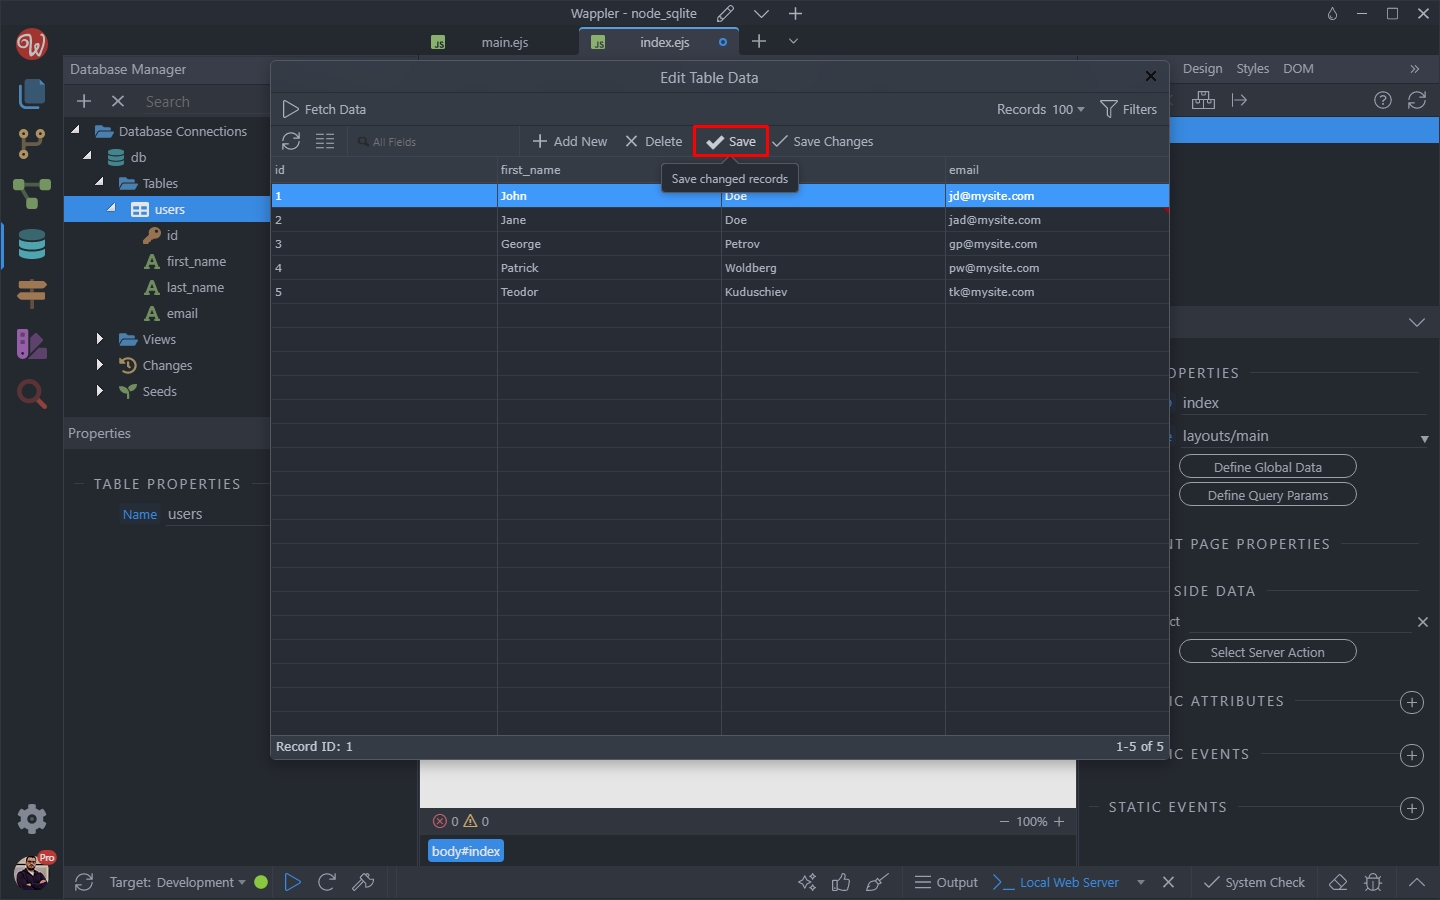
Step 37
Section titled “Step 37”Our records are now saved in the database. You can refresh the data in the Database Editor buy clicking the Fetch data button. This will also show the identity column values:
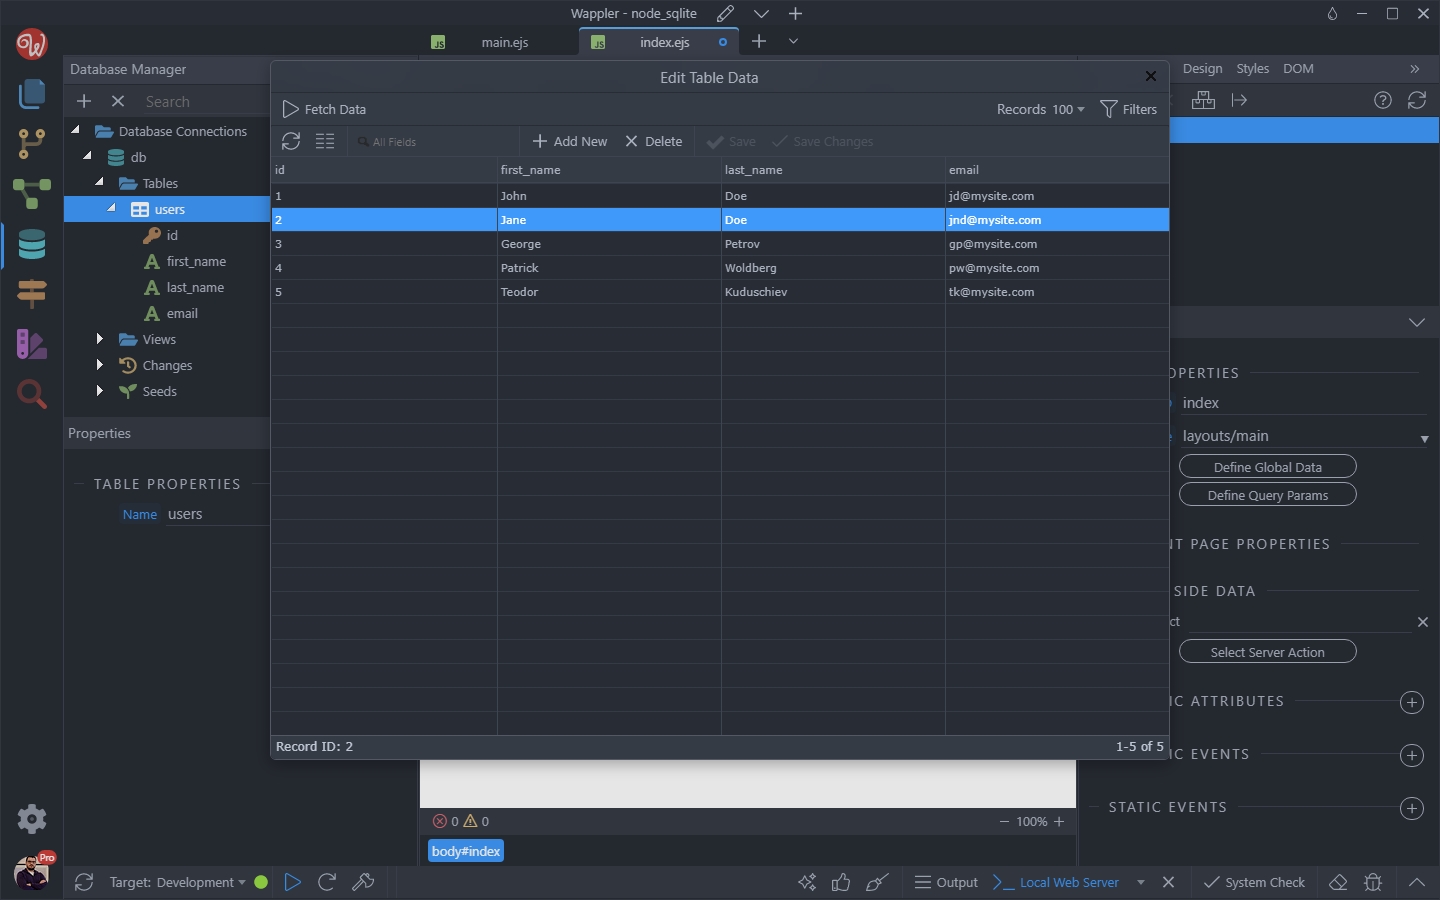
You can close the database editor dialog, as we are done entering the data in the database.
Section titled “You can close the database editor dialog, as we are done entering the data in the database.”API Action Setup
Section titled “API Action Setup”We need an API Action (also known as Server Action) to fetch the data from the database and use it on our page.
Open the Workflows Panel:
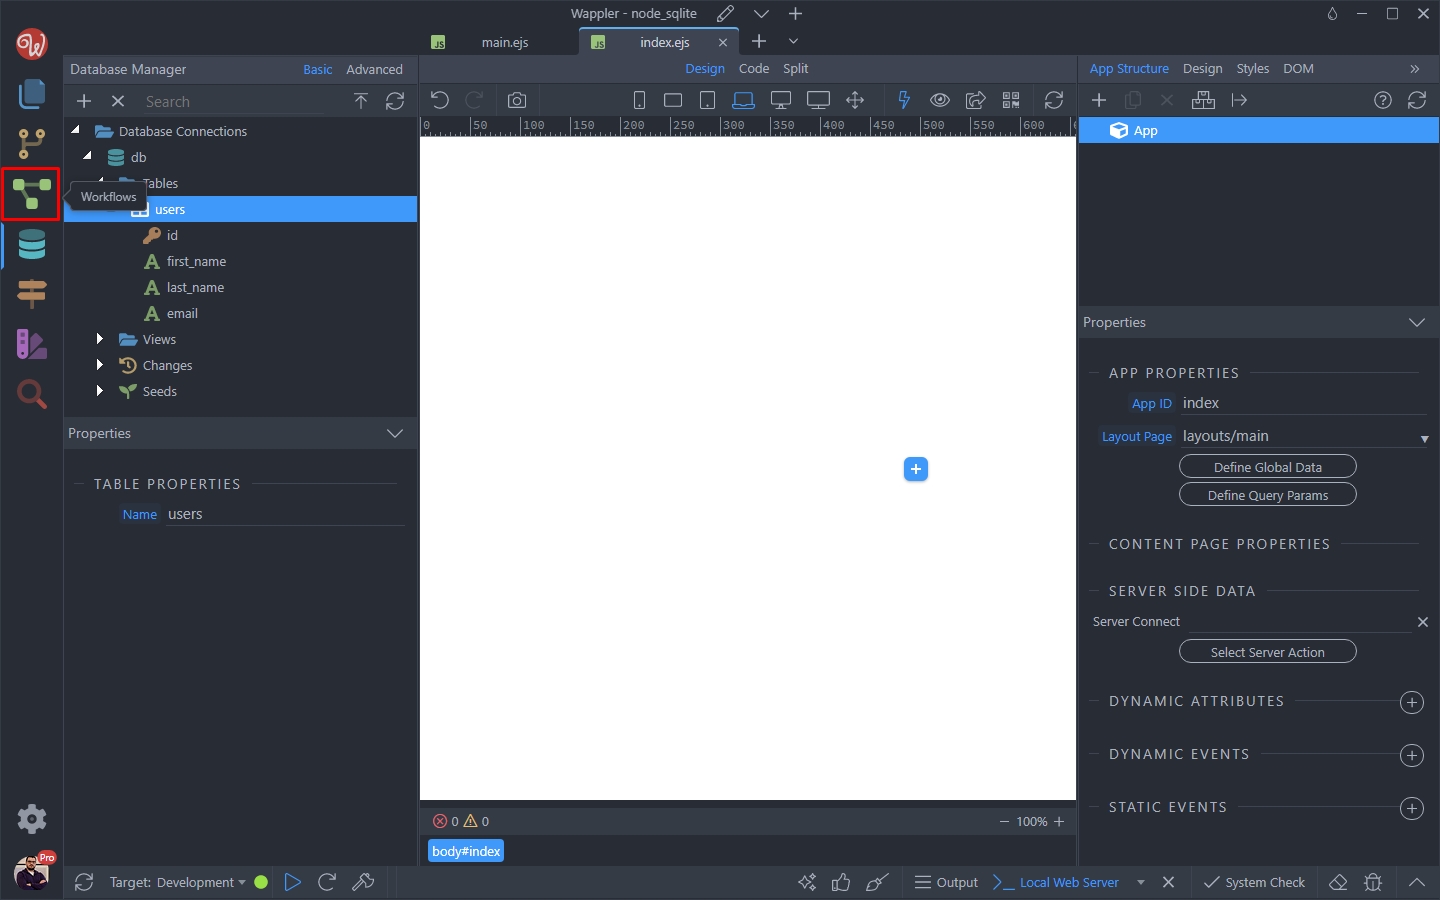
It defaults to Server Actions section. Expand Globals:
Section titled “It defaults to Server Actions section. Expand Globals:”It defaults to Server Actions section.
Expand Globals:

Step 41
Section titled “Step 41”Under Database Connections you can find the database connection called db, which we created in the database manager:
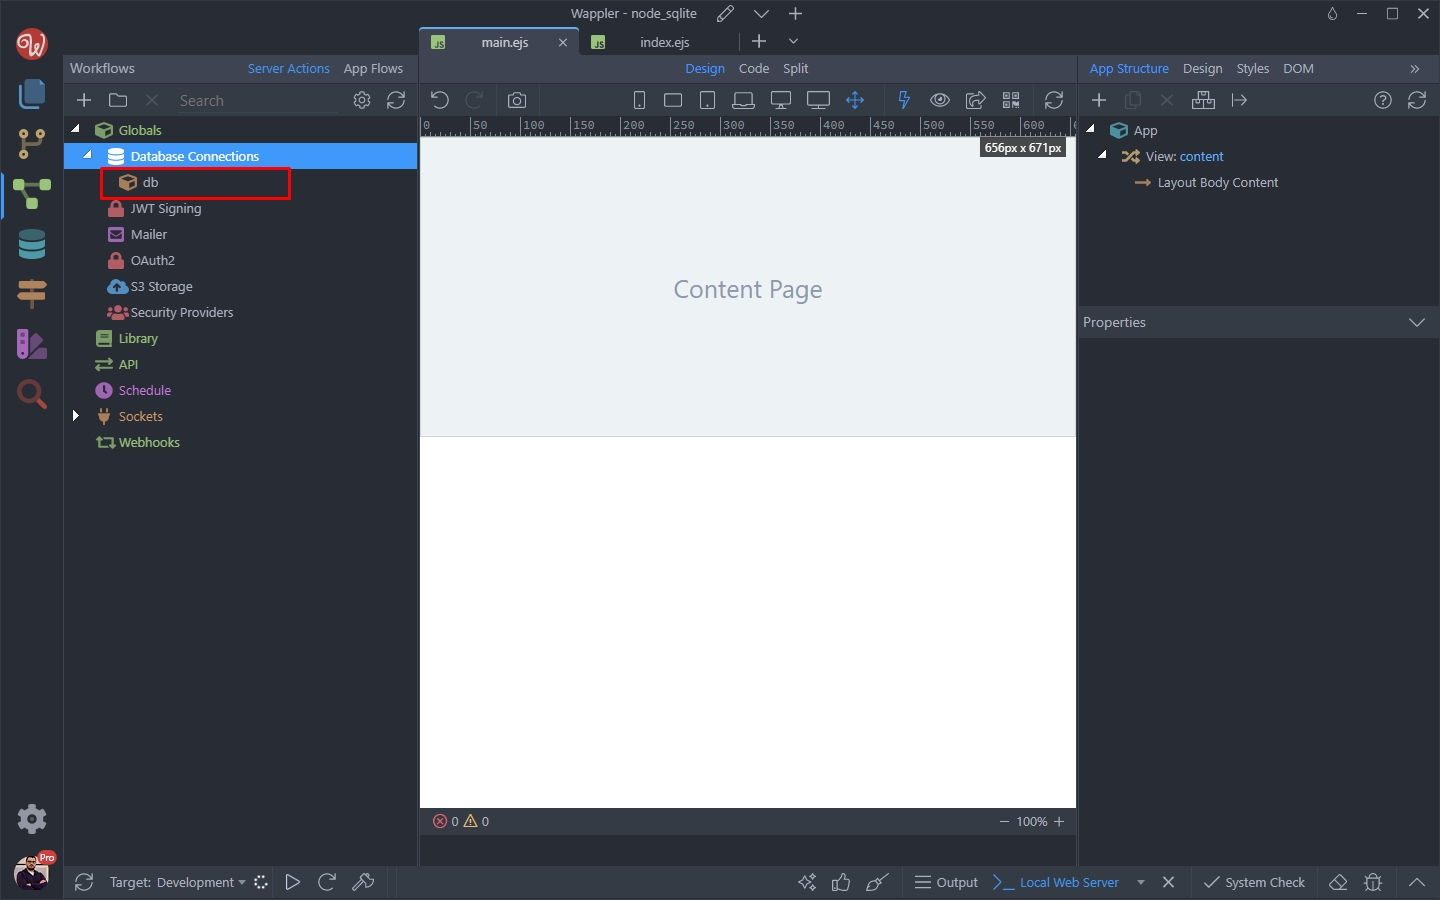
Right click API and select Add API Action:
Section titled “Right click API and select Add API Action:”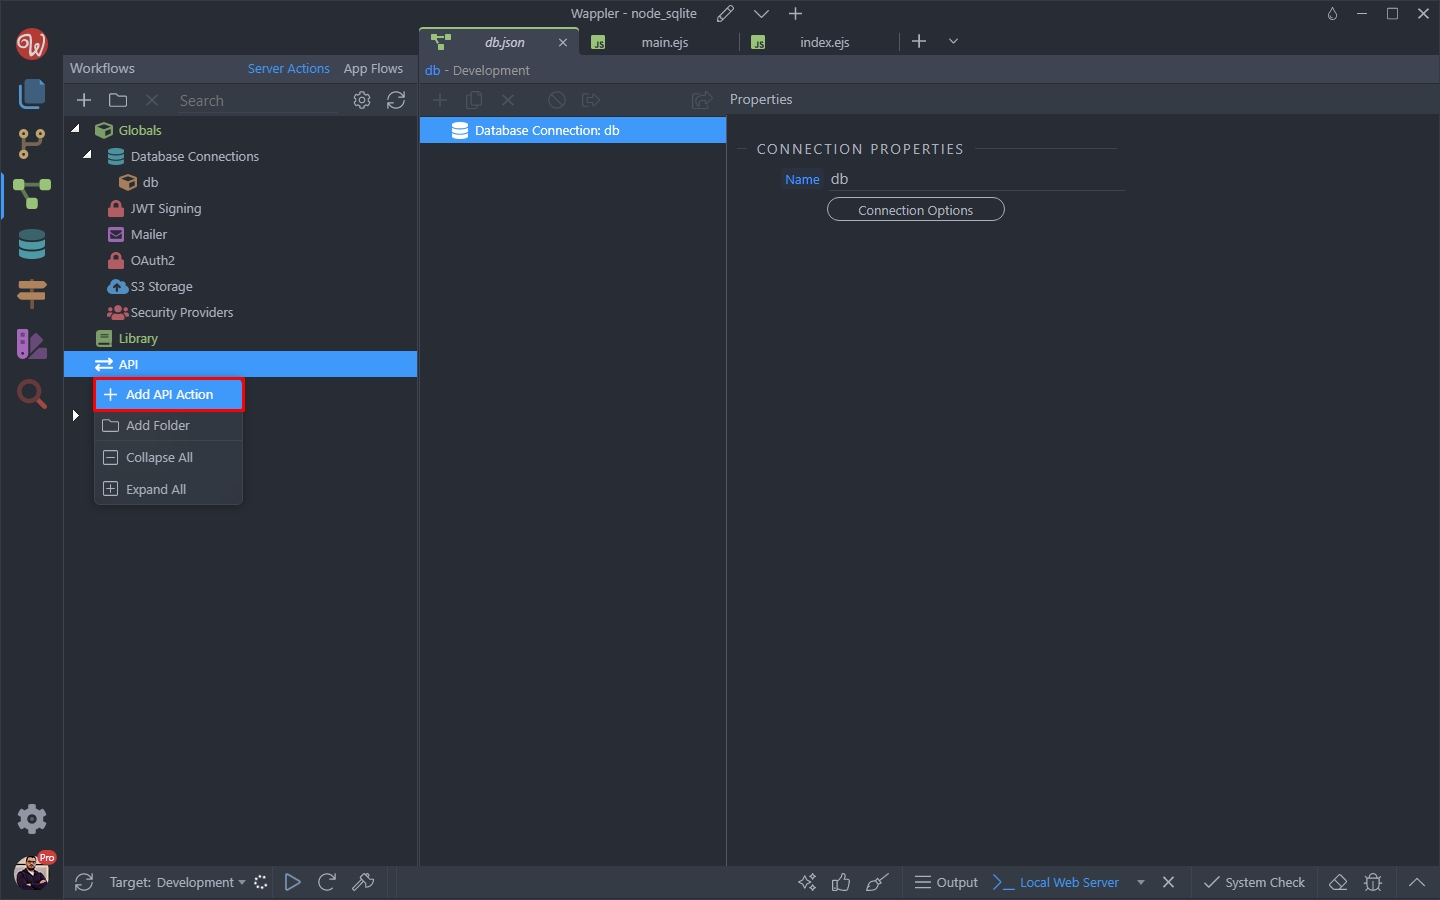
We call it list_users:
Section titled “We call it list_users:”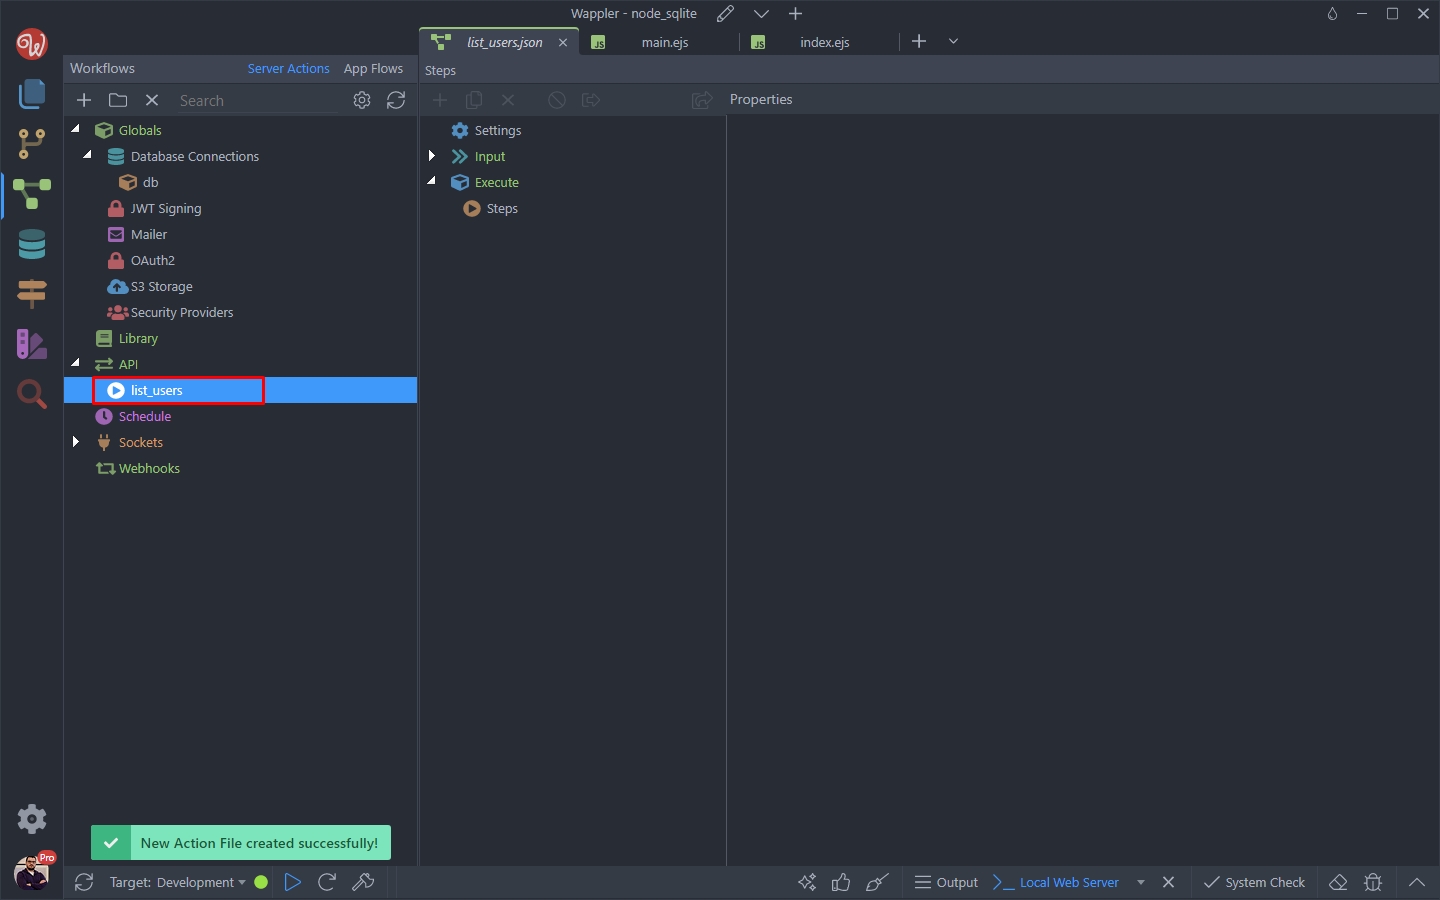
This API Action will automatically be loaded in a new tab. Right click its steps:
Section titled “This API Action will automatically be loaded in a new tab. Right click its steps:”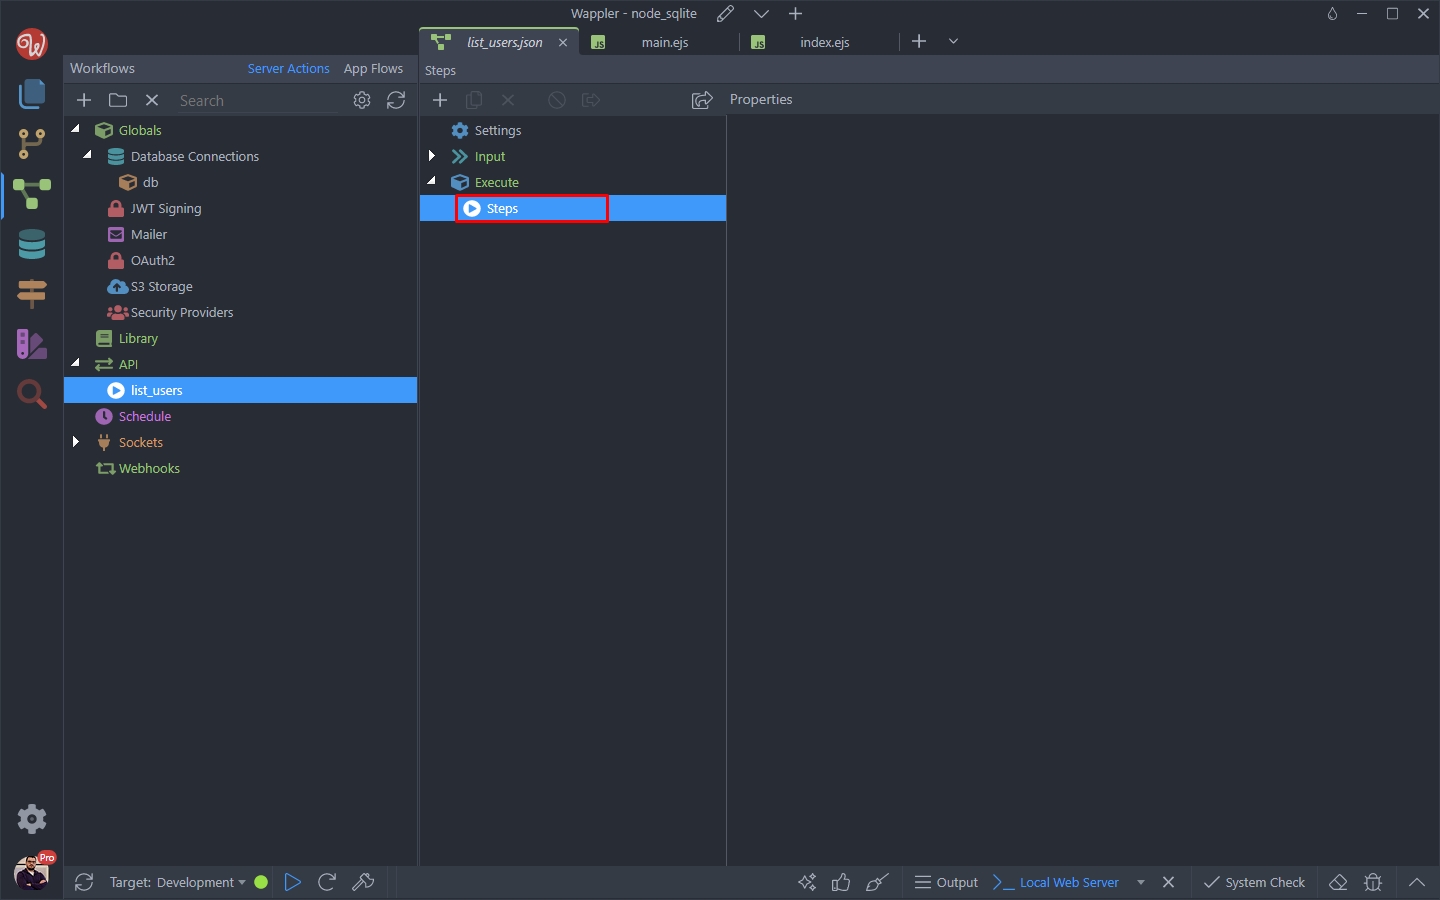
Under Database Actions select Database Query:
Section titled “Under Database Actions select Database Query:”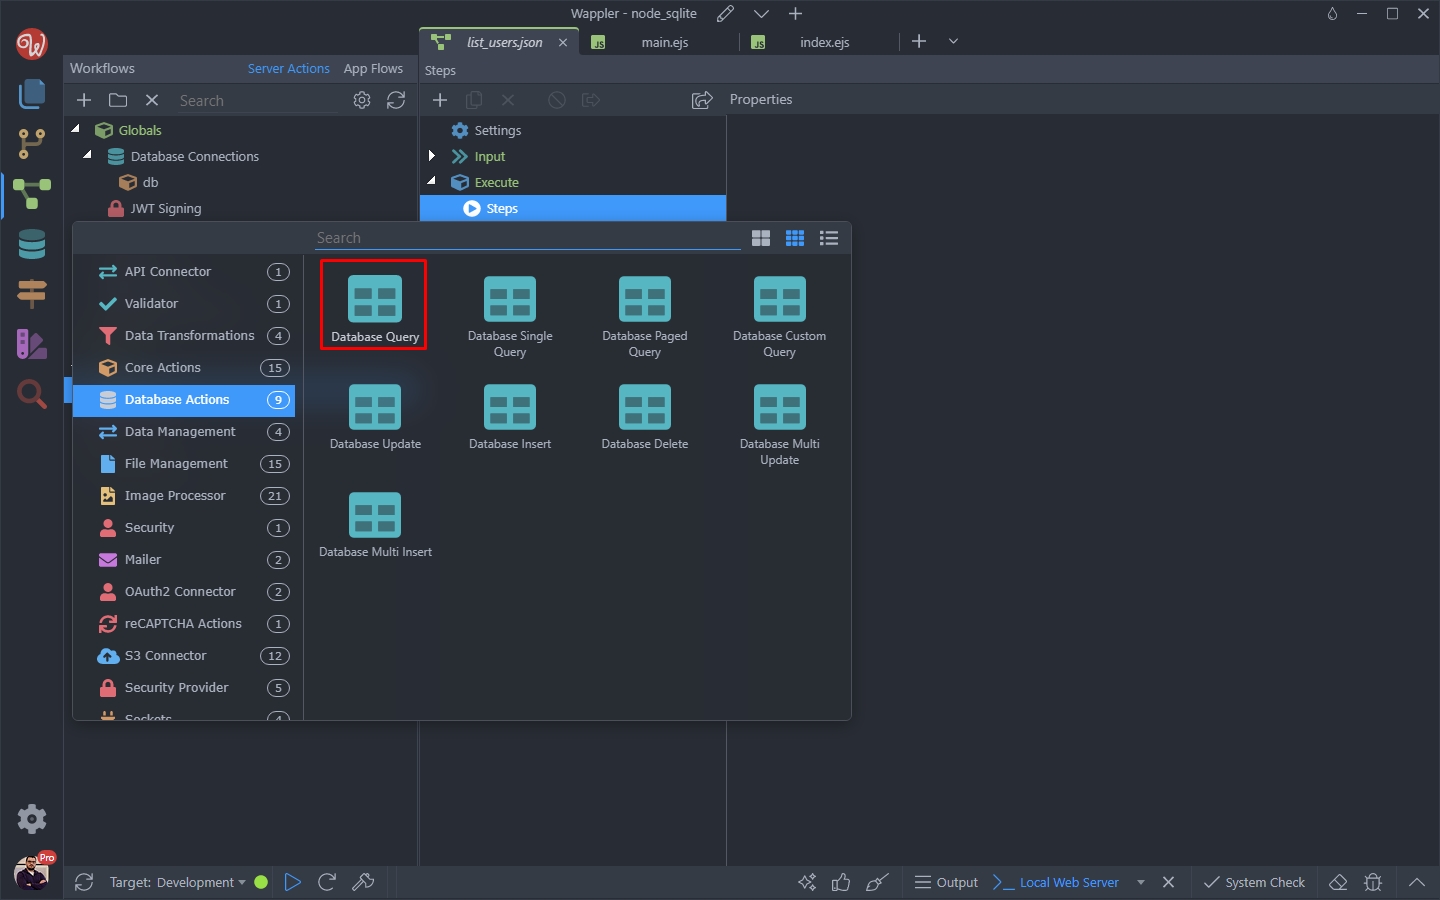
And click the Query Builder button:
Section titled “And click the Query Builder button:”
Open the Database Tables dropdown:
Section titled “Open the Database Tables dropdown:”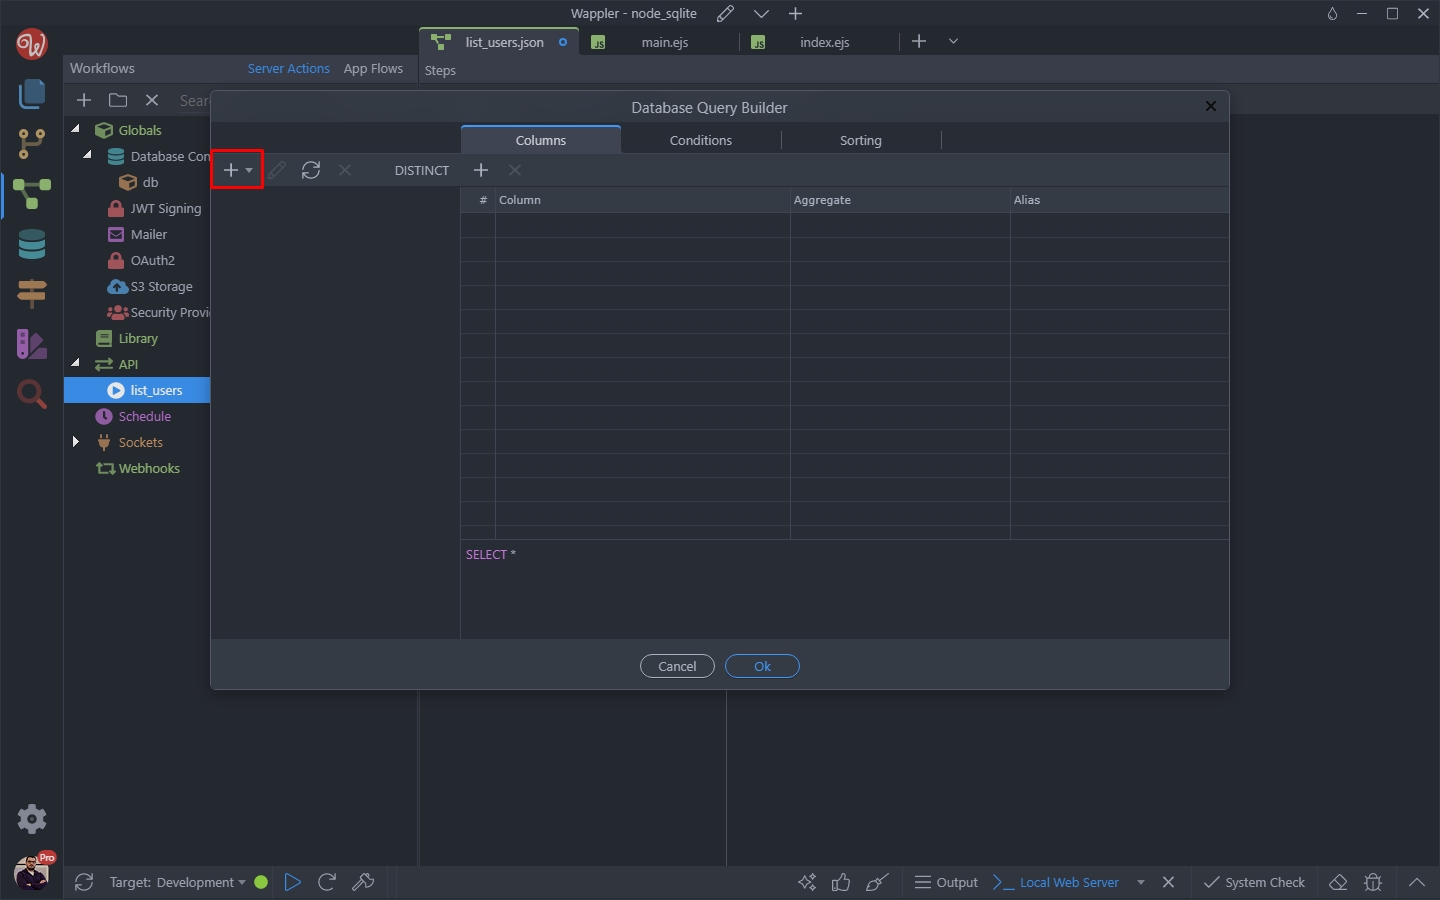
And here you will see our users table. It’s the only table in our database currently. Select the users table:
Section titled “And here you will see our users table. It’s the only table in our database currently. Select the users table:”And here you will see our users table. It’s the only table in our database currently.
Select the users table:
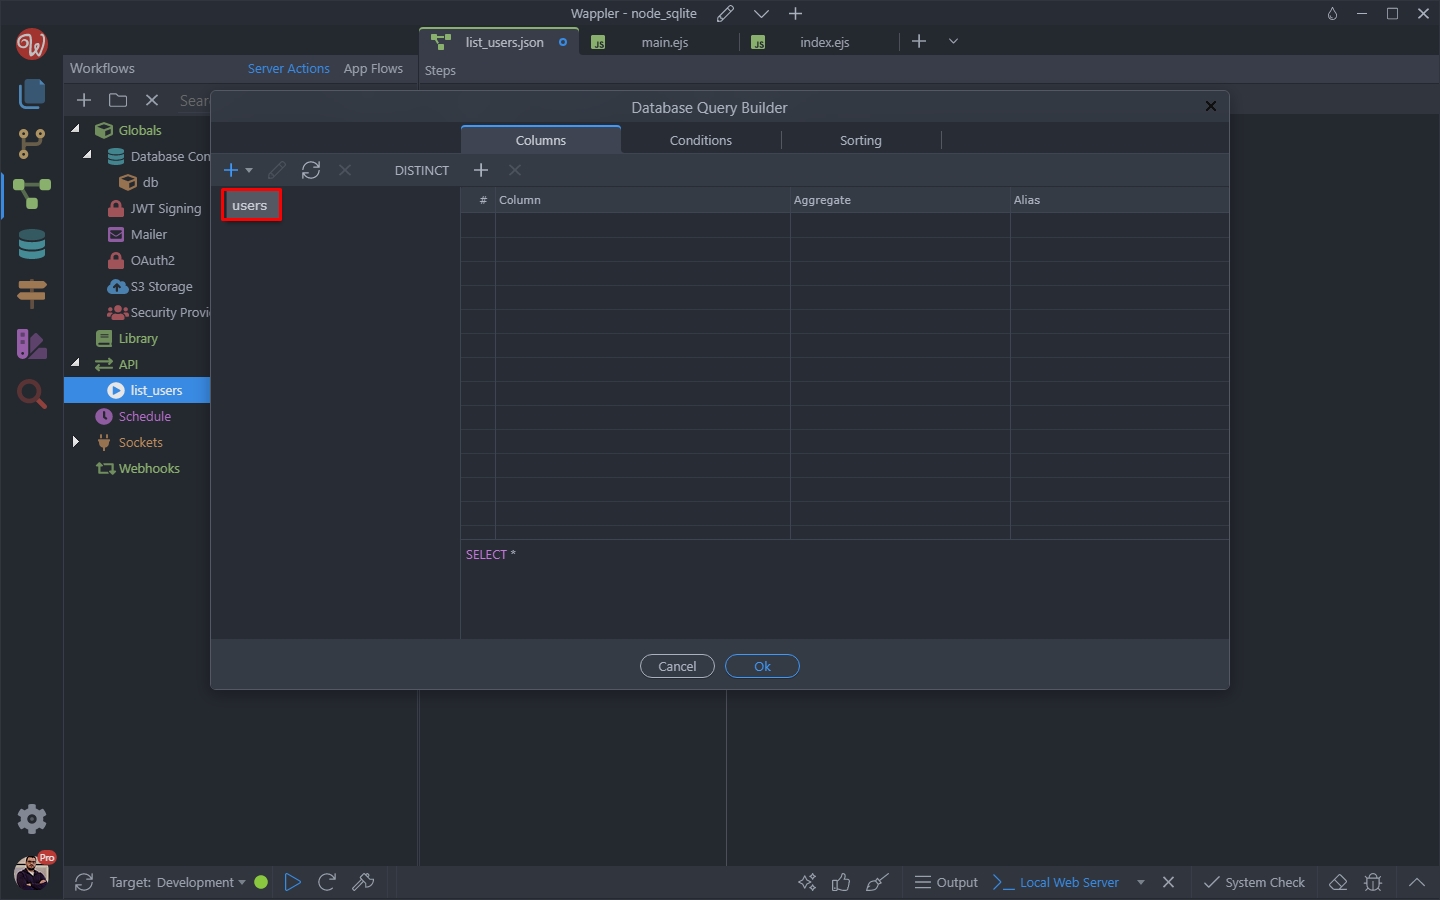
Step 49
Section titled “Step 49”We won’t do any filtering and sorting here, so just click OK to return all the records in the order they are stored in the database table:
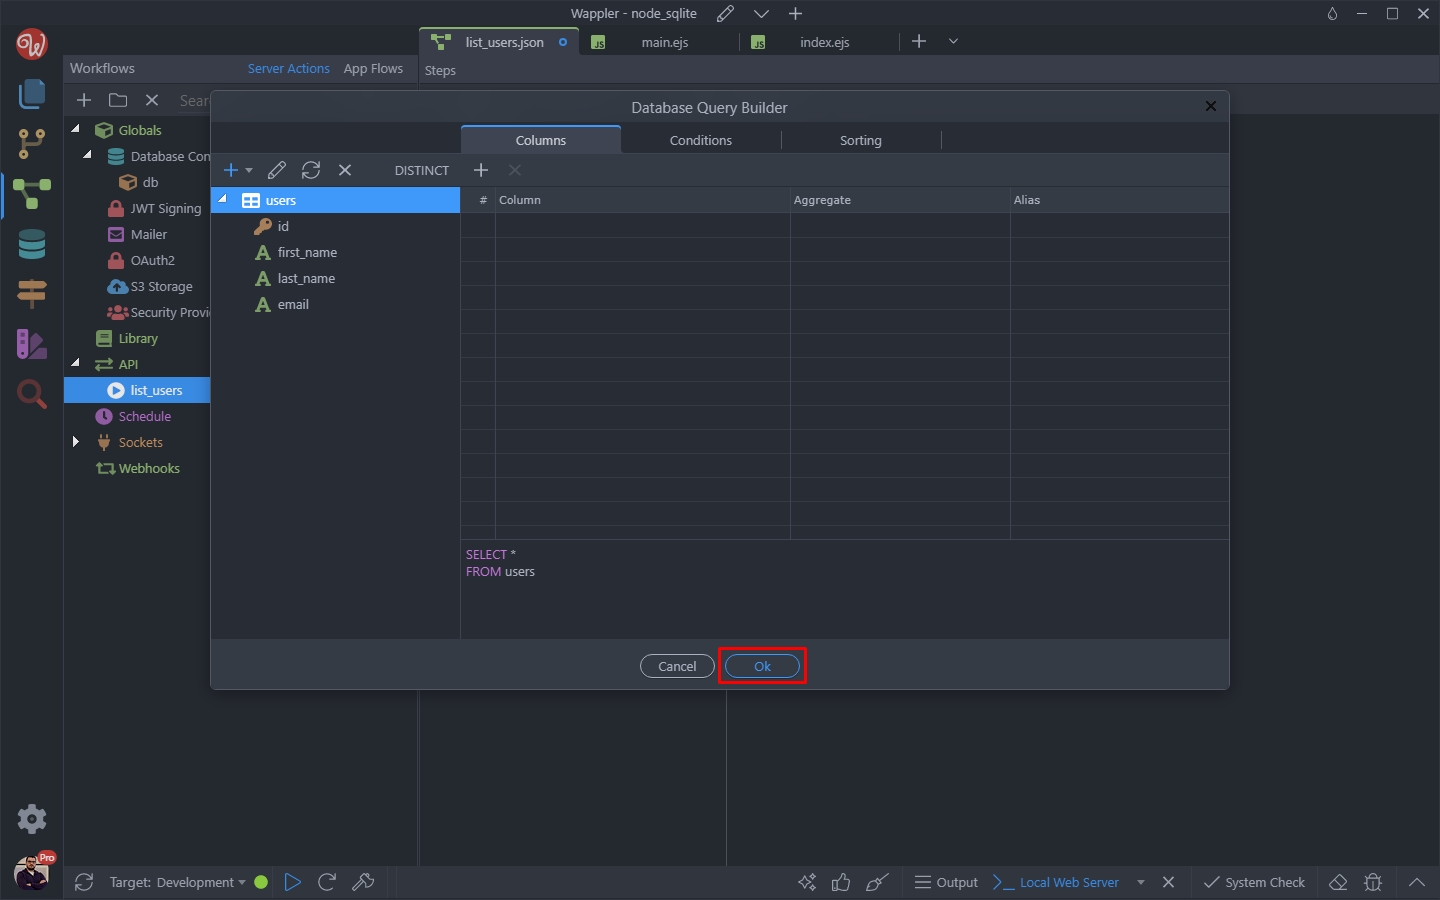
And then click Cttrl+s / Cmd+s to save your API Action:
Section titled “And then click Cttrl+s / Cmd+s to save your API Action:”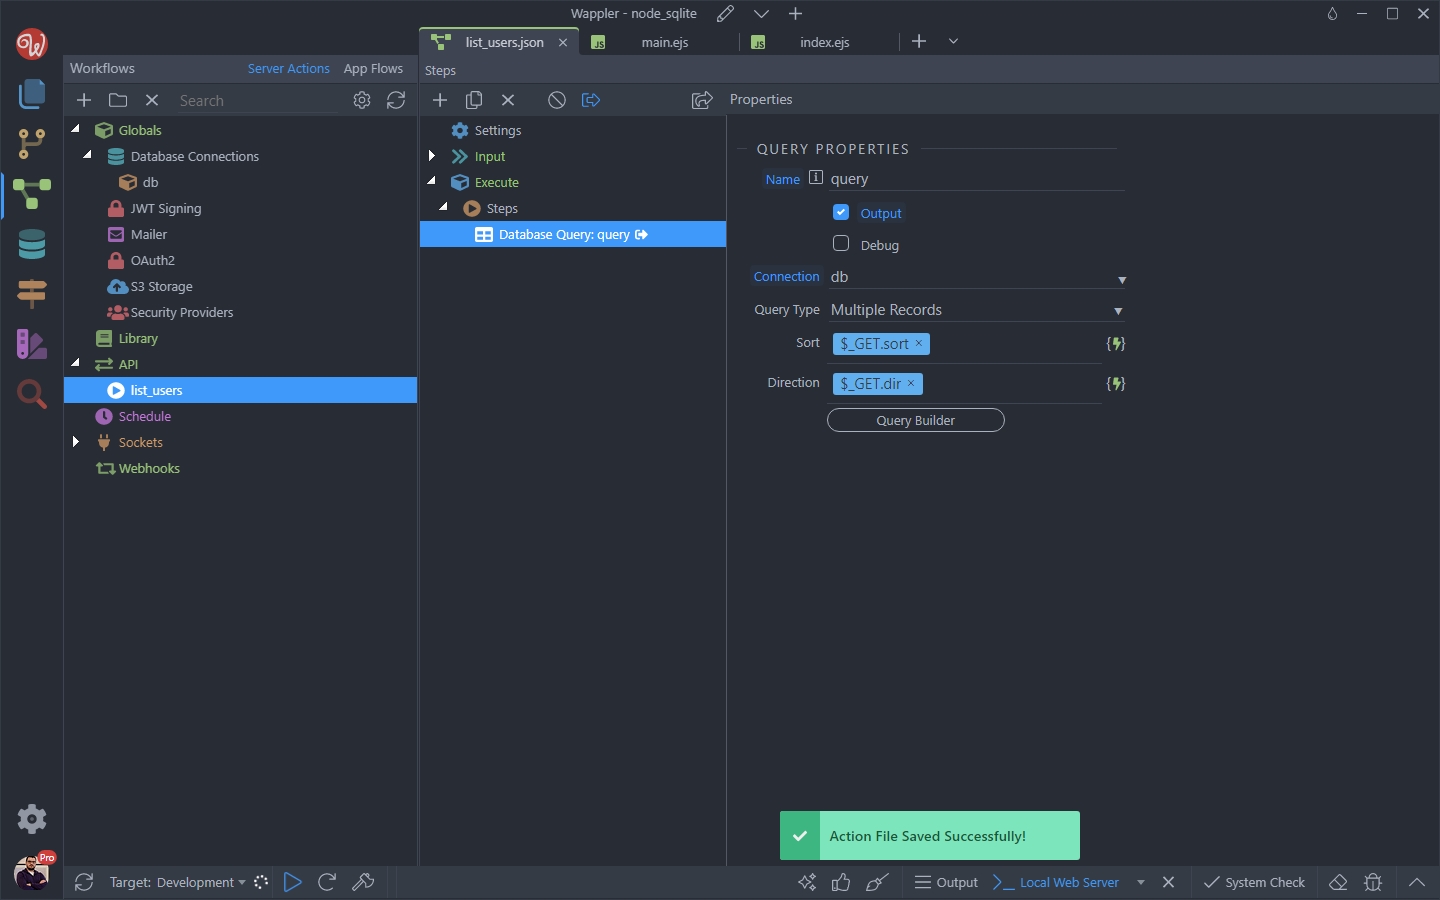
Listing Data on the Page
Section titled “Listing Data on the Page”You can close the Workflows panel and open the index page, which has been created automatically when we created the project:

Step 53
Section titled “Step 53”First we need to add our data source - the API Action we just created.
Right click App in the App Structure panel:
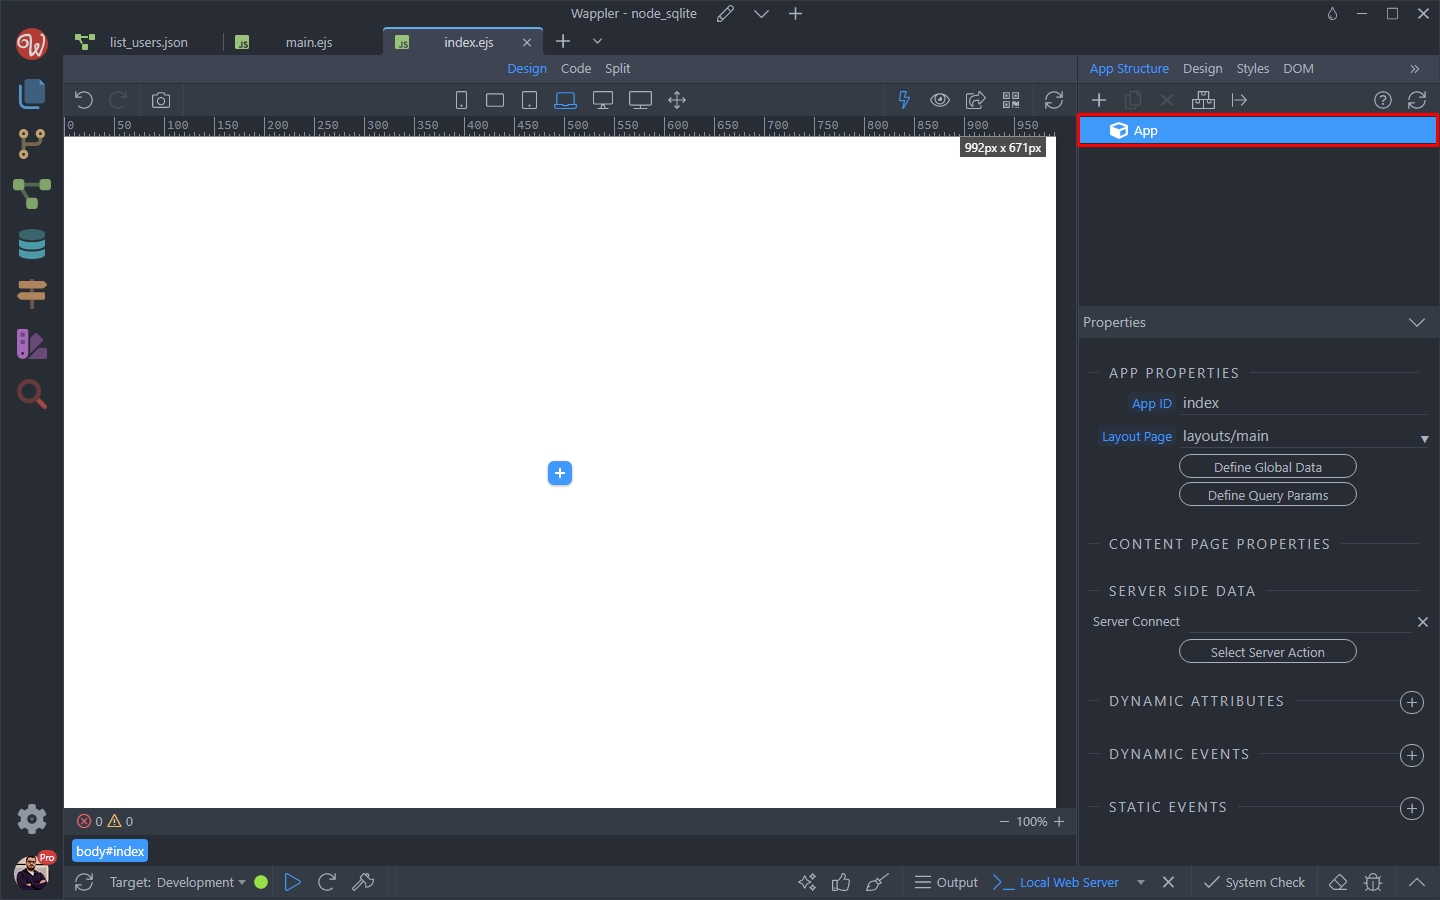
And select Data > Server Action:
Section titled “And select Data > Server Action:”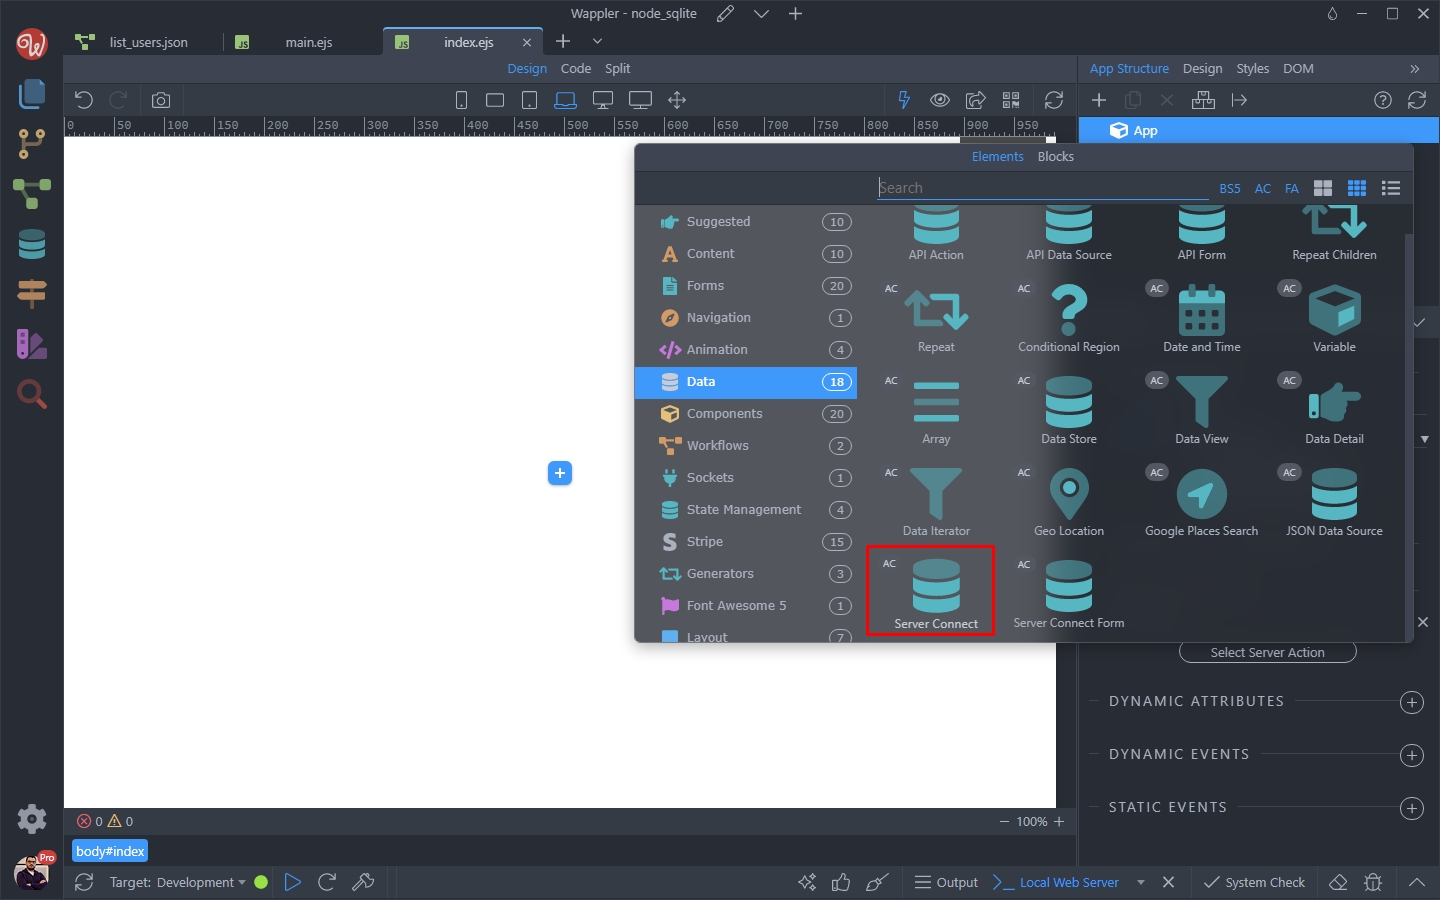
Then click the Select Server Action button:
Section titled “Then click the Select Server Action button:”
And select the list_users action we created in the previous steps:
Section titled “And select the list_users action we created in the previous steps:”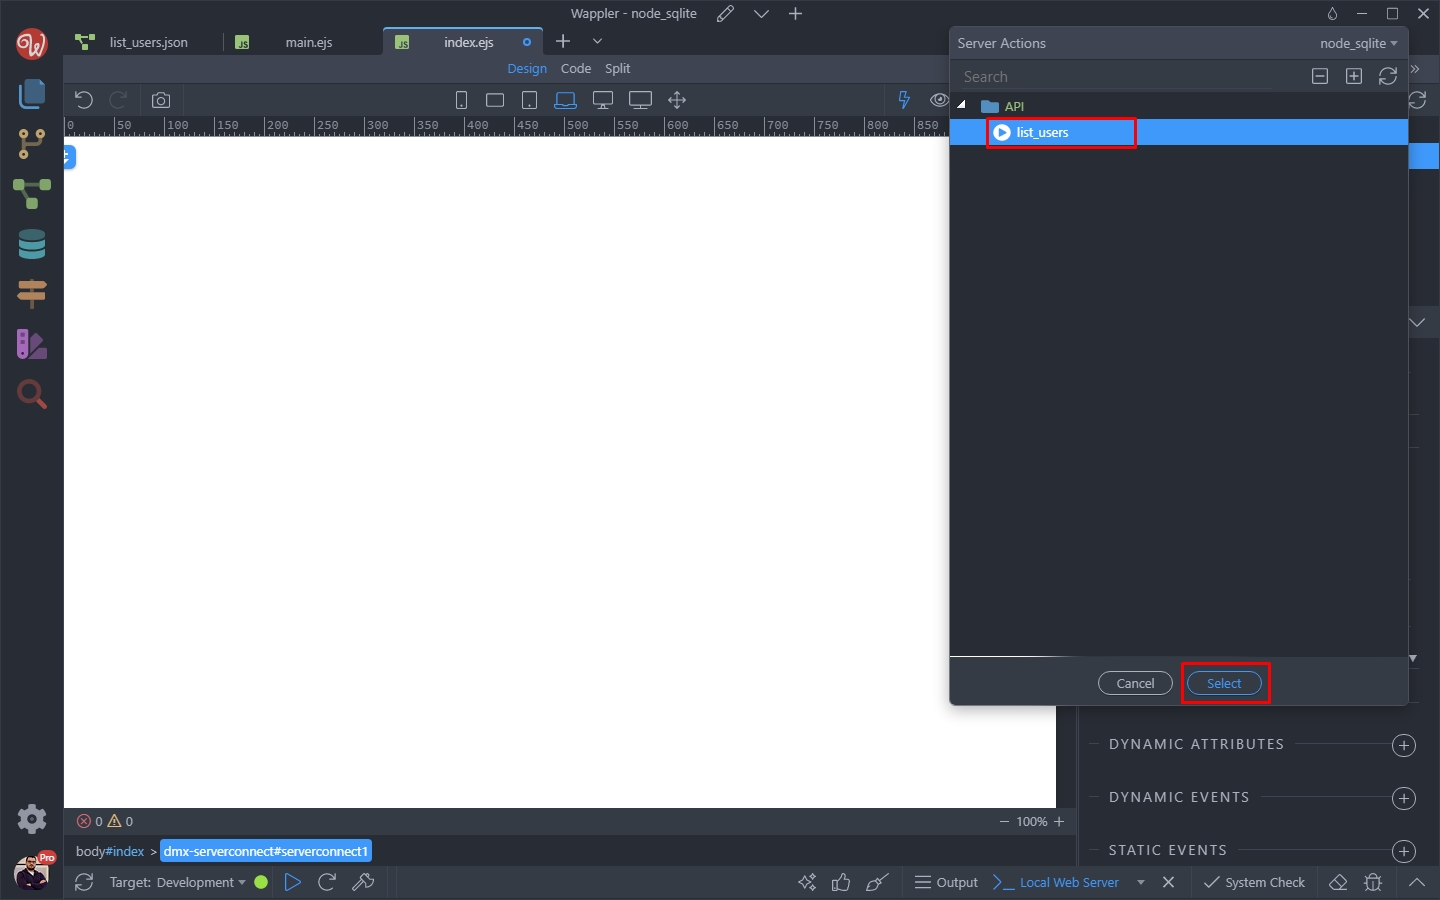
Click the add new element button in Design View:
Section titled “Click the add new element button in Design View:”We will show you how to generate a dynamic table, listing your records on the page. Of course you can use any other structure to list them if you like.
Click the add new element button in Design View:
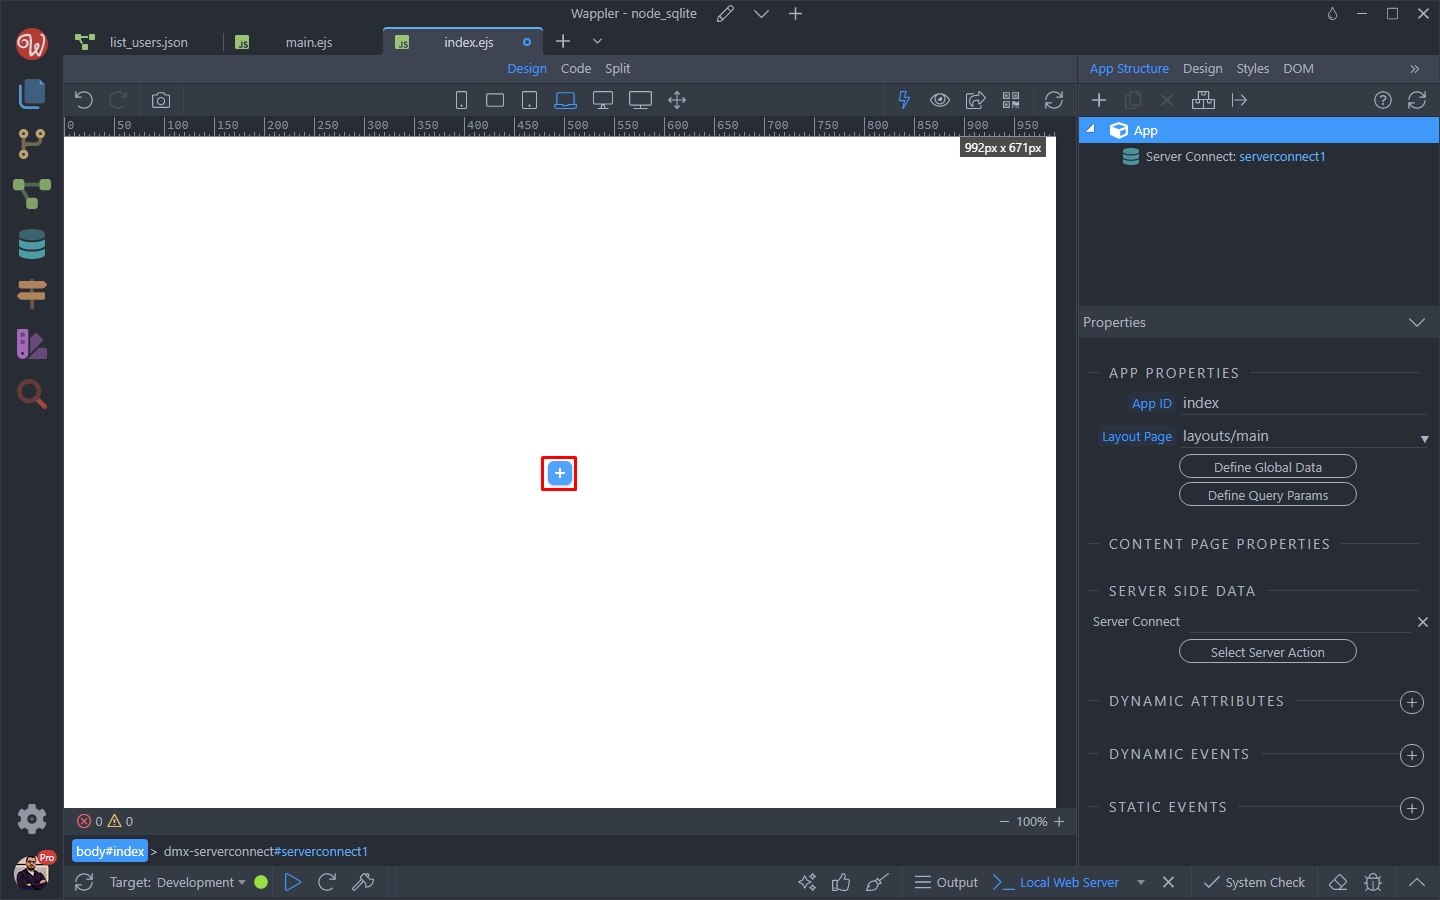
And add a container:
Section titled “And add a container:”
Then click the add element button inside the container:
Section titled “Then click the add element button inside the container:”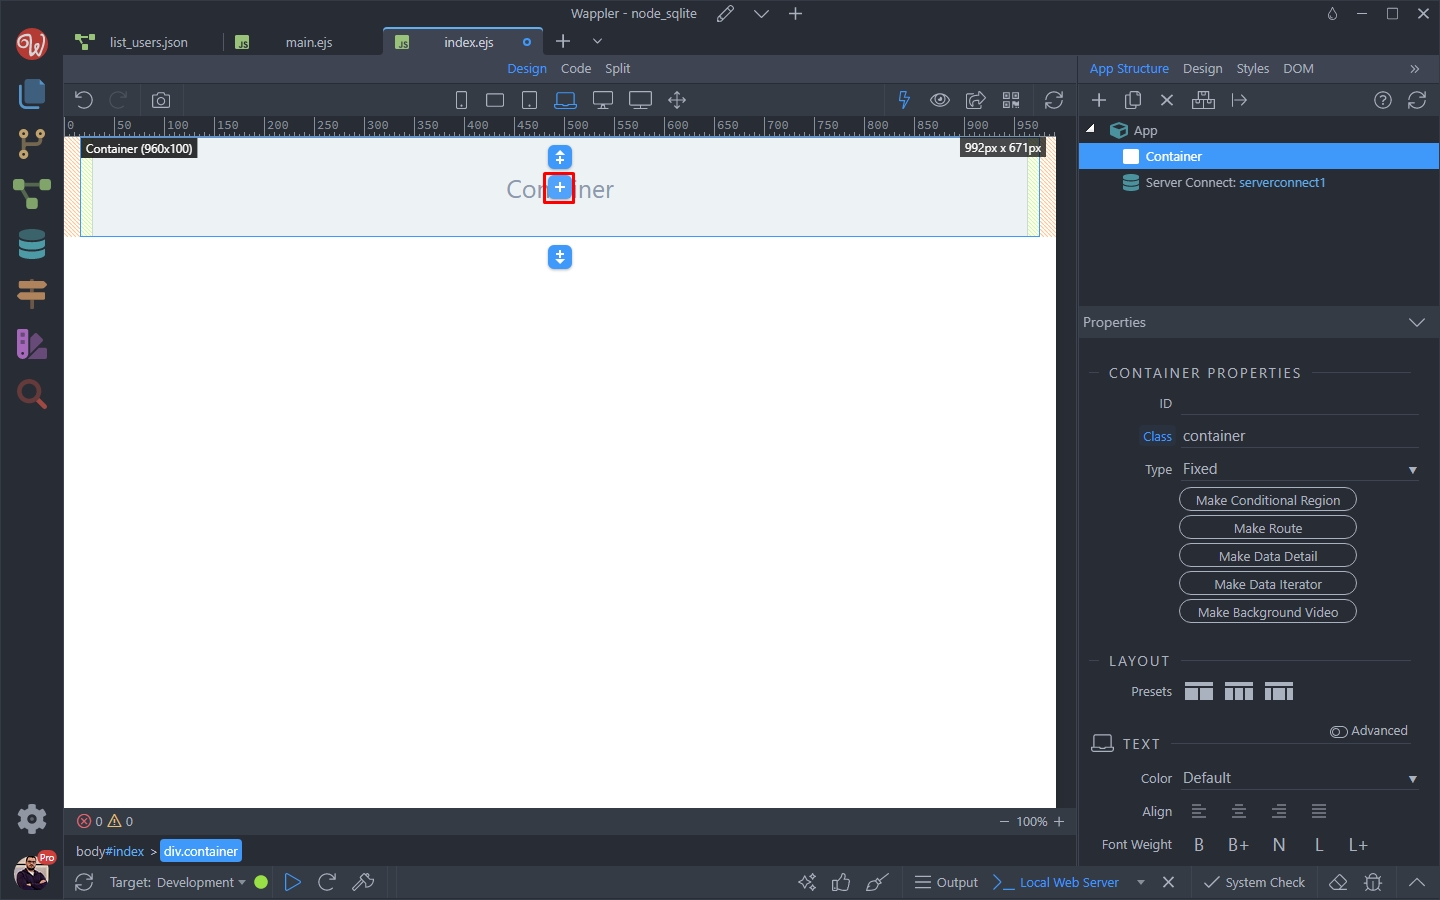
And select Generators > Bootstrap Table Generator:
Section titled “And select Generators > Bootstrap Table Generator:”
Click the dynamic data picker, to select the data which should be used to populate the table:
Section titled “Click the dynamic data picker, to select the data which should be used to populate the table:”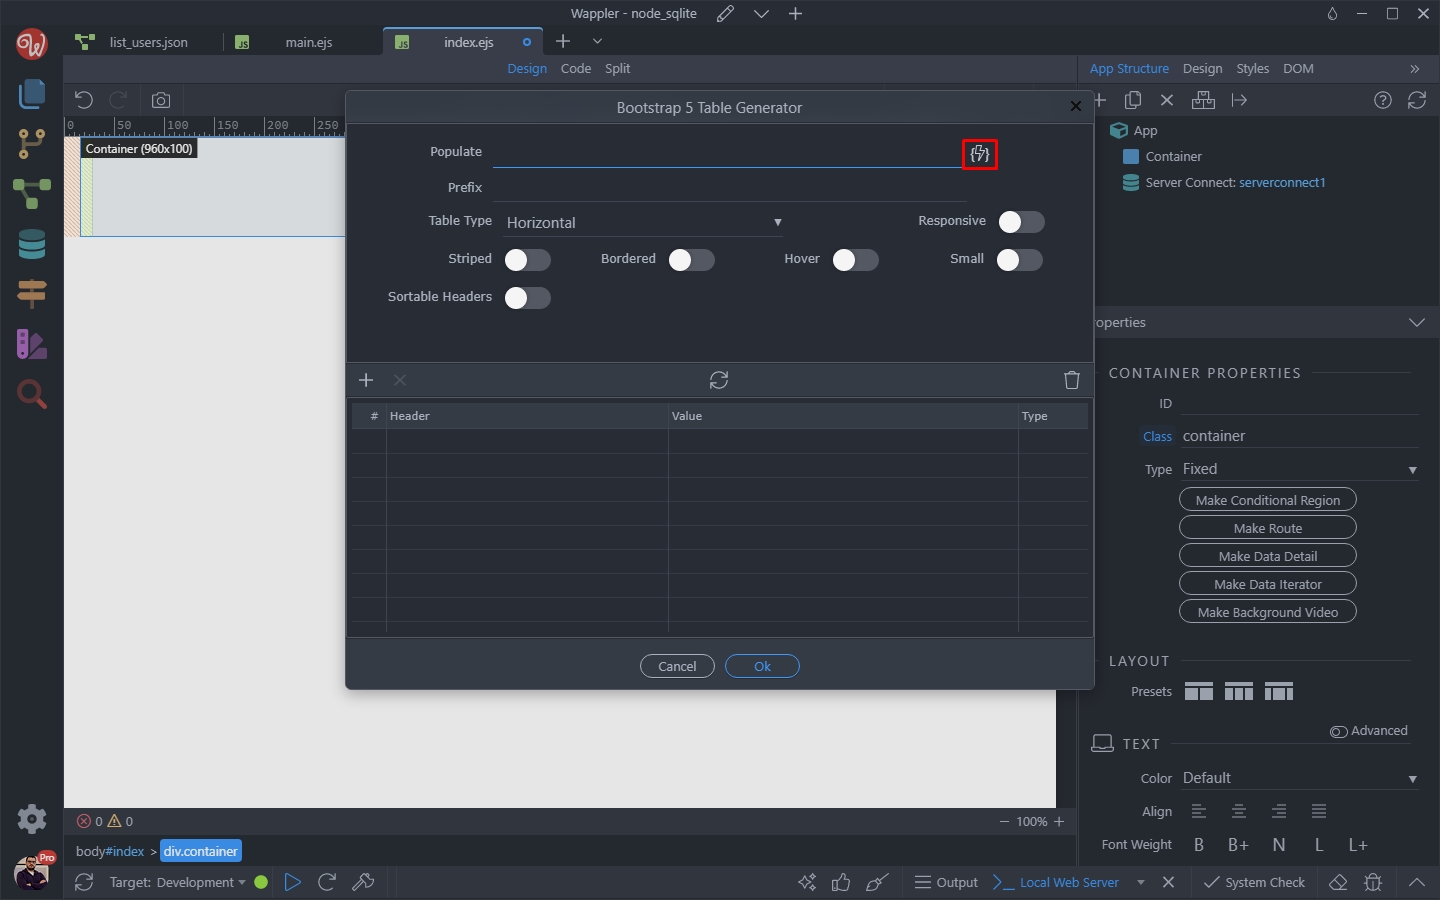
This is the database query, in our API Action:
Section titled “This is the database query, in our API Action:”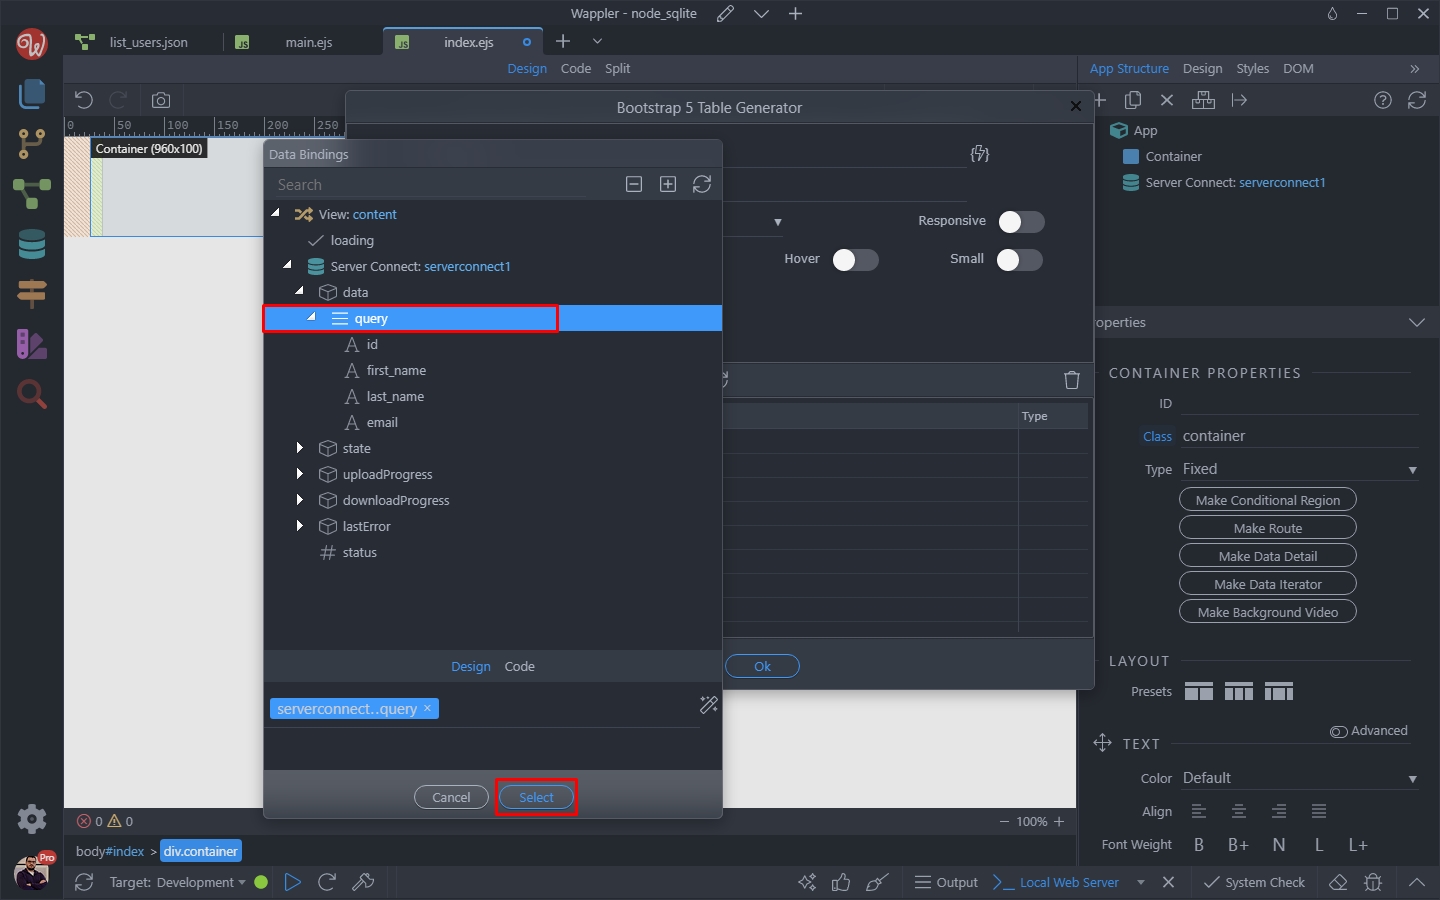
The data from your database query will be populated in the table:
Section titled “The data from your database query will be populated in the table:”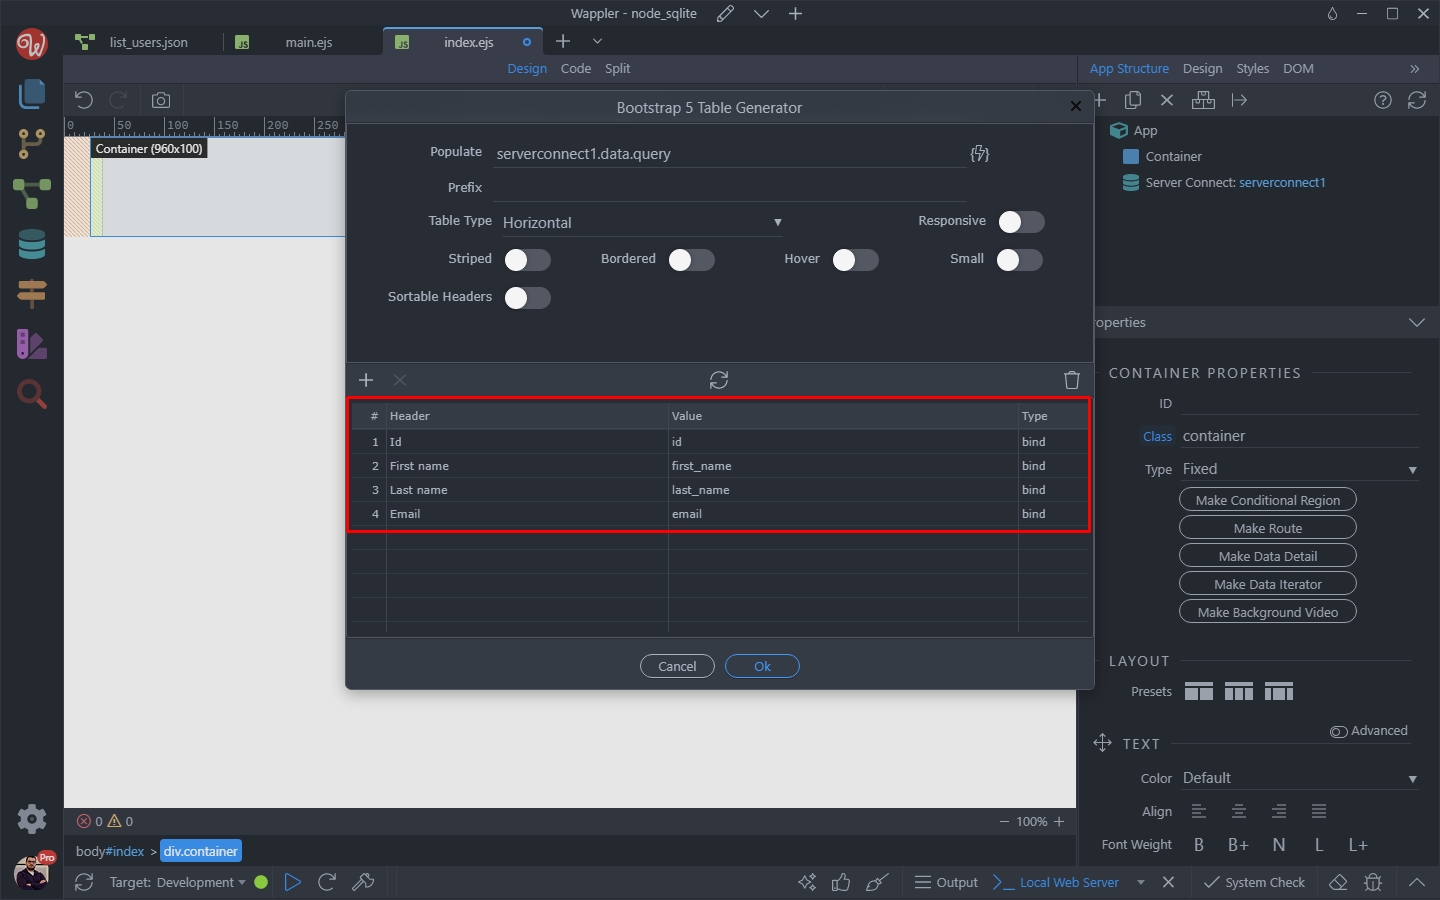
Adjust the appearance options of the table as you like and click OK:
Section titled “Adjust the appearance options of the table as you like and click OK:”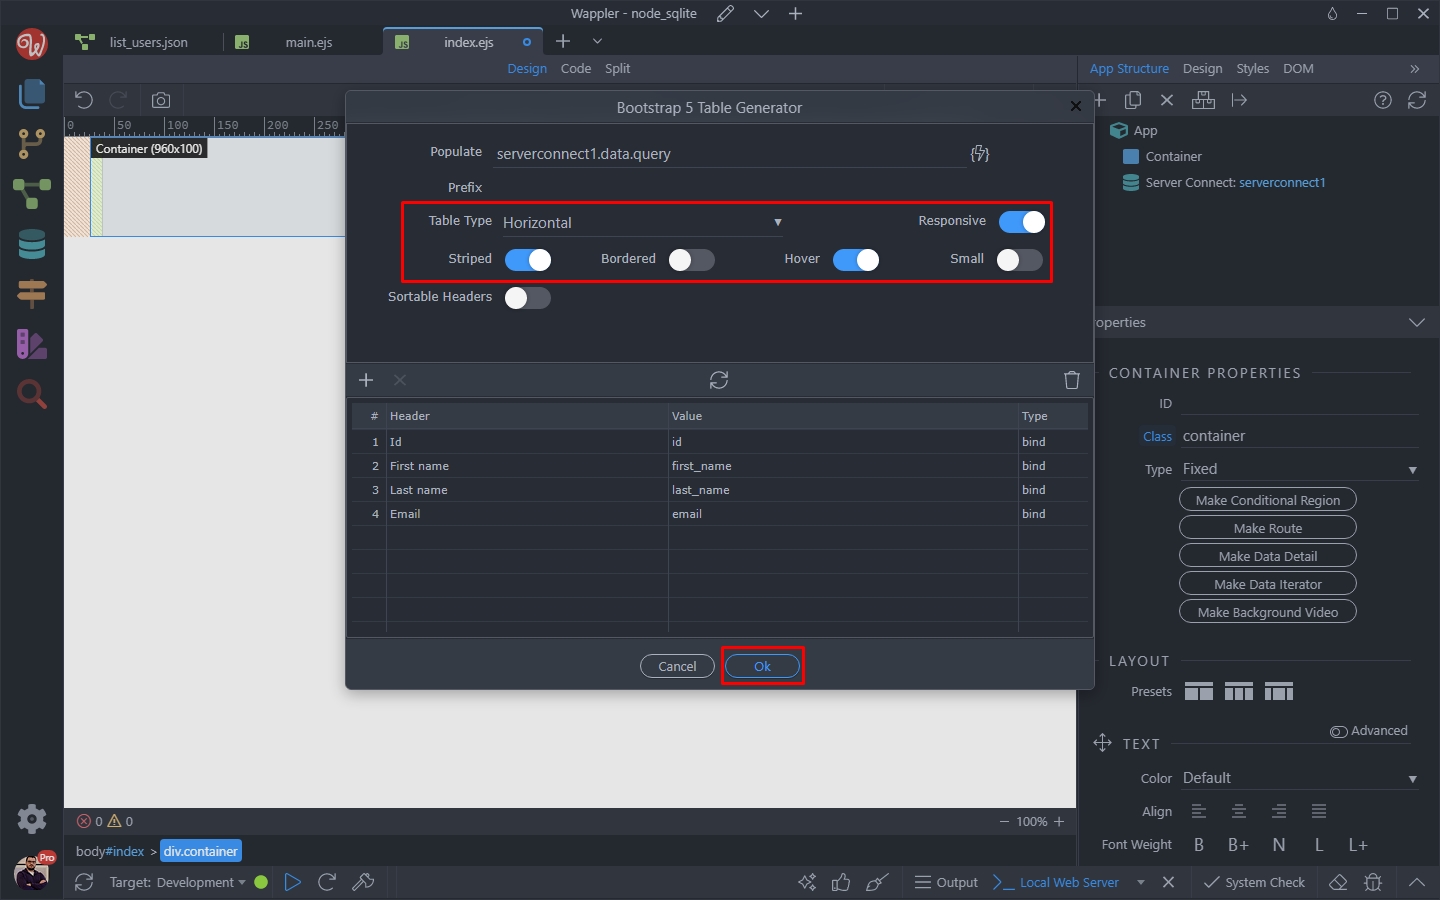
Save your page and you can see the results listed in the table:
Section titled “Save your page and you can see the results listed in the table:”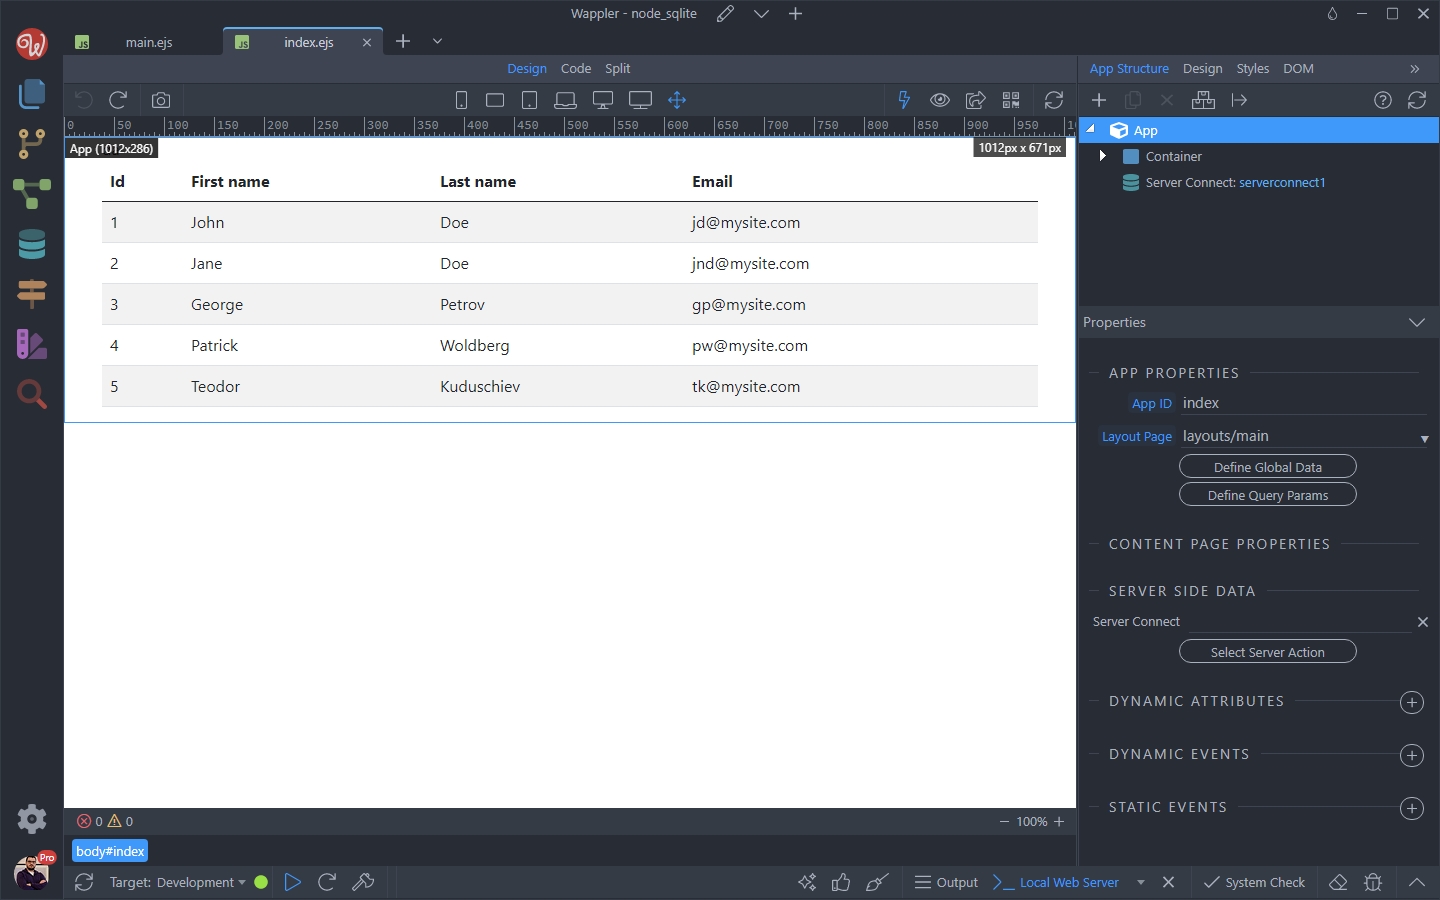
Step 66
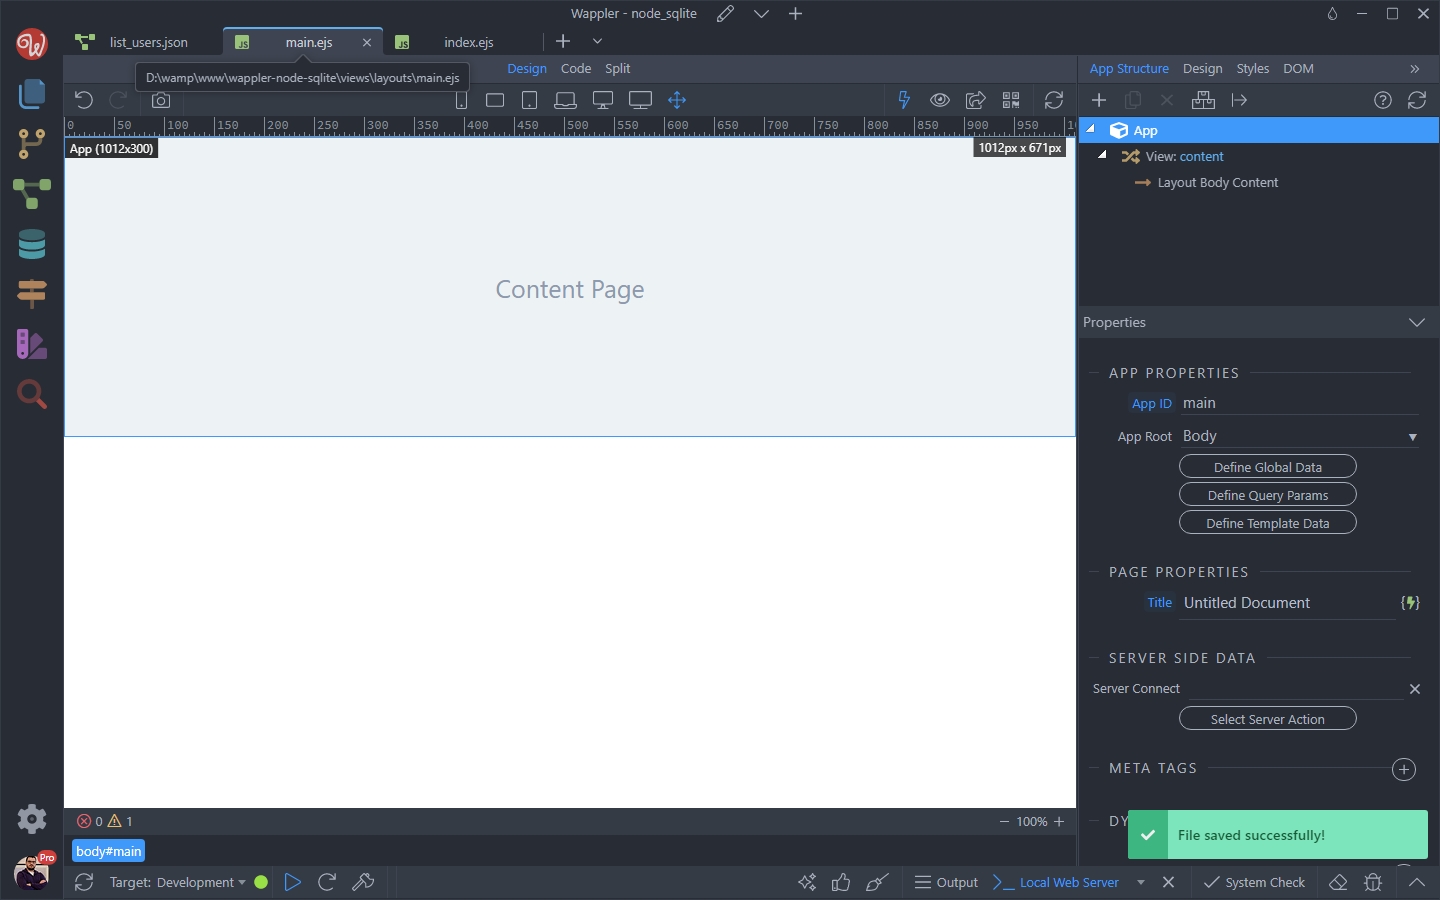
Section titled “Step 66”Also don’t forget the save the layout page, which contains all the required scripts, before previewing your page in the browser:
That’s how you can easily setup a lightweight development environment using NodeJS and SQLite.
Section titled “That’s how you can easily setup a lightweight development environment using NodeJS and SQLite.”That’s how you can easily setup a lightweight development environment using NodeJS and SQLite.