Using Local Databases in Mobile and Desktop apps
Intro You can use local SQLite database for your mobile and desktop apps. The database will be created locally on the users device initially on app start. The database will be created as defined in th
You can use local SQLite database for your mobile and desktop apps. The database will be created locally on the users device initially on app start. The database will be created as defined in the database manager in Wappler. That’s a great way to allow users to store, manage and work with dynamic data locally, without an internet connection.
Note the Capacitor SQLite Connector is a beta extension now to let your try new functionality first. So make sure you have enabled the experimental options and have enabled the Beta extensions channel in your Wappler Settings.
Project Setup
Section titled “Project Setup”We start with creating a standard blank mobile project in Wappler. It can be Bootstrap or Framework 7 based, for this simple tutorial we select Bootstrap:

Add a name for the project, select a local folder for it and make sure you selected Capacitor as a runtime:
Section titled “Add a name for the project, select a local folder for it and make sure you selected Capacitor as a runtime:”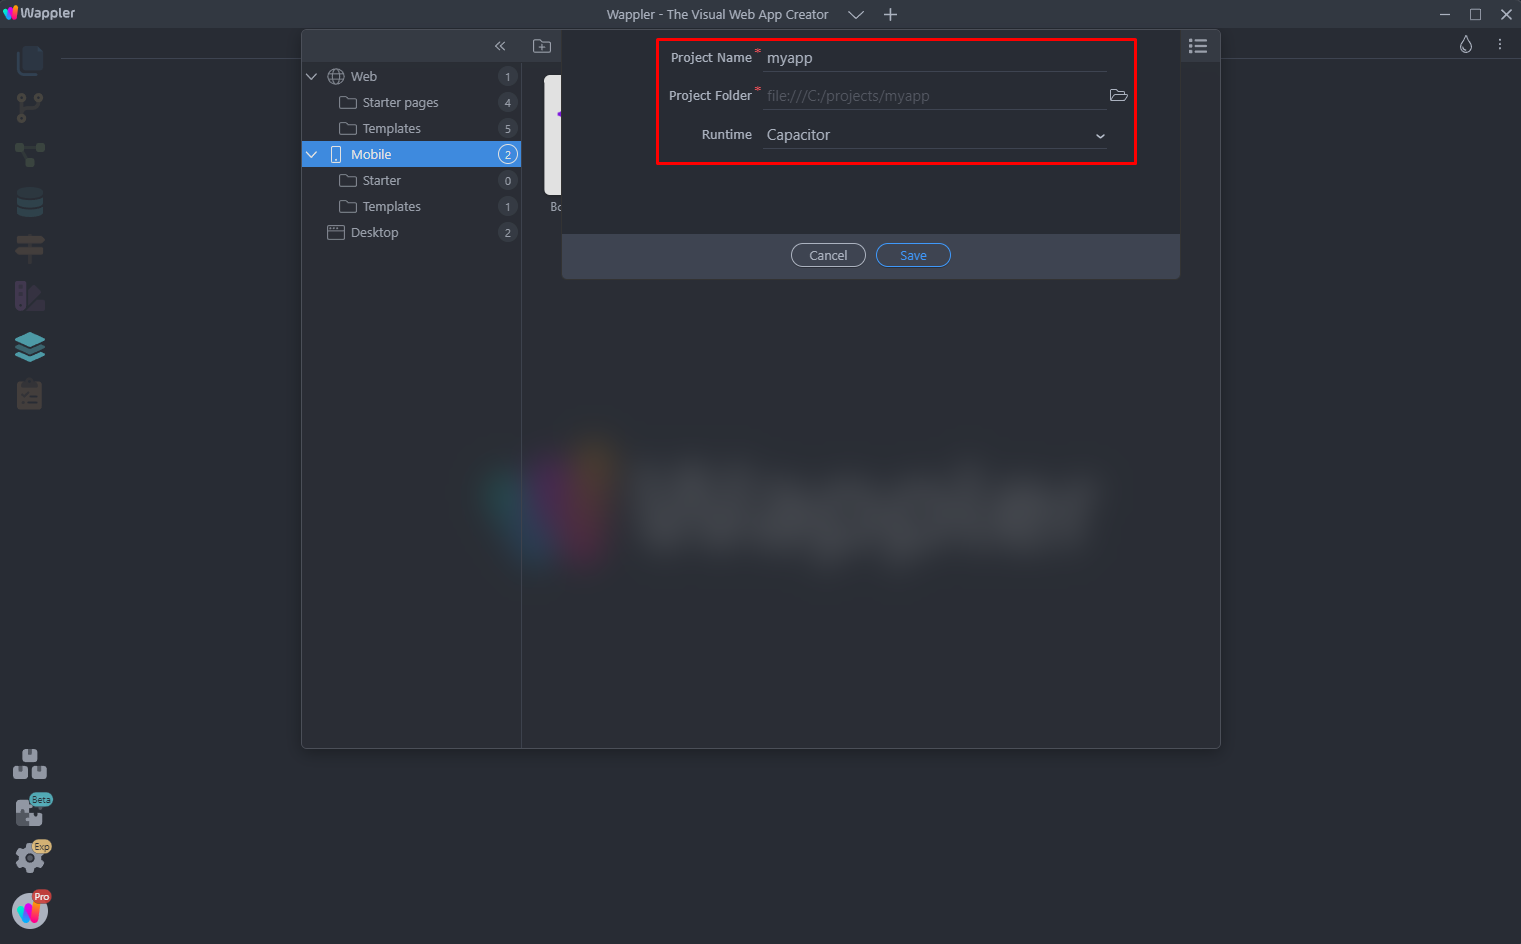
Step 5
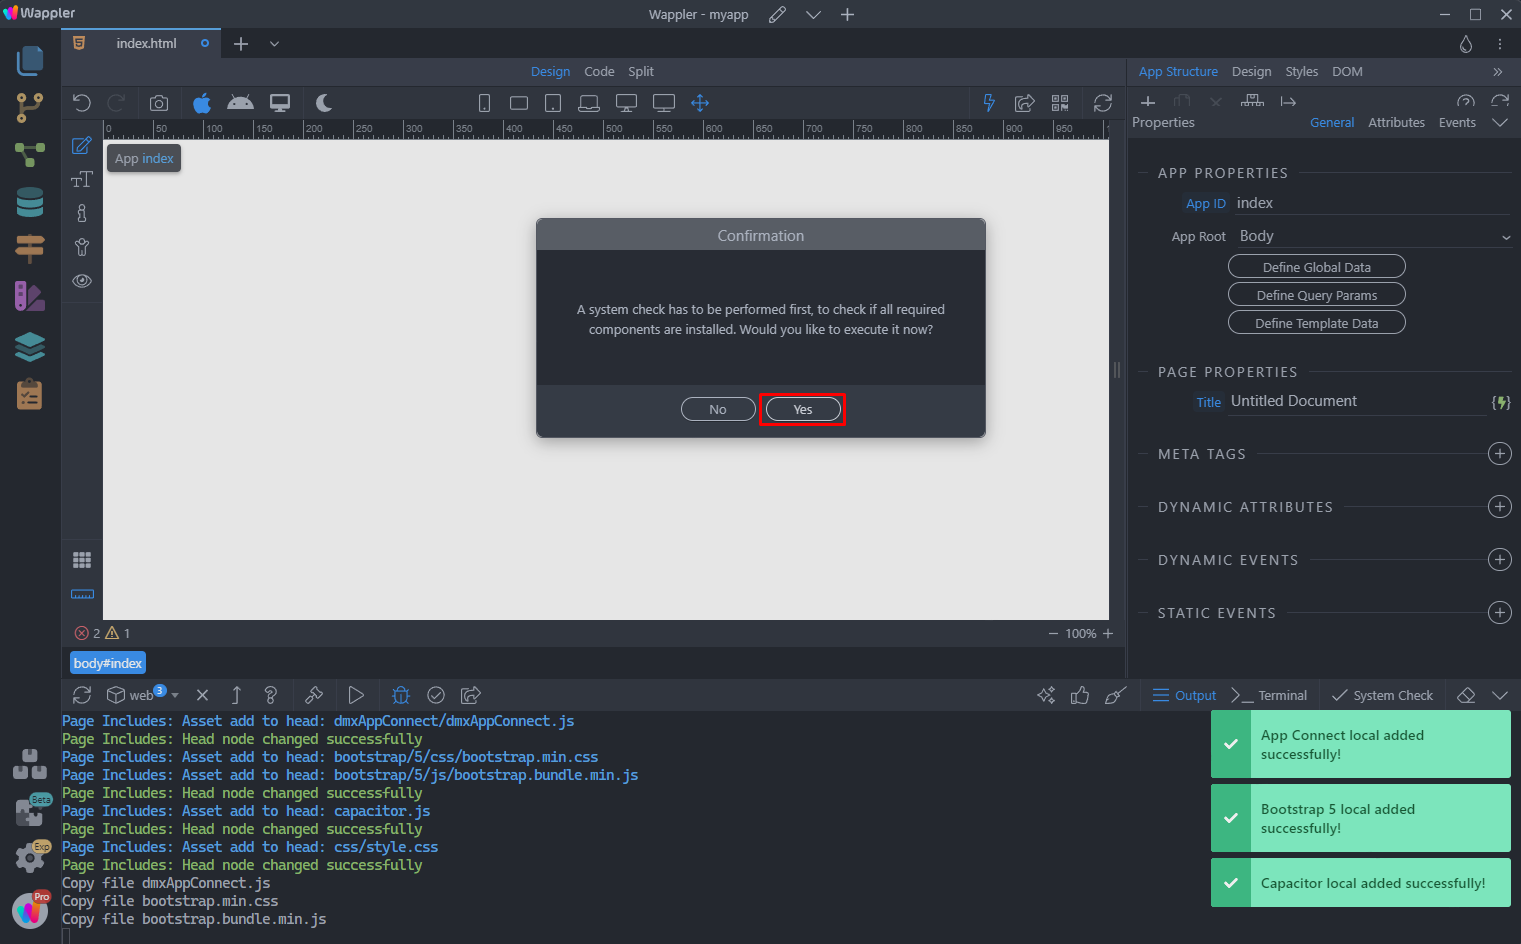
Section titled “Step 5”Once you create the project, a system check will be required. Click yes and the system check will be performed:
Database Setup
Section titled “Database Setup”The local SQLite database on your users devices will be created based on how it’s defined in Wappler’s Database Manager.
Creating the Database
Section titled “Creating the Database”The first step is to create the database. Open the Database Manager and click the Create New Connection button:

Add a name for your database connection and click the create new database file button:
Section titled “Add a name for your database connection and click the create new database file button:”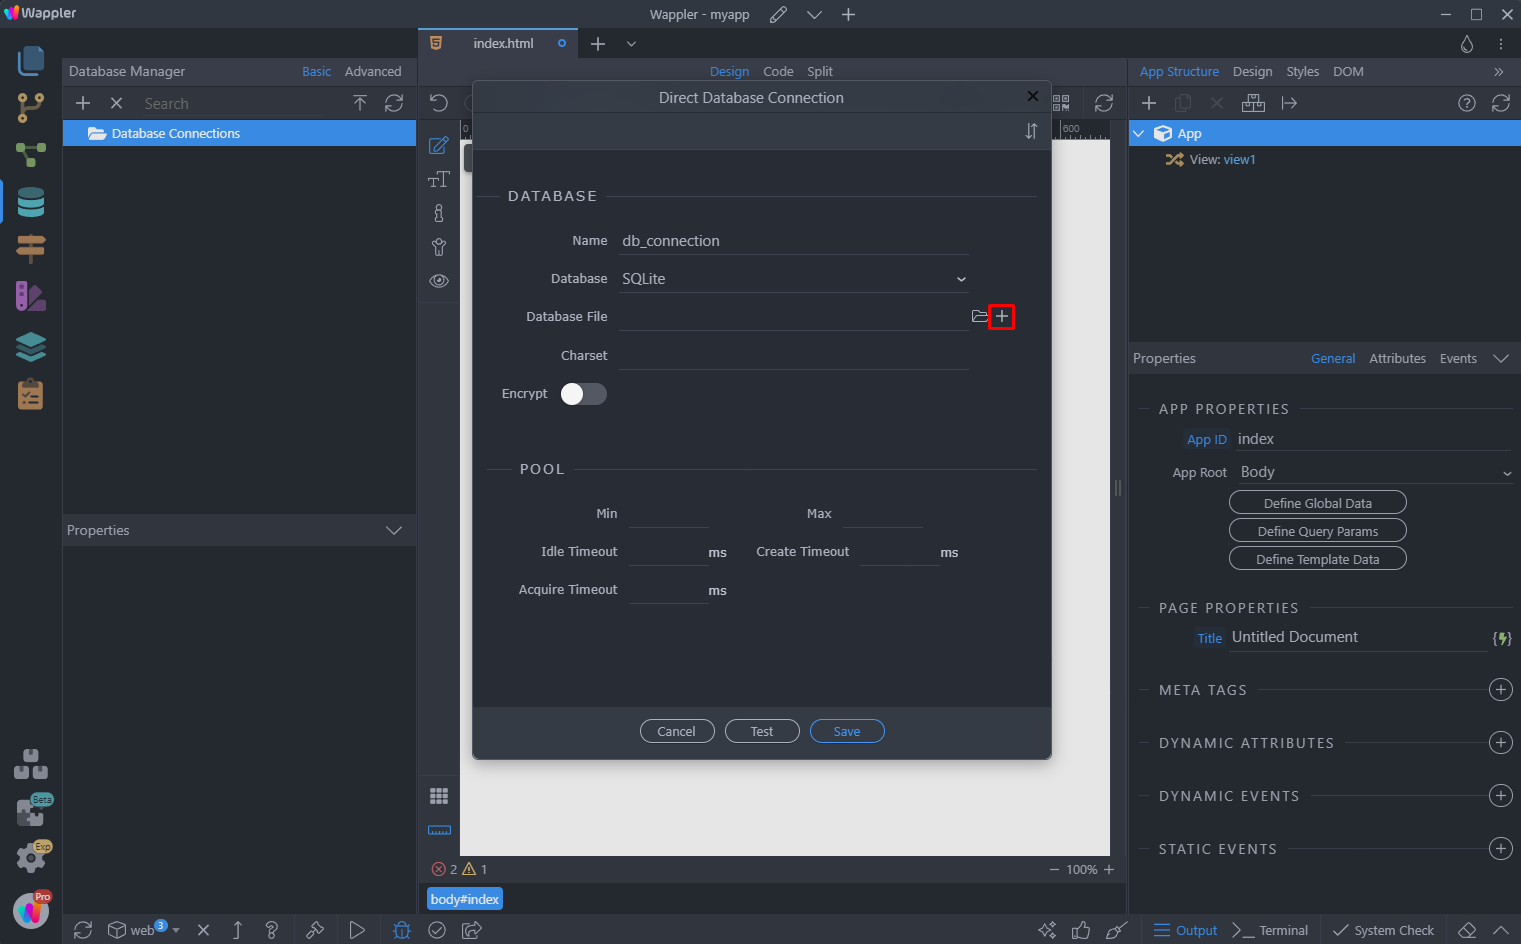
Add a name for the database file and save it in the root folder of your project:
Section titled “Add a name for the database file and save it in the root folder of your project:”
Click the Save button:
Section titled “Click the Save button:”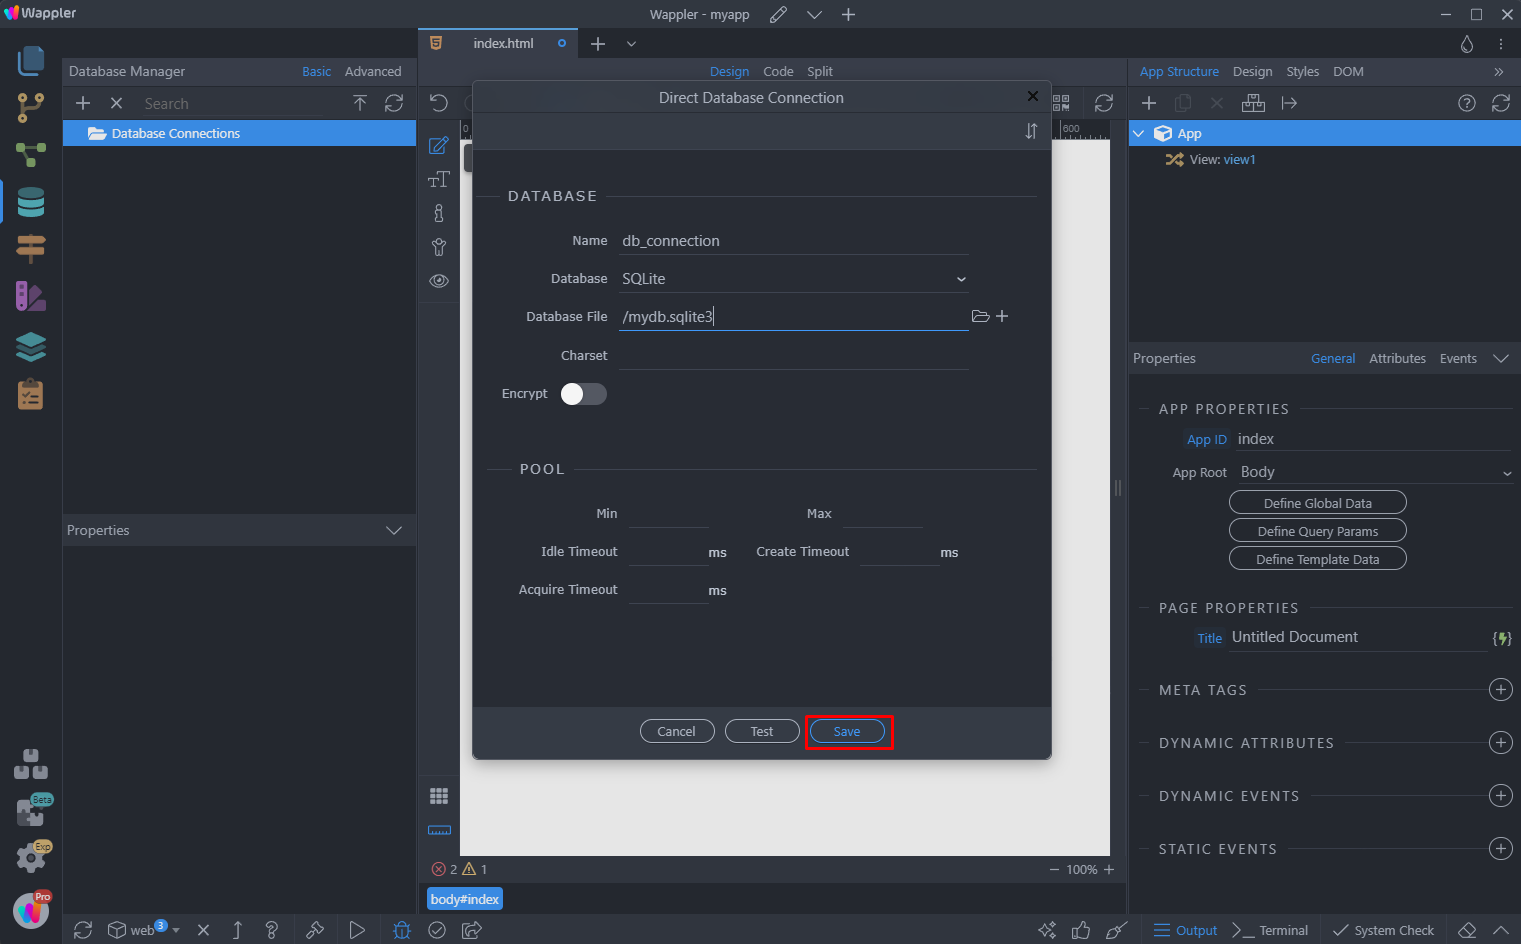
Step 12
Section titled “Step 12”And you are done. Your database has been successfully created.
Note that you can create multiple databases for your project if needed.
Creating Database Tables
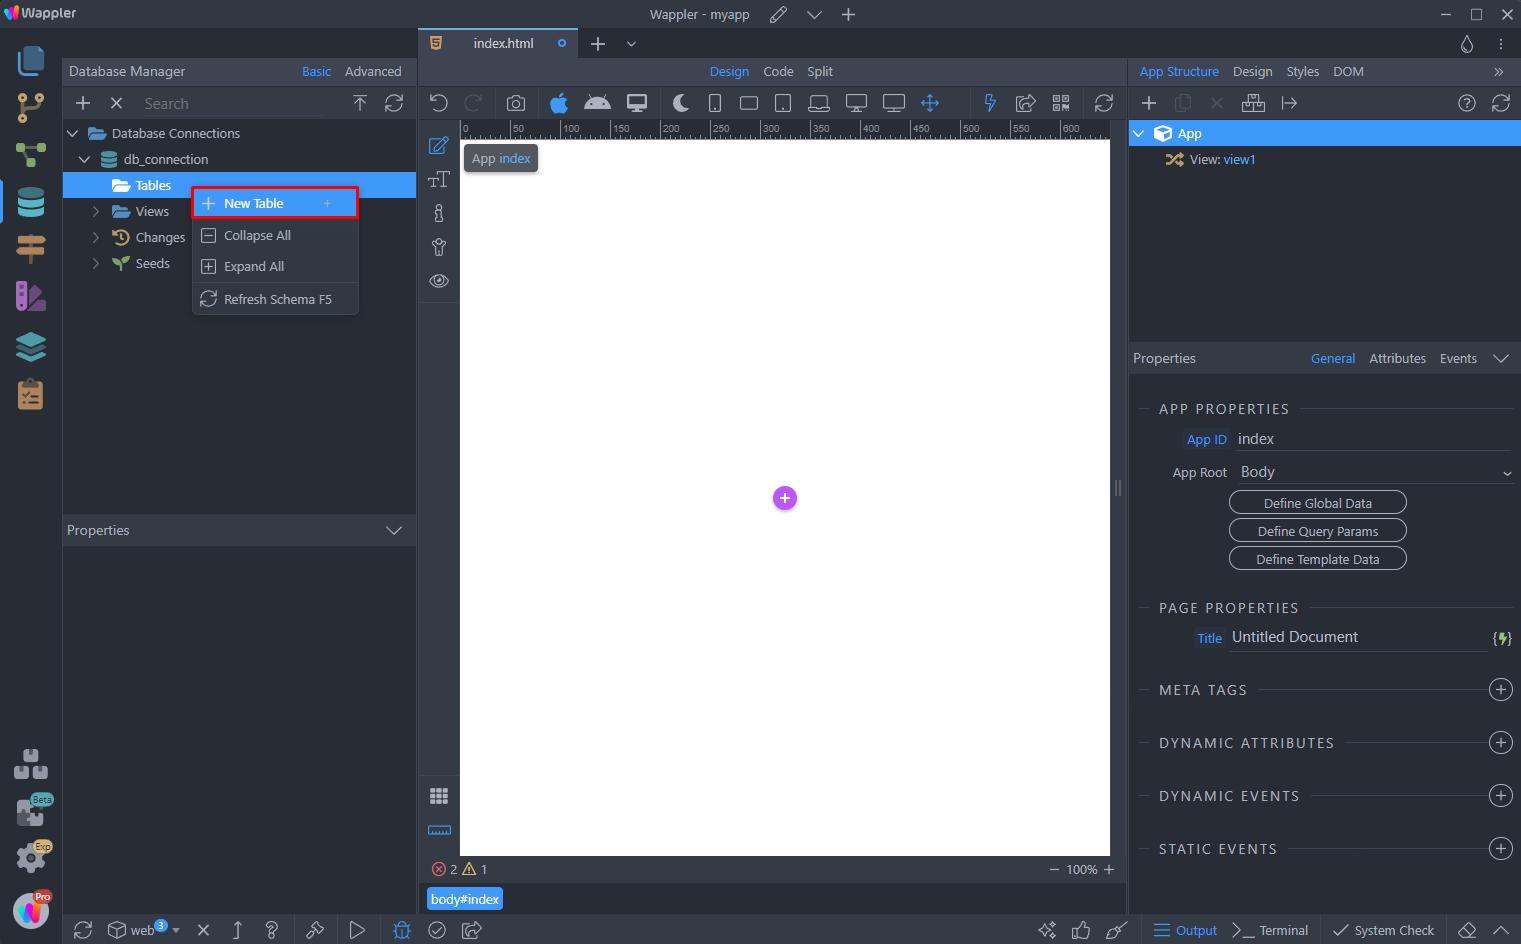
Section titled “Creating Database Tables”Let’s continue with creating the database tables. Right click Tables and select New Table:
Step 14
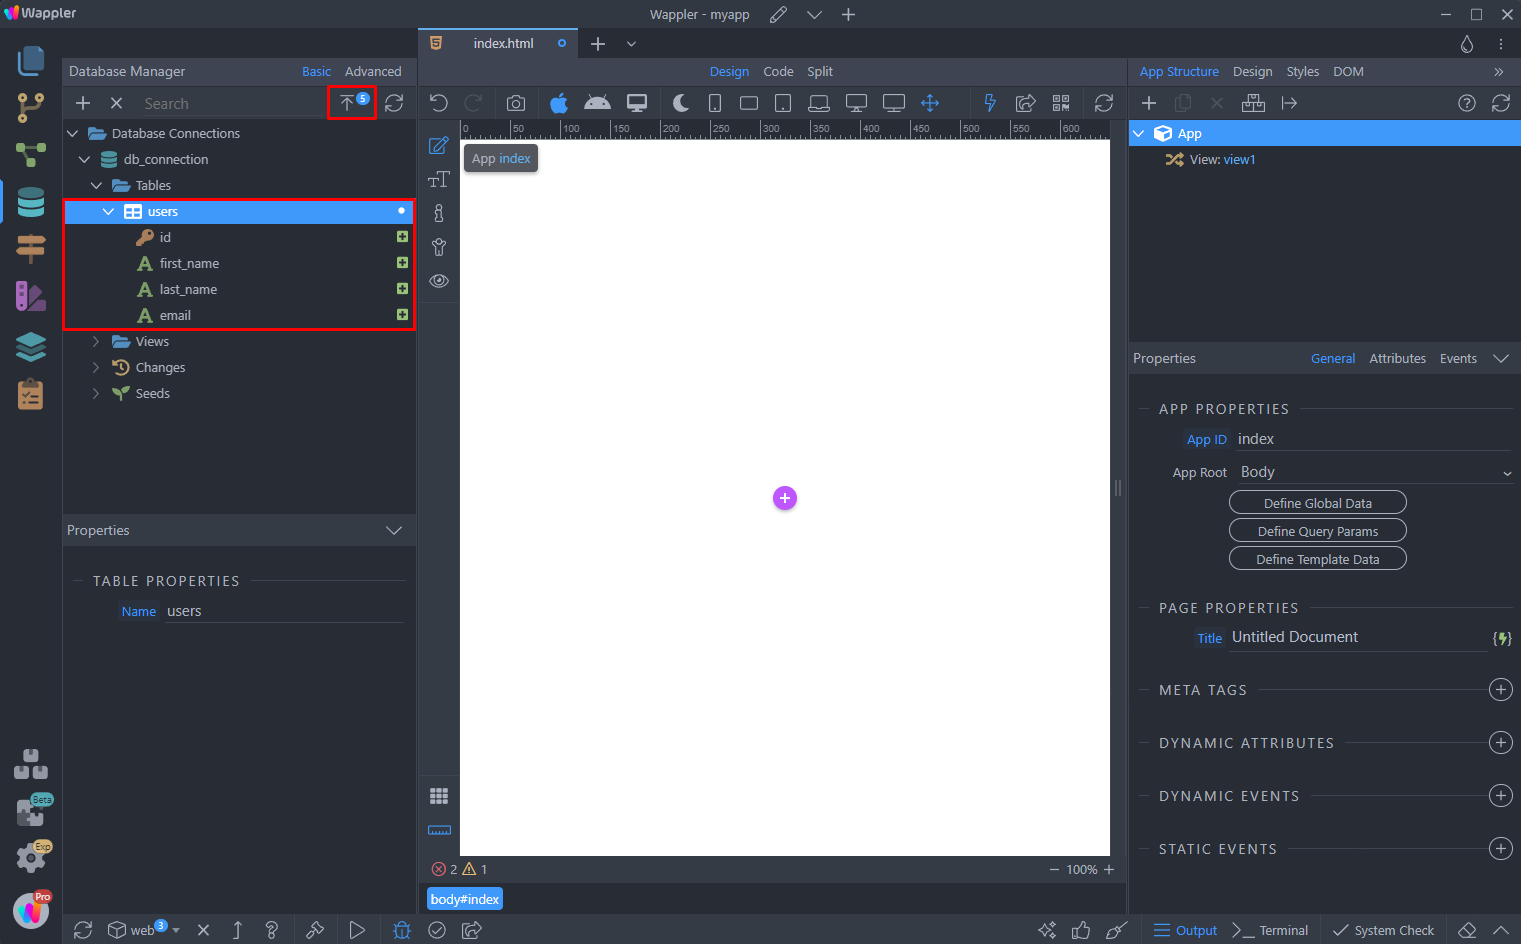
Section titled “Step 14”For this tutorial we create a simple table called users and add 3 additional columns next to the id column - first_name, last_name and email. This table will store some data about our users. Click the apply changes button:
Add a description for the changes you are applying and click OK:
Section titled “Add a description for the changes you are applying and click OK:”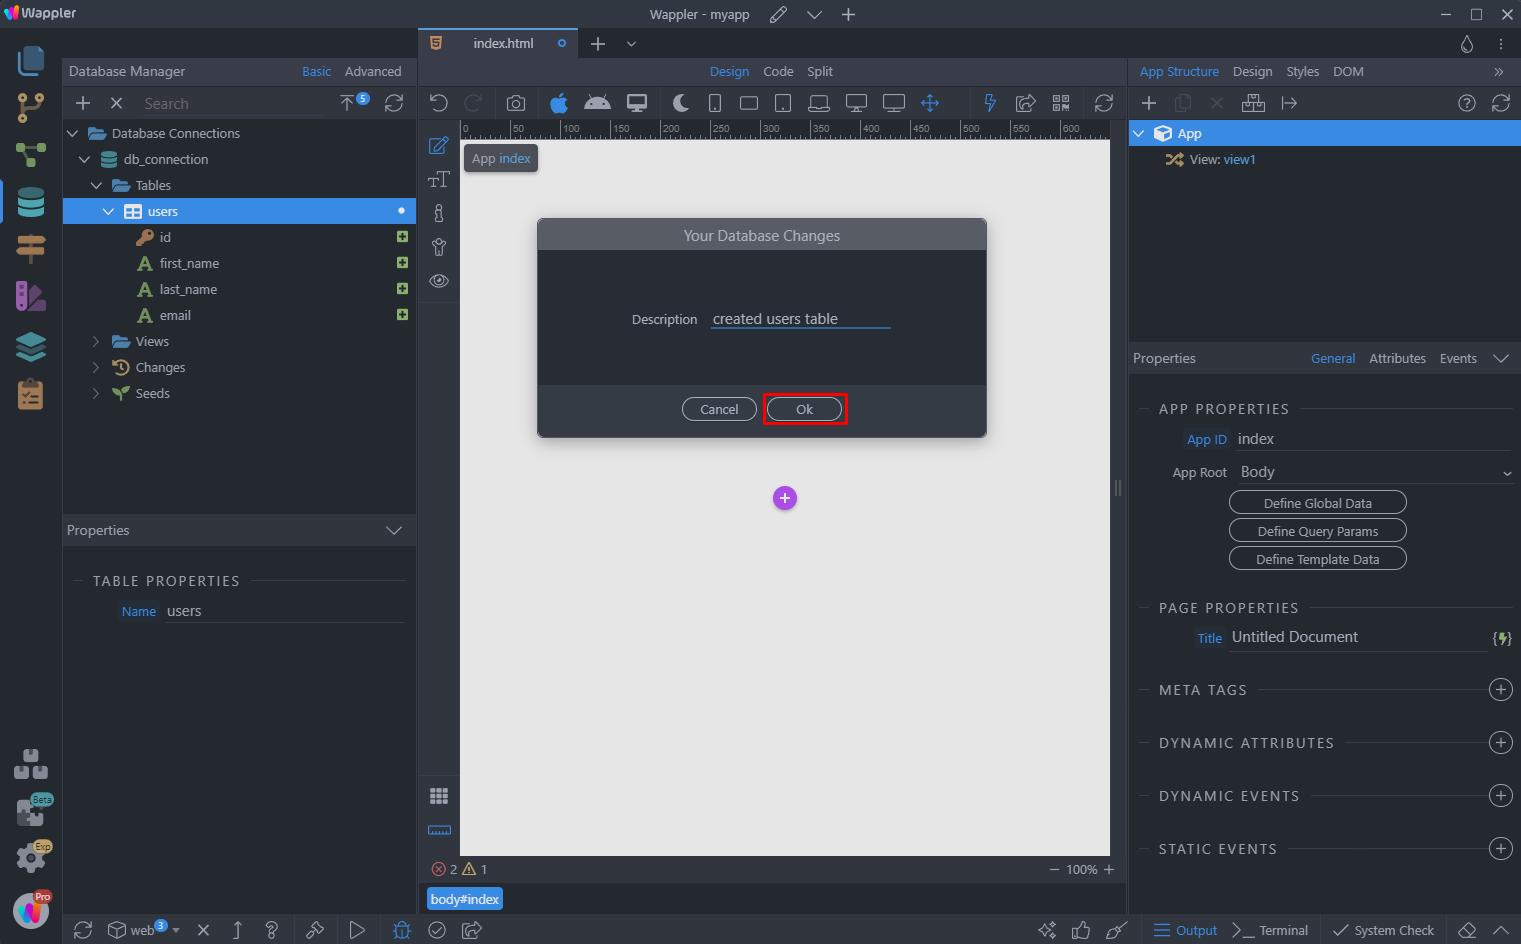
We are done - our table has been created.
Section titled “We are done - our table has been created.”Adding Database Data
Section titled “Adding Database Data”If you want to add some predefined data in your database table(s), that will be also added on your users devices, when they run the app, you can do it in the Database Manager. This is optional and not a mandatory step - you can also just provide your users with an empty database table.
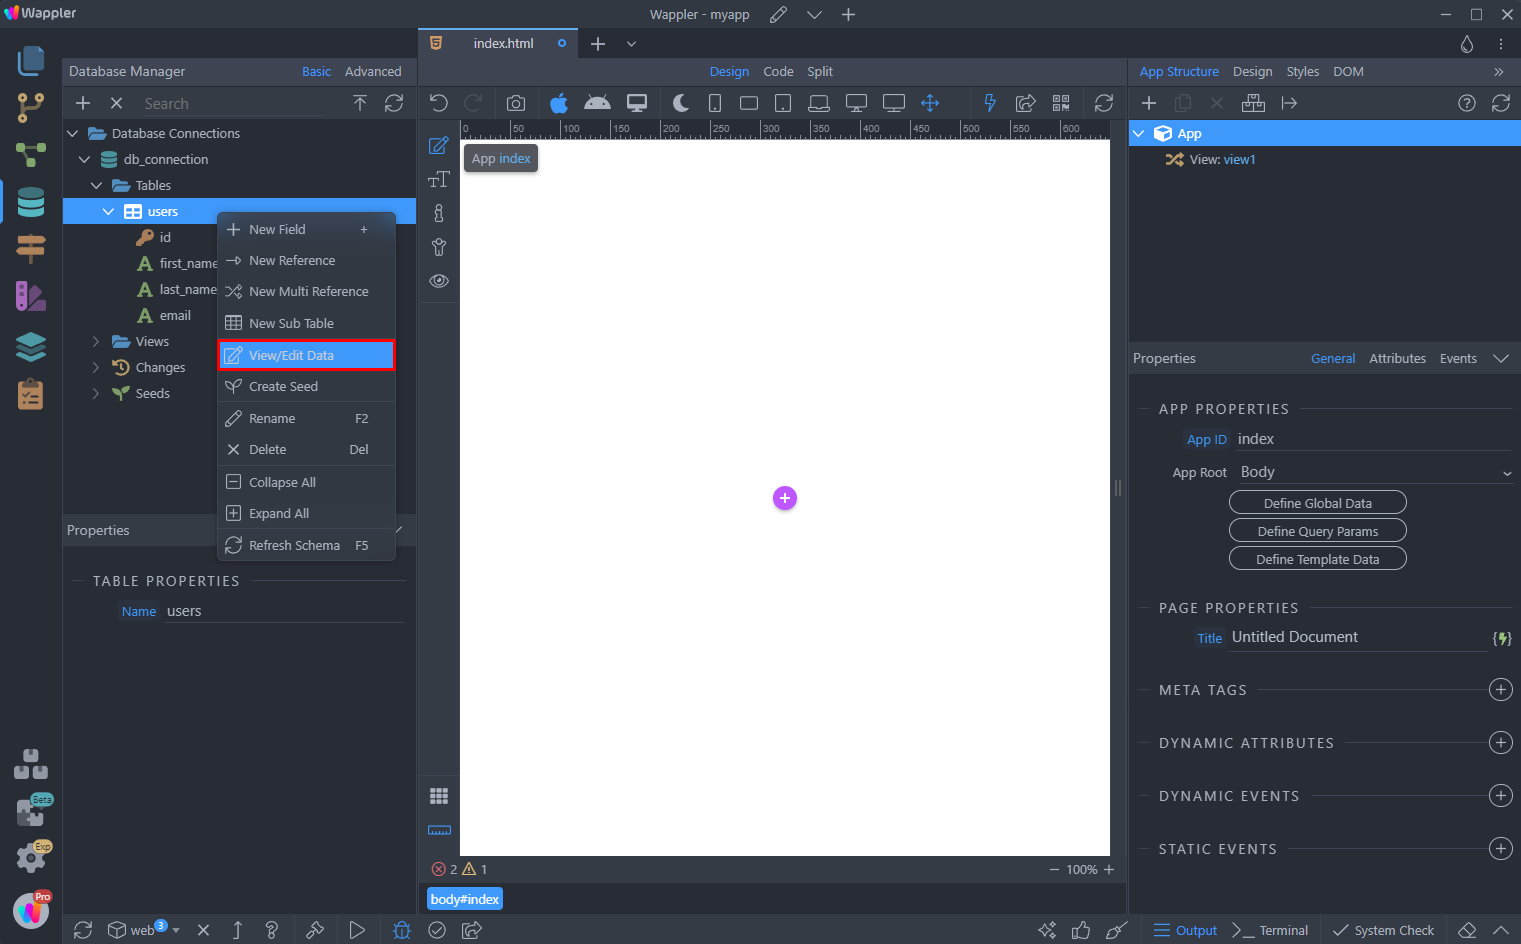
Right click and select View/Edit Data:
Click Add New in order to add a new record in your table:
Section titled “Click Add New in order to add a new record in your table:”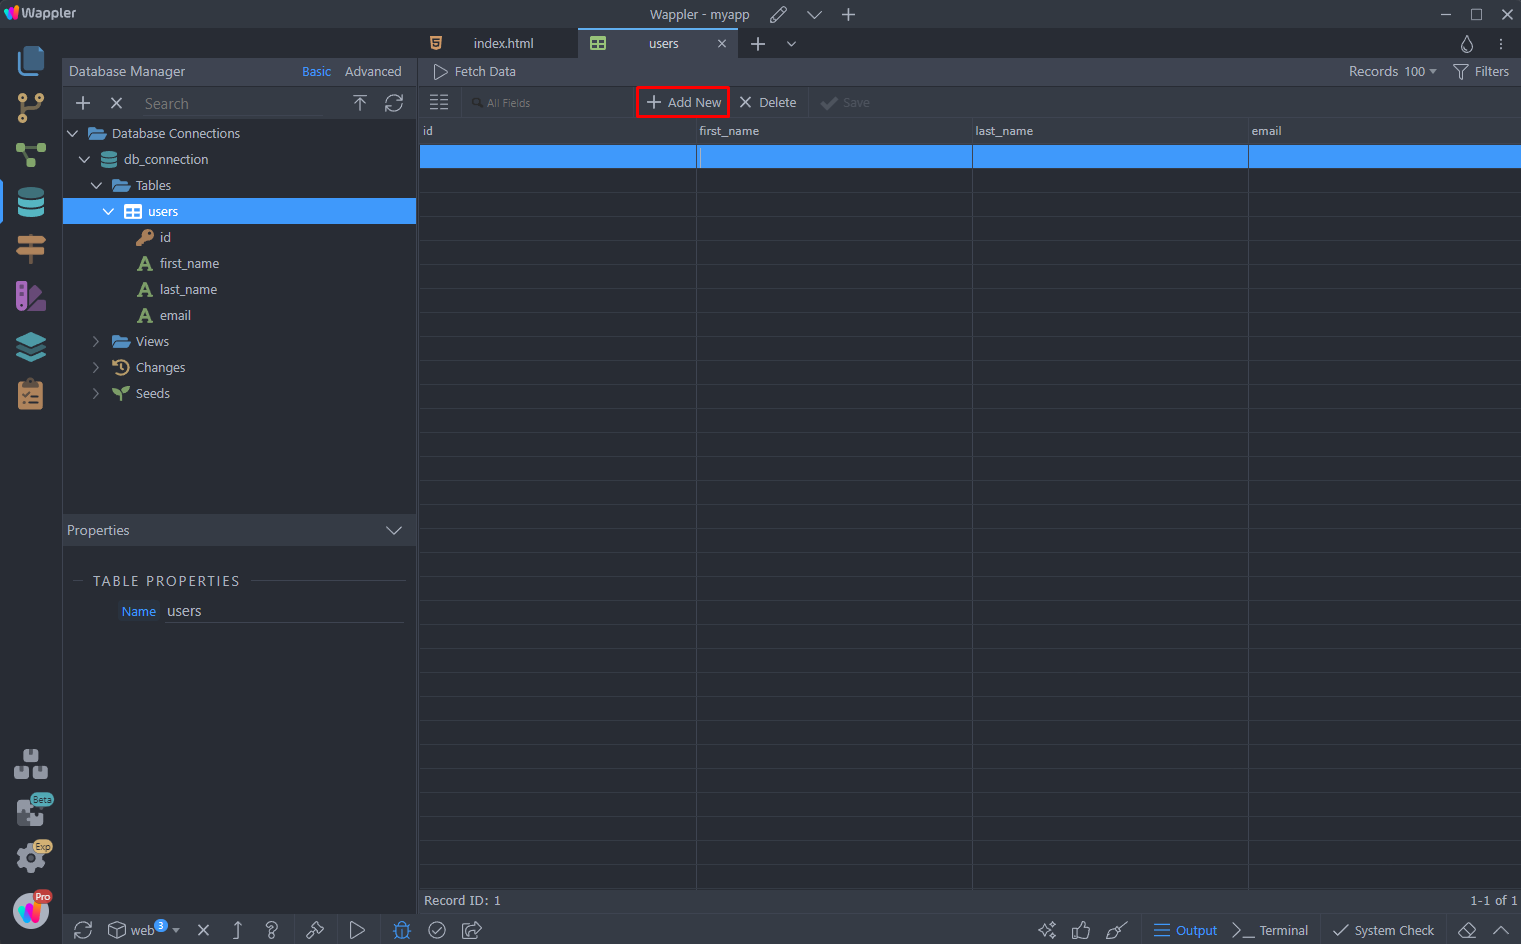
Add as many records as you need and click Save:
Section titled “Add as many records as you need and click Save:”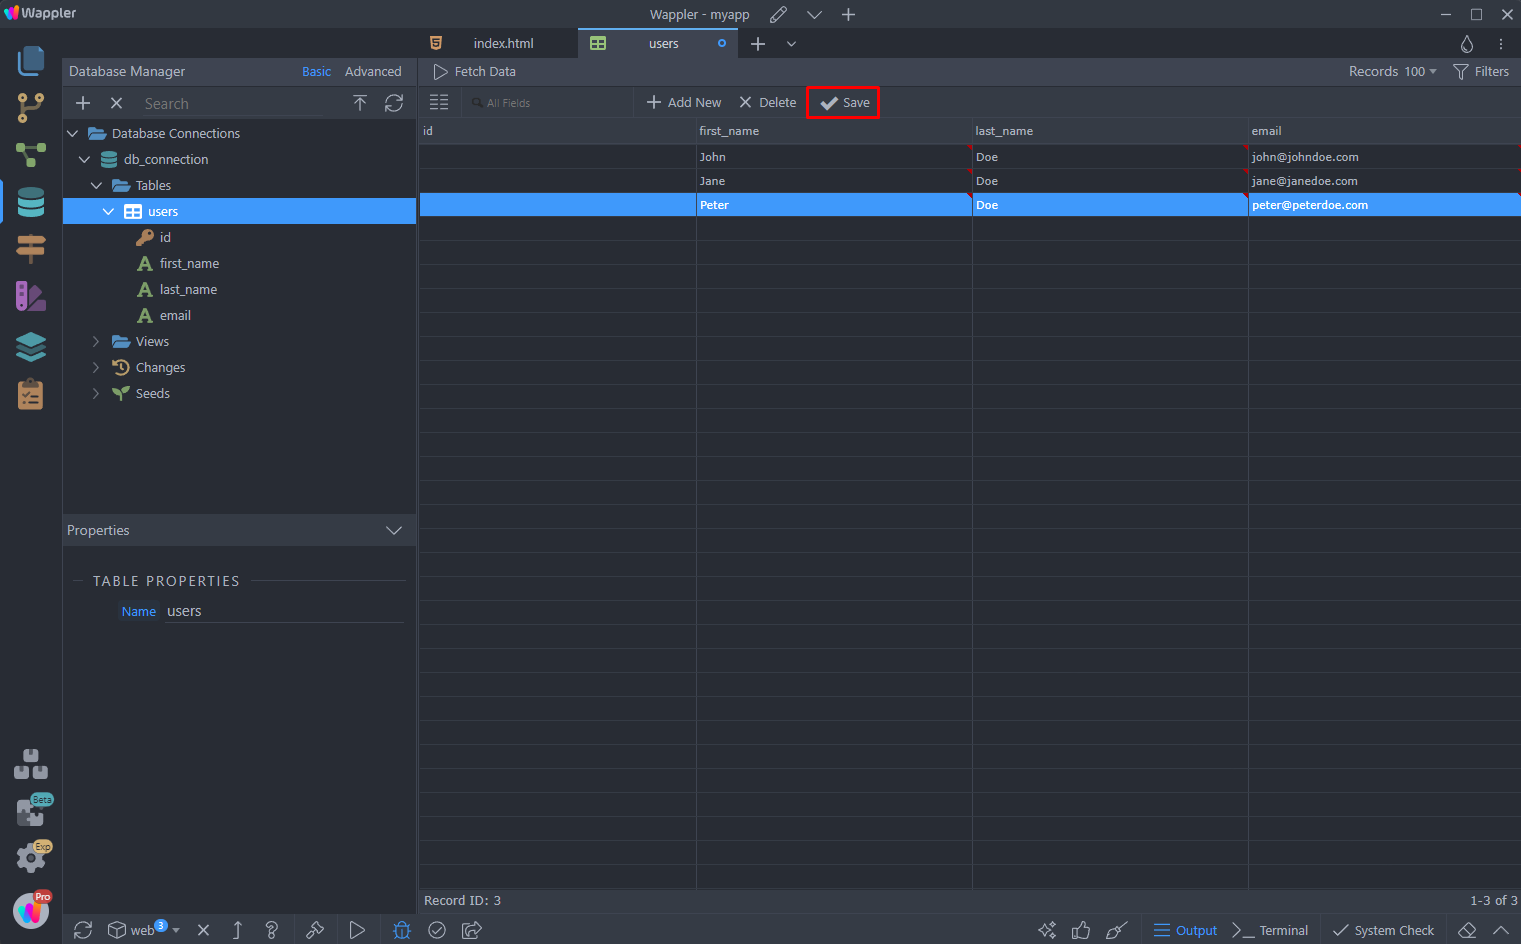
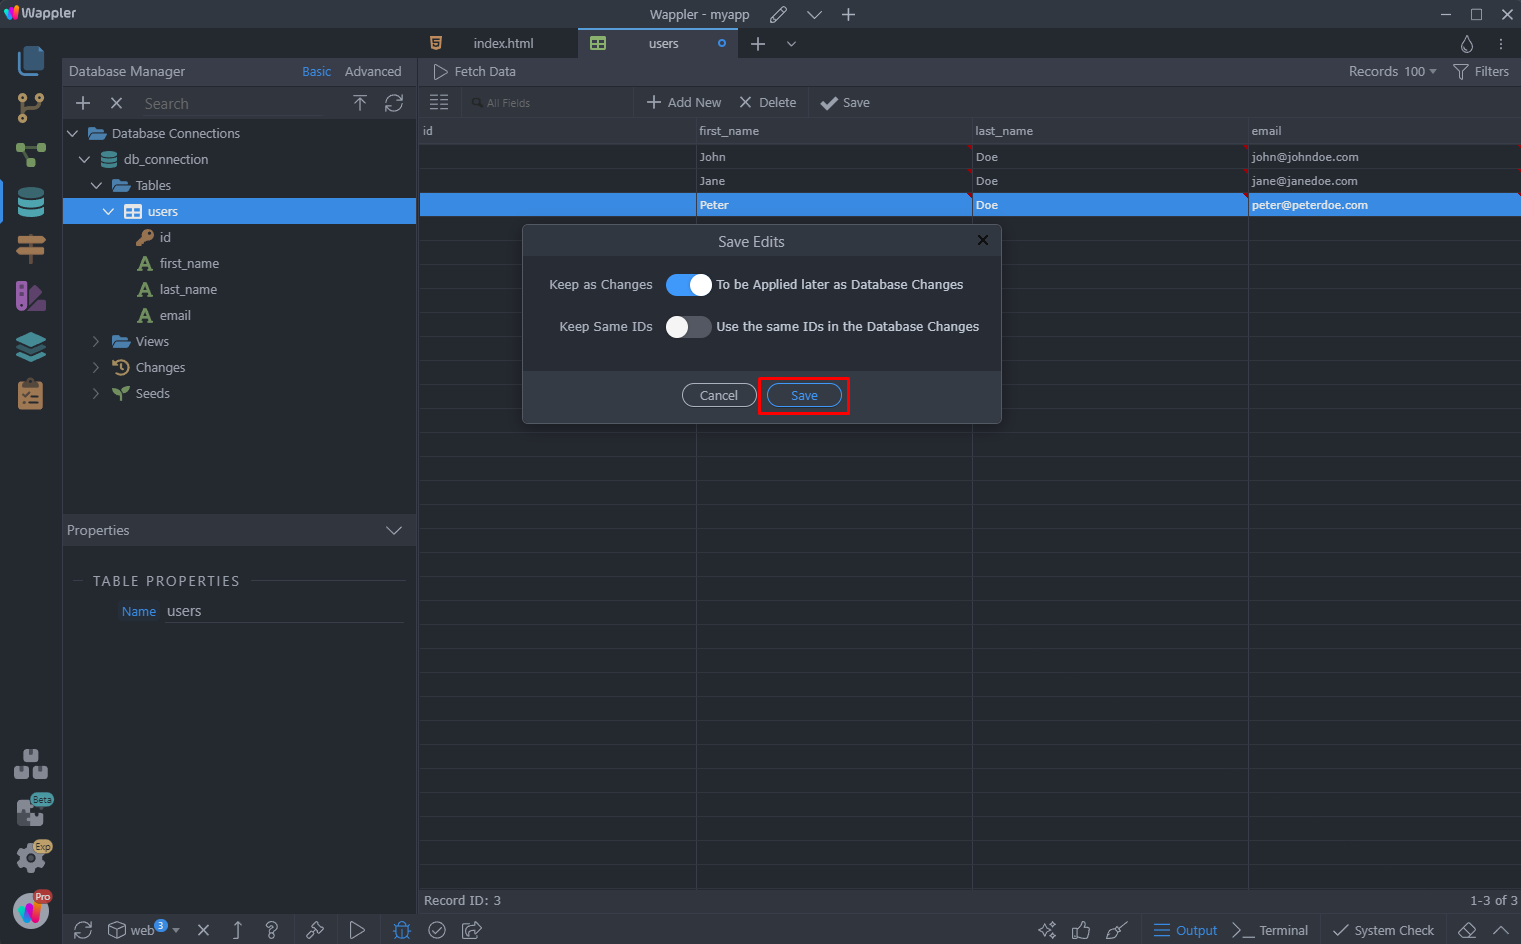
So we keep the first option enabled, in order to transfer the data we entered to the users’ devices database:
Section titled “So we keep the first option enabled, in order to transfer the data we entered to the users’ devices database:”A dialog with two options appears.
Keep as Changes - will keep your data as a database change and will transfer the data you just added to your users devices on the first run.
Keep Same IDs - to always use the same IDs for the database changes.
So we keep the first option enabled, in order to transfer the data we entered to the users’ devices database:
Then we apply the changes:
Section titled “Then we apply the changes:”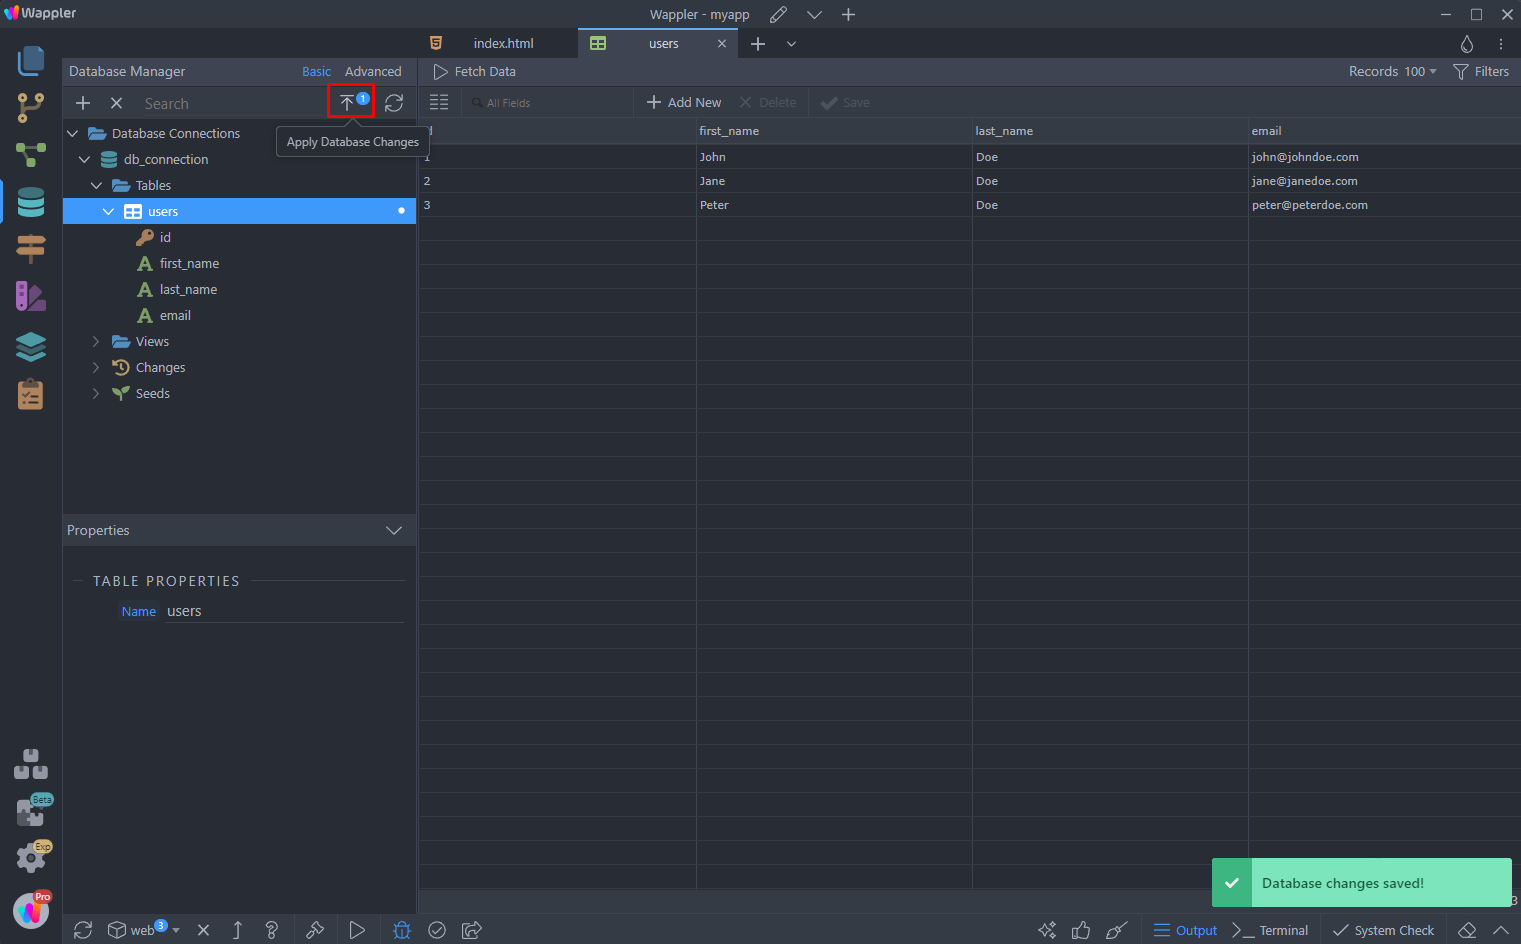
Add a description and click OK:
Section titled “Add a description and click OK:”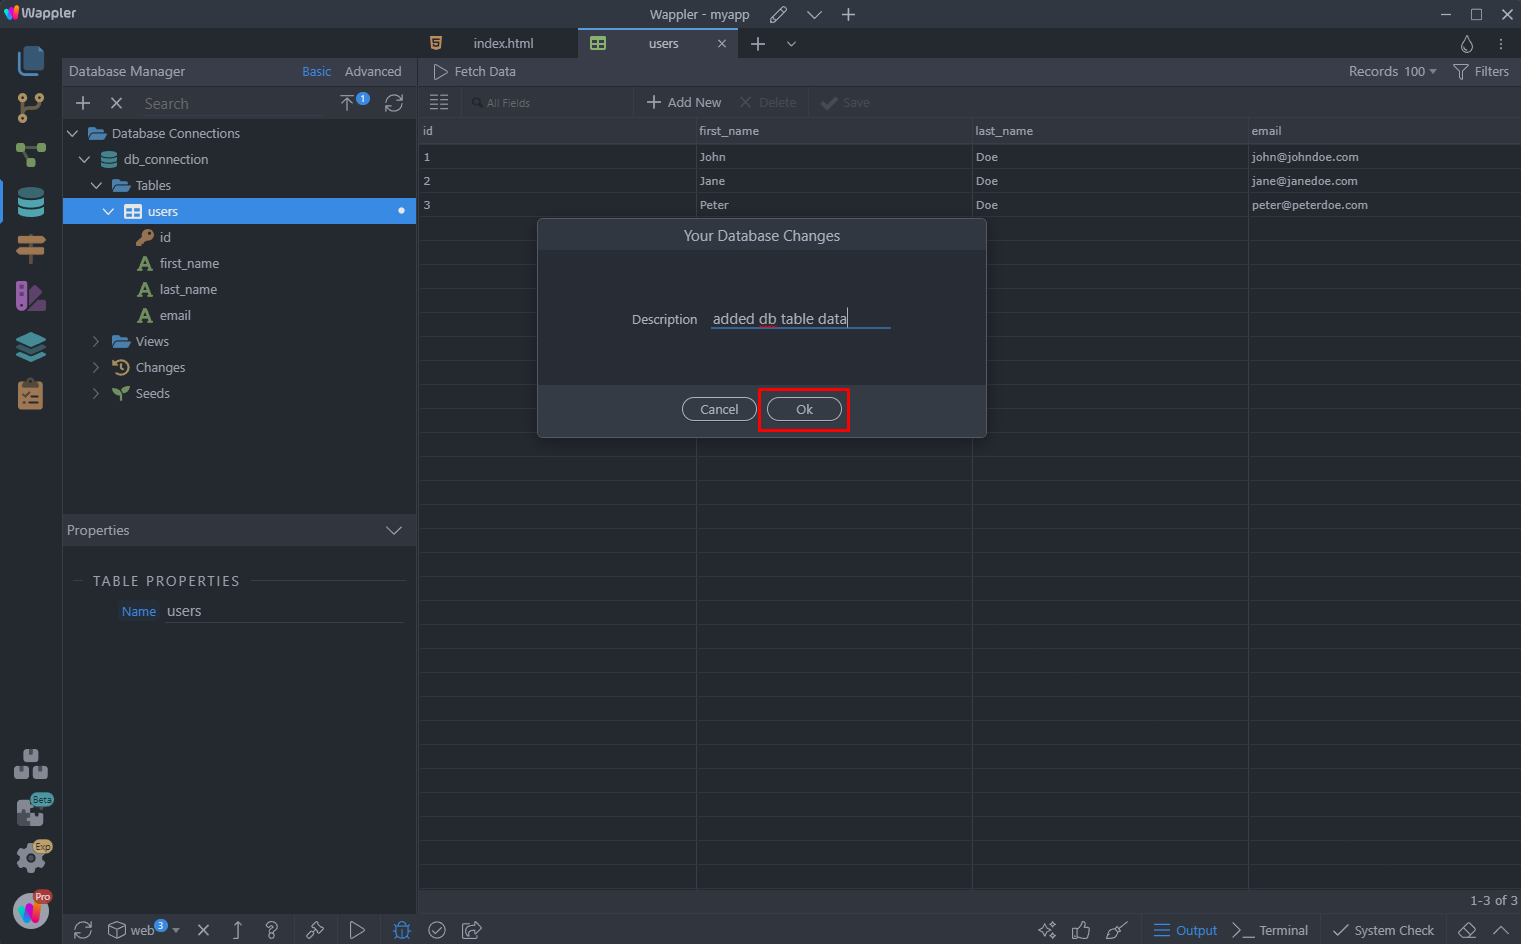
You can see the data we entered in the database:
Section titled “You can see the data we entered in the database:”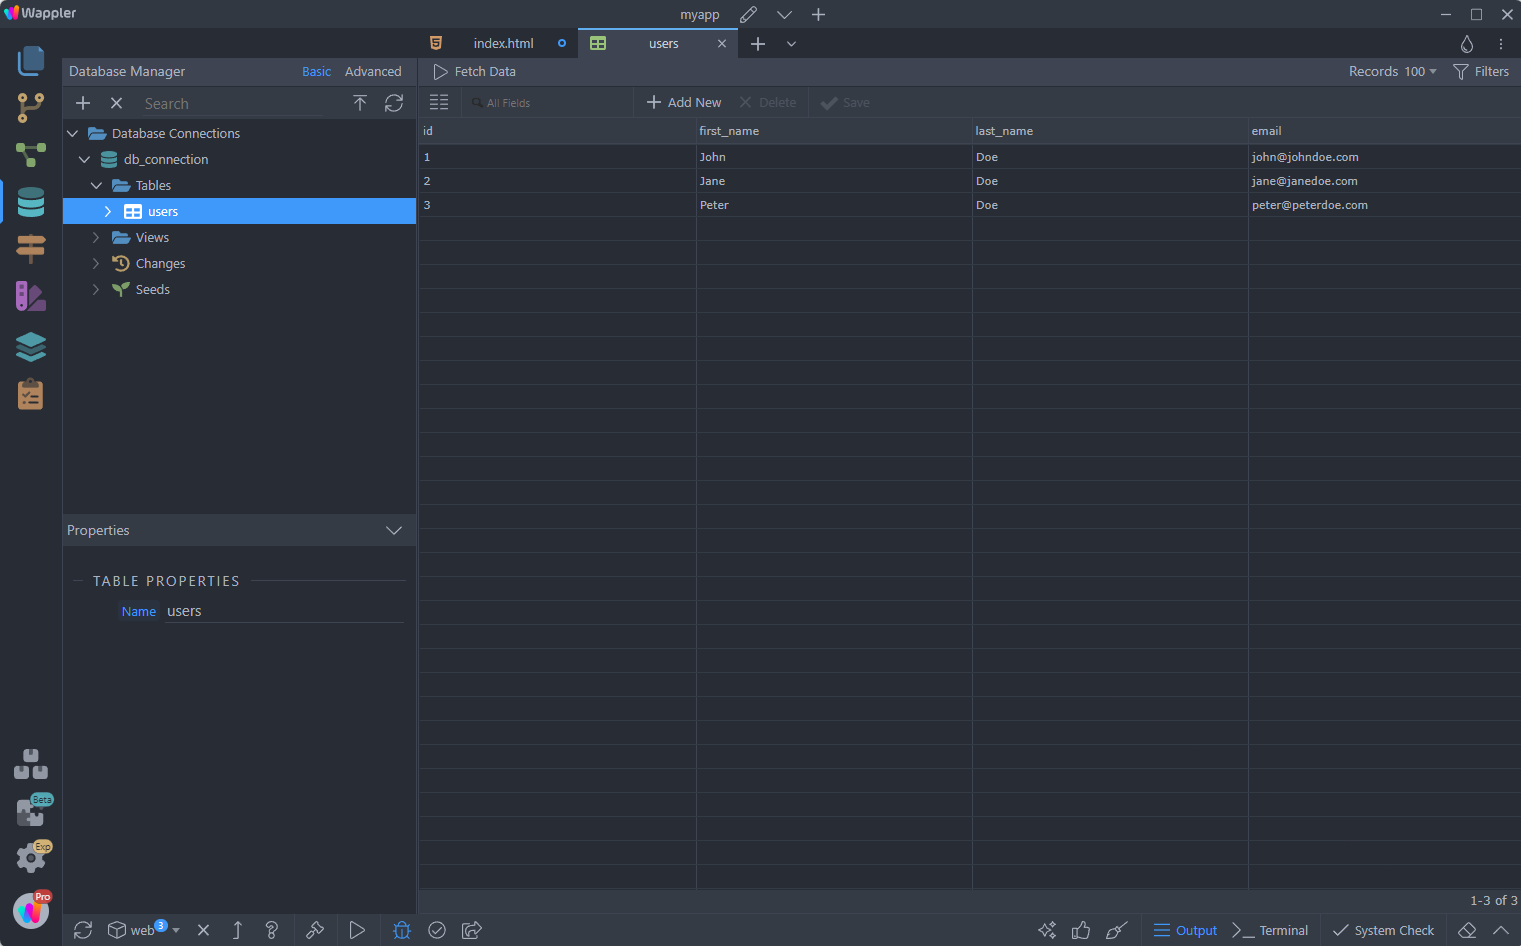
Working with Dynamic Data
Section titled “Working with Dynamic Data”We close the database manager for now and open the index.html page.
The next thing we are going to explain is how to use the dynamic data on your pages.
Displaying Dynamic Data
Section titled “Displaying Dynamic Data”First let’s see how to display the dynamic data on your app’s pages.
Add a new component:
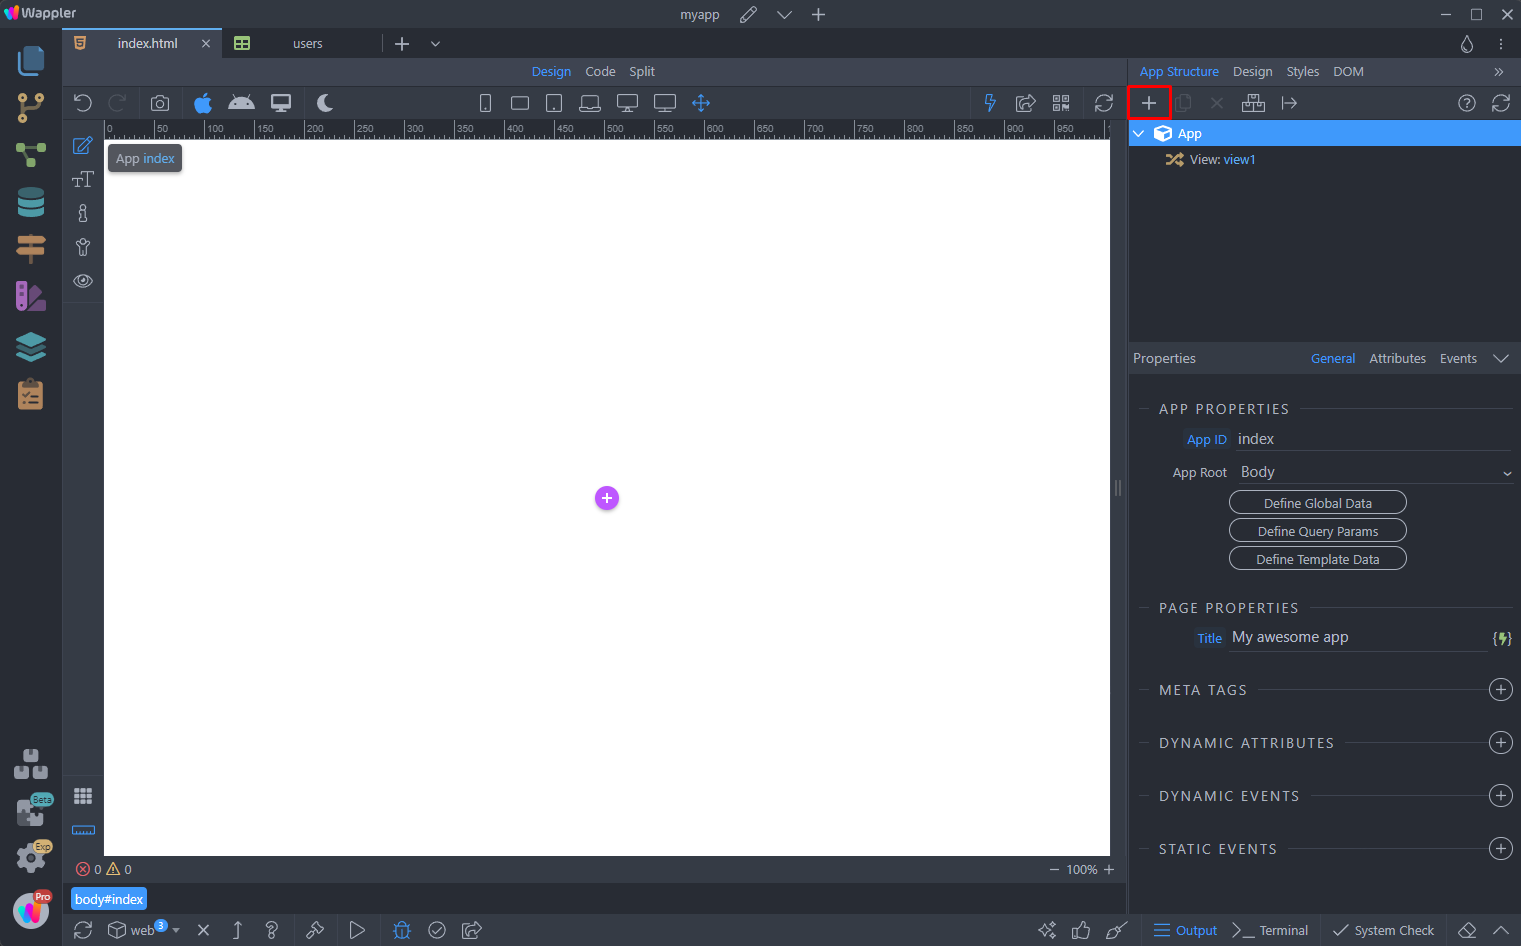
And under Workflows select Page flow:
Section titled “And under Workflows select Page flow:”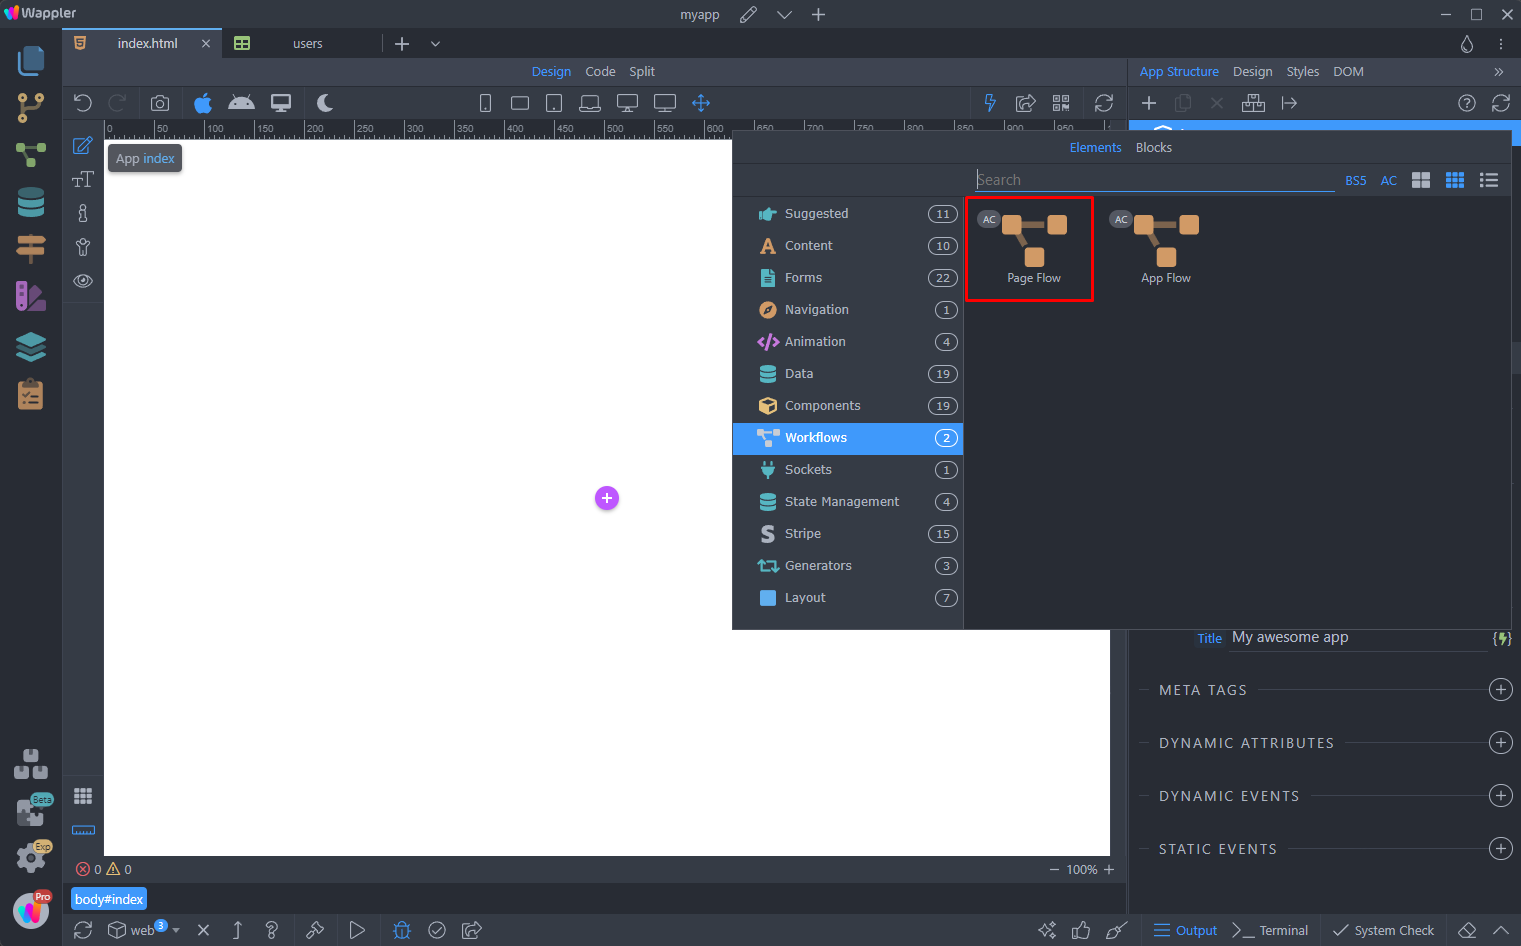
Add new step:
Section titled “Add new step:”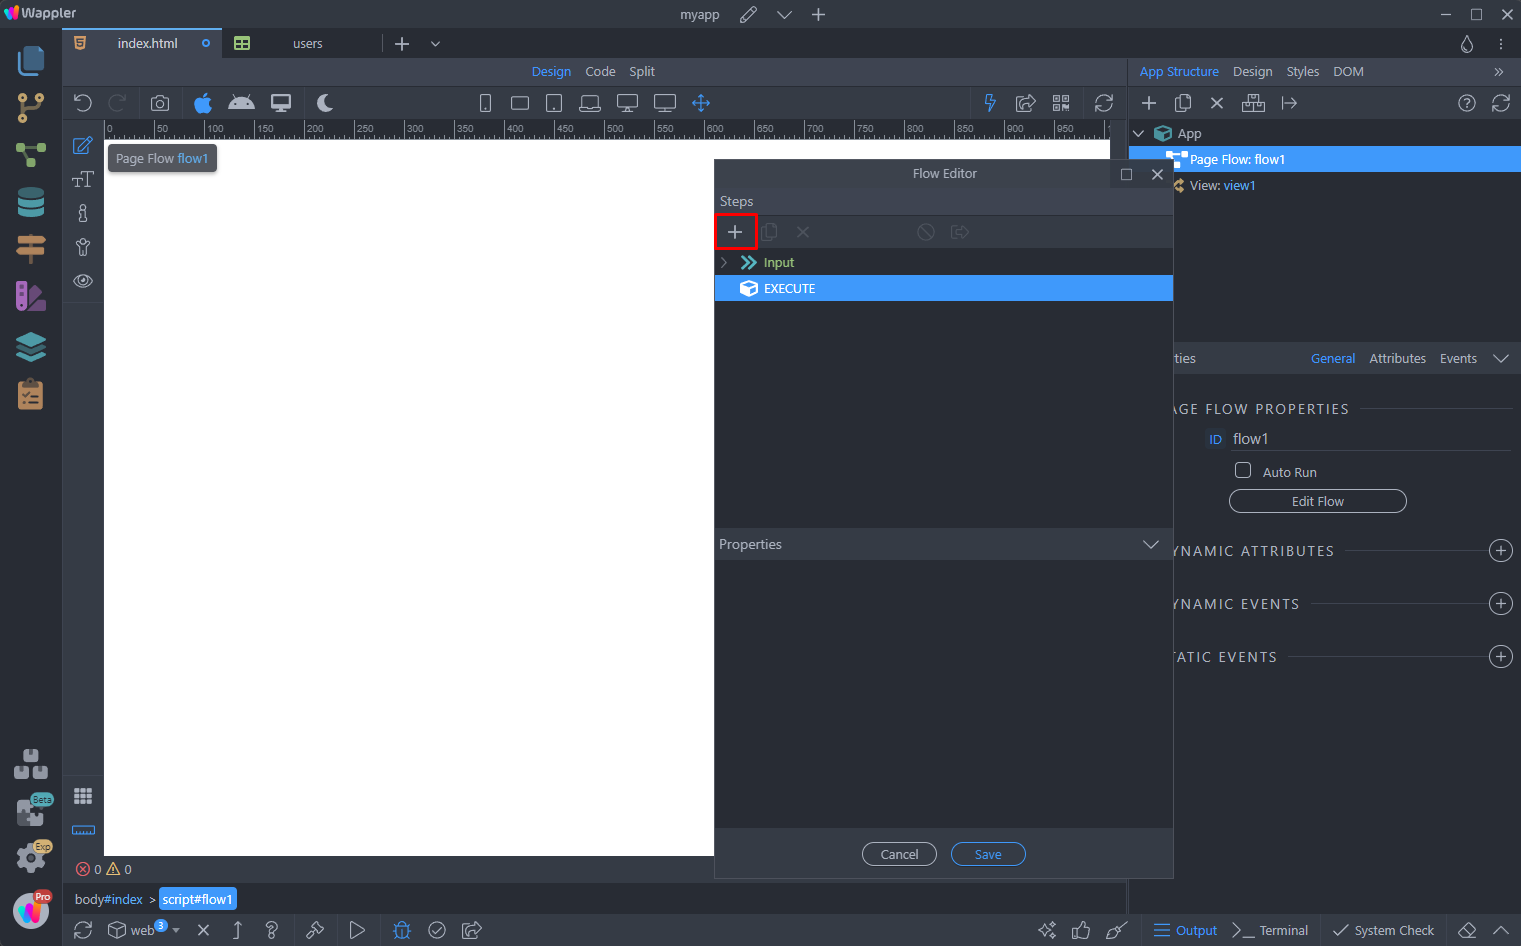
Open the Database Actions menu and select Database Query:
Section titled “Open the Database Actions menu and select Database Query:”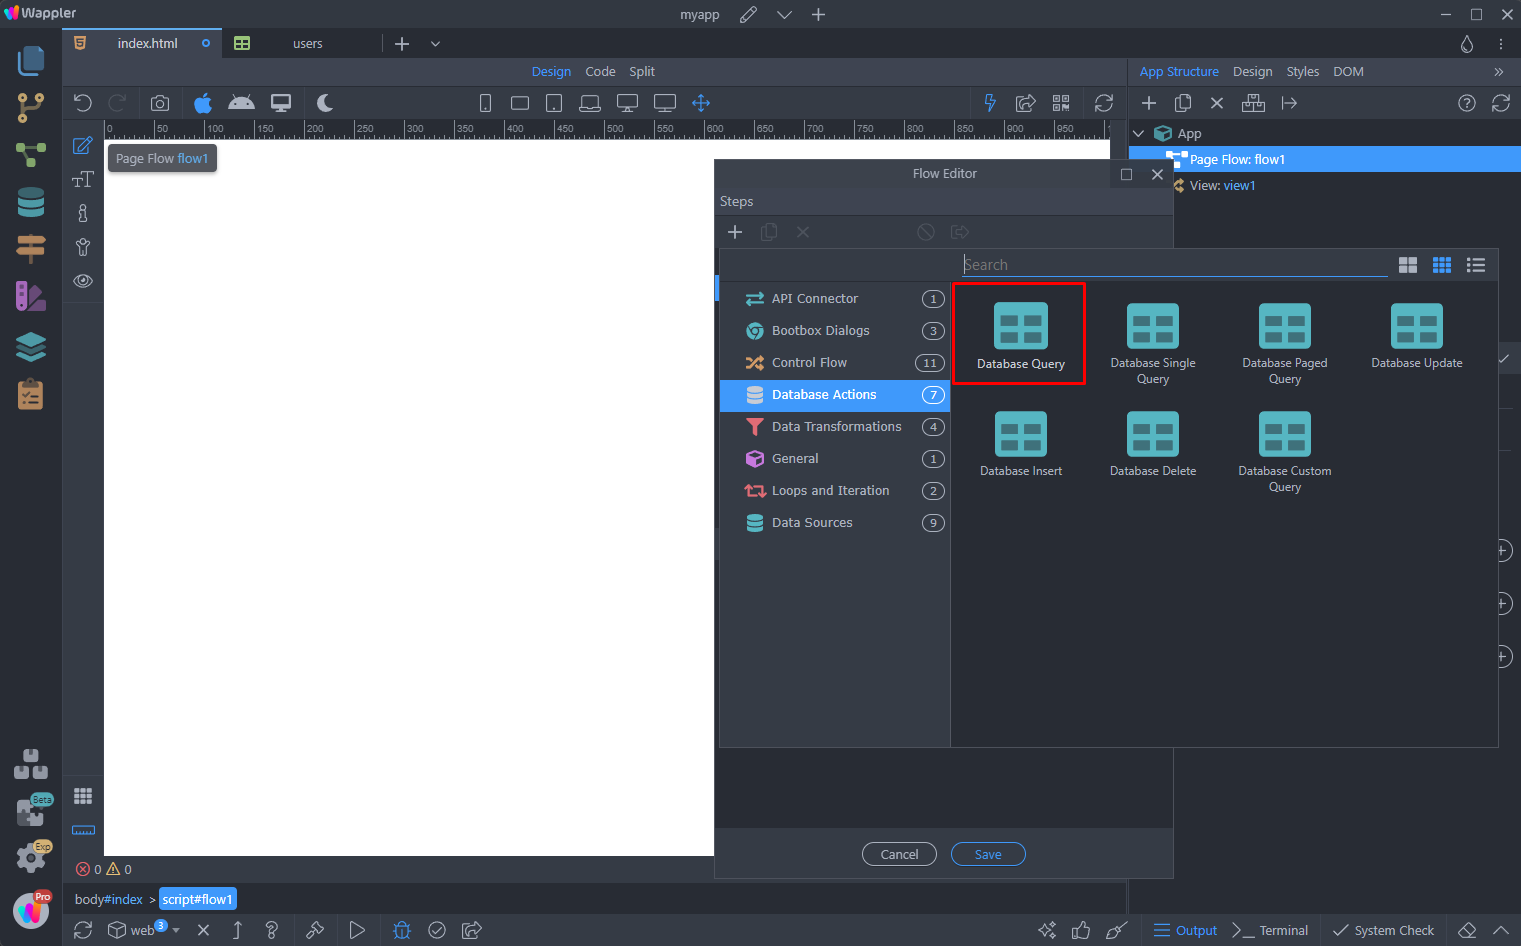
Select your database connection and open the Query Builder:
Section titled “Select your database connection and open the Query Builder:”
Step 31
Section titled “Step 31”The Query Builder dialog is the same as in Server Connect.
We open the tables menu and select our users table:

We add the columns which we want to output and click Ok:
Section titled “We add the columns which we want to output and click Ok:”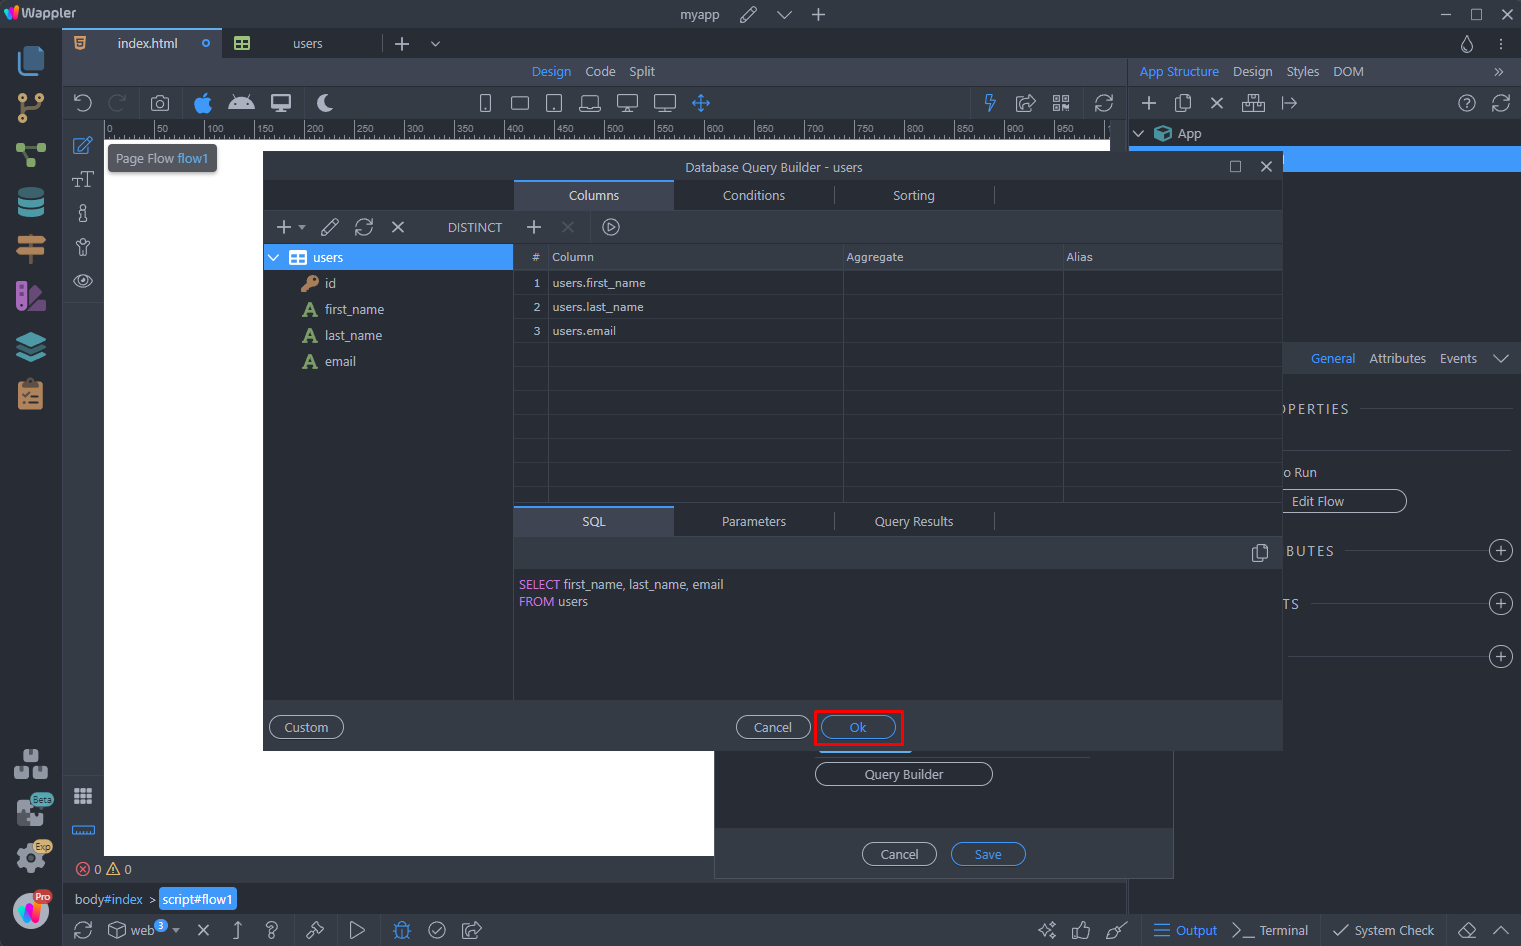
Then click Save to add the flow on the page:
Section titled “Then click Save to add the flow on the page:”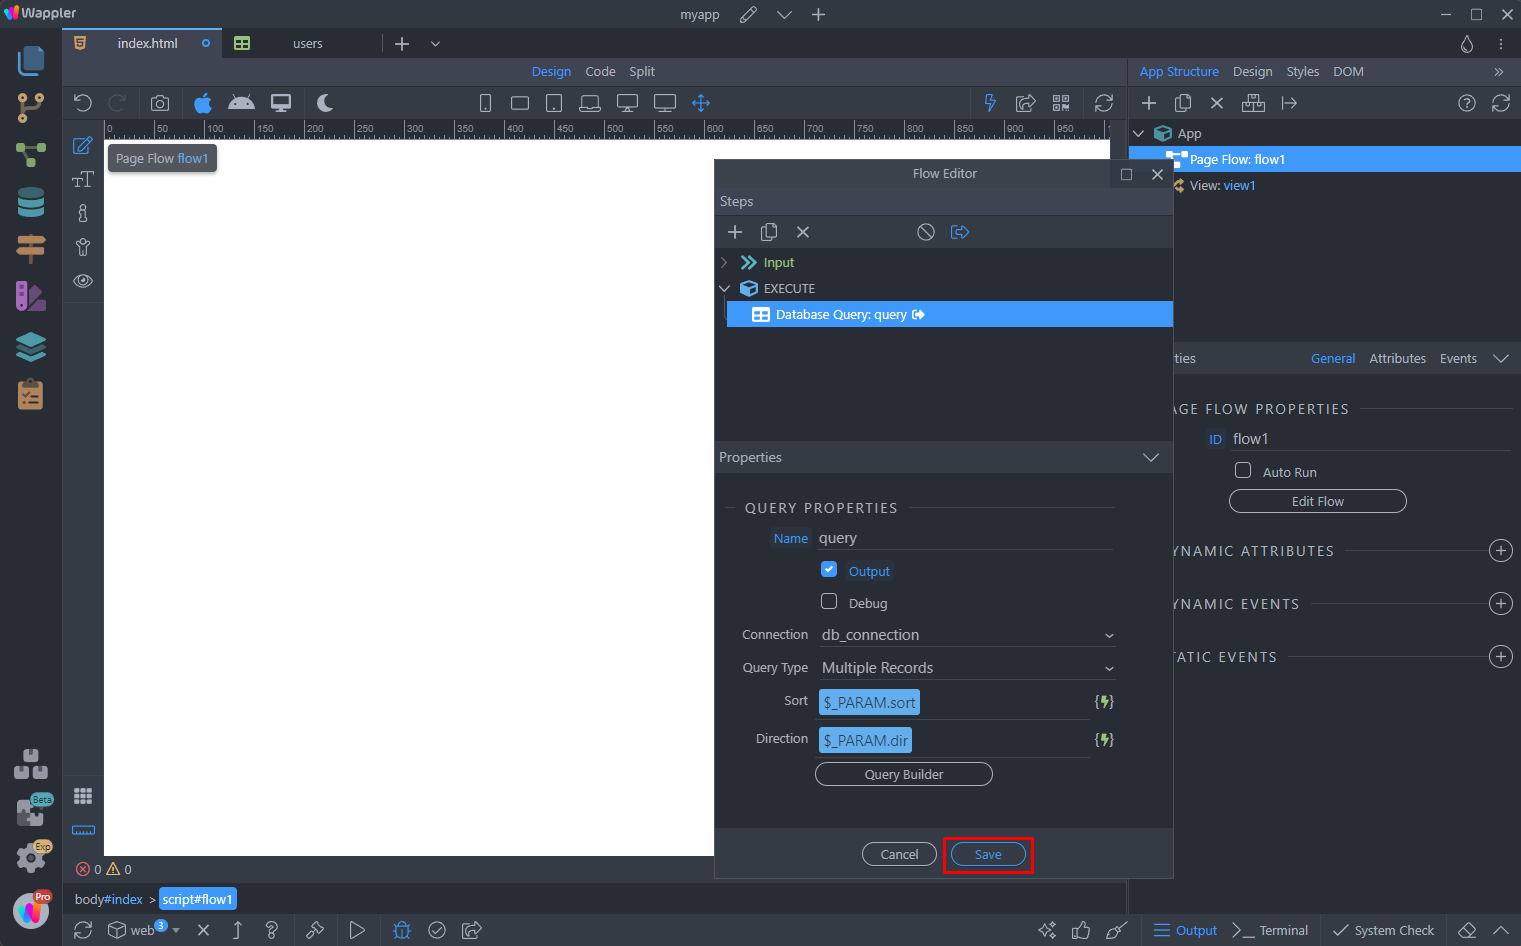
Step 34
Section titled “Step 34”We will use this flow to display the data on the page, so we need it to auto run on app load. So we check the Auto Run checkbox:
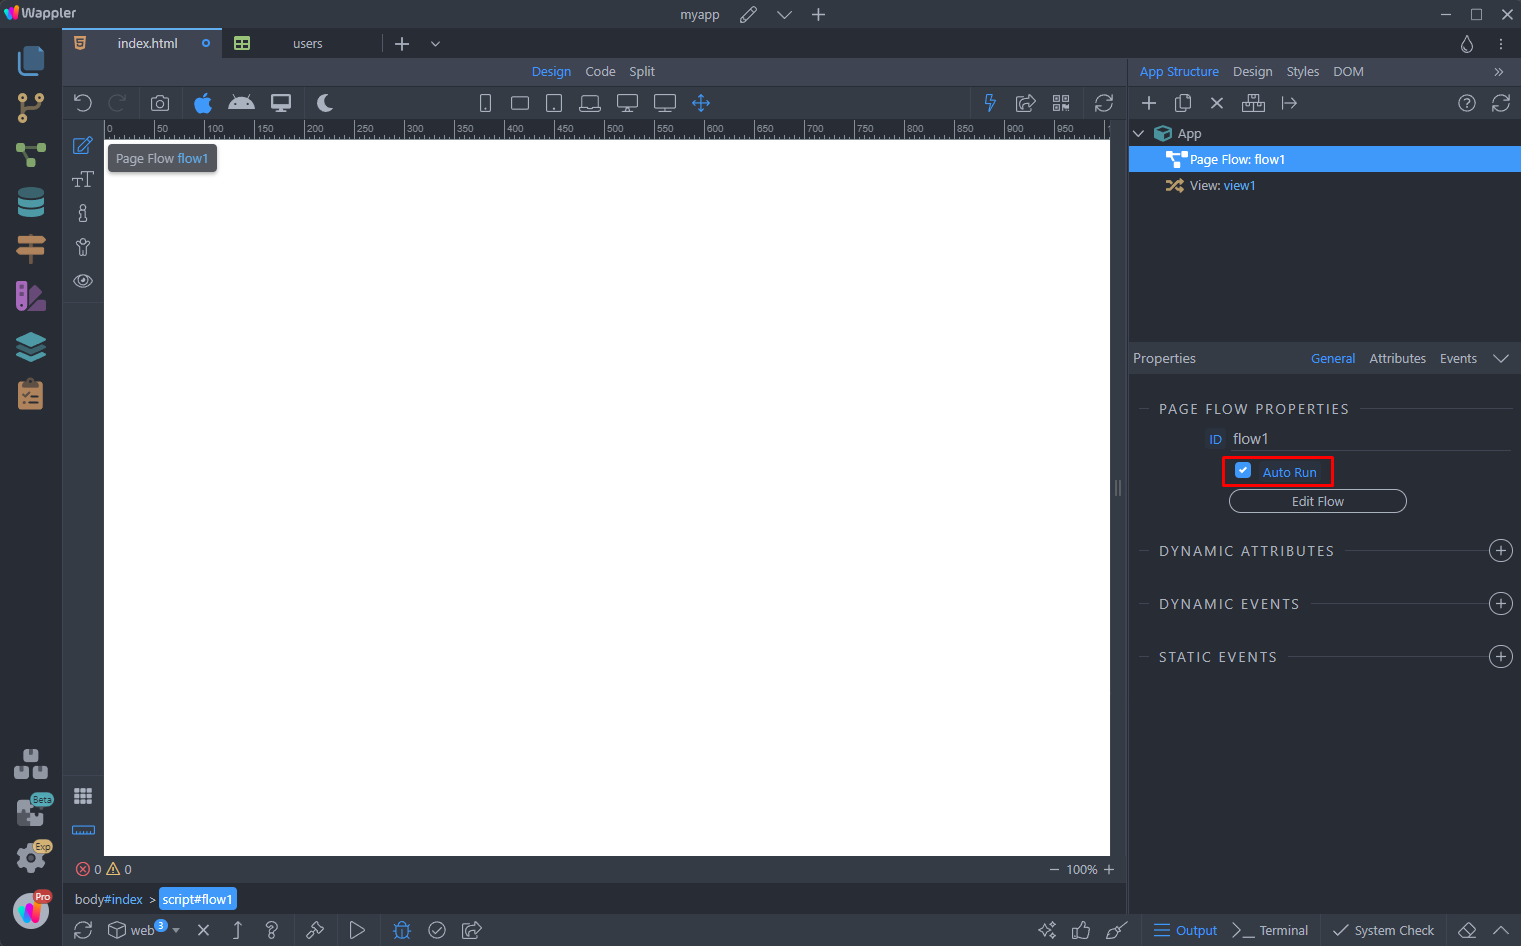
Step 35
Section titled “Step 35”You can display the data on the page in any repeat region or any structure you like. We will display it in a dynamic table. Add new component:
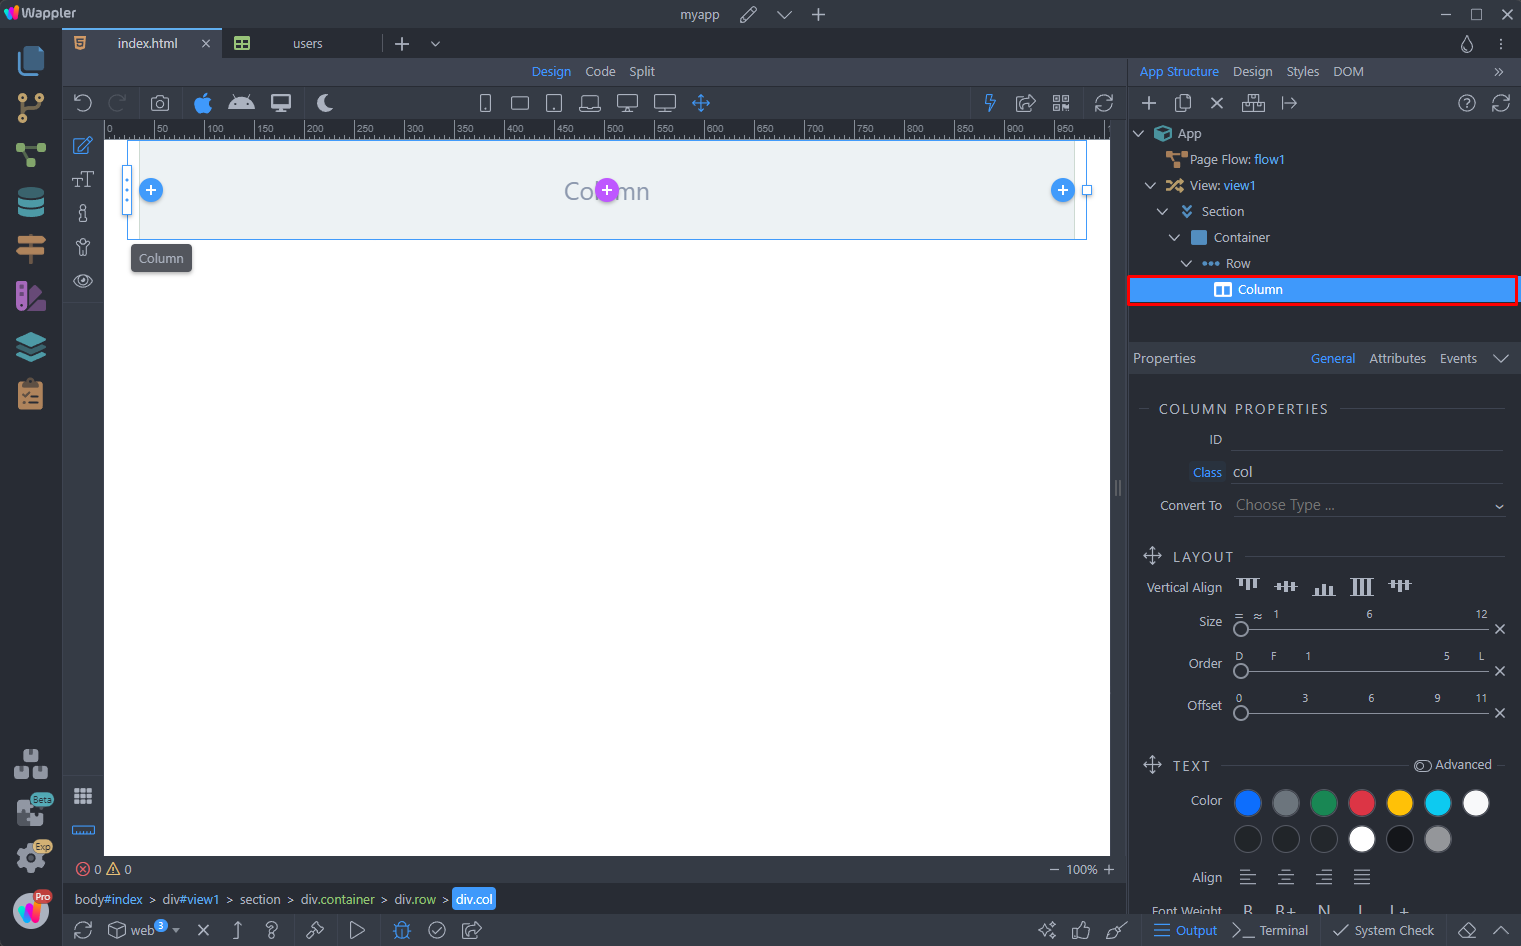
Select the Bootstrap Table Generator:
Section titled “Select the Bootstrap Table Generator:”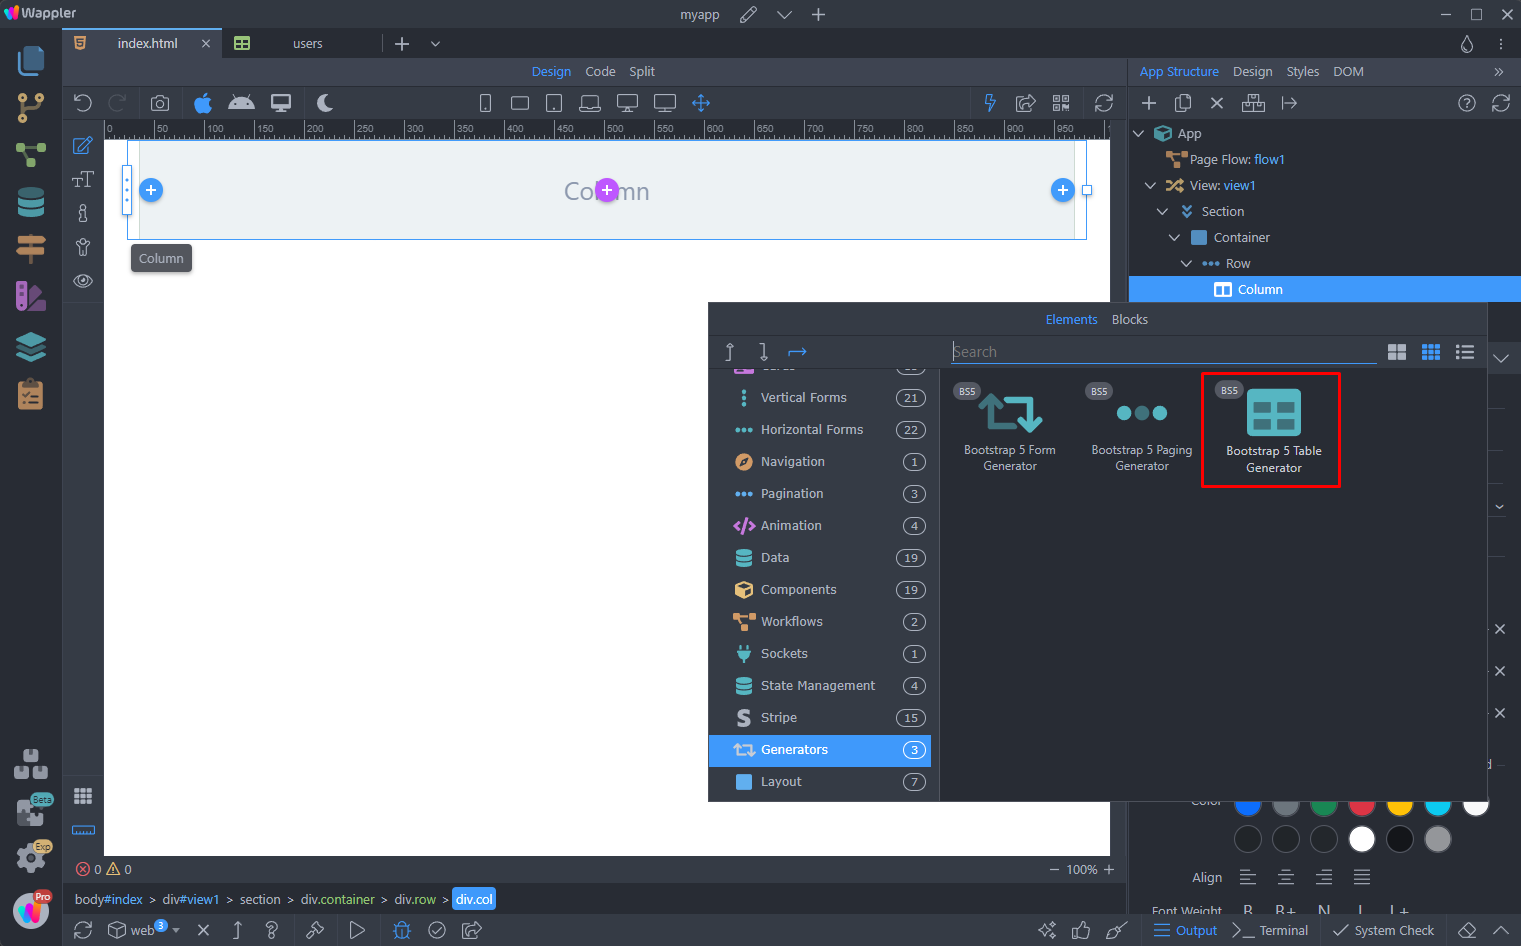
Then select the data to be used for the dynamic table:
Section titled “Then select the data to be used for the dynamic table:”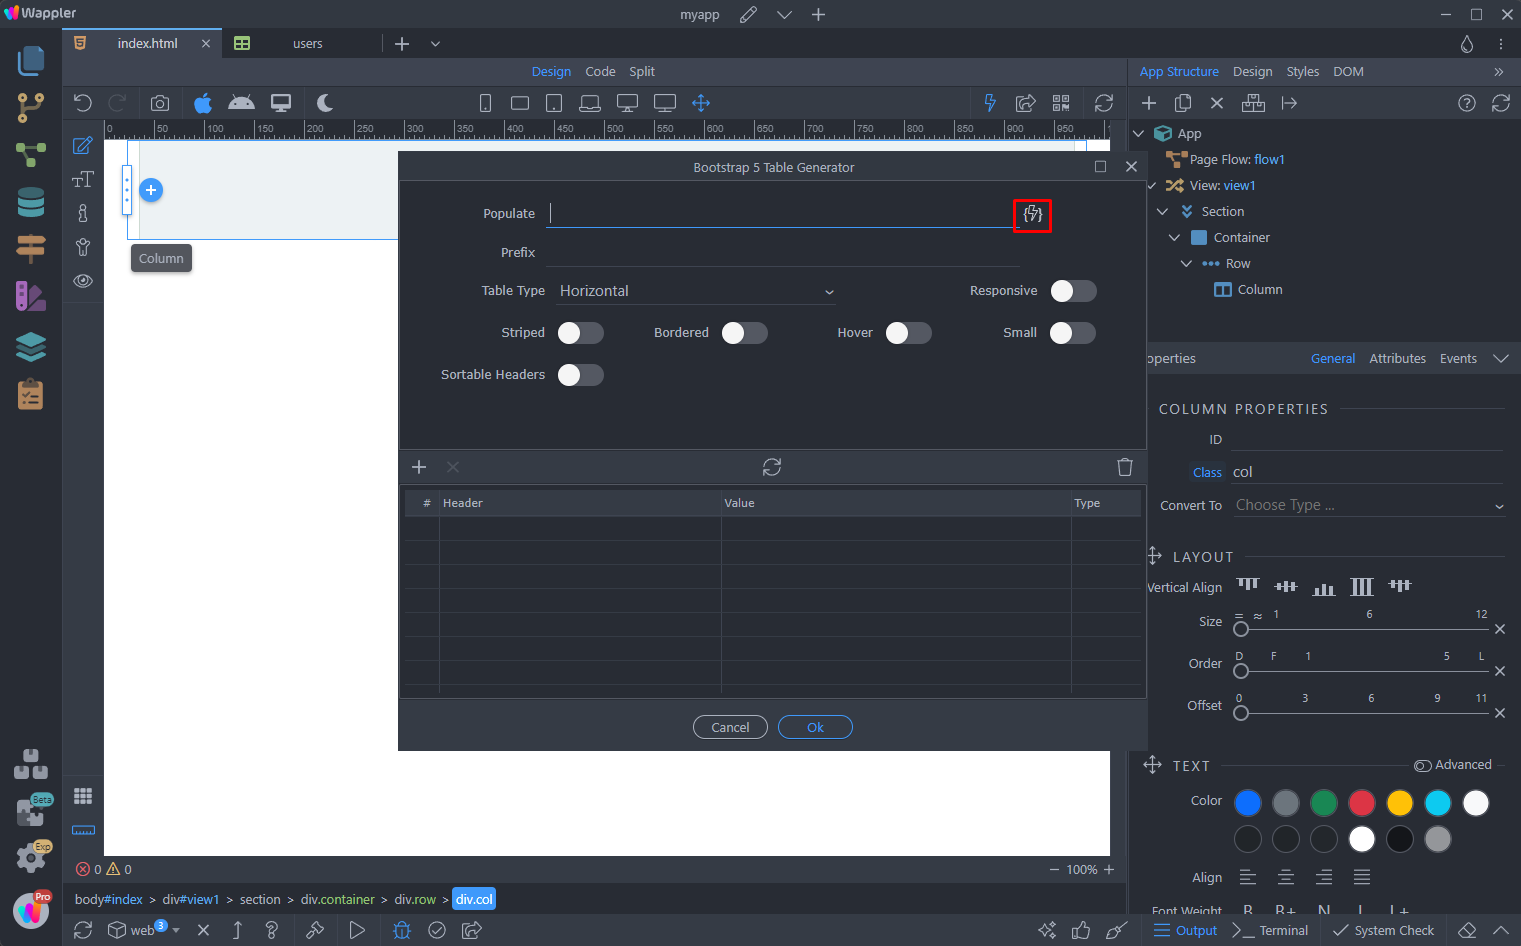
Under the page flow we created, select data > query:
Section titled “Under the page flow we created, select data > query:”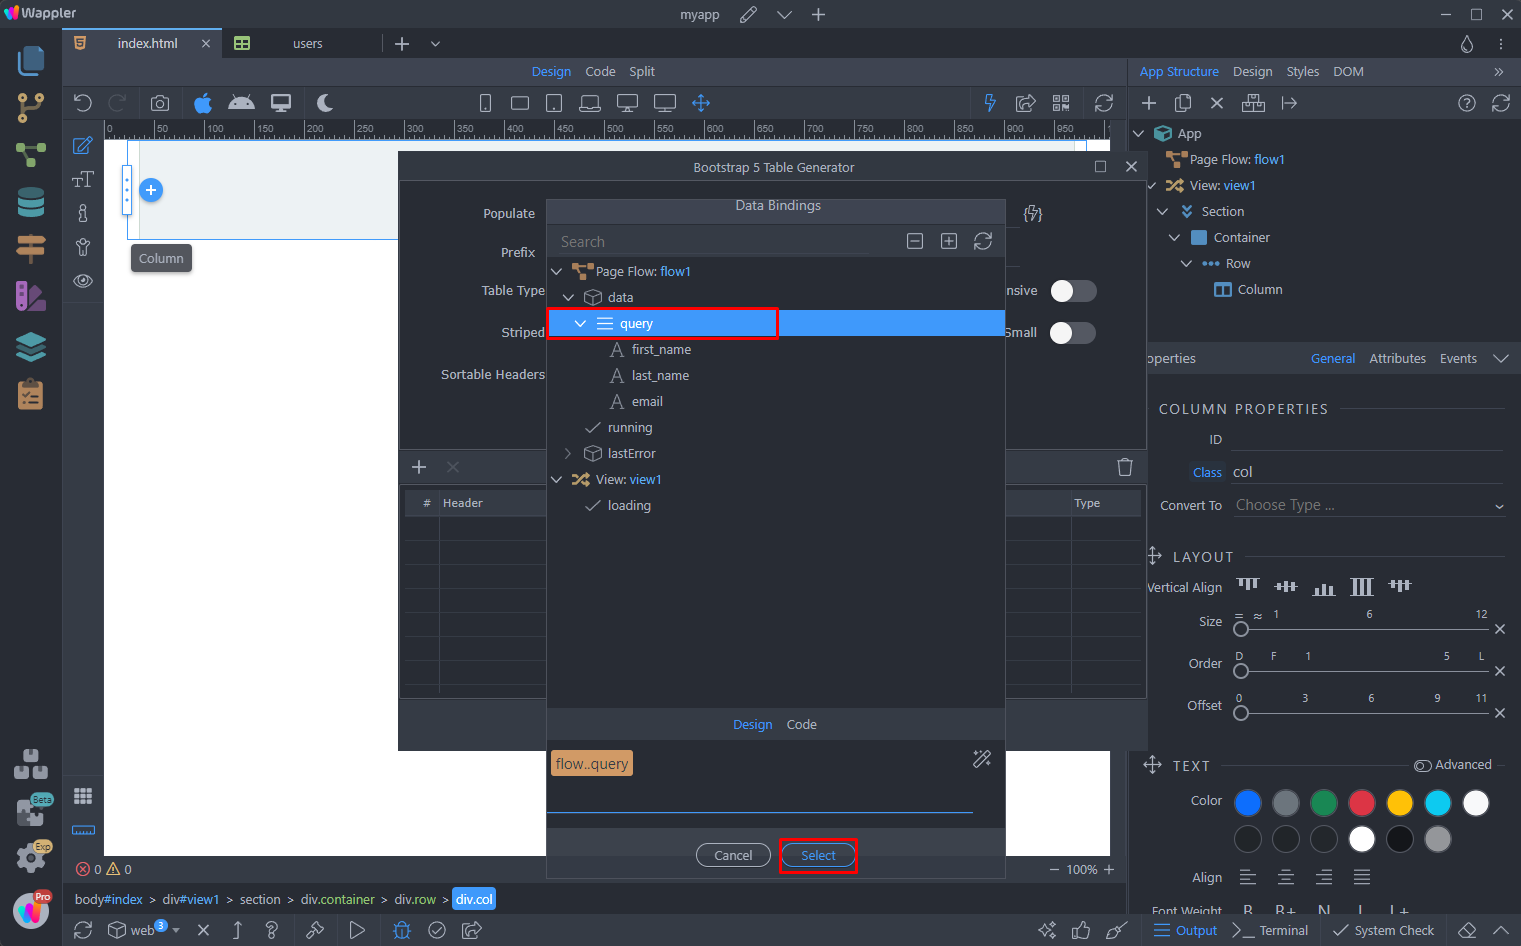
Setup your dynamic table look and field and click OK:
Section titled “Setup your dynamic table look and field and click OK:”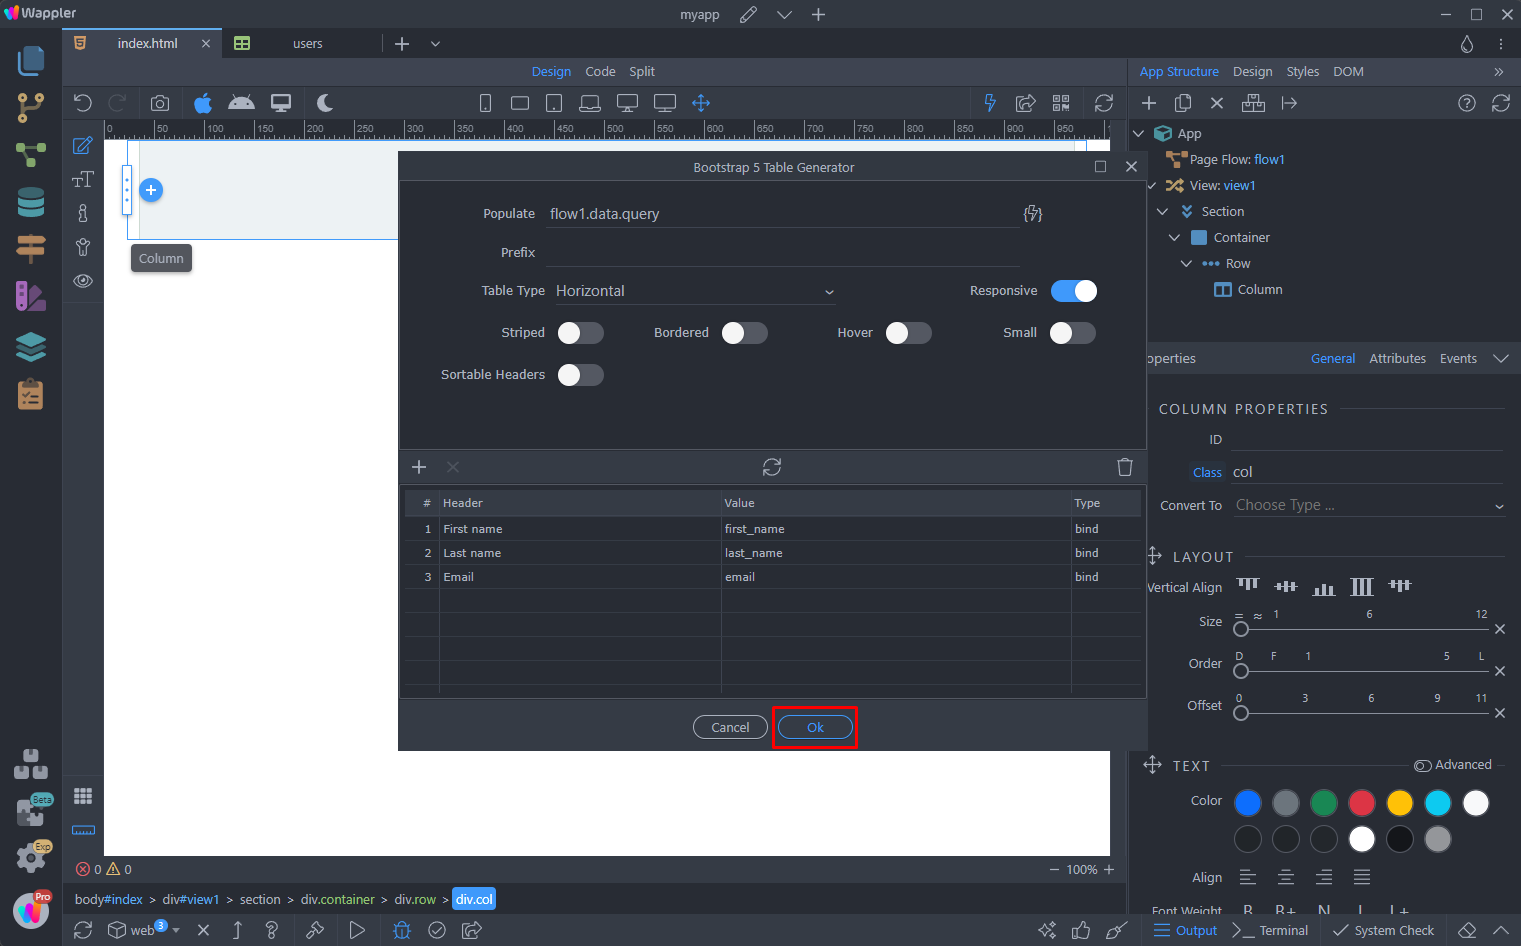
And you are done. You can see the data rendered in our app:
Section titled “And you are done. You can see the data rendered in our app:”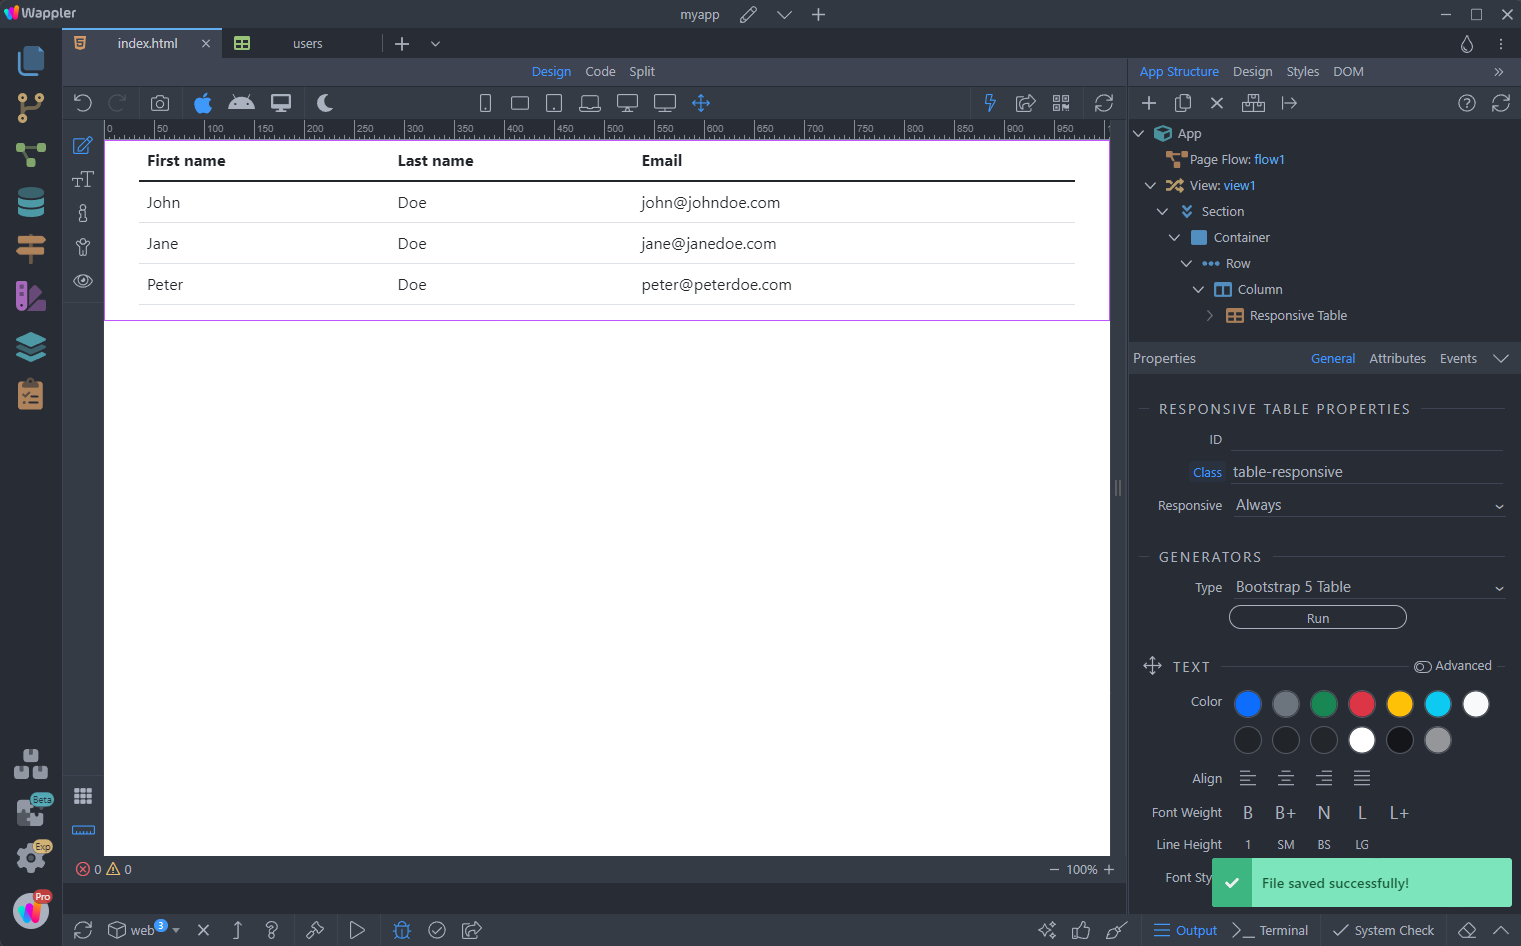
Inserting Data
Section titled “Inserting Data”You can also insert data in the local SQLite database, in a way very similar to how you do this in Server Connect.
We created a very basic form, containing 3 inputs - first_name, last_name and email. The form should not be a server connect form, as we are not using any server actions here:
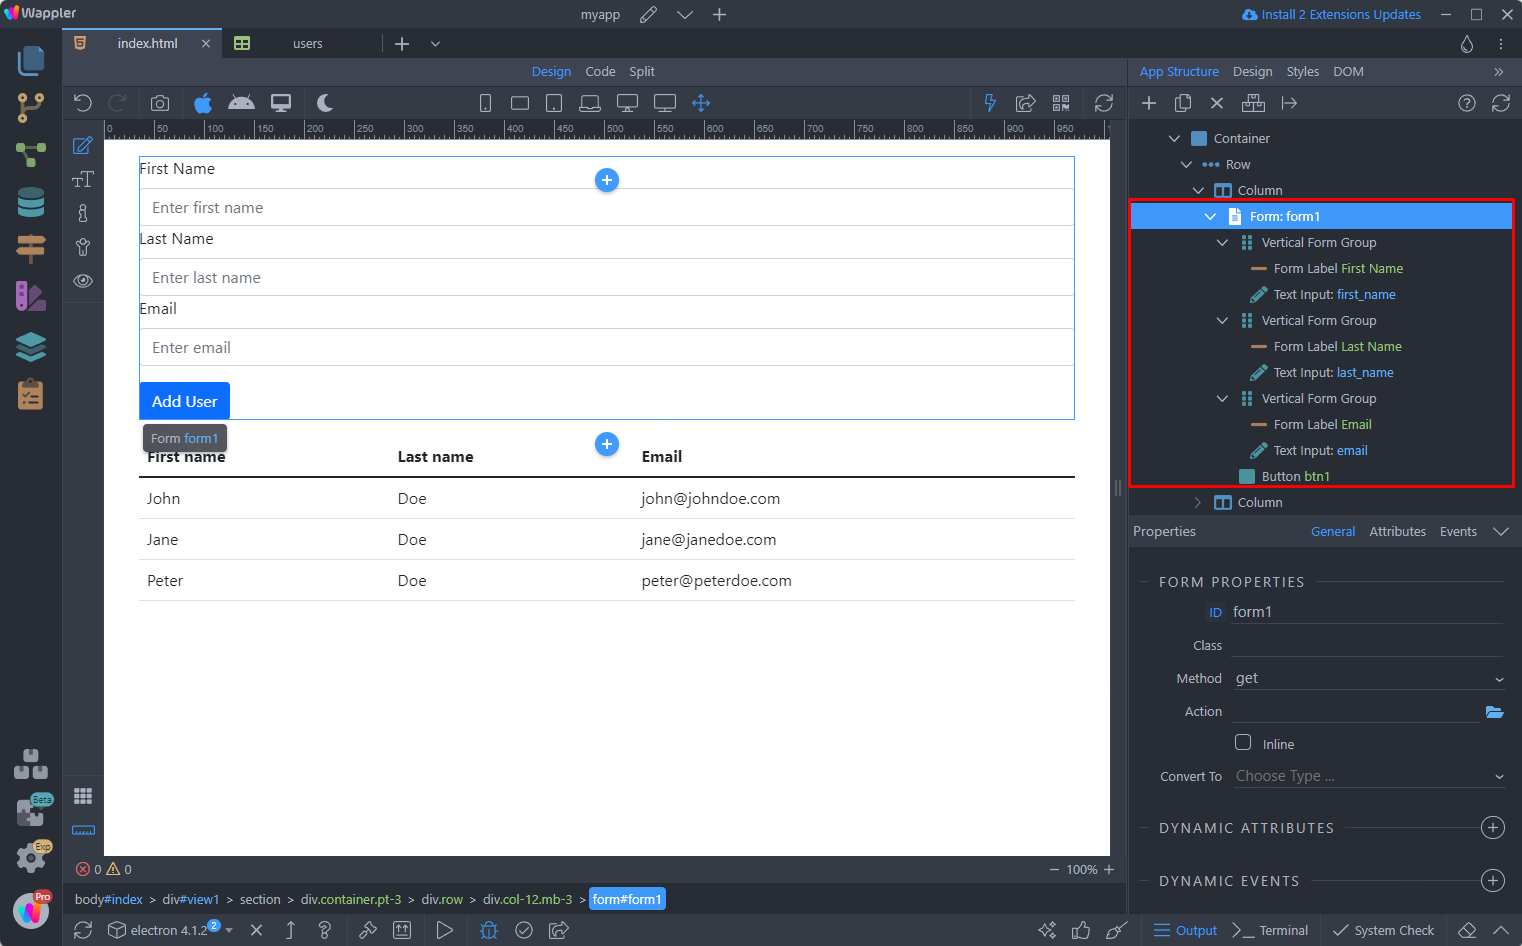
The form also contains a button. Note that this is not a submit button, but a regular button:
Section titled “The form also contains a button. Note that this is not a submit button, but a regular button:”
Right click app structure and add a new page flow:
Section titled “Right click app structure and add a new page flow:”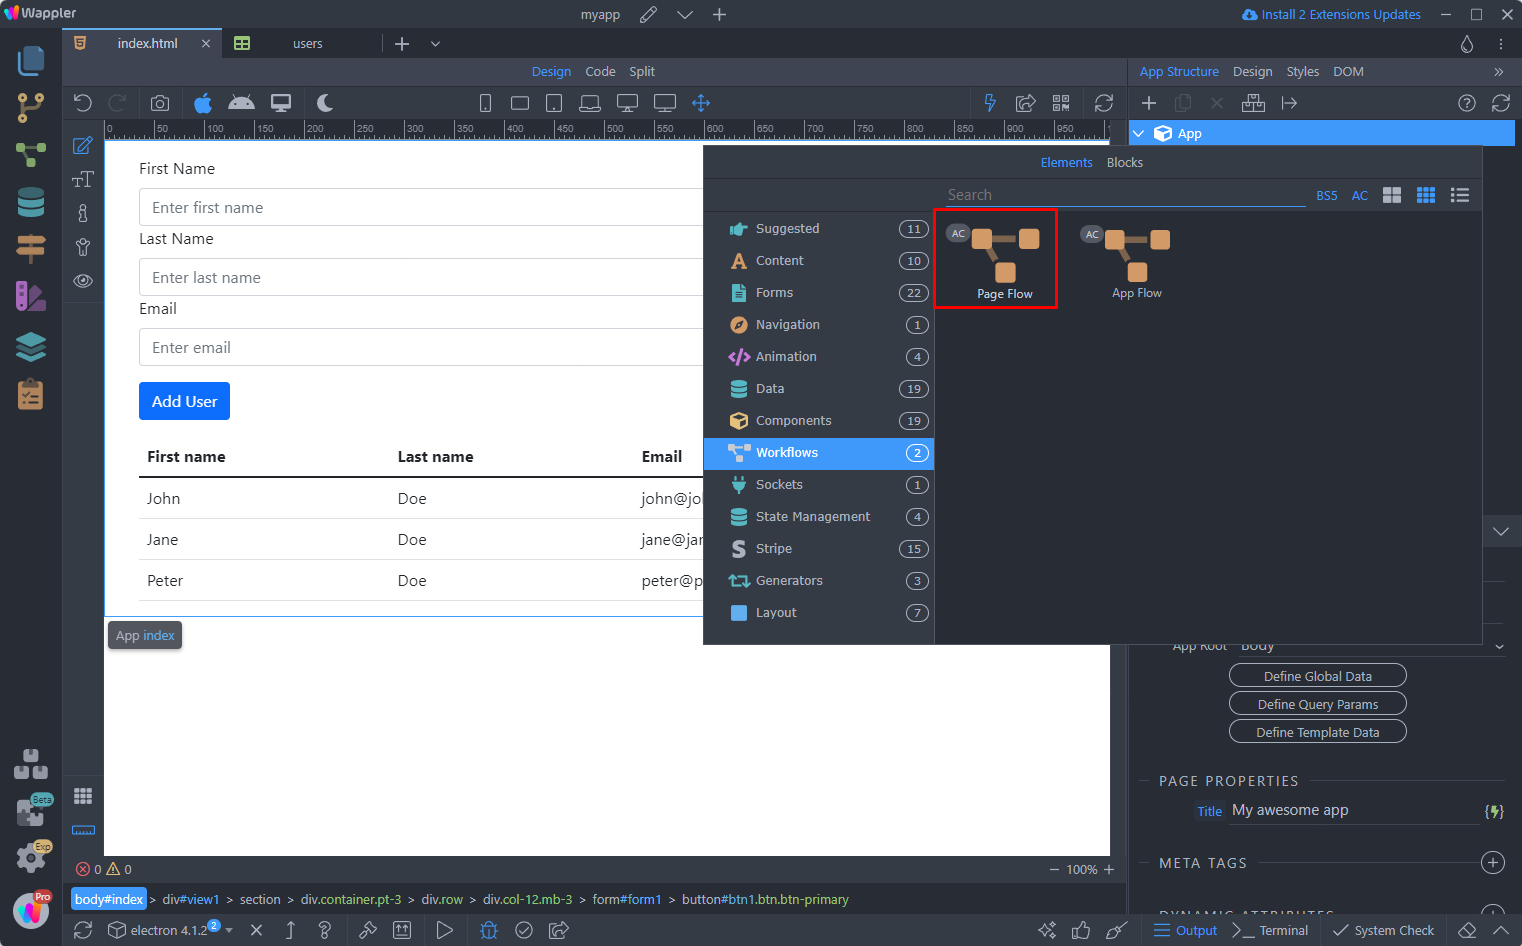
Edit Flow:
Section titled “Edit Flow:”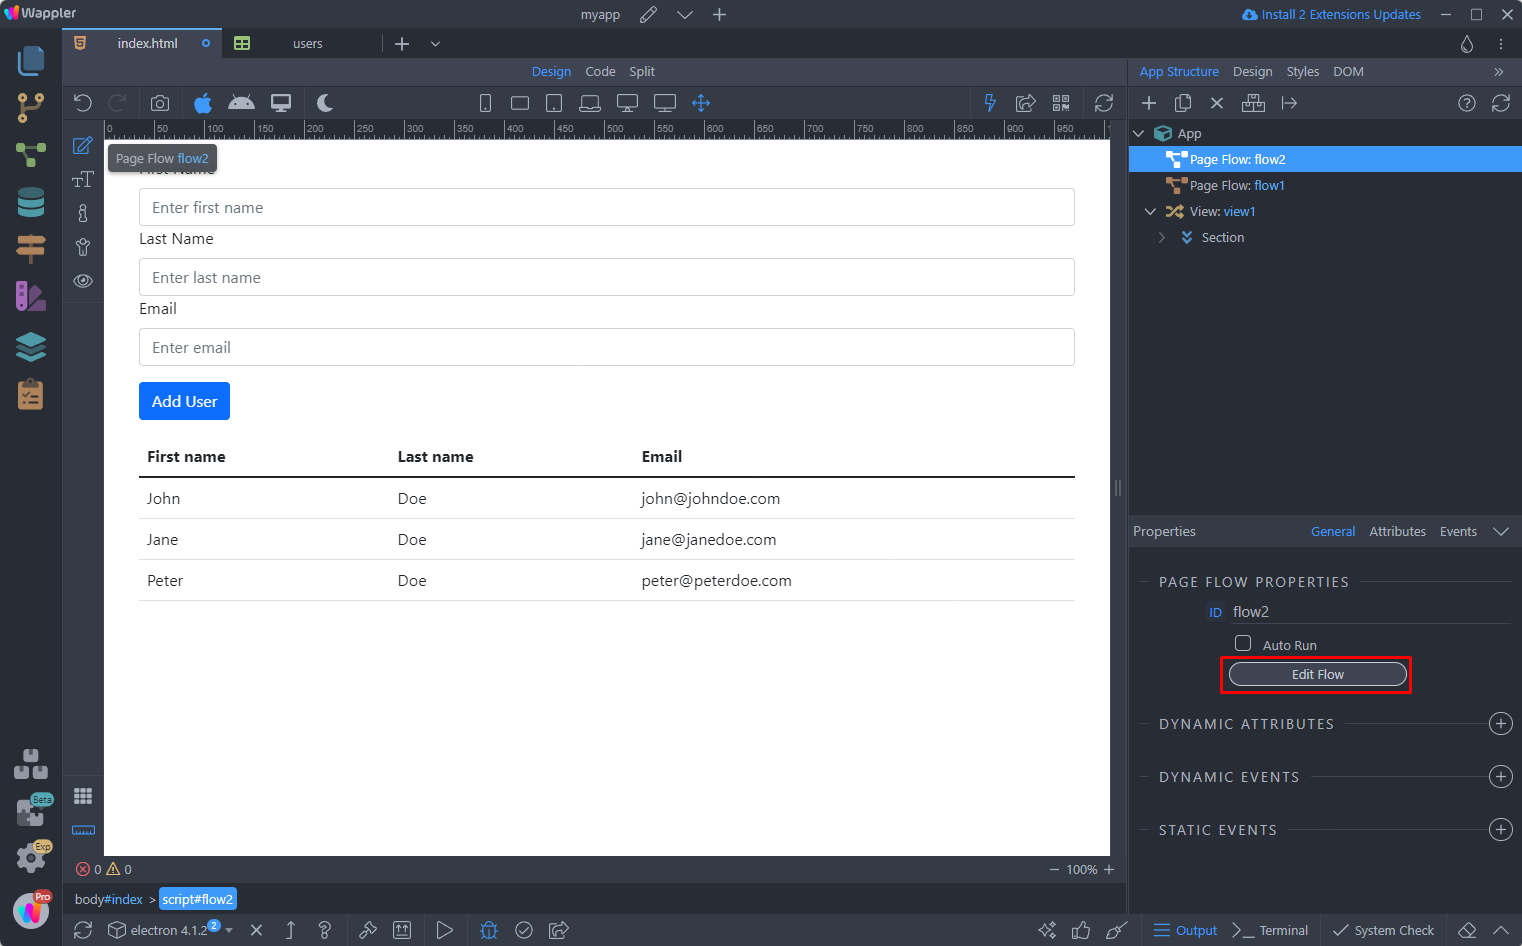
Add a new step in the flow:
Section titled “Add a new step in the flow:”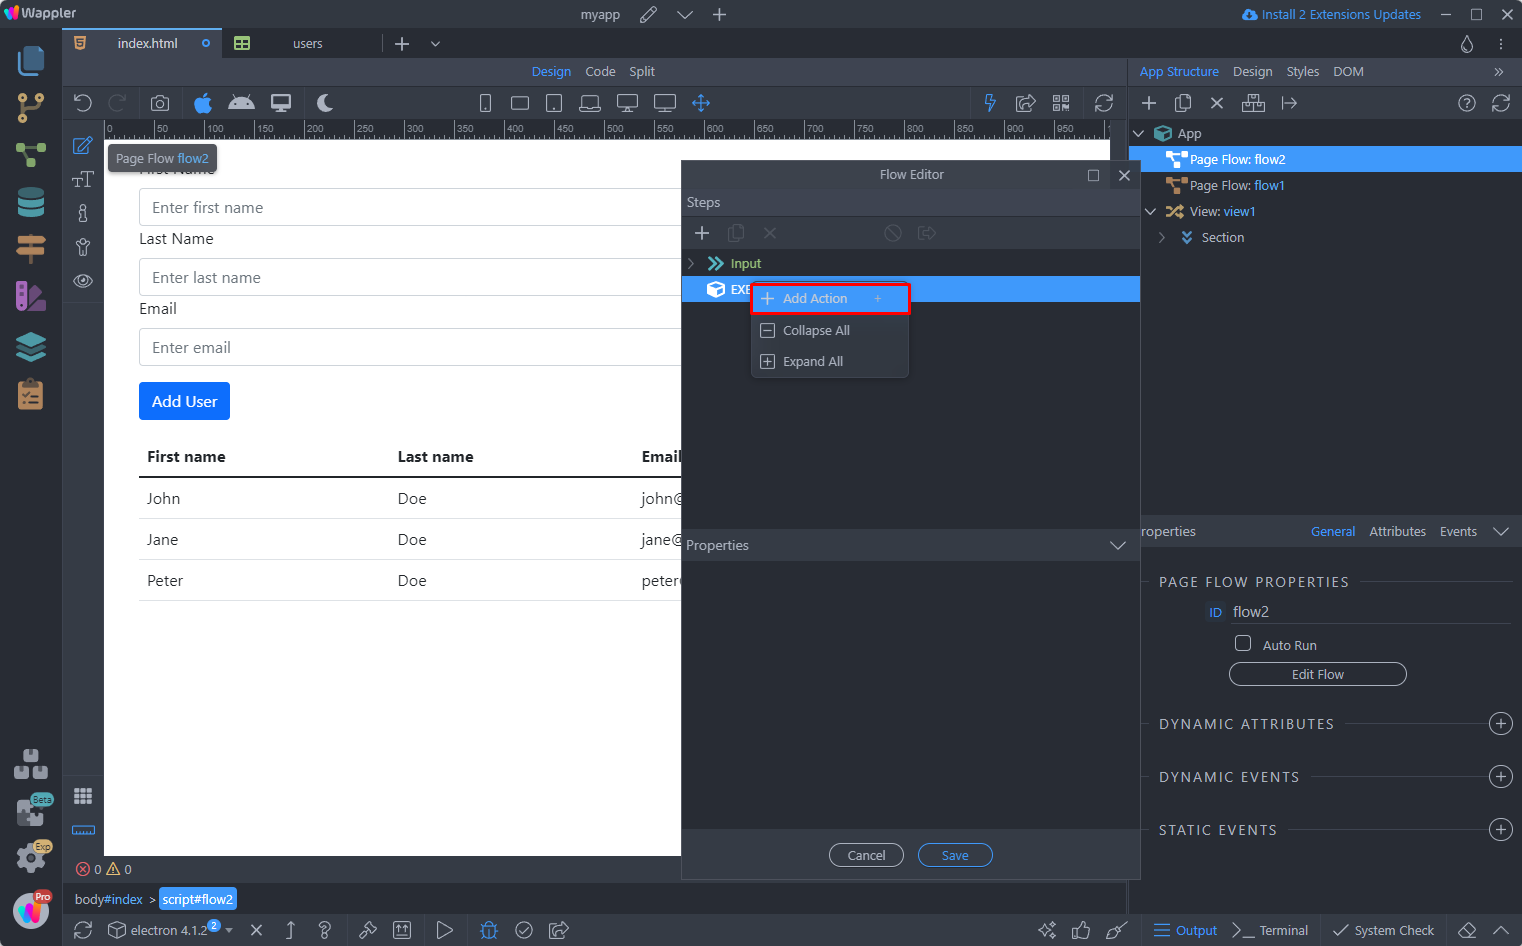
Select Database Actions > Database Insert
Section titled “Select Database Actions > Database Insert”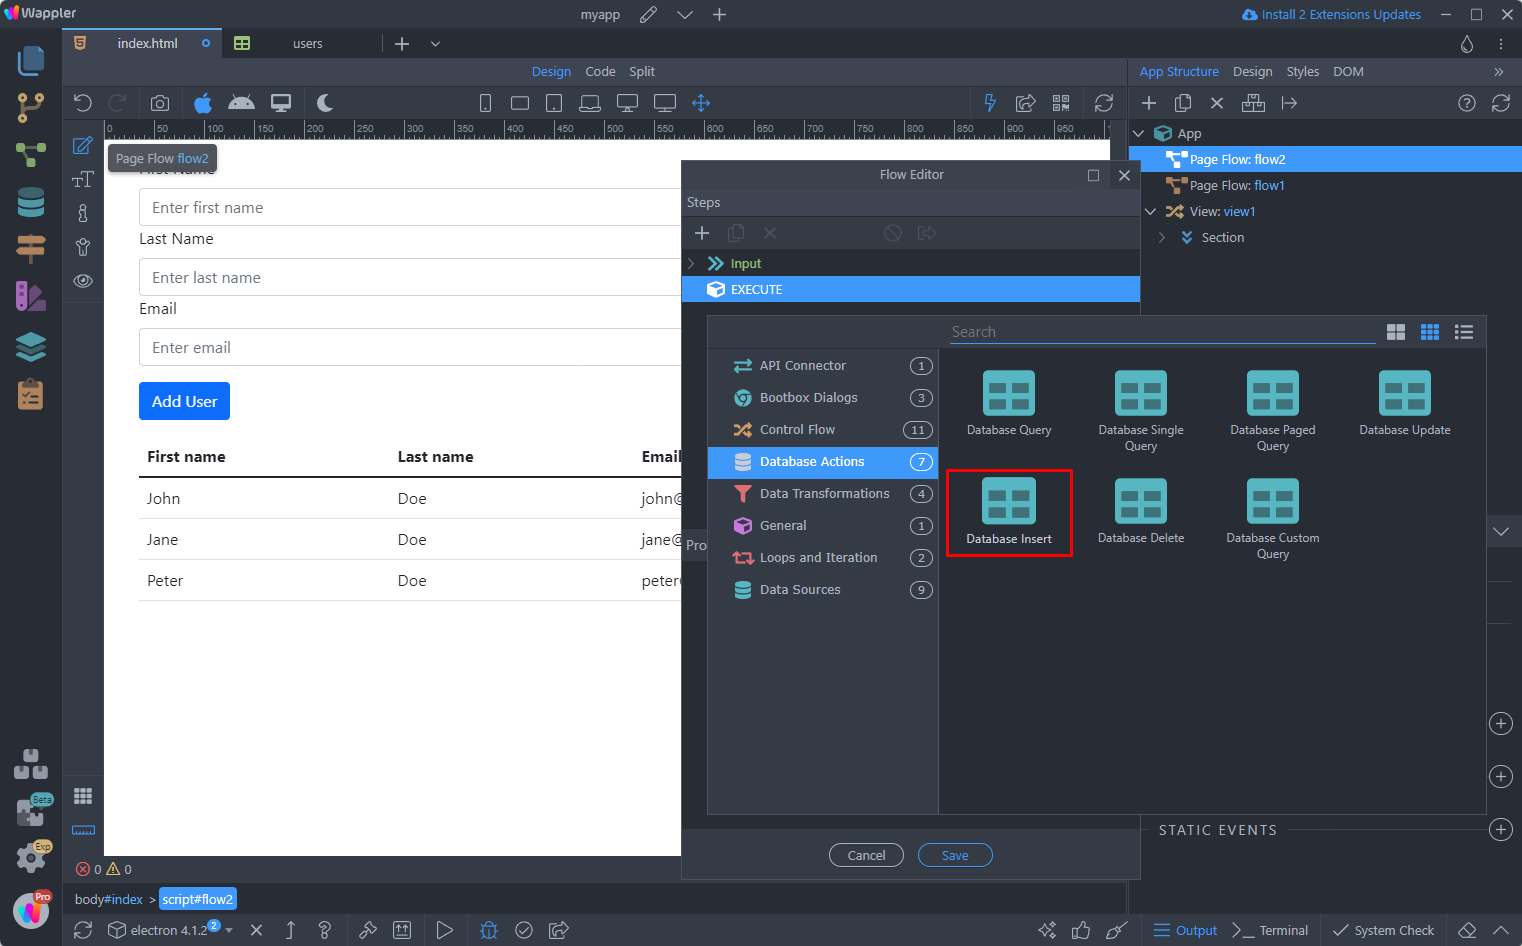
And open the Insert Options:
Section titled “And open the Insert Options:”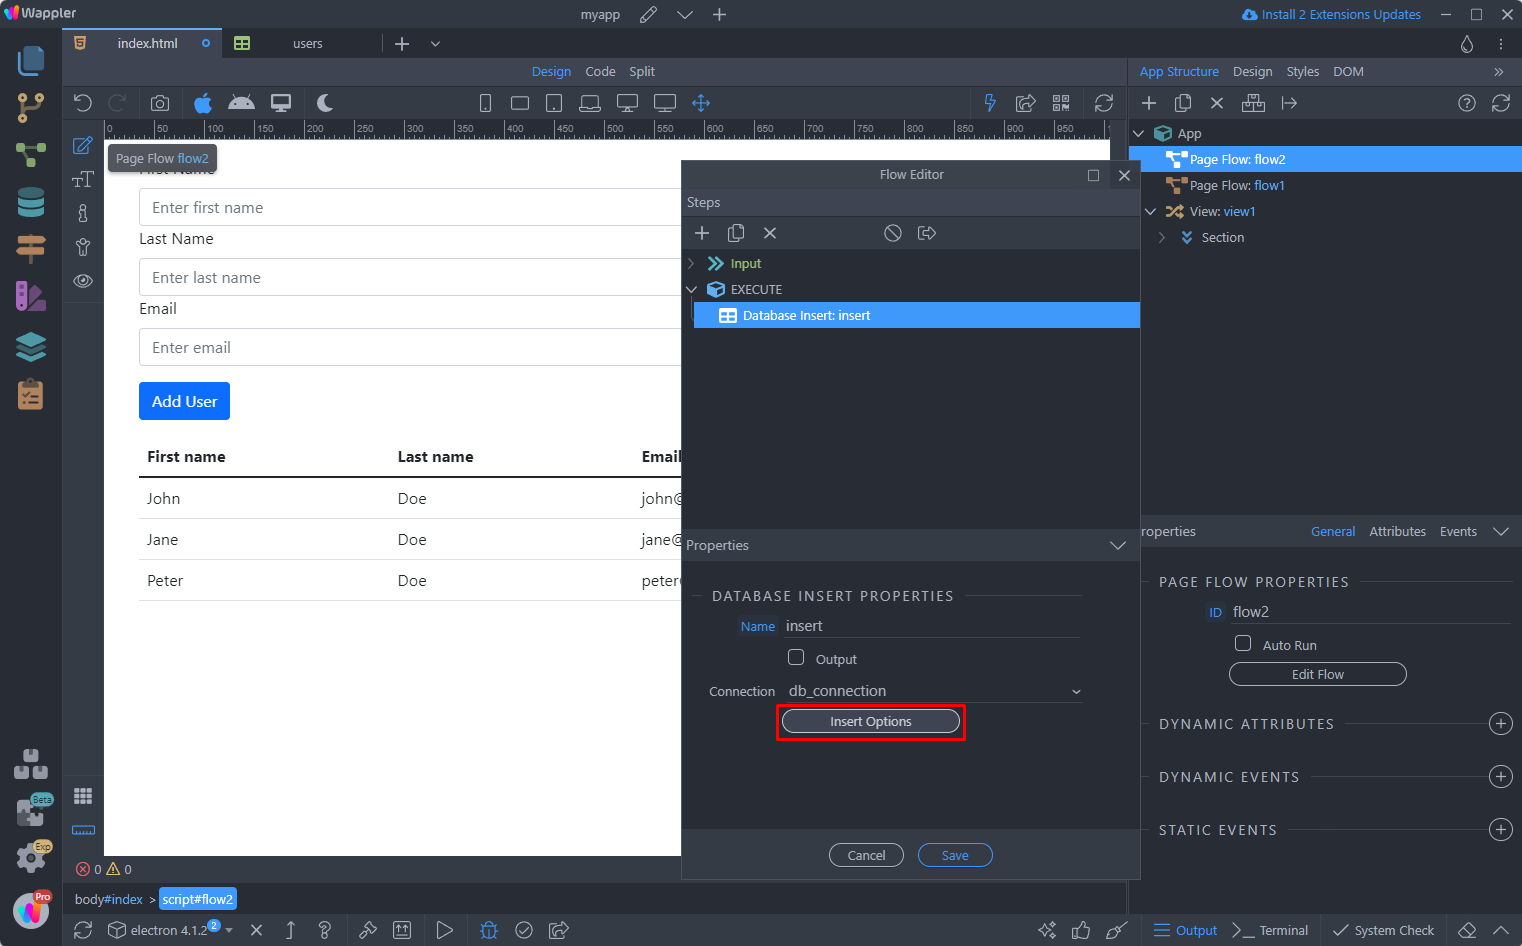
Similar to server connect insert step, we need to select the table where we want to insert the data:
Section titled “Similar to server connect insert step, we need to select the table where we want to insert the data:”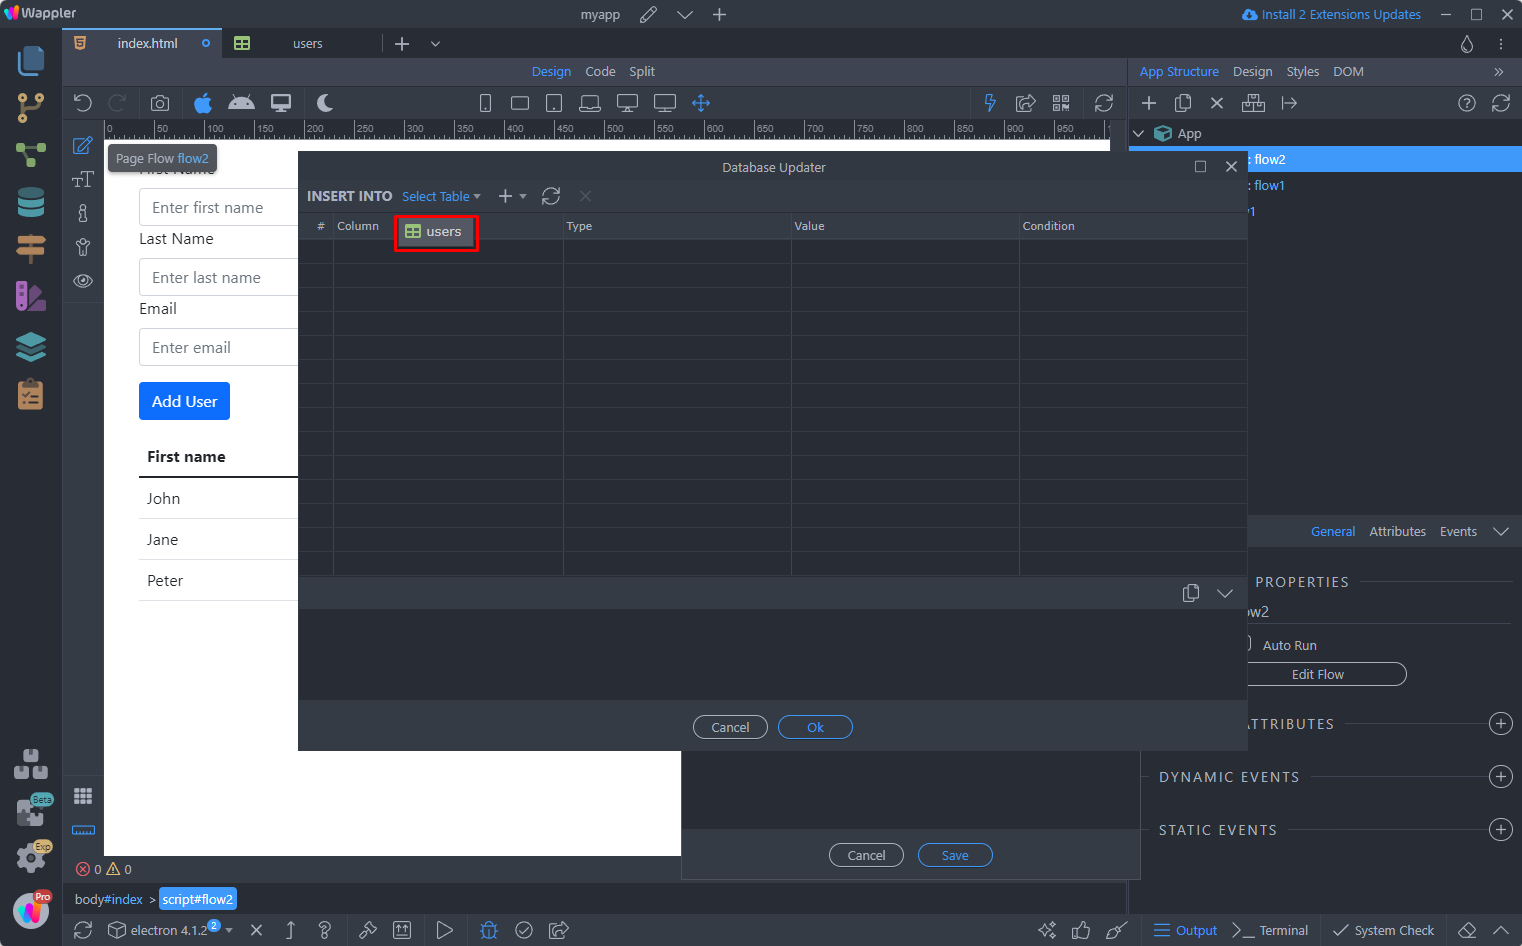
Click the dynamic data picker to select the data for the first name column:
Section titled “Click the dynamic data picker to select the data for the first name column:”
We select the first_name field from our form on the page:
Section titled “We select the first_name field from our form on the page:”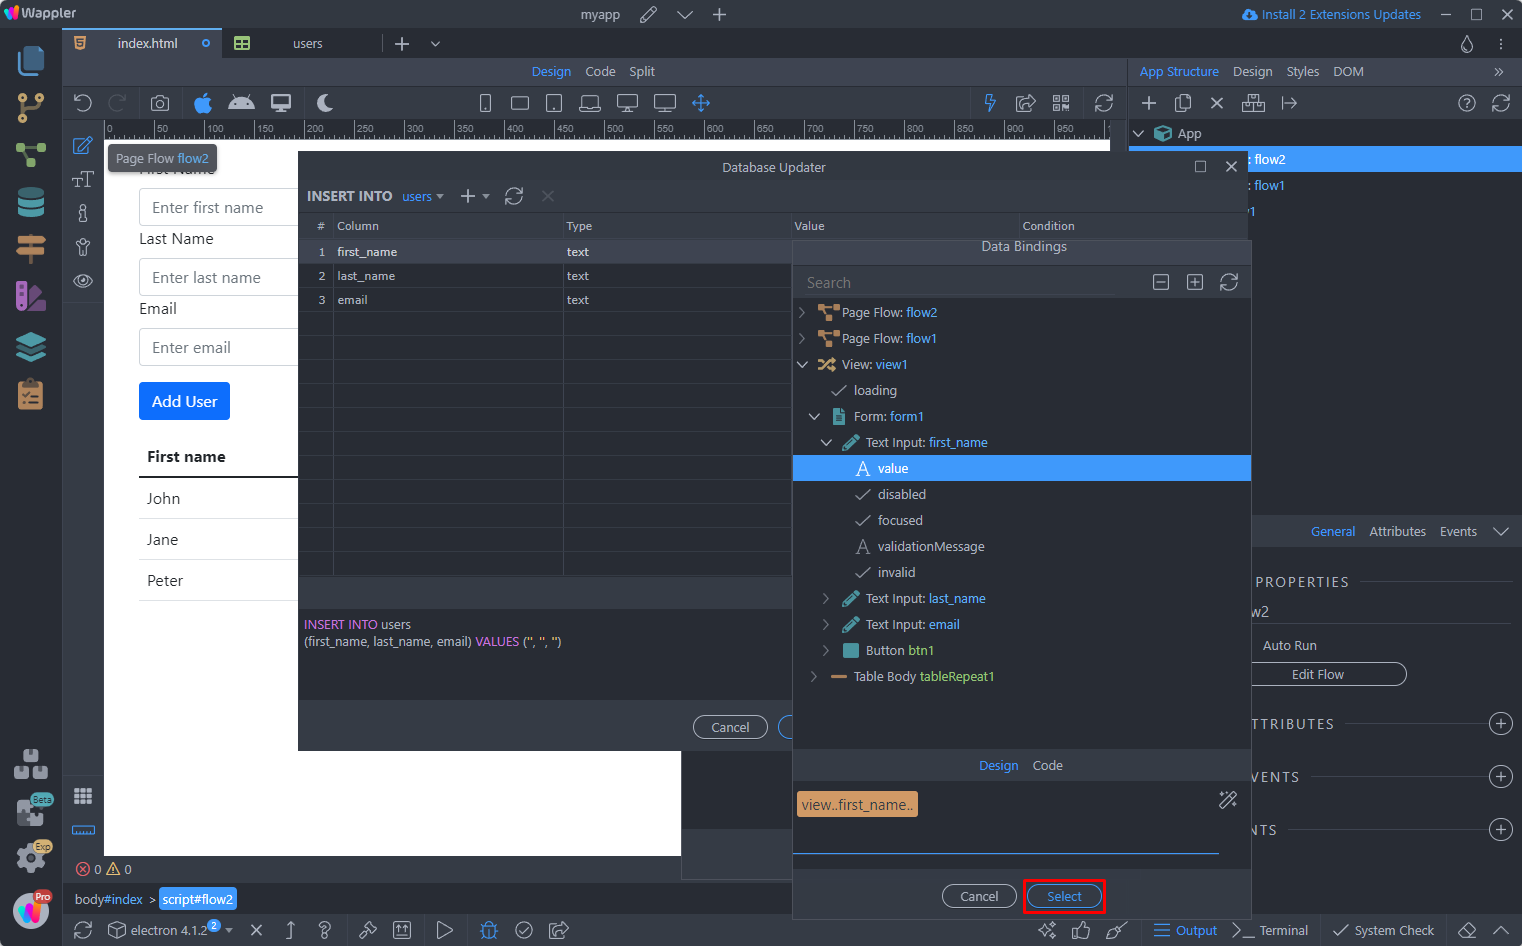
We do the same for the rest of the fields:
Section titled “We do the same for the rest of the fields:”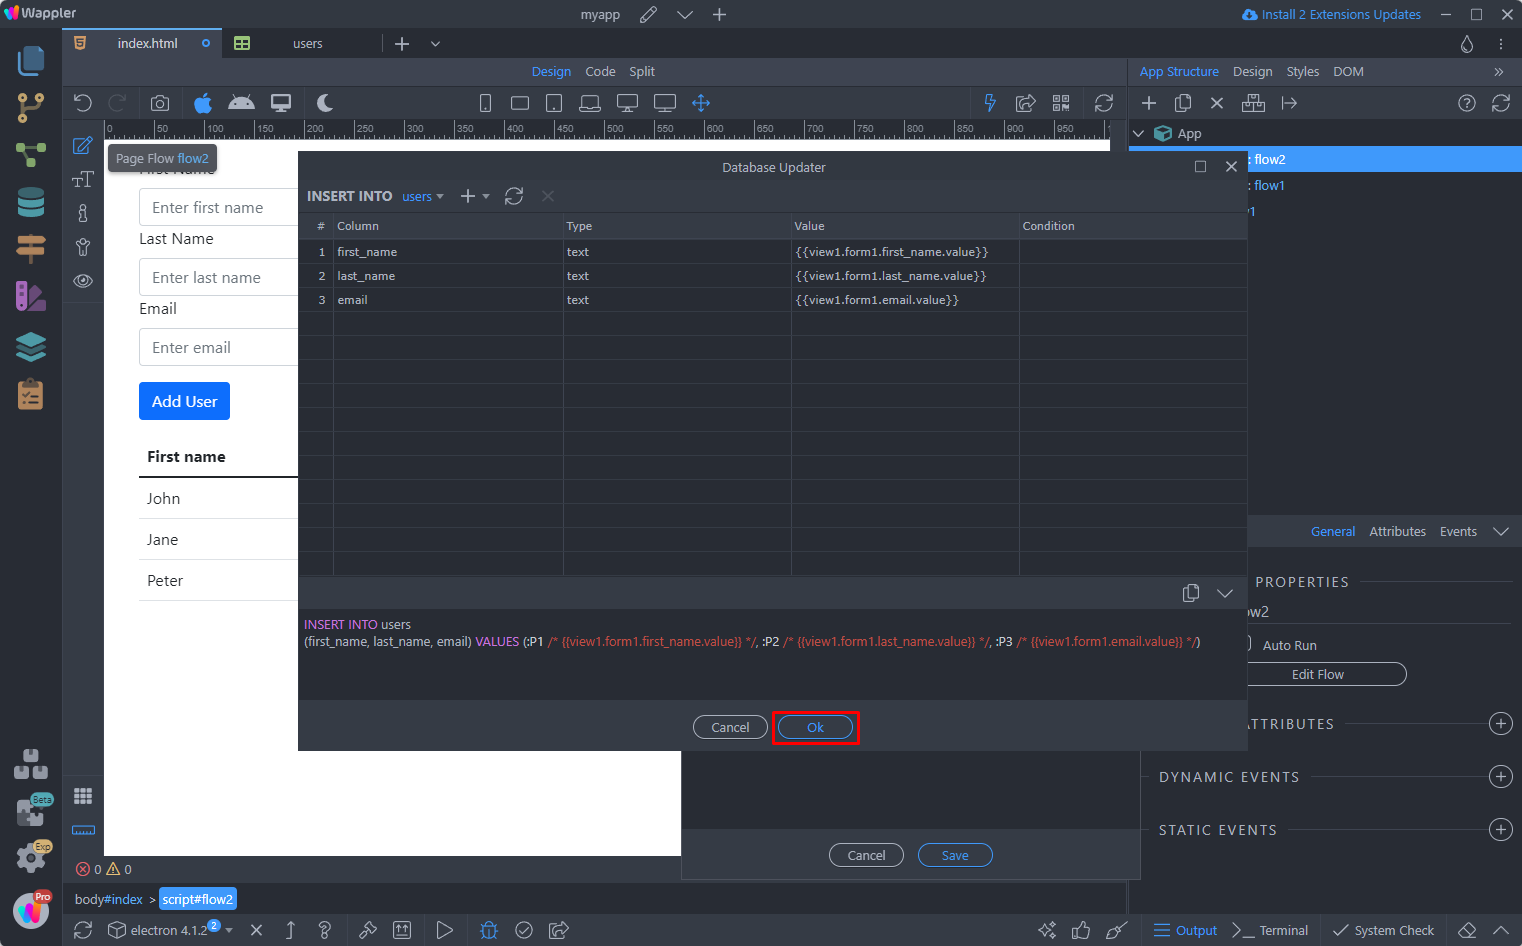
Then we want to reload the dynamic data on the page, after we insert the new records, so we add a new step:
Section titled “Then we want to reload the dynamic data on the page, after we insert the new records, so we add a new step:”
Select Run:
Section titled “Select Run:”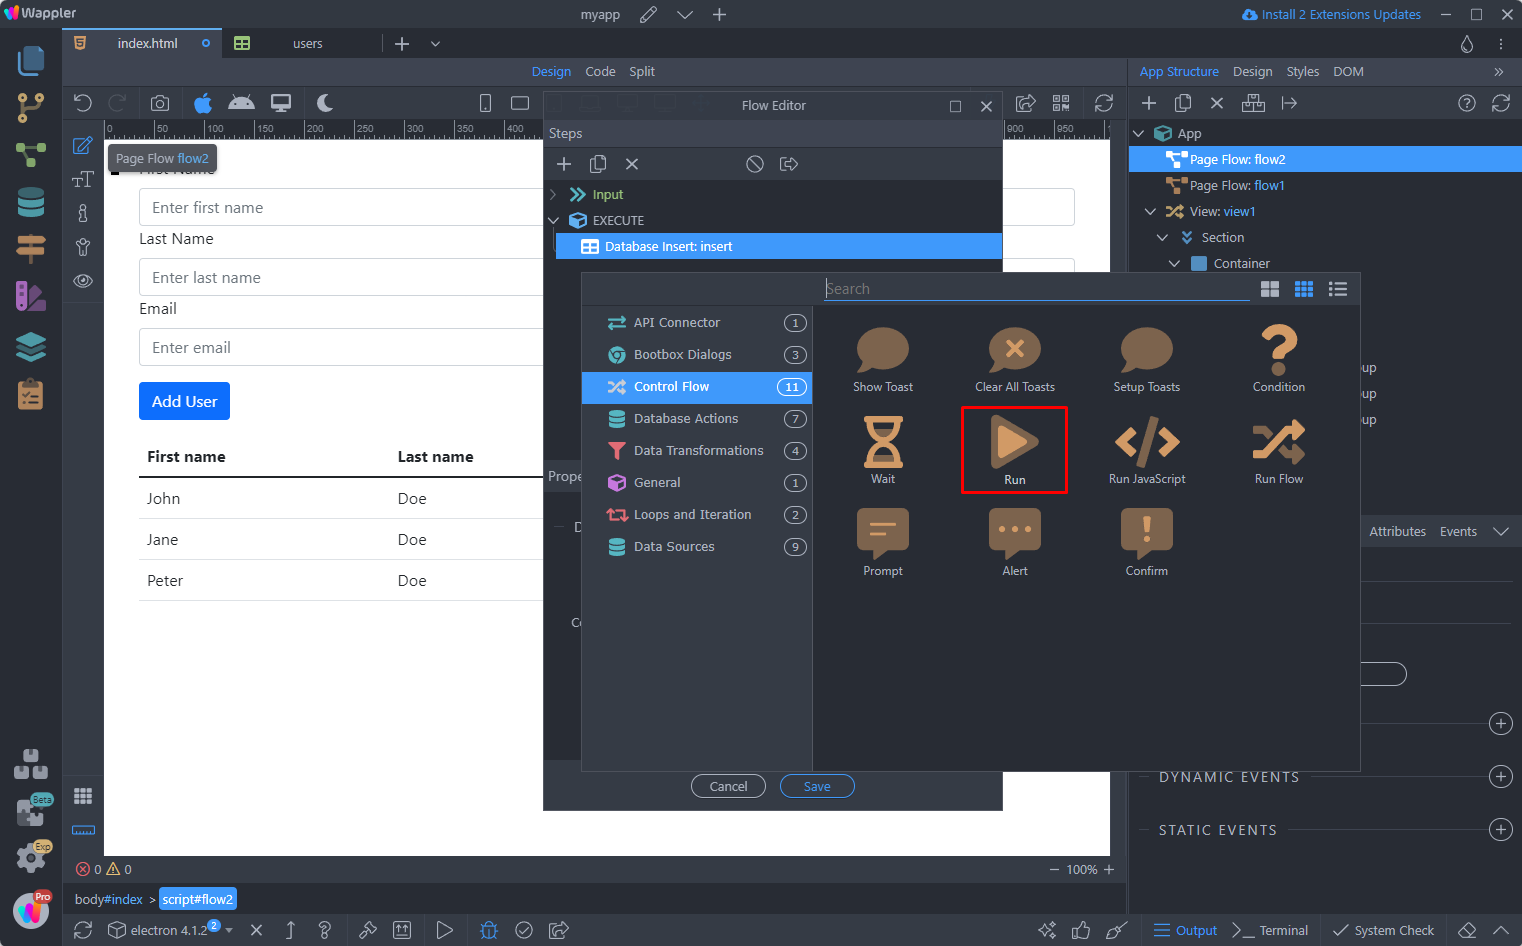
And select an action to run:
Section titled “And select an action to run:”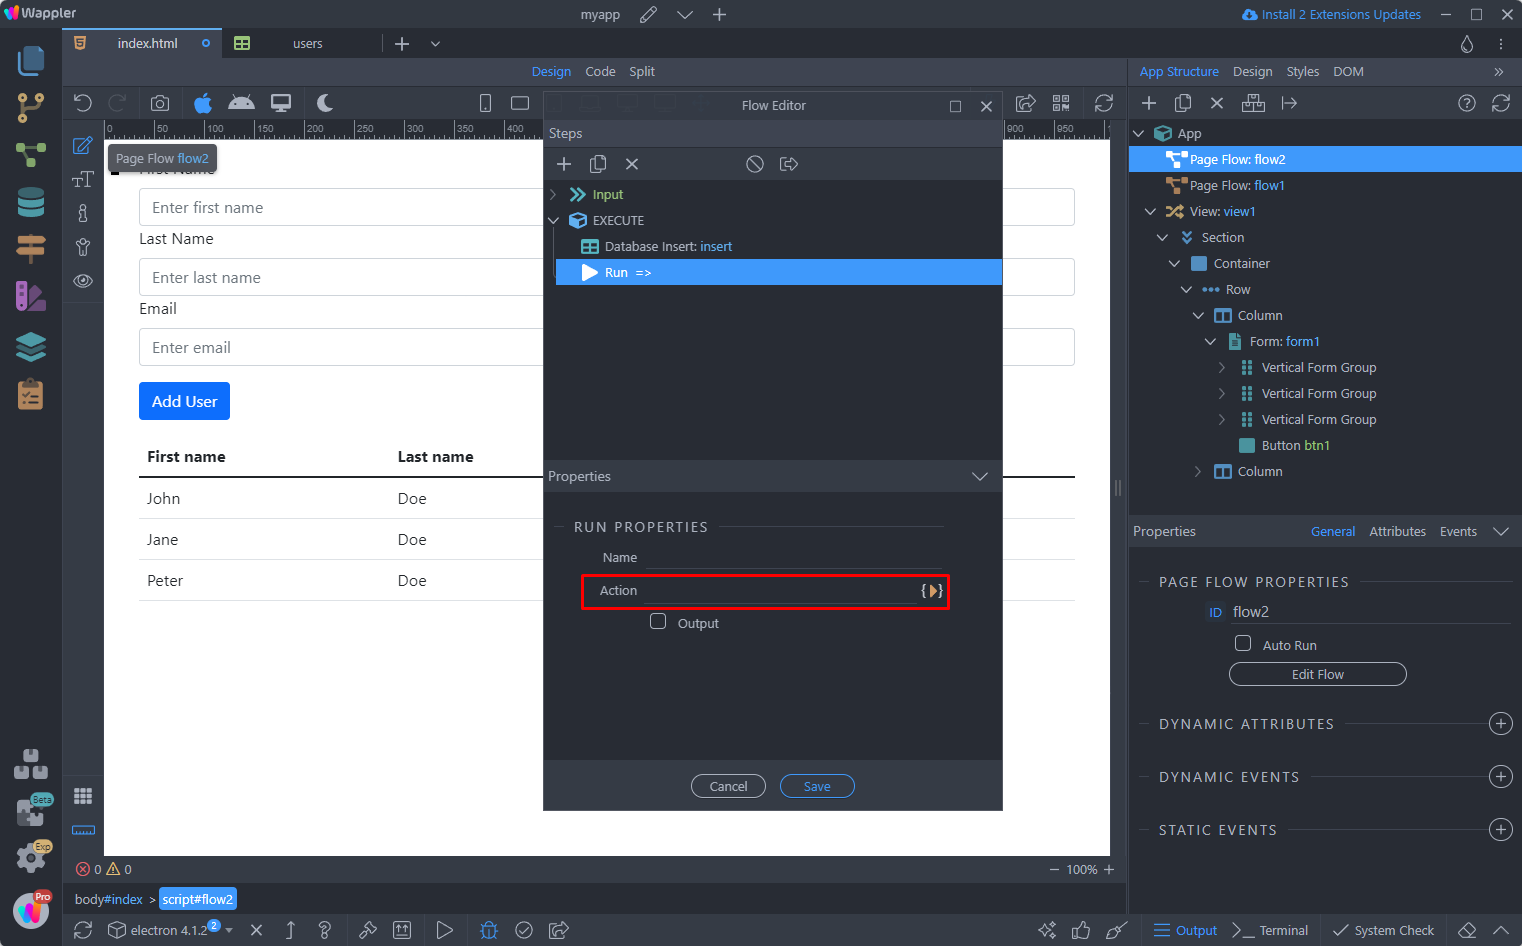
We select to run the flow, used to display the data on the page:
Section titled “We select to run the flow, used to display the data on the page:”
Click Save:
Section titled “Click Save:”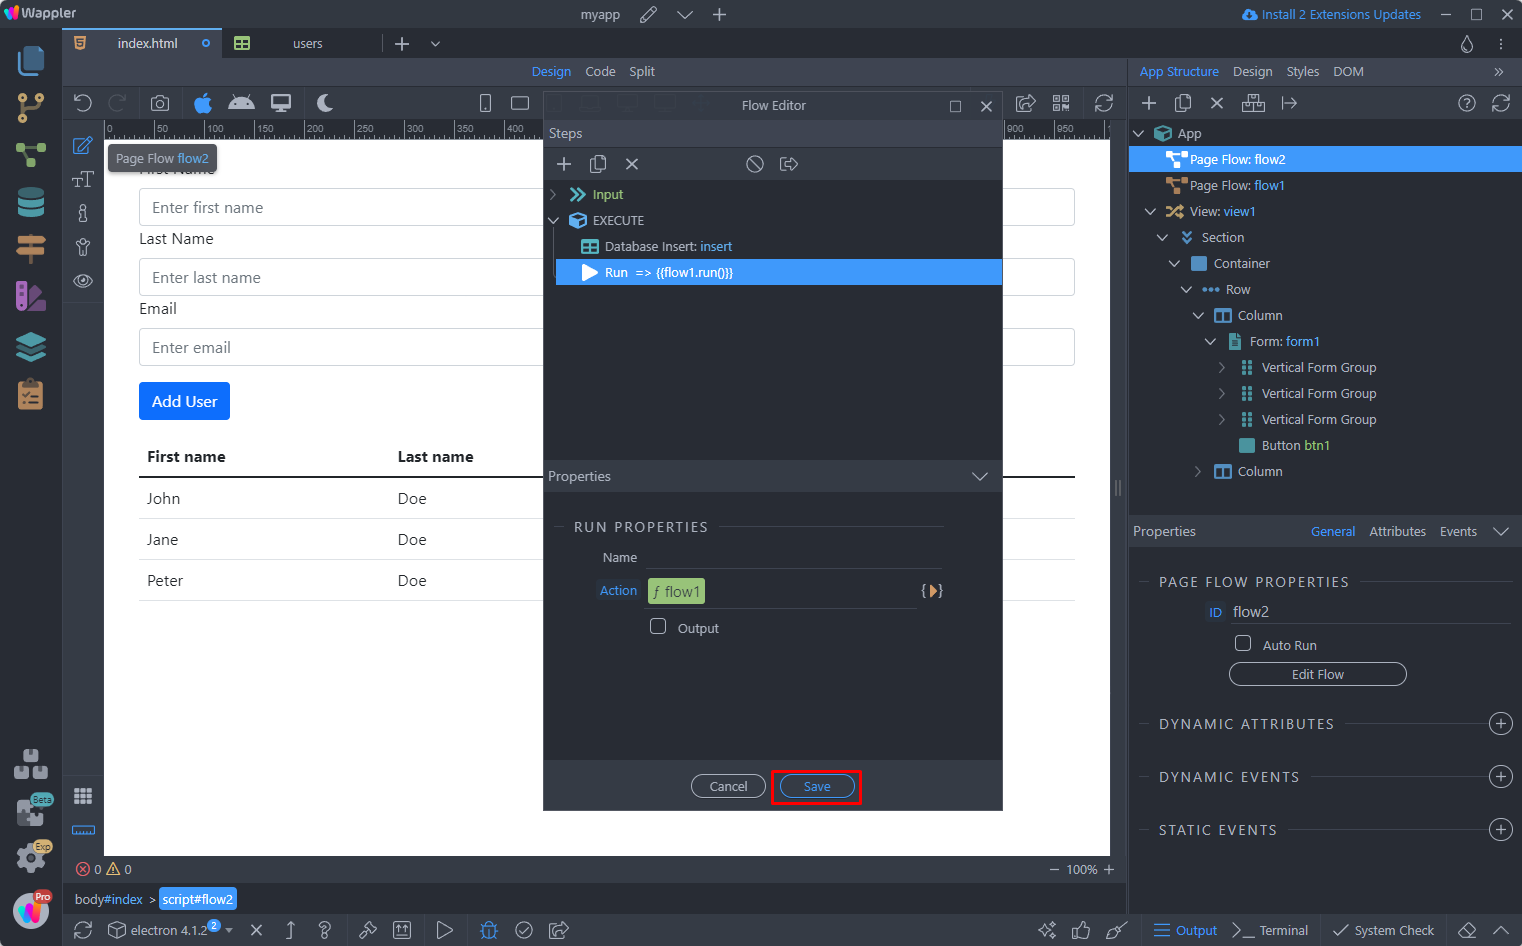
Now we need to run this insert flow by clicking the button. Select the button:
Section titled “Now we need to run this insert flow by clicking the button. Select the button:”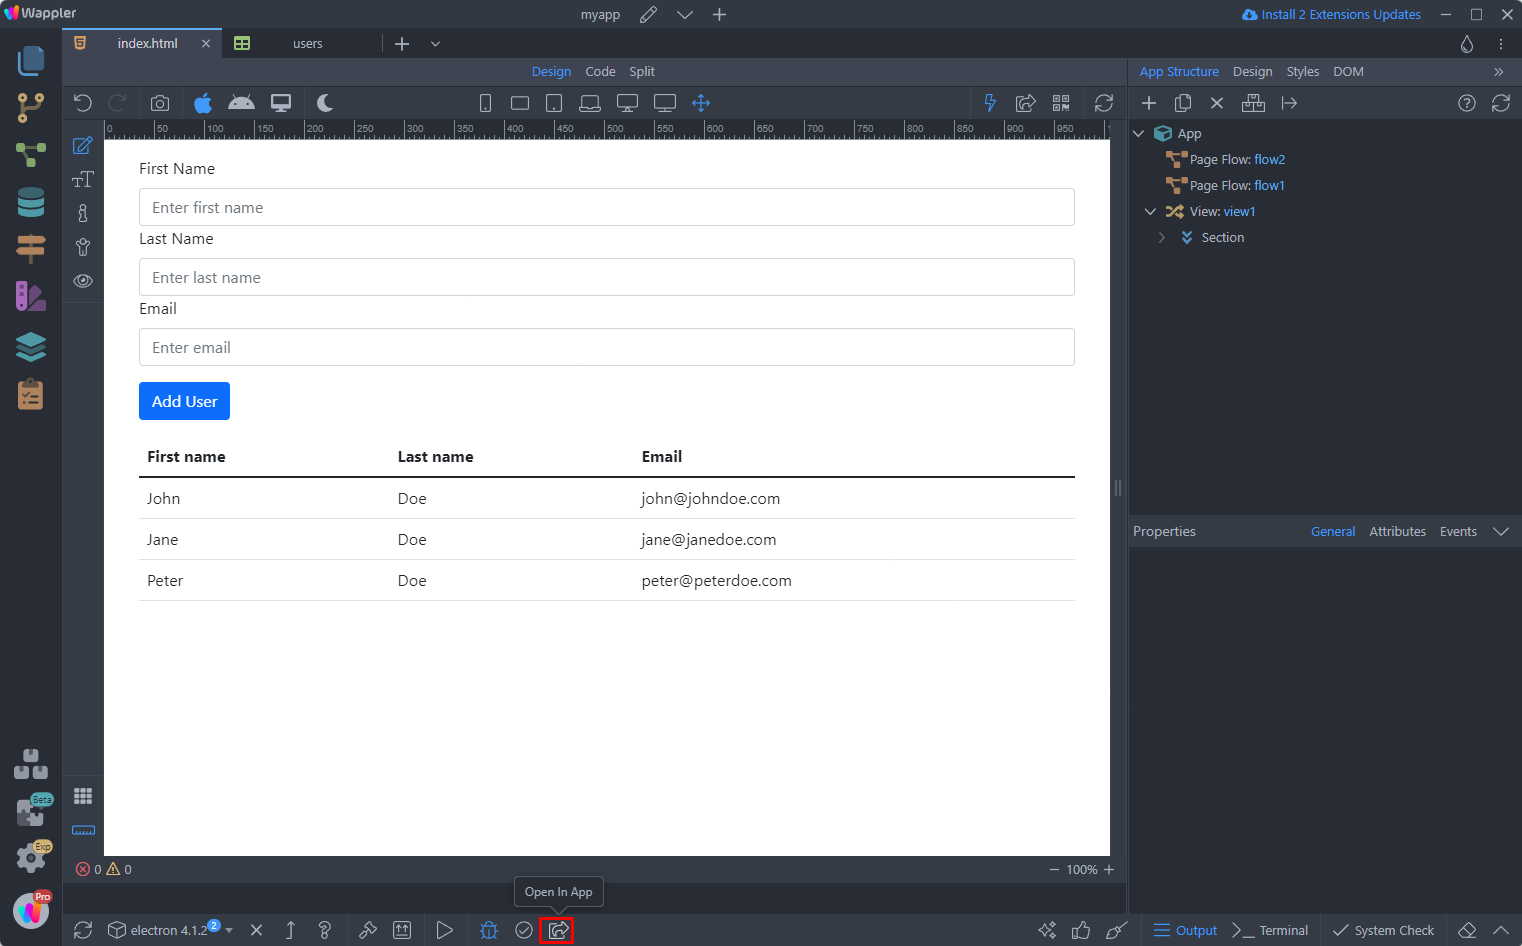
Add new dynamic event:
Section titled “Add new dynamic event:”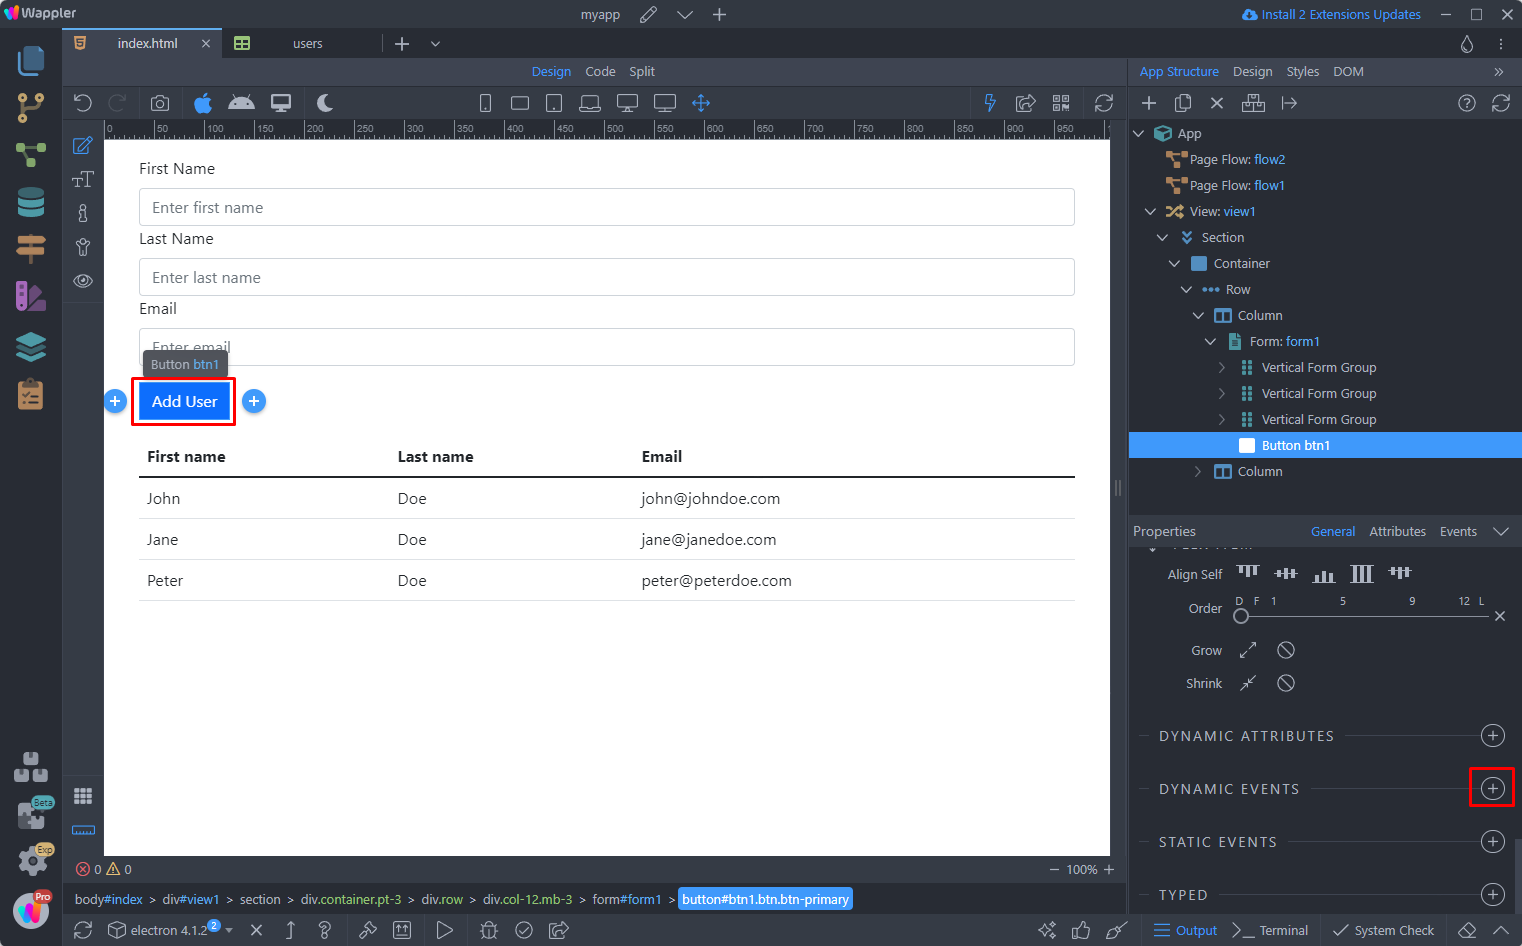
Select on click:
Section titled “Select on click:”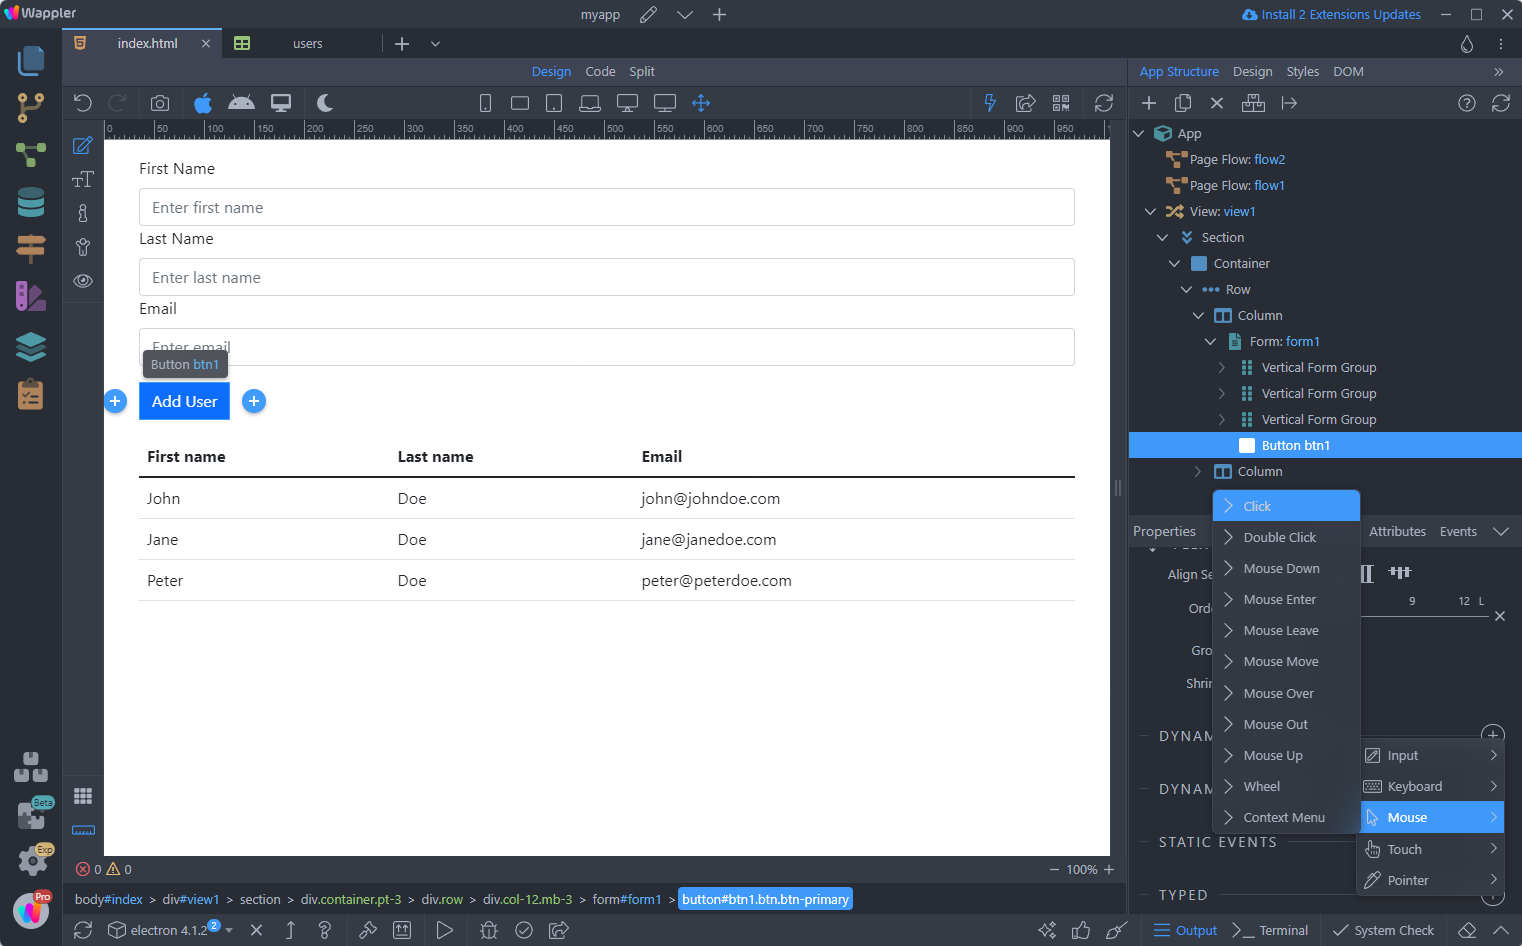
And pick an action:
Section titled “And pick an action:”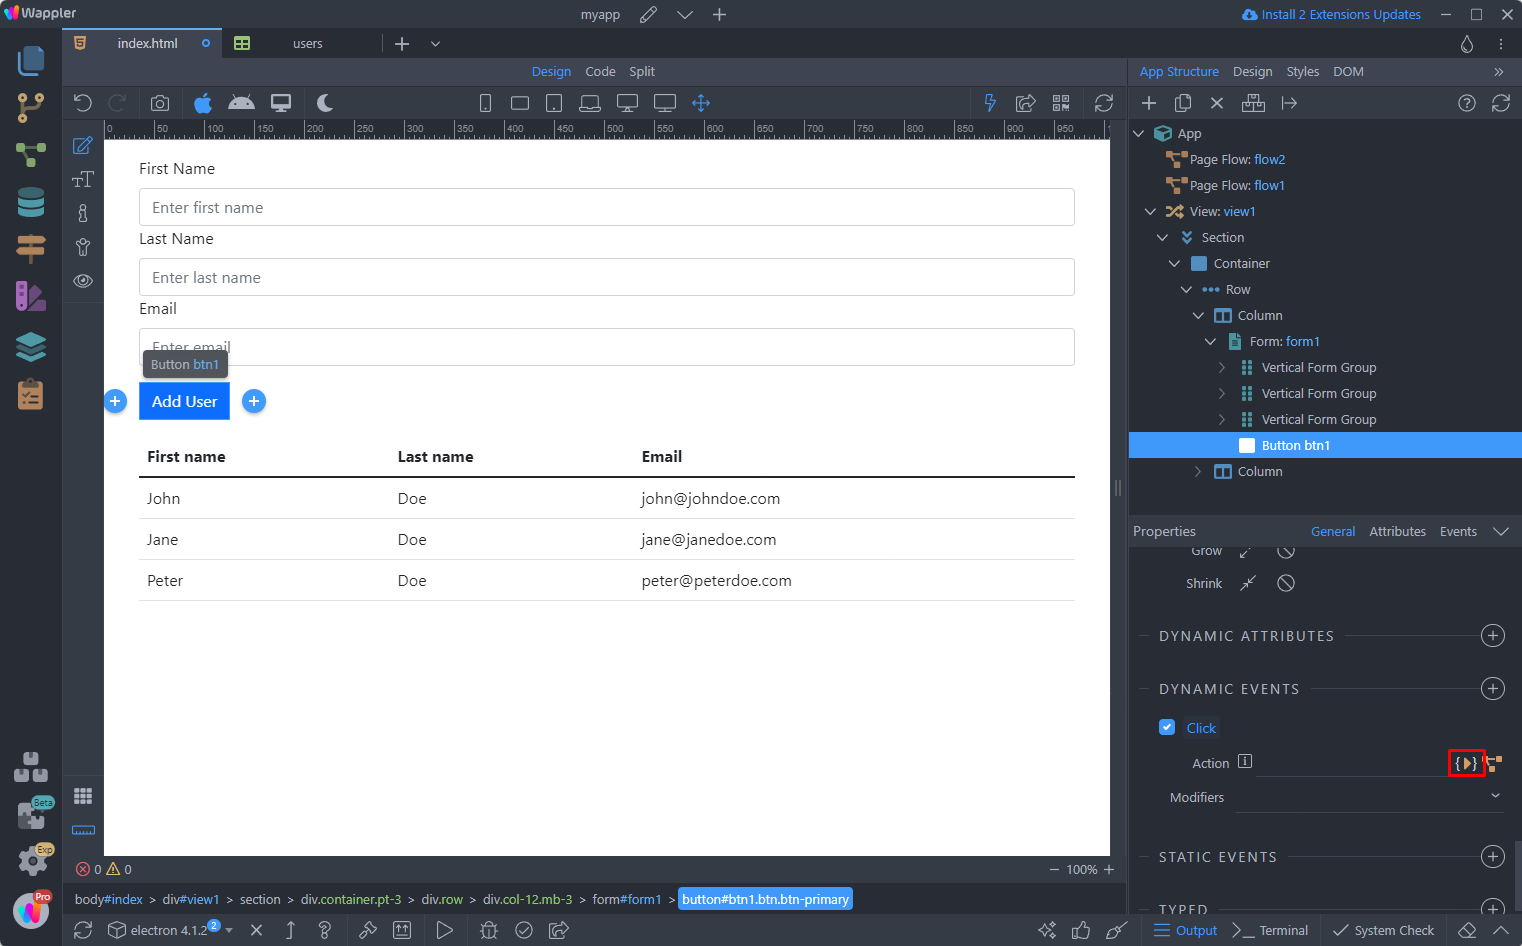
We select to run the insert data flow we created:
Section titled “We select to run the insert data flow we created:”
and that’s it. You can check the results:
Section titled “and that’s it. You can check the results:”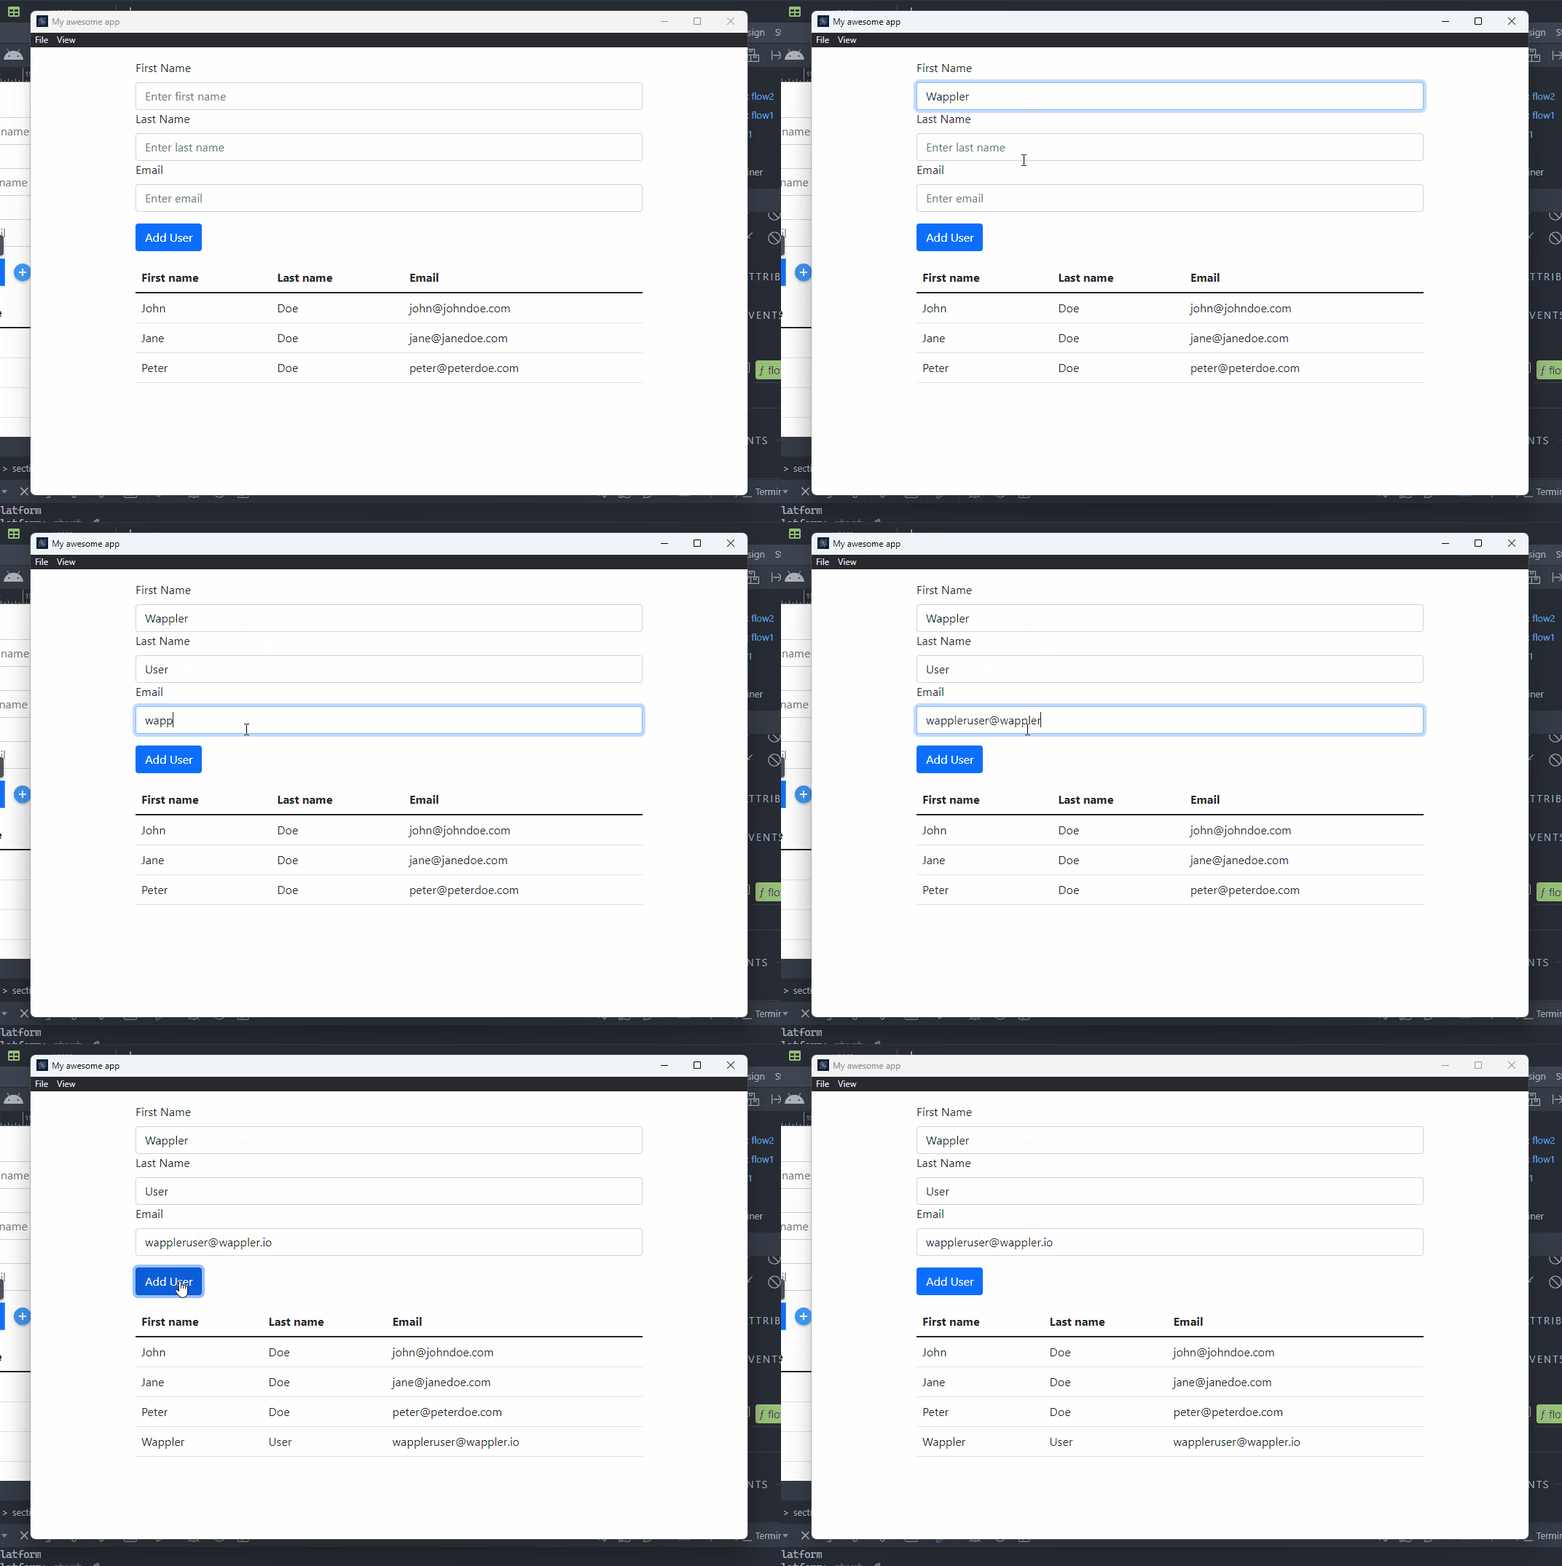
Adding a Platform
Section titled “Adding a Platform”After we tested our app using the default platform - web, then we can add the platform we need to build our app for - Android and iOS (for mobile apps) or Electron (for desktop apps).
To add a platform open the platforms menu and select one. In this example we will show you how to do this for Electron, as it also has some specific requirements for Windows computers.
Windows only:
Make sure to download and install node.js from the official website https://nodejs.org/ and when installing it, make sure to enable installation of the optional tools for compiling native modules:
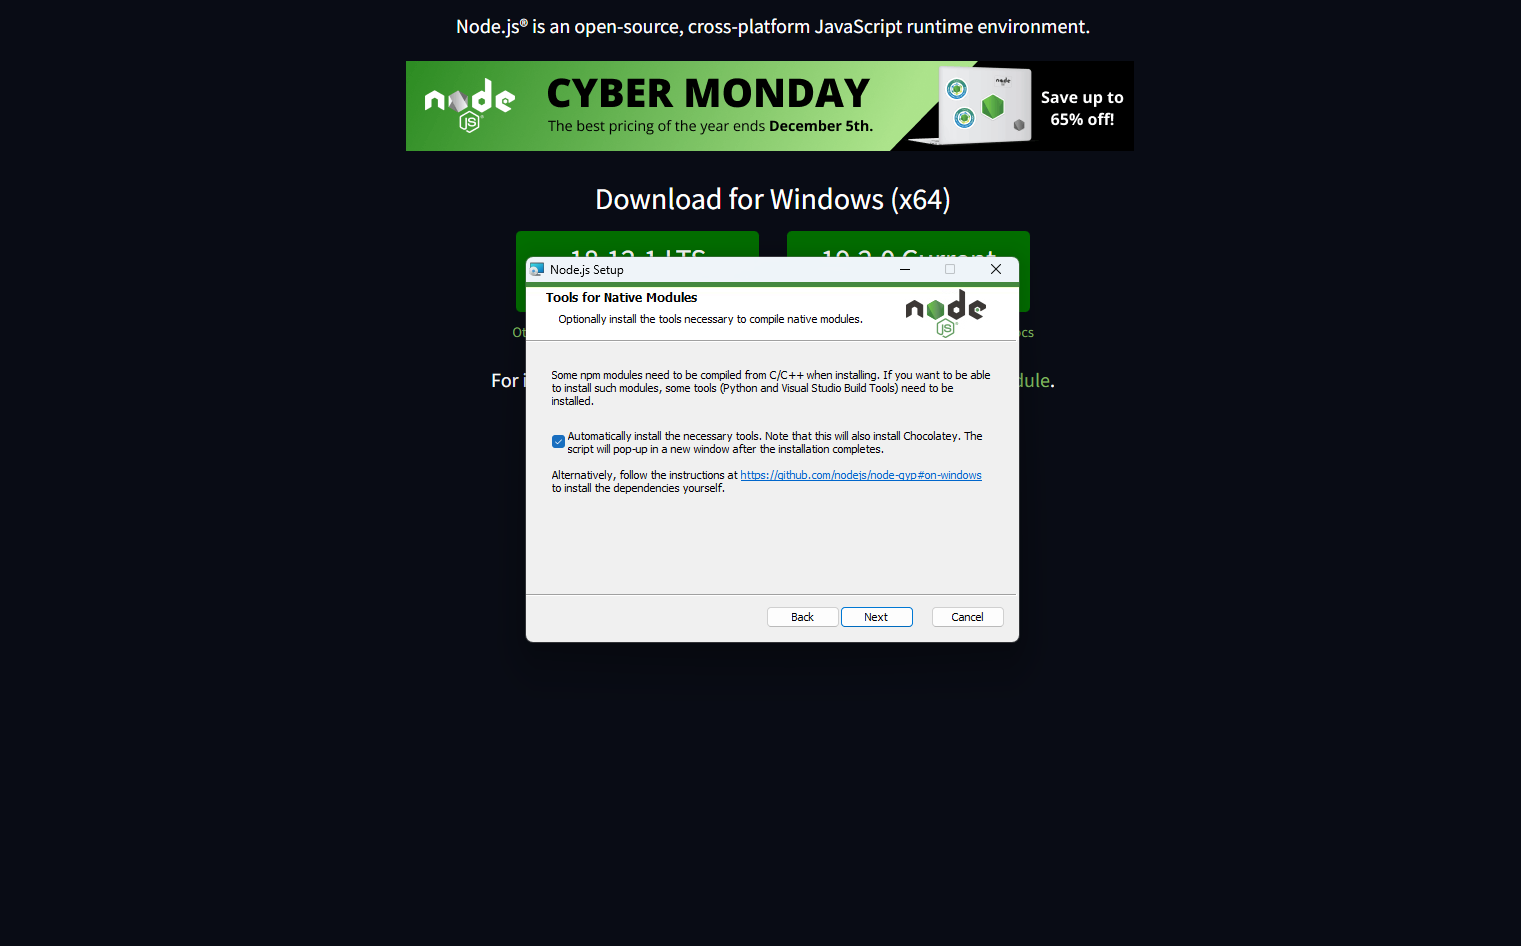
The steps below are valid for all OS. To add Electron to your project, open the platforms menu:
Section titled “The steps below are valid for all OS. To add Electron to your project, open the platforms menu:”The steps below are valid for all OS.
To add Electron to your project, open the platforms menu:

Select Electron:
Section titled “Select Electron:”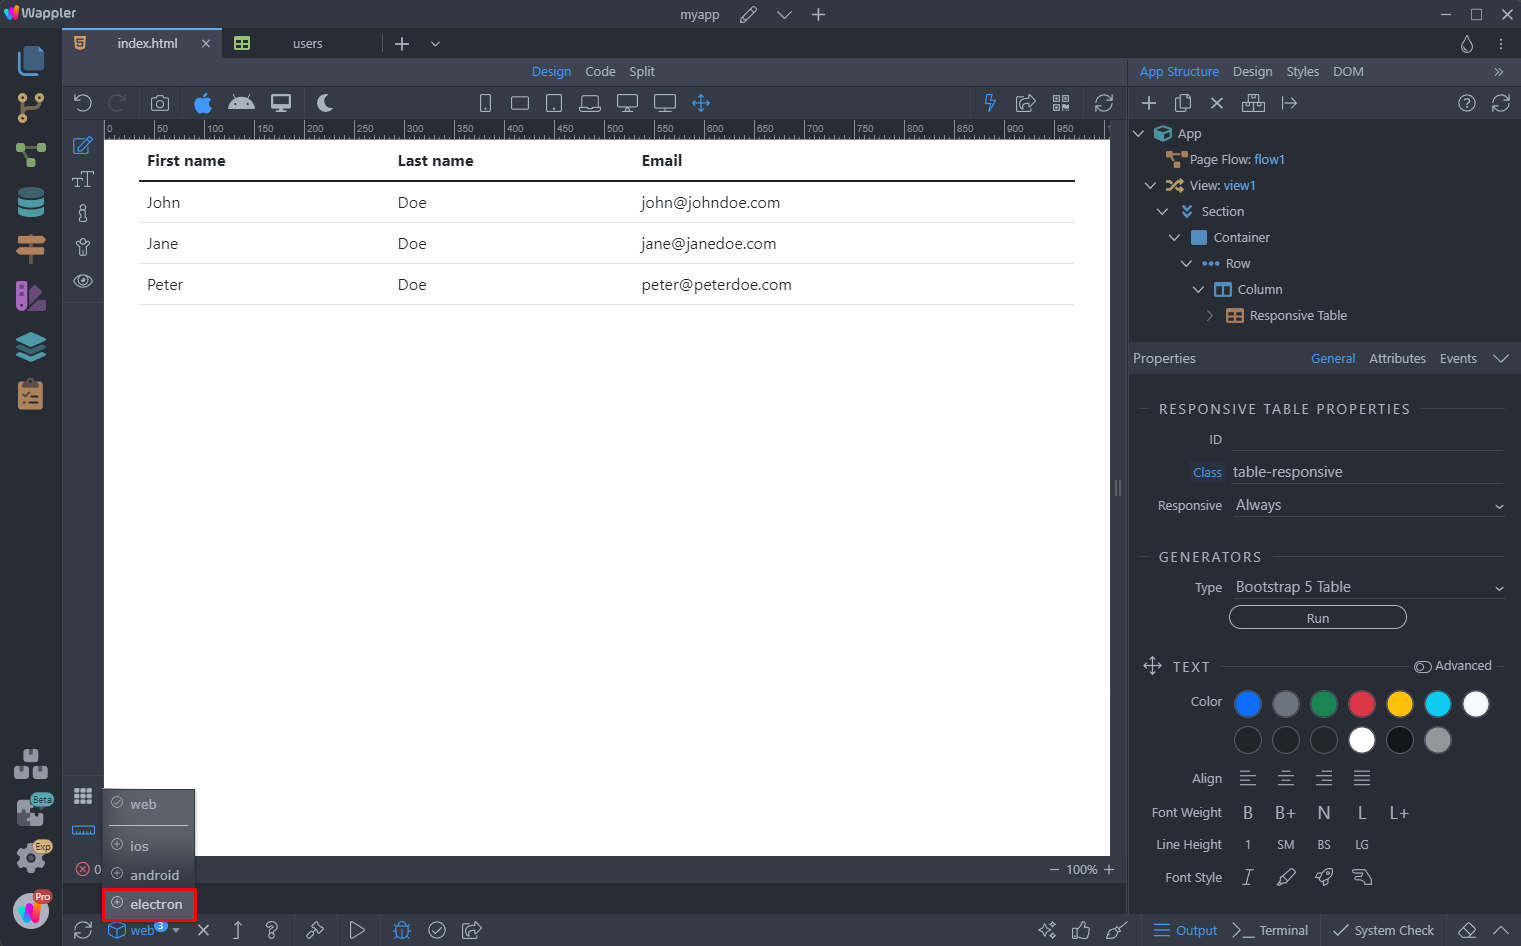
Step 67
Section titled “Step 67”You will see two confirmation popups appearing, click Yes for both, so all the required files can be installed in your project:
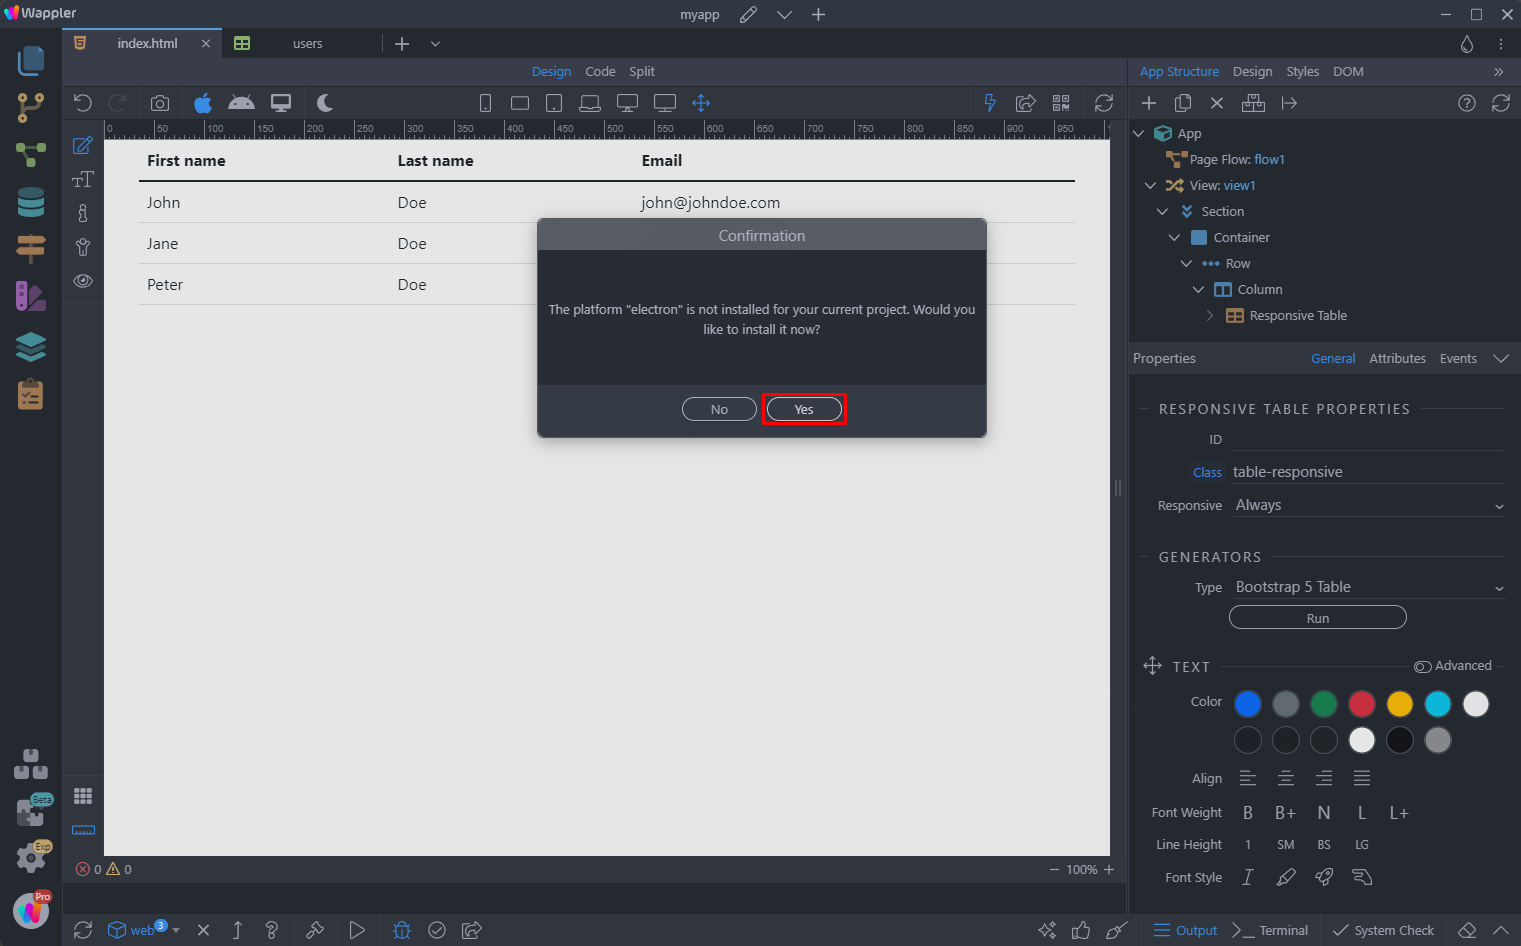
Step 68
Section titled “Step 68”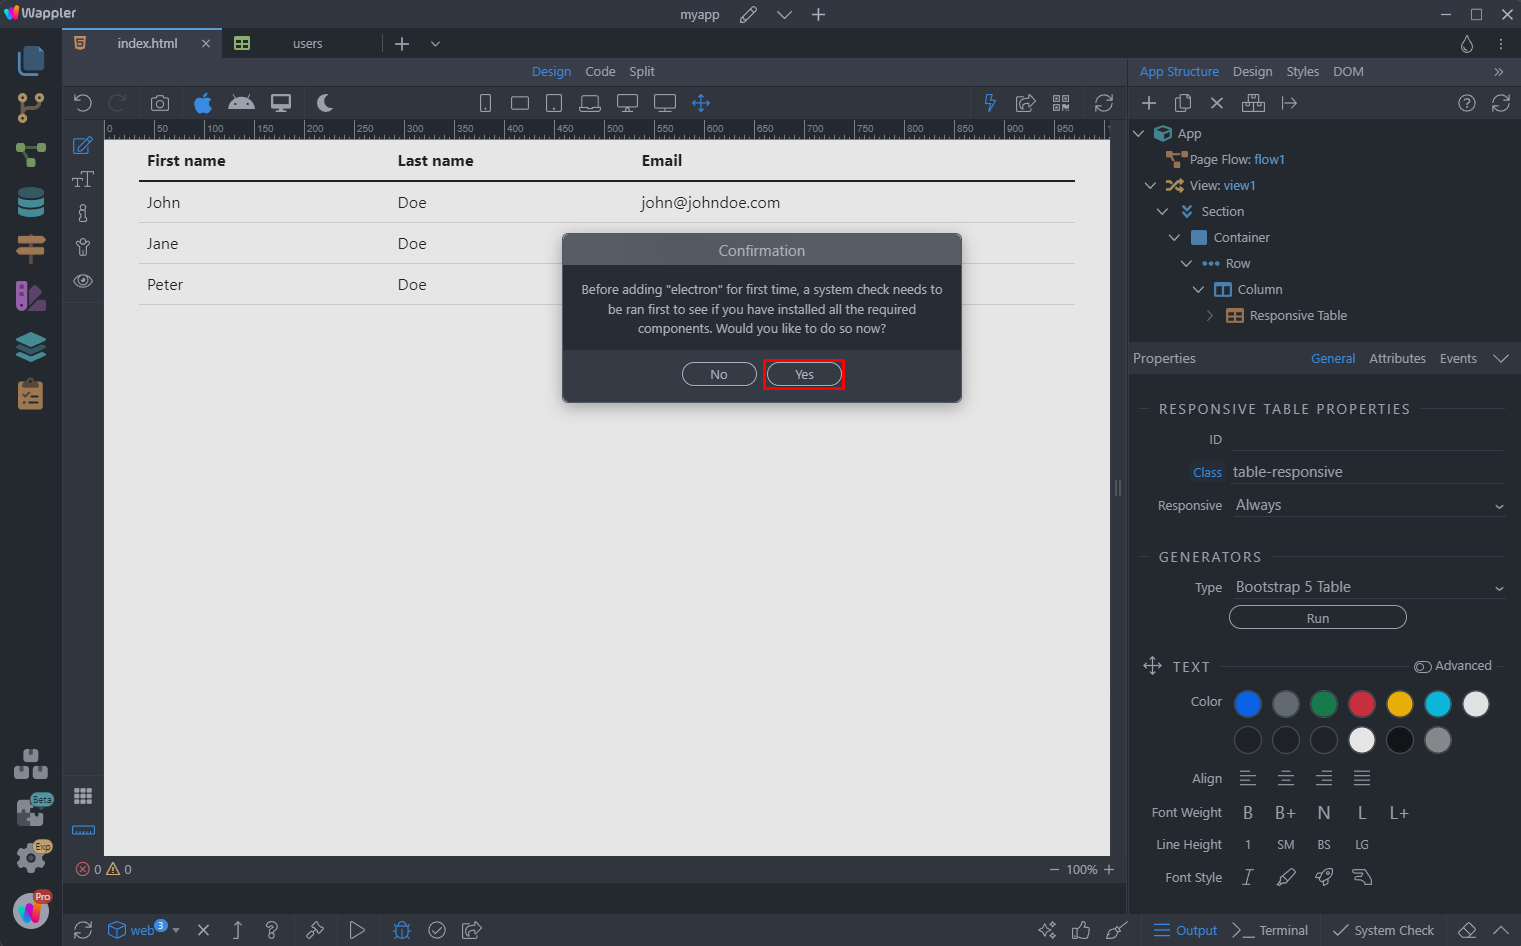
Step 69
Section titled “Step 69”You will see a loader, showing the status of installation and a successful message when the installation finishes:

Step 70
Section titled “Step 70”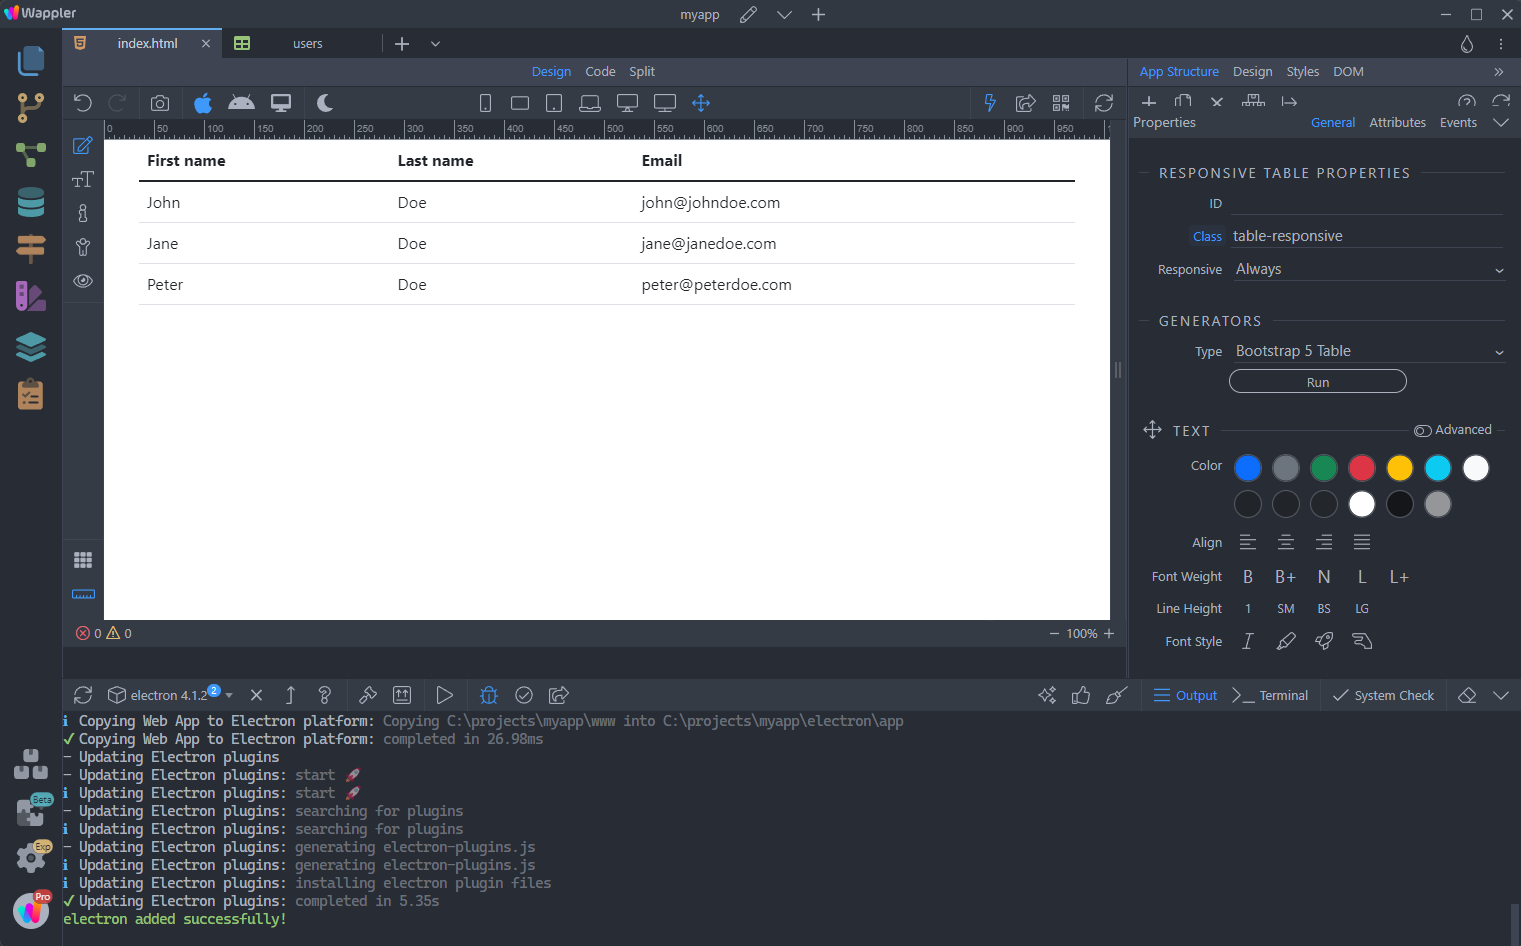
Step 71
Section titled “Step 71”The following step is required for Electron based projects only.
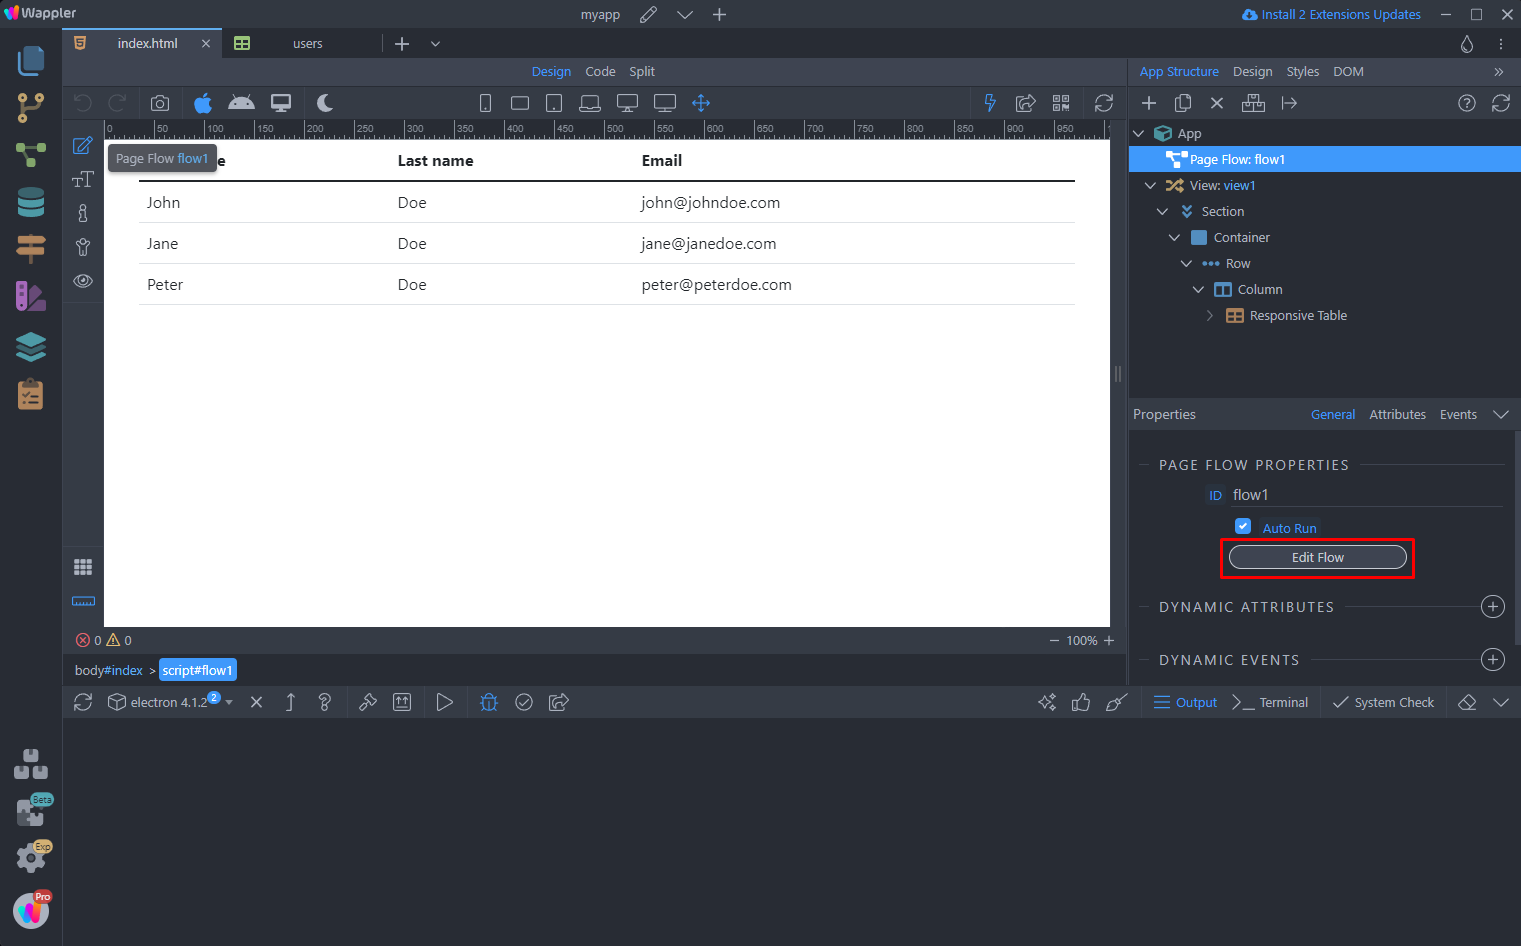
Once you add Electron to your project, make sure to open and close the Flow we already created, so that it can add electron specific files to your projects:
Step 72
Section titled “Step 72”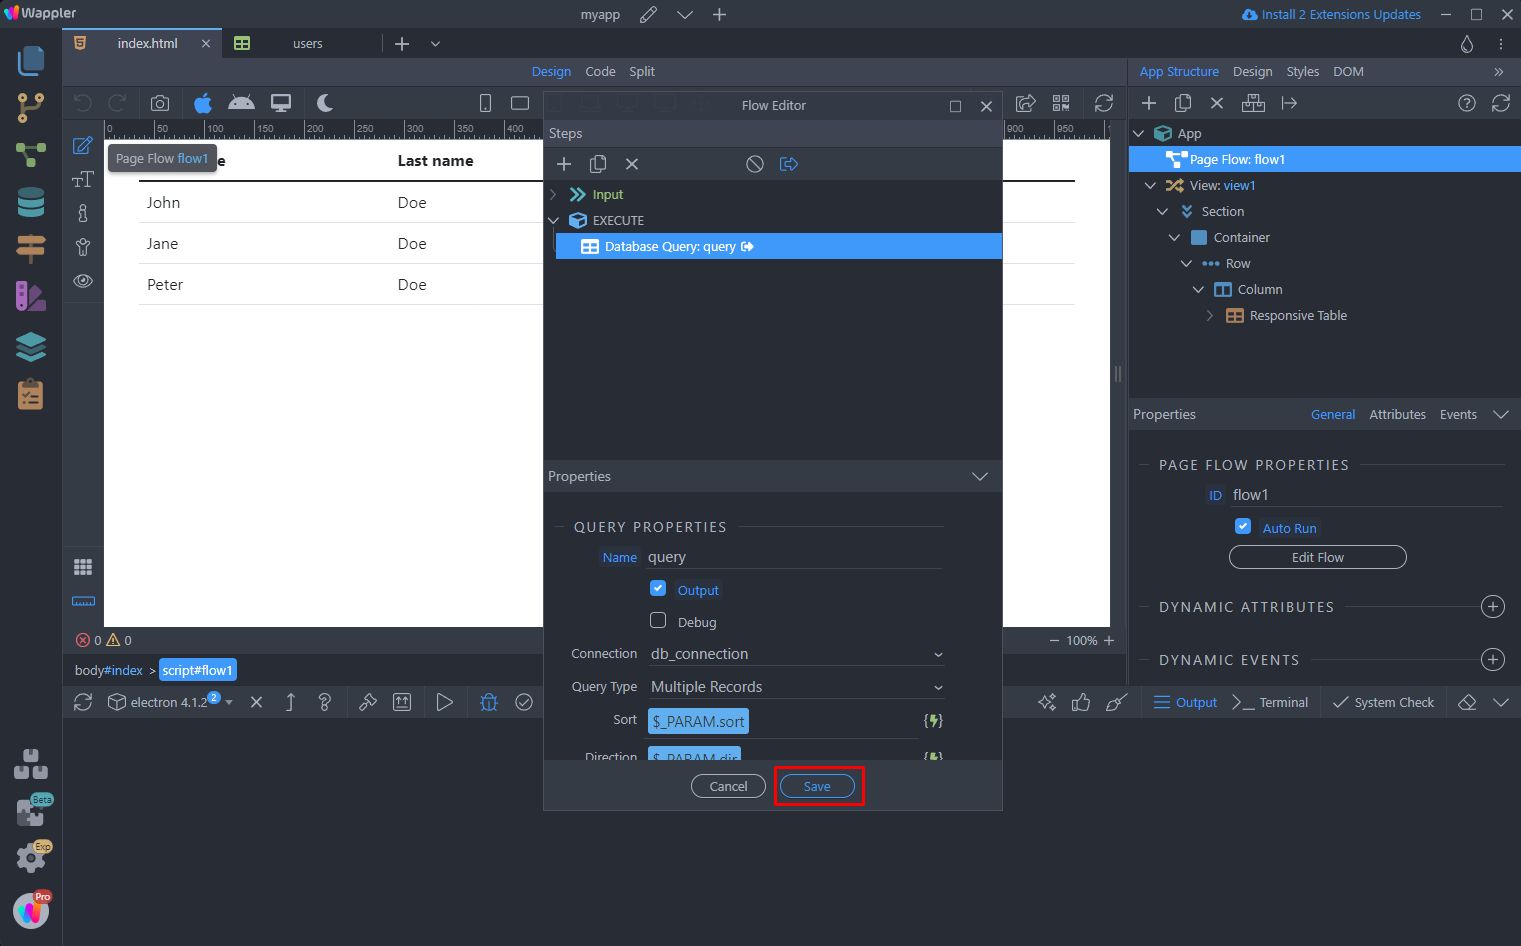
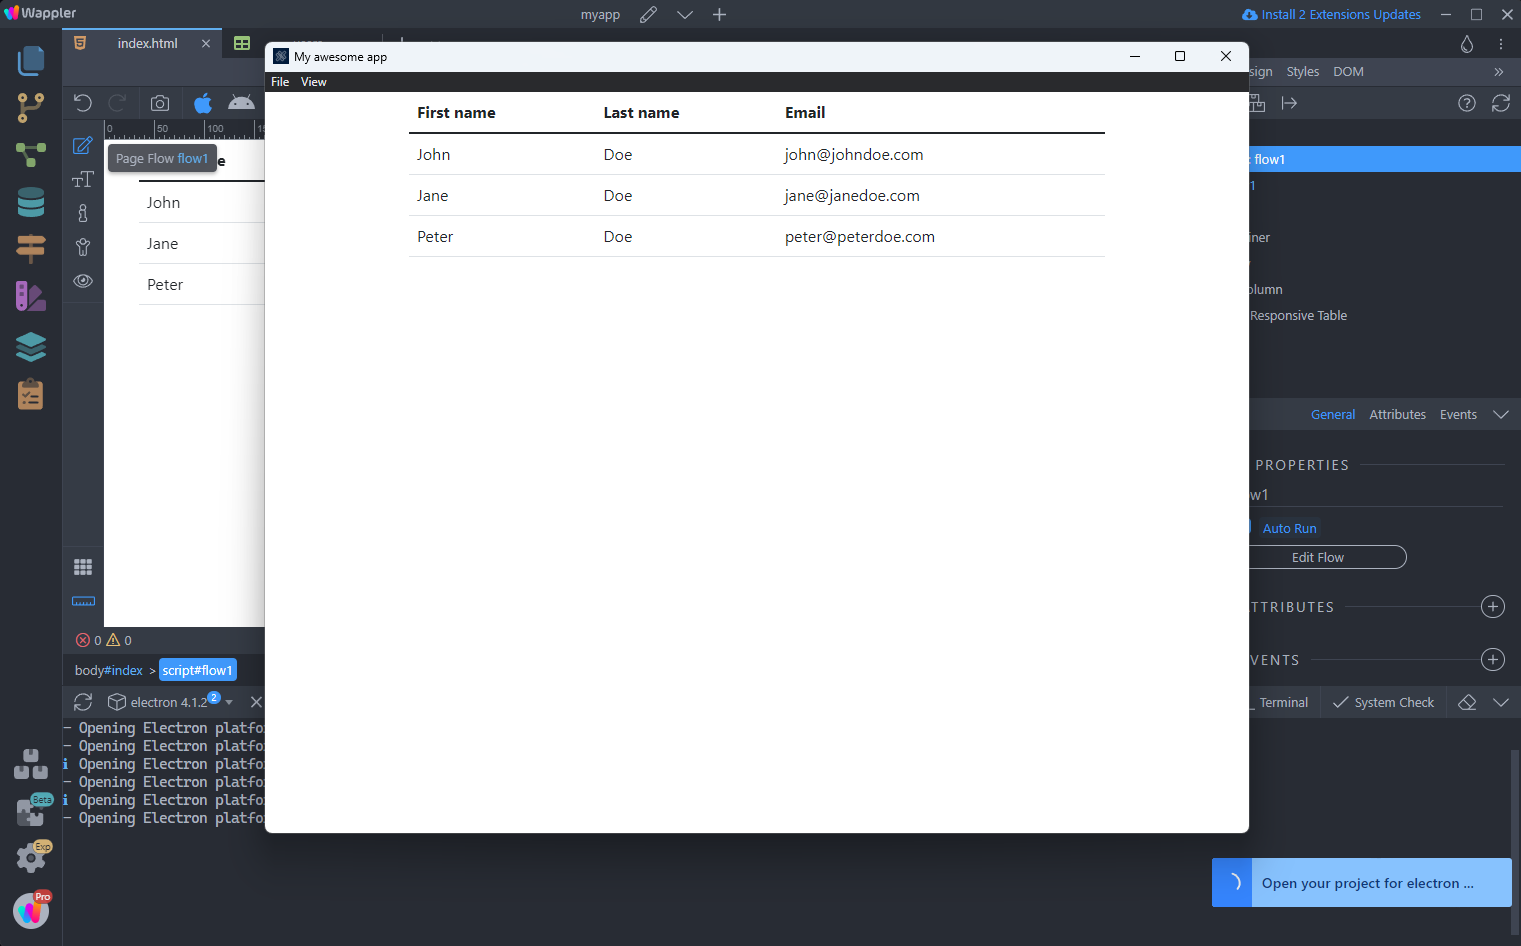
And finally we can preview this simple app:
Section titled “And finally we can preview this simple app:”And finally we can preview this simple app:

You can see our dynamic data displayed on the page in a table:
Section titled “You can see our dynamic data displayed on the page in a table:”