Using Dynamic Data in Desktop and Mobile Apps
As you know the Mobile and Desktop apps cannot run PHP/ASP/ASP.NET files, which are required to create a database connection and get data from your database. You are only allowed to use HTML files in
Overview
Section titled “Overview”In our example we will show you how to do this for a Desktop App, but the logic and the workflow are the same with Mobile Apps as well. We need to setup separate projects in Wappler:
- A static local project, for your Desktop/Mobile App
- A remote API project, which will be used to run the server files, connect to the database and return the data.
Setting up the App Project
Section titled “Setting up the App Project”First you need to setup the App Project. We are setting up a Desktop App, so we follow the tutorial explaining how to do this: Creating a Desktop App Project
Check the tutorial linked above, setup your project and continue with the steps below.
Setting up the Data API Project
Section titled “Setting up the Data API Project”We need to setup a Data API Project. This project is nothing more than a regular Web Project, which runs on your remote server. It is only used to run your Server Actions, so you can connect to the database, make database queries, manage data (insert, update, delete), login and logout users or any other Server Action workflow you need.
Creating the Project in Wappler
Section titled “Creating the Project in Wappler”Follow the tutorial explaining how to Create a Web Project
Adding a Remote Target
Section titled “Adding a Remote Target”After we setup the Data API Project, create your remote target, as you do usual.
Explained here: Setting up a Remote Target
NOTE: the target can be any target - your own server, a remote hosting server etc.
Creating a Server Action
Section titled “Creating a Server Action”Open the Data API project, which you just created and let’s create a Server Action with a Database Query inside it. We will use this Database Query Data on the Desktop App pages.
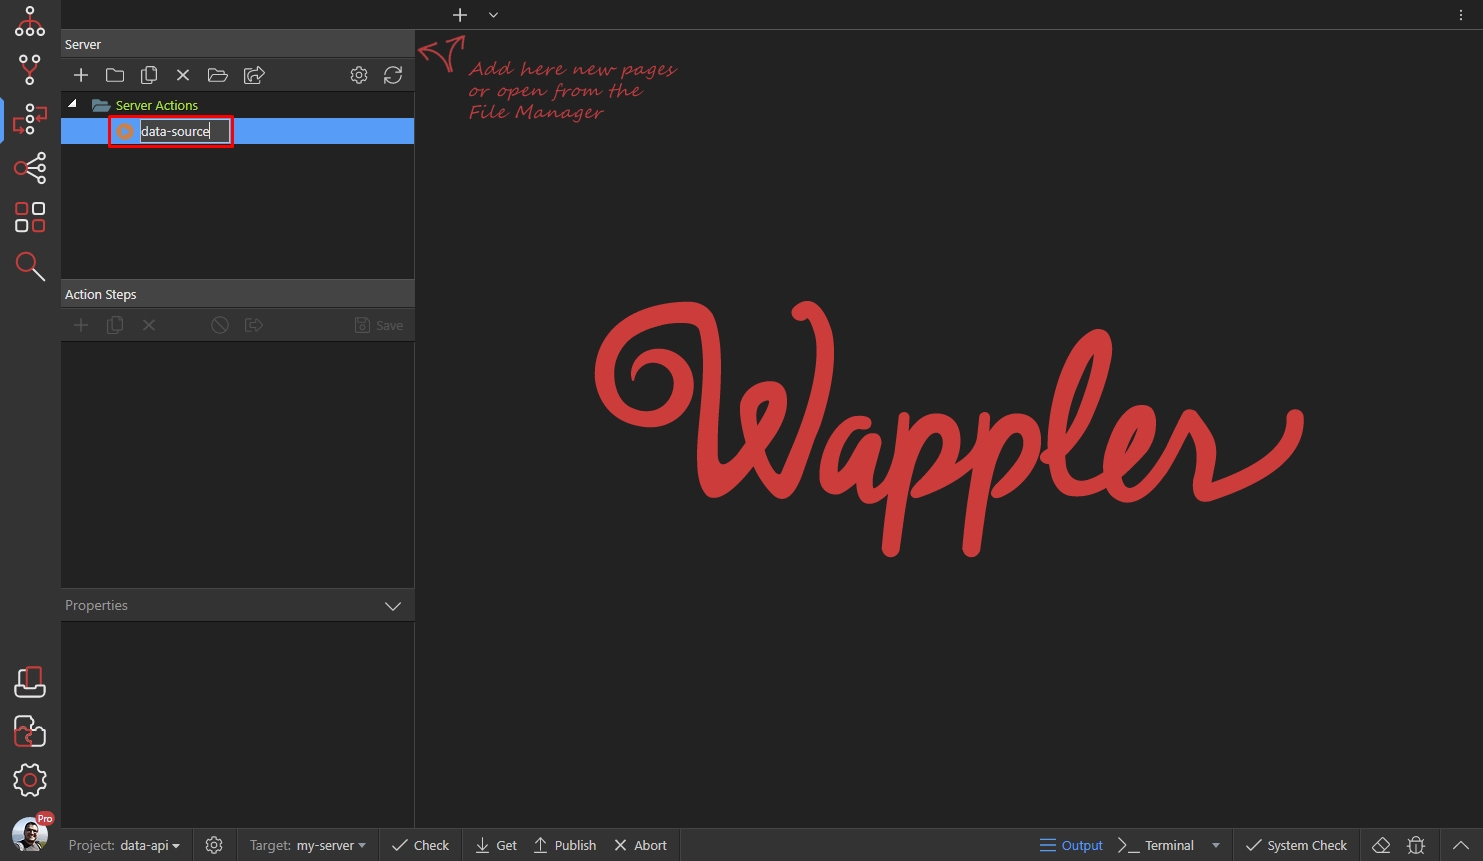
We call the server action data-source:
Right click steps:
Section titled “Right click steps:”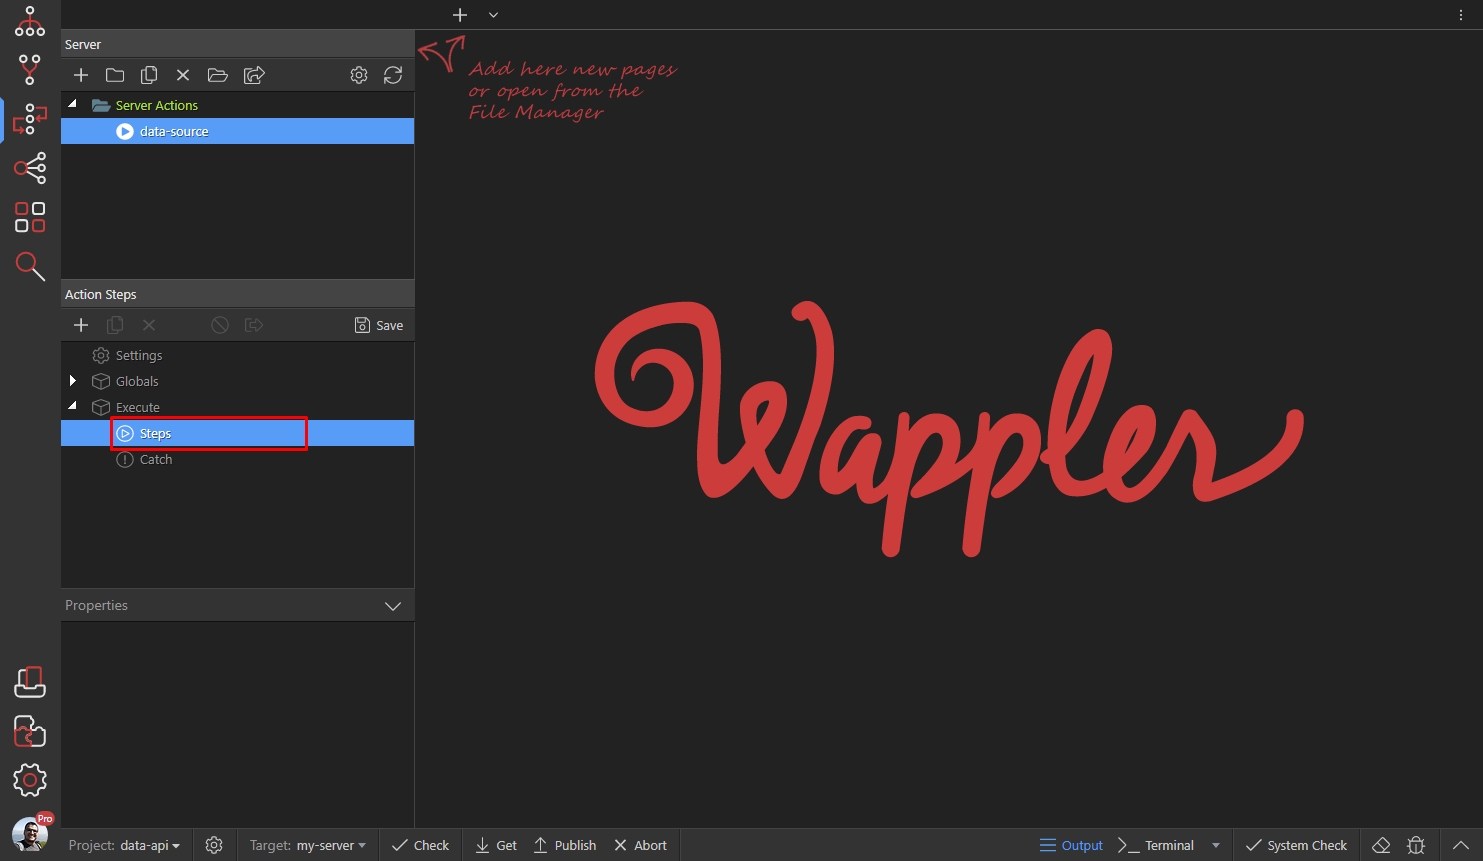
Open Database Actions and select Database Connection:
Section titled “Open Database Actions and select Database Connection:”
Setup your database connection:
Section titled “Setup your database connection:”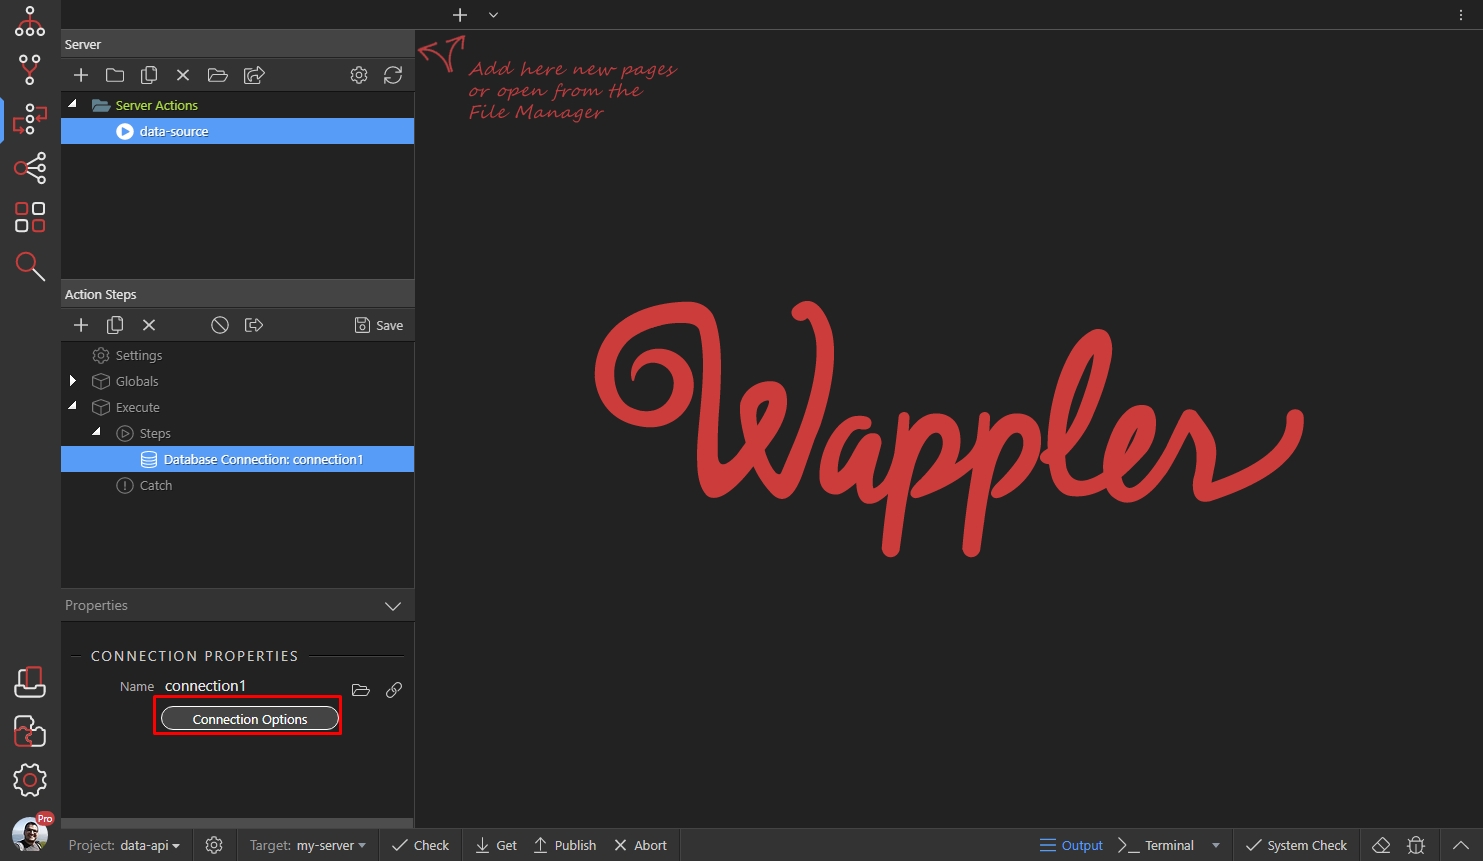
Then right click the Database Connection step:
Section titled “Then right click the Database Connection step:”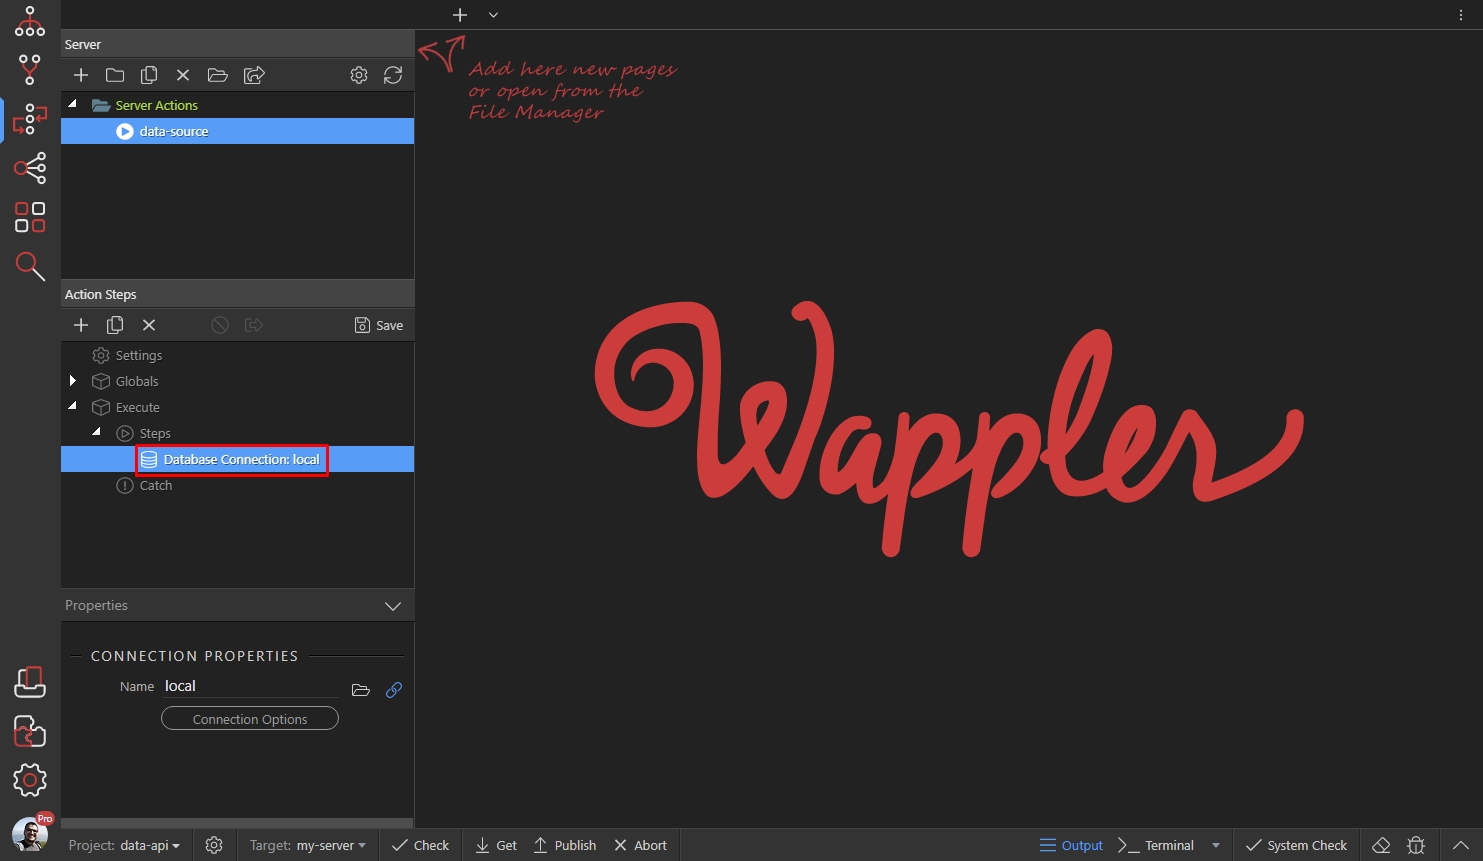
Open Database Actions and select Database Query:
Section titled “Open Database Actions and select Database Query:”
Setup your query:
Section titled “Setup your query:”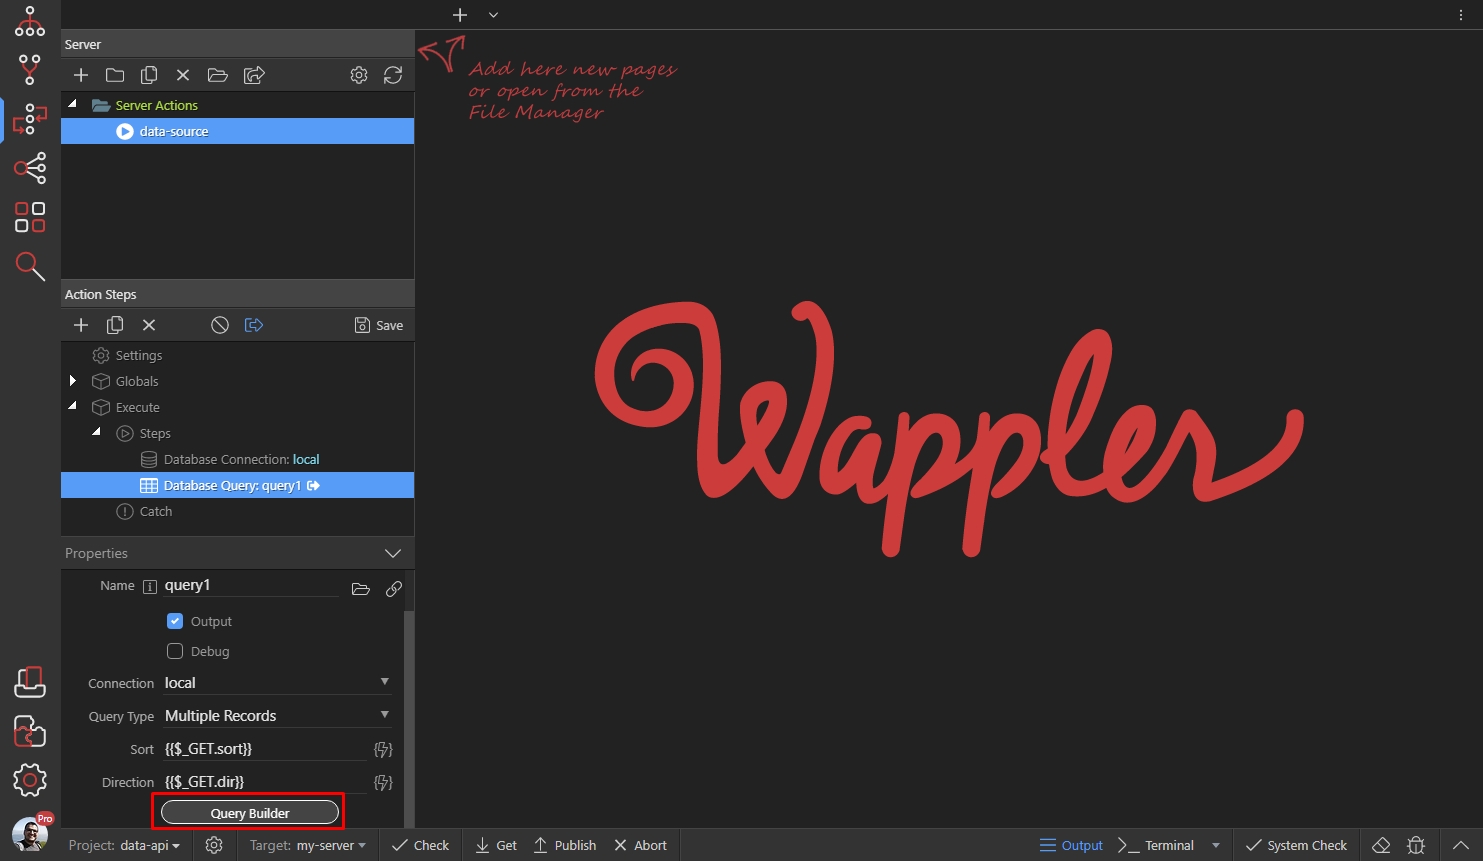
Select the table you want to use and add the columns to the query builder:
Section titled “Select the table you want to use and add the columns to the query builder:”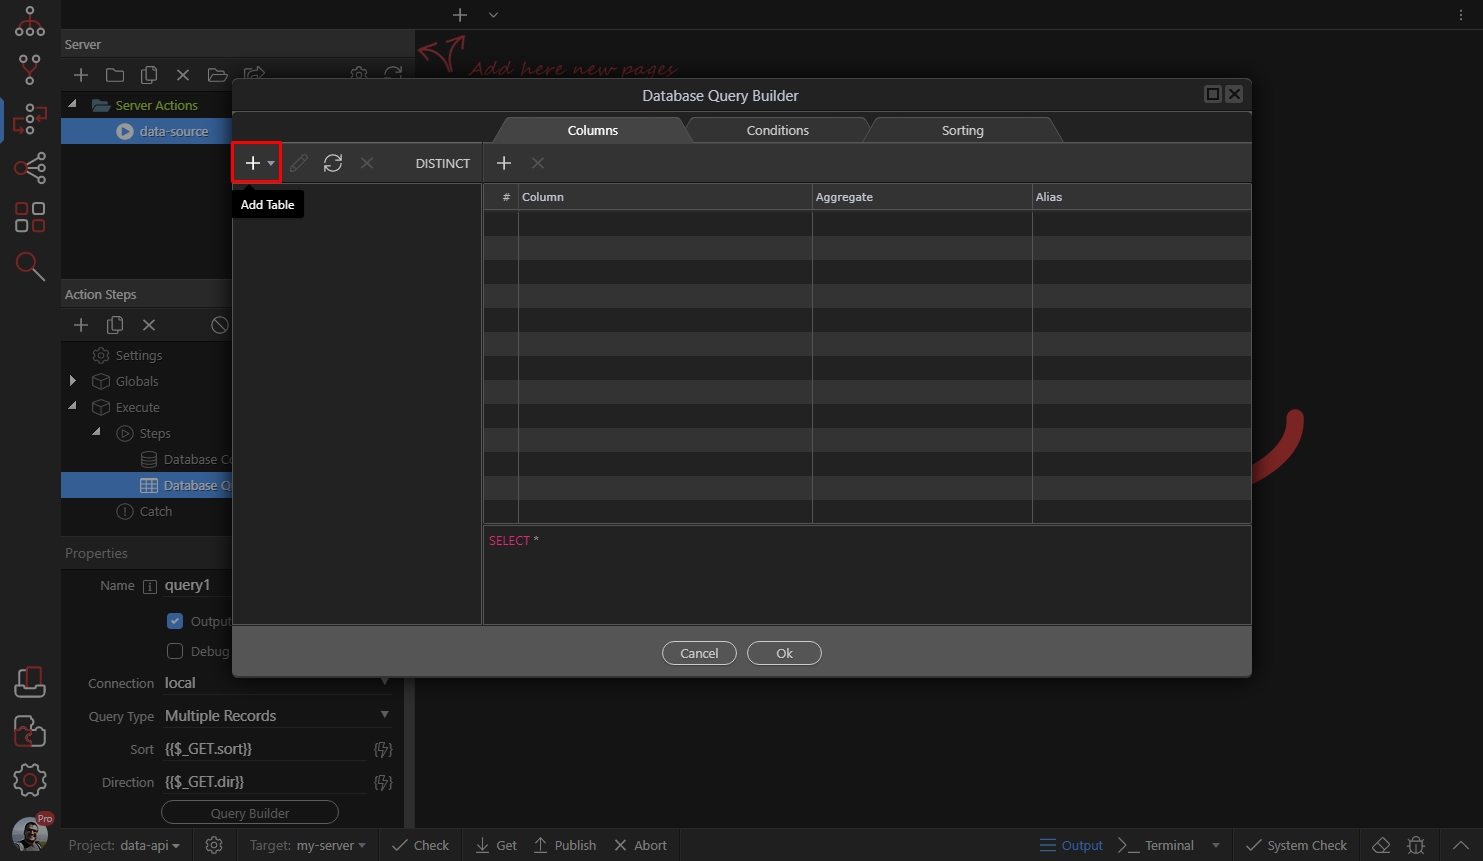
Click OK:
Section titled “Click OK:”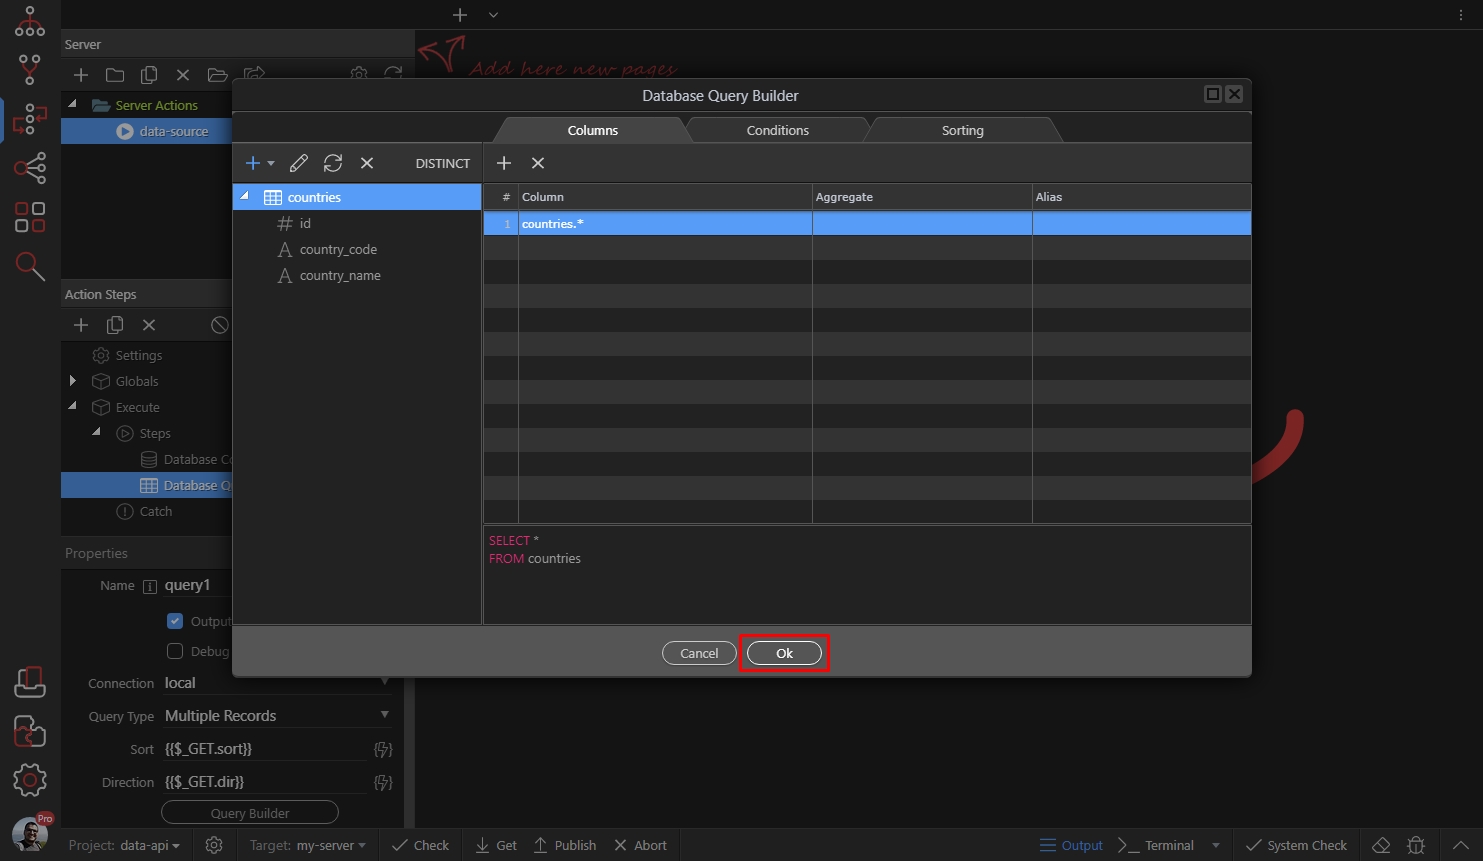
You are done setting up your data source. Save your Server Action:
Section titled “You are done setting up your data source. Save your Server Action:”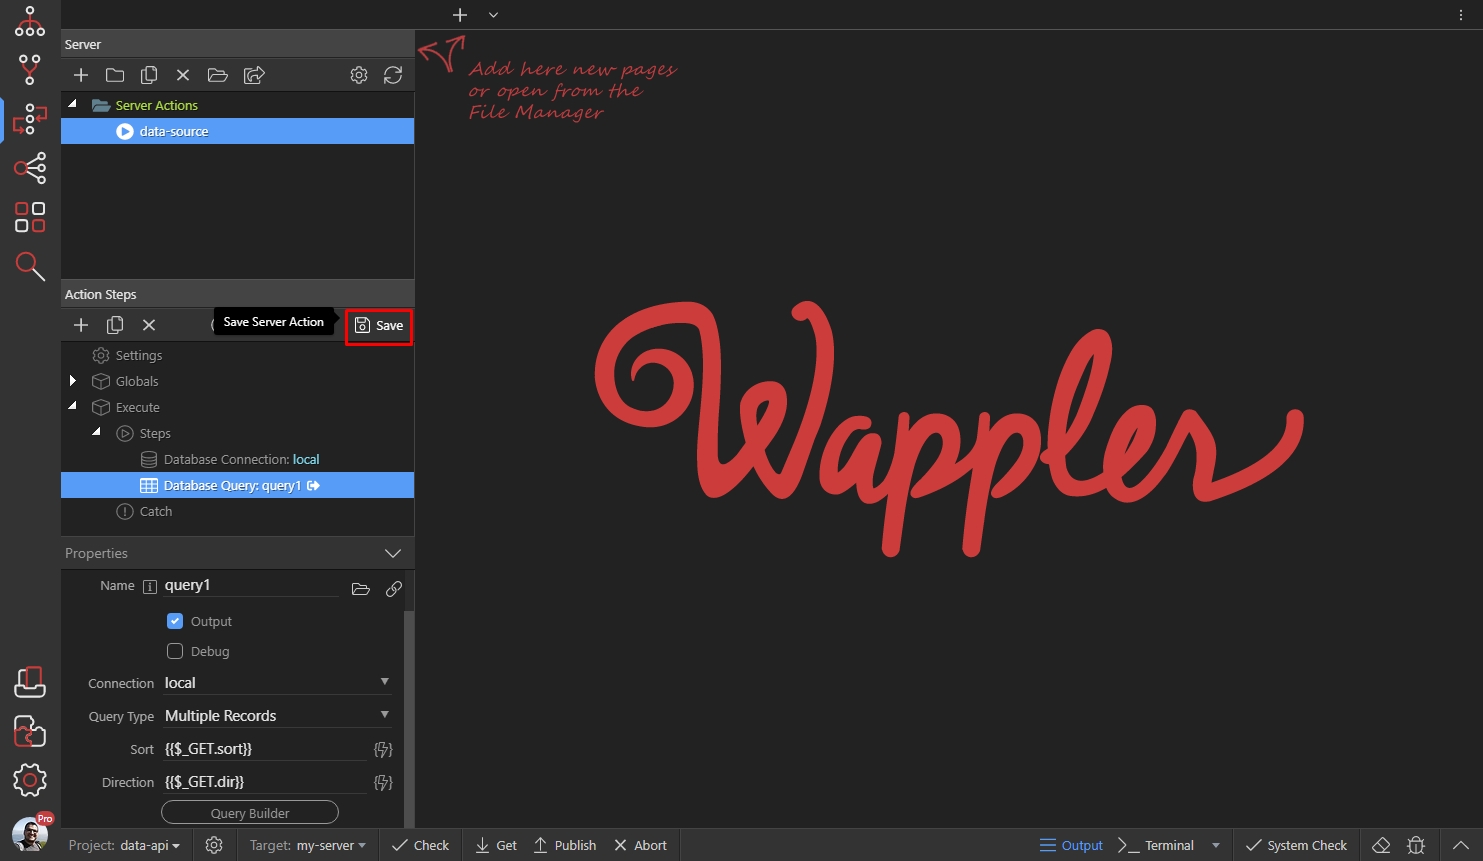
Using Dynamic Data on App Project Pages
Section titled “Using Dynamic Data on App Project Pages”Open the Project Manager:
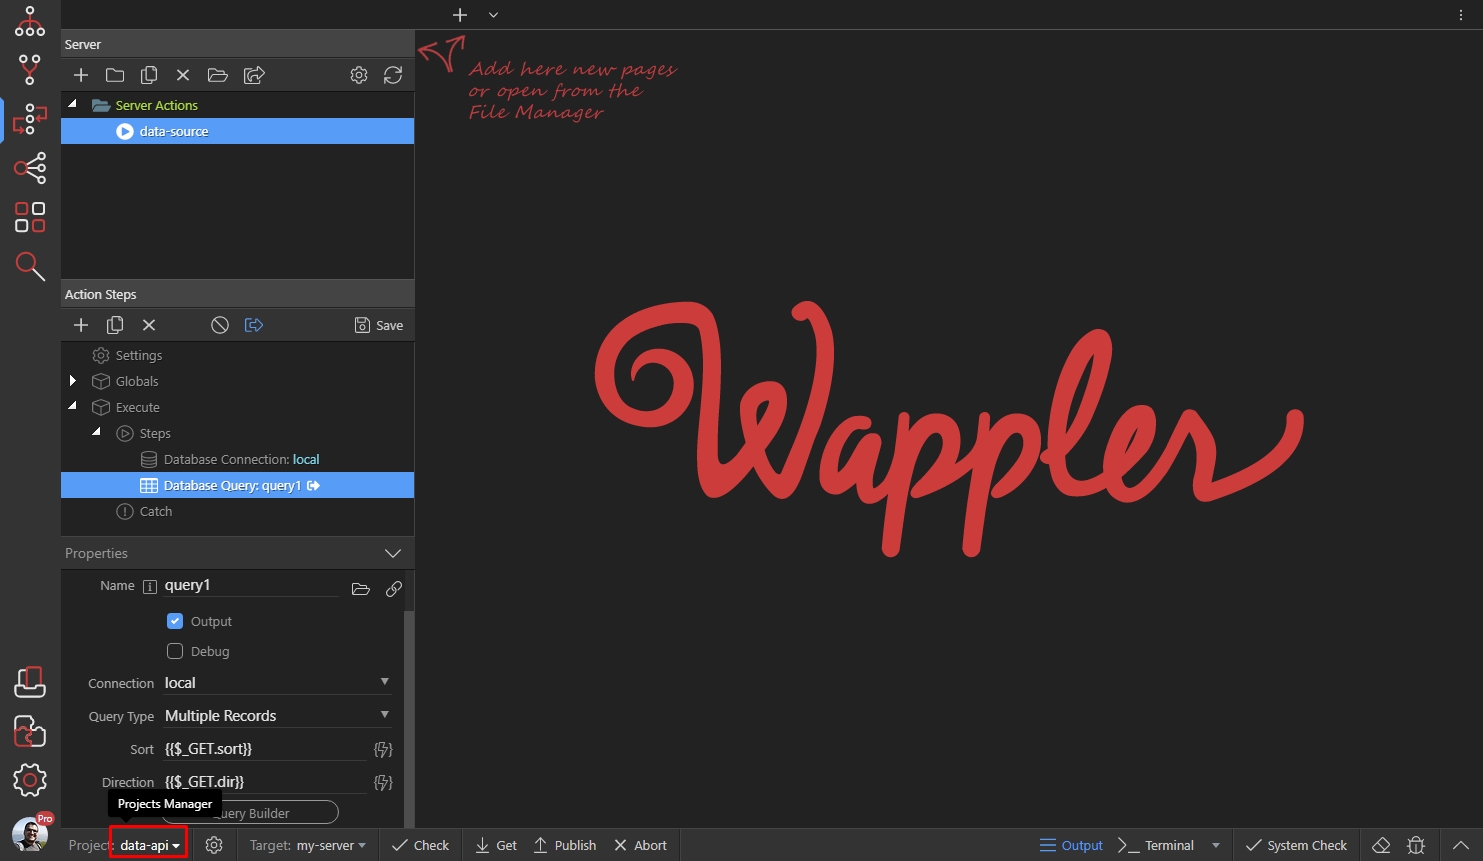
And switch to your Desktop App project:
Section titled “And switch to your Desktop App project:”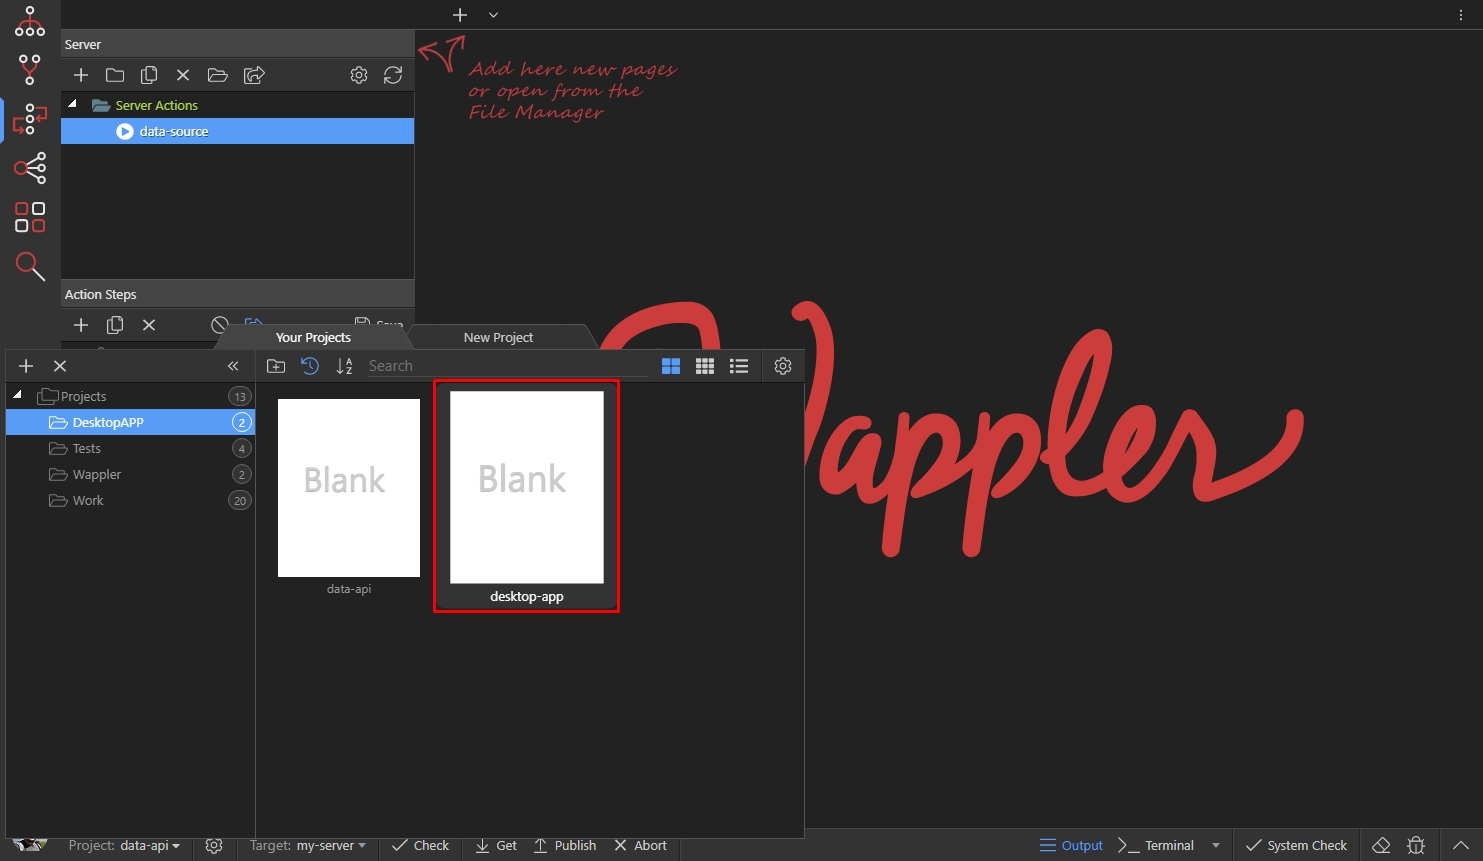
Step 20
Section titled “Step 20”Open an HTML file in Design View. We added a really simple layout - a list with items which we are going to make dynamic. Select App And add new component:
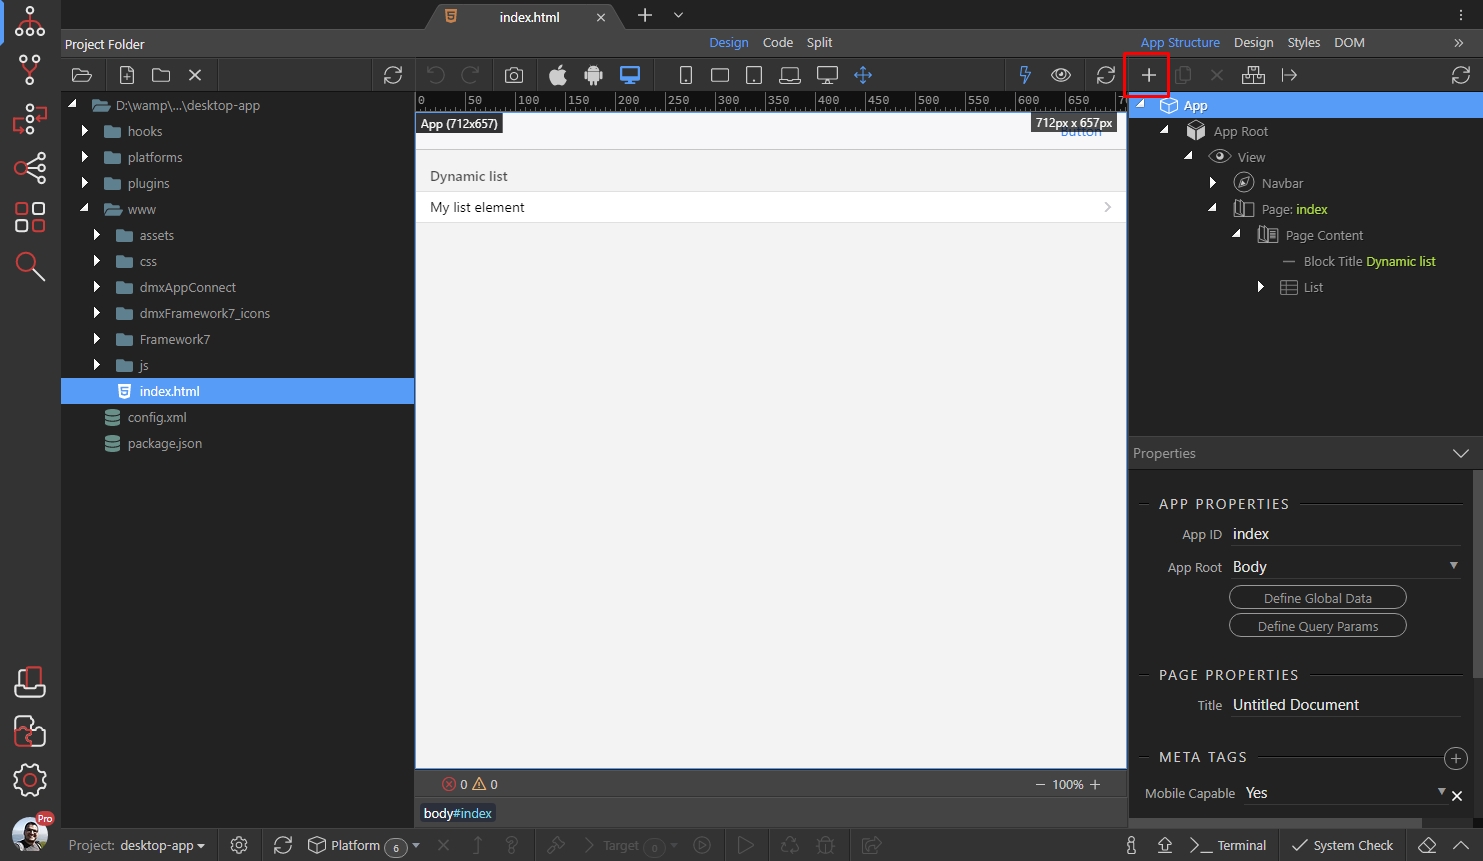
Open Data and select Server Connect:
Section titled “Open Data and select Server Connect:”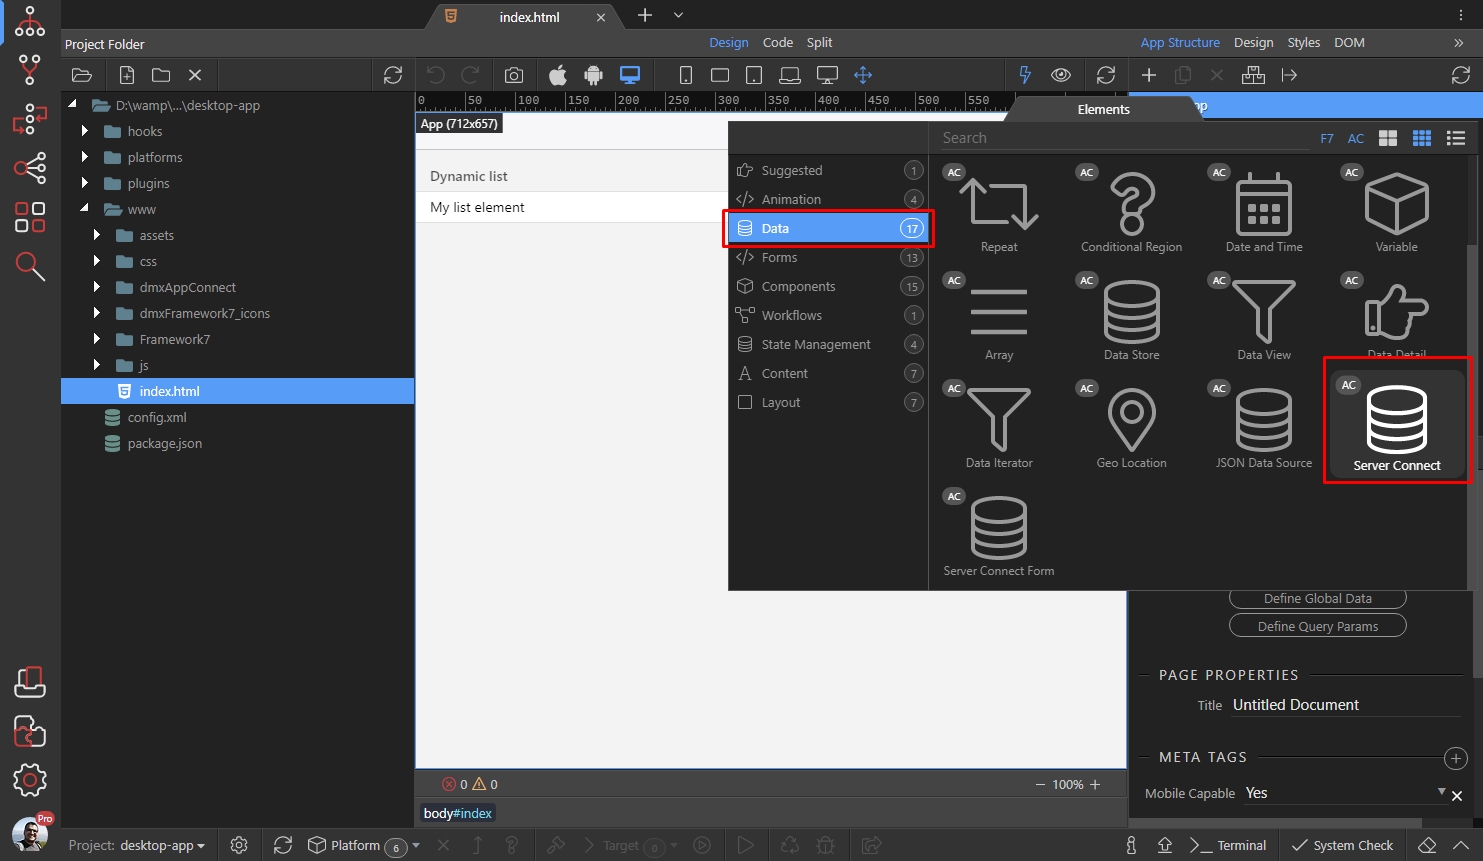
Then click Select Server Action button:
Section titled “Then click Select Server Action button:”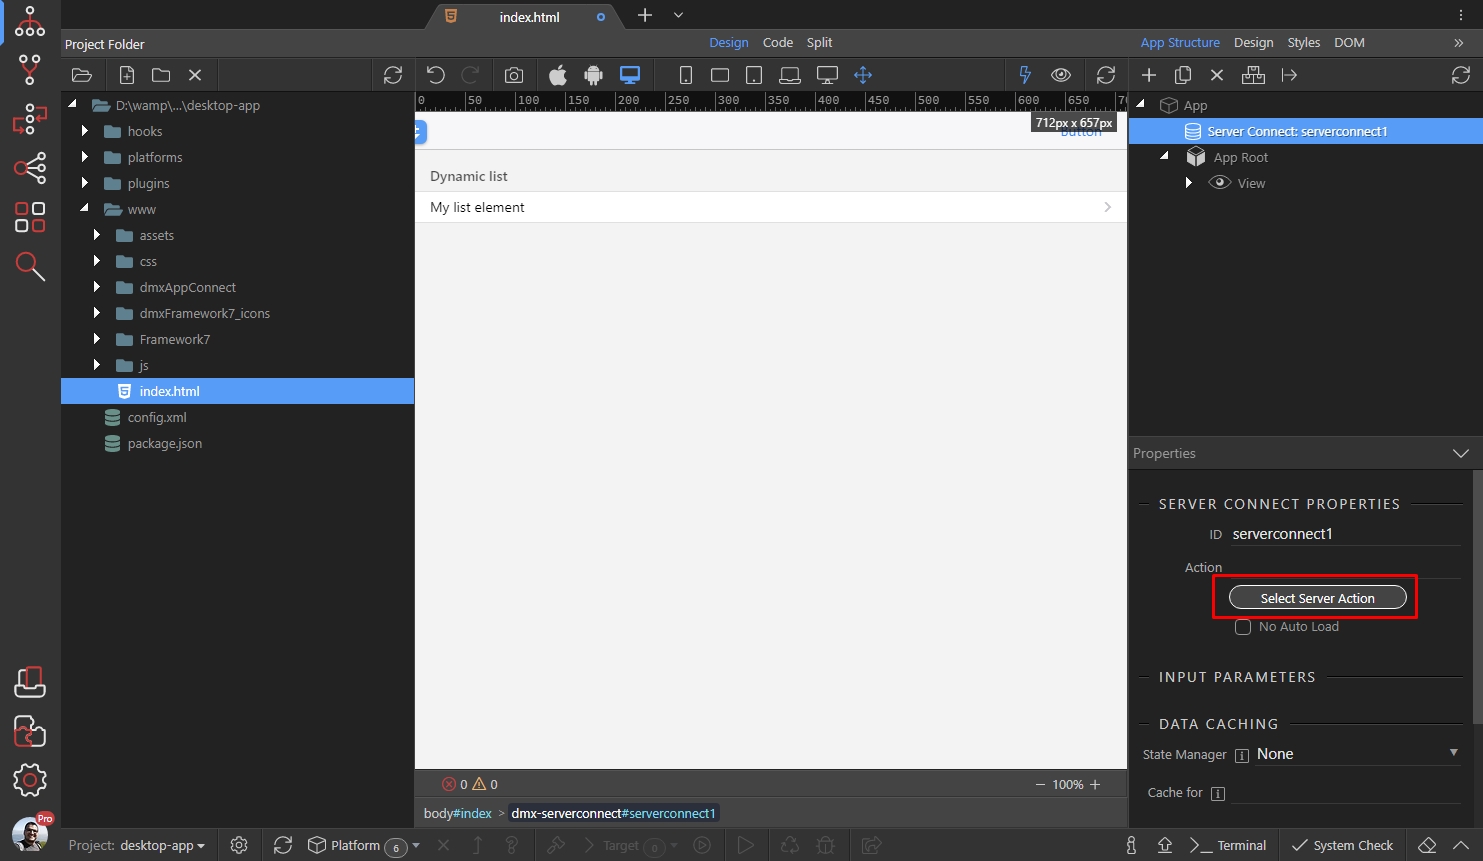
Step 23
Section titled “Step 23”As we explained earlier, server side language (PHP, ASP, ASP.NET) are not allowed in these projects so no server actions are available here. That’s we created the Data API Project.
Open the Site Dropdown on the top right:
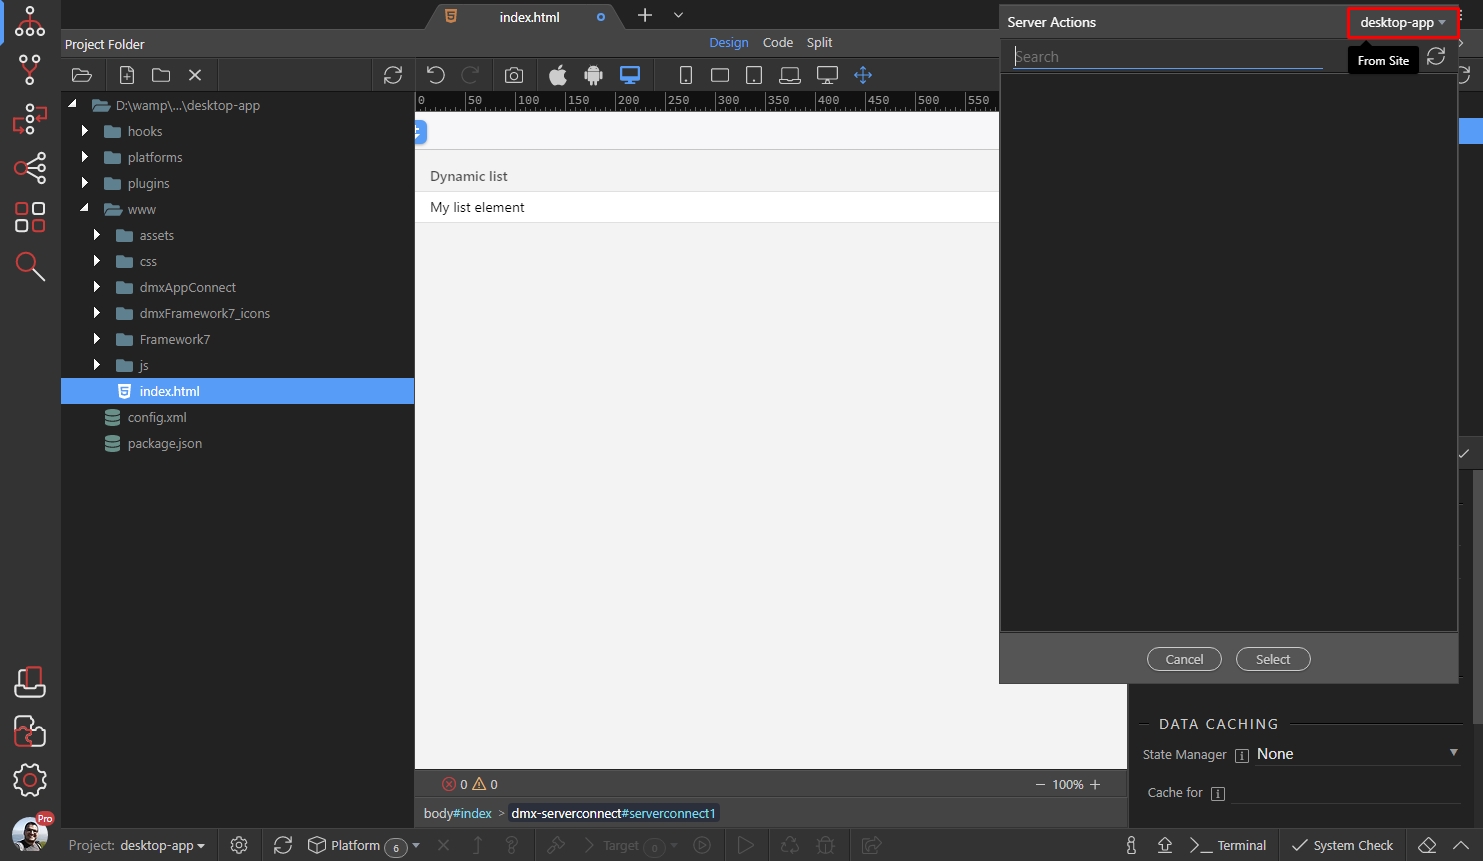
Step 24
Section titled “Step 24”Switch to the Data API Project and you will see the Server Action which we created there. Select the server action:
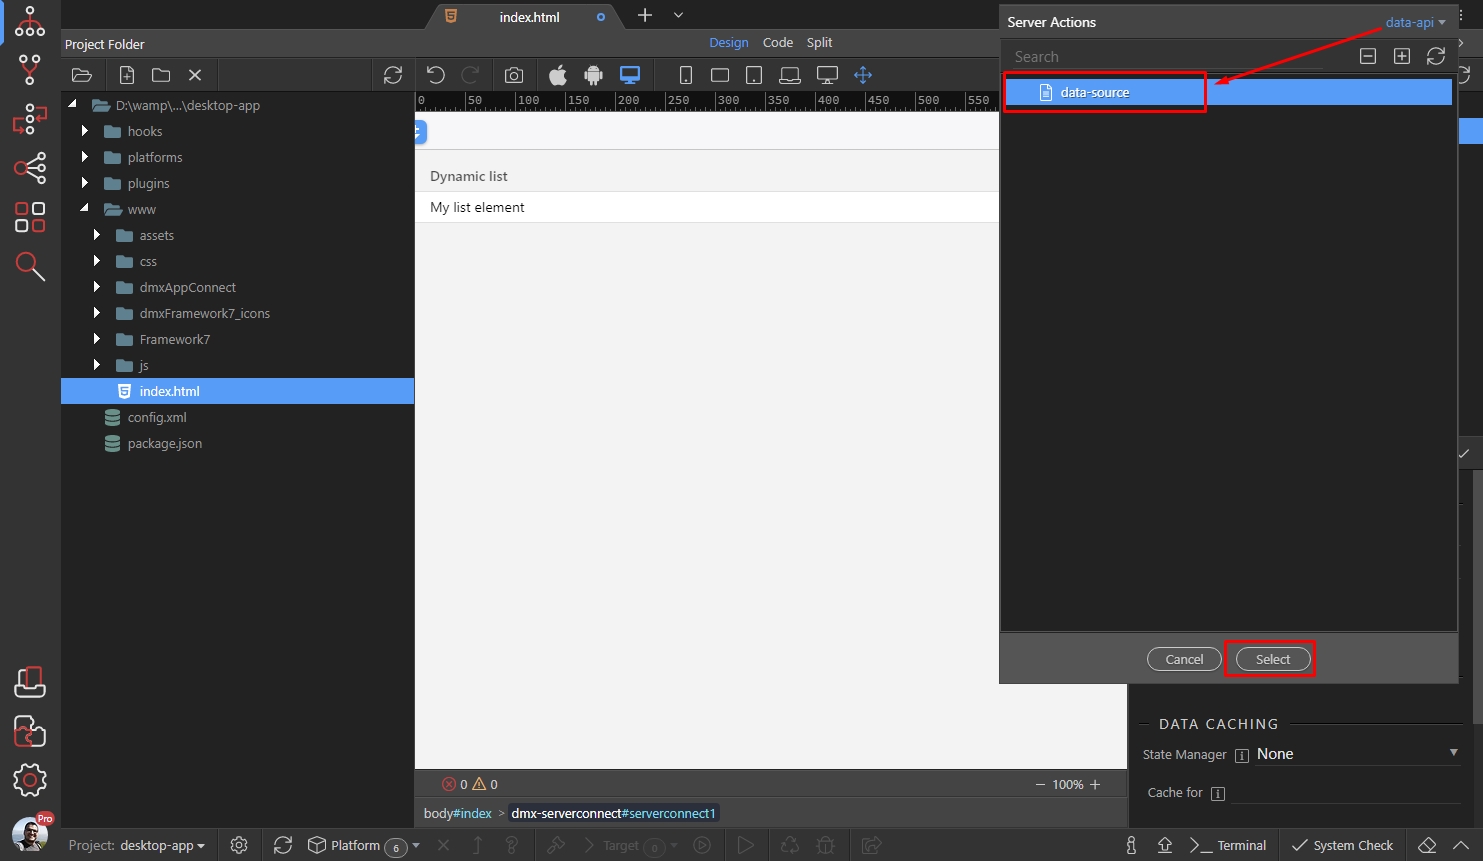
And now your data from the Data API Project is available on this page:
Section titled “And now your data from the Data API Project is available on this page:”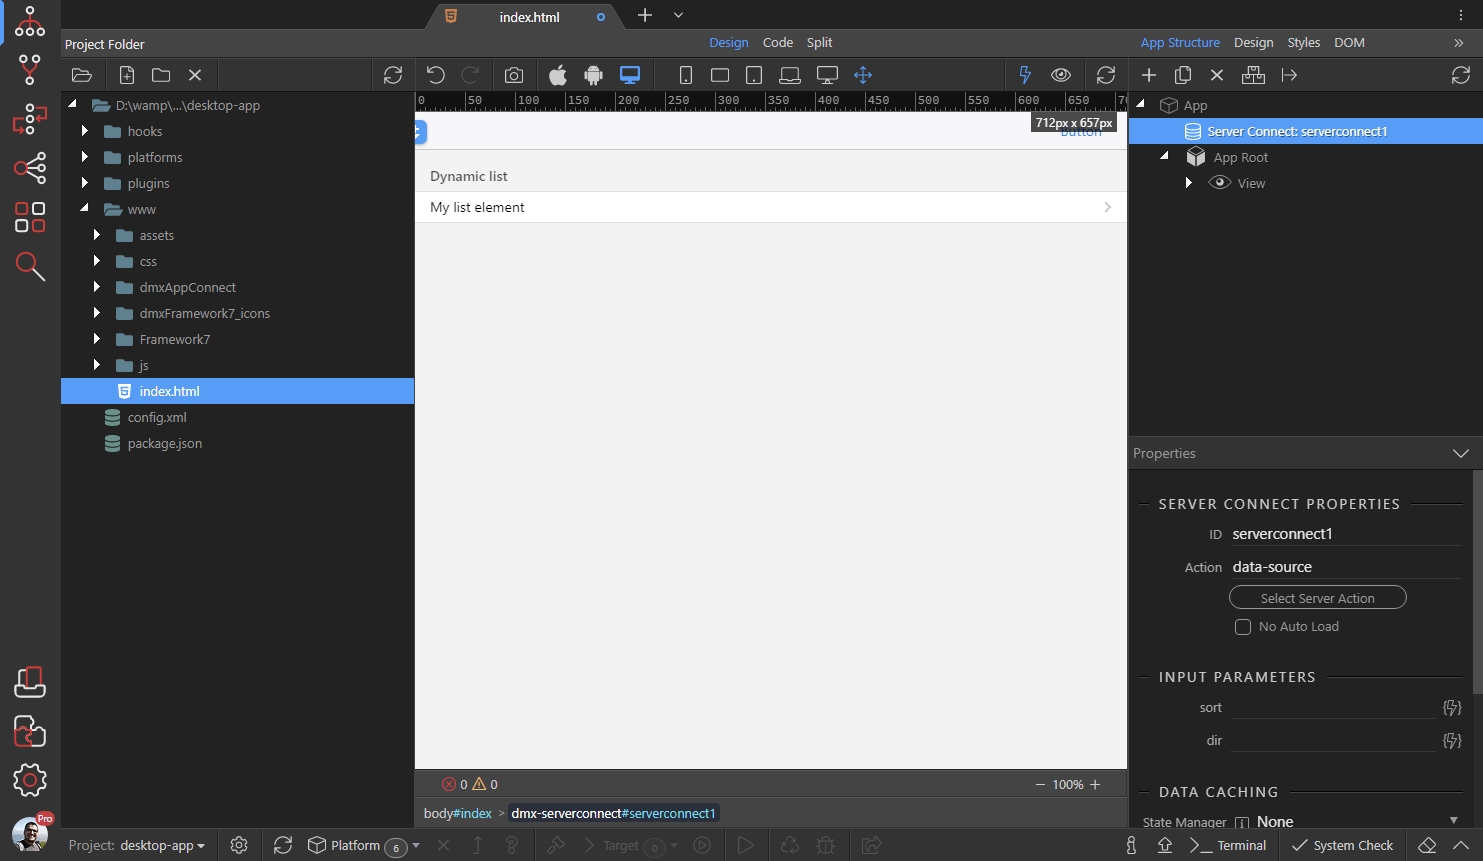
Step 26
Section titled “Step 26”You can use it to create repeat regions and bind data on the page.
We select our list item and click Make Repeat Children:

Then we select an expression:
Section titled “Then we select an expression:”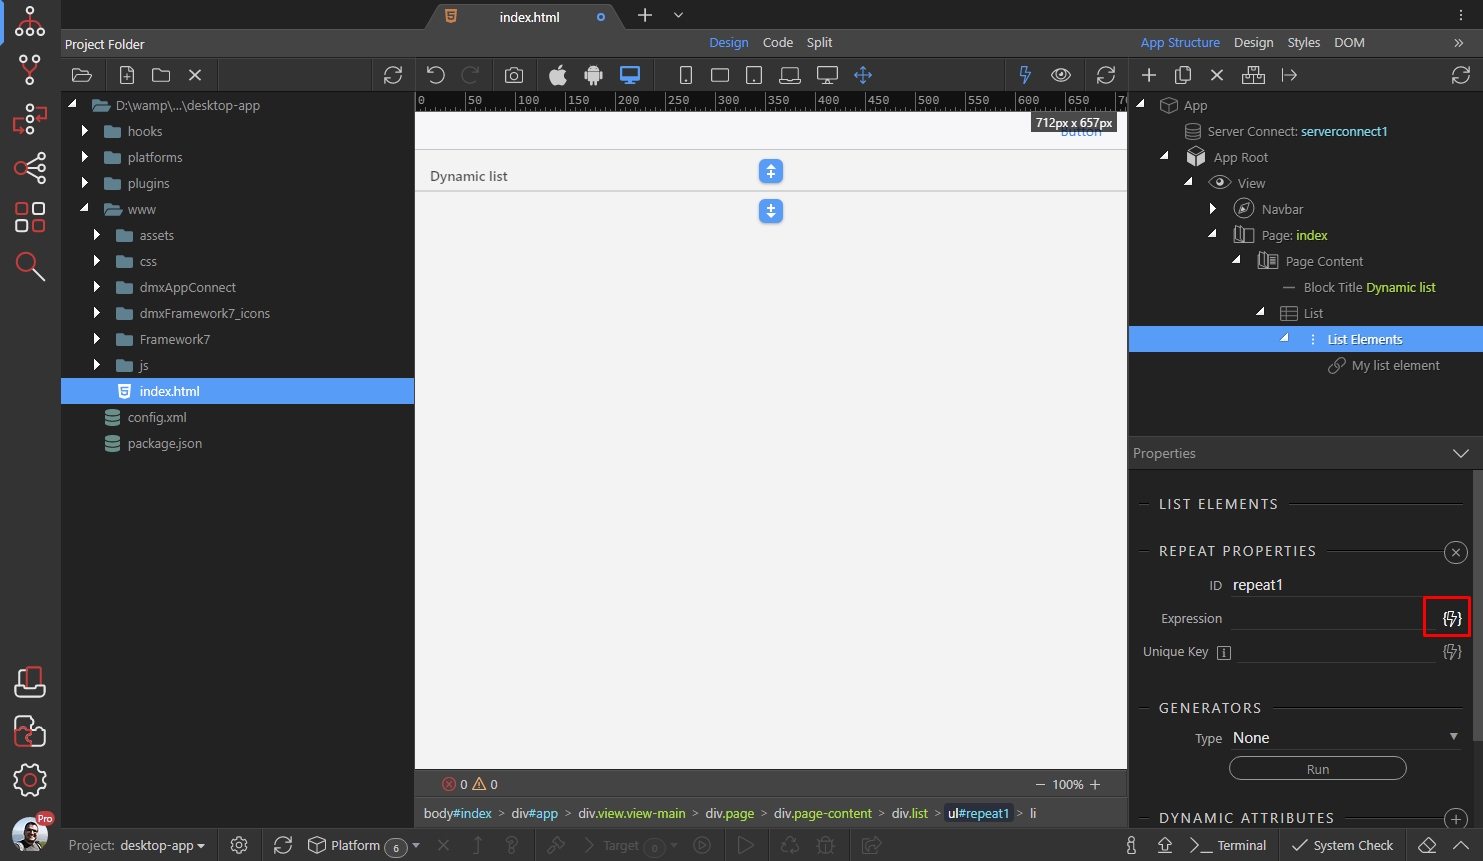
This is the database query returned by our server action:
Section titled “This is the database query returned by our server action:”
You can bind data in the repeat region, just the same way you are doing in any other project:
Section titled “You can bind data in the repeat region, just the same way you are doing in any other project:”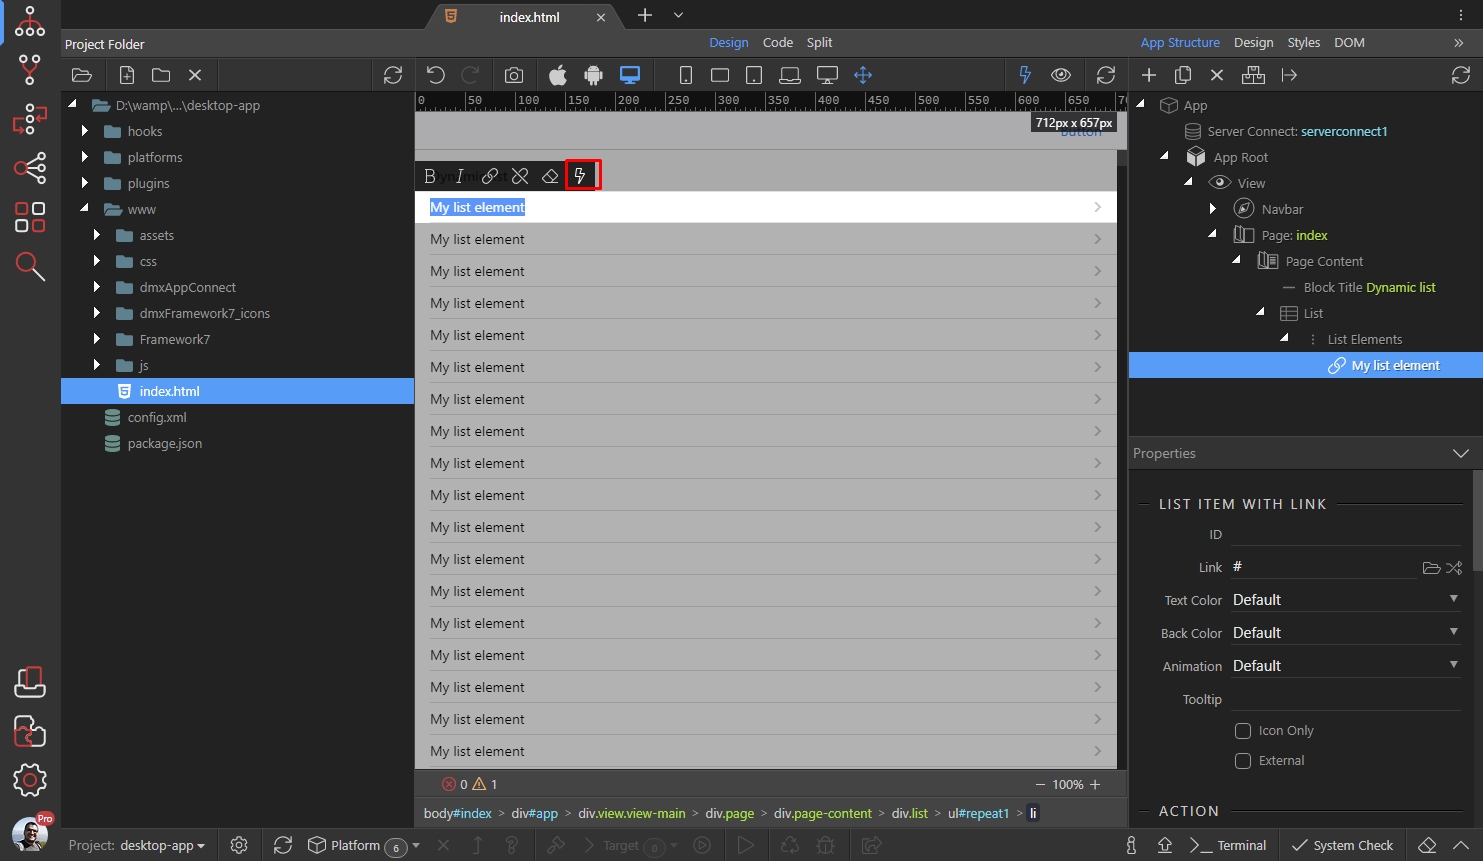
Step 30
Section titled “Step 30”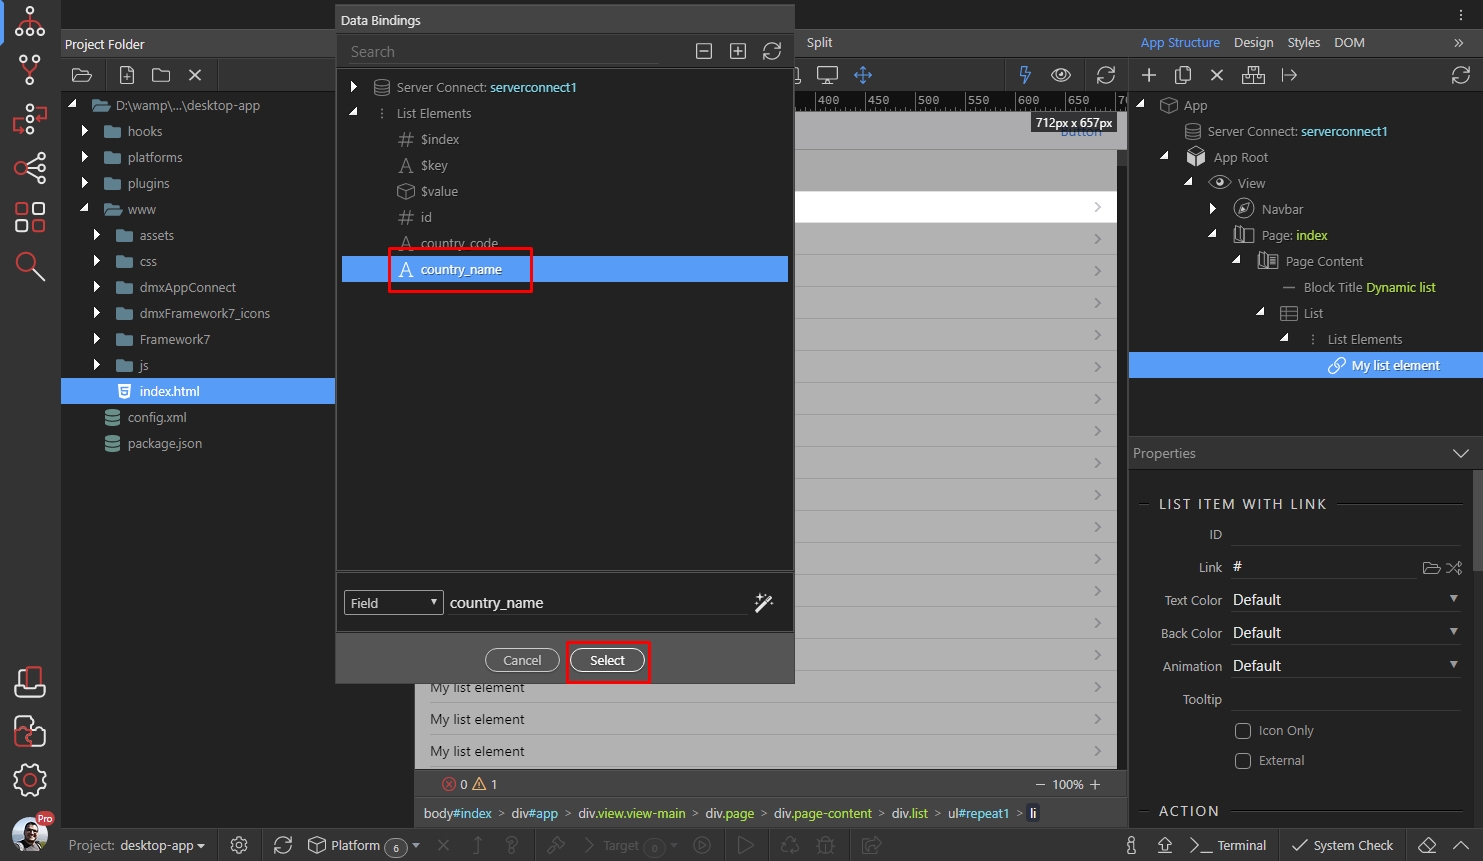
And you are done. Save your page:
Section titled “And you are done. Save your page:”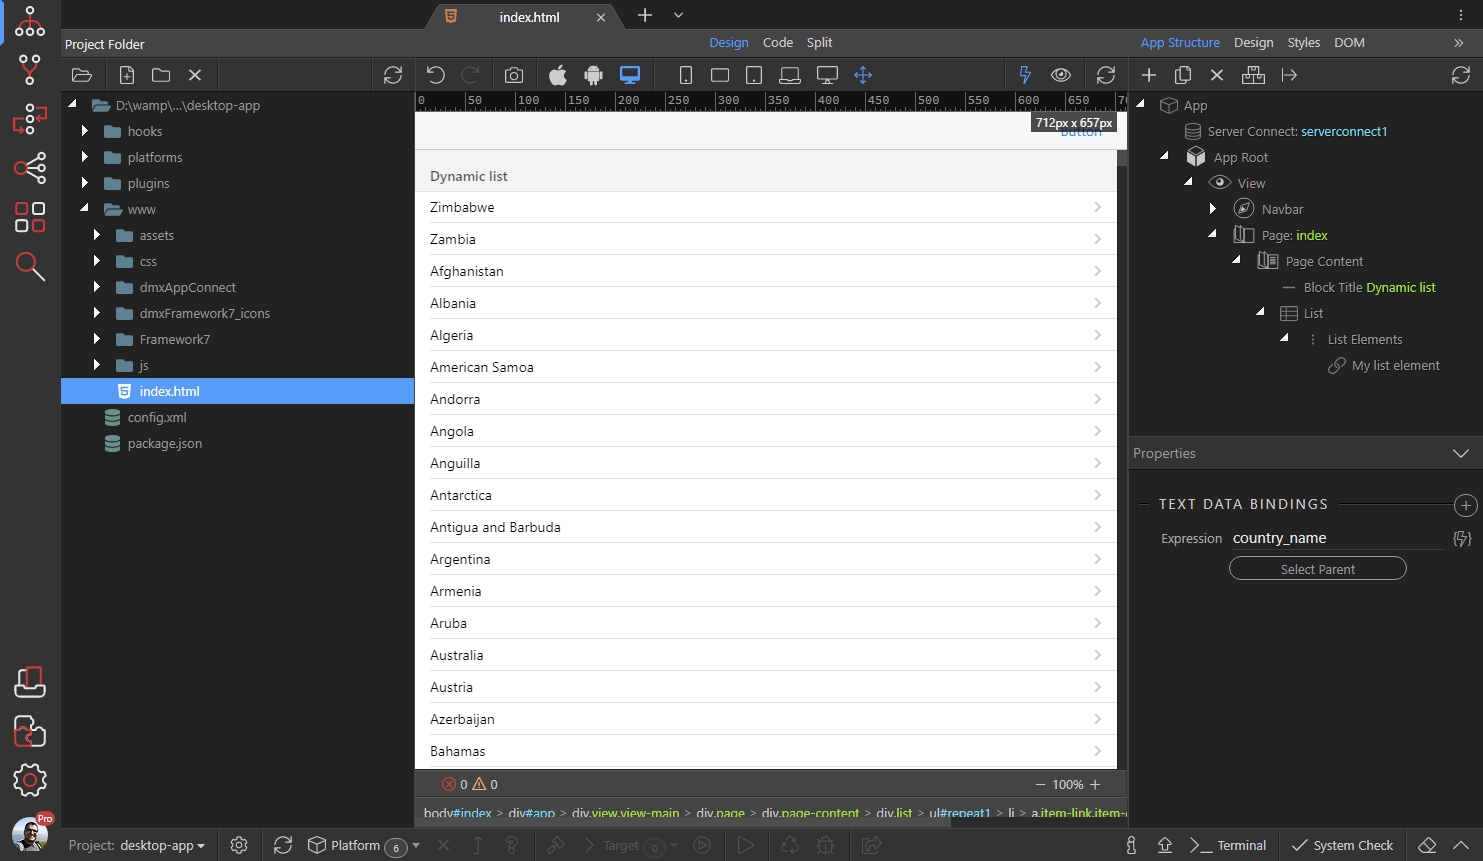
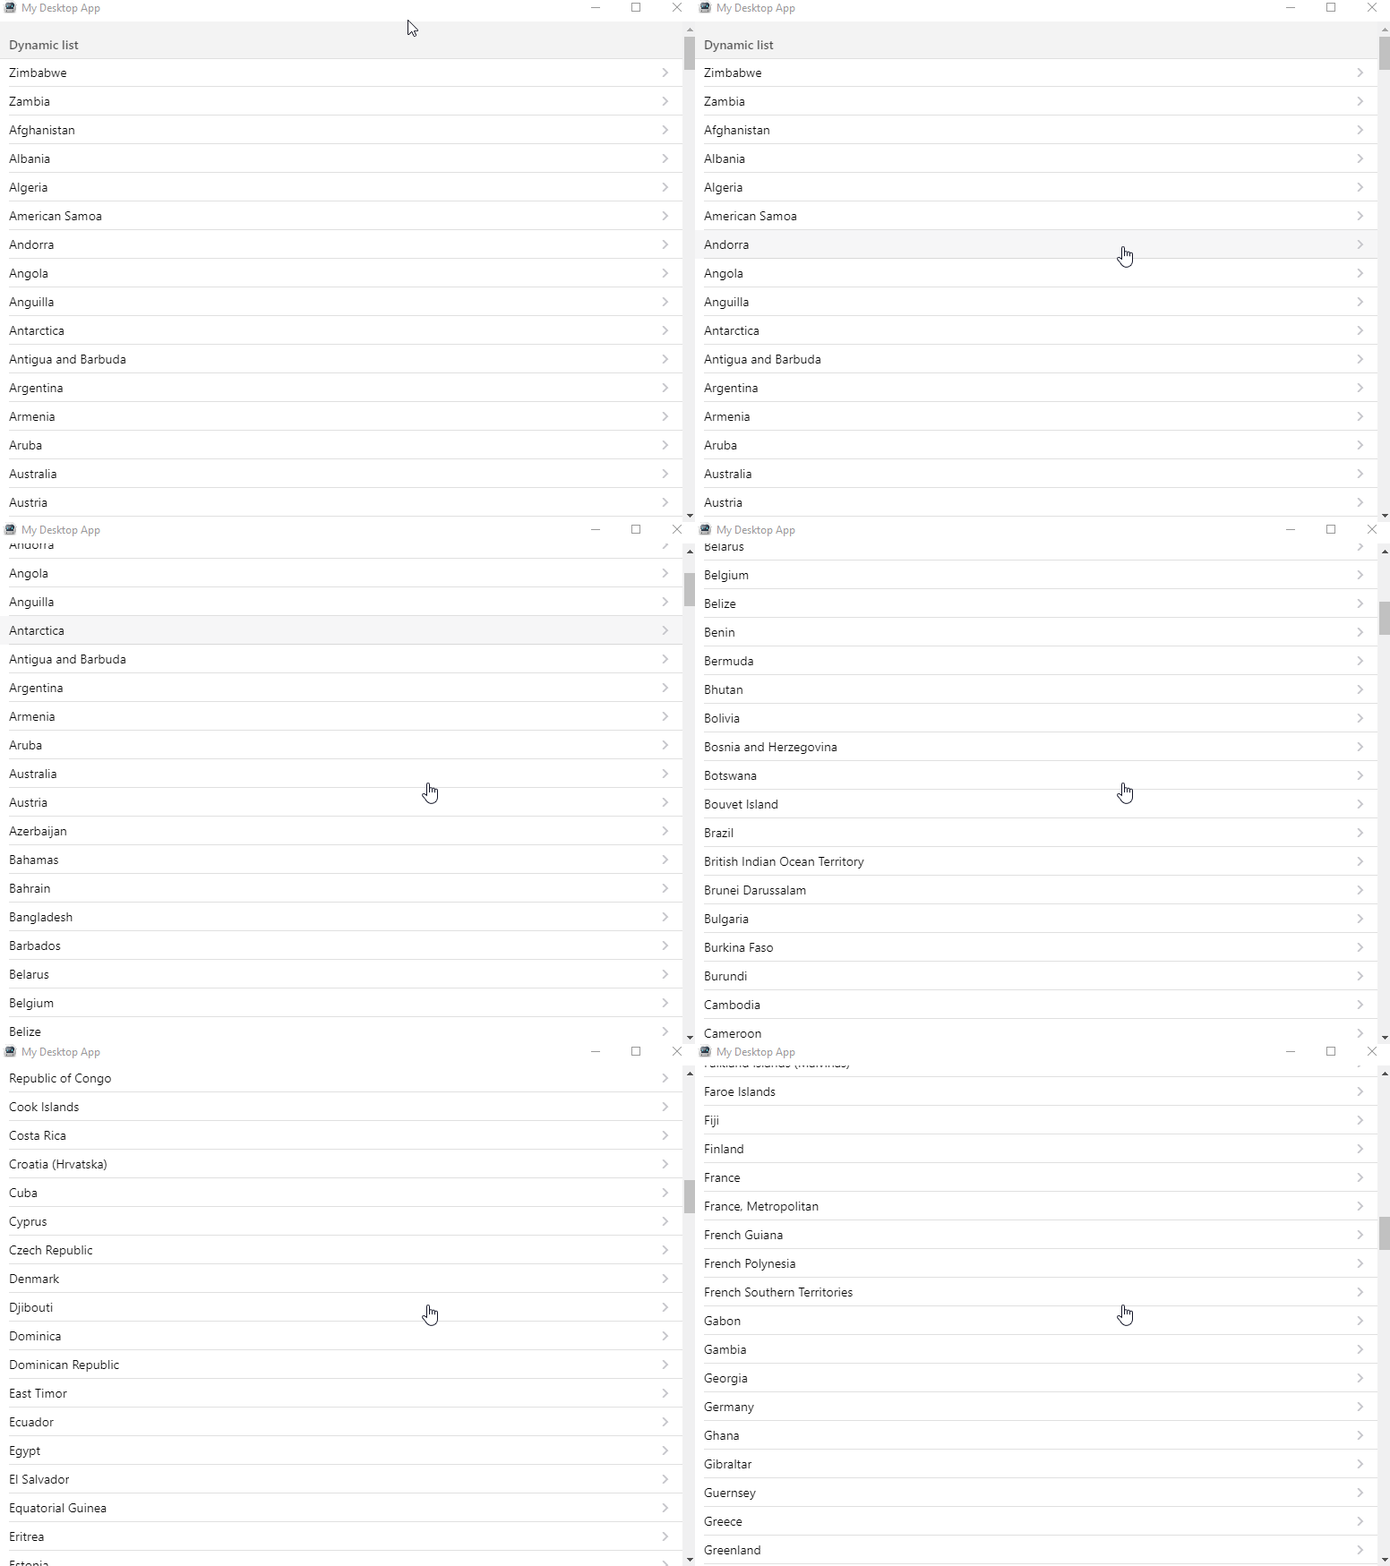
Your dynamic data is now displayed on your Desktop/Mobile App pages:
Section titled “Your dynamic data is now displayed on your Desktop/Mobile App pages:”