
Creating a Shopping Cart with the Data Store Component
The Data Store component allows you to store and edit local data in a simple local storage driven database. You can use this component to create a shopping cart, favorite products list, task lists etc
Step 1
Section titled “Step 1”The Data Store component allows you to store and edit local data in a simple local storage driven database. You can use this component to create a shopping cart, favorite products list, task lists etc. In this tutorial we will show you how to add a shopping cart functionality to your site.
Local Storage vs Session Storage
Section titled “Local Storage vs Session Storage”You can select between storing your data in the browser local storage or session storage. What are differences?
Local Storage
Section titled “Local Storage”The Local Storage stores data with no expiration date, and gets cleared only through JavaScript (Wappler dynamic events) or clearing the Browser cache / Locally Stored Data.
Session Storage
Section titled “Session Storage”The Session Storage stores data only for a session, so the data is stored until the browser or the tab is closed.
Products page overview
Section titled “Products page overview”We created a server action, which returns records from our database table. On the products page we created repeating row, which lists products from a database. The dynamic data used here is product id, name, price, description and an image per each of the products.
There is also an Add To Cart button for each of the products, it will be used to add the selected product into the shopping cart later.
You can add more info in the repeat region, this is just an example:

Creating the Shopping Cart
Section titled “Creating the Shopping Cart”Let’s setup our shopping cart. The functionality we are going to add in the steps below include: adding a product into the shopping cart, updating a product quantity, removing a product from the shopping cart.
Define Data Store Schema
Section titled “Define Data Store Schema”The first thing we need to do is to define the Data Store Schema. In order to do this, we need to add the Data Store component on the page. Select App and click Add New Component:
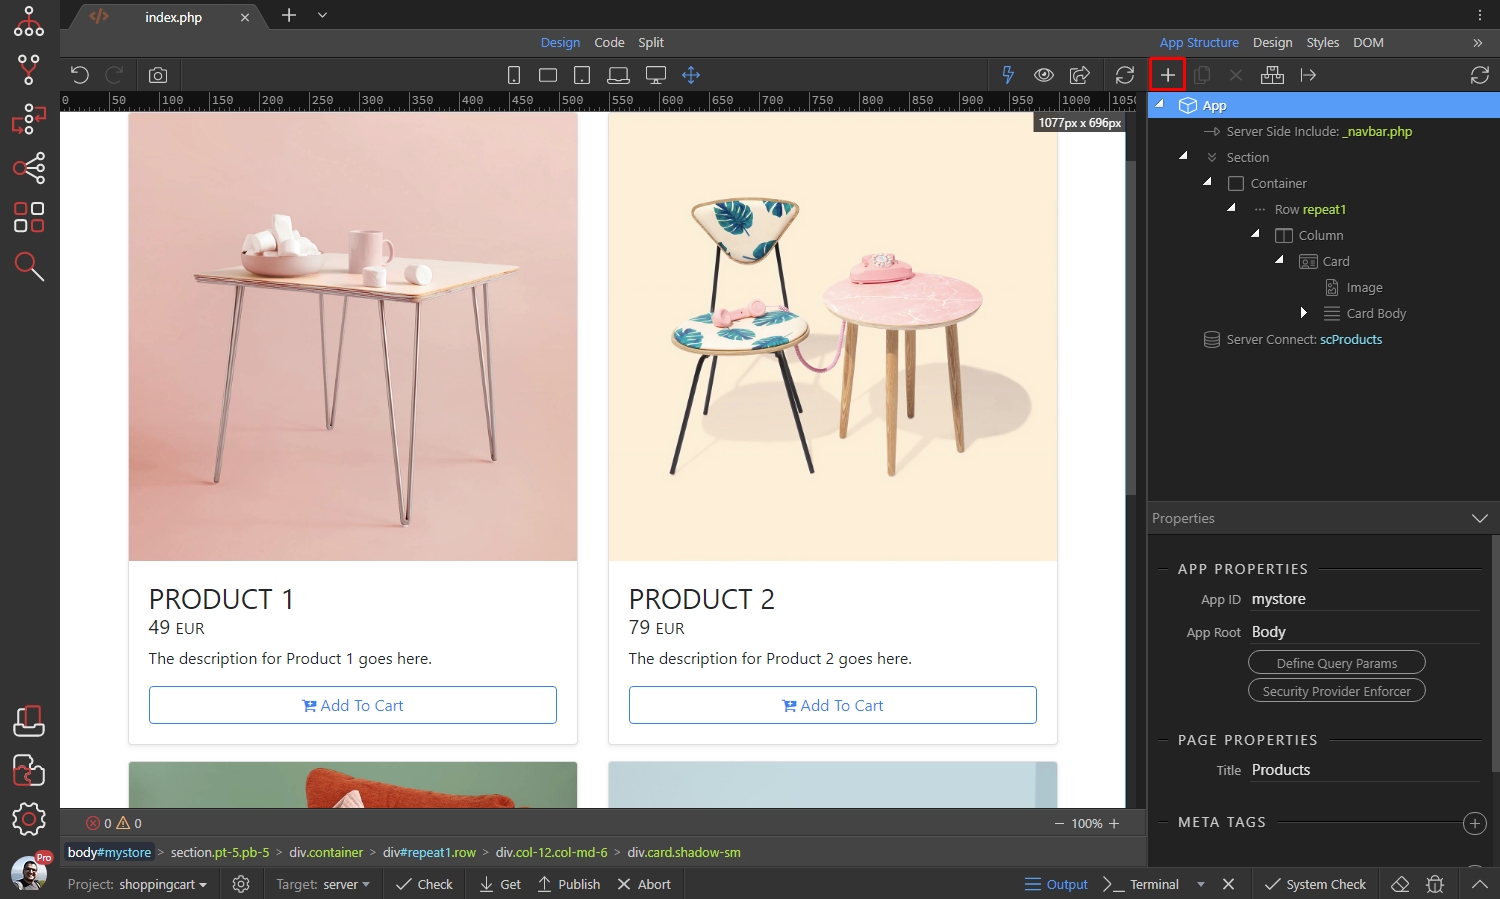
Select Data and add Data Store:
Section titled “Select Data and add Data Store:”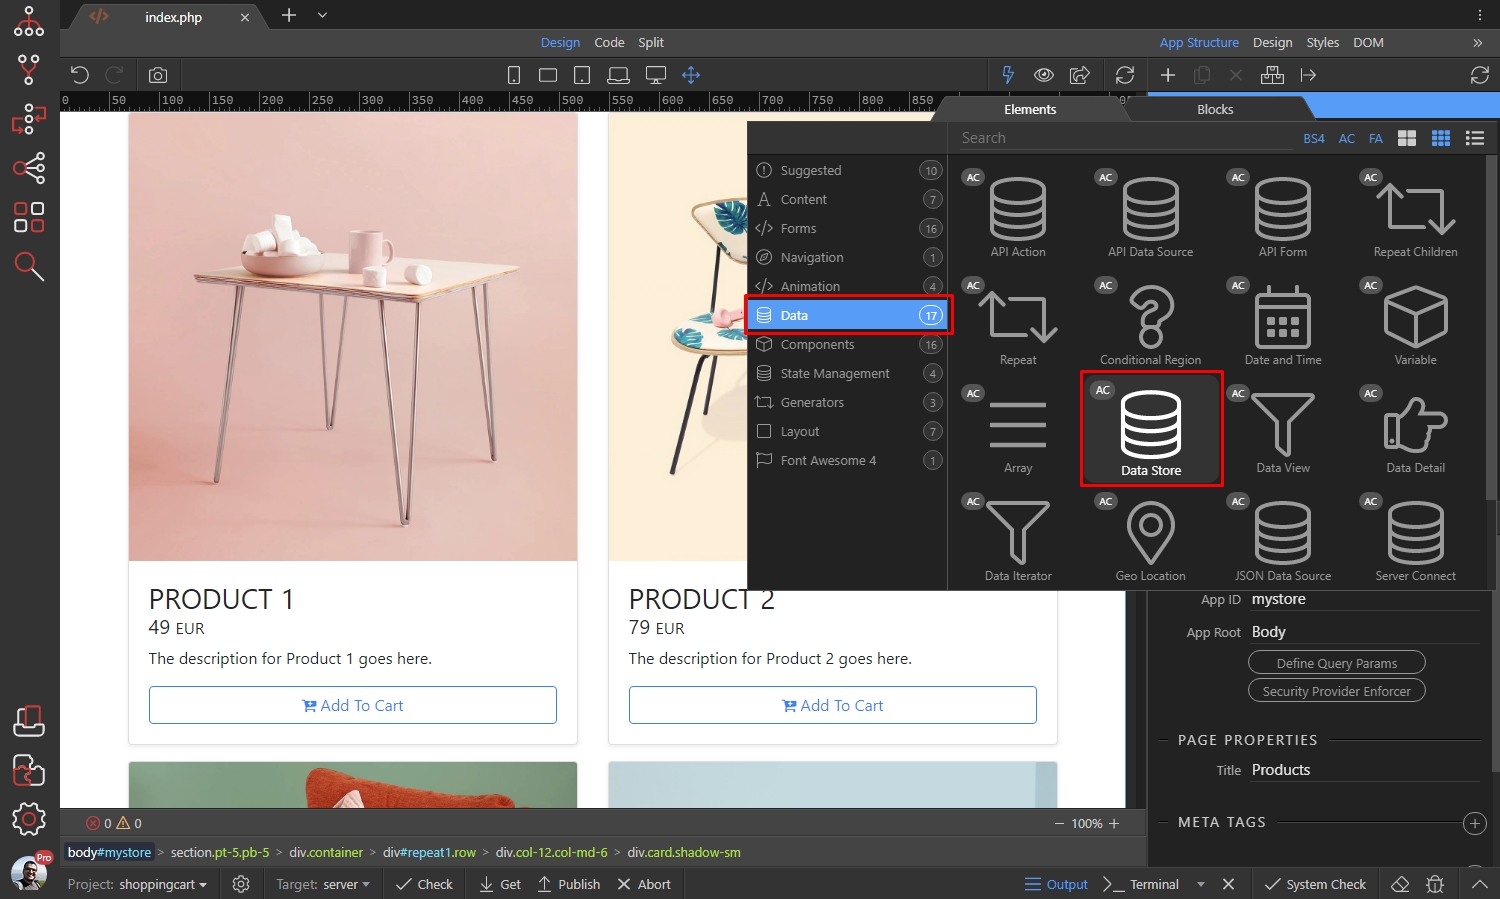
Let’s change the Data Store ID to something more meaningful, like cart:
Section titled “Let’s change the Data Store ID to something more meaningful, like cart:”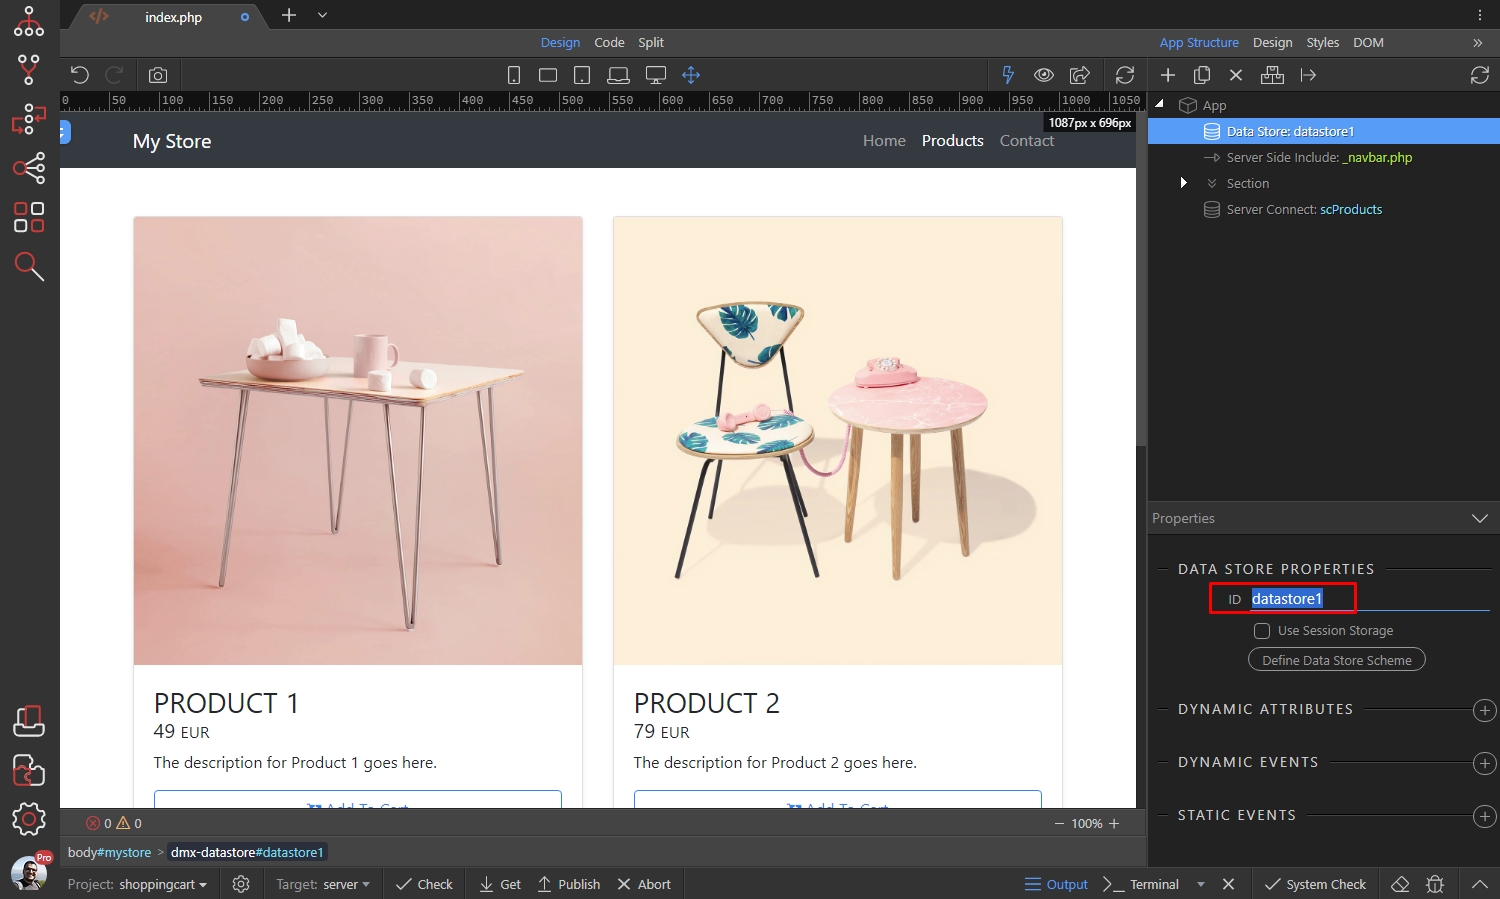
Step 11
Section titled “Step 11”In order to keep the products in the shopping cart, even if the users leave the site and come back later, we will use the browser local storage. So - don’t check the Use Session Storage checkbox.
Then click the Define Data Store Schema button:
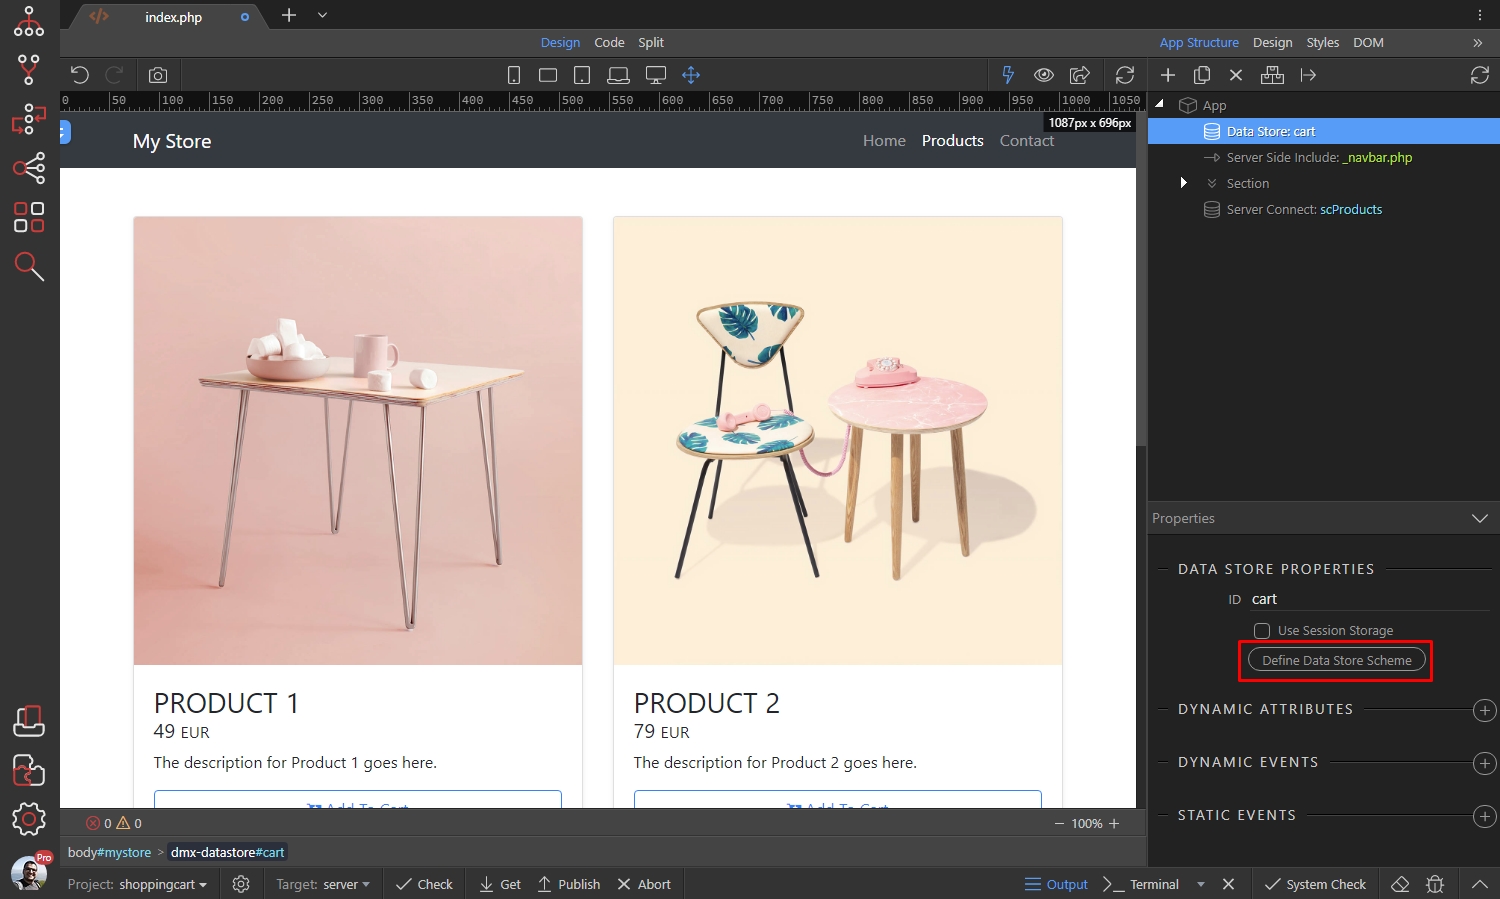
Select cart and click the Add New Item button:
Section titled “Select cart and click the Add New Item button:”
Step 13
Section titled “Step 13”Then select Add Variable. We need separate variables for the different dynamic data items you need to use in the cart. In the most basic cases you would need: product id, product name, price and quantity.
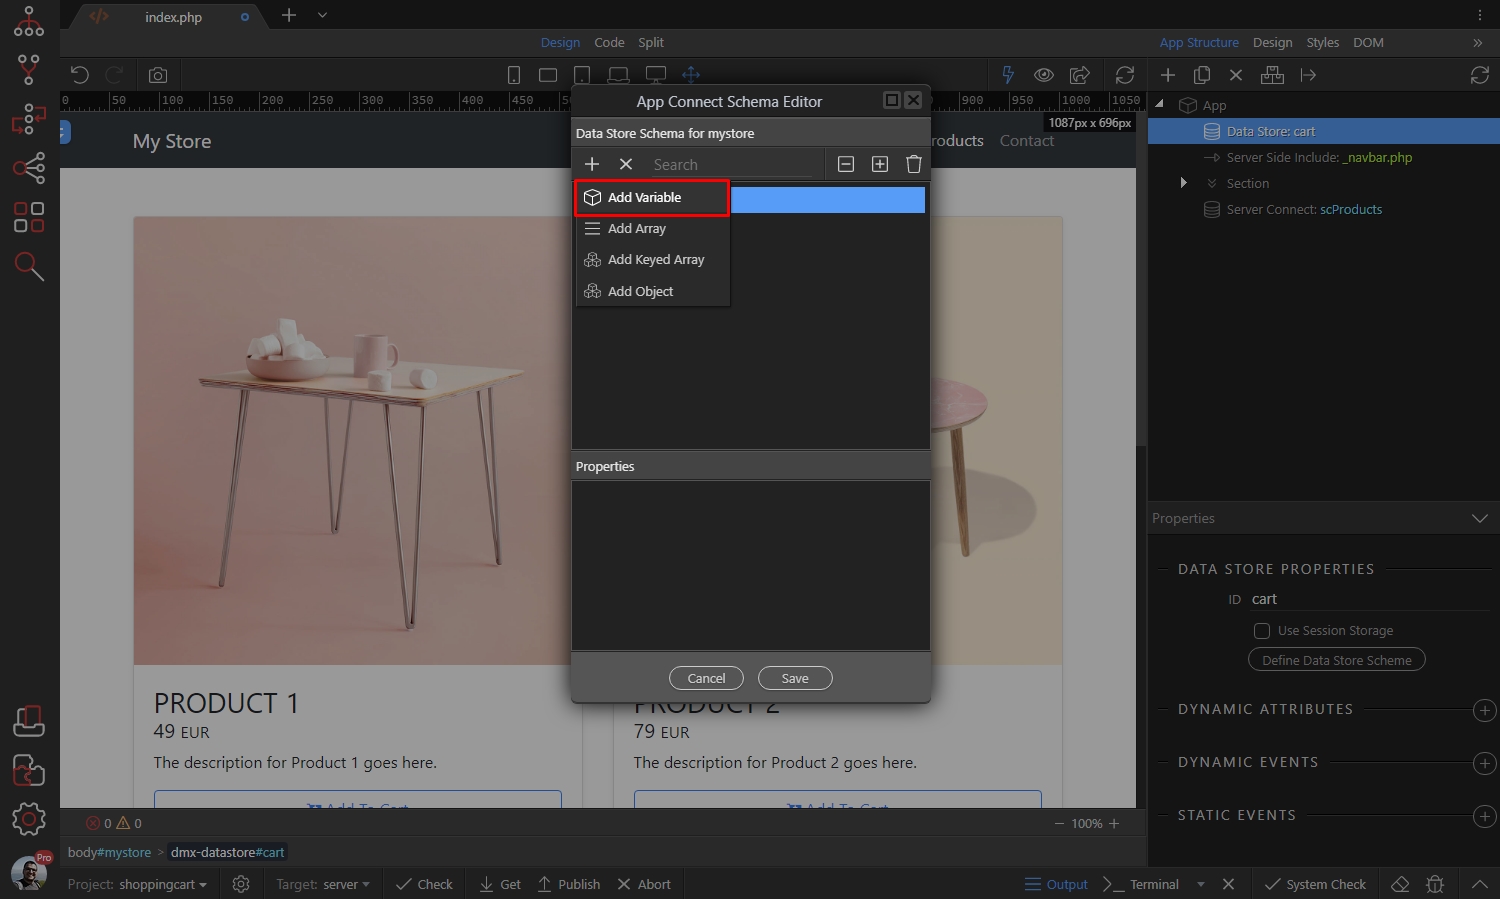
Step 14
Section titled “Step 14”We call this variable prd_id as it will store the product ID. Set the data type, which is going to be stored here, in our case this is a number:
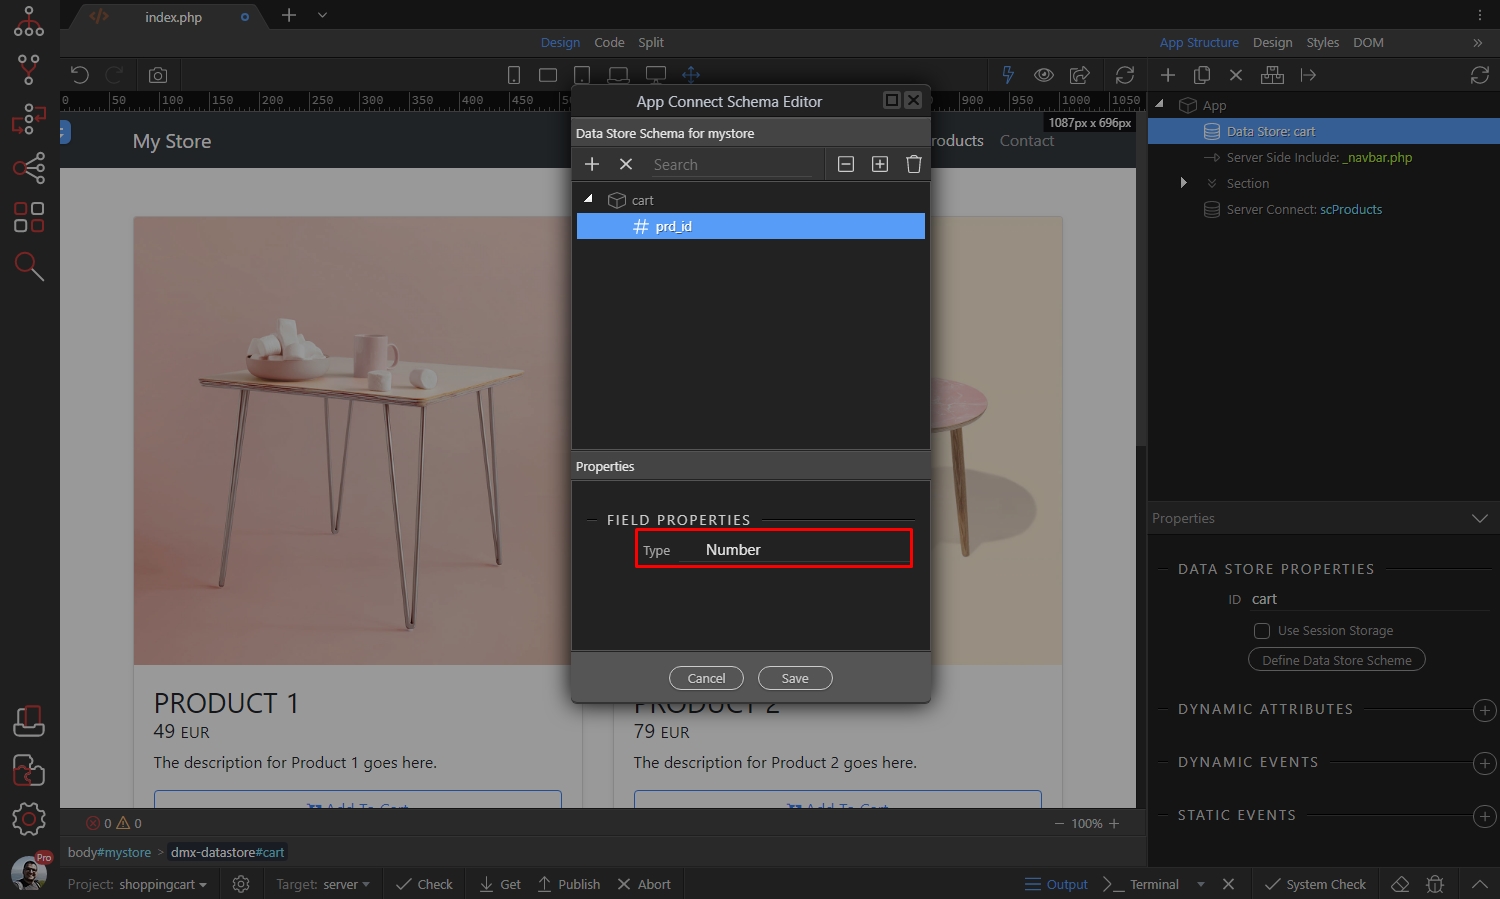
Do the same with the rest of the variables which you need for your shopping cart:
Section titled “Do the same with the rest of the variables which you need for your shopping cart:”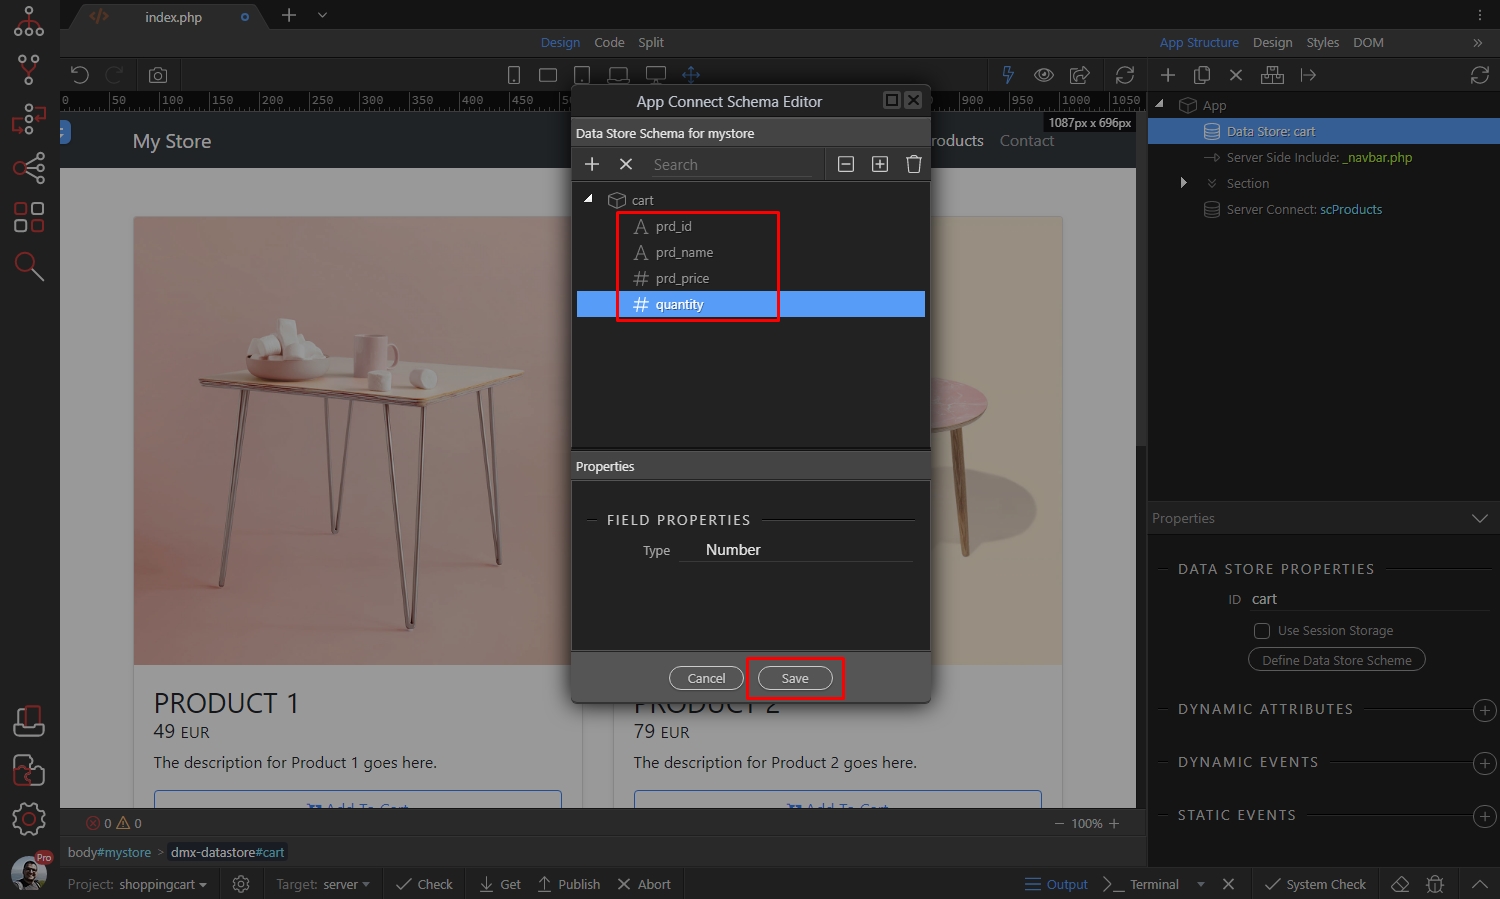
We are done setting up the Data Store Schema.
Section titled “We are done setting up the Data Store Schema.”Add products to the shopping cart
Section titled “Add products to the shopping cart”We already have the shopping cart structure defined, so let’s start with adding product data into it. Select the Add To Cart button and add a new Dynamic Event:

Select Mouse > Click:
Section titled “Select Mouse > Click:”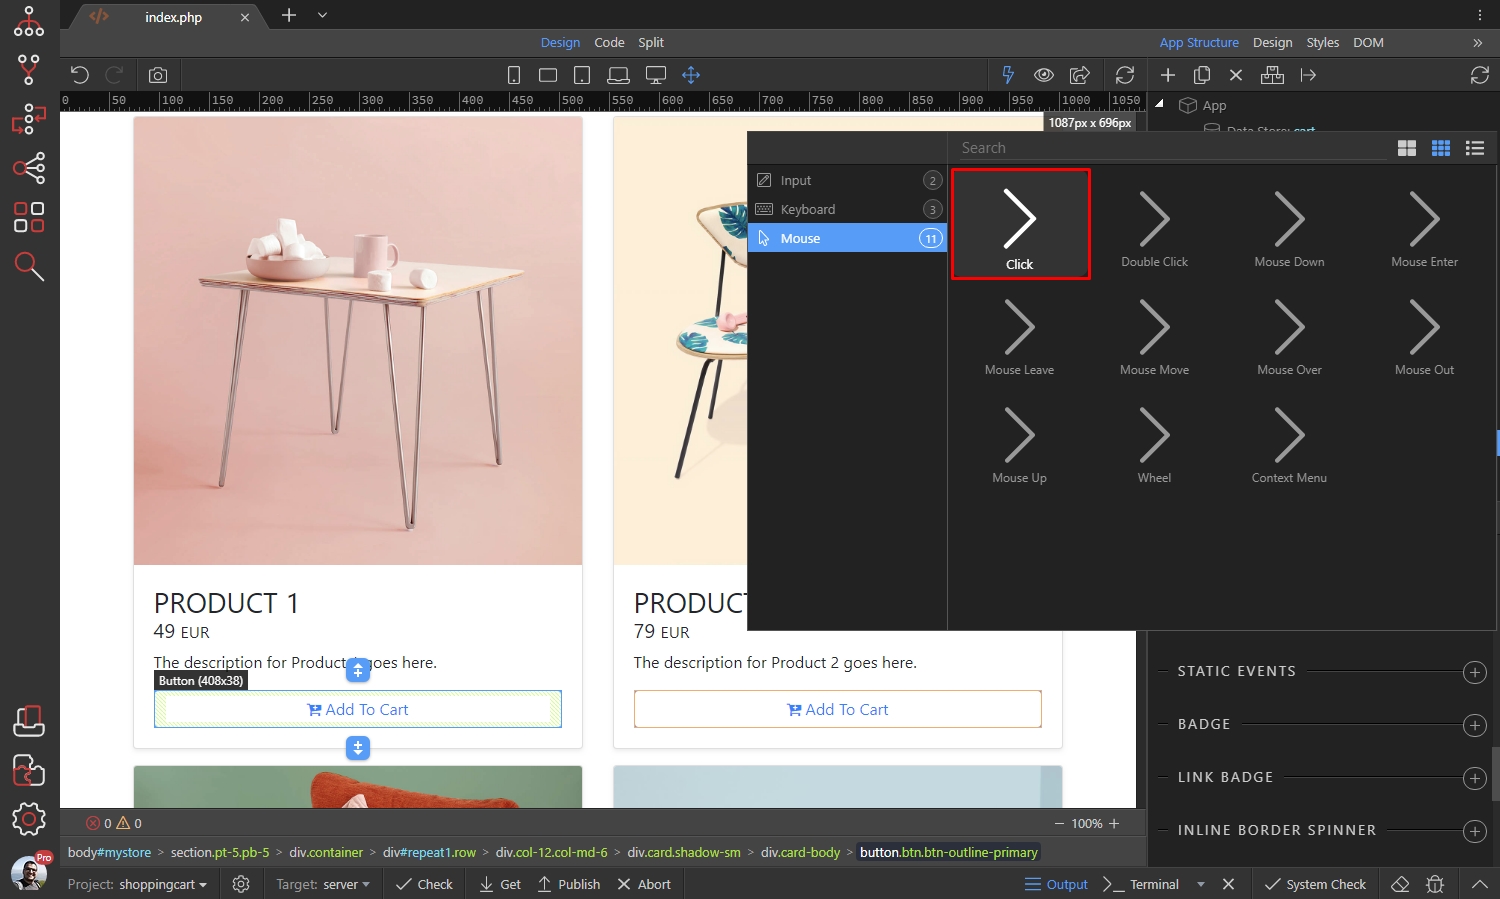
And select what needs to happen on click:
Section titled “And select what needs to happen on click:”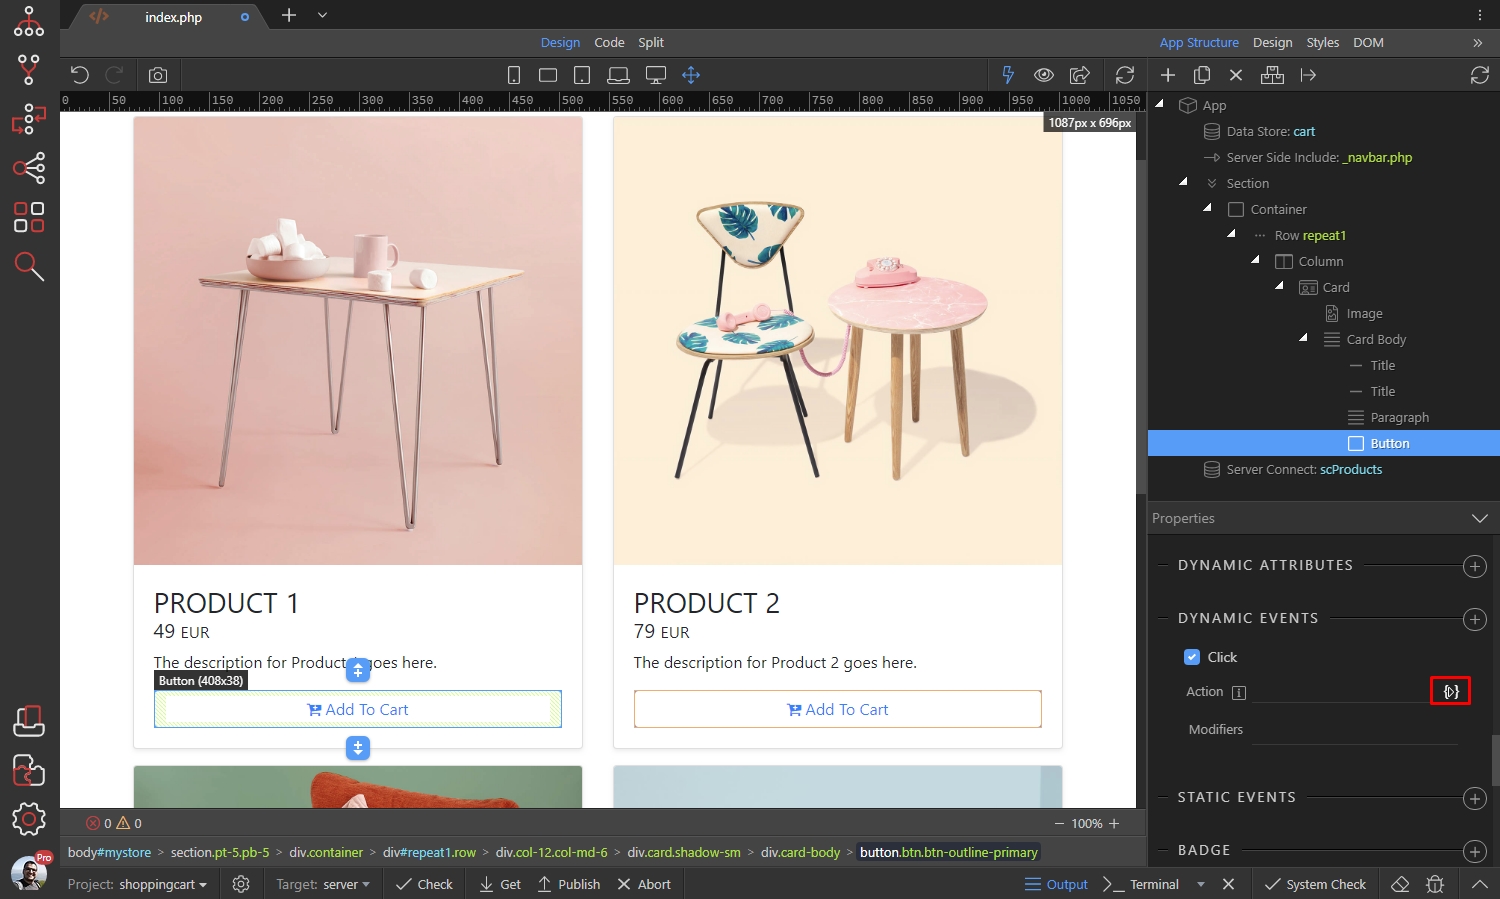
Step 20
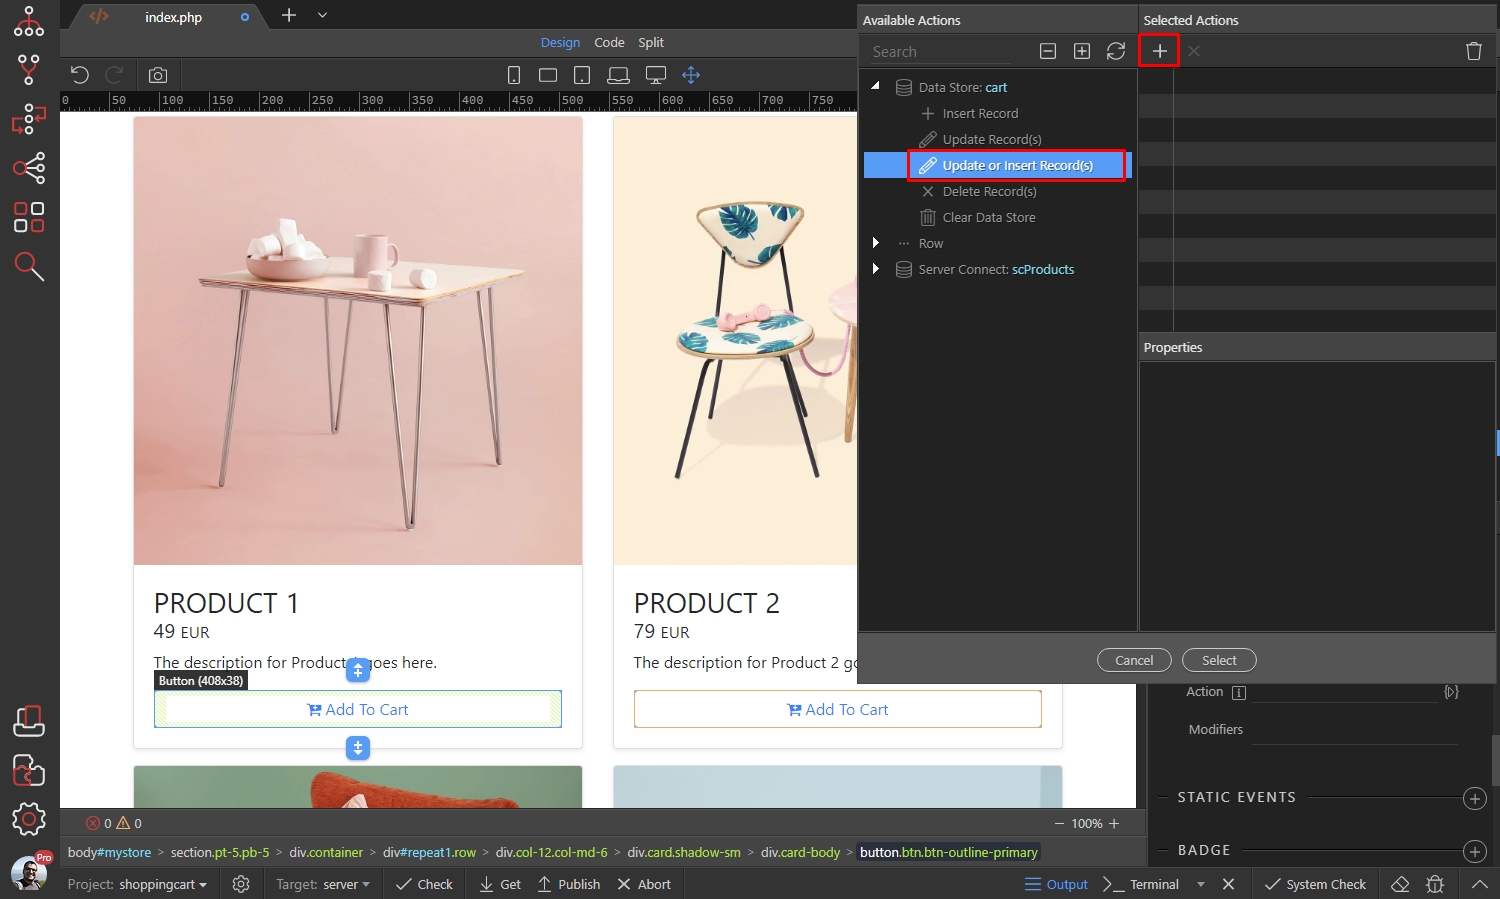
Section titled “Step 20”We need a functionality that automatically updates the product quantity, if the product has already been added to the cart, or insert it as a new product there if it’s not in the cart yet. So select Update or Insert Record(s) action and click the add button:
Step 21
Section titled “Step 21”In order to check if the product is already in the cart, we need to use it’s unique id. So we are going to check the dynamic product ID, returned by our database. Under Which Records click the dynamic data picker to select your unique product ID:

This is the product ID binding, located under the repeat region in the data picker:
Section titled “This is the product ID binding, located under the repeat region in the data picker:”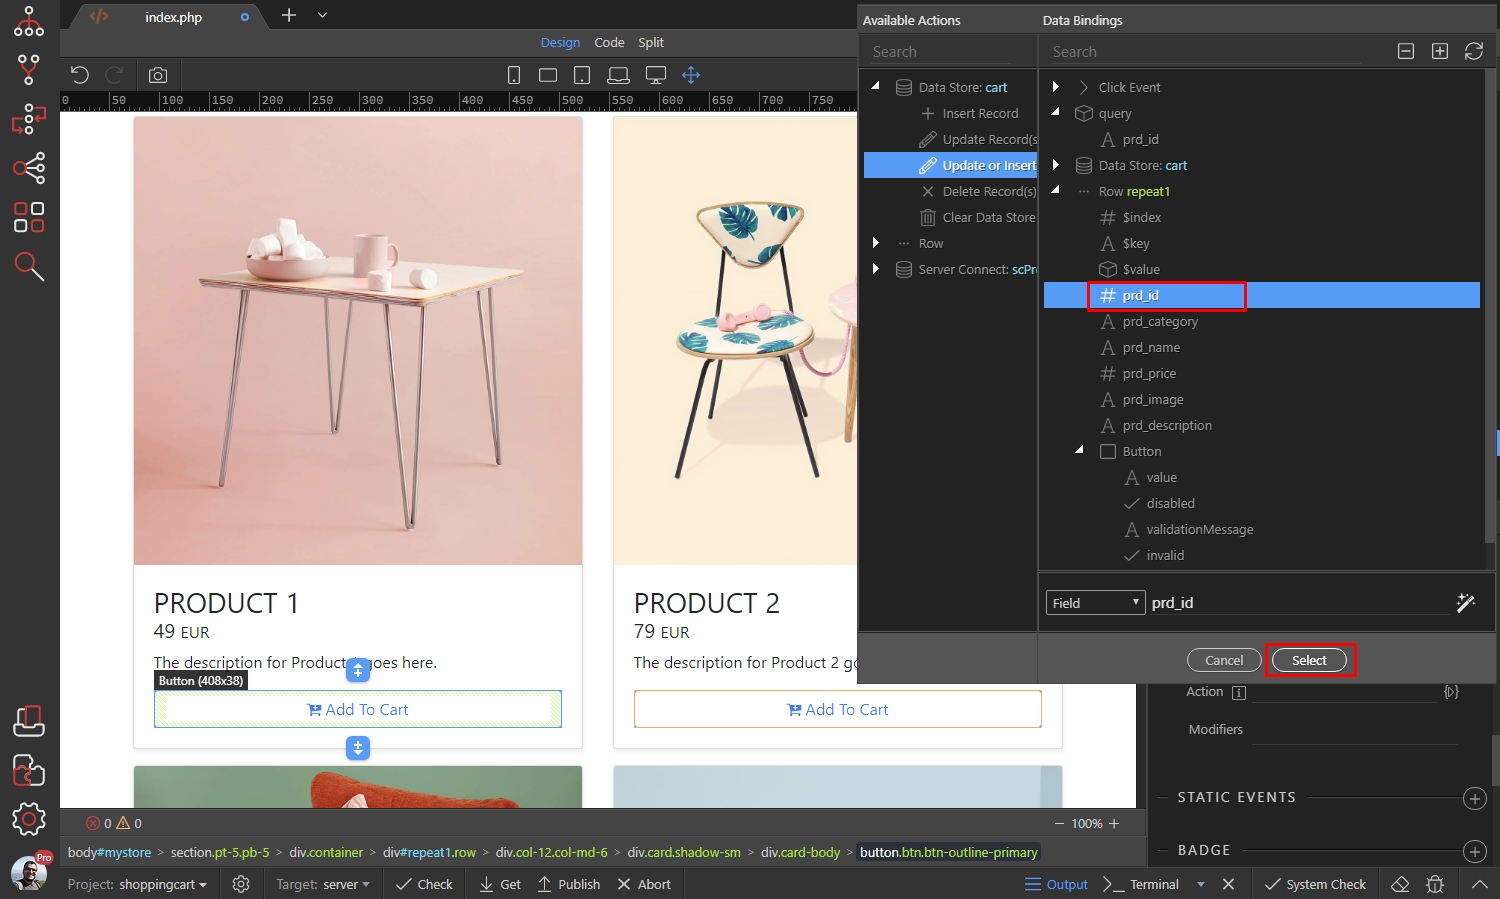
Then scroll down to New Values and select the dynamic values which you want to insert in your shopping cart:
Section titled “Then scroll down to New Values and select the dynamic values which you want to insert in your shopping cart:”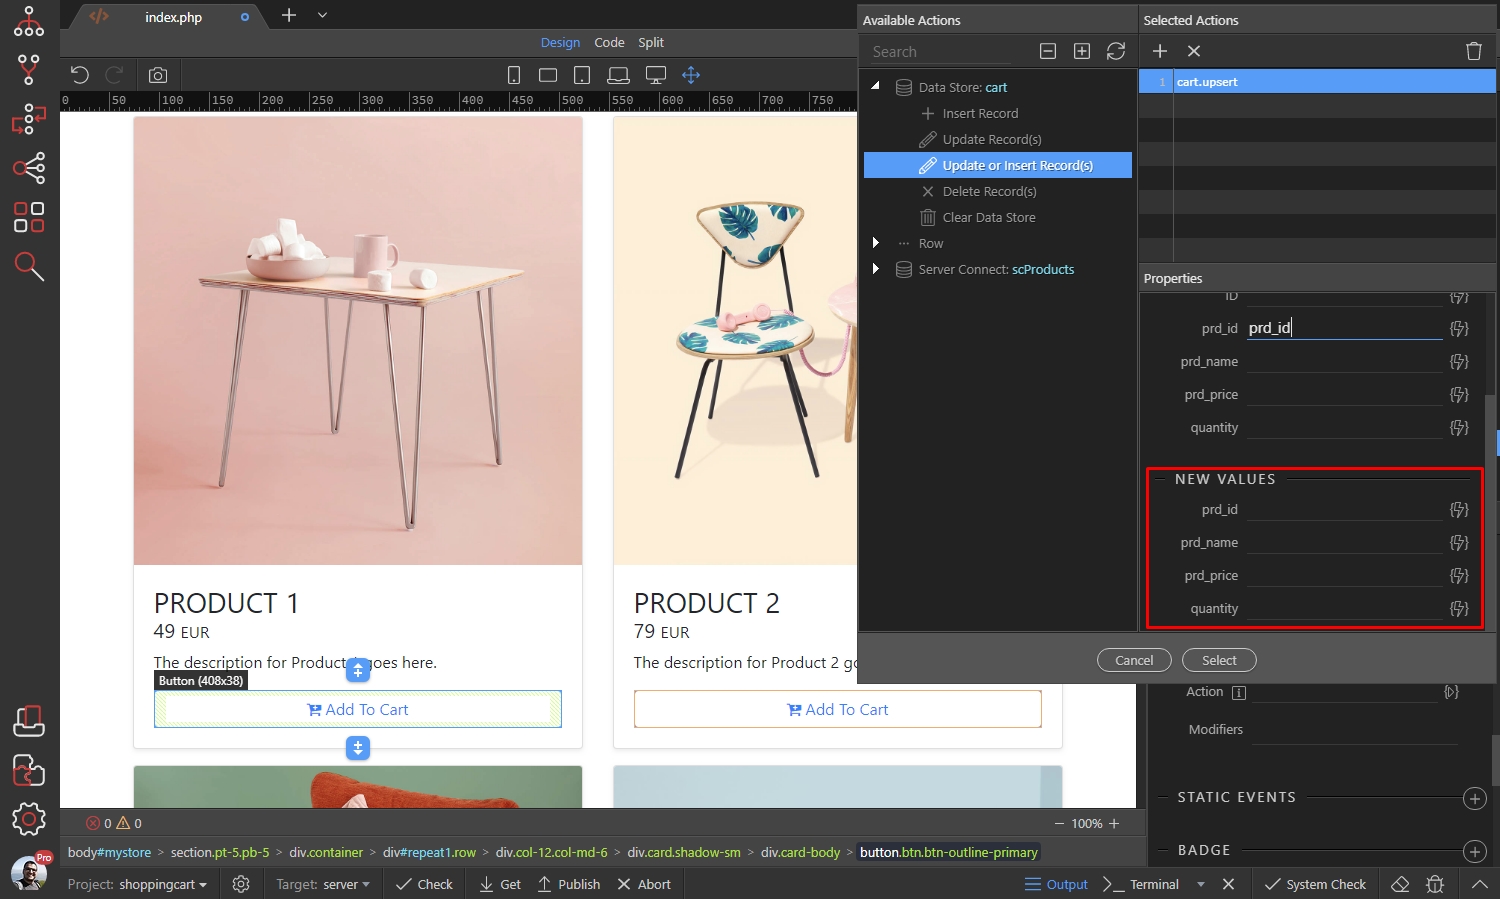
Just select the corresponding dynamic bindings, under your repeat region in the data picker:
Section titled “Just select the corresponding dynamic bindings, under your repeat region in the data picker:”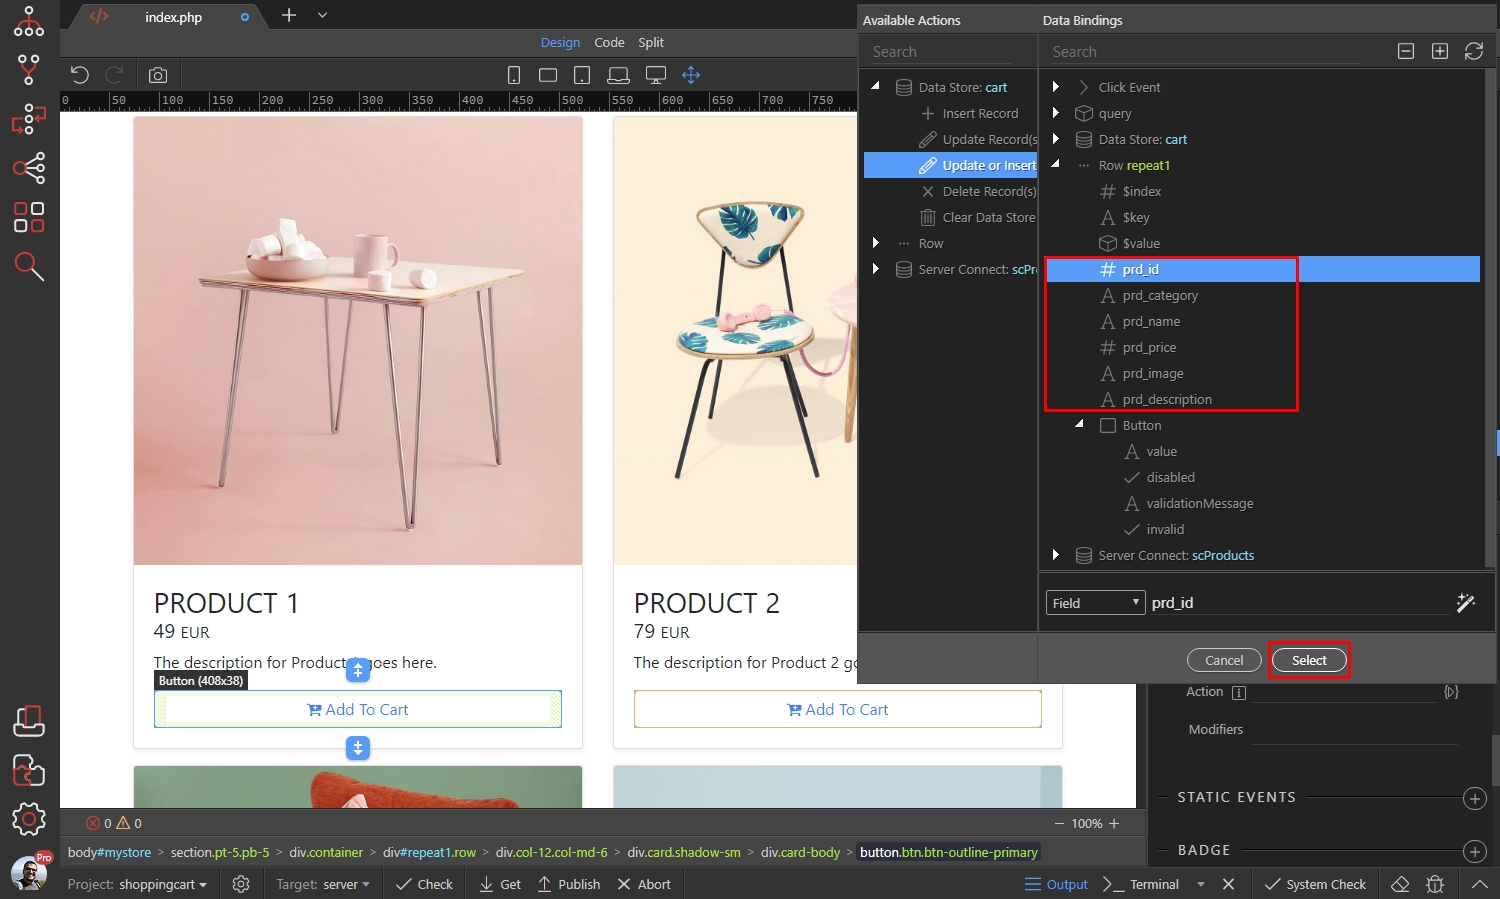
Step 25
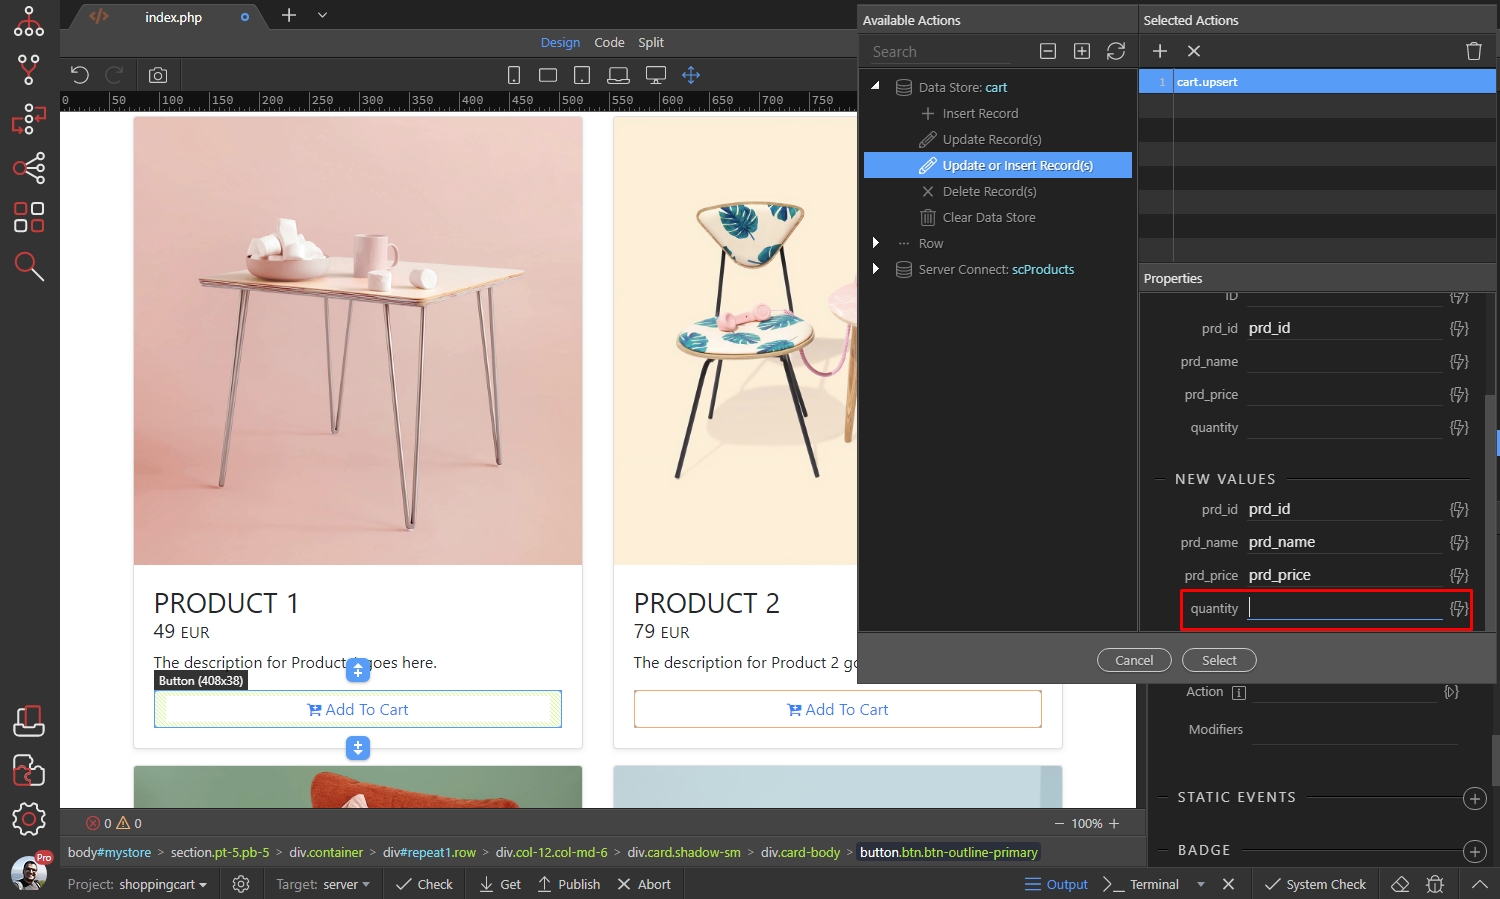
Section titled “Step 25”As we explained a few steps above, we need the quantity to automatically update if the product has already been added to the shopping cart:
`quantity + 1`
Section titled “`quantity + 1`”This quantity field here is the quantity variable you added to the Data Store Schema earlier. For its value enter:
`quantity + 1`
Where the word quantity is the name of the quantity variable in the Data Store Schema.
Note that the value is enclosed in backticks:
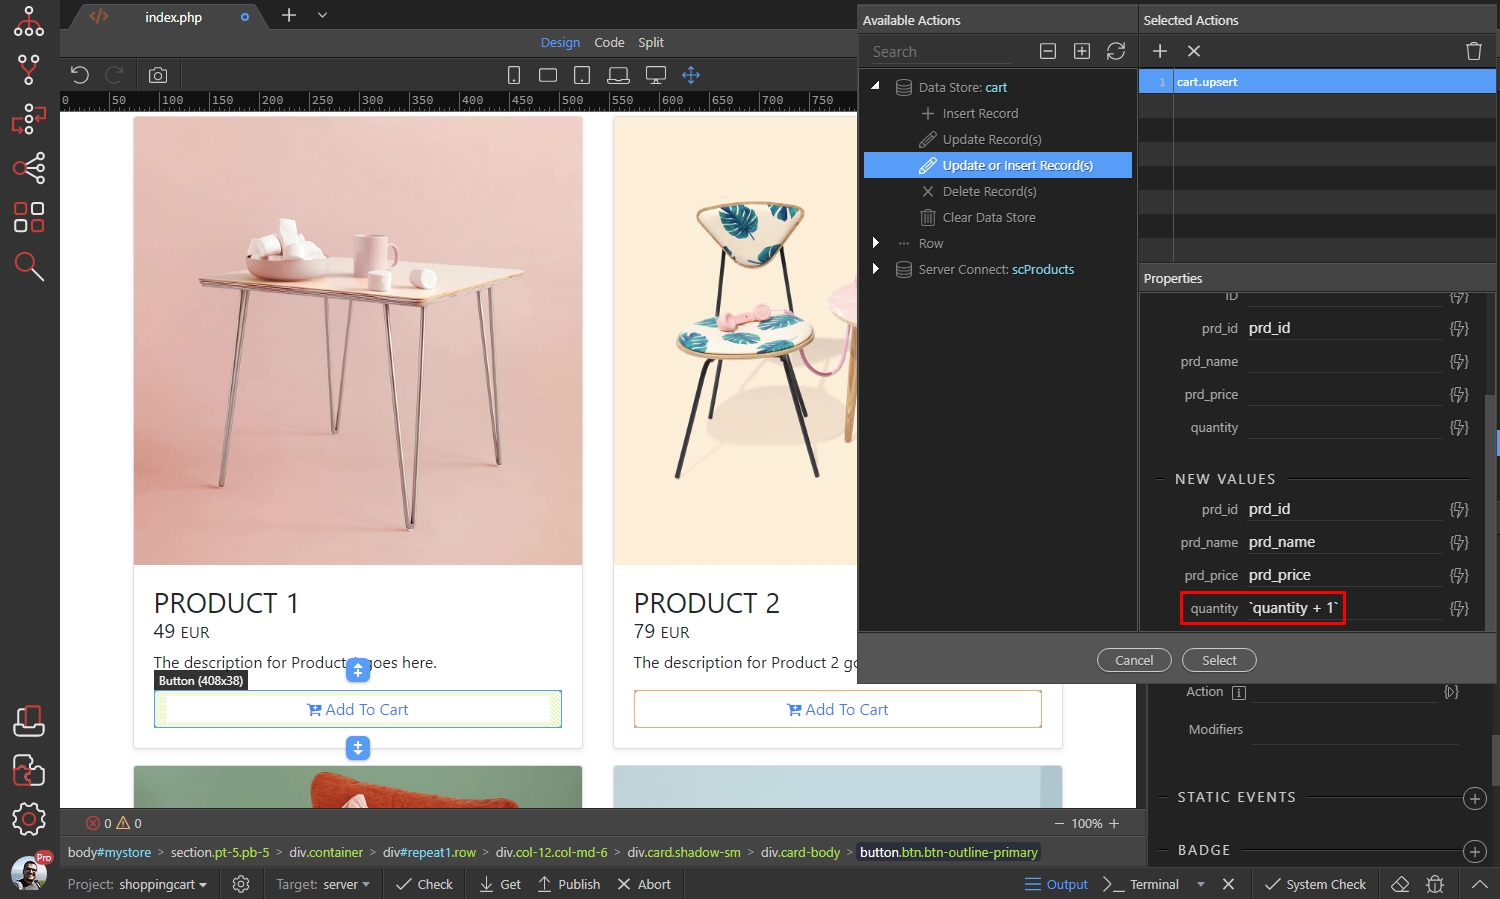
Click select when you are done:
Section titled “Click select when you are done:”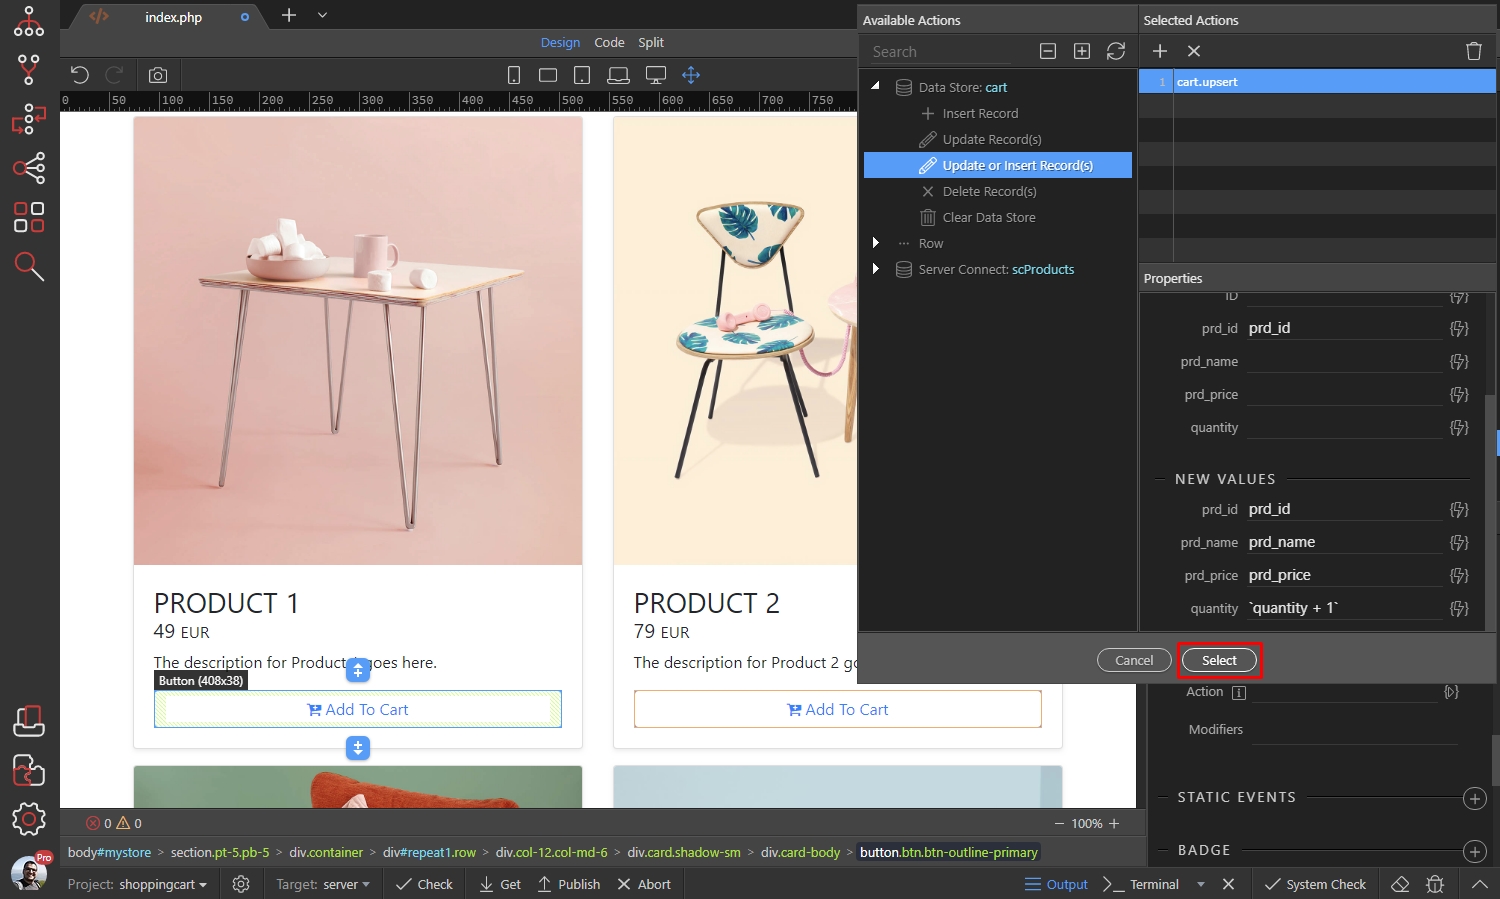
Setup the shopping cart layout
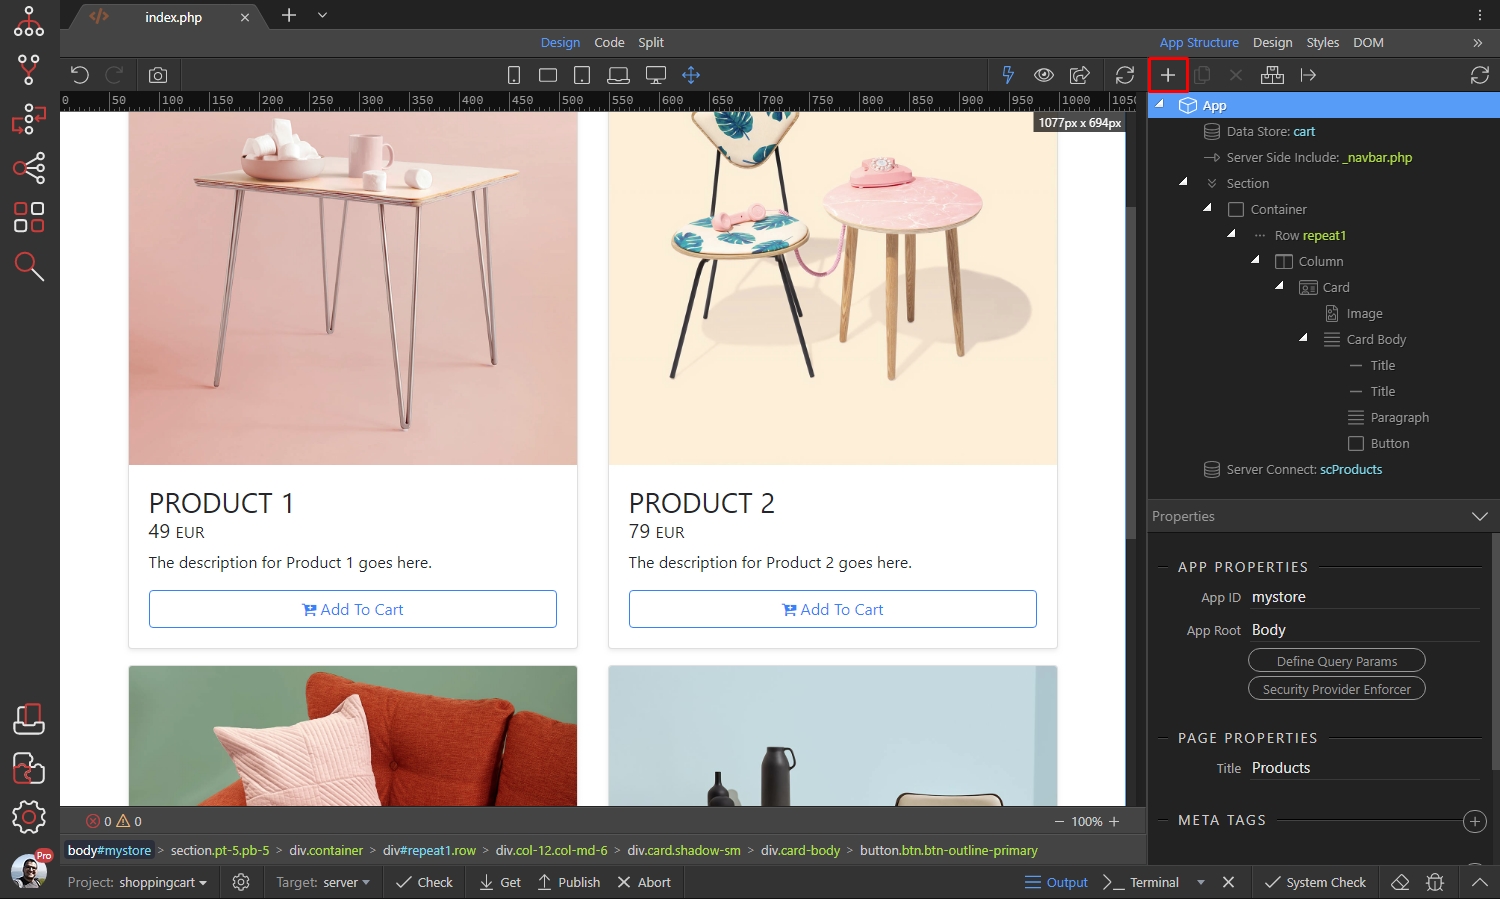
Section titled “Setup the shopping cart layout”In our example we will show you how to display your shopping cart content in a table, inside a modal. Every time you add an item to the cart, the modal will fade in and show its content. Add new component:
Open Components and select Dynamic Modal:
Section titled “Open Components and select Dynamic Modal:”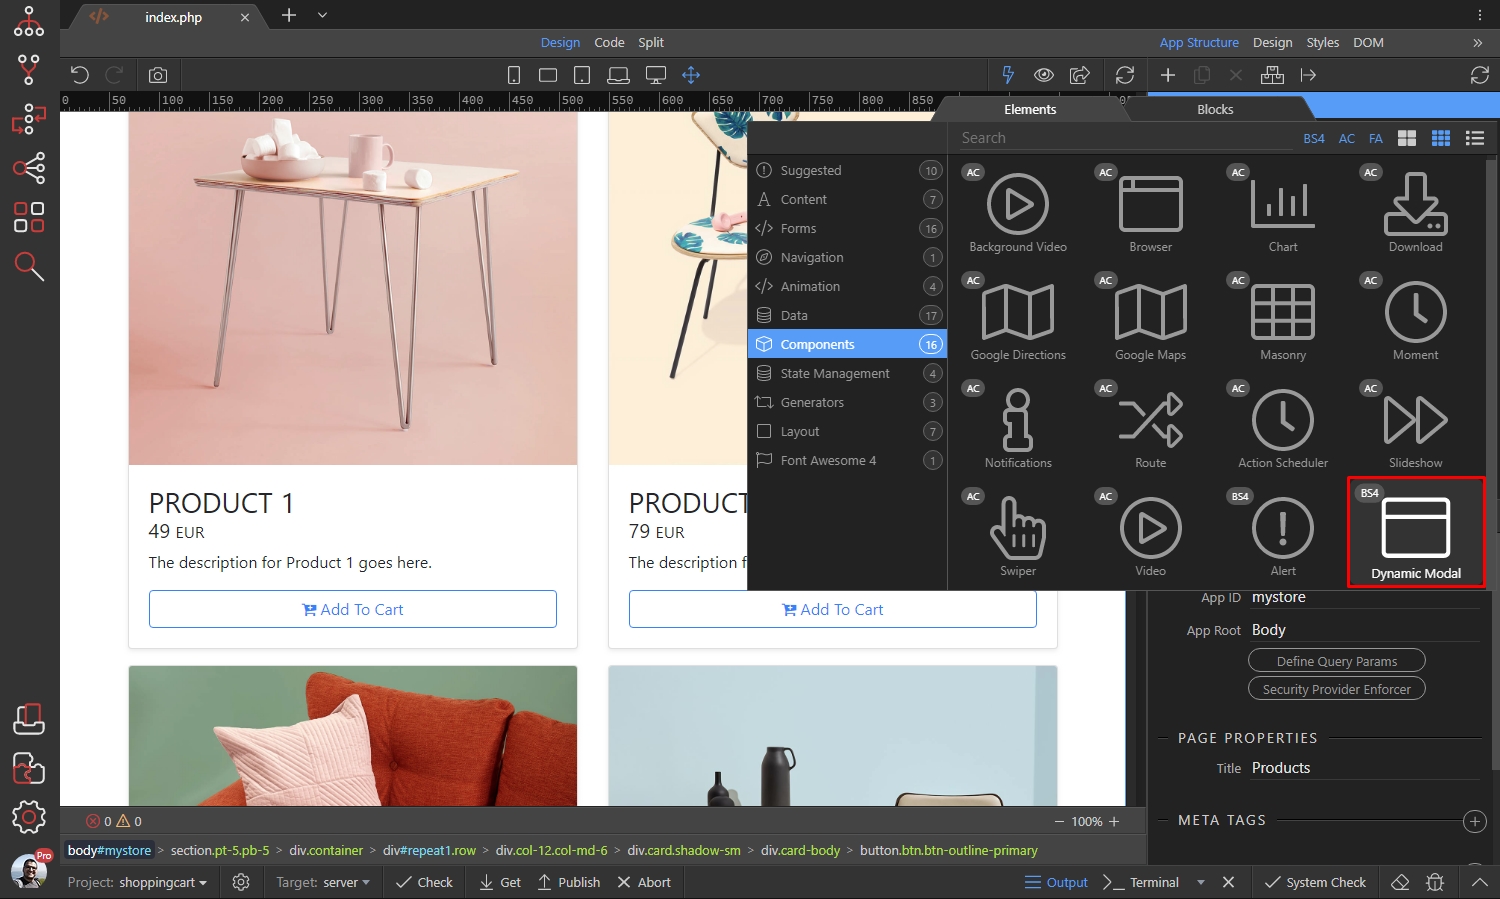
Let’s change the default modal title to Shopping Cart:
Section titled “Let’s change the default modal title to Shopping Cart:”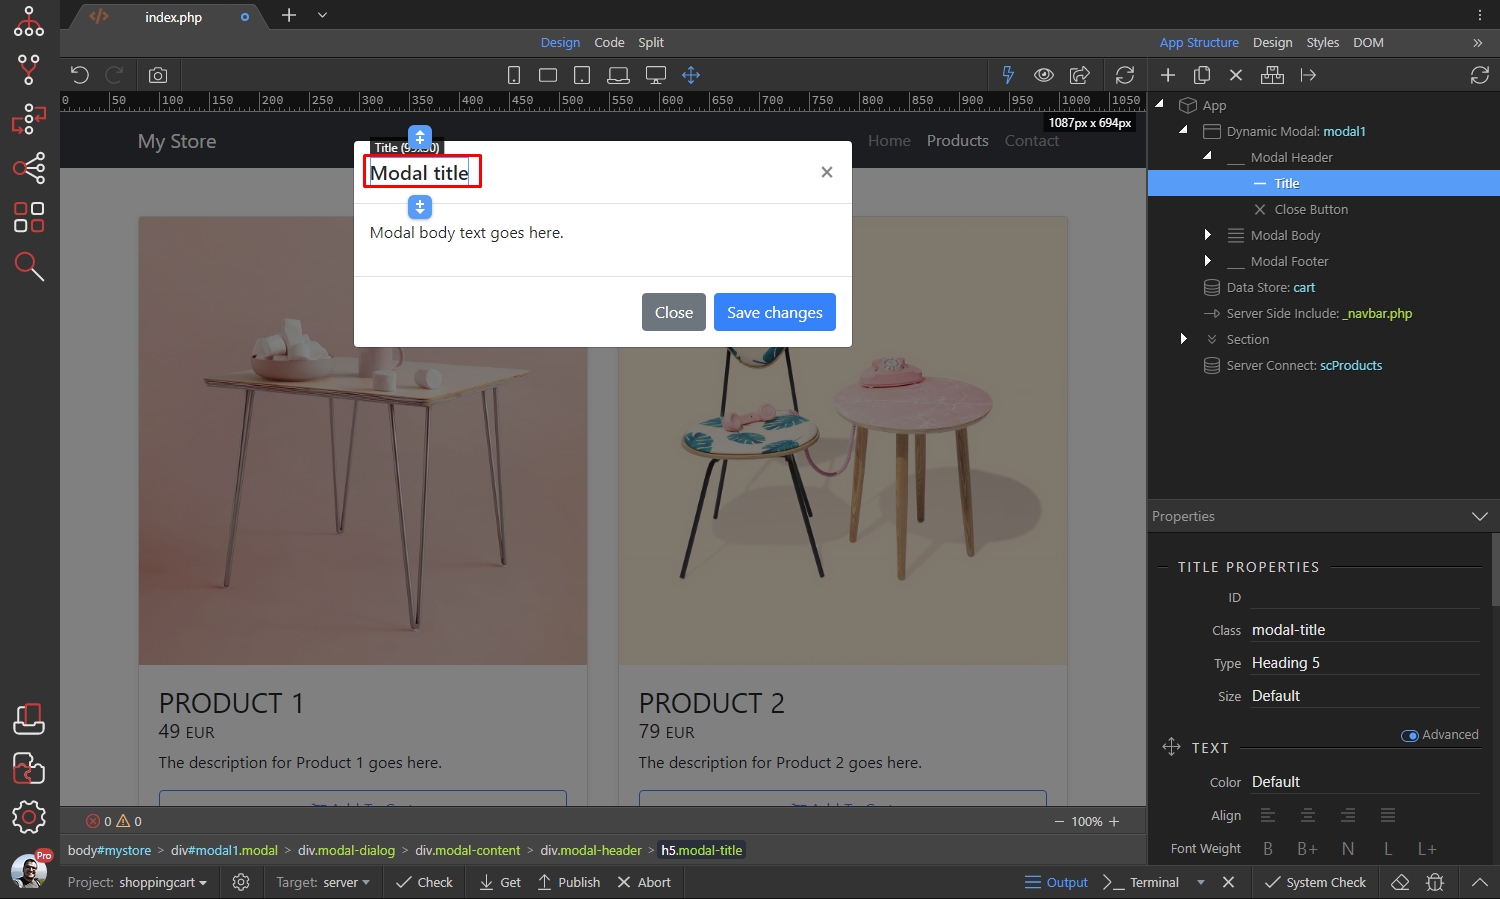
Step 32
Section titled “Step 32”Then we want to have two buttons at the modal footer - Continue Shopping (which closes the modal) and Checkout (which redirects you to a checkout page):
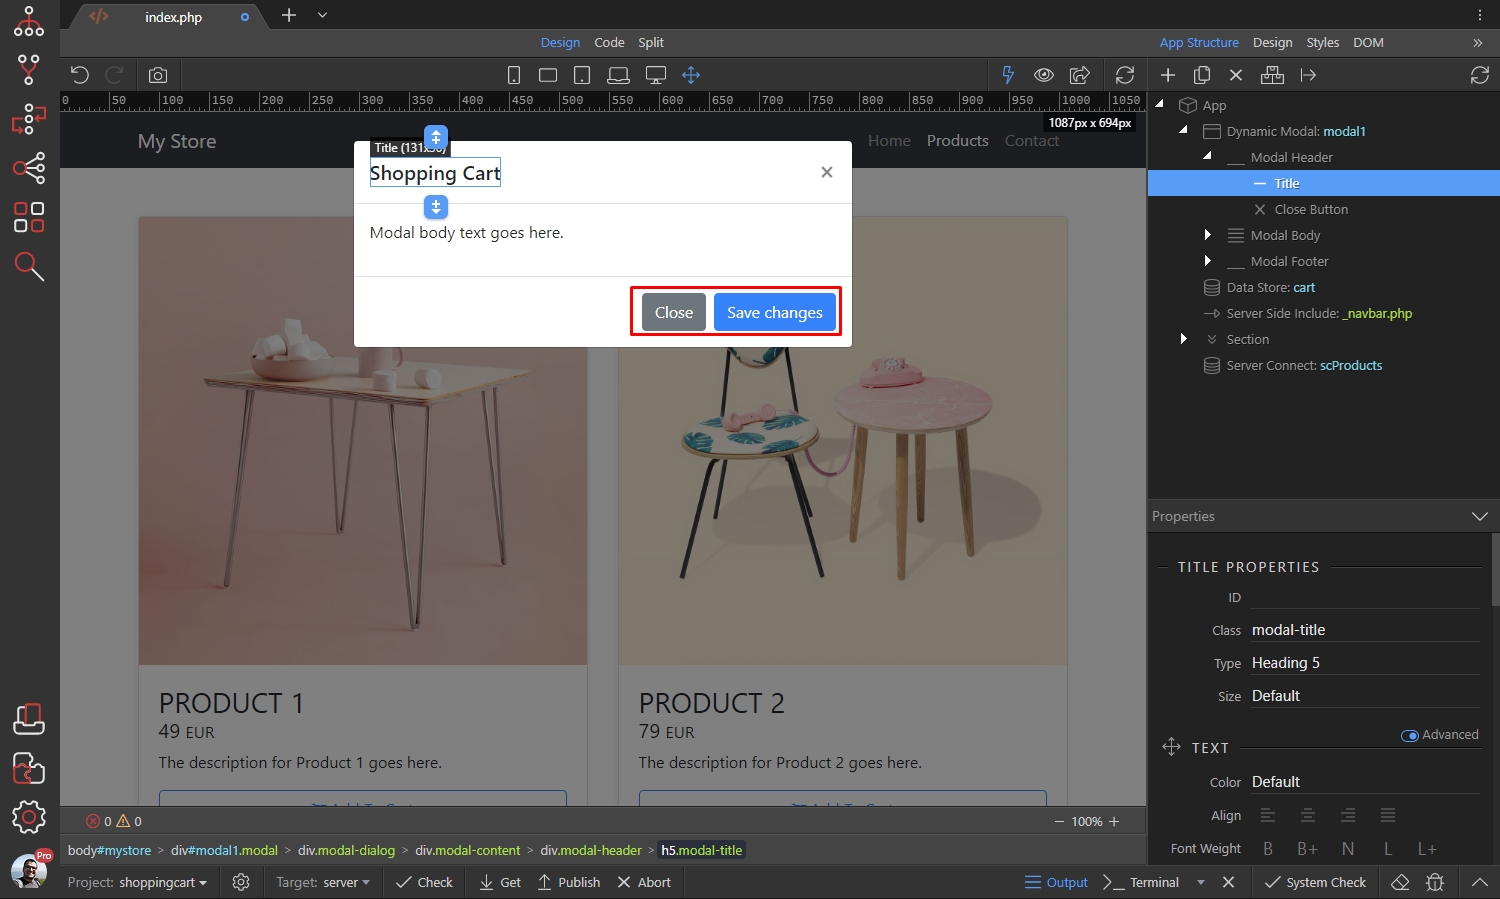
Click the default Save Changes button and remove it:
Section titled “Click the default Save Changes button and remove it:”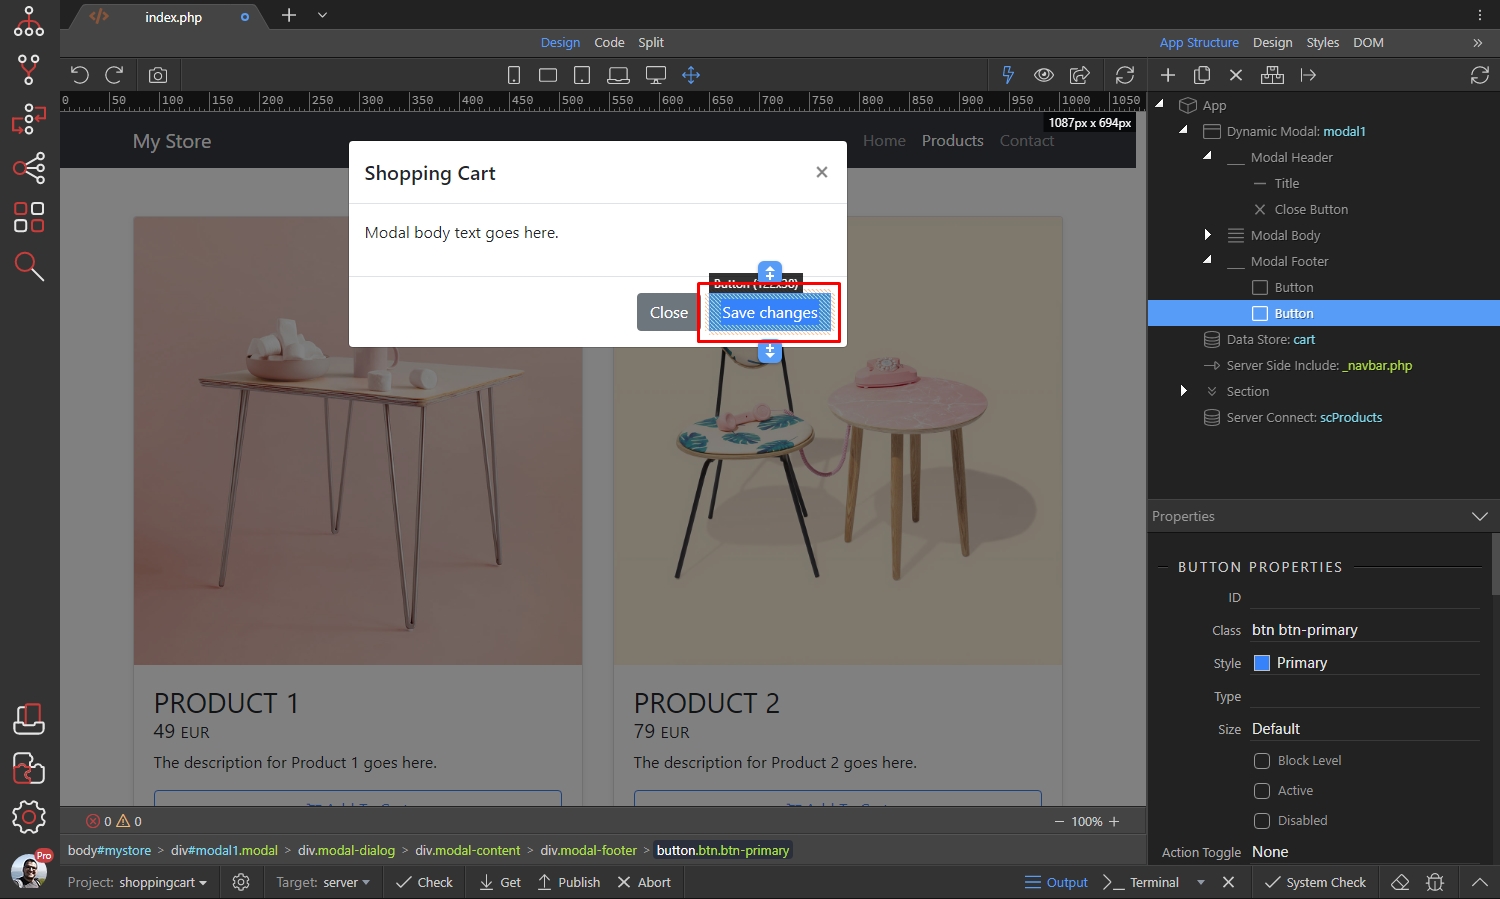
Then rename the default Close button to Continue Shopping:
Section titled “Then rename the default Close button to Continue Shopping:”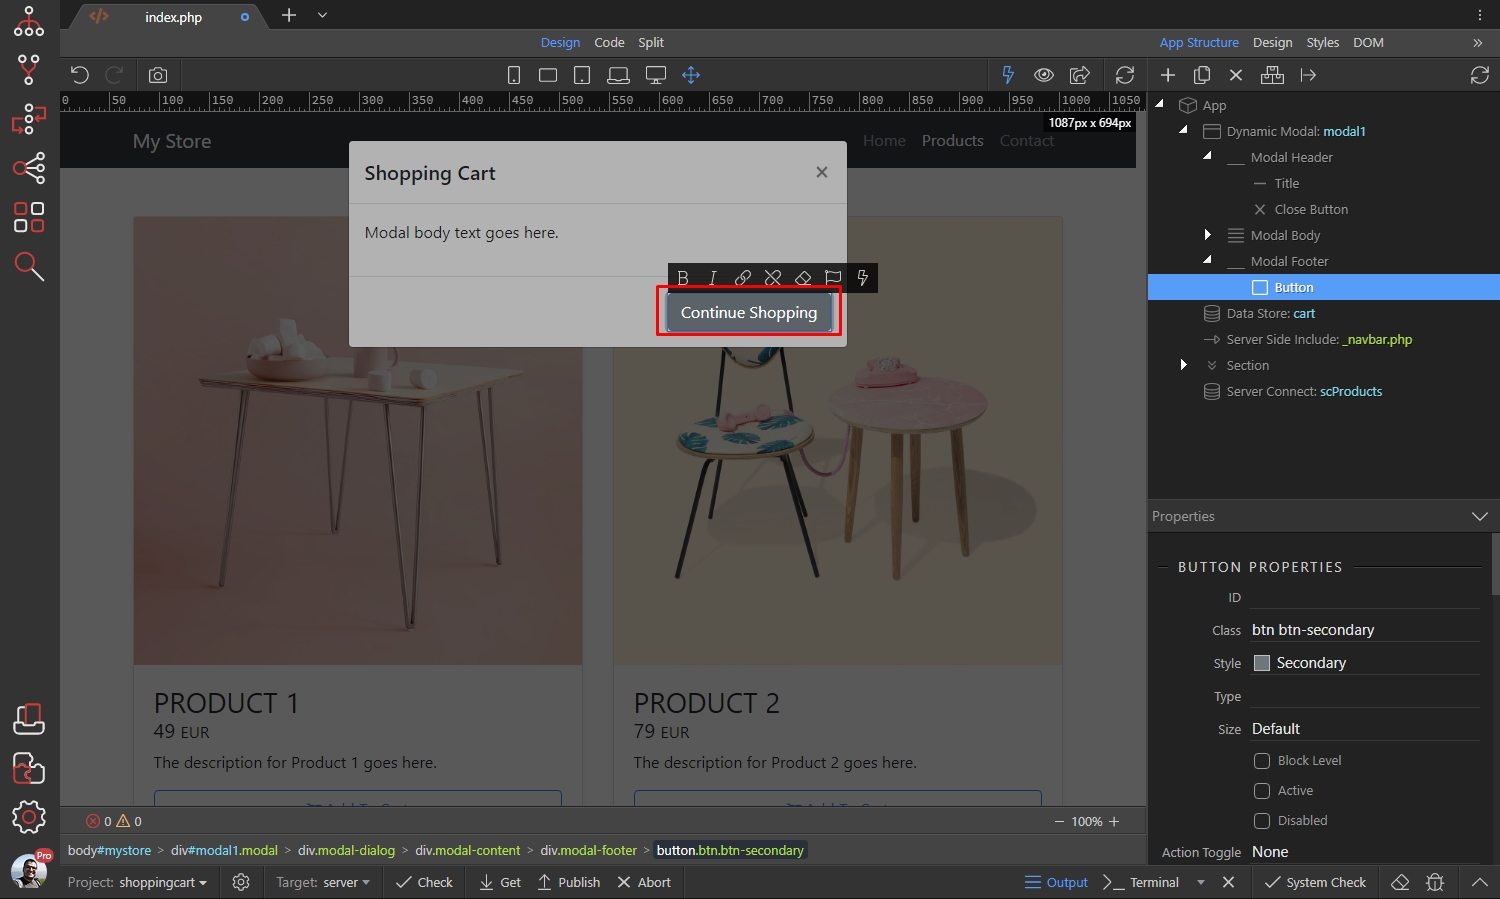
And add another element after it:
Section titled “And add another element after it:”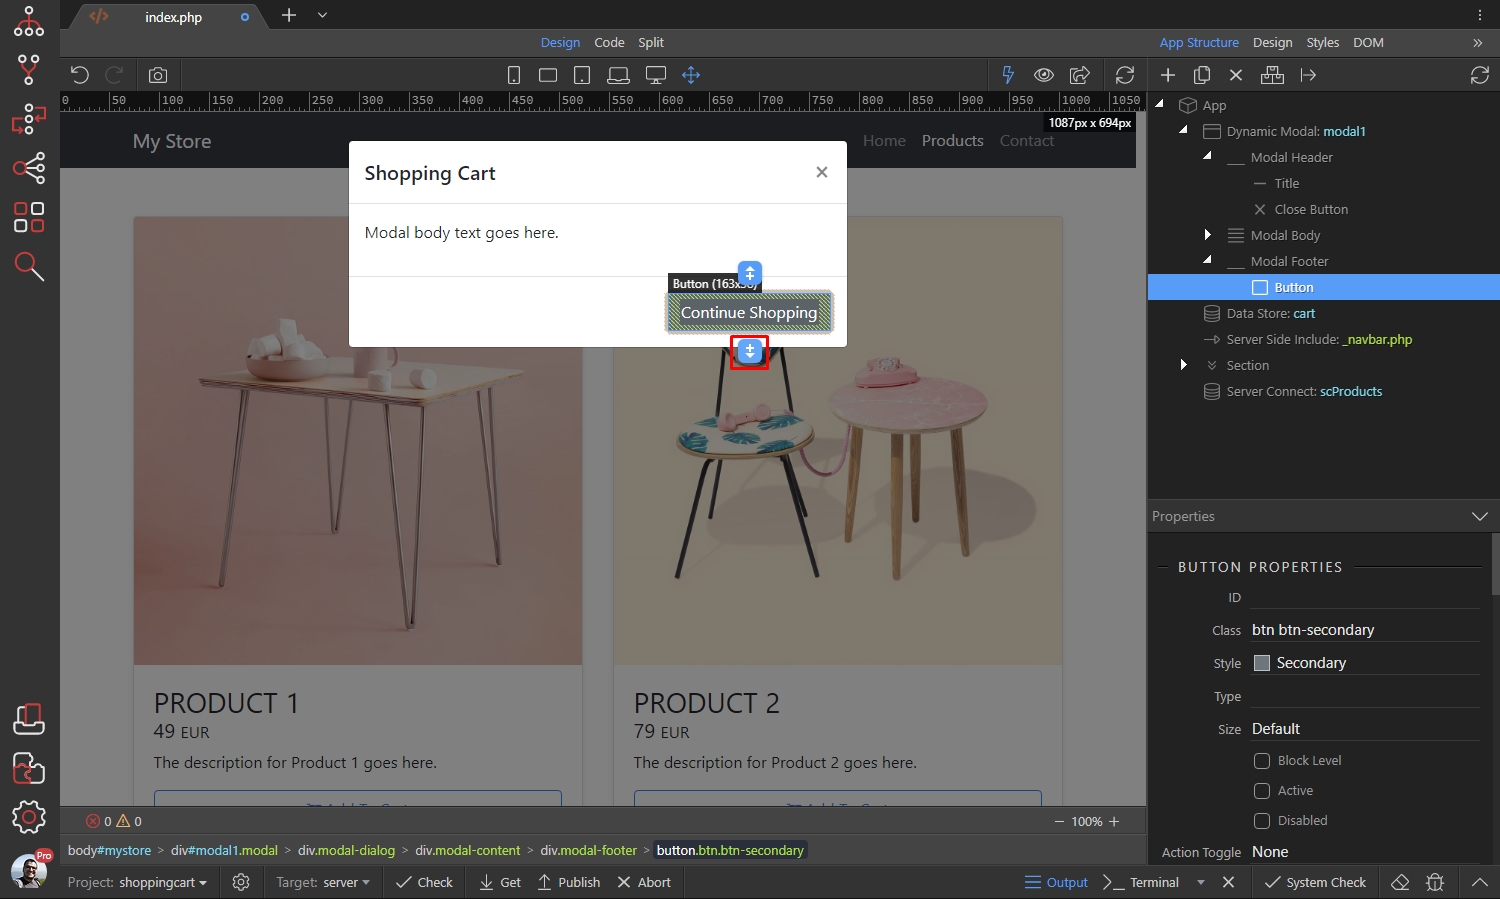
Under Forms select Anchor Button:
Section titled “Under Forms select Anchor Button:”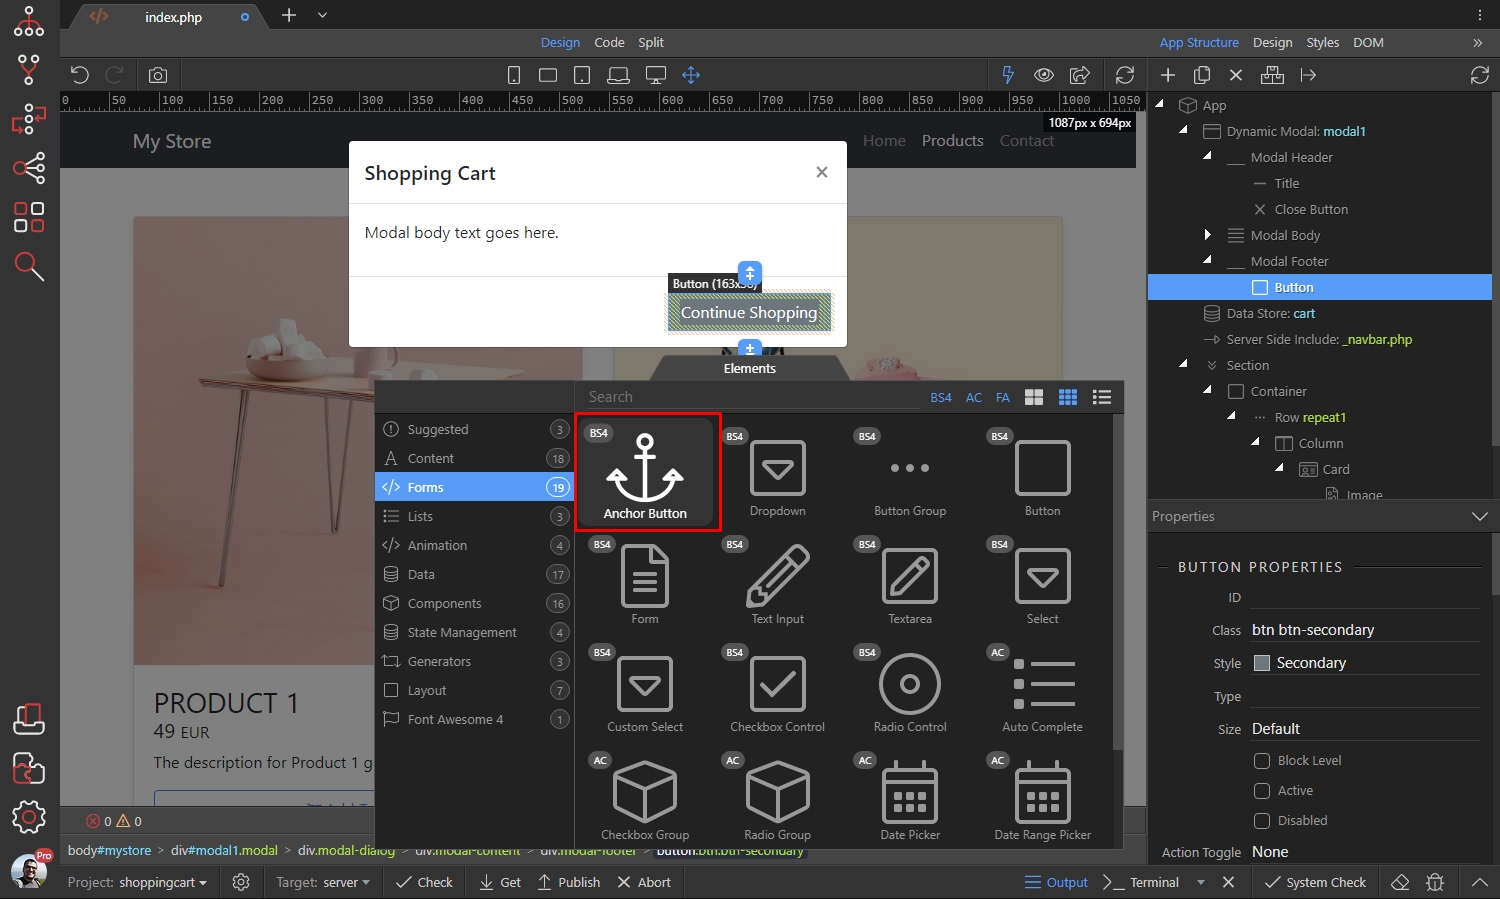
Change the Anchor Button text to Checkout:
Section titled “Change the Anchor Button text to Checkout:”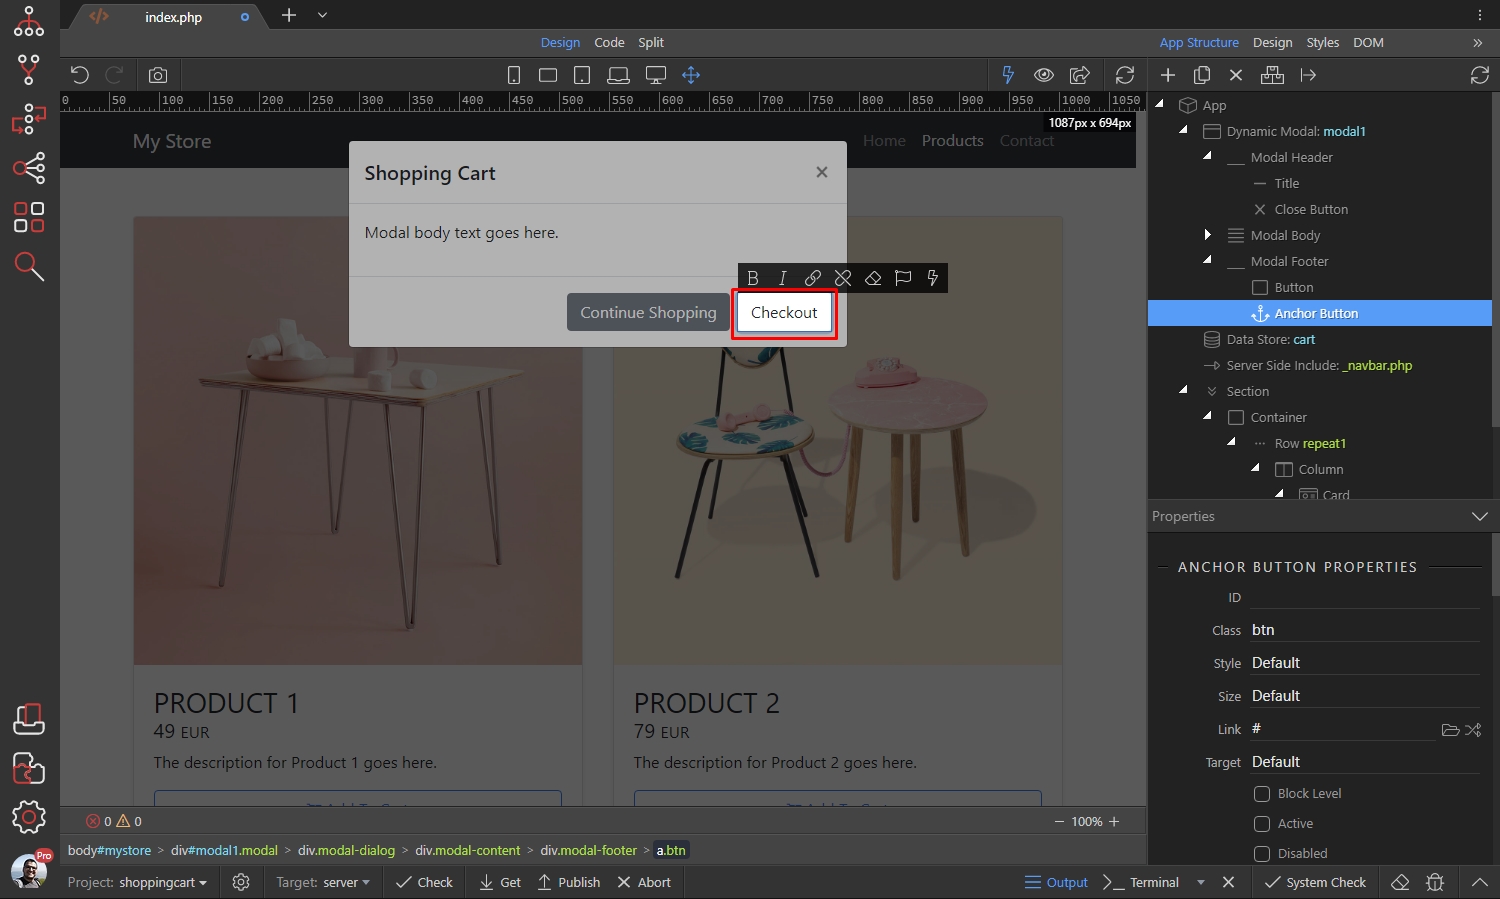
We set its style to Primary:
Section titled “We set its style to Primary:”
And then select the link it should point to:
Section titled “And then select the link it should point to:”
This is our checkout page. You can select this later, if you haven’t added a dummy chekout page yet:
Section titled “This is our checkout page. You can select this later, if you haven’t added a dummy chekout page yet:”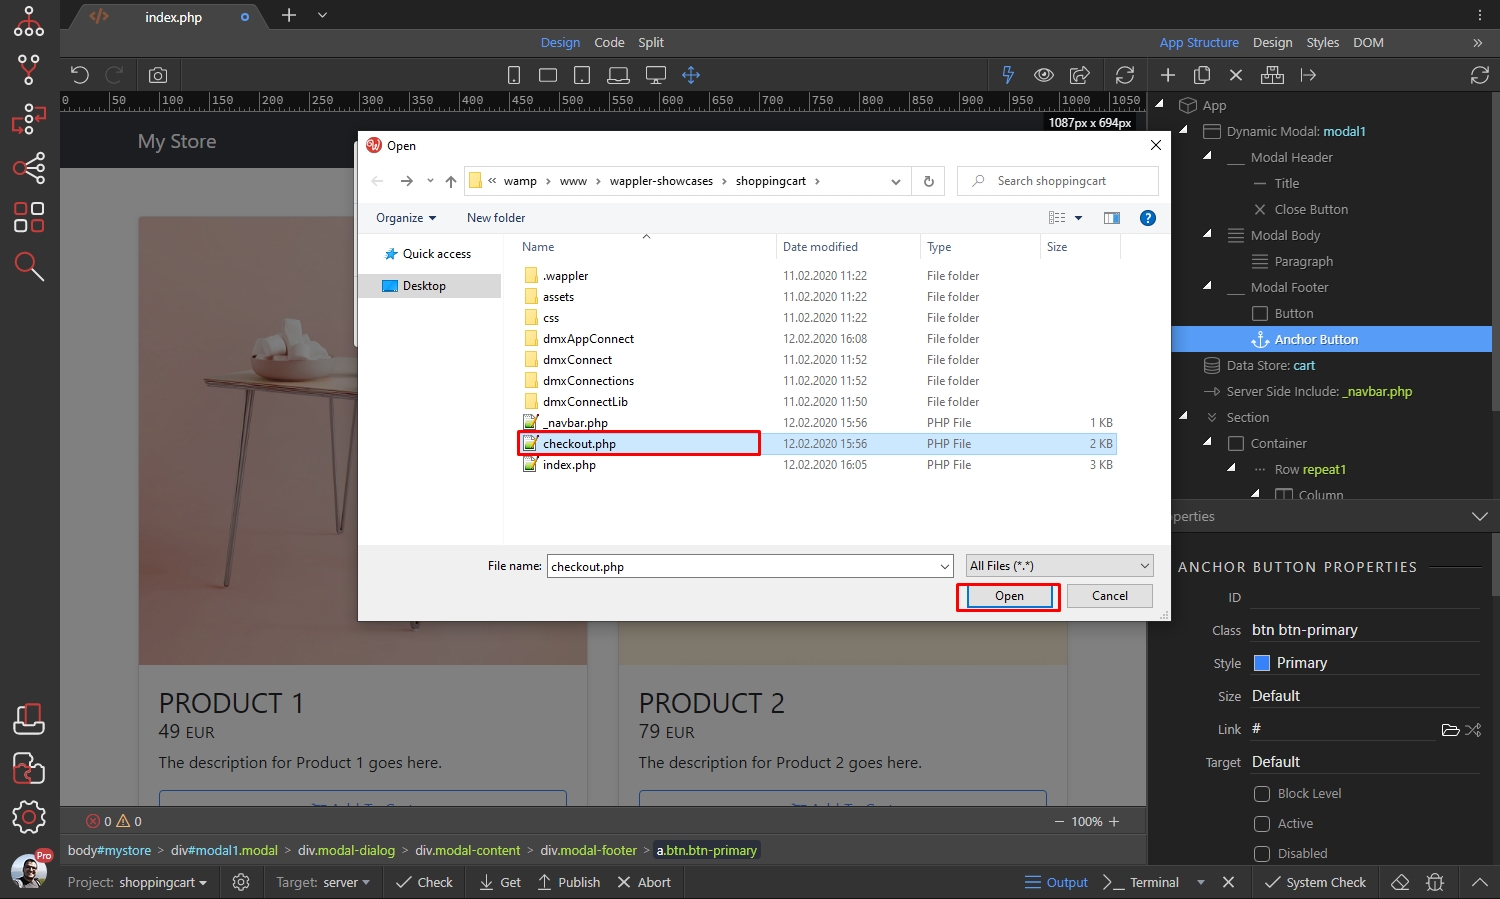
Then we remove the default content in the modal body:
Section titled “Then we remove the default content in the modal body:”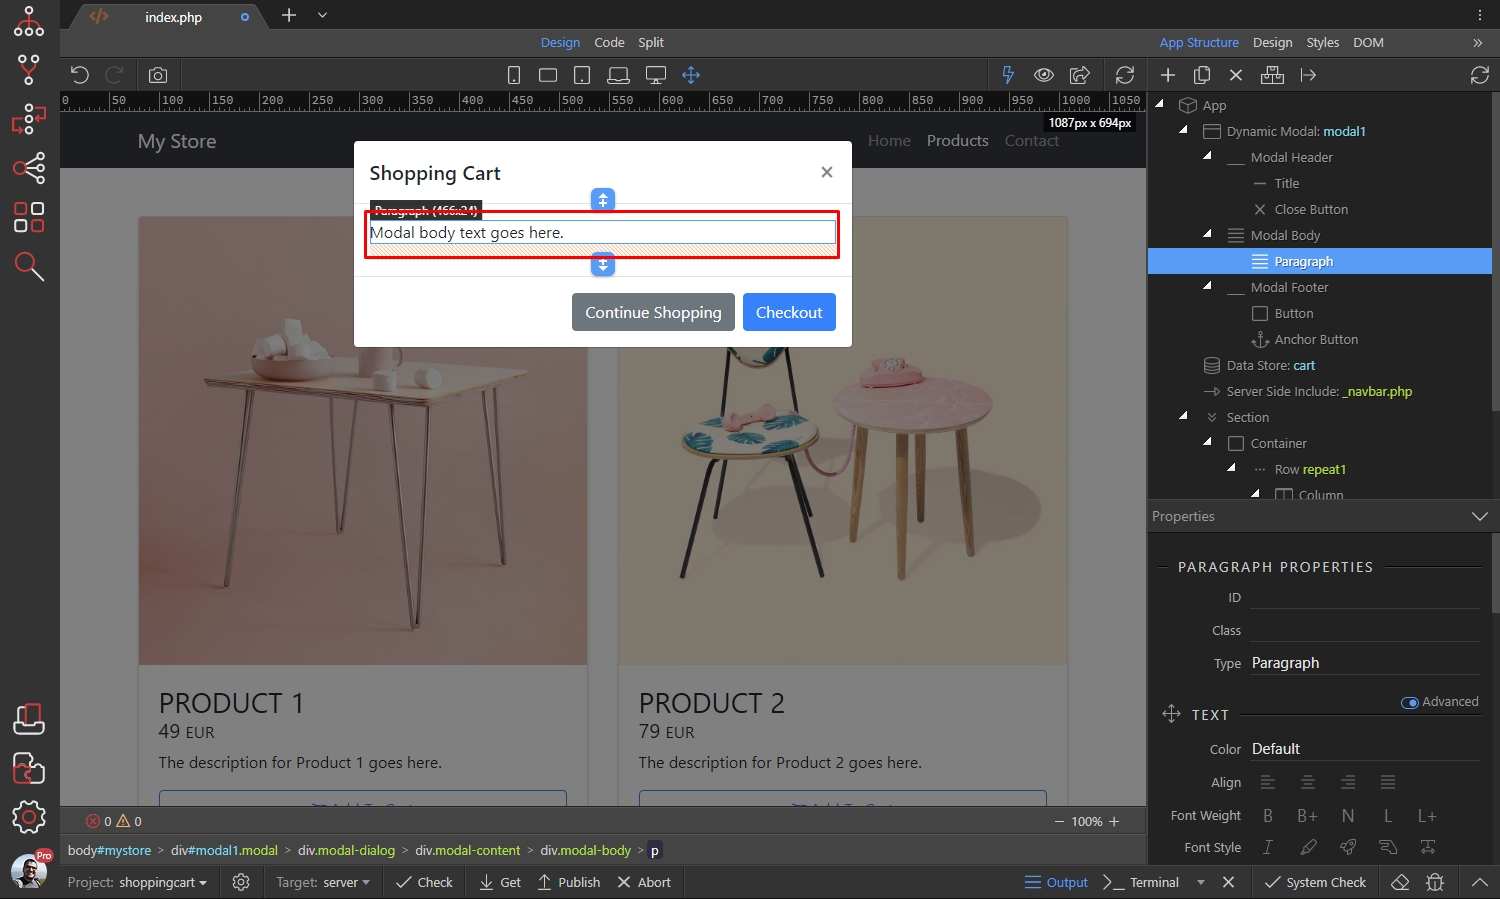
Step 42
Section titled “Step 42”We want to add a dynamic table, listing the Data Store component content. Select modal body and add new component inside:
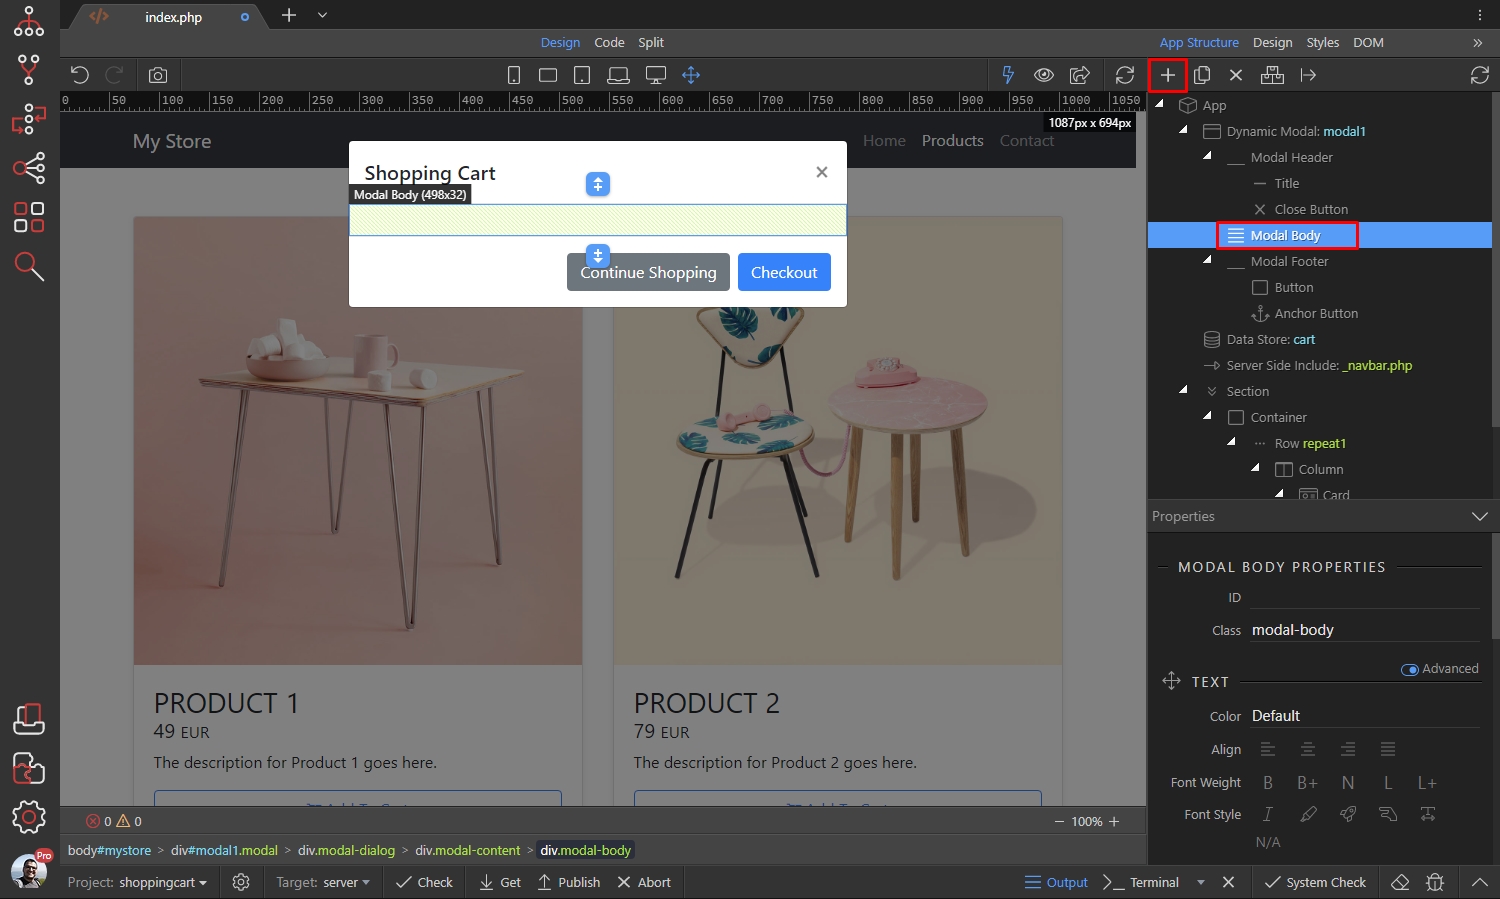
Under Generators select Bootstrap 4 Table Generator:
Section titled “Under Generators select Bootstrap 4 Table Generator:”
And select the dynamic data source for it:
Section titled “And select the dynamic data source for it:”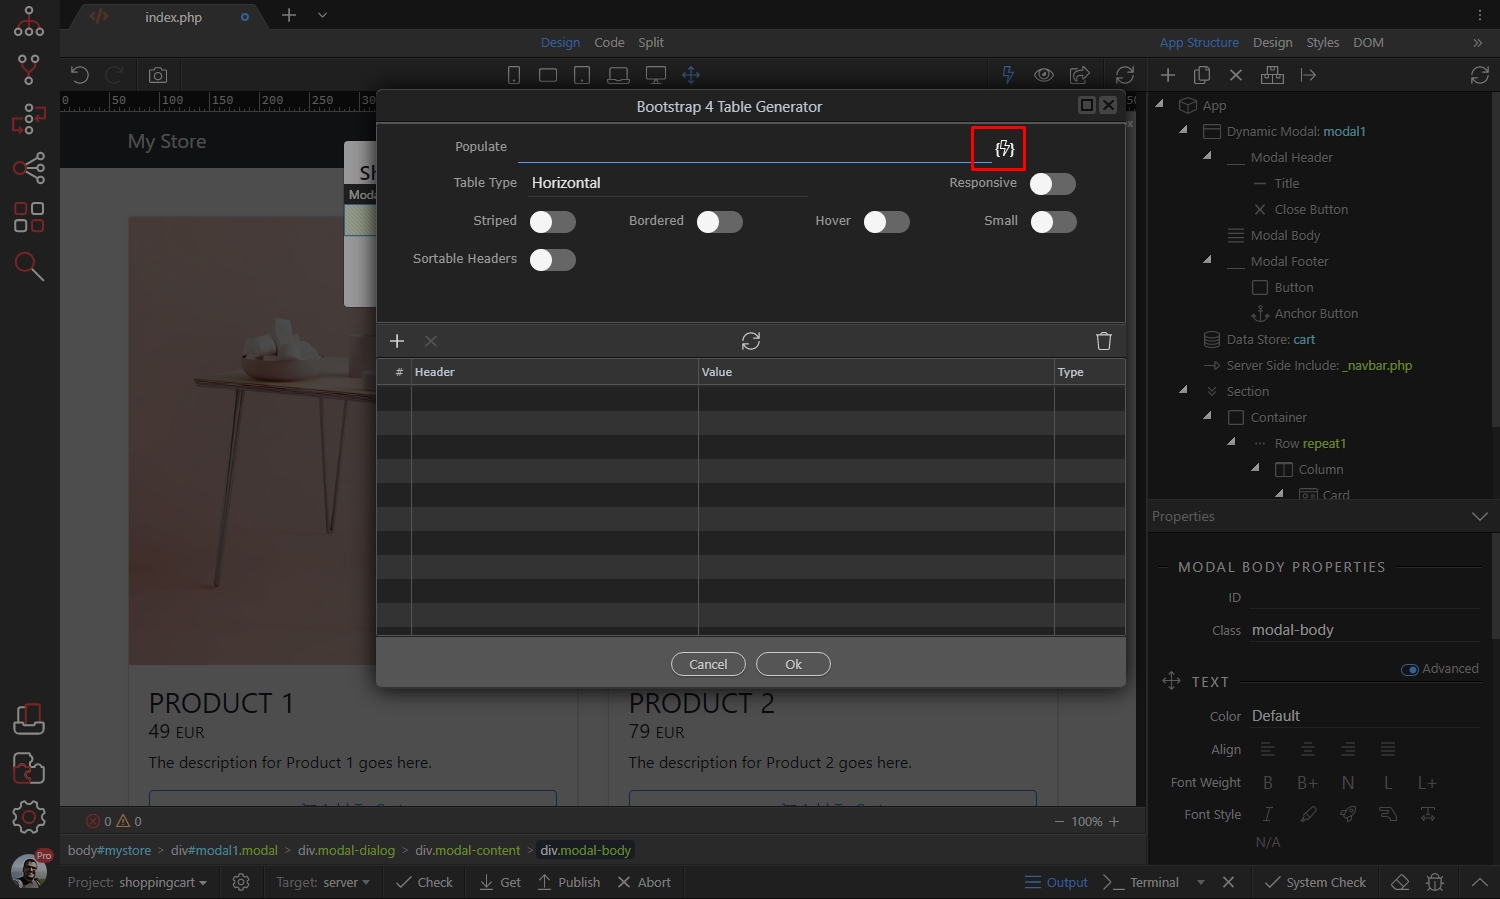
Select the data element under the Data Store component:
Section titled “Select the data element under the Data Store component:”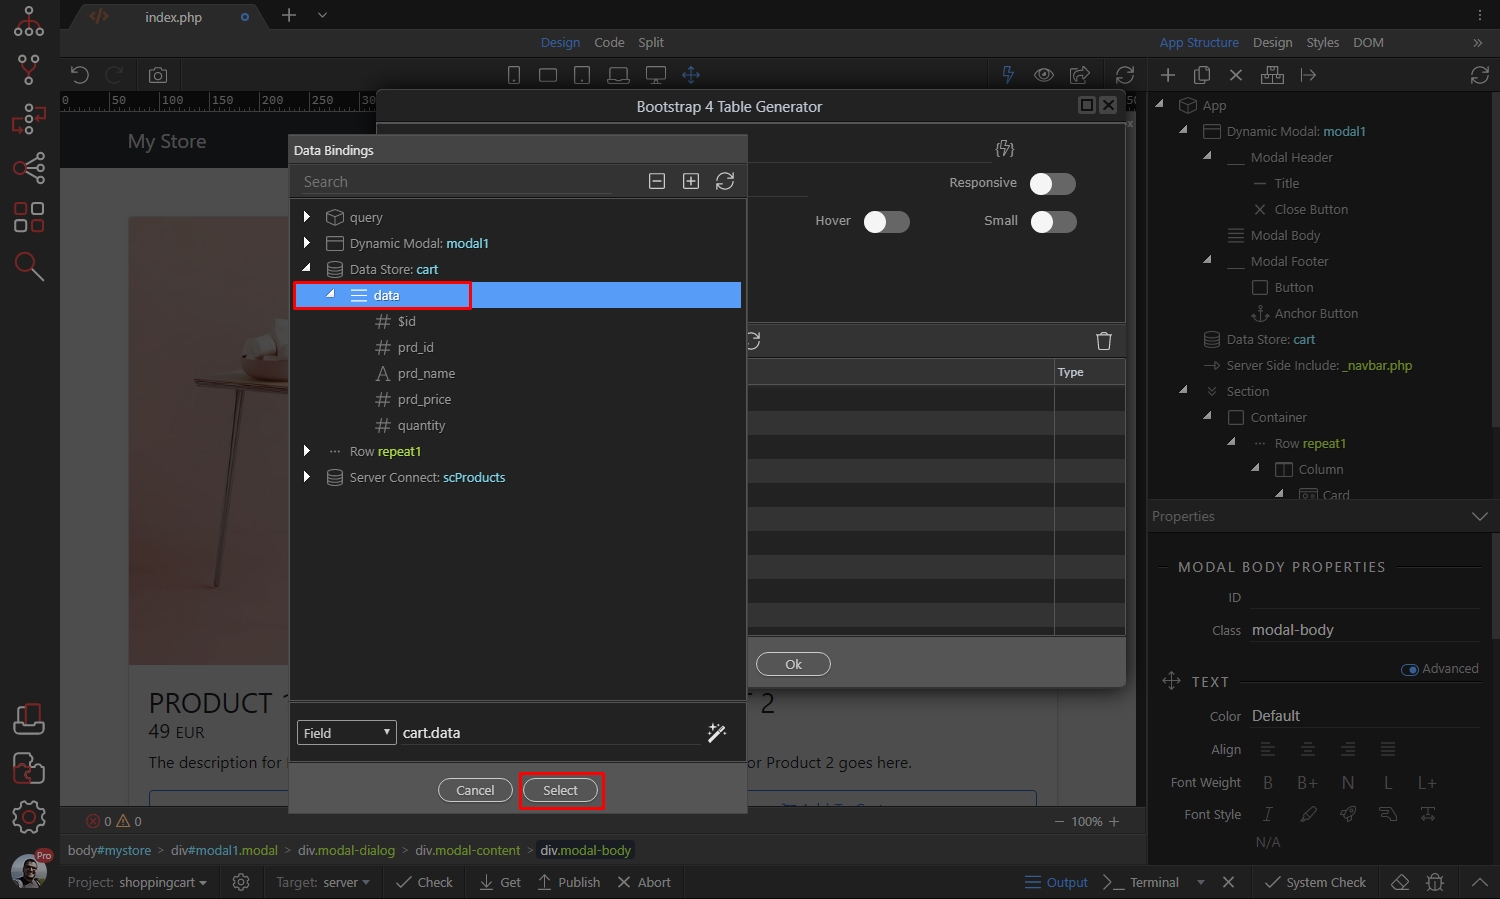
Step 46
Section titled “Step 46”Table columns have been automatically added, depending on your Data Store schema. We need another column, where we will place 3 buttons - increase quantity, decrease quantity and remove item. So we add another column in to the table:
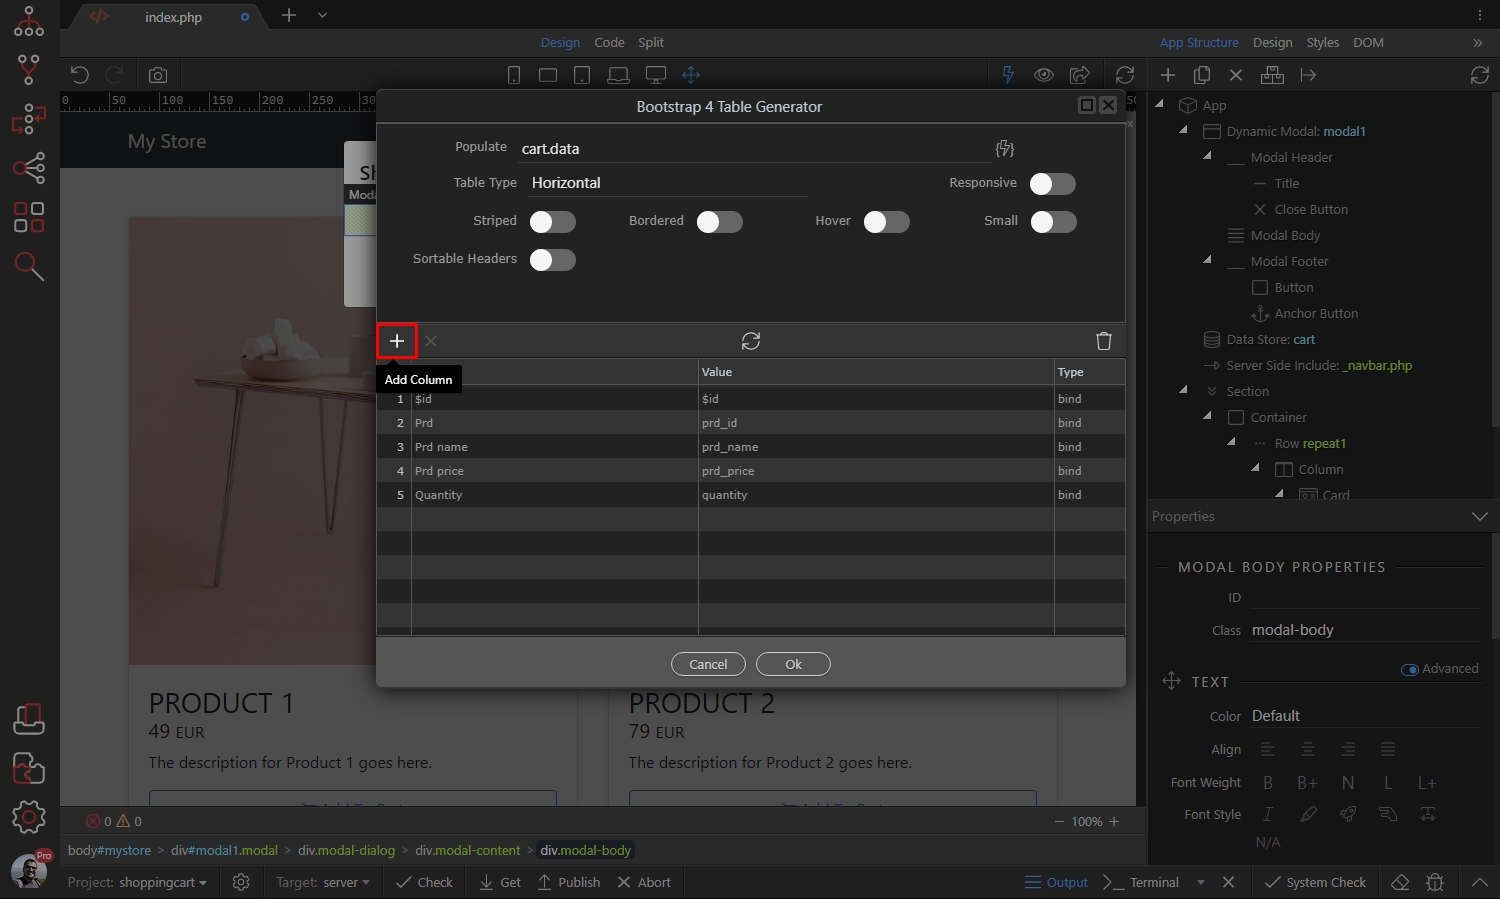
Let’s call it Actions and set its content type to custom:
Section titled “Let’s call it Actions and set its content type to custom:”
Step 48
Section titled “Step 48”Then customize the table layout and options. In our case we don’t need to show the item id and product unique id to the users, so we delete these columns:
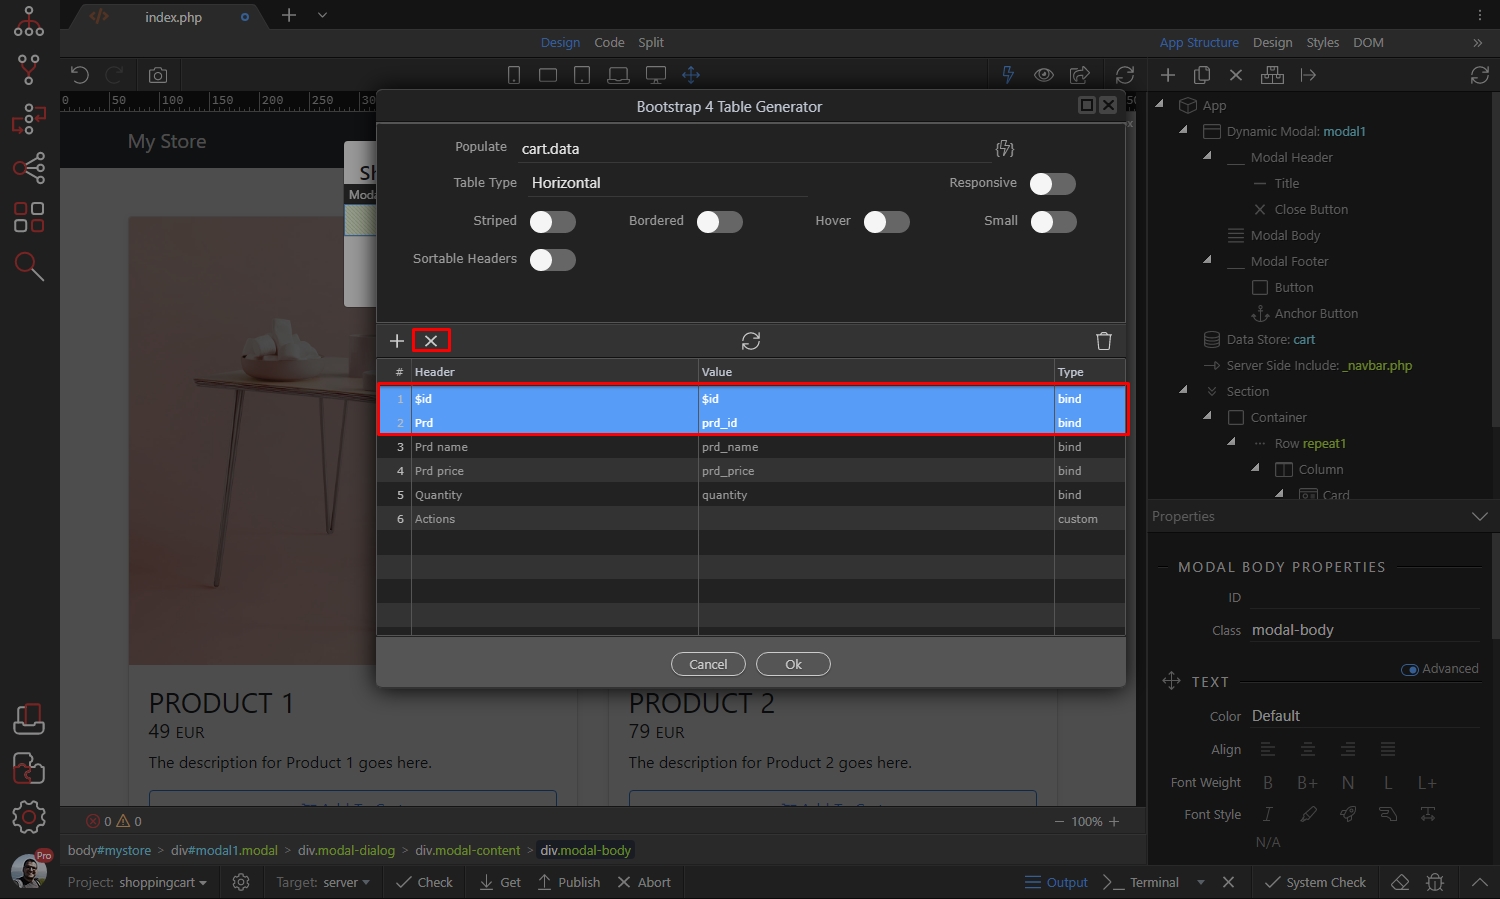
Click OK when you are done customizing the table options and layout:
Section titled “Click OK when you are done customizing the table options and layout:”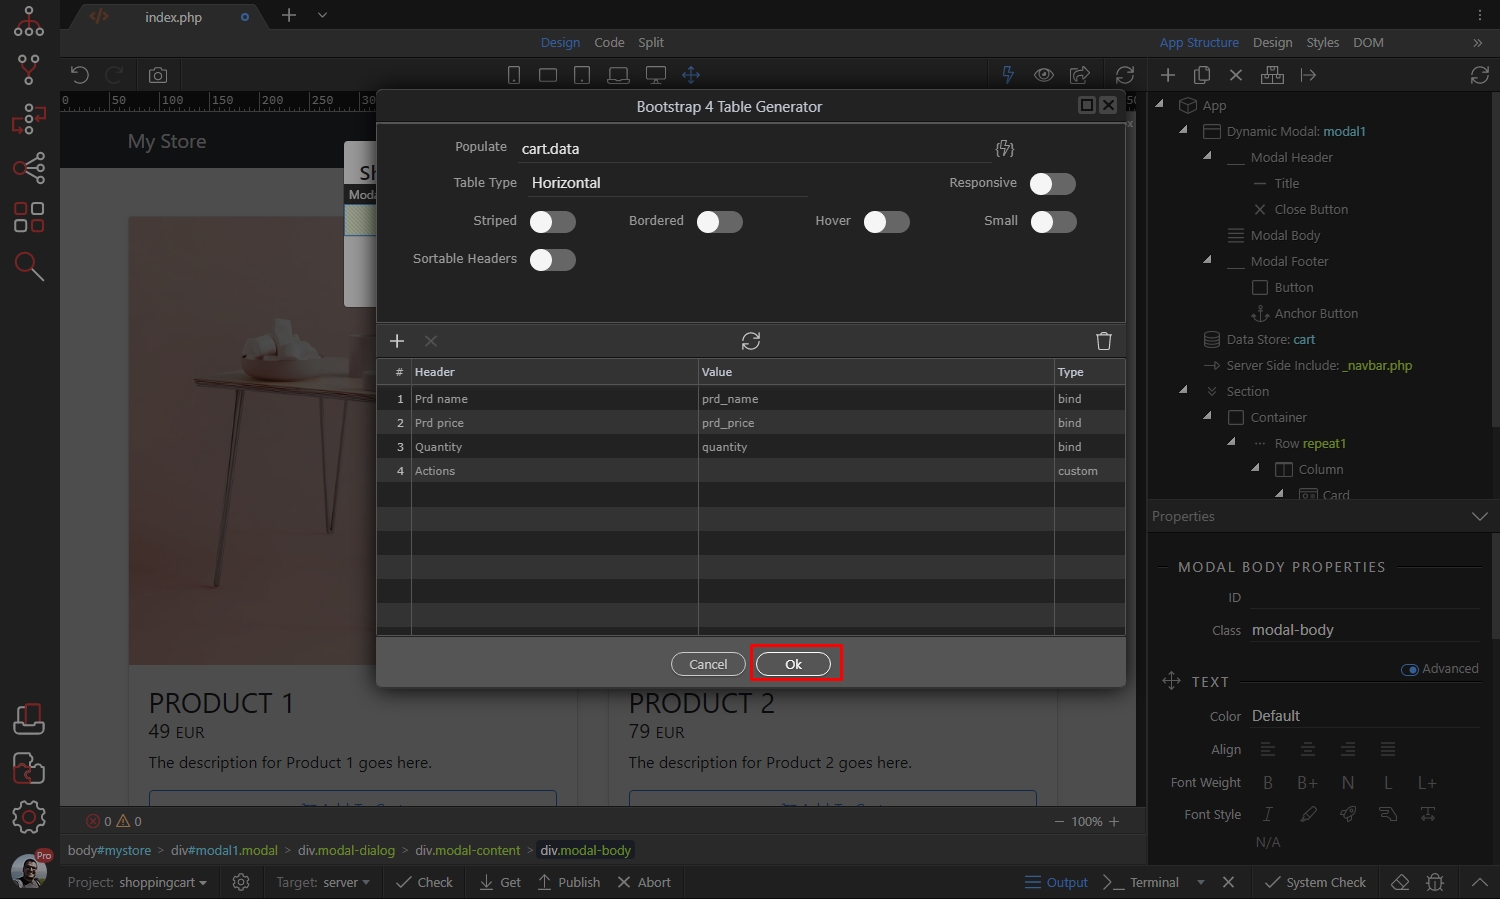
You can select the modal and change its size, if needed:
Section titled “You can select the modal and change its size, if needed:”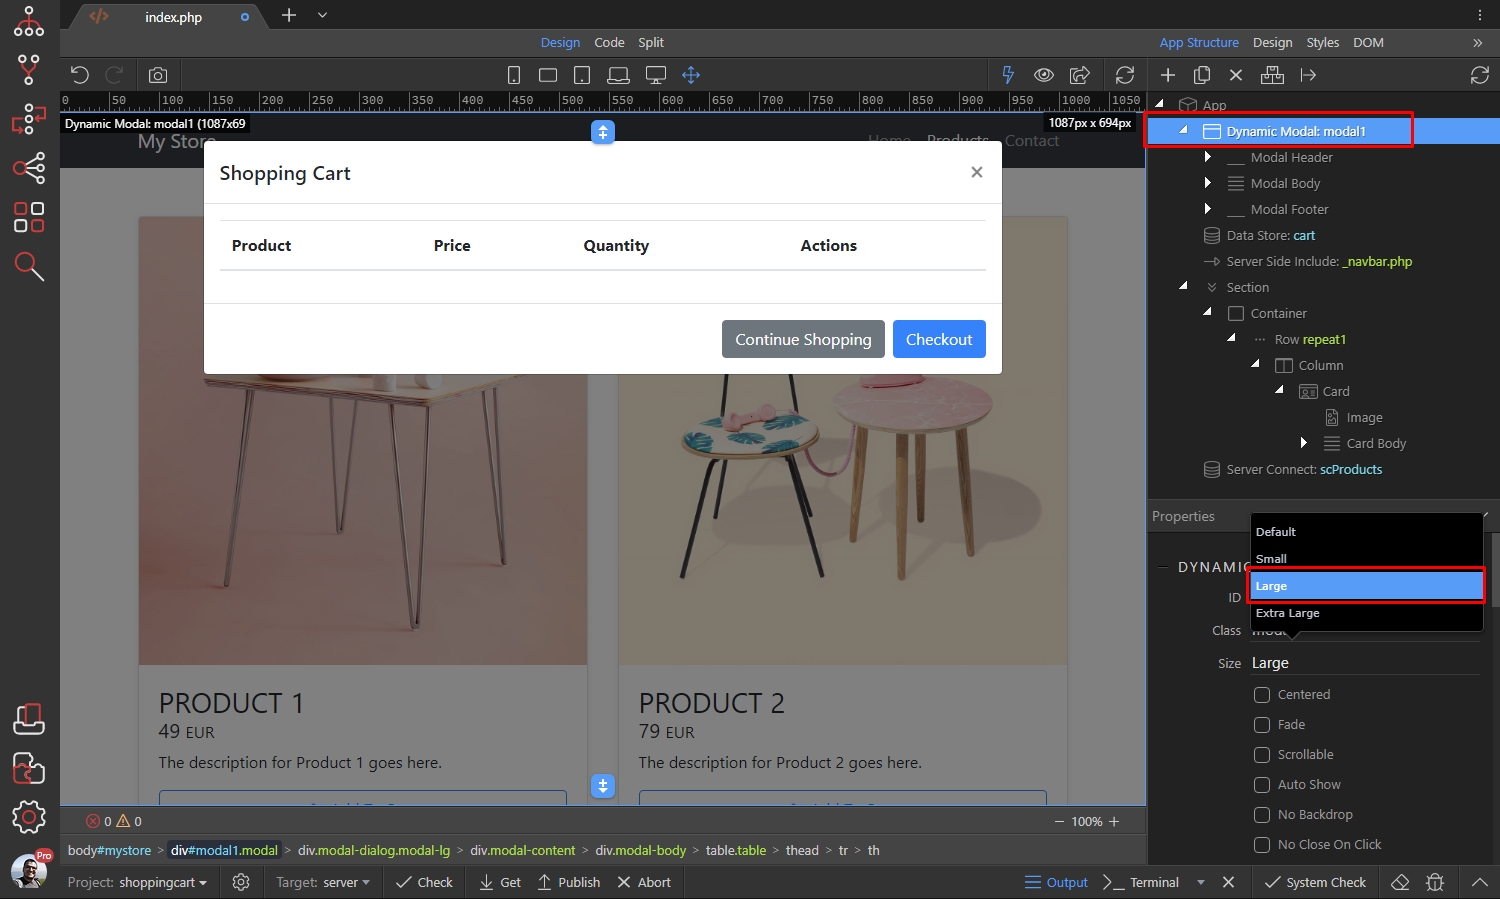
Step 51
Section titled “Step 51”As we are using the Data Store component for dynamic data source, there is no data displayed on the page - its initial values are empty, so you won’t see anything repeated in the table. In order to be able to add custom data in the dynamic table we need to turn the App Connect mode off:
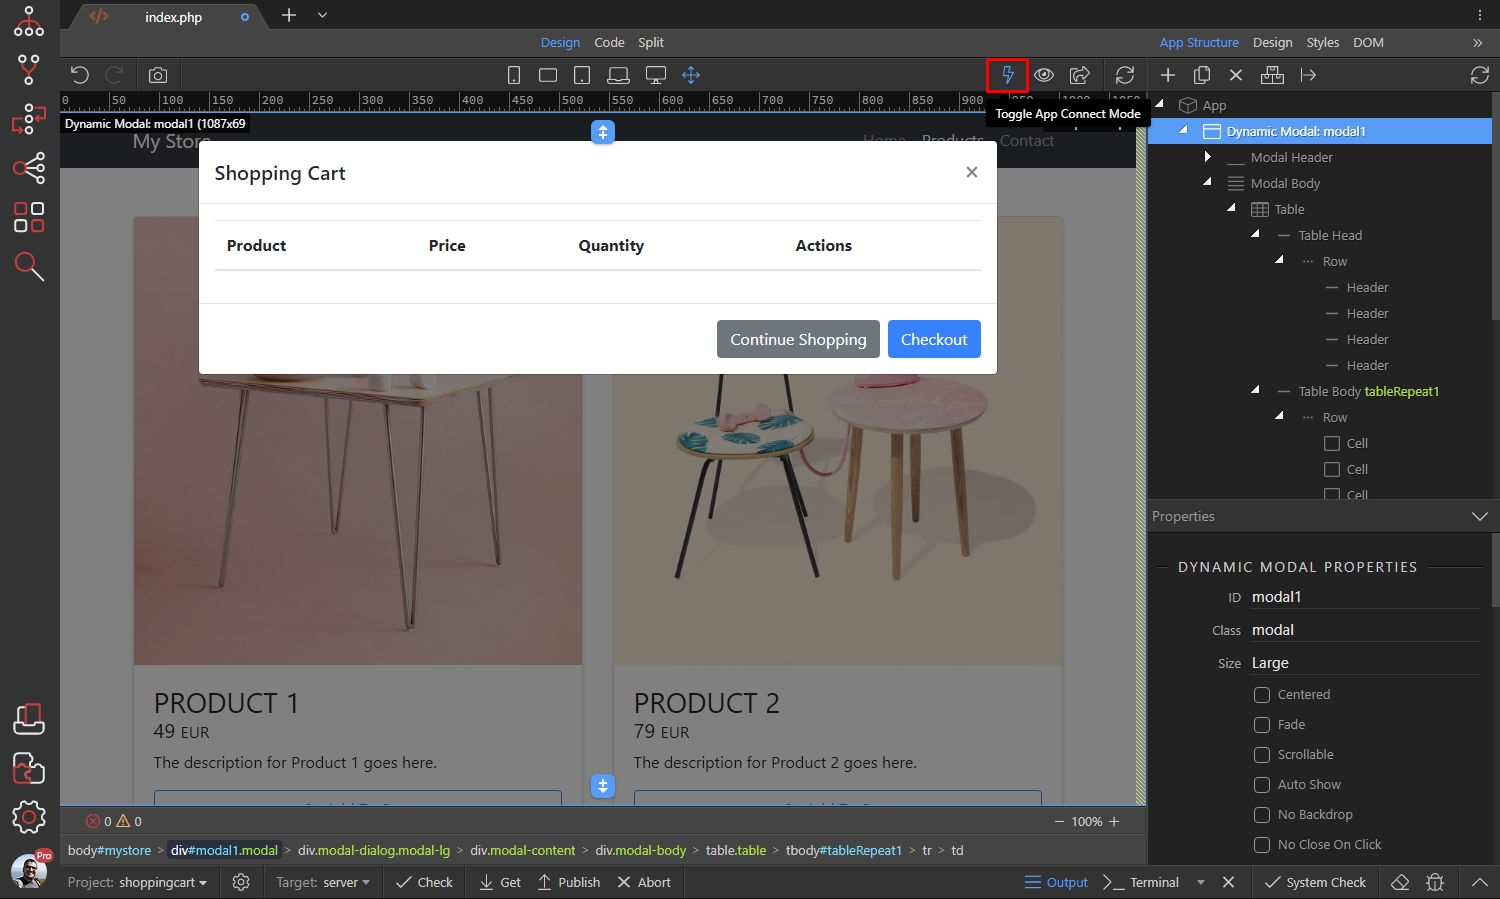
Then click in the custom column which we created and add a new component:
Section titled “Then click in the custom column which we created and add a new component:”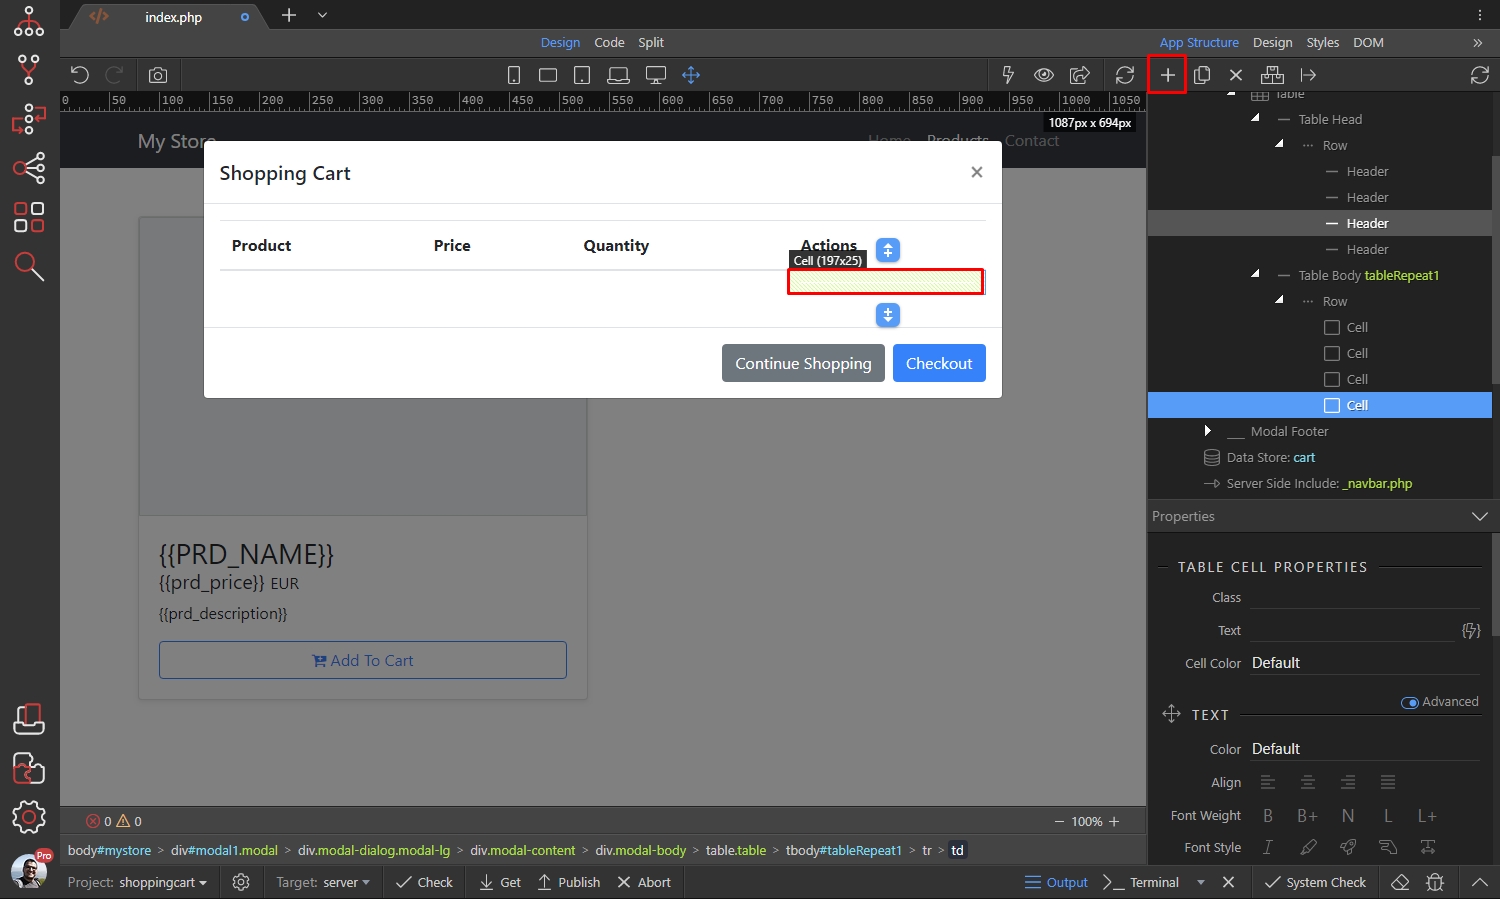
Select Button:
Section titled “Select Button:”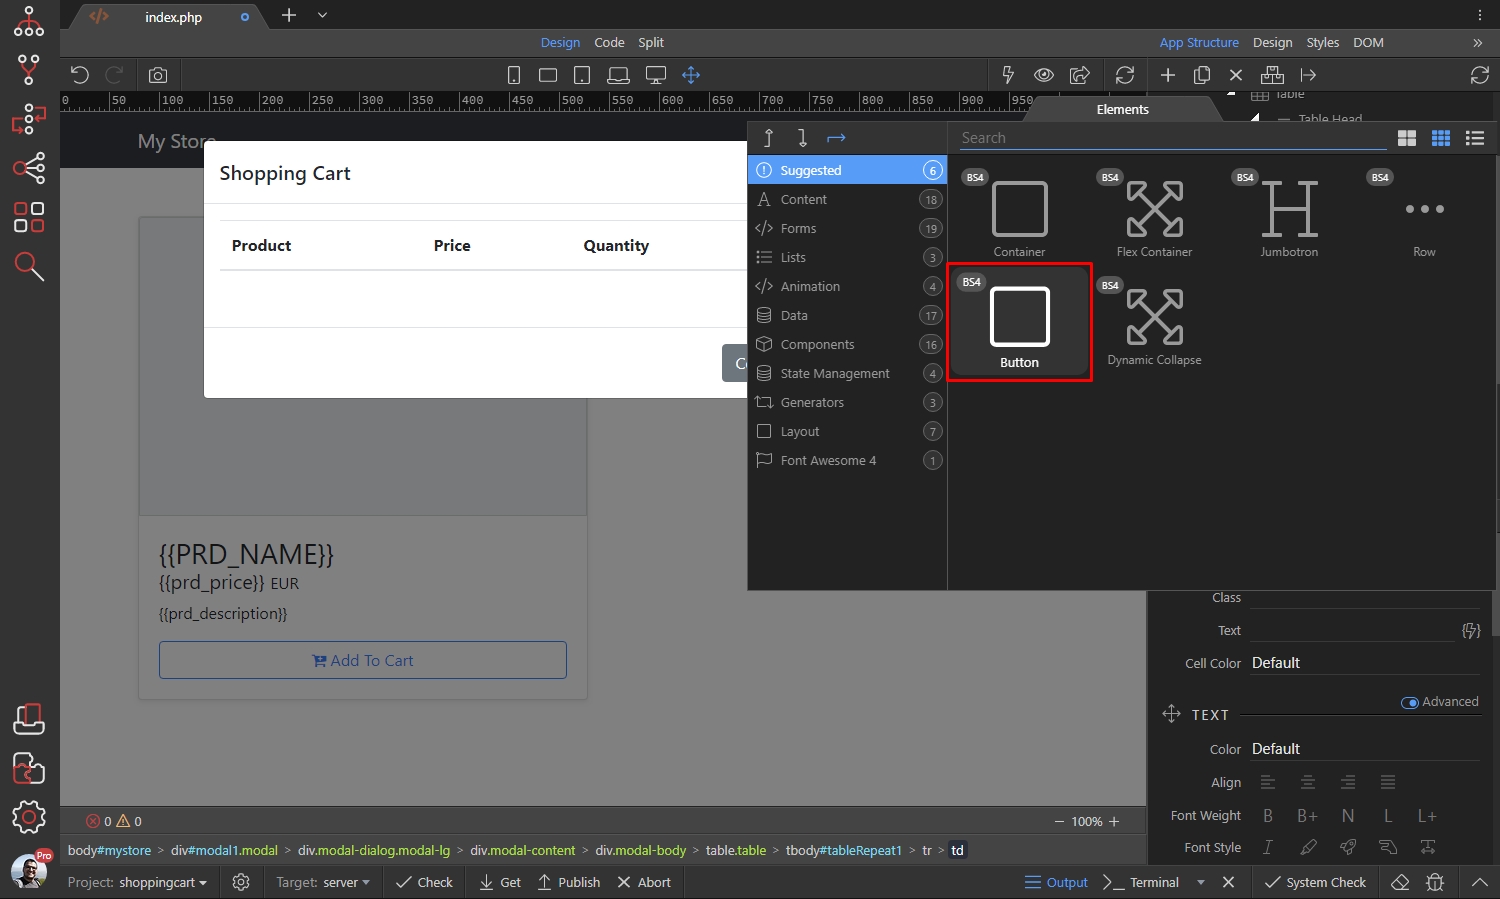
Step 54
Section titled “Step 54”We will need 3 buttons here - decrease quantity, increase quantity and remove item. So just duplicate the buttons 2 times.
Select the first button, this will be the decrease quantity button. Double click to edit, delete its text and click the font awesome button:

Find a suitable icon - for example the following one:
Section titled “Find a suitable icon - for example the following one:”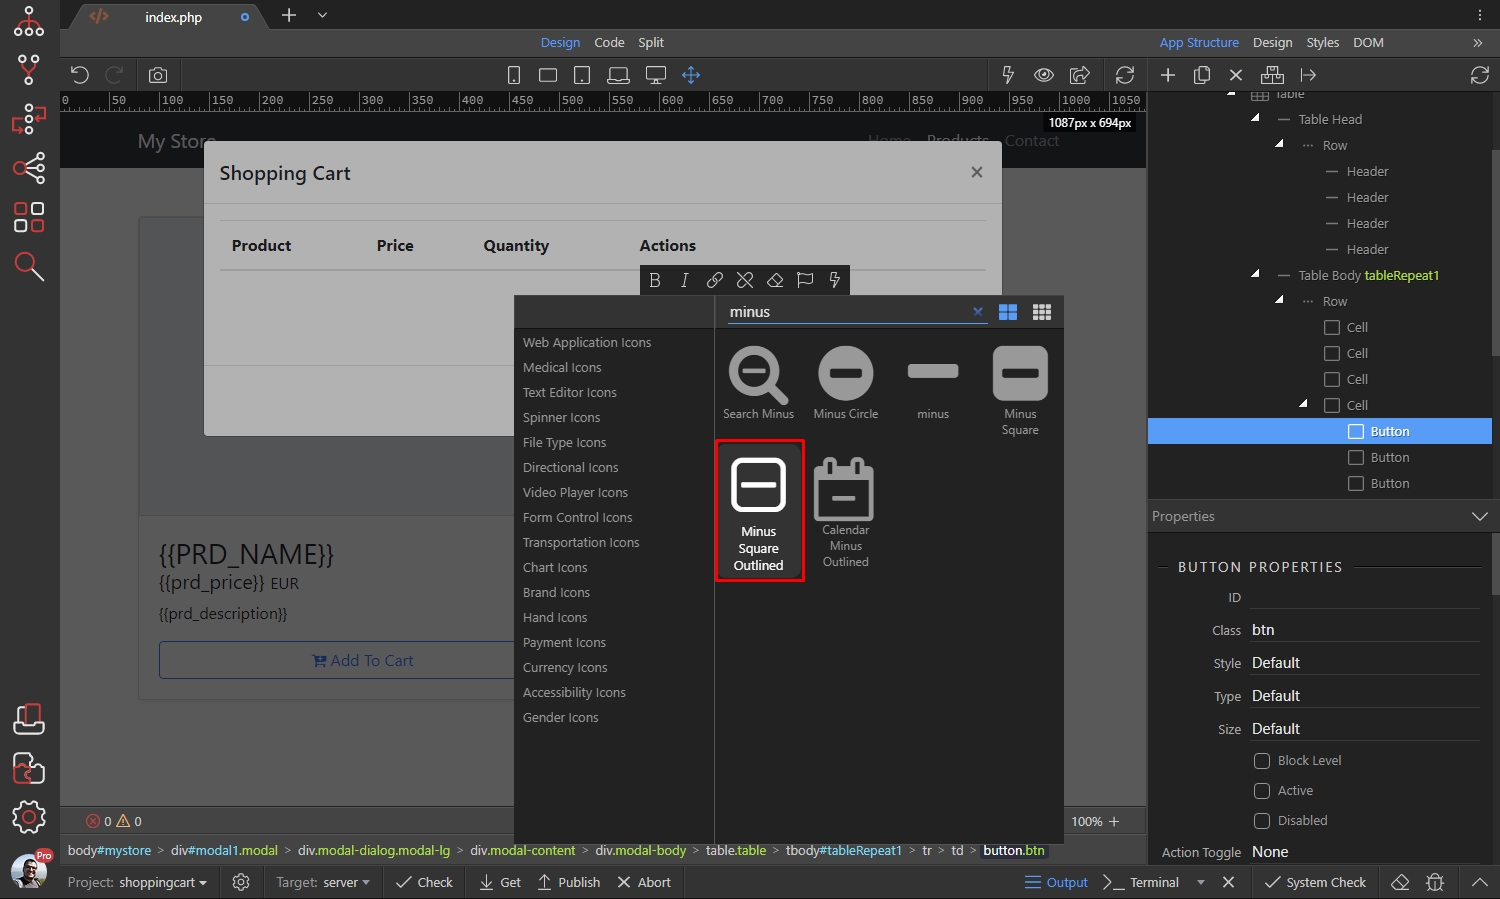
Step 56
Section titled “Step 56”Do the same for the other two buttons - increase quantity and delete item. When you add the icons in the buttons let’s style them. For the increase and decrease quantity we set the style to Primary and size to Small:

For the delete item button we set the style to Danger and size to Small:
Section titled “For the delete item button we set the style to Danger and size to Small:”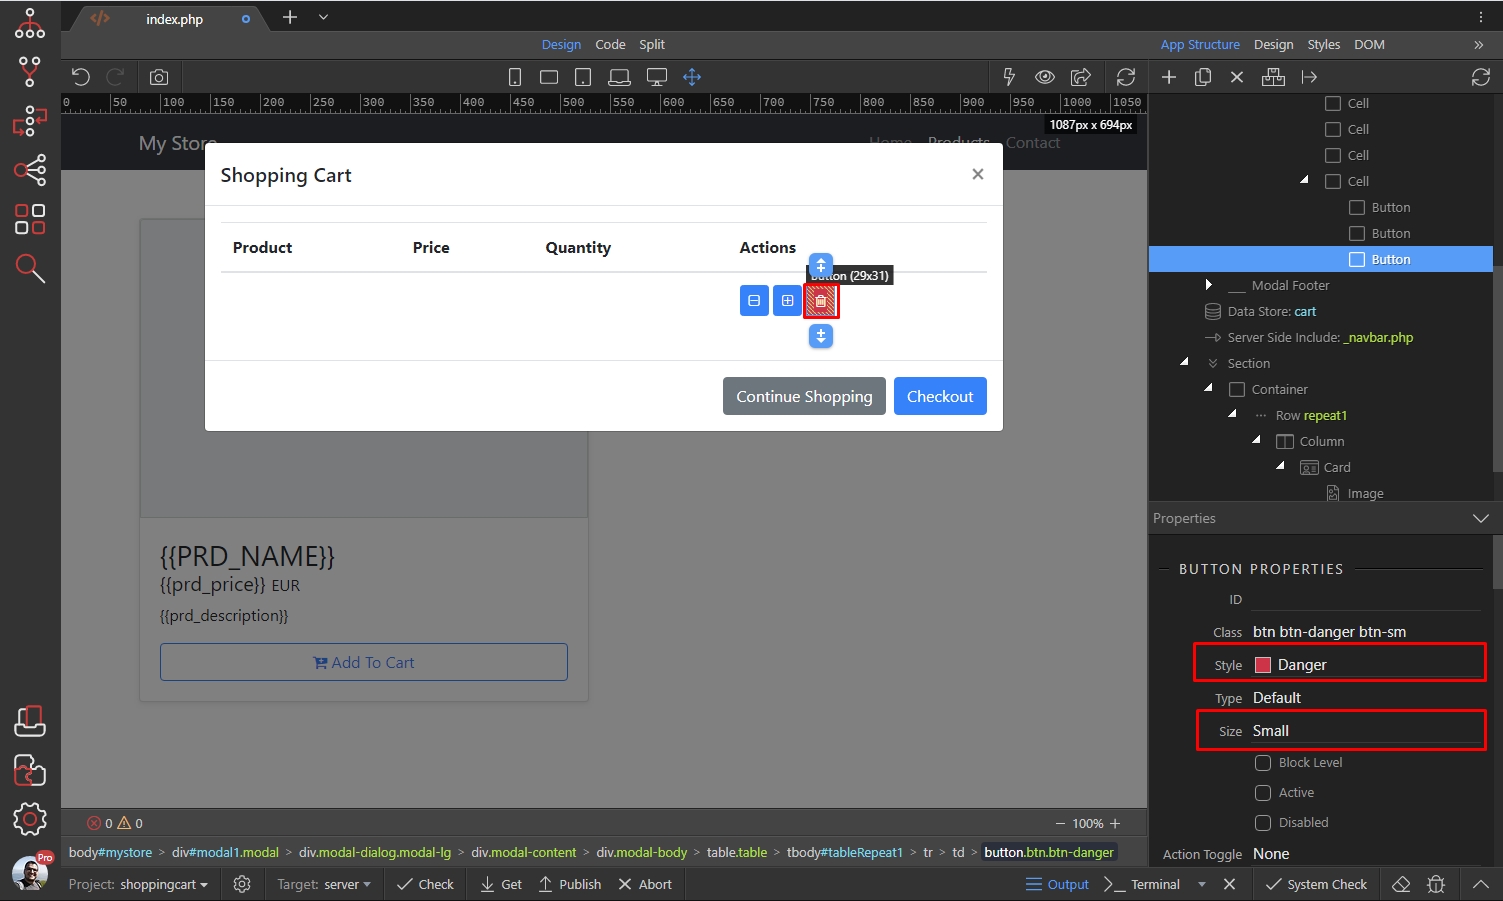
We are done with our simple shopping cart layout.
Section titled “We are done with our simple shopping cart layout.”Update shopping cart items quantity
Section titled “Update shopping cart items quantity”Now let’s make buttons work - we are going to add the increase/decrease quantity and remove item functionality to them. Select the decrease quantity button and add new dynamic event:
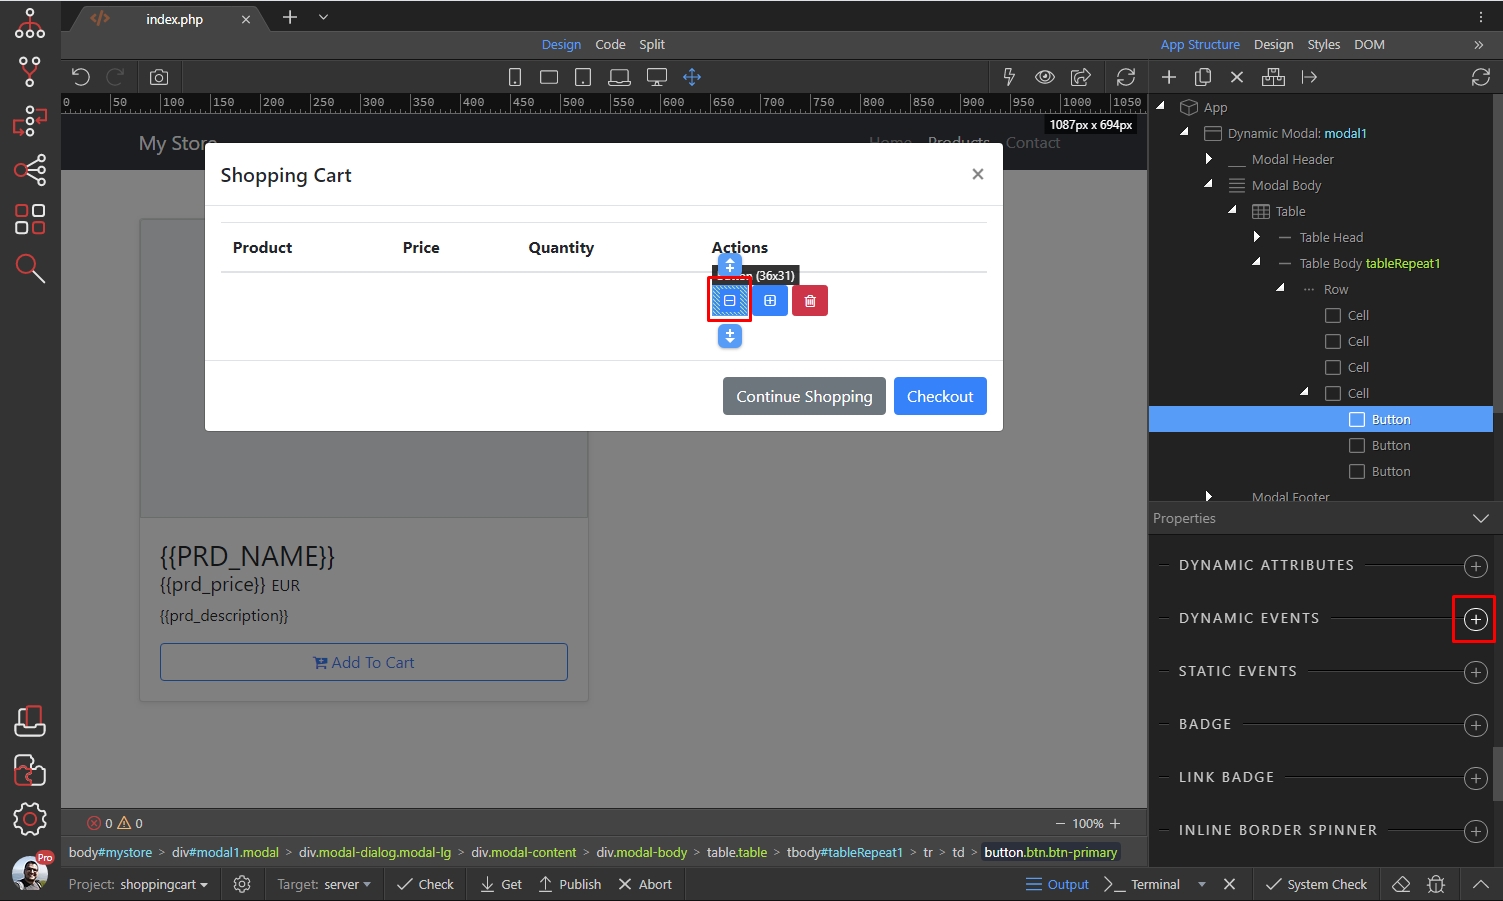
Select Mouse > Click:
Section titled “Select Mouse > Click:”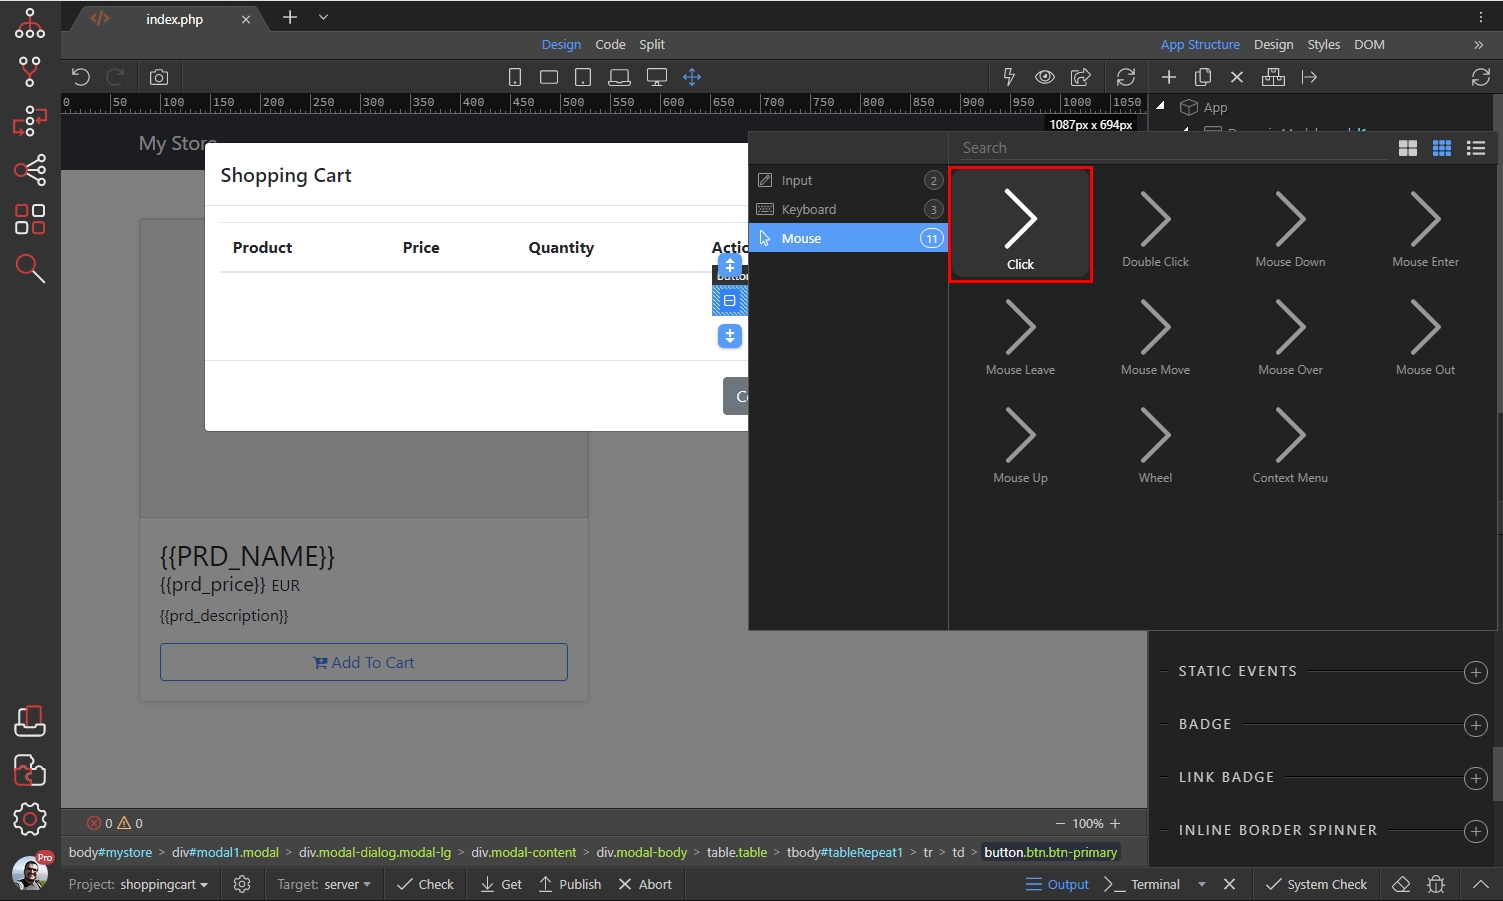
Then select what needs to happen on click:
Section titled “Then select what needs to happen on click:”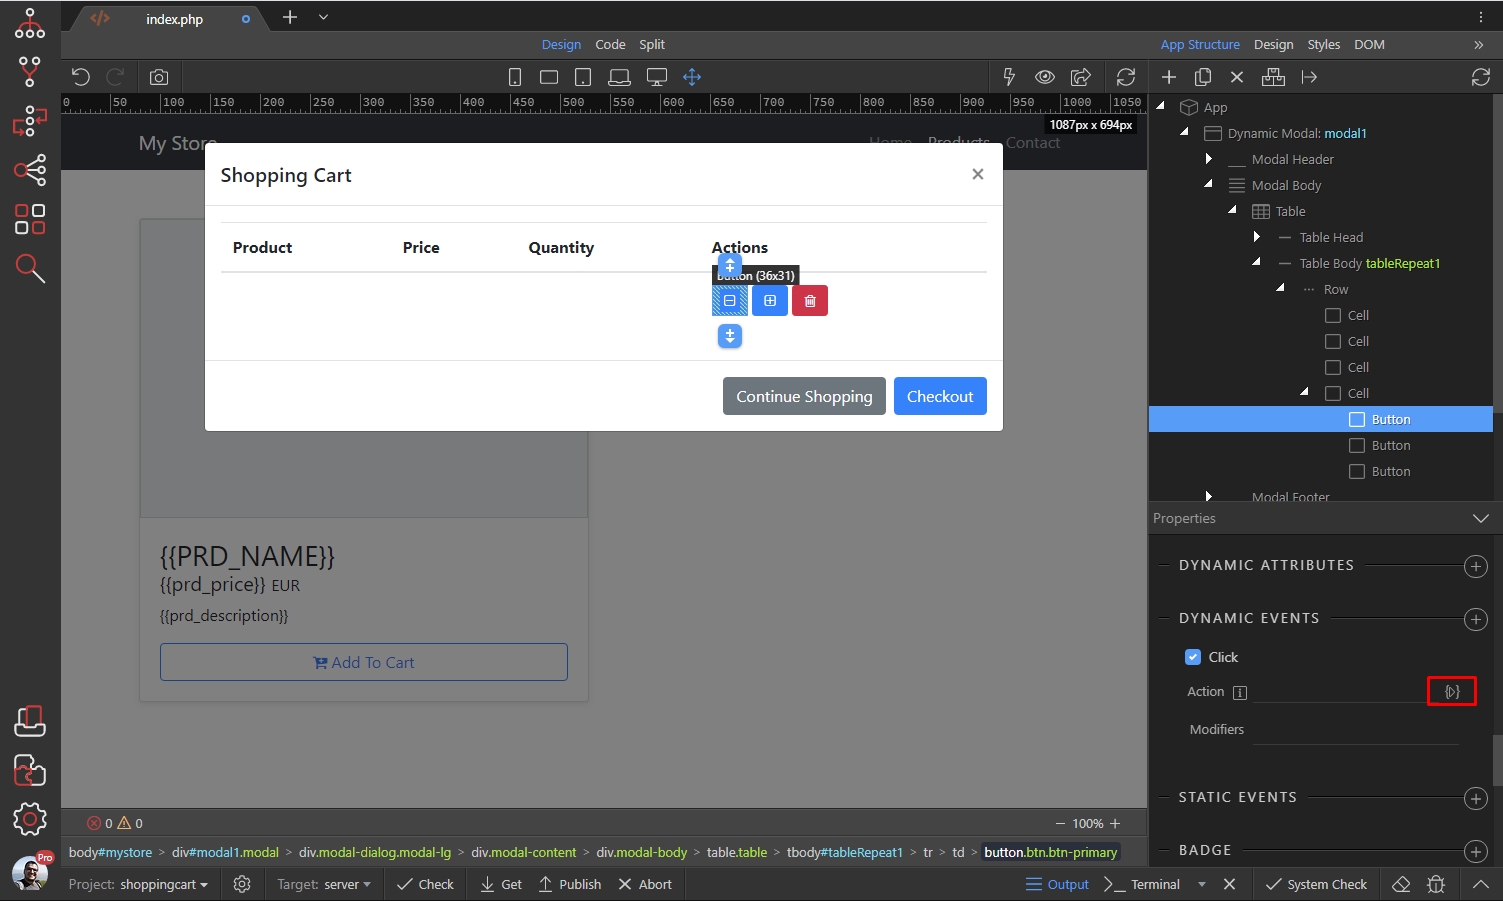
Under the Data Store component, select Update Record(s):
Section titled “Under the Data Store component, select Update Record(s):”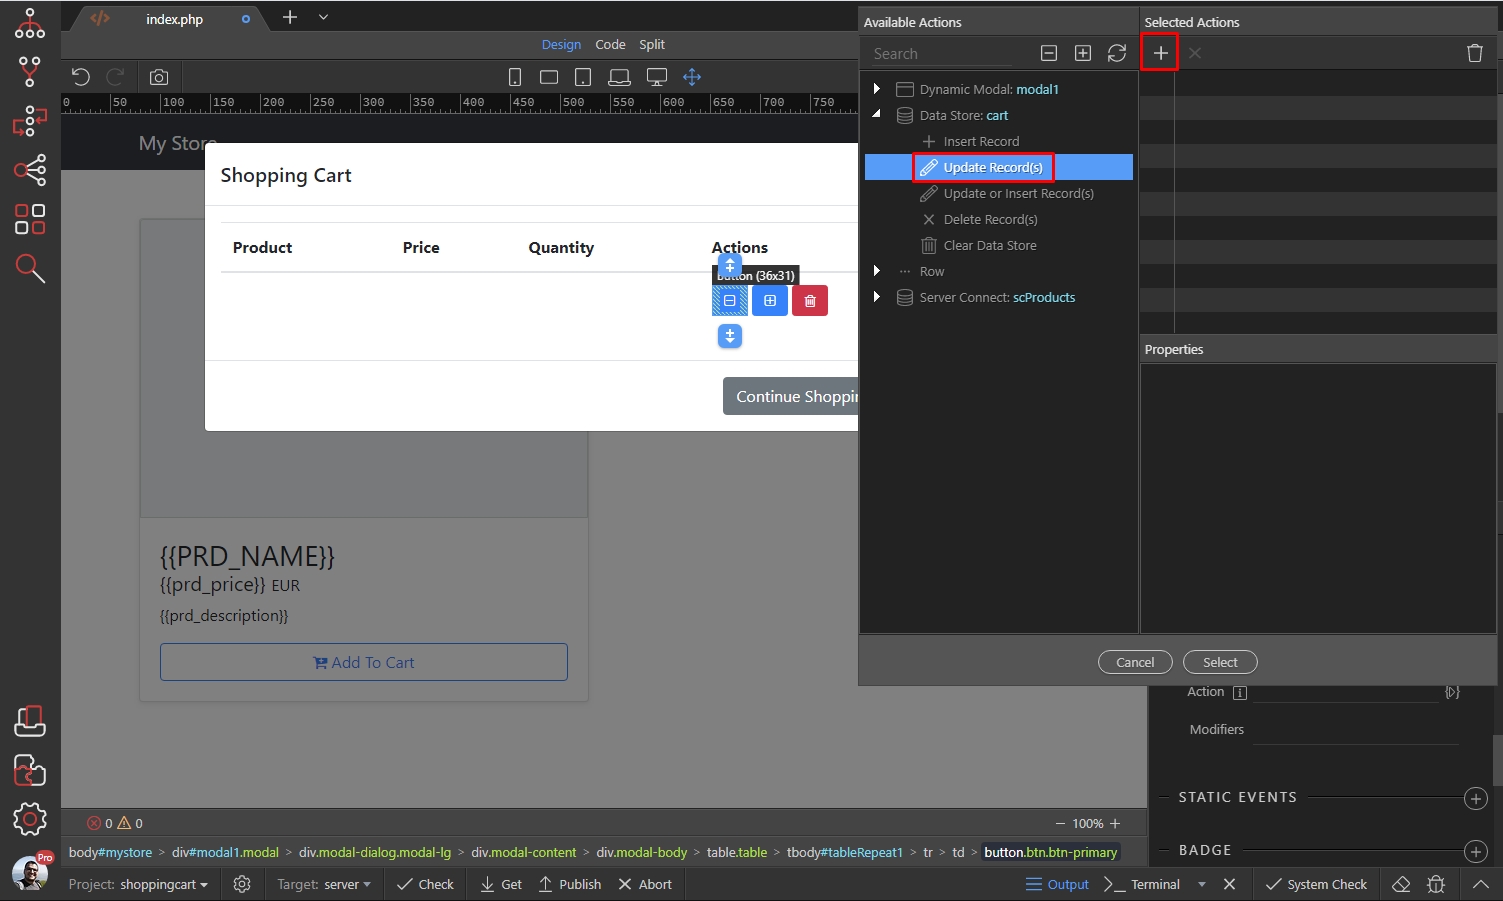
Step 63
Section titled “Step 63”Then, let’s select which record to update. Here we are going to use the default record ID returned by the Data Store component:
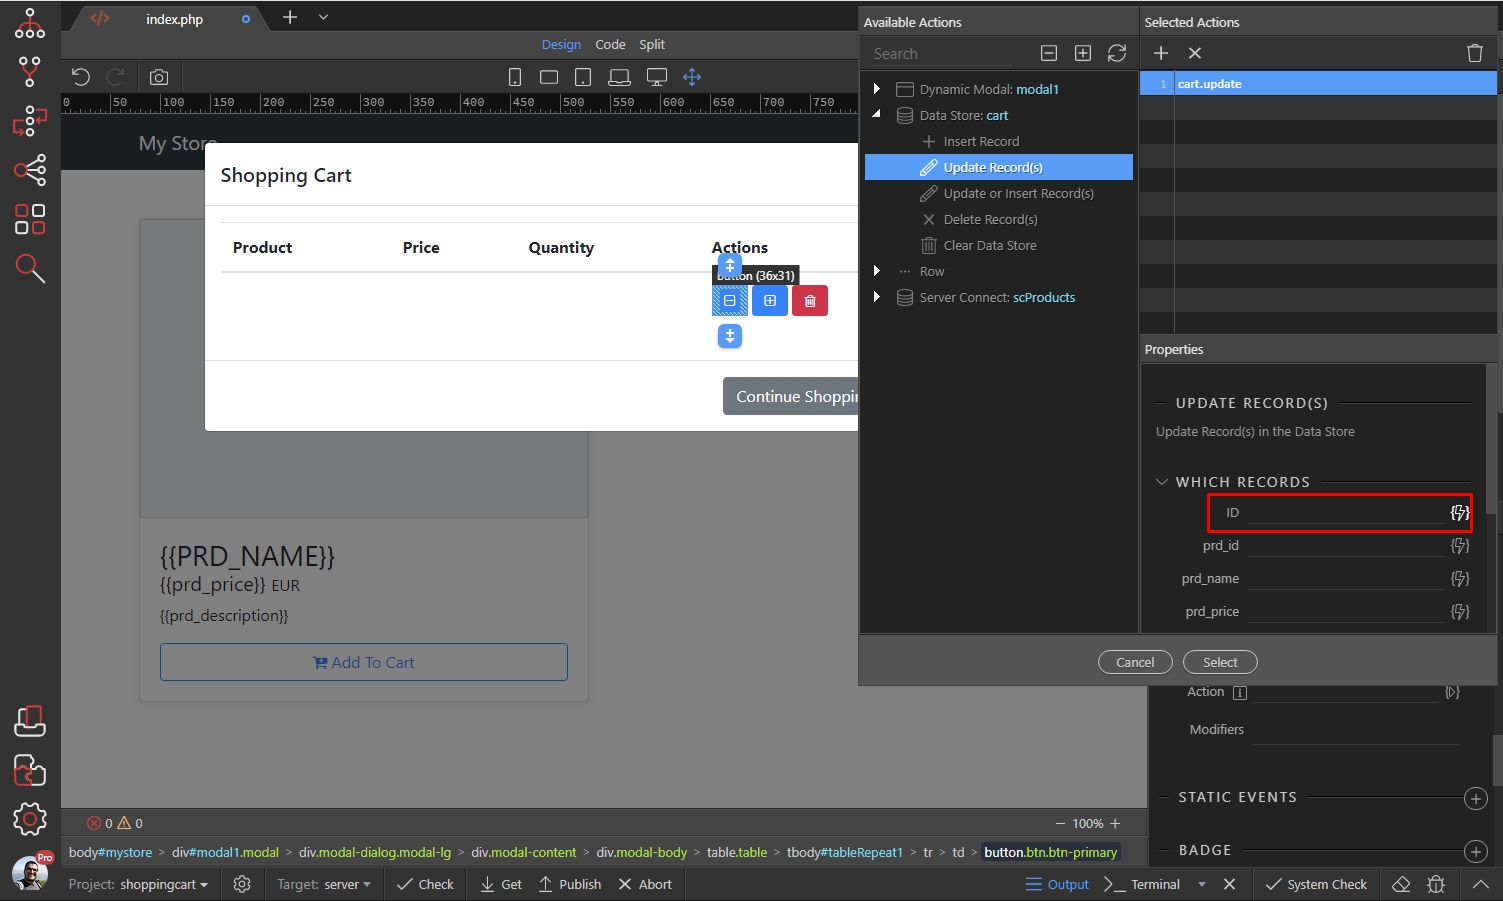
Its value should be the $id element under the table repeat region, in the data picker:
Section titled “Its value should be the $id element under the table repeat region, in the data picker:”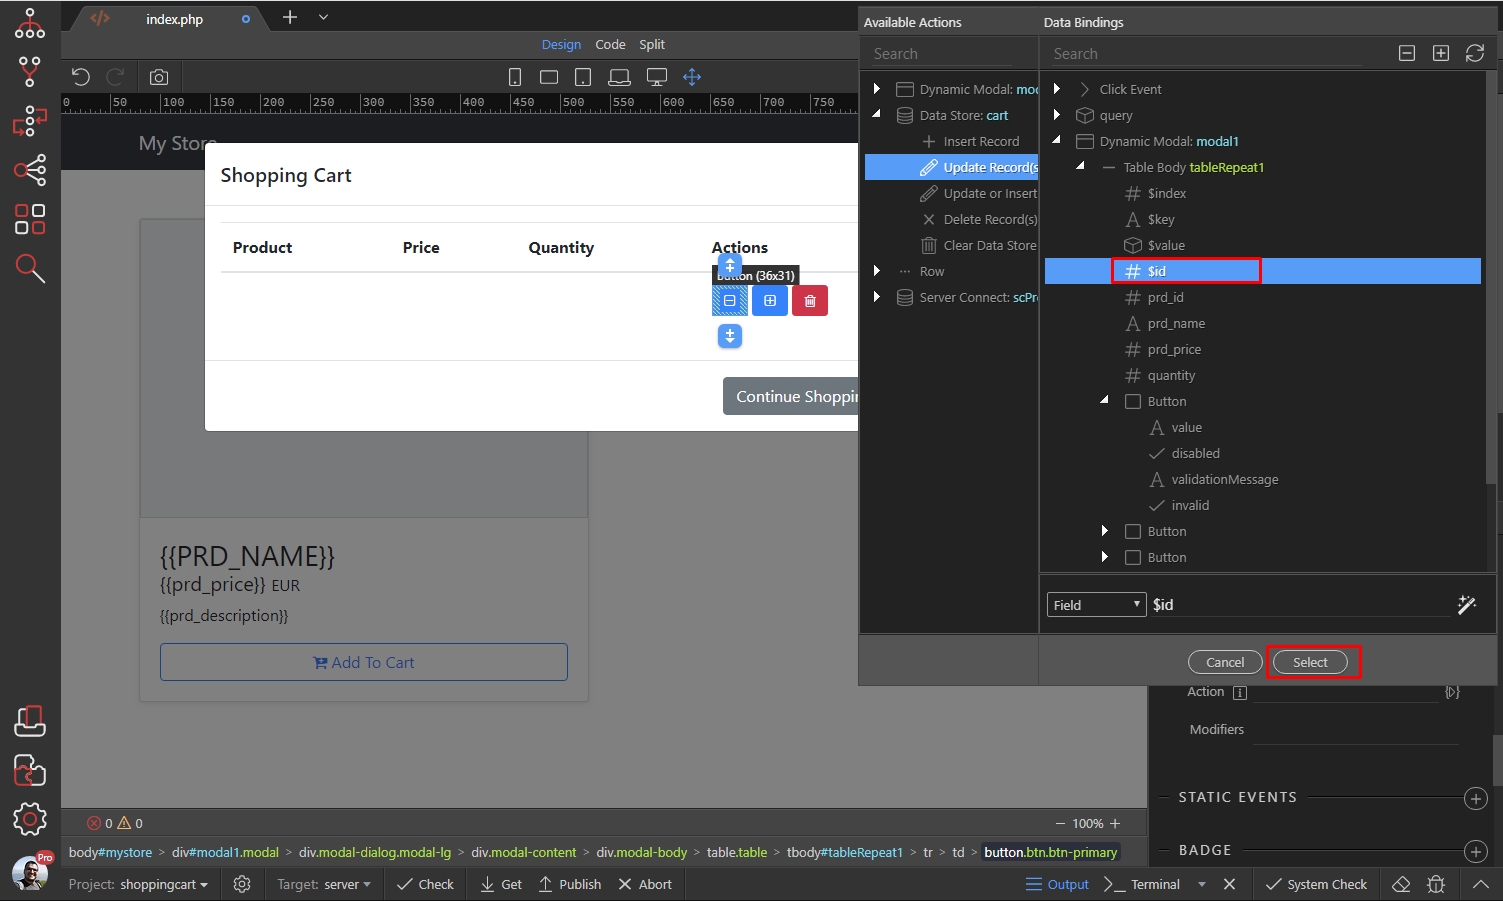
Here we need to update (decrease) the quantity so click the dynamic data picker icon for the quantity field:
Section titled “Here we need to update (decrease) the quantity so click the dynamic data picker icon for the quantity field:”
Step 66
Section titled “Step 66”We need to subtract 1 from the current quantity, so we select the quantity binding under the table repeat and add - 1 to it, so it becomes: quantity - 1:
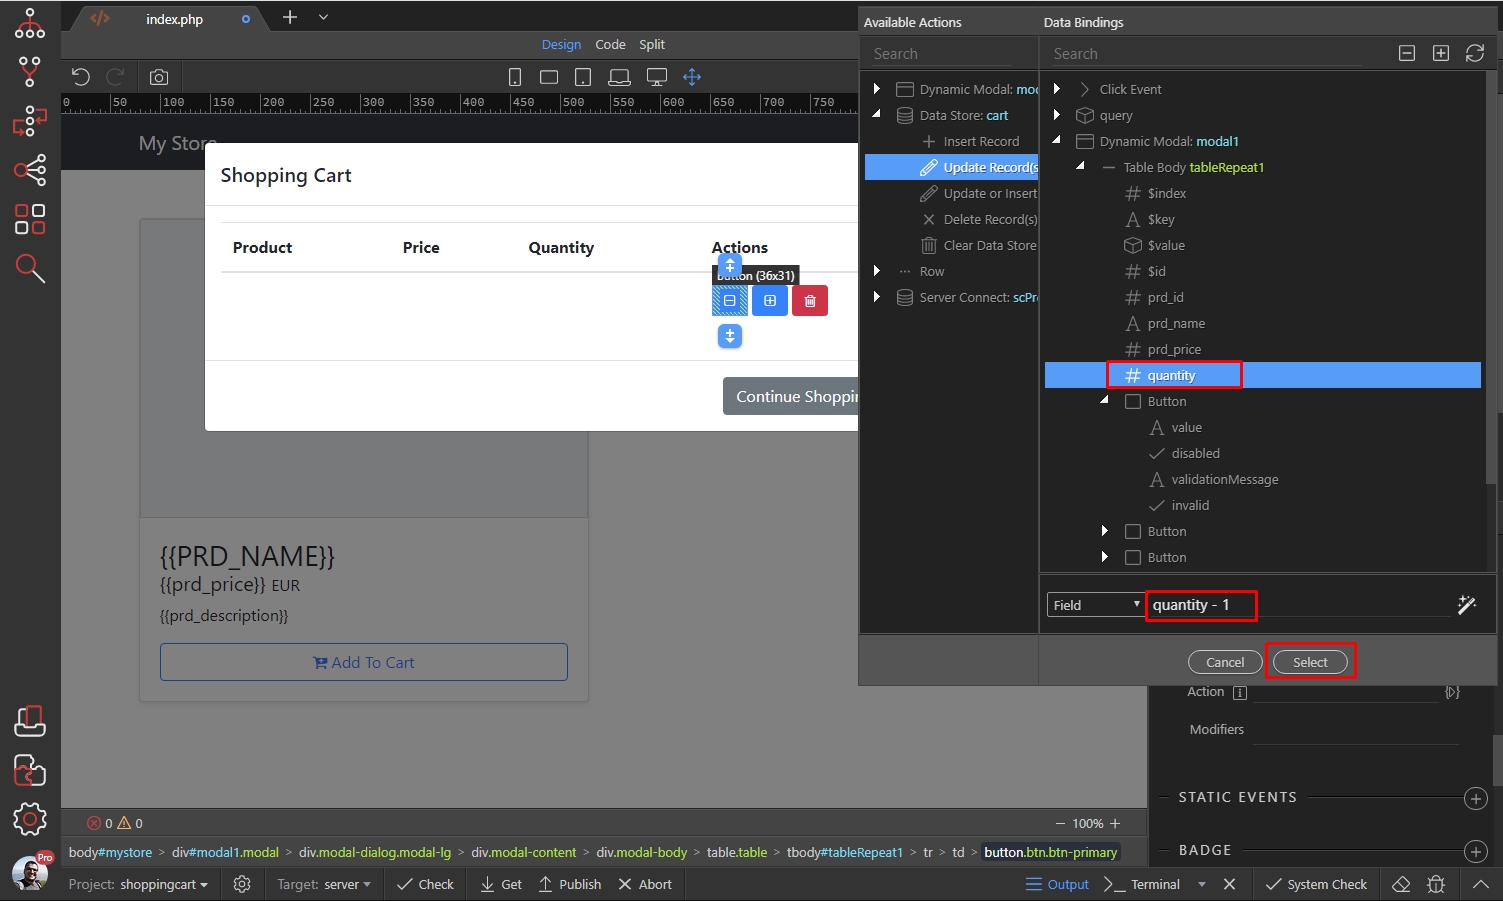
Click Select:
Section titled “Click Select:”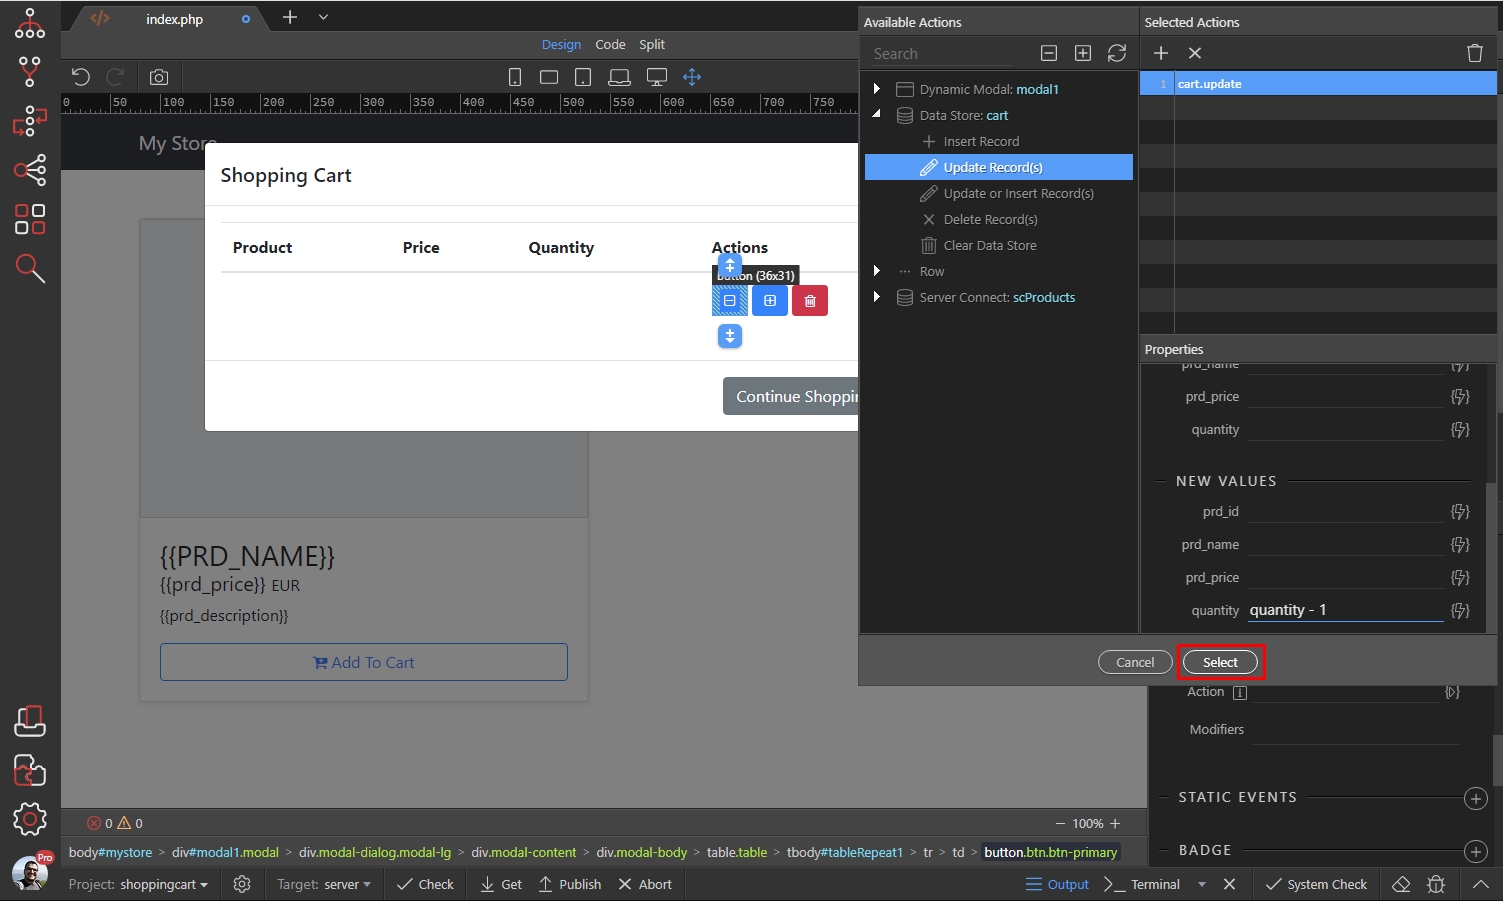
Step 68
Section titled “Step 68”We only need the decrease quantity button to be available if the quantity is more than 1. With the button still selected, add new dynamic attribute:

Select Input > Disabled:
Section titled “Select Input > Disabled:”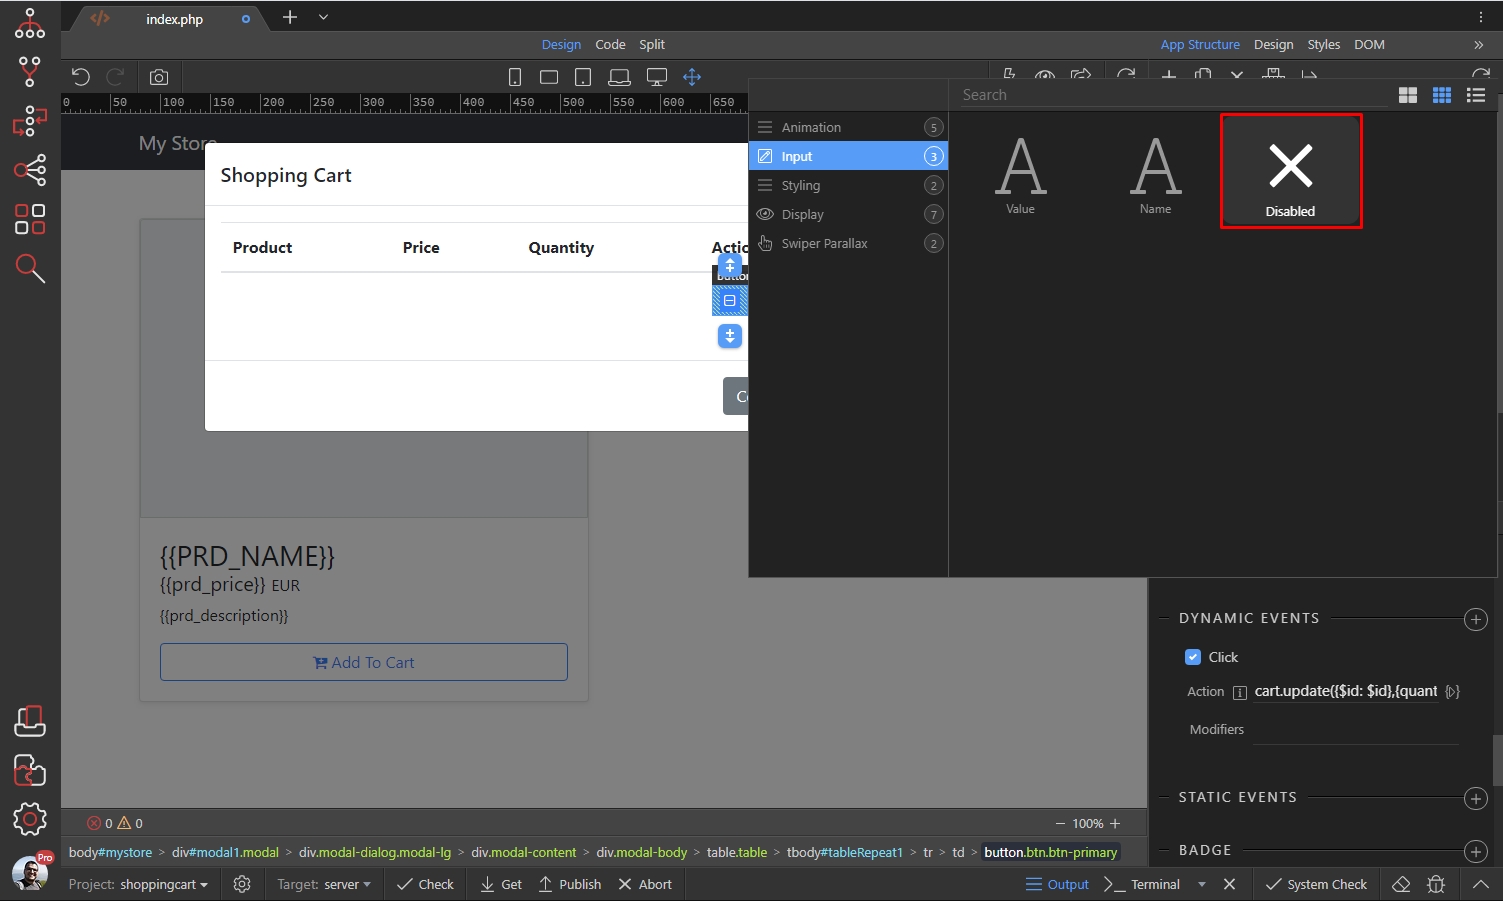
And then click the dynamic data picker, to select when should it be disabled:
Section titled “And then click the dynamic data picker, to select when should it be disabled:”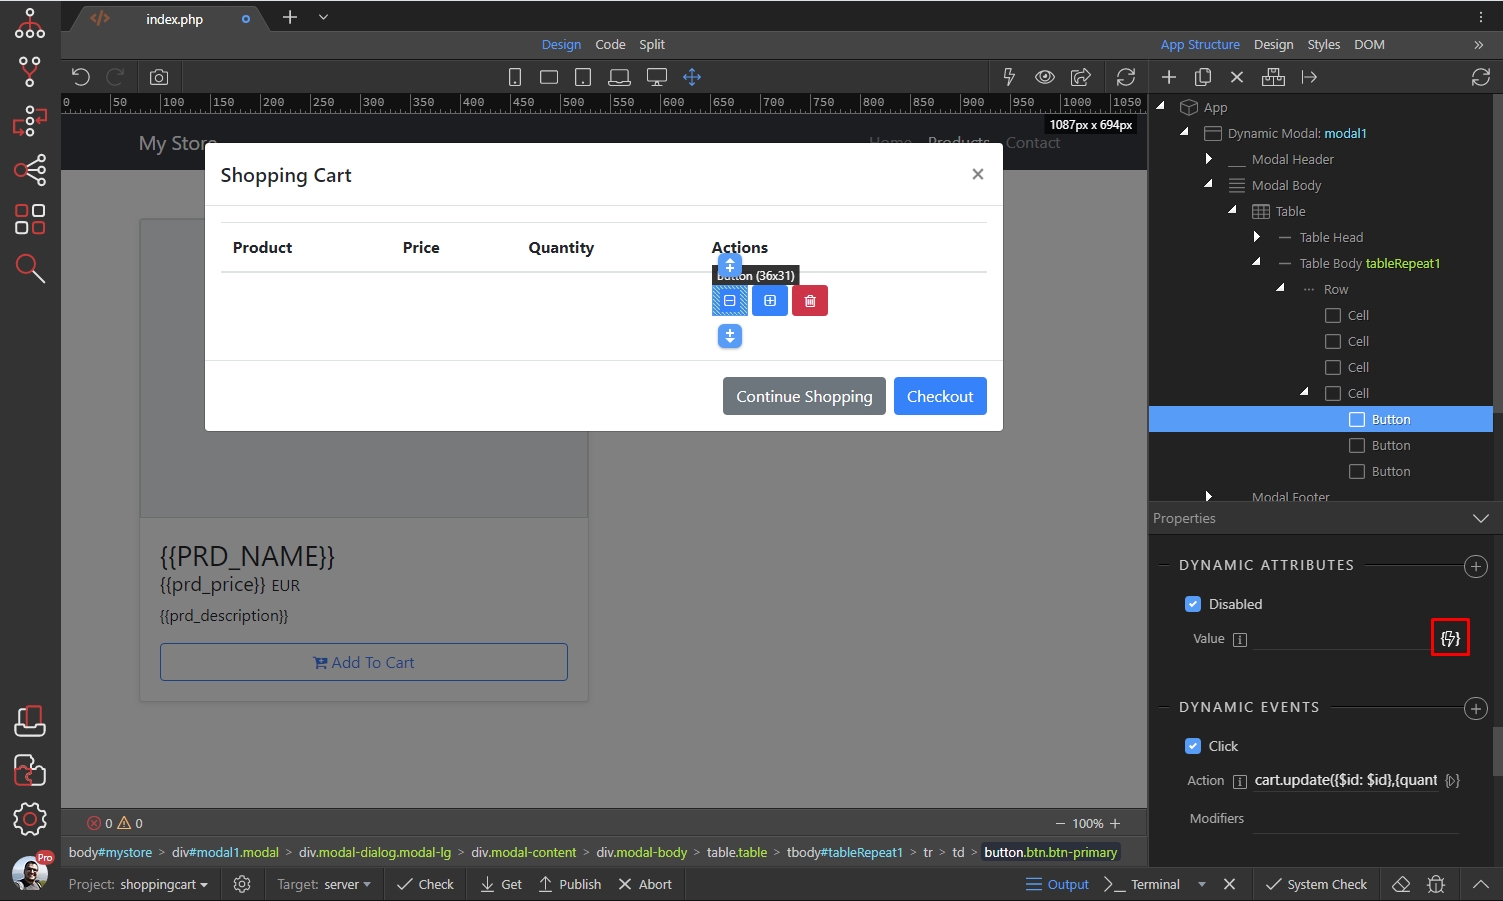
Select the quantity binding, under the table repeat region and add == 1 to it:
Section titled “Select the quantity binding, under the table repeat region and add == 1 to it:”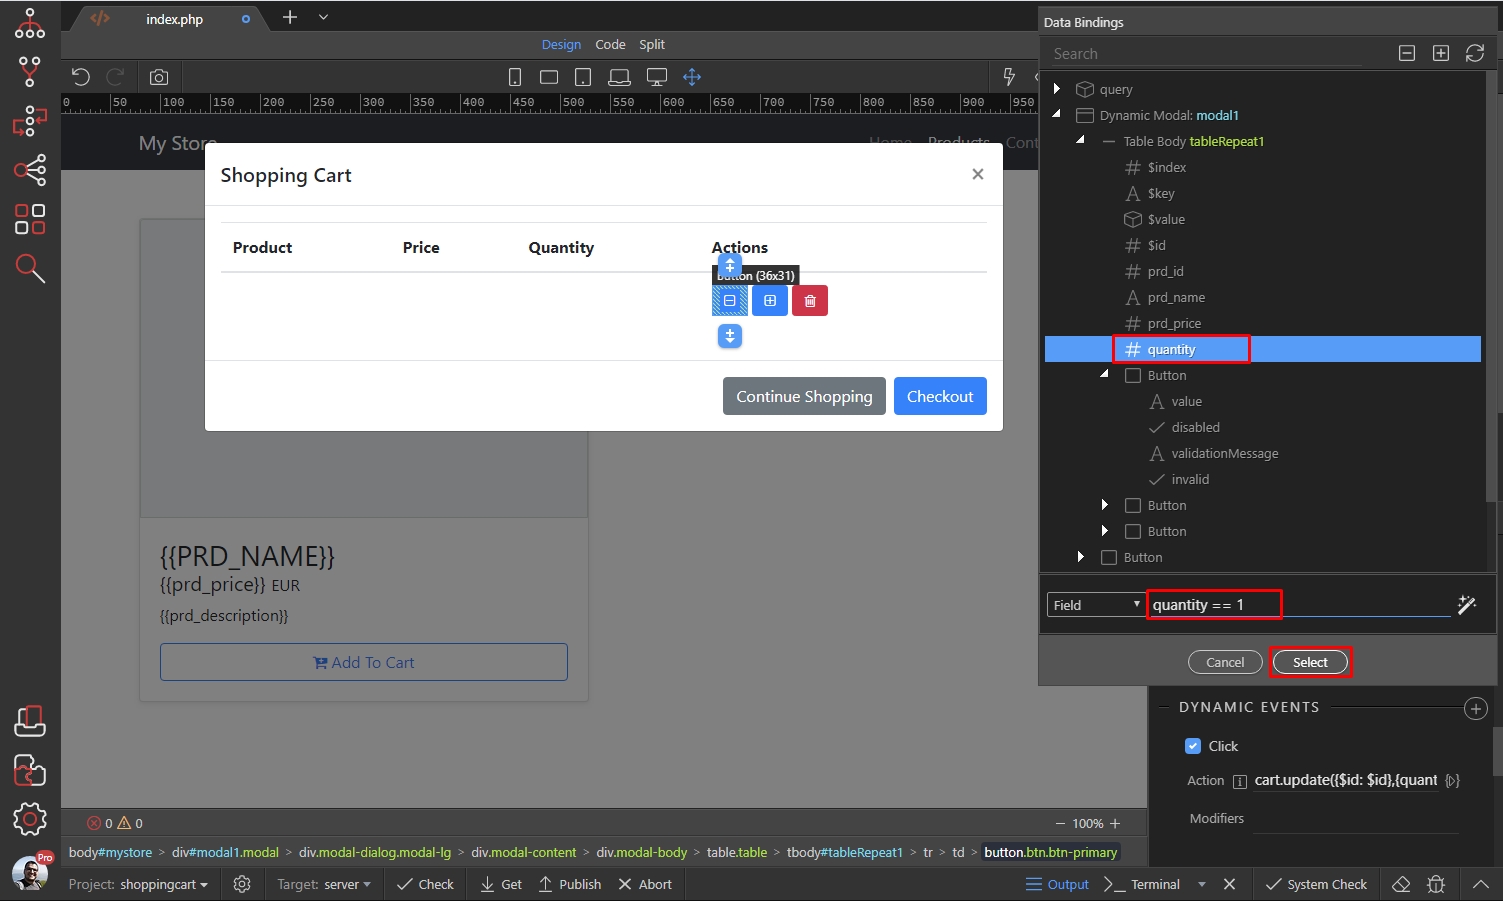
Now, select the increase quantity button and add a new dynamic event:
Section titled “Now, select the increase quantity button and add a new dynamic event:”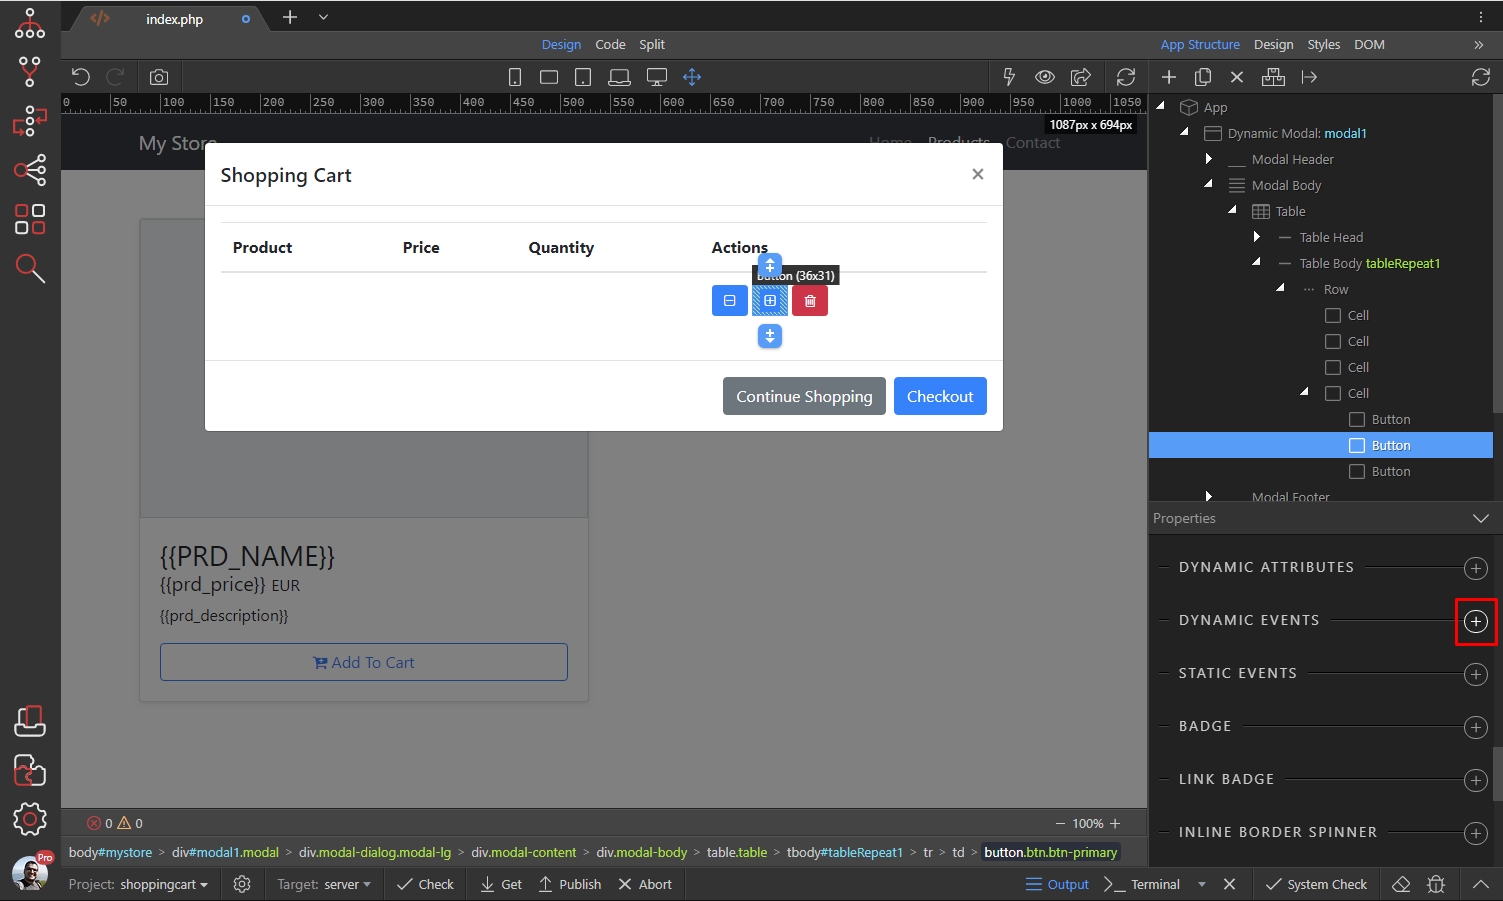
Select Mouse > Click:
Section titled “Select Mouse > Click:”
And select what needs to happen on click:
Section titled “And select what needs to happen on click:”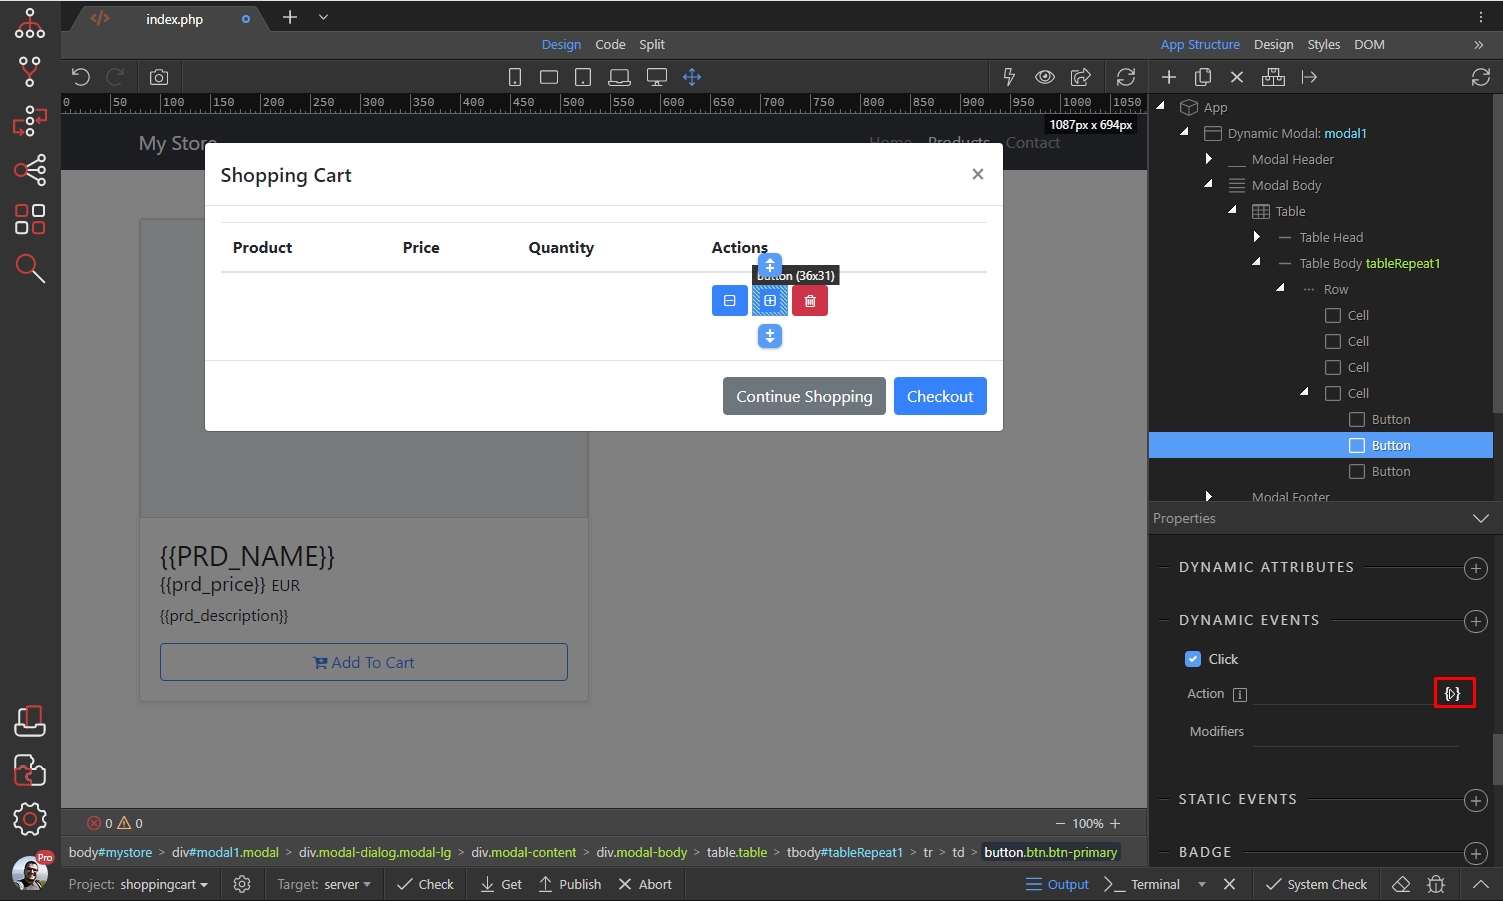
Under the Data Store component select Update Record(s):
Section titled “Under the Data Store component select Update Record(s):”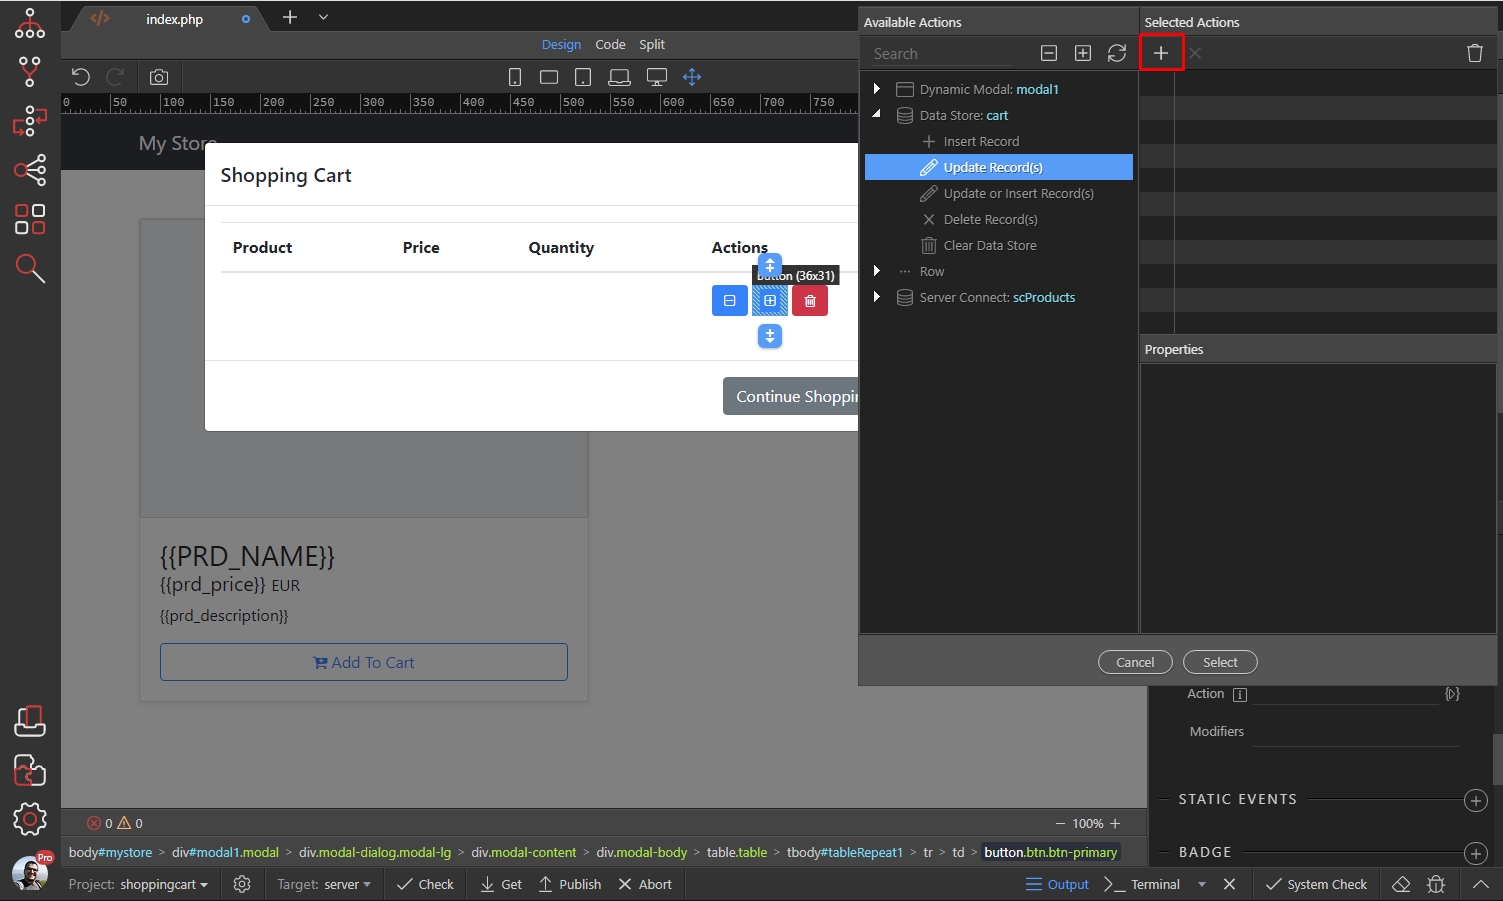
Step 76
Section titled “Step 76”Then select which record to update. Here, again, we are going to use the default record ID returned by the Data Store component:
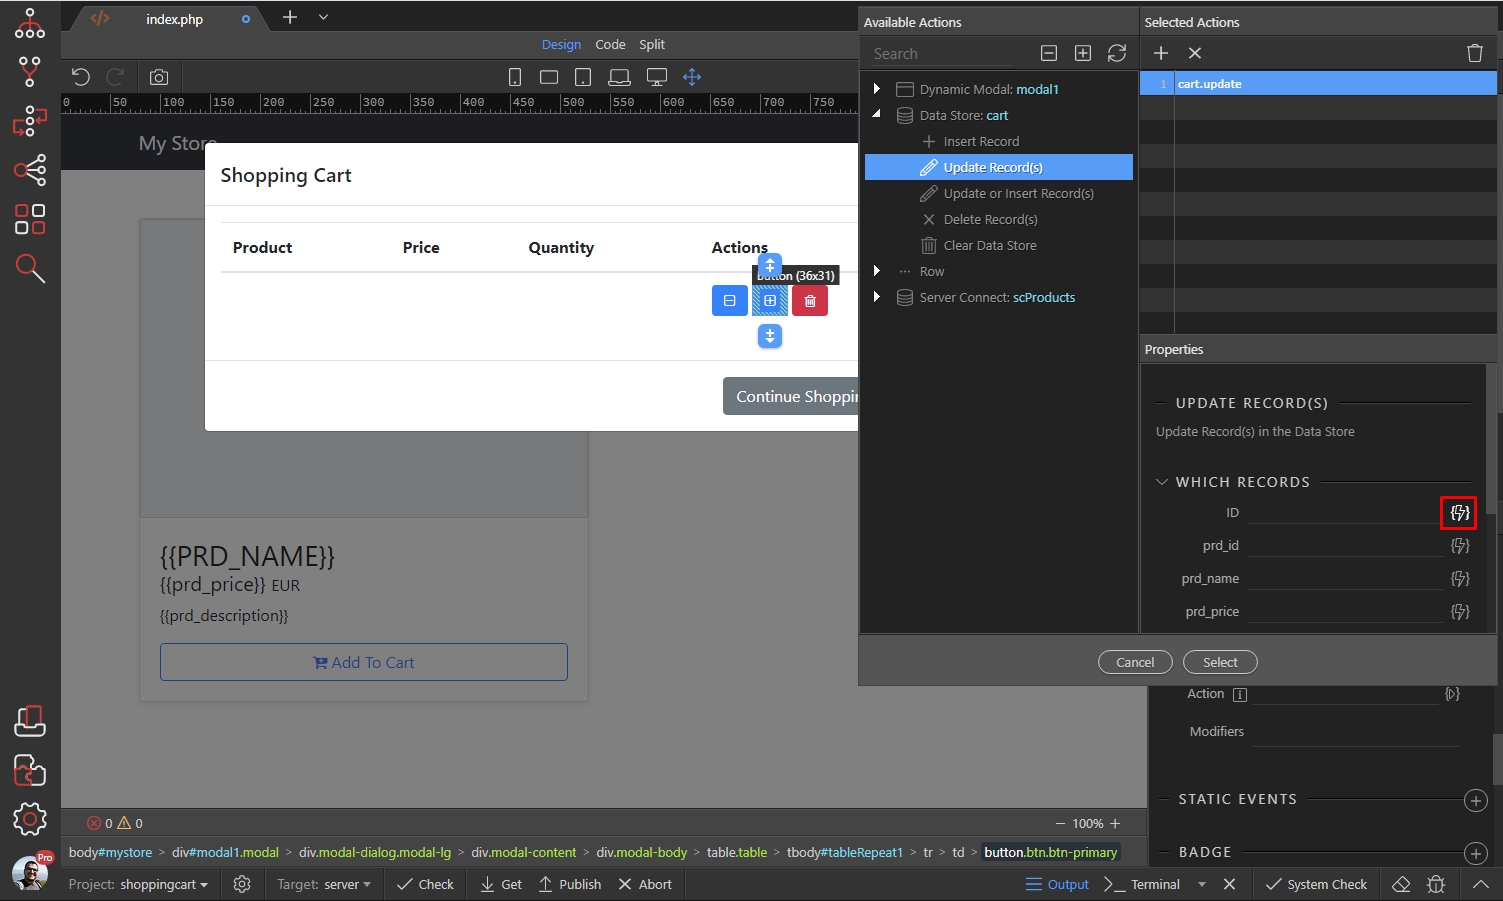
Its value should be the $id element under the table repeat region, in the data picker:
Section titled “Its value should be the $id element under the table repeat region, in the data picker:”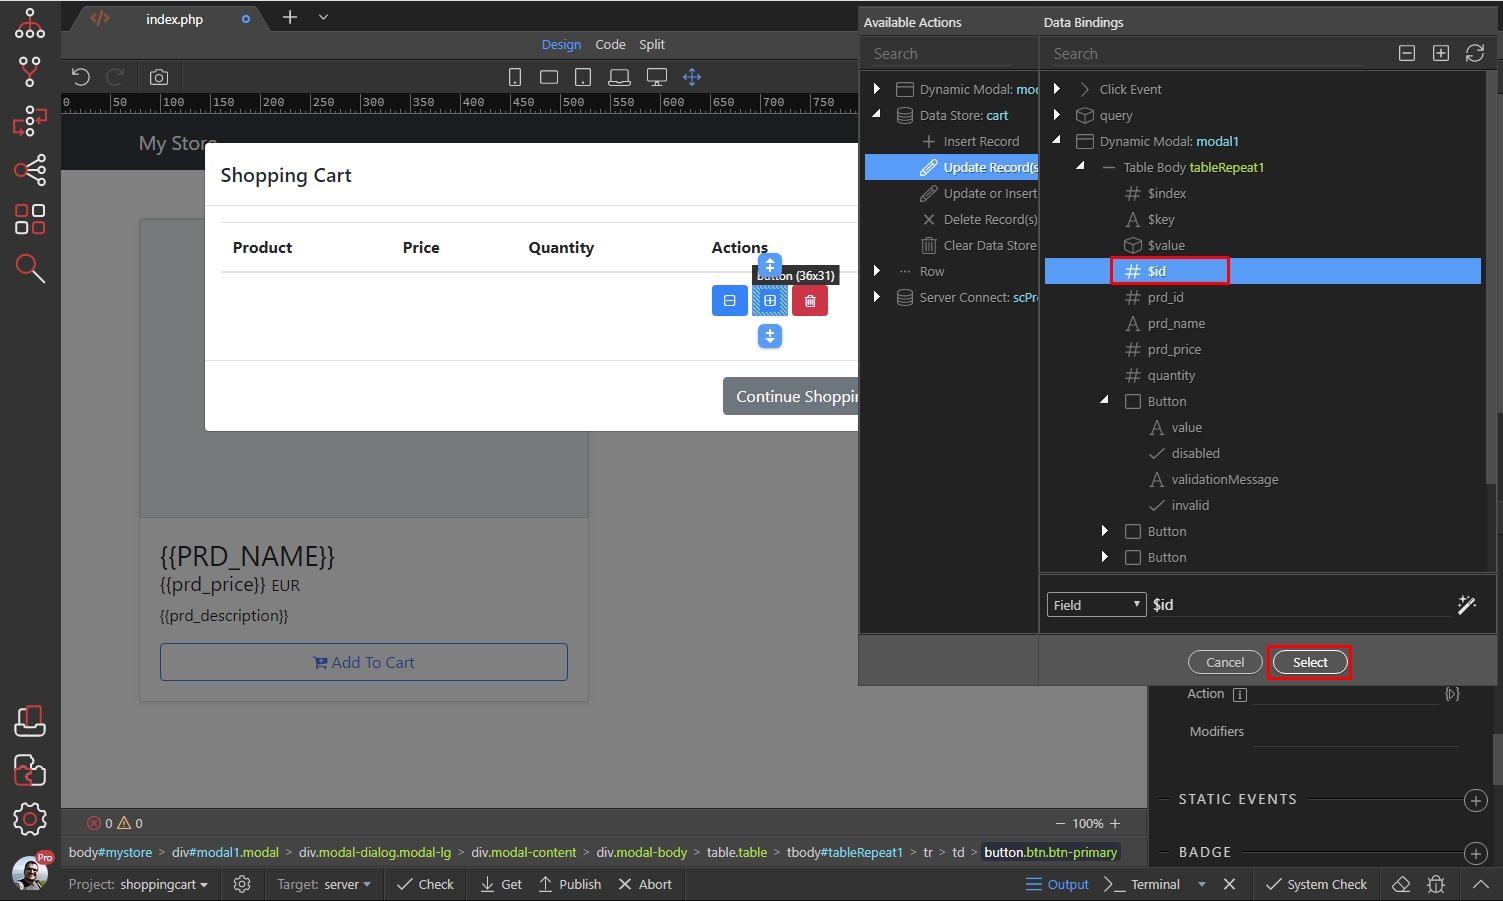
Here we need to update (increase) the quantity, so click the dynamic data picker icon for the quantity field:
Section titled “Here we need to update (increase) the quantity, so click the dynamic data picker icon for the quantity field:”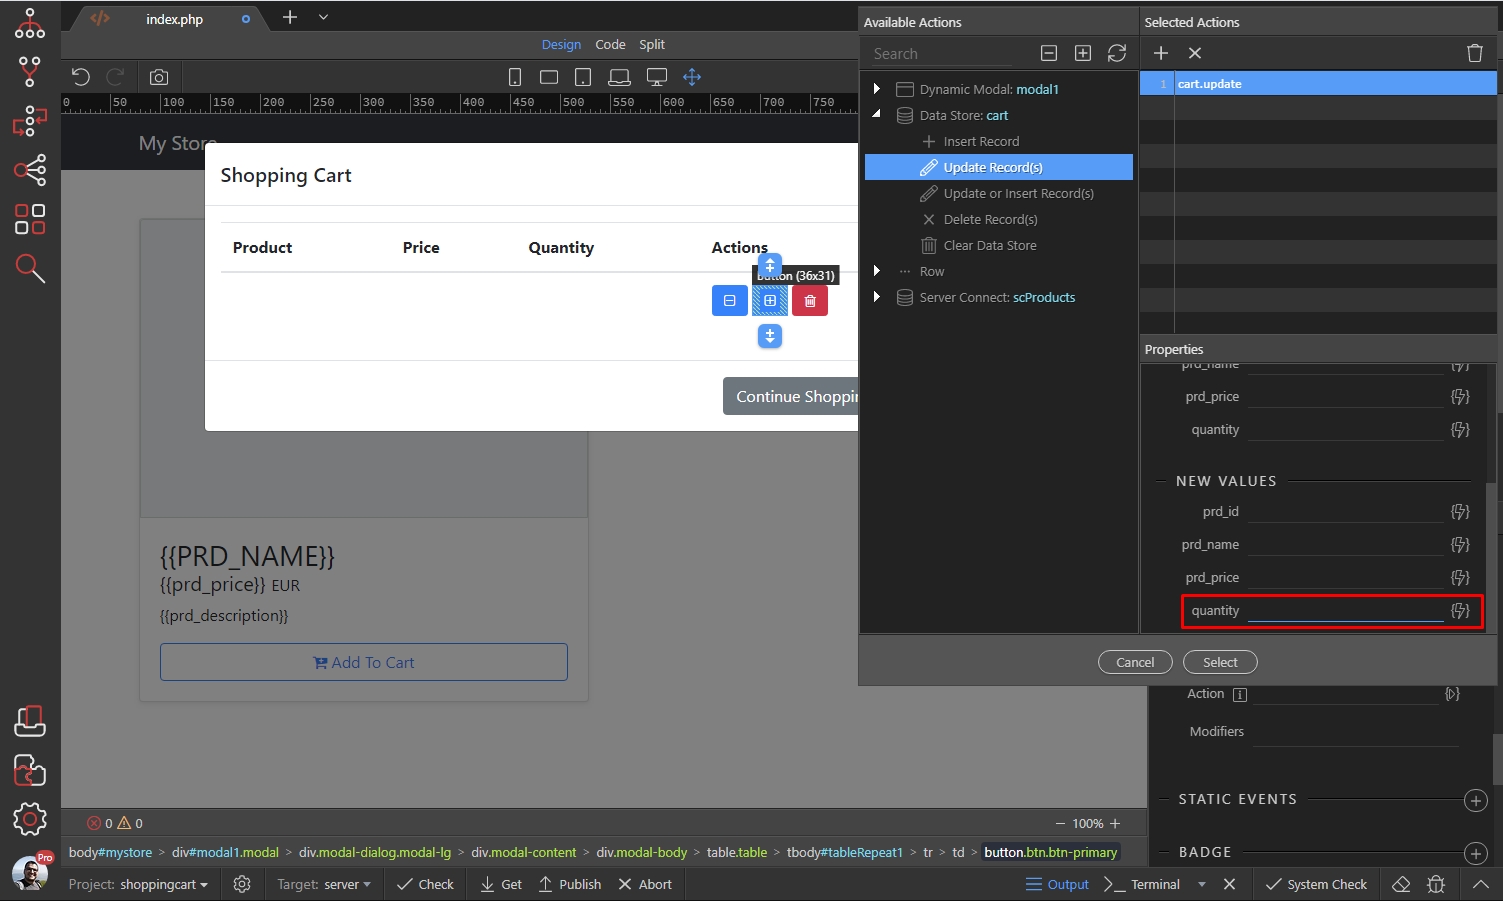
Step 79
Section titled “Step 79”We need to add 1 to the current quantity, so we select the quantity binding under the table repeat and add + 1 to it, so it becomes: quantity + 1:
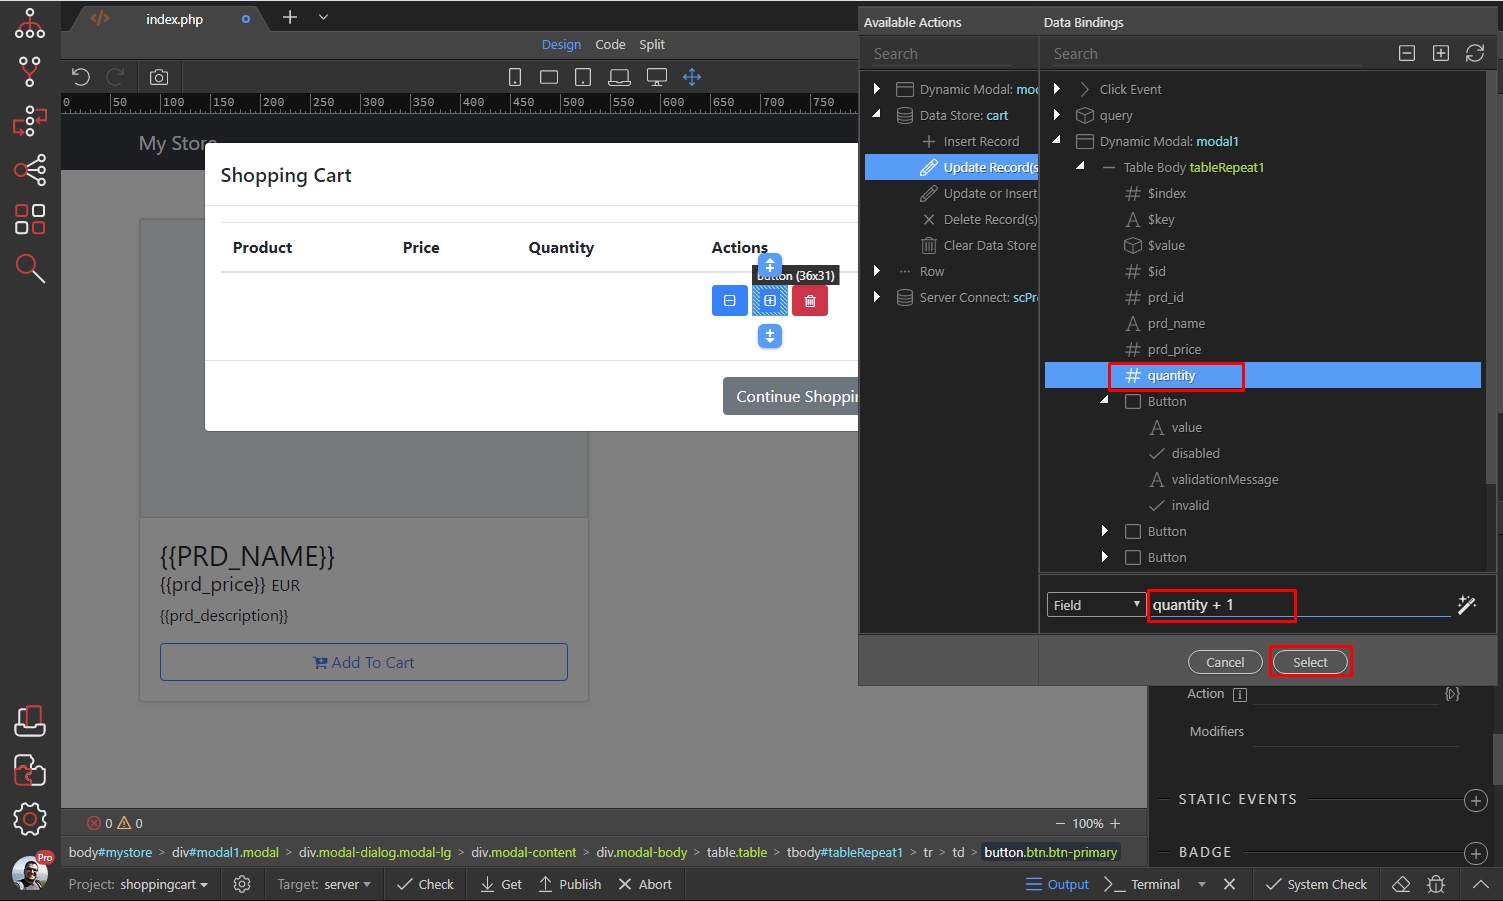
Click Select:
Section titled “Click Select:”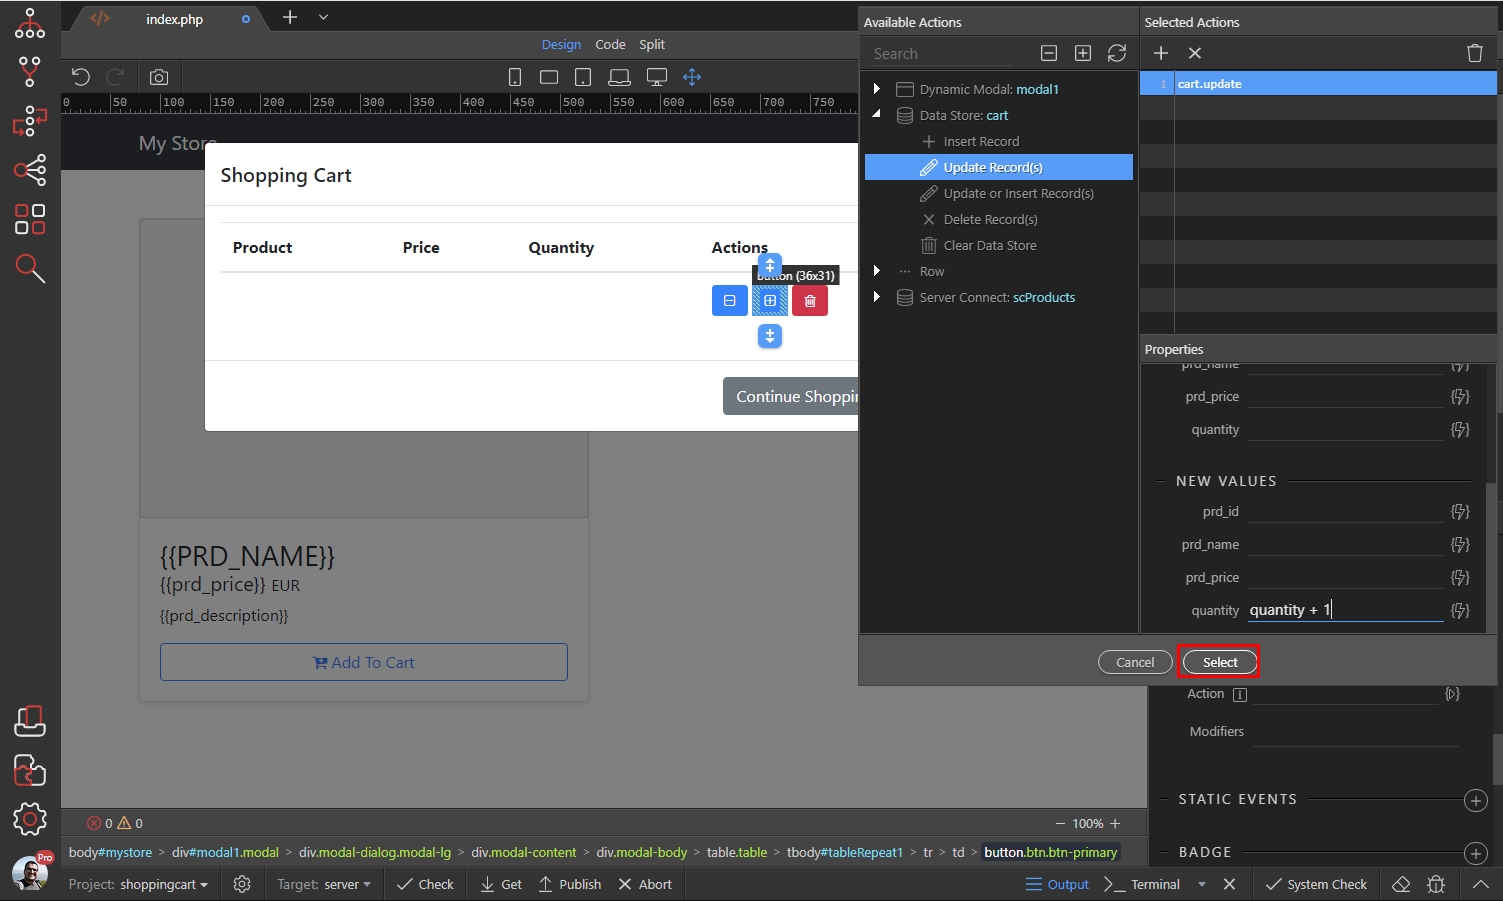
Remove items from the shopping cart
Section titled “Remove items from the shopping cart”The only thing left is to add the remove item functionality to the delete button. Select the button and add new dynamic event:

Select Mouse > Click:
Section titled “Select Mouse > Click:”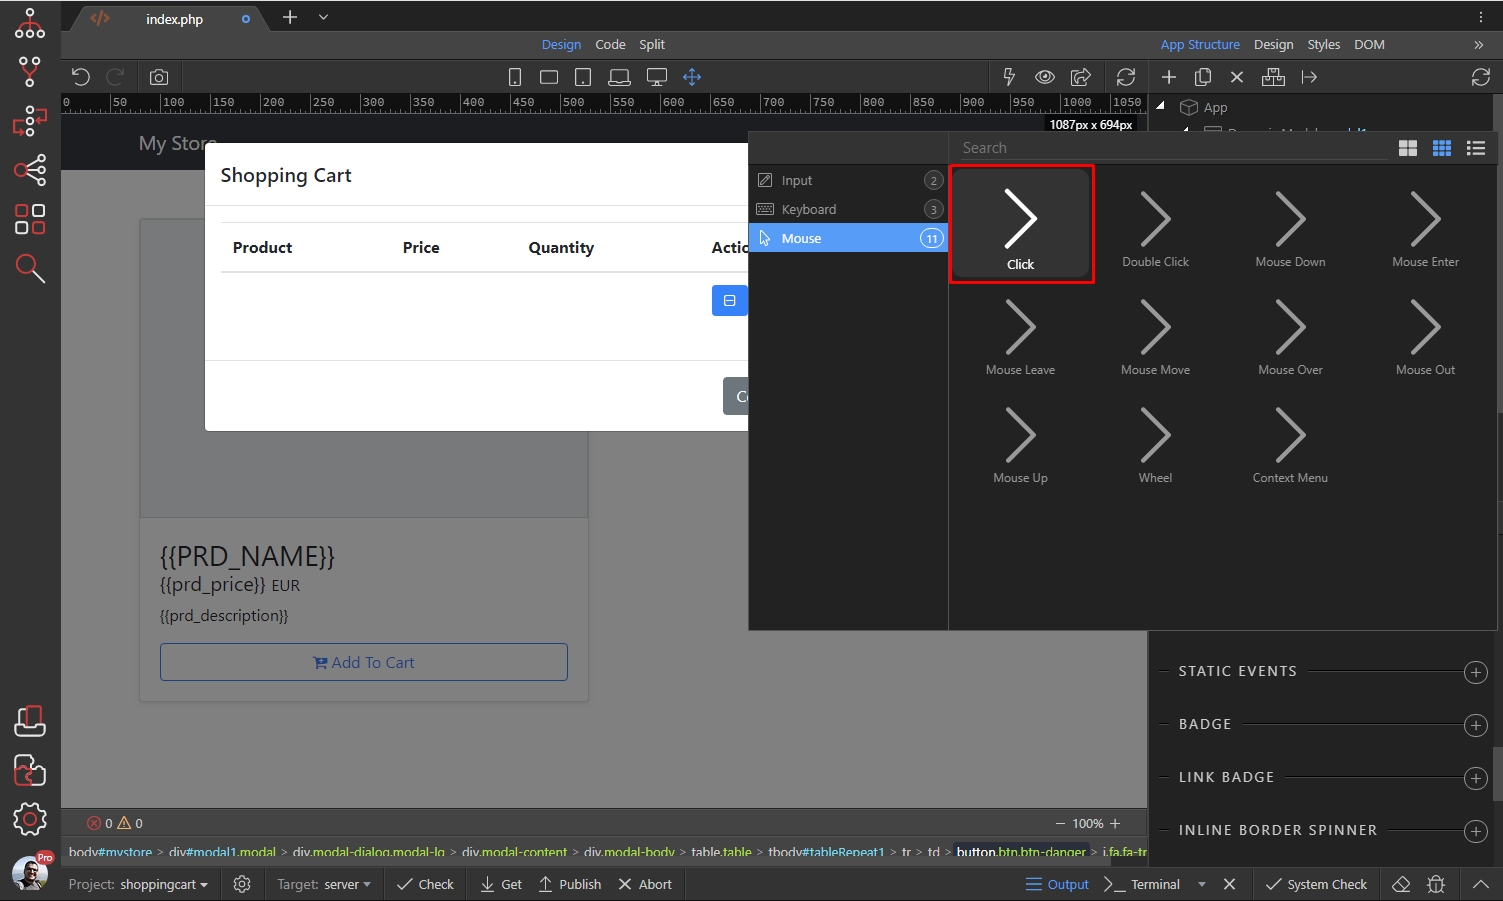
Then select what needs to happen on click
Section titled “Then select what needs to happen on click”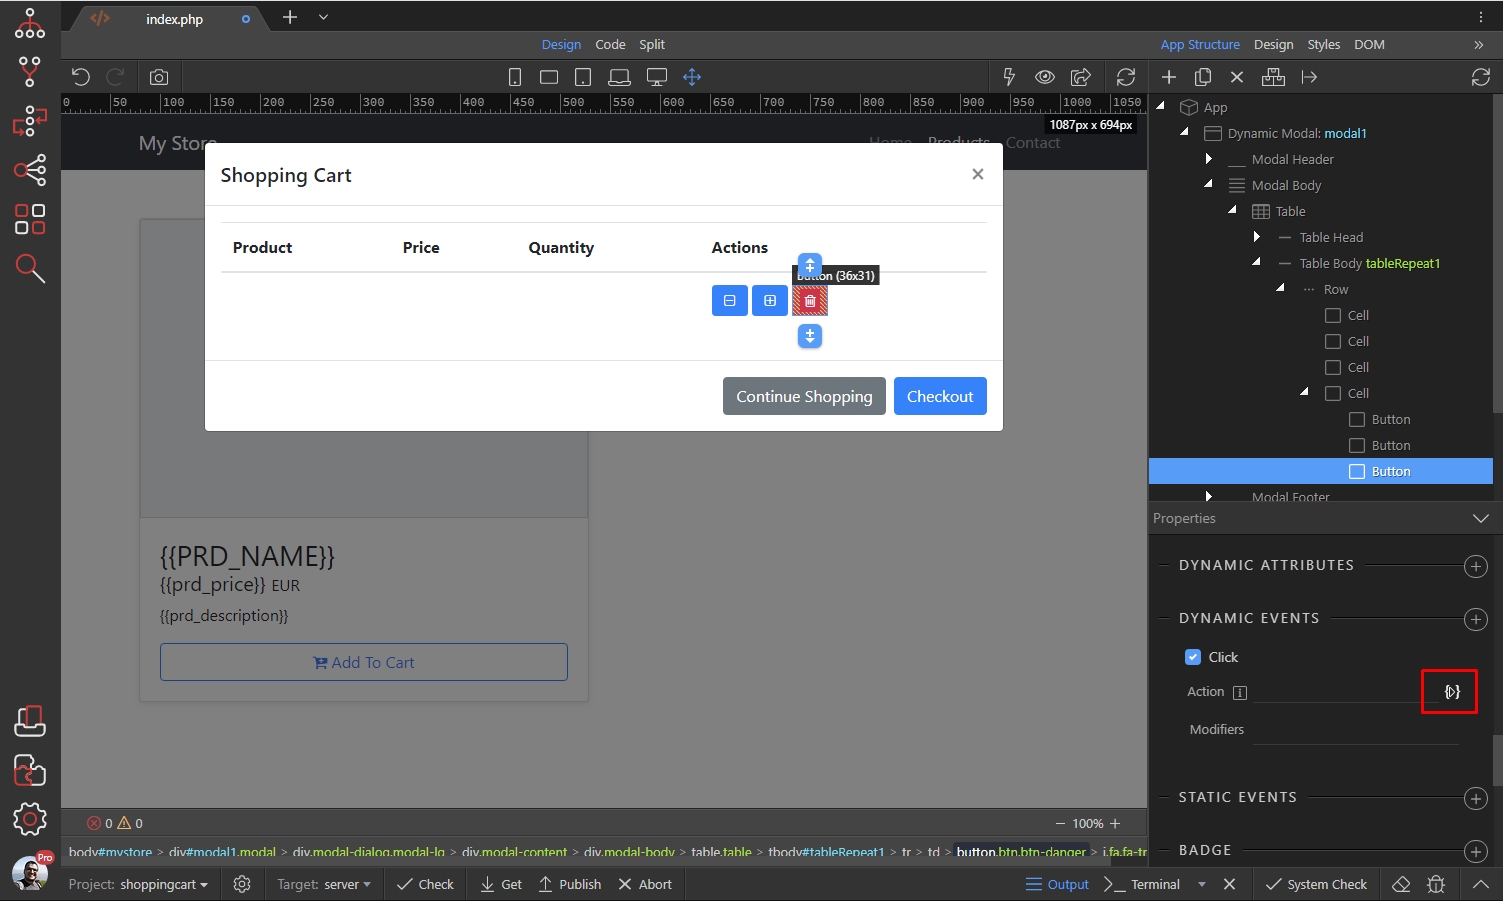
Under the Data Store component select Delete Record(s):
Section titled “Under the Data Store component select Delete Record(s):”
Again we use the record ID returned by the Data Store component:
Section titled “Again we use the record ID returned by the Data Store component:”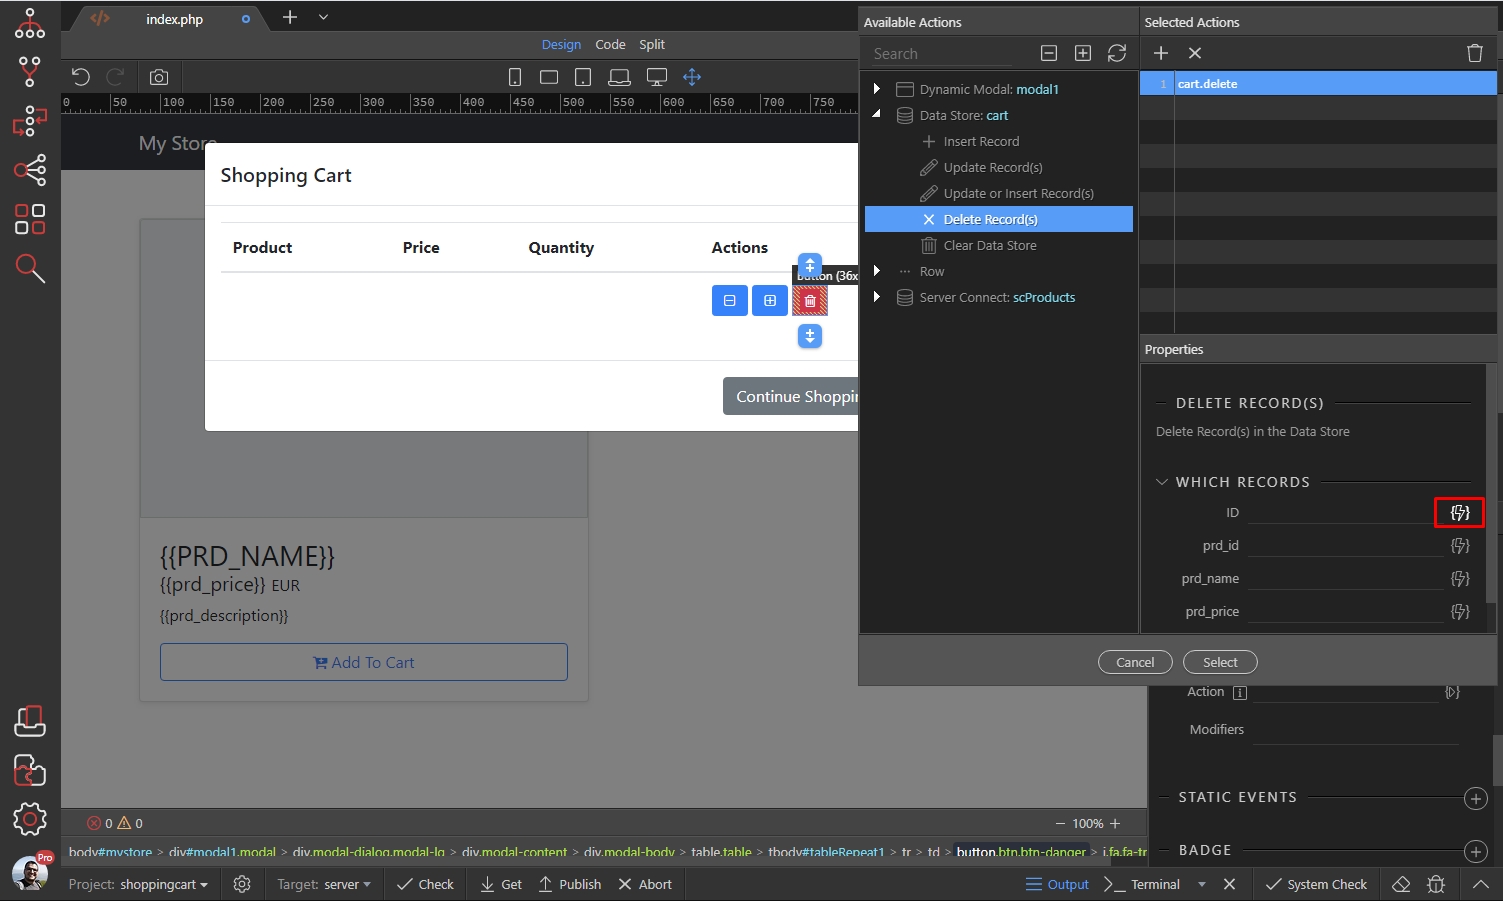
And select the $id under the table repeat region:
Section titled “And select the $id under the table repeat region:”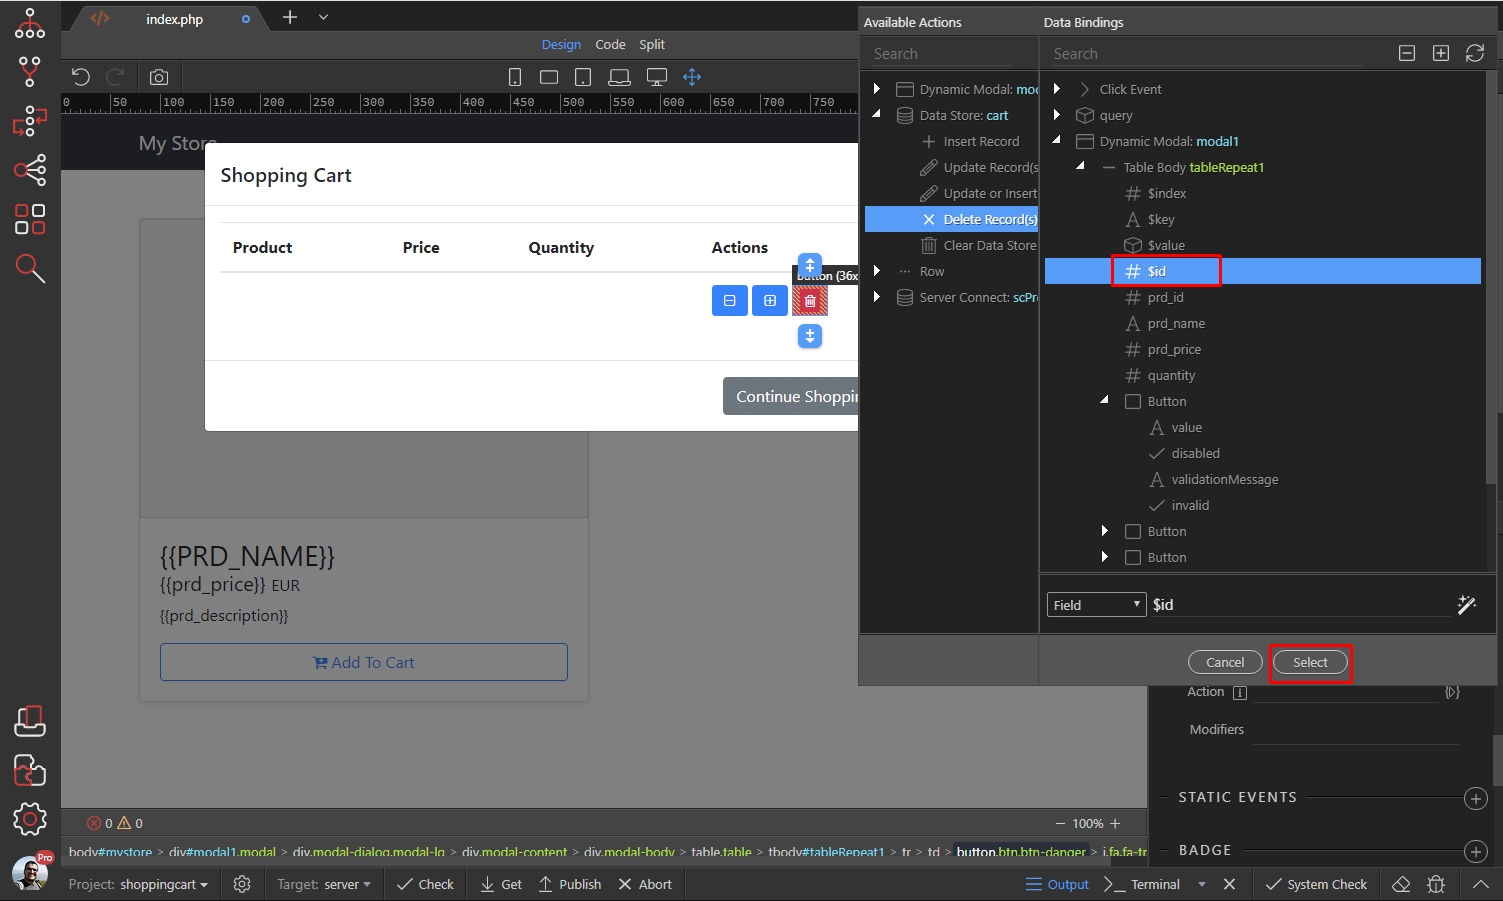
Step 88
Section titled “Step 88”And you are done, your buttons are now fully functional and you can update the items quantity or remove items from the cart.
Show the cart when an item is added
Section titled “Show the cart when an item is added”We want to show the cart, when an item has been added to it. This means we need to show the modal once the Add To Cart button is clicked.
We can turn on the App Connect mode now, then select the Add To Cart button:
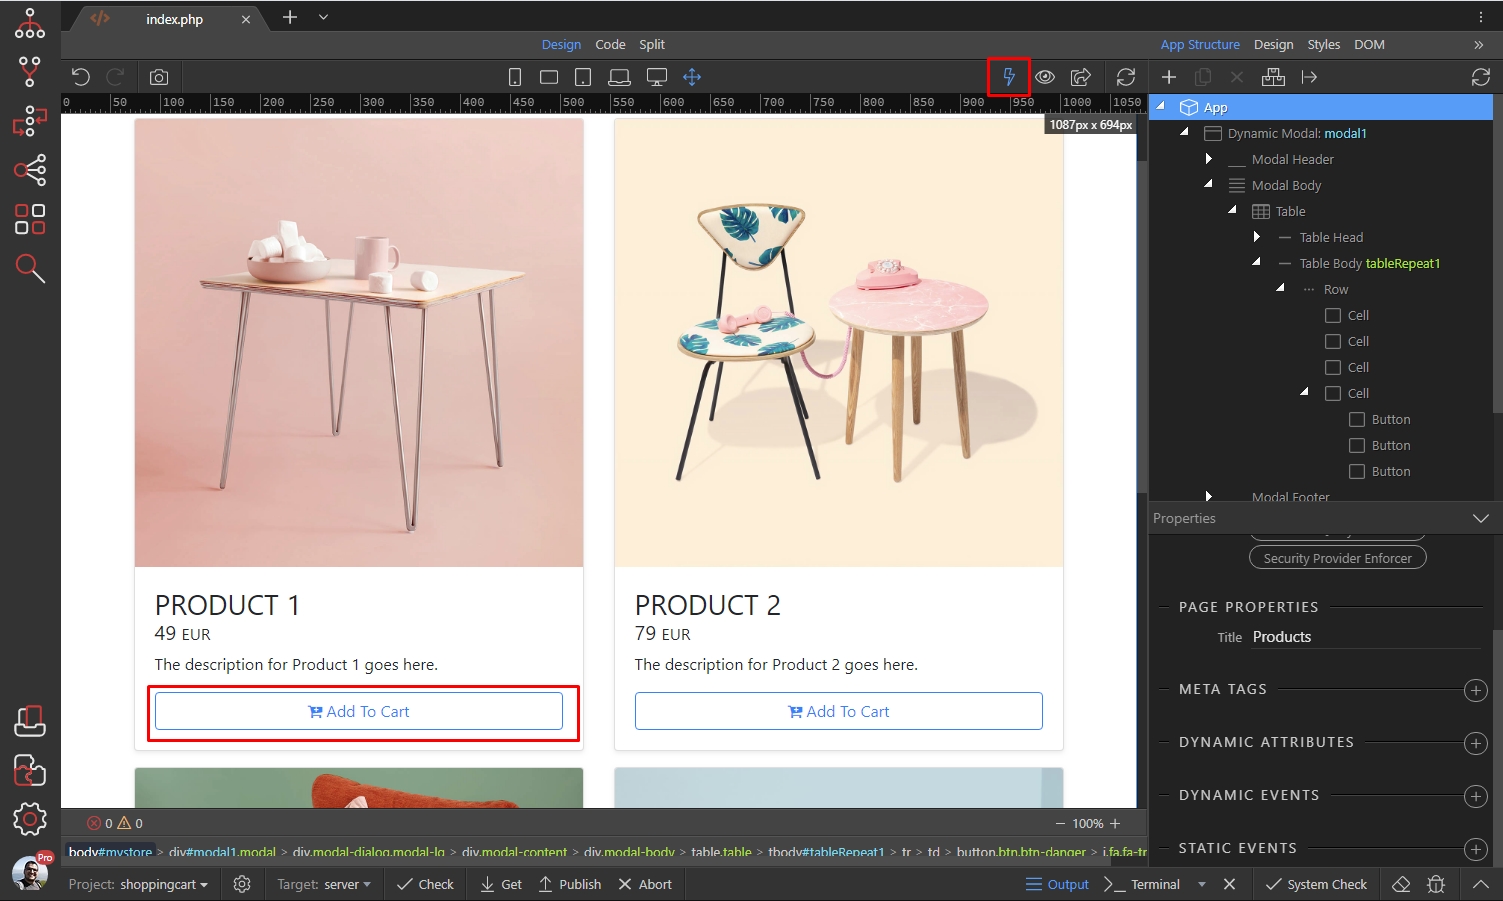
We already have a dynamic event added on click (add product to cart), so let’s add another one:
Section titled “We already have a dynamic event added on click (add product to cart), so let’s add another one:”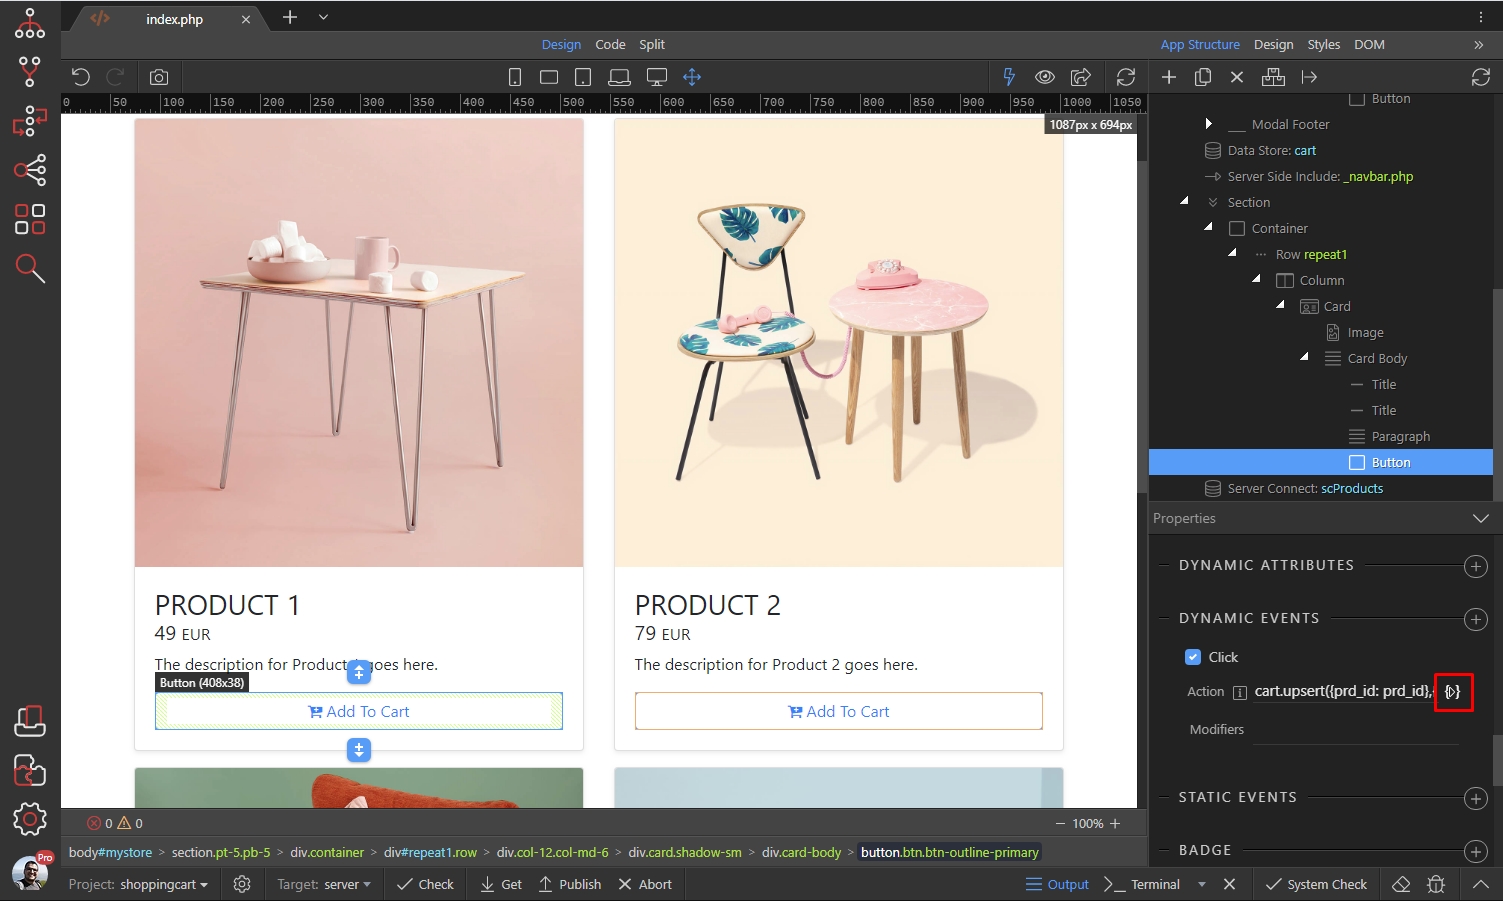
Under Modal select Show and add it to the events list:
Section titled “Under Modal select Show and add it to the events list:”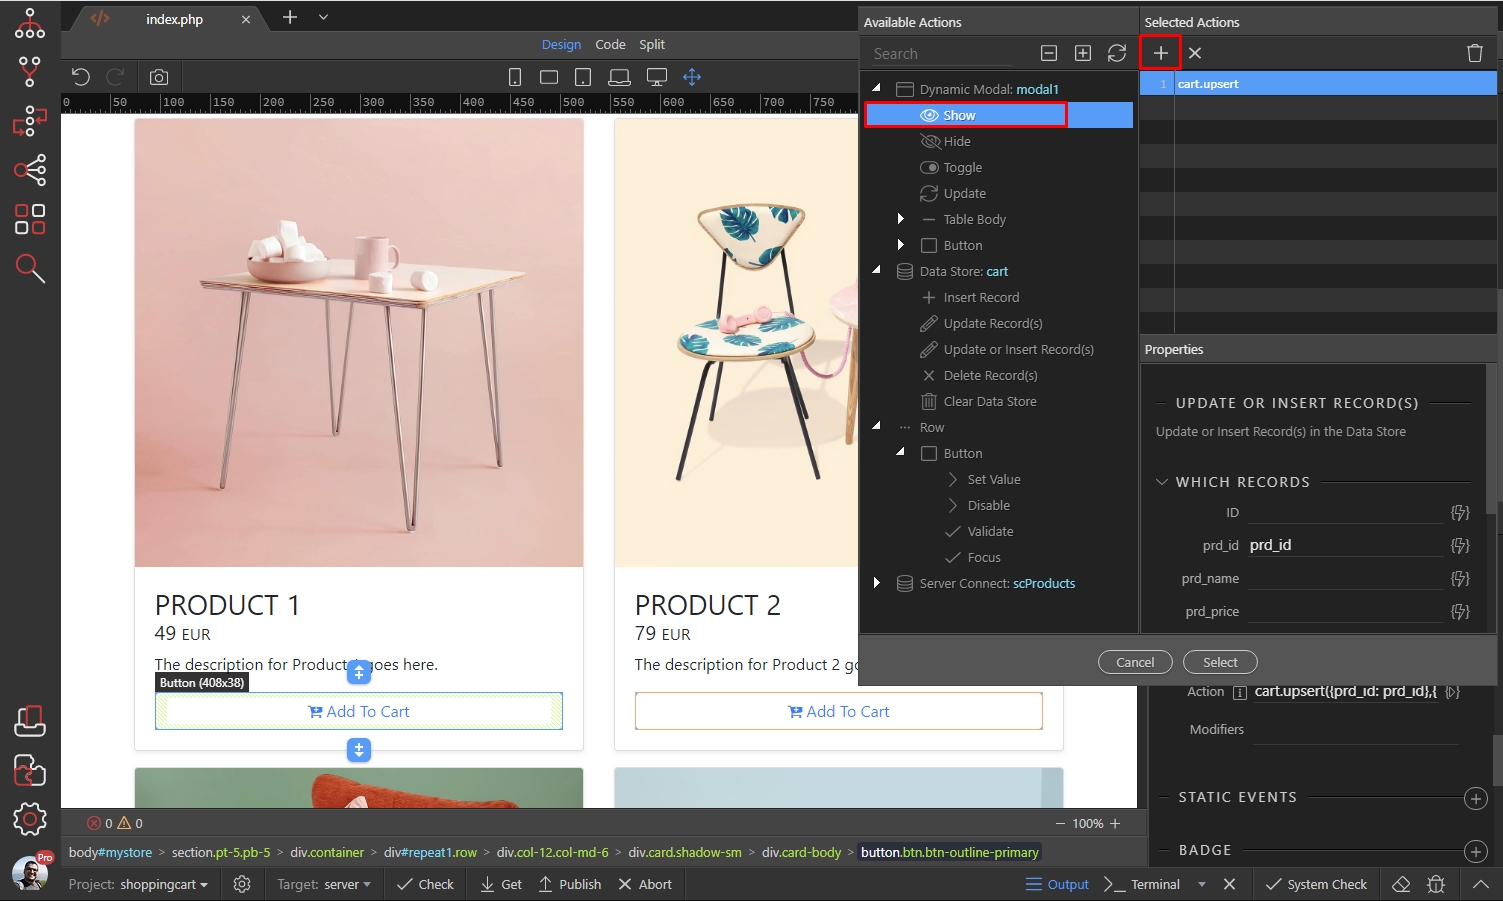
Click Select:
Section titled “Click Select:”
Display total price in the cart
Section titled “Display total price in the cart”You can use the App Connect Data Formatter to display the total price of all the items in the cart. You can do this per row (per item) and for the whole cart.
In our example we will show you how to do this for the whole cart, as we didn’t add a total column per row.
We’d like to show the totals below the table, so select the table and click - insert after:
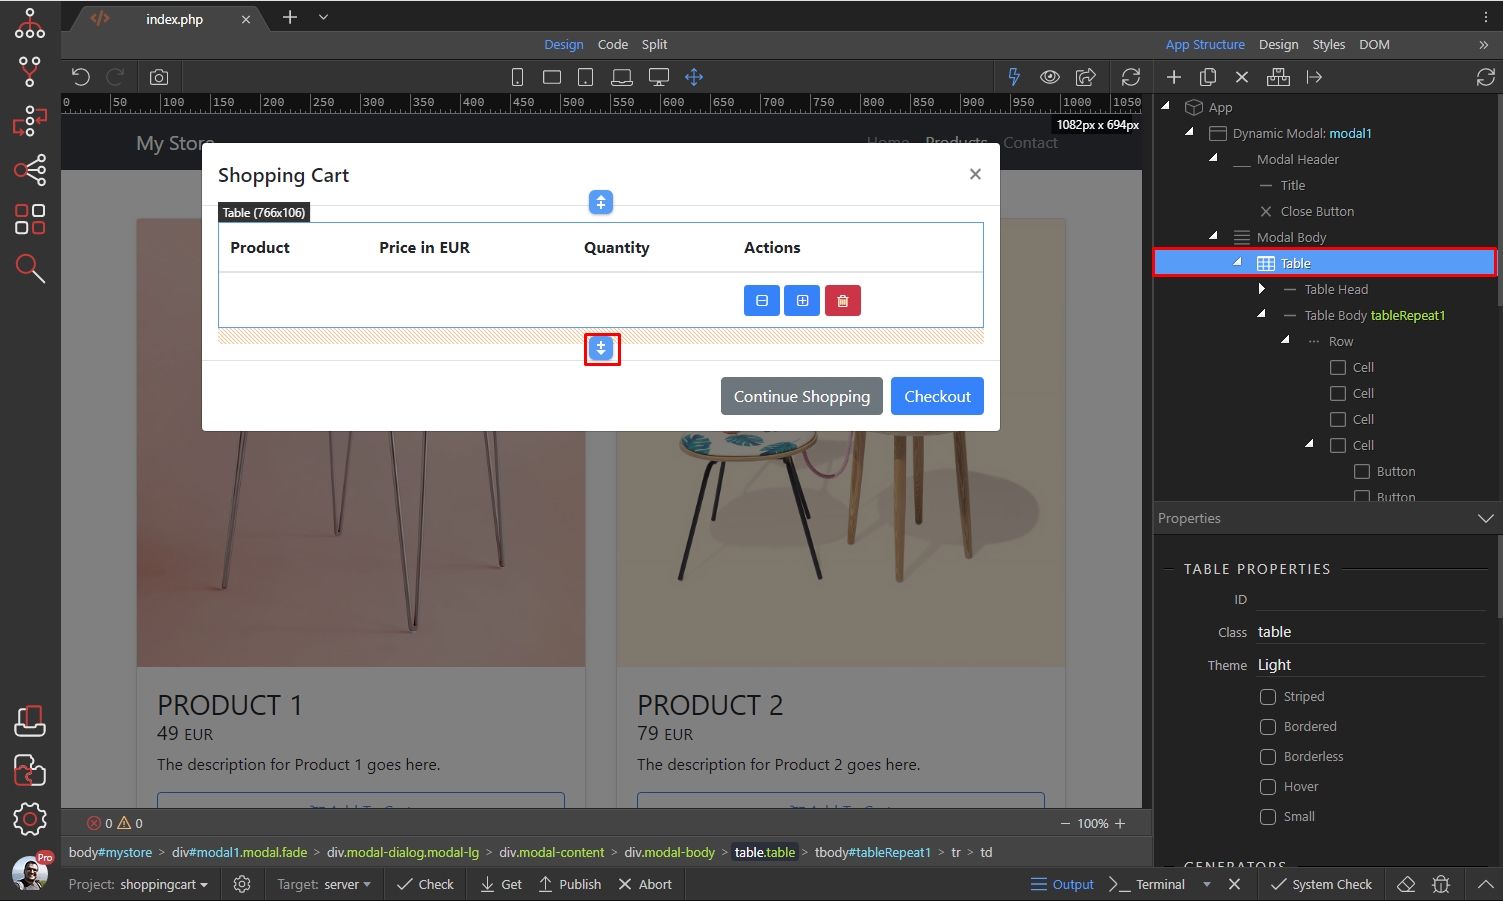
Select Content > Paragraph:
Section titled “Select Content > Paragraph:”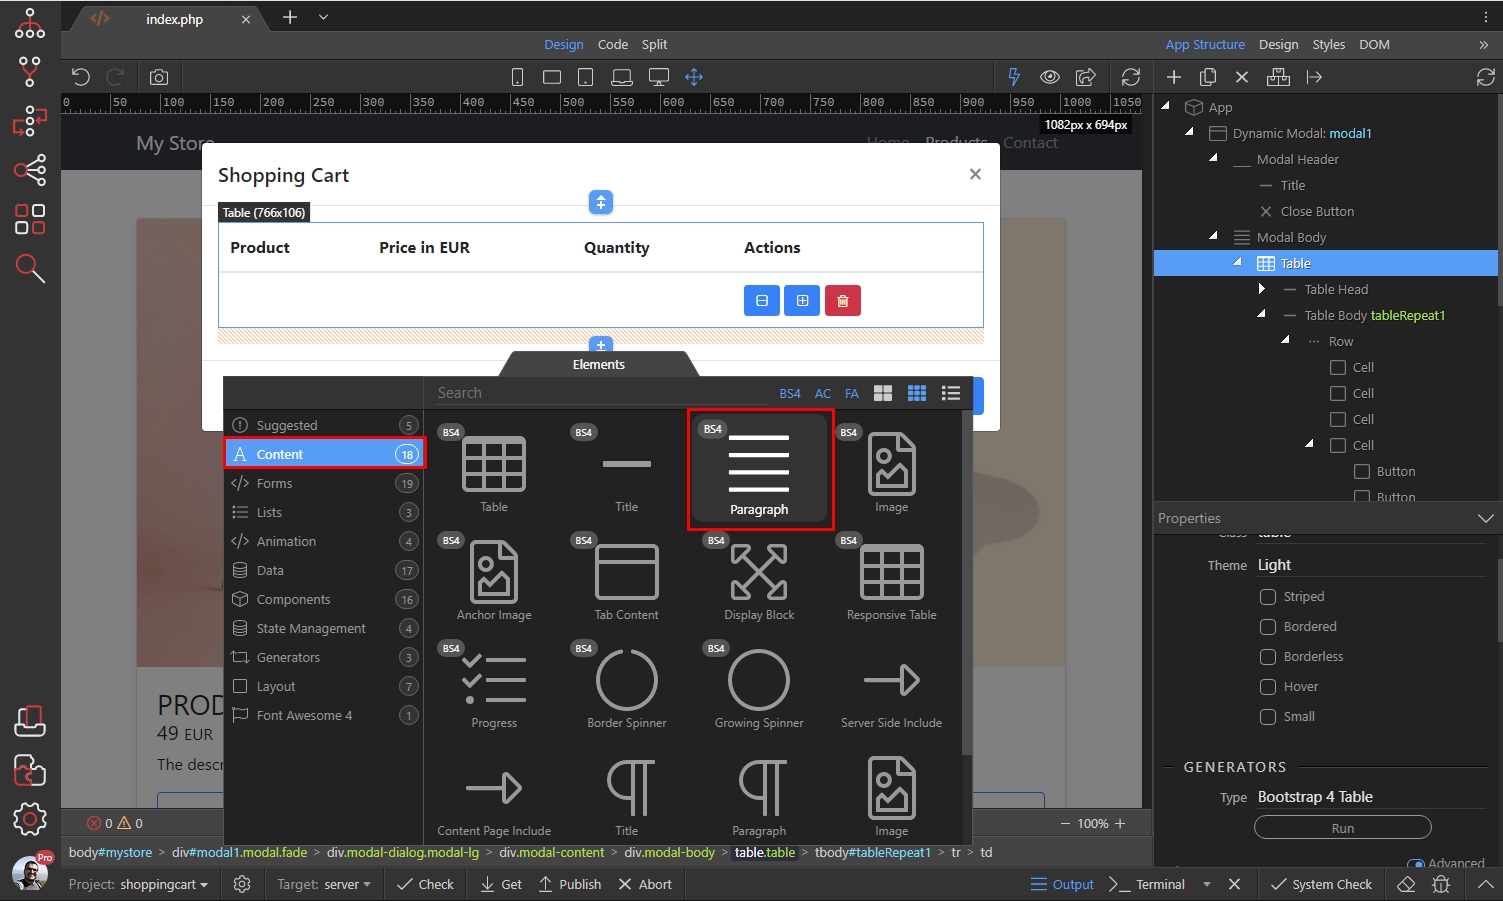
Let’s align the paragraph right:
Section titled “Let’s align the paragraph right:”
Then double click to edit its default text. We enter: Total Amount:
Section titled “Then double click to edit its default text. We enter: Total Amount:”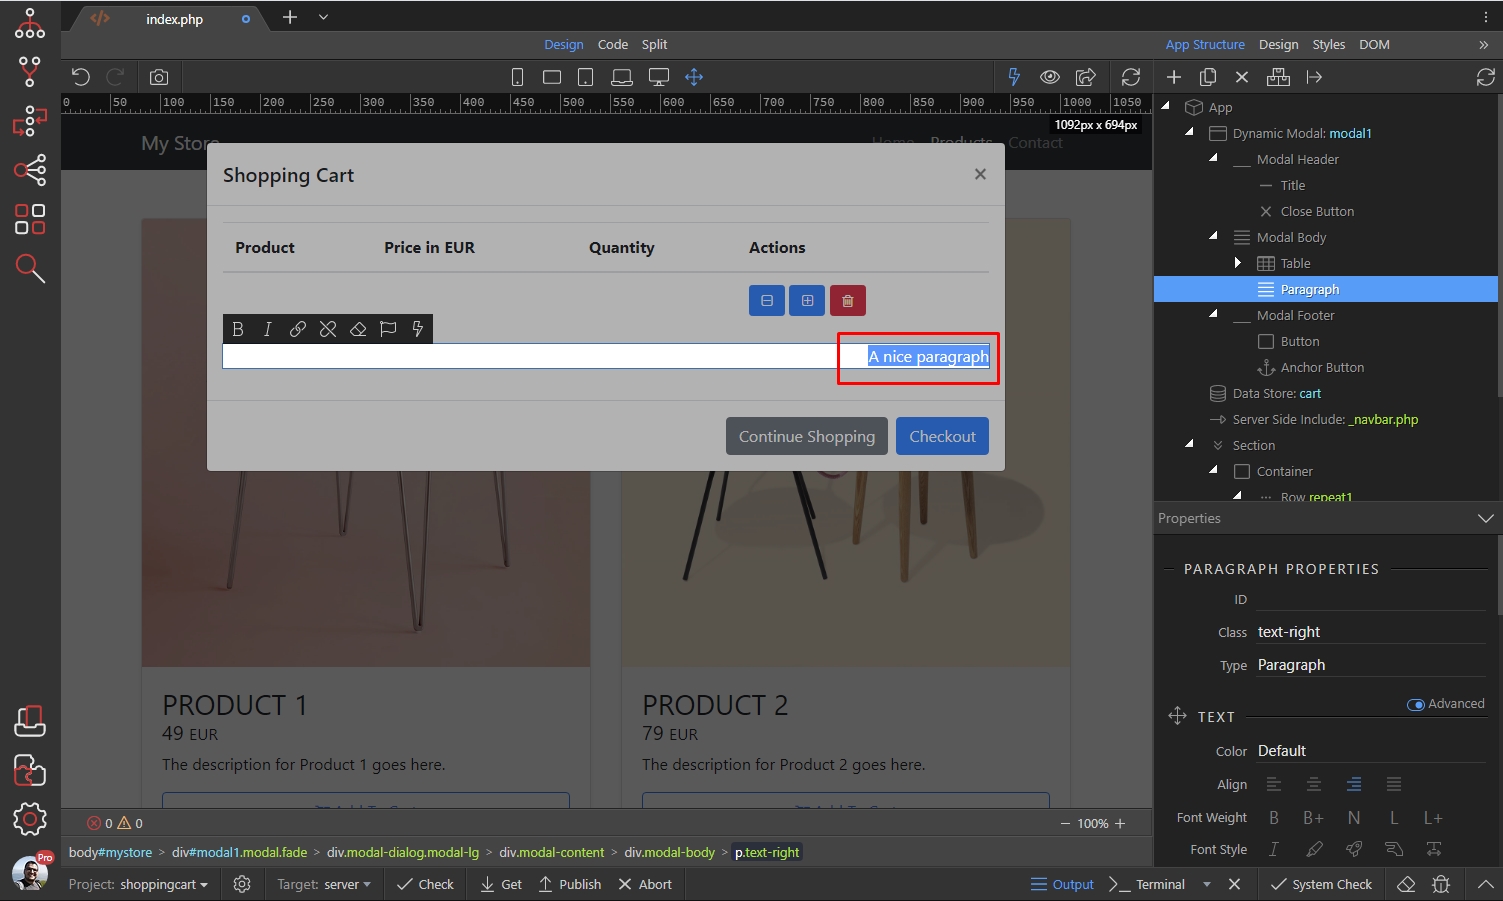
And then we click the dynamic data picker icon:
Section titled “And then we click the dynamic data picker icon:”
Select the data element under the Data Store component:
Section titled “Select the data element under the Data Store component:”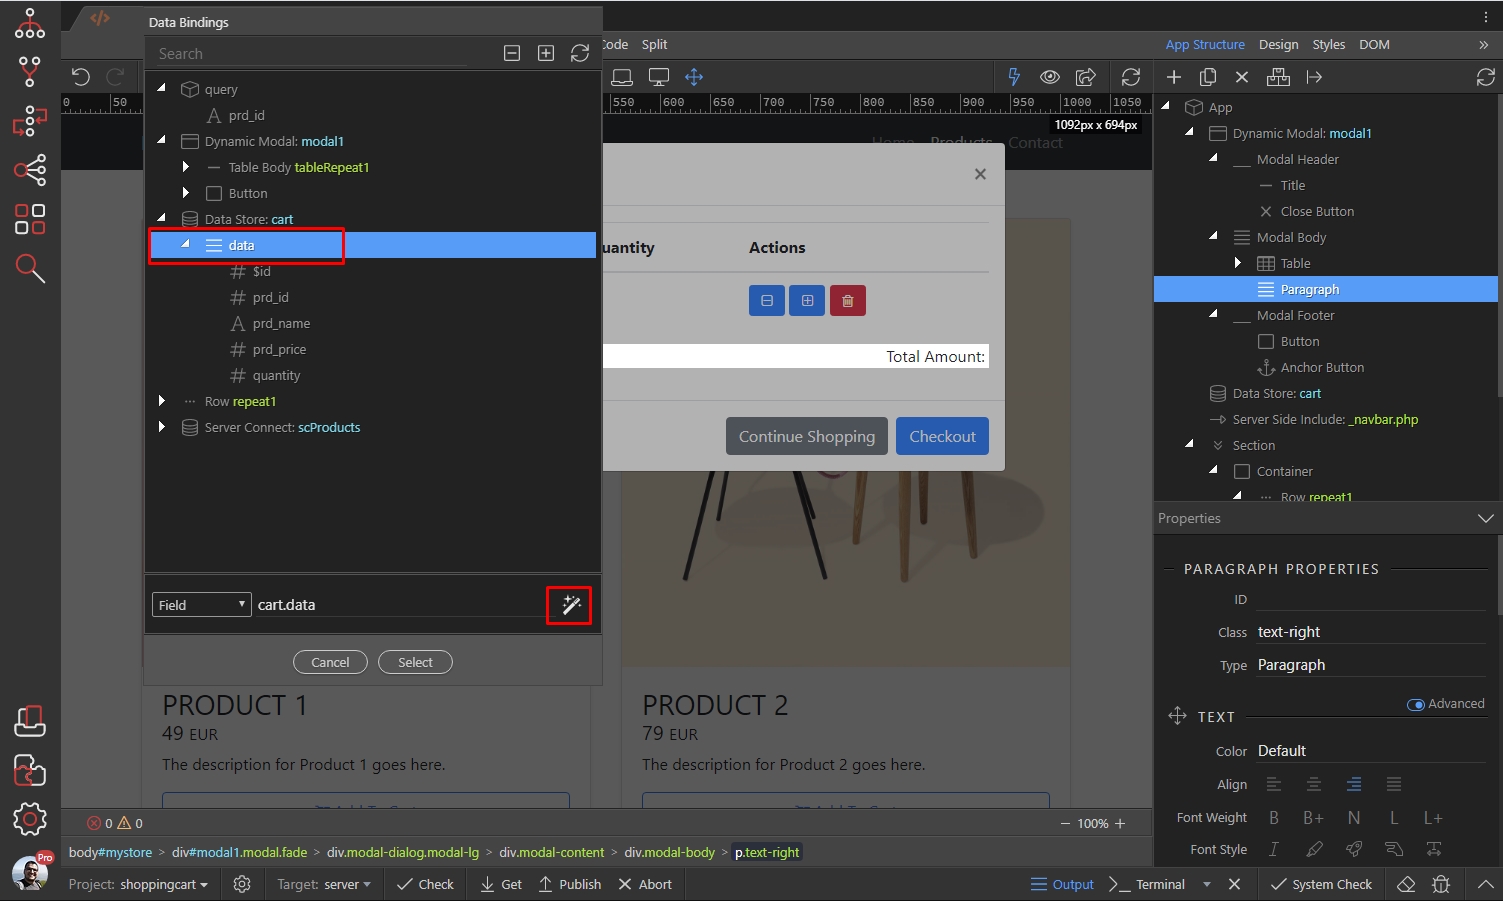
Open Collections and select Sum:
Section titled “Open Collections and select Sum:”We need to sum each row (or item) totals. So each product price multiplied by its quantity. So the result will be: product1 * quantity1 + product2 * quantity2 ... product99*quantity99
Open Collections and select Sum:
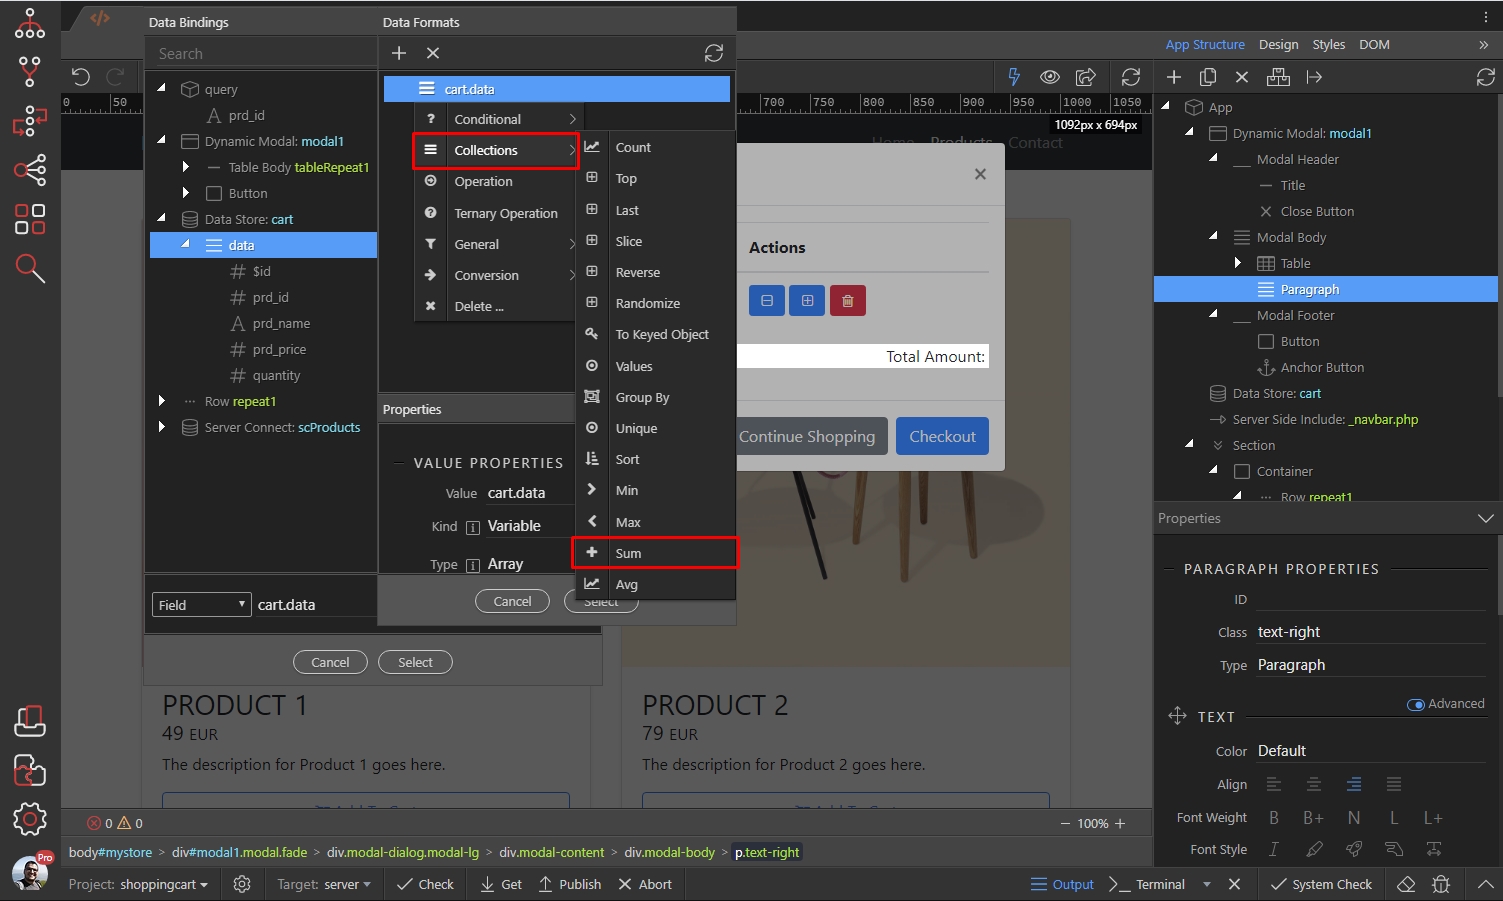
Click Property and click the dynamic data picker icon:
Section titled “Click Property and click the dynamic data picker icon:”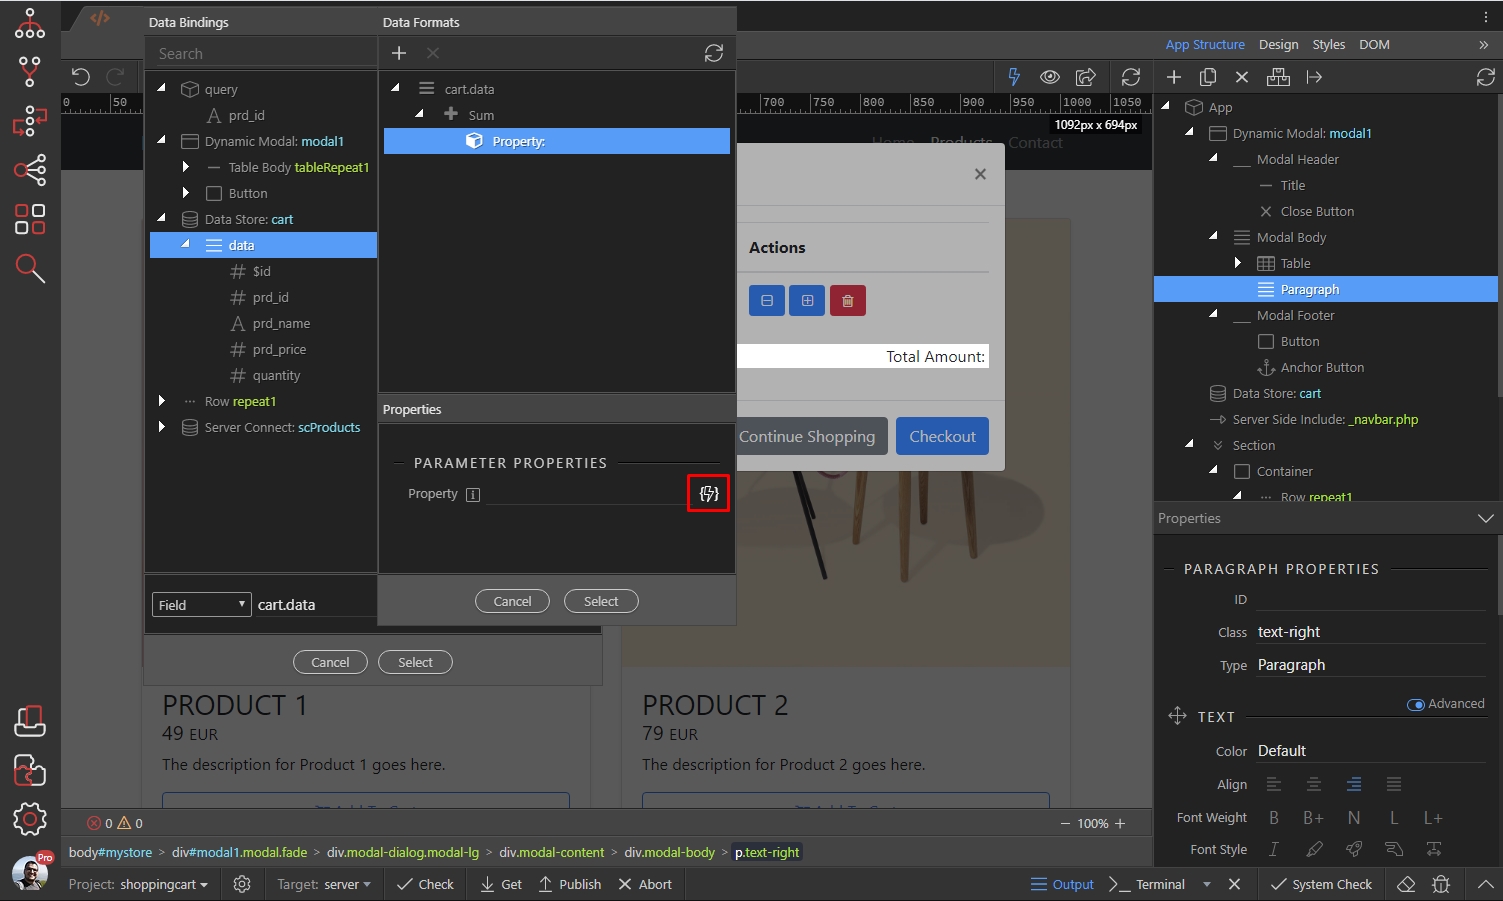
Select the product price and add * quantity to it:
Section titled “Select the product price and add * quantity to it:”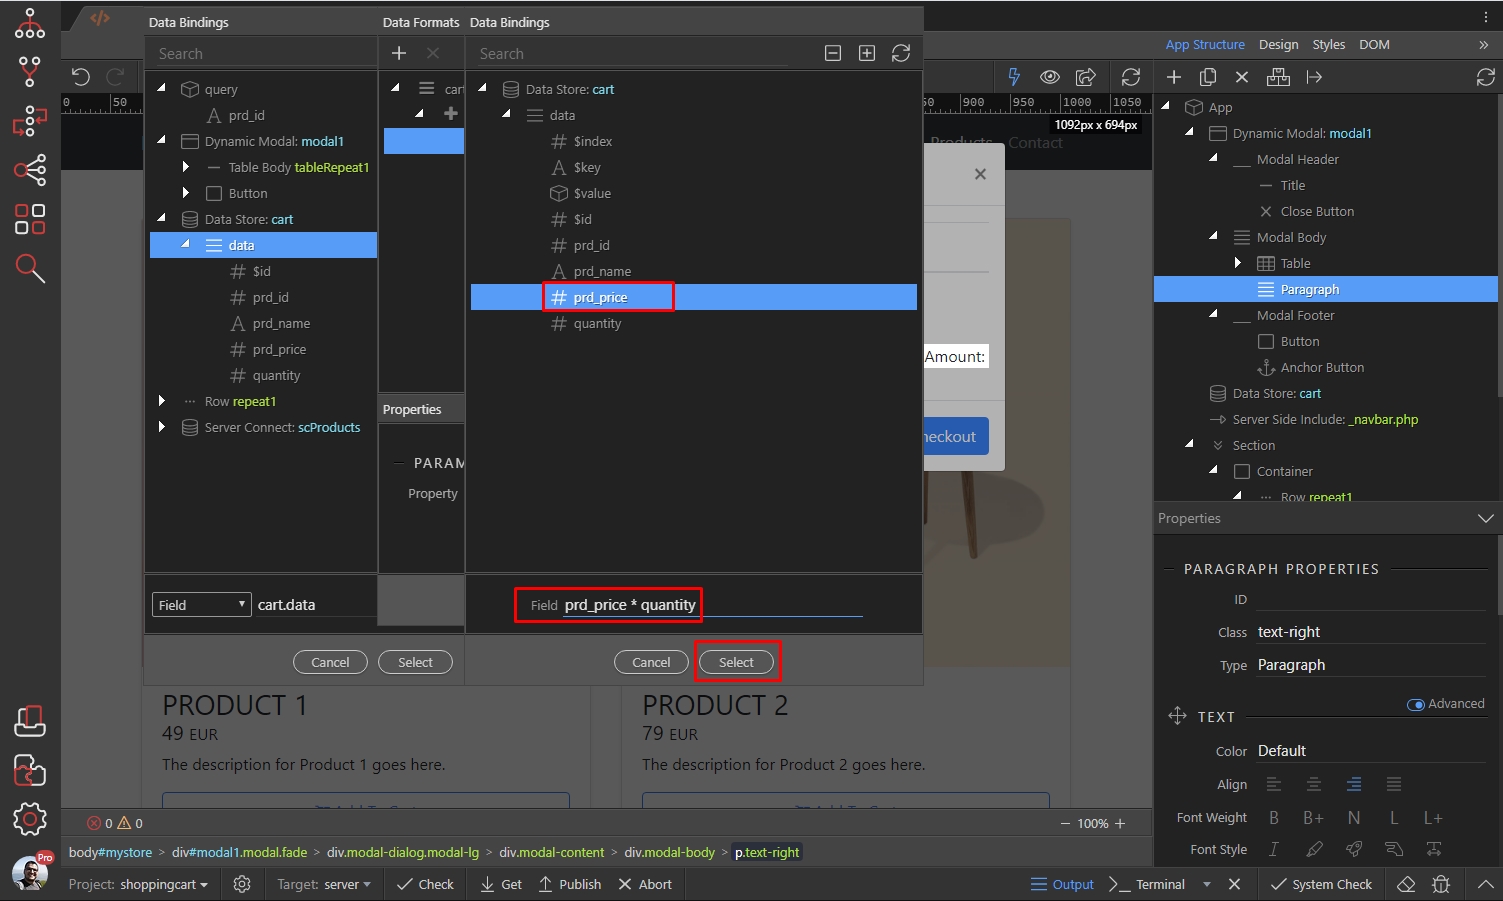
Now we have the sum of each row (or item) total price:
Section titled “Now we have the sum of each row (or item) total price:”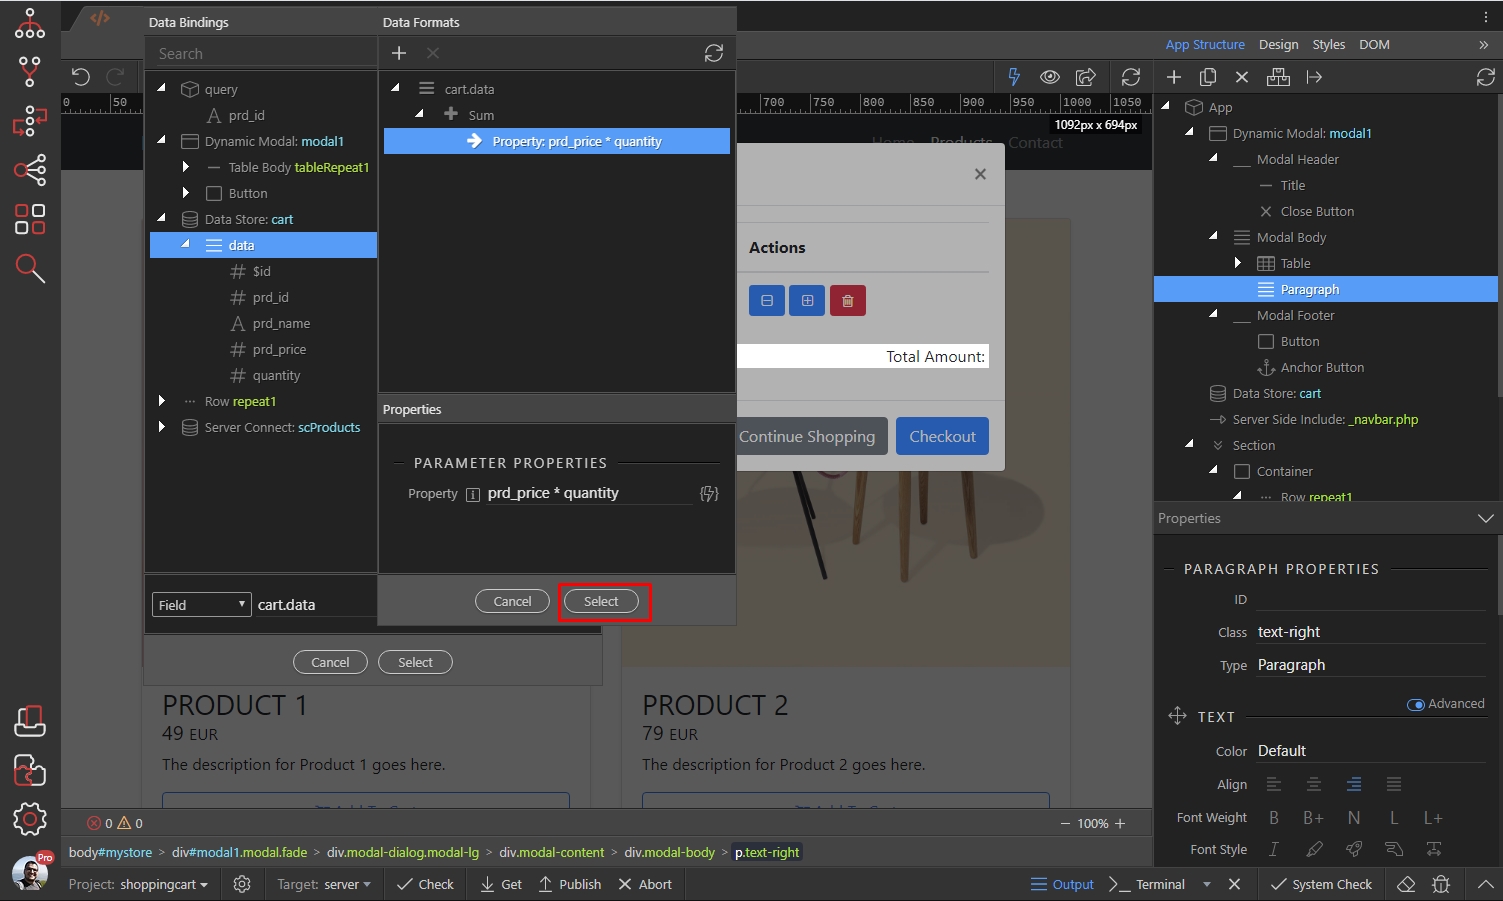
Click Select:
Section titled “Click Select:”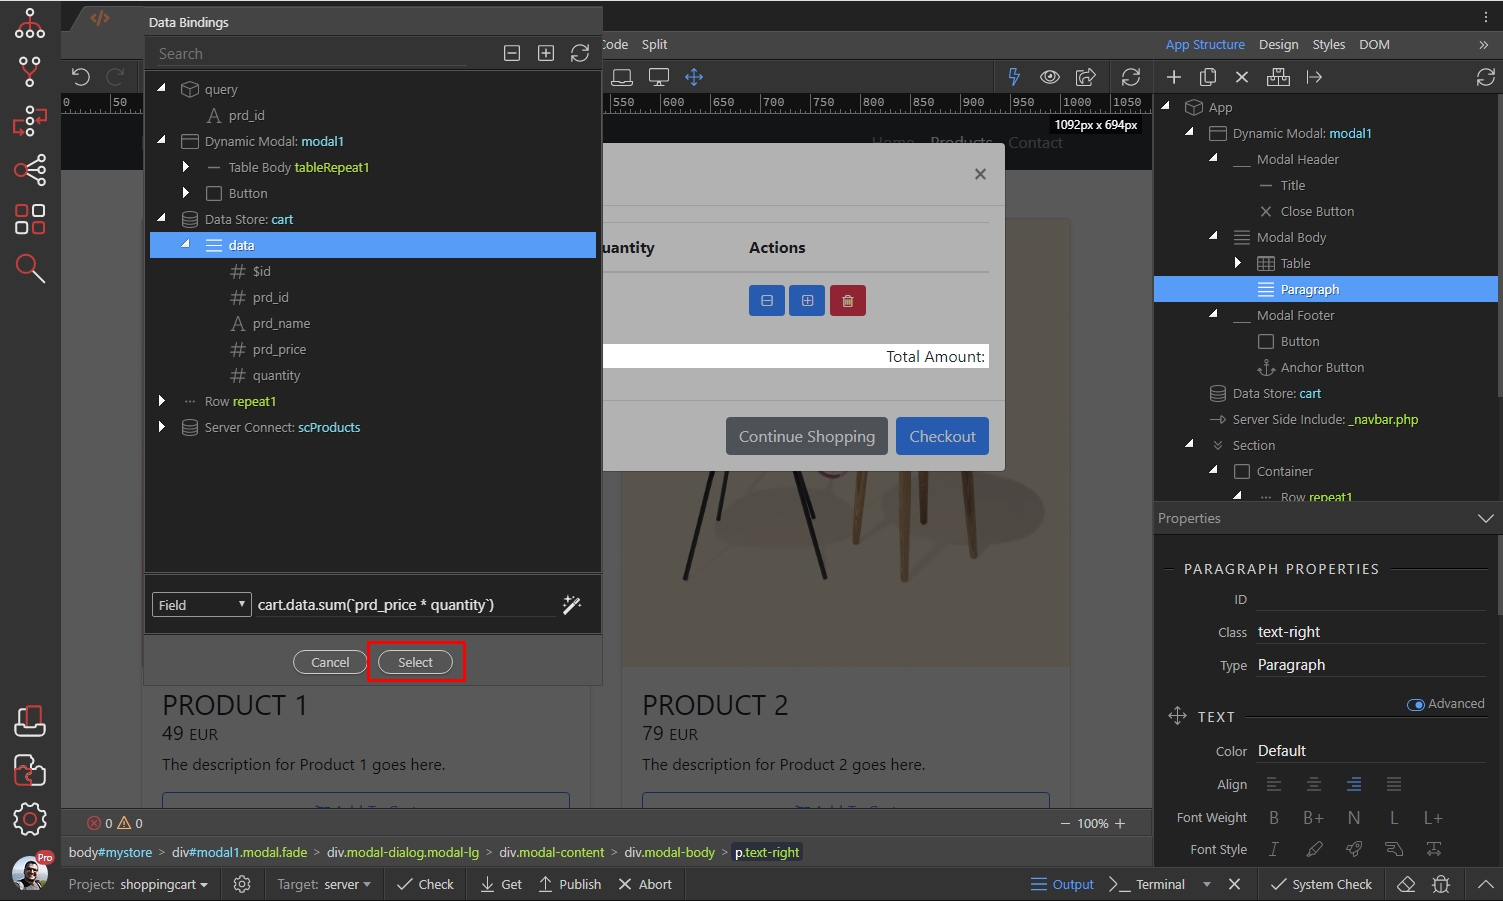
And you are done. Just format the text as you need:
Section titled “And you are done. Just format the text as you need:”
Show shopping cart button
Section titled “Show shopping cart button”A useful addition to our shopping cart would be a button which opens it, so you can preview its contents. This button will also show how many items are currently added in the cart.
Let’s start by adding a button somewhere on the page:
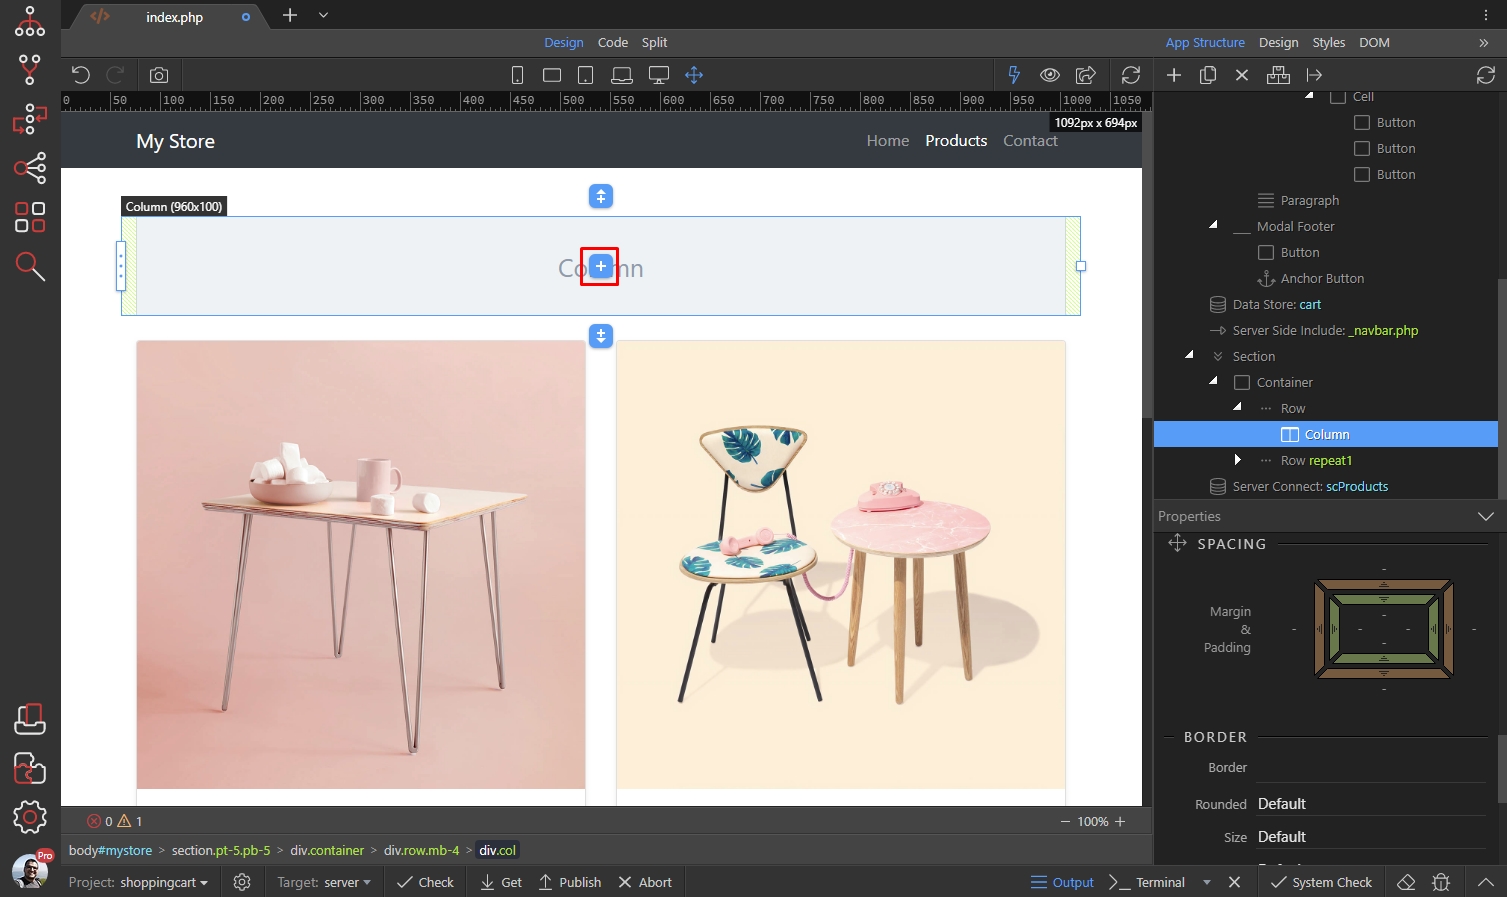
We add a regular button:
Section titled “We add a regular button:”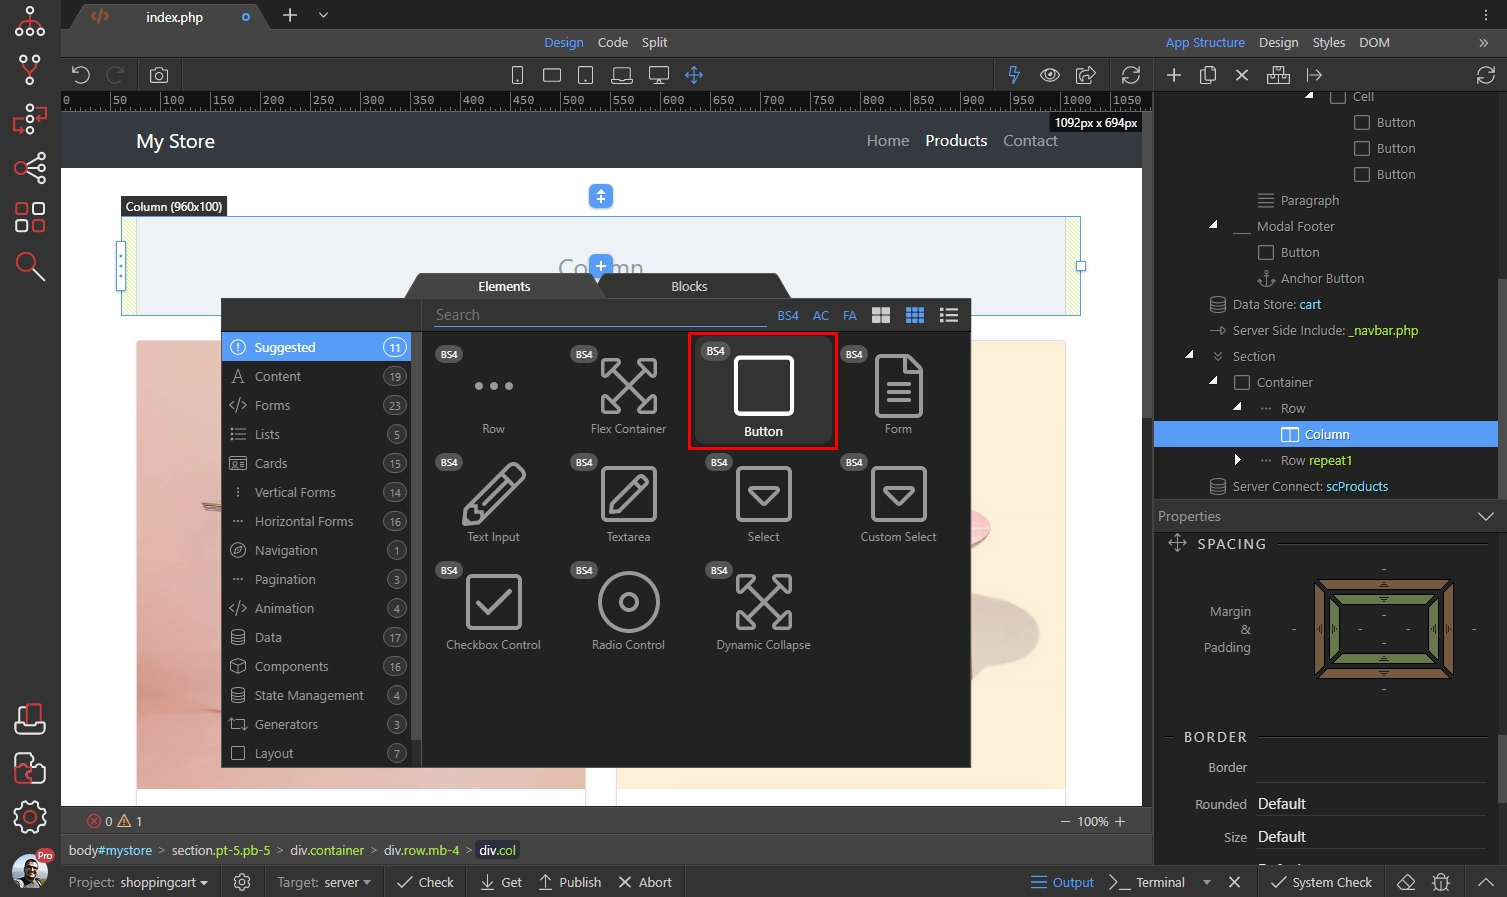
Select a style for it:
Section titled “Select a style for it:”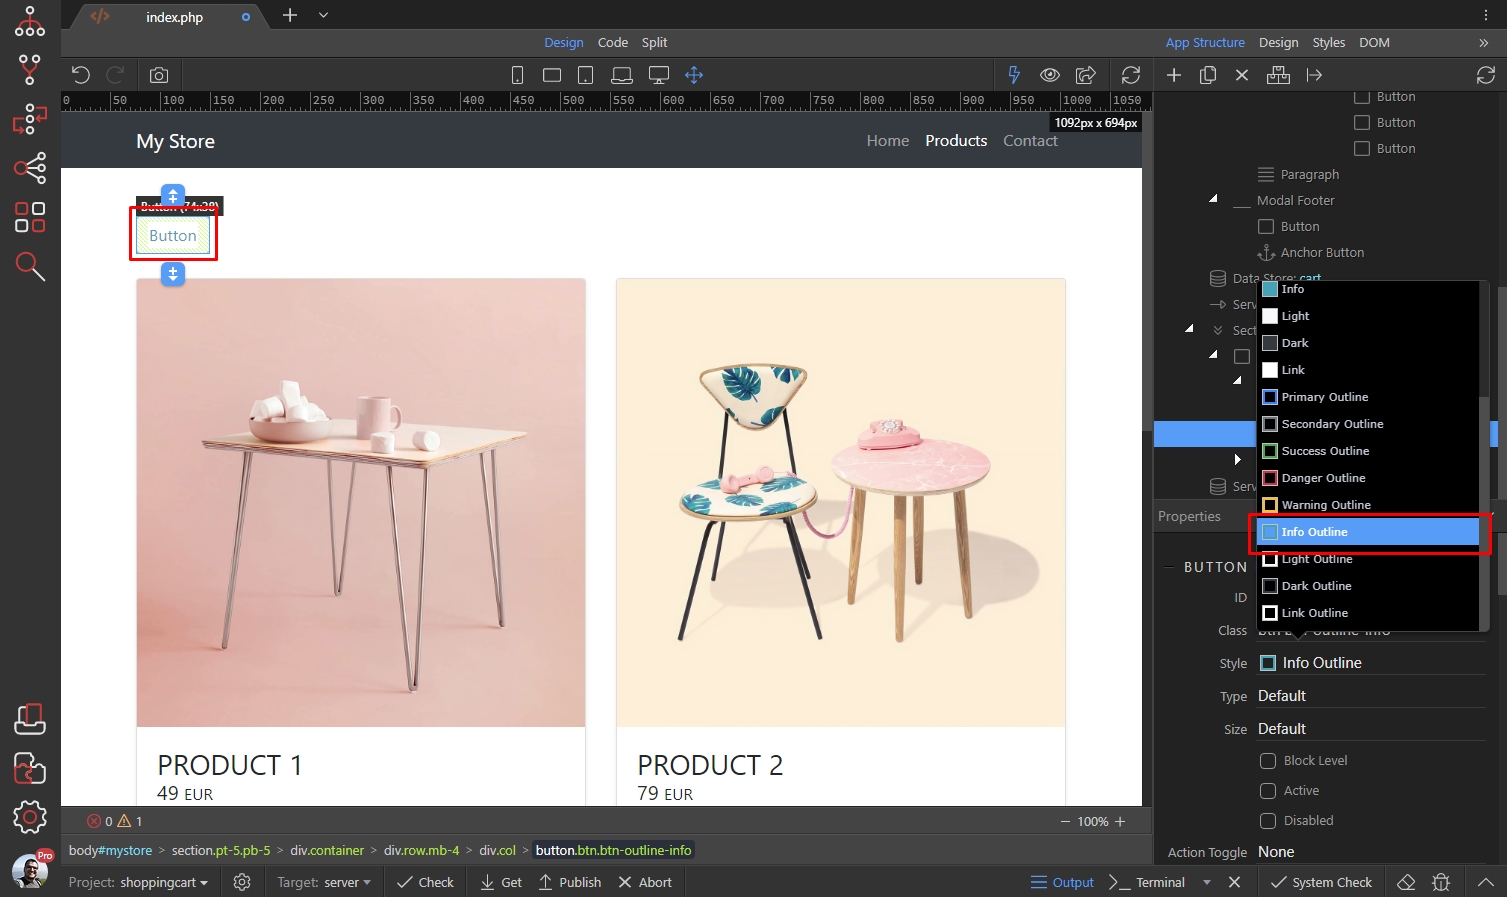
Then double click its text and enter Shopping Cart:
Section titled “Then double click its text and enter Shopping Cart:”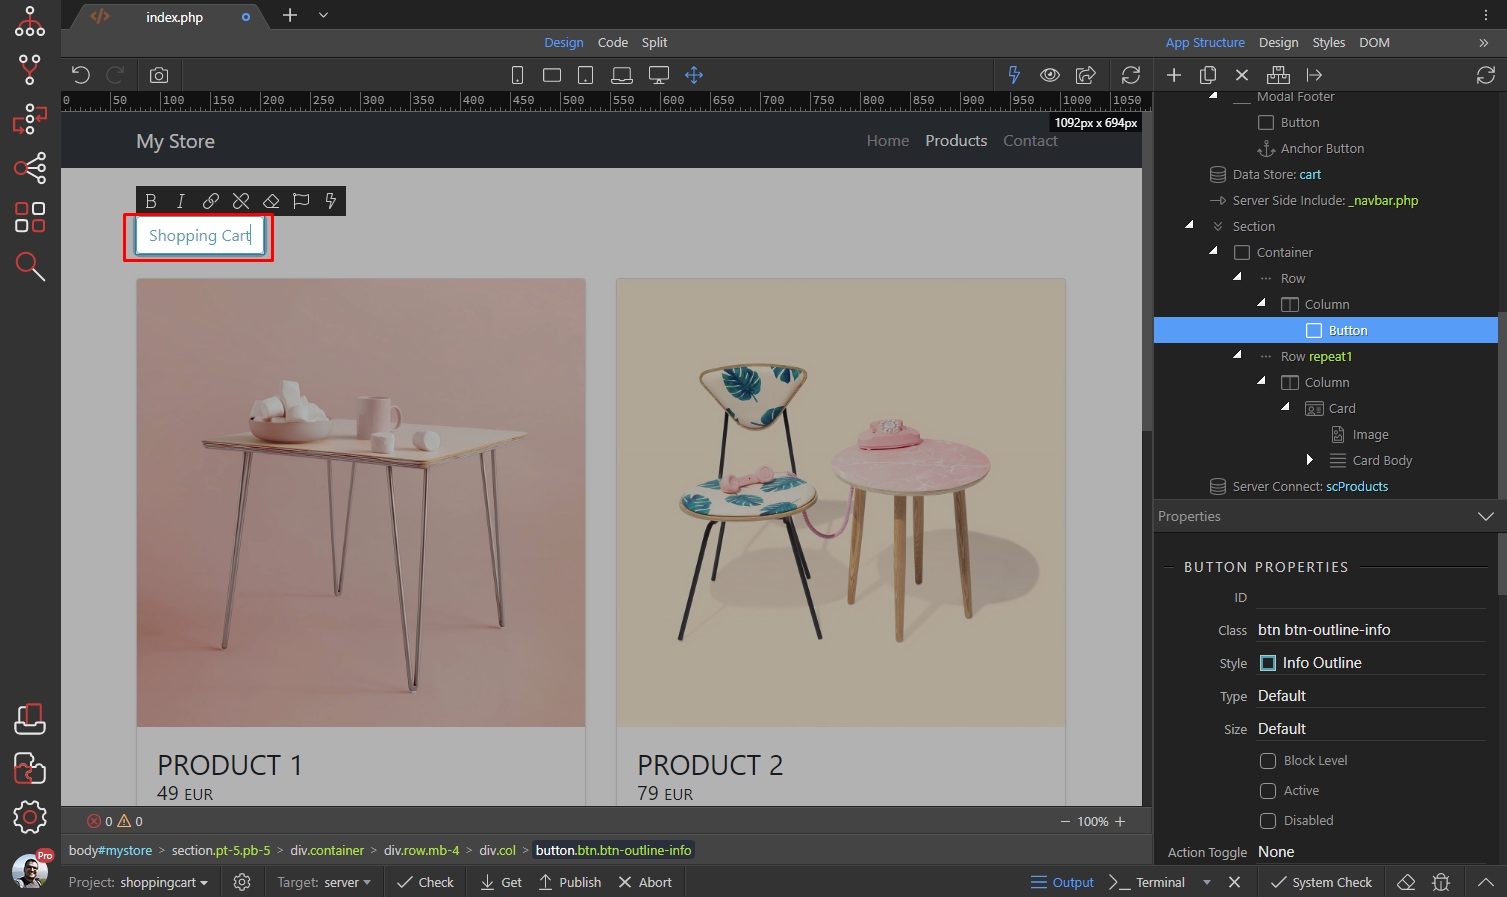
We want to show the number of items added in the cart, so click the dynamic data picker button:
Section titled “We want to show the number of items added in the cart, so click the dynamic data picker button:”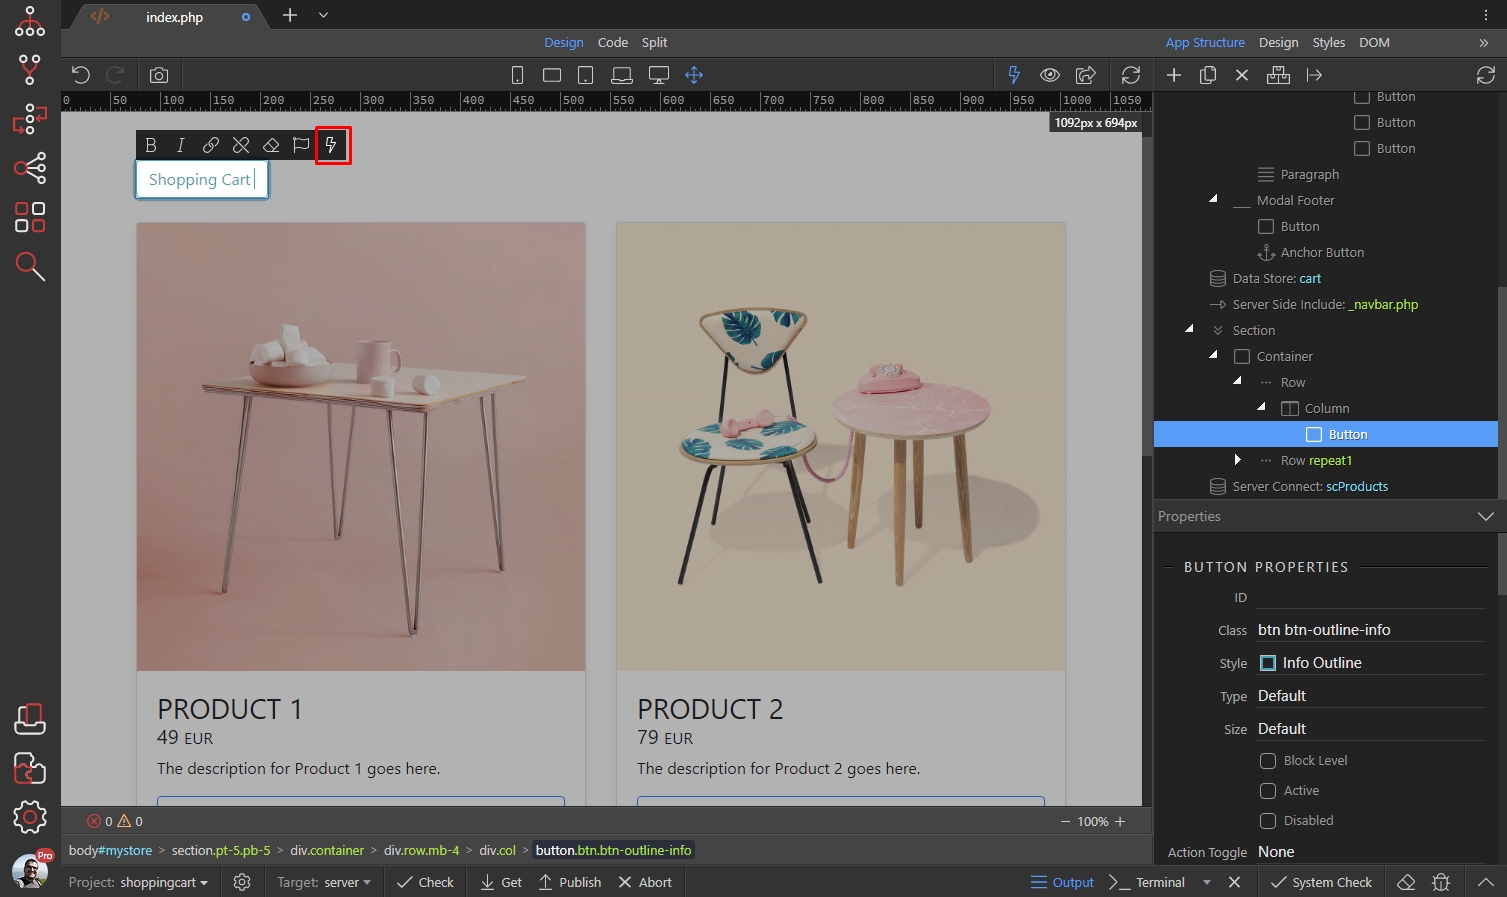
Select the data element under the Data Store component, then click the data formatter icon:
Section titled “Select the data element under the Data Store component, then click the data formatter icon:”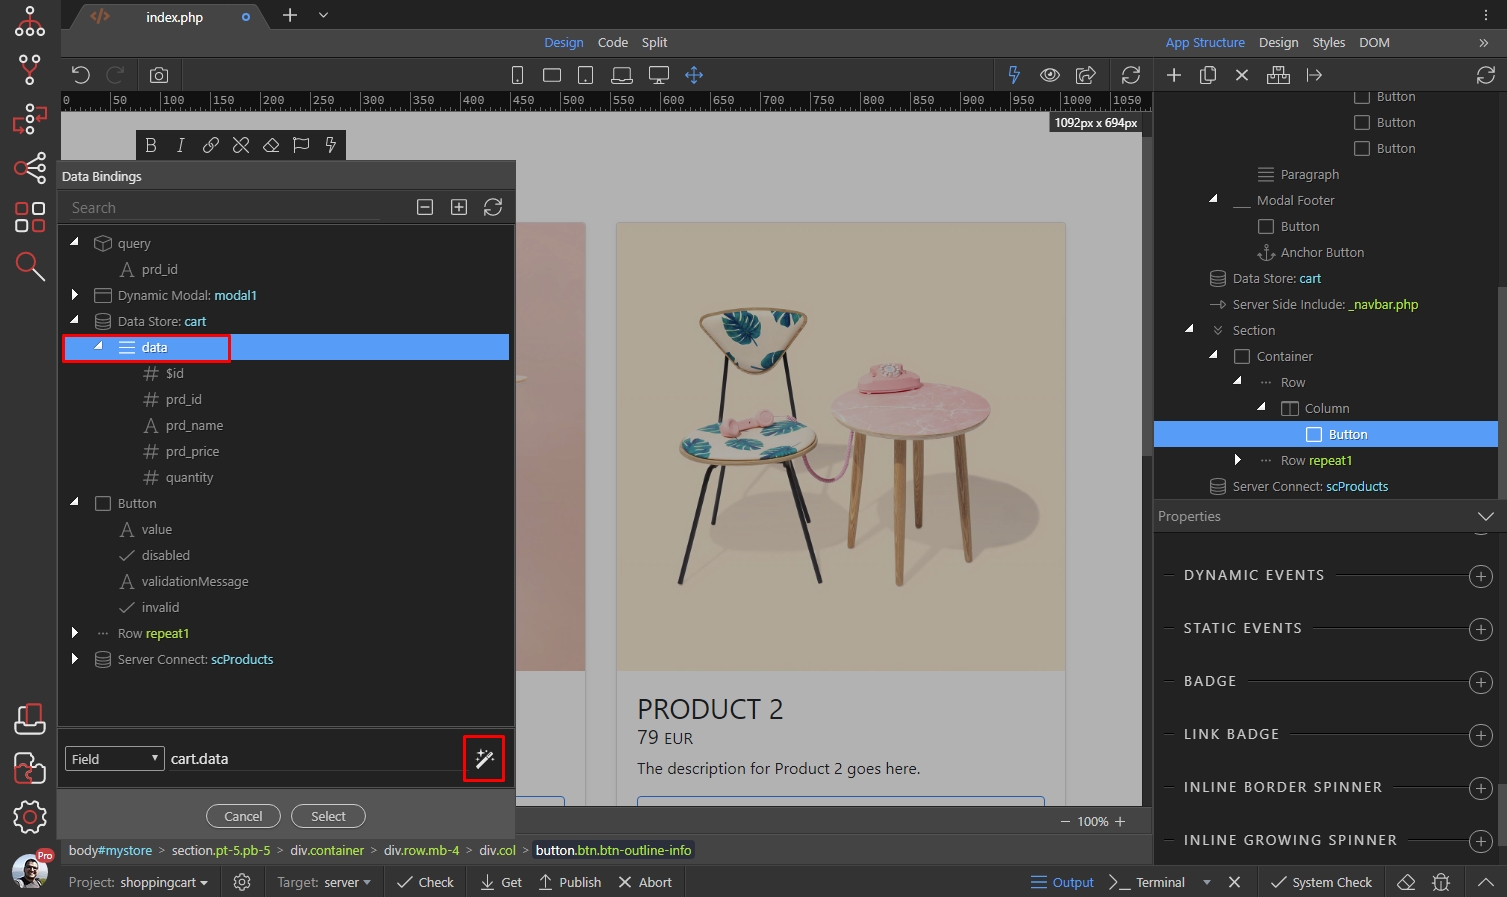
Open collections and select sum:
Section titled “Open collections and select sum:”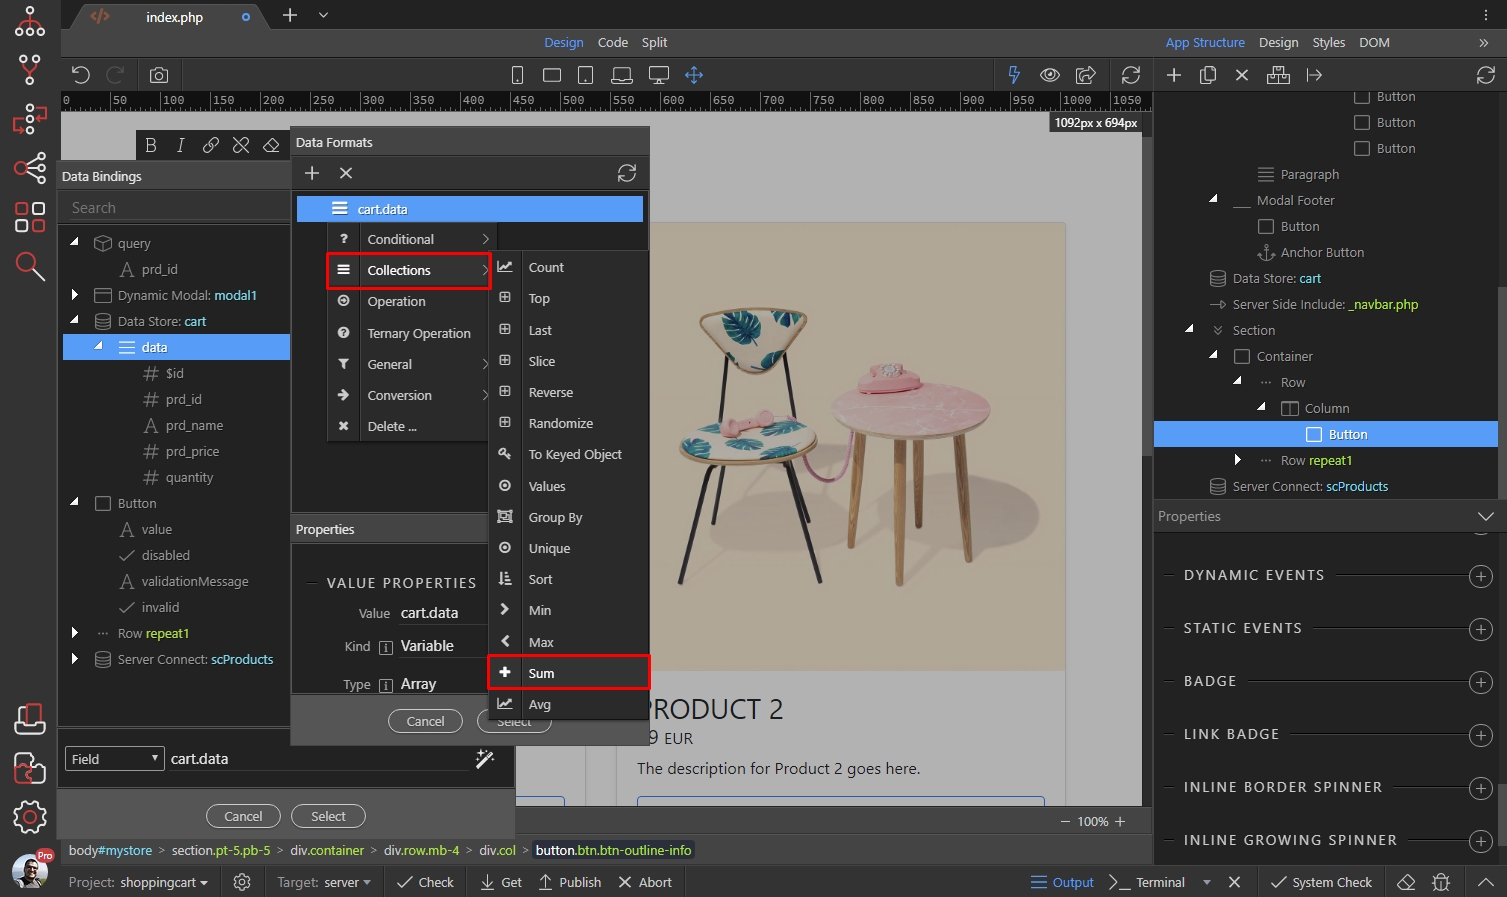
Select a property to sum:
Section titled “Select a property to sum:”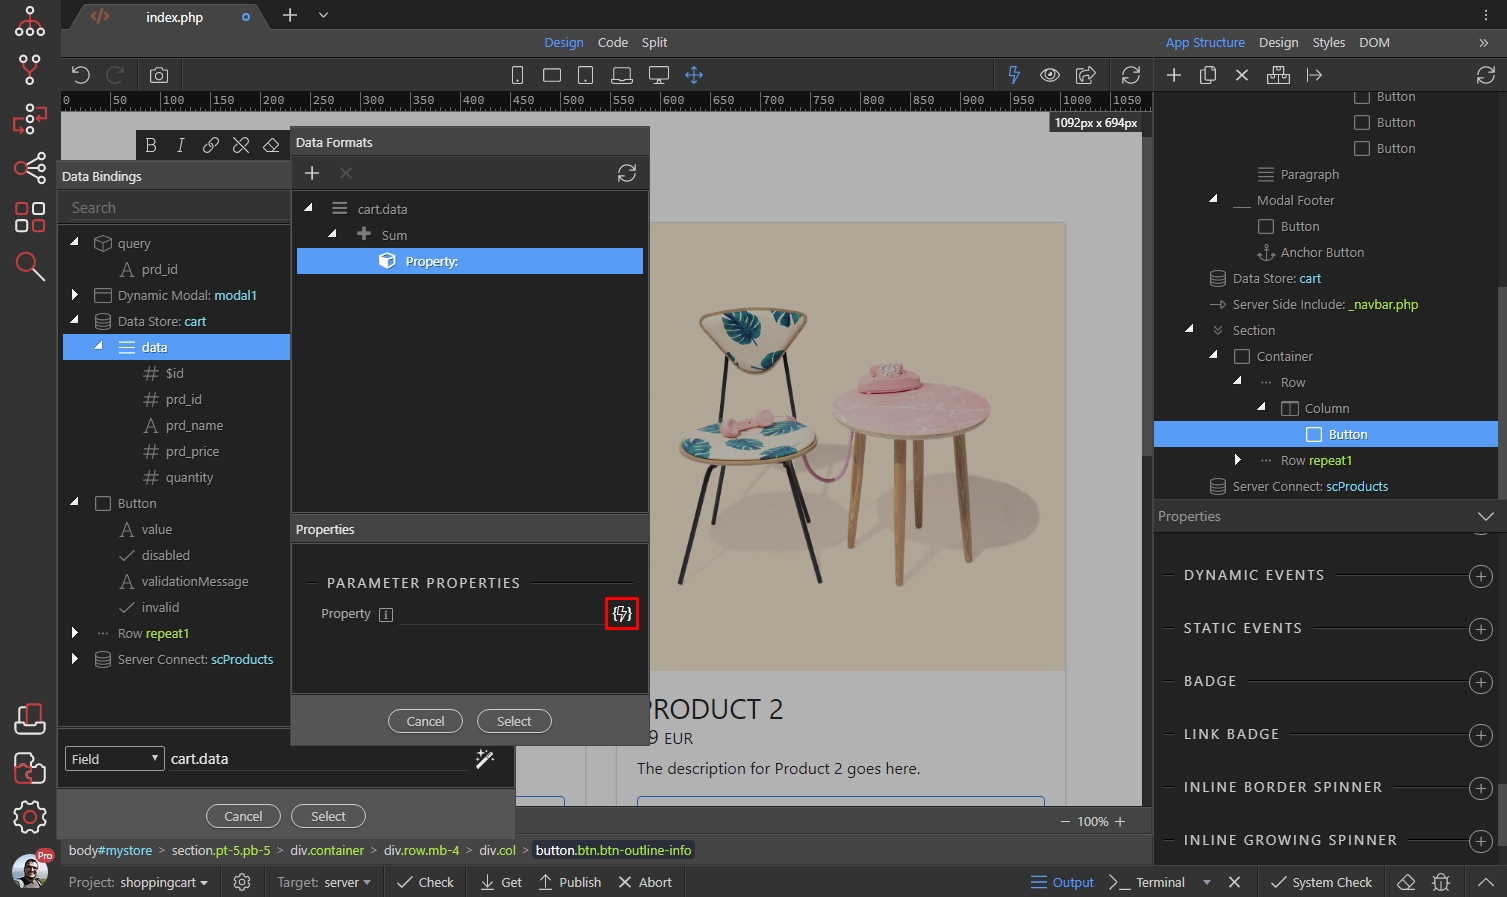
This should be the quantity for each of the rows/items:
Section titled “This should be the quantity for each of the rows/items:”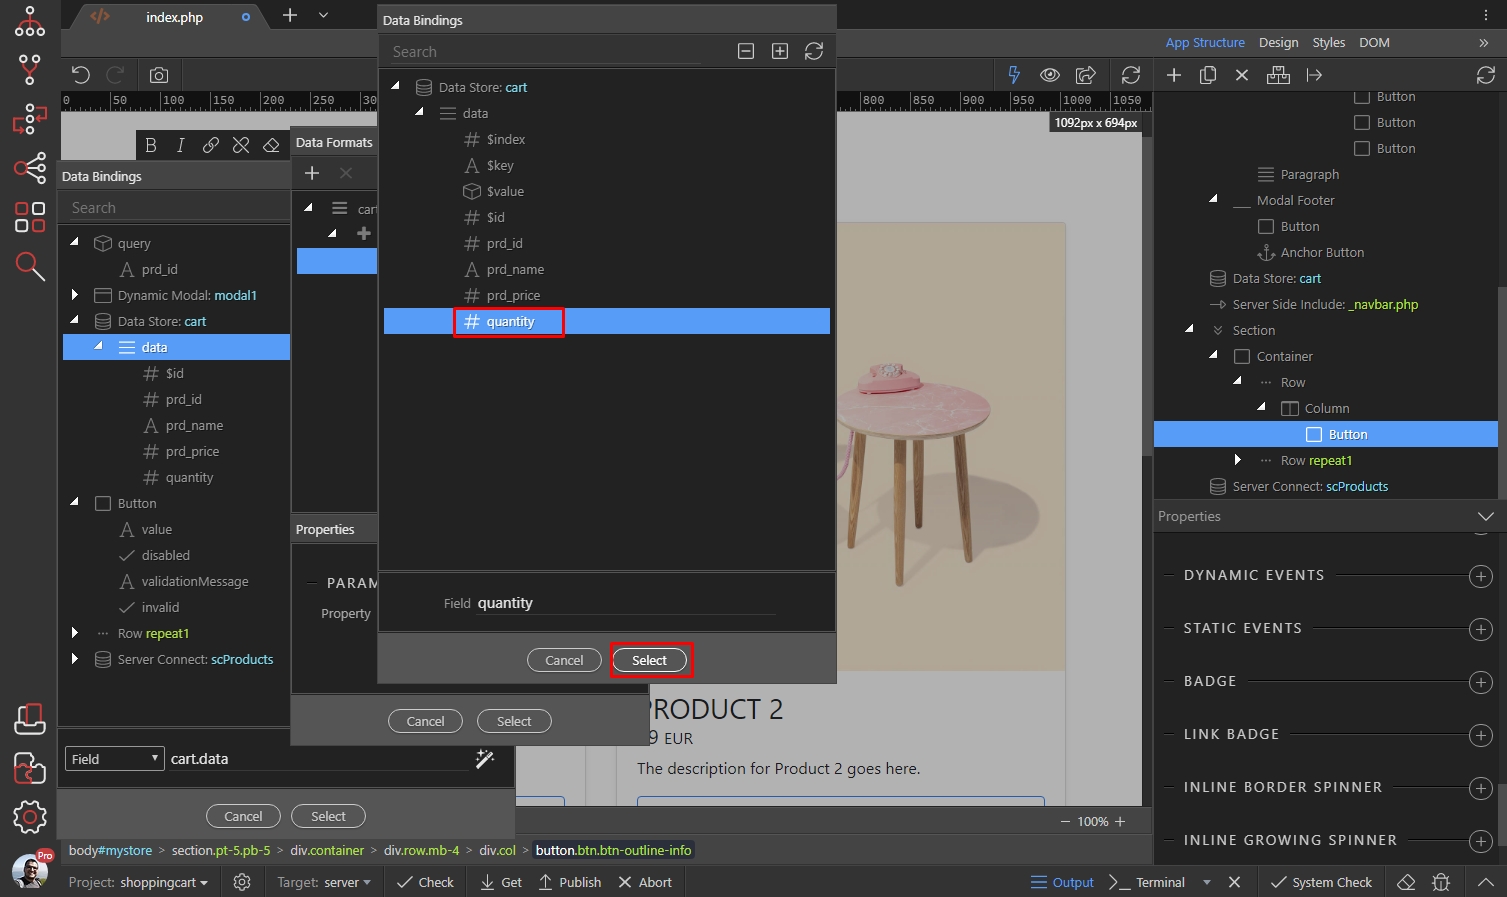
Click Select:
Section titled “Click Select:”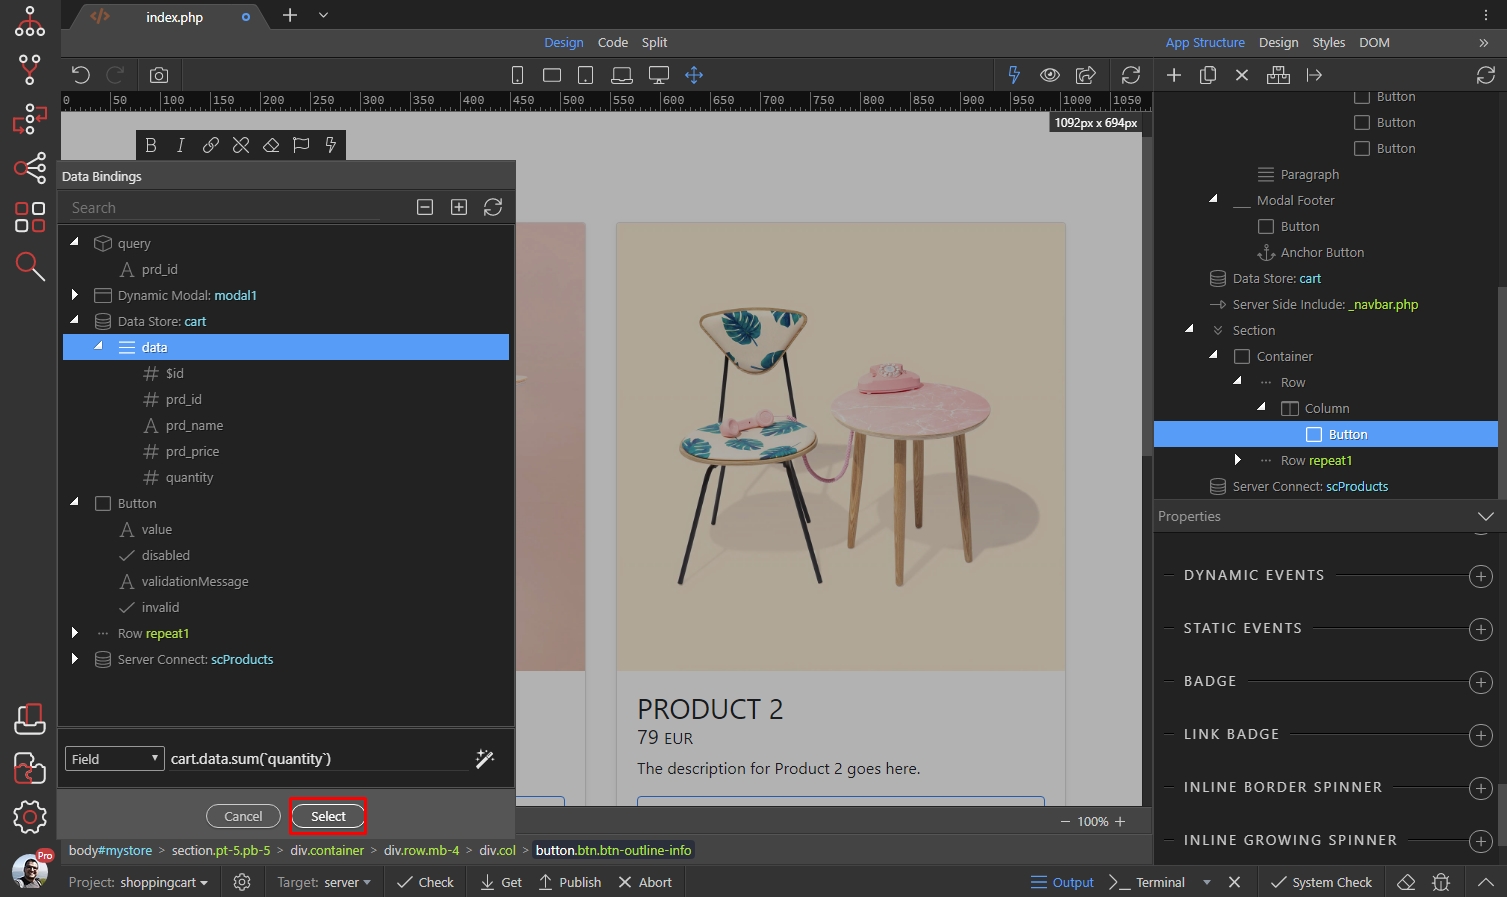
And you are done. Now add new dynamic event:
Section titled “And you are done. Now add new dynamic event:”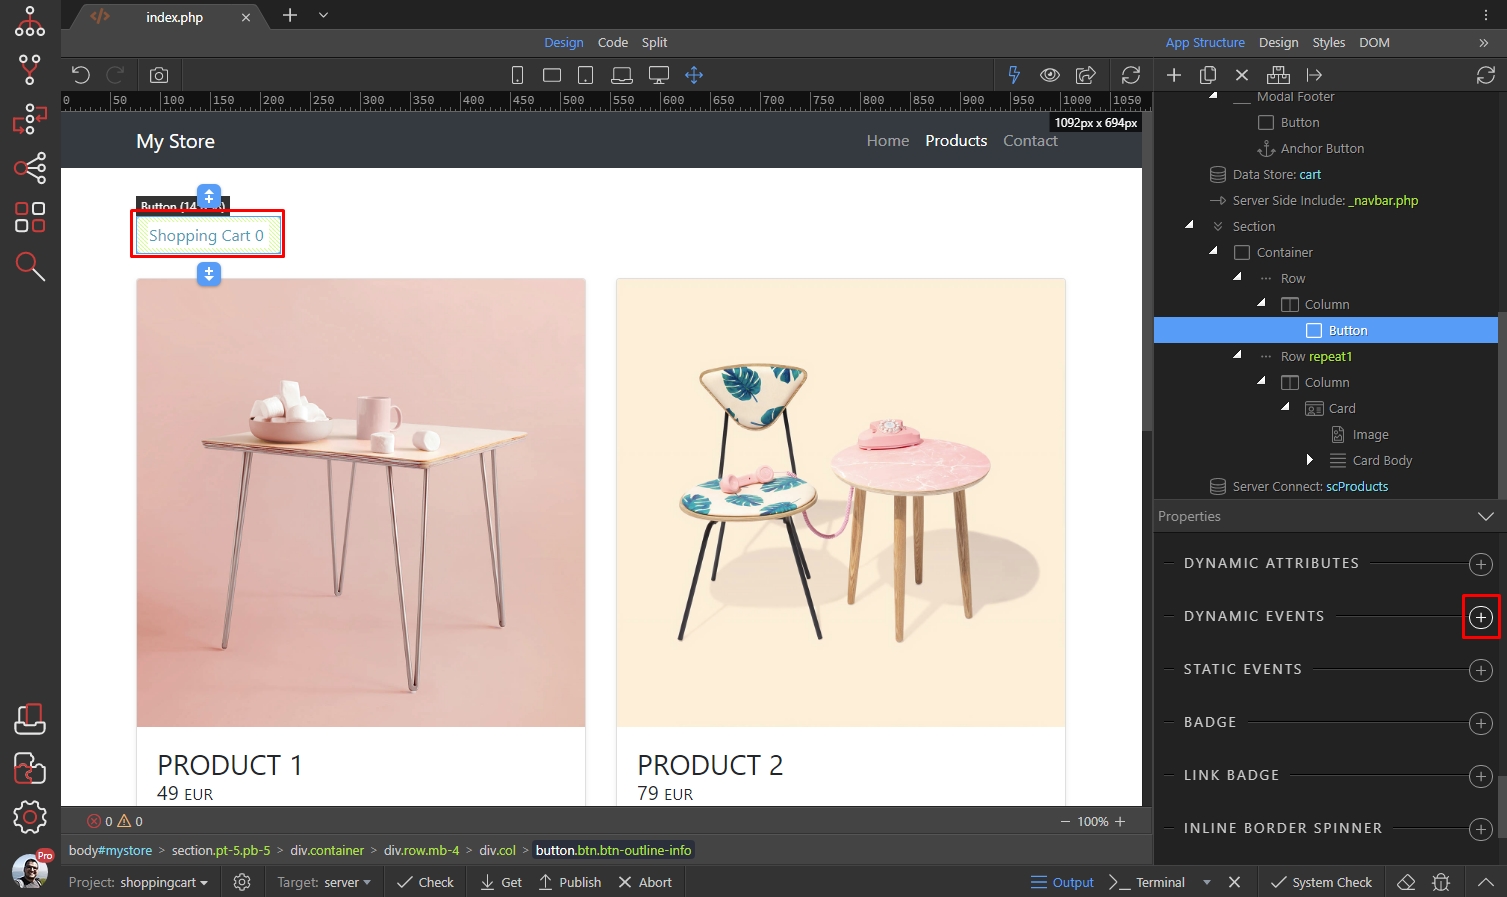
Select Mouse > Click:
Section titled “Select Mouse > Click:”
And select what needs to happen on click:
Section titled “And select what needs to happen on click:”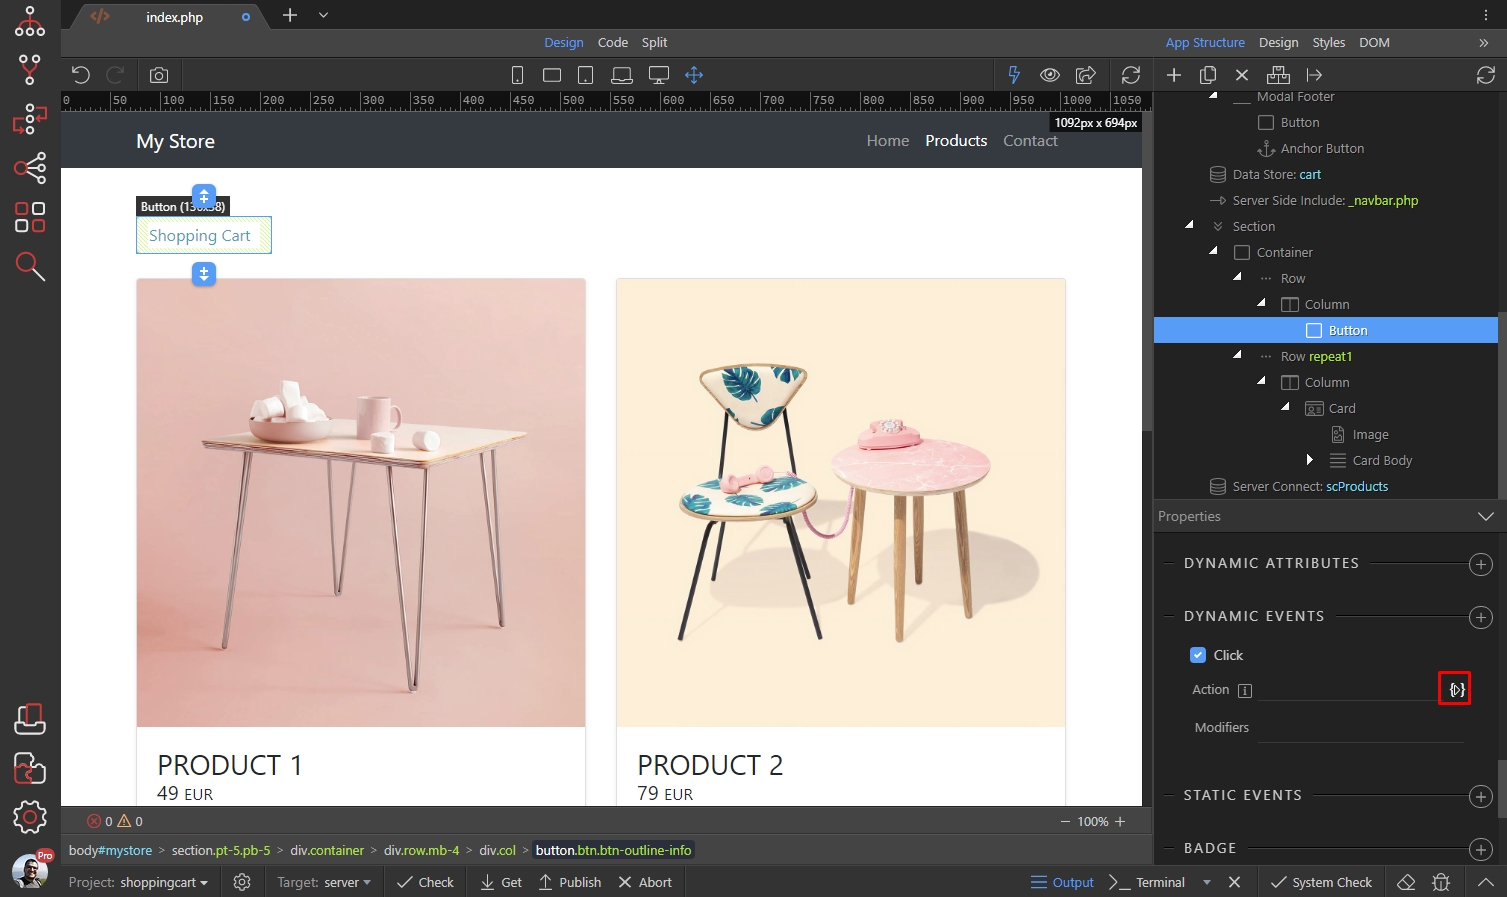
Under Modal select Show and add it:
Section titled “Under Modal select Show and add it:”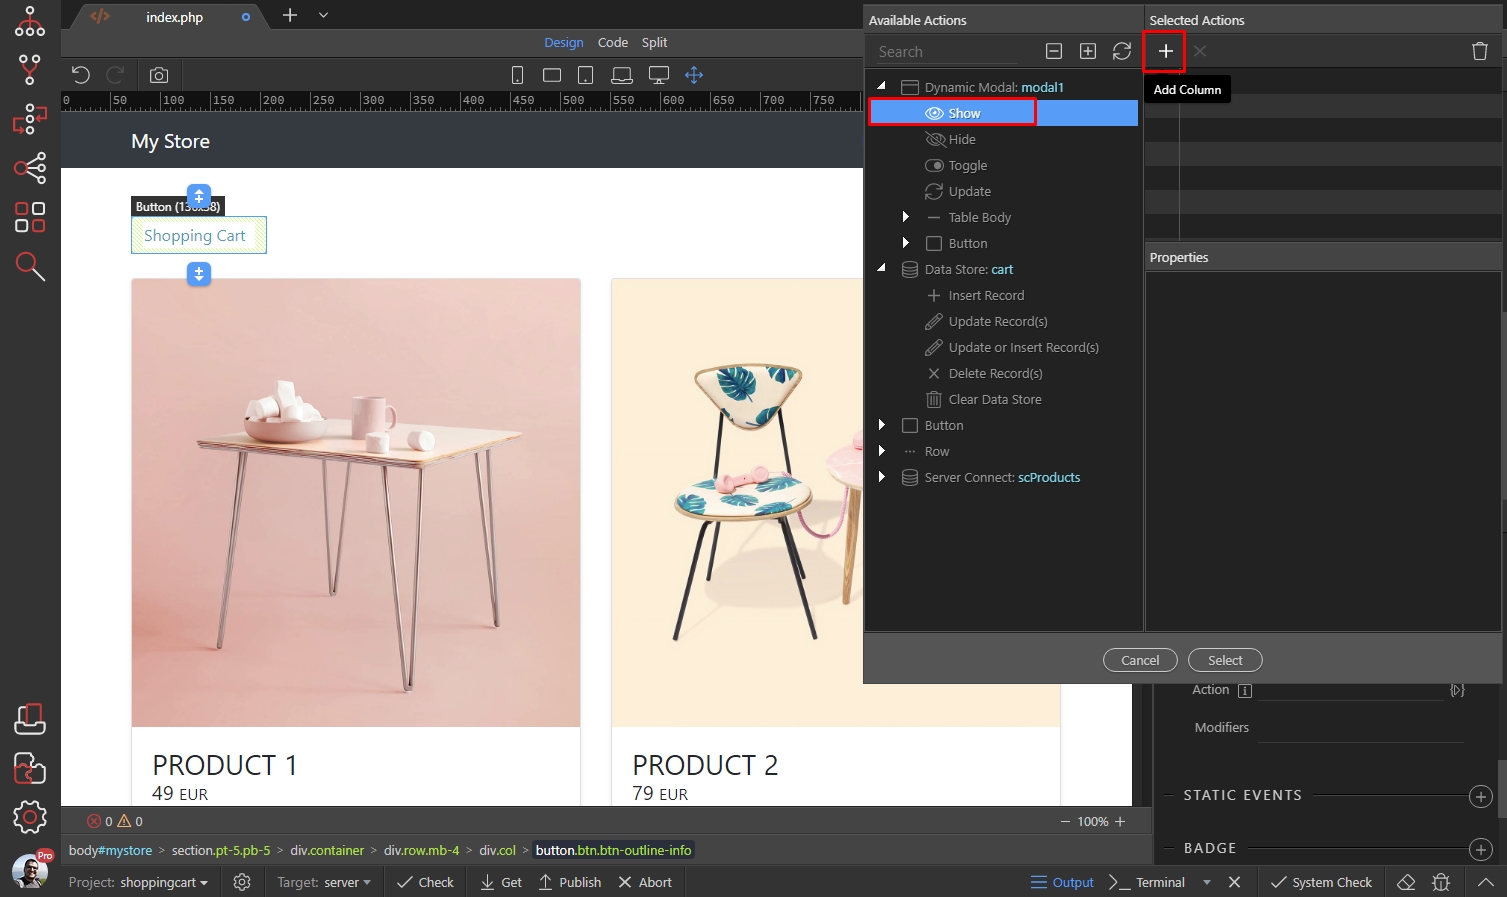
Click Select:
Section titled “Click Select:”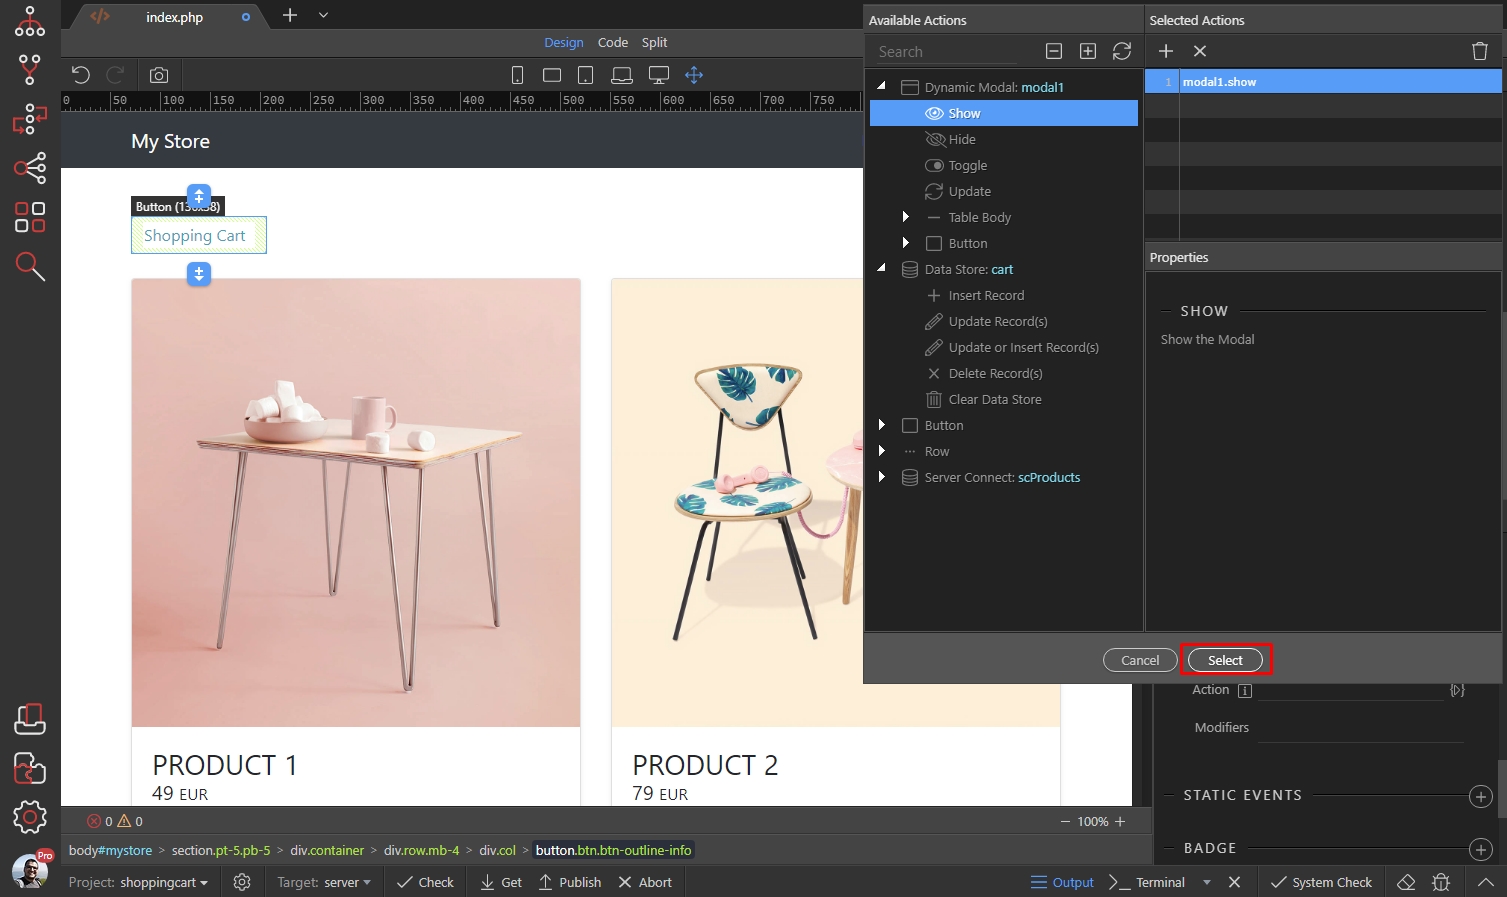
Now you have a button which shows the number of items added in the shopping cart and also opens it on click.
Section titled “Now you have a button which shows the number of items added in the shopping cart and also opens it on click.”Checkout Page Overview
Section titled “Checkout Page Overview”In order to be able to use the Data Store data on another page, let’s say a checkout page there are two requirements you need to follow:
- The App ID must be the same as on the page where you defined the Data Store:

The Data Store component ID must be the same as the one used for the shopping cart:
Section titled “The Data Store component ID must be the same as the one used for the shopping cart:”- The Data Store component ID must be the same as the one used for the shopping cart:
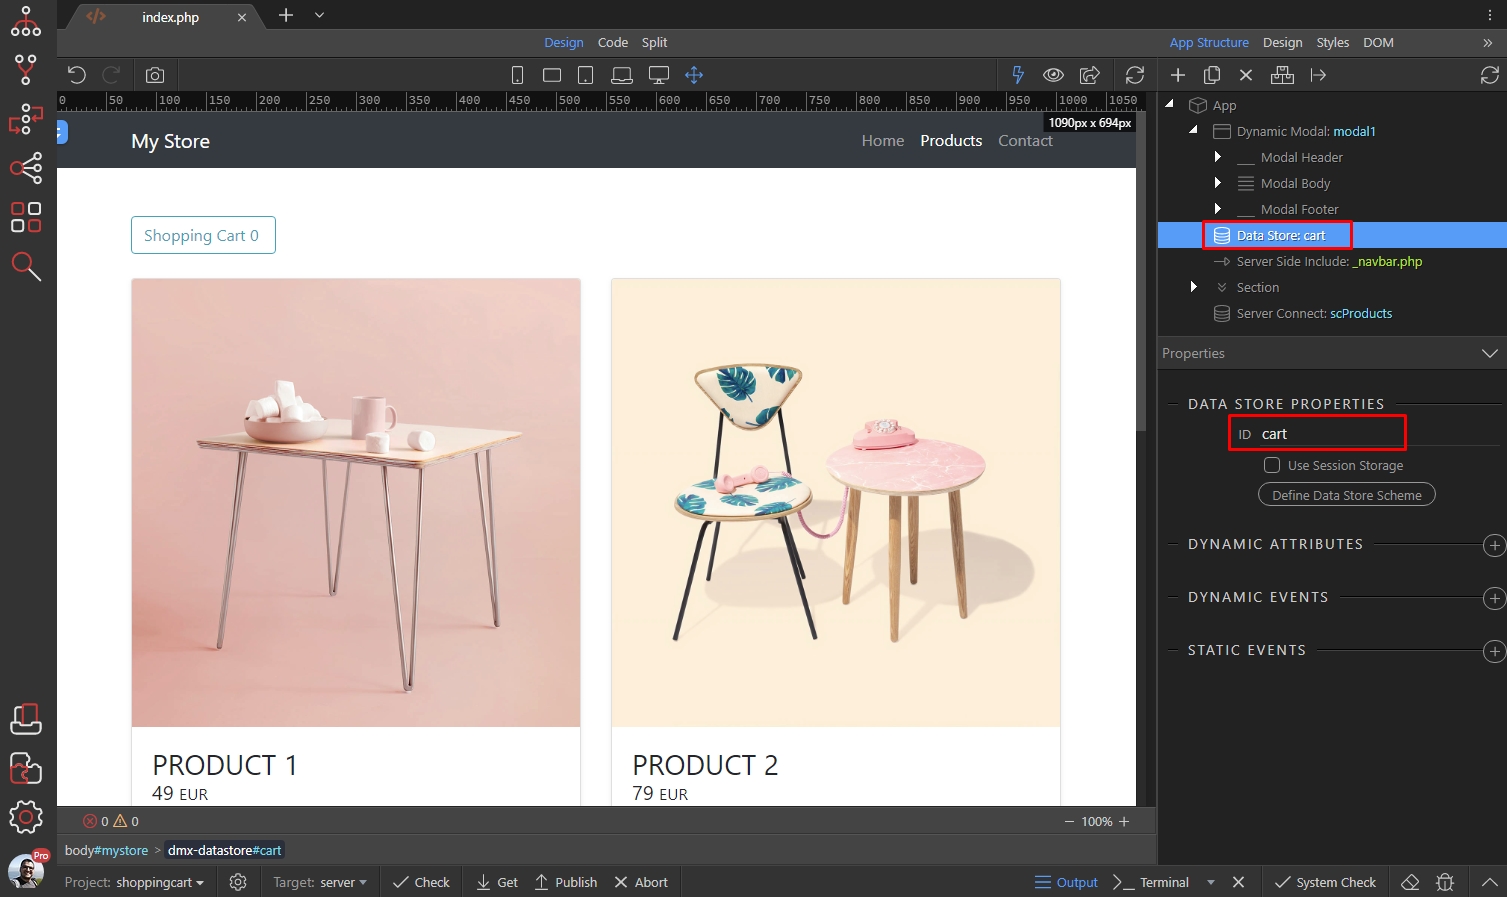
Following these two simple rules you can create your own custom checkout page:
Section titled “Following these two simple rules you can create your own custom checkout page:”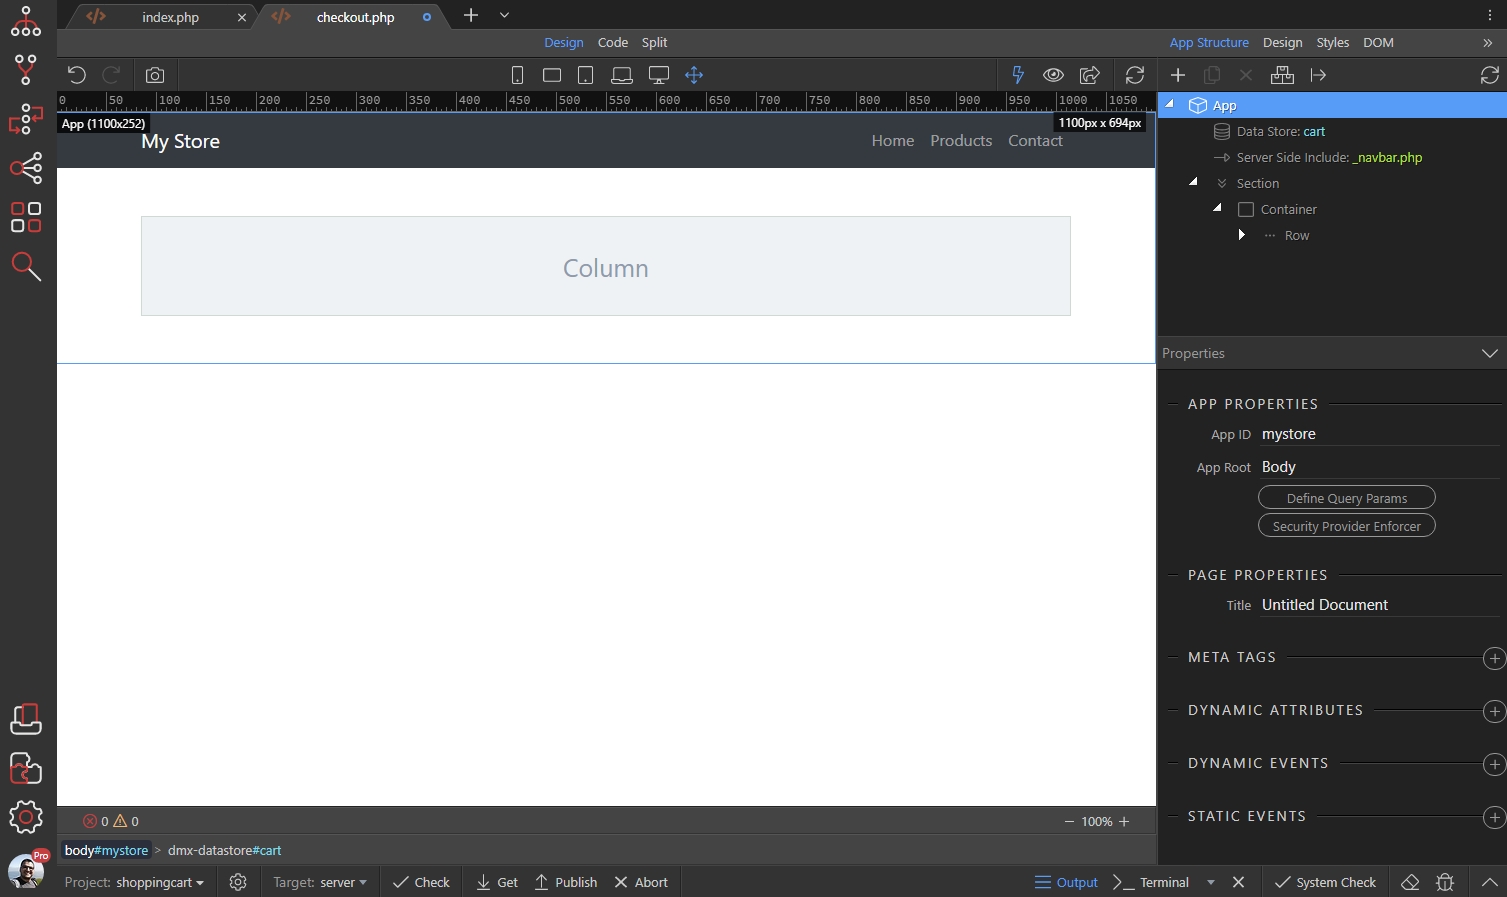
Step 126
Section titled “Step 126”Here you can use the data from the Data Store component to add a dynamic table, the same way as in your shopping cart:
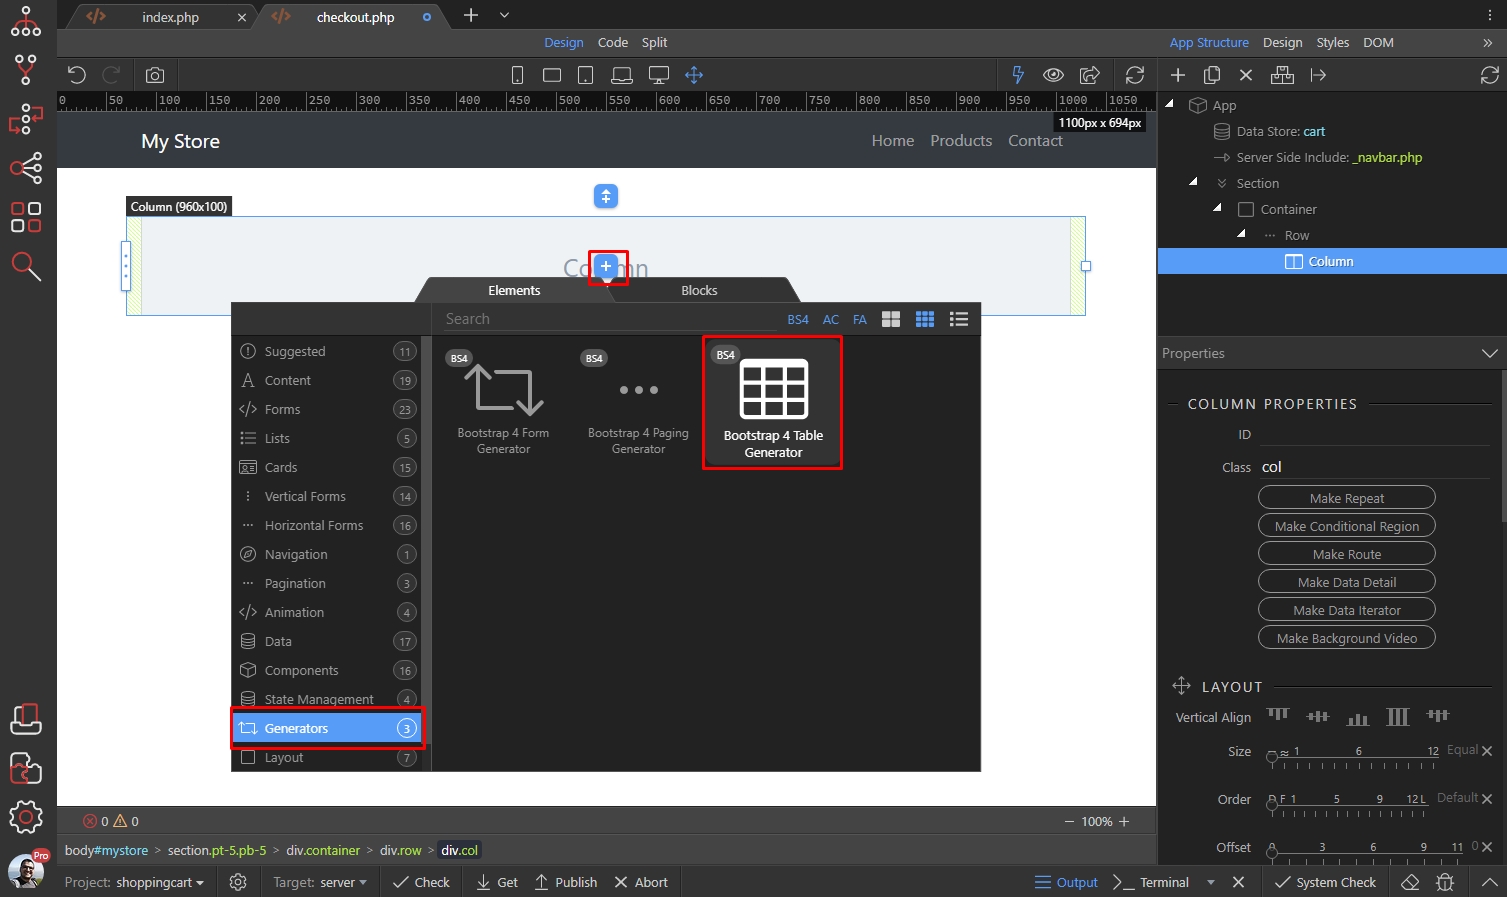
The data from the Data Store component is available in the data picker dialog:
Section titled “The data from the Data Store component is available in the data picker dialog:”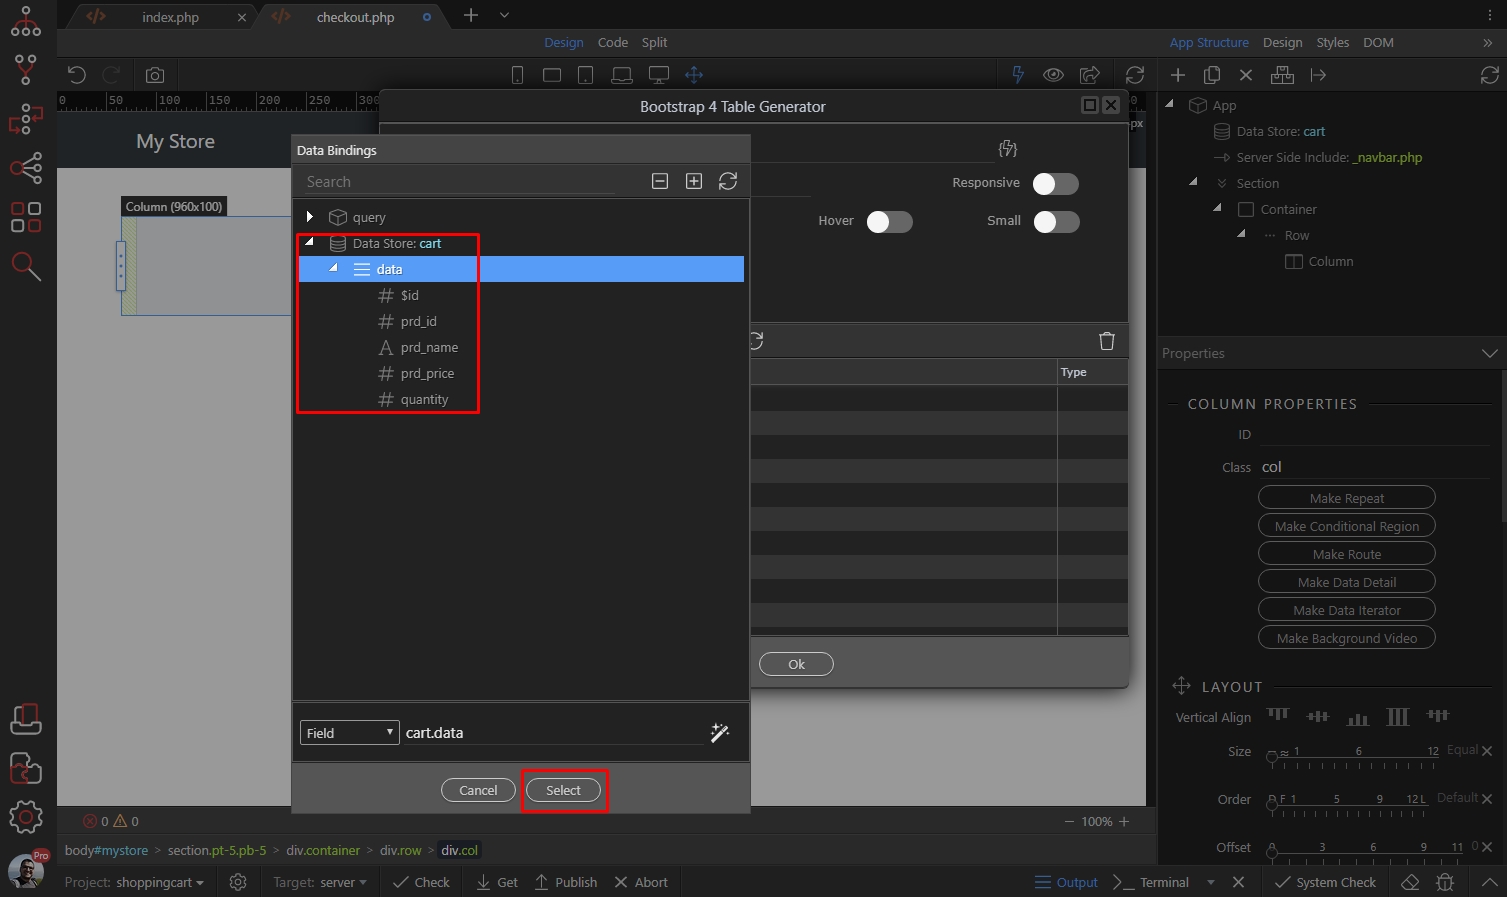
Step 128
Section titled “Step 128”So - go ahead and finish the Checkout Page layout, using what you learned in this tutorial 
Conclusion
Section titled “Conclusion”That’s how easy you can add a shopping cart functionality using the Data Store component. This is just a simple example of what can be done, you are free to fully customize every aspect of this shopping cart tutorial as per your needs.
