
Using Google reCAPTCHA to Protect Forms
Intro Google reCAPTCHA helps you protect your forms from spam and automated submissions. In Wappler, it works with two parts: Client-side – adds the reCAPTCHA element to your form. Server-side – check
Google reCAPTCHA helps you protect your forms from spam and automated submissions.
In Wappler, it works with two parts:
- Client-side – adds the reCAPTCHA element to your form.
- Server-side – checks the reCAPTCHA result before running the rest of your server action.
reCAPTCHA Types
Section titled “reCAPTCHA Types”Wappler supports Google reCAPTCHA v2, which comes in two forms:
-
Checkbox (“I’m not a robot”)
Displays a simple checkbox for the user to confirm they’re human.
Depending on Google’s detection, the user may be passed instantly or asked to solve a challenge. -
Invisible reCAPTCHA badge
No checkbox is shown. The check runs automatically when the user clicks your form’s submit button.
Only suspicious traffic is challenged, and you can adjust this behavior in Google’s advanced security settings.
[!note]
In this tutorial, we’ll be using the Invisible reCAPTCHA type.
Generating reCAPTCHA Keys
Section titled “Generating reCAPTCHA Keys”Before adding reCAPTCHA in Wappler, you need a Site Key and a Secret Key from Google.
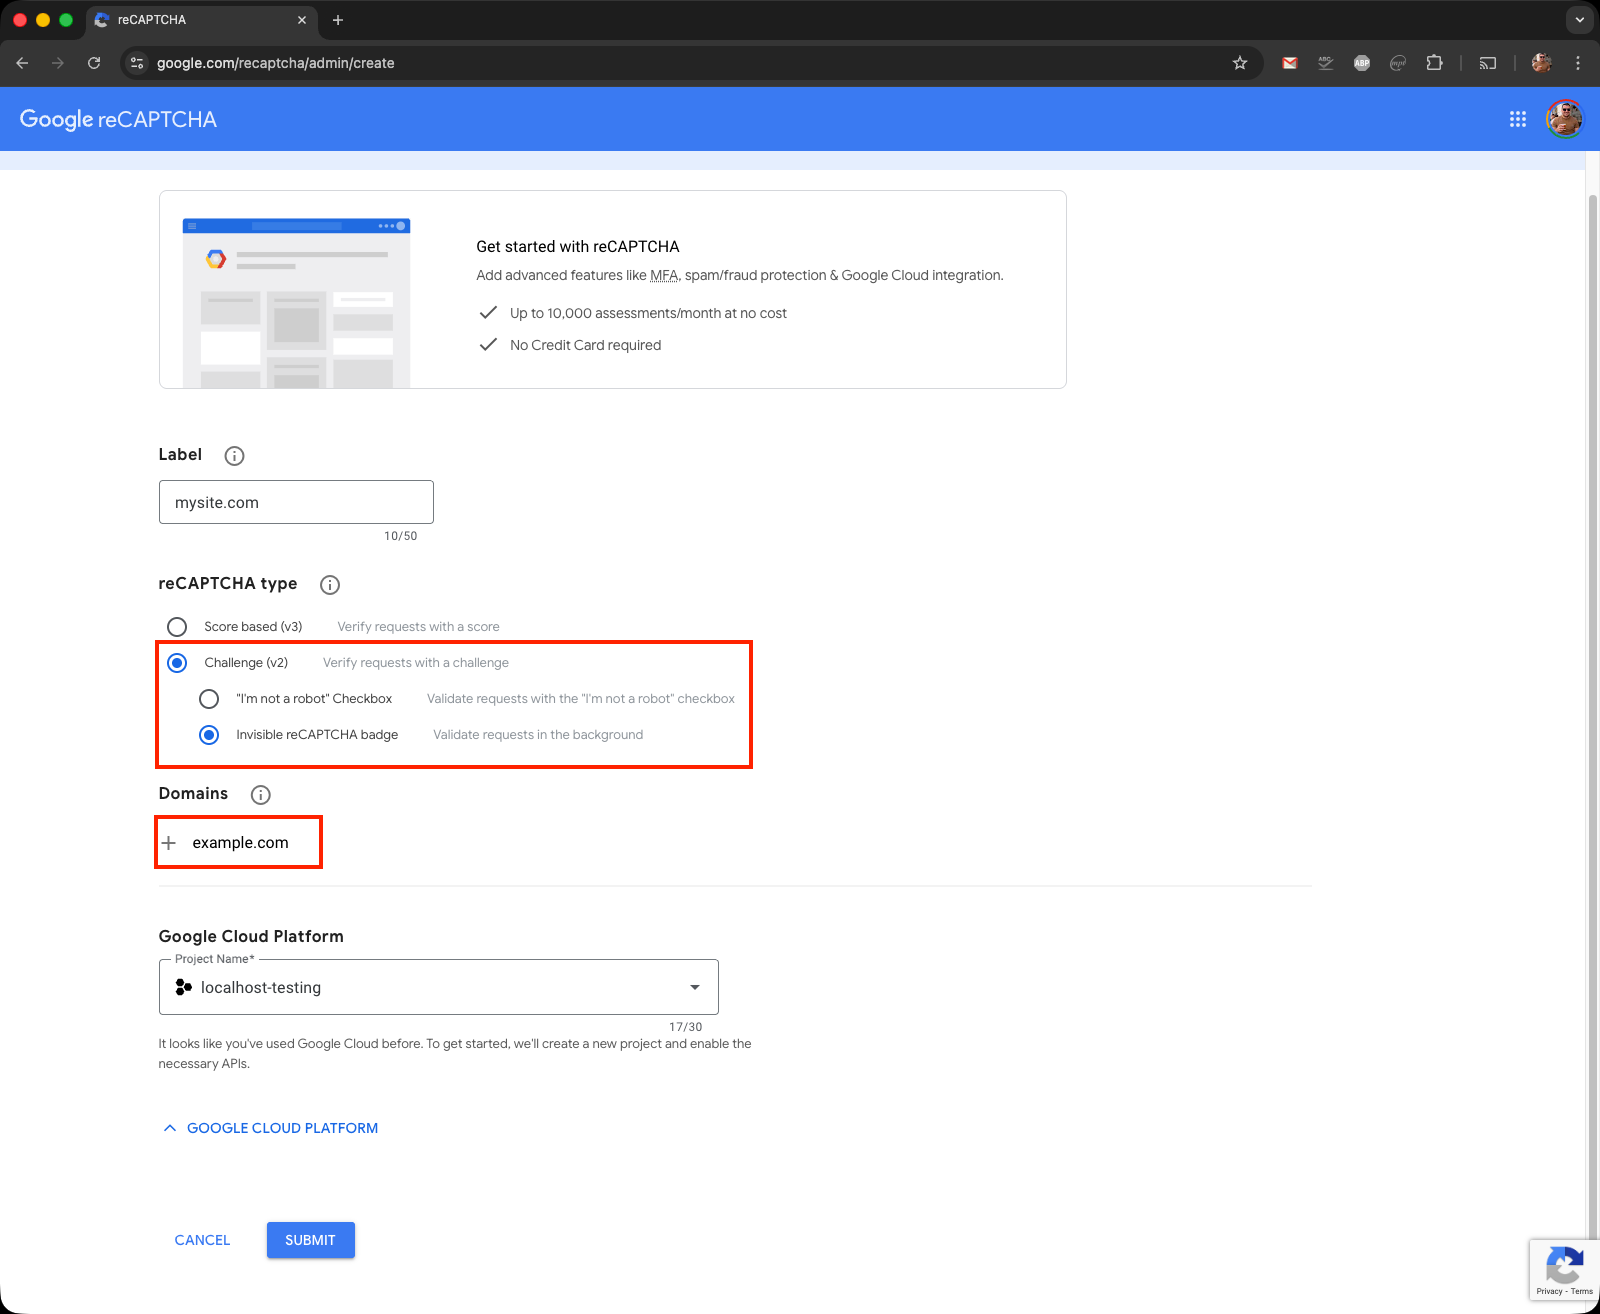
Open the Google reCAPTCHA Admin Console and create a new site.
When registering your site:
- Select Challenge v2 as the type.
- Choose Invisible reCAPTCHA badge.
- Enter the domains where you’ll use reCAPTCHA (e.g.,
localhostfor local testing and your production domain).
After saving, Google will give you:
Section titled “After saving, Google will give you:”- A Site Key – used on the client side.
- A Secret Key – used on the server side.
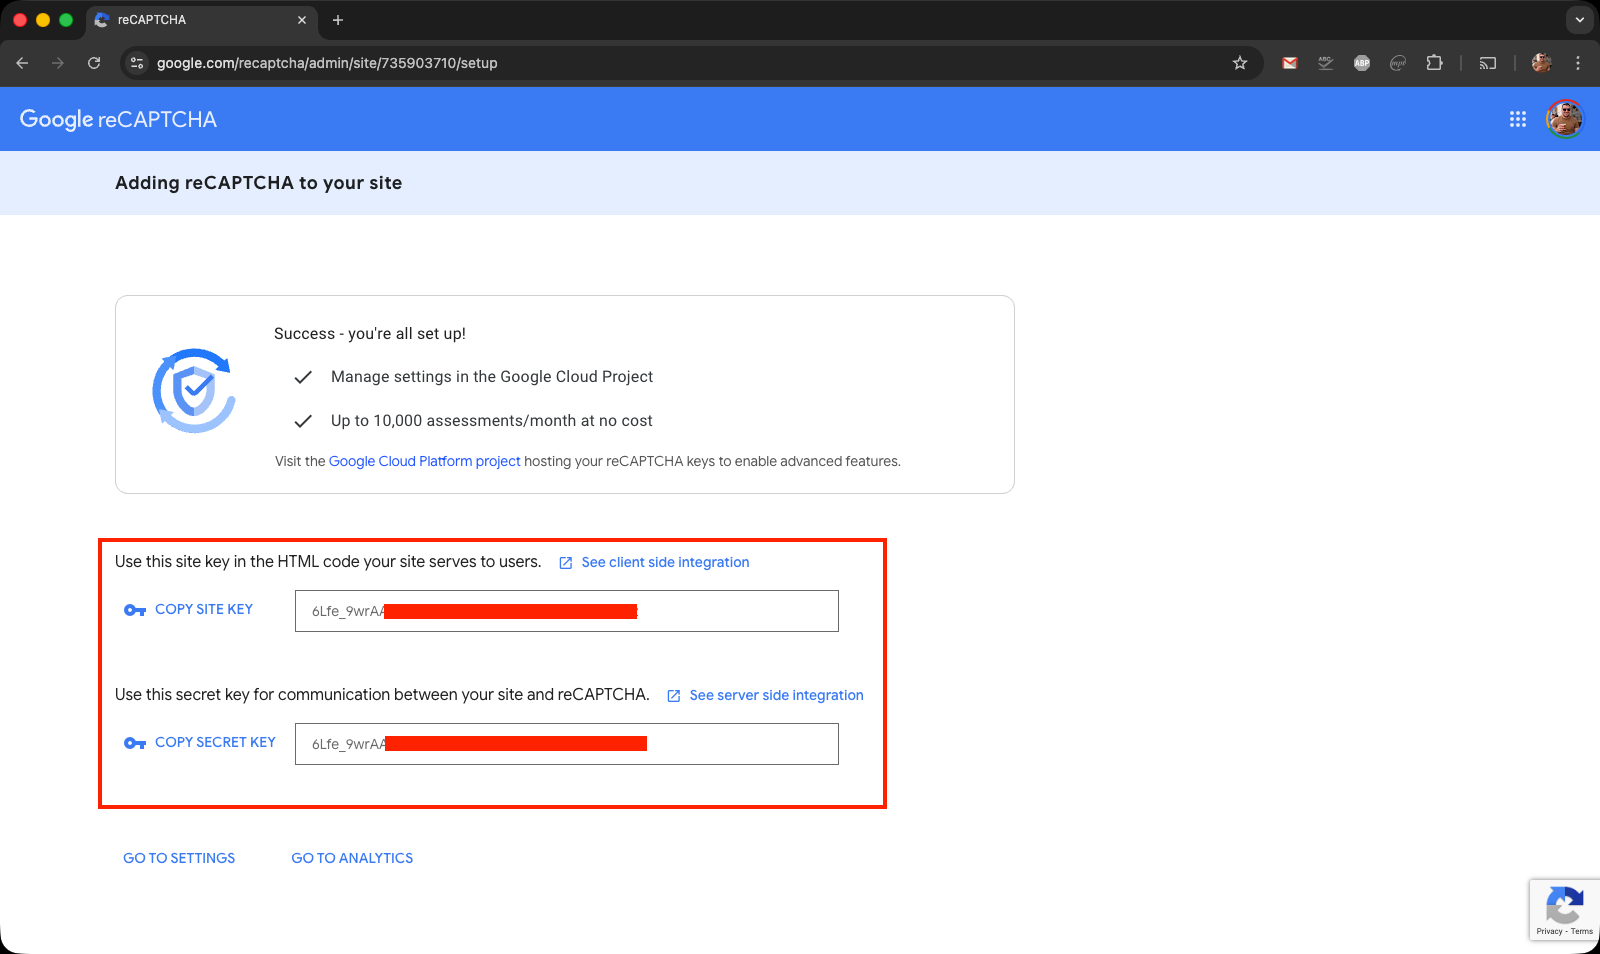
You’ll need both keys in the next steps.
Section titled “You’ll need both keys in the next steps.”Client Side
Section titled “Client Side”Open your page with the form in Wappler.
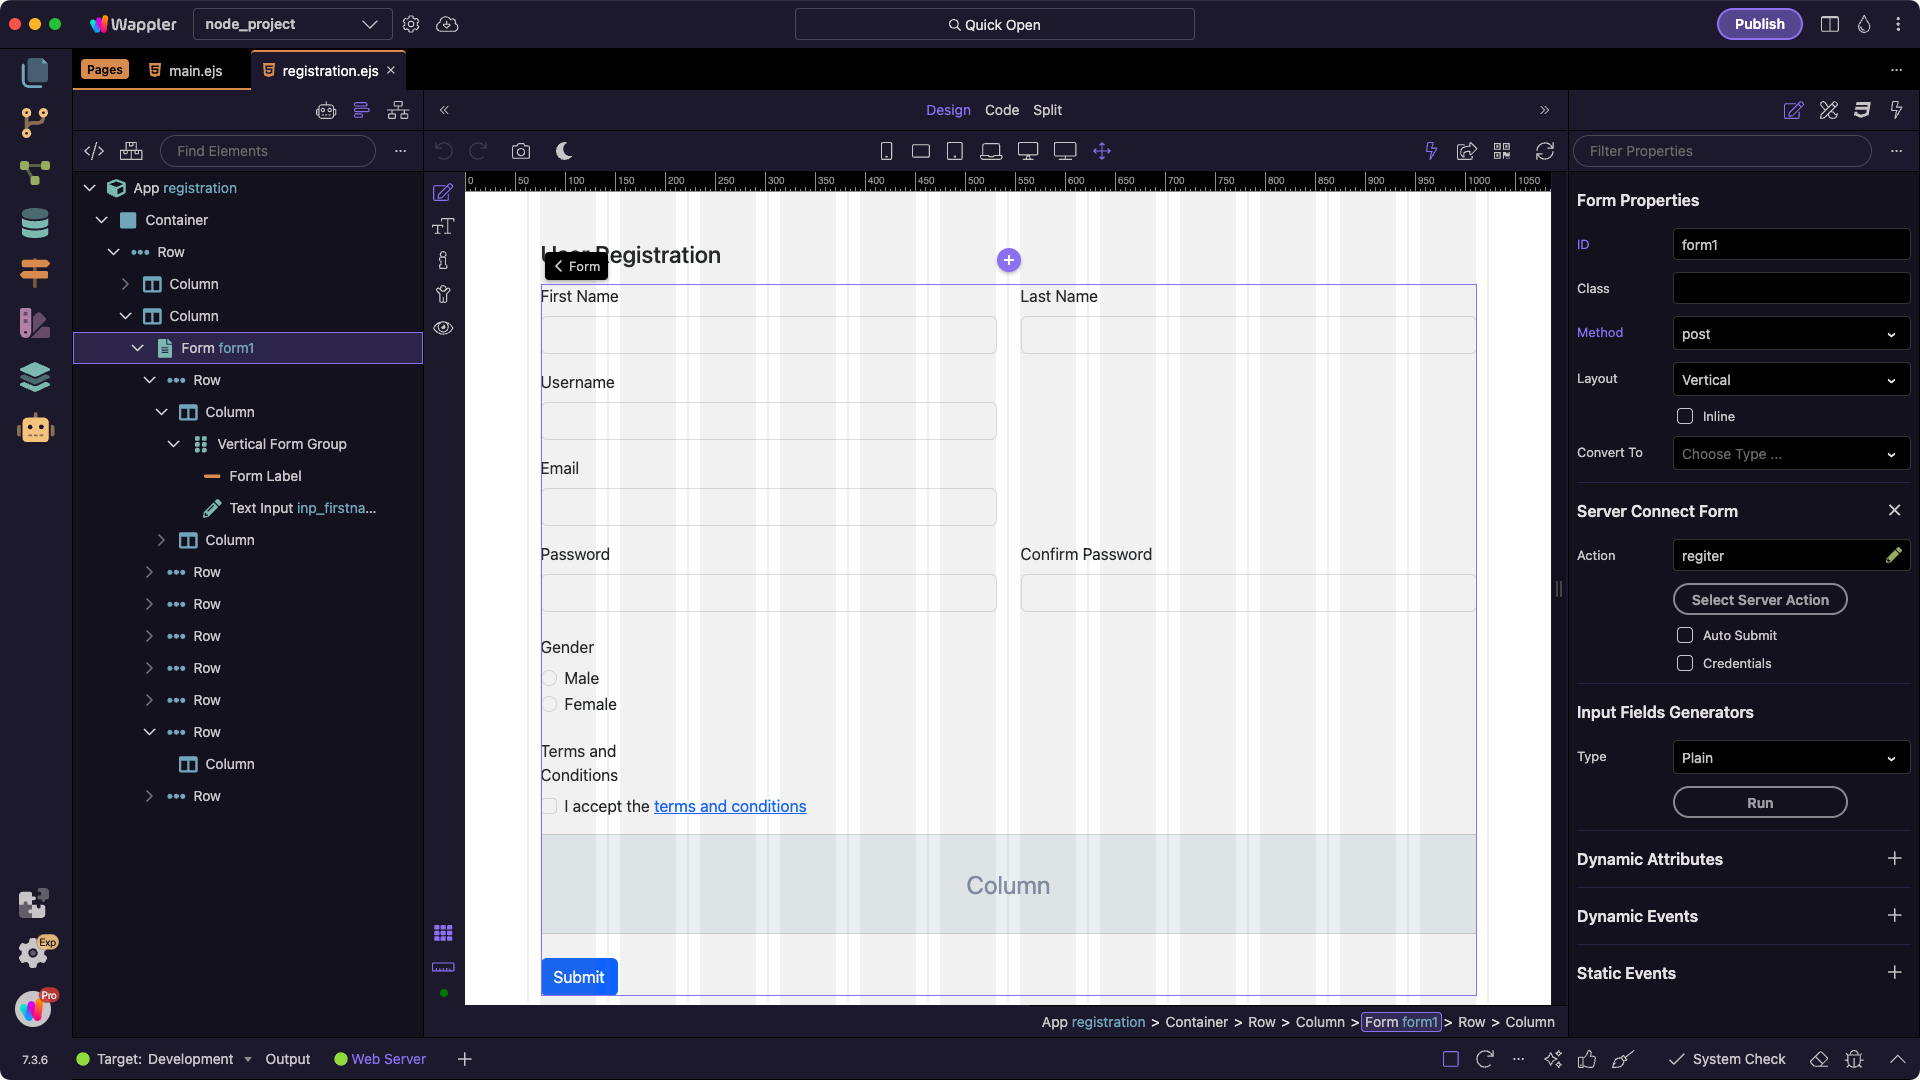
We have a registration form on the page:
Step 8
Section titled “Step 8”Click the + where you want to add the reCaptcha in the form. From the Components Picker, select Forms > reCAPTCHA.
This adds the reCAPTCHA component to your form.

In the Properties panel, paste your Site Key:
Section titled “In the Properties panel, paste your Site Key:”
Choose your reCaptcha Theme:
Section titled “Choose your reCaptcha Theme:”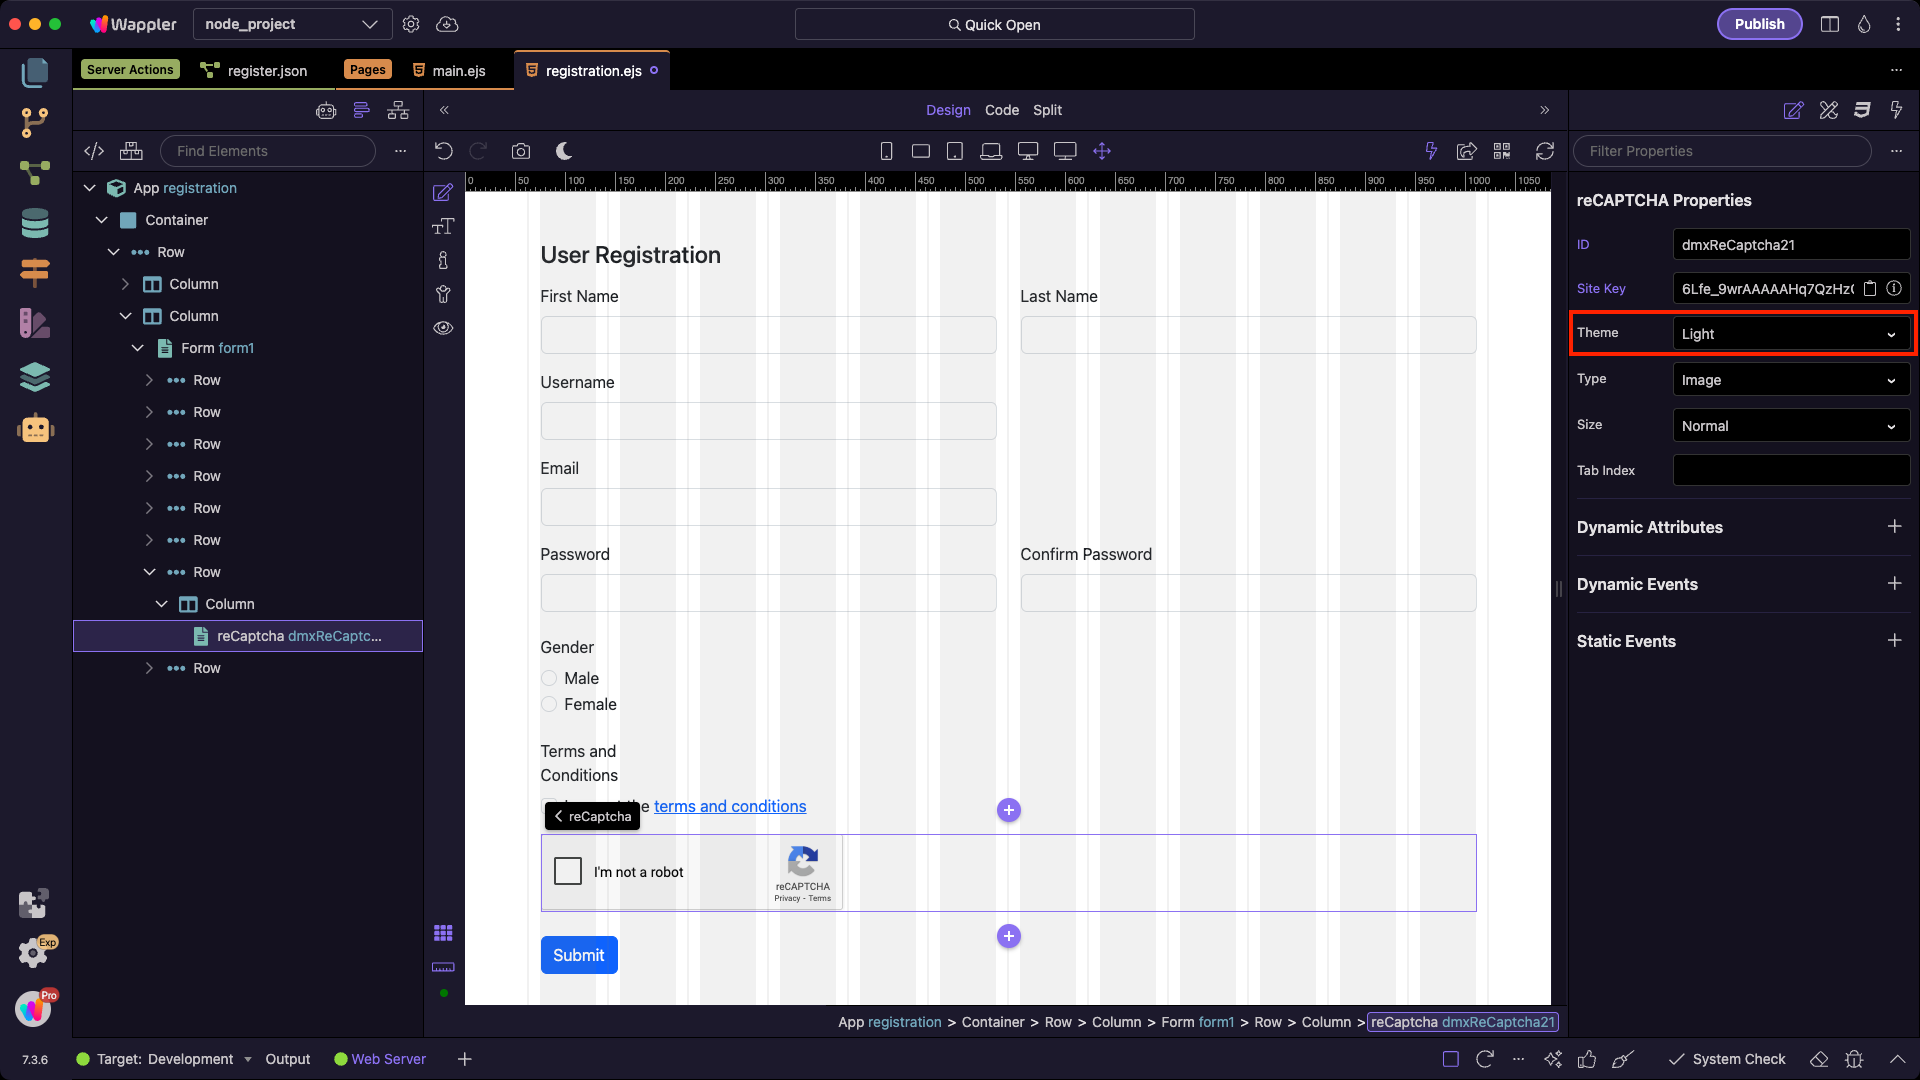
Select Invisible for reCaptcha Type:
Section titled “Select Invisible for reCaptcha Type:”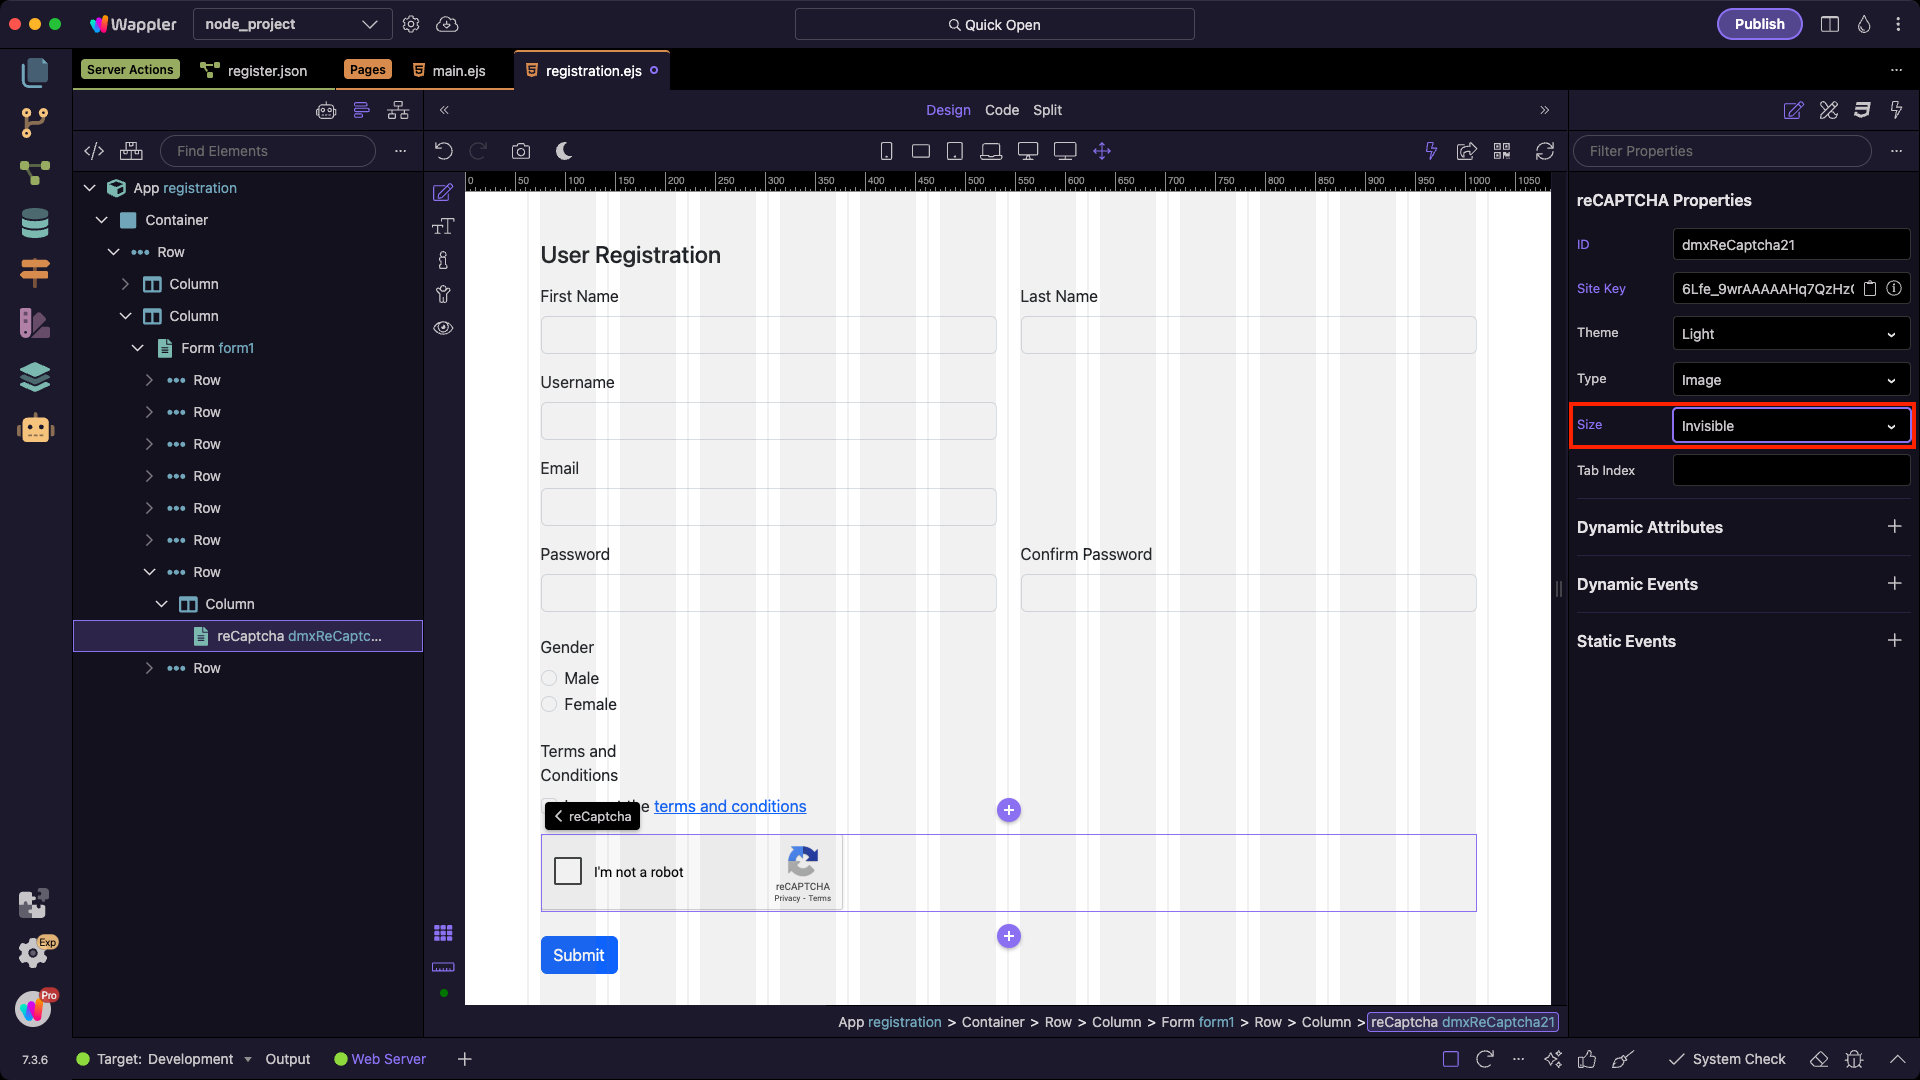
Step 12
Section titled “Step 12”[!tip]
The keys you generate from Google reCAPTCHA are type-specific.
A key created for the Checkbox option will not work for the Invisible, and vice versa.
Be sure to use the correct key for the reCAPTCHA type you selected.
Server Side
Section titled “Server Side”Open the Server Connect panel and select the Server Action that processes your form submission.
Click the + button to add a new step. Make sure to add this step before all the other steps in the server action:

Choose reCAPTCHA Actions > reCAPTCHA Validate:
Section titled “Choose reCAPTCHA Actions > reCAPTCHA Validate:”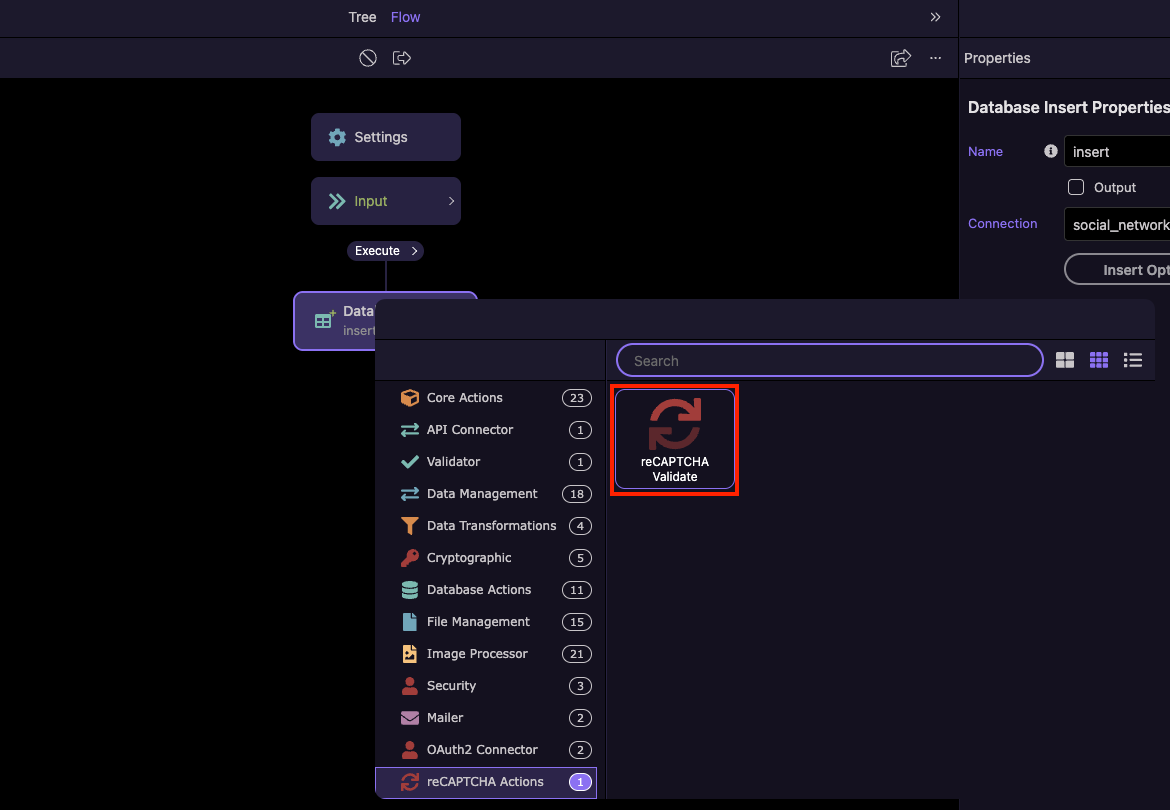
In the Properties panel, enter your Secret Key:
Section titled “In the Properties panel, enter your Secret Key:”
Save your Server Action, and you are done.
Section titled “Save your Server Action, and you are done.”You’ve now added Google reCAPTCHA to your Wappler form — with client-side integration and server-side validation. This ensures only human-verified submissions are processed, helping keep your forms secure and spam-free.
