Git Manager Reference
Reference map of Git Manager surfaces, menus, history tools, detail workspaces, and special repository states.
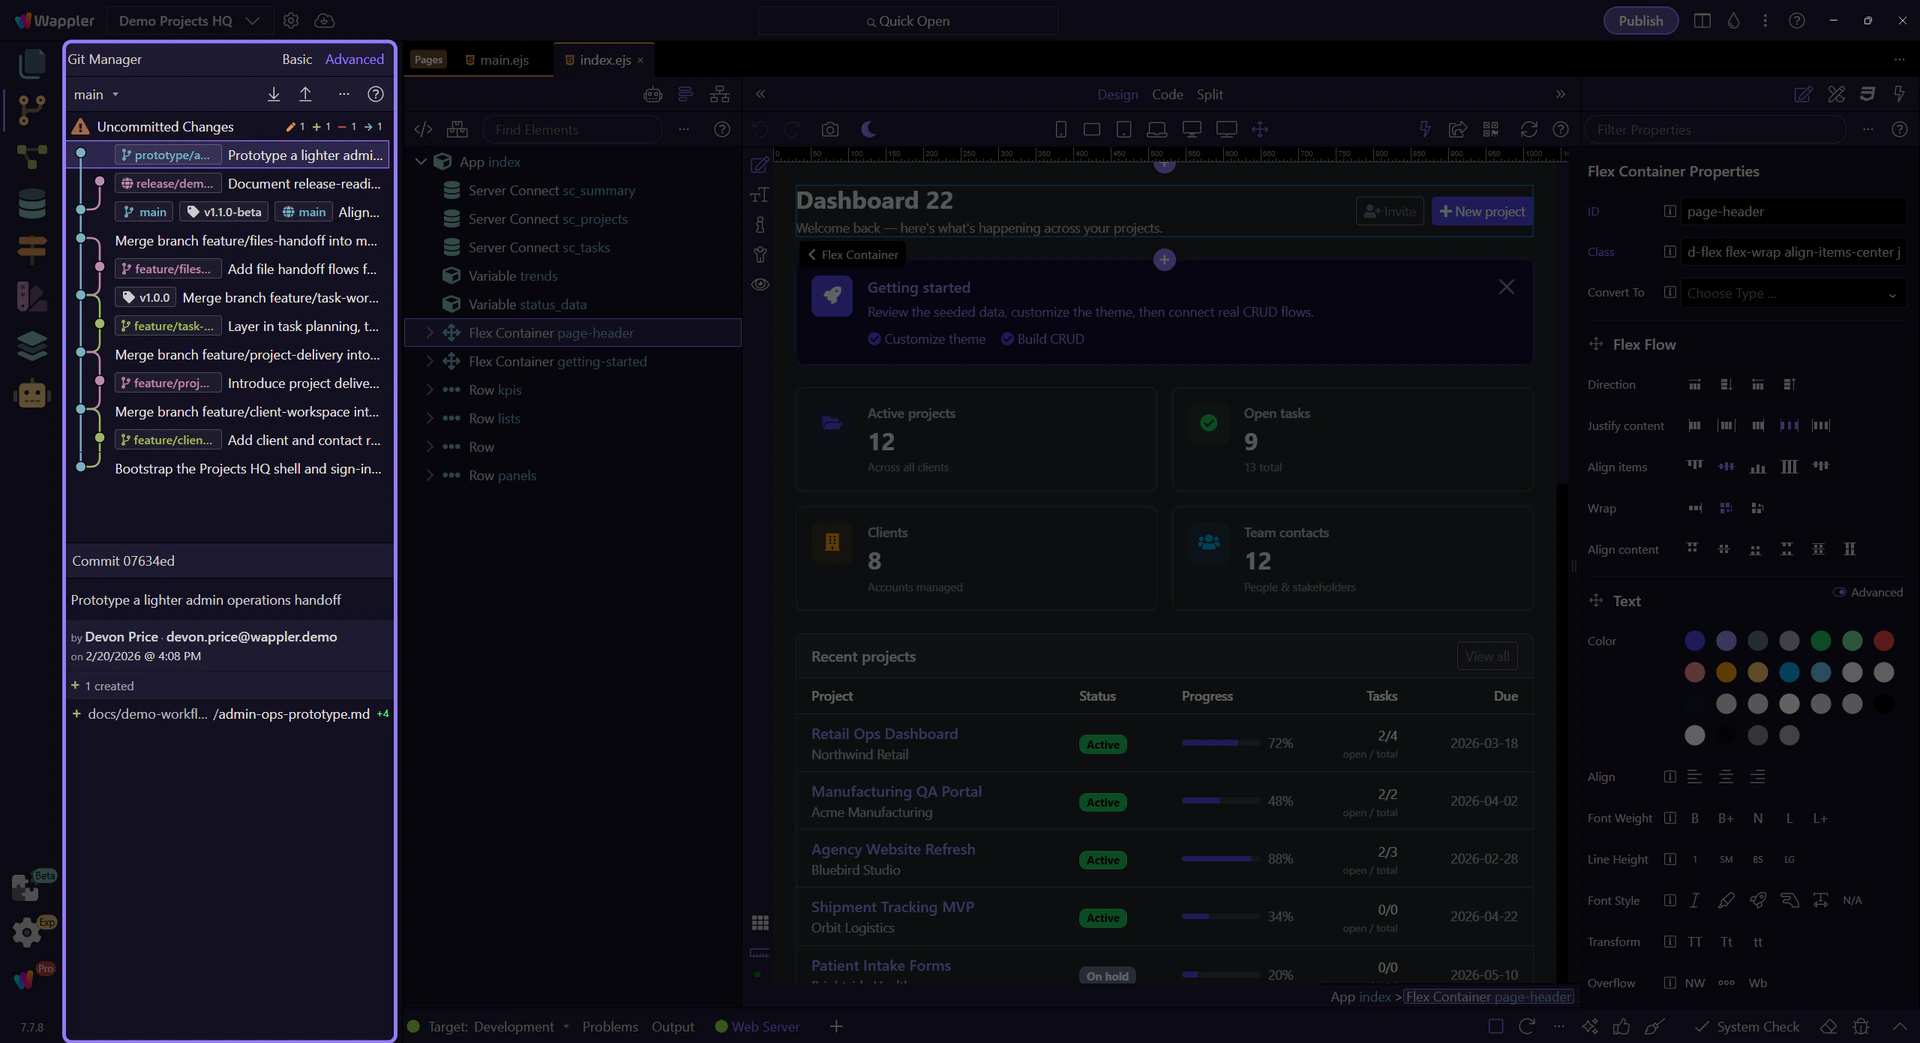
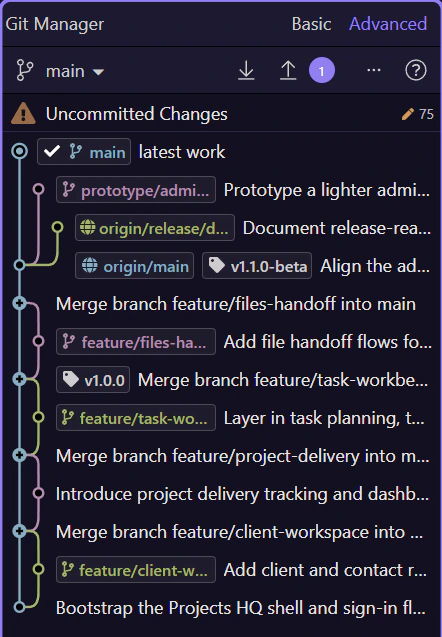
Git Manager has three recurring surfaces
Read the manager in three layers: the title area chooses how much history structure you want, the main toolbar exposes repository operations, and the main panel moves between working-tree review and commit history. Once you see those three layers, the rest of the UI becomes predictable.
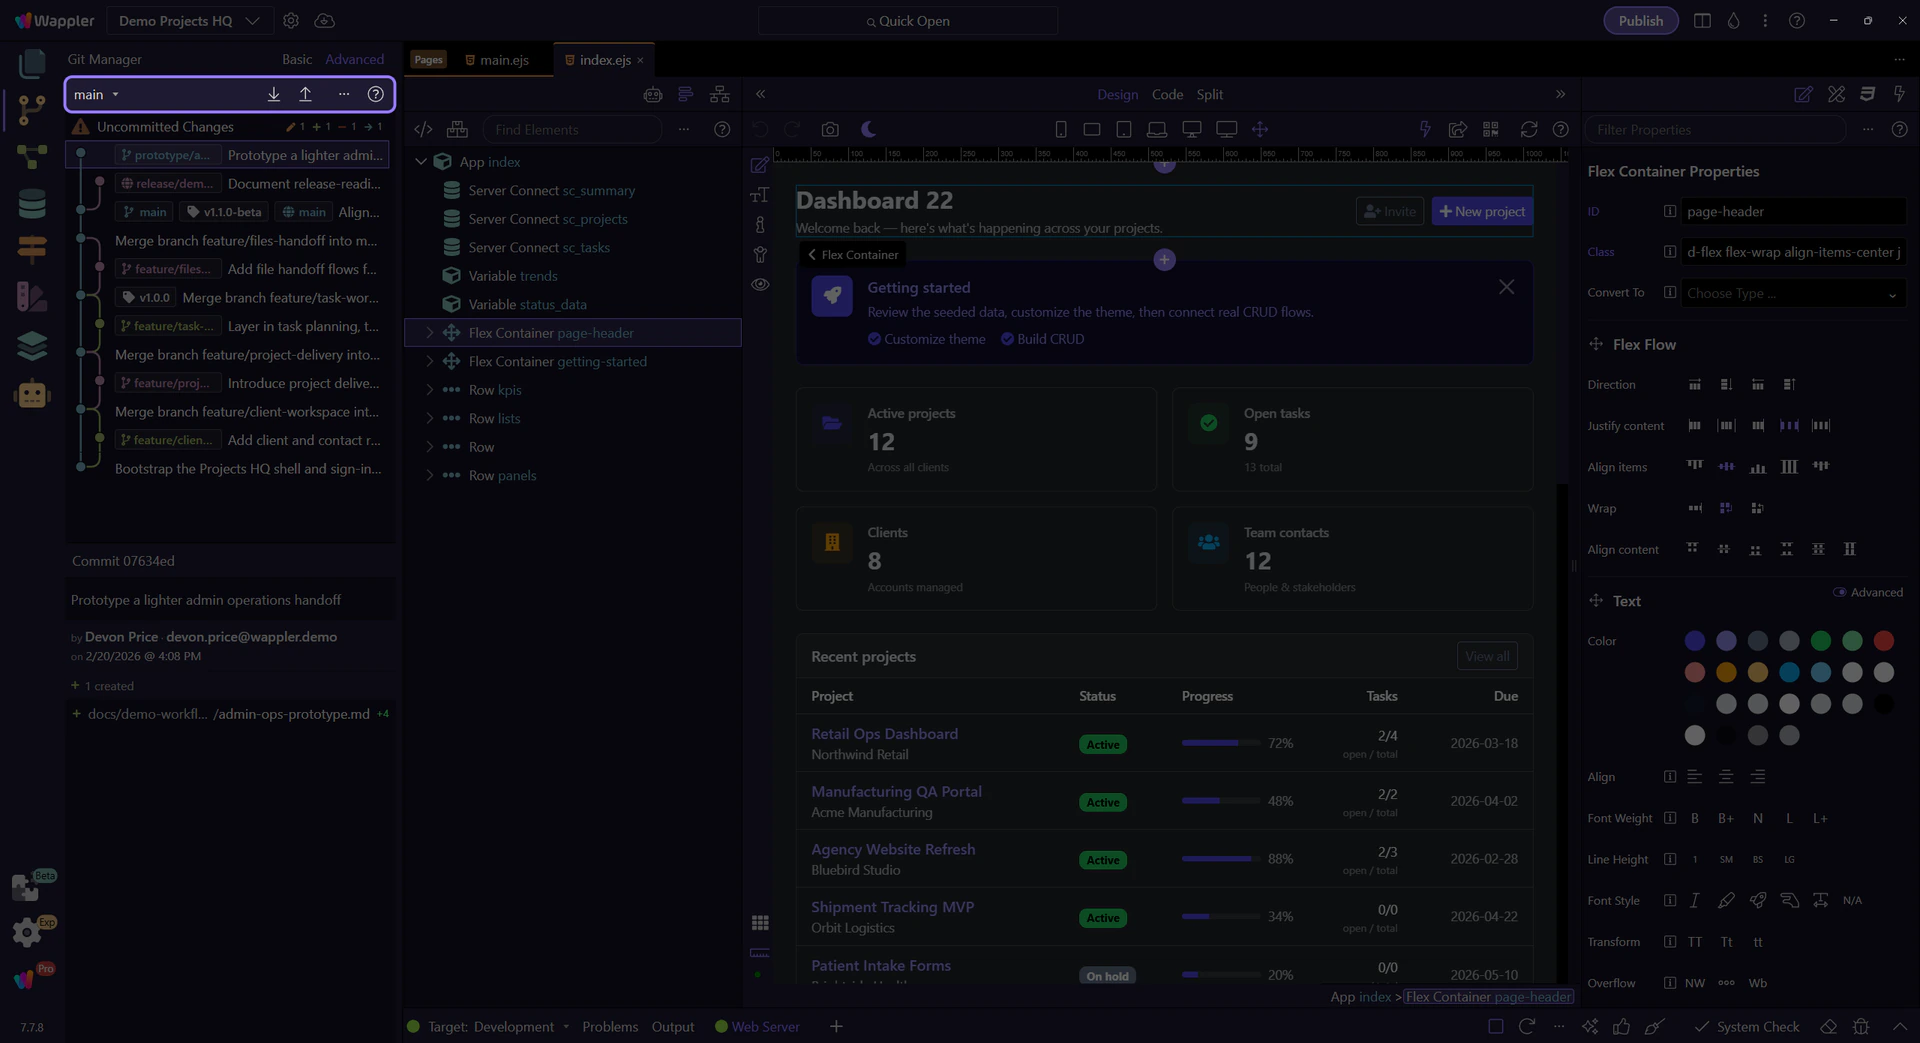
Switch to Basic view
Start with Basic view so the rest of the reference tour has a simple baseline before it expands into the richer controls.

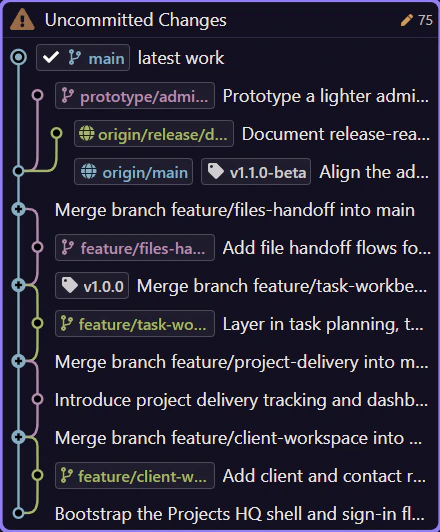
Basic view is the focused everyday reading
Basic view is active here in the history list. The list stays flatter and easier to scan: commit subjects, relative time, and only lightweight tag context unless you explicitly add more structure back from the actions & options menu.

Toolbar controls appear and disappear with repository state
Read the toolbar from left to right until you reach the utility end. Branch opens the switching and creation menu. Connect appears before any remote is configured; once a remote exists it gives way to Pull and Push, which can show behind and ahead counts on the current tracking branch. During merge state those sync buttons step aside for Continue Merge and Abort Merge so you finish or cancel the risky state first.
The real branch menu opens from the toolbar
Use Next here to open the actual branch menu from the toolbar so the live switching surface stays visible on the following step.

The branch menu keeps switching and creation together
This is the real branch menu from the toolbar. It shows the current branch with a check, lists the local branches you can switch to, and keeps Create Branch in the same surface so the normal branch workflow stays visible and direct.

The actions & options menu and Help are part of the manager model
After the branch and sync controls, the right end of the toolbar finishes with the actions & options menu and Help. The ... button is the quick maintenance and reading-controls surface: Refresh stays there, Fetch joins when remotes exist, and its View and Show submenus expose toggle-driven reading options for the history you are looking at. Help is the anchored learning entry point, so even when the repository is messy you still have a direct path back to the Git guides.
The Basic actions and options menu opens from the toolbar
Use Next here to open the real actions & options menu while Basic is still selected. That matters because Basic is not just a static simplified list anymore; this menu is where you can add back graph and tag context without switching to Advanced.
Basic keeps the actions & options menu lightweight
This is the real Basic actions & options menu. Refresh redraws the current repository state, Fetch appears once a remote exists, and Show is the lightweight reading group for Basic mode. Inside that Show submenu, the toggle items for Commit Graph and Tags let you turn those layers on or off without forcing full Advanced mode. The checkmarks tell you which optional reading layers are currently visible.
Switch to Advanced view
Advanced is the richer reading mode when branch shape, refs, and tags matter. This step returns you to the view toggle after the Basic actions & options menu so the next step can switch that richer mode on cleanly.

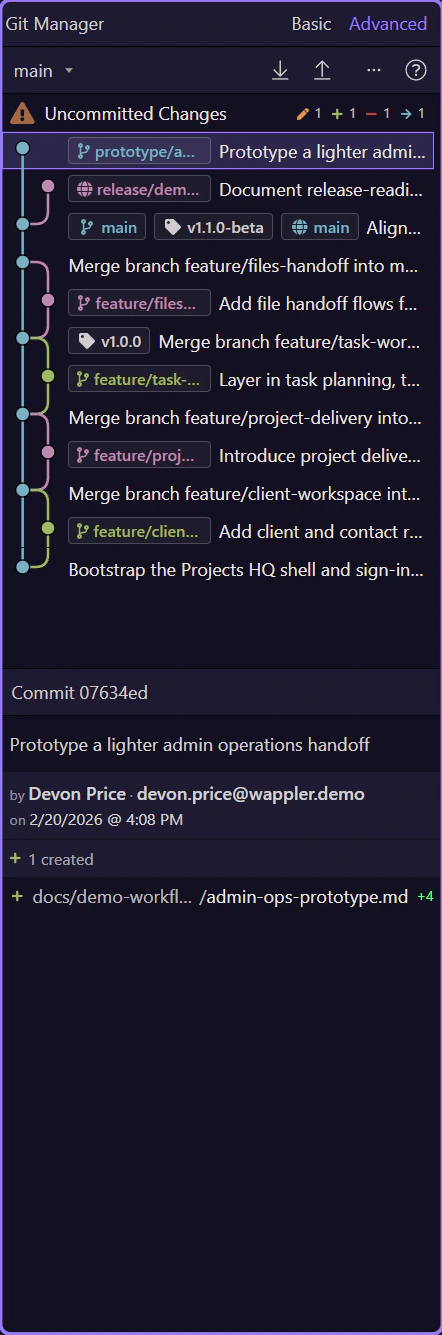
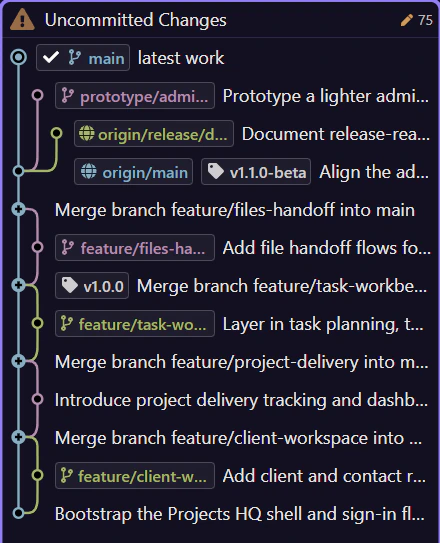
Advanced view exposes graph, refs, and richer history context
Advanced view is active here in the history list. The same commits now carry graph lines, branch refs, remote refs, and tags so you can read branch position and merge shape instead of only a flat timeline.

The Advanced actions and options menu opens from the toolbar
Use Next here to open the real actions & options menu for Advanced mode while Advanced is still selected. The point is to see the live reading controls while the selected Advanced button is still on screen.

Advanced exposes full history reading controls
This is the real Advanced actions & options menu. Refresh and Fetch still maintain the repository picture, but Advanced adds three reading groups. The View submenu lets you toggle between the full history and just the current branch. The Show submenu gives you toggle items for Commit Graph, Tags, First Parent Only, and Decorated Commits Only, with checkmarks showing the active reading layers. Order lets you read the same graph either By Date or Topologically, depending on whether chronology or branch shape matters more.
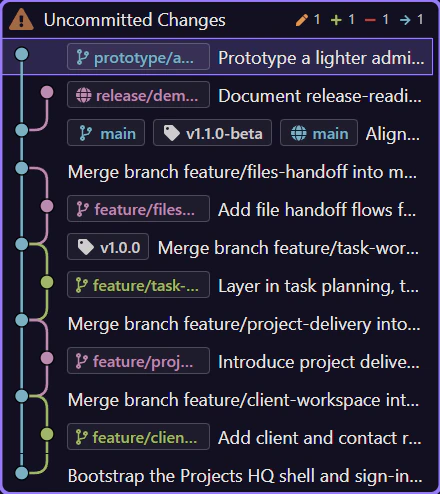
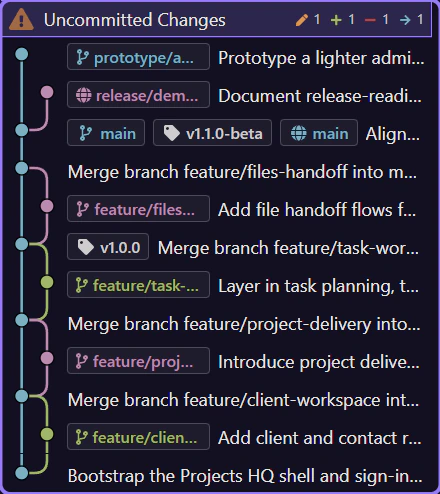
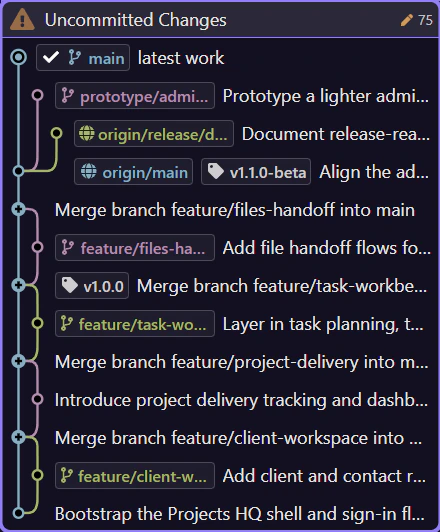
The history list mixes now and then on purpose
Read the main list as two adjacent layers. The pinned Uncommitted Changes row answers what is different right now. The commit rows below answer what has already been recorded. In Advanced mode those same commit rows gain graph lines and refs, but the basic interaction stays the same: pick a row, then read the matching detail workspace.

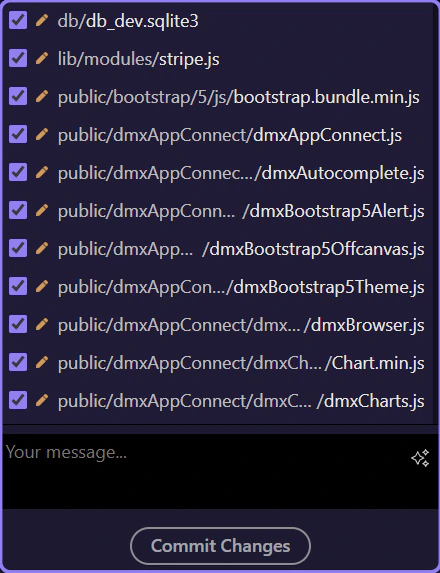
Uncommitted files use a checkbox list, not the same selection model
When you select Uncommitted Changes, the lower file list switches to checkbox selection because the job here is staging. That list is built with the new wui-list control as well, but its interaction is intentionally different from the commit history: history rows change the active snapshot, while status rows decide which current files are included in the next commit.
Selection decides which detail workspace opens
Selection decides which detail workspace opens. Click Uncommitted Changes and the lower workspace becomes commit preparation: current file list, selection controls, discard actions, and the commit box. Click a specific commit row and the same area switches to inspection: commit message, author, totals, and the committed files shown below. The right-hand surface is meant to change with the row you selected.
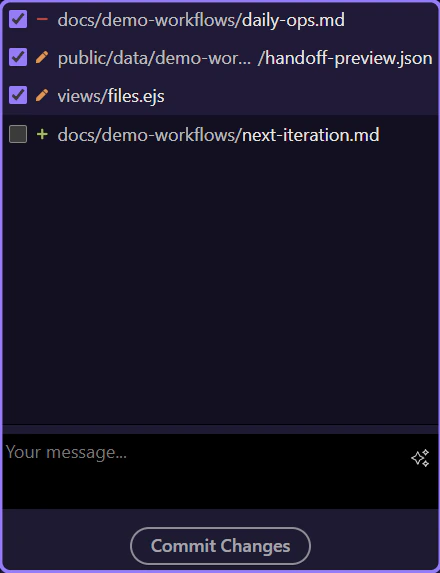
The uncommitted preview has its own tools and commit box
The uncommitted preview is operational, not historical. Its toolbar is about shaping the next commit with Select All, Select None, and Discard All, and the commit message box is where that reviewed selection becomes a named snapshot. Those controls disappear when you switch to a past commit because history inspection should not look like staging.

The real commit context menu opens from the selected row
Use Next here to select a real commit row and open its context menu so the branch, tag, and recovery actions are visible on the following step.
Commit context menus now gather the branch and recovery actions
This is the real commit context menu on the selected history row. This is where you create a branch or tag at this snapshot, checkout, reset, or revert the commit, and manage attached refs from the same place you were inspecting.

Close the open menu
Close the open context menu so the history list becomes the active surface again. That reset matters because the next step deliberately reselects a commit and turns the lower workspace back into the summary-and-files inspection state.
Return to Advanced view
Switch back to Advanced view before selecting the commit so the summary strip is introduced with the richer commit context already restored.

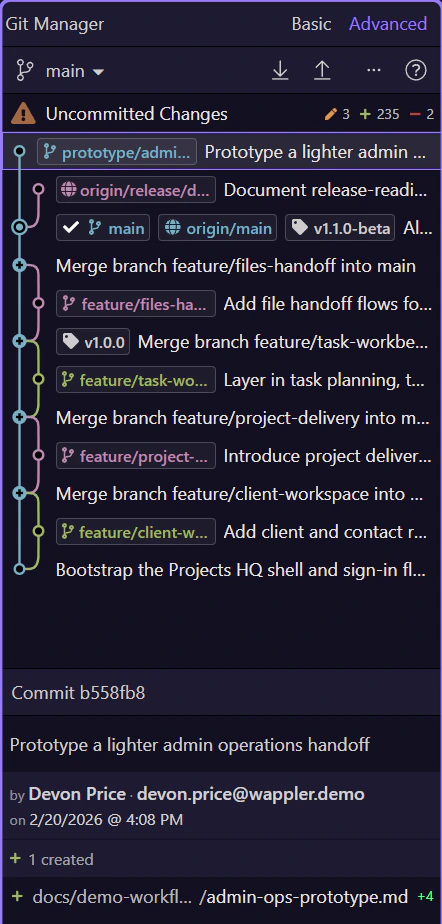
Selected commits expose a summary strip and a read-only file list
With a real commit selected, the lower workspace changes from staging to inspection. The summary strip gives quick totals for that snapshot, and the committed file list underneath is a read-only wui-list used for diff-oriented inspection instead of checkbox staging. In Advanced mode, file rows also show insertion and deletion counts so the size of the change is visible at a glance.
Special states change the UI instead of hiding the problem
If a project is not yet a repository, Git Manager shows a Create Repository path instead of an empty list. If a merge is active, the manager disables branch switching and sync until the repository is safe again. The UI deliberately exposes those states so you know which class of action is safe.
Continue with a focused Git task
Now that you have the full map, the next useful change is to stop thinking about the whole manager at once and switch to the single workflow you actually need. Pick the focused tour that matches the Git task you want to perform next.
