
Responsive Fullscreen Swiper
In this tutorial we will show you how to create a fullscreen Swiper, similar to the one we created in THIS SHOWCASE. This will require us to add 4 lines of CSS through the Styles panel, but everything
We start with a blank page, as we don’t want anything else on the page. Right click App:
Section titled “We start with a blank page, as we don’t want anything else on the page. Right click App:”In this tutorial we will show you how to create a fullscreen Swiper, similar to the one we created in THIS SHOWCASE.
This will require us to add 4 lines of CSS through the Styles panel, but everything is really easy even for beginners.
We start with a blank page, as we don’t want anything else on the page. Right click App:

Open Components and add Swiper:
Section titled “Open Components and add Swiper:”
Then right click the swiper component:
Section titled “Then right click the swiper component:”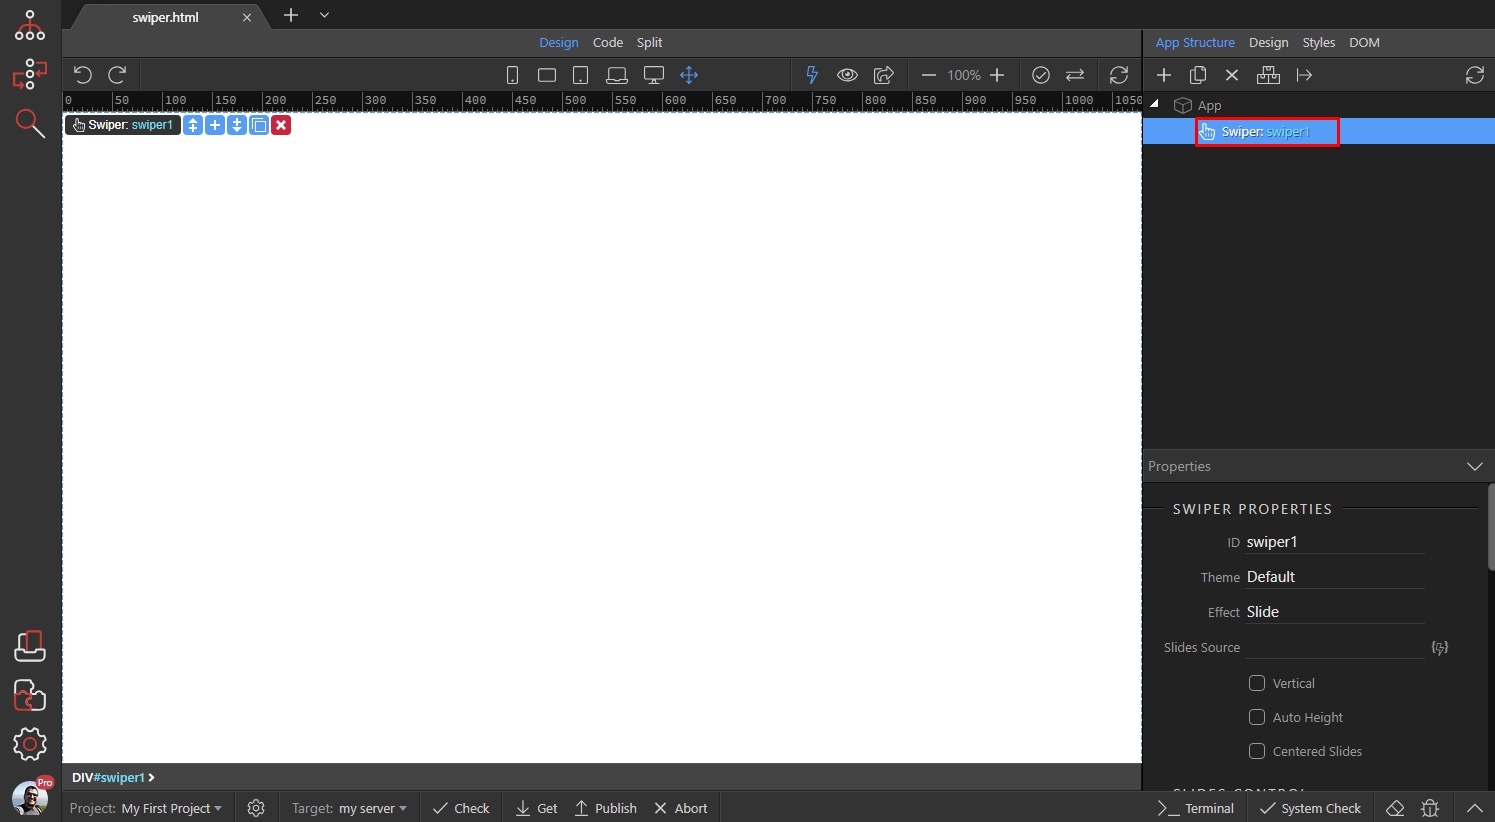
And add a slide:
Section titled “And add a slide:”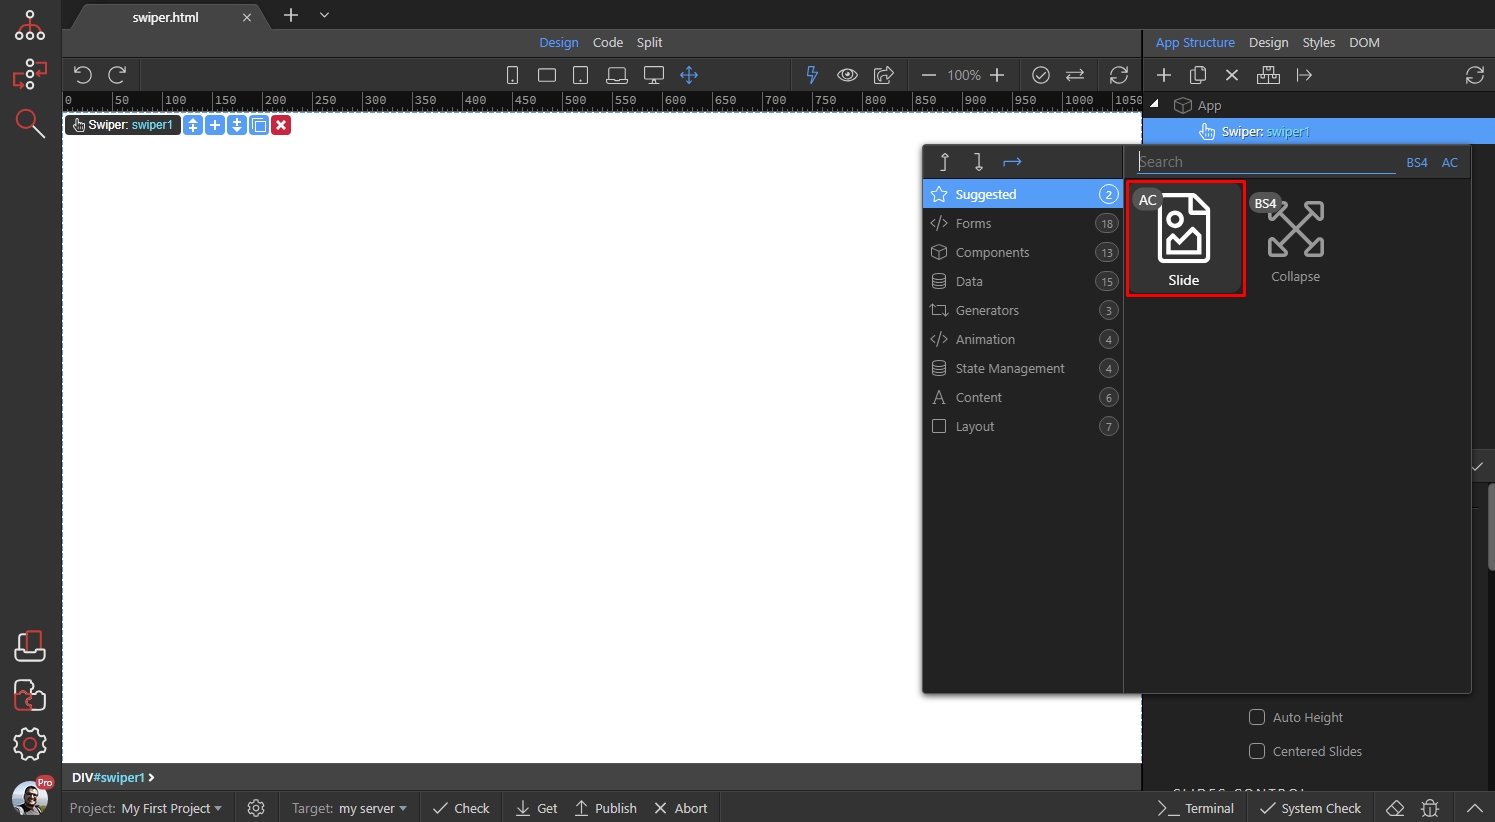
Step 5
Section titled “Step 5”That’s enough for us to apply the custom styles we need. Select the Swiper component (1) and open the Styles panel (2):
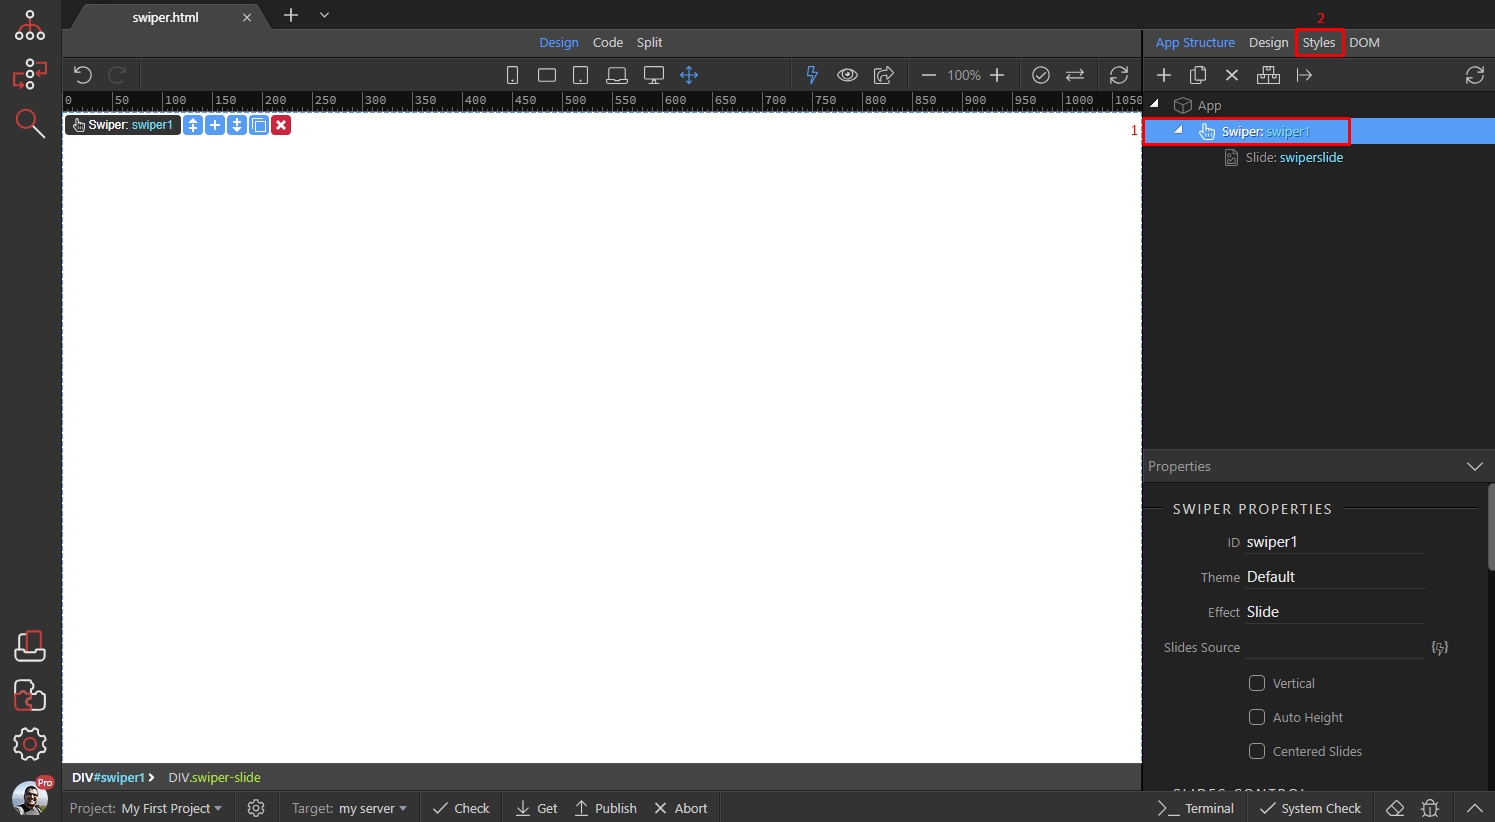
Click the Add New Rule button:
Section titled “Click the Add New Rule button:”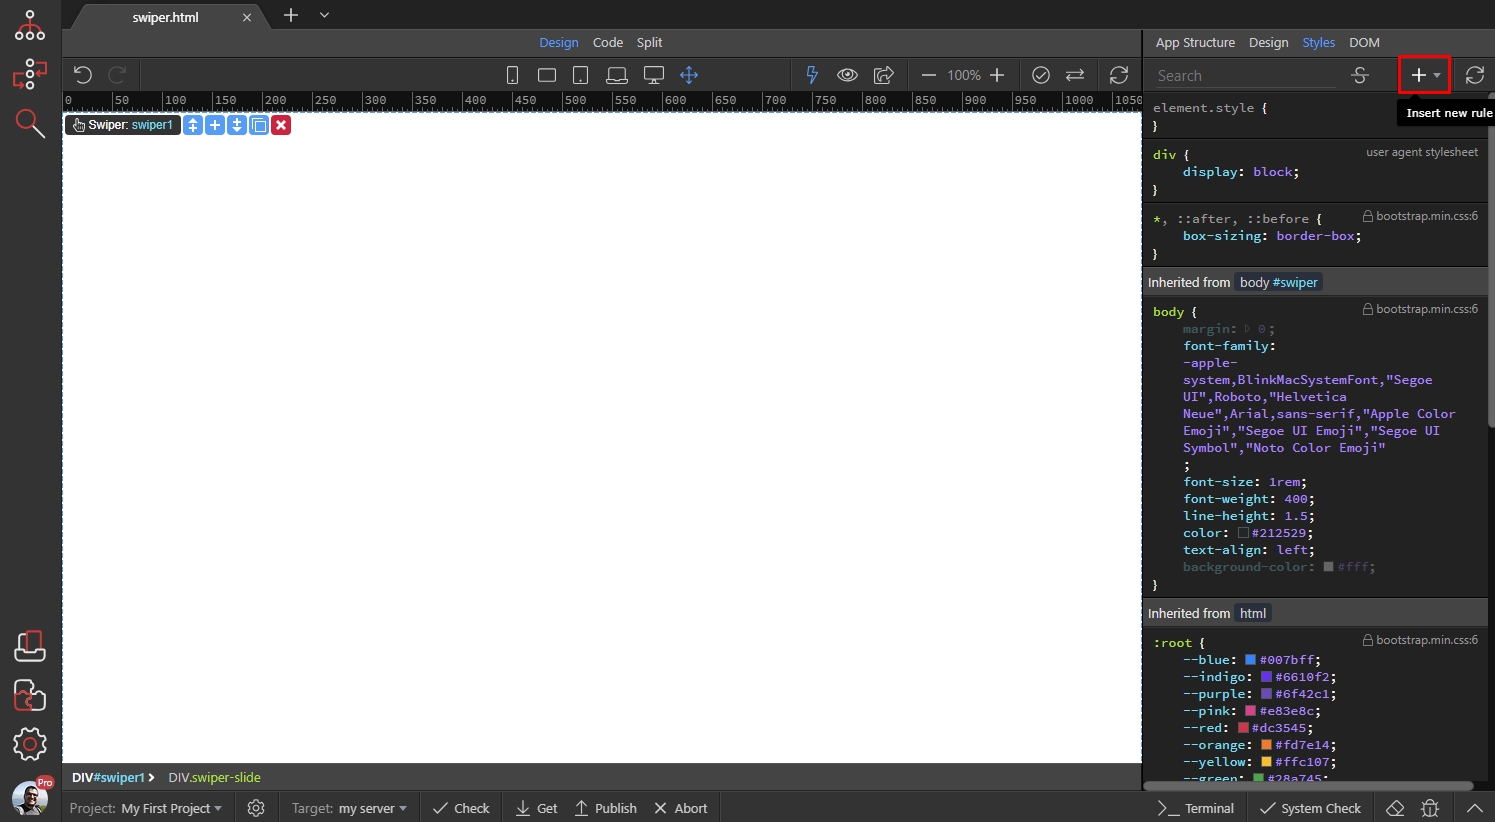
We select to create a custom CSS file, as we don’t have one included on the page:
Section titled “We select to create a custom CSS file, as we don’t have one included on the page:”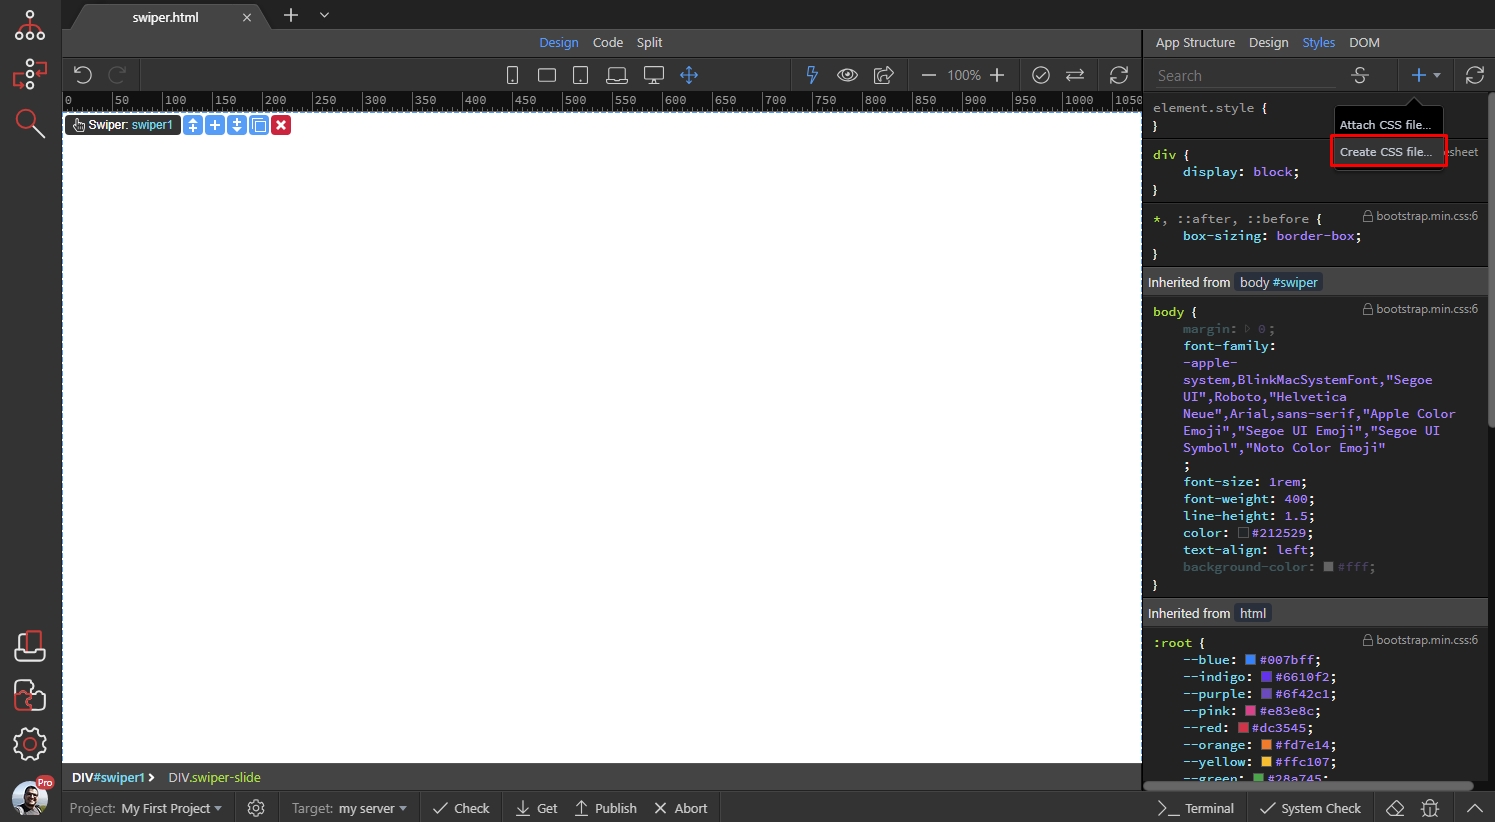
Browse to the folder, where you want to store it, add a name for the custom CSS file and save it:
Section titled “Browse to the folder, where you want to store it, add a name for the custom CSS file and save it:”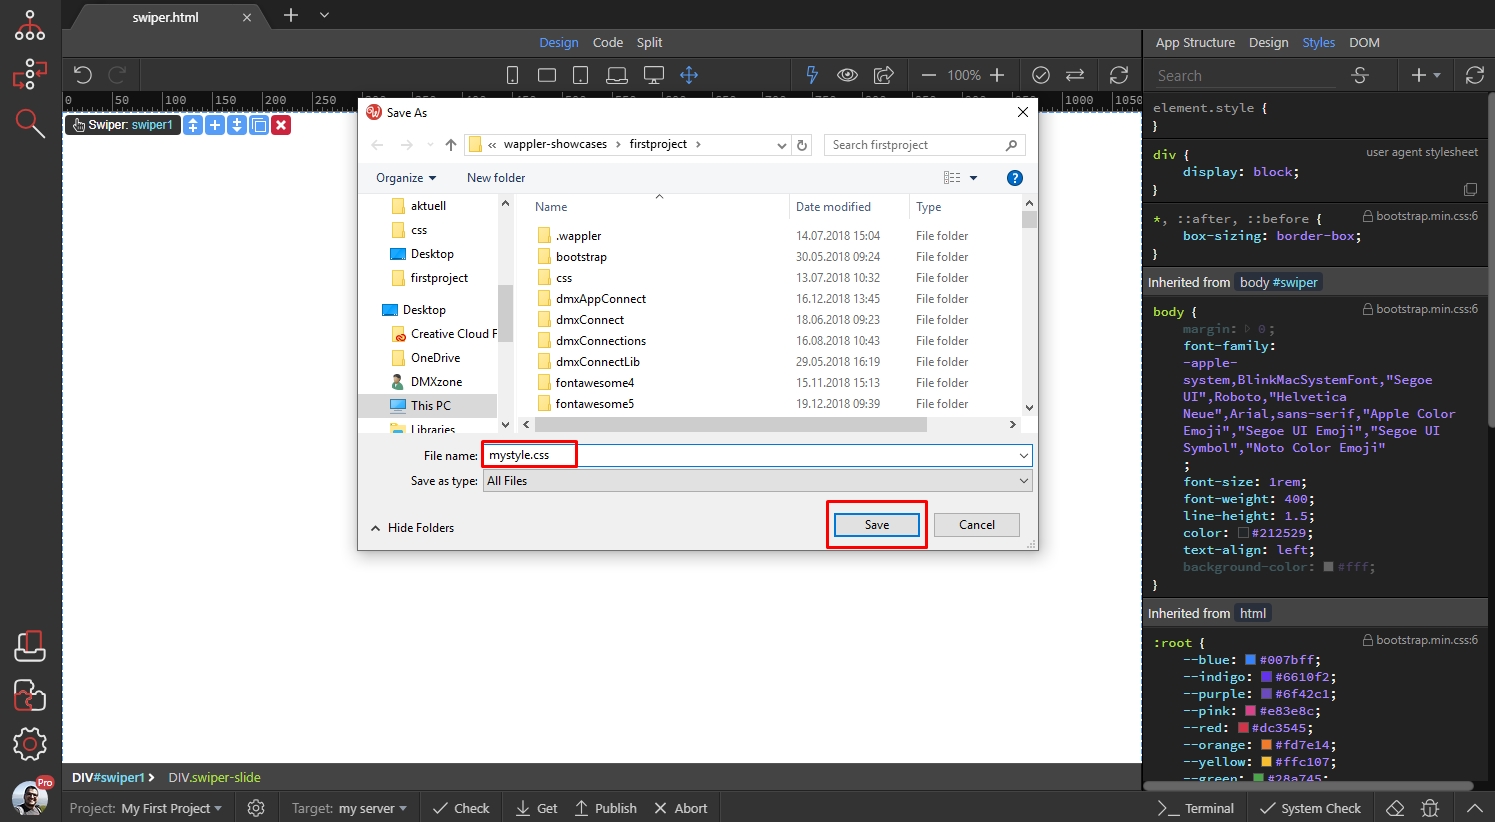
You will see the new selector added and waiting for some rules:
Section titled “You will see the new selector added and waiting for some rules:”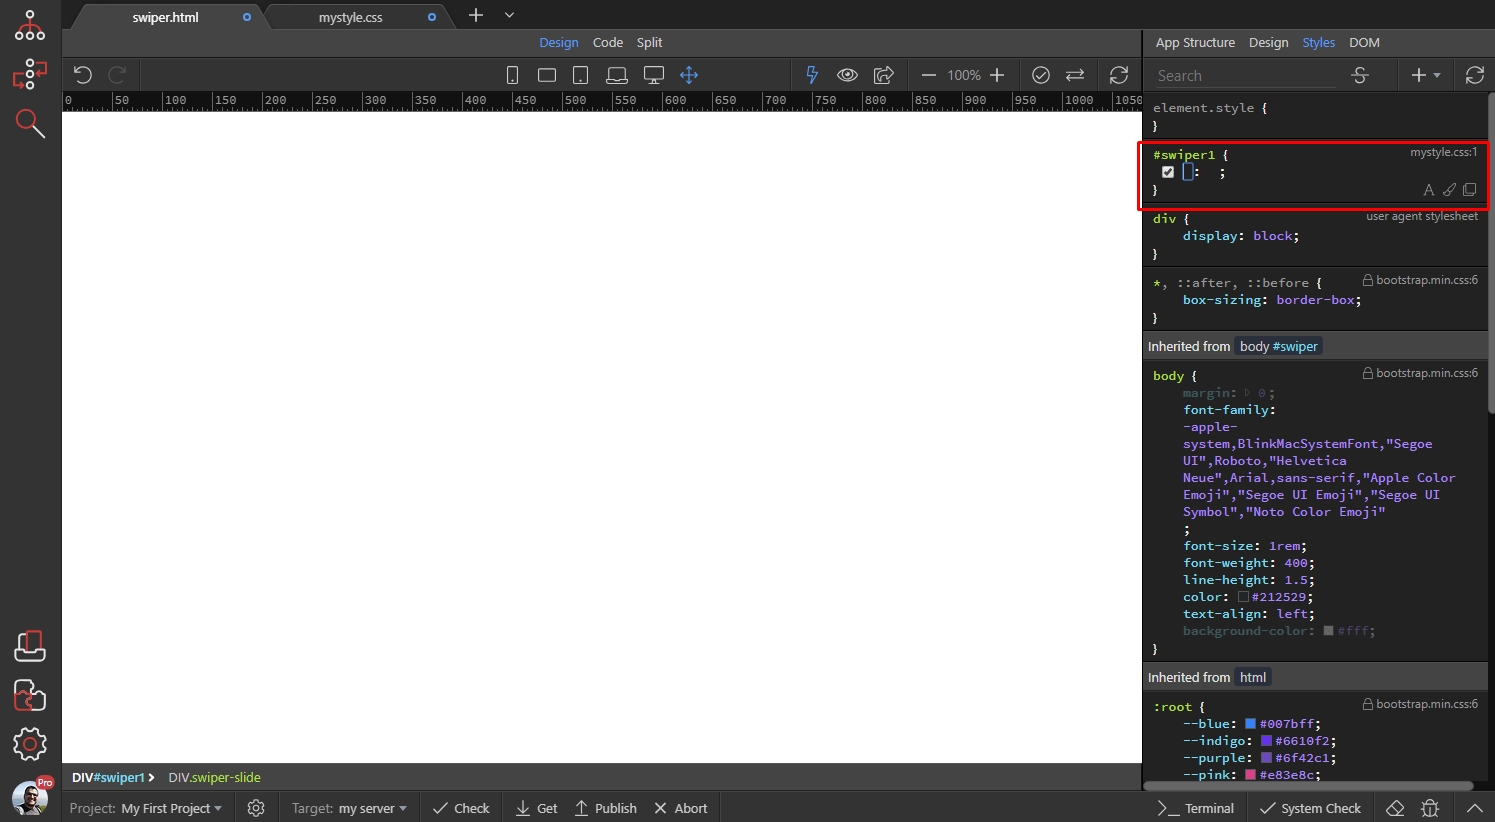
Step 10
Section titled “Step 10”You need to add the following rule there height: 100vh - this will make the Swiper take 100% of the height of viewport:
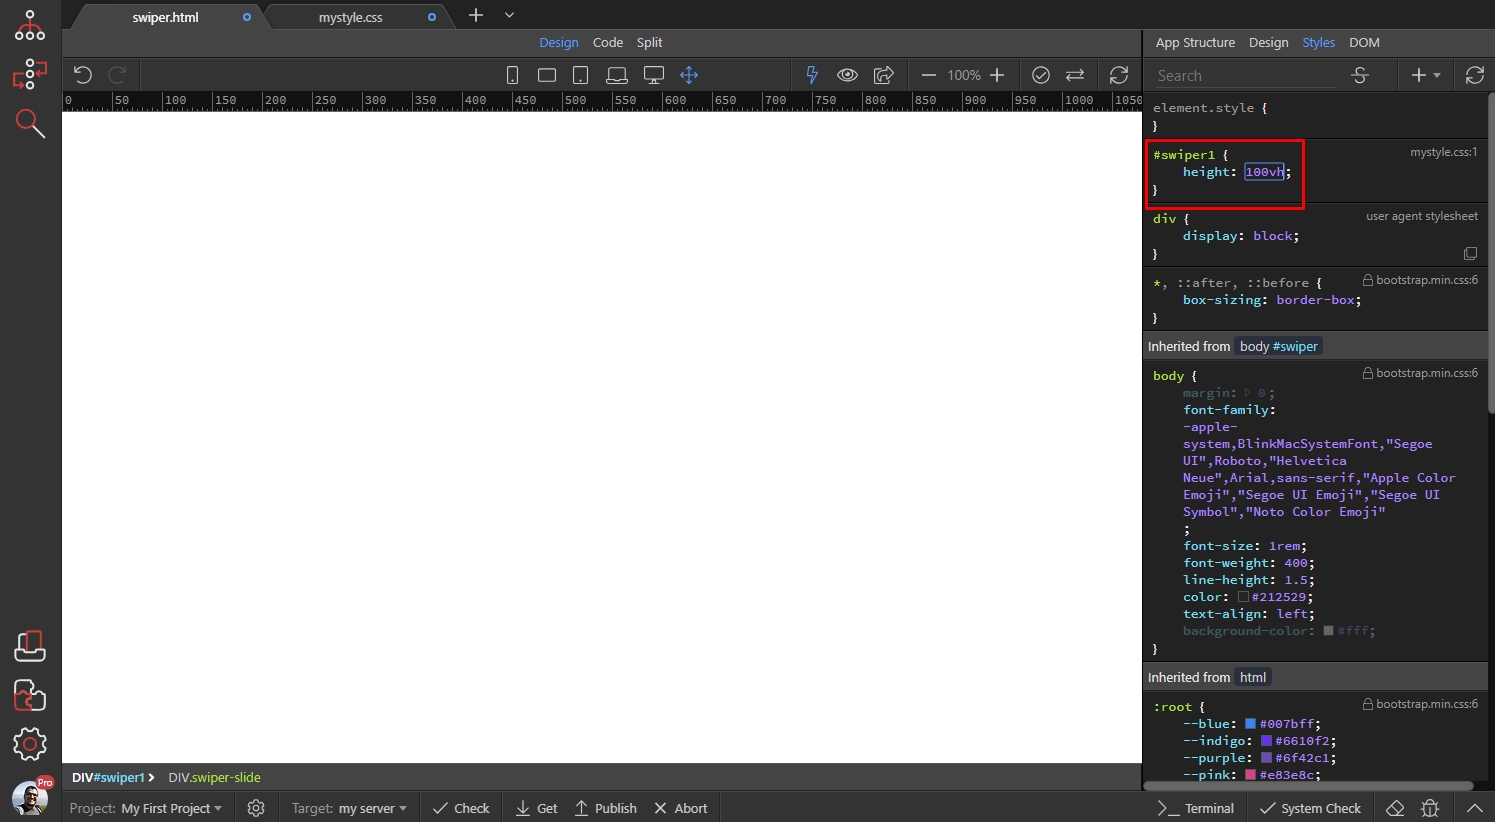
We are done with styling the Swiper container. Now let’s switch back to App Structure:
Section titled “We are done with styling the Swiper container. Now let’s switch back to App Structure:”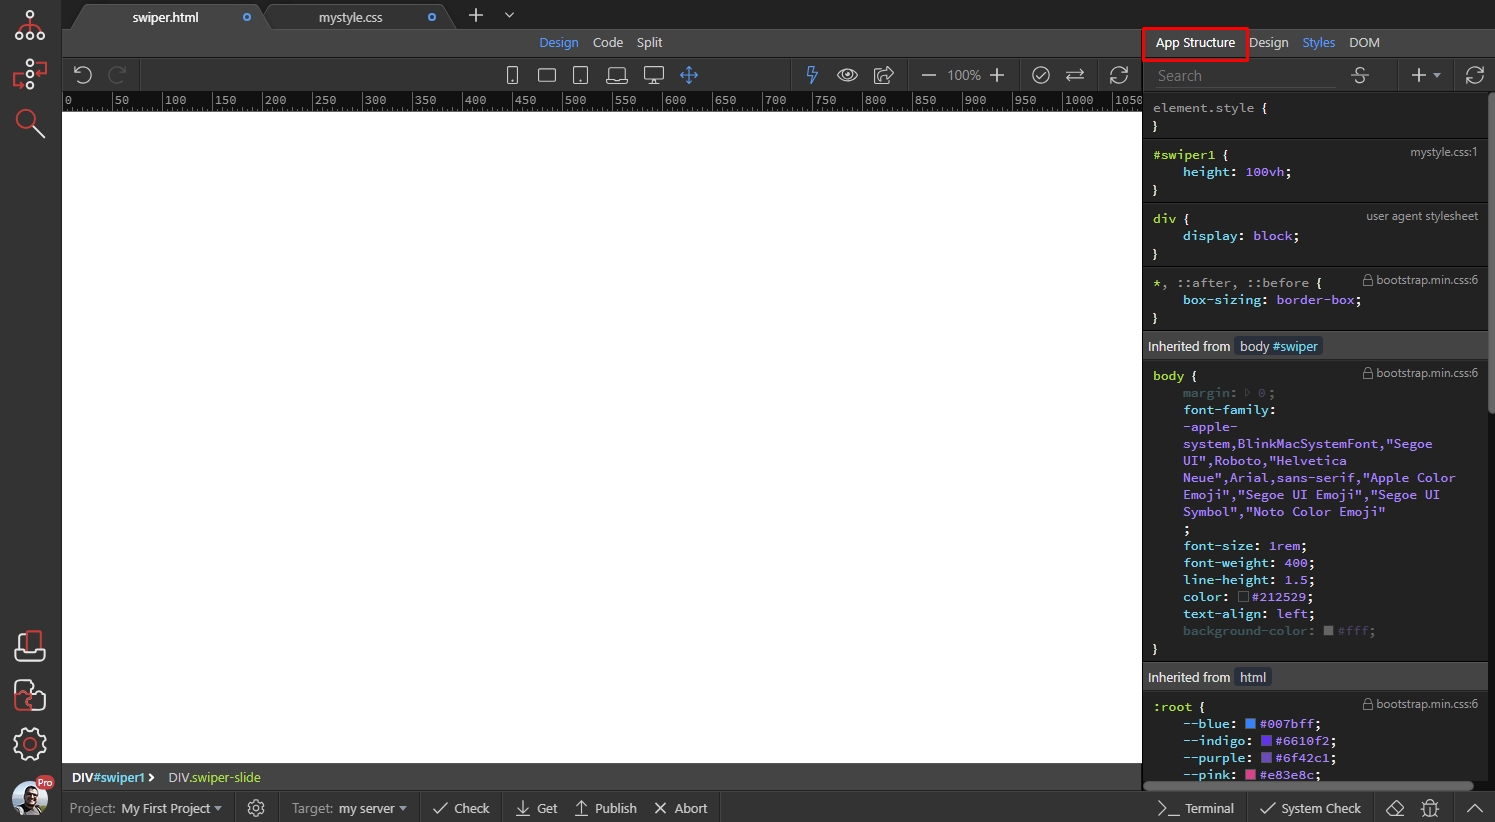
Select the swiper slide (1) and click the Styles panel (2) so we can add some styles to the swiper slides:
Section titled “Select the swiper slide (1) and click the Styles panel (2) so we can add some styles to the swiper slides:”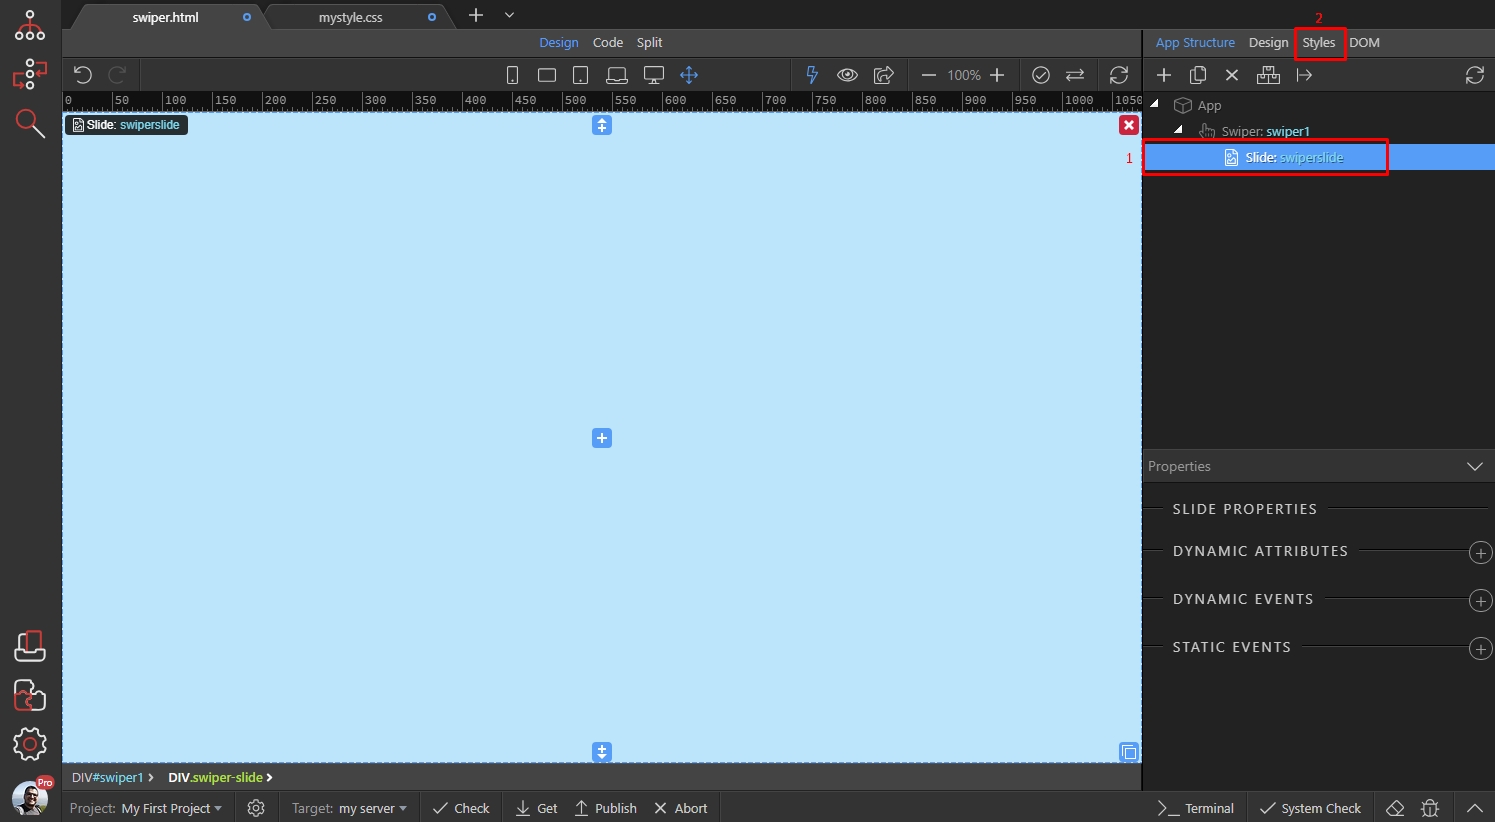
Add new rule:
Section titled “Add new rule:”
Select your custom CSS file:
Section titled “Select your custom CSS file:”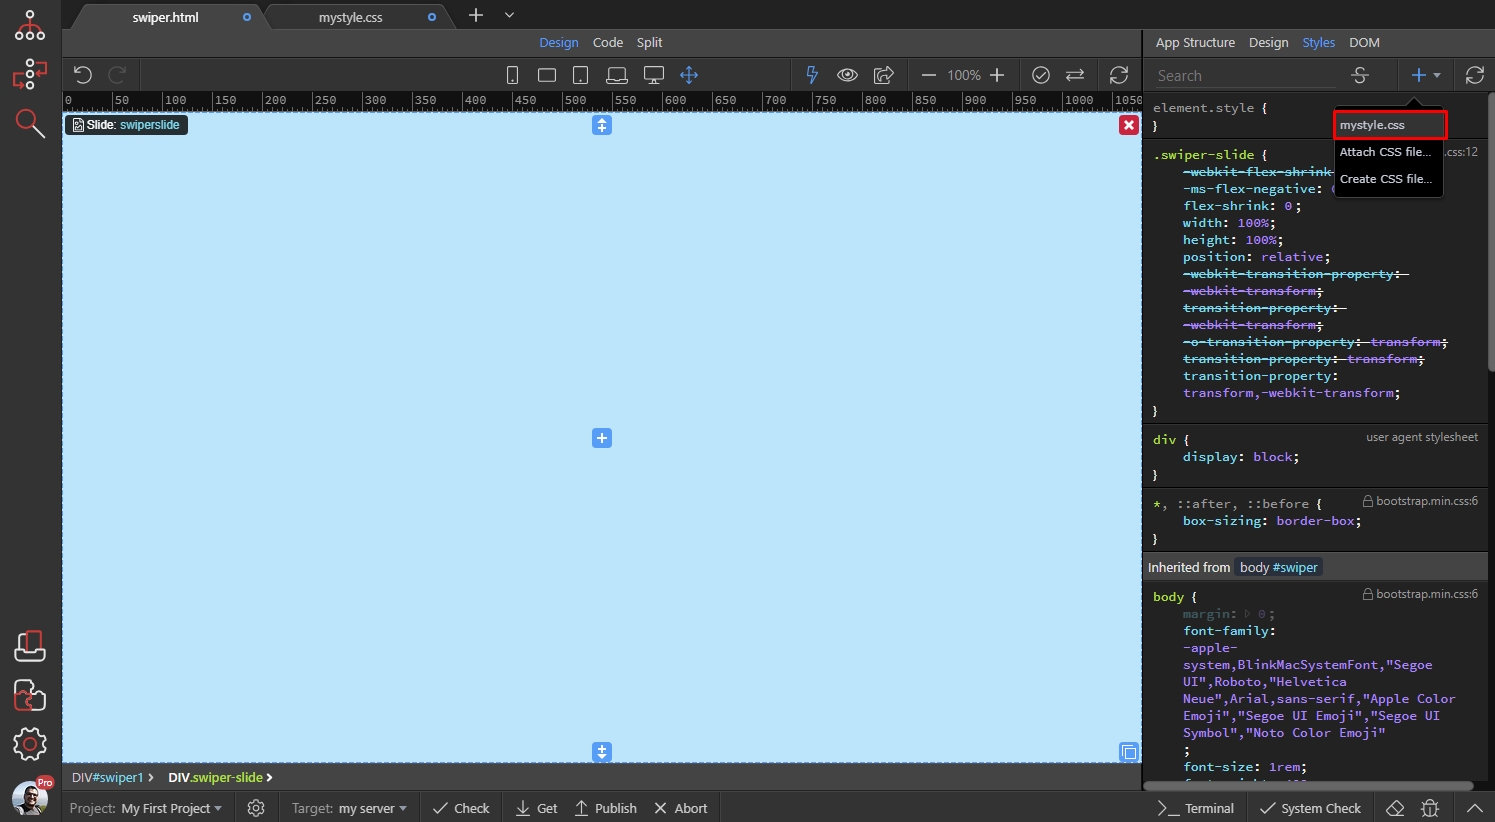
Add the following rules to the div.swiper-slide selector which is added there:
Section titled “Add the following rules to the div.swiper-slide selector which is added there:”background-size: cover;
background-repeat: no-repeat;
background-position: center;
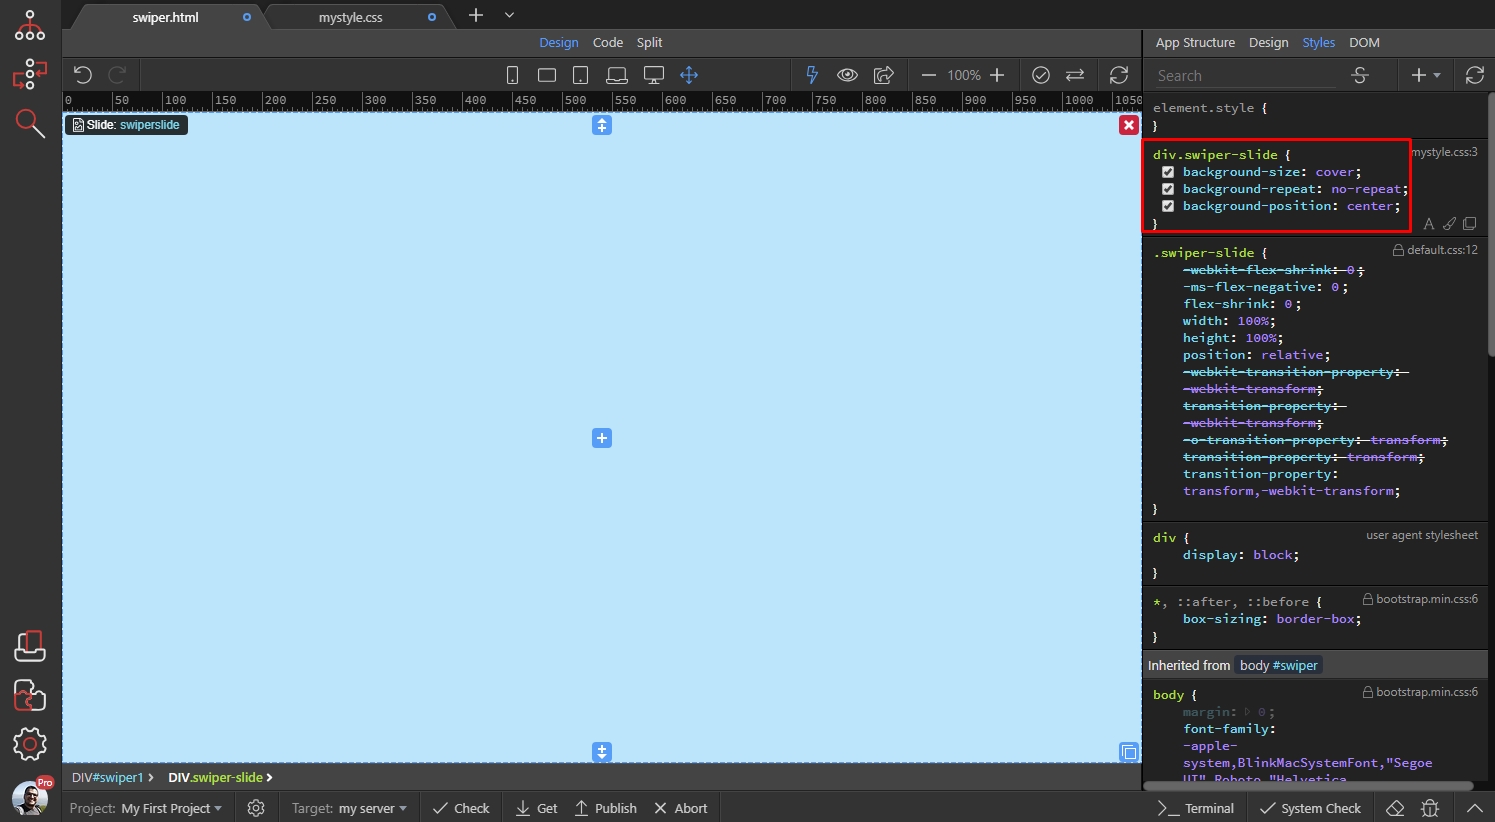
Step 16
Section titled “Step 16”We are done with customizing the Swiper and Swiper Slides. No more CSS rules are needed, now the Swiper is taking 100% height and 100% width of the screen. Also the Slides images will always be fullscreen and centered.
What we need to do now, should be done separately for each of your slides. I.e. - we need to add an image in each slide. The images will be set as background images, so just switch to Design panel:

Under Background, click the browse icon to select a background image:
Section titled “Under Background, click the browse icon to select a background image:”
Select and add it:
Section titled “Select and add it:”
Your image is now set for this slide:
Section titled “Your image is now set for this slide:”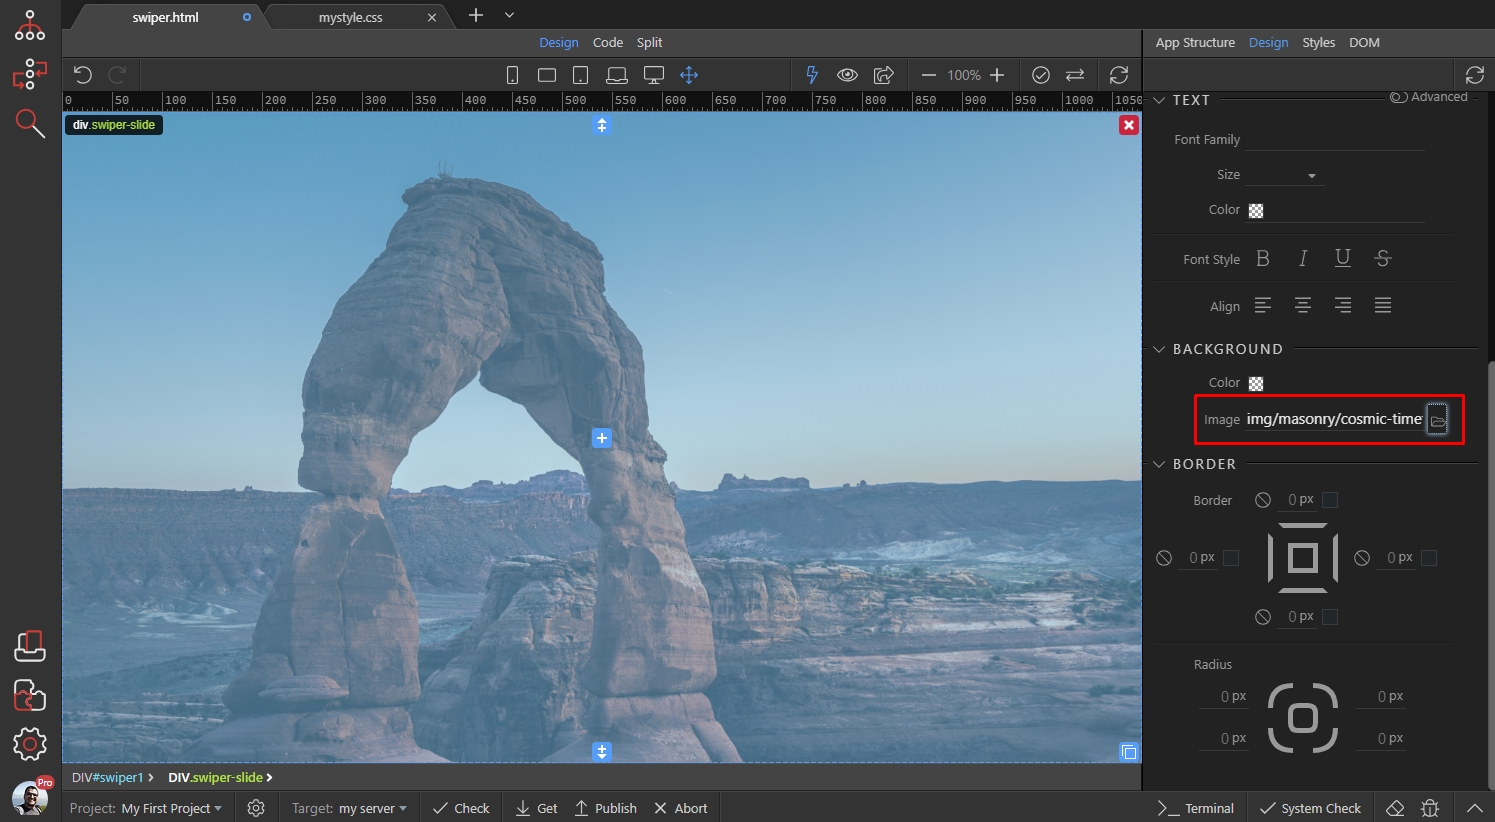
Step 20
Section titled “Step 20”Add as many slides as you wish, and add a background image for each of them. Setup the Swiper effects, paging and controls and you are done!