
Installing Shared Services on Remote Servers
Intro You can install a service, such as a database, on a remote cloud server and use it for different projects. This is useful as you can have a single database server running for all your projects.
You can install a service, such as a database, on a remote cloud server and use it for different projects. This is useful as you can have a single database server running for all your projects.
Setting Up a Database Server
Section titled “Setting Up a Database Server”We are using a cloud server by one of the cloud providers in Wappler, Hetzner:
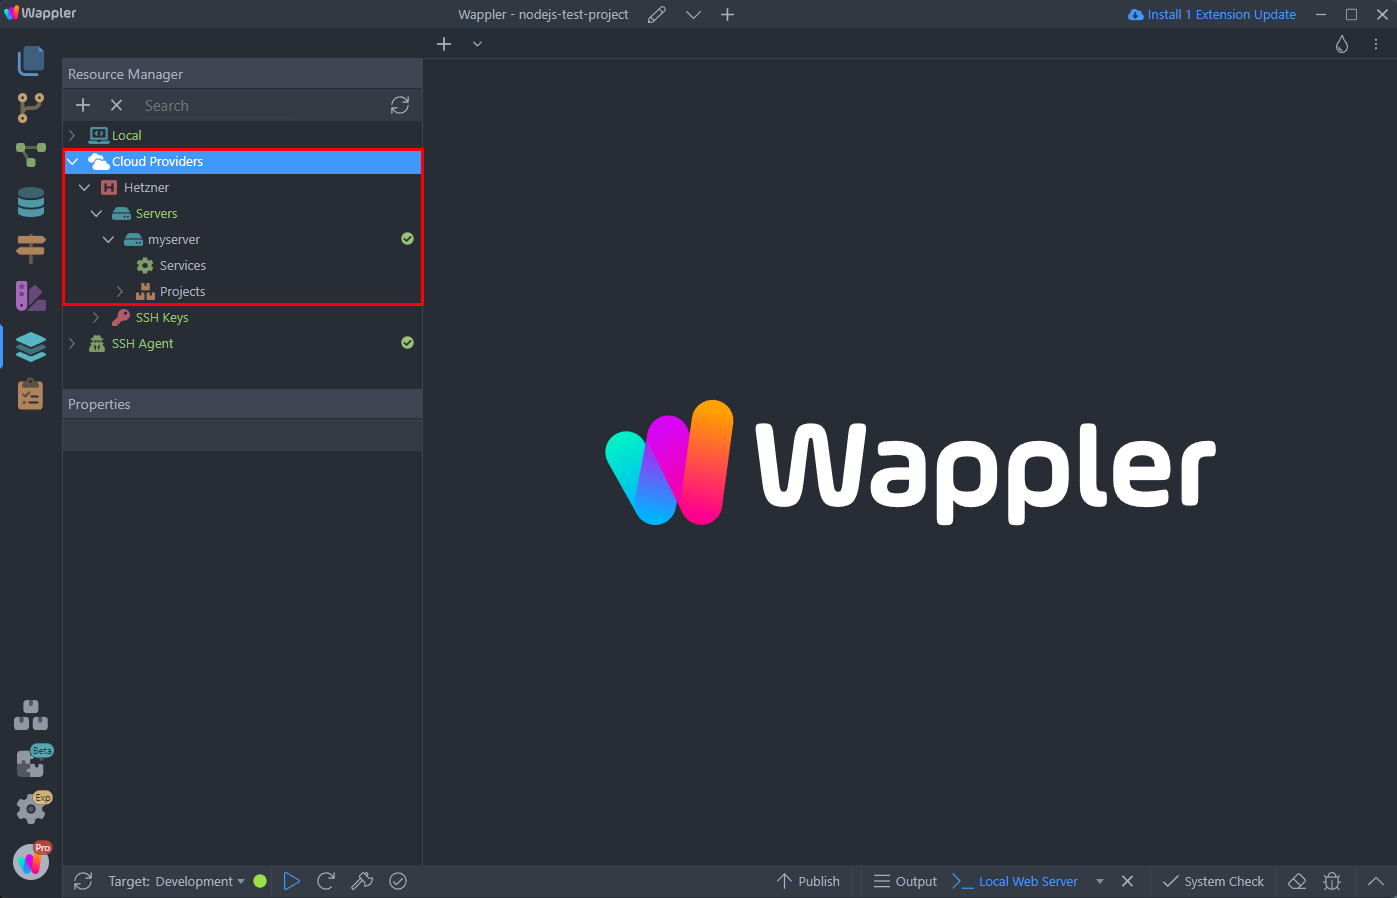
Step 4
Section titled “Step 4”In order to create a database server there, right click services, then select Add Service > Databases > and select the database type which you want to use. In our example that’s MySQL:
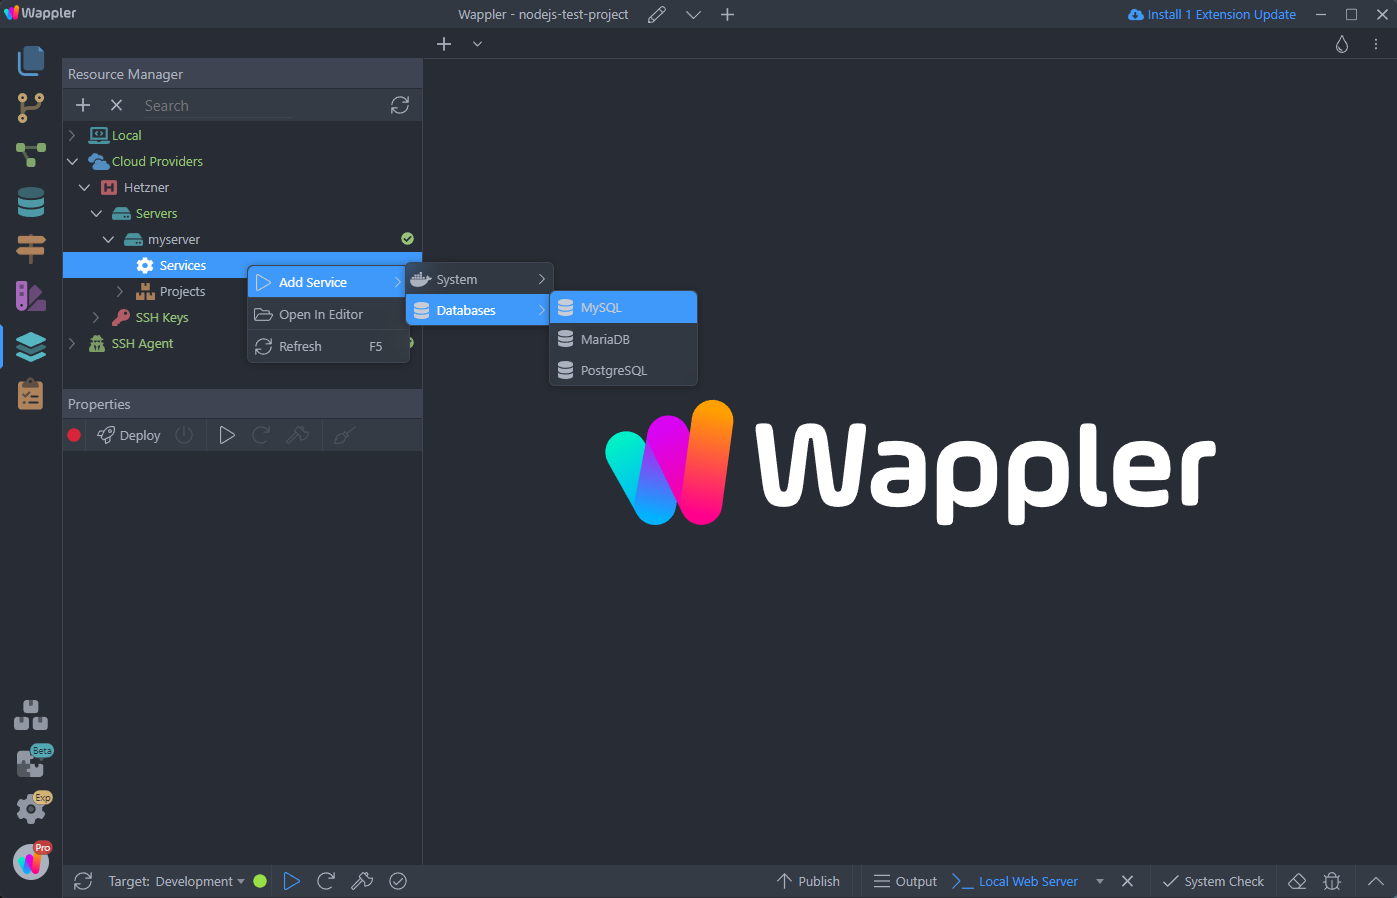
Add a name for the database server:
Section titled “Add a name for the database server:”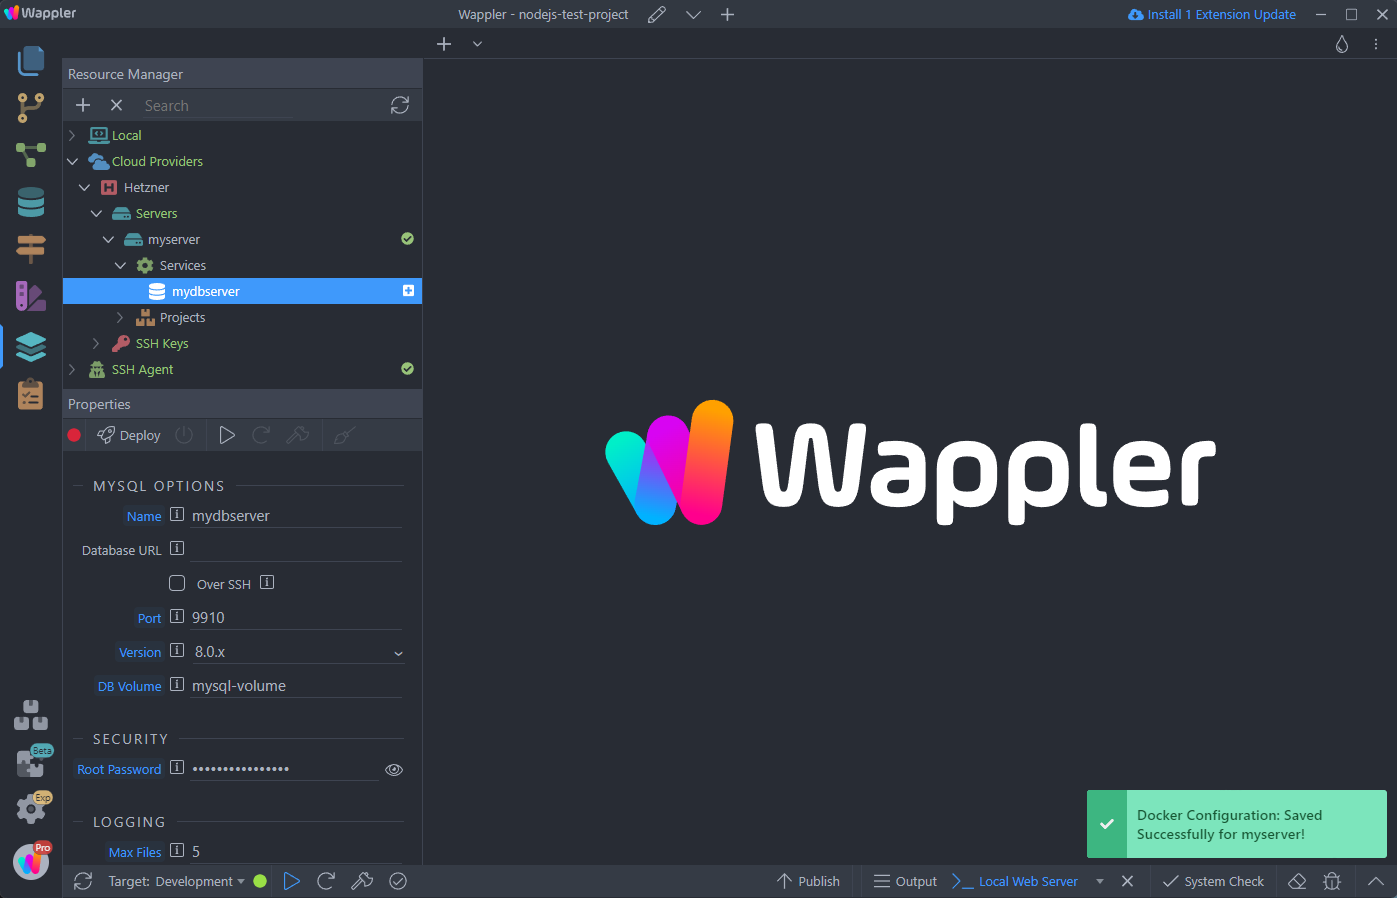
And click Deploy in order to create and start it on your remote cloud server:
Section titled “And click Deploy in order to create and start it on your remote cloud server:”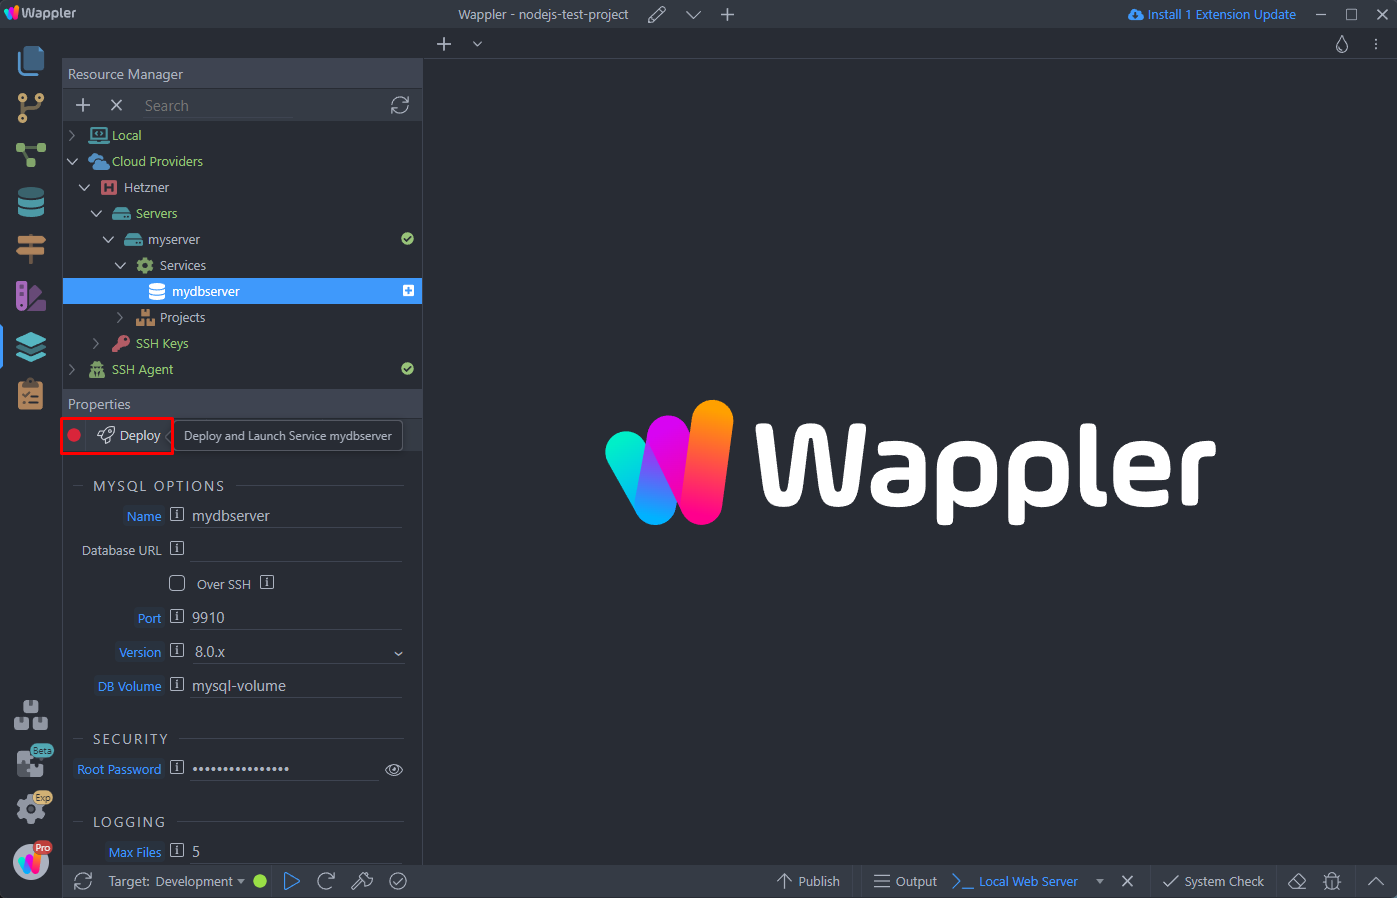
You can see the progress in the bottom panel:
Section titled “You can see the progress in the bottom panel:”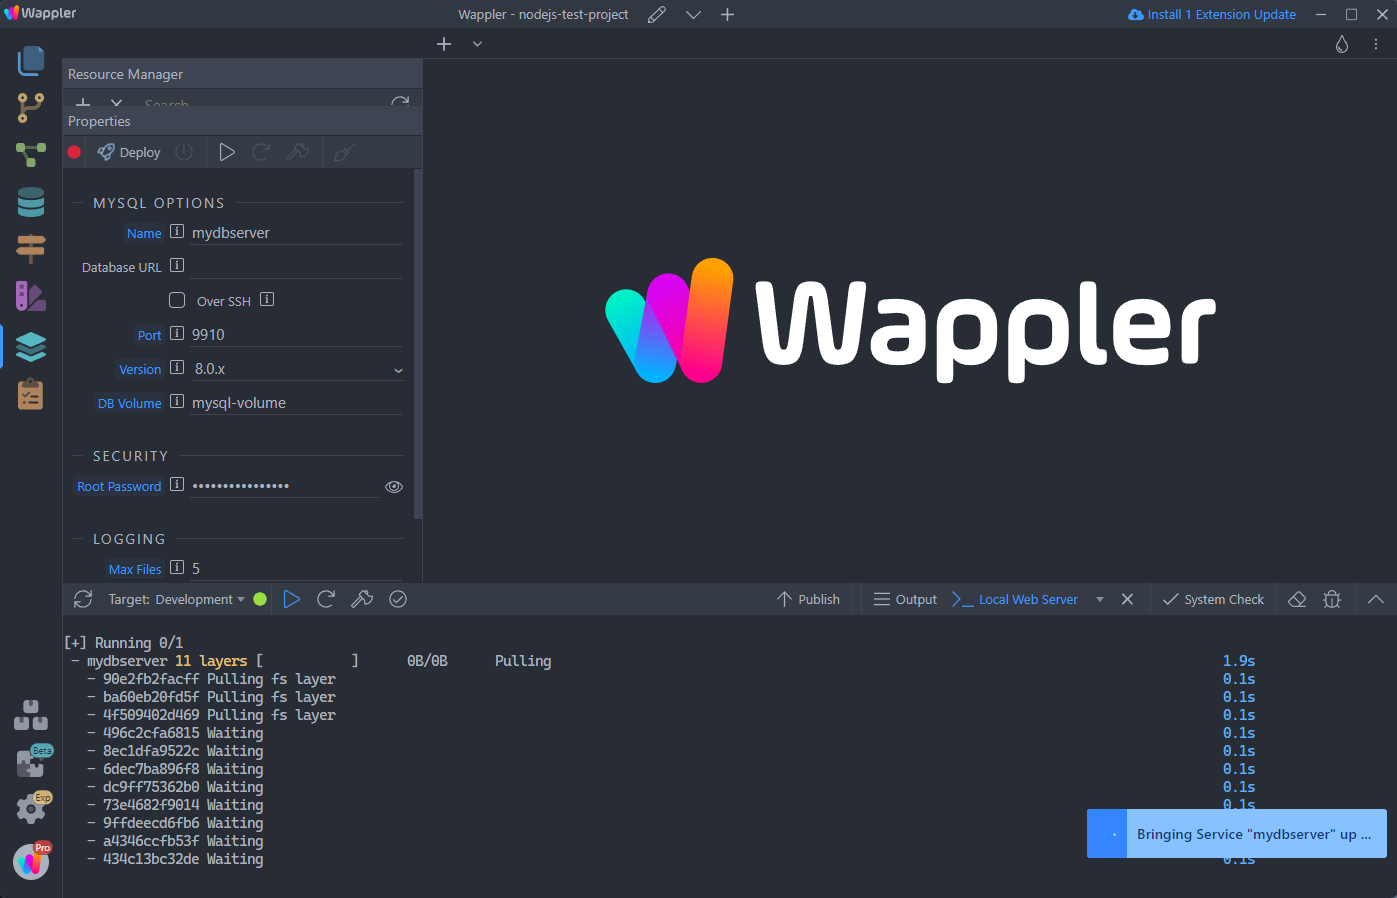
Setting Up a Database:
Section titled “Setting Up a Database:”Once the database server is created, right click Databases and select Add New Database:
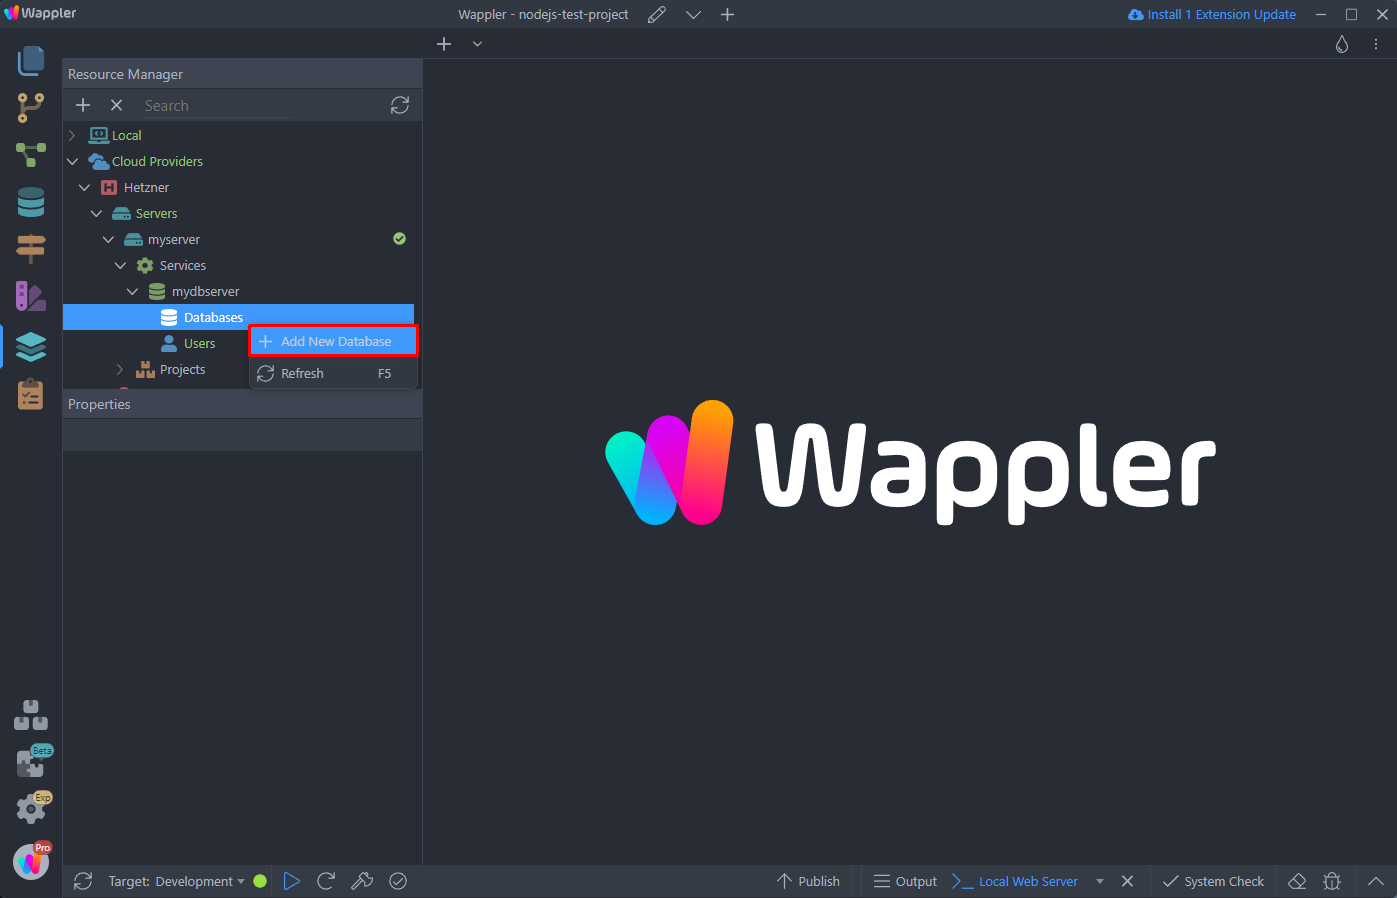
Step 10
Section titled “Step 10”Add a name for your database.
The next step is to add a new database user, so right click Users and Add New User:
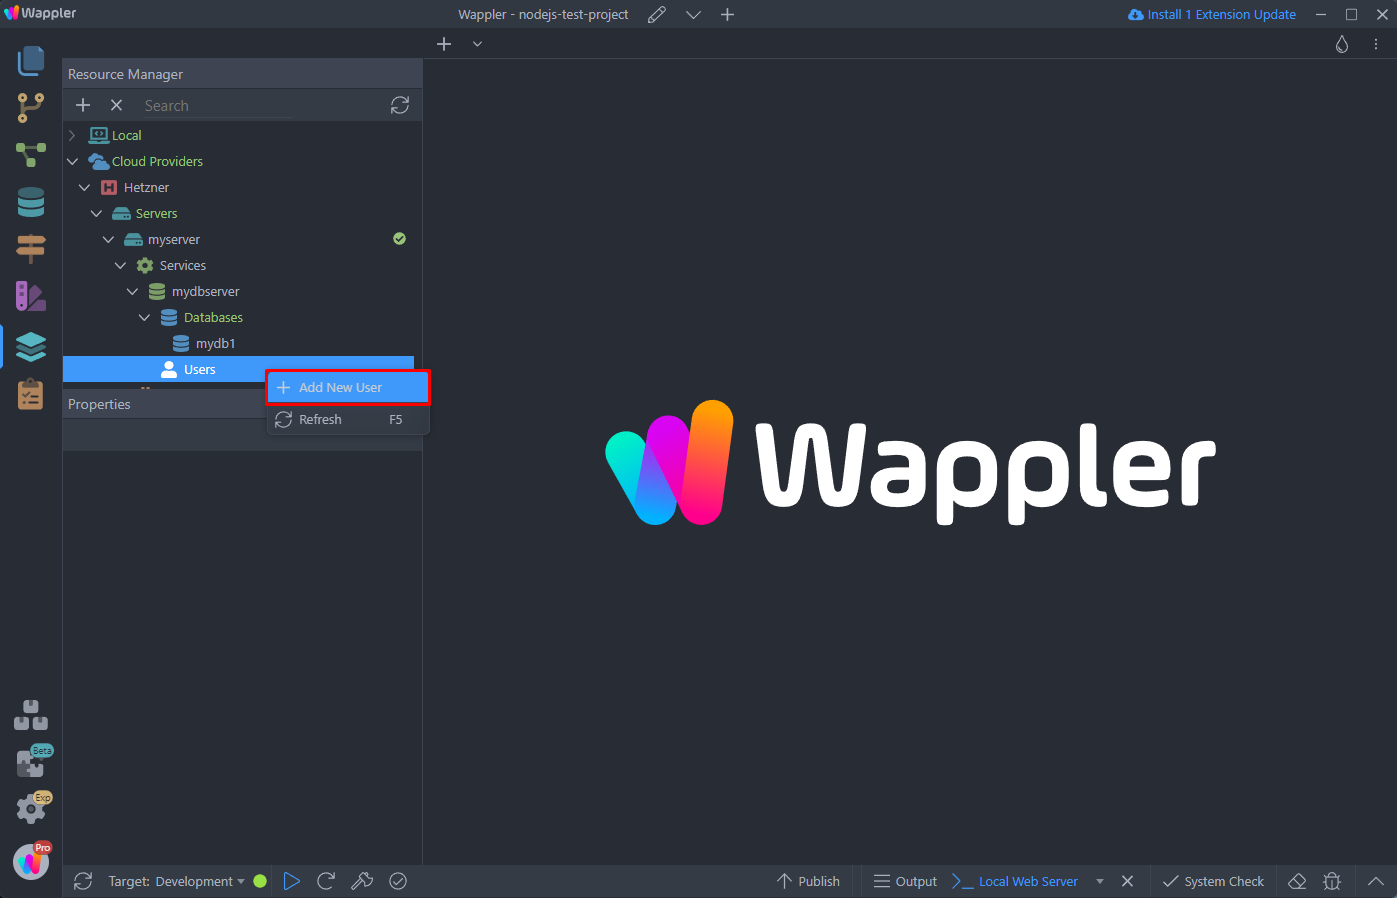
Add a name for the user:
Section titled “Add a name for the user:”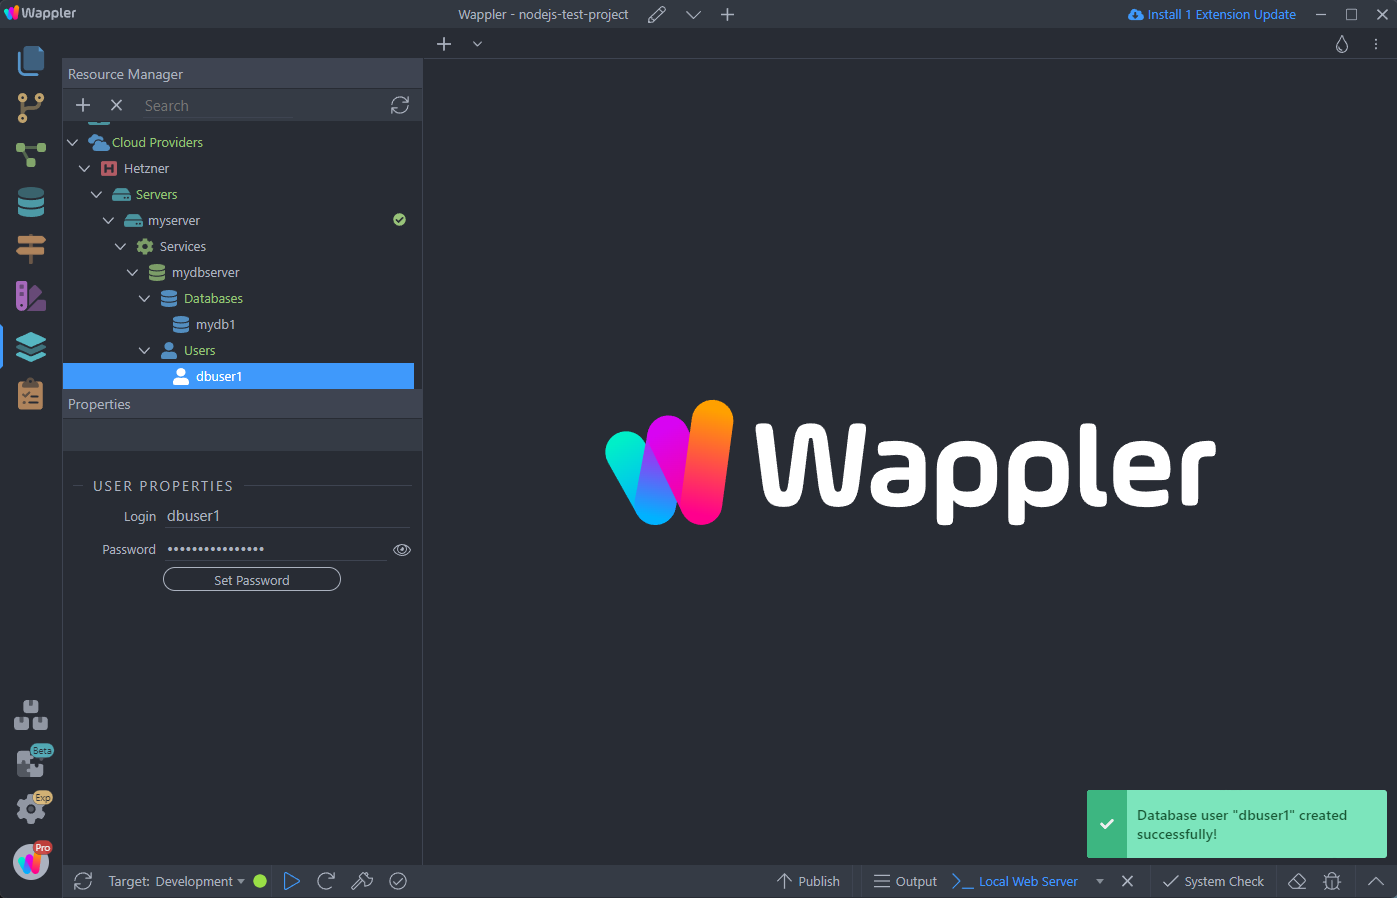
Step 12
Section titled “Step 12”Then select the database you created, select the user from the dropdown and click Grant Users button in order to grant this user access to the database:
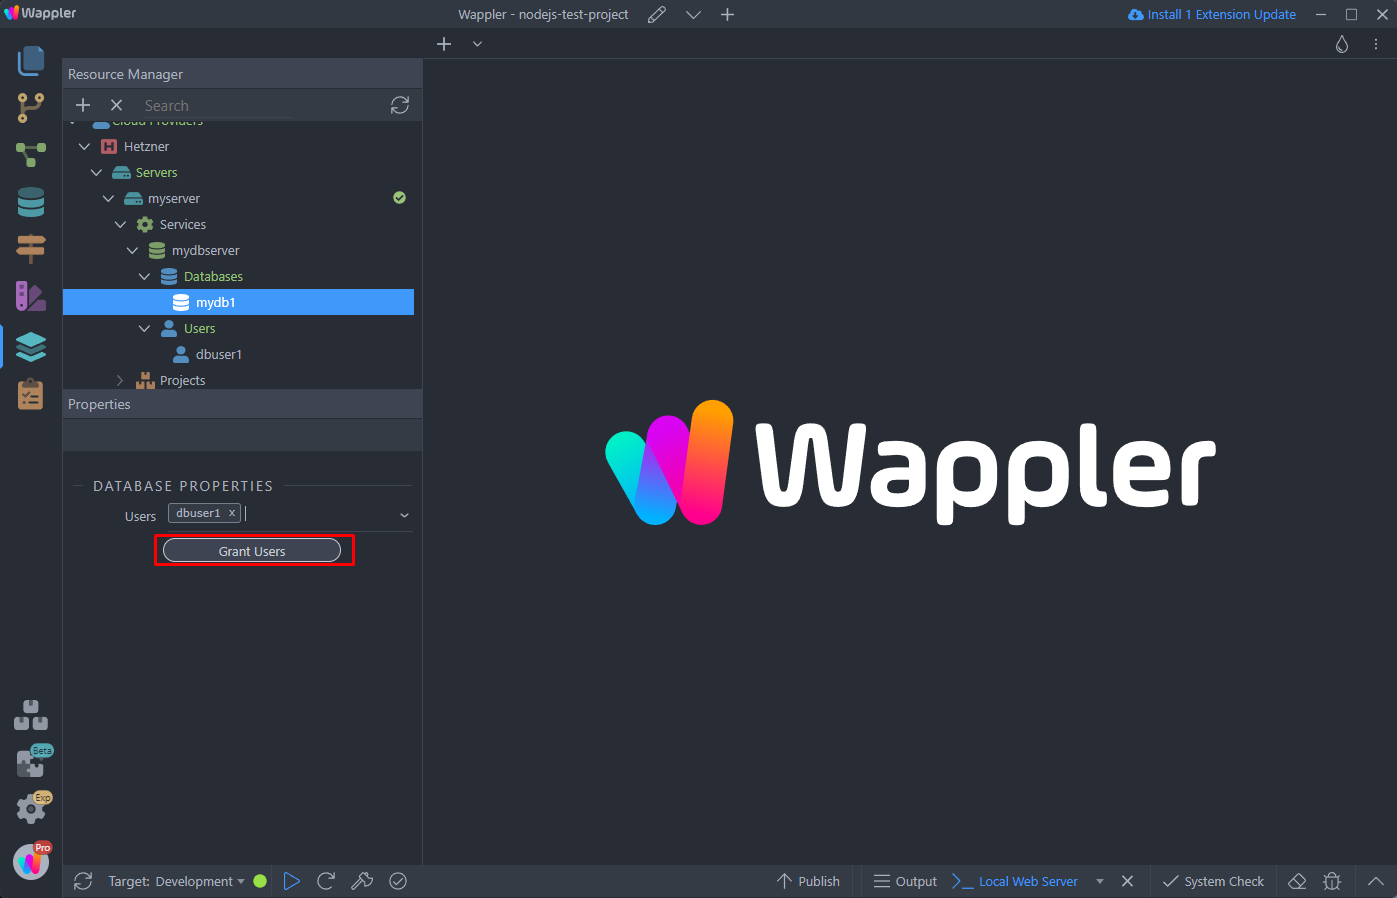
Step 13
Section titled “Step 13”We are done. We have a database server up and running on the remote cloud server and a database, that we created for this project.
Adding Database To a Project
Section titled “Adding Database To a Project”The next step is to add the database we created to our project. Then you will be able to add tables and data using the Database Manager and use them in your Server Actions.
Open the Project Settings:
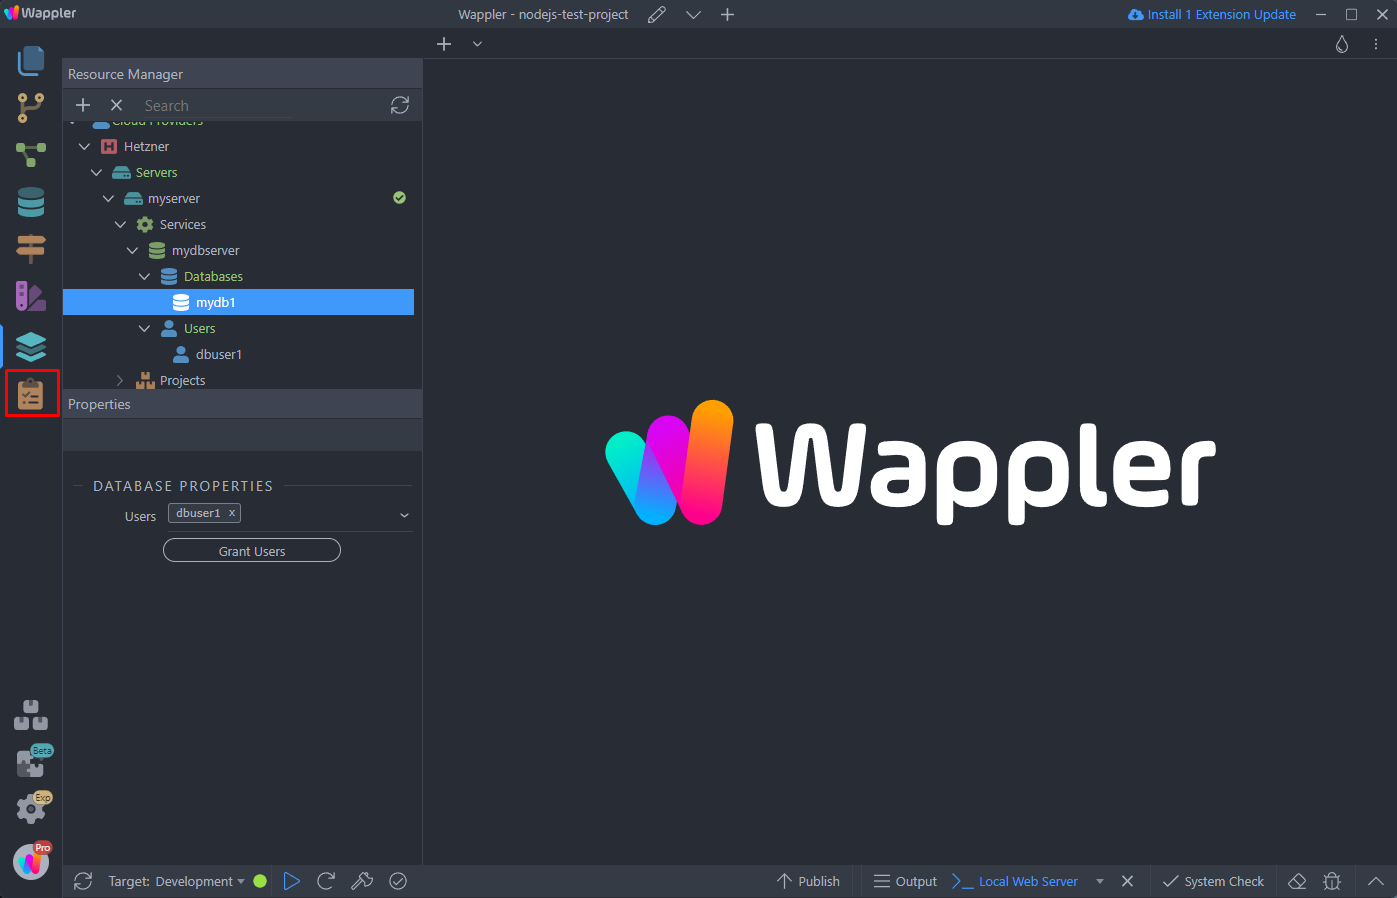
Go to Targets and open the Database Type dropdown, select Cloud Database:
Section titled “Go to Targets and open the Database Type dropdown, select Cloud Database:”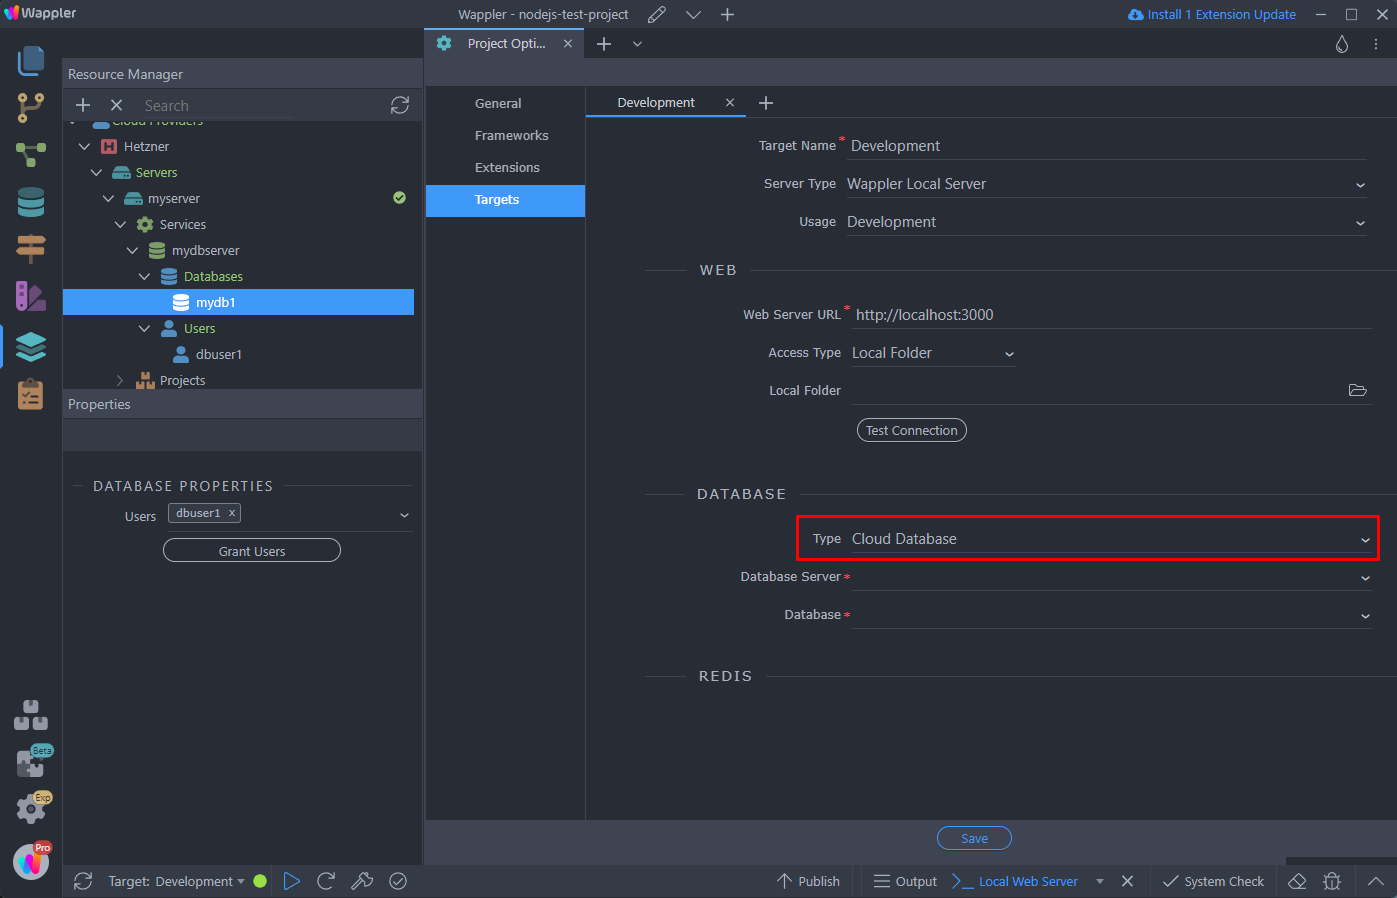
Then select your database server and the database from the dropdowns:
Section titled “Then select your database server and the database from the dropdowns:”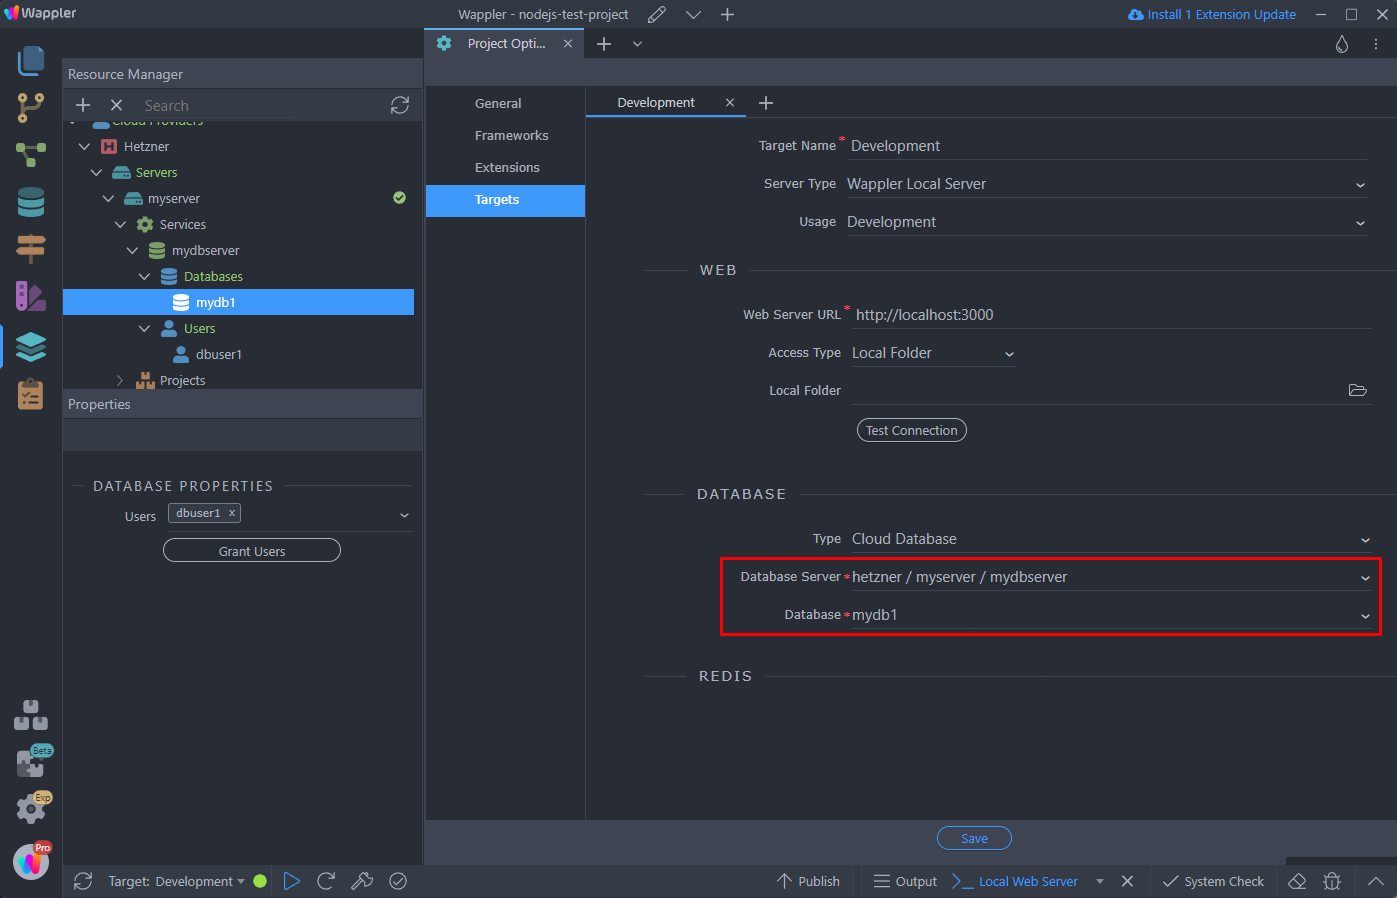
Step 17
Section titled “Step 17”Click save when you are done. Now you can open the Database Manager and you can see that a Database Connection to your database has been created. You can create your tables, add data and also use it in your Server Actions
Importing Database Server in Another Project
Section titled “Importing Database Server in Another Project”You can import the same database server in any other project and setup another database for it there.
Change your project to another one:
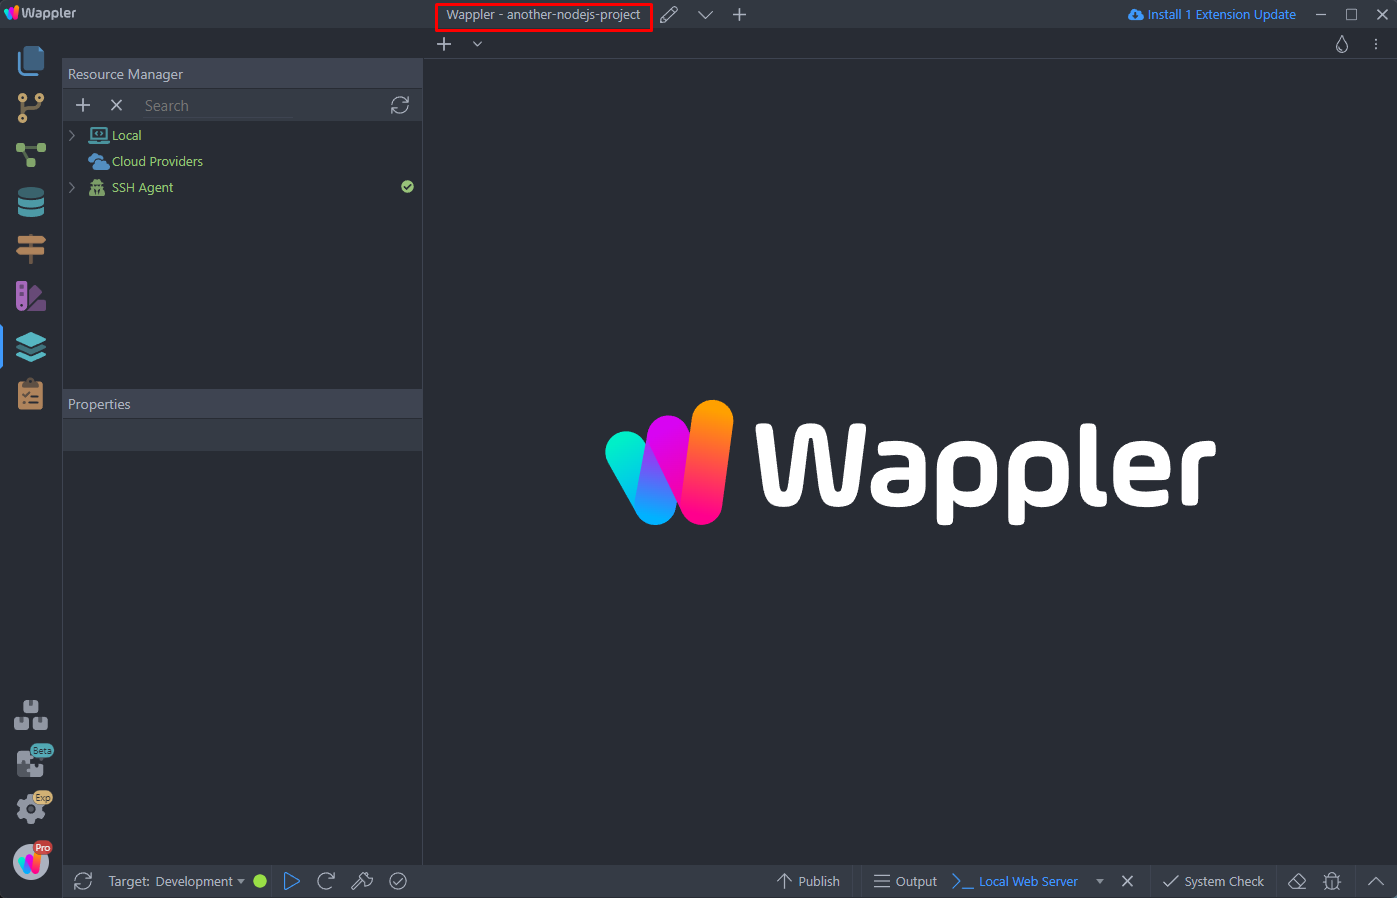
Right click Cloud Providers and select Add New Provider
Section titled “Right click Cloud Providers and select Add New Provider”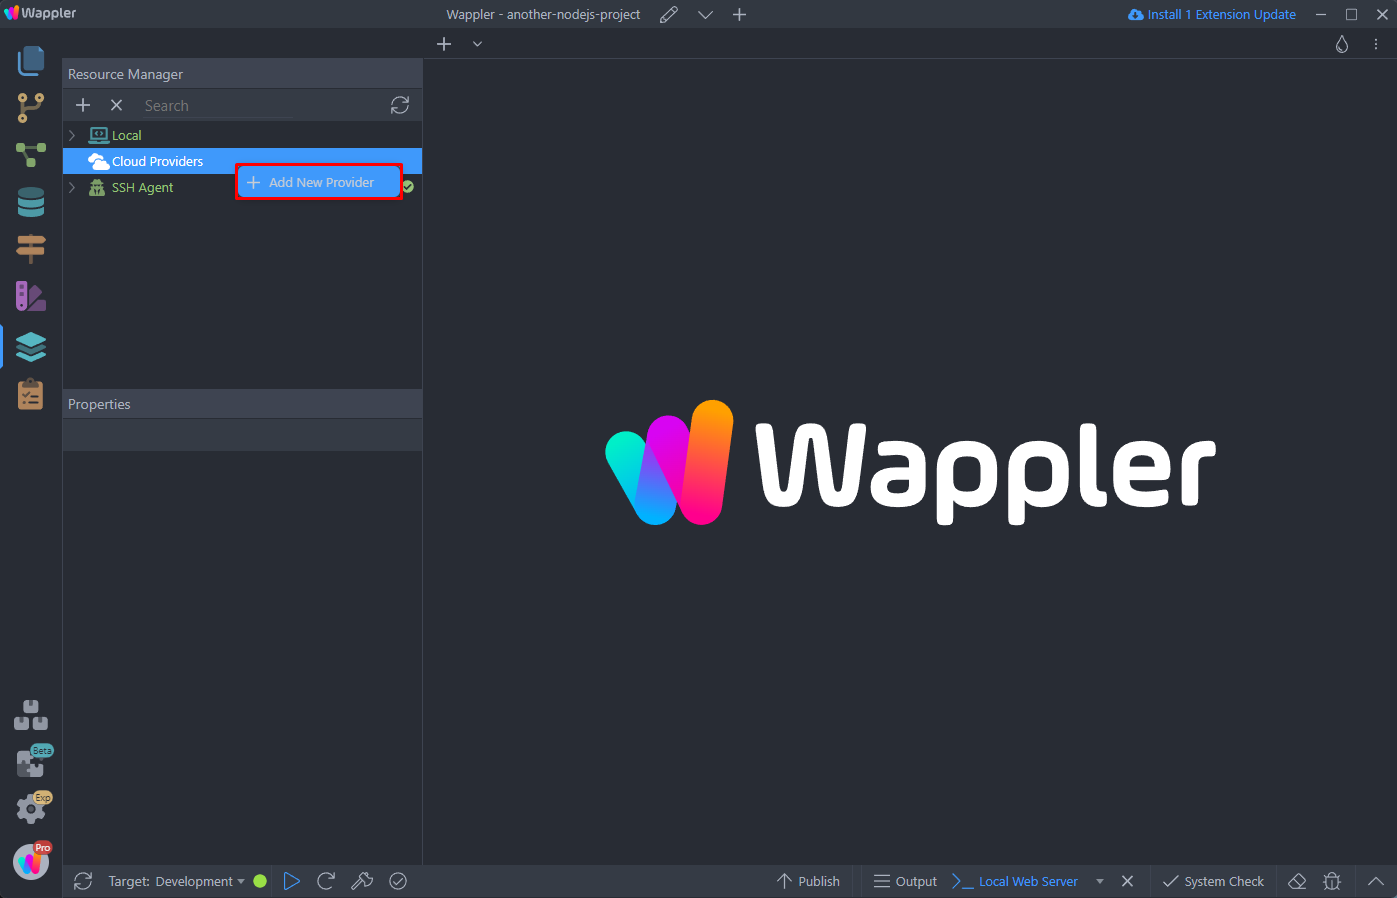
Connect to the same cloud provider as on the previous project, in our case that’s Hetzner:
Section titled “Connect to the same cloud provider as on the previous project, in our case that’s Hetzner:”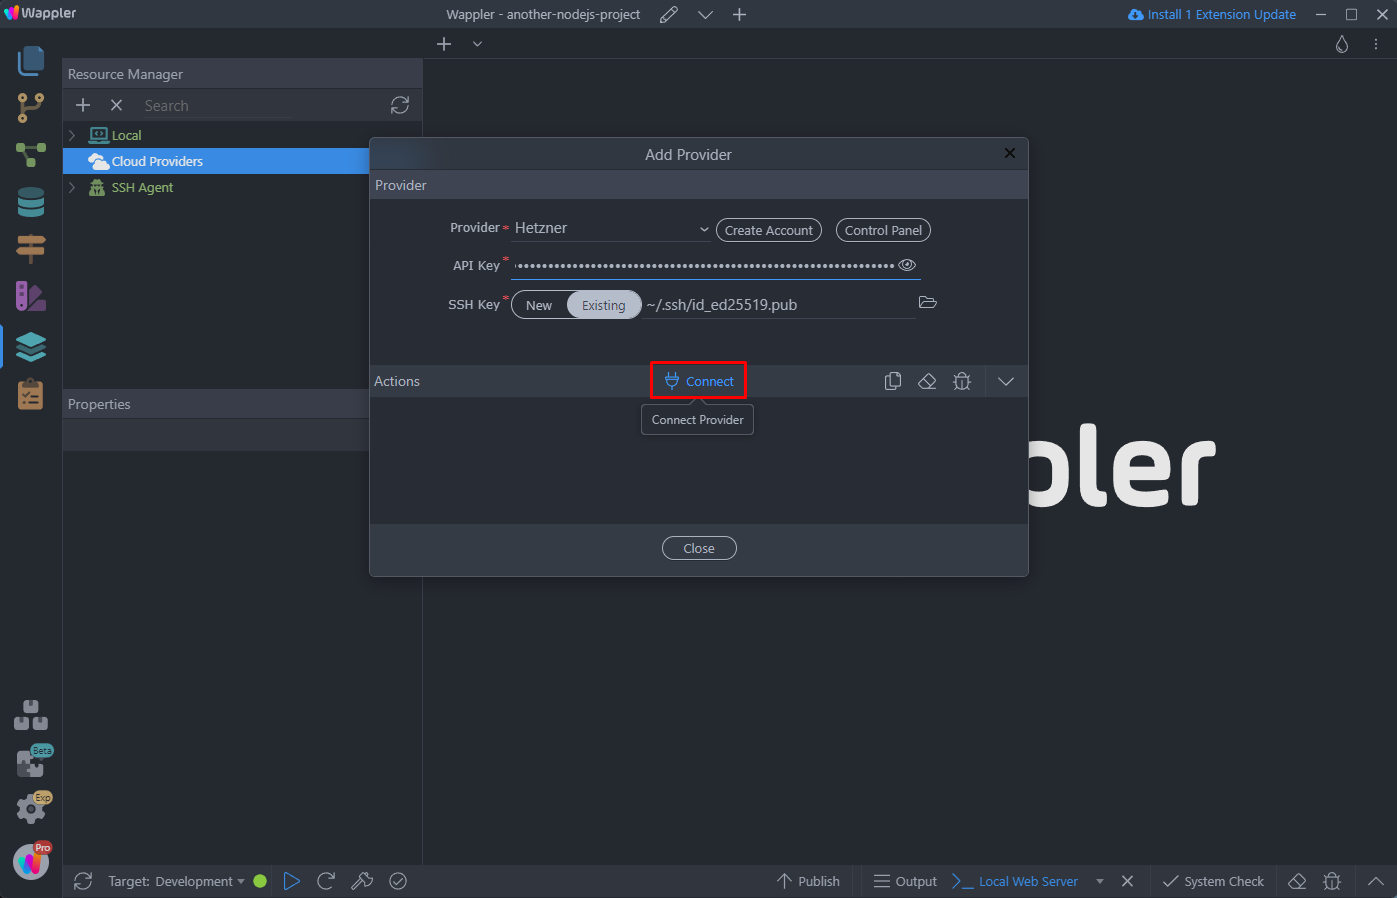
Close the dialog:
Section titled “Close the dialog:”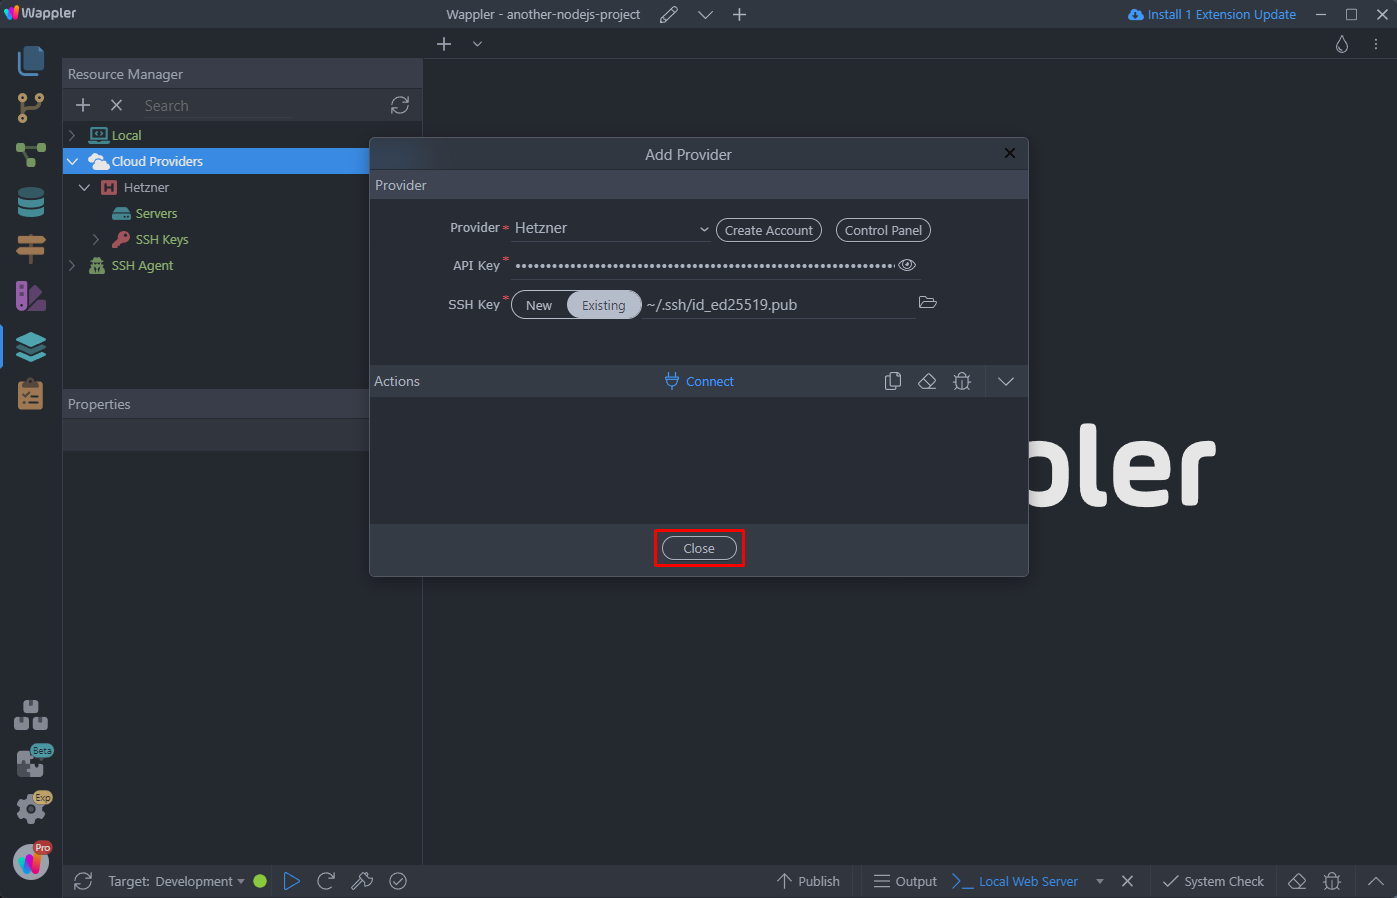
Then right click Servers and select Import Existing Server:
Section titled “Then right click Servers and select Import Existing Server:”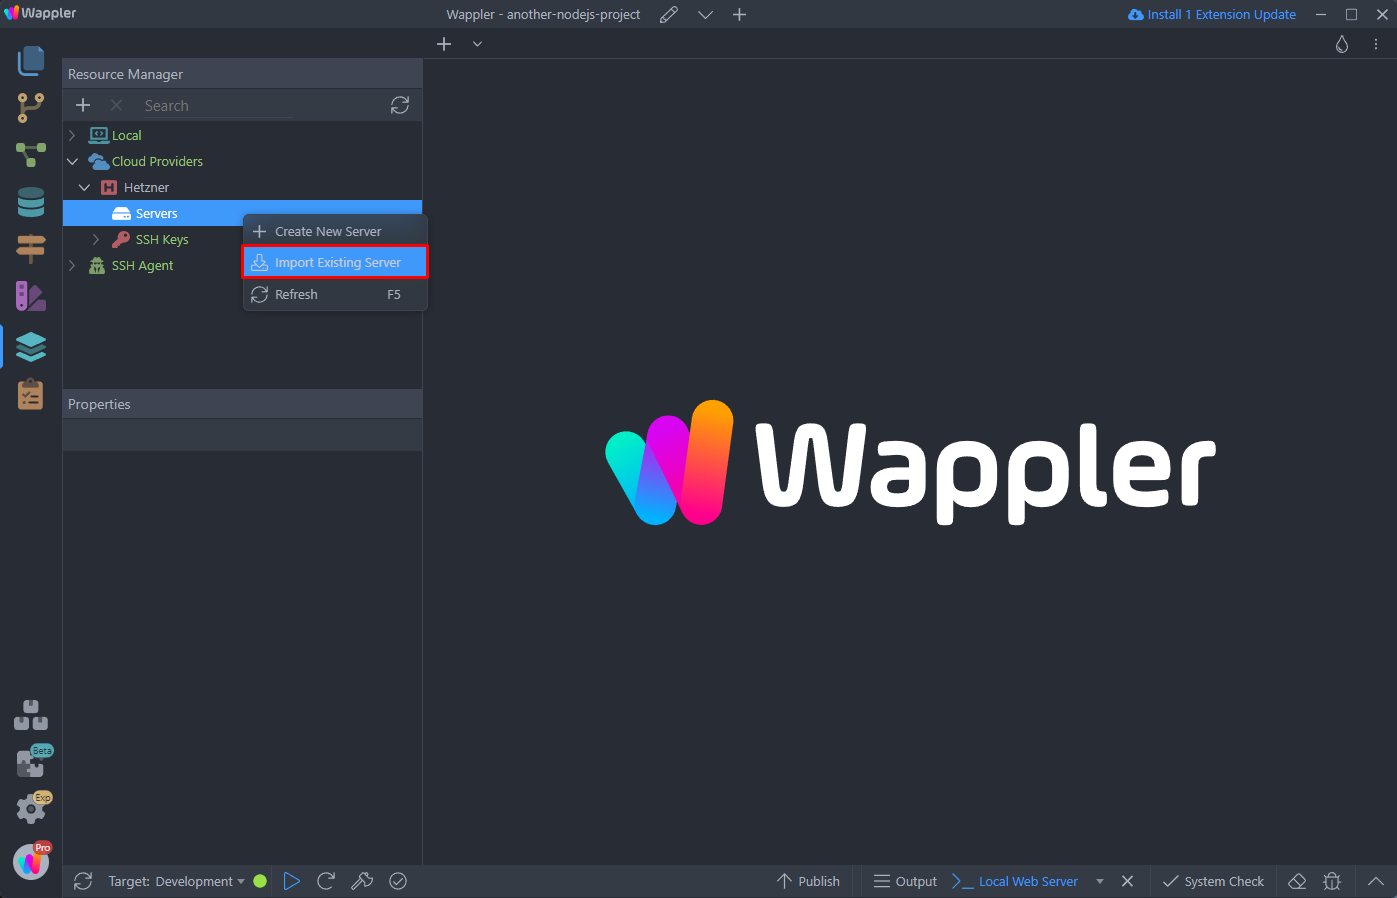
Select the cloud server, which you used in the previous project and click import:
Section titled “Select the cloud server, which you used in the previous project and click import:”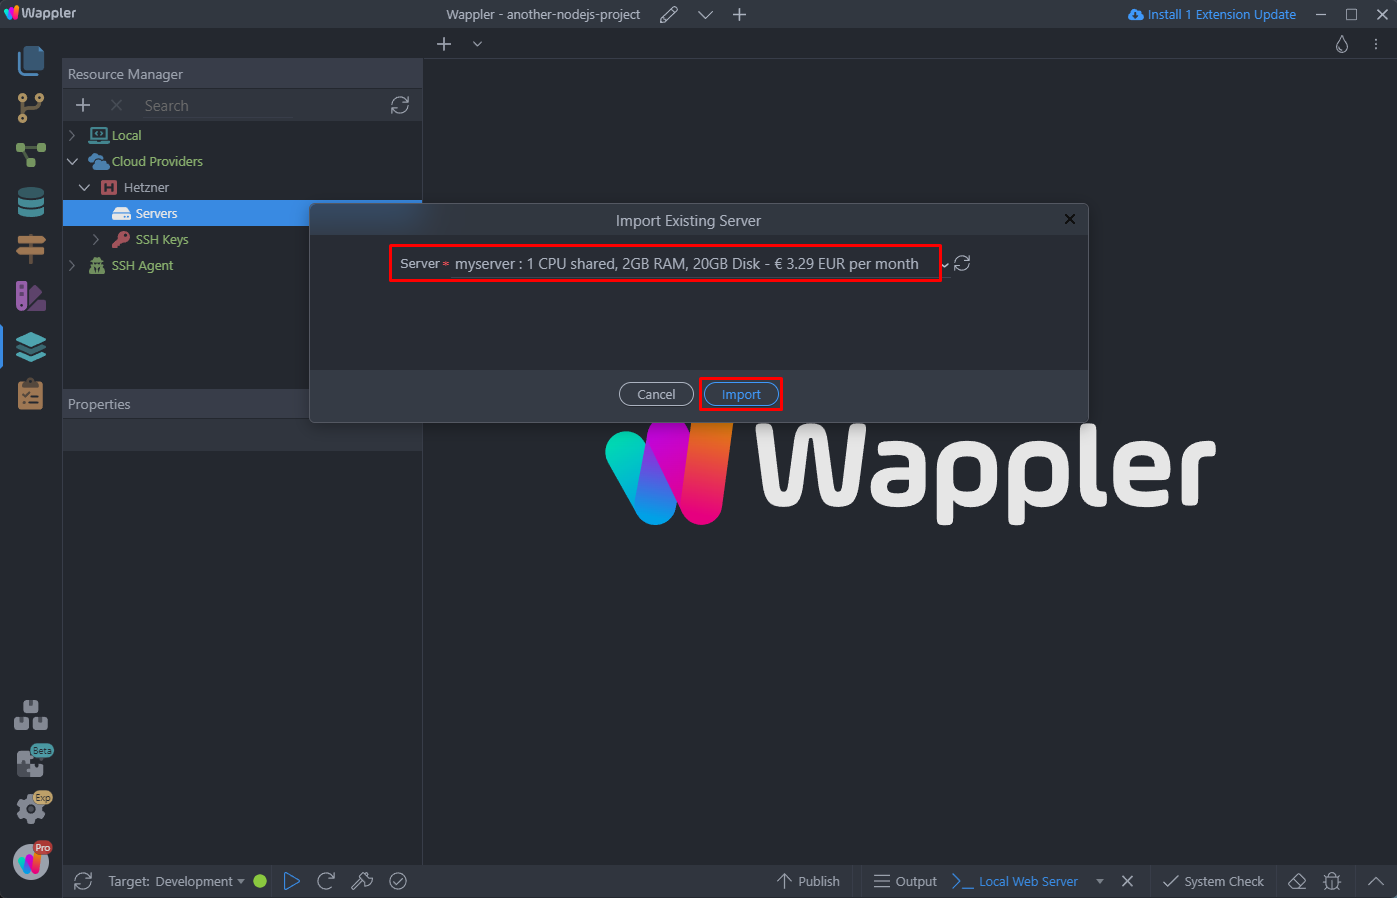
You can see the same database server here, under services:
Section titled “You can see the same database server here, under services:”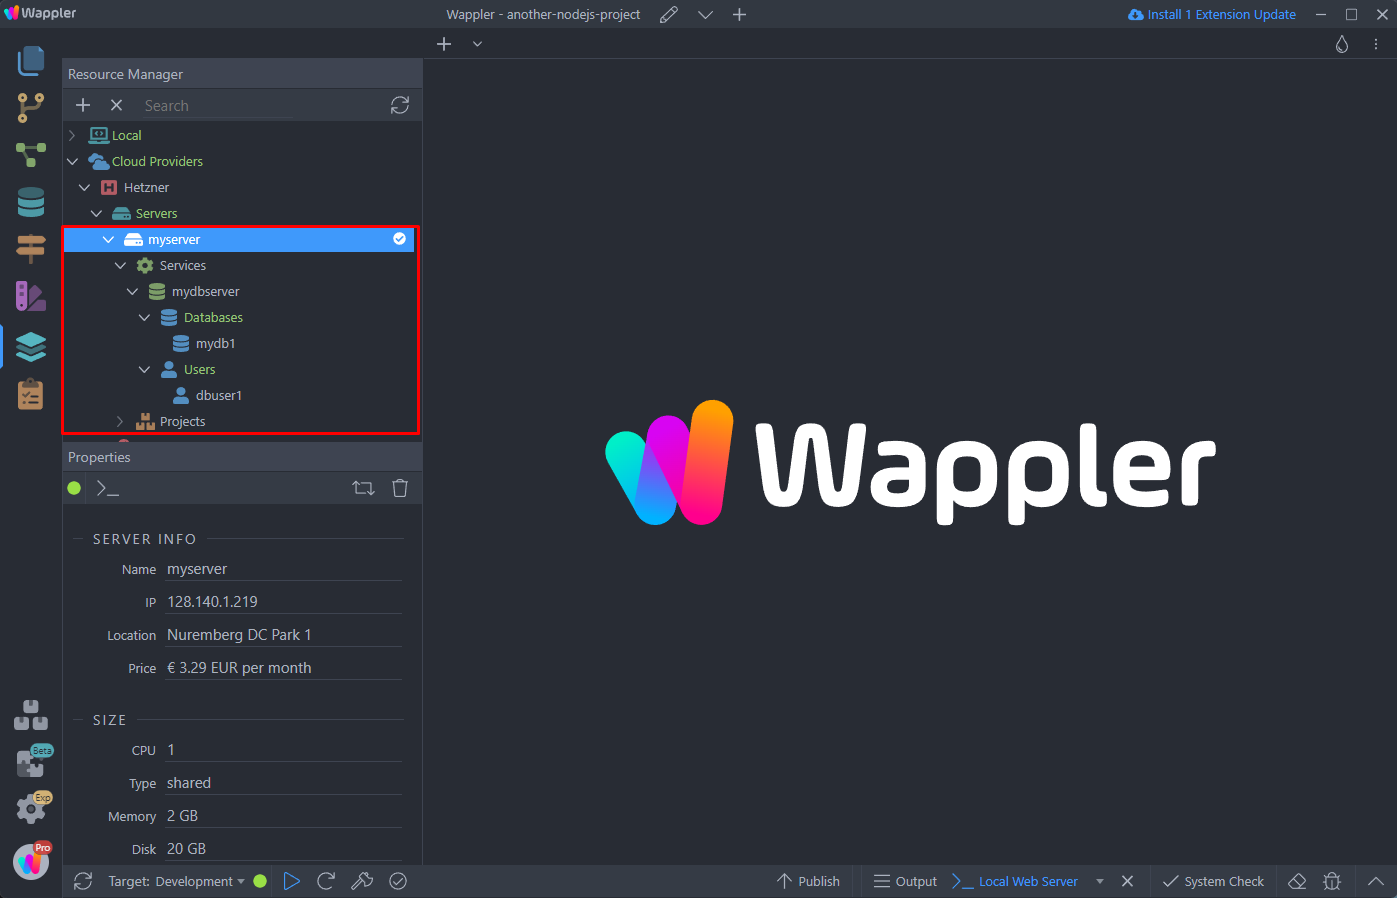
The process is the same, first we create a new database:
Section titled “The process is the same, first we create a new database:”All we need to do now is to create a new database and user for this project and add it to the project settings.
The process is the same, first we create a new database:
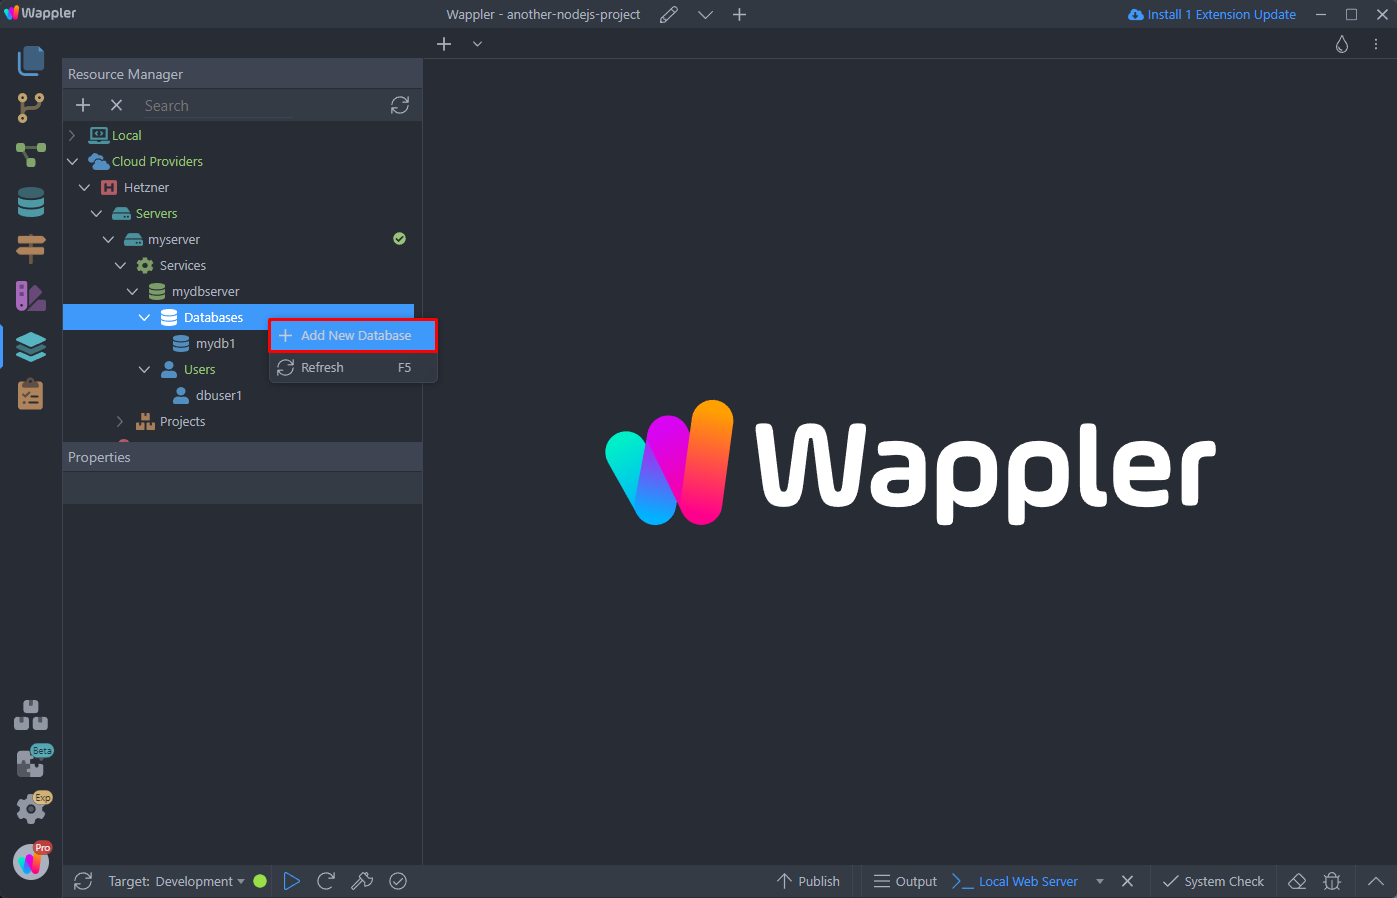
Then a new database user:
Section titled “Then a new database user:”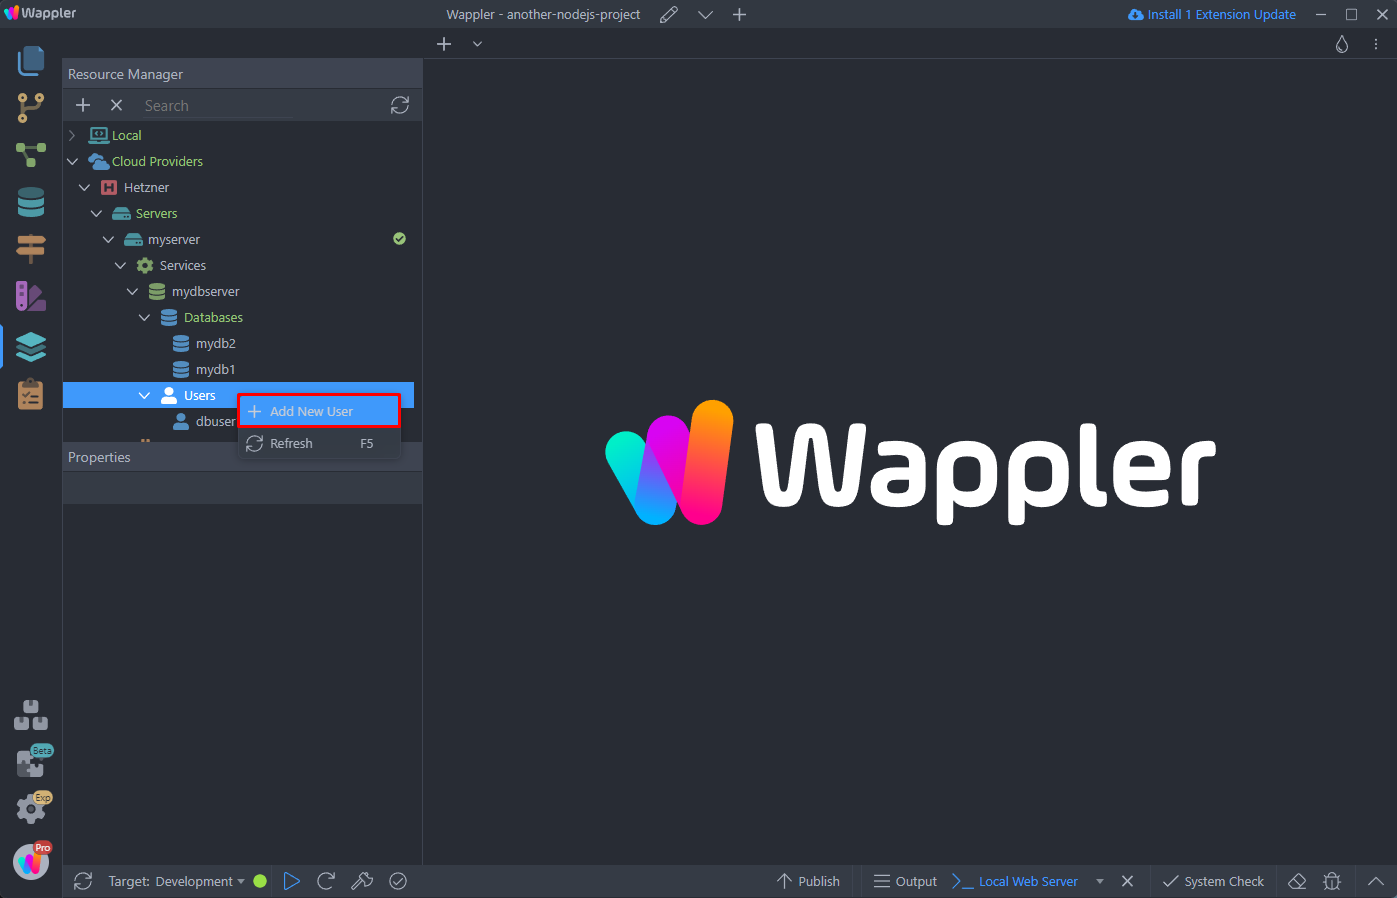
Step 27
Section titled “Step 27”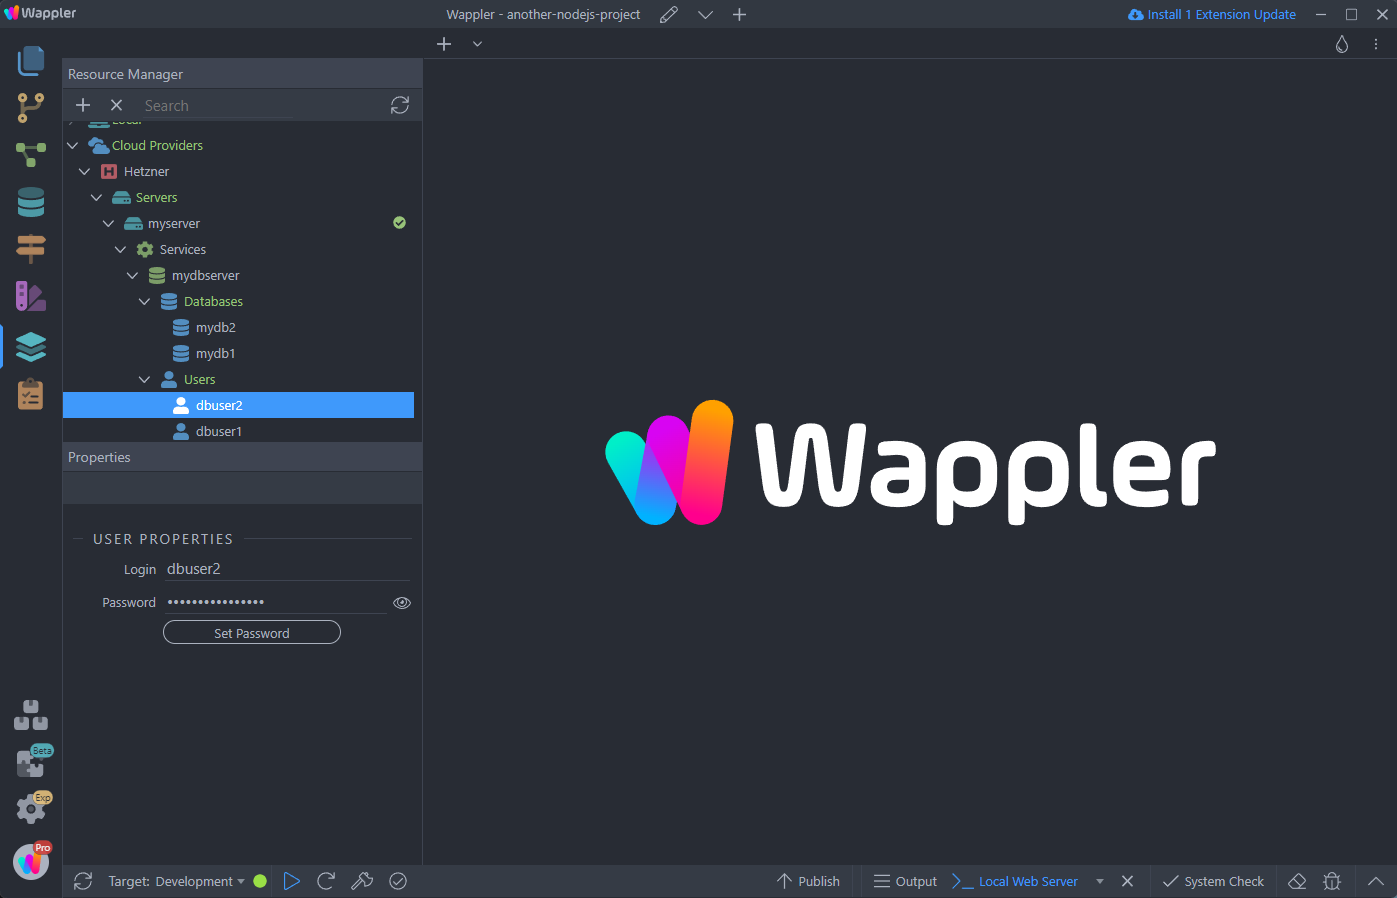
Then we assign the new user to the database:
Section titled “Then we assign the new user to the database:”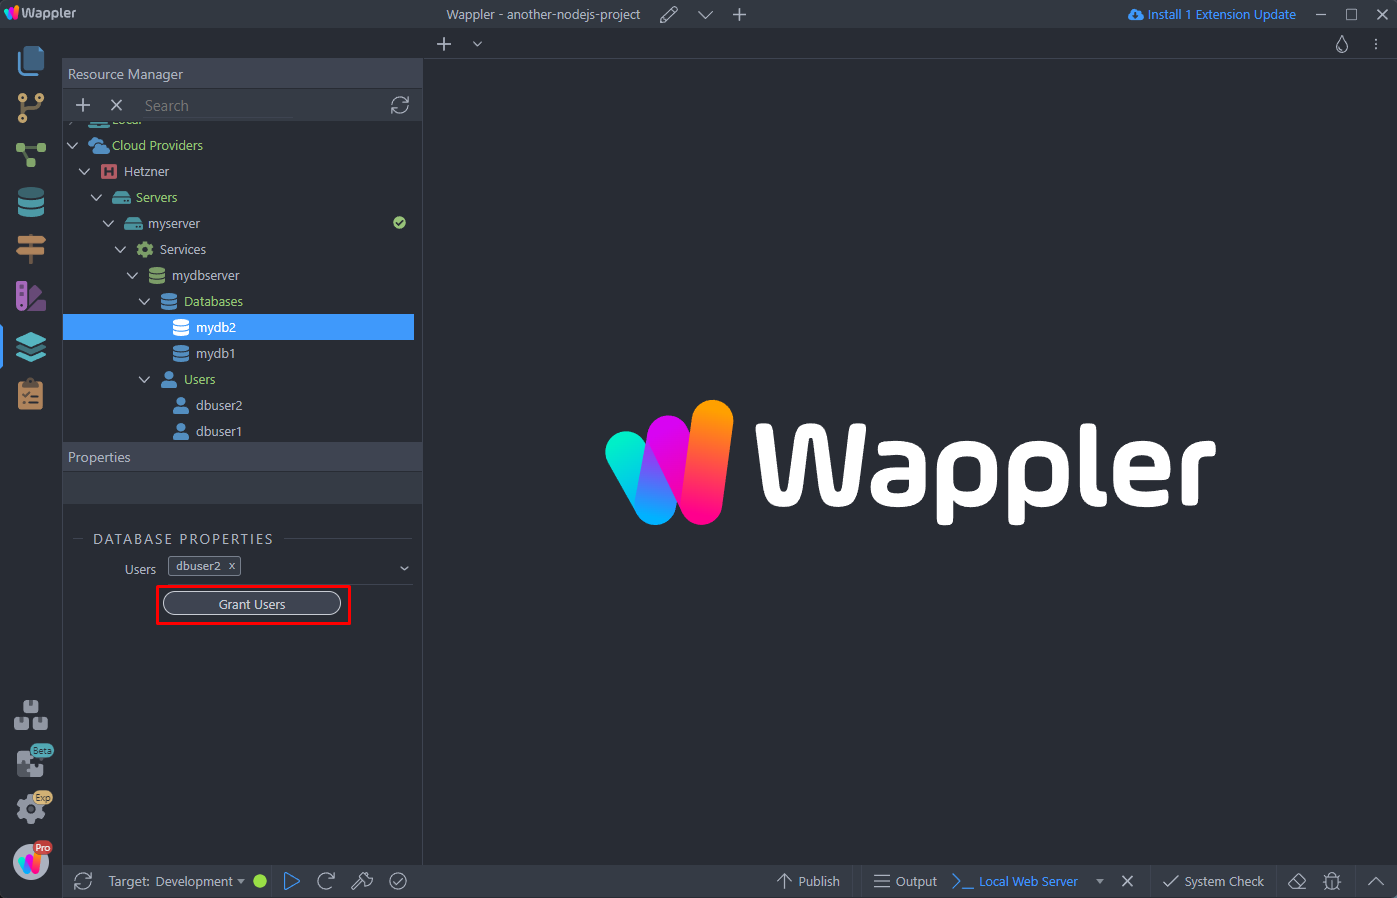
And we are ready to add the database to our project settings. Open the project settings:
Section titled “And we are ready to add the database to our project settings. Open the project settings:”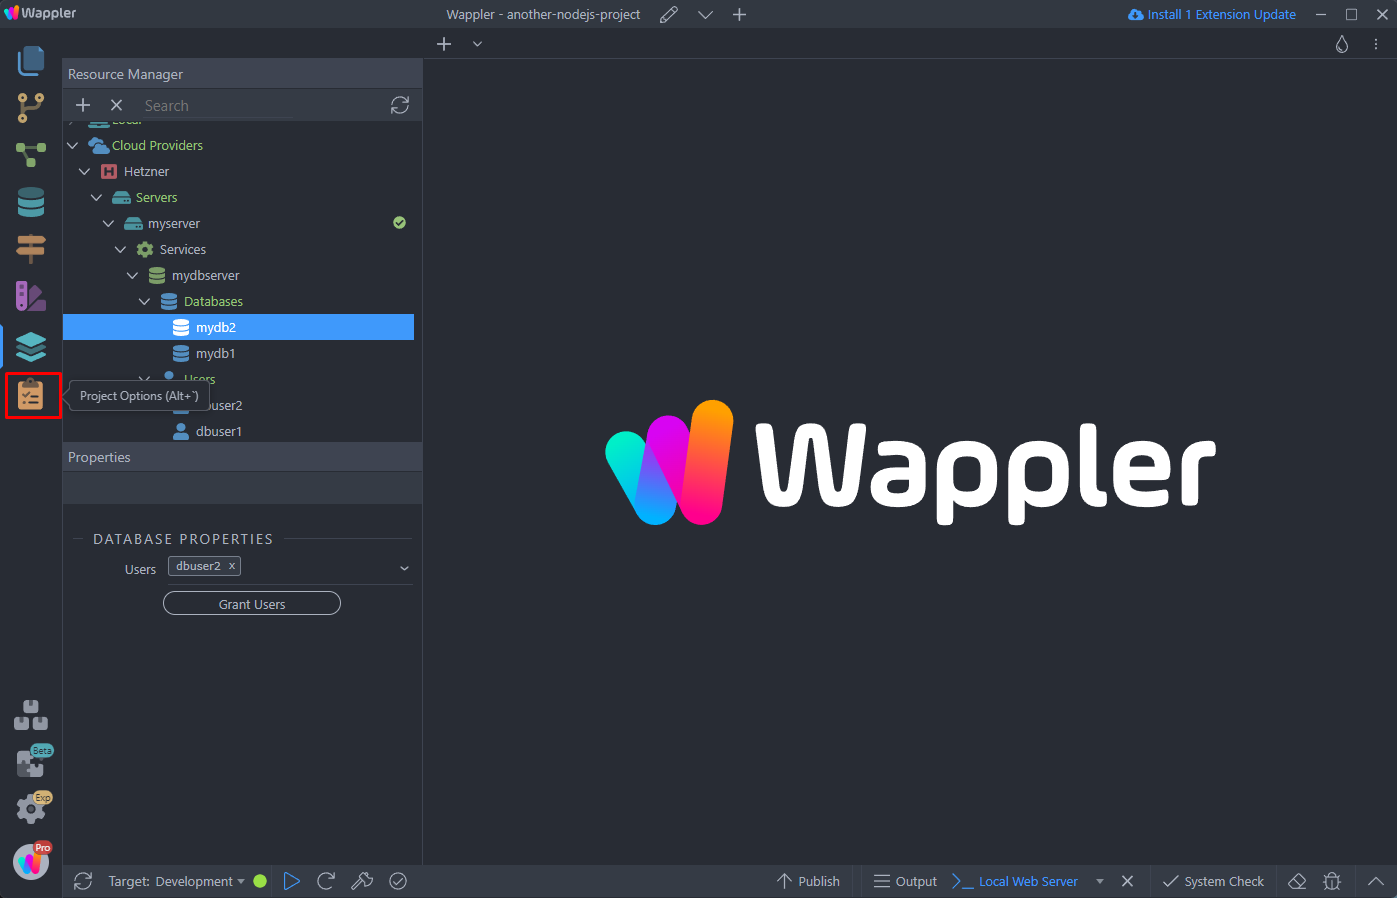
Open Targets and select Cloud Database in the Database Type Dropdown:
Section titled “Open Targets and select Cloud Database in the Database Type Dropdown:”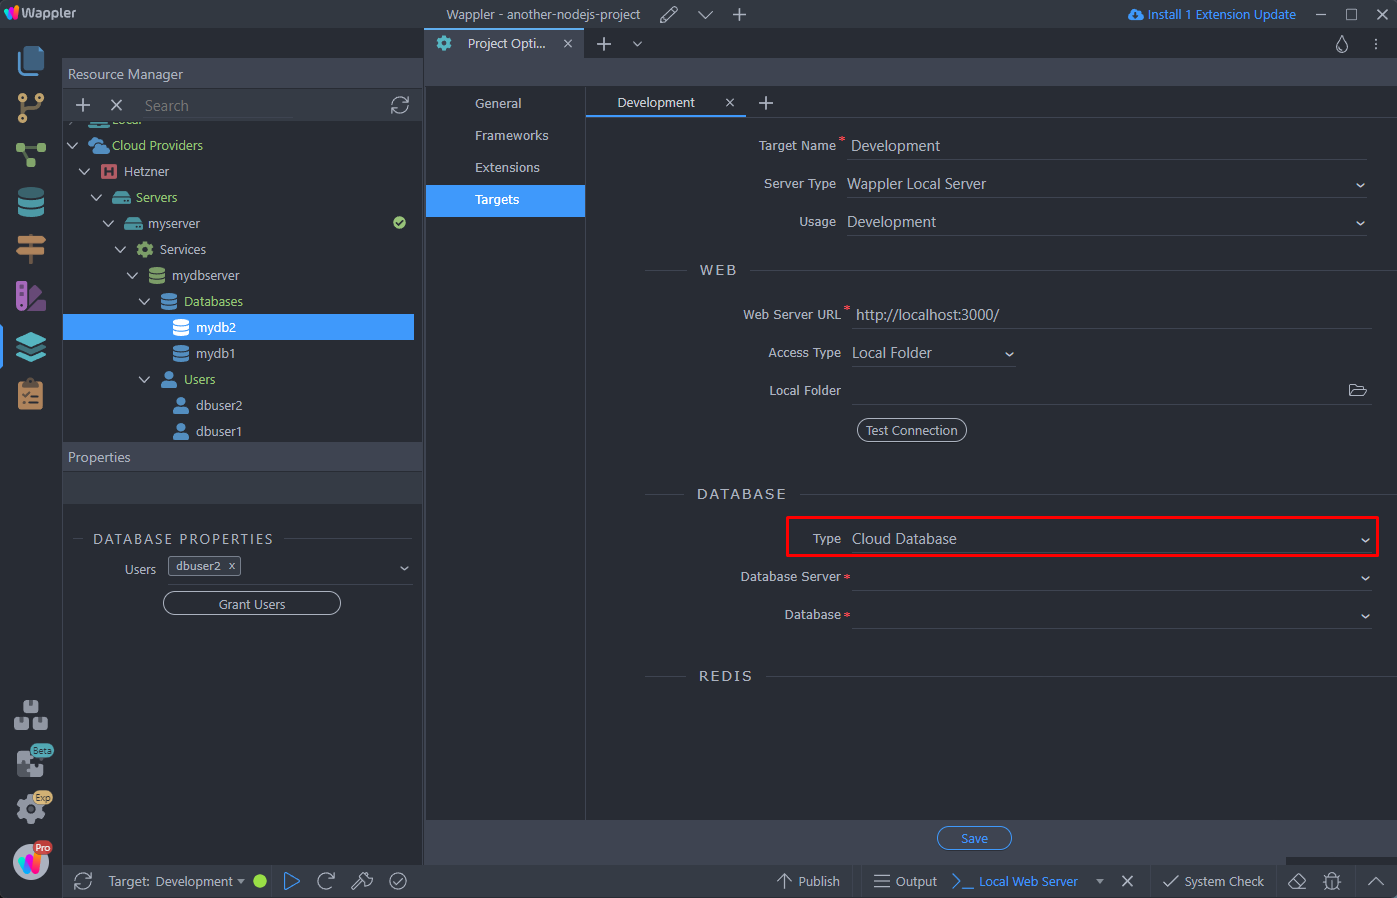
Select your cloud server and the database which we just created for this project:
Section titled “Select your cloud server and the database which we just created for this project:”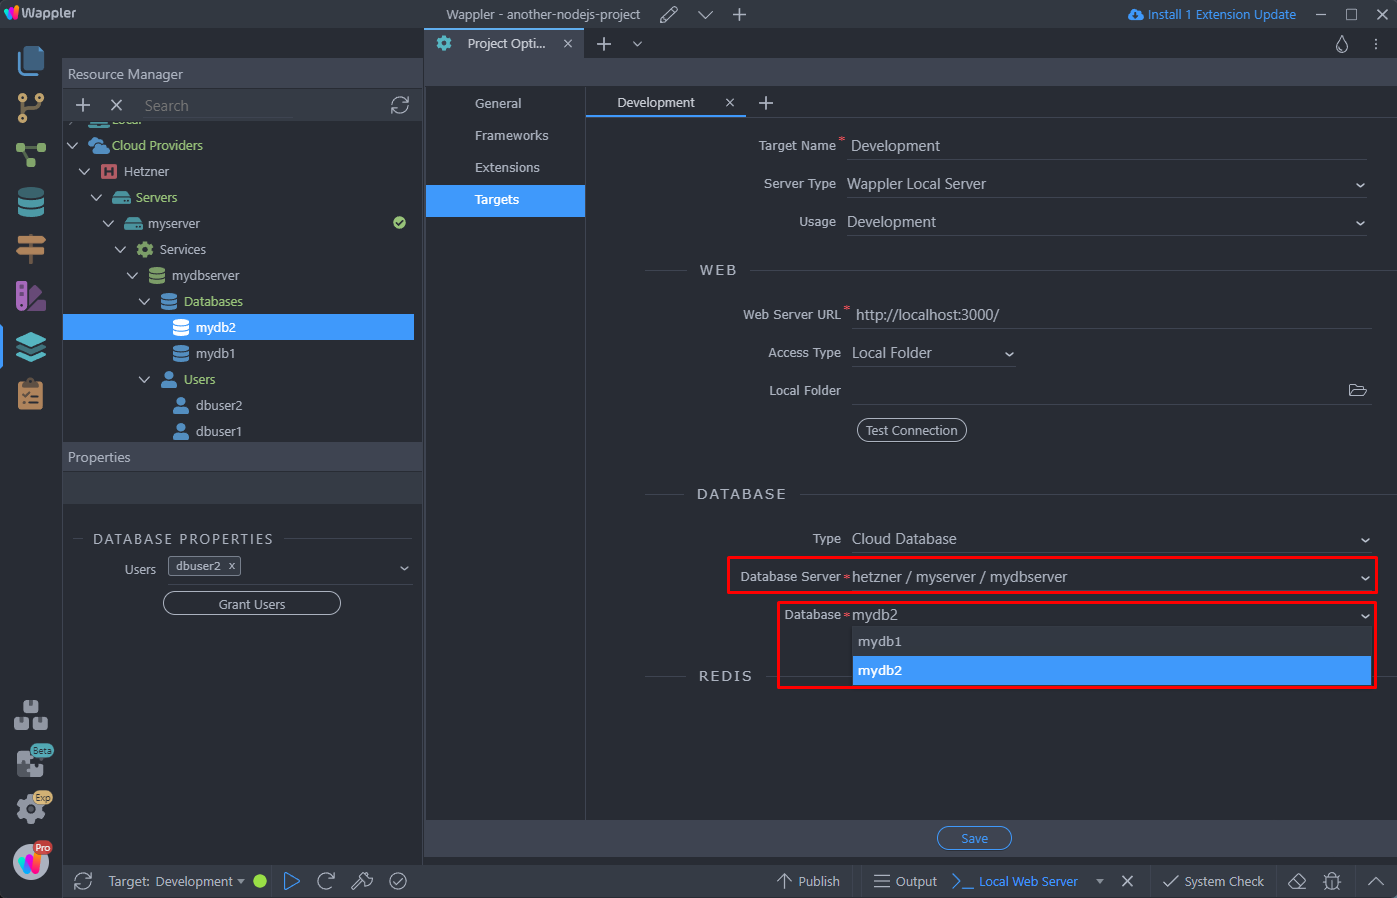
Click Save when you are done:
Section titled “Click Save when you are done:”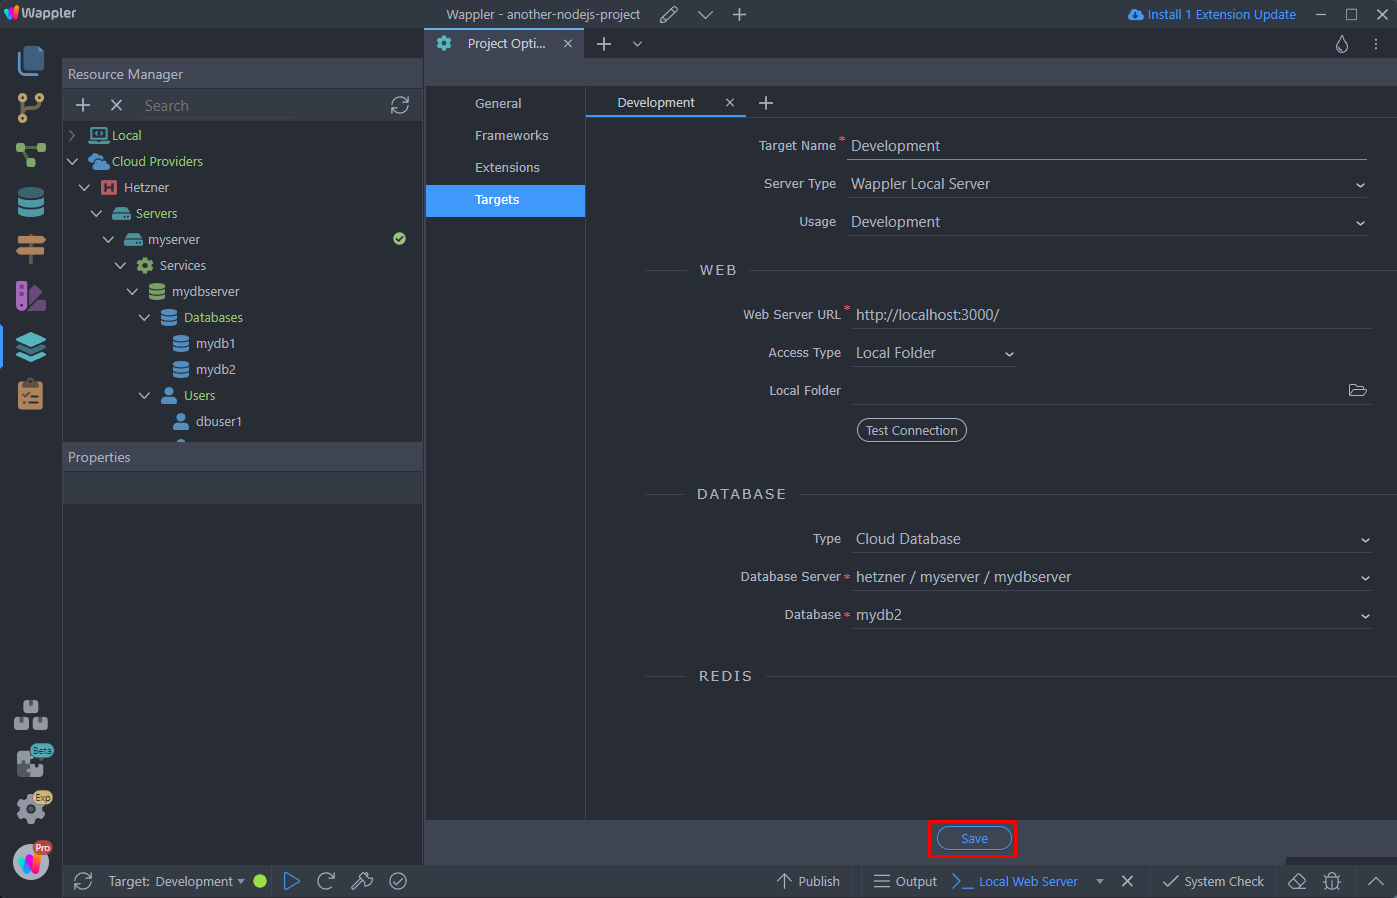
That’s how easy it is to reuse the same services from your remote cloud service in all your projects.
Section titled “That’s how easy it is to reuse the same services from your remote cloud service in all your projects.”Now you can open the Database Manager and you can see that a Database Connection to your database has been created. You can create your tables, add data and also use it in your Server Actions.
That’s how easy it is to reuse the same services from your remote cloud service in all your projects.