Using S3 Connector
What is S3 Connector S3 Connector allows you to connect to AWS and Digital Ocean cloud storage services, create buckets, list/put/get/delete files, create signed URLs and more. Now as you know how to
What is S3 Connector
Section titled “What is S3 Connector”S3 Connector allows you to connect to AWS and Digital Ocean cloud storage services, create buckets, list/put/get/delete files, create signed URLs and more.
Now as you know how to setup S3 on AWS and Digital Ocean you are ready to use the S3 Connector in Server Connect.
Setting up S3 Provider
Section titled “Setting up S3 Provider”Using the S3 Connector is really easy.
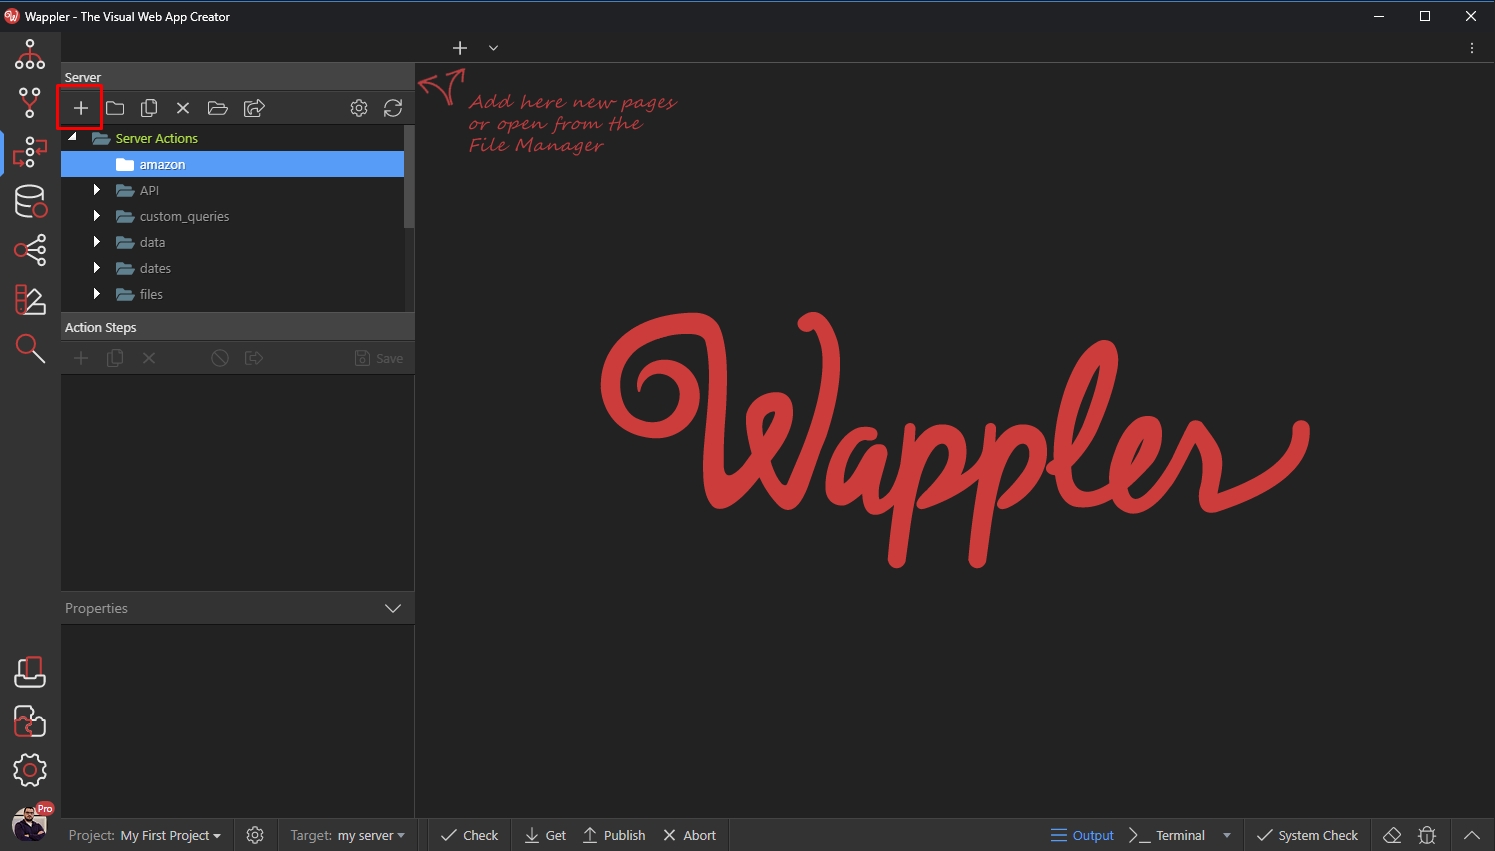
First create a Server Action:
Right click steps:
Section titled “Right click steps:”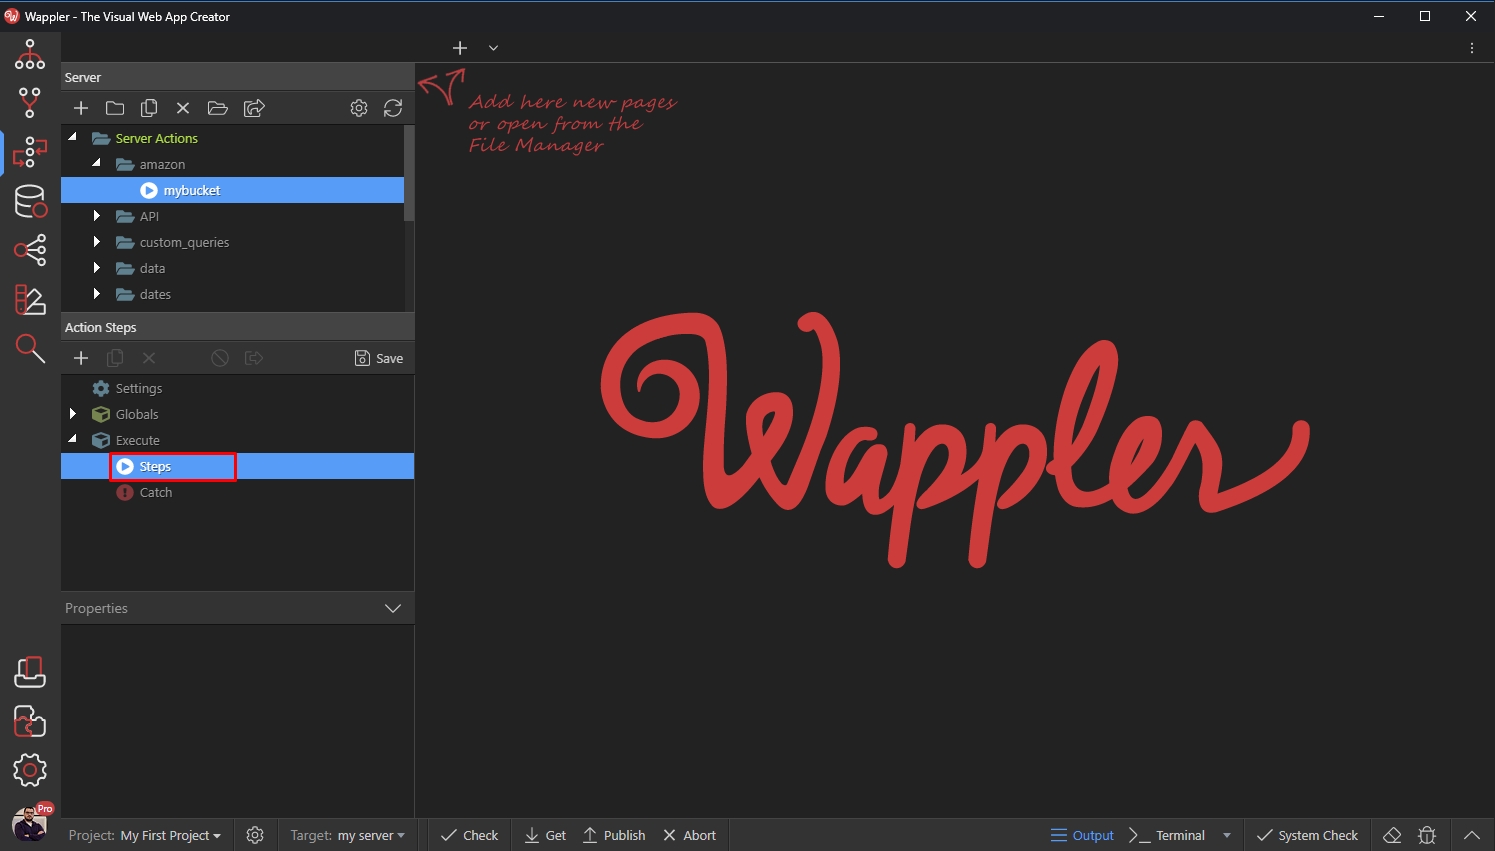
Select S3 Connector and click S3 Provider:
Section titled “Select S3 Connector and click S3 Provider:”
Select the Service you want to use: AWS, Digital Ocean or a Custom Service. We select AWS:
Section titled “Select the Service you want to use: AWS, Digital Ocean or a Custom Service. We select AWS:”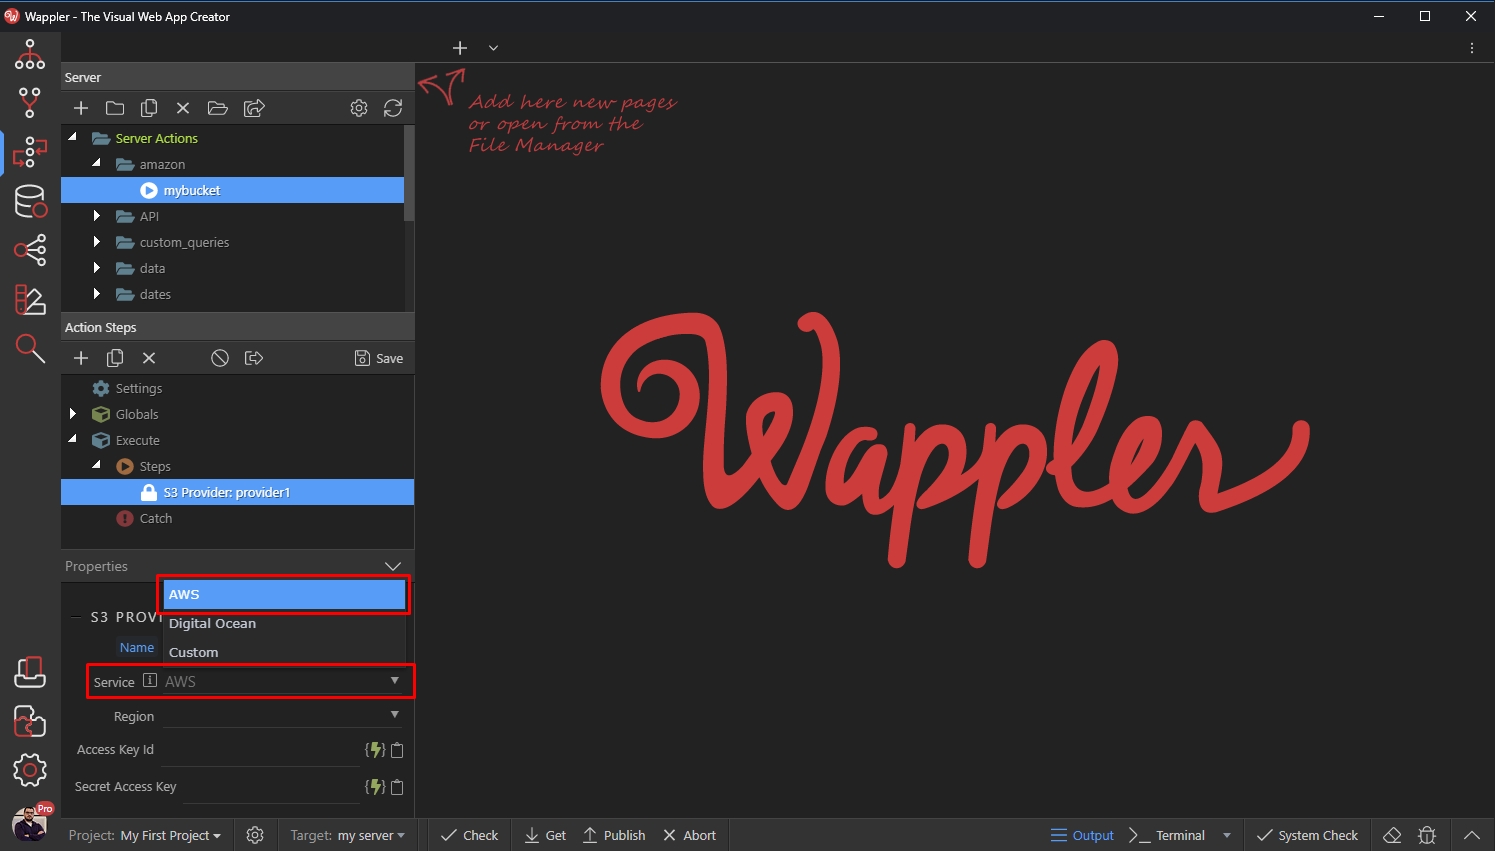
Select your region:
Section titled “Select your region:”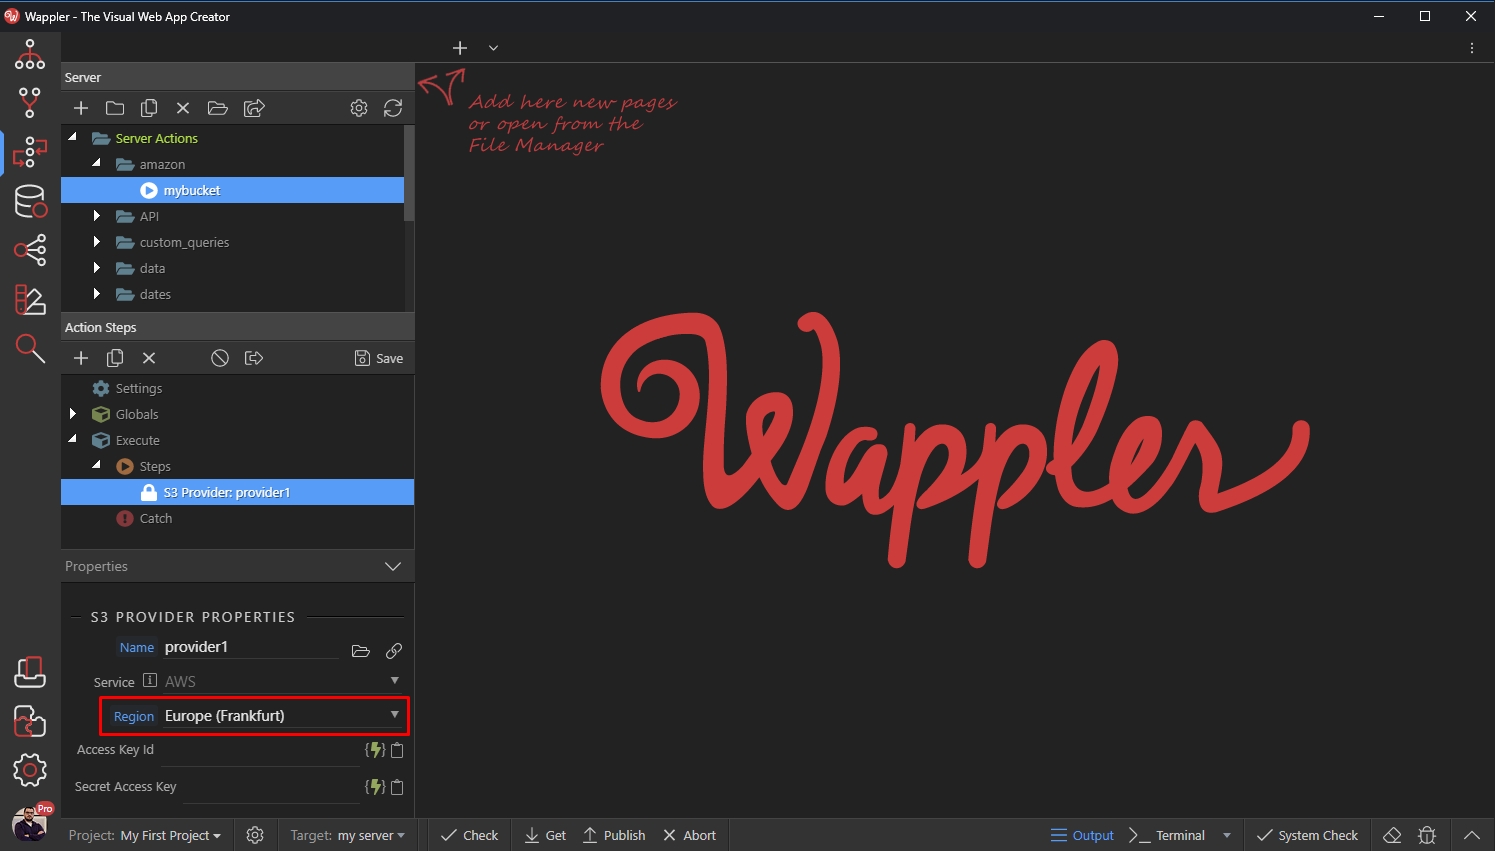
And enter the Access Key ID and the Secret Access Key for your user:
Section titled “And enter the Access Key ID and the Secret Access Key for your user:”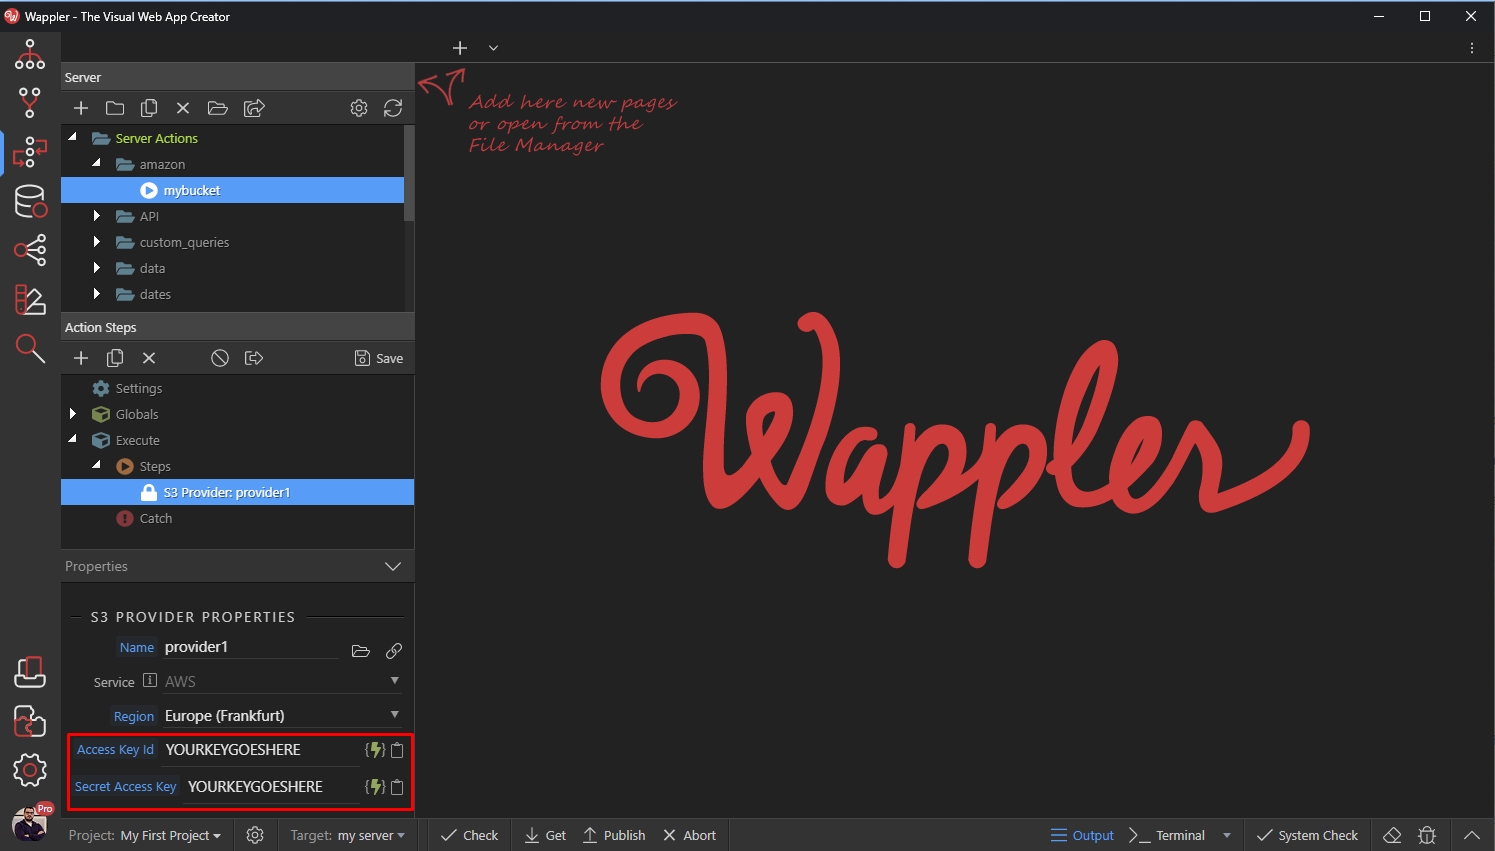
Step 9
Section titled “Step 9”Now, as we’ve set up the S3 Provider we can do different things, such as listing our buckets, list/get/put/delete files from a bucket, create a bucket or delete existing one etc.
Listing Buckets
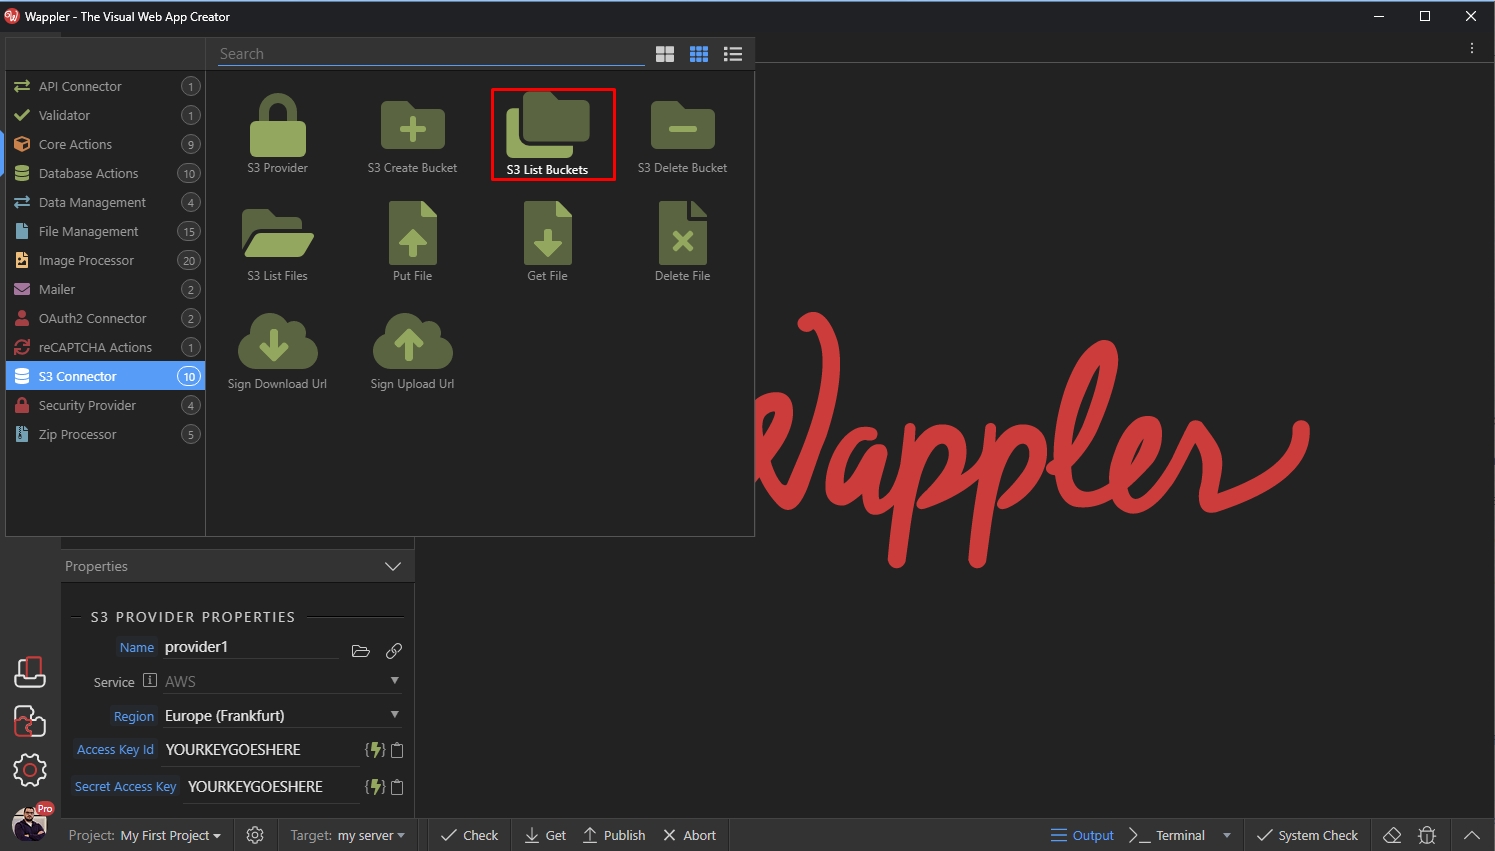
Section titled “Listing Buckets”A simple example of what you can do with the S3 Connector would be to list our buckets. So right click the S3 Provider step, open the S3 Connector menu and select S3 List Buckets:
Save your Server Action:
Section titled “Save your Server Action:”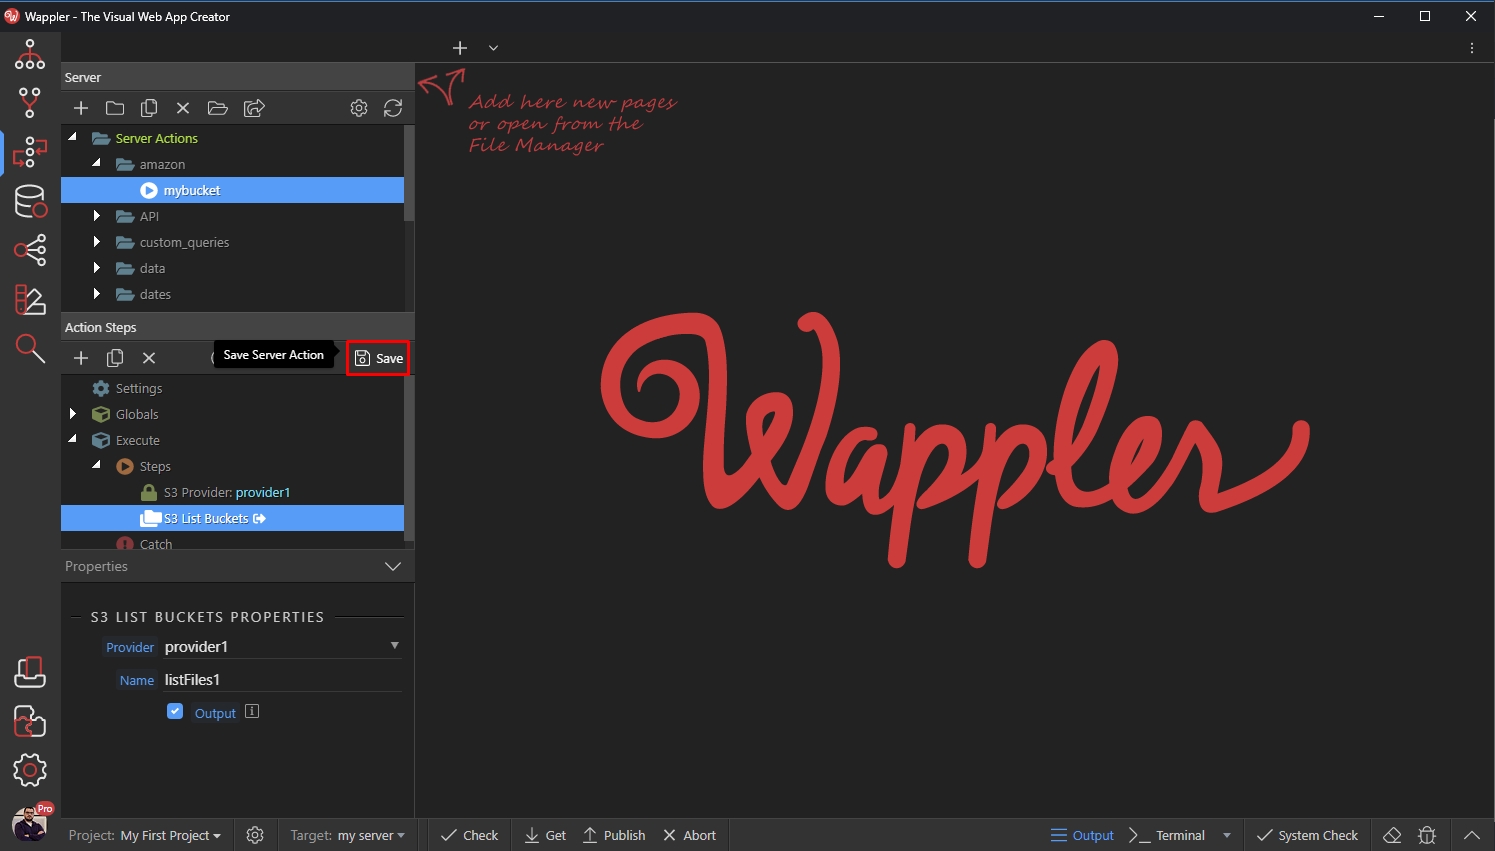
And click the Open in Browser button to preview the results:
Section titled “And click the Open in Browser button to preview the results:”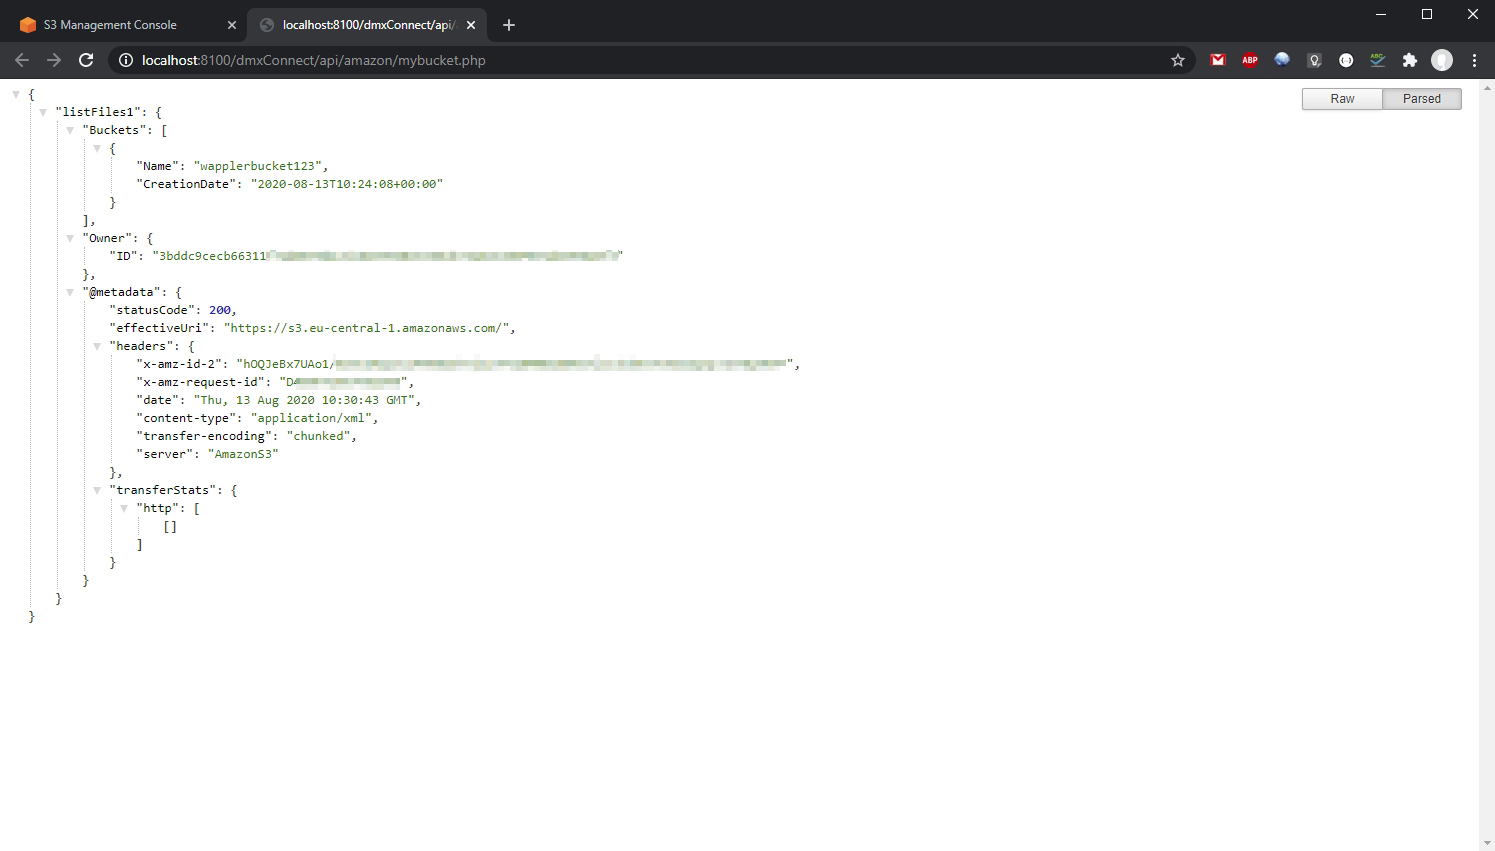
You can see the S3 Bucker we’ve set up earlier in AWS with some additional info.
Section titled “You can see the S3 Bucker we’ve set up earlier in AWS with some additional info.”Uploading Files to a Bucket
Section titled “Uploading Files to a Bucket”There are two ways of uploading files to a Bucket using the S3 Connector. The first option is to upload a file which already exists on your server and the other one is to use a form on a regular page and the File Uploader component available in Server Connect.
Let’s use an upload form.
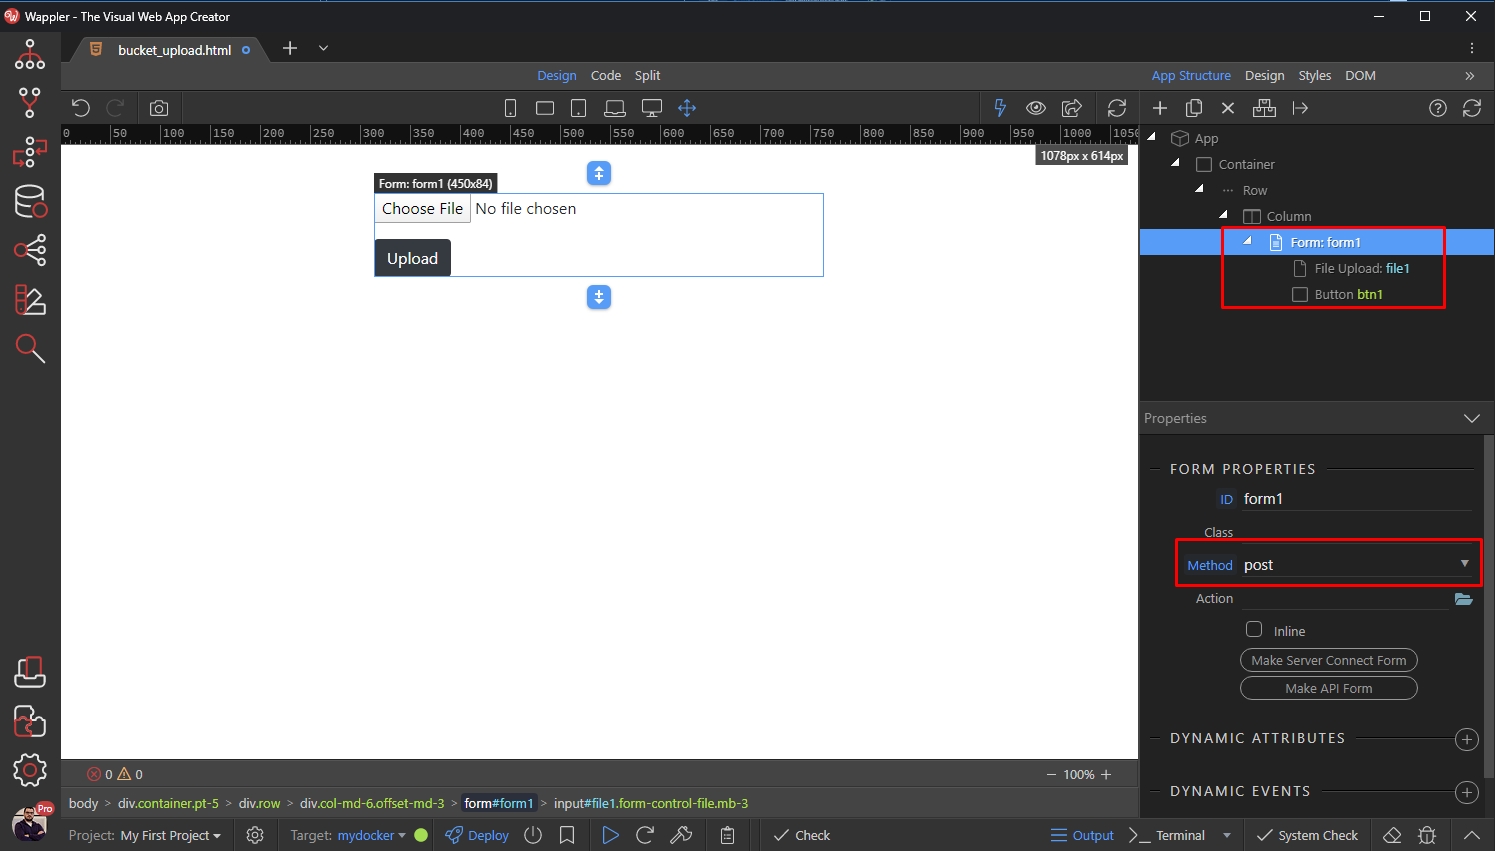
First we need a simple HTML page containing a form with a file input and a submit button inside. Make sure the Method is set to POST and save your page:
Open Server Connect and create a new Server Action:
Section titled “Open Server Connect and create a new Server Action:”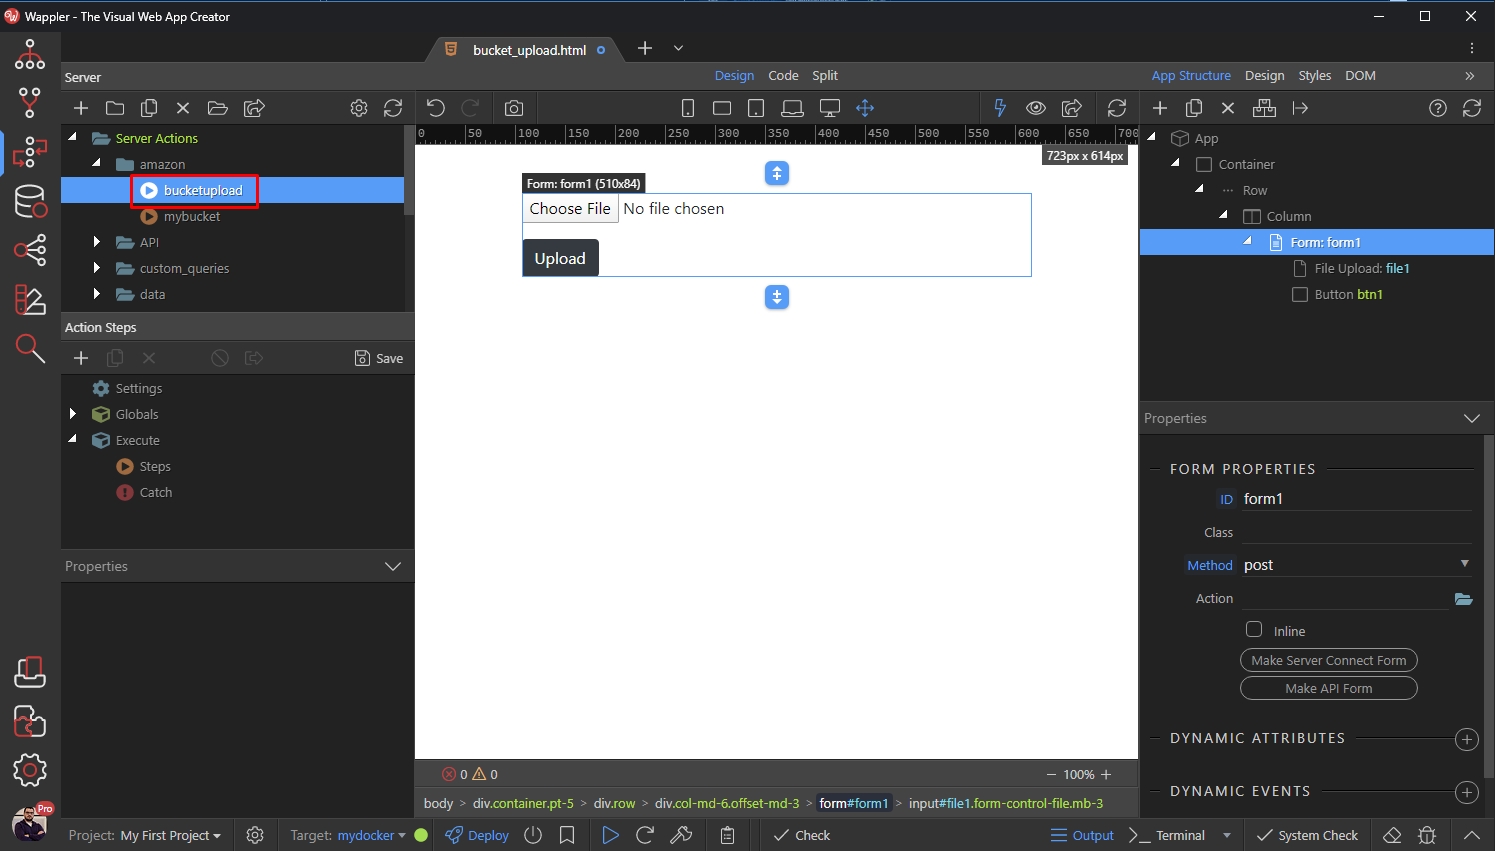
Select Globals and click the browse button in the linked page field. Select your HTML page there:
Section titled “Select Globals and click the browse button in the linked page field. Select your HTML page there:”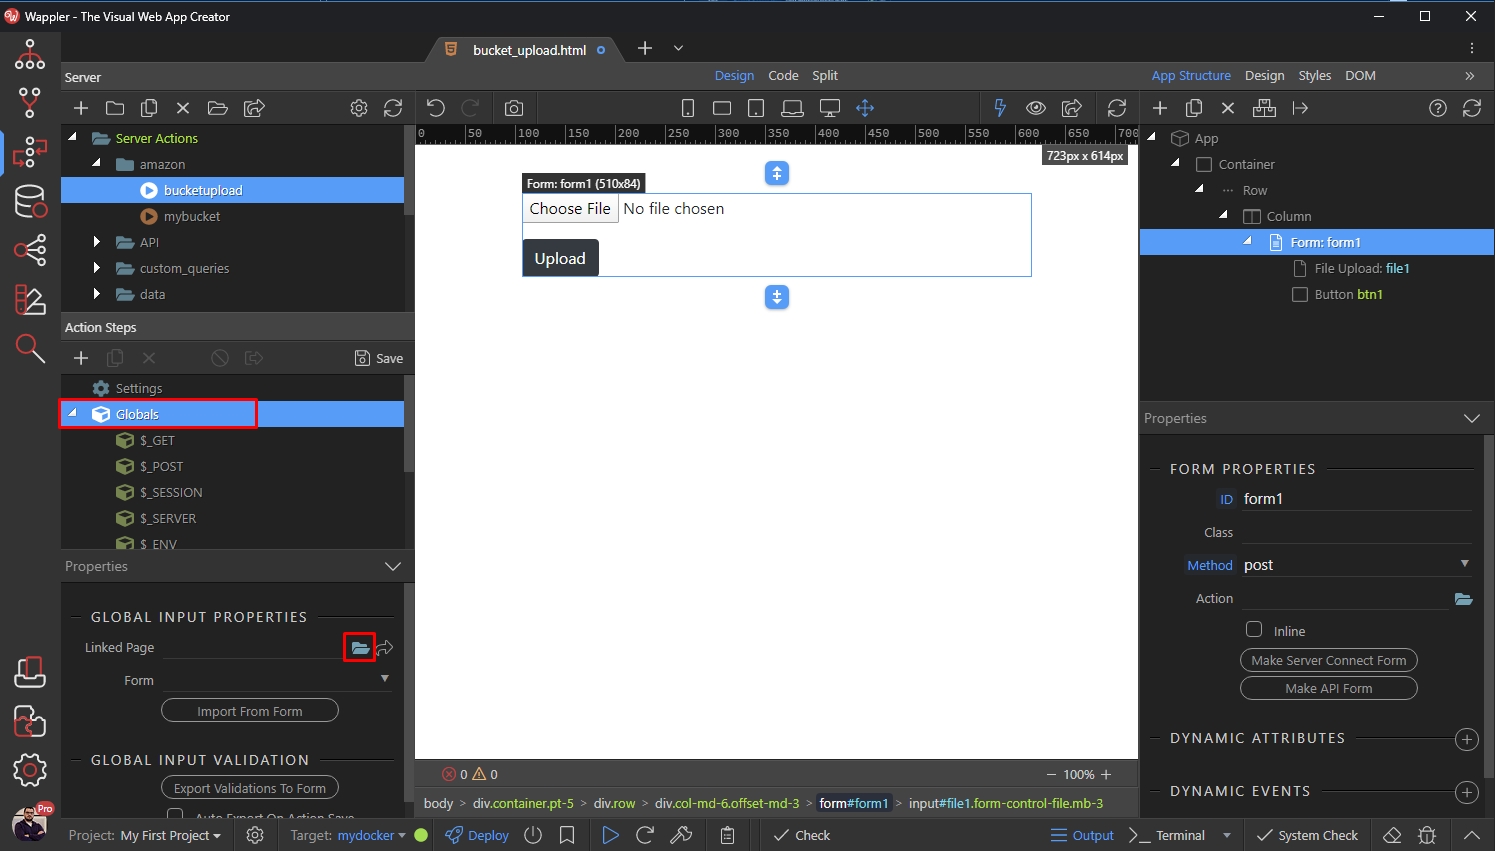
Then select your form in the dropdown:
Section titled “Then select your form in the dropdown:”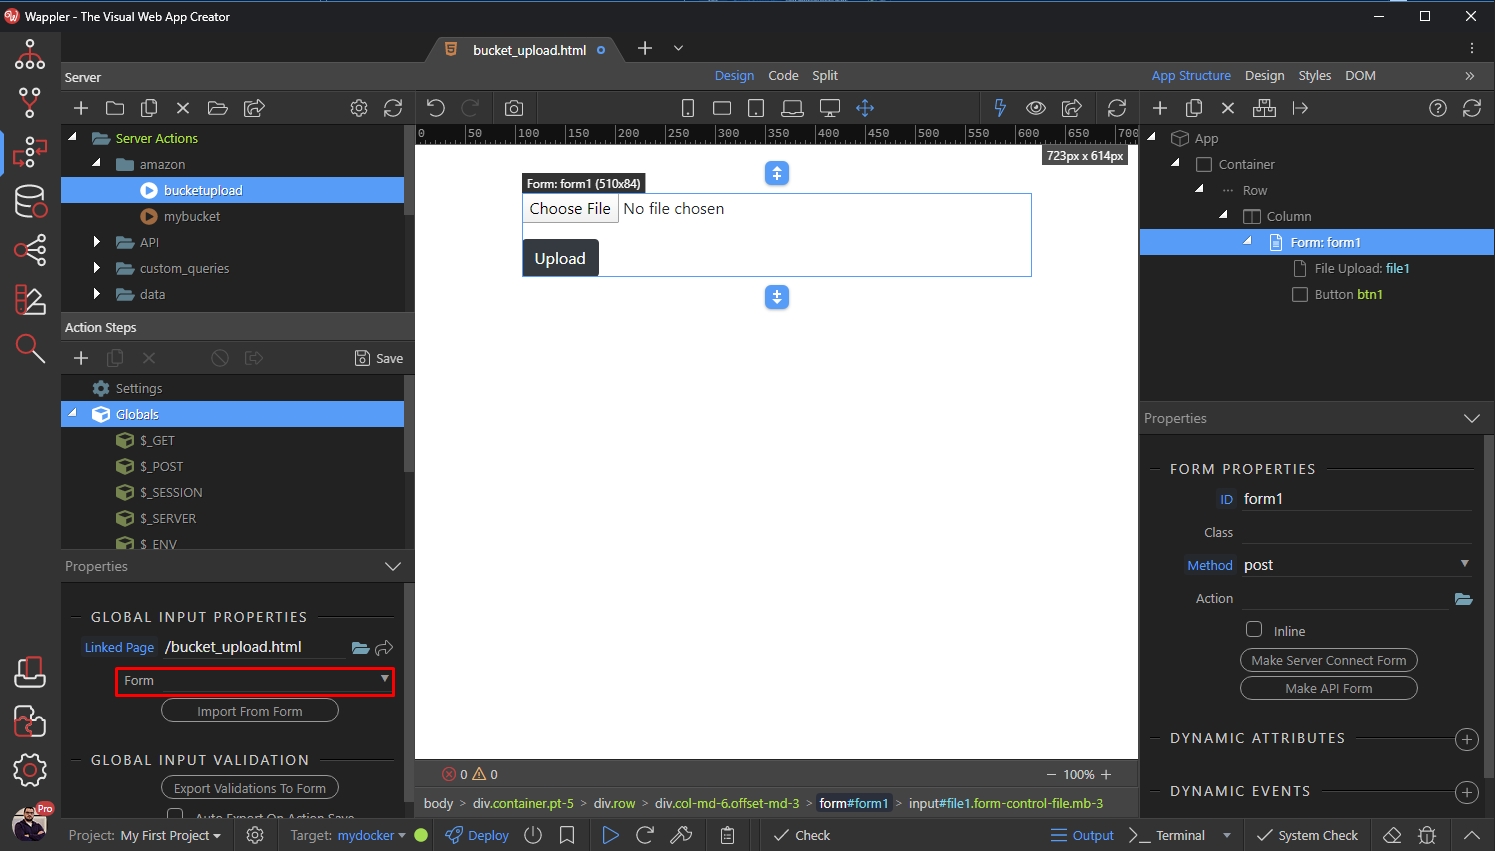
And click the Import From Form button:
Section titled “And click the Import From Form button:”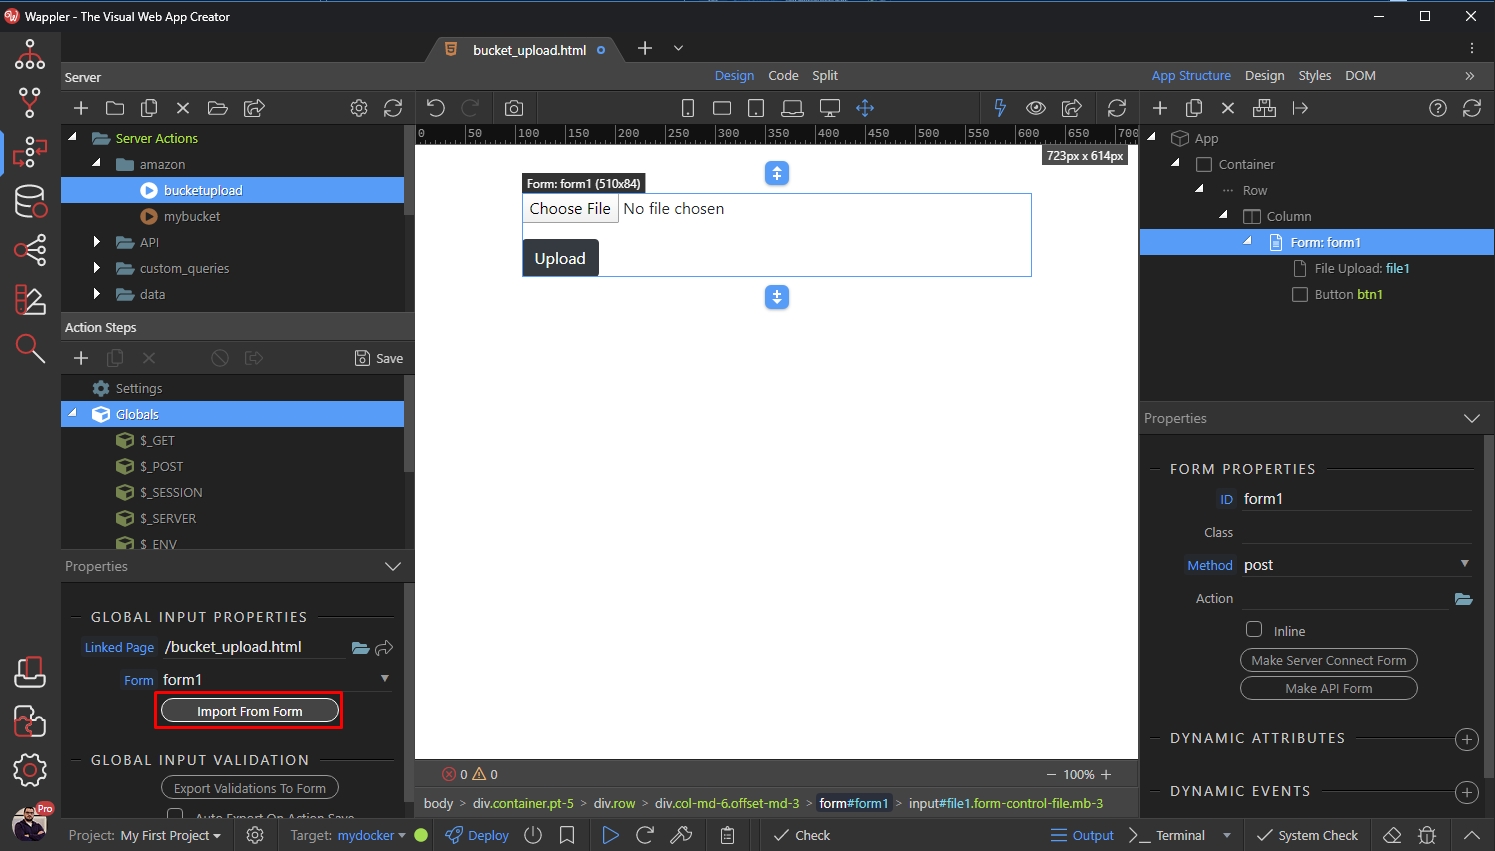
Your file input has been imported under the Global $_POST variables:
Section titled “Your file input has been imported under the Global $_POST variables:”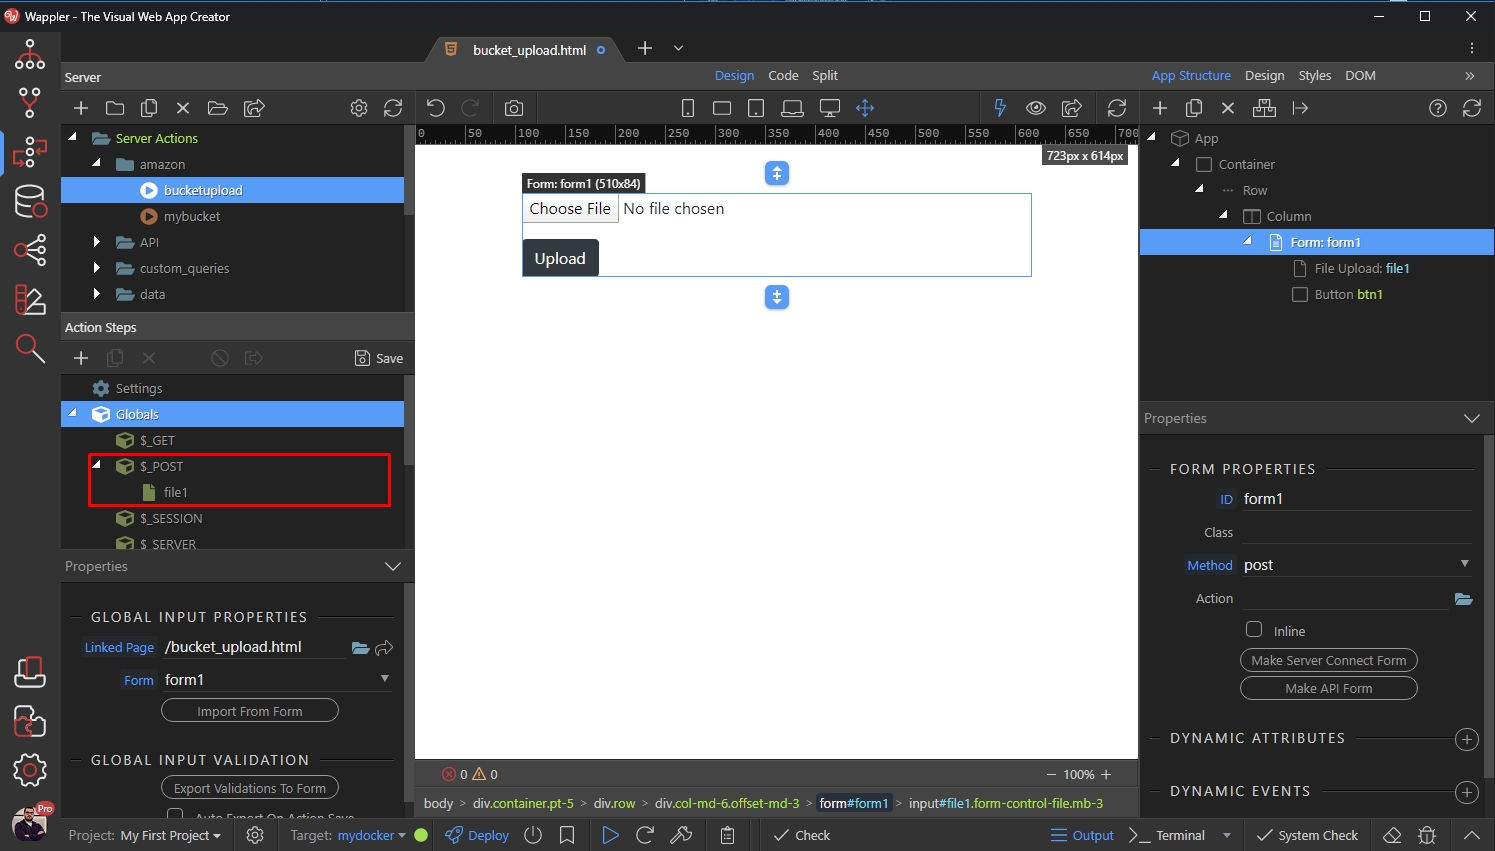
Right click steps:
Section titled “Right click steps:”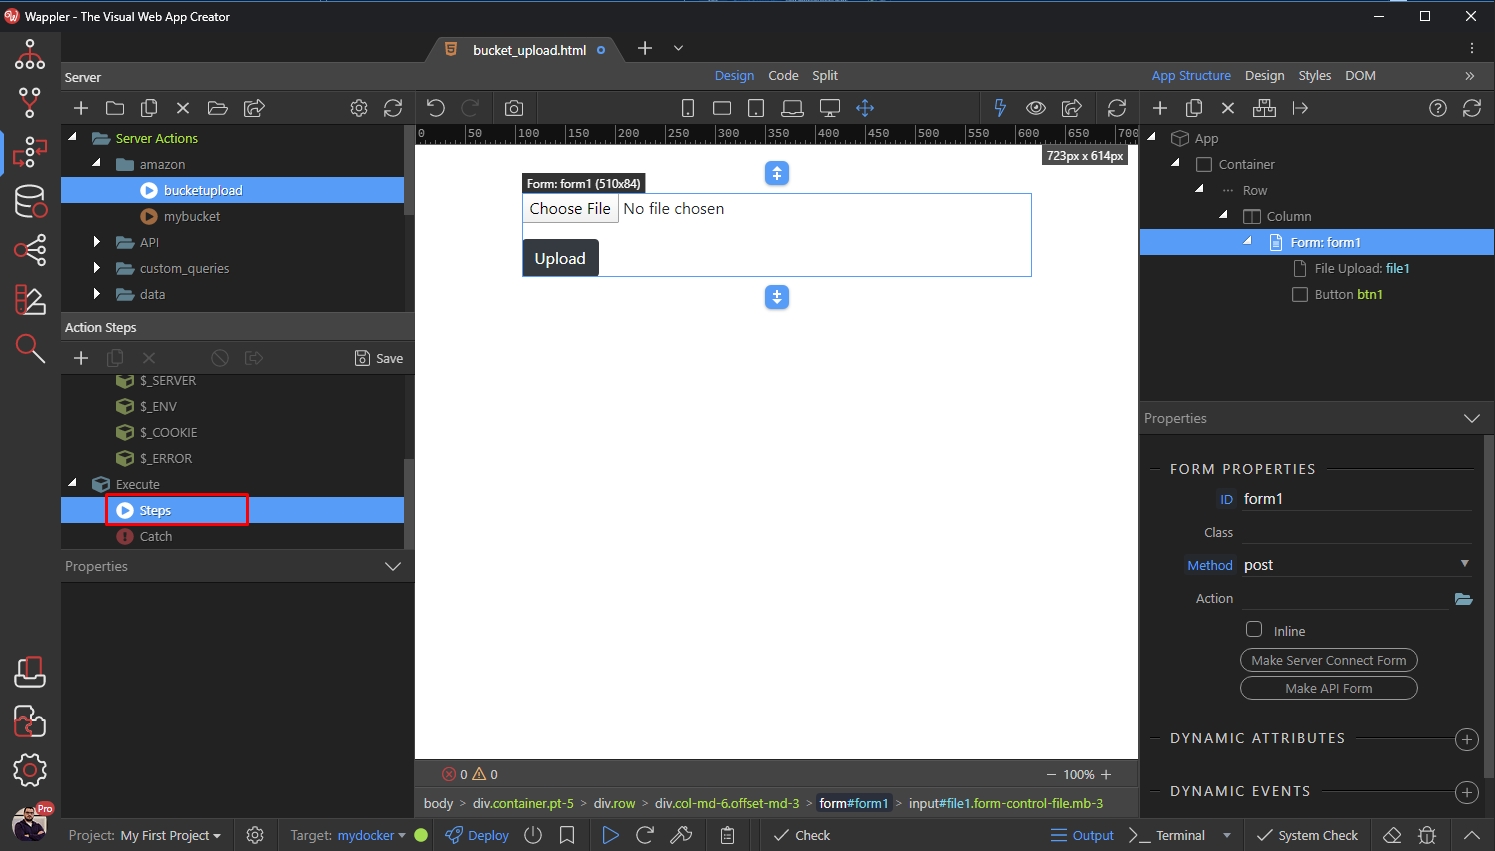
And add add the S3 Provider:
Section titled “And add add the S3 Provider:”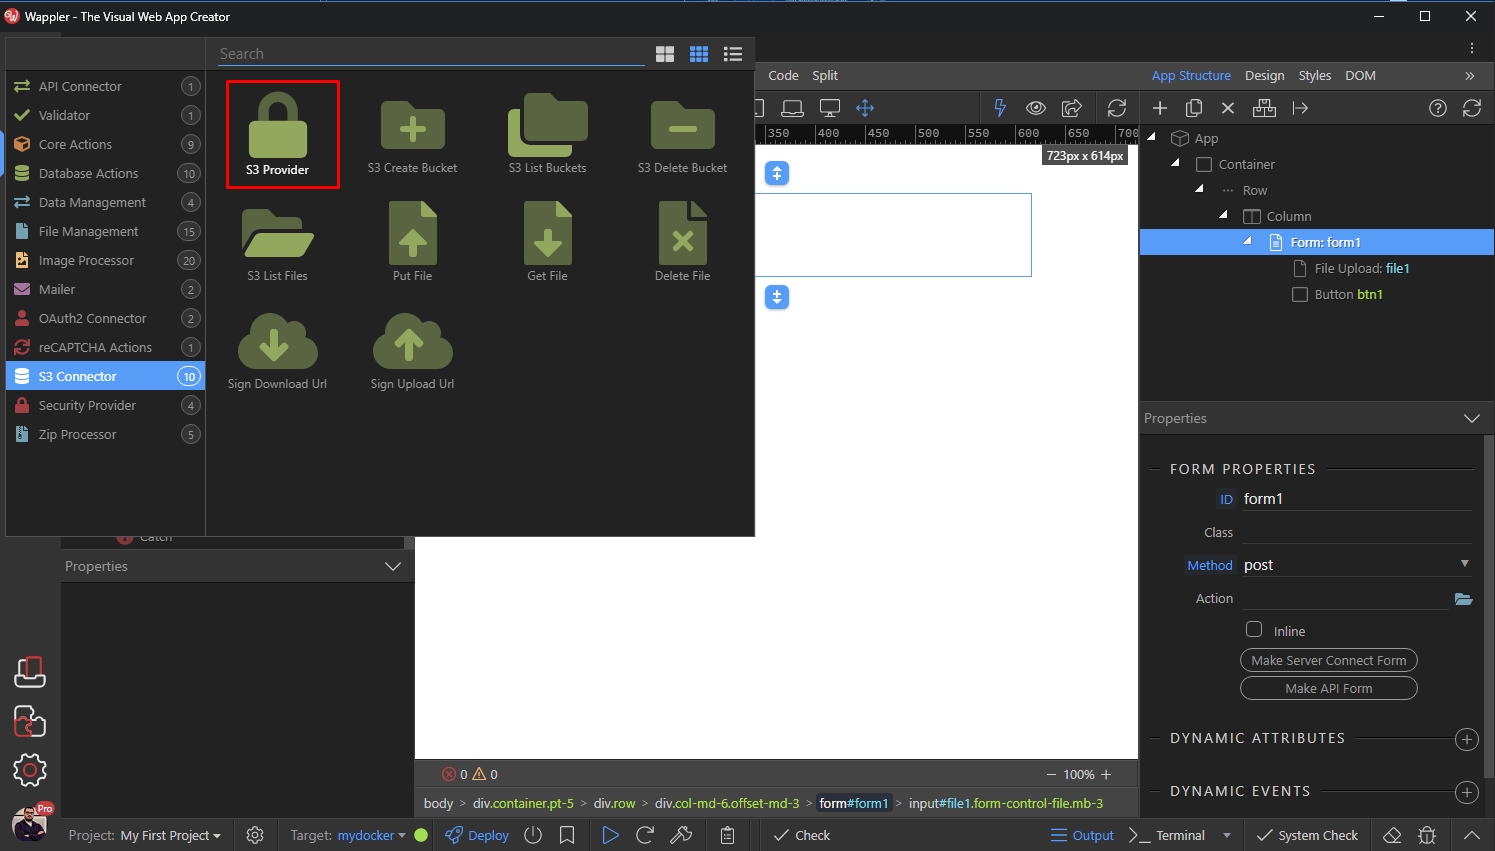
Setup the S3 Provider as explained earlier in this tutorial:
Section titled “Setup the S3 Provider as explained earlier in this tutorial:”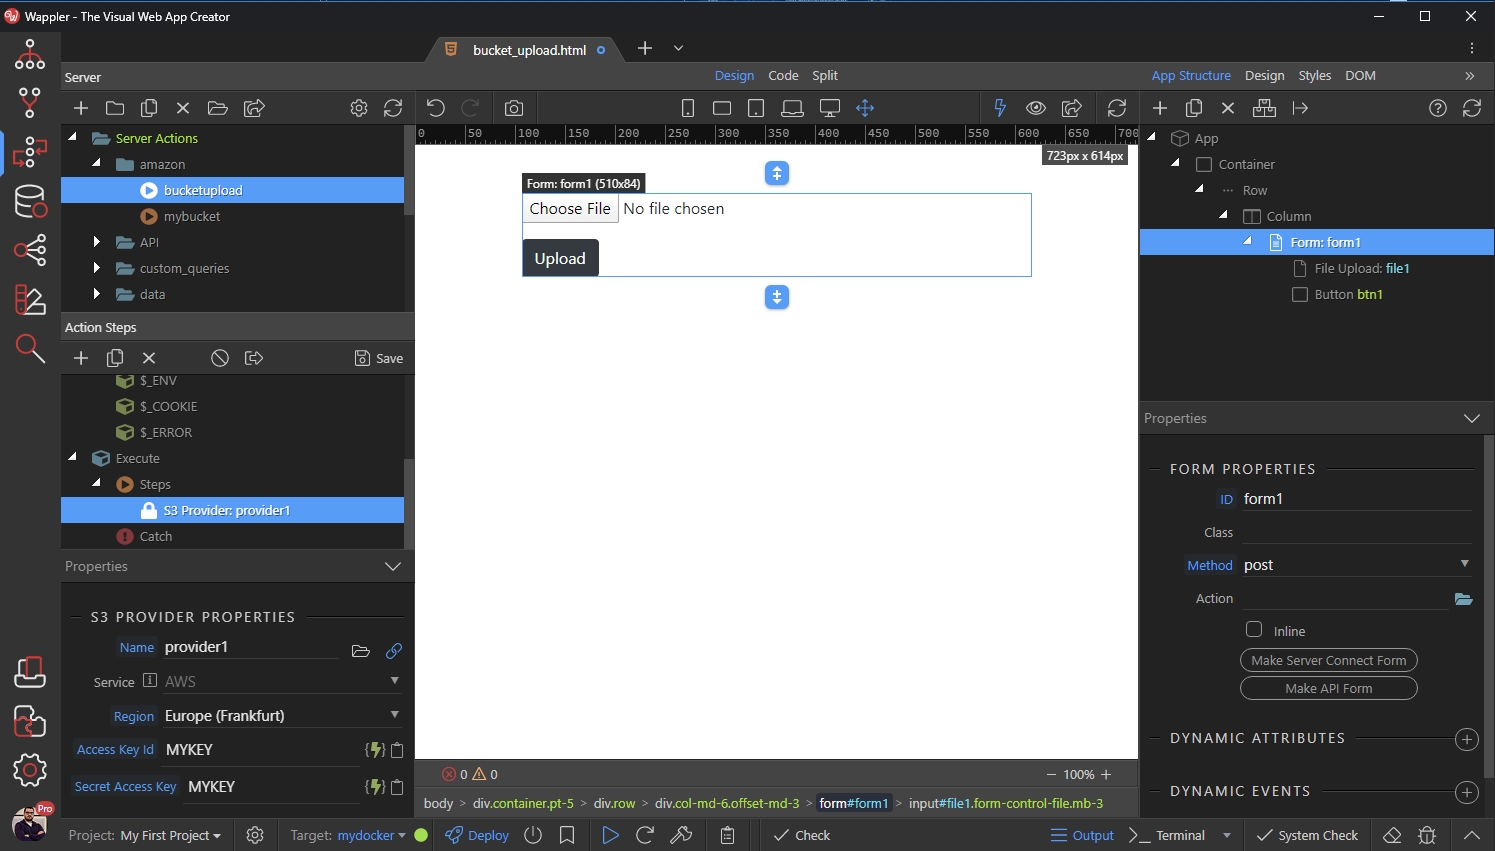
Right click the S3 Provider step and add File Upload:
Section titled “Right click the S3 Provider step and add File Upload:”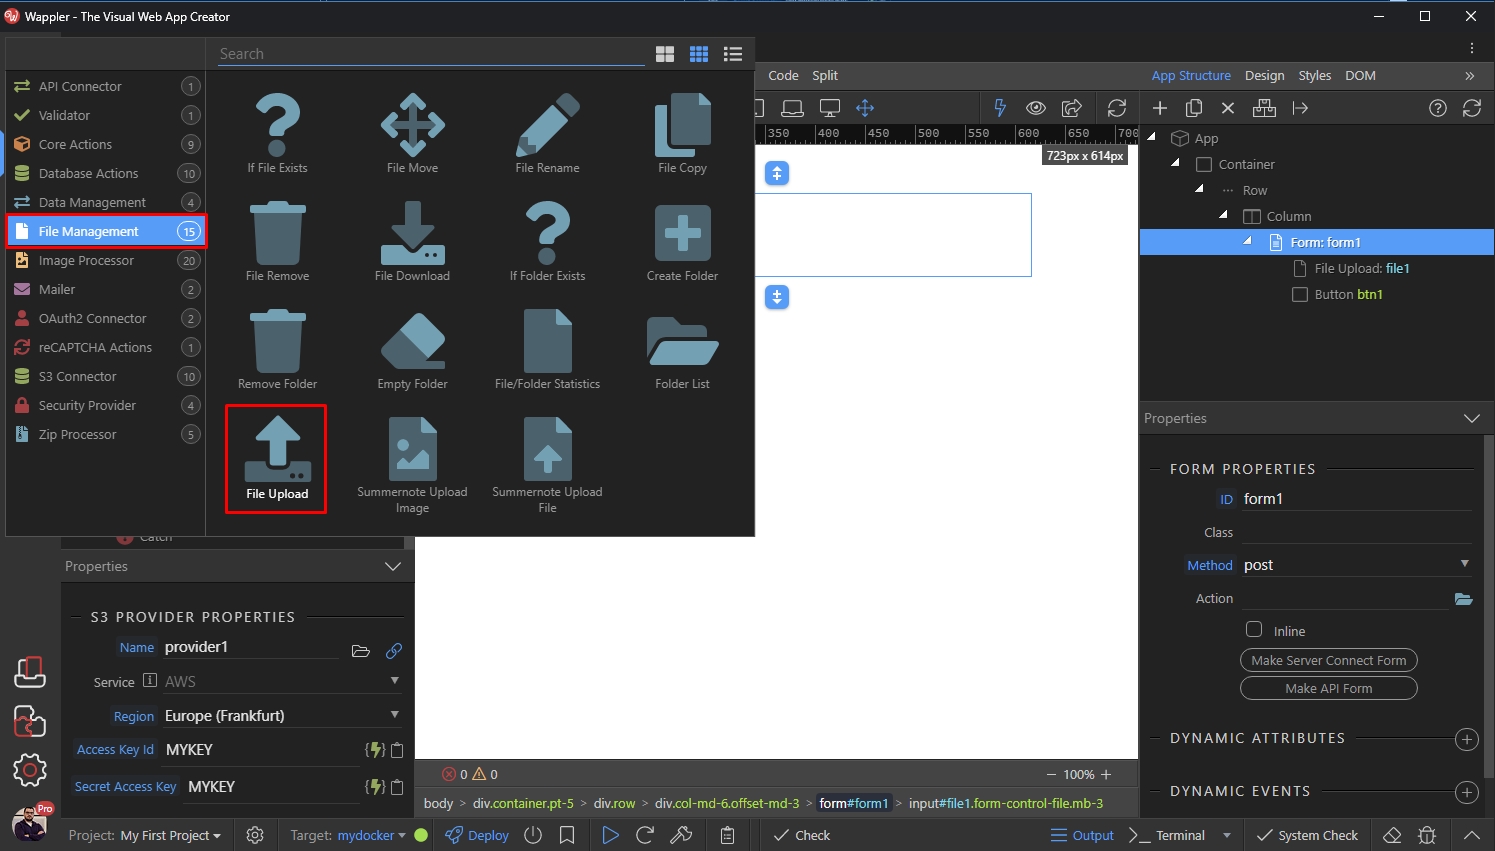
Select your upload field:
Section titled “Select your upload field:”
We select our file input, imported under $_POST:
Section titled “We select our file input, imported under $_POST:”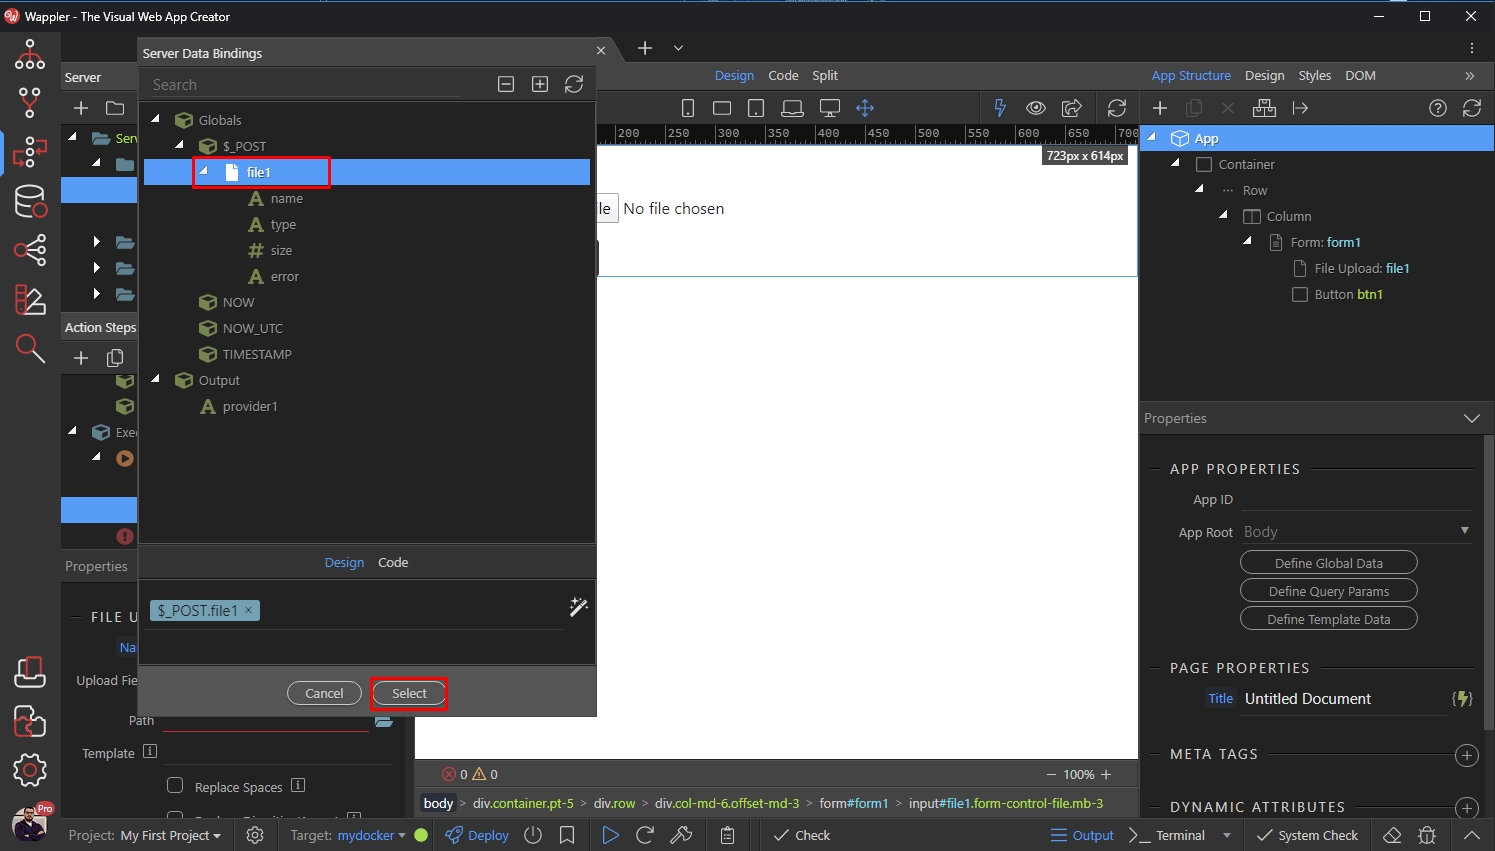
Select an upload path on your server:
Section titled “Select an upload path on your server:”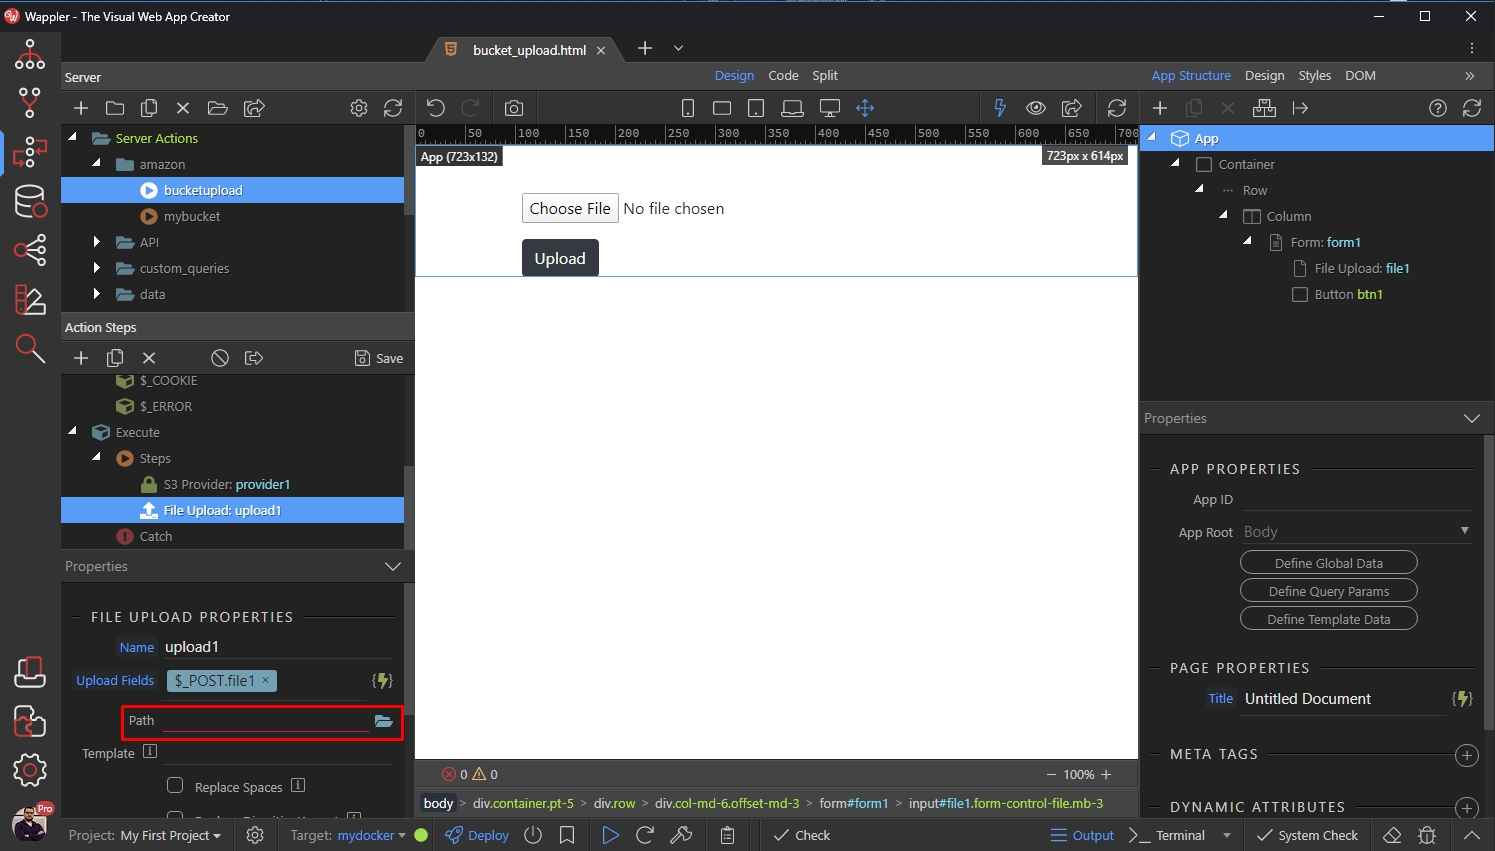
The files will be uploaded into /uploads/bucket on our server:
Section titled “The files will be uploaded into /uploads/bucket on our server:”
Step 28
Section titled “Step 28”Then, we want to send them to our bucket. So right click the Upload step, open S3 Connector and select Put File:
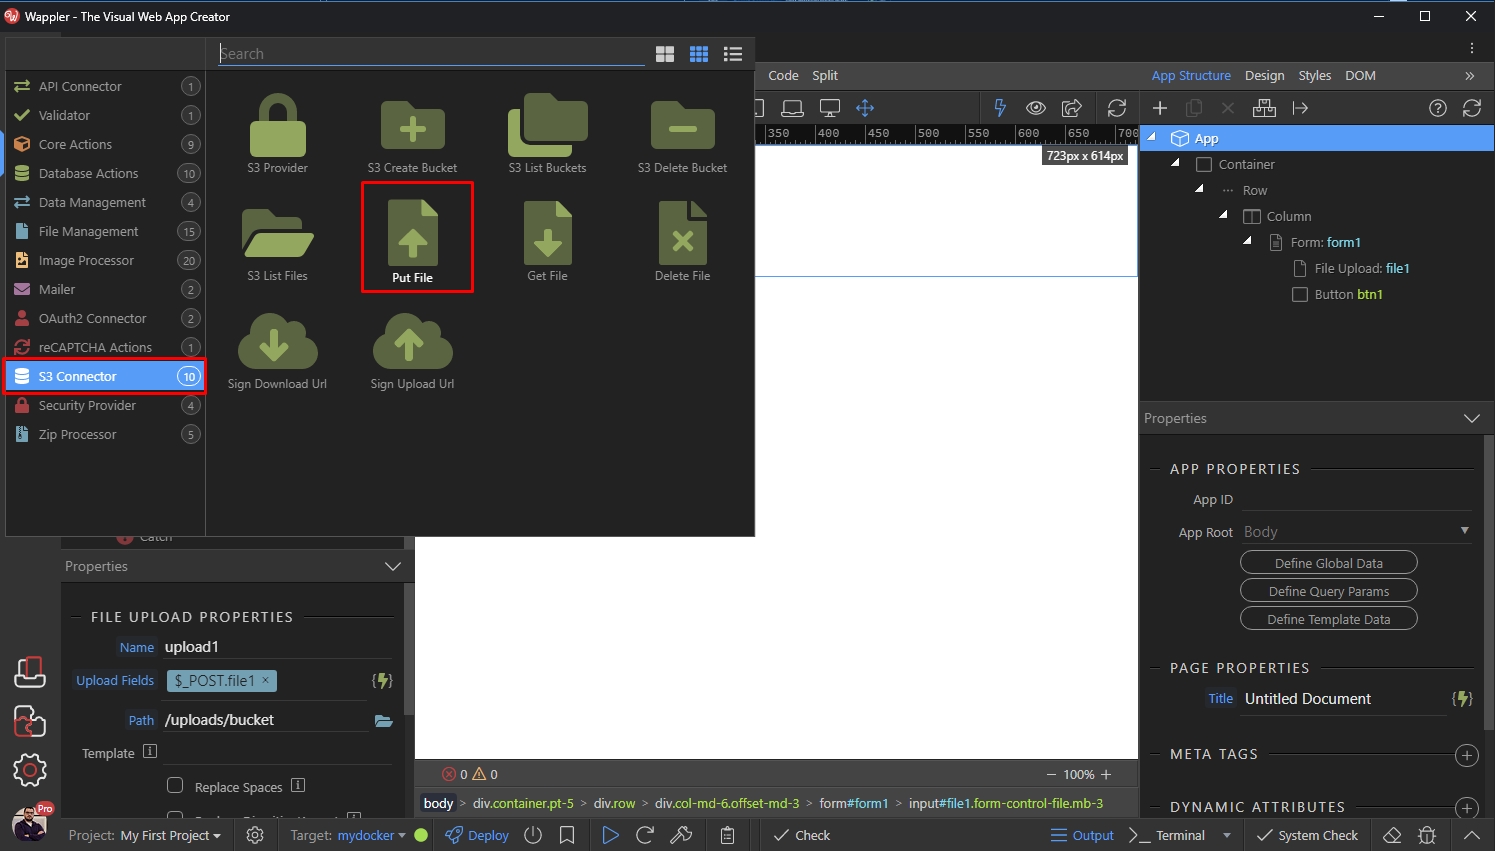
Step 29
Section titled “Step 29”Enter your bucket name, or select a dynamic value returning it. We just enter our bucket name here for this tutorial:
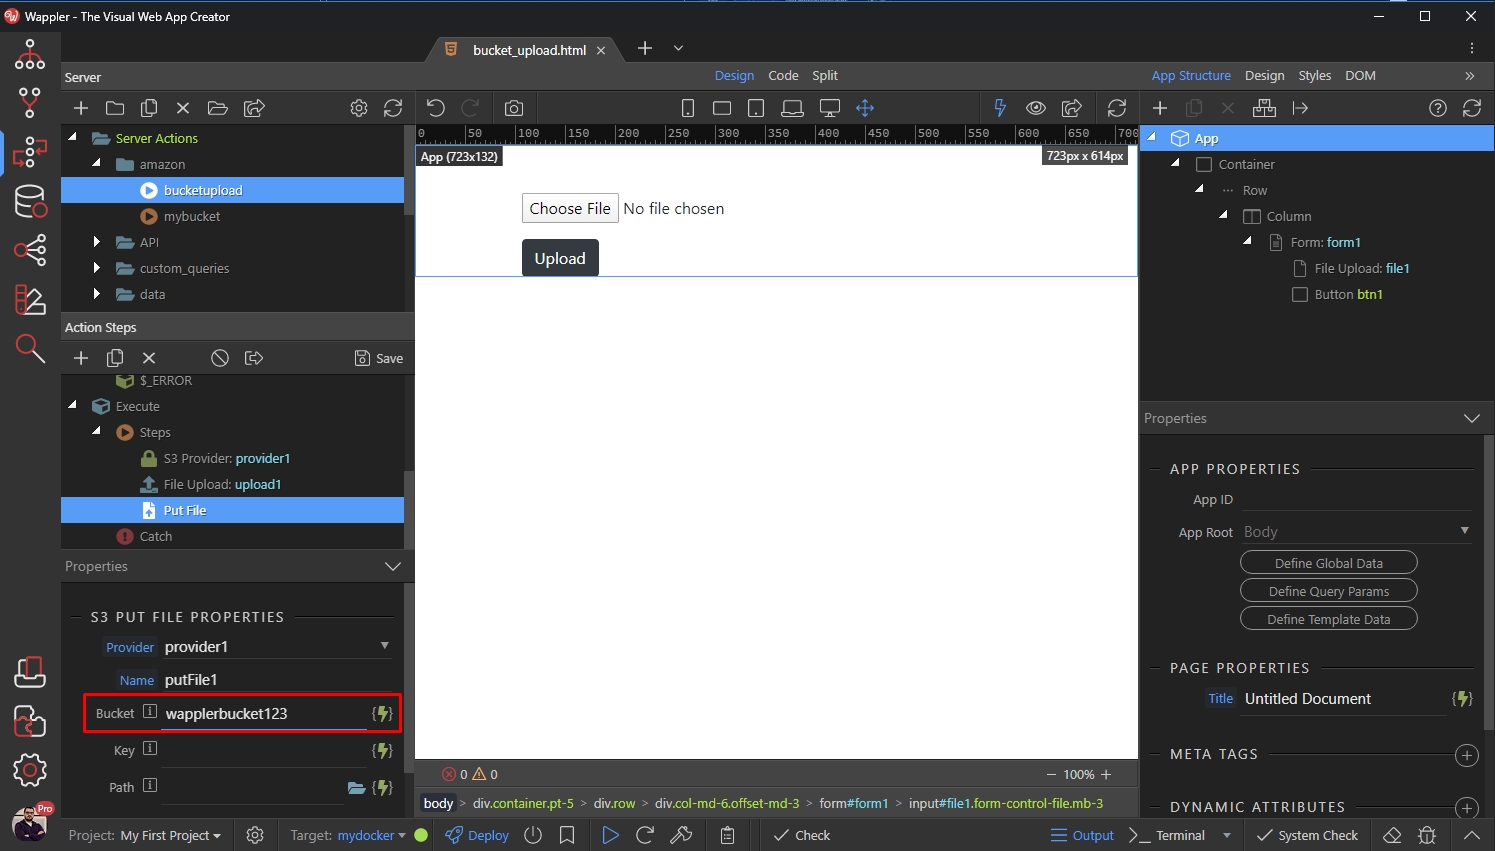
Then, select a dynamic value for the Key option (that’s how your file will be called in the bucket):
Section titled “Then, select a dynamic value for the Key option (that’s how your file will be called in the bucket):”
We will use the uploaded file name, so select name under the upload step:
Section titled “We will use the uploaded file name, so select name under the upload step:”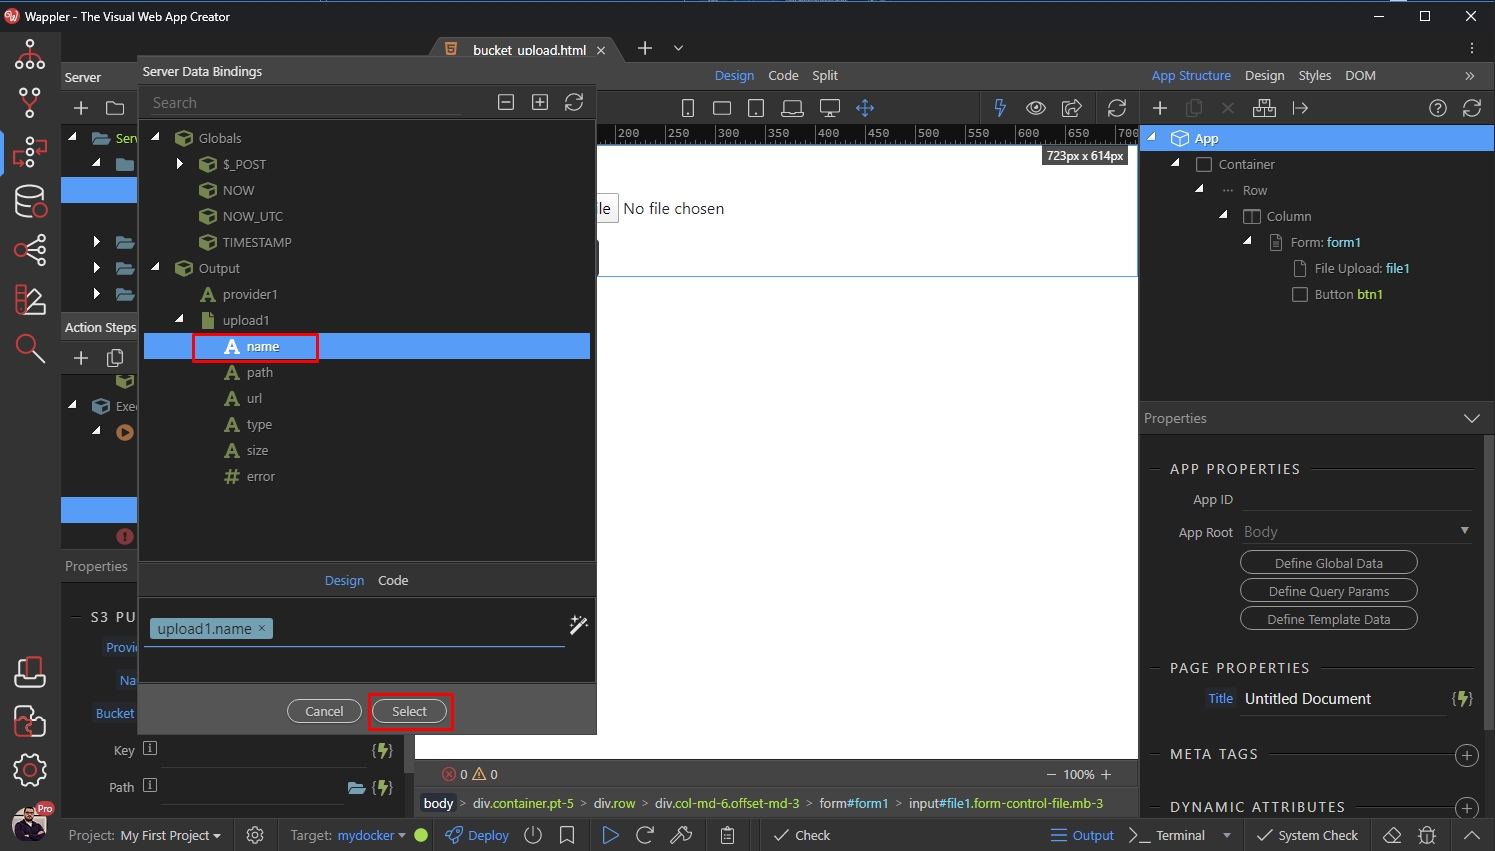
Then select a dynamic value for the file path:
Section titled “Then select a dynamic value for the file path:”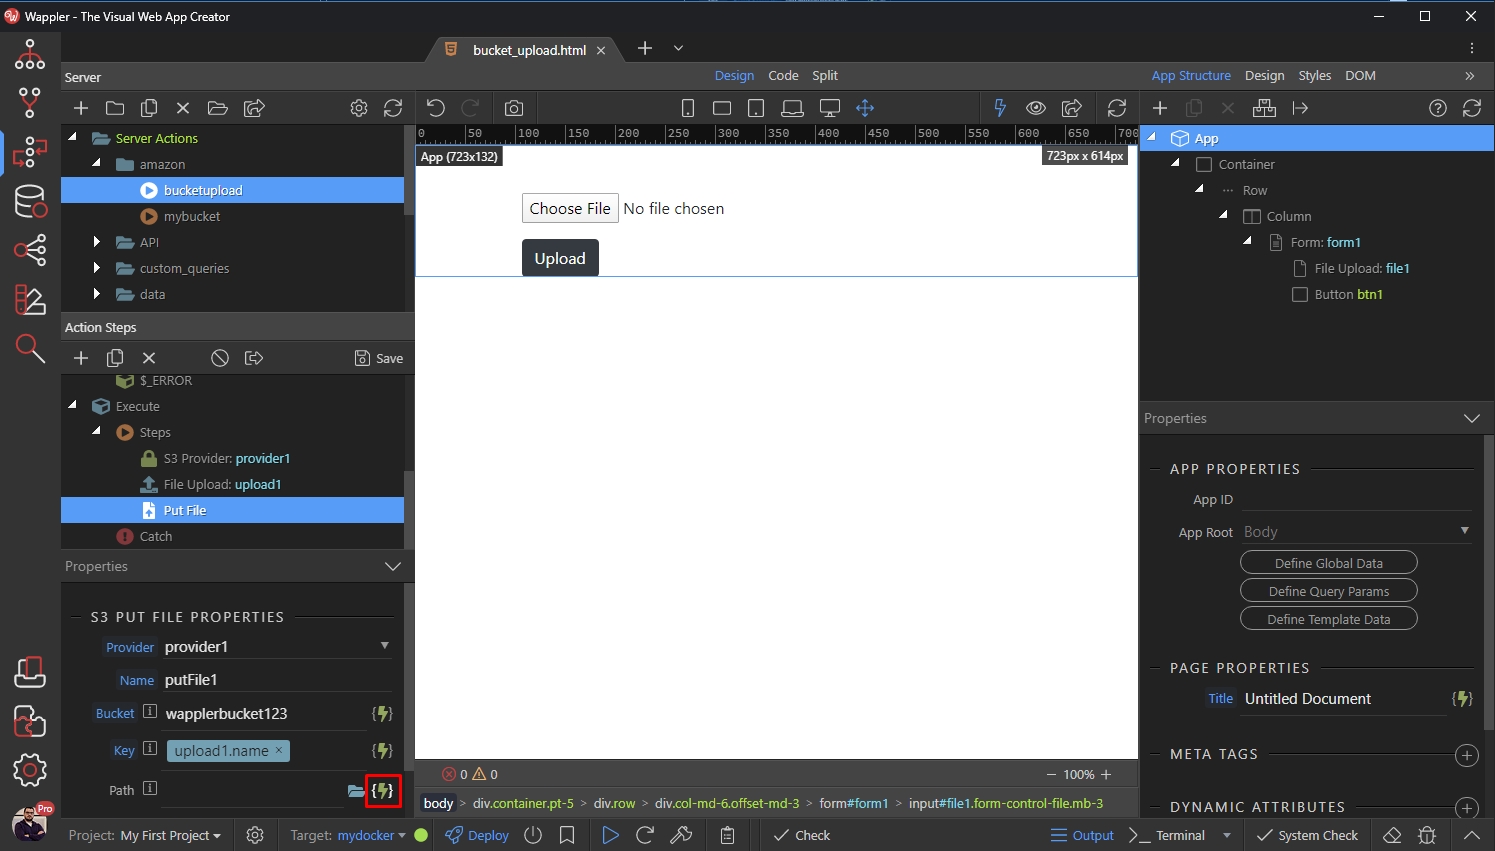
This should be the upload path returned by our upload step:
Section titled “This should be the upload path returned by our upload step:”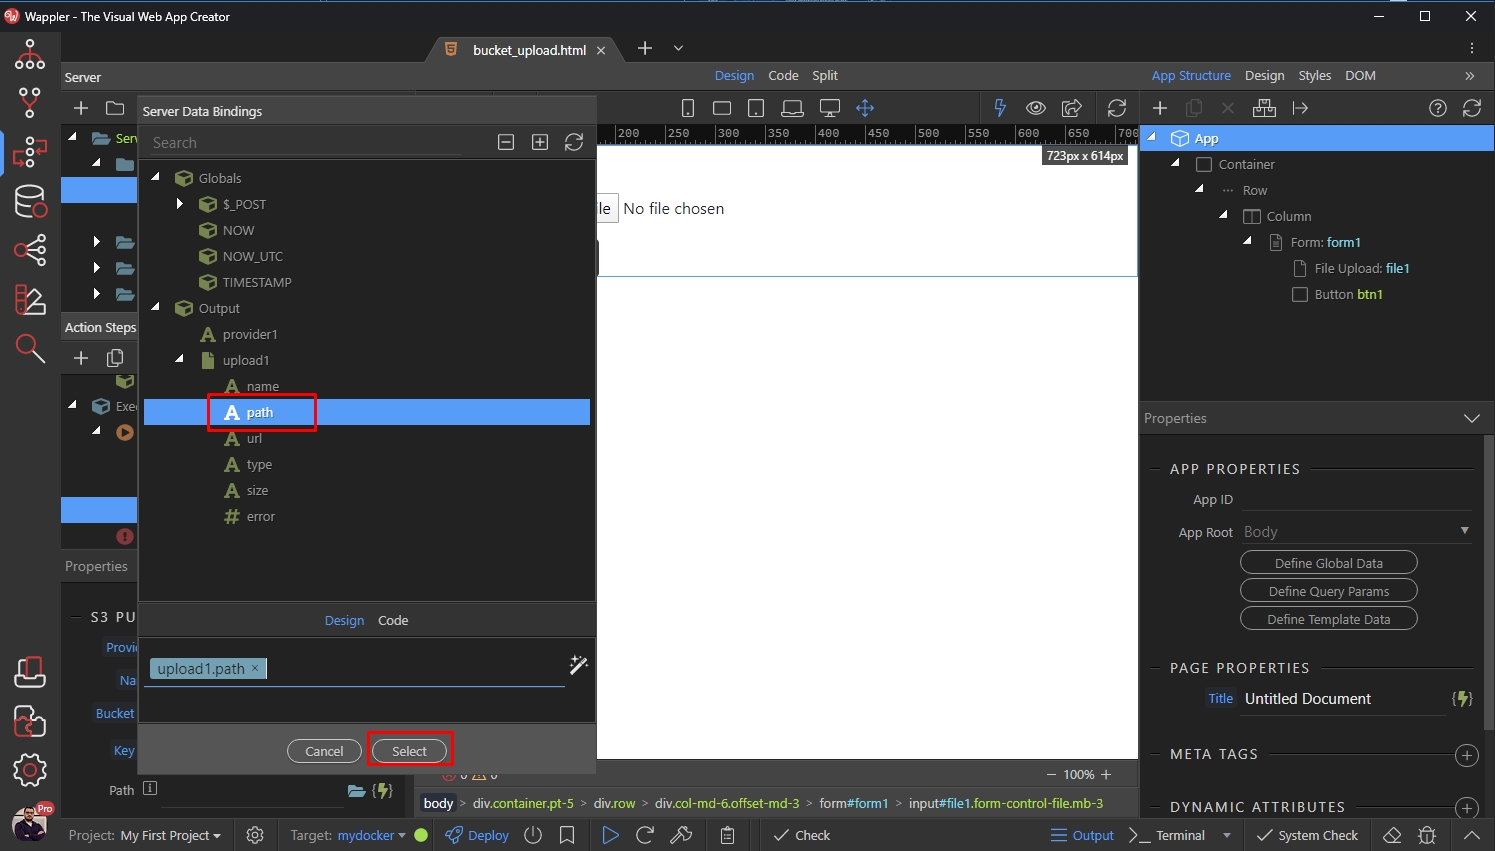
Select the access to the file Private or Public Read:
Section titled “Select the access to the file Private or Public Read:”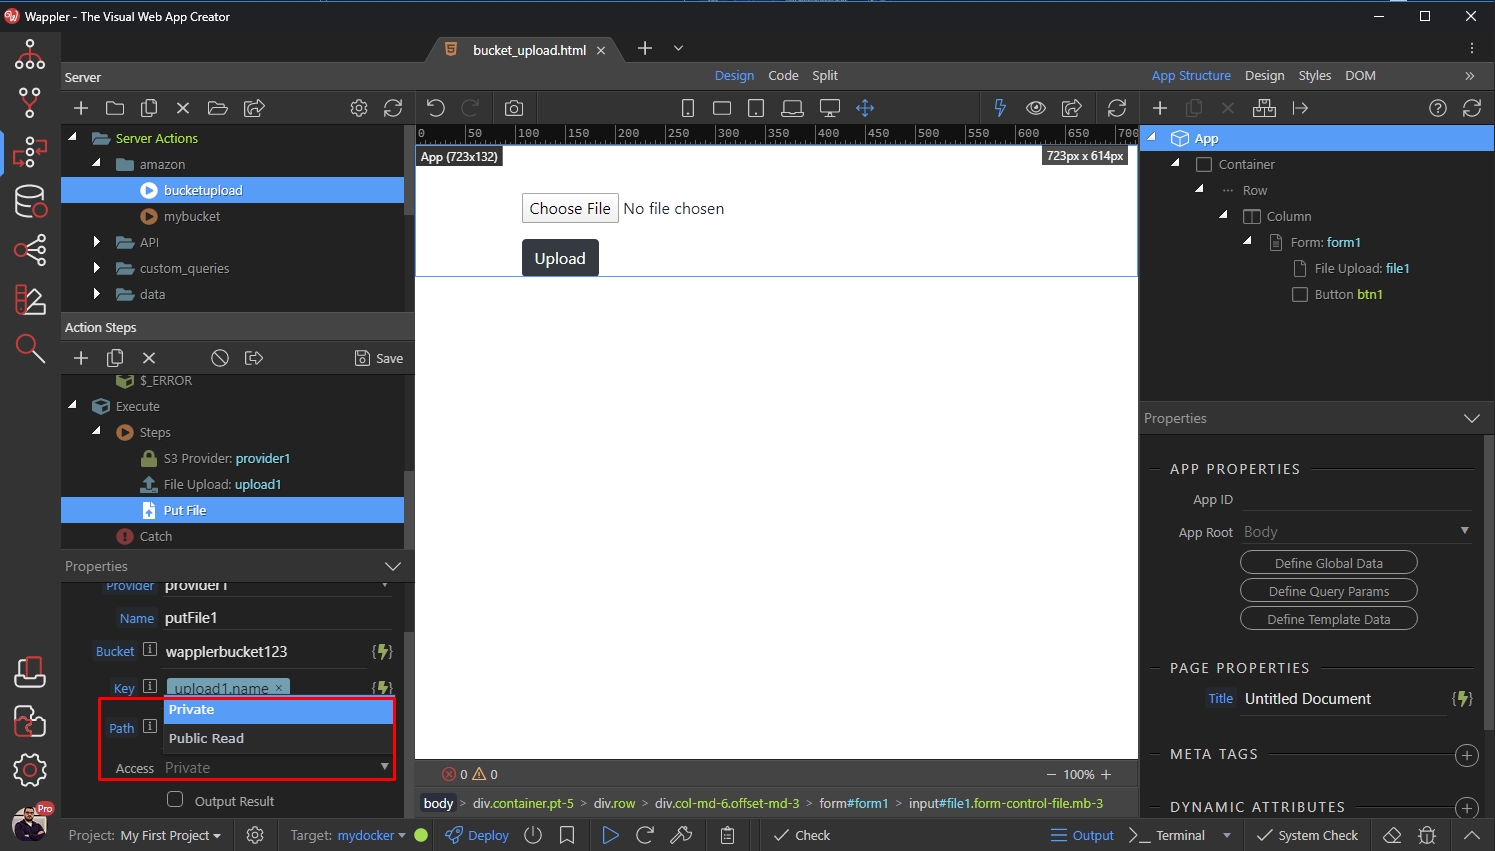
Save your server action and close the Server Connect panel:
Section titled “Save your server action and close the Server Connect panel:”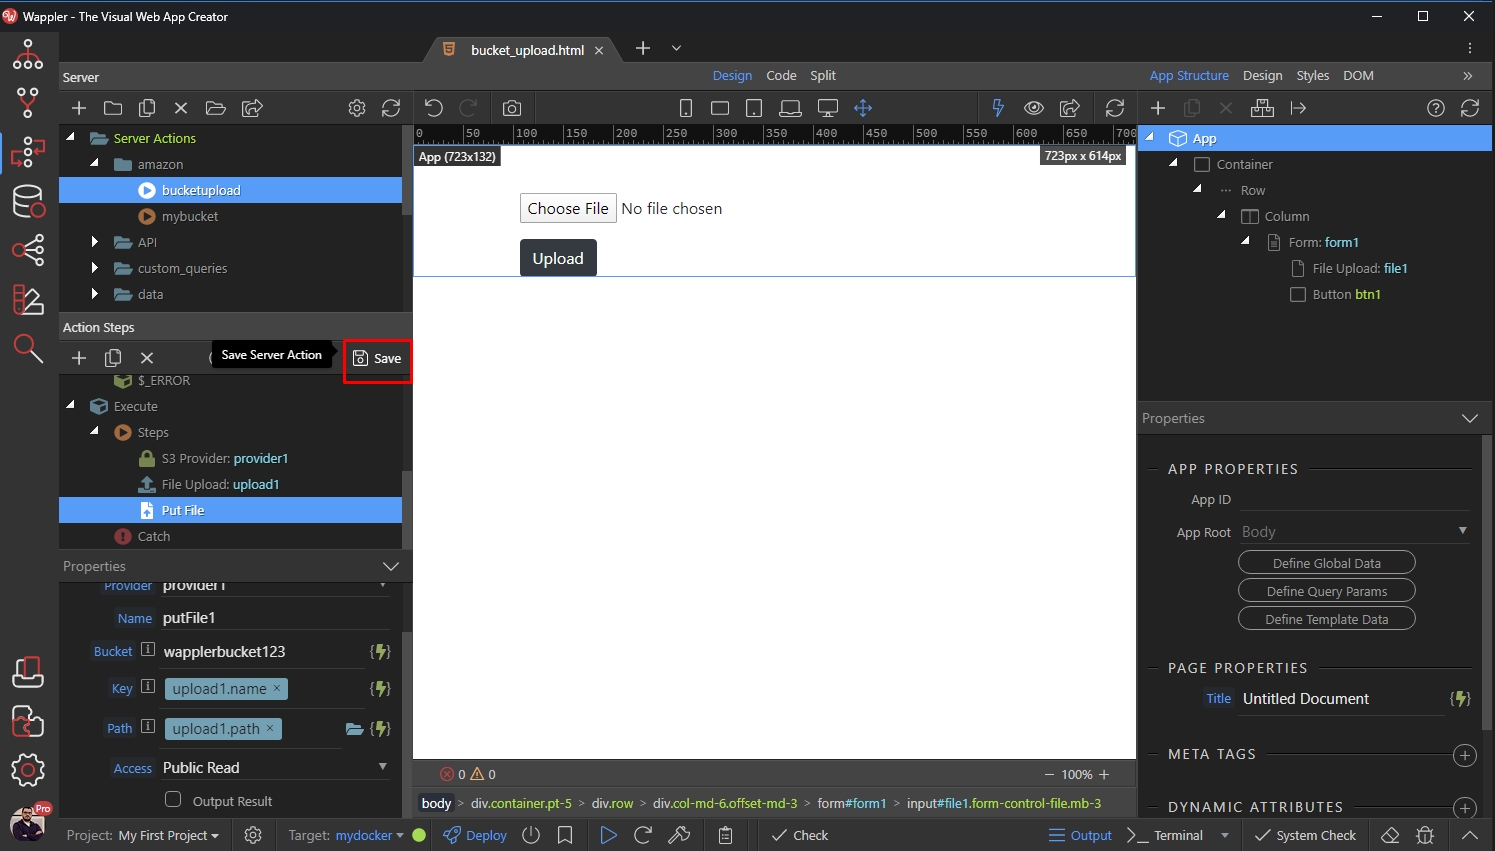
Select your form on the page and click the Make Server Action Form button:
Section titled “Select your form on the page and click the Make Server Action Form button:”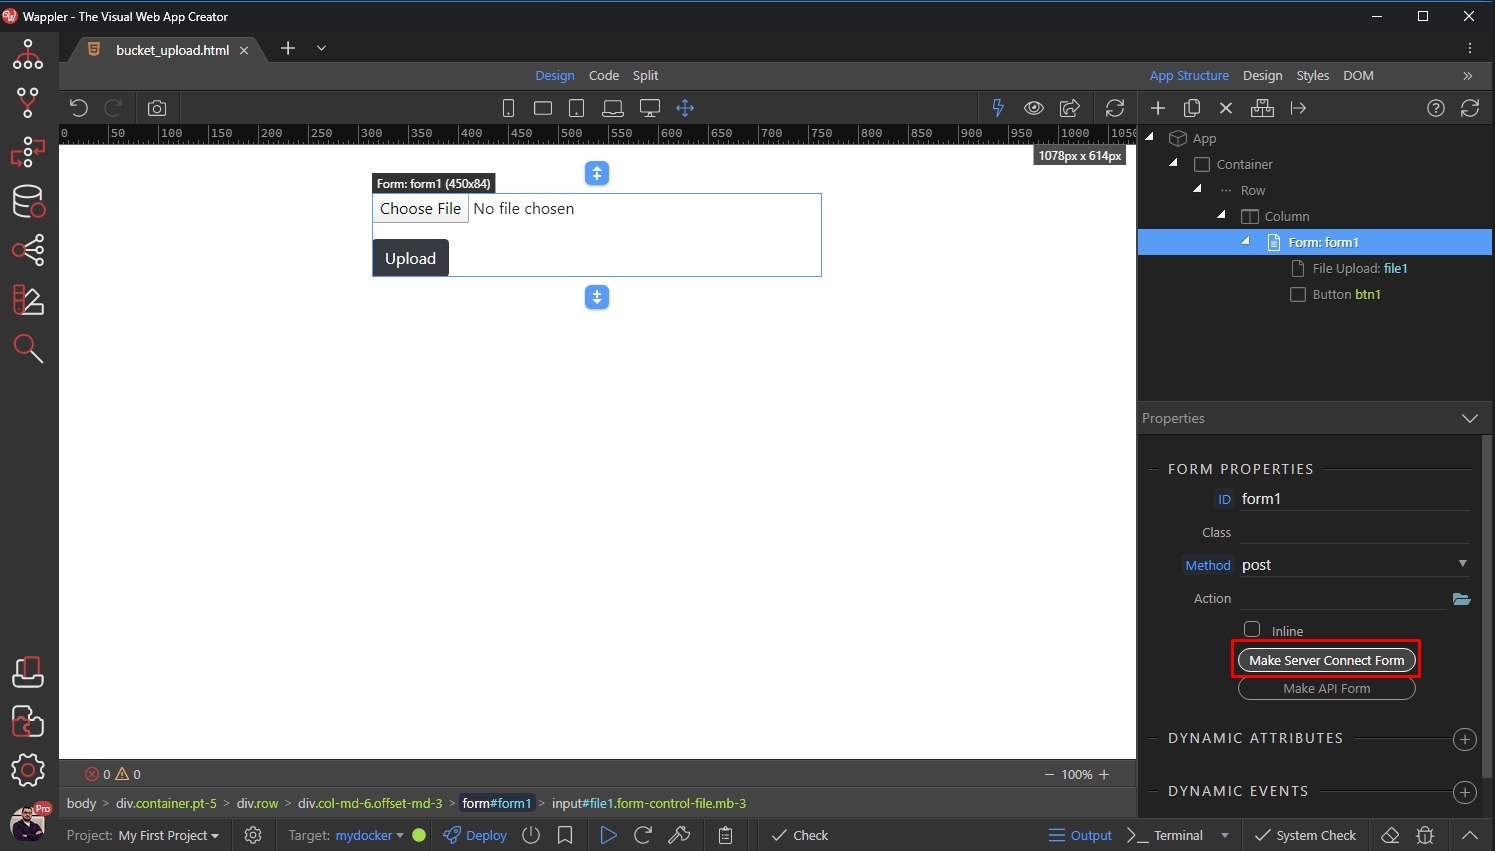
Then select a server action for this form:
Section titled “Then select a server action for this form:”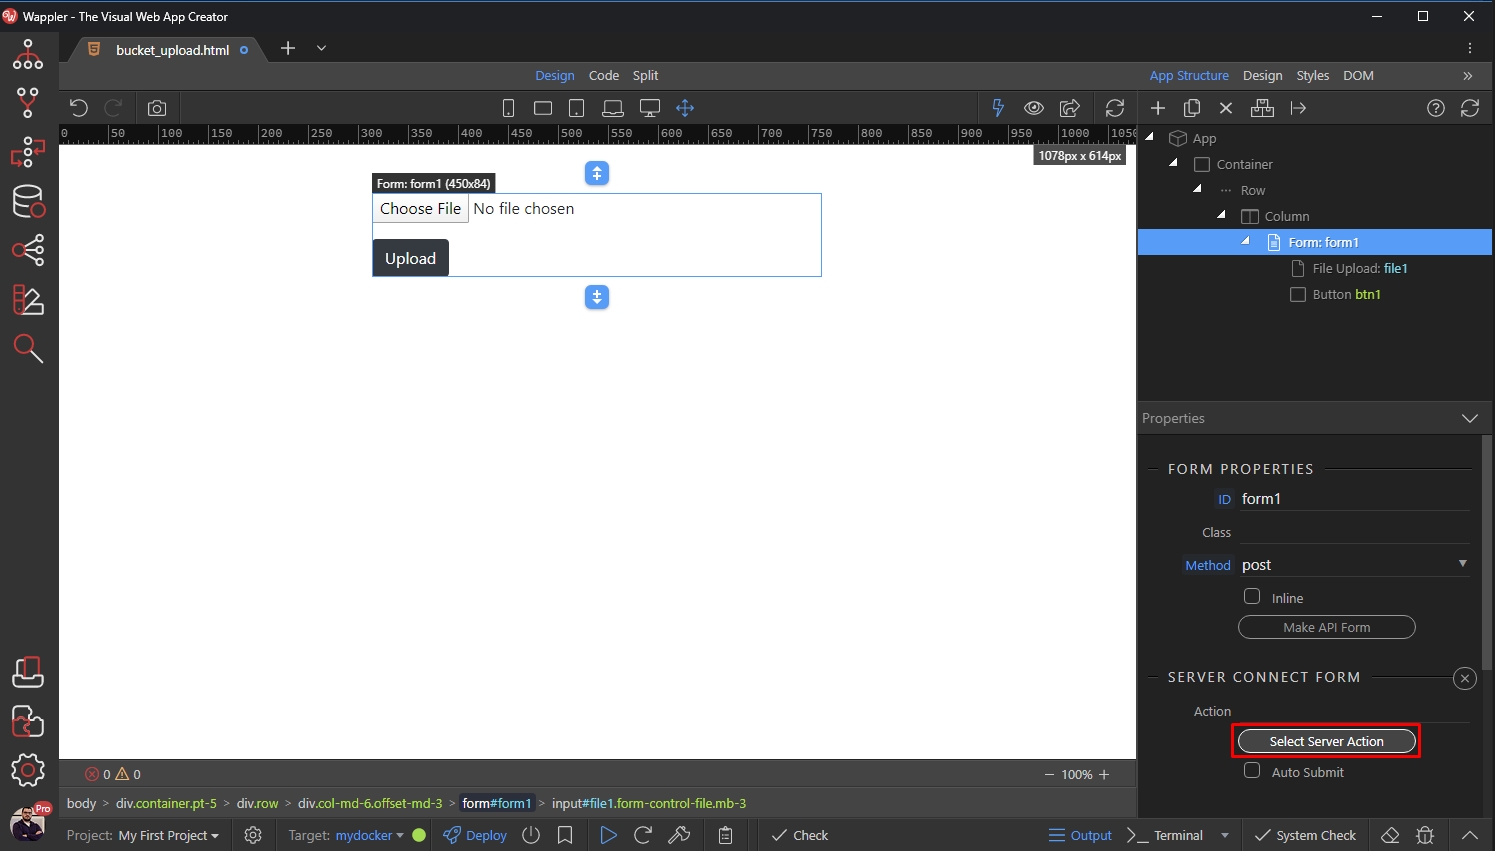
Select the bucketupload server action, which we just created:
Section titled “Select the bucketupload server action, which we just created:”
Save your page and preview the results in your browser:
Section titled “Save your page and preview the results in your browser:”Setup any redirect, alert, form reset or any other action that needs needs to run when the file has been successfully uploaded. We won’t show this now, as it’s already documented in other tutorials.
Save your page and preview the results in your browser:
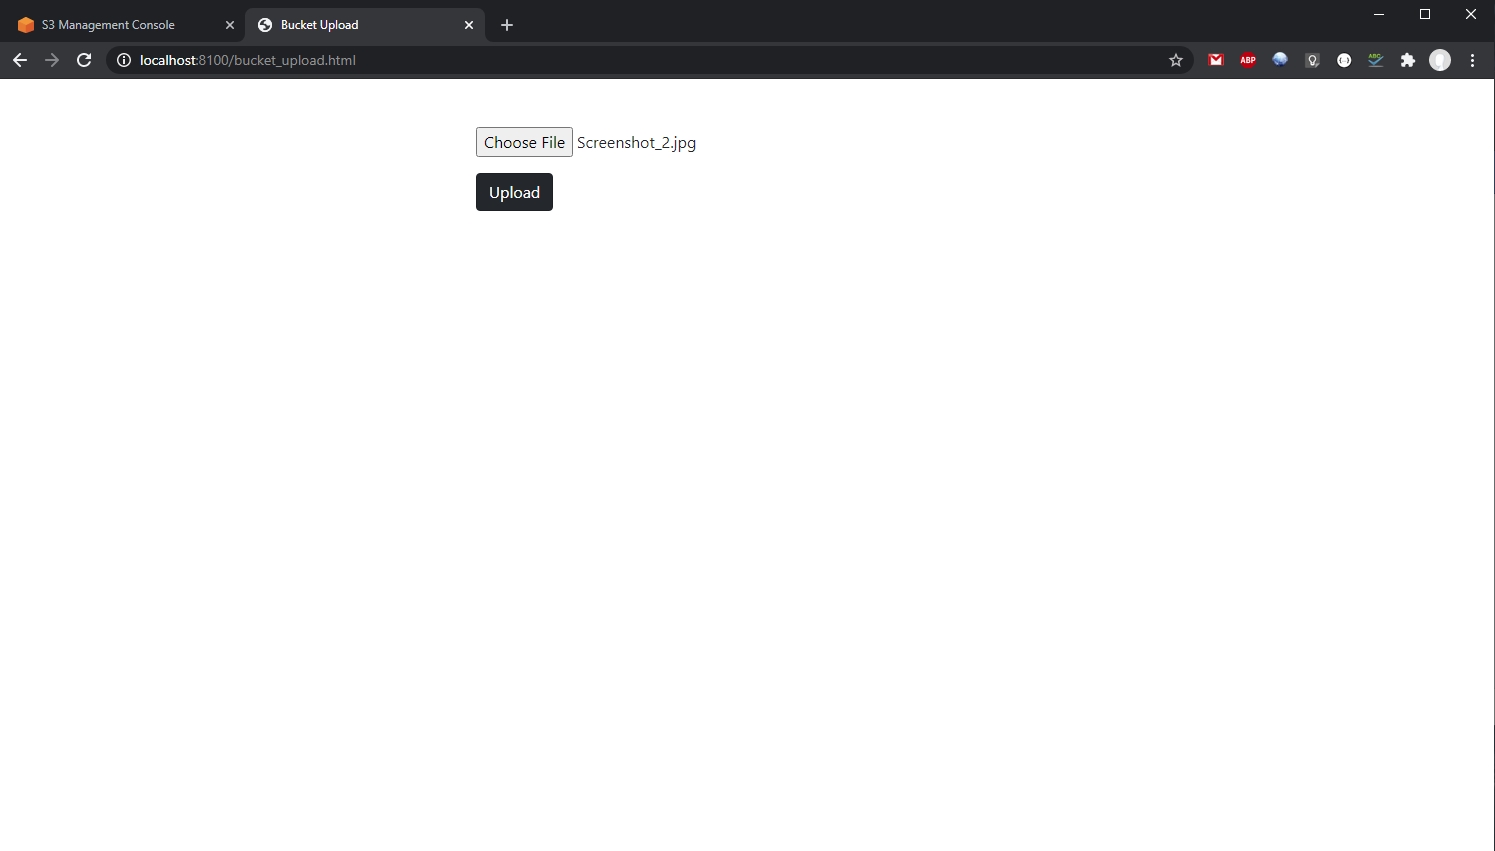
You can see the file has been uploaded in the Bucket when you open the AWS Console and view your Bucket:
Section titled “You can see the file has been uploaded in the Bucket when you open the AWS Console and view your Bucket:”
Listing Files from a Bucket
Section titled “Listing Files from a Bucket”Another simple example of what you can do with the S3 Connector is to list the files from a bucket.
First, create a Server Action:
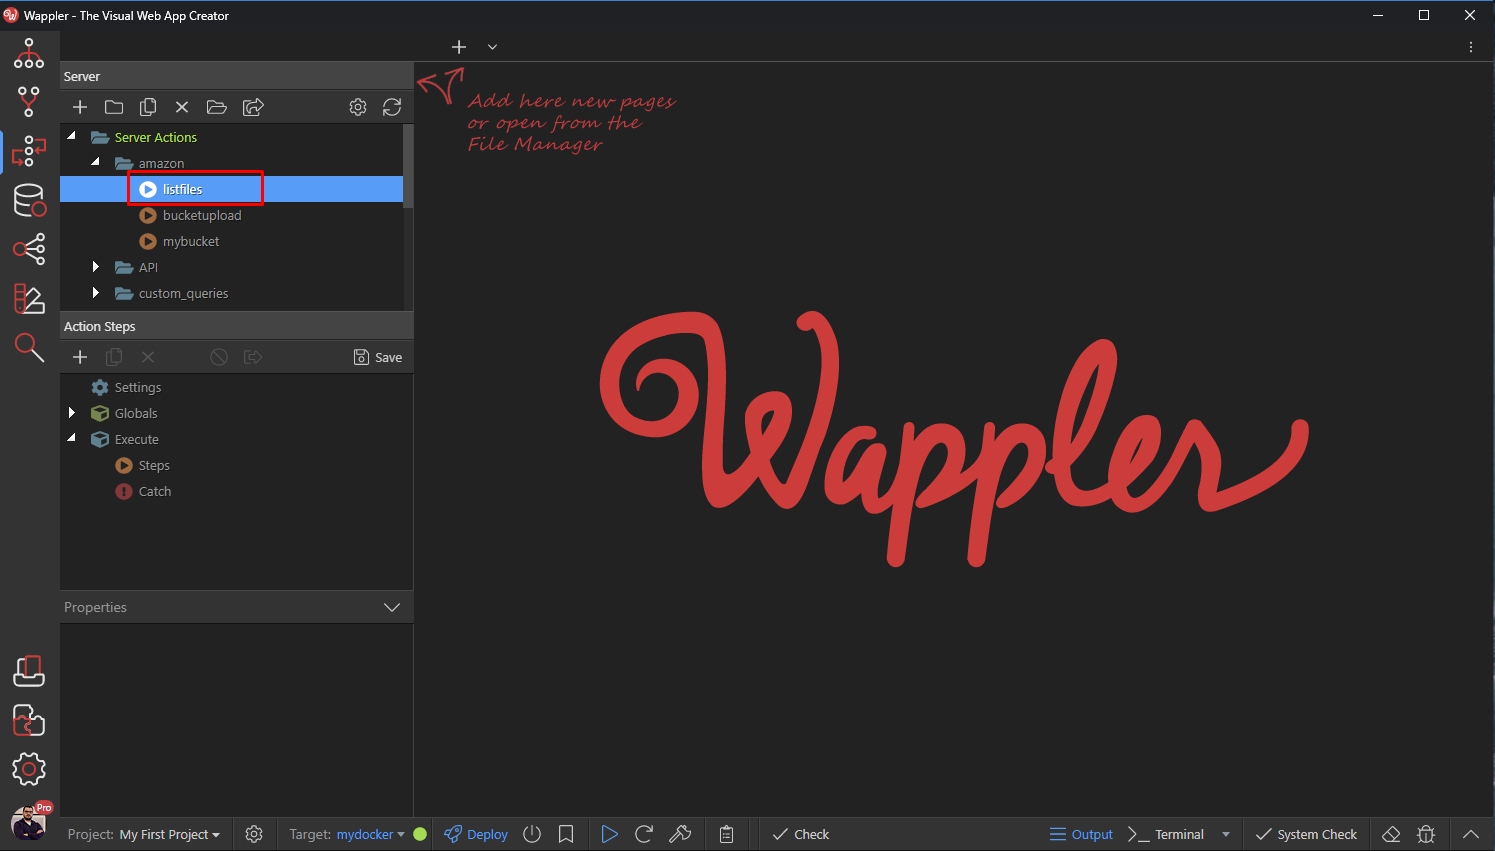
Then right click steps and add S3 Provider. Setup the S3 Provider as explained earlier in this tutorial:
Section titled “Then right click steps and add S3 Provider. Setup the S3 Provider as explained earlier in this tutorial:”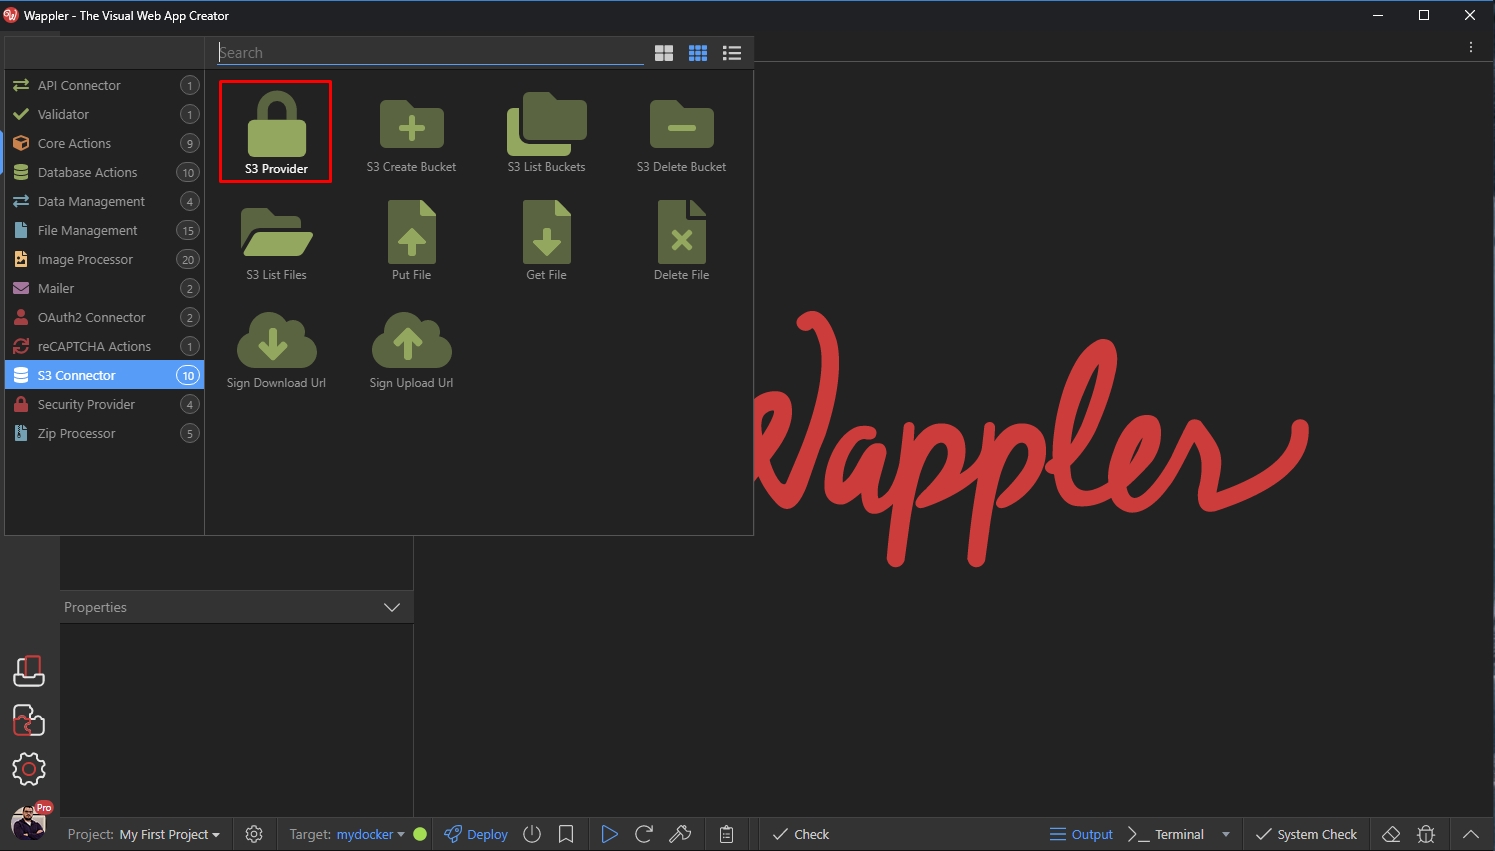
Then right click S3 Provider step:
Section titled “Then right click S3 Provider step:”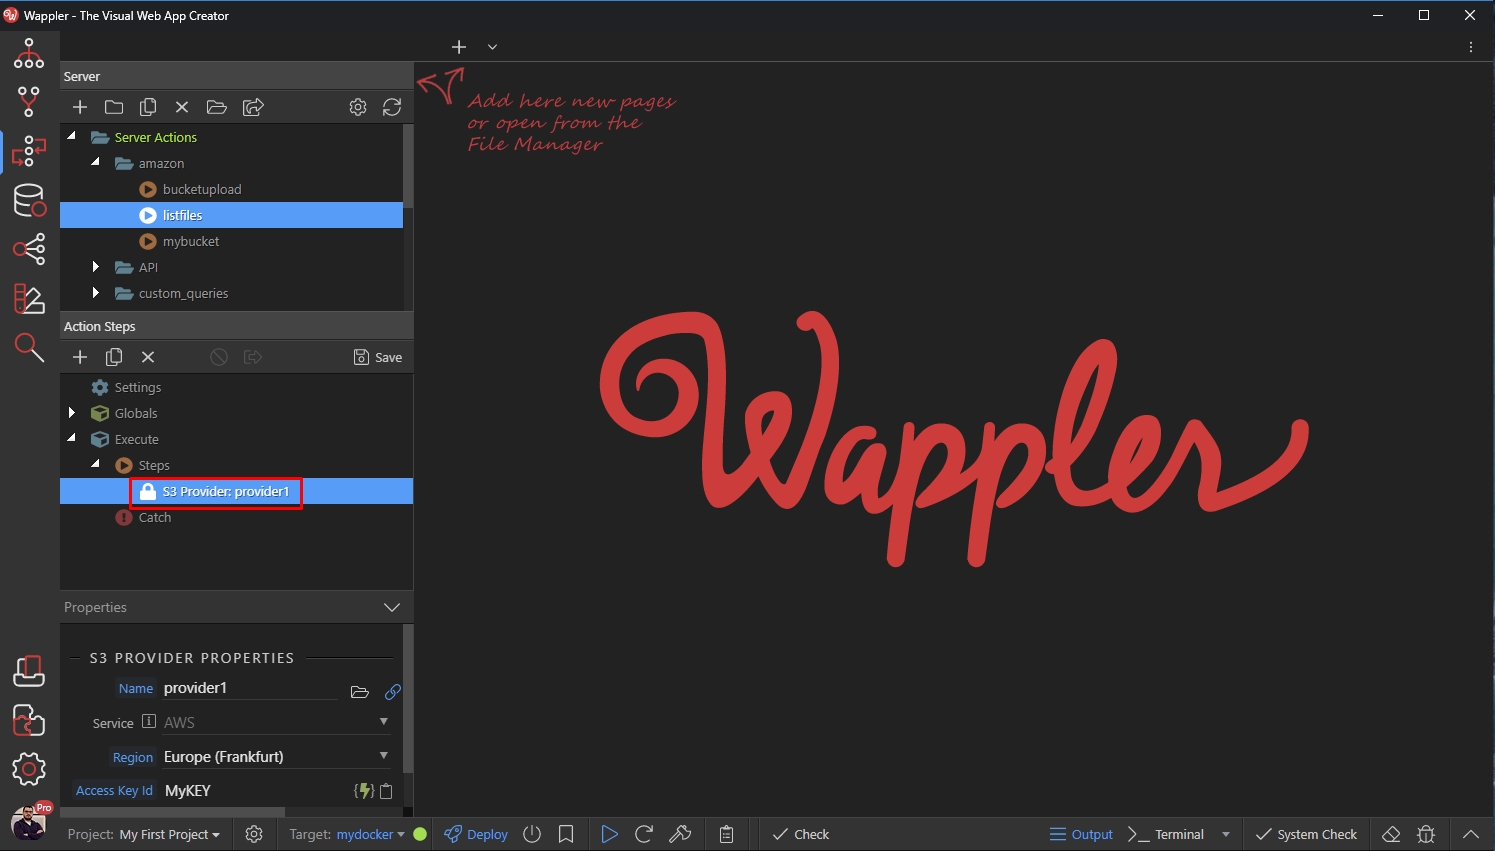
Open S3 Connector and select S3 List Files:
Section titled “Open S3 Connector and select S3 List Files:”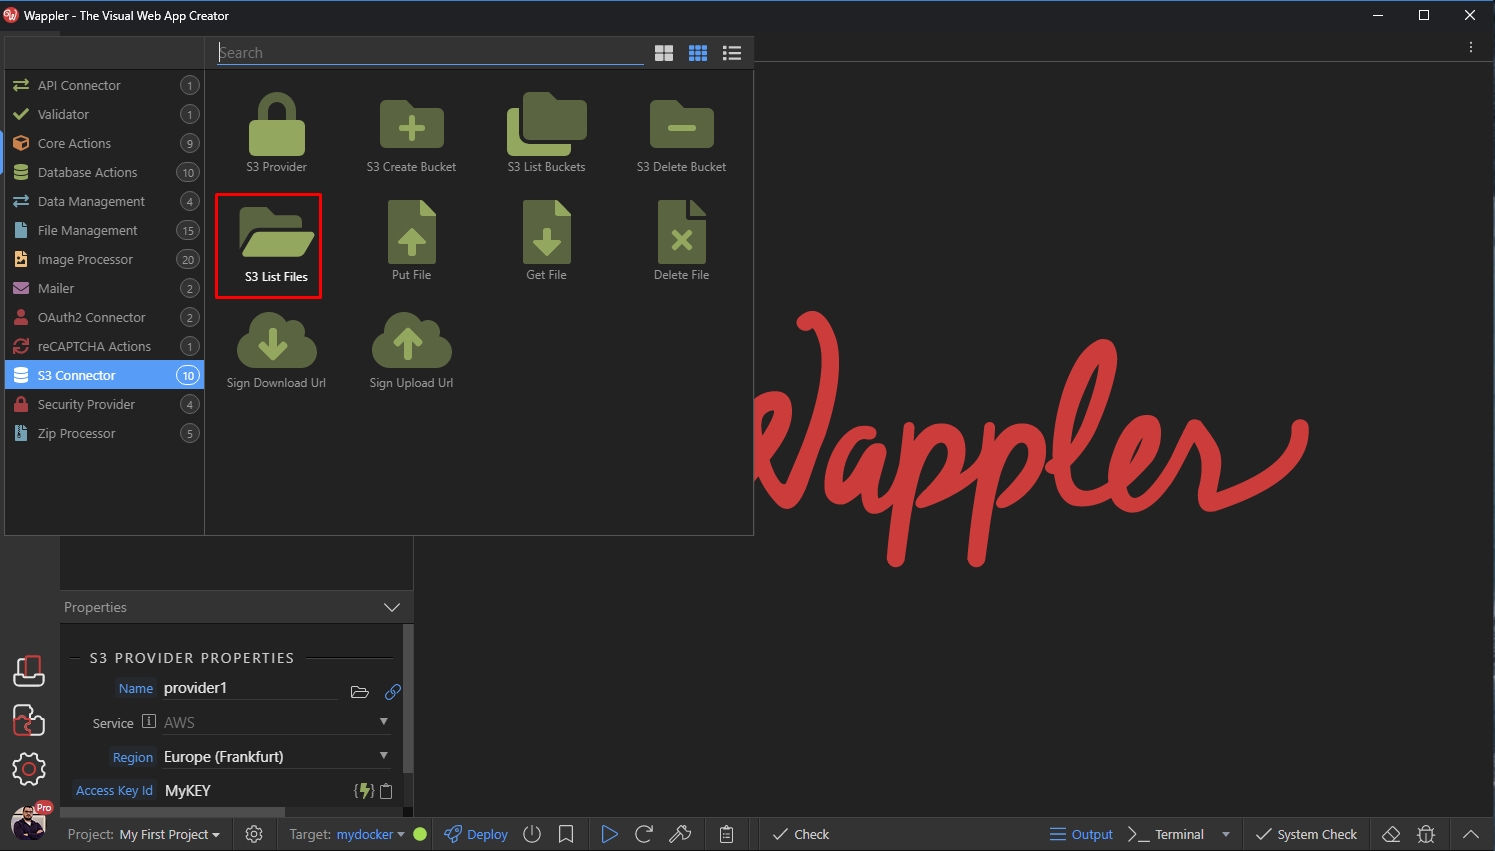
Step 46
Section titled “Step 46”Enter the name of the Bucket which files you want to list, or select a dynamic value for it. In our tutorial we just use a static Bucket name:
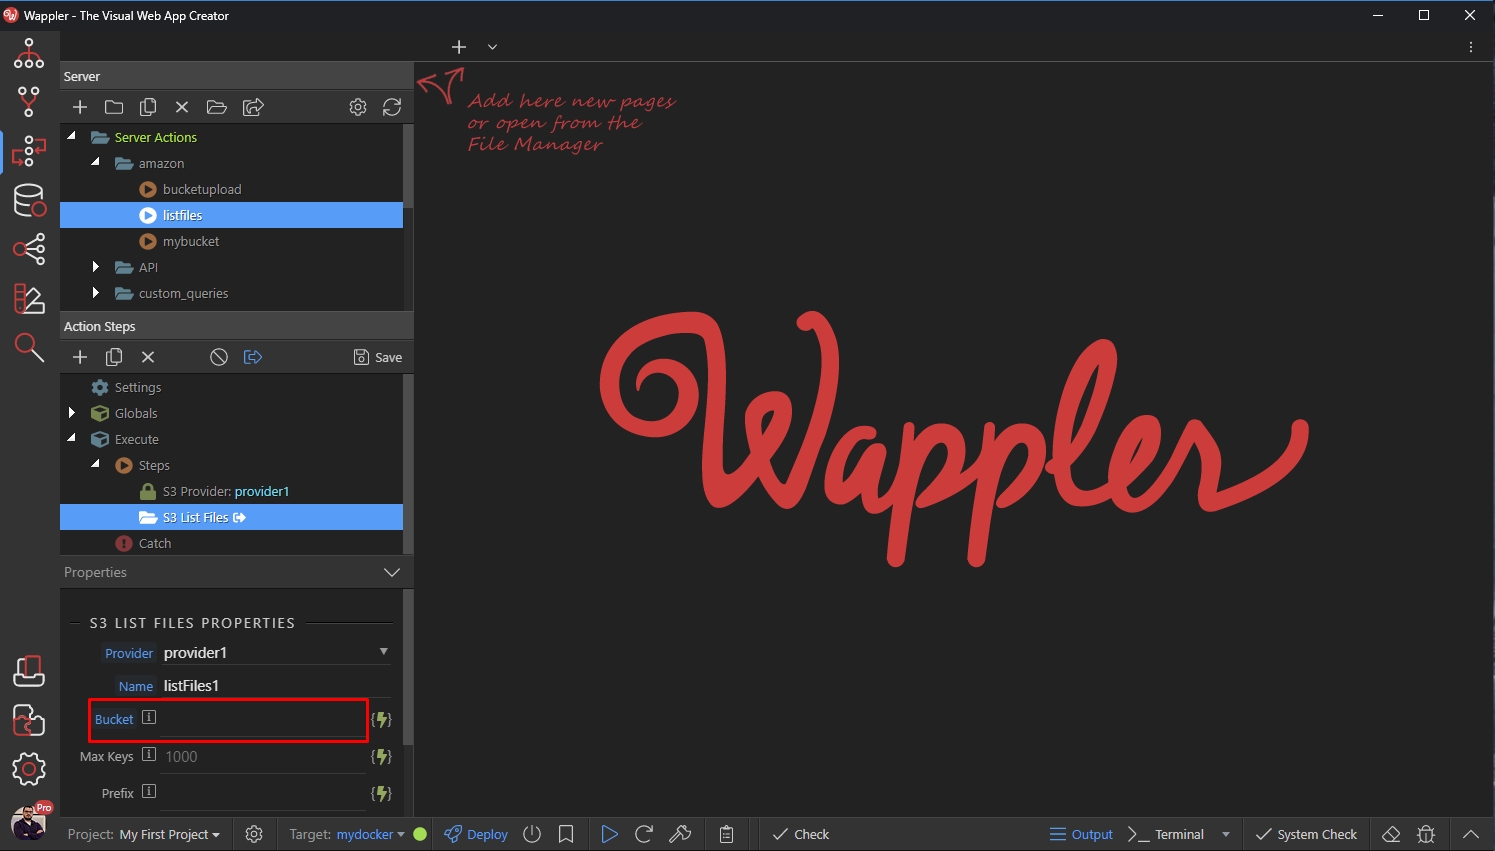
Step 47
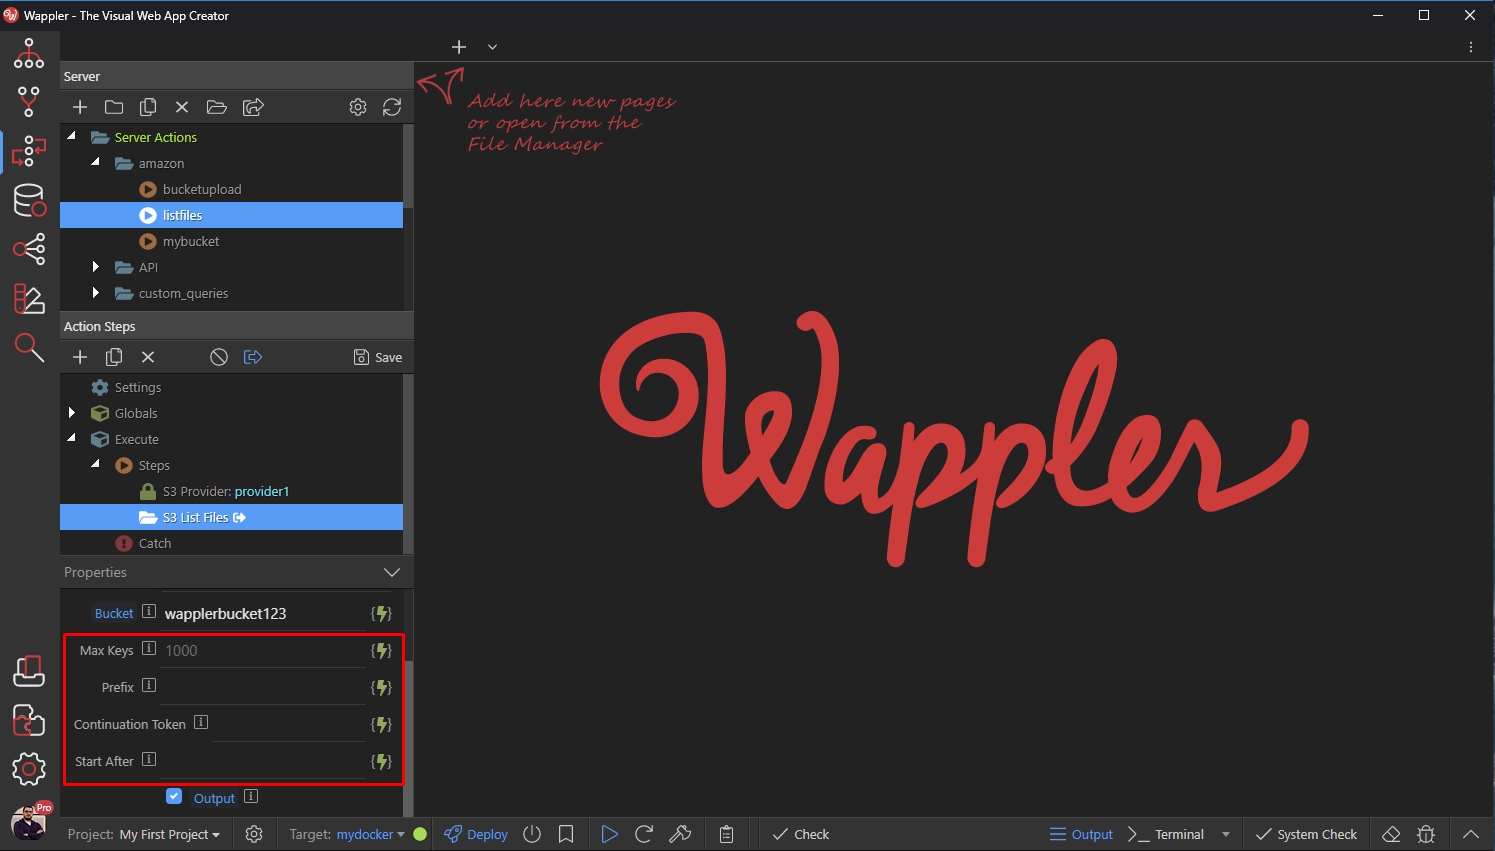
Section titled “Step 47”Then setup the list options, such as the max number of records to return, the prefix of the files you want to return etc. (check the info tooltips for more detailed information). We leave these options to their default values:
Save your server action:
Section titled “Save your server action:”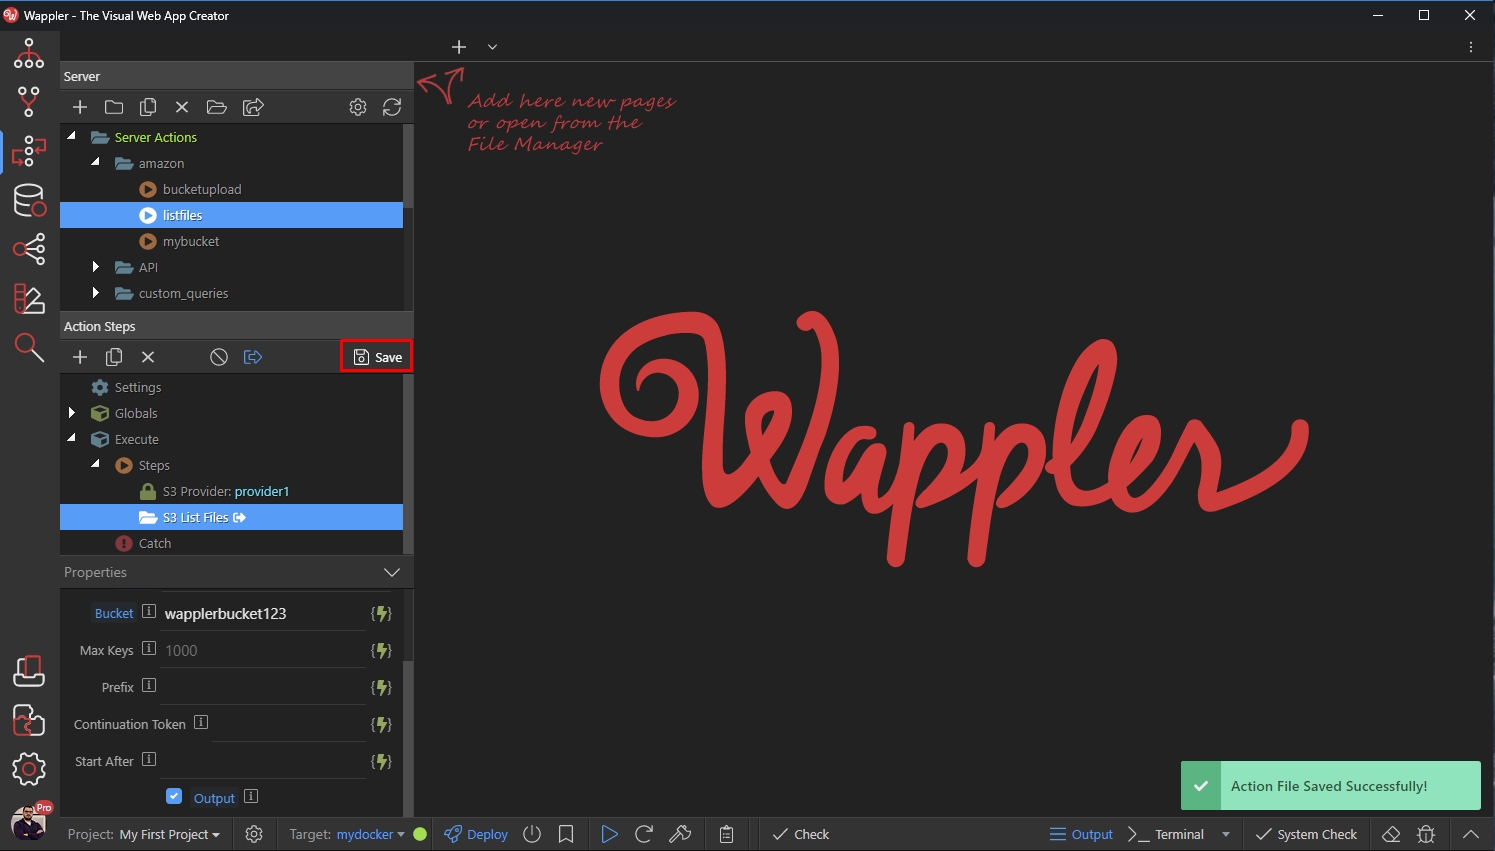
You can preview the results by opening the server action in your browser:
Section titled “You can preview the results by opening the server action in your browser:”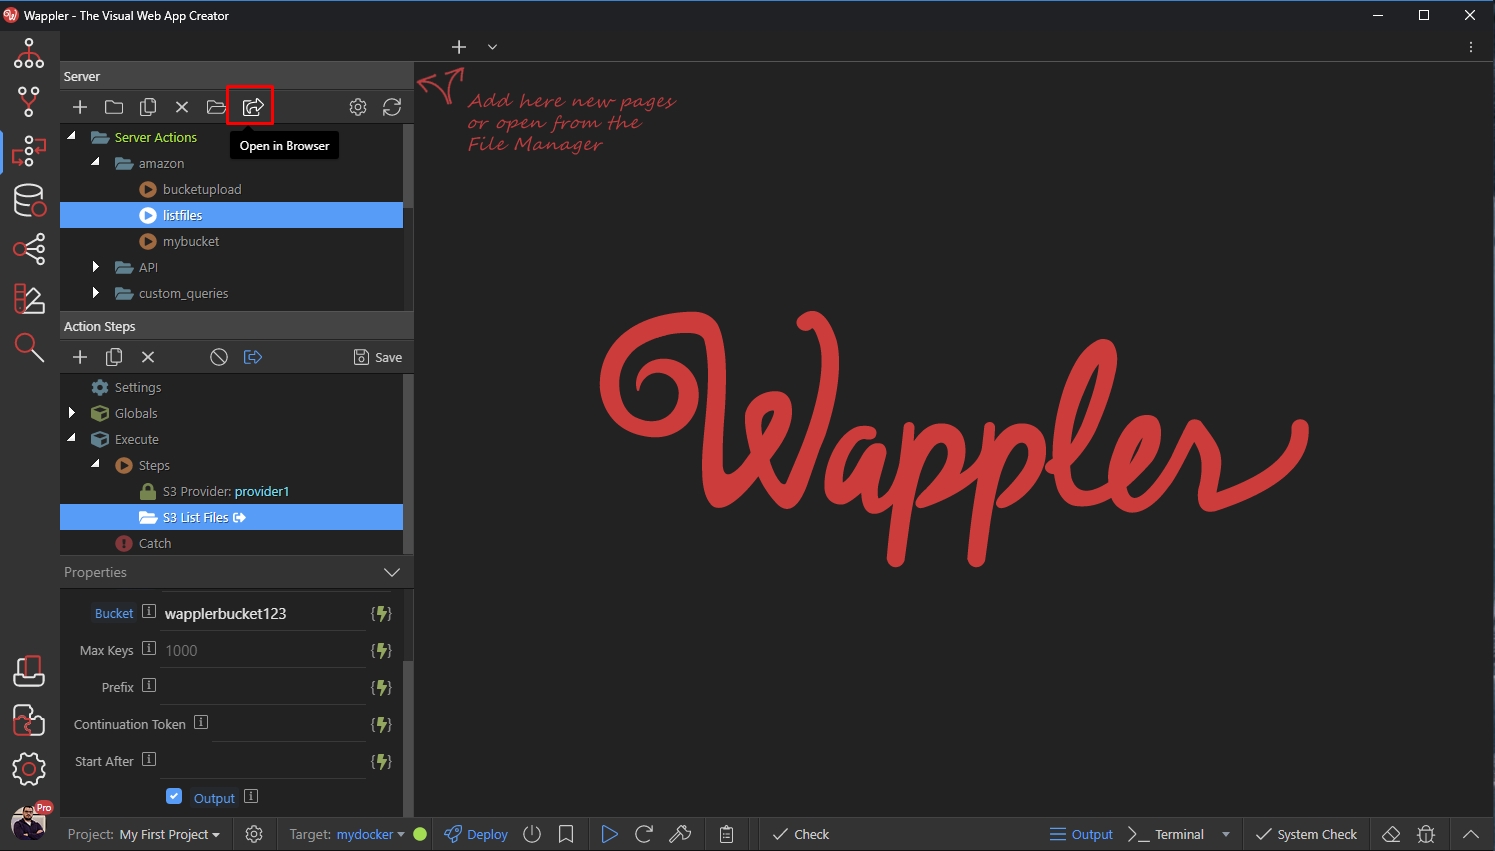
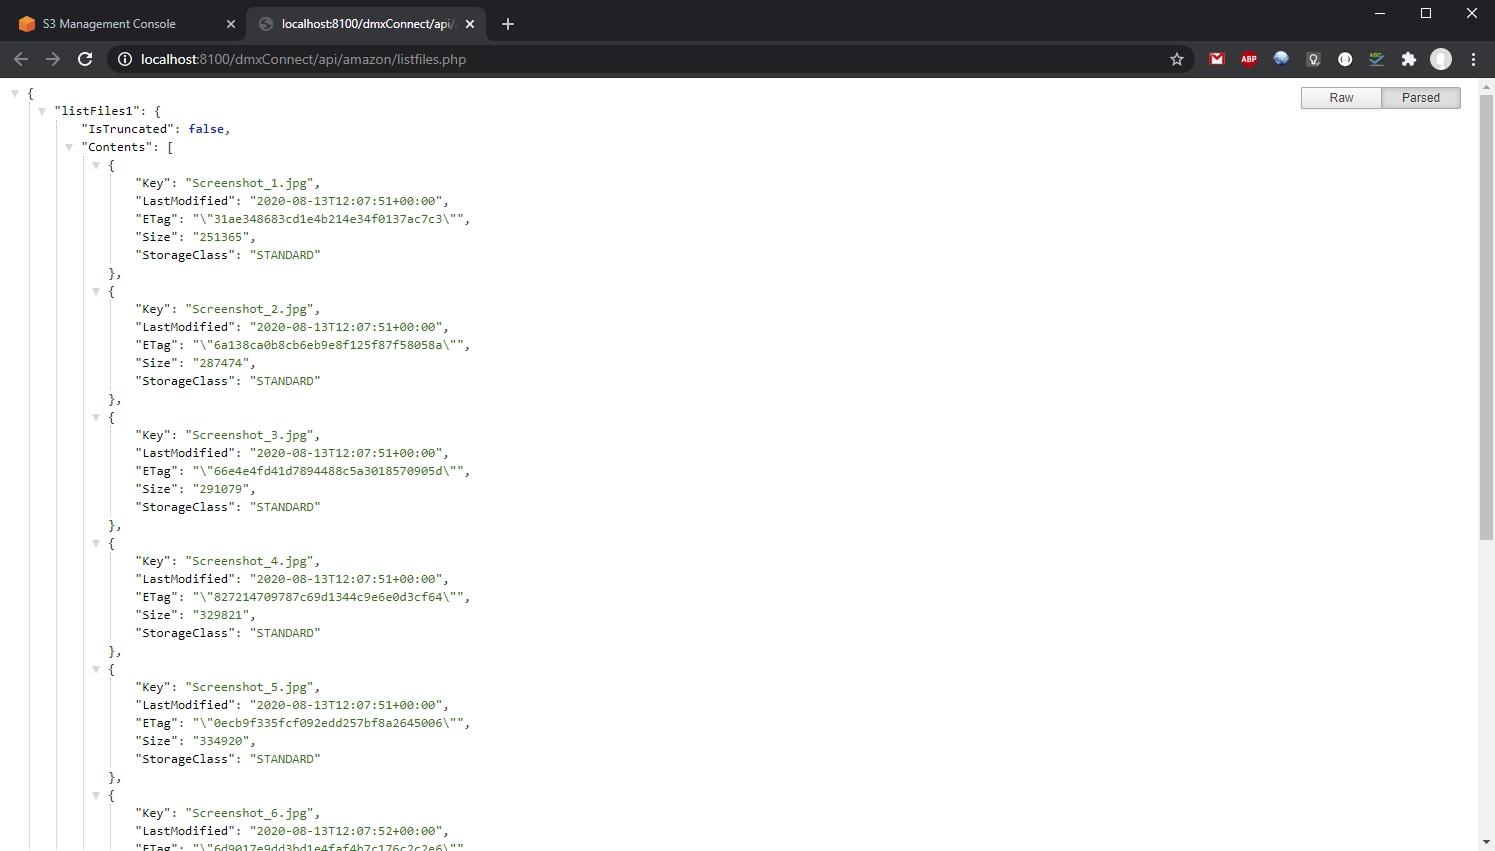
And you can see the files list returned in your browser:
Section titled “And you can see the files list returned in your browser:”