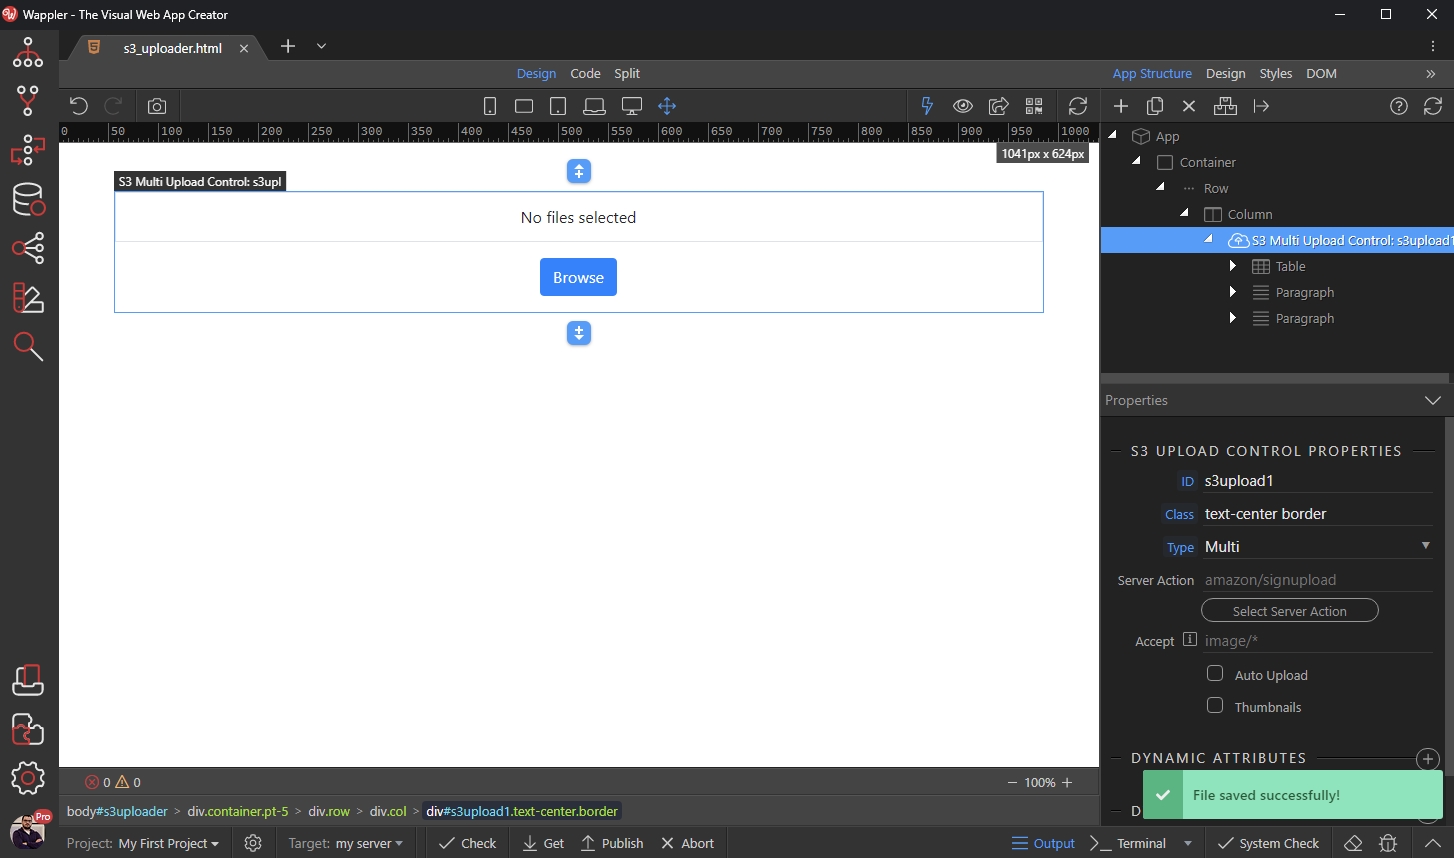
Using App Connect S3 Upload
Intro App Connect S3 Upload component allows you to do client side uploads to S3 cloud storage. Unlike the Server Connect S3 Upload workflow, where it's required to first upload the files on your serv
App Connect S3 Upload component allows you to do client side uploads to S3 cloud storage. Unlike the Server Connect S3 Upload workflow, where it's required to first upload the files on your server, with App Connect S3 Upload you upload your files directly to the S3 cloud storage.
Make sure to properly setup S3 Full Access on AWS before following this tutorial:
Set up CORS
Section titled “Set up CORS”In order to be able to upload files from your site, you need to setup the CORS configuration for your S3
cloud storage.
CORS Configuration on AWS S3
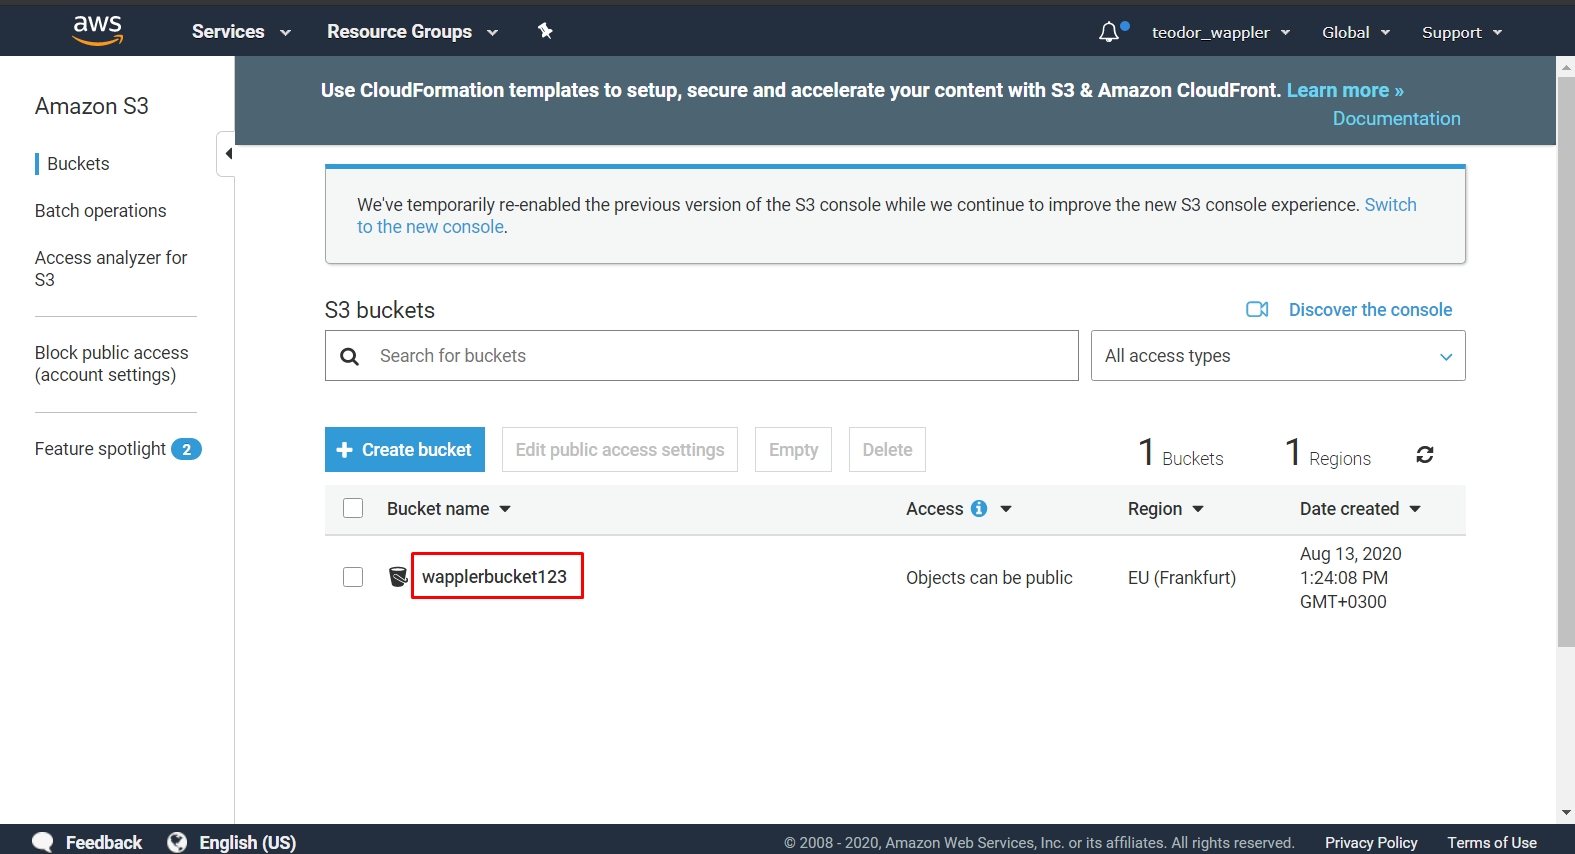
Section titled “CORS Configuration on AWS S3”Log into your AWS Management Console, then navigate to S3 and you will see your bucket(s) listed. Click your bucket name:
Then select Permissions:
Section titled “Then select Permissions:”
And then CORS configuration:
Section titled “And then CORS configuration:”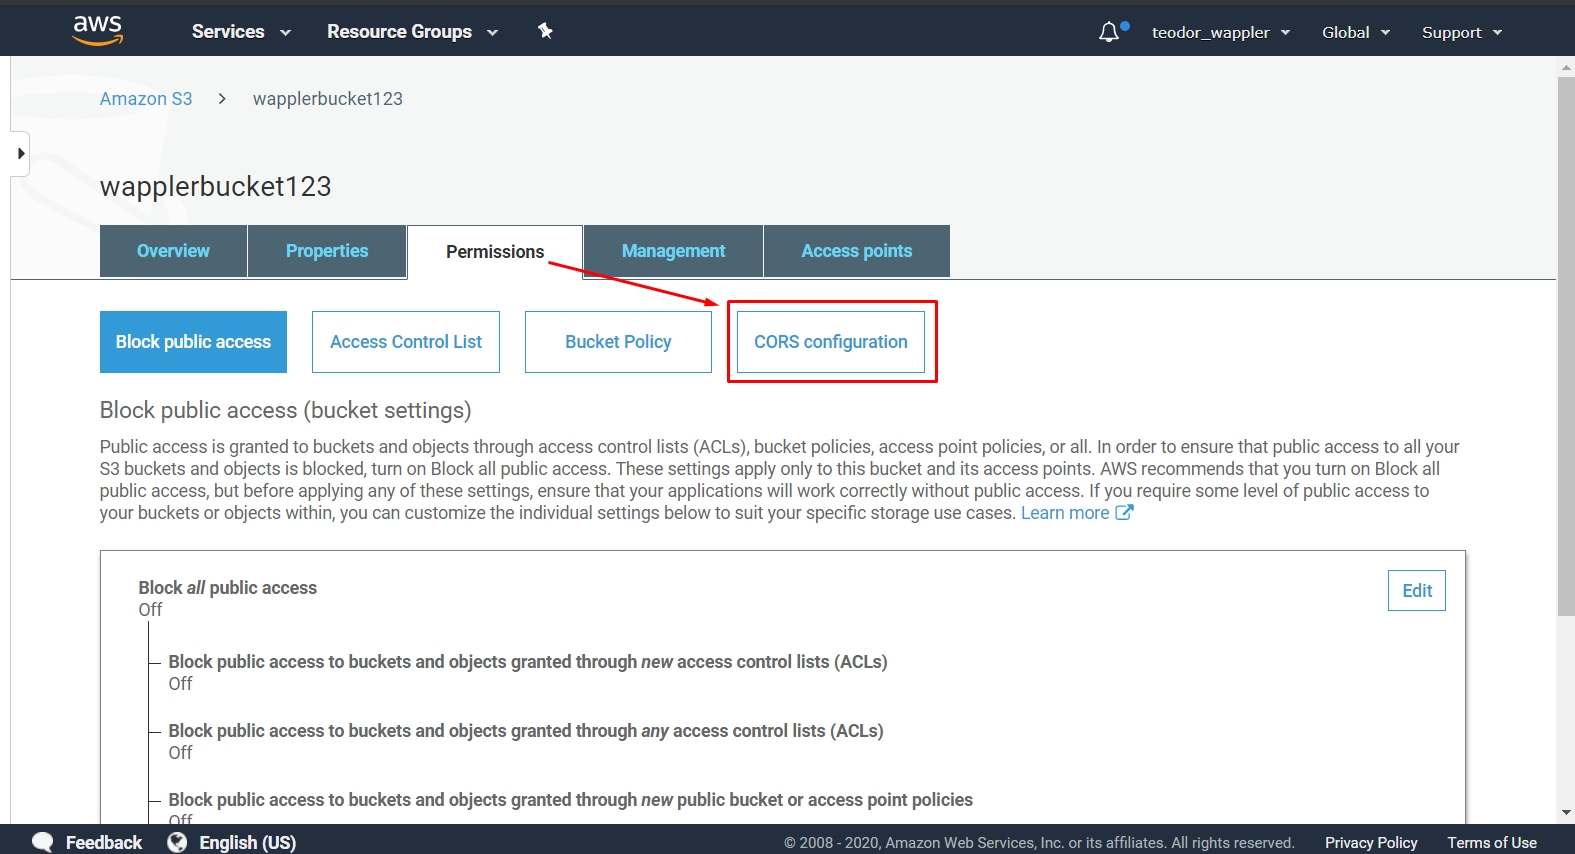
Then click save:
Section titled “Then click save:”Paste the following xml code in the CORS configuration Editor, replacing http://www.example1.com with your actual website domain:
<?xml version="1.0" encoding="UTF-8"?>
<CORSConfiguration xmlns="http://s3.amazonaws.com/doc/2006-03-01/">
<CORSRule>
    <AllowedOrigin>https://www.example1.com</AllowedOrigin>
    <AllowedMethod>GET</AllowedMethod>
    <AllowedMethod>PUT</AllowedMethod>
    <AllowedMethod>POST</AllowedMethod>
    <AllowedMethod>DELETE</AllowedMethod>
    <AllowedHeader>*</AllowedHeader>
</CORSRule>
</CORSConfiguration>
Then click save:
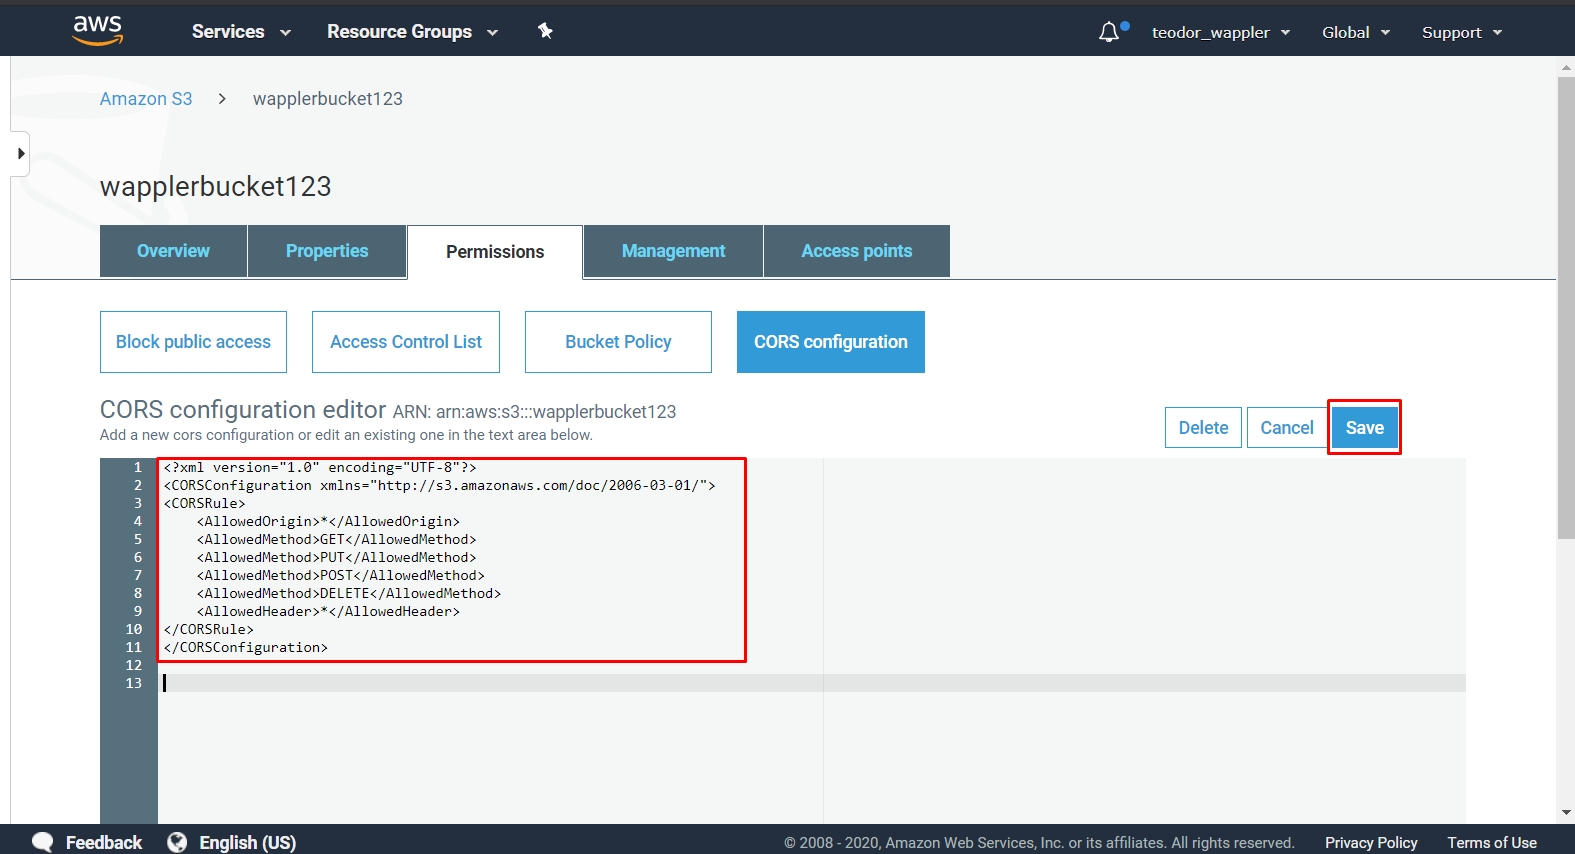
And you are done.
Section titled “And you are done.”CORS Configuration on Digital Ocean Spaces
Section titled “CORS Configuration on Digital Ocean Spaces”Log into Digital Ocean Spaces control panel. You will see your spaces listed there.
Open the More menu and click Settings:

Scroll down to CORS Configuration and click Add:
Section titled “Scroll down to CORS Configuration and click Add:”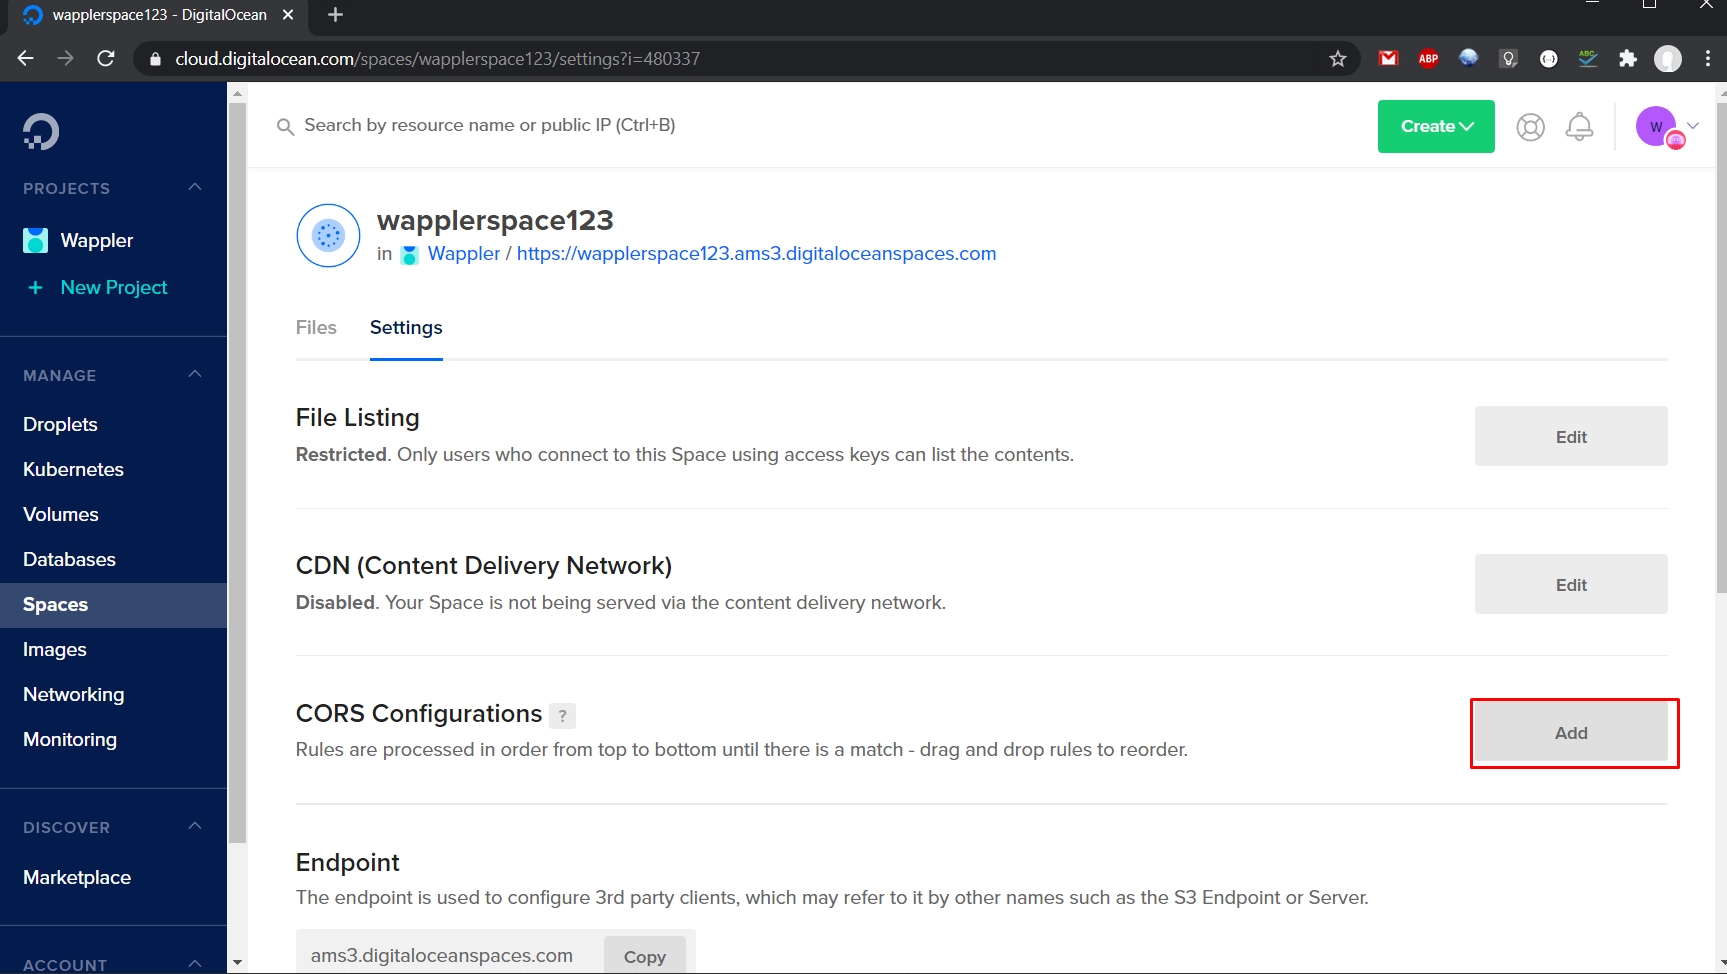
And click the Save Options button:
Section titled “And click the Save Options button:”Here you need to add the following:
Origin: https://example1.com - replace this with your site domain.
Allowed Methods: GET is enabled by default, you need to select PUT as well.
Allowed Headers: Create a new header *
And click the Save Options button:

You can see your CORS options have been set:
Section titled “You can see your CORS options have been set:”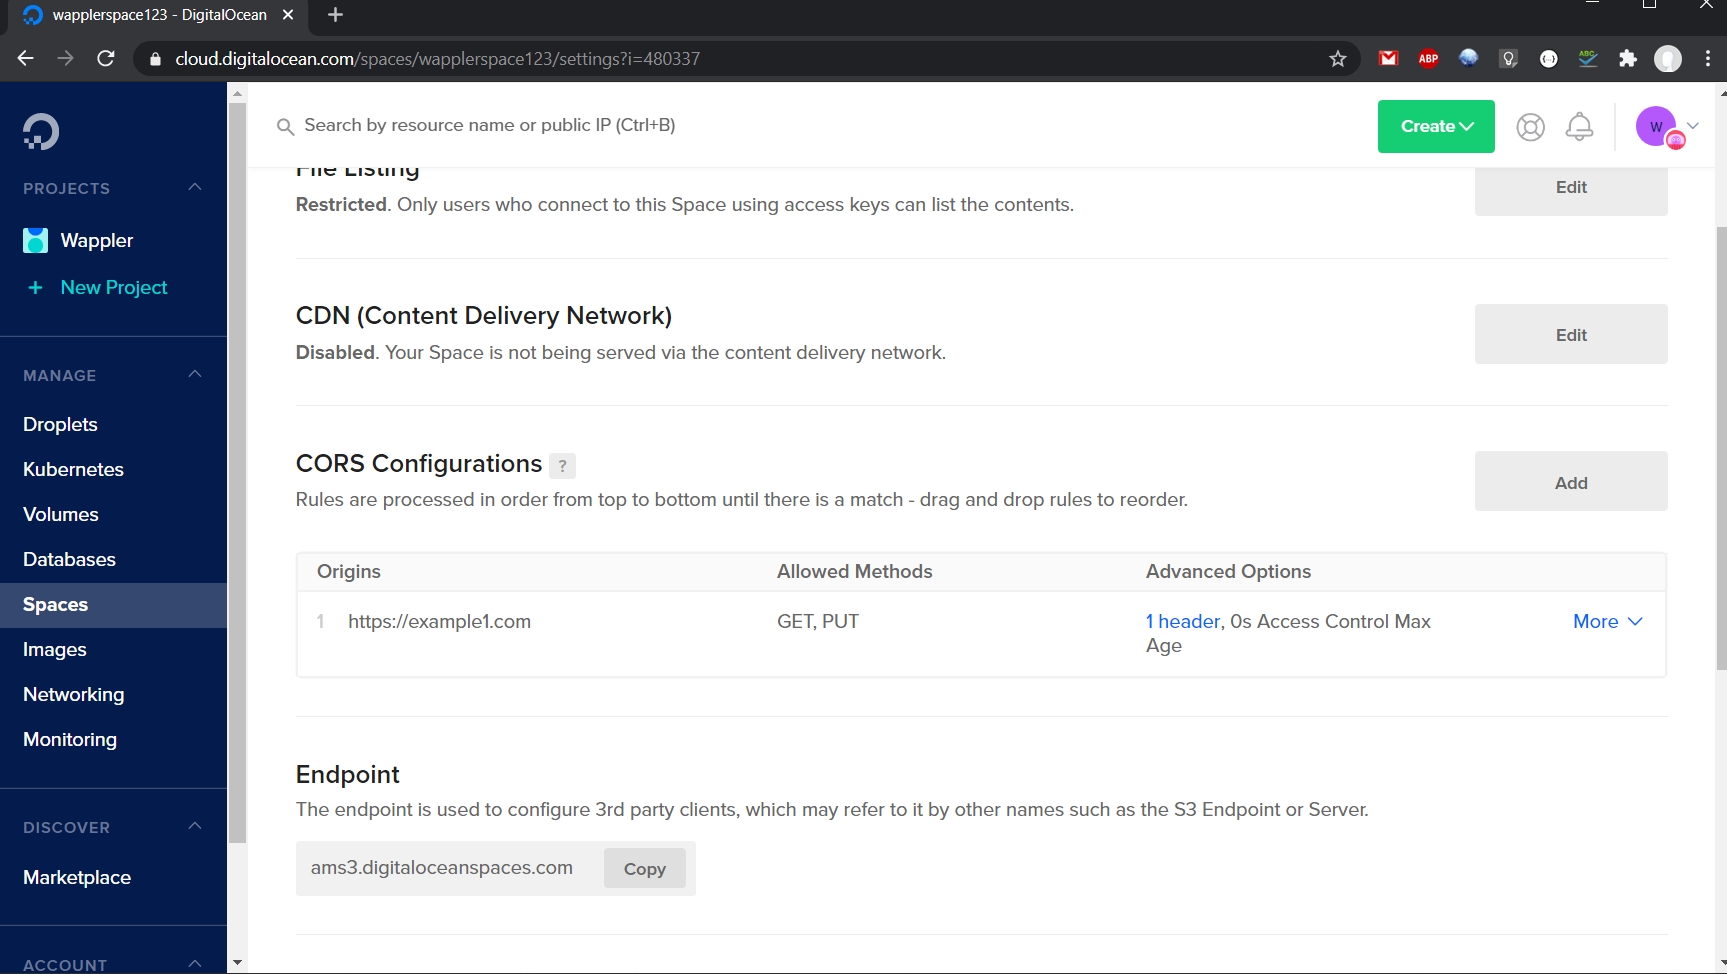
And you are done!
Section titled “And you are done!”Creating a S3 Upload Sign Server Action
Section titled “Creating a S3 Upload Sign Server Action”To be able to upload to S3 you need to sign your upload link to verify your identity. This is done by creating a S3 Upload Sign Server Action.
Open the Server Connect panel and create a new server action:
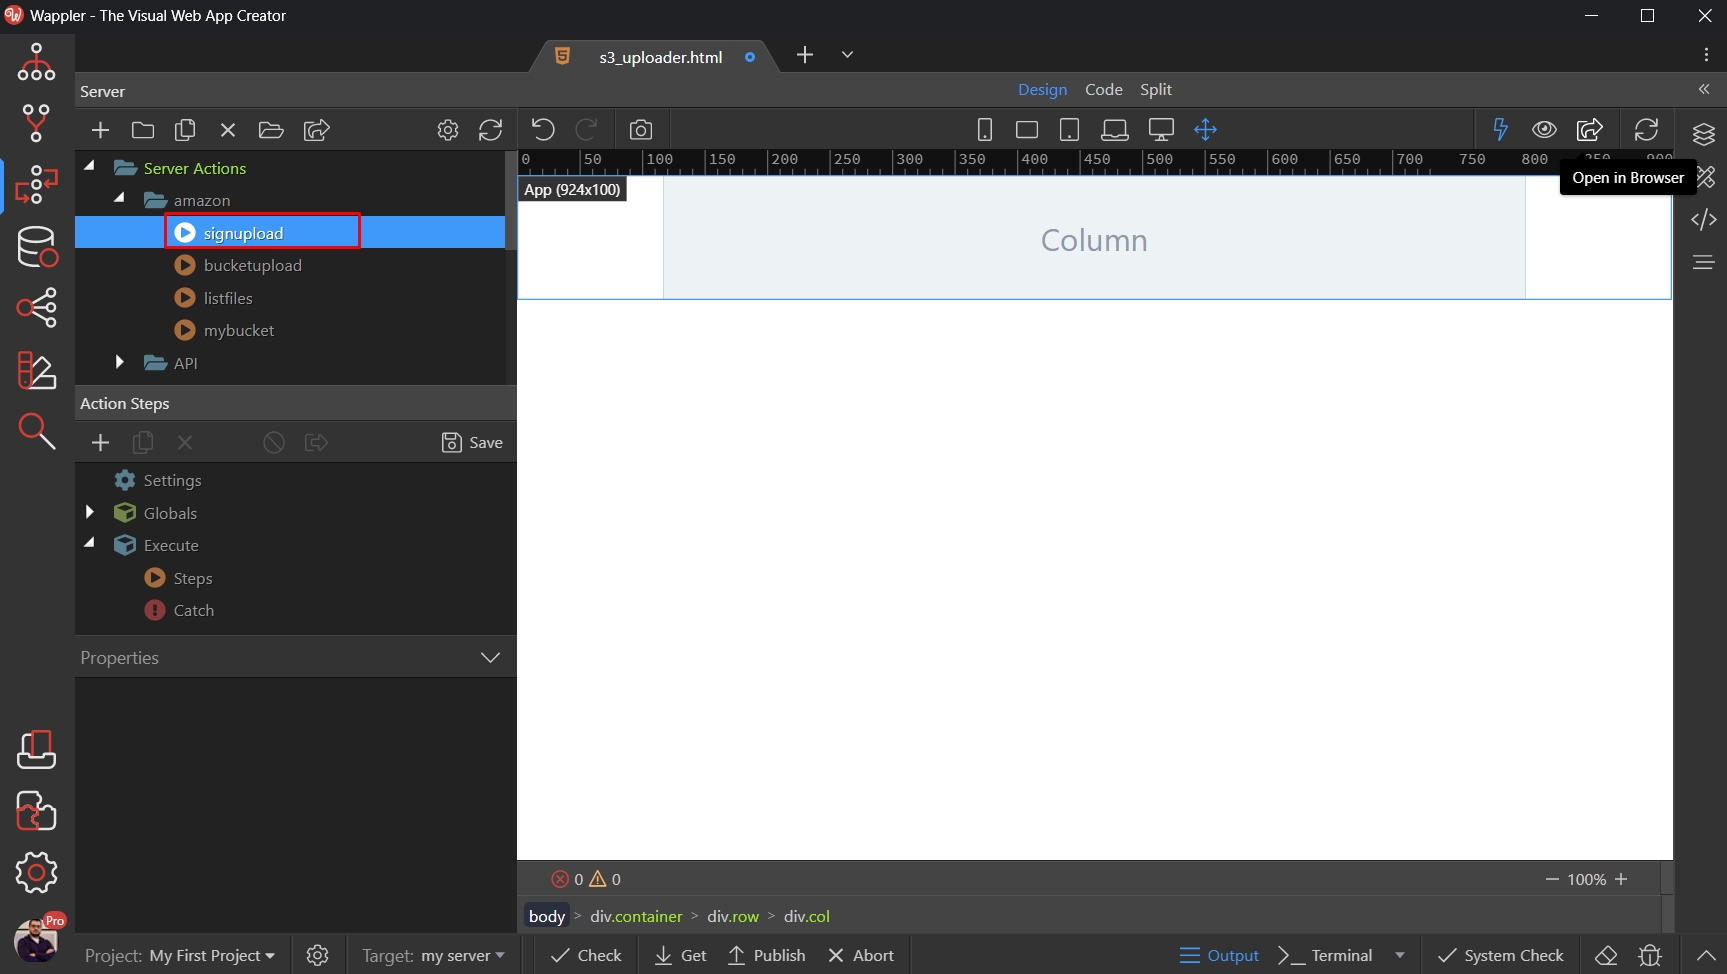
Right click steps:
Section titled “Right click steps:”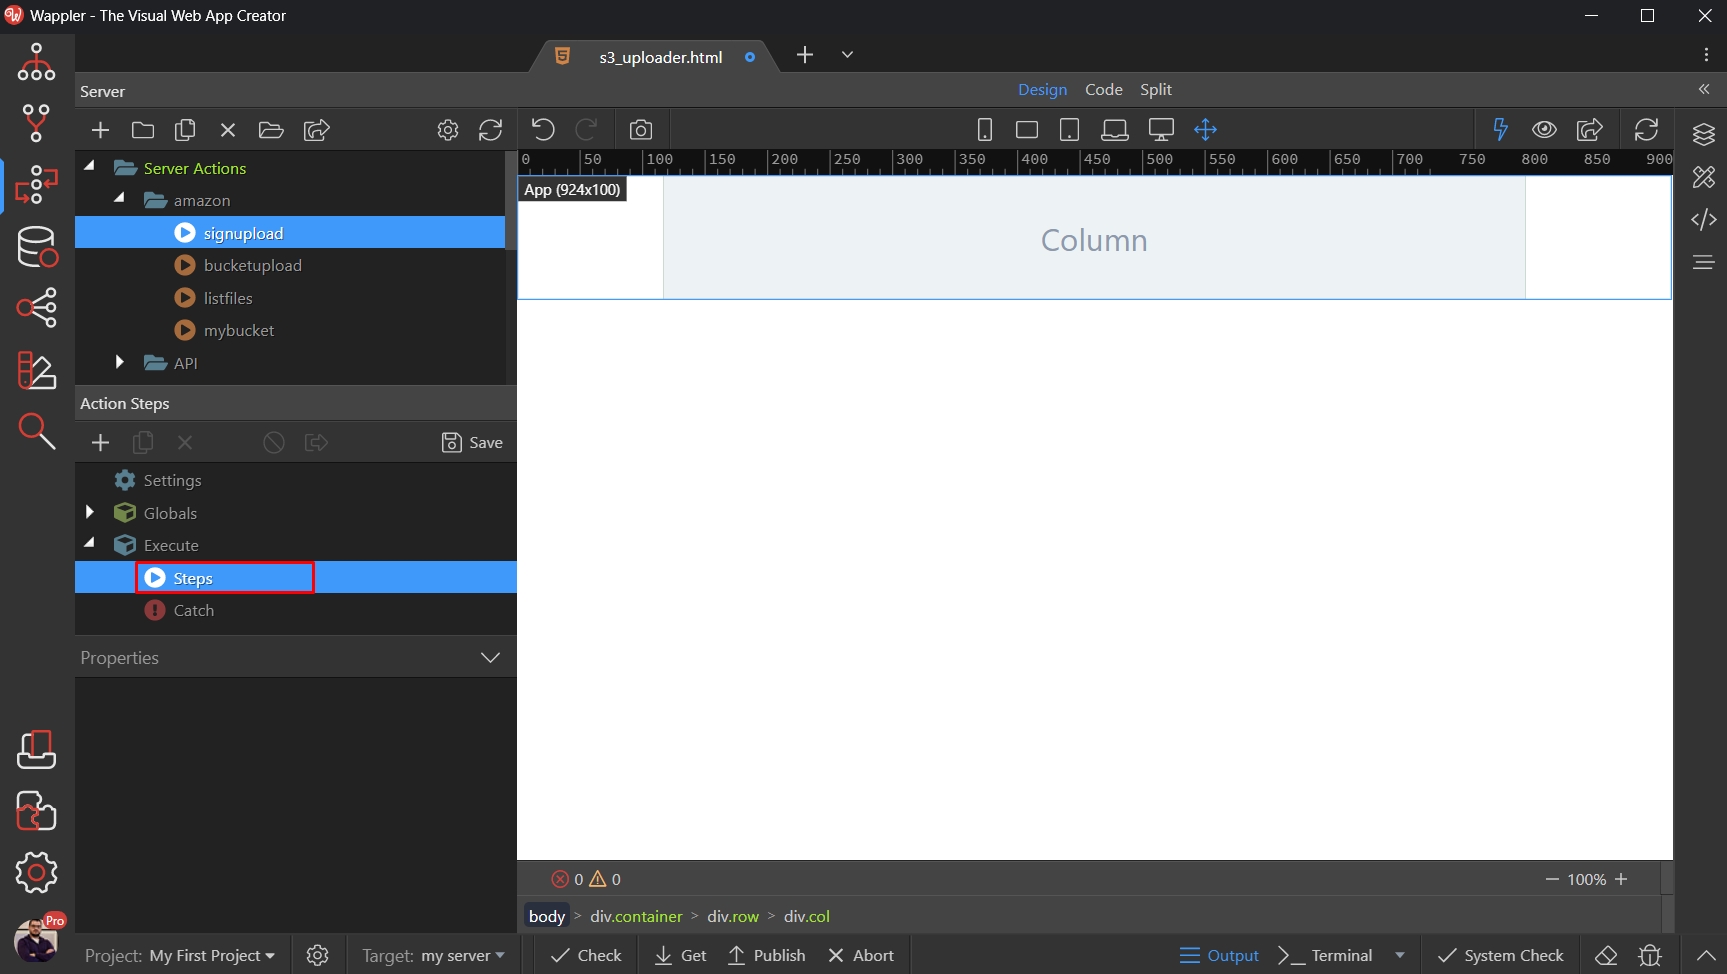
Open S3 Connector and select S3 Sign Upload Template:
Section titled “Open S3 Connector and select S3 Sign Upload Template:”
Select the S3 Provider step:
Section titled “Select the S3 Provider step:”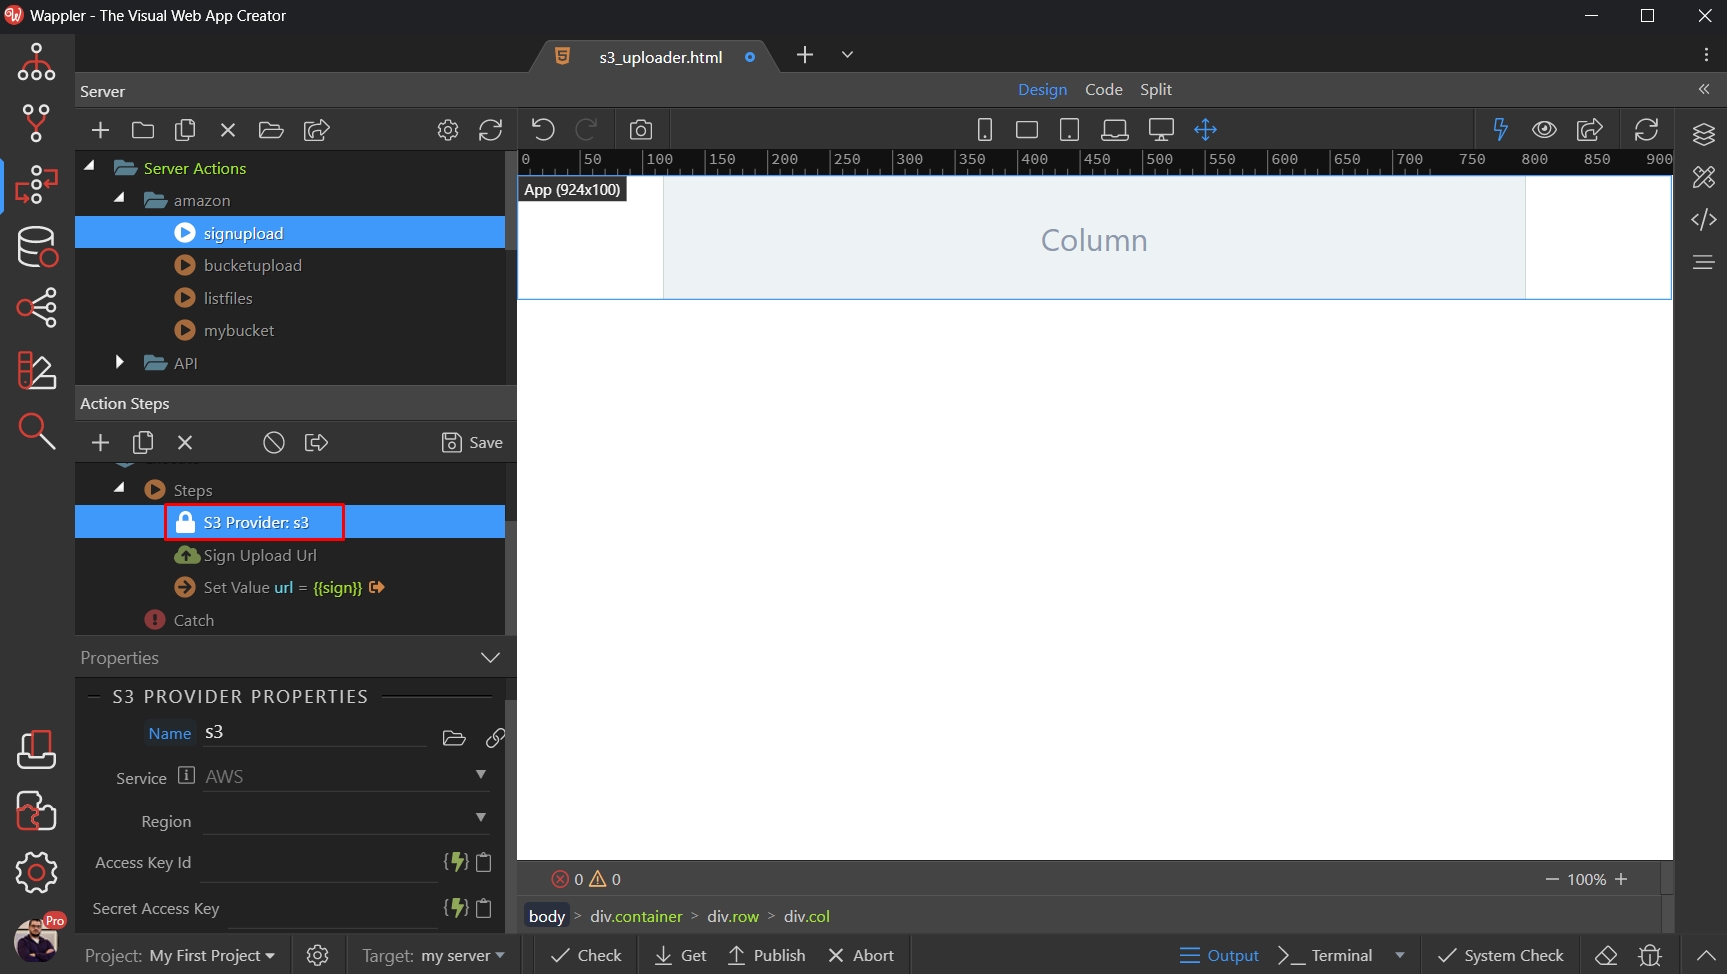
And setup its settings such as Provider (AWS or Digital Ocean), Region and your Access and Secret Keys:
Section titled “And setup its settings such as Provider (AWS or Digital Ocean), Region and your Access and Secret Keys:”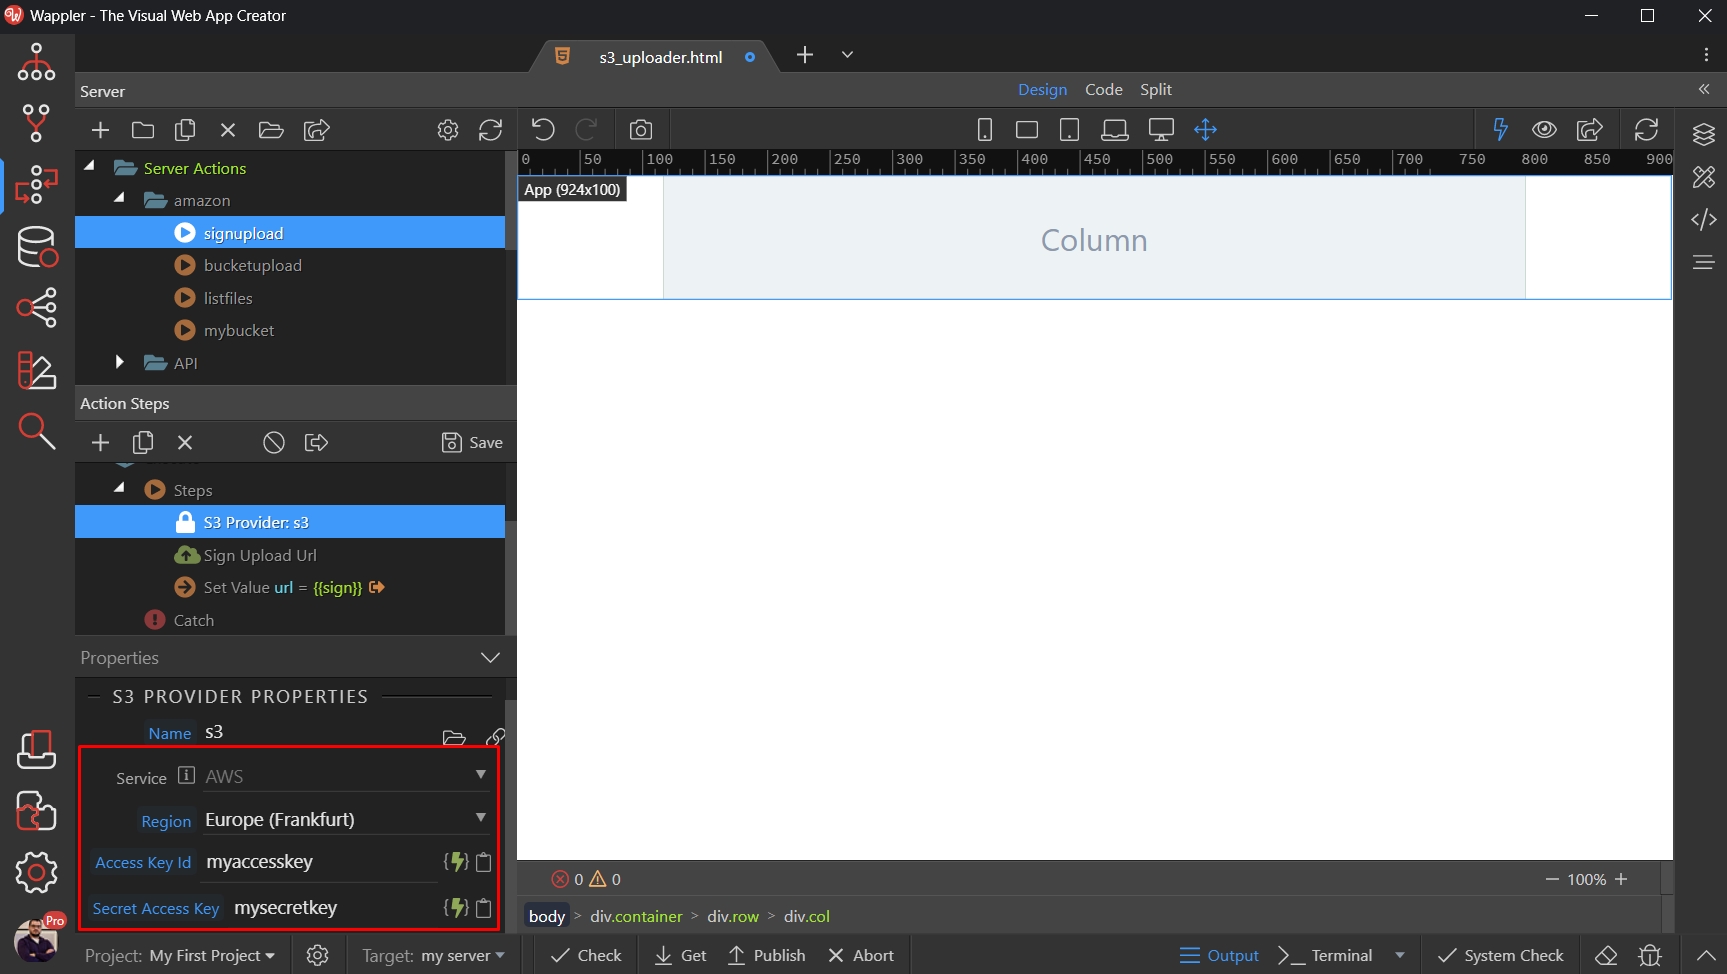
Then click the Sign Upload Step and enter your Bucket name:
Section titled “Then click the Sign Upload Step and enter your Bucket name:”
And you are done! Save your server action and close the Server Connect Panel:
Section titled “And you are done! Save your server action and close the Server Connect Panel:”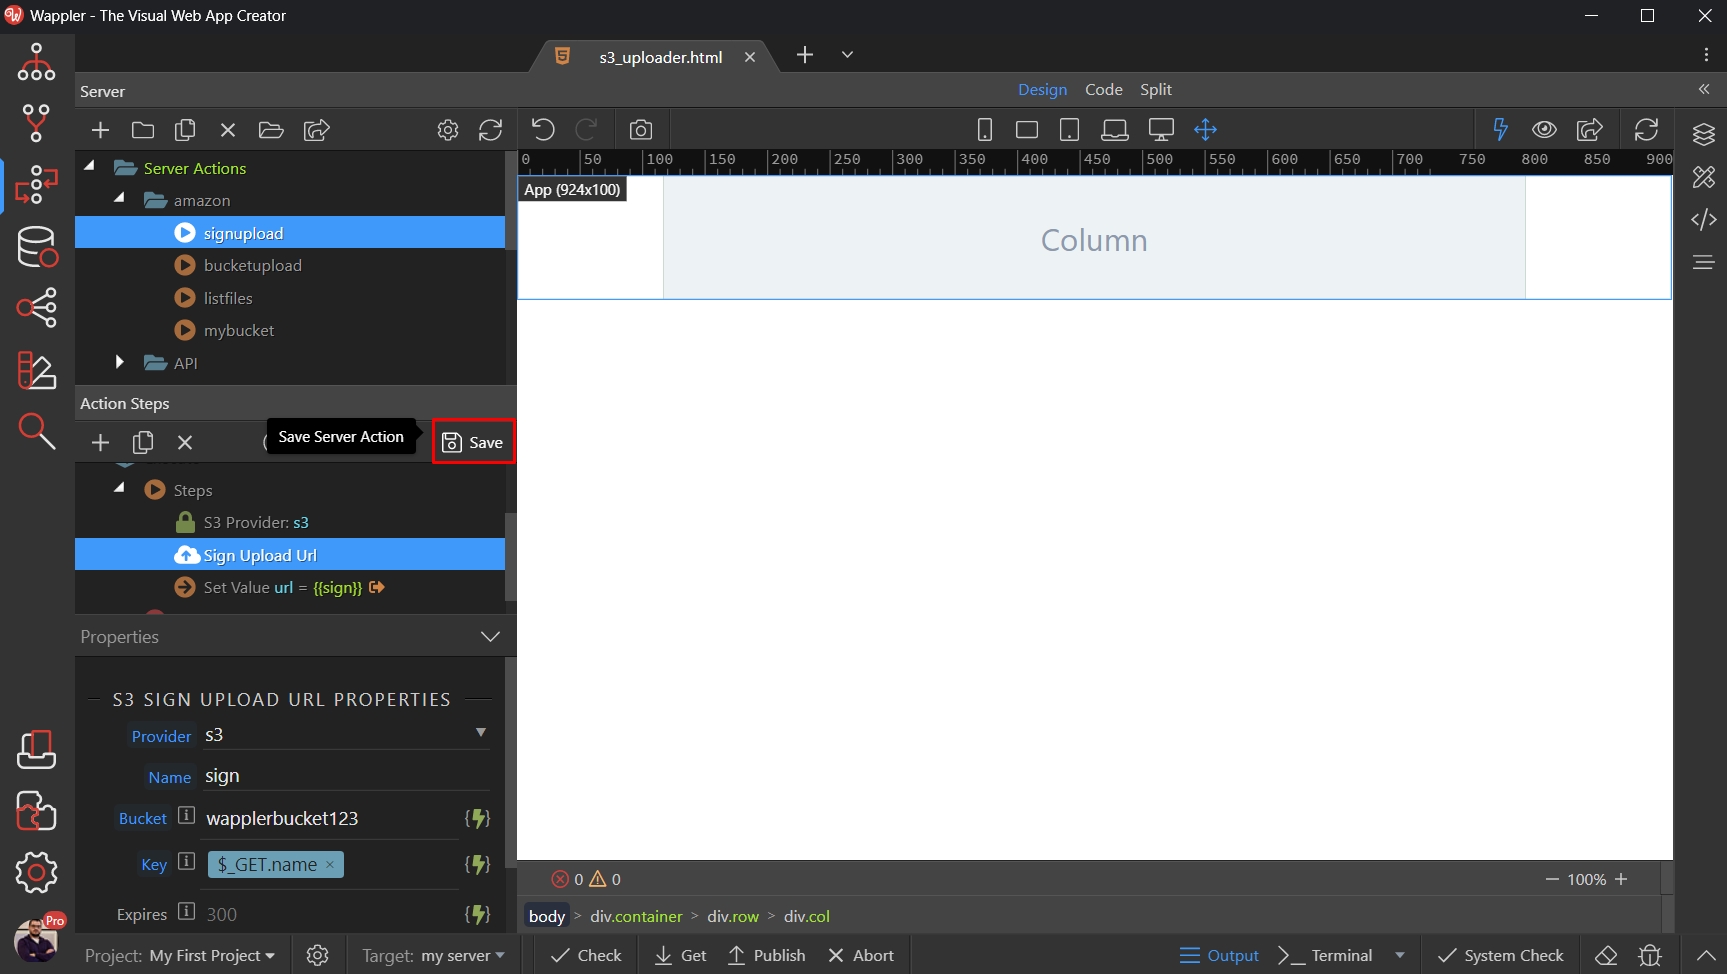
Uploading Single File
Section titled “Uploading Single File”You can add the S3 Upload component, anywhere on your page. It does not require a form, so just
click the Add Element button:
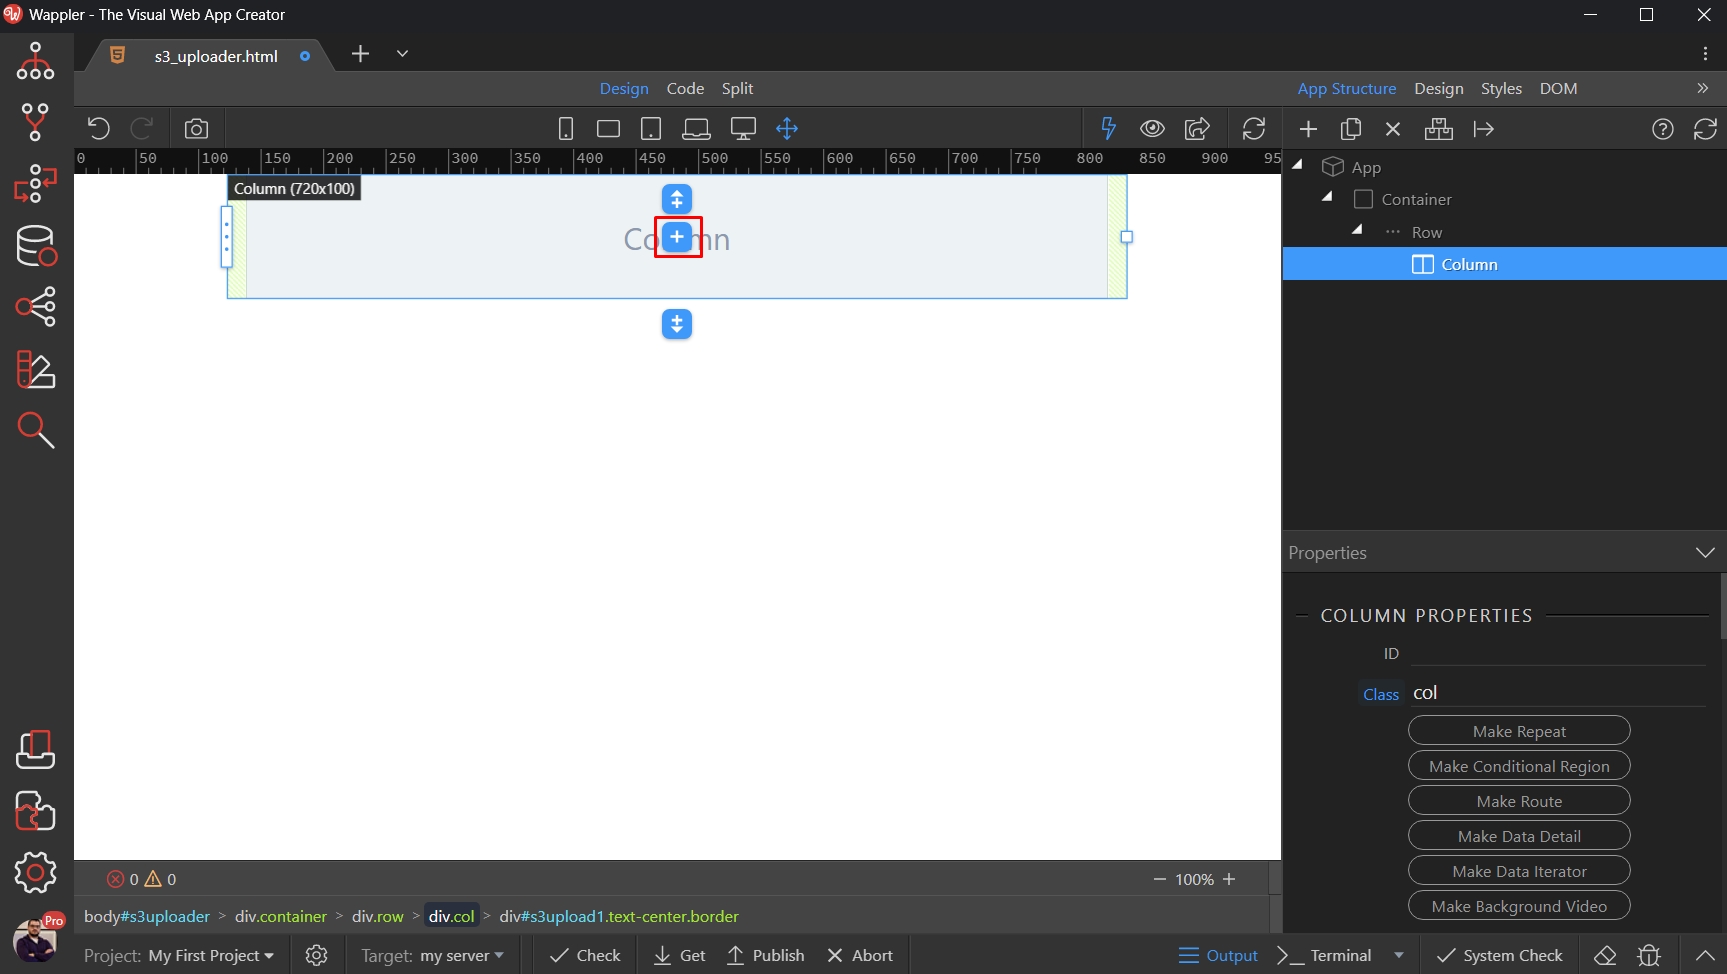
Open Forms and select S3 Upload Control:
Section titled “Open Forms and select S3 Upload Control:”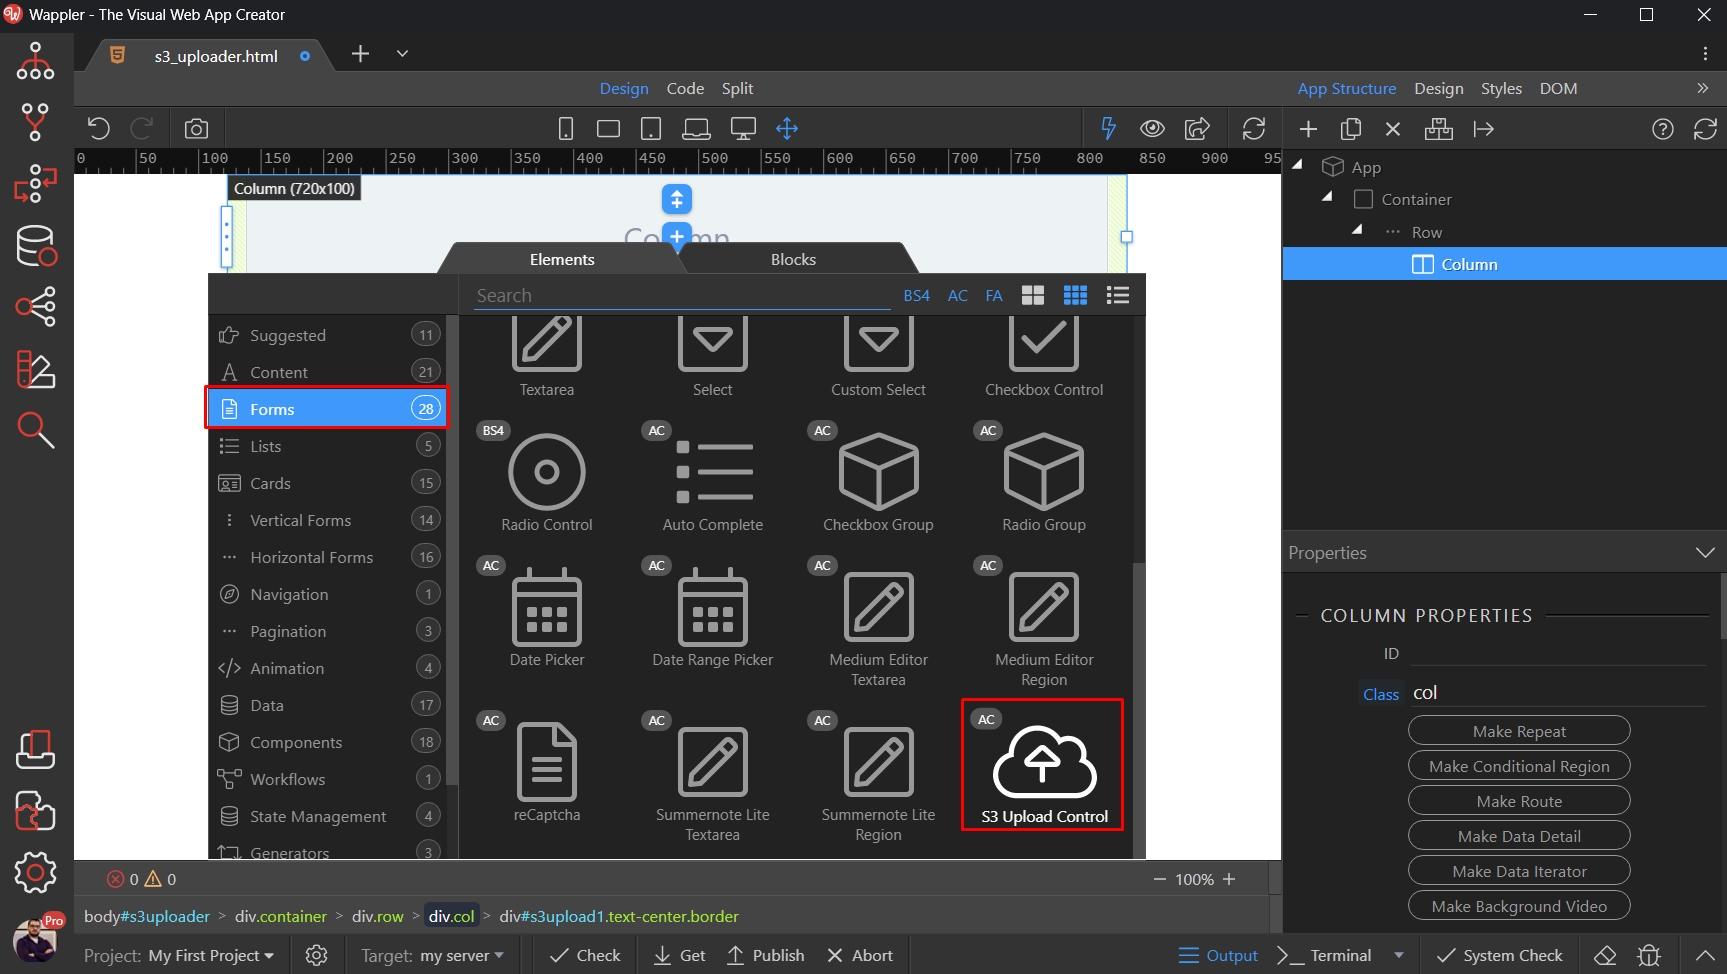
You need to select the Sign Upload Server Action, which we created:
Section titled “You need to select the Sign Upload Server Action, which we created:”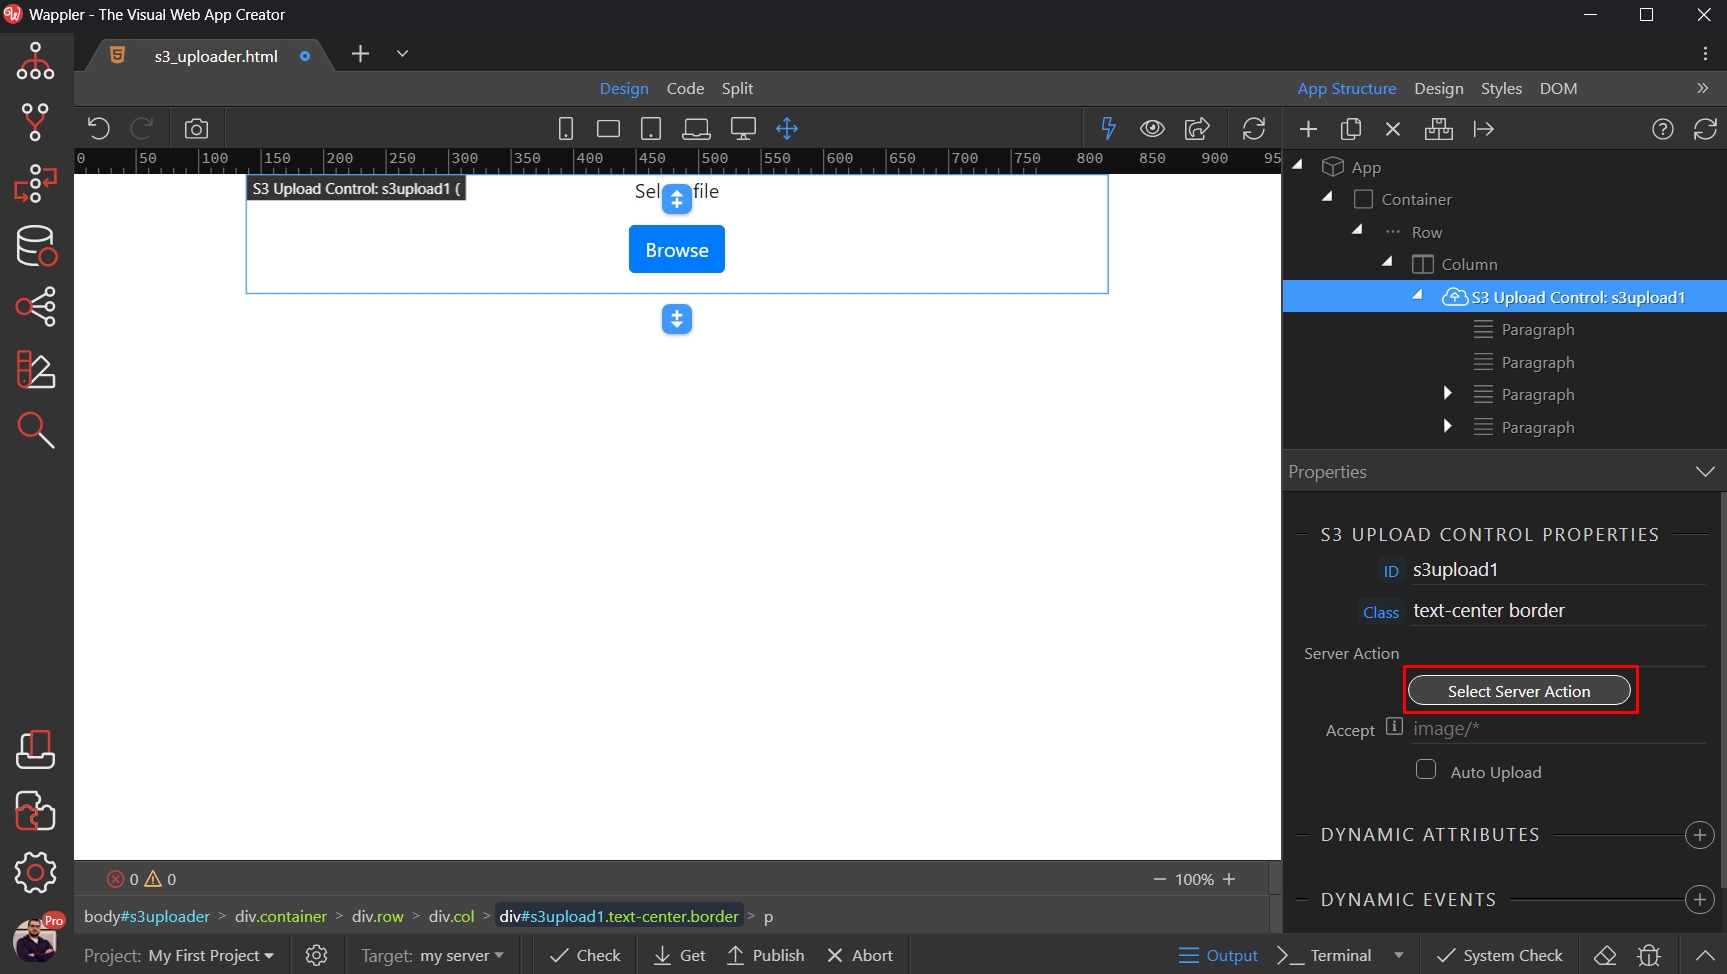
Select it and click the select button:
Section titled “Select it and click the select button:”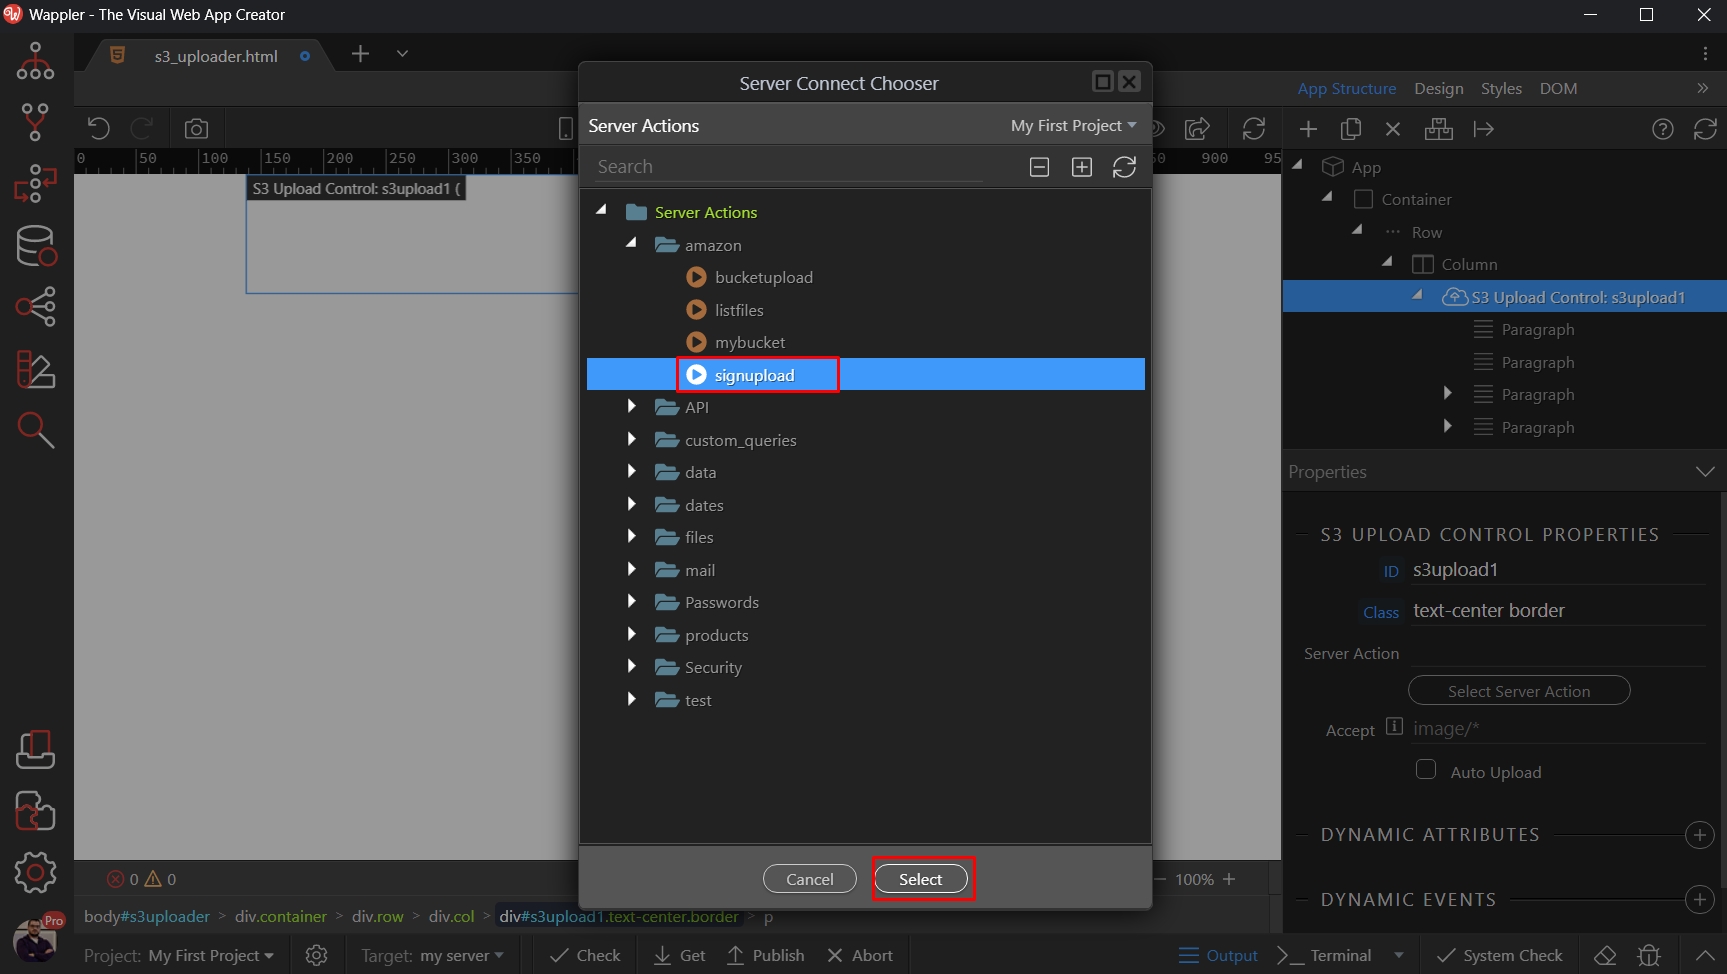
You can add a comma separated list of allowed file extensions, or file types:
Section titled “You can add a comma separated list of allowed file extensions, or file types:”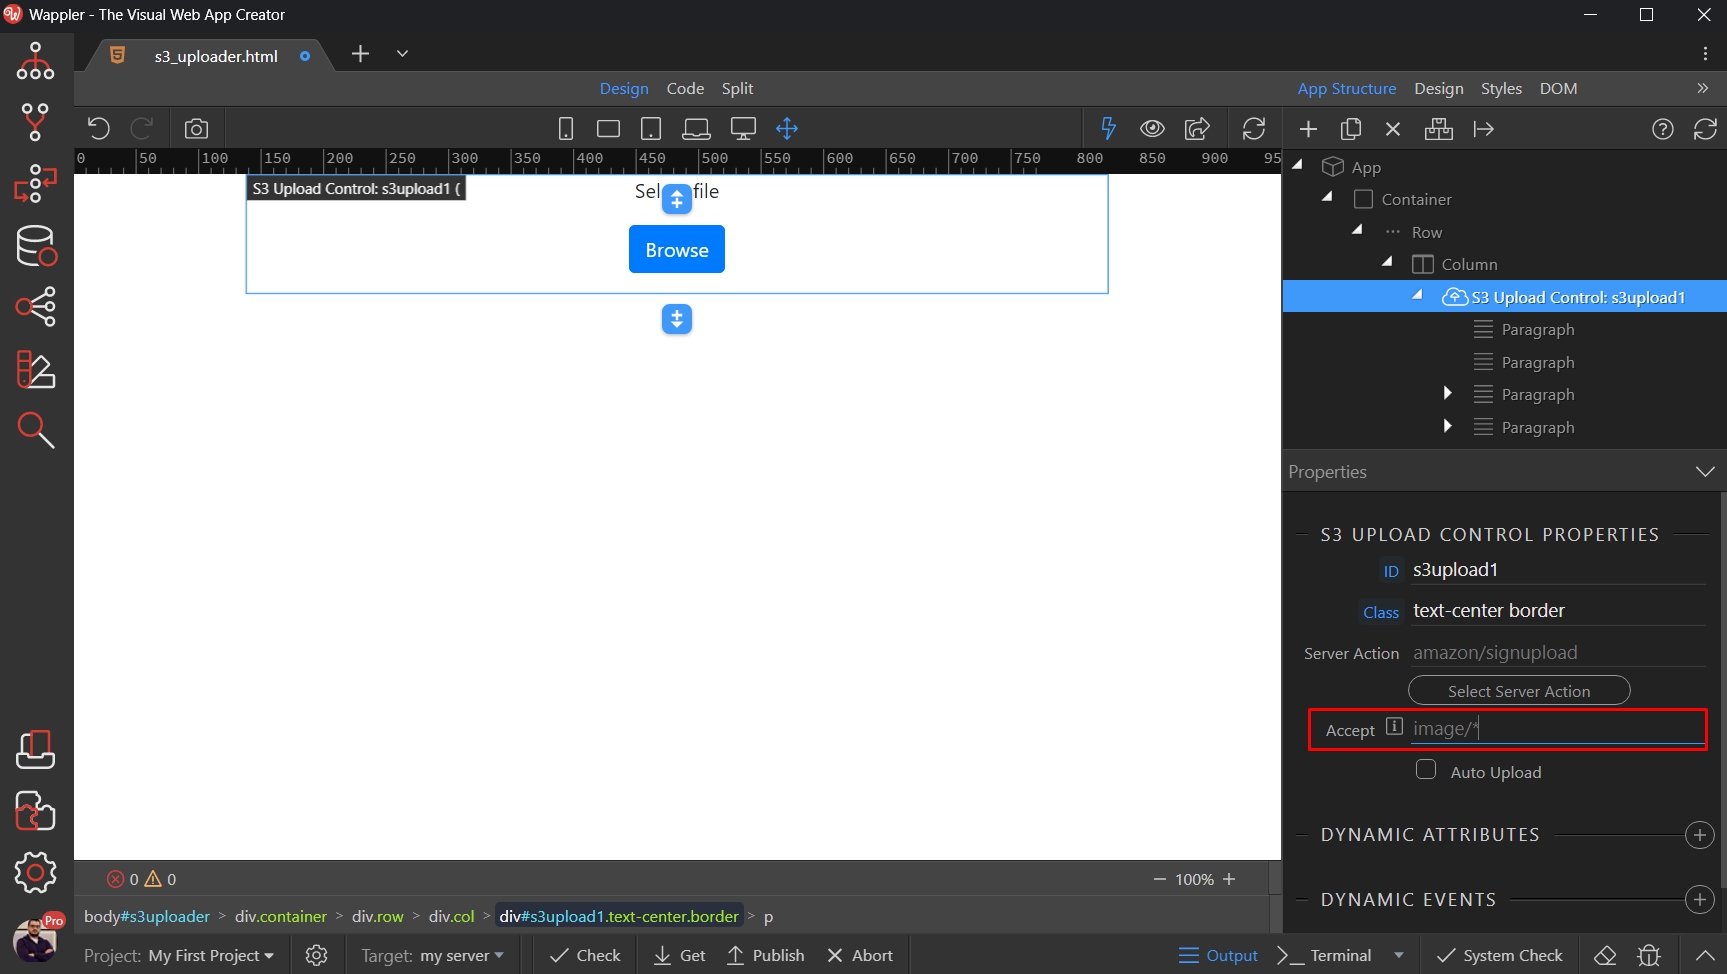
Save your page and you are done:
Section titled “Save your page and you are done:”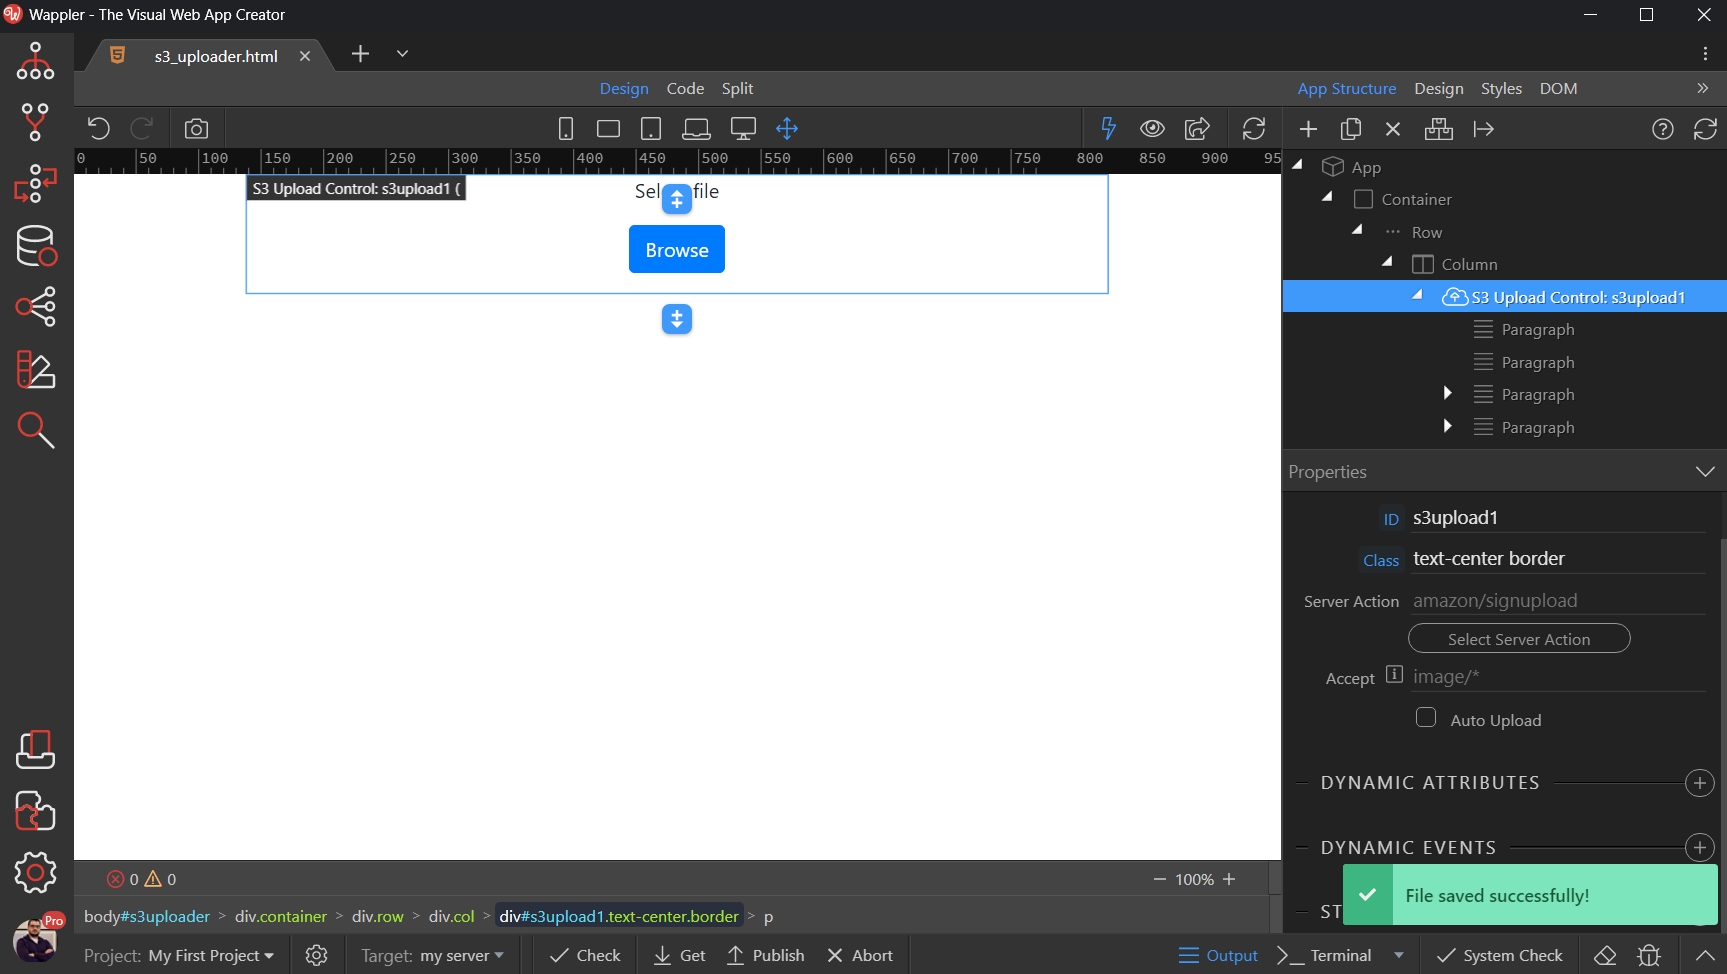
Here's the result:
Section titled “Here's the result:”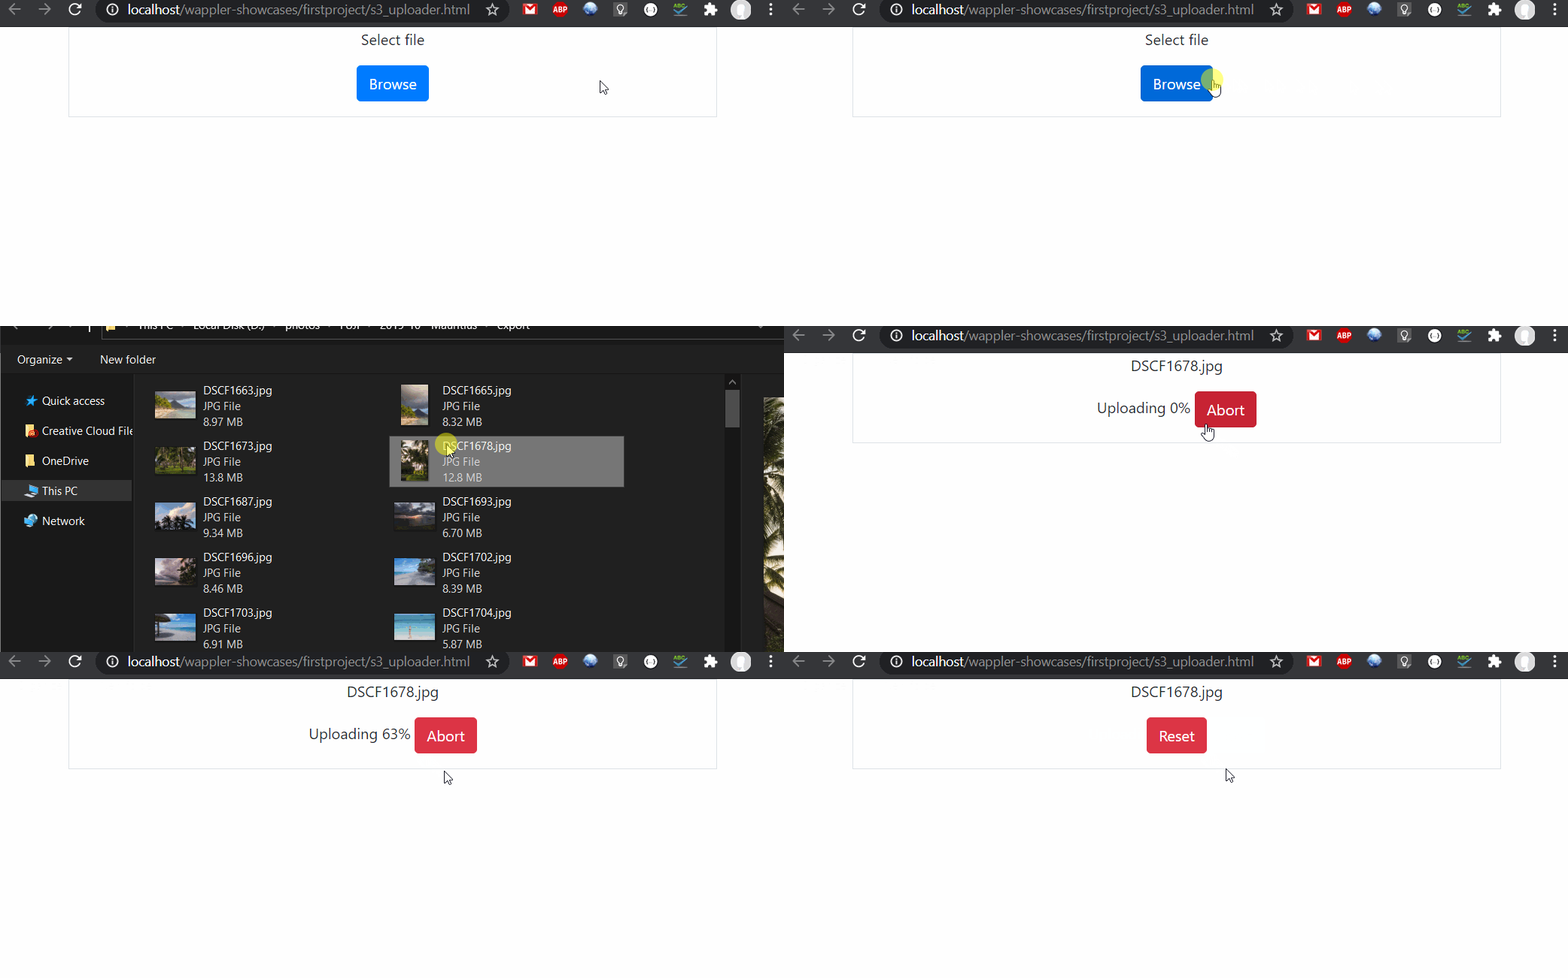
Your file has been uploaded to the selected Bucket!
Section titled “Your file has been uploaded to the selected Bucket!”Uploading Multiple Files
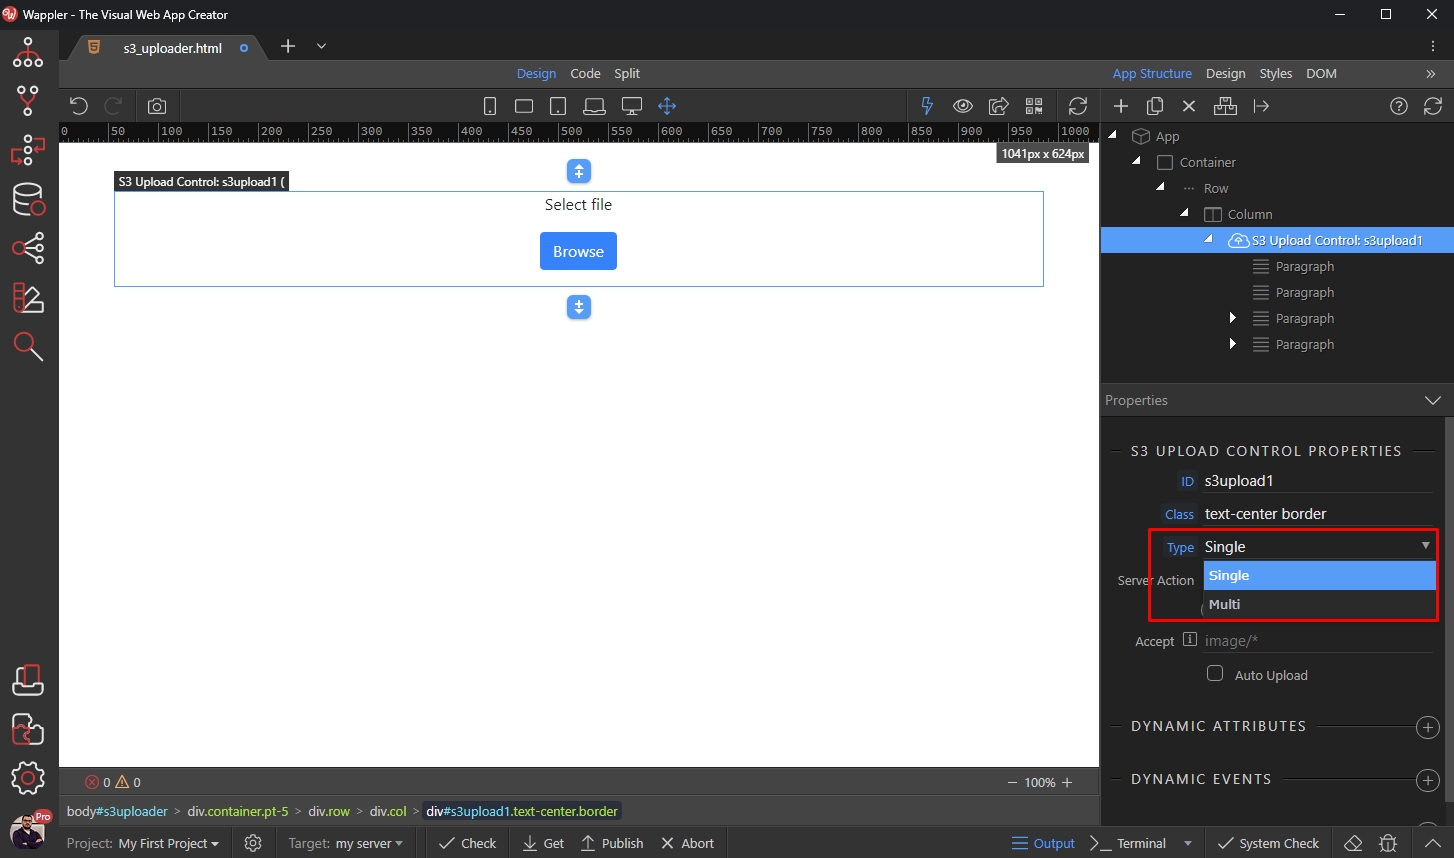
Section titled “Uploading Multiple Files”Uploading multiple files to your S3 storage is as easy as uploading a single file. You can either change the S3 Upload Component type from single to multi:
Or insert the S3 Multi Upload Component on the page directly:
Section titled “Or insert the S3 Multi Upload Component on the page directly:”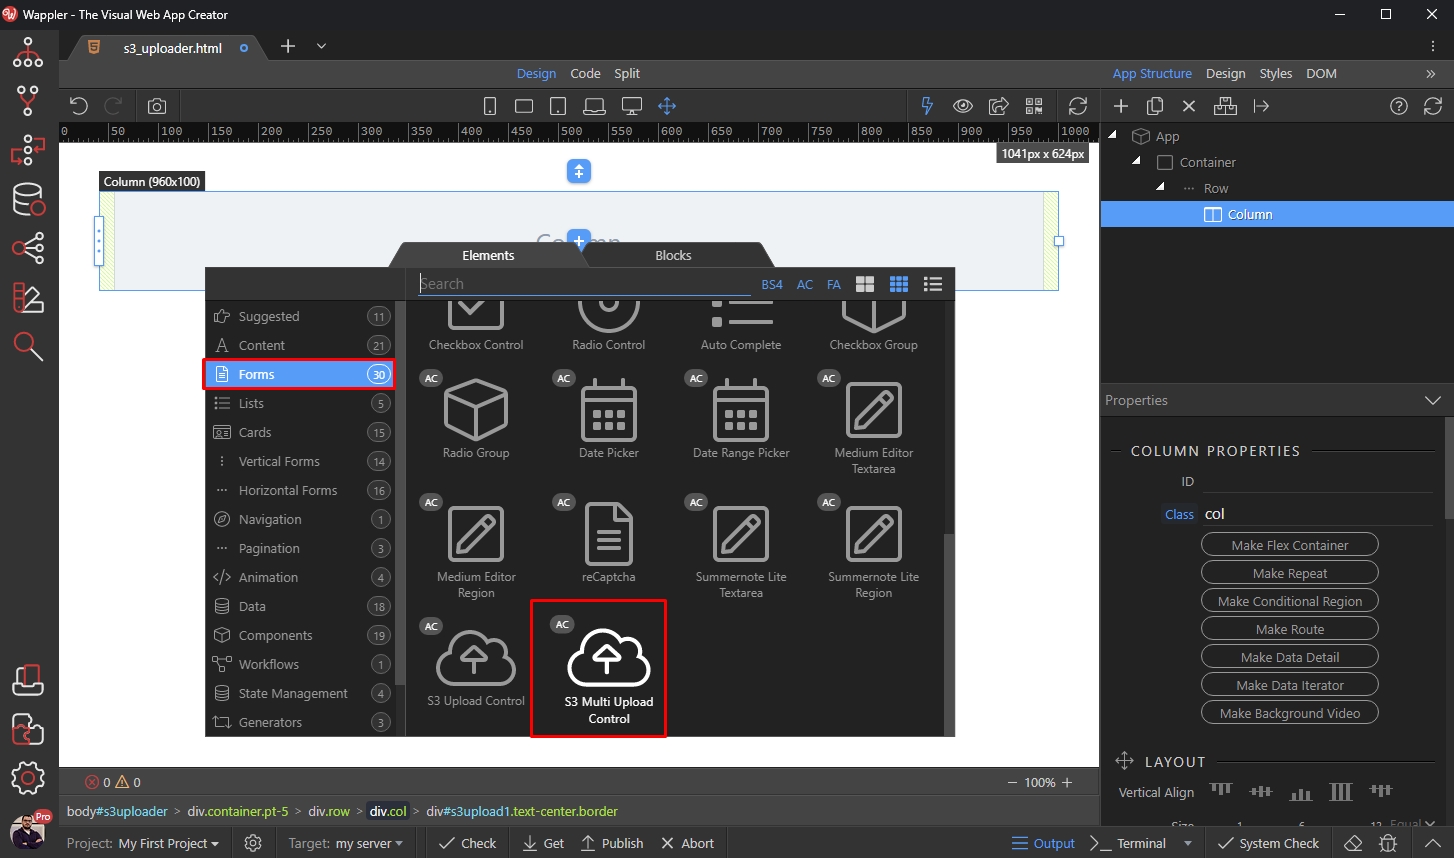
Select your server action, save your page and you are done:
Section titled “Select your server action, save your page and you are done:”