Password Reset Functionality: Part 2
In Part 1 of Password Reset Functionality tutorial you learned how to: Create the request new password page Add user email validation Generate and send the unique password reset link to user’s email I
In Part 1 of Password Reset Functionality tutorial you learned how to:
Section titled “In Part 1 of Password Reset Functionality tutorial you learned how to:”- Create the request new password page
- Add user email validation
- Generate and send the unique password reset link to user’s email
In Part 2 we will cover the rest:
- Create the password reset page
- Create the server action which will update the password in the database
Let’s start with the password reset page.
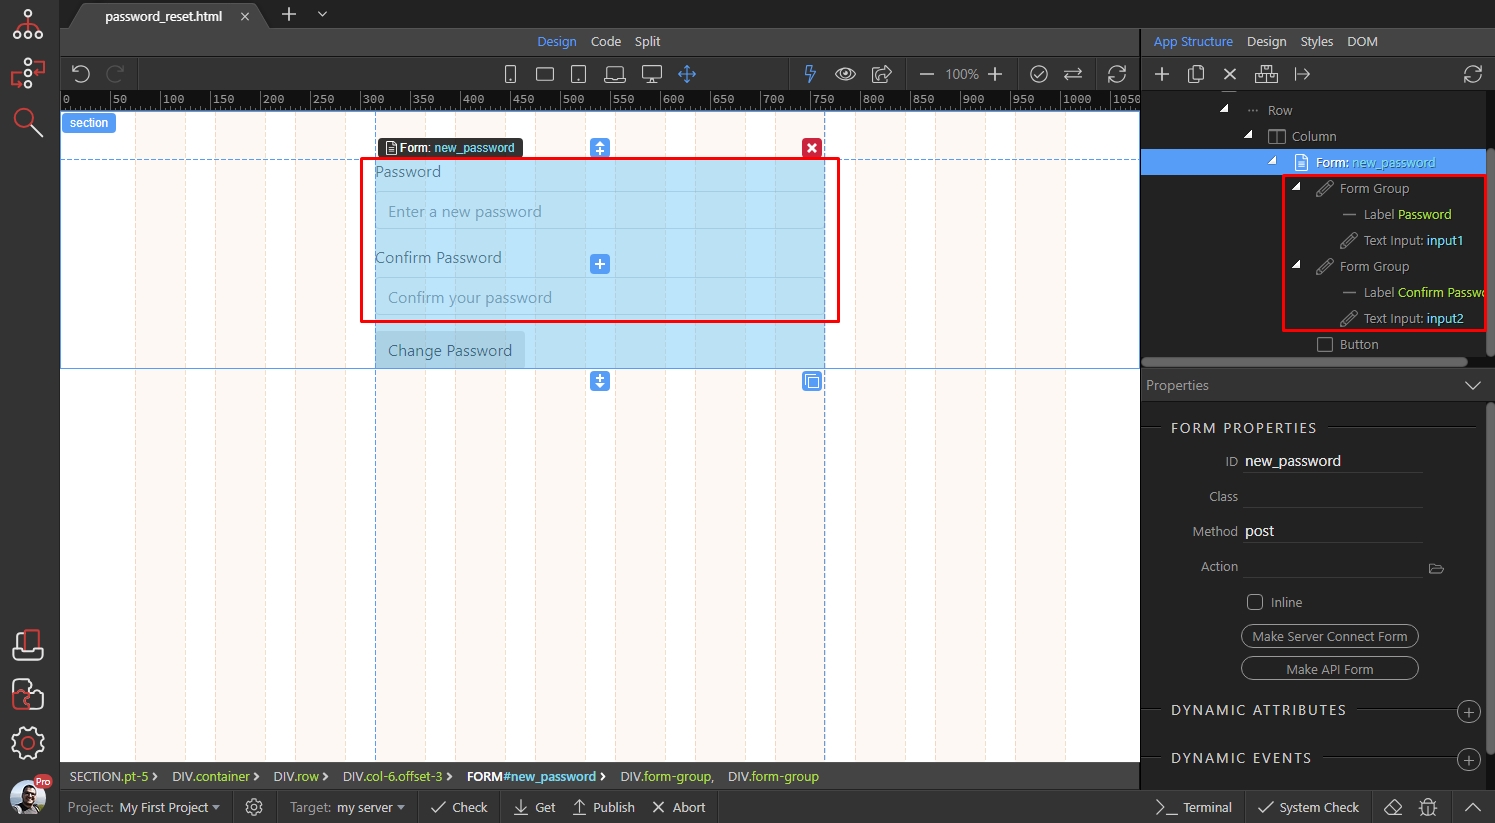
We added a Form, containing two inputs for the new password. The form ID is new_password and the method is set to POST:

Step 2
Section titled “Step 2”It contains two inputs - one for the new password and the other one for password confirmation. We will add validation to them:
The Form also contains a submit button:
Section titled “The Form also contains a submit button:”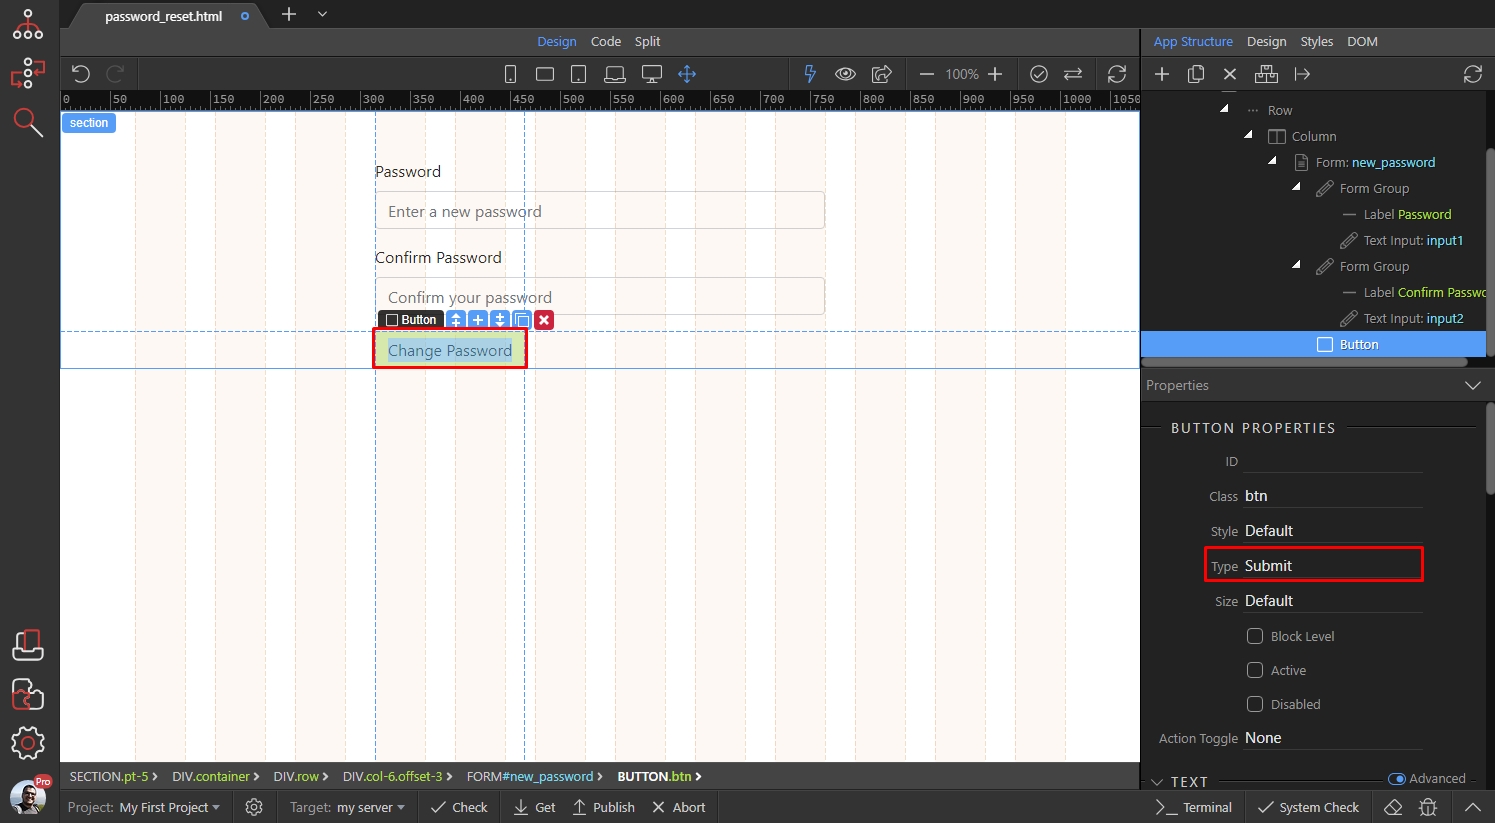
Step 4
Section titled “Step 4”First, let’s the define the two query (url) parameters that will be used to filter our users table. In the Part 1 of this tutorial we generated a link which sends two values to the reset page - id and email. We need to defined them on this page, so they become available in the data picker dialogs. Select App, then click the define Query Params button:
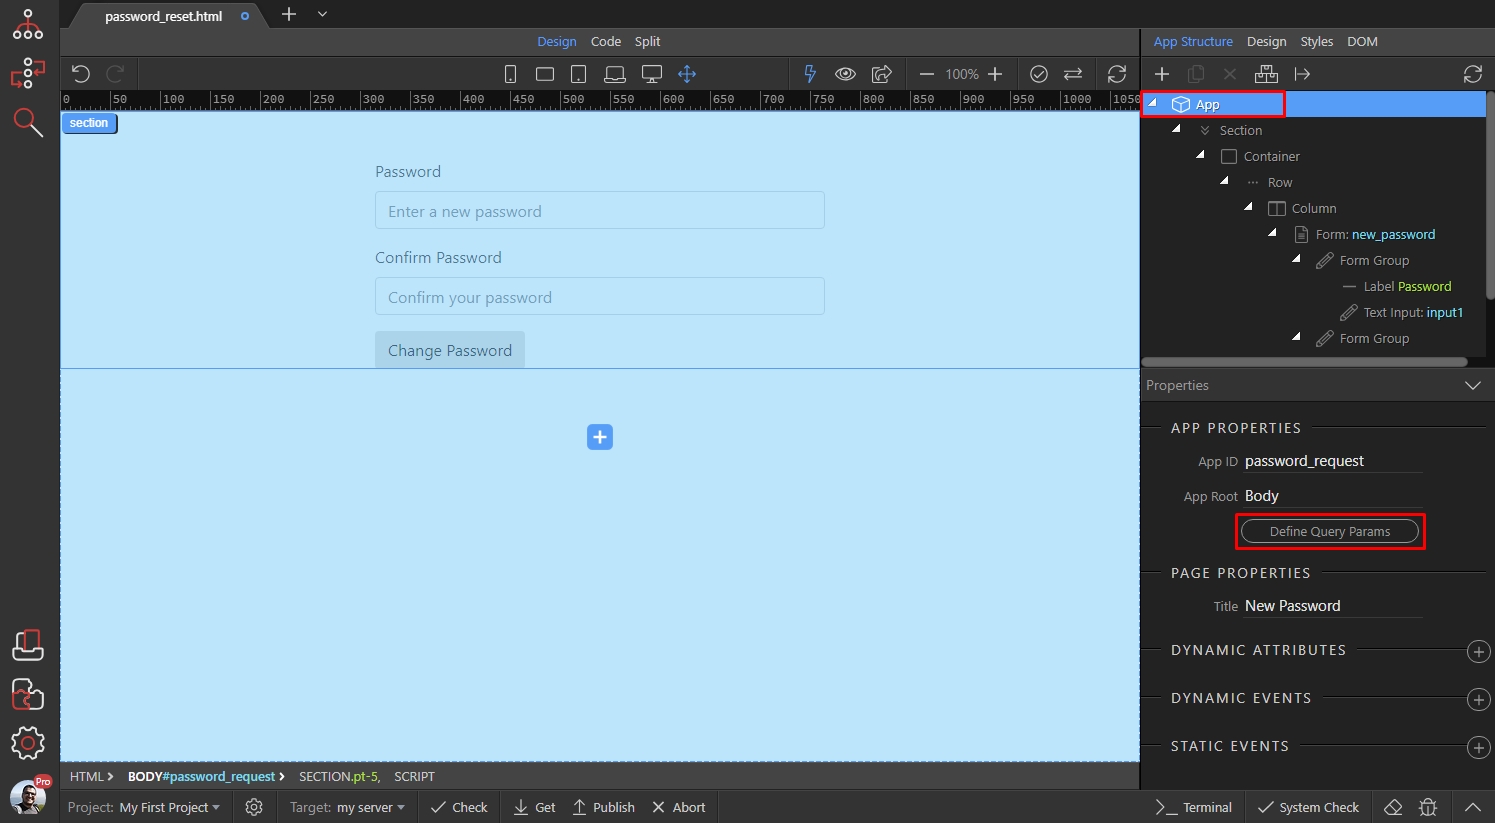
Click the Add New button:
Section titled “Click the Add New button:”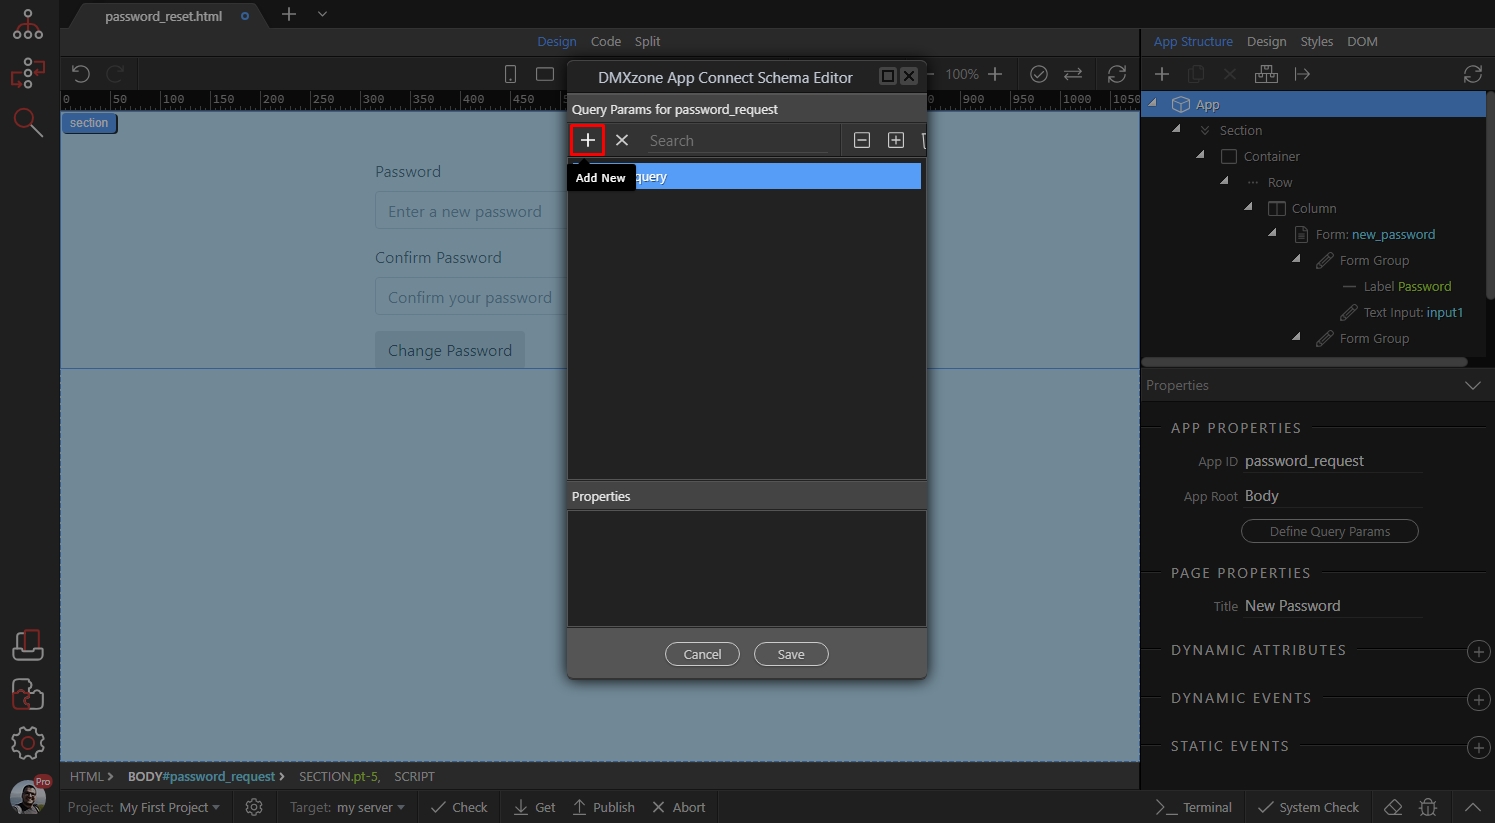
Add two variables there: id and email (as these are what we expect from the URL to provide):
Section titled “Add two variables there: id and email (as these are what we expect from the URL to provide):”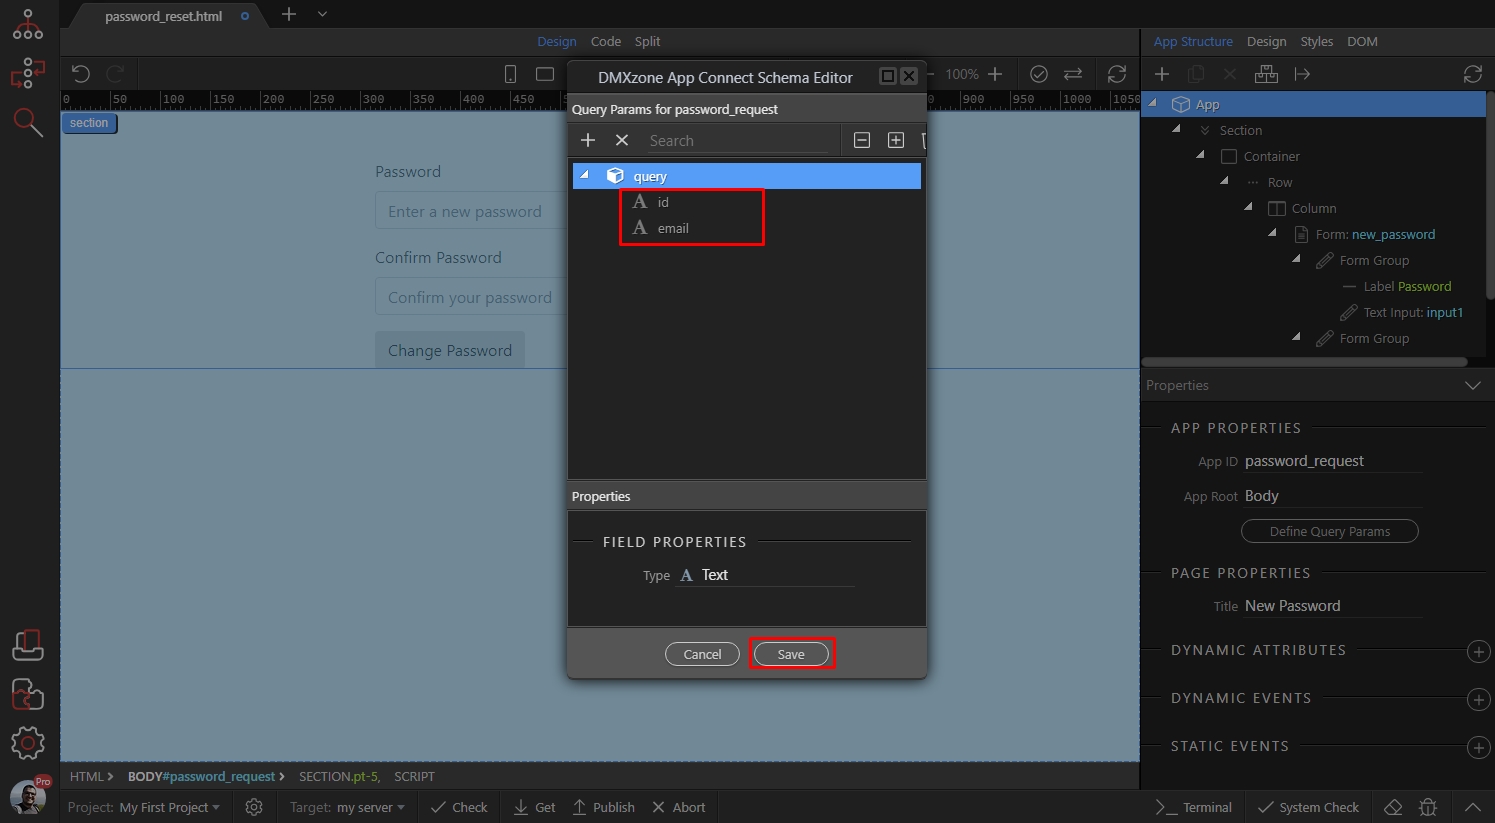
Step 7
Section titled “Step 7”We need to pass these URL parameters to our server action, so we will store their values in hidden fields in the form. Right click the Form:
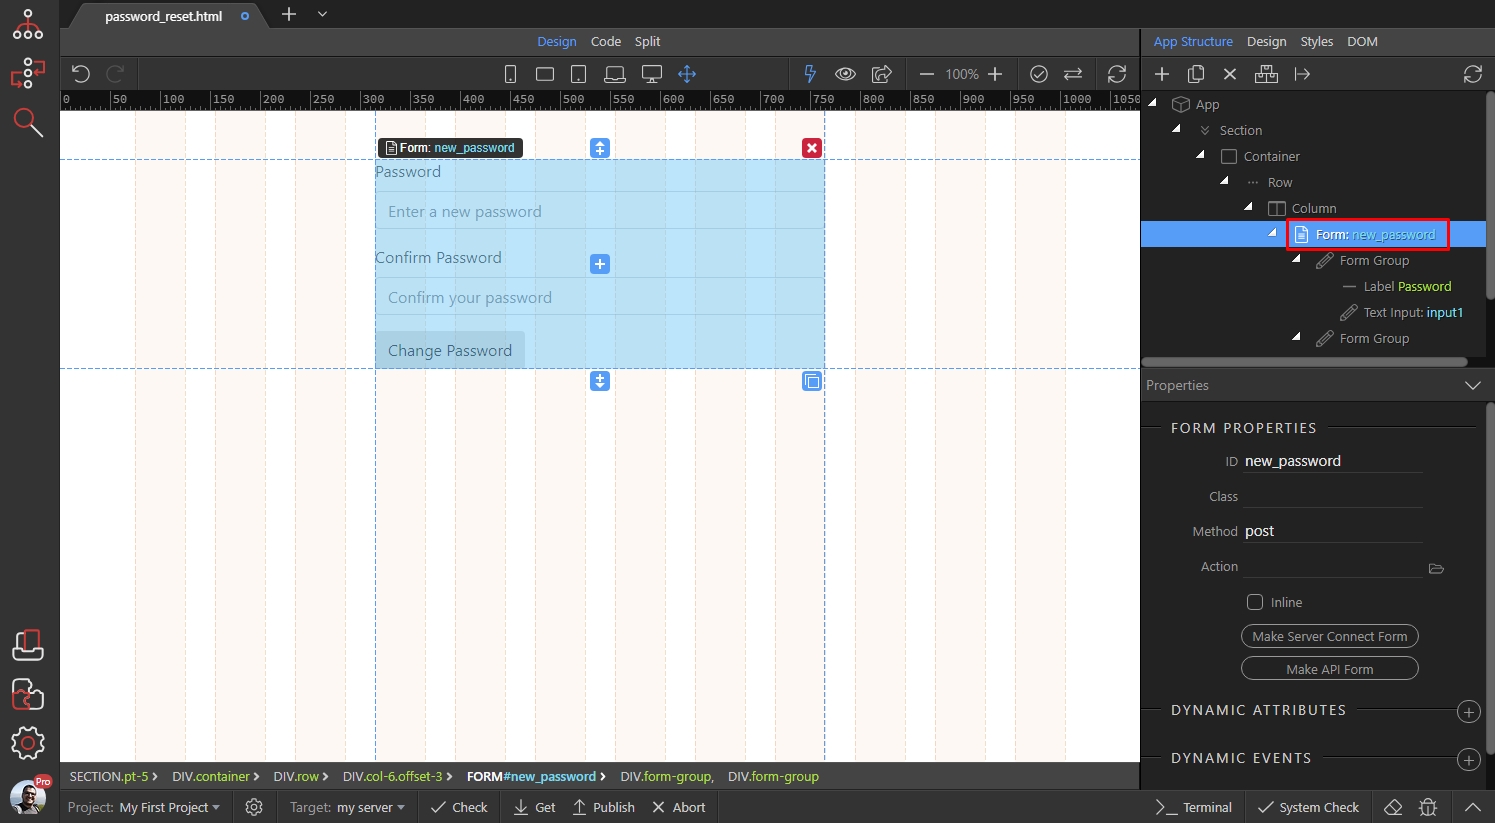
Open Forms and select text input:
Section titled “Open Forms and select text input:”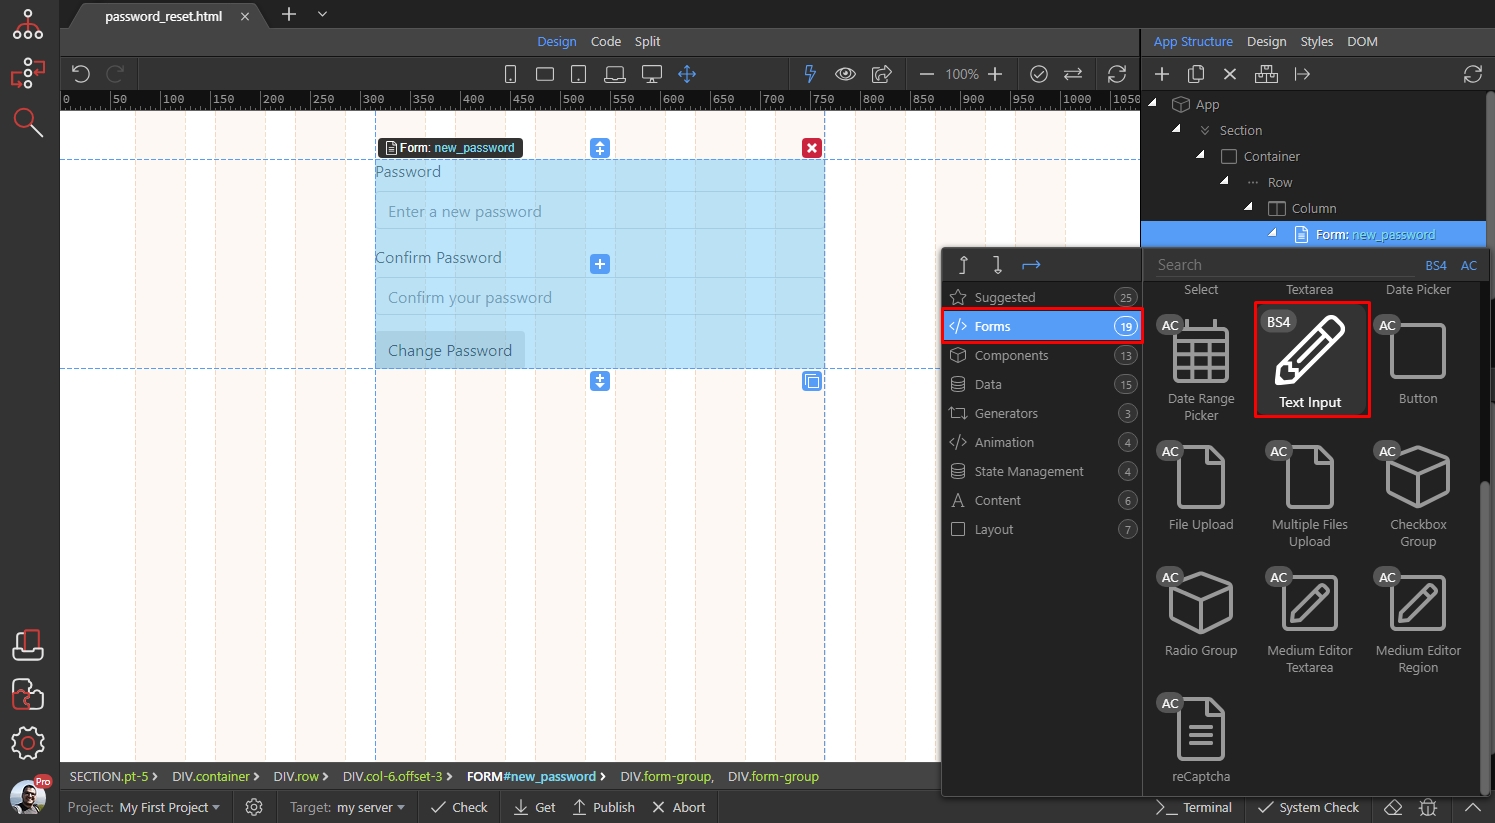
Step 9
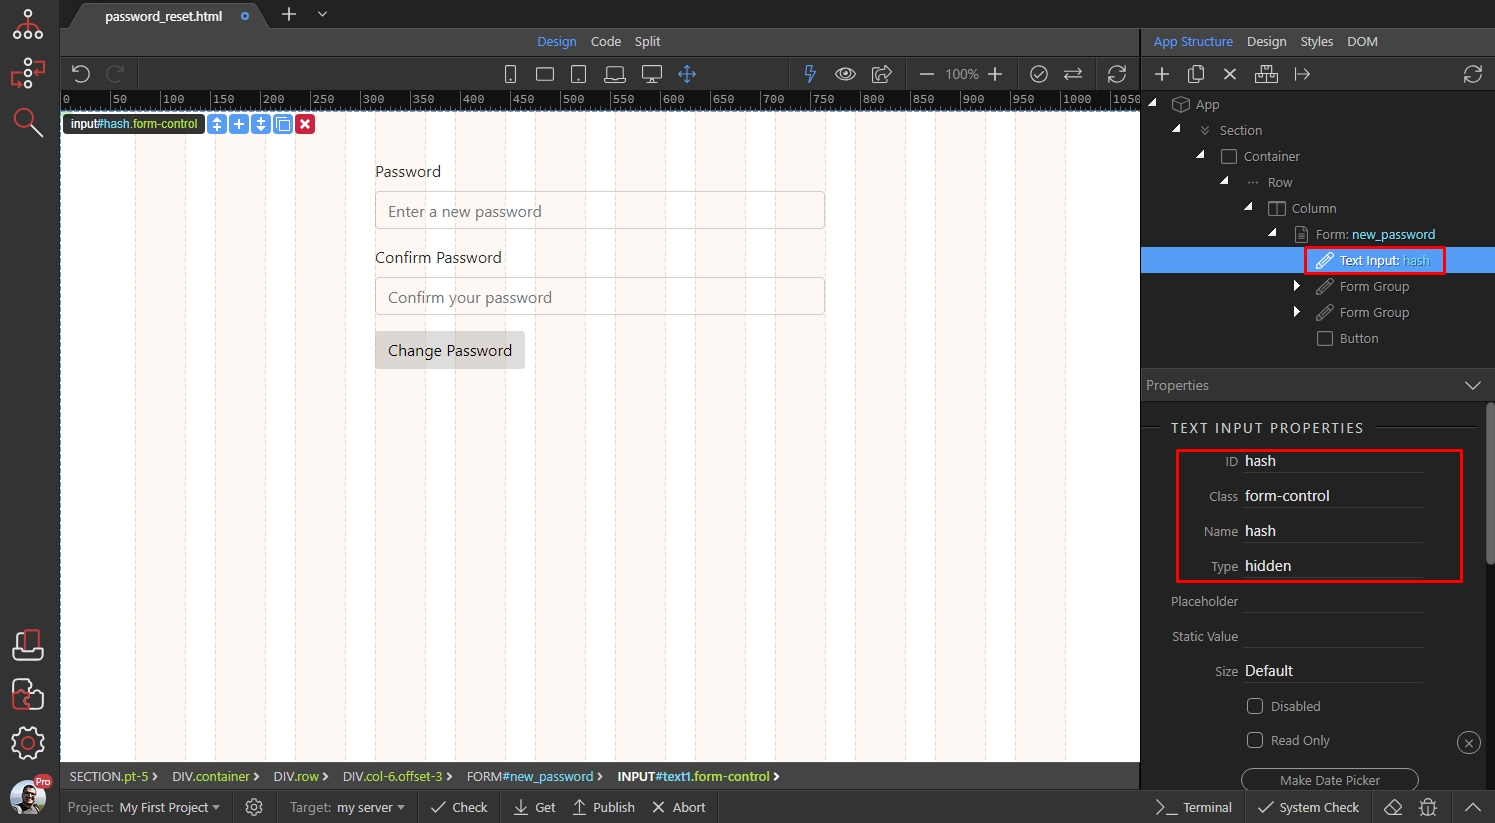
Section titled “Step 9”We will store the hash, from the id URL parameter here. So we set this field ID and Name to hash. We also set its type to hidden:
Step 10
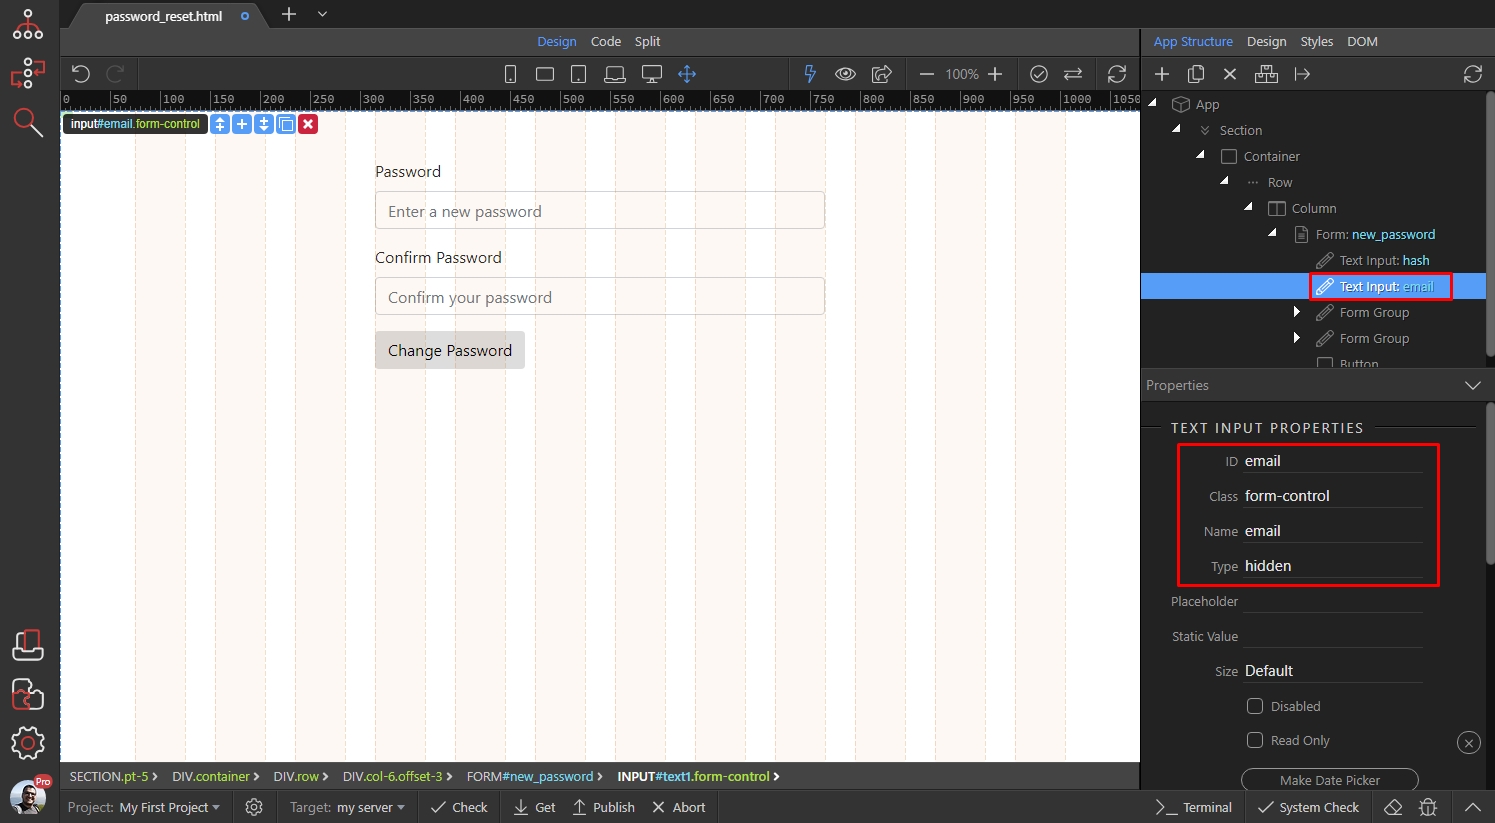
Section titled “Step 10”We create one more hidden field like this, for the email. We set this field ID and Name to email and also set its type to hidden:
Step 11
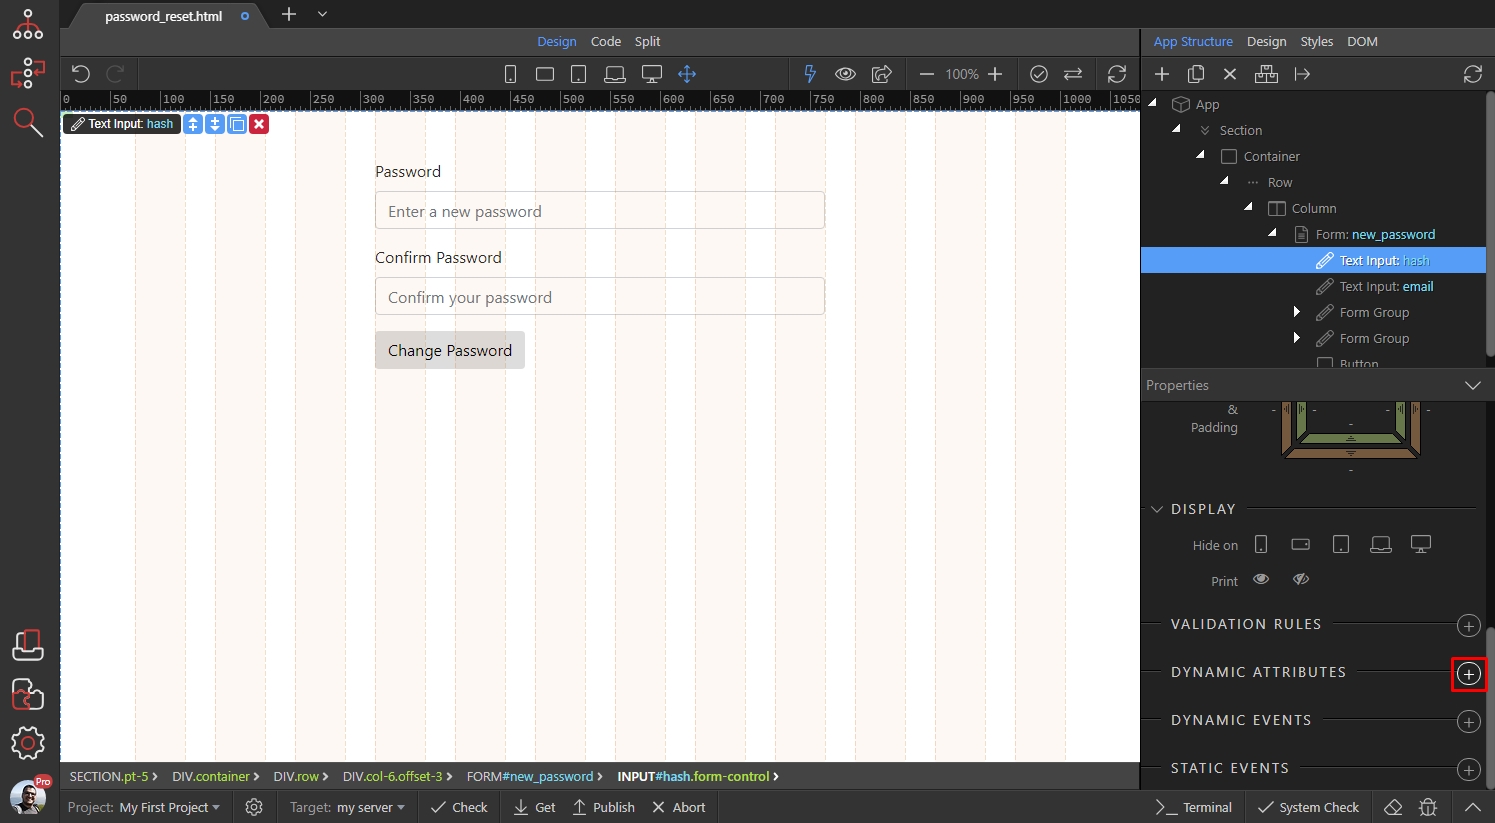
Section titled “Step 11”Our hidden fields are now added, we need to assign the URL parameter values to them. Select the hash hidden field and add new dynamic attribute:
Select Value:
Section titled “Select Value:”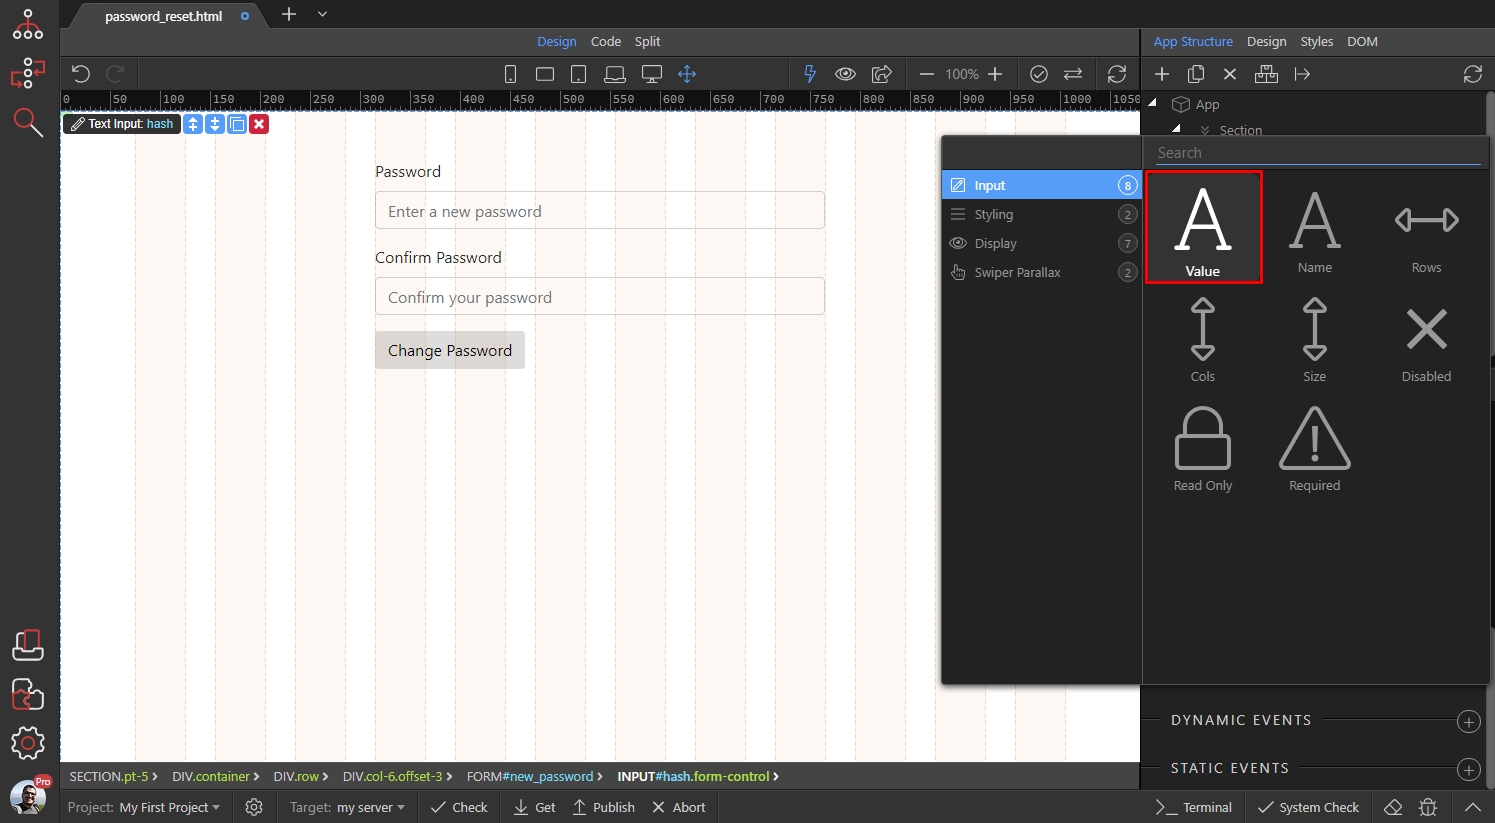
And click the dynamic data picker:
Section titled “And click the dynamic data picker:”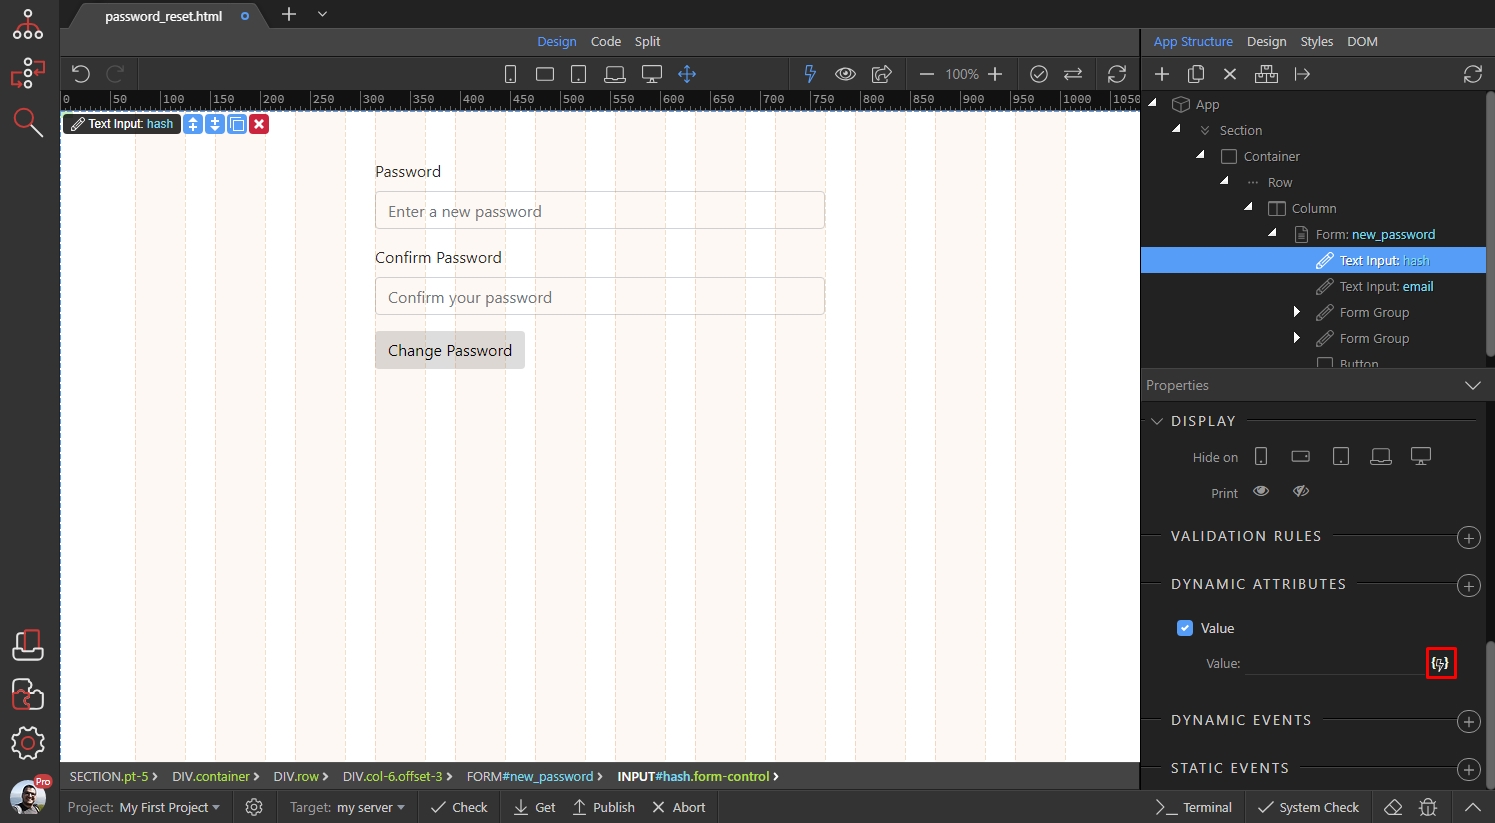
We select the query (url) parameter called id as a value:
Section titled “We select the query (url) parameter called id as a value:”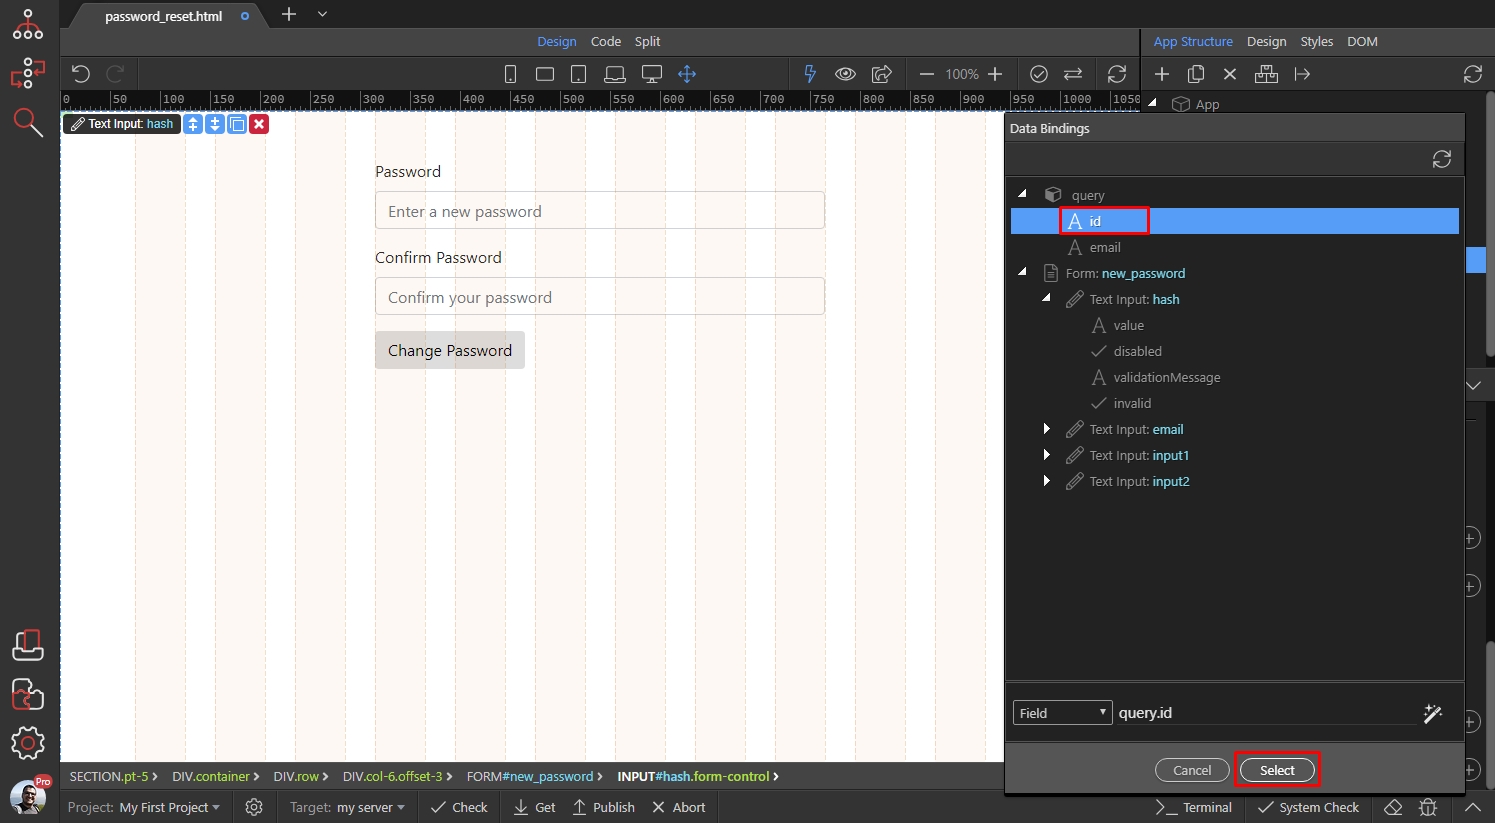
Step 15
Section titled “Step 15”We do the same for the email hidden field. We just select here the query (url) parameter called email as a value here:
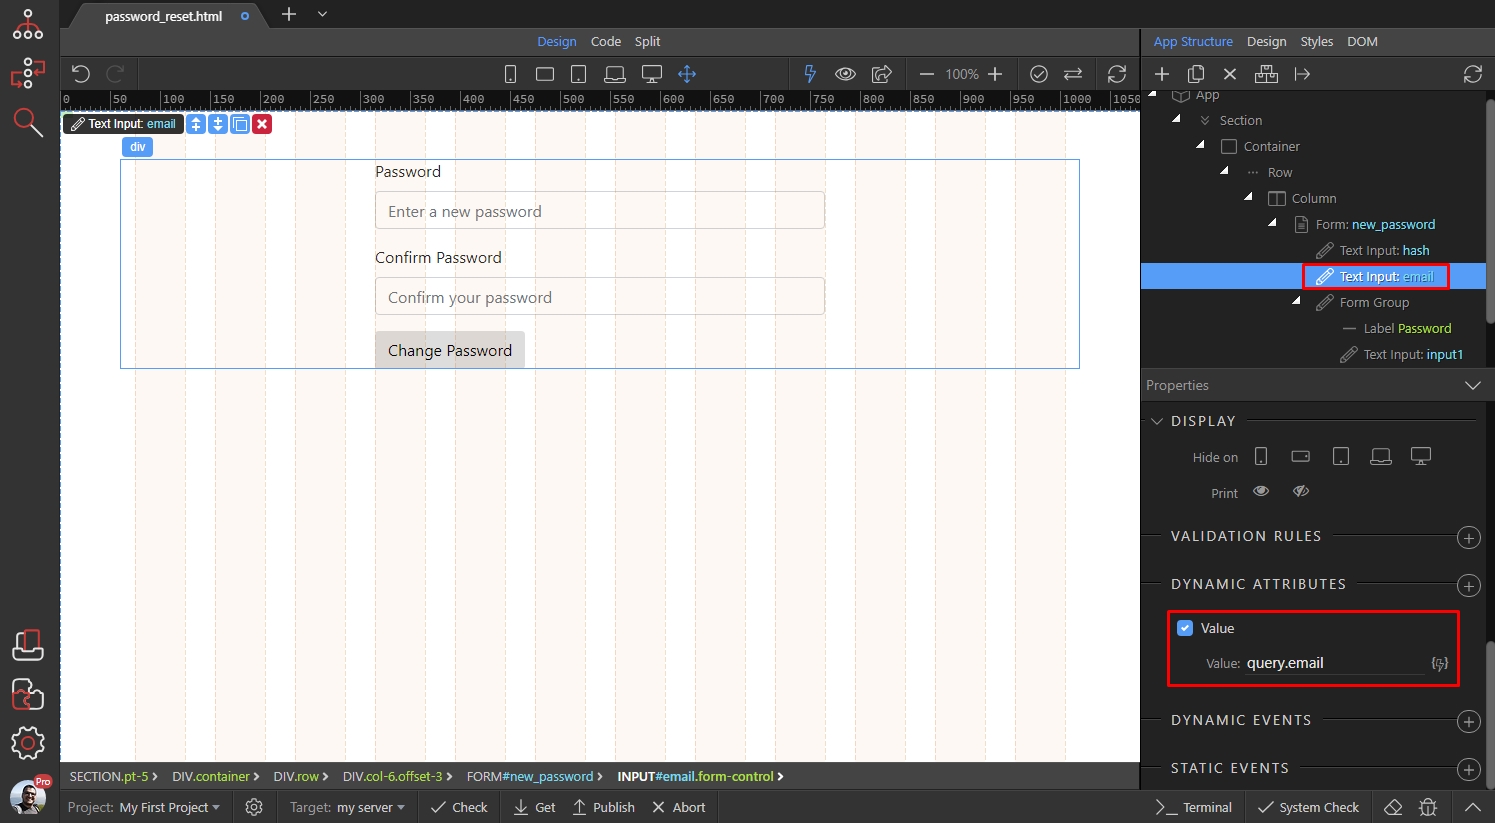
Step 16
Section titled “Step 16”Now, let’s add the required validation rules to the two password fields.
Select the first one and add new validation rule:
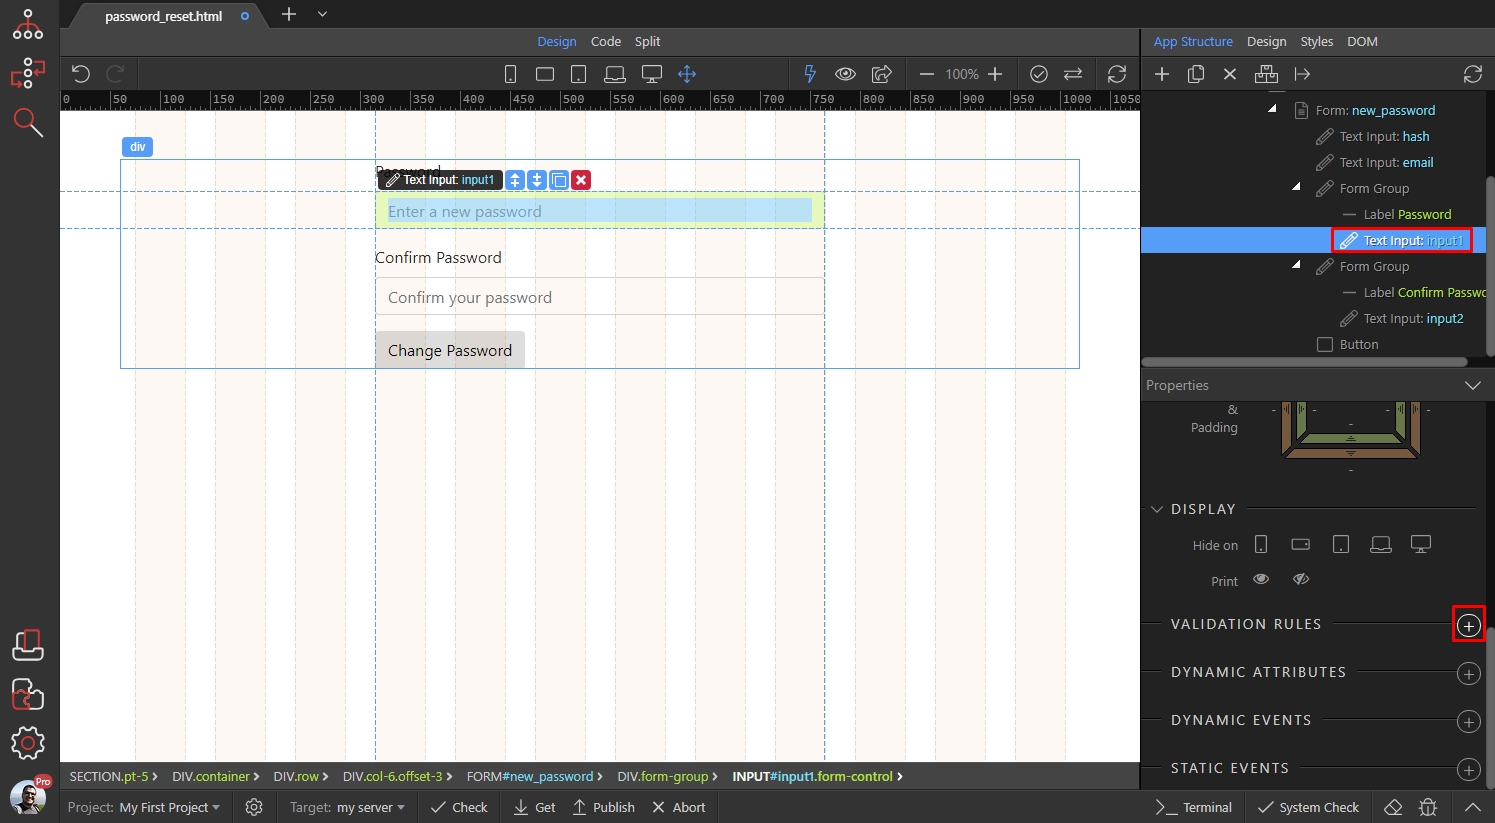
We need this field to have a value, when submitting the form, so we add the required rule:
Section titled “We need this field to have a value, when submitting the form, so we add the required rule:”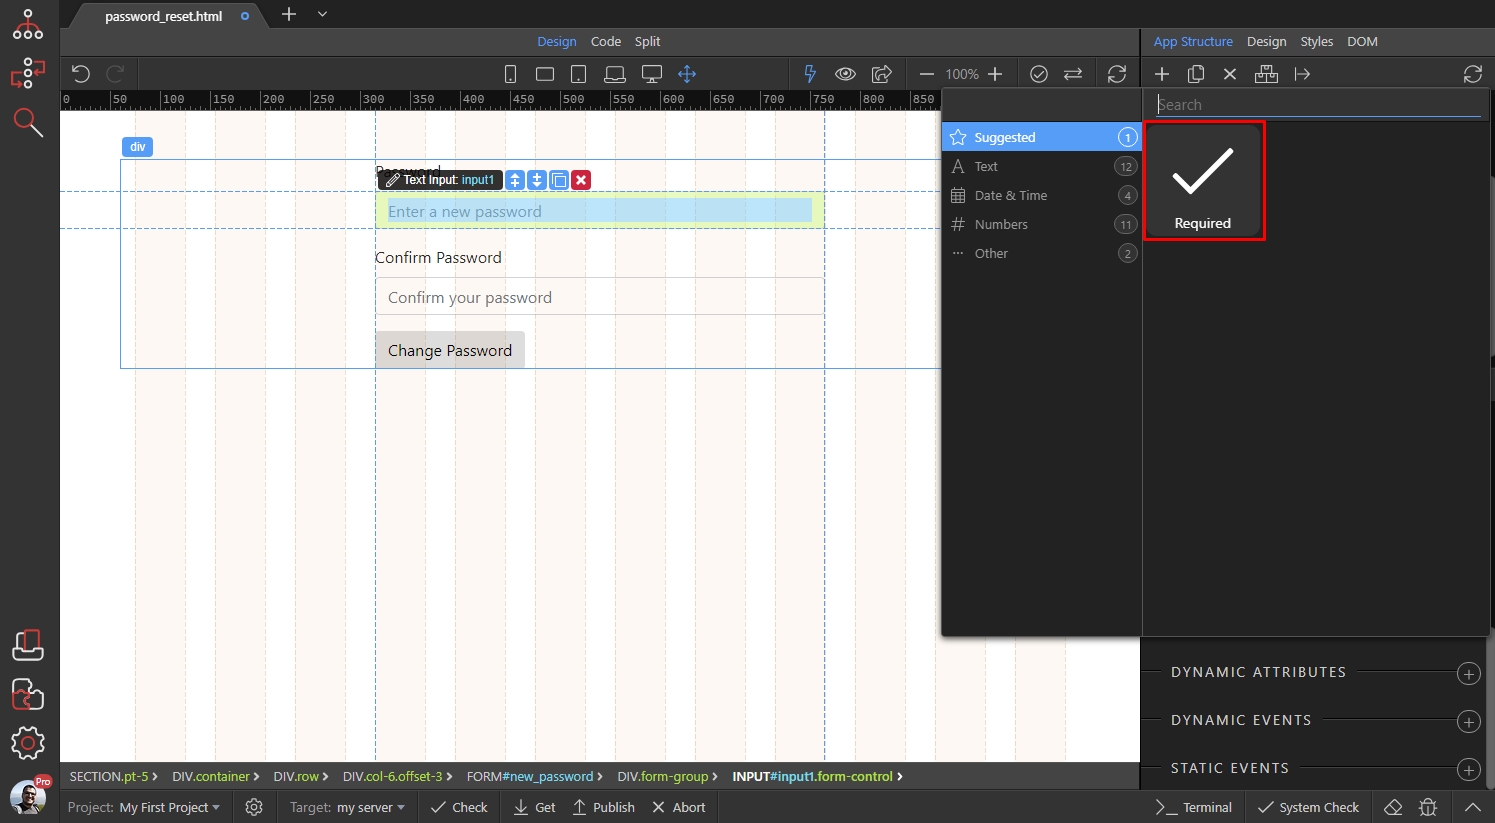
Then we select the second input - password confirm:
Section titled “Then we select the second input - password confirm:”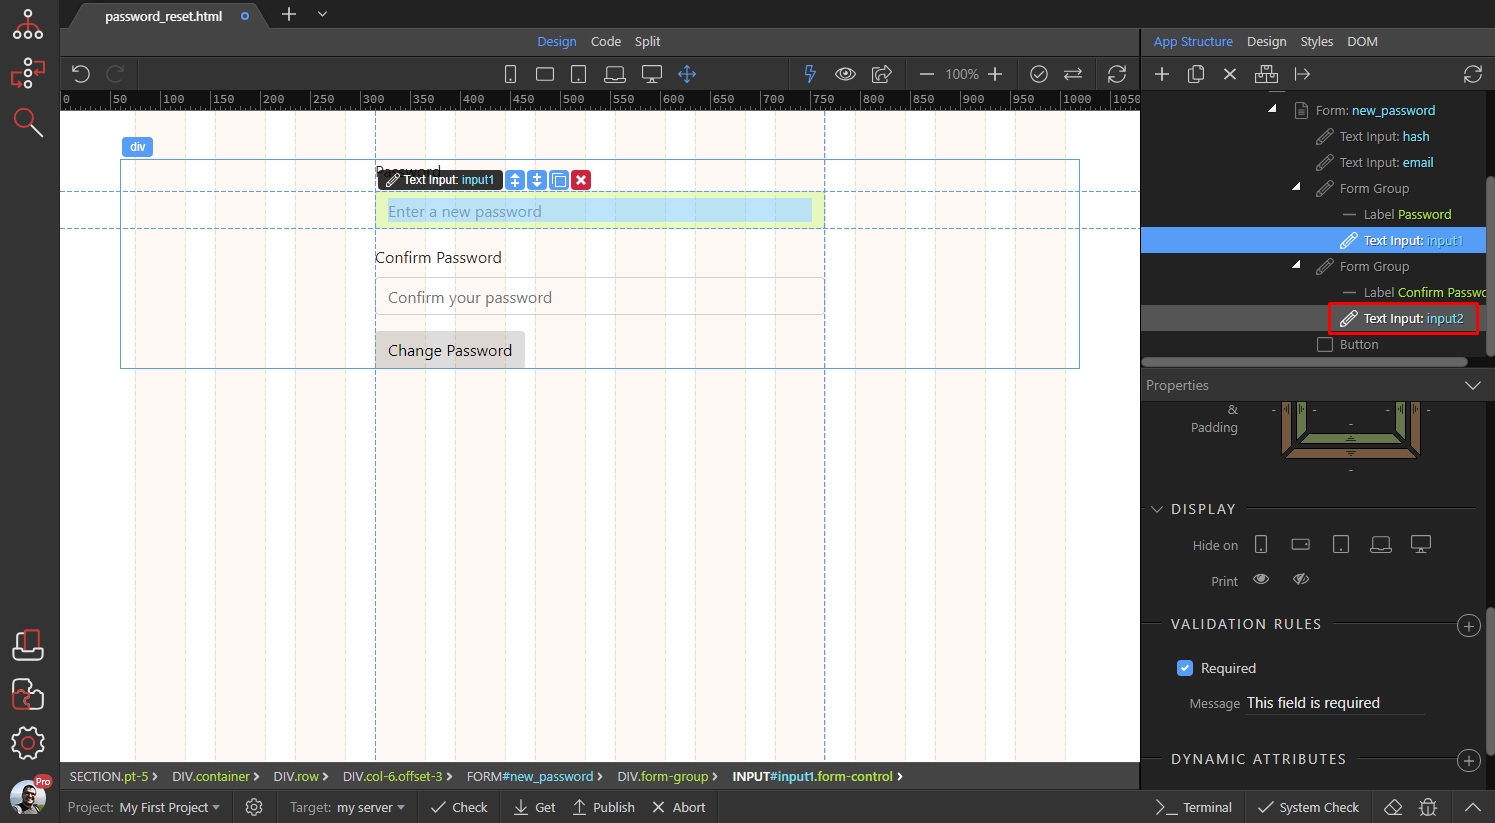
Add new validation rule:
Section titled “Add new validation rule:”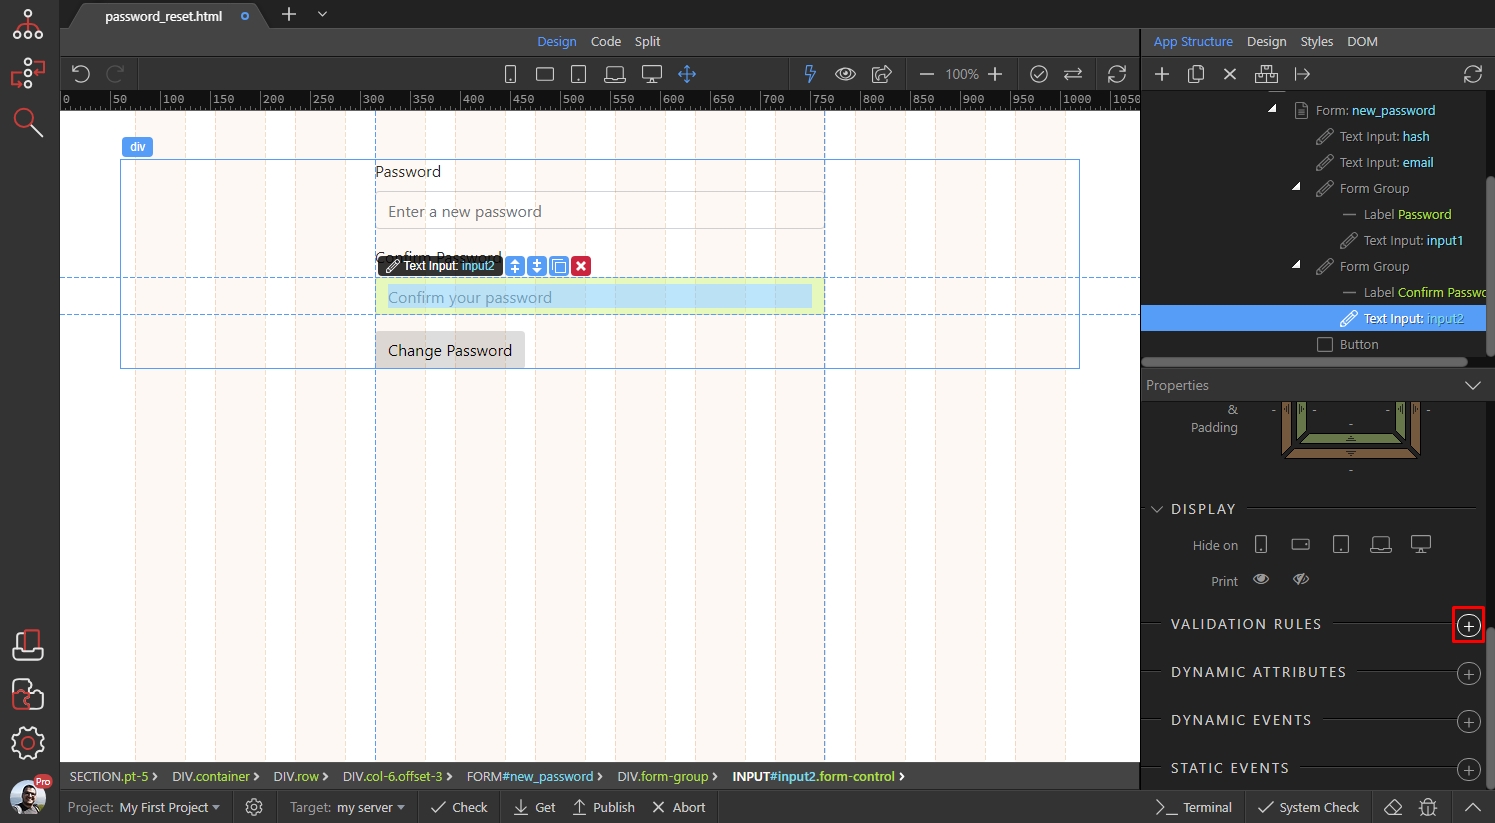
Here we also need the required validation:
Section titled “Here we also need the required validation:”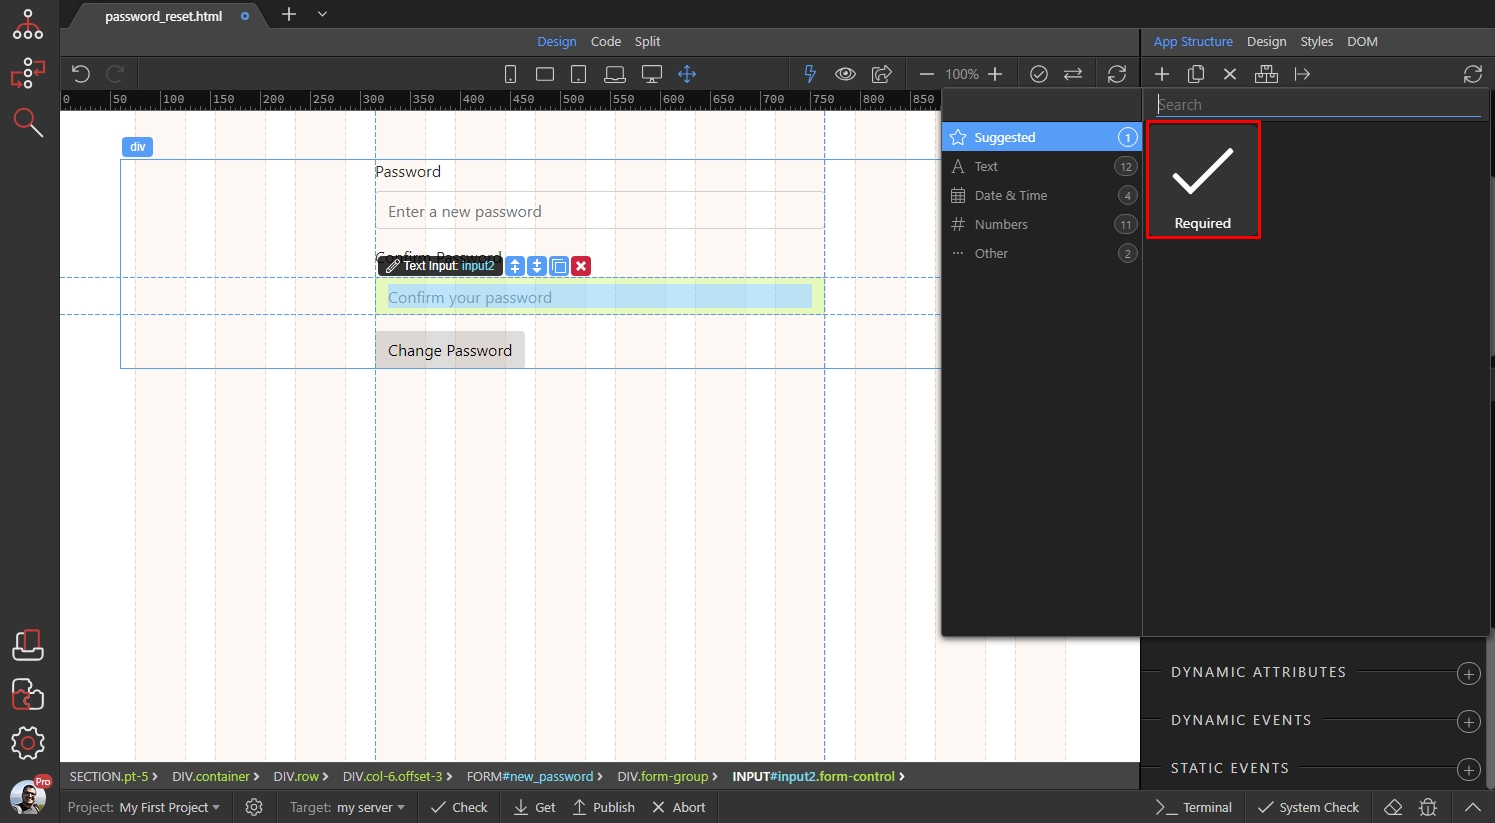
Step 21
Section titled “Step 21”We also need a check if the password entered here match the one entered in the first field, so we add one more validation rule:
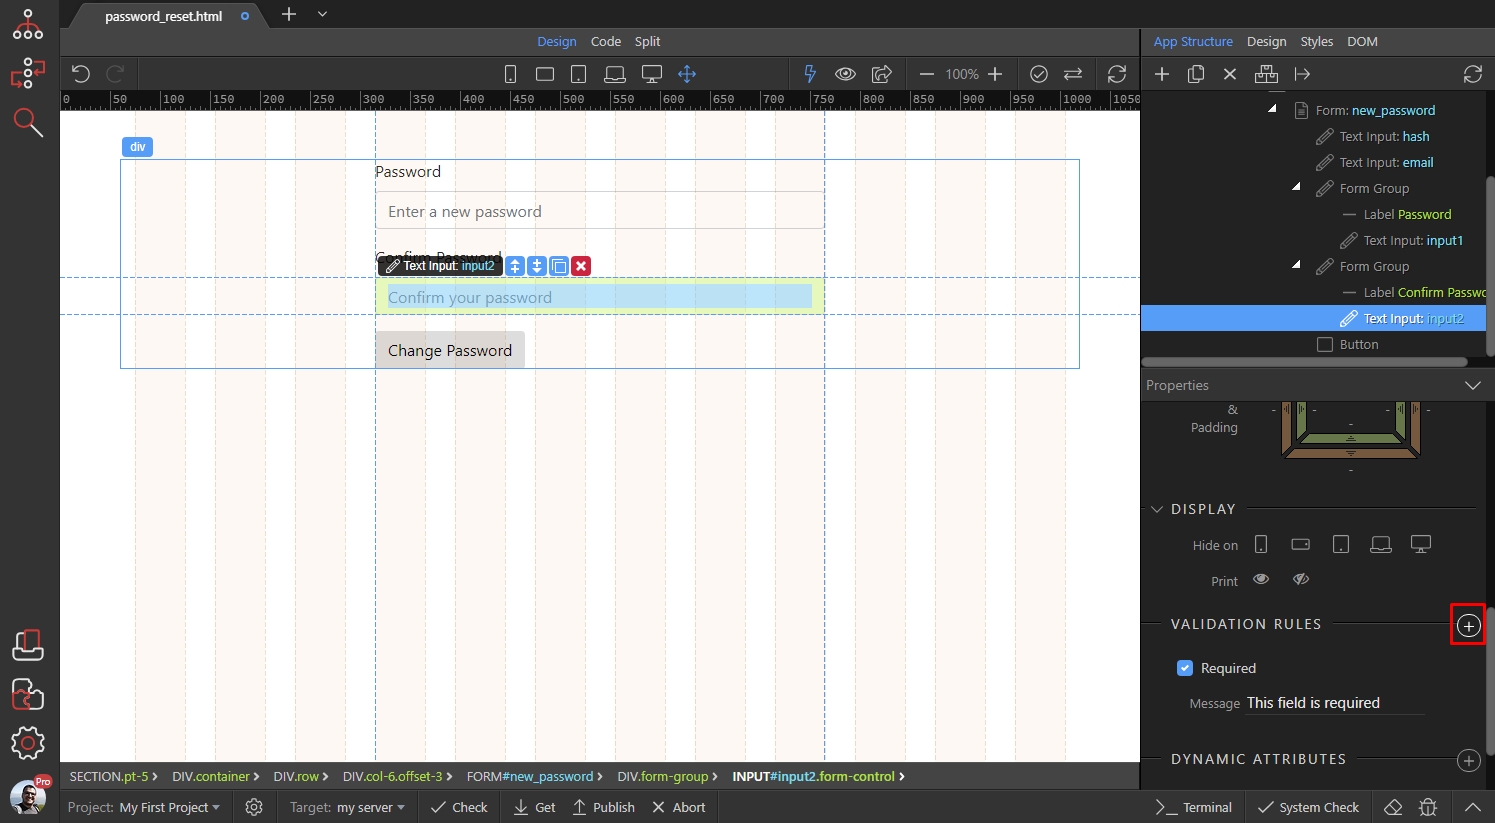
Open Other and select Equal To:
Section titled “Open Other and select Equal To:”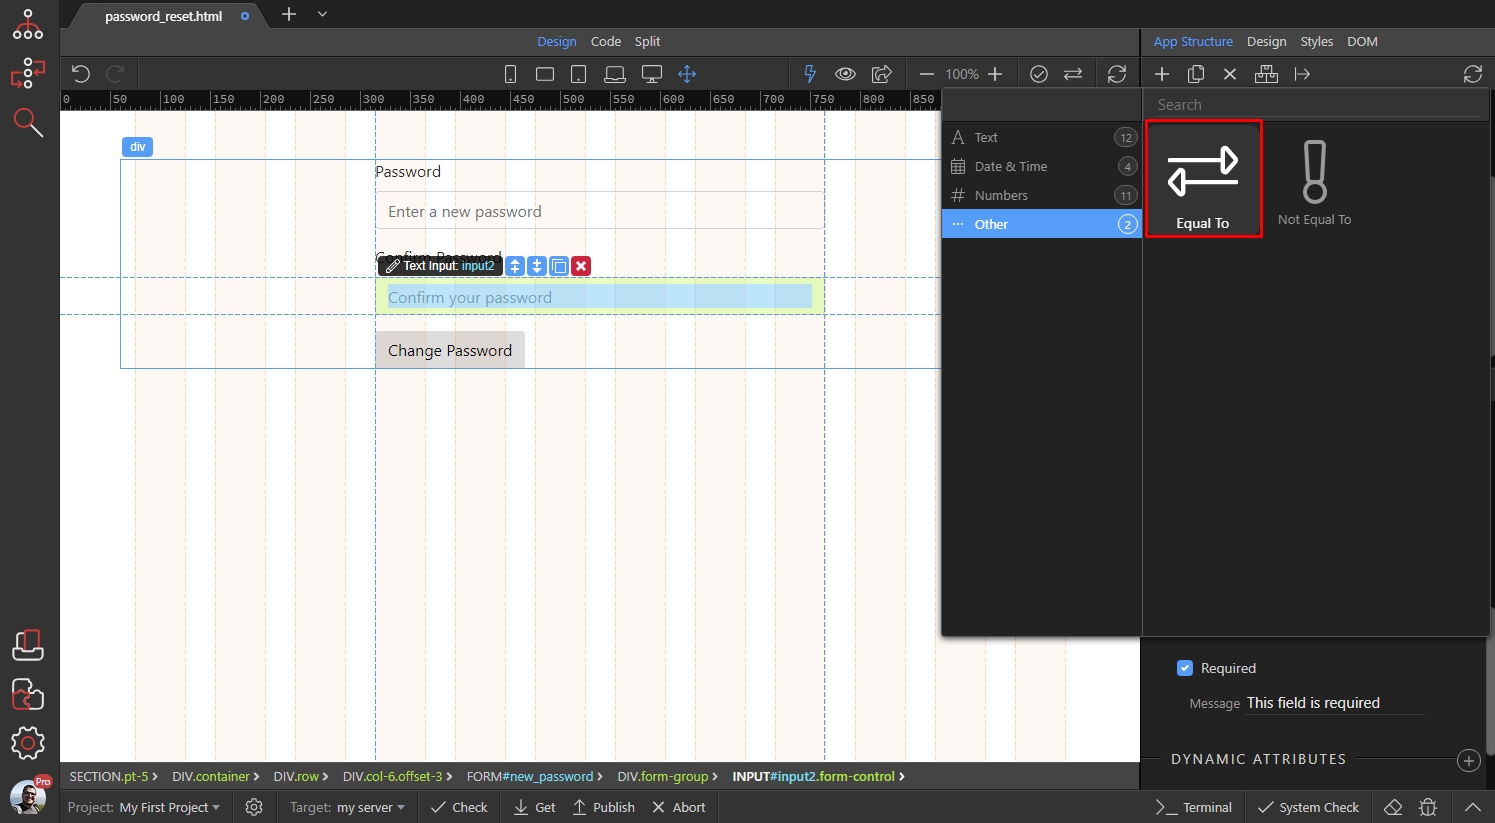
Step 23
Section titled “Step 23”Here we enter the name of the field we want to compare values with. In our case this is the password field which name is input1:
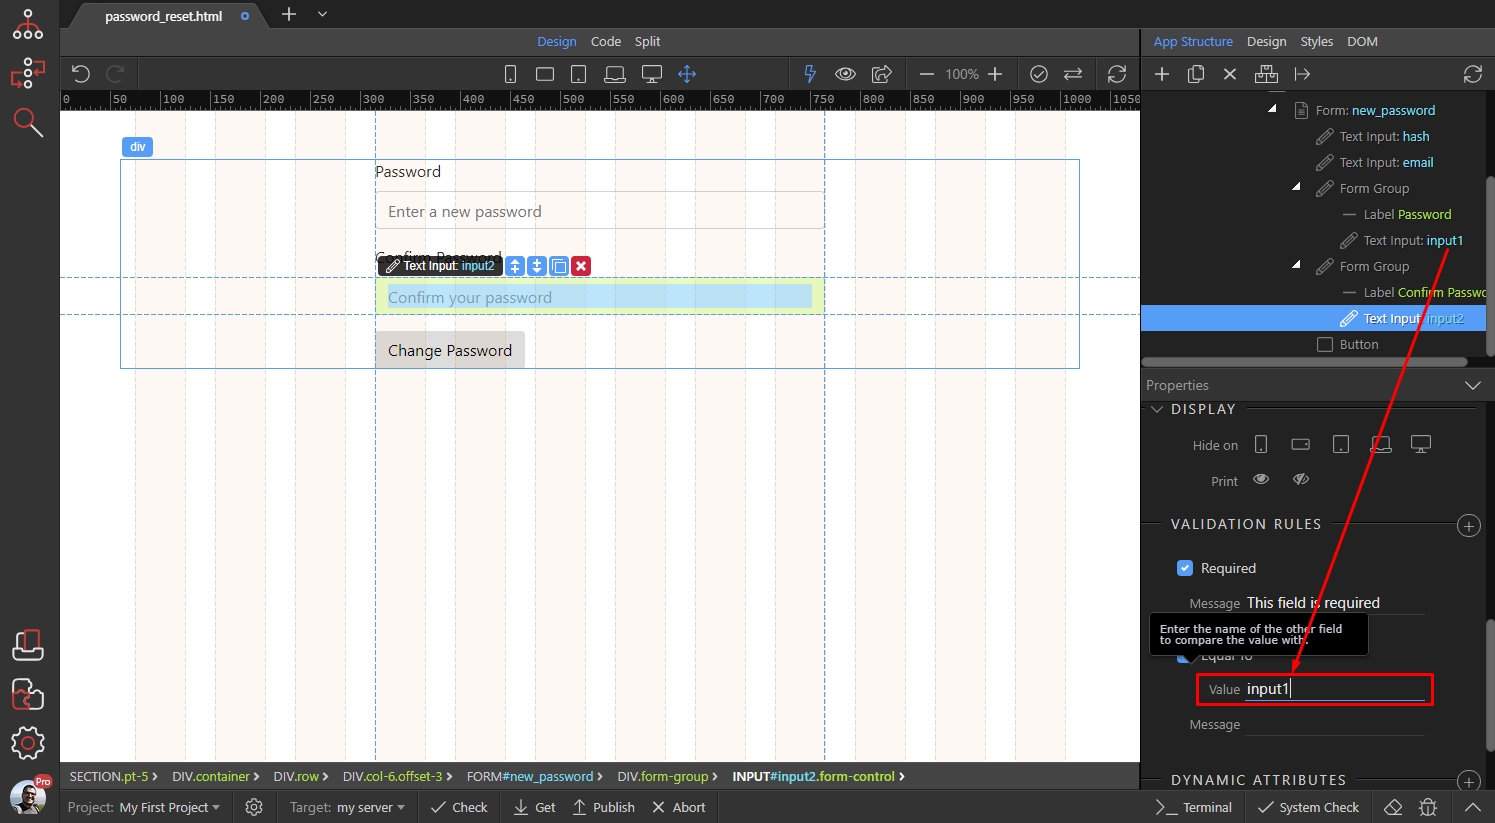
Enter your custom error message, that will appear when the values of both fields don’t match:
Section titled “Enter your custom error message, that will appear when the values of both fields don’t match:”
We are done setting up our form. Save your page and open Server Connect:
Section titled “We are done setting up our form. Save your page and open Server Connect:”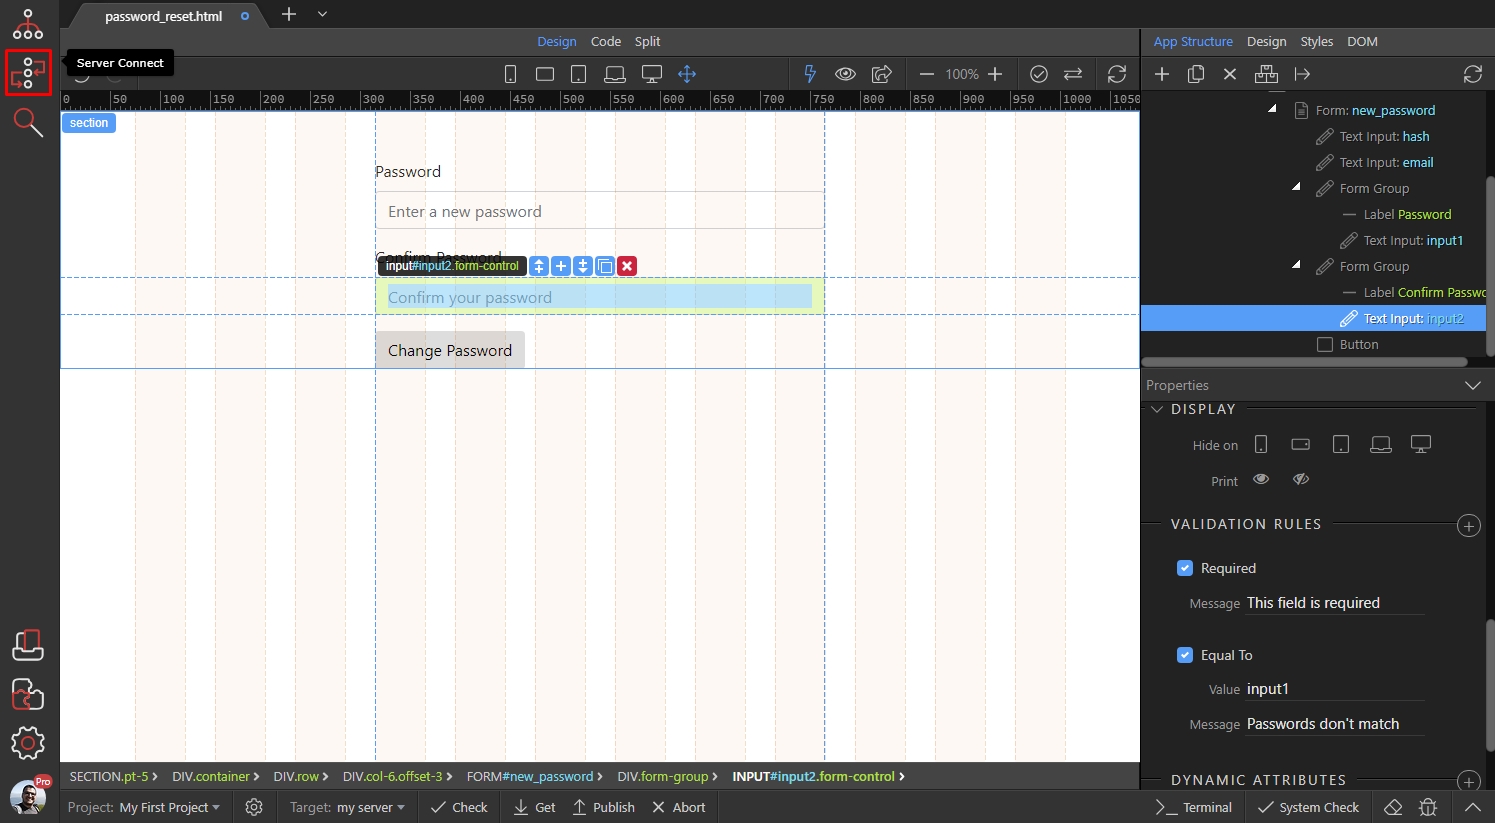
Create new Server Action:
Section titled “Create new Server Action:”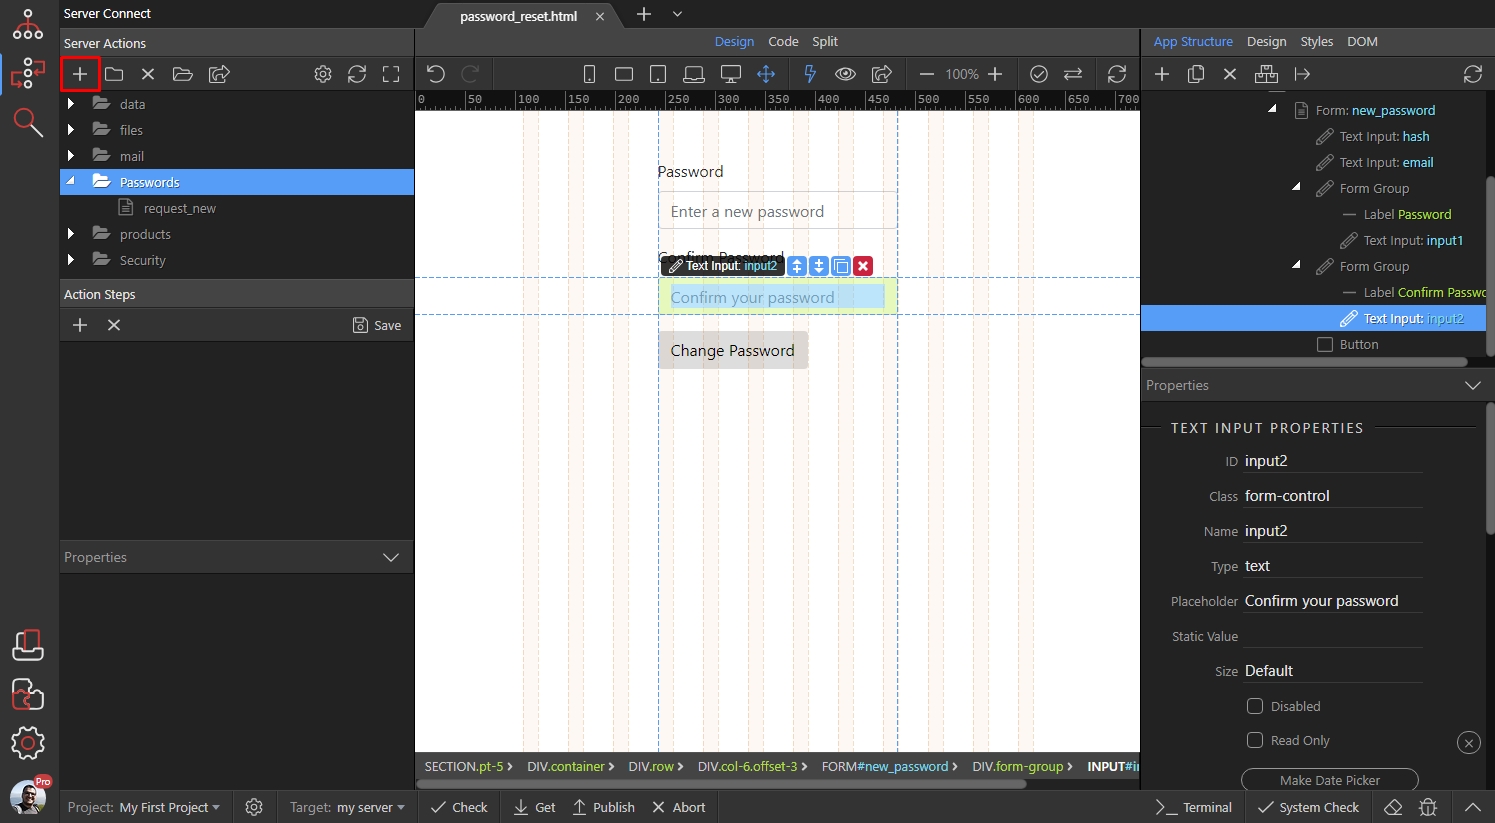
We call it update_password. Select Globals:
Section titled “We call it update_password. Select Globals:”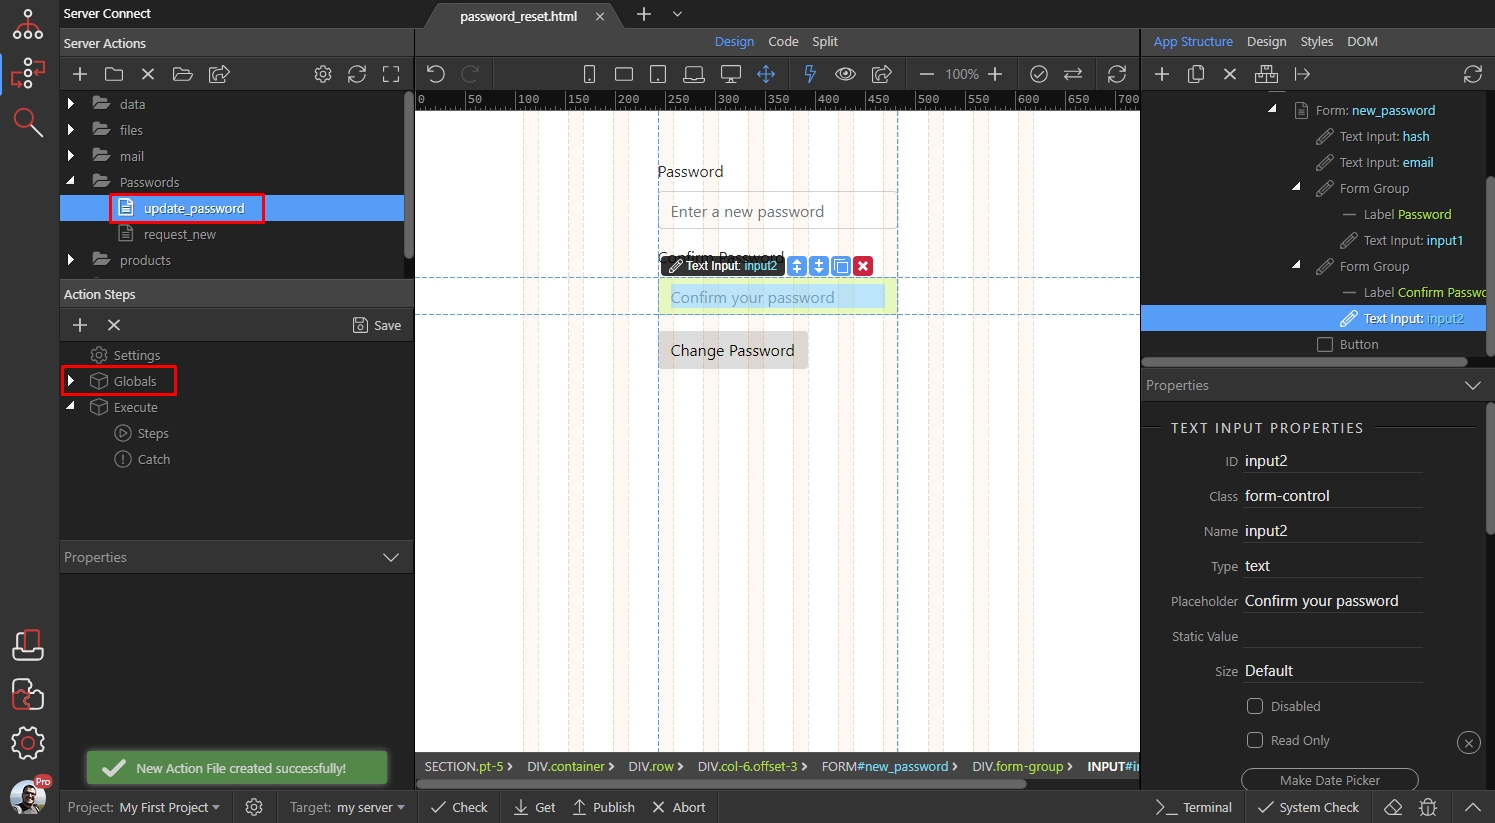
Click the browse icon, next to the Linked Page field. Browse to the page containing your password reset form:
Section titled “Click the browse icon, next to the Linked Page field. Browse to the page containing your password reset form:”
Then select password reset form from the menu:
Section titled “Then select password reset form from the menu:”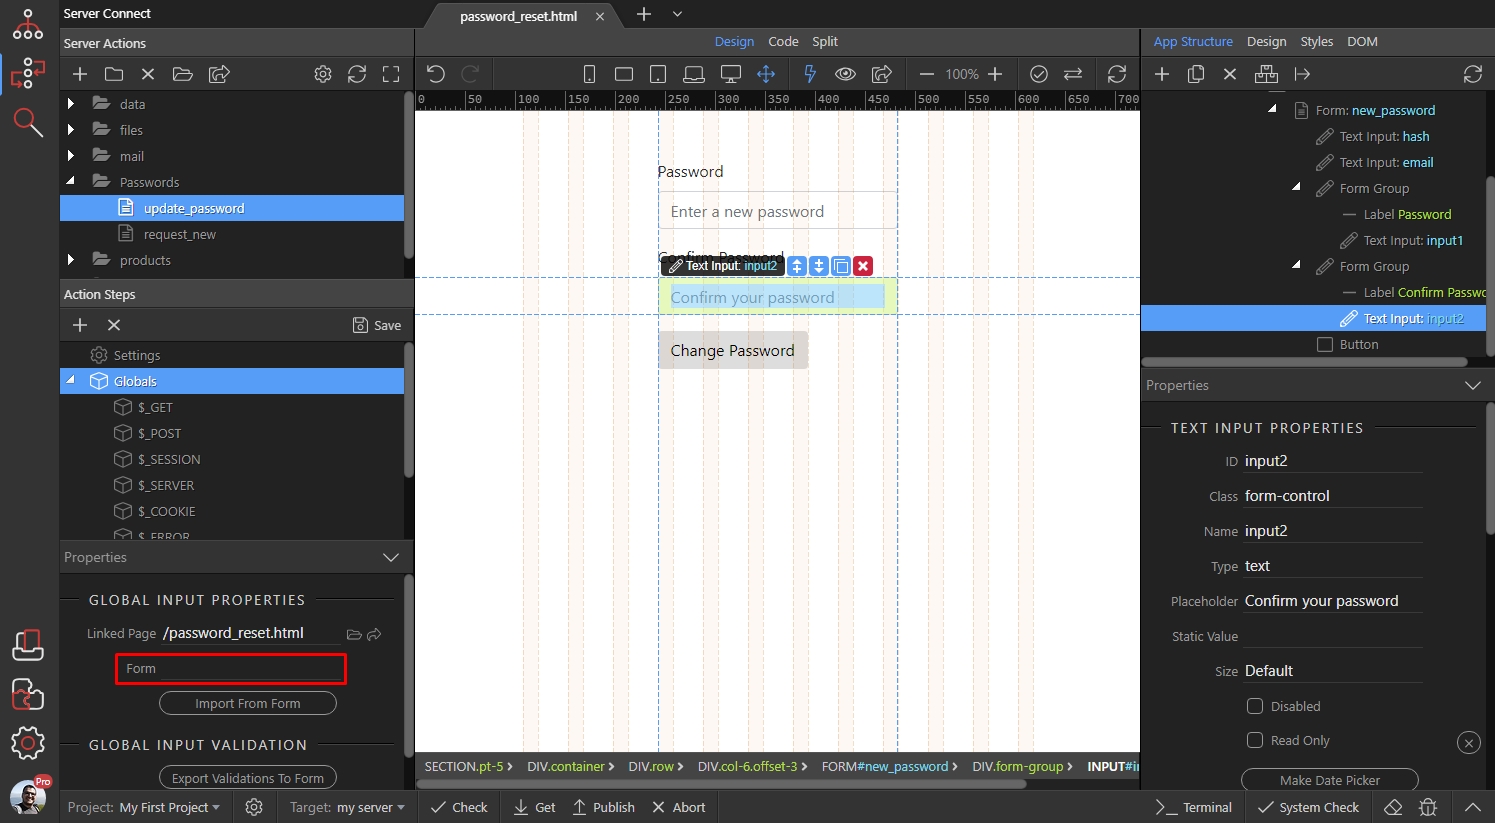
And click the Import from form button:
Section titled “And click the Import from form button:”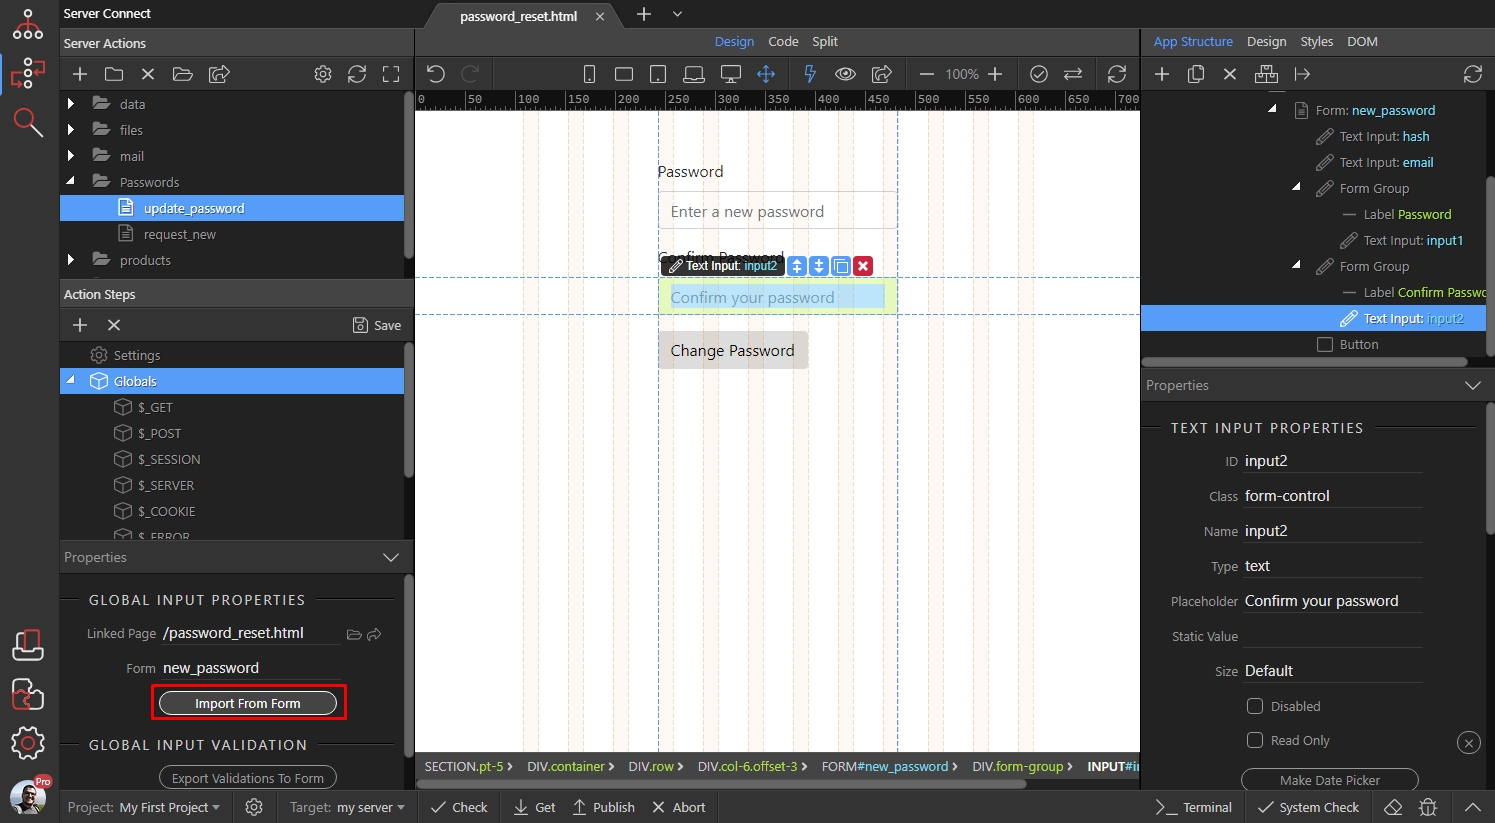
Now, right click steps:
Section titled “Now, right click steps:”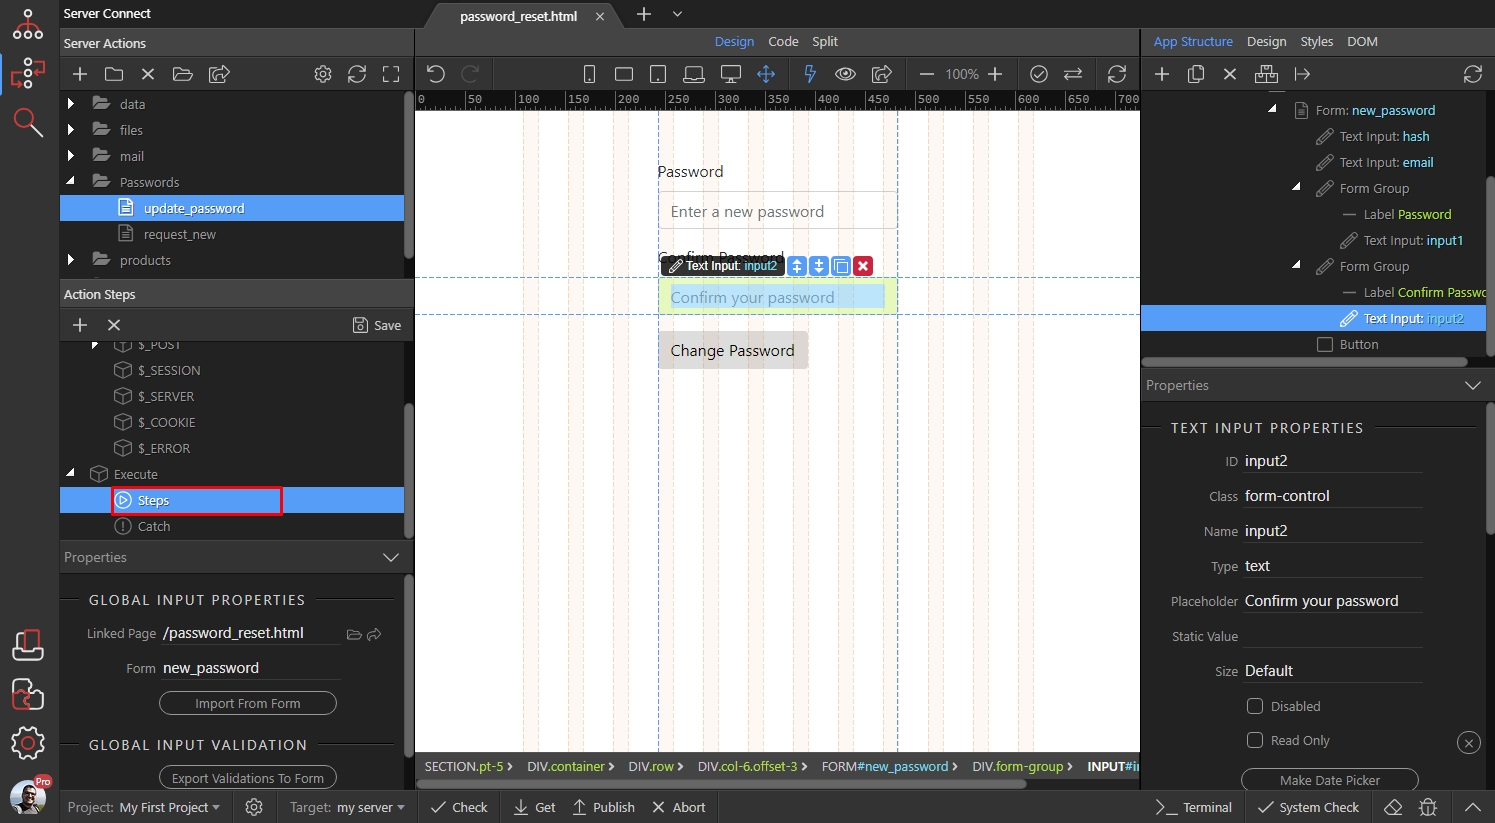
Step 32
Section titled “Step 32”Add a database connection. Setup your connection or select it from the drop-down if you have already defined it:
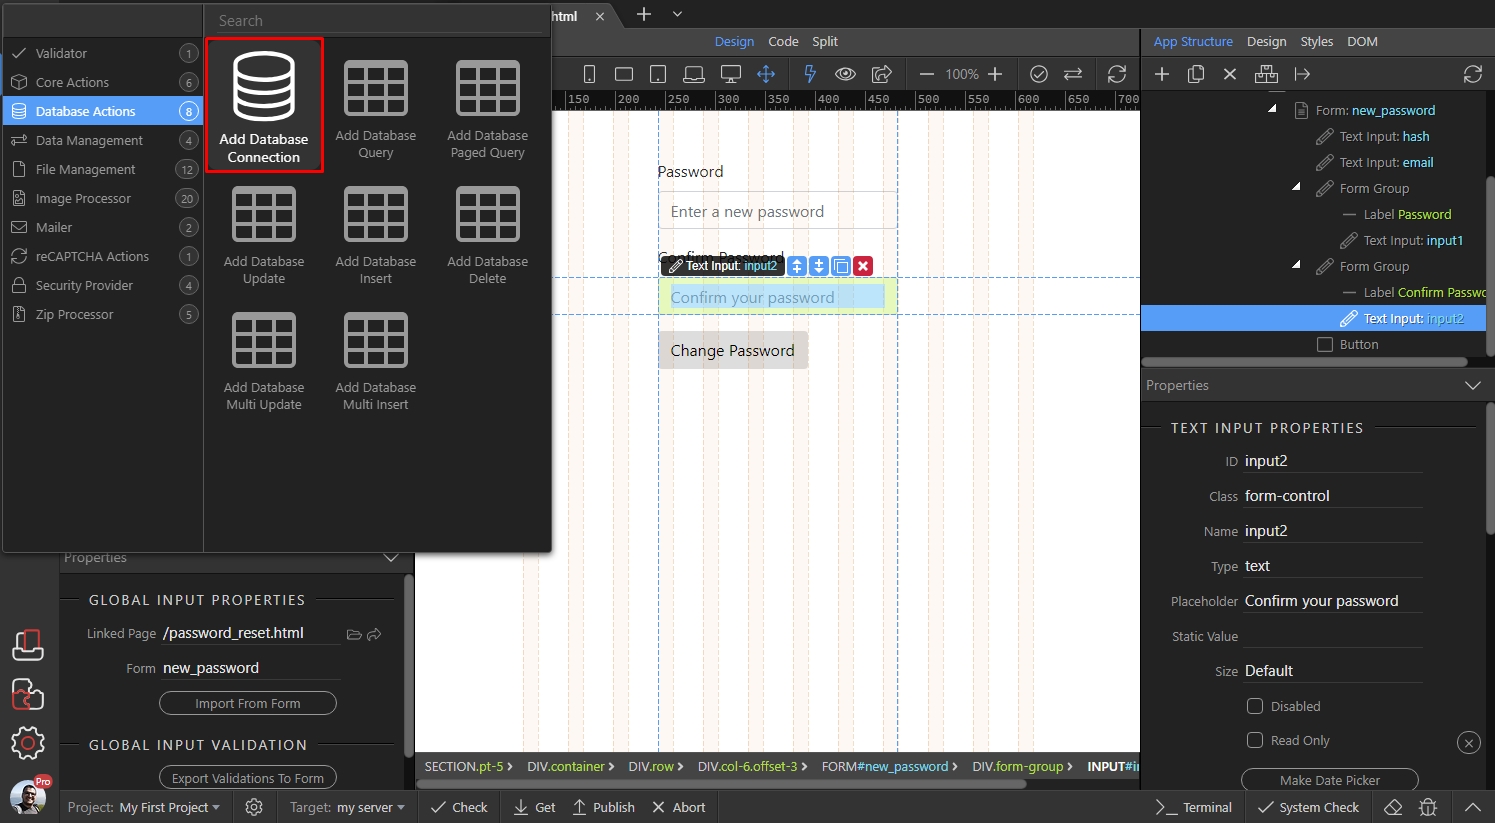
Then right click the database connection step:
Section titled “Then right click the database connection step:”
Step 34
Section titled “Step 34”And add a database query. We will use this query to check if the email provided with the url parameters exists in the database:
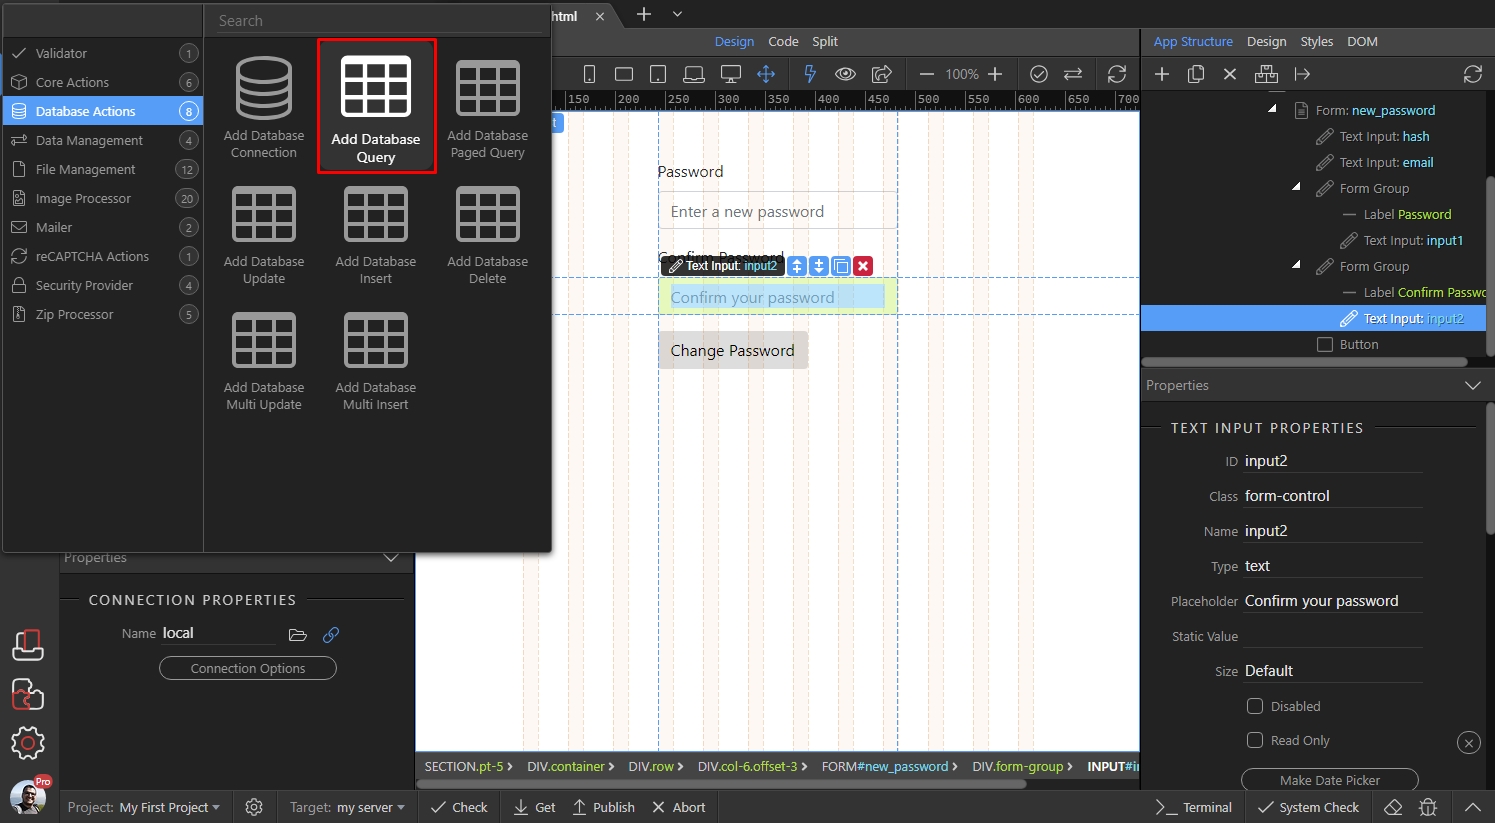
Turn off the Output option:
Section titled “Turn off the Output option:”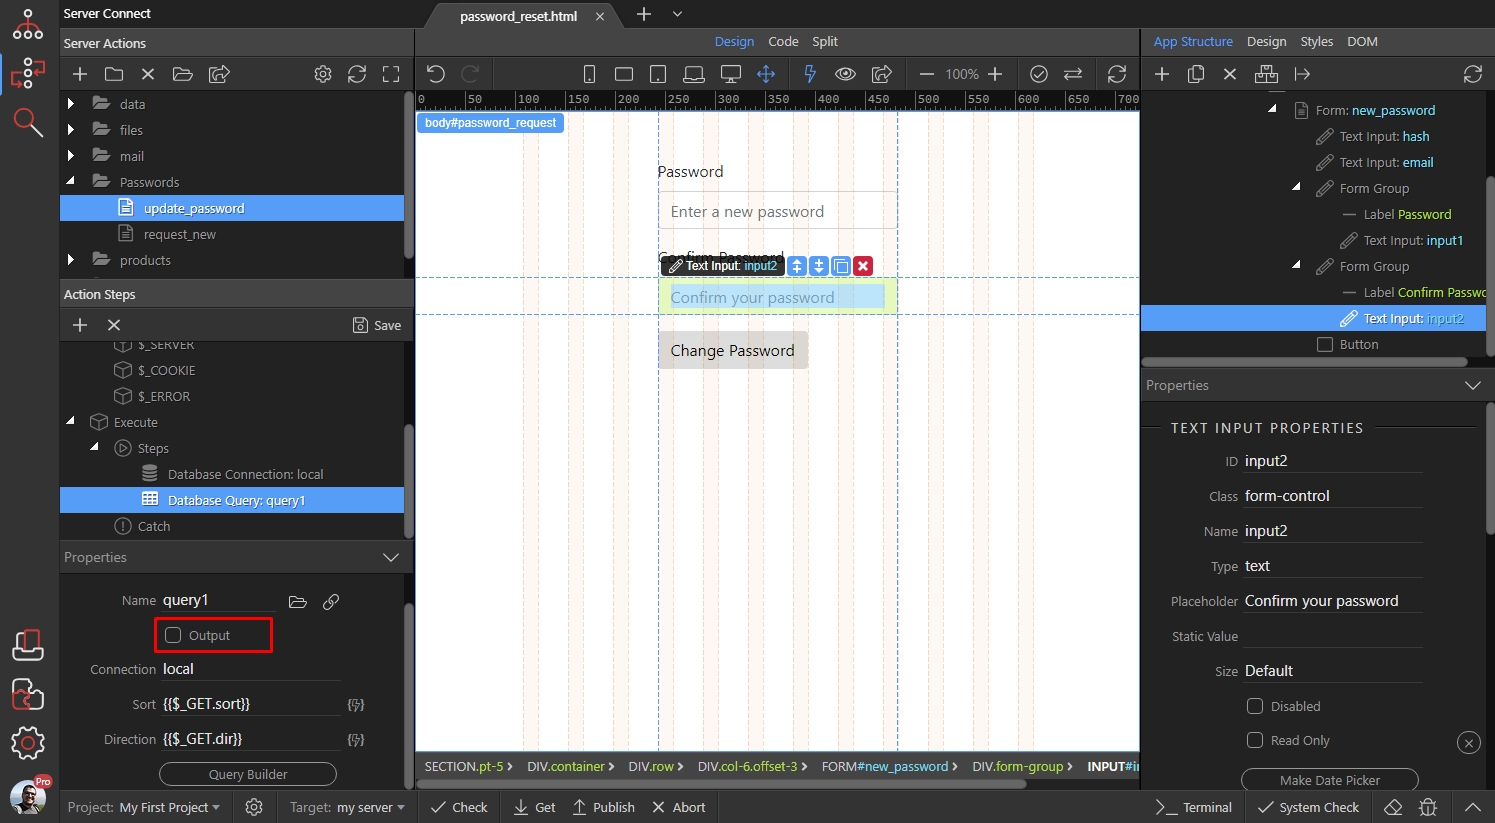
Then click the query builder button:
Section titled “Then click the query builder button:”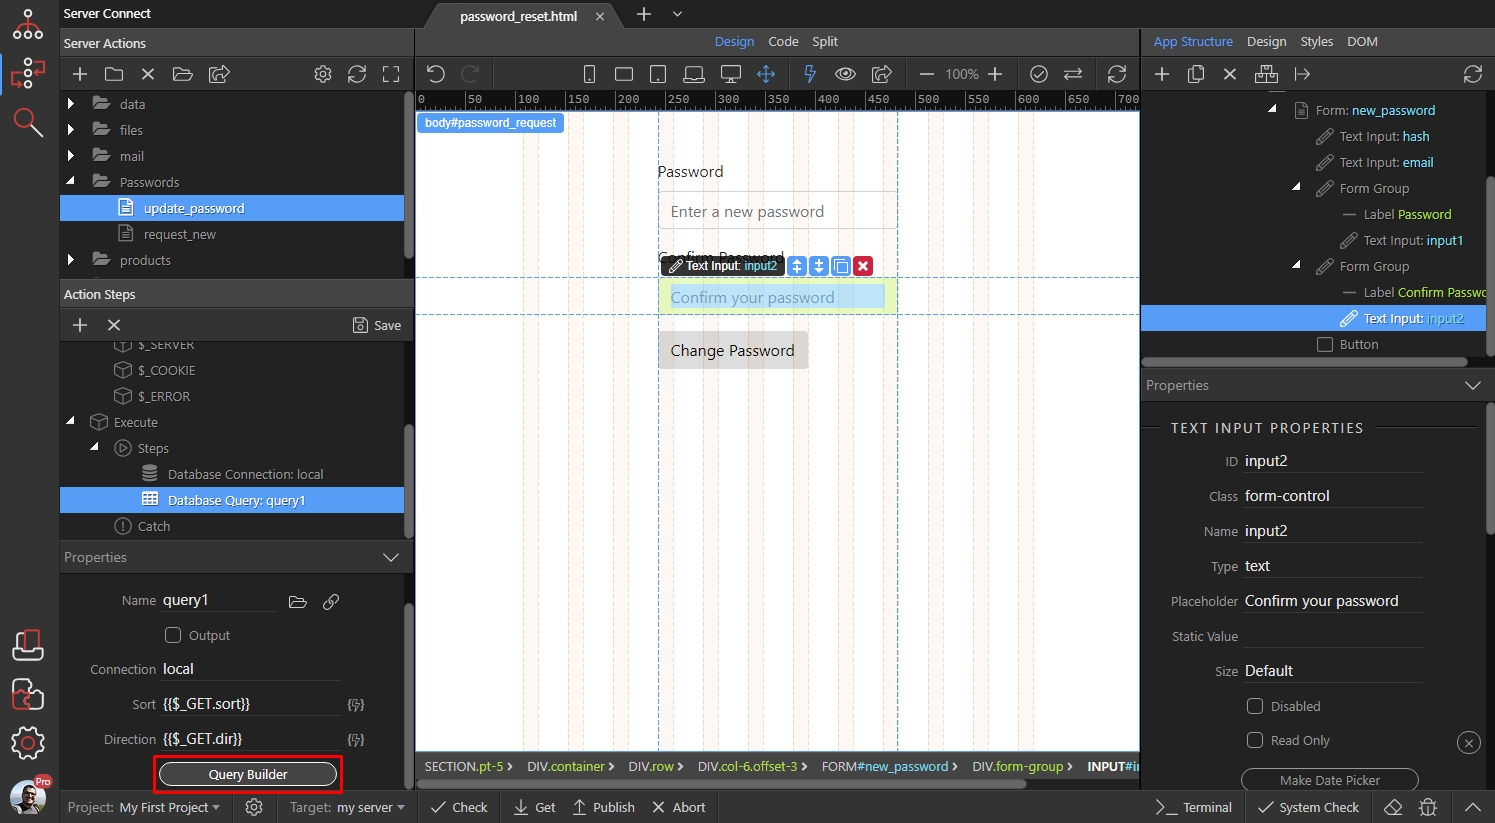
Select the users table and add it to the query:
Section titled “Select the users table and add it to the query:”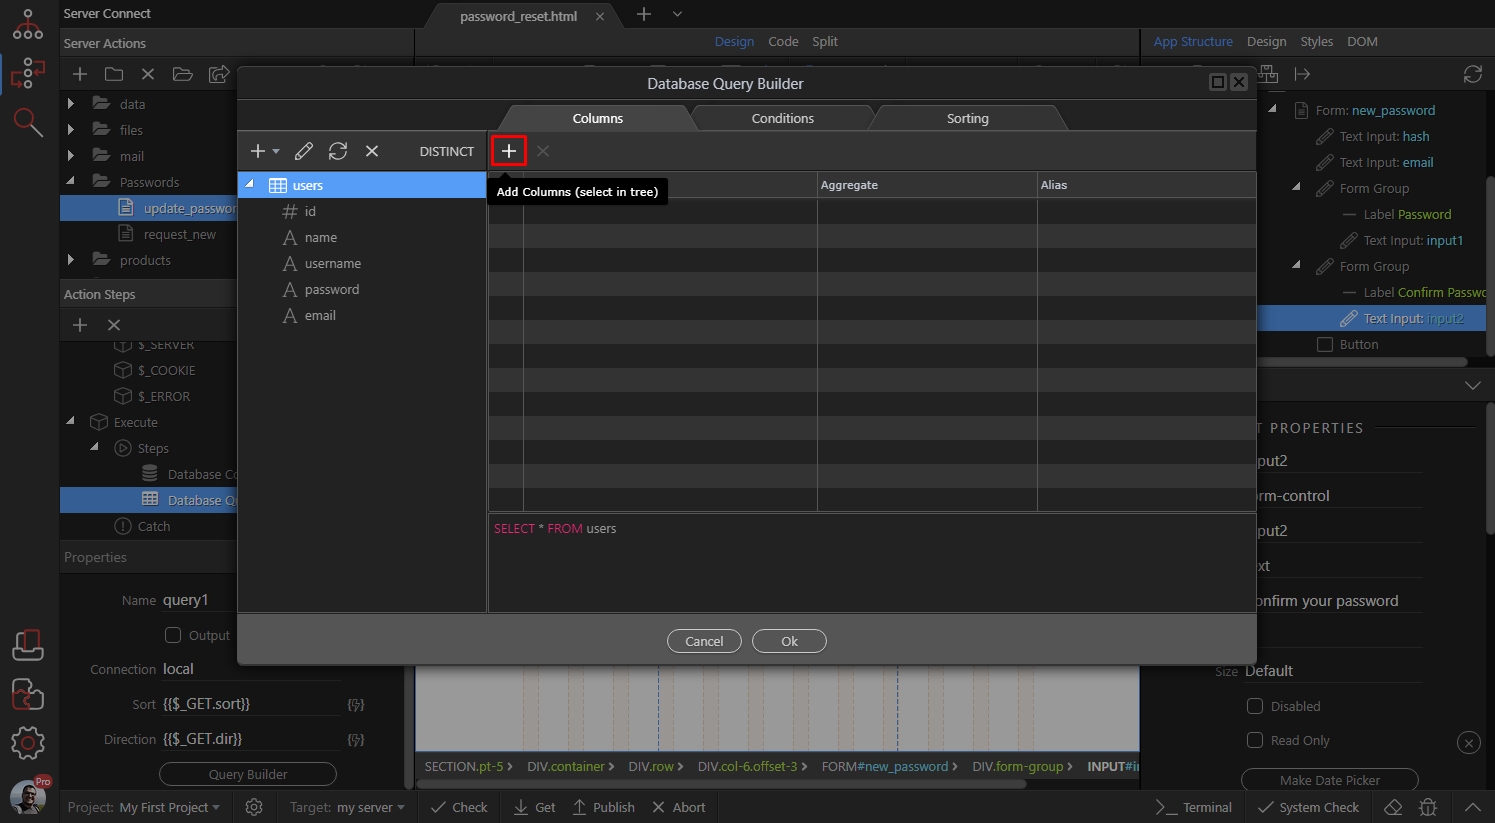
Open the Conditions tab:
Section titled “Open the Conditions tab:”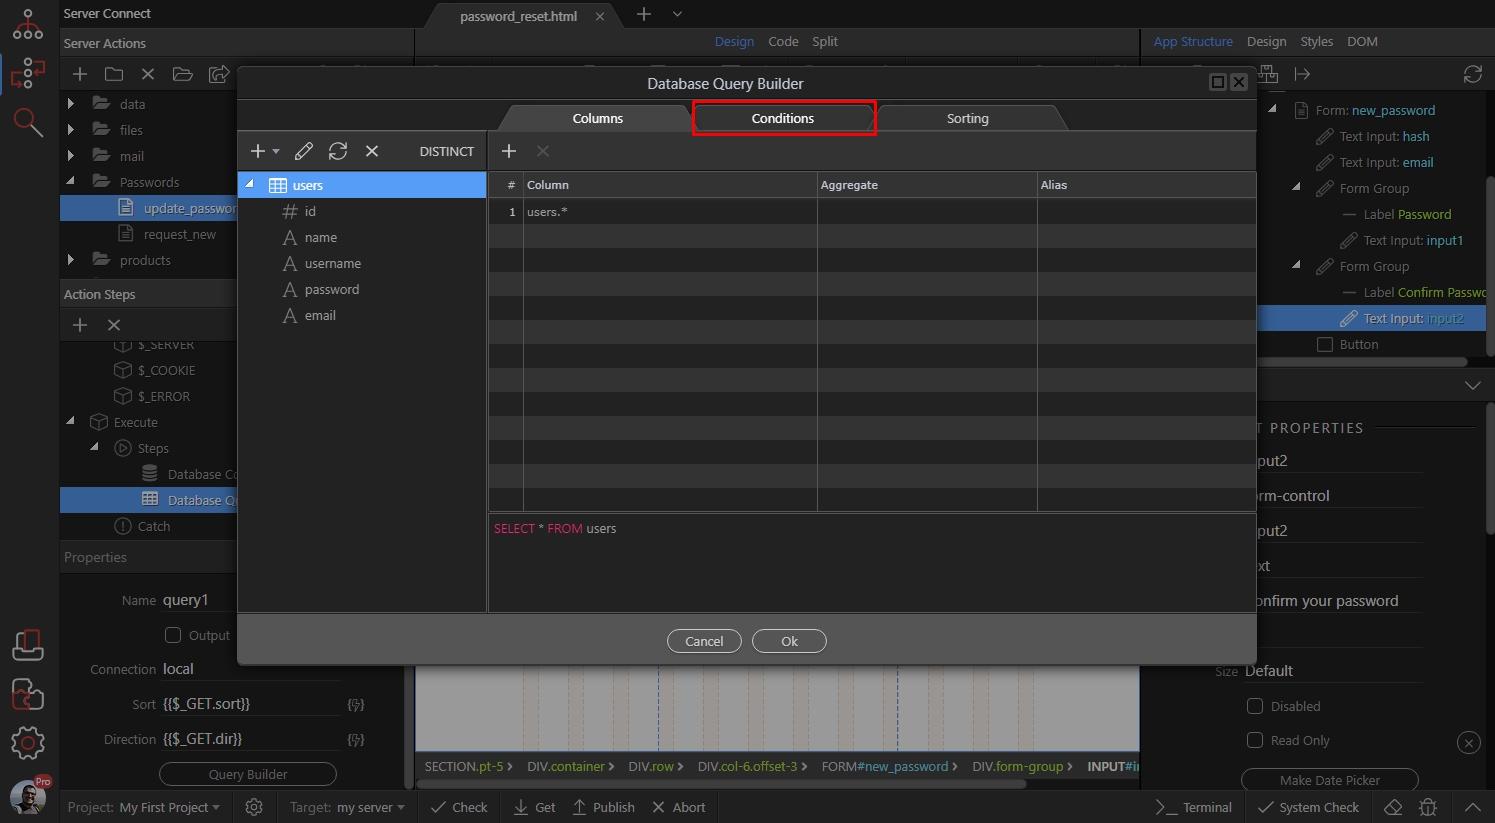
And select the email column:
Section titled “And select the email column:”
Click the dynamic data picker to select its value:
Section titled “Click the dynamic data picker to select its value:”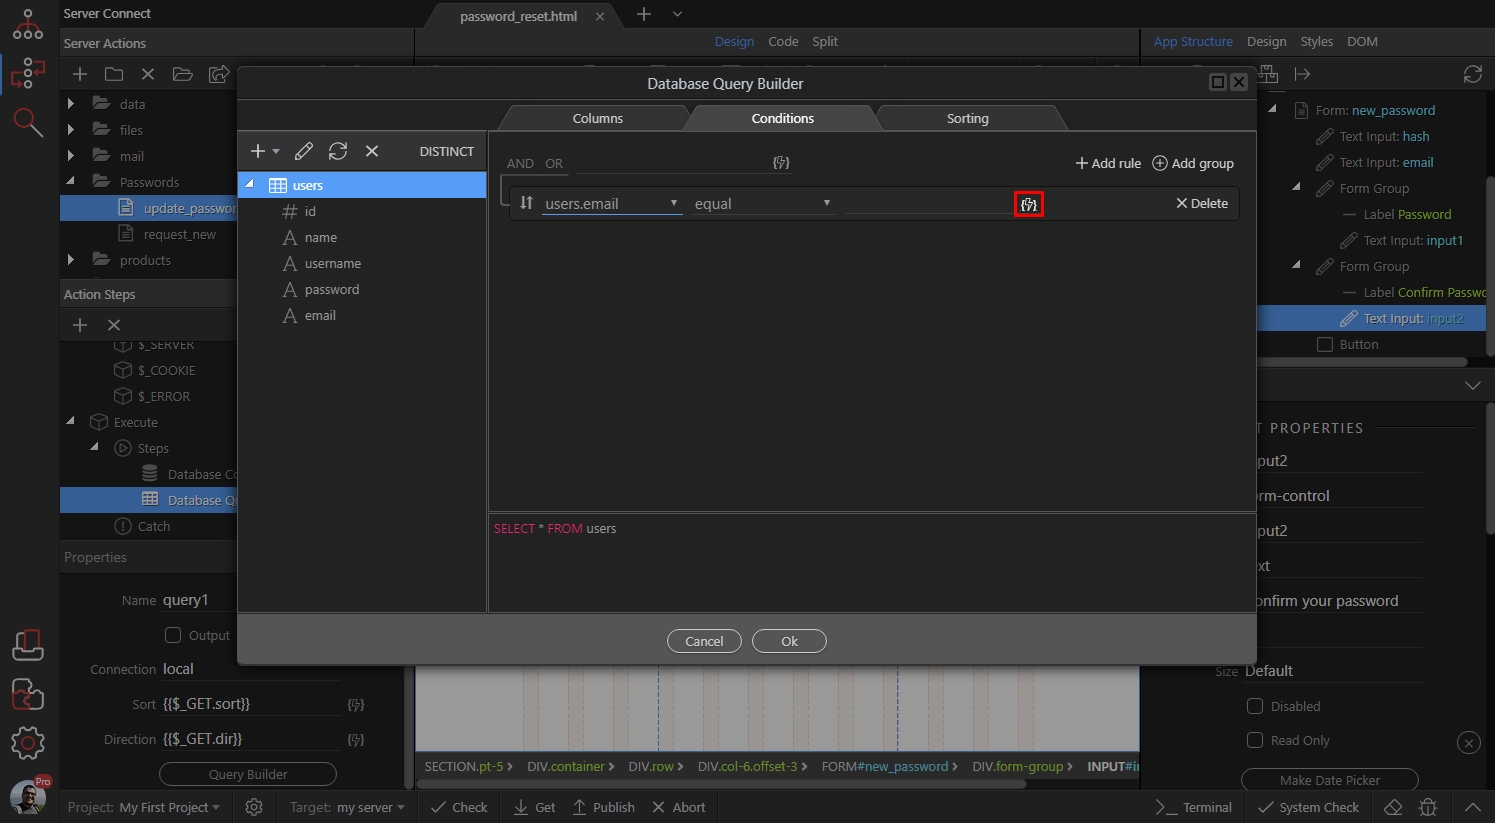
This should be the hidden email field from our form:
Section titled “This should be the hidden email field from our form:”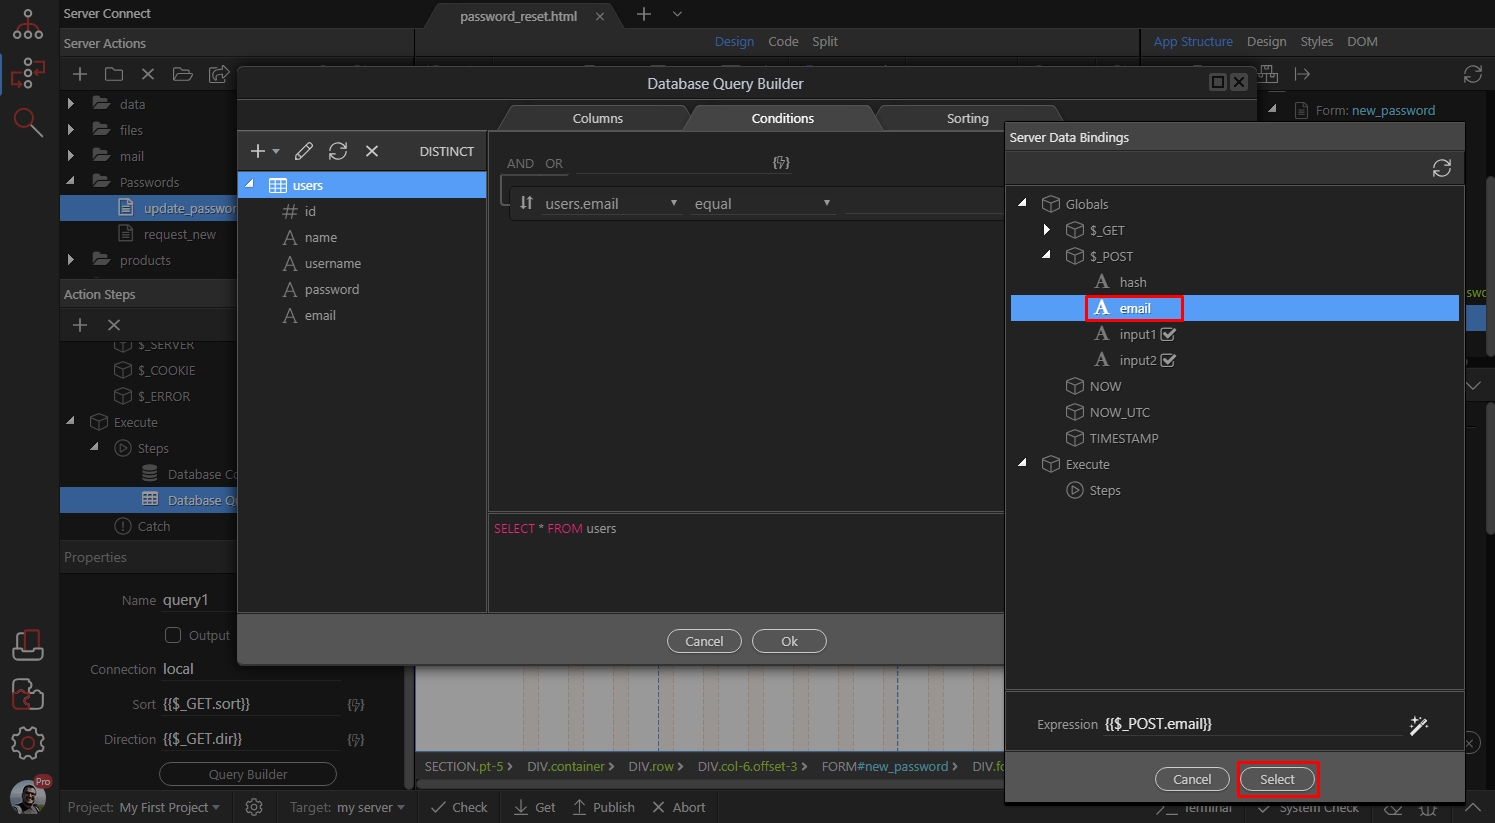
We are done with the query setup. Click OK:
Section titled “We are done with the query setup. Click OK:”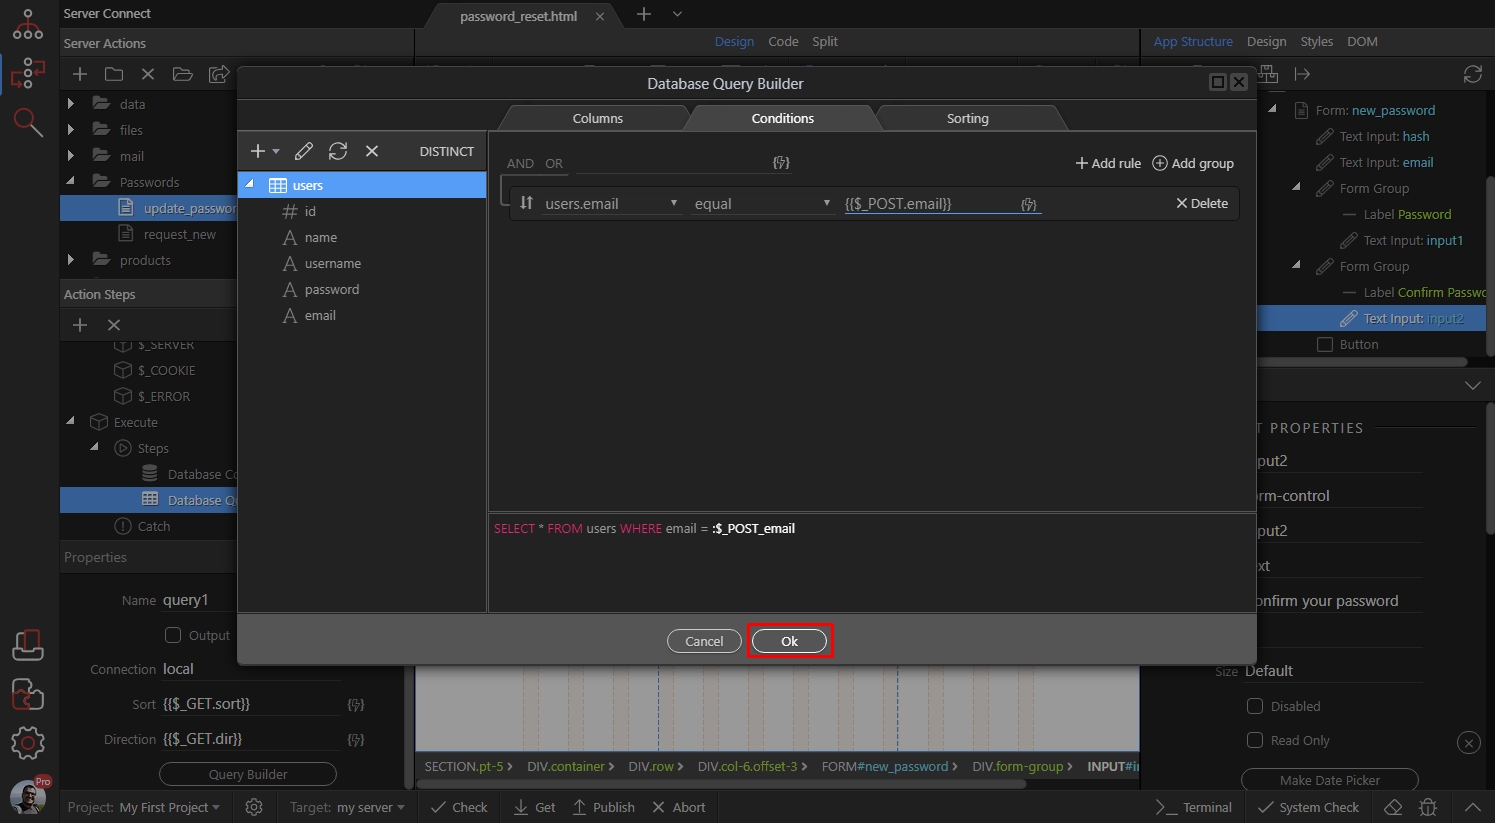
Step 43
Section titled “Step 43”Now we should check - if the query returns results, i.e. if an user with the provided email is found. This check is done using a condition.
Right click the steps inside the repeat:
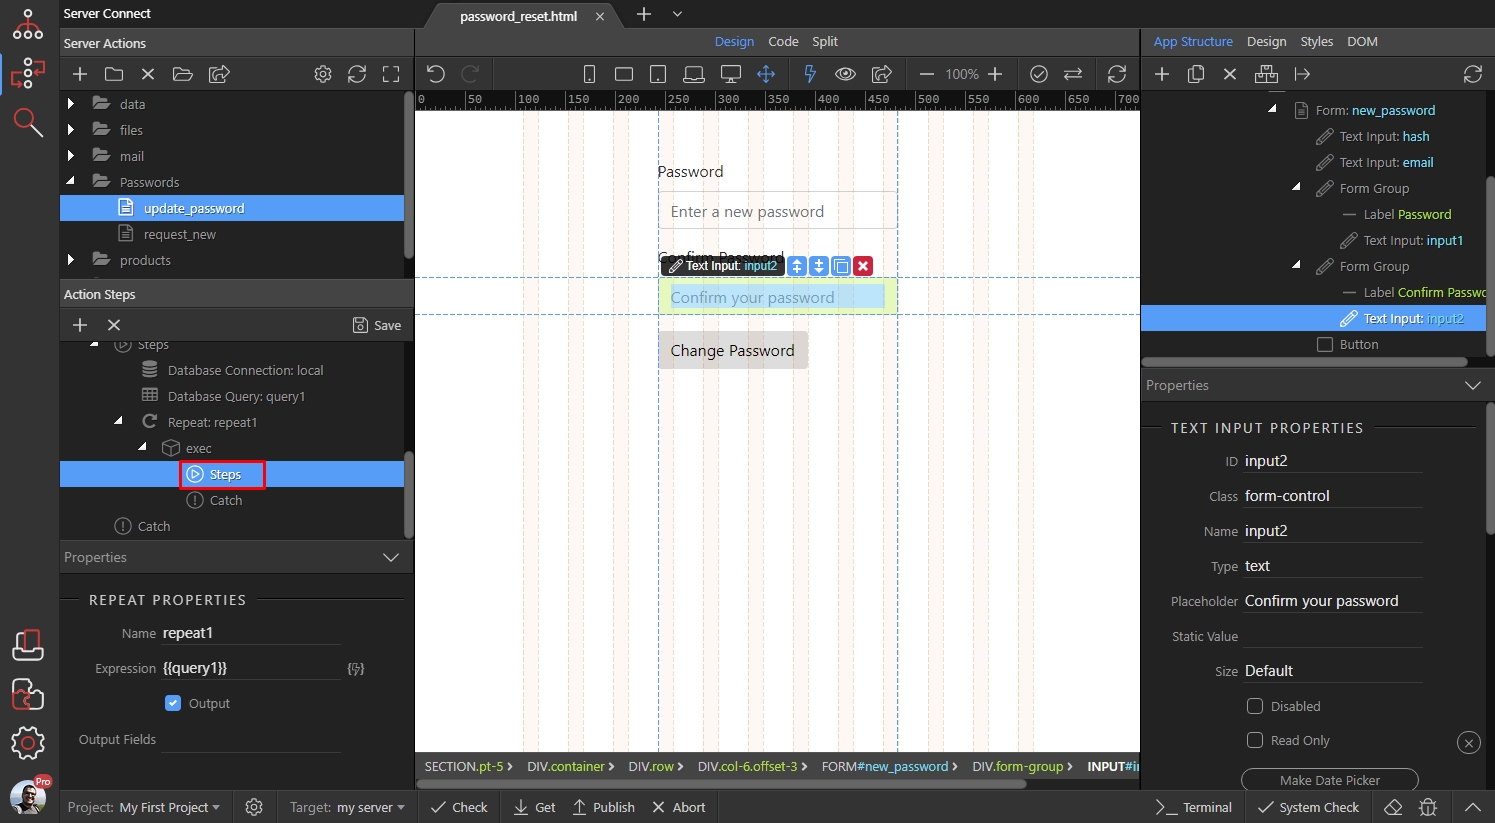
Add a Condition:
Section titled “Add a Condition:”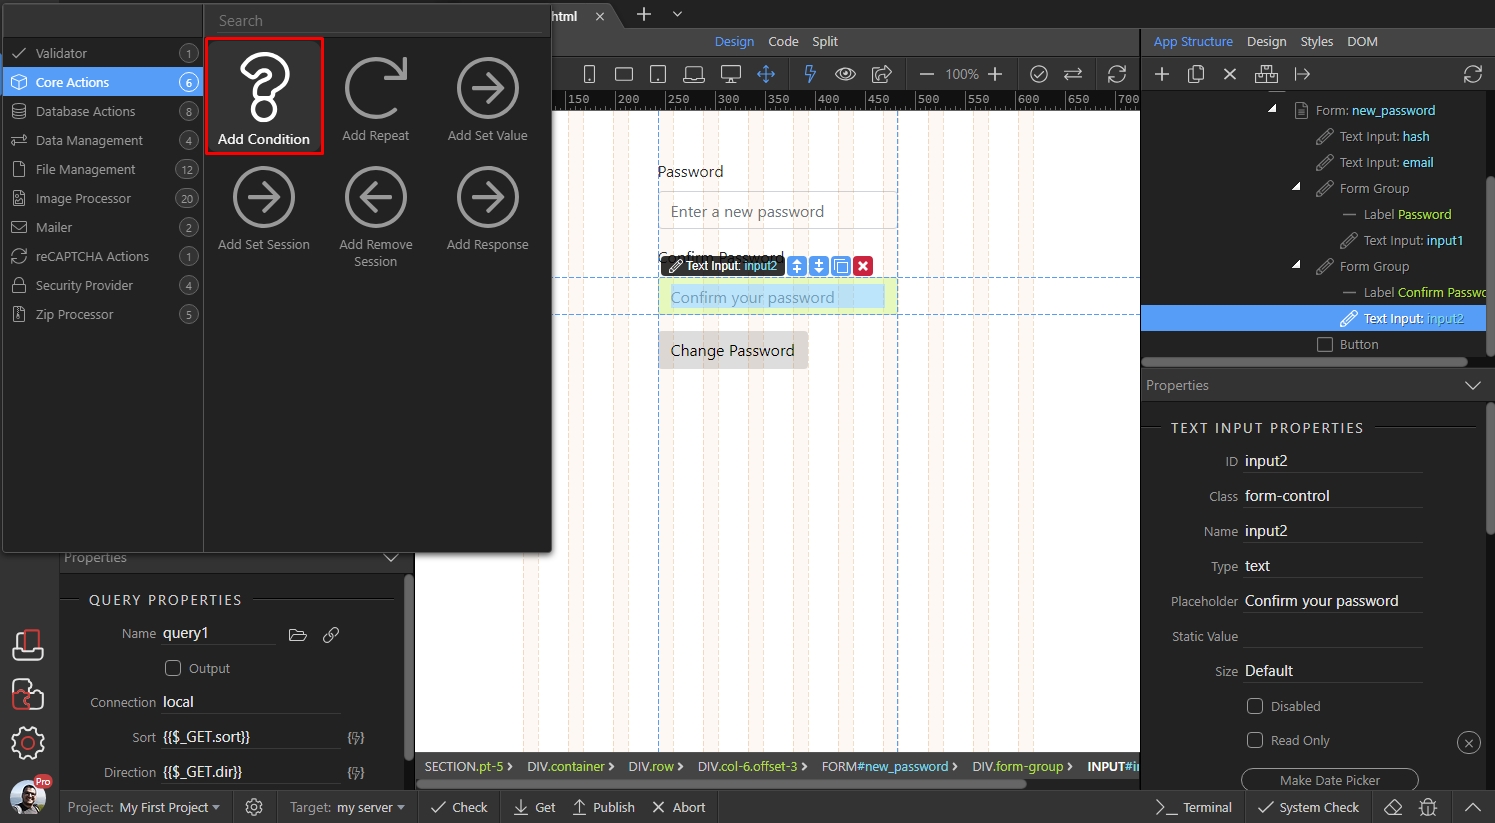
And click the dynamic data picker button, to setup the condition:
Section titled “And click the dynamic data picker button, to setup the condition:”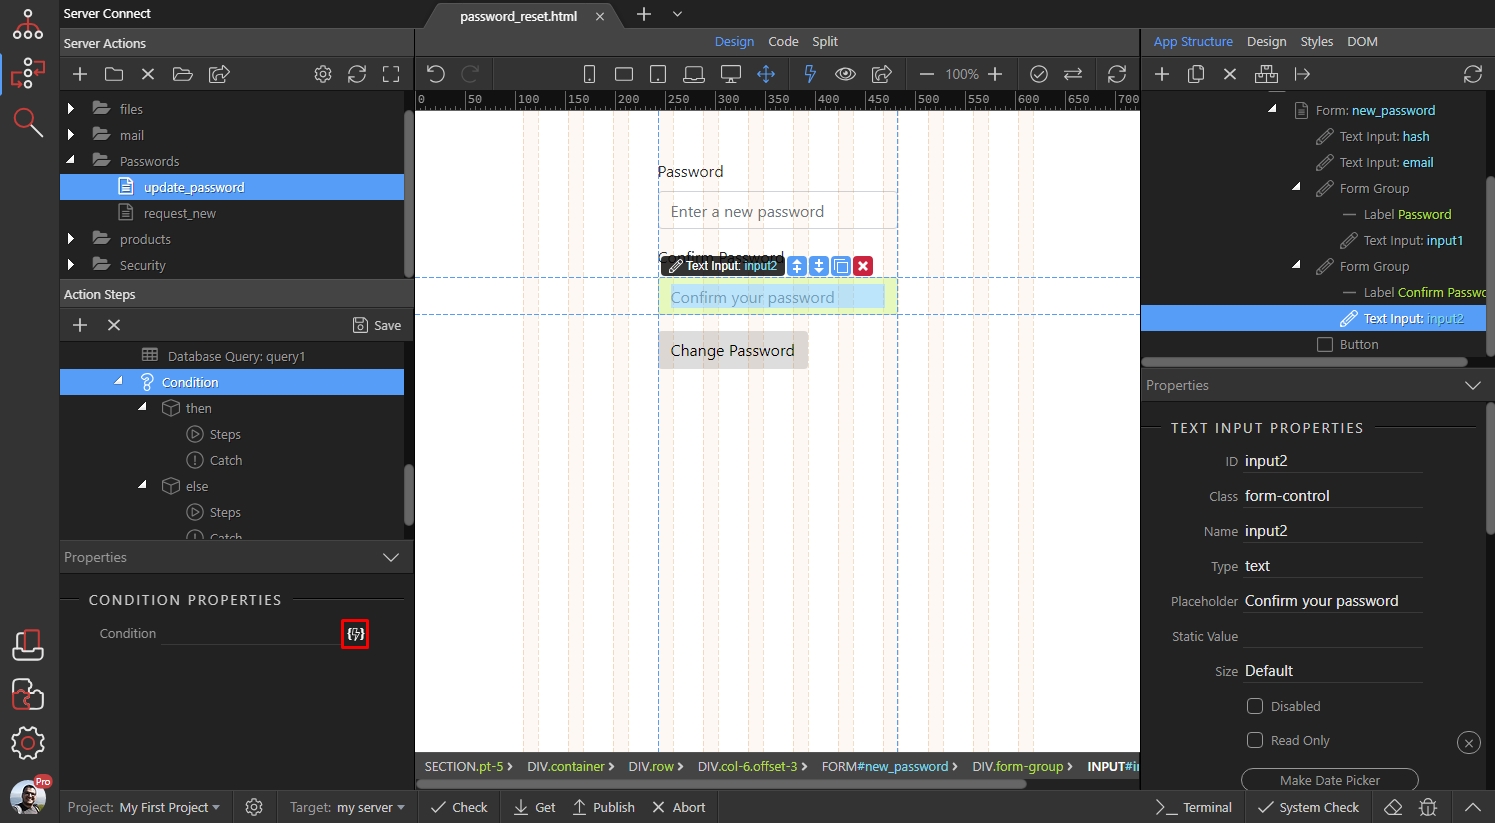
Step 46
Section titled “Step 46”This is the database query itself. If it’s empty the condition will be false, if it returns a record the condition will be true:
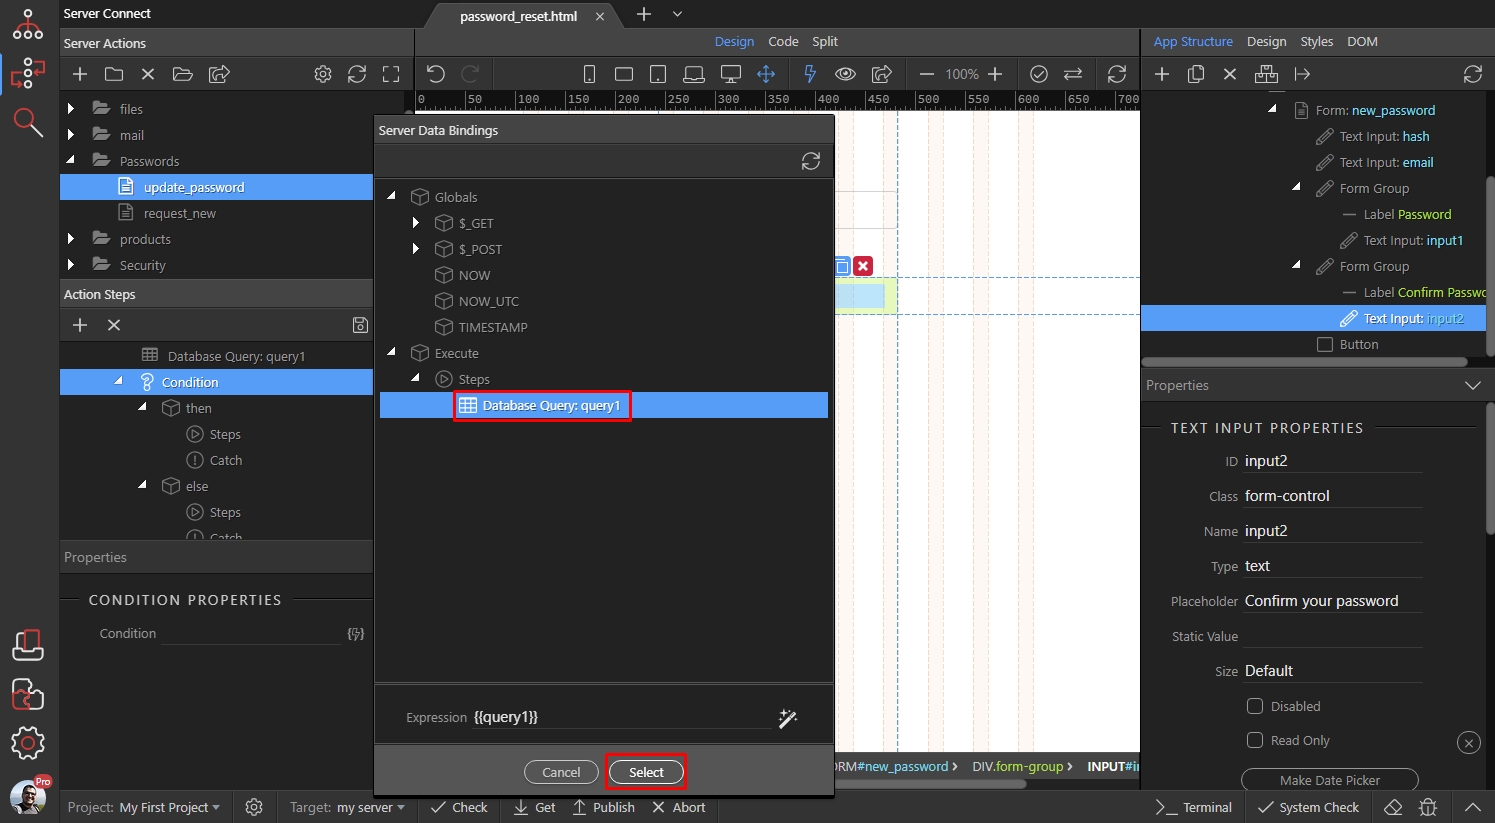
First we will setup what happens when the condition is true. Right click the steps under THEN:
Section titled “First we will setup what happens when the condition is true. Right click the steps under THEN:”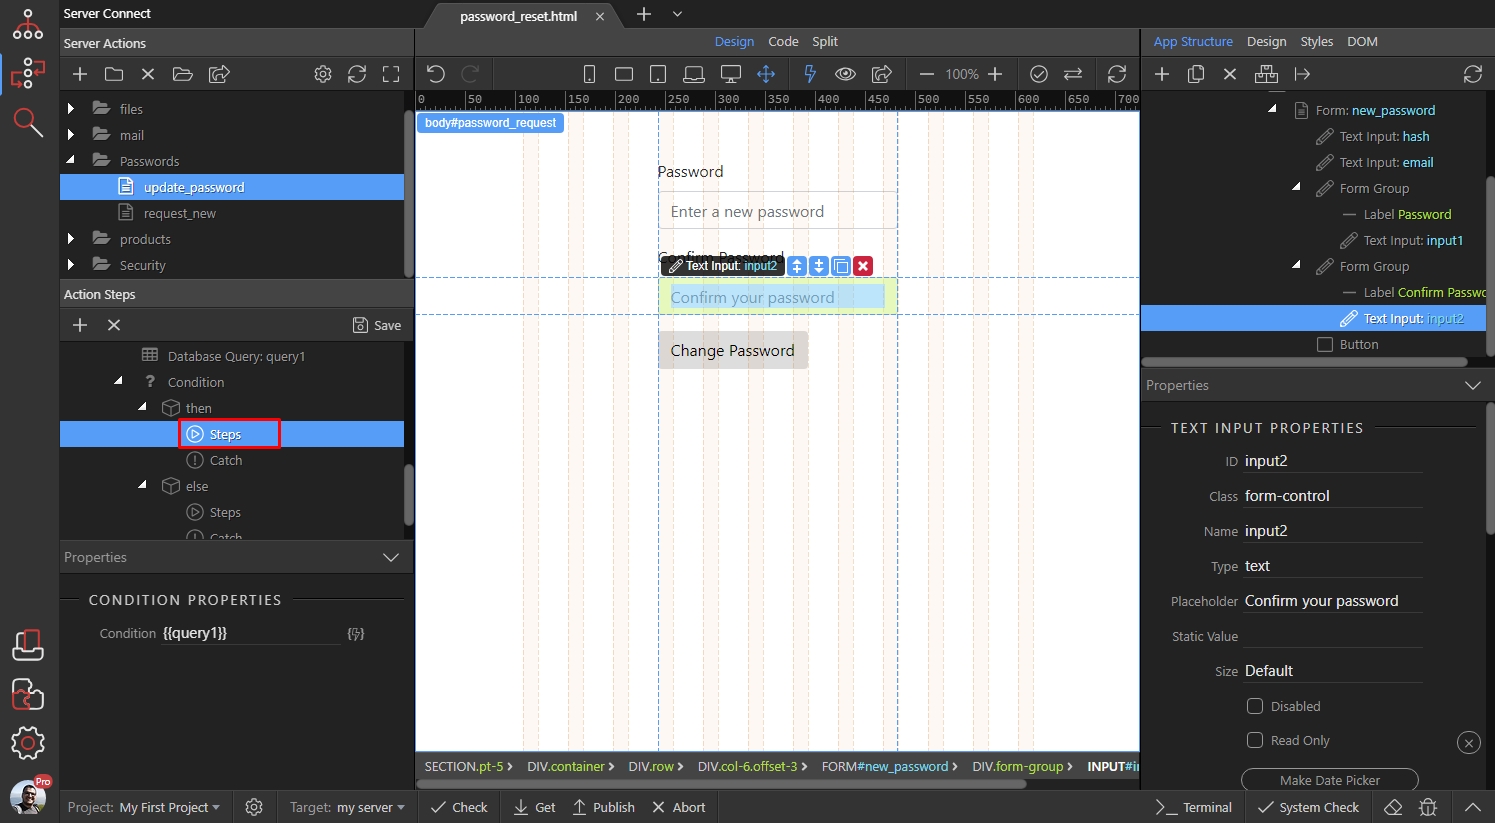
And add a repeat. We need a repeat step in order to be able to work with the results from the query:
Section titled “And add a repeat. We need a repeat step in order to be able to work with the results from the query:”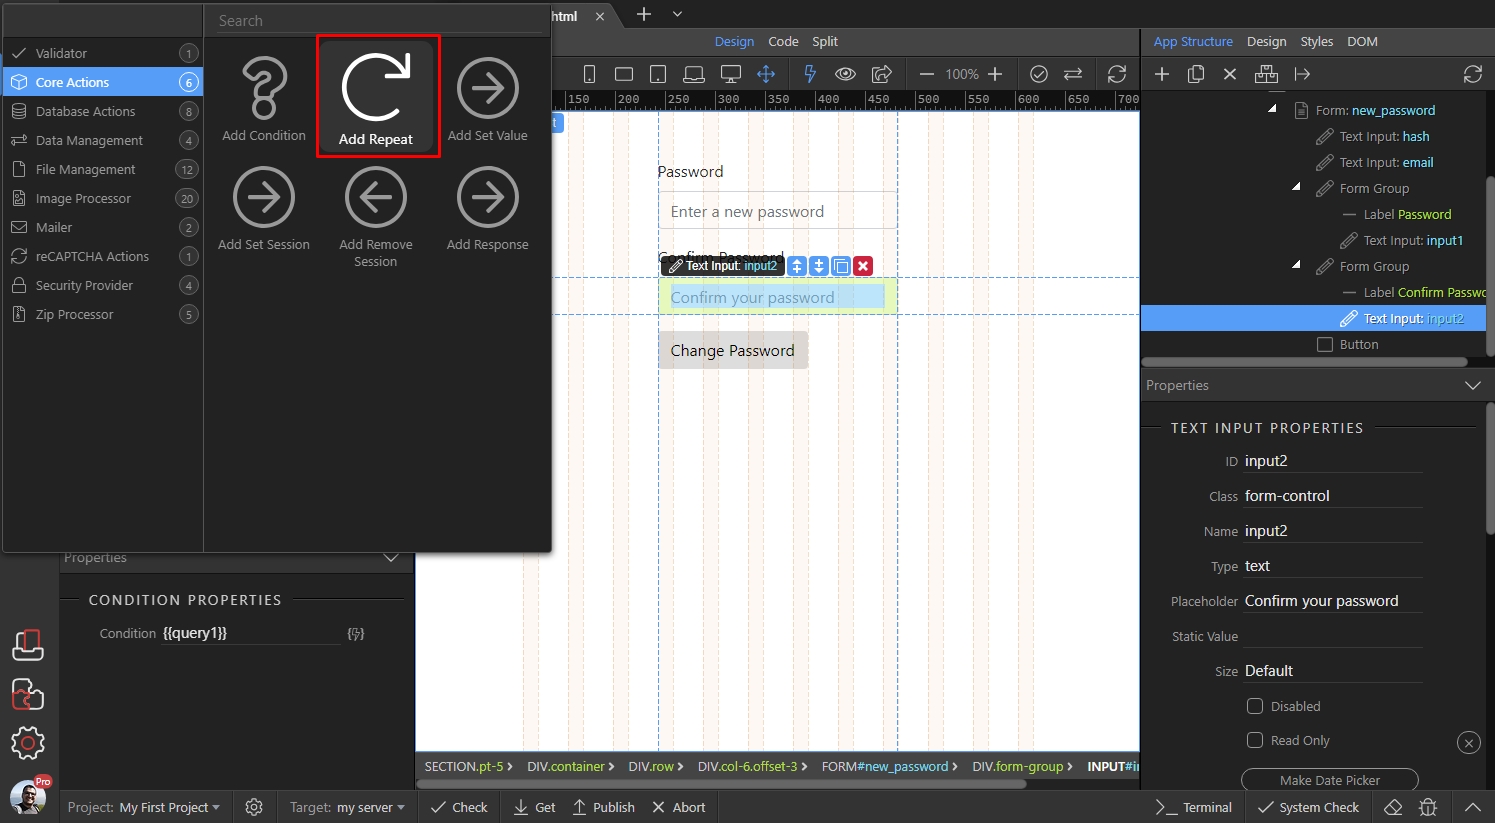
Click the dynamic data picker to select an expression for the repeater:
Section titled “Click the dynamic data picker to select an expression for the repeater:”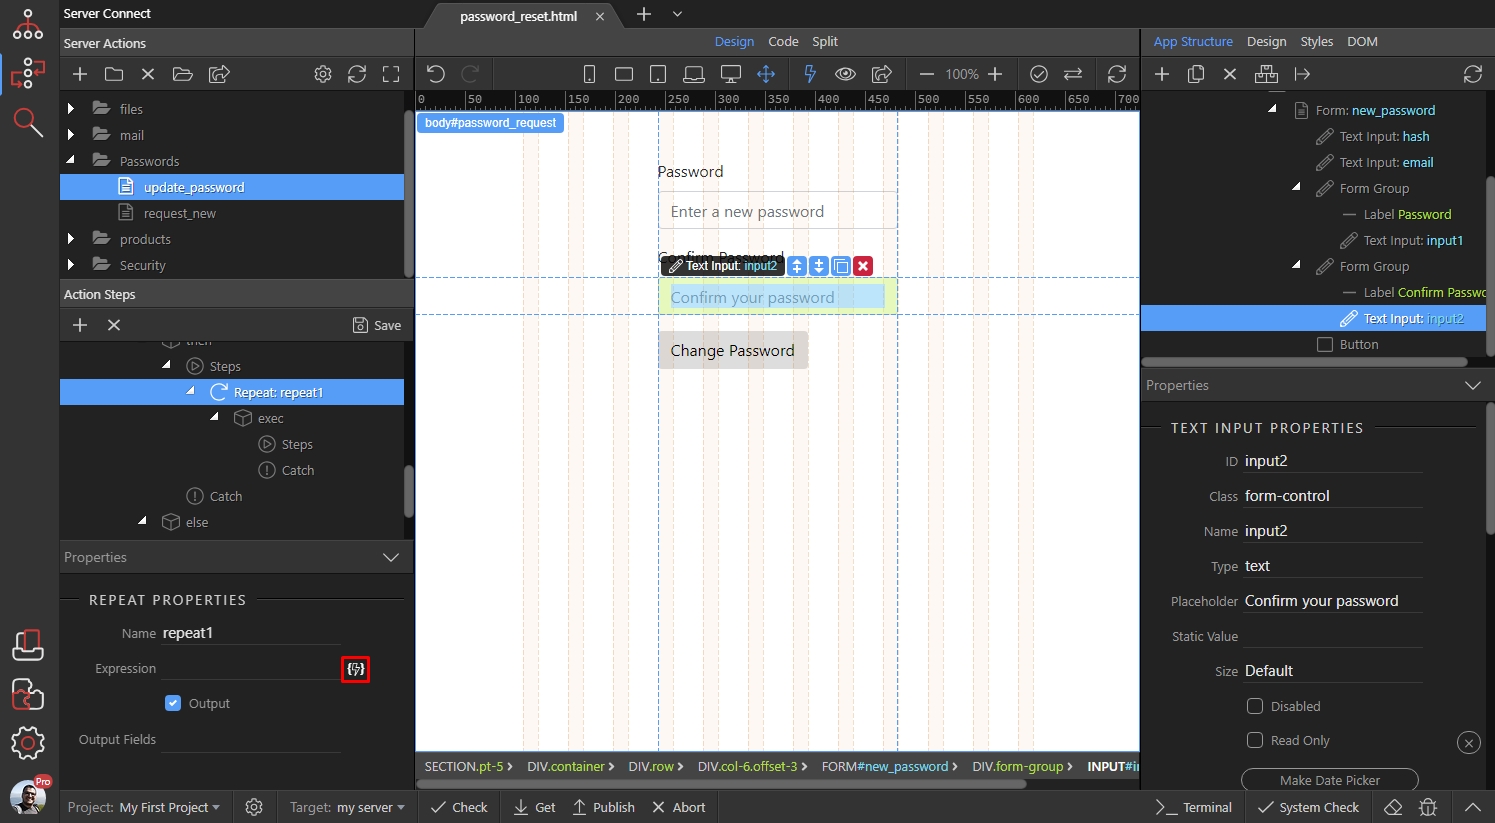
This should be the database query step:
Section titled “This should be the database query step:”
Right click the steps inside the repeat:
Section titled “Right click the steps inside the repeat:”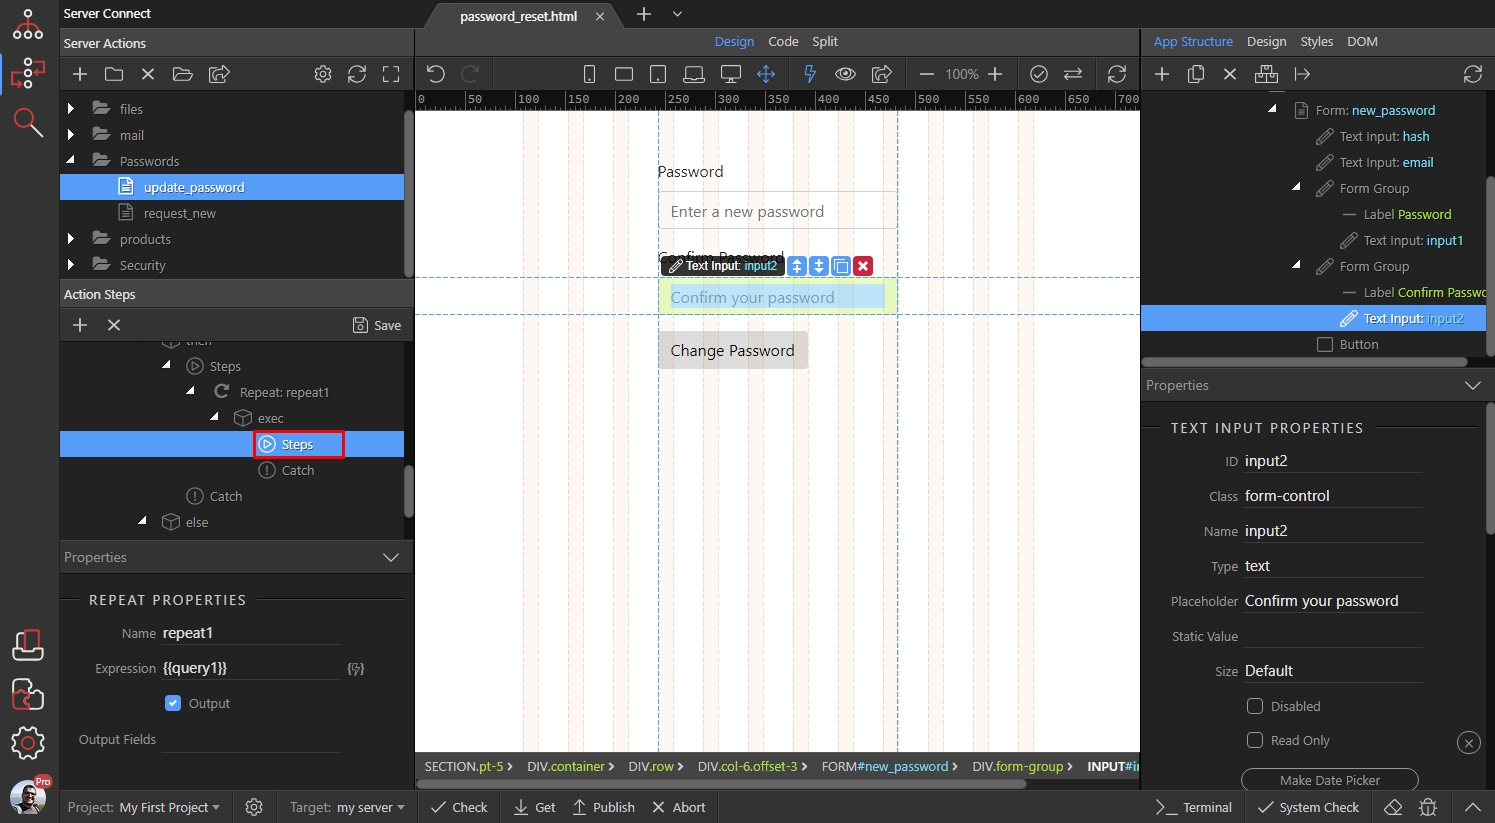
Step 52
Section titled “Step 52”We need an additional check here - to see if the hash provided with the URL parameter is valid. So we add another condition:
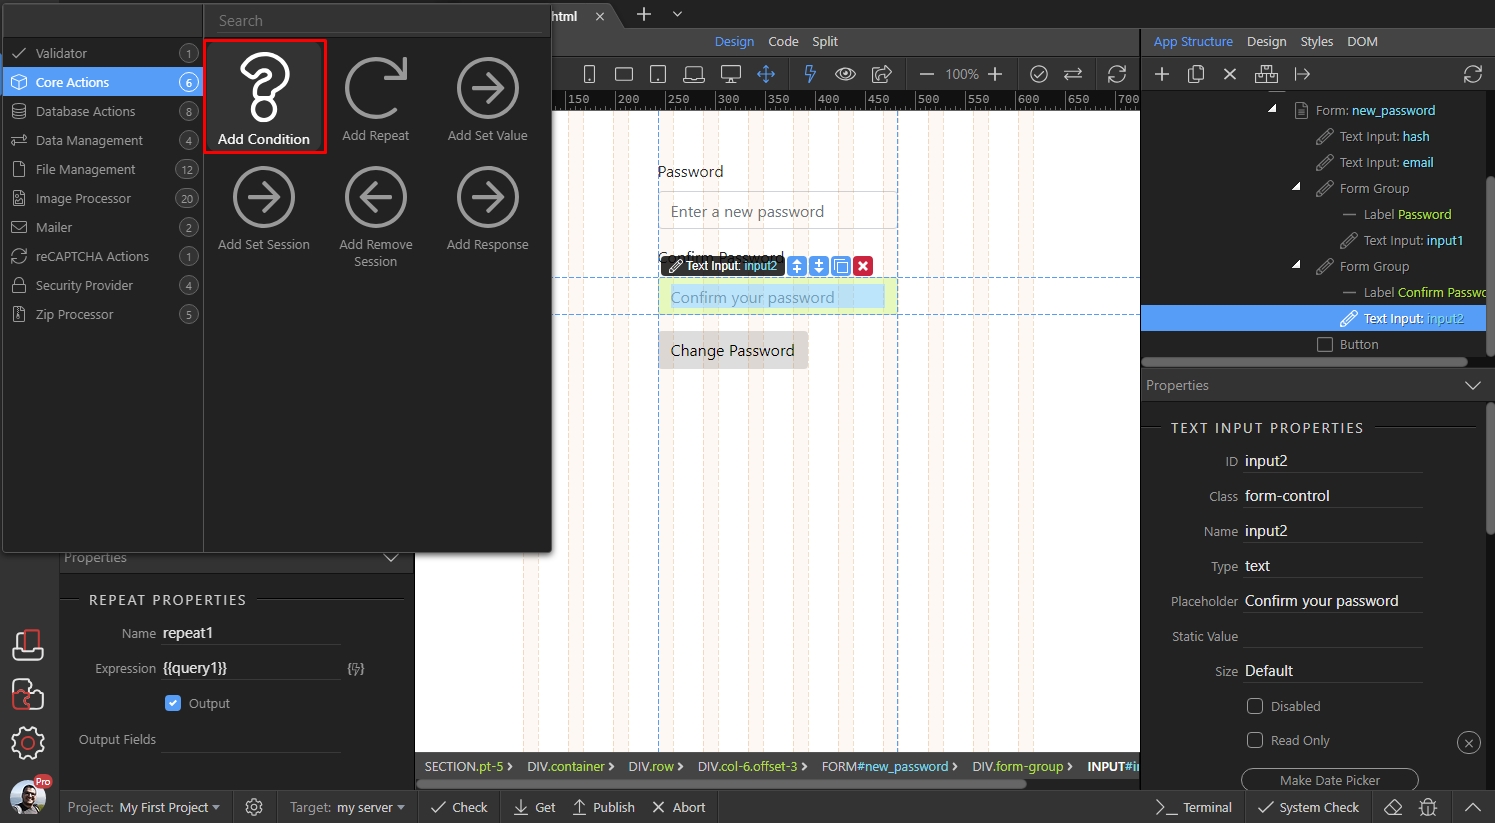
Click the dynamic data picker to setup the condition:
Section titled “Click the dynamic data picker to setup the condition:”
Step 54
Section titled “Step 54”As you remember from Part 1, the hash we are sending is generated by the user email and user password as a salt. So we should do the same here - select the email, returned from the repeat step and click the formatter icon:
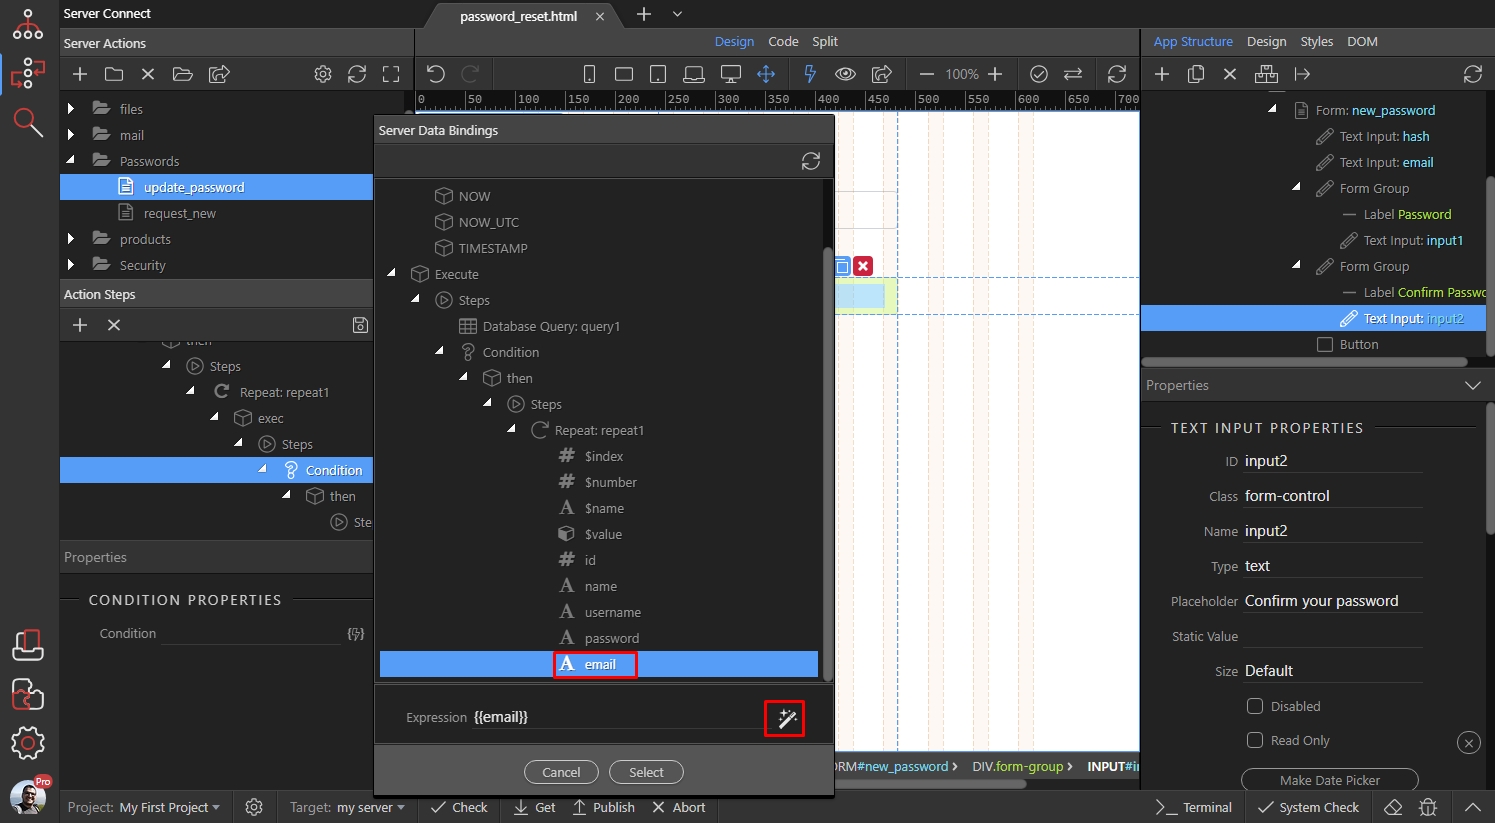
Select the SHA1 hash:
Section titled “Select the SHA1 hash:”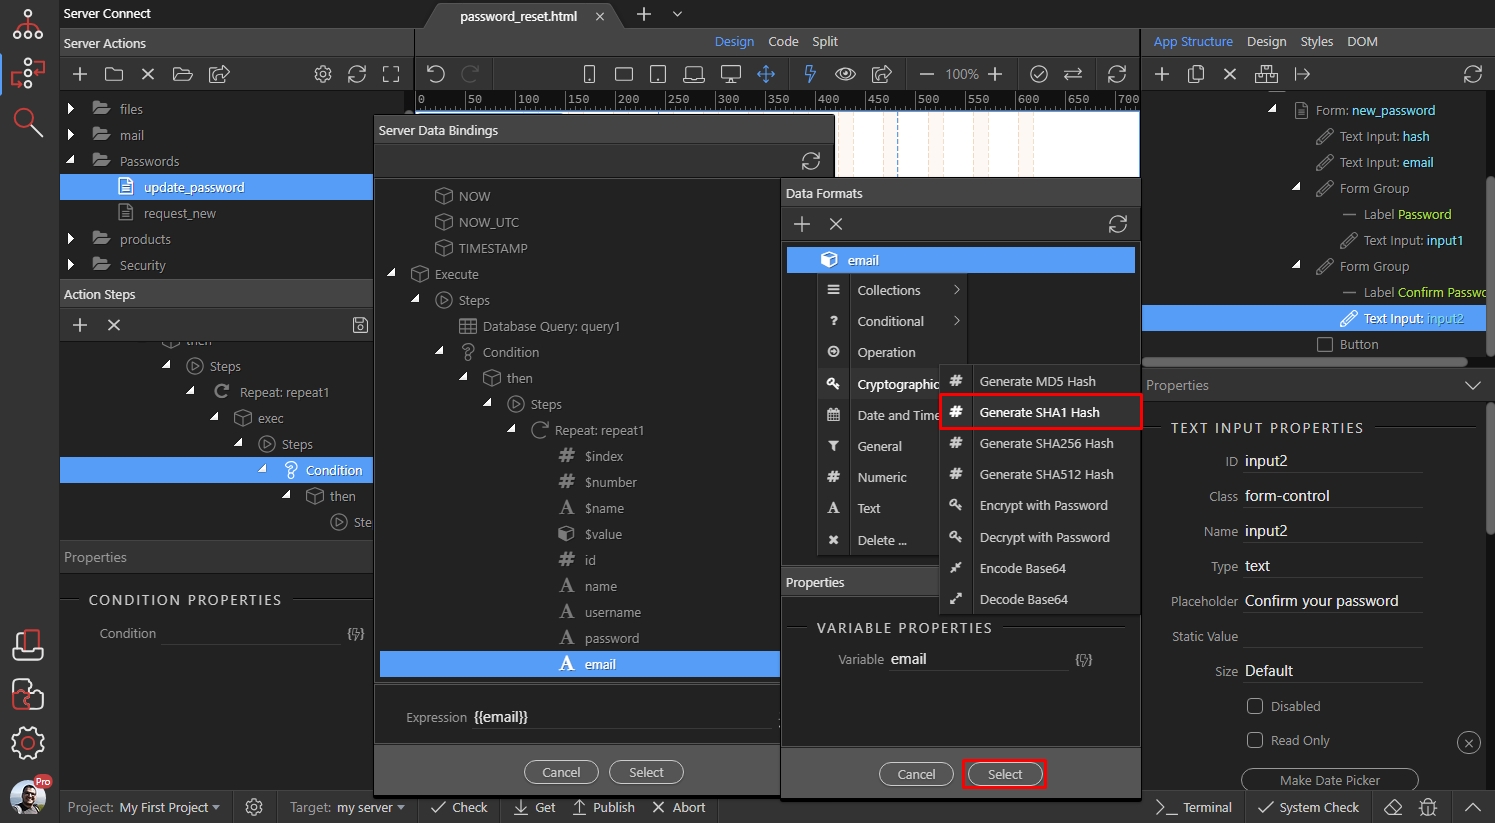
Then select Salt and click the dynamic data icon:
Section titled “Then select Salt and click the dynamic data icon:”
Select the password as a value for the salt:
Section titled “Select the password as a value for the salt:”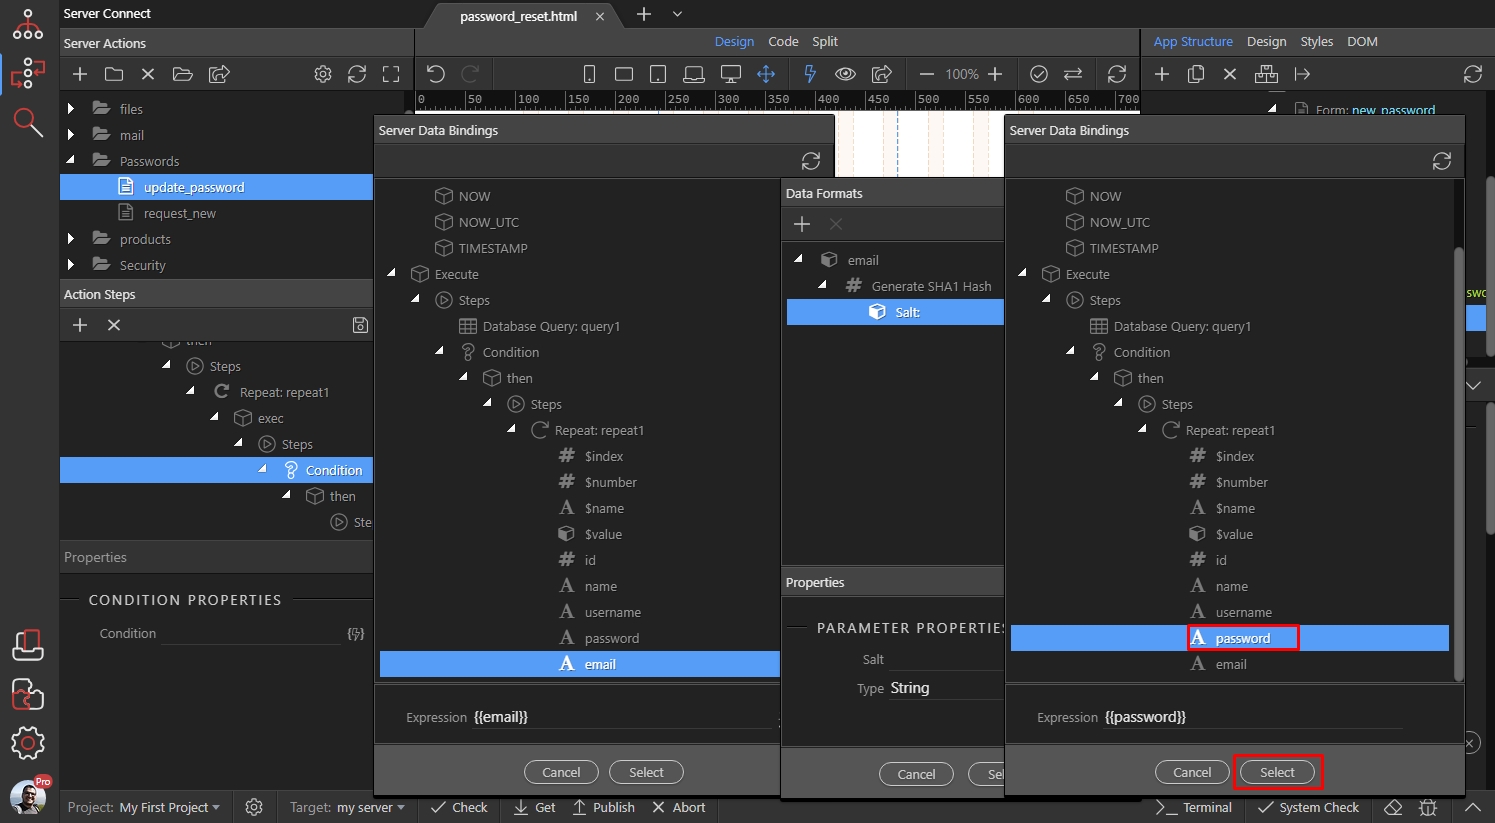
Step 58
Section titled “Step 58”Now we need to compare this hash value with the one from the URL parameter on our page. Right click the Generate SHA1 Hash step:
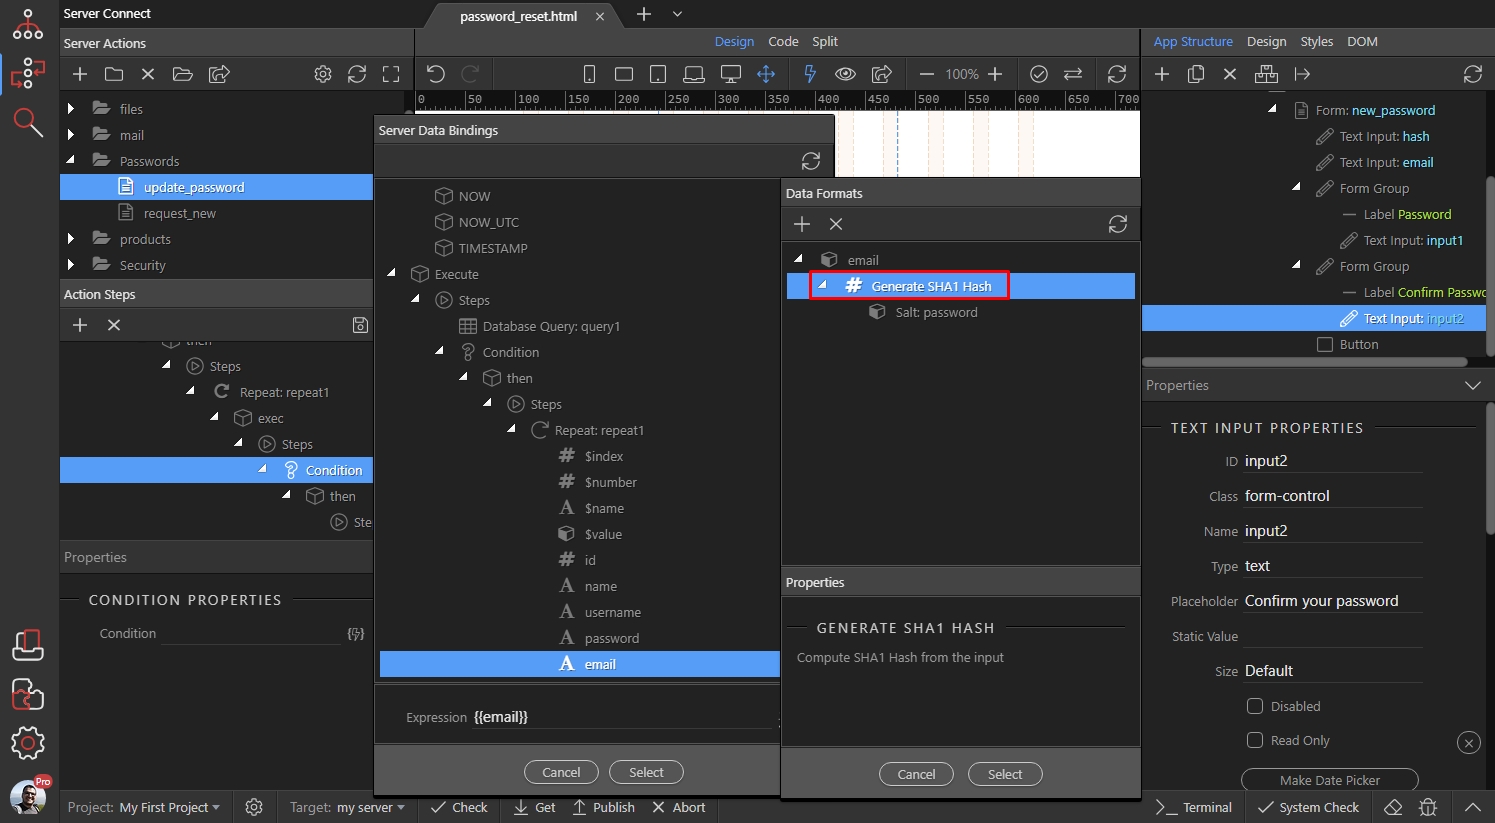
Select operation:
Section titled “Select operation:”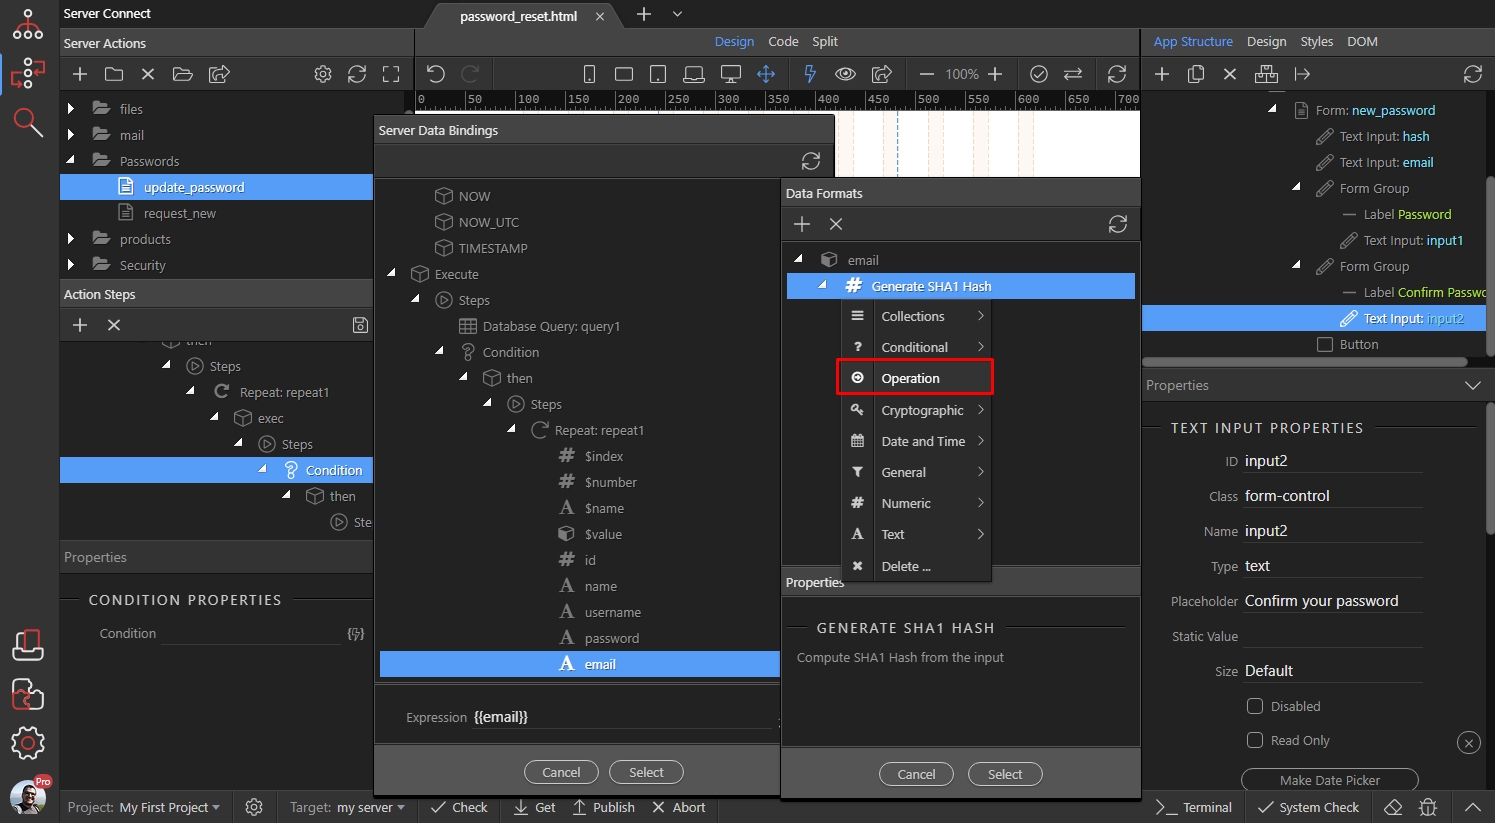
Set the operator to equals == and click the dynamic data picker icon:
Section titled “Set the operator to equals == and click the dynamic data picker icon:”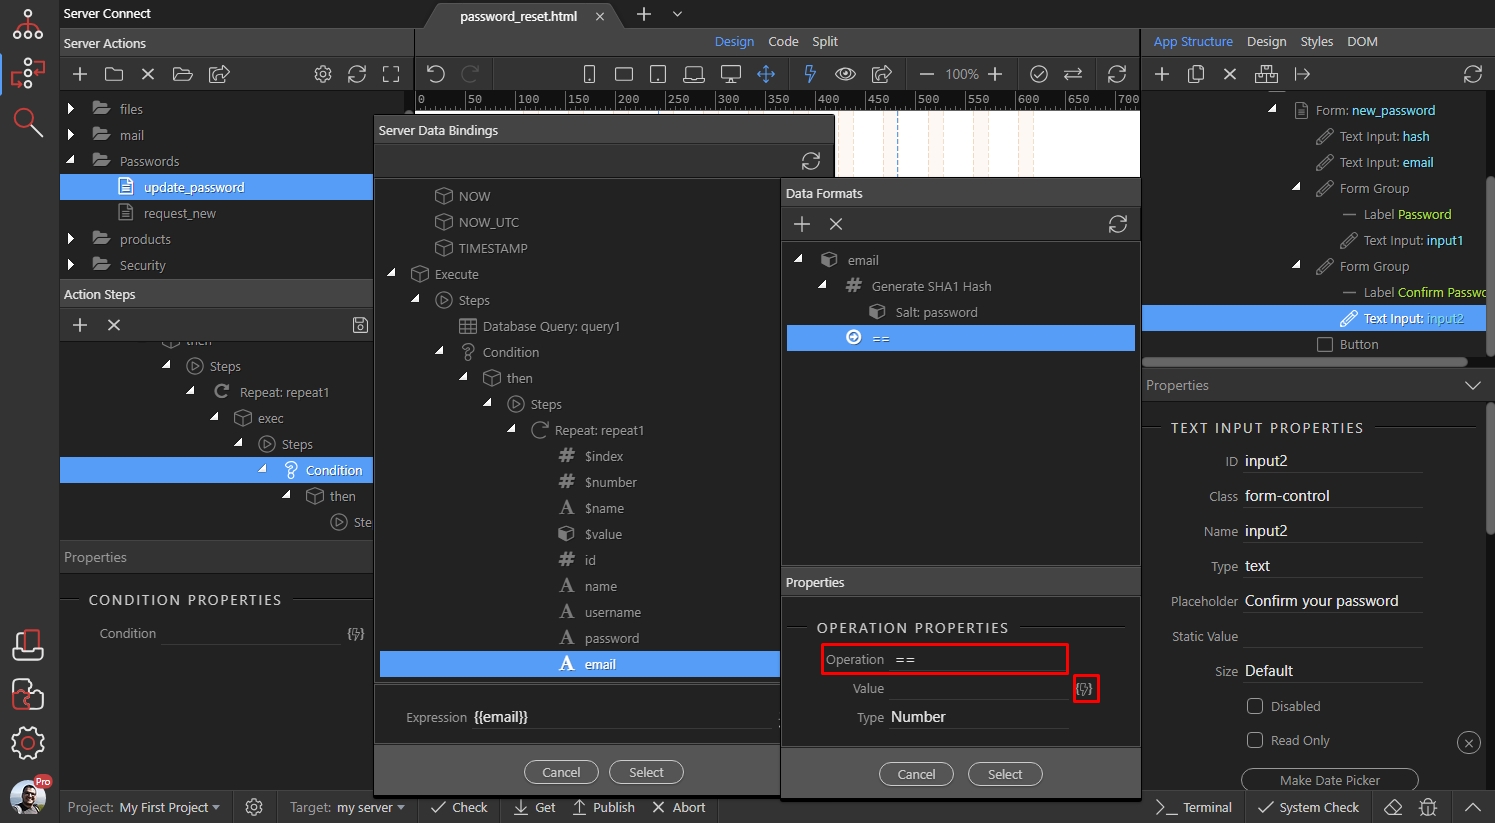
Then select the hidden hash input from our form (the one which gets the hash value from the URL):
Section titled “Then select the hidden hash input from our form (the one which gets the hash value from the URL):”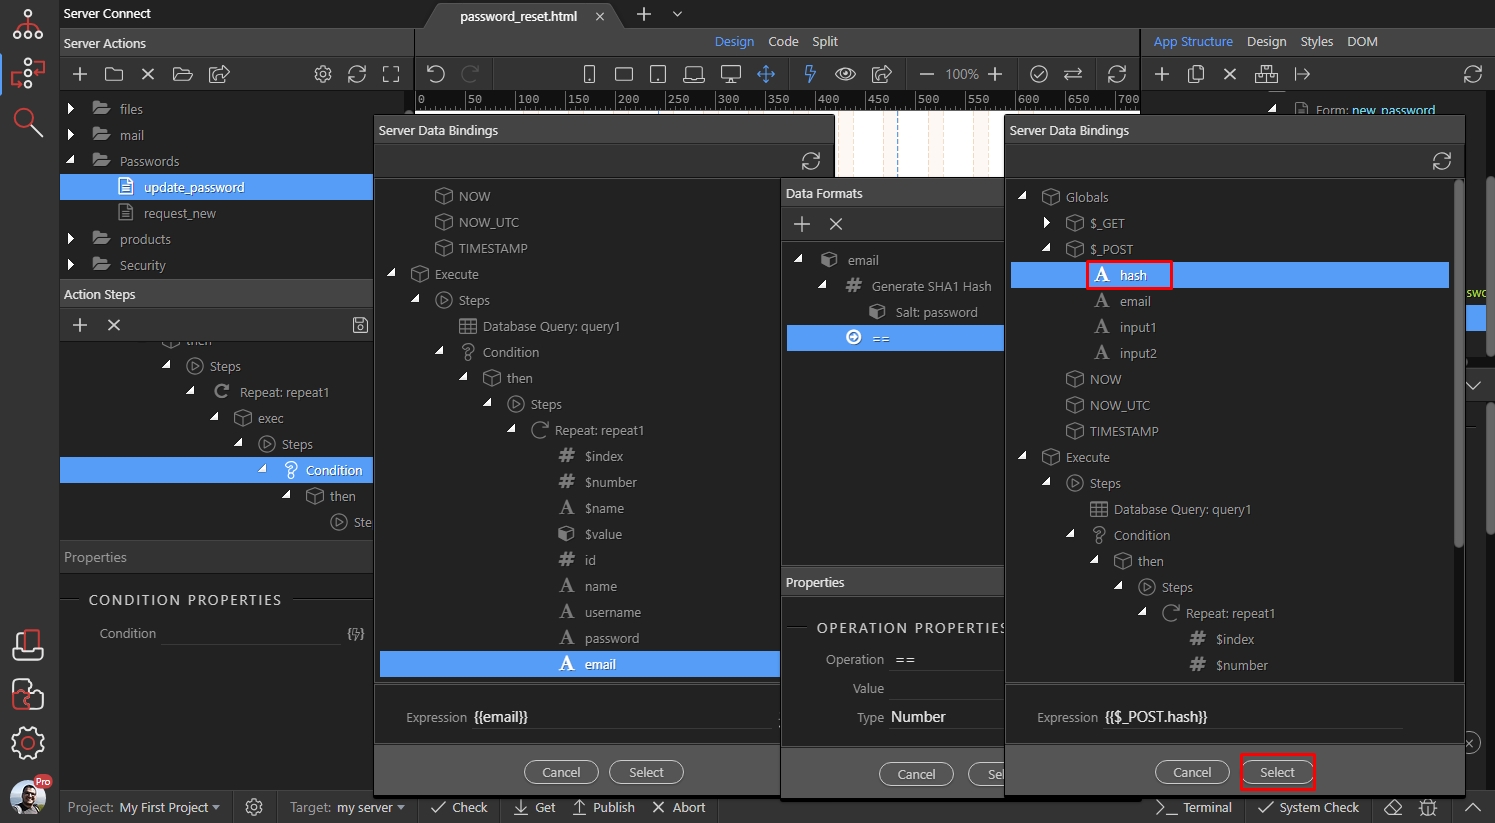
Click Select:
Section titled “Click Select:”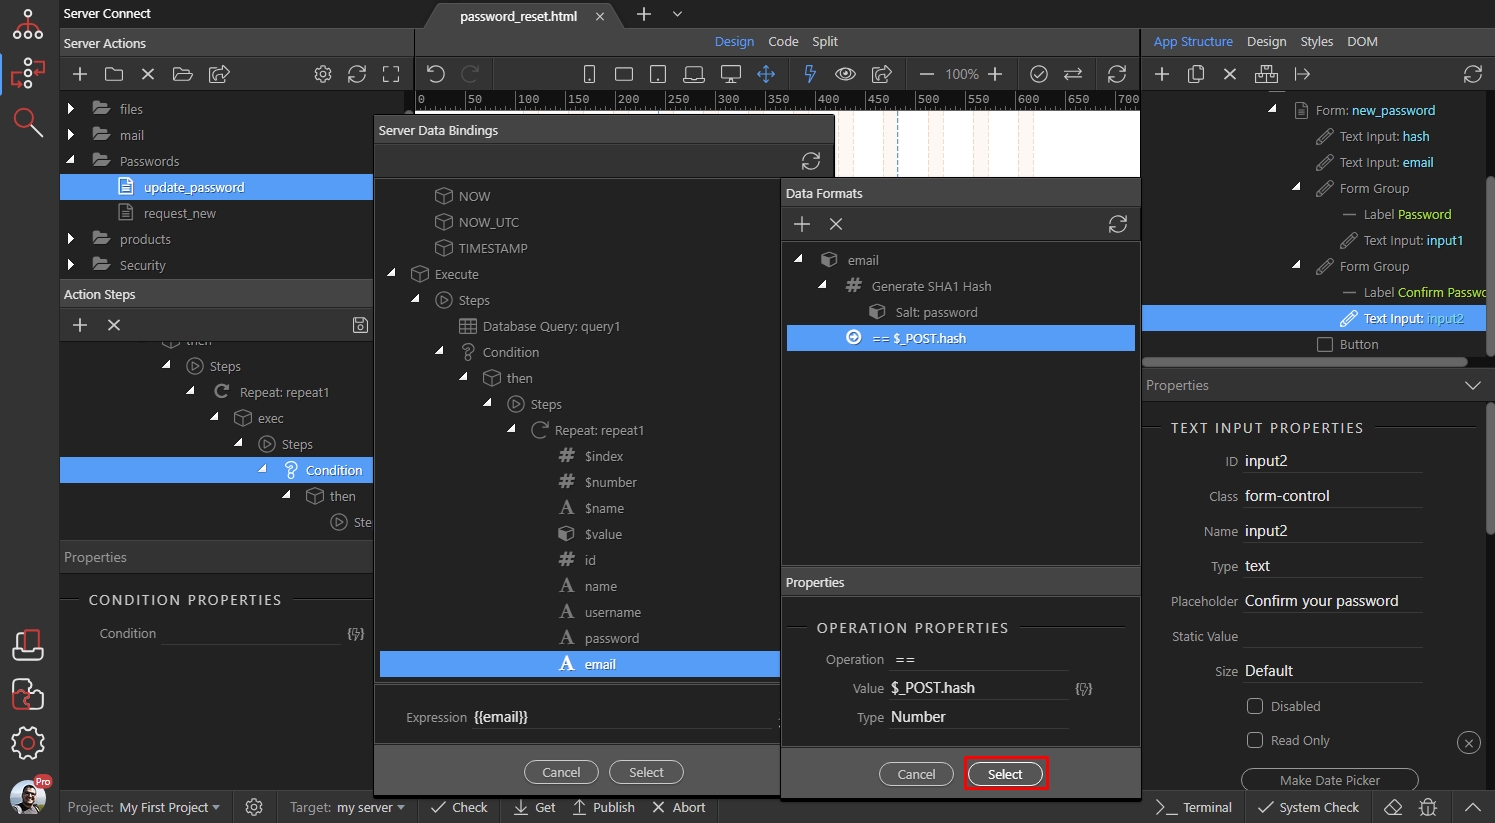
And click Select to apply the condition:
Section titled “And click Select to apply the condition:”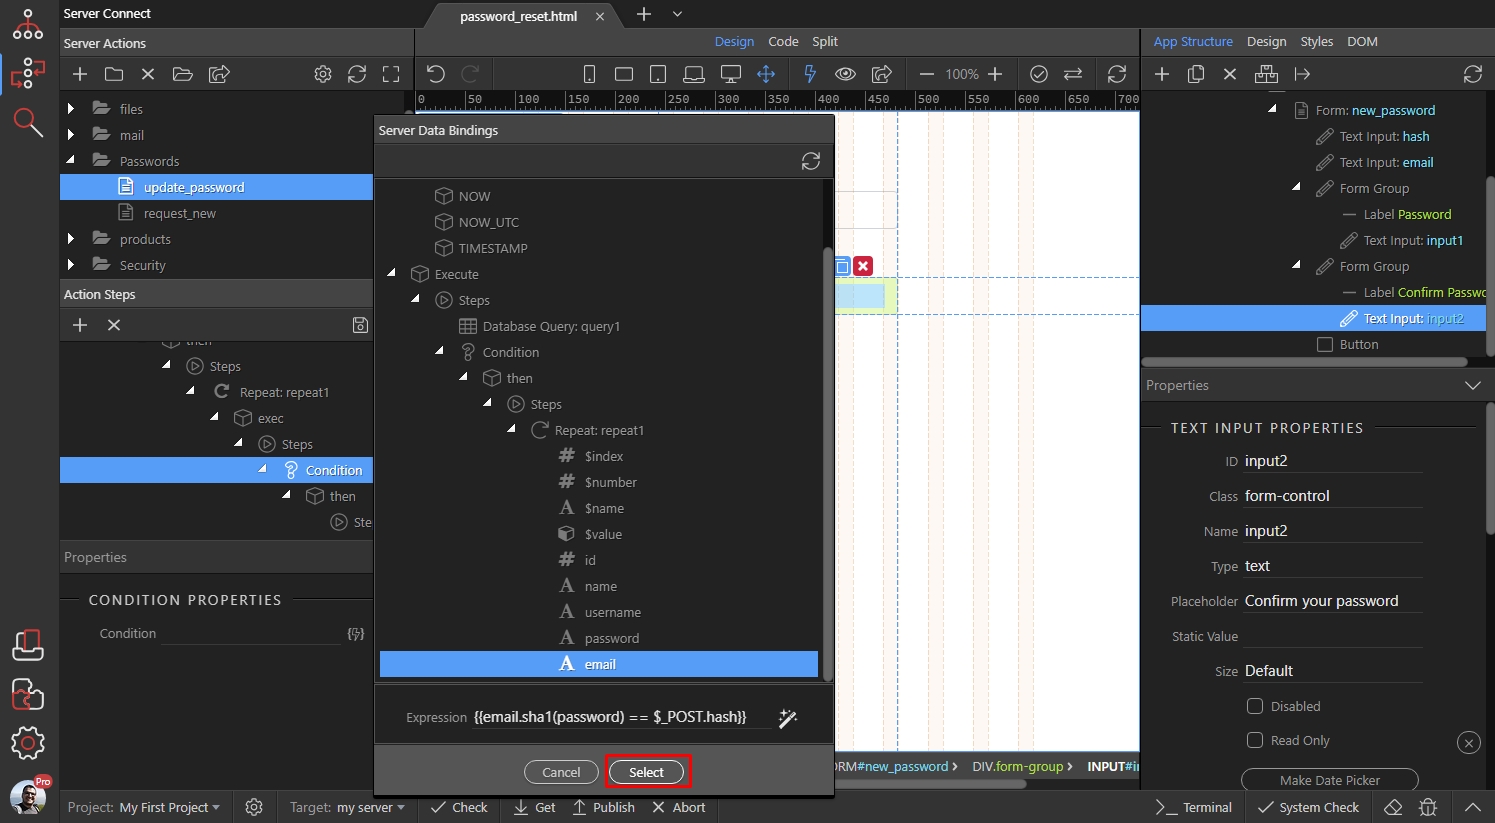
Step 64
Section titled “Step 64”Now, as our condition is setup, if true (i.e. hash matches) it will update the database record and set the new password. So right click the steps under Then:
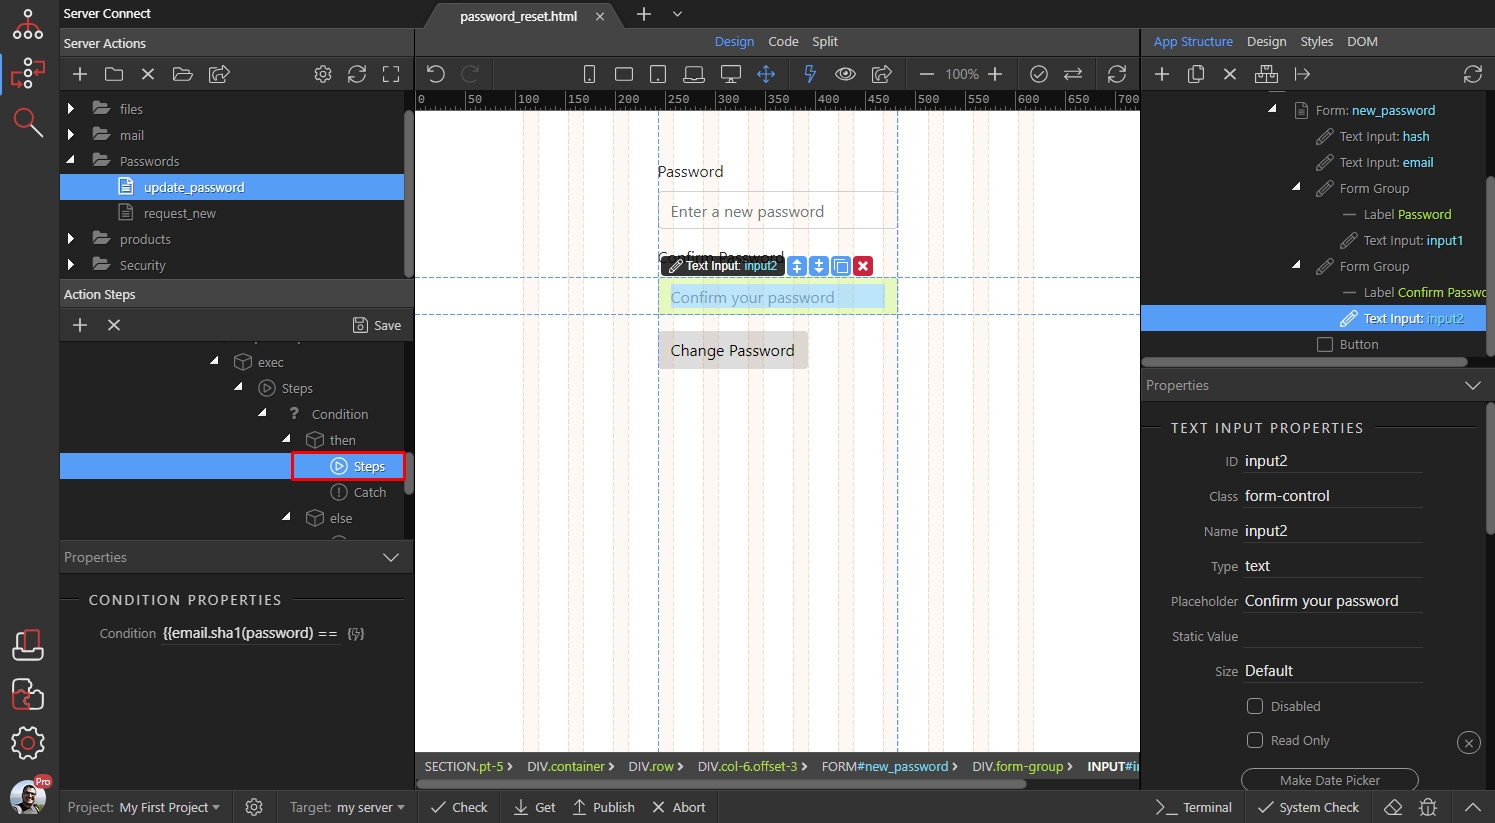
Add database update:
Section titled “Add database update:”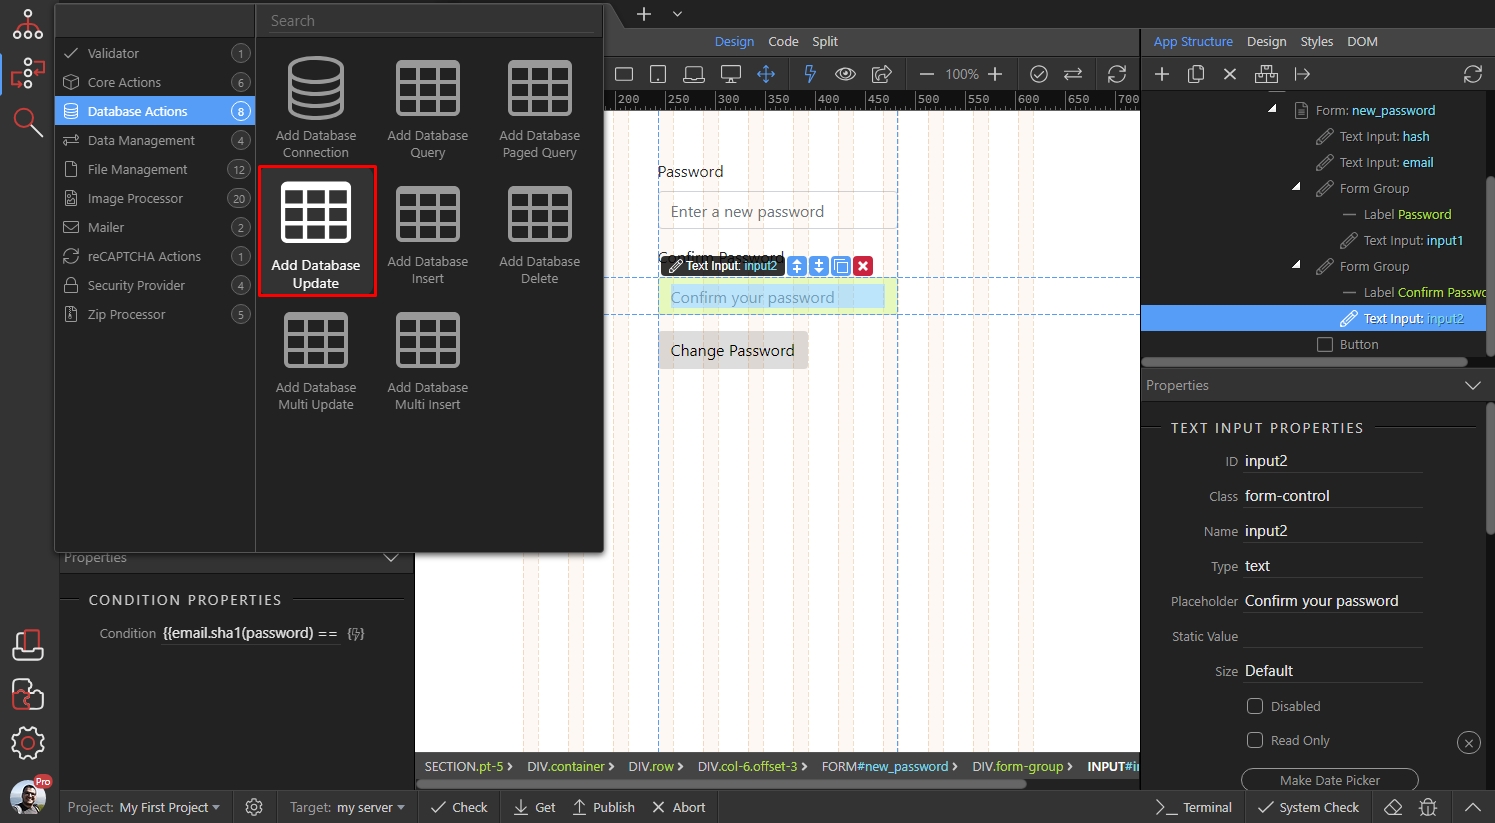
Set the update options:
Section titled “Set the update options:”
Step 67
Section titled “Step 67”Select to update the users table, but we only need to update the password so we select the rest and delete them:
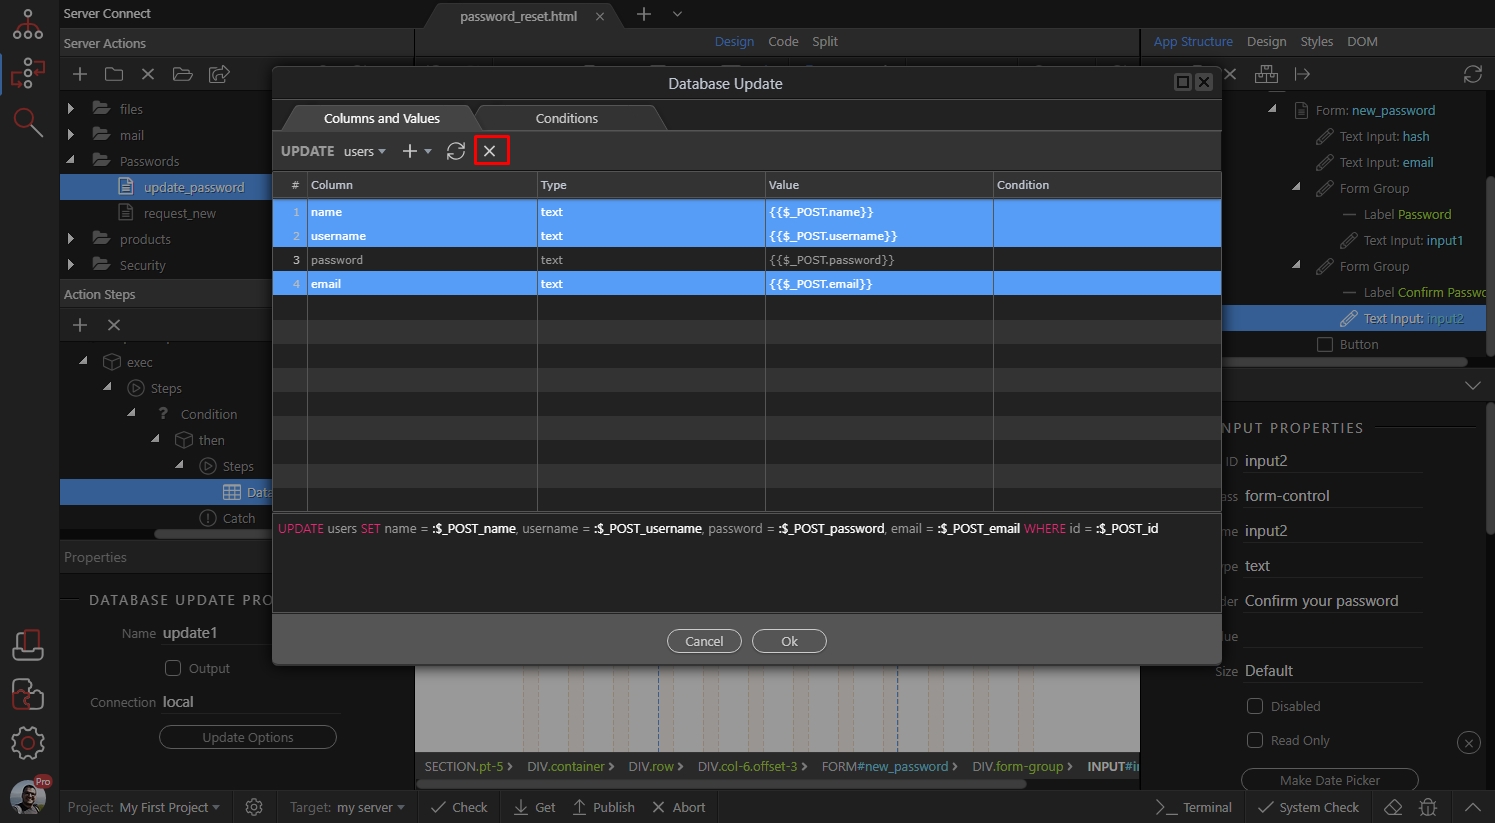
Double click the value to select your password input:
Section titled “Double click the value to select your password input:”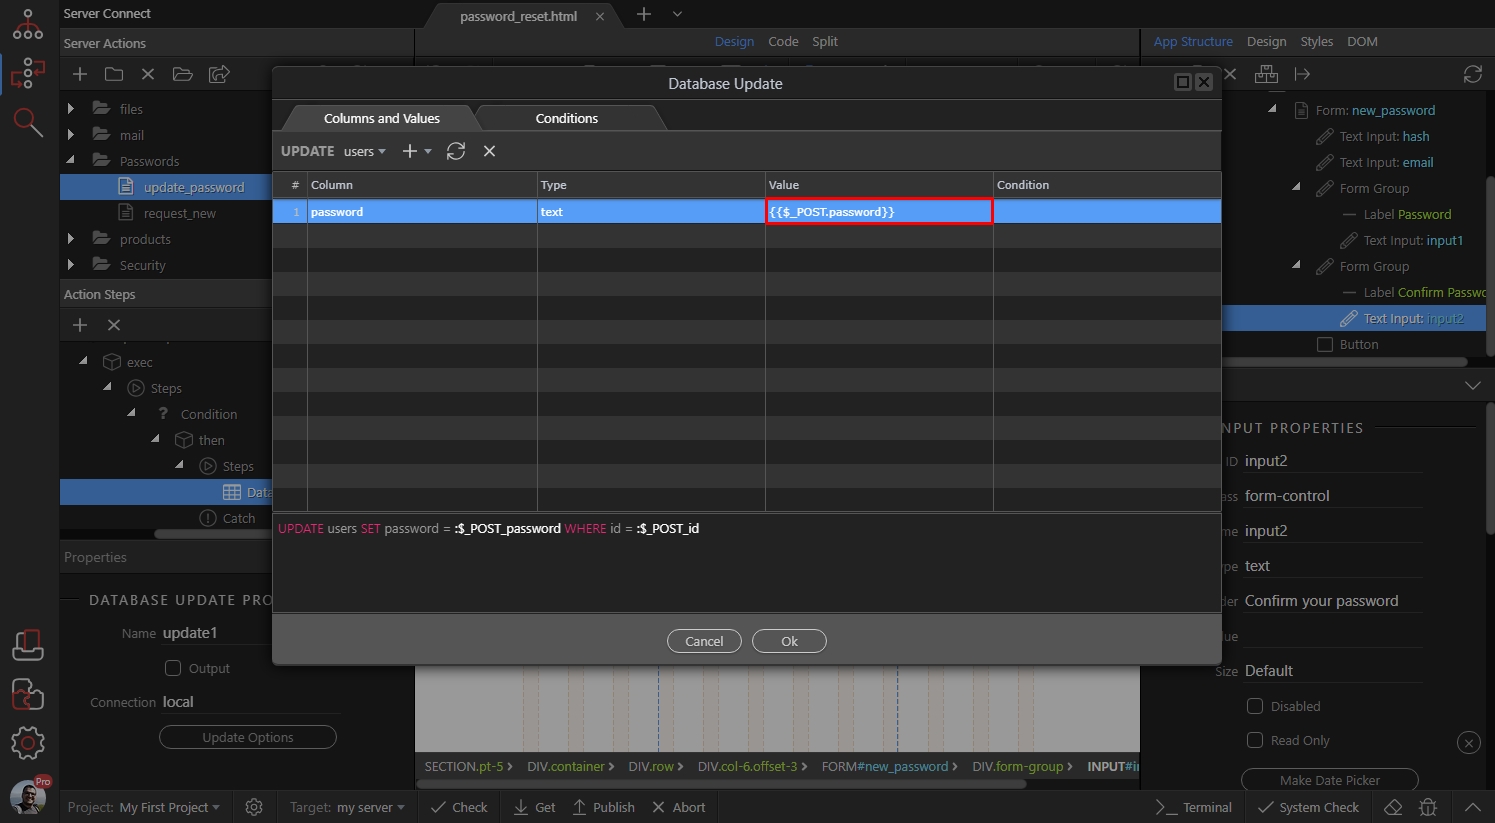
Step 69
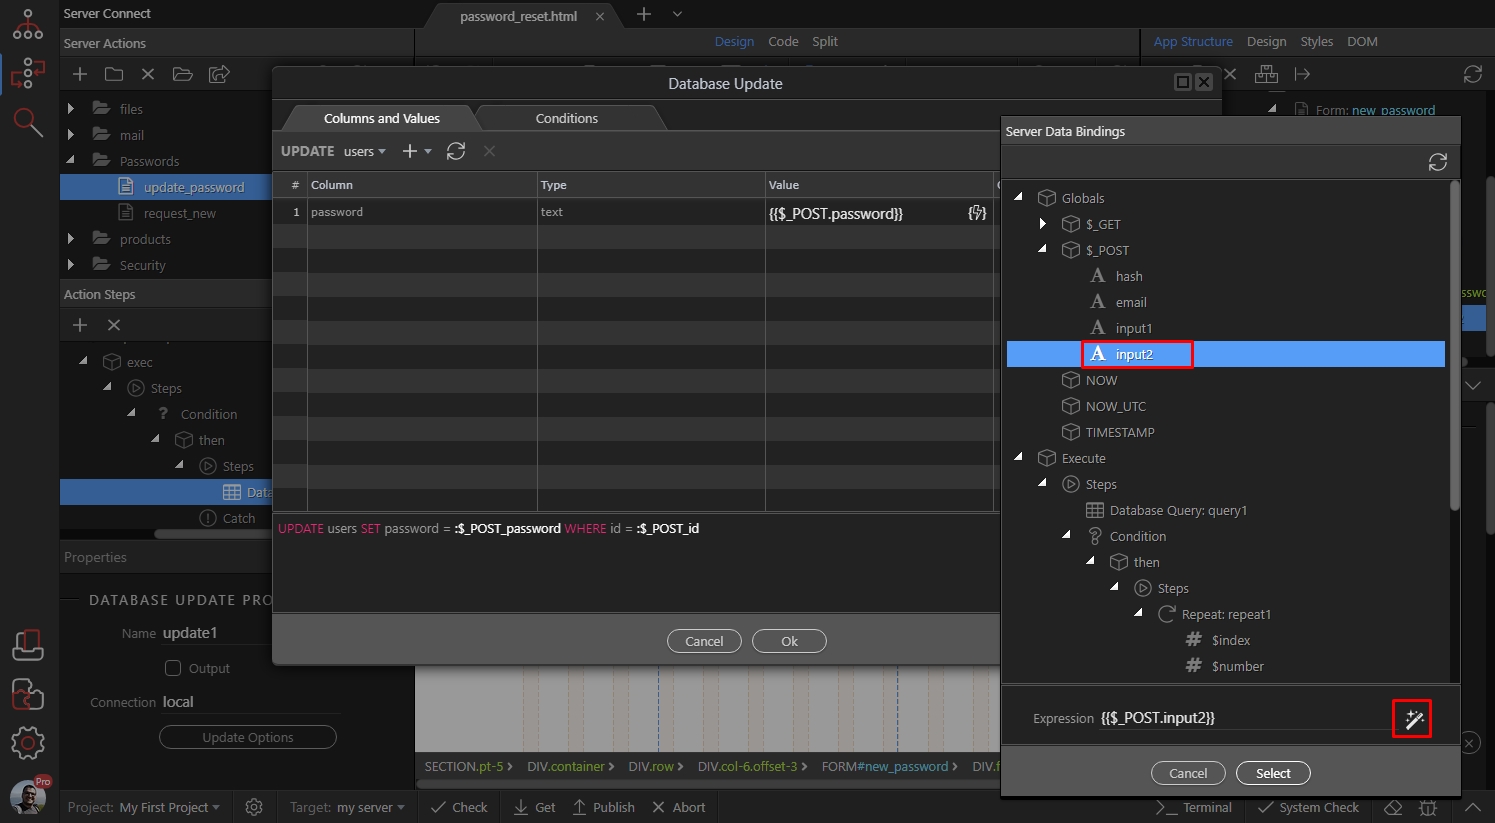
Section titled “Step 69”We select the second password input in our form (the one where we confirm the password) and click the formatter icon:
Step 70
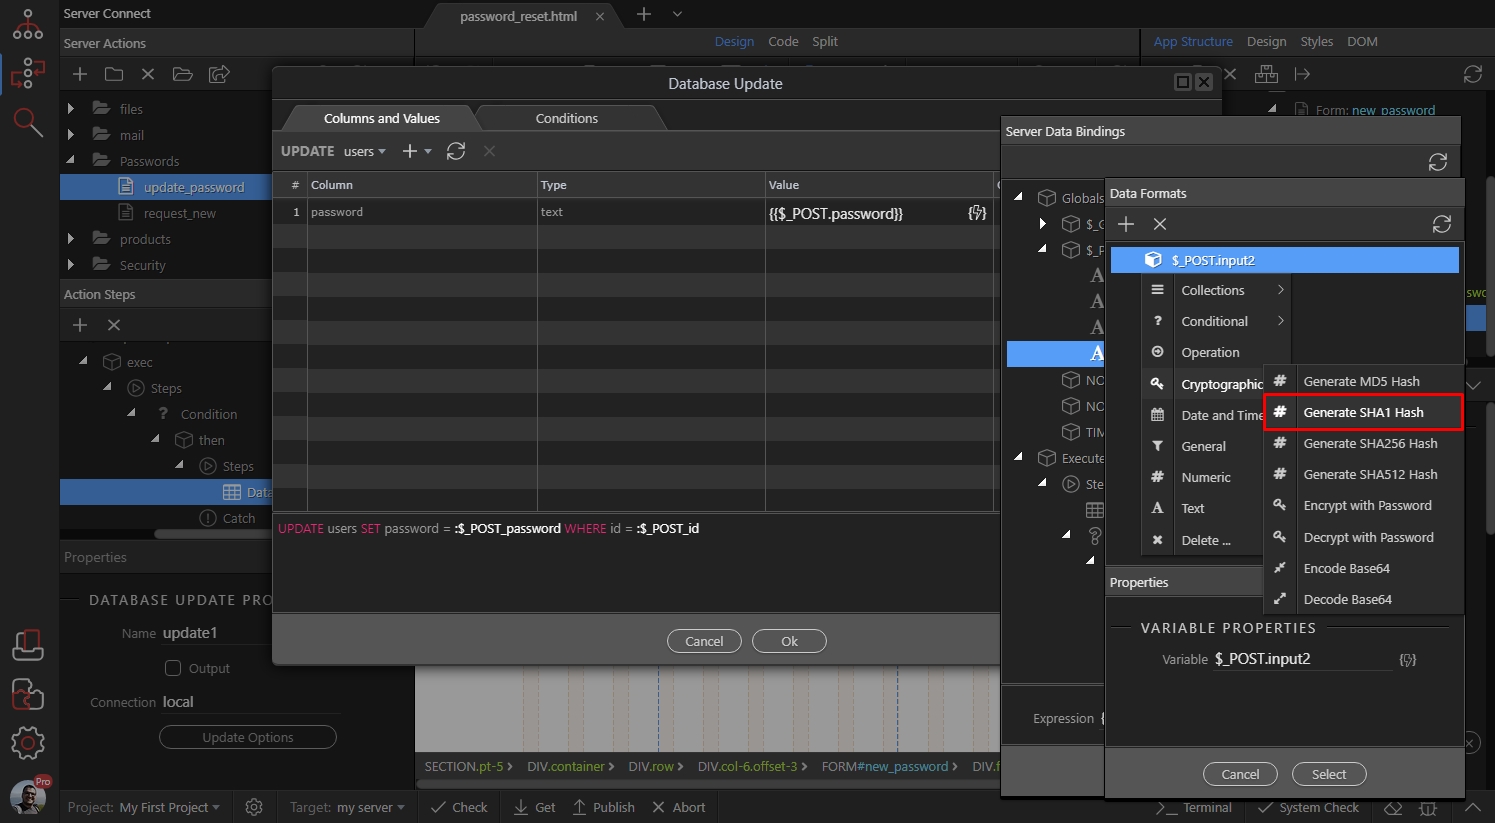
Section titled “Step 70”You don’t want to store your passwords as plain text, so select any of the Hash options. In our example we use the SHA1 Hash (but you can use ANY of the other options):
Enter a value for the hash salt and click the select button:
Section titled “Enter a value for the hash salt and click the select button:”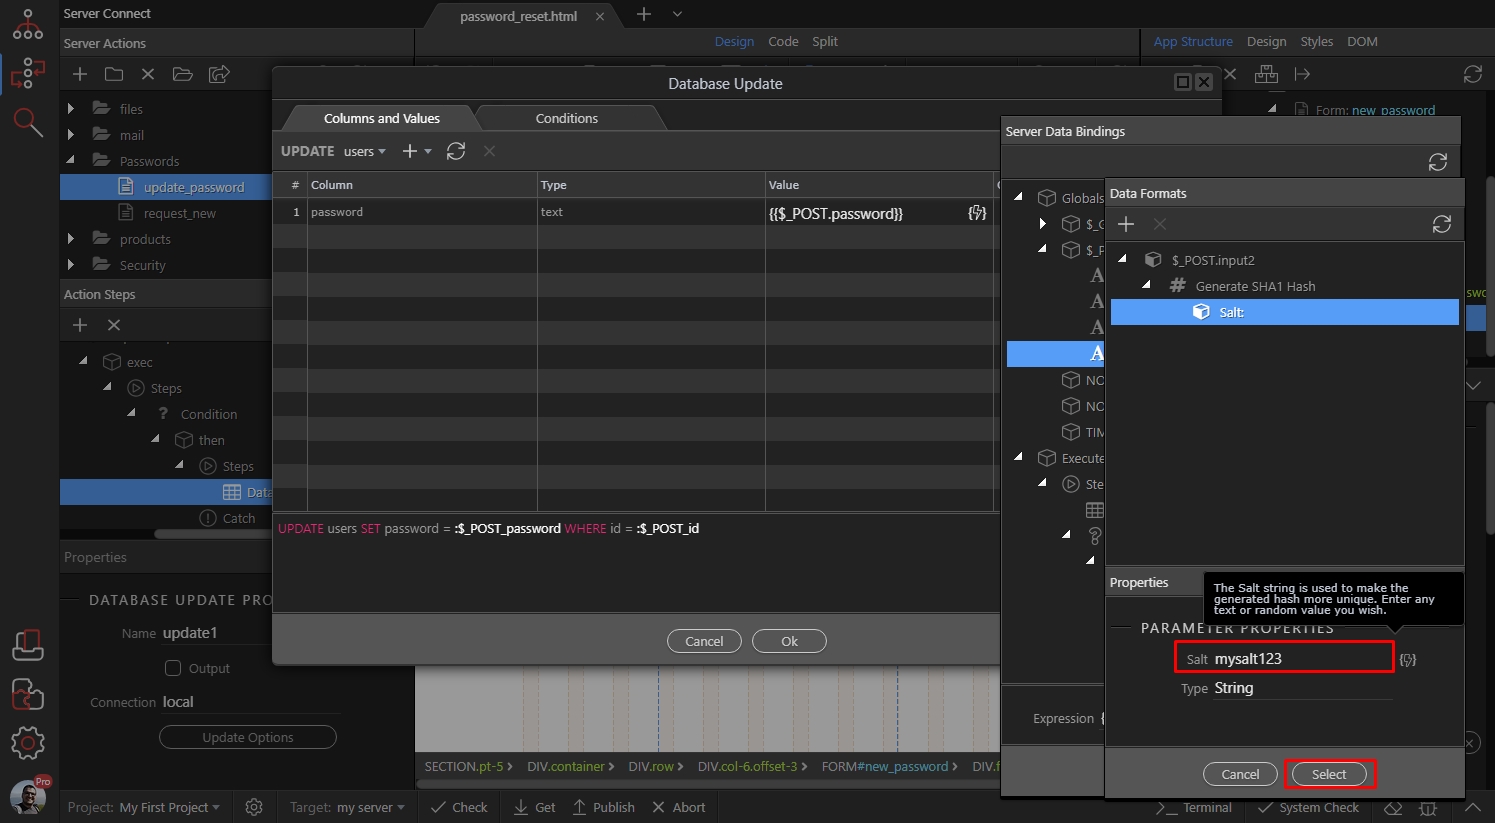
Click Select to apply the value:
Section titled “Click Select to apply the value:”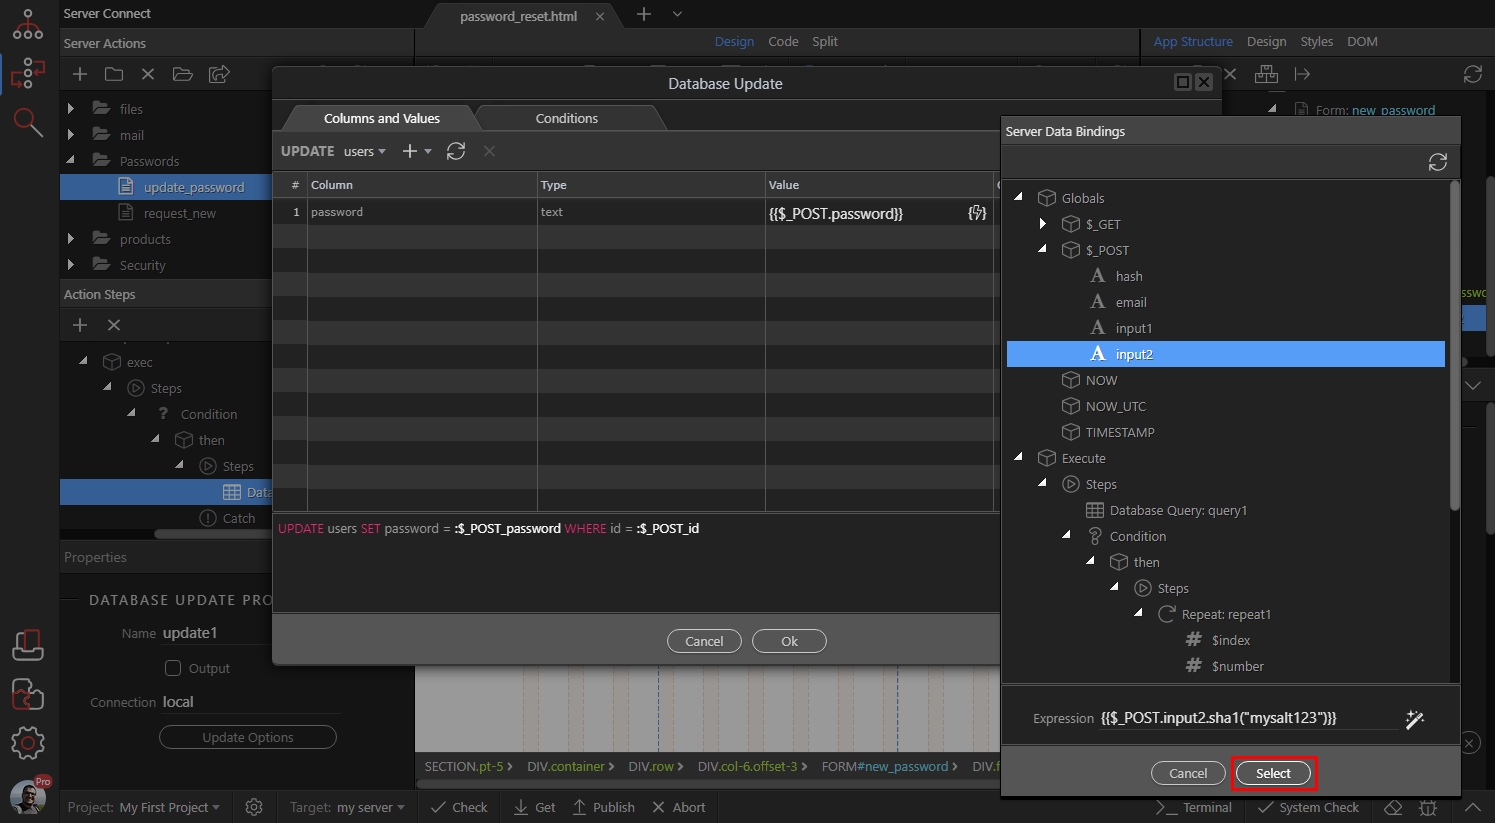
Then open the conditions tab:
Section titled “Then open the conditions tab:”
The identity column is automatically added here, so we need to select a value:
Section titled “The identity column is automatically added here, so we need to select a value:”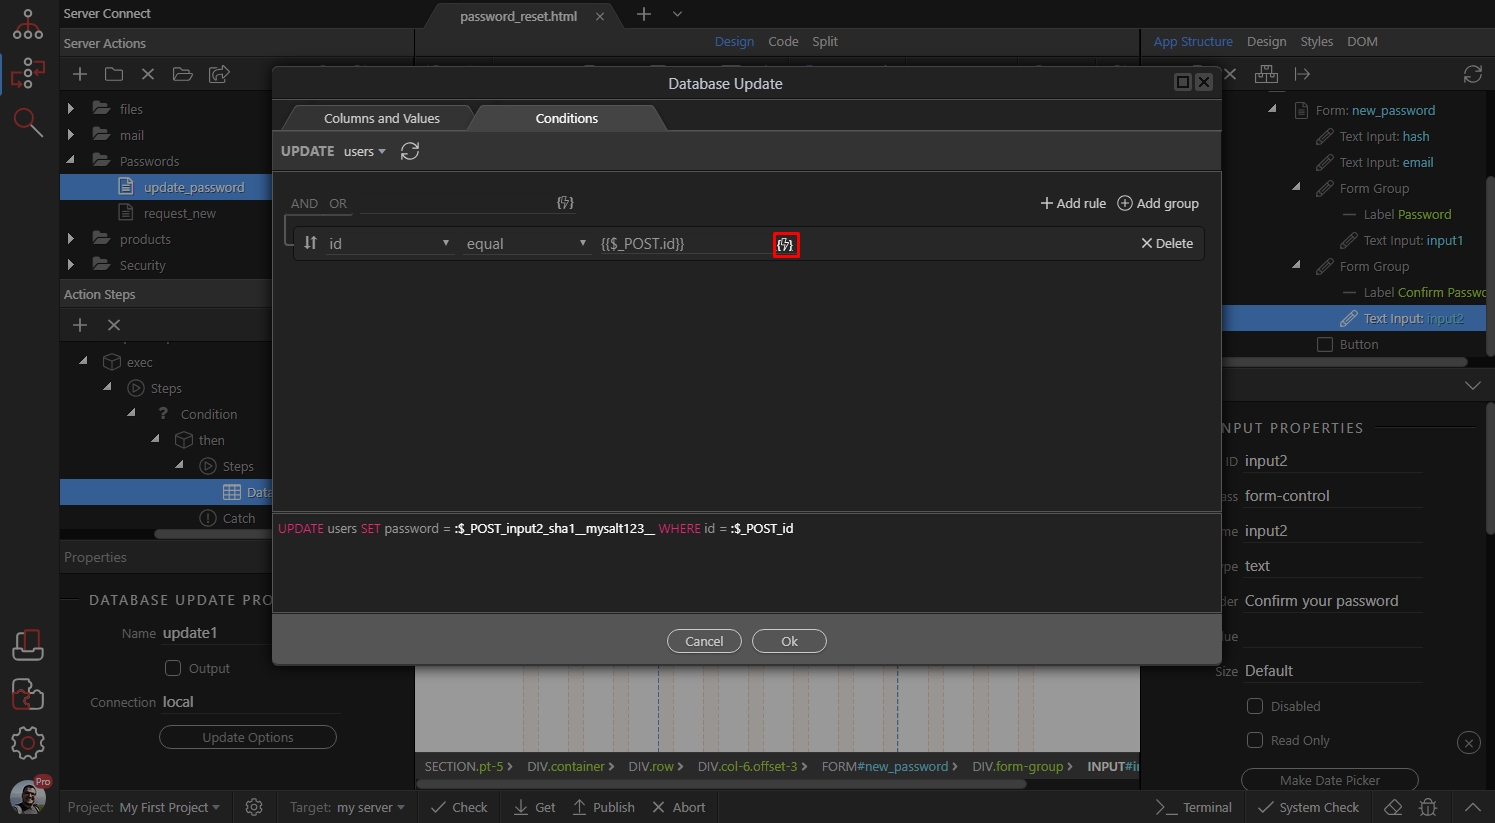
Select the identity value returned from the repeat step:
Section titled “Select the identity value returned from the repeat step:”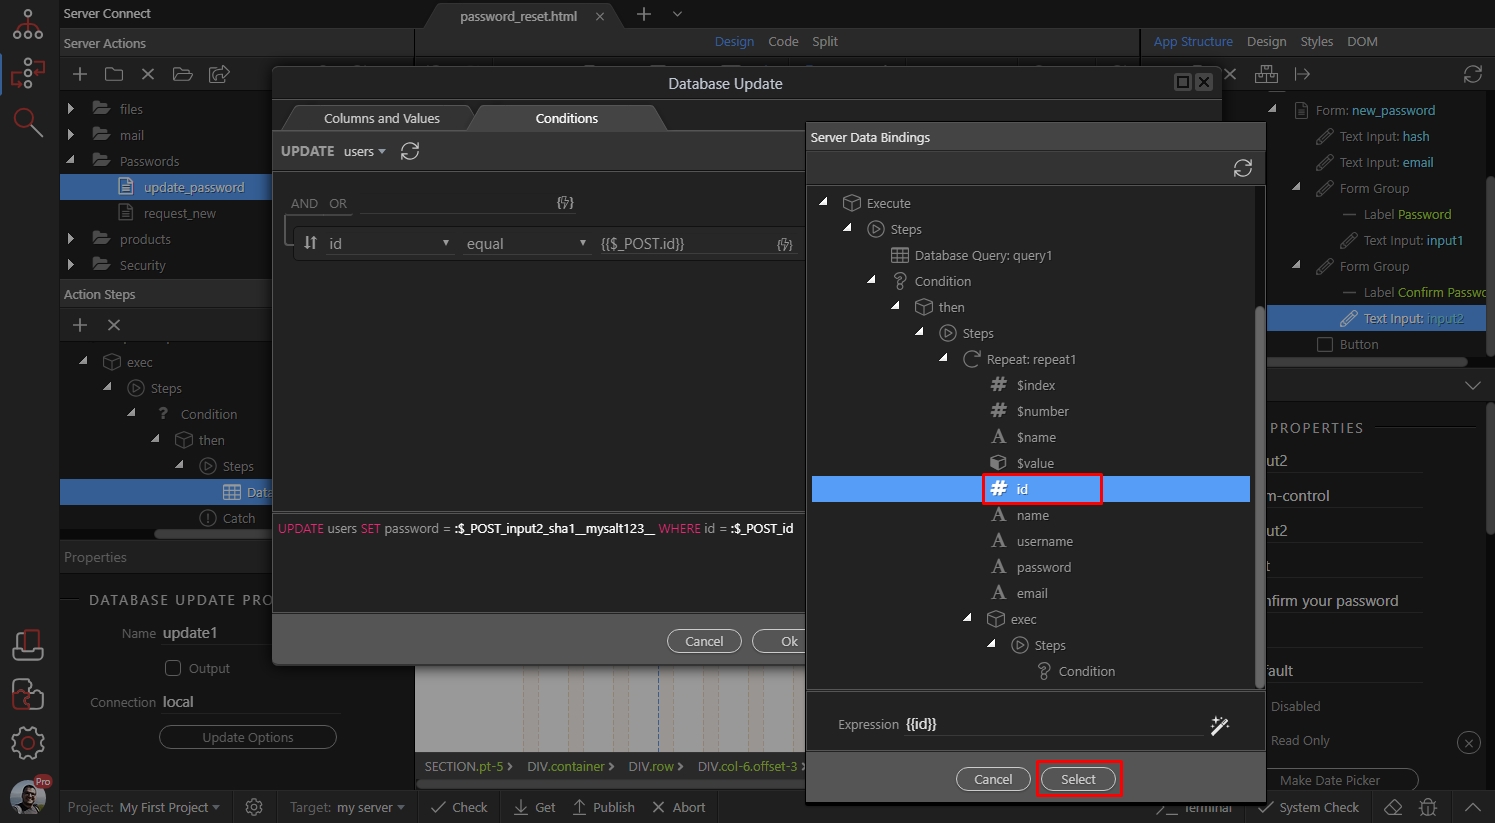
Click OK:
Section titled “Click OK:”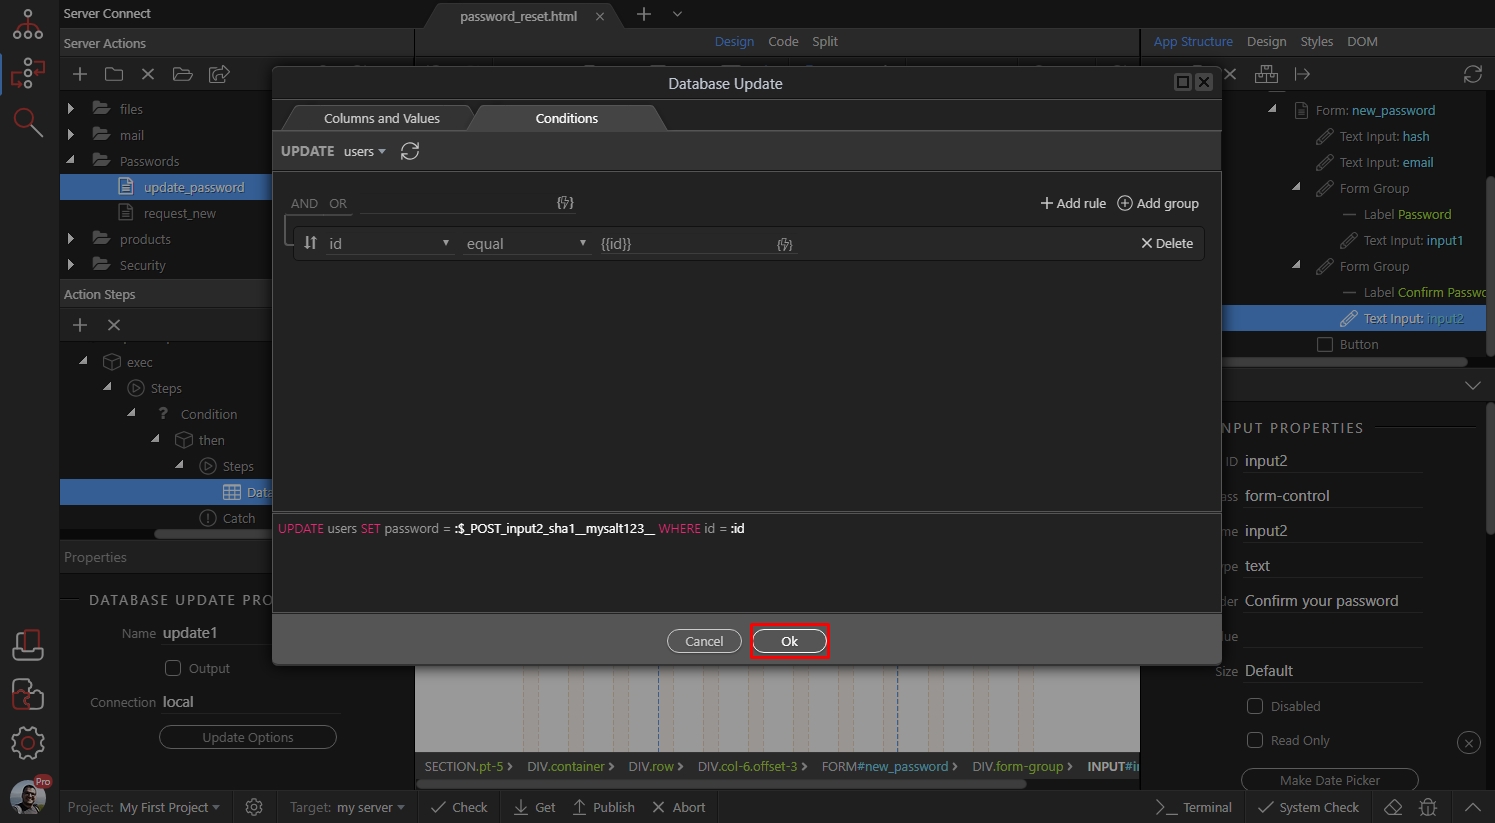
Now, we need to setup the else step - i.e. when the hash does not match. Right click the steps, under ELSE:
Section titled “Now, we need to setup the else step - i.e. when the hash does not match. Right click the steps, under ELSE:”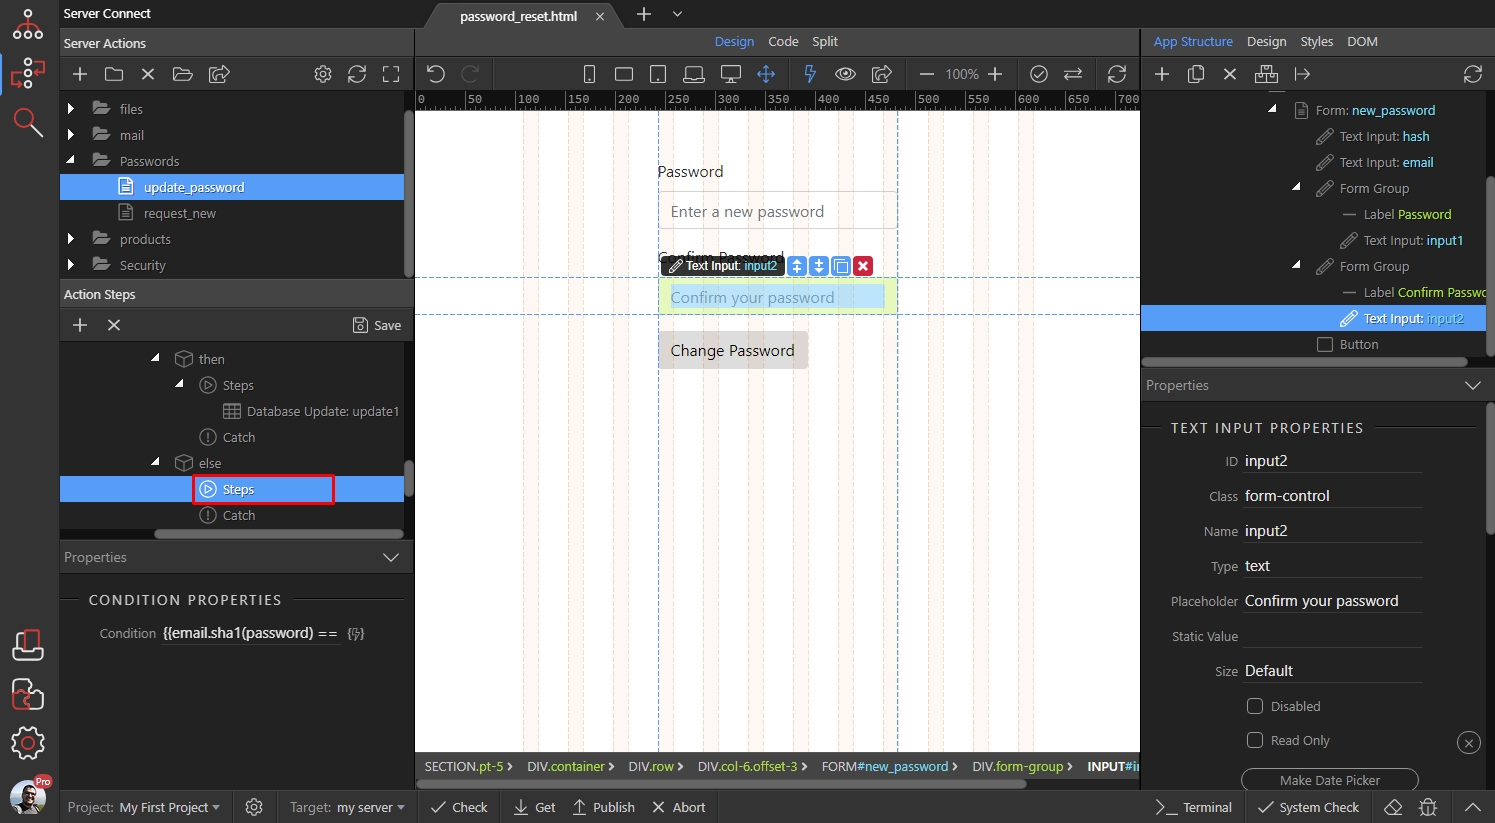
We will return an “invalid” response back to our page. Add Response:
Section titled “We will return an “invalid” response back to our page. Add Response:”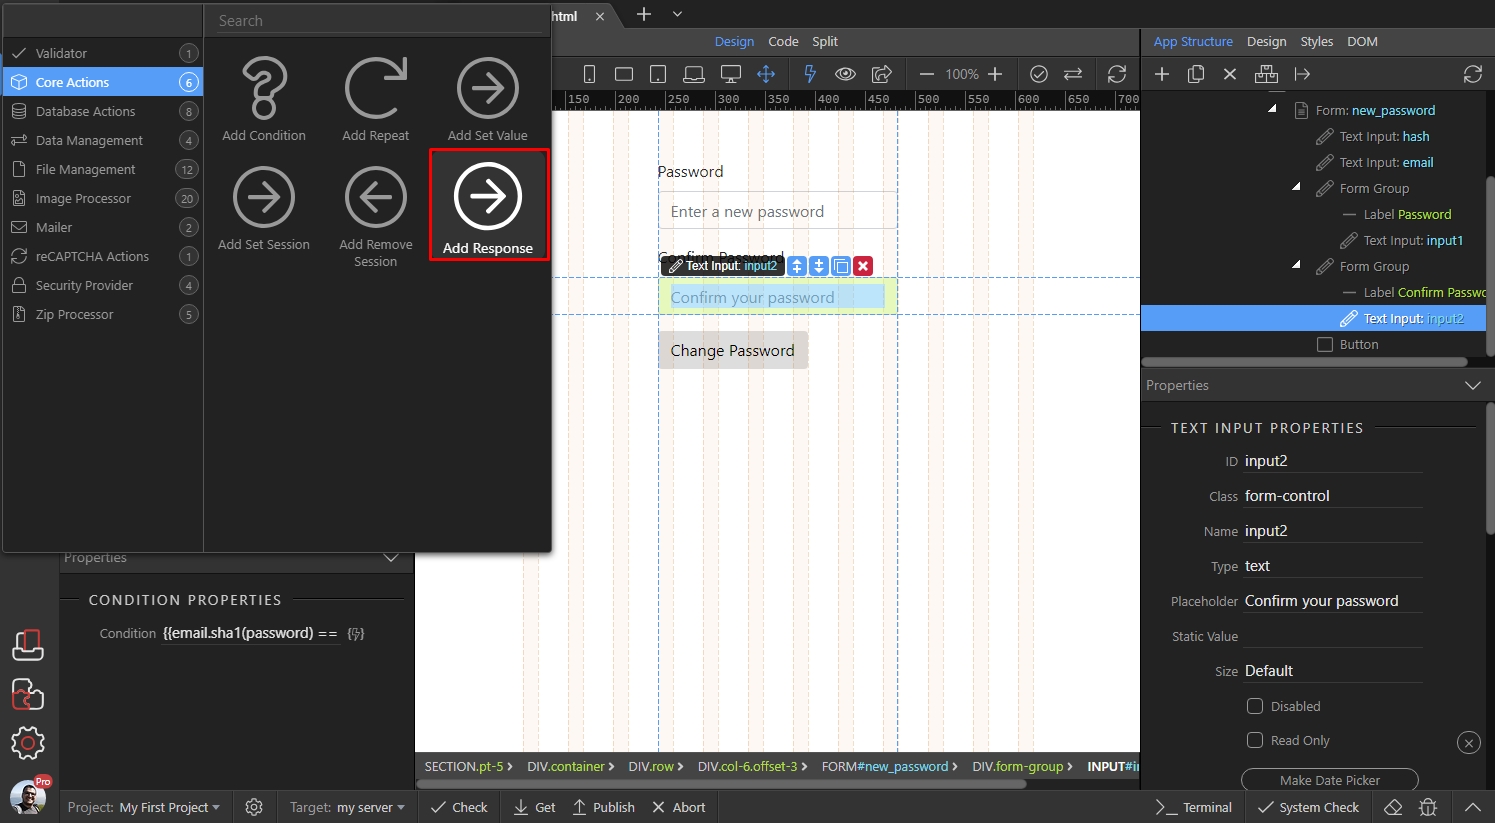
Step 79
Section titled “Step 79”For the response step we add a name (use whatever name you like), status should be 400 and the text will be used later on the page, so enter a custom error message:
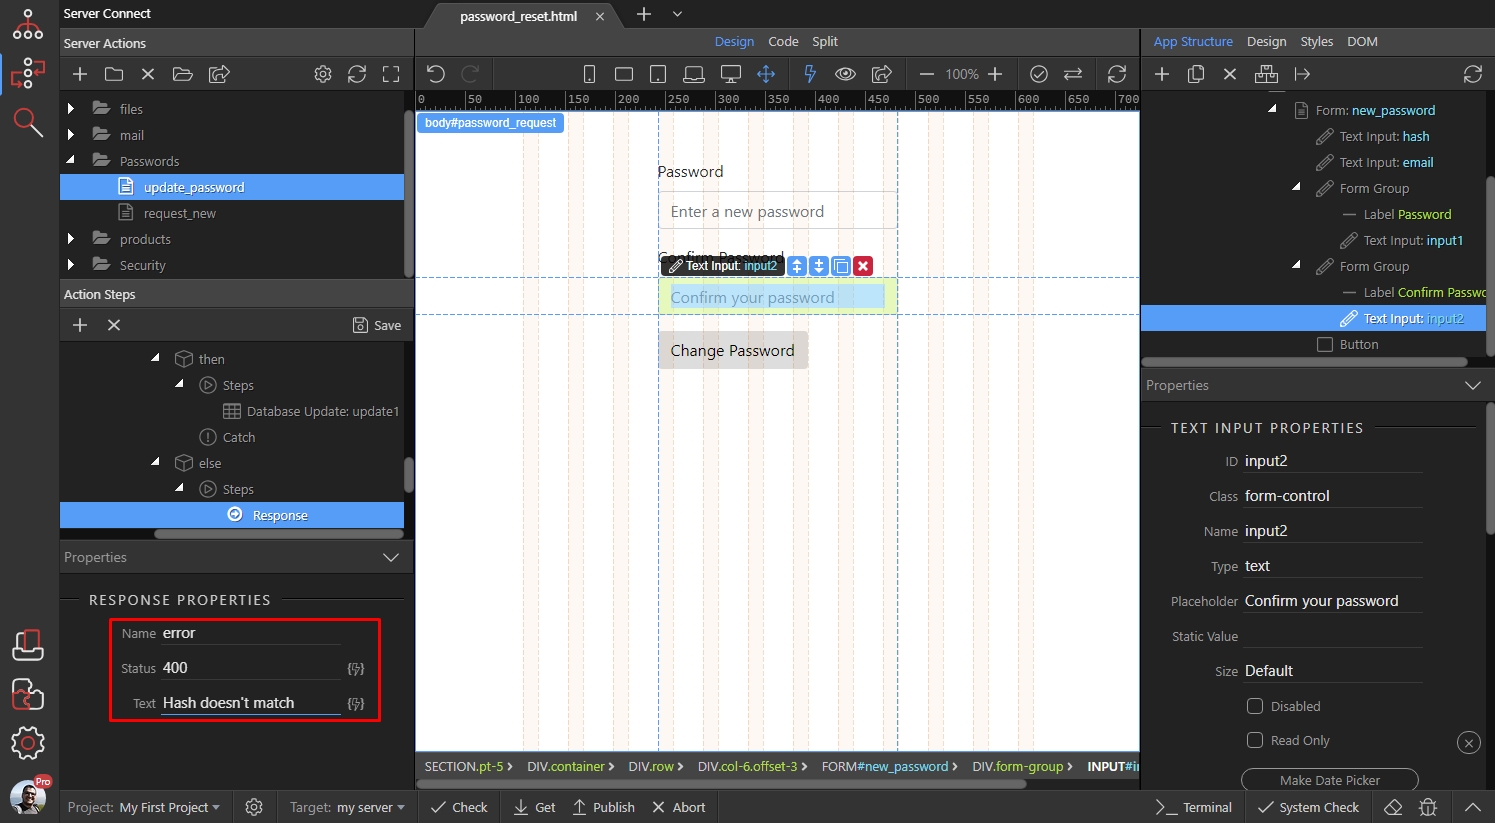
Right click steps under ELSE there. We will also need an error response here:
Section titled “Right click steps under ELSE there. We will also need an error response here:”We are done with this Condition.
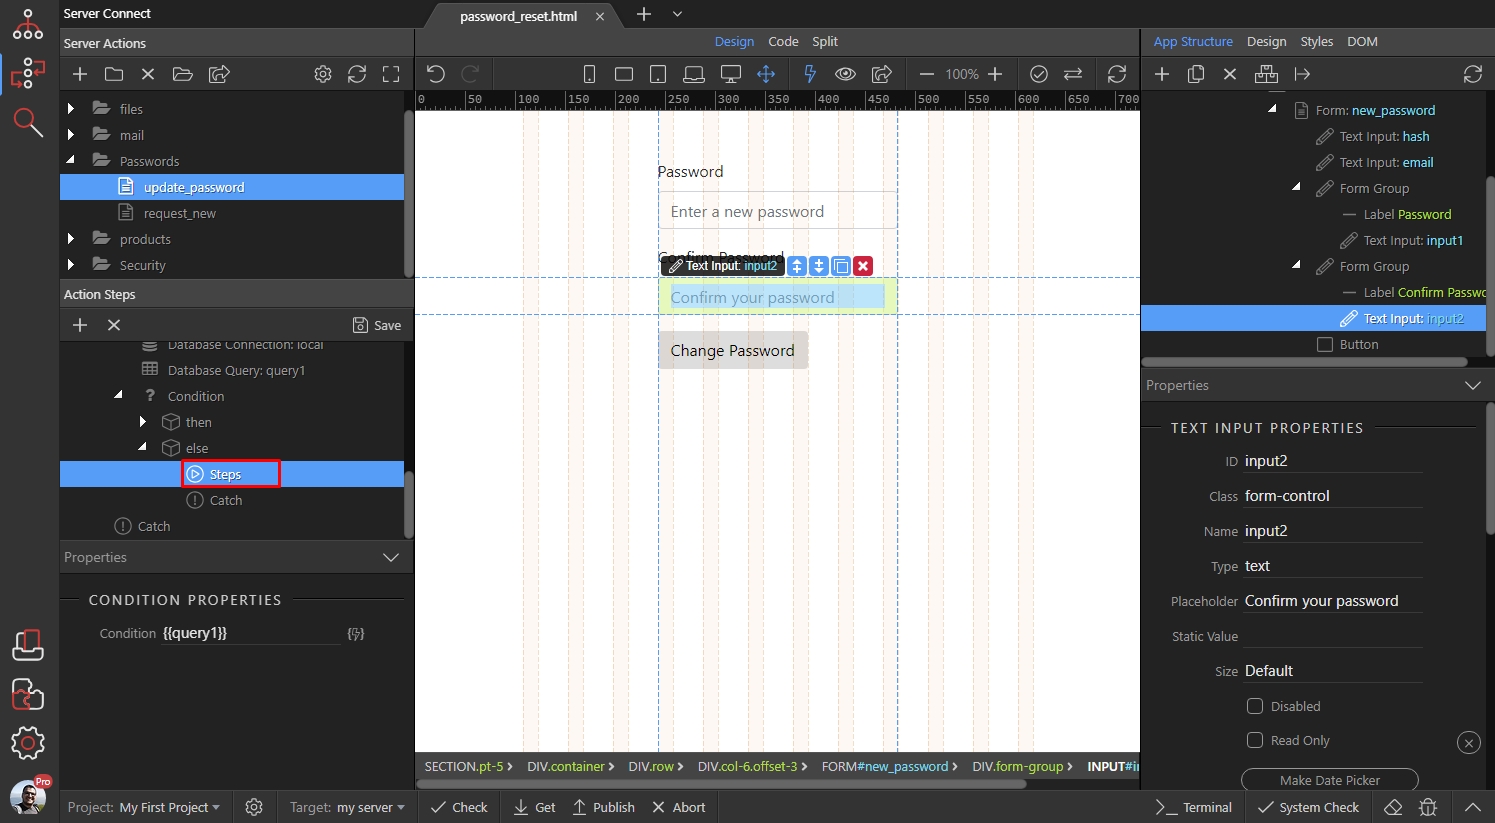
Now back to the main Condition which we added first. This one we used to check if the query returns results (i.e. if the email exists in the database).
Right click steps under ELSE there. We will also need an error response here:
Add Response:
Section titled “Add Response:”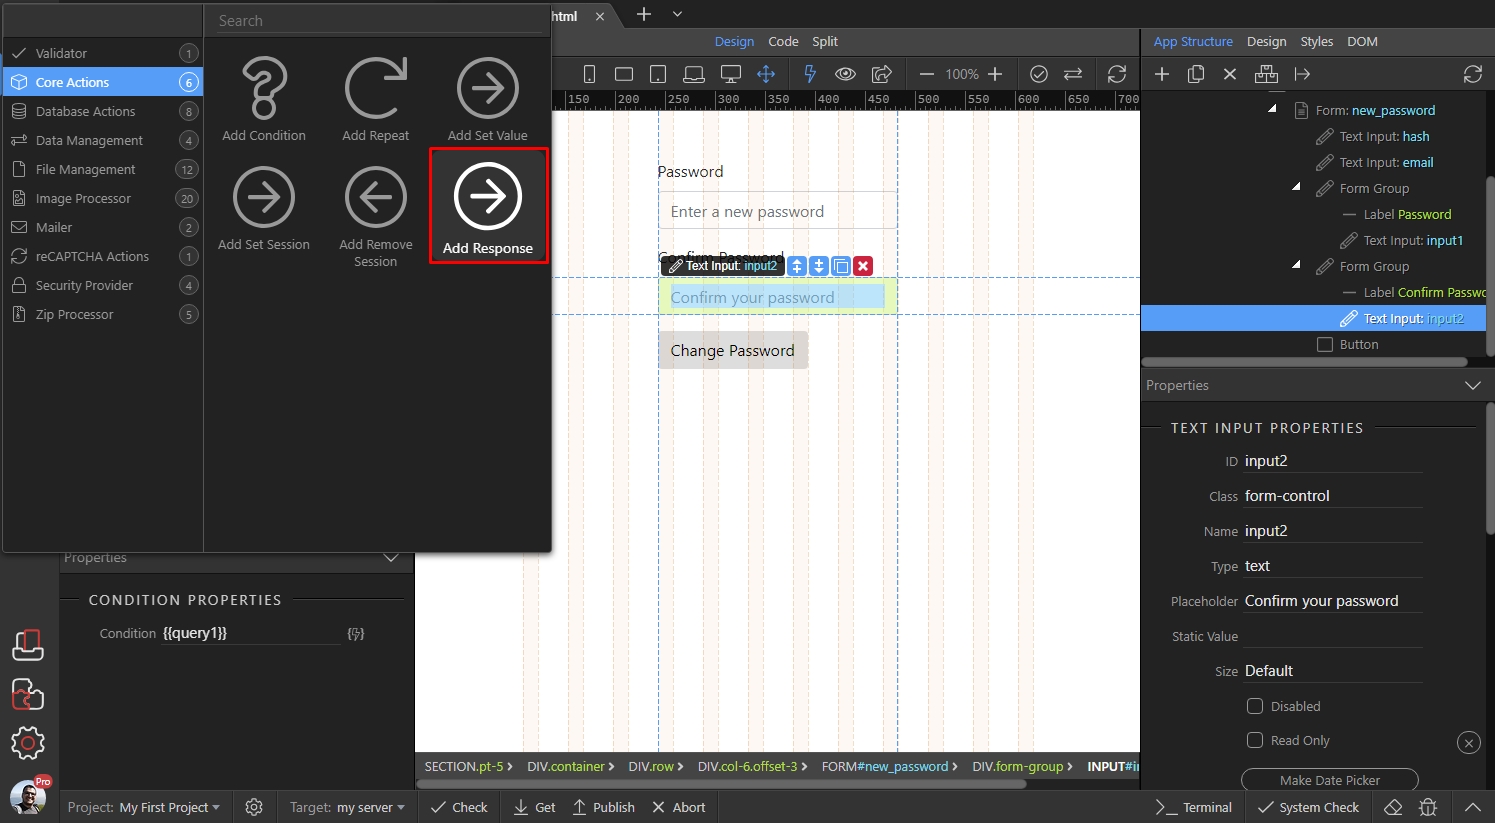
Add a name for this step, then set the status to 400 and add a custom error message in the Text field:
Section titled “Add a name for this step, then set the status to 400 and add a custom error message in the Text field:”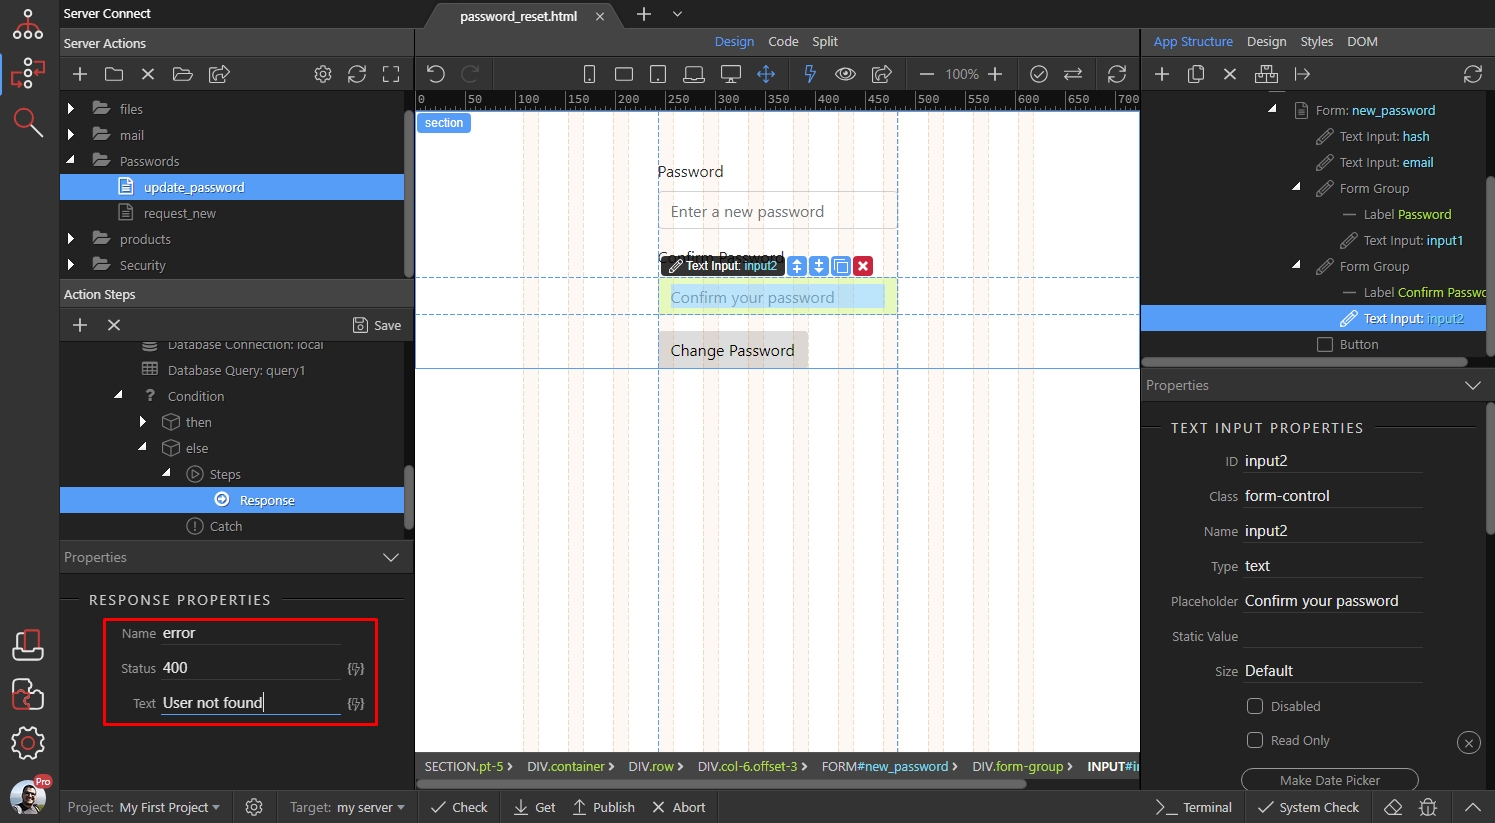
We are done with the work on the Server Action. Save it and close the Server Connect panel:
Section titled “We are done with the work on the Server Action. Save it and close the Server Connect panel:”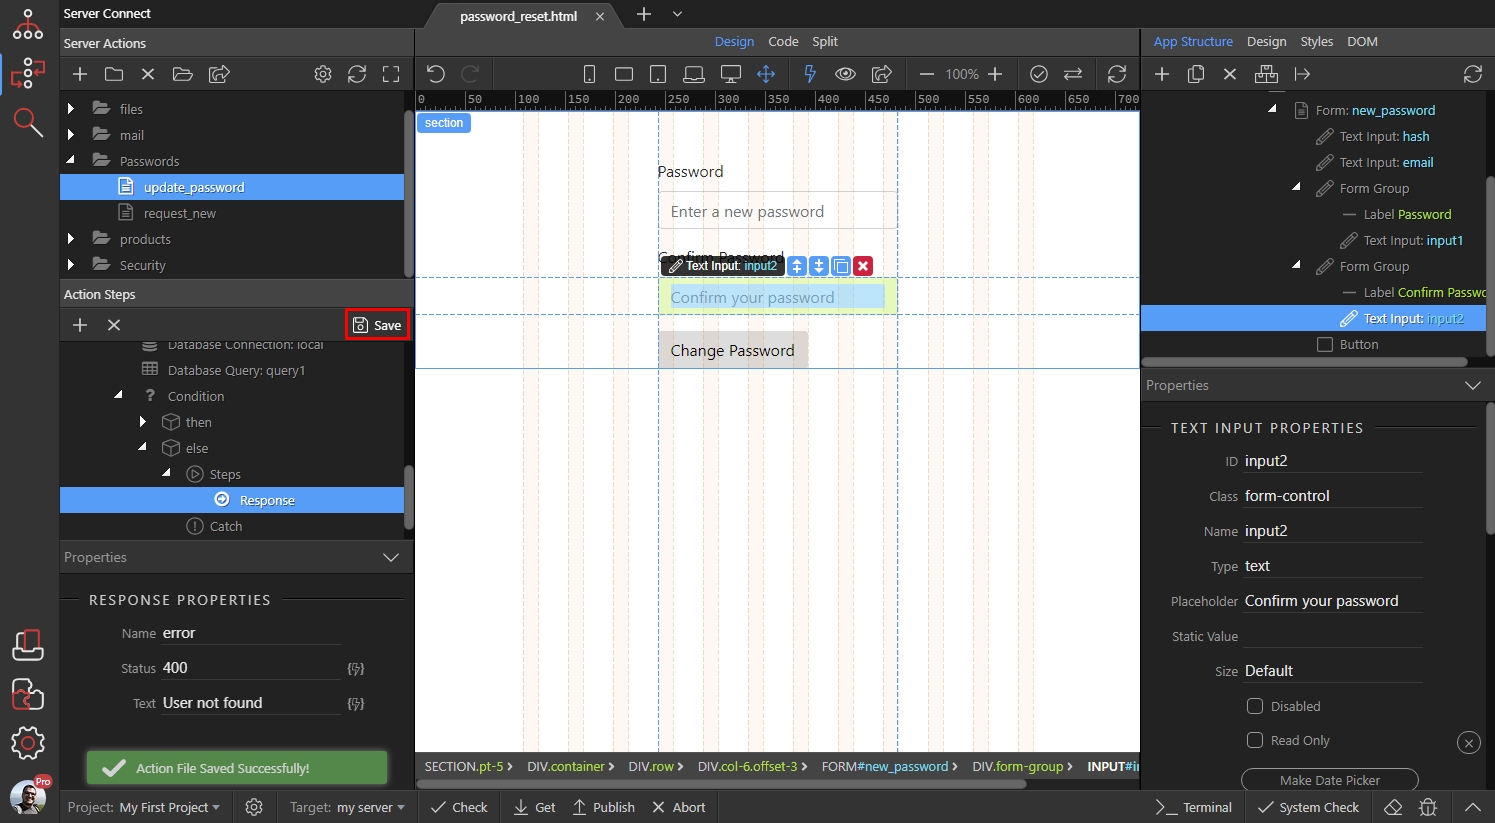
Step 84
Section titled “Step 84”Back to our form, we need to add an alert which will show the success or error messages when we submit the form. Select the password confirm form group and click Add After:
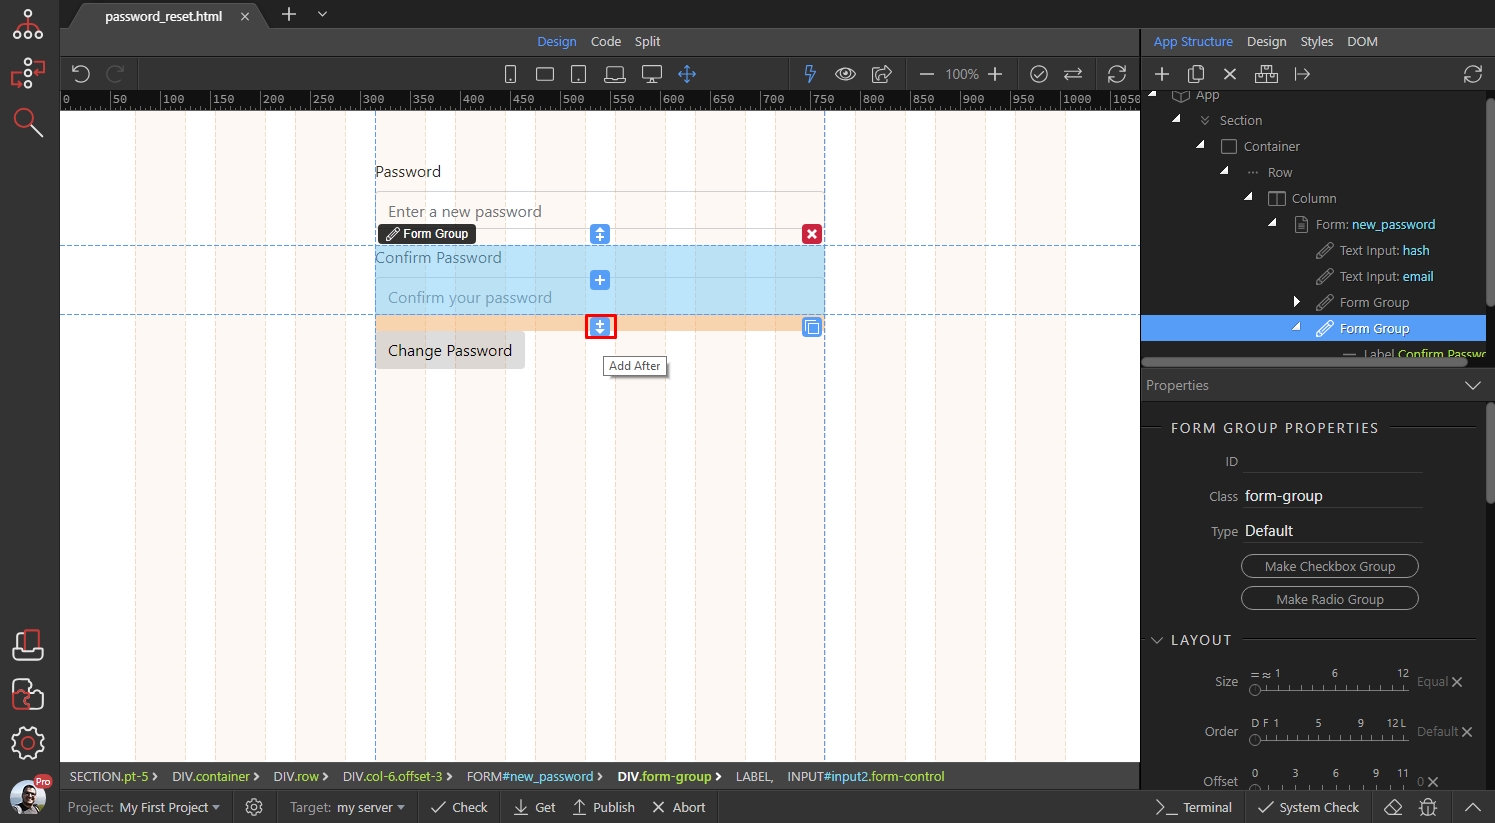
Open Components and add Alert:
Section titled “Open Components and add Alert:”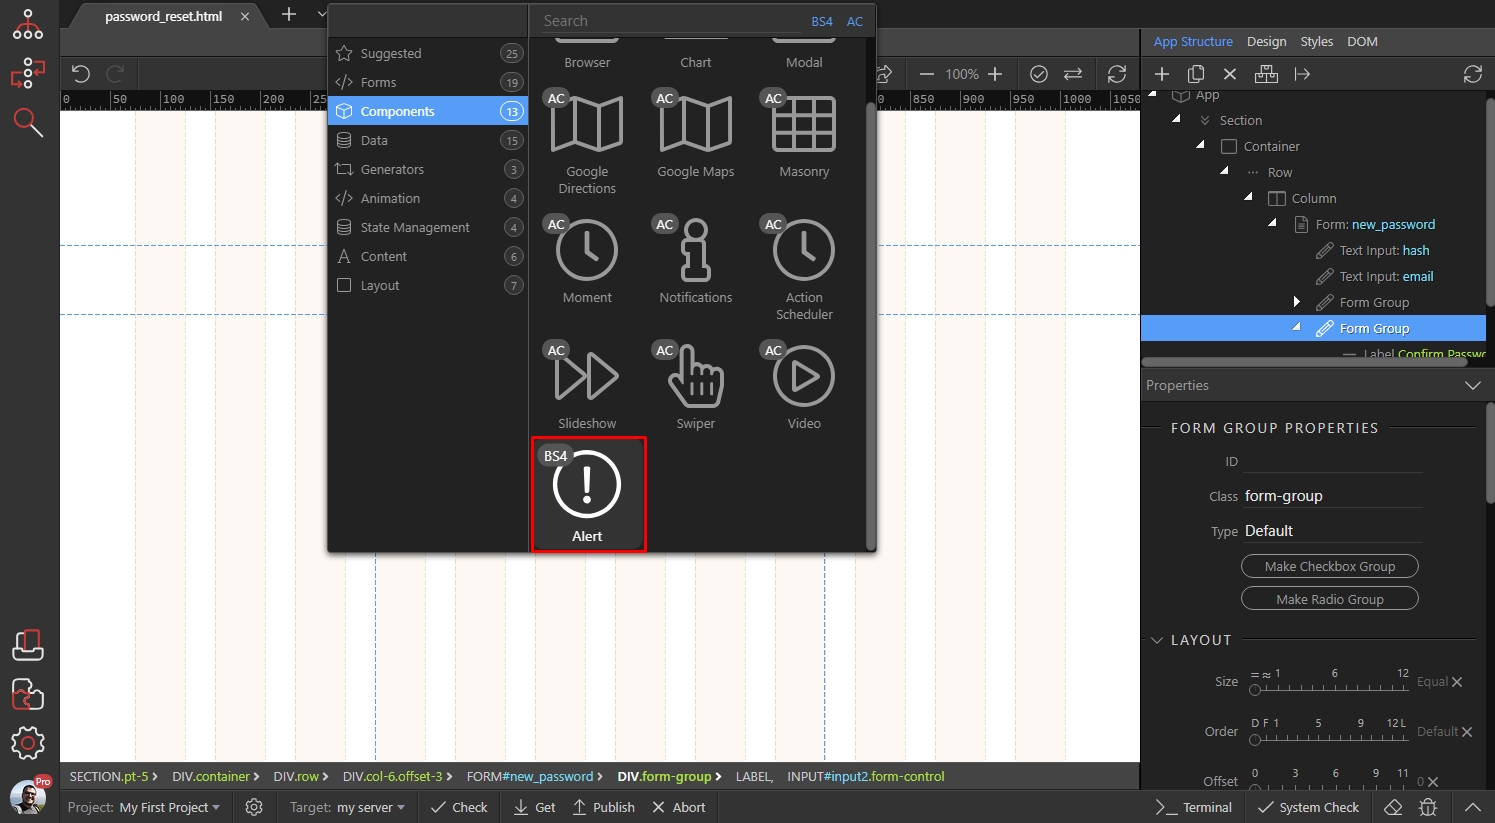
We don’t need to do anything with the alert. Let’s setup when should it appear. Select the form:
Section titled “We don’t need to do anything with the alert. Let’s setup when should it appear. Select the form:”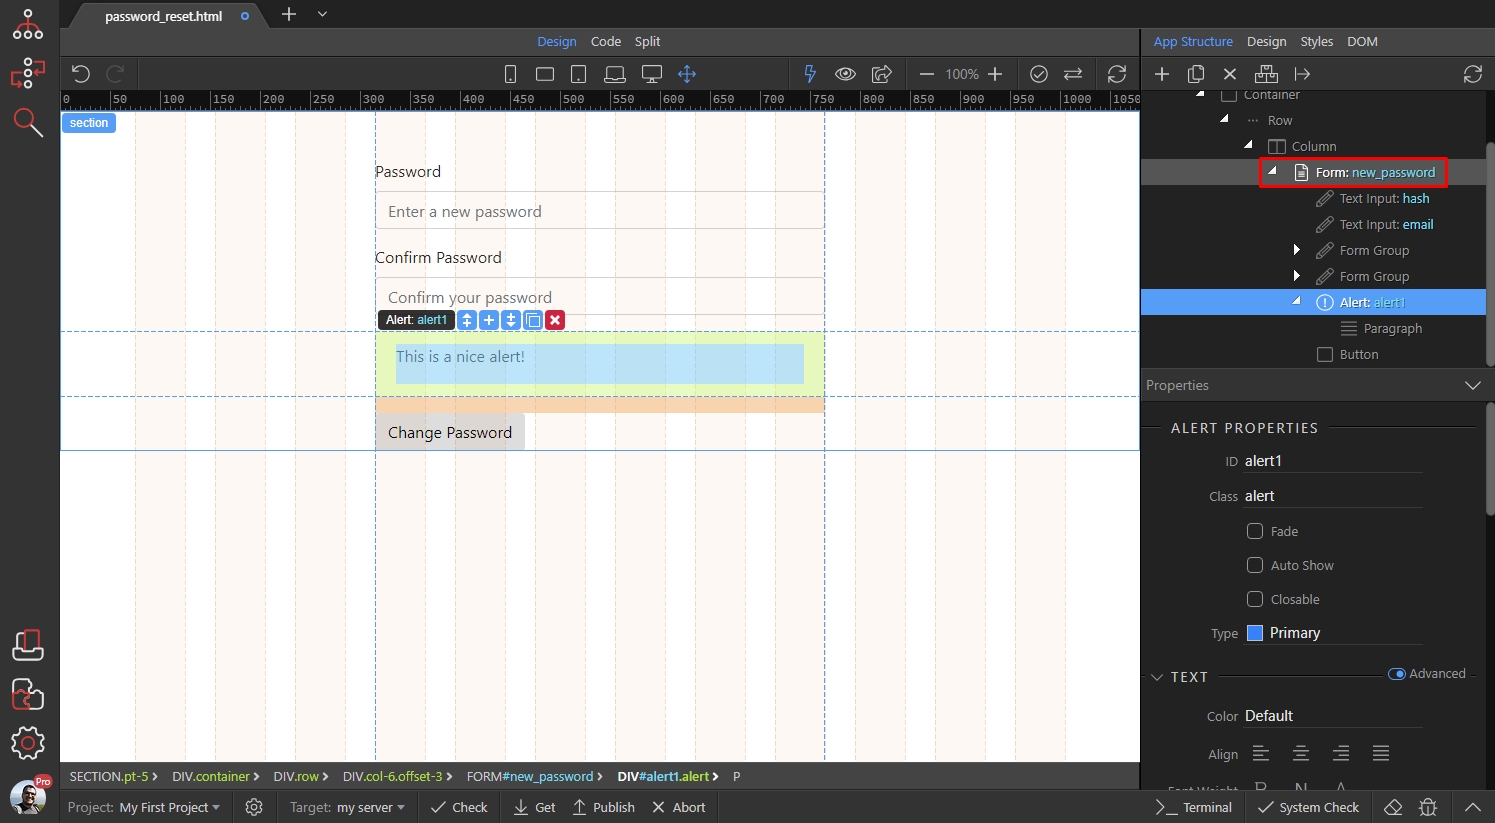
Click the Make Server Connect Form button:
Section titled “Click the Make Server Connect Form button:”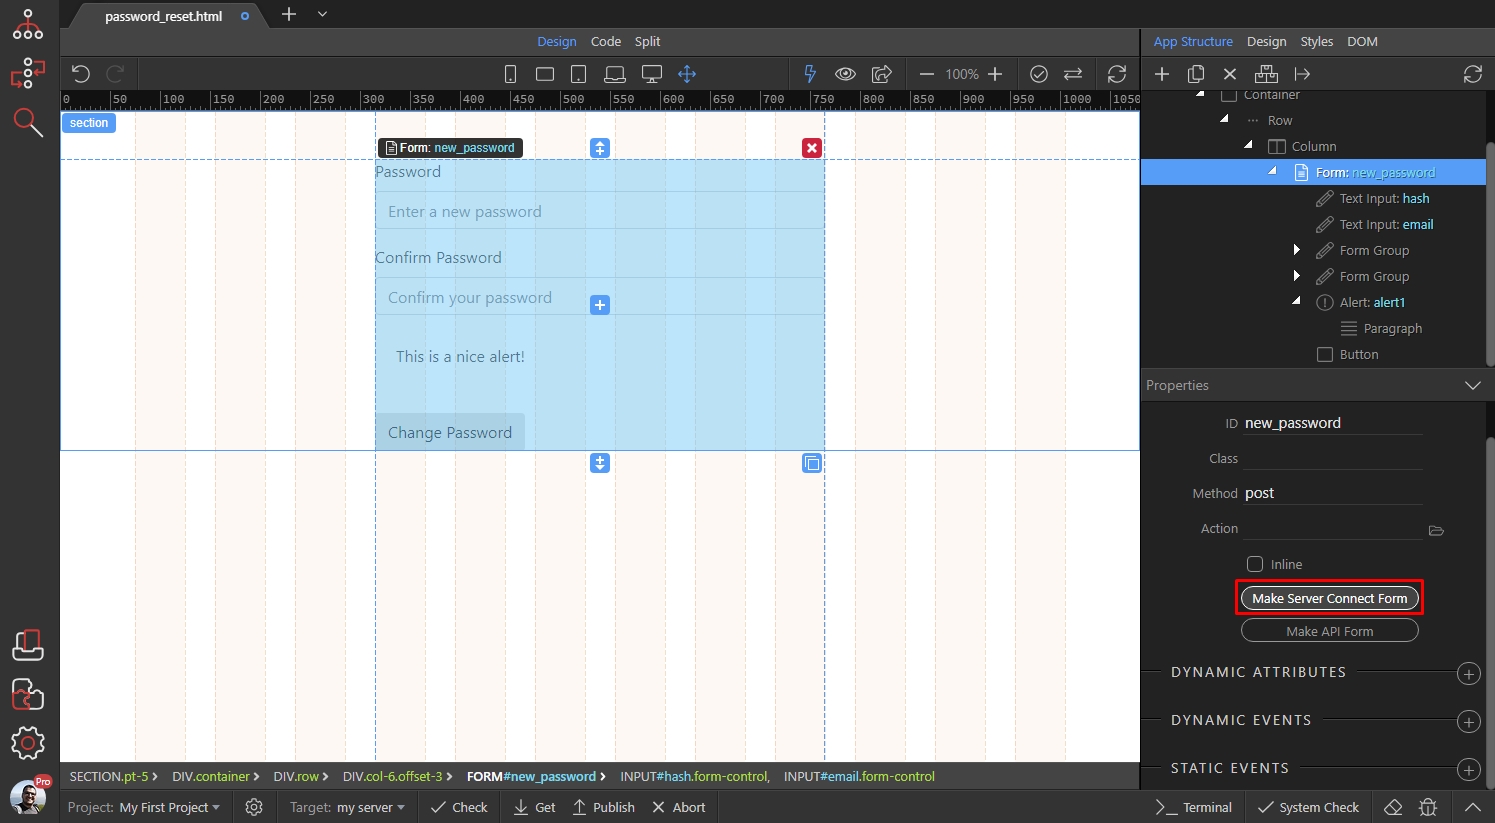
And click select server action:
Section titled “And click select server action:”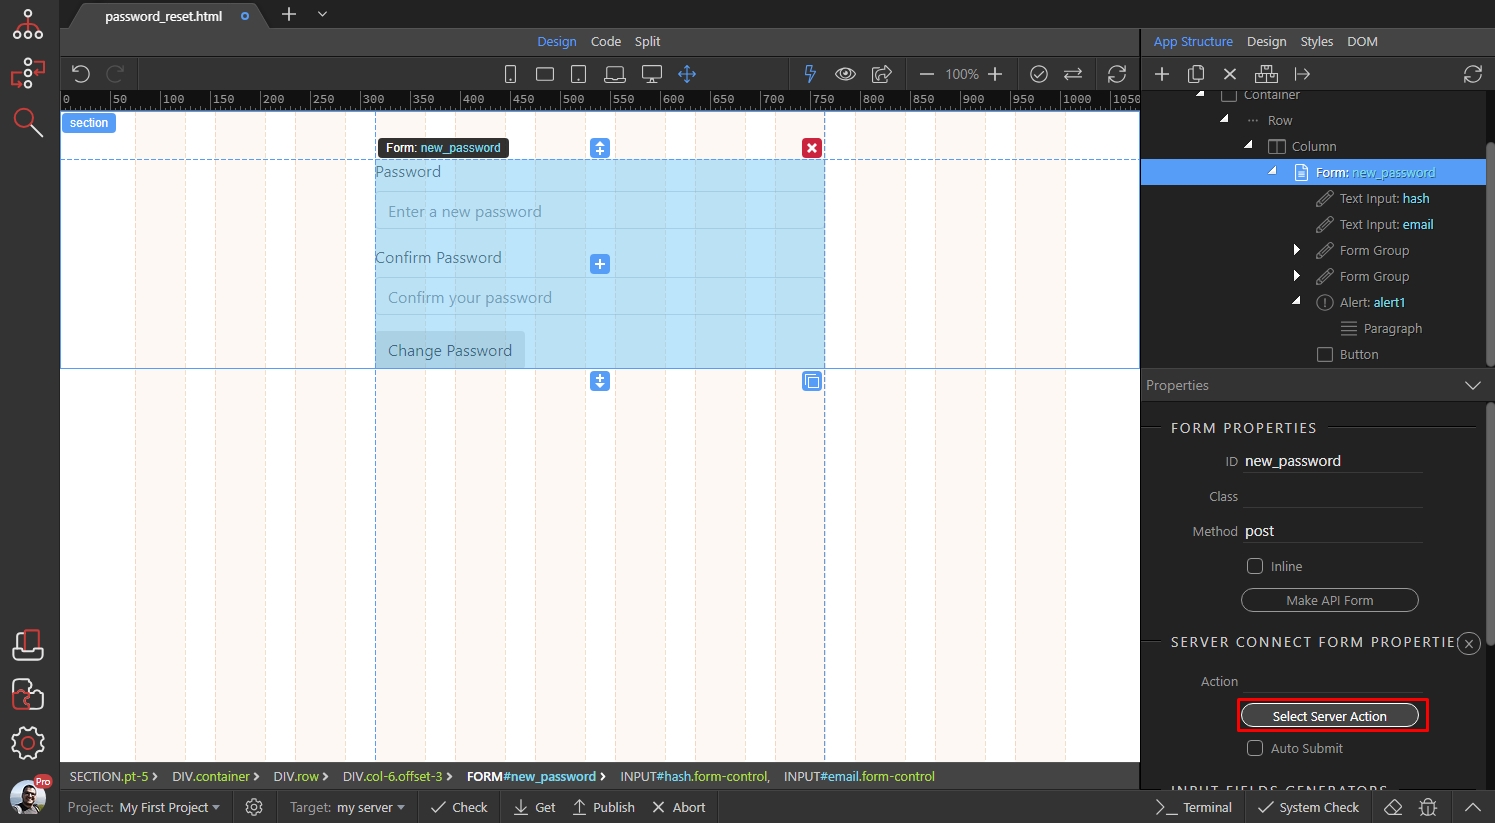
Select the update_password server action:
Section titled “Select the update_password server action:”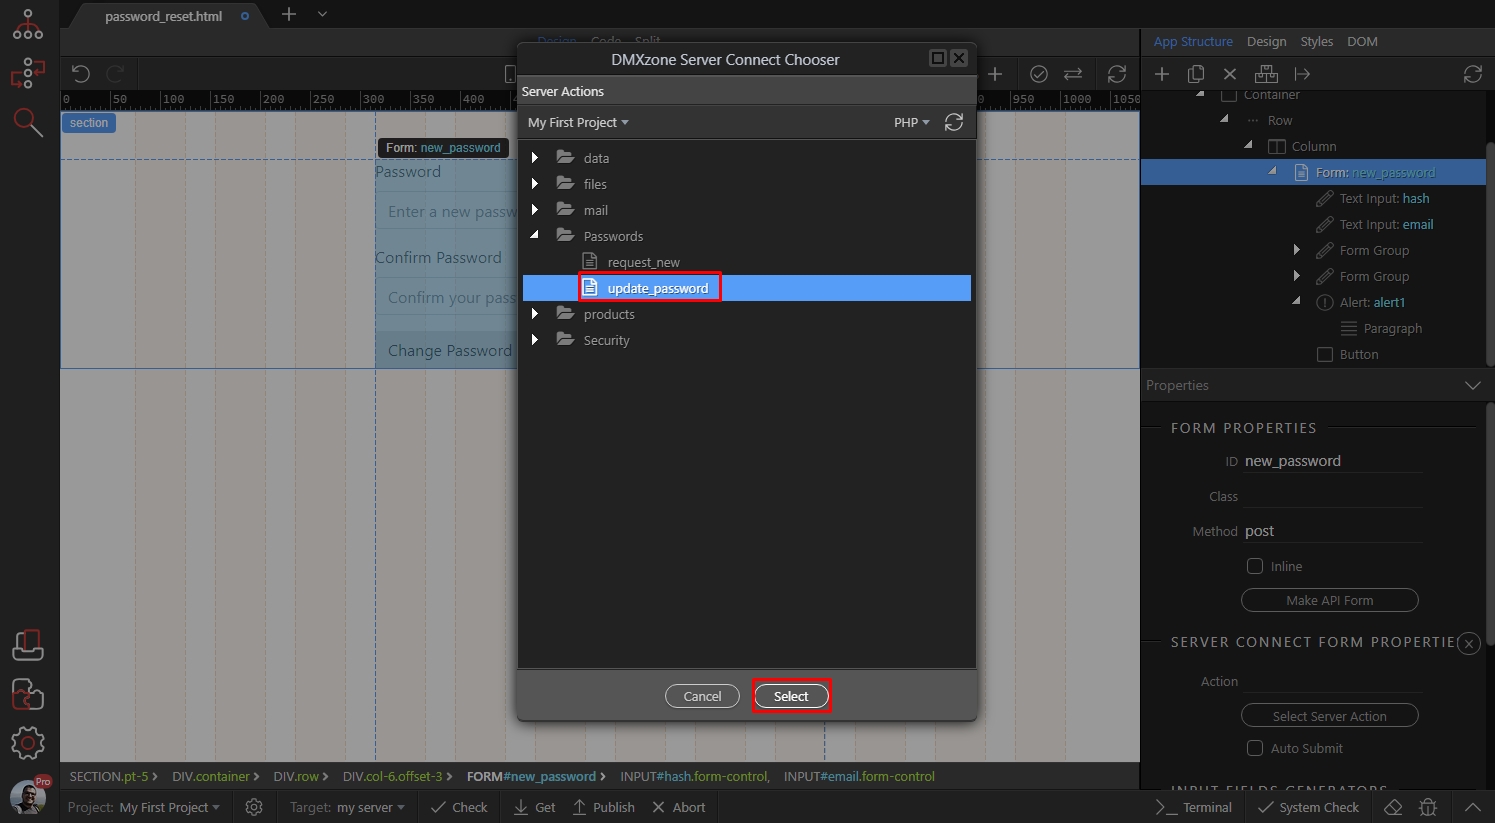
With the form still selected, add new dynamic event:
Section titled “With the form still selected, add new dynamic event:”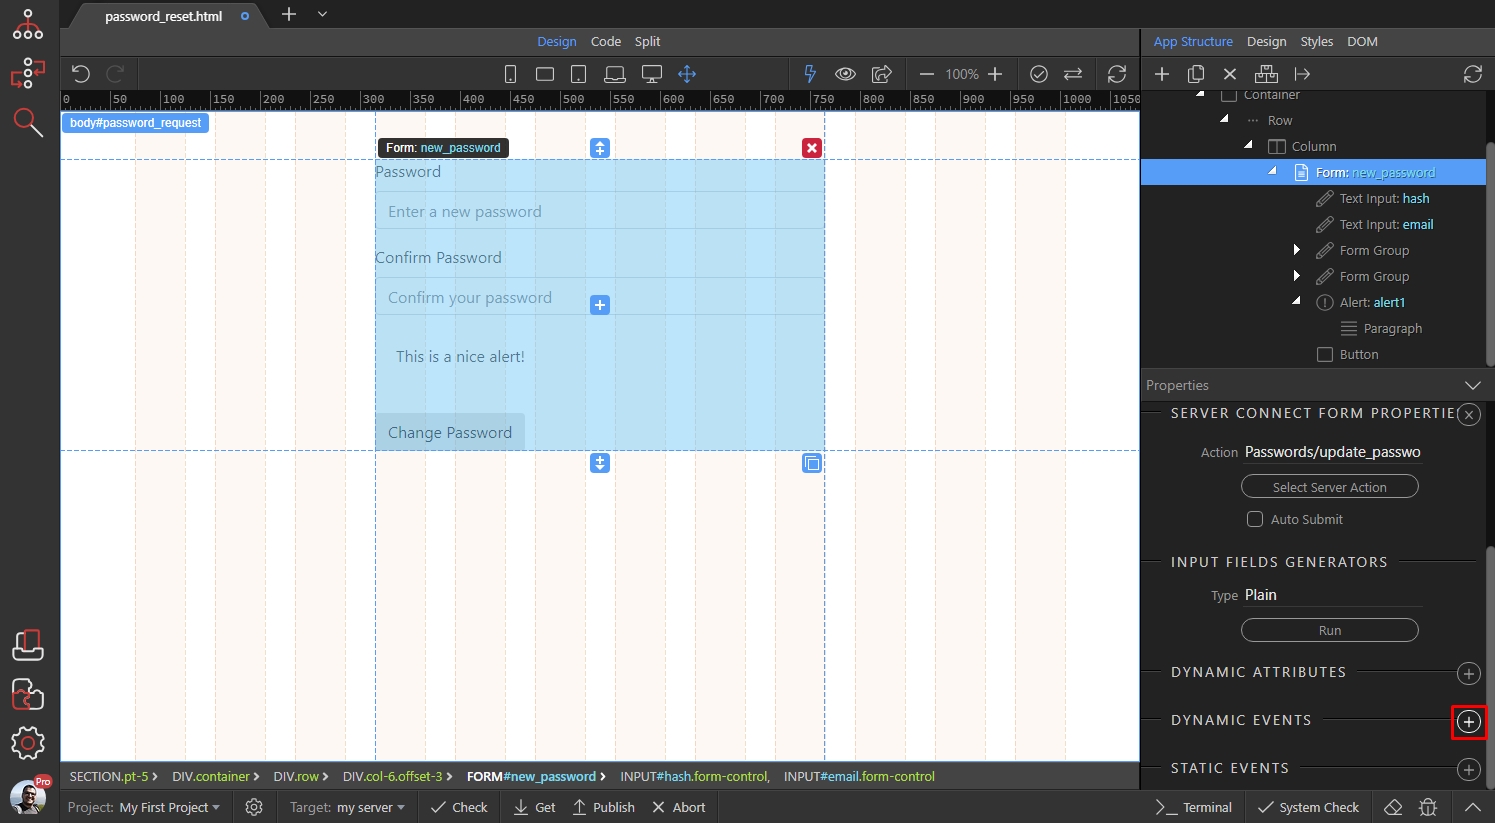
Step 91
Section titled “Step 91”Open Server Connect group and select Invalid. This event will be triggered by the response steps with status of 400, which we added in the server action:
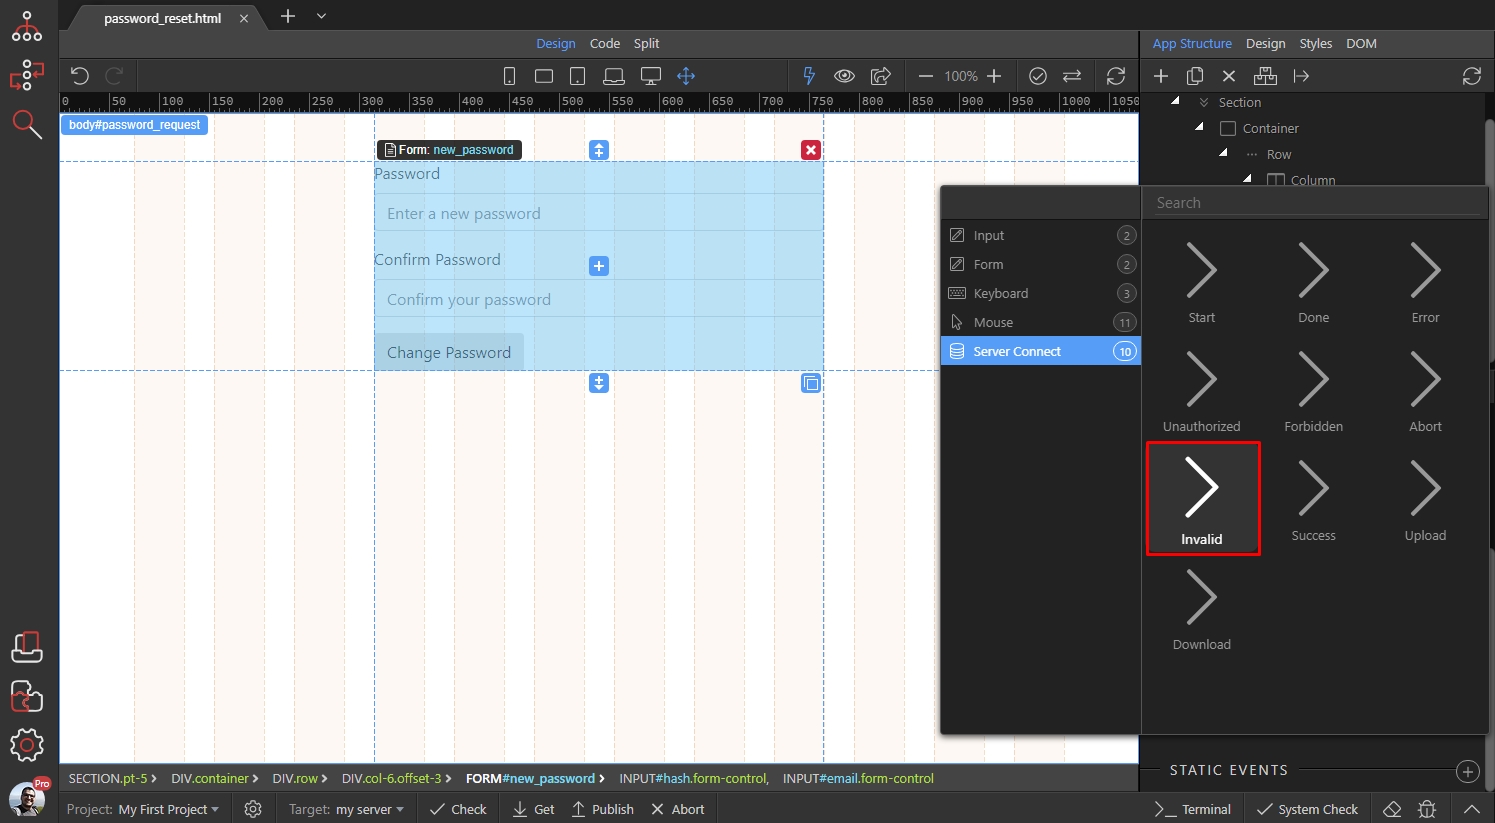
And click the dynamic action picker icon:
Section titled “And click the dynamic action picker icon:”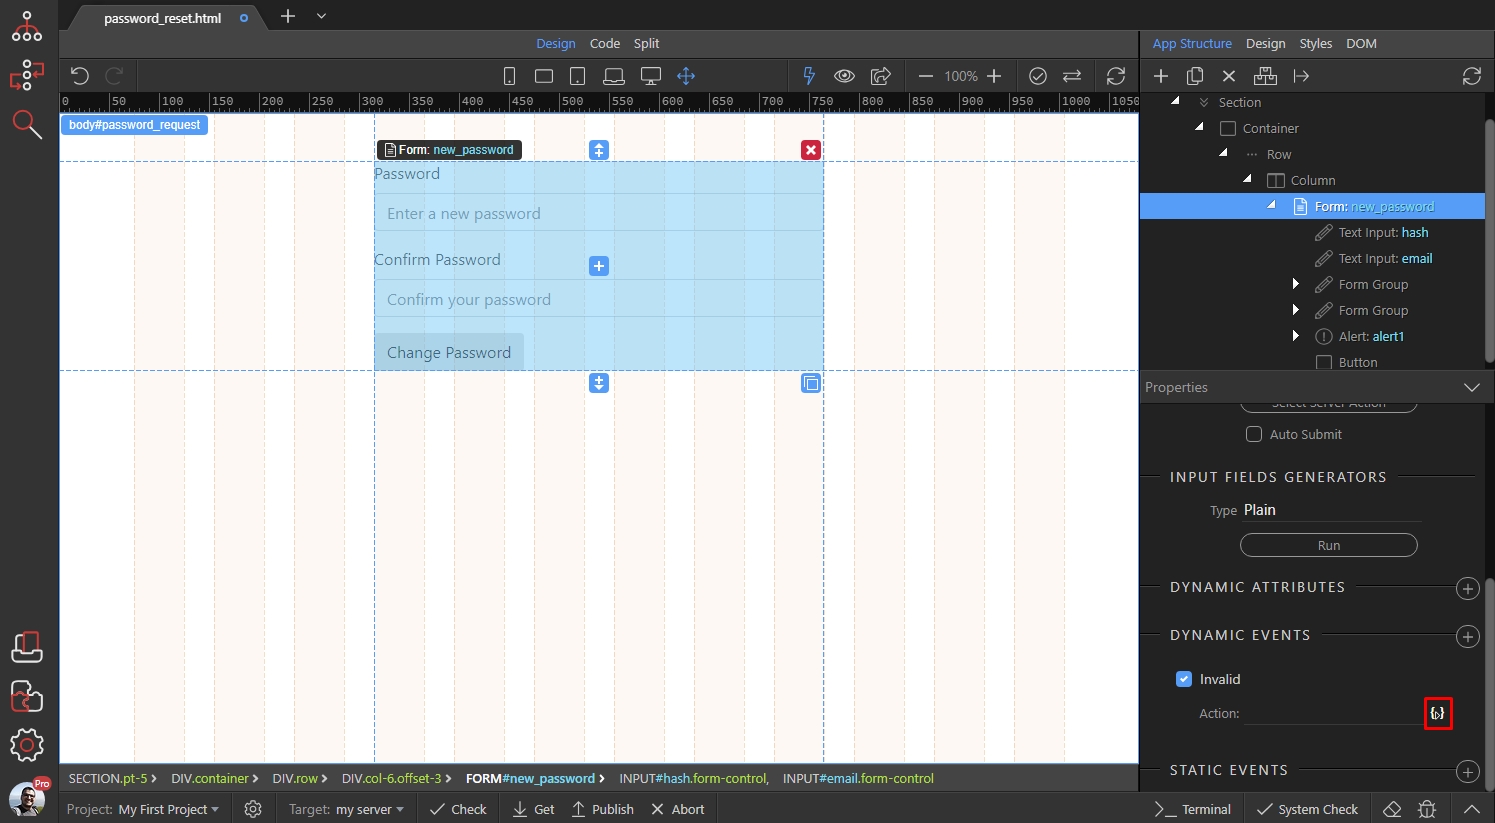
Under Alert, select Show and click the add button:
Section titled “Under Alert, select Show and click the add button:”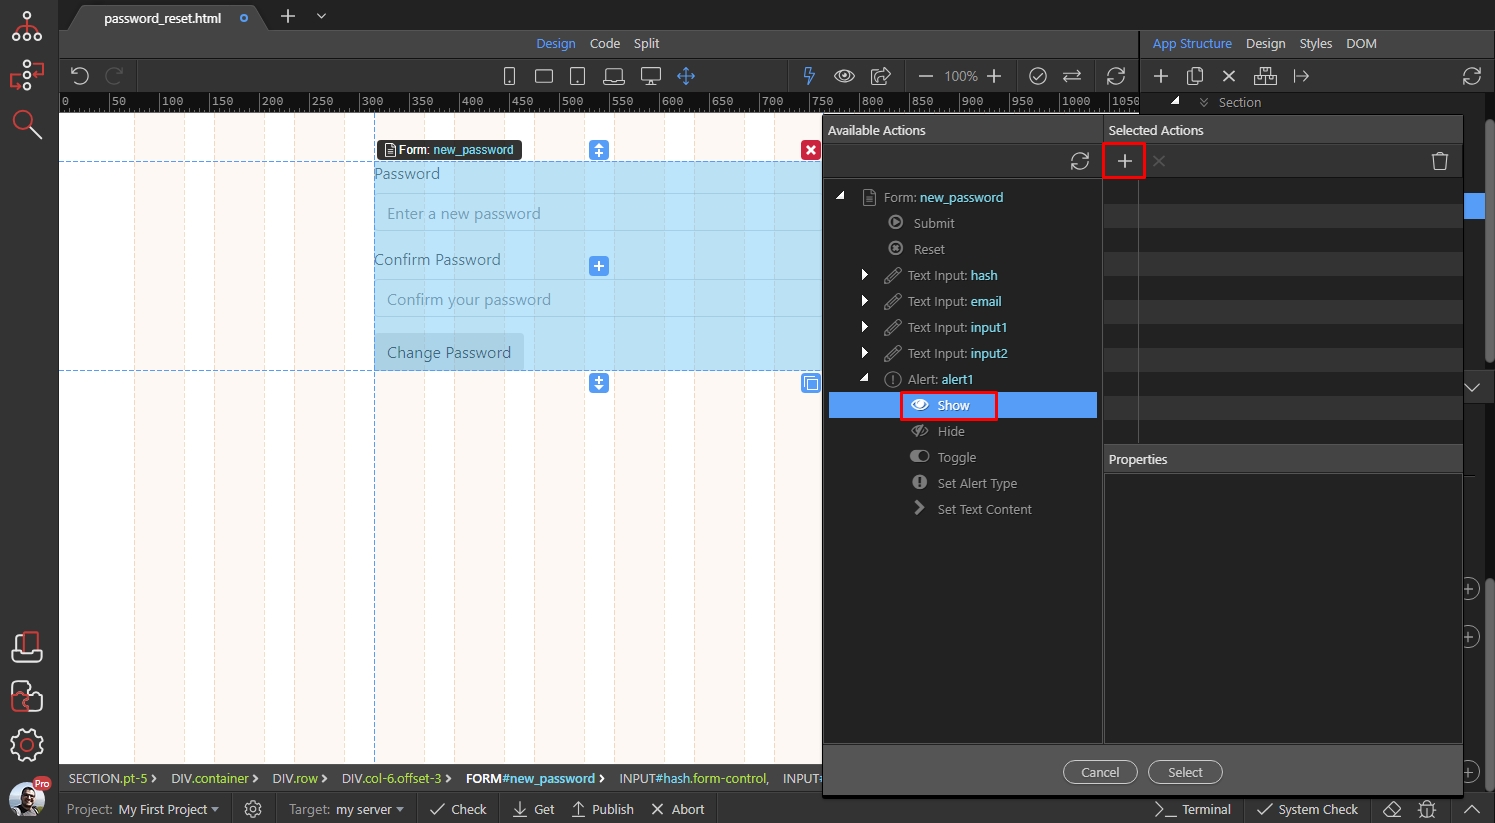
Then add the Set Alert Type action:
Section titled “Then add the Set Alert Type action:”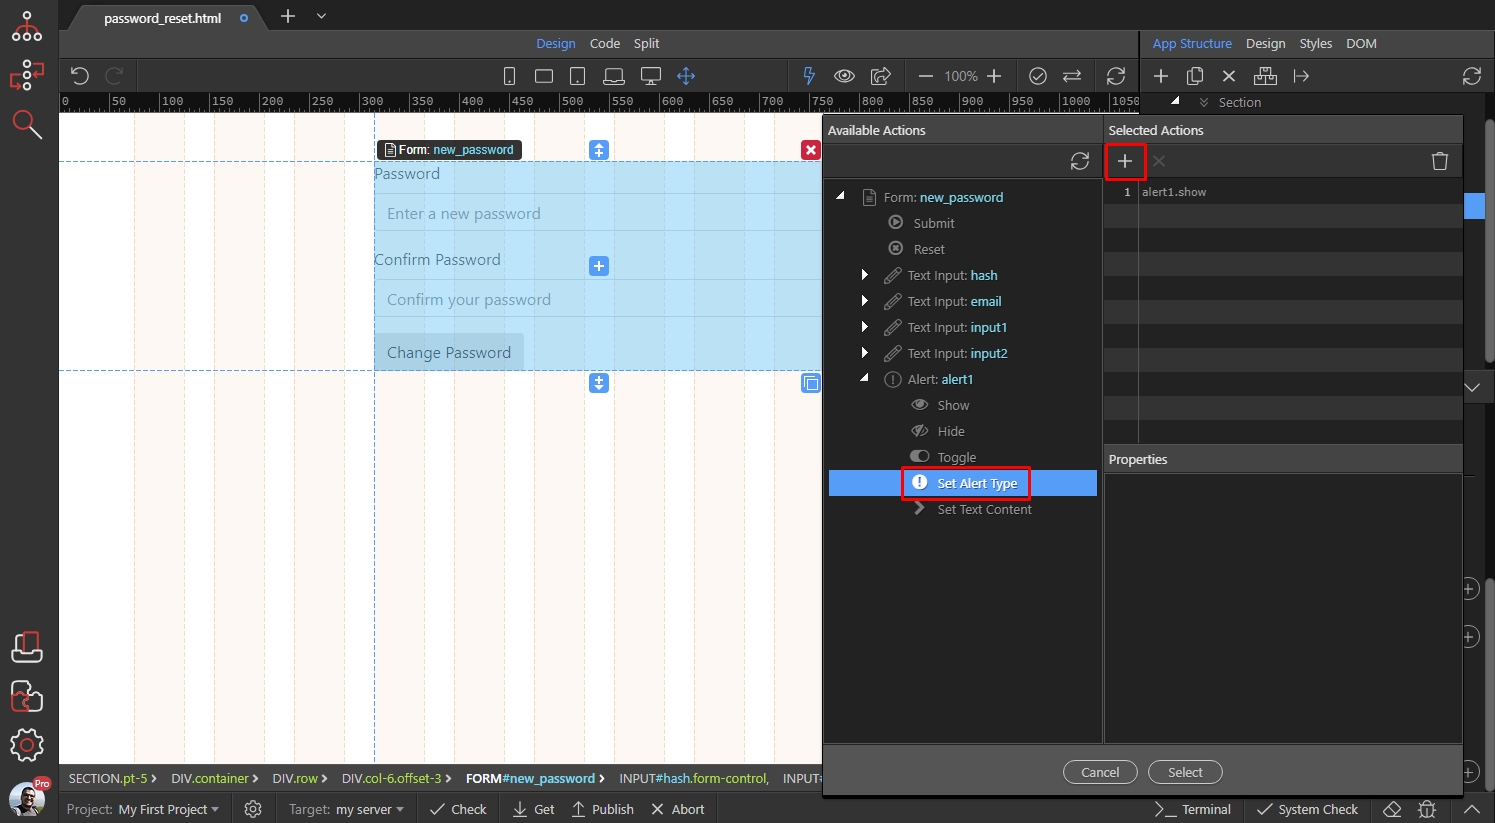
We set the alert type to Danger (red):
Section titled “We set the alert type to Danger (red):”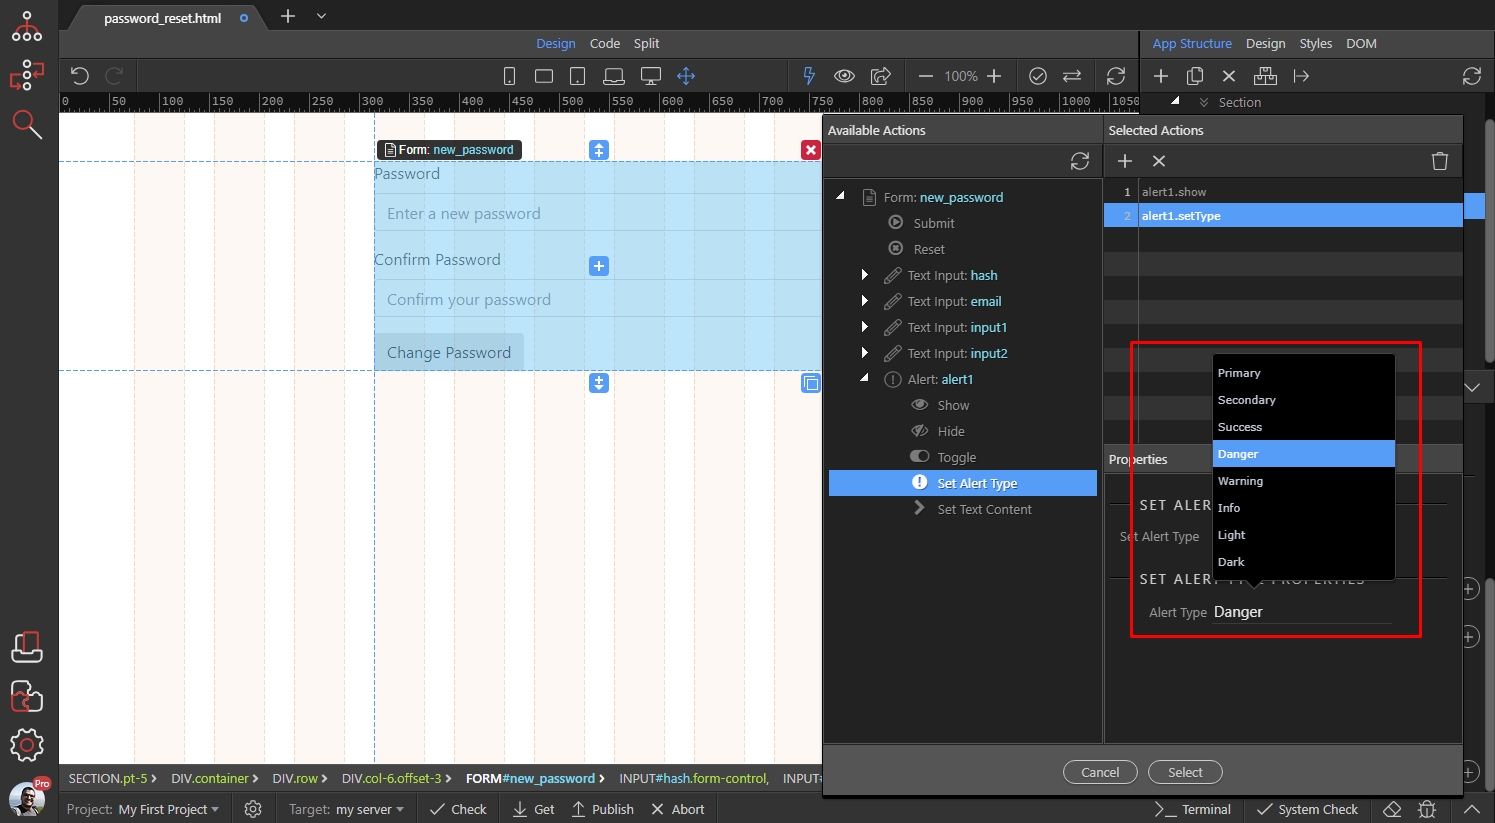
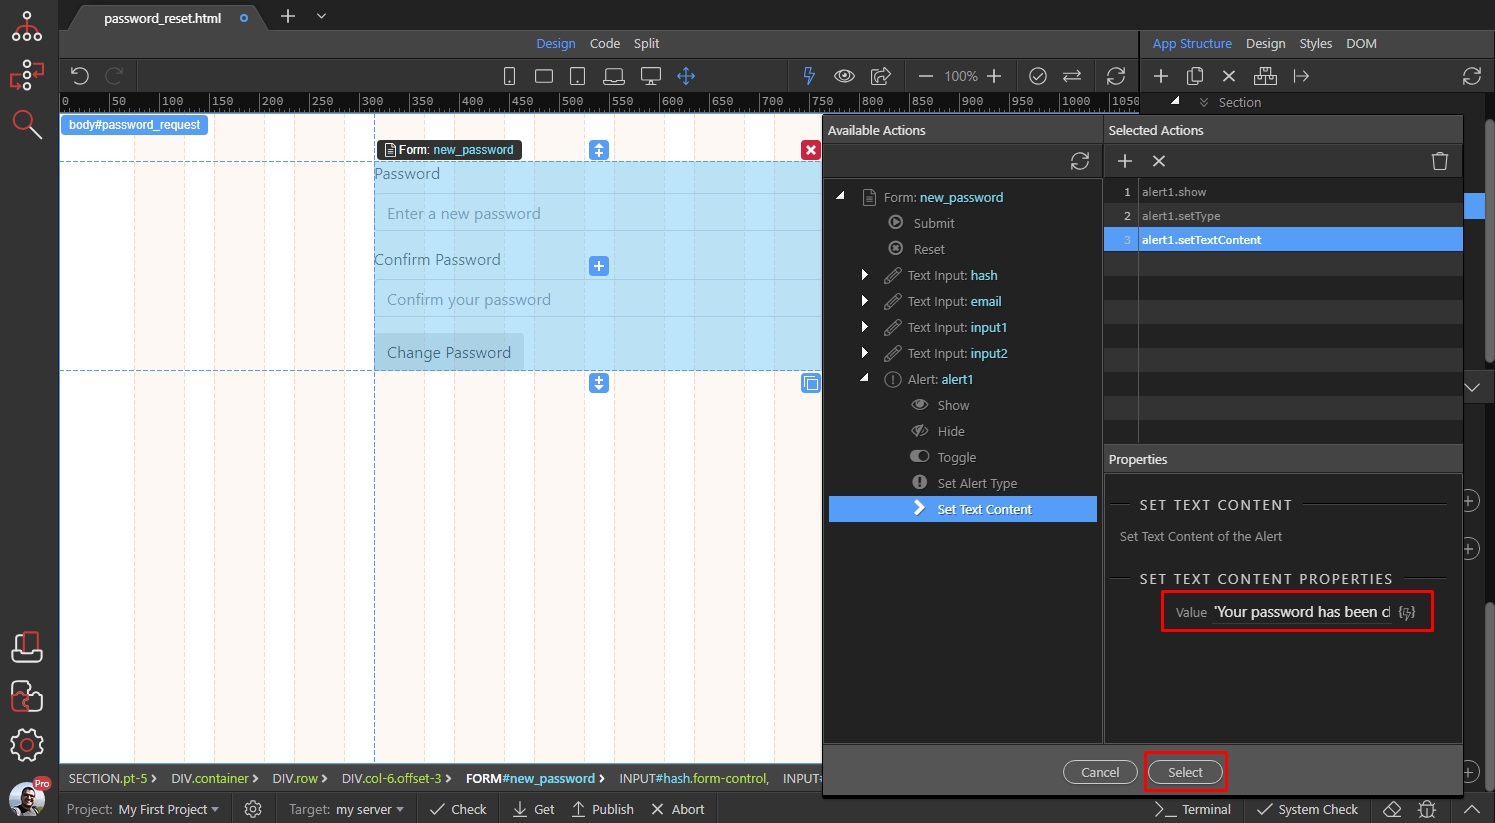
And then we add the Set Text Content action:
Section titled “And then we add the Set Text Content action:”
Select a dynamic value for this action:
Section titled “Select a dynamic value for this action:”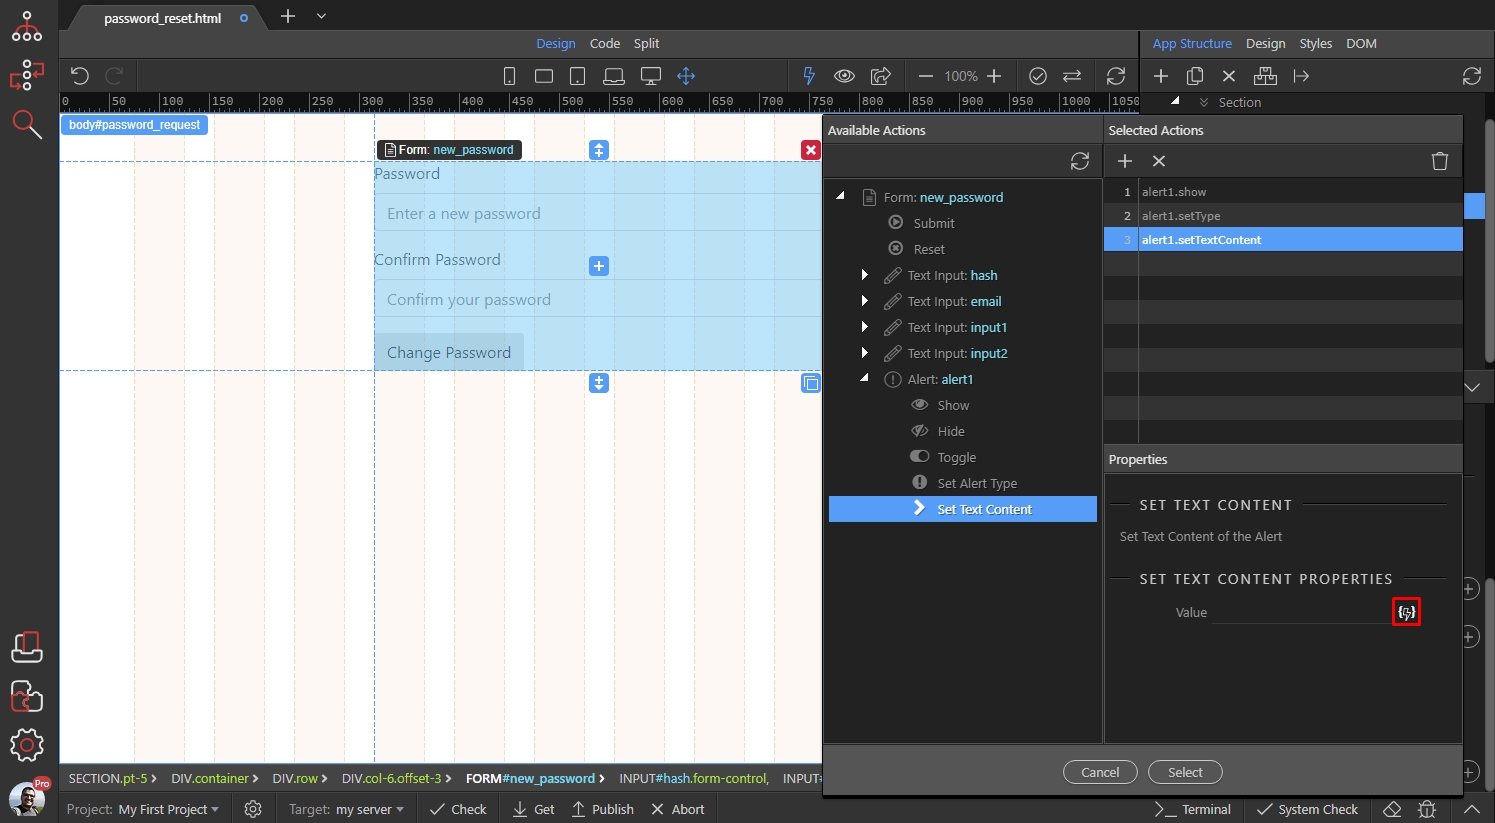
Step 98
Section titled “Step 98”We want to show the custom error messages, which we added in the response steps. So, under your form open lastError and select response:
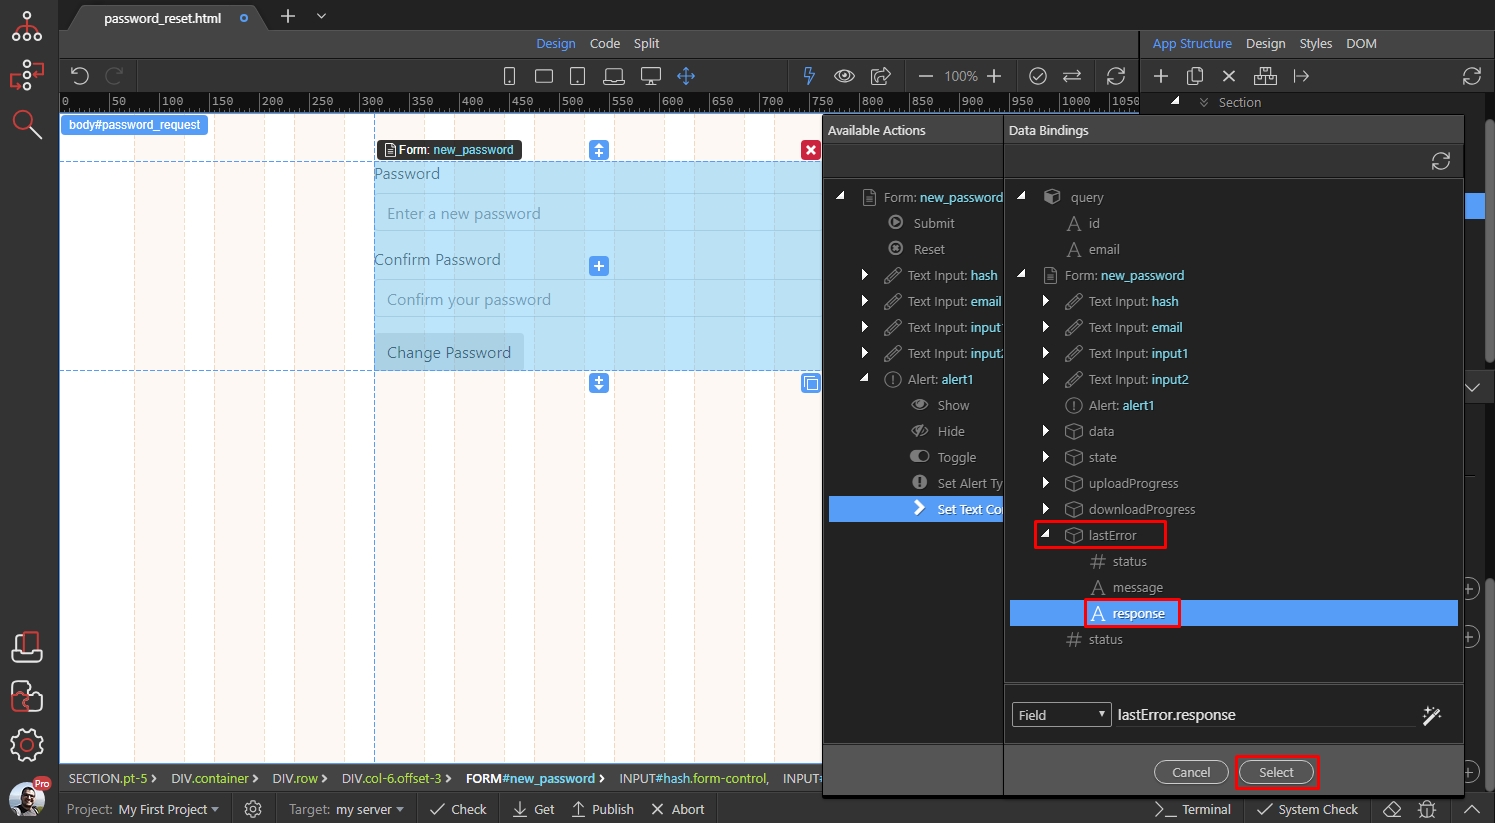
Click select:
Section titled “Click select:”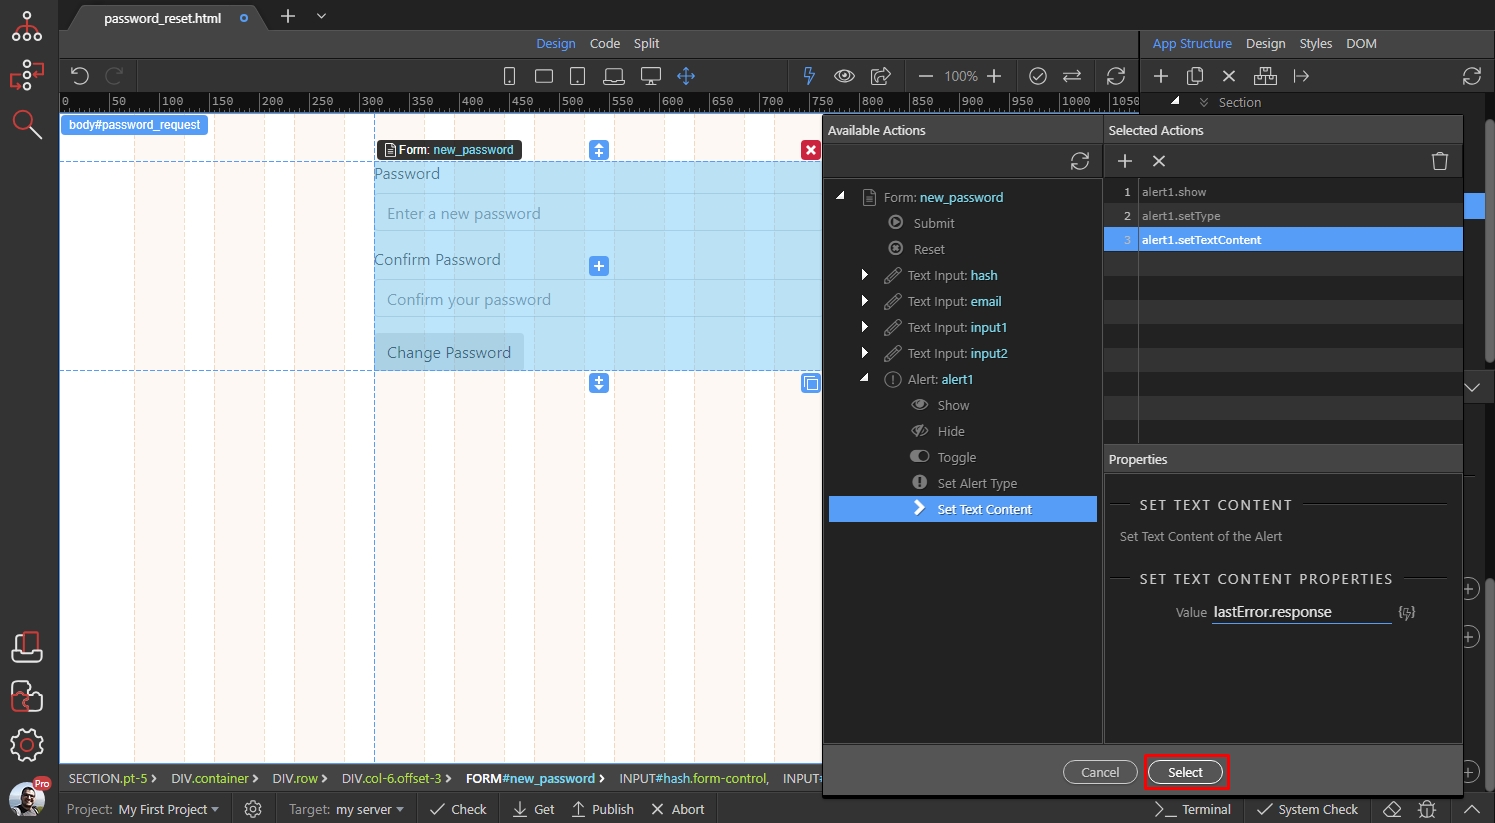
We are done with the error alerts, now let’s add a success one. Add new Dynamic Event:
Section titled “We are done with the error alerts, now let’s add a success one. Add new Dynamic Event:”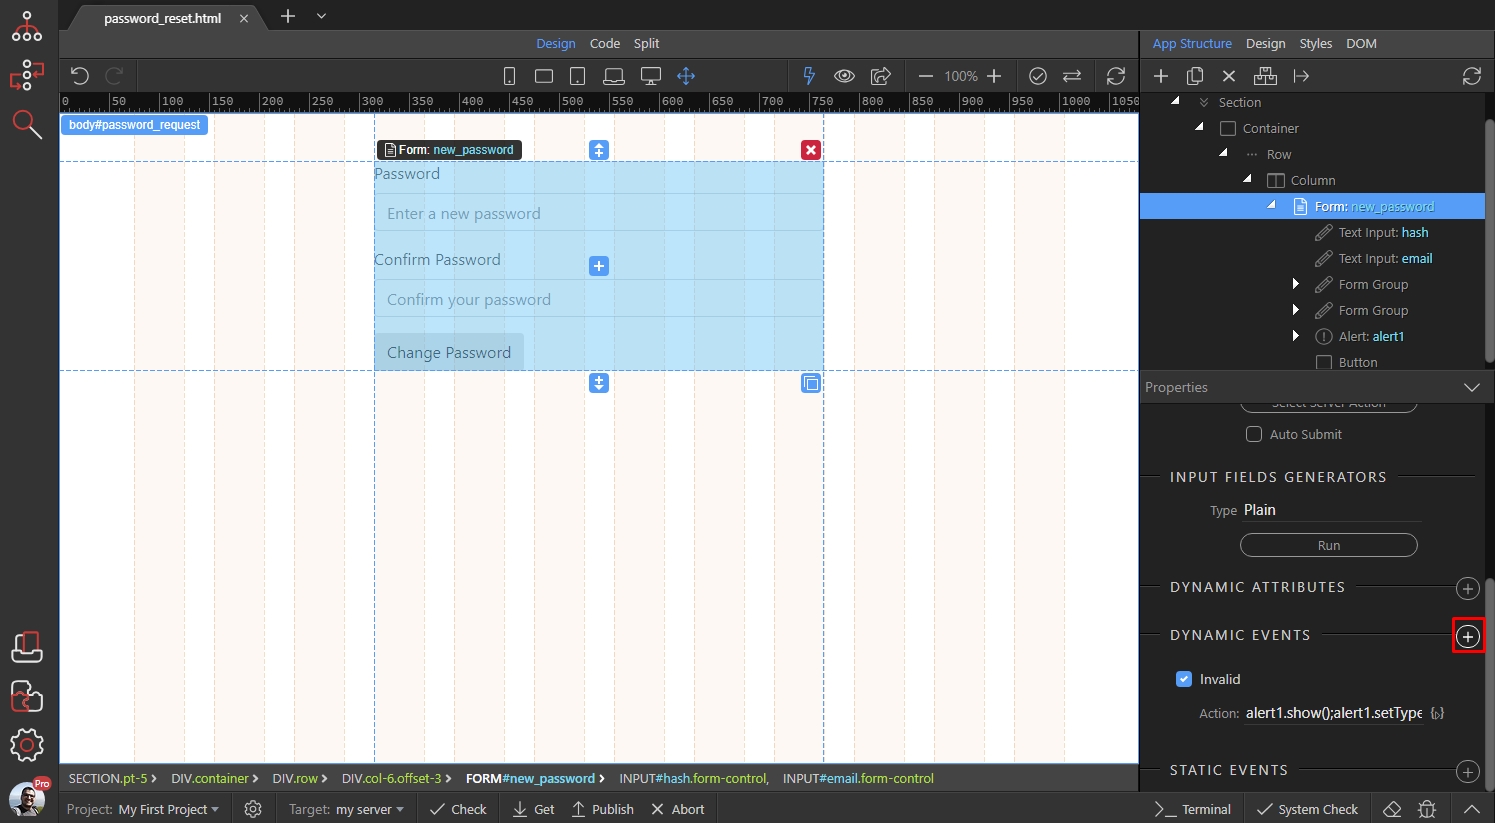
Open Server Connect and click Success:
Section titled “Open Server Connect and click Success:”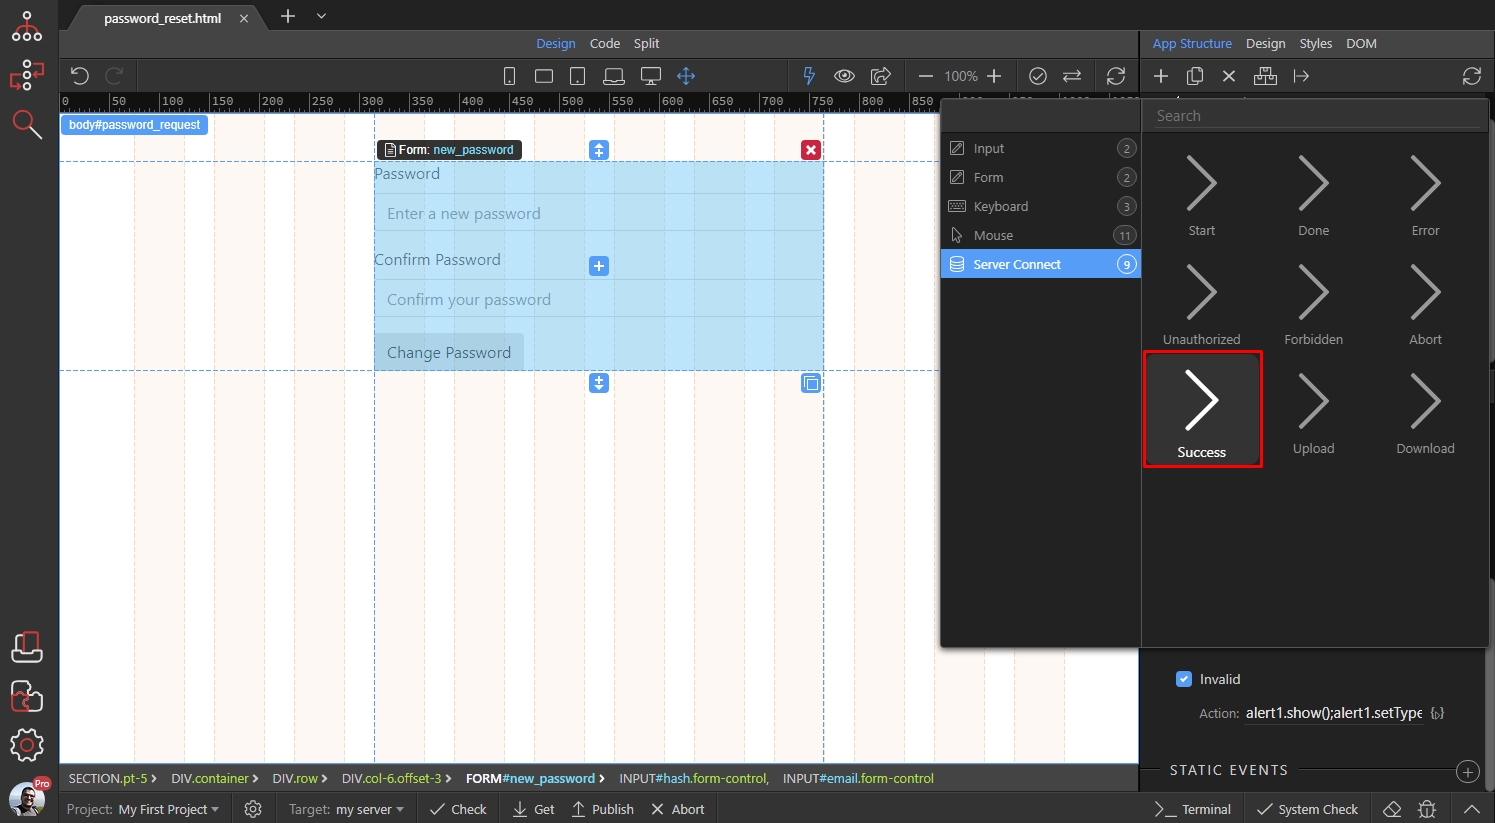
Click the dynamic action picker button:
Section titled “Click the dynamic action picker button:”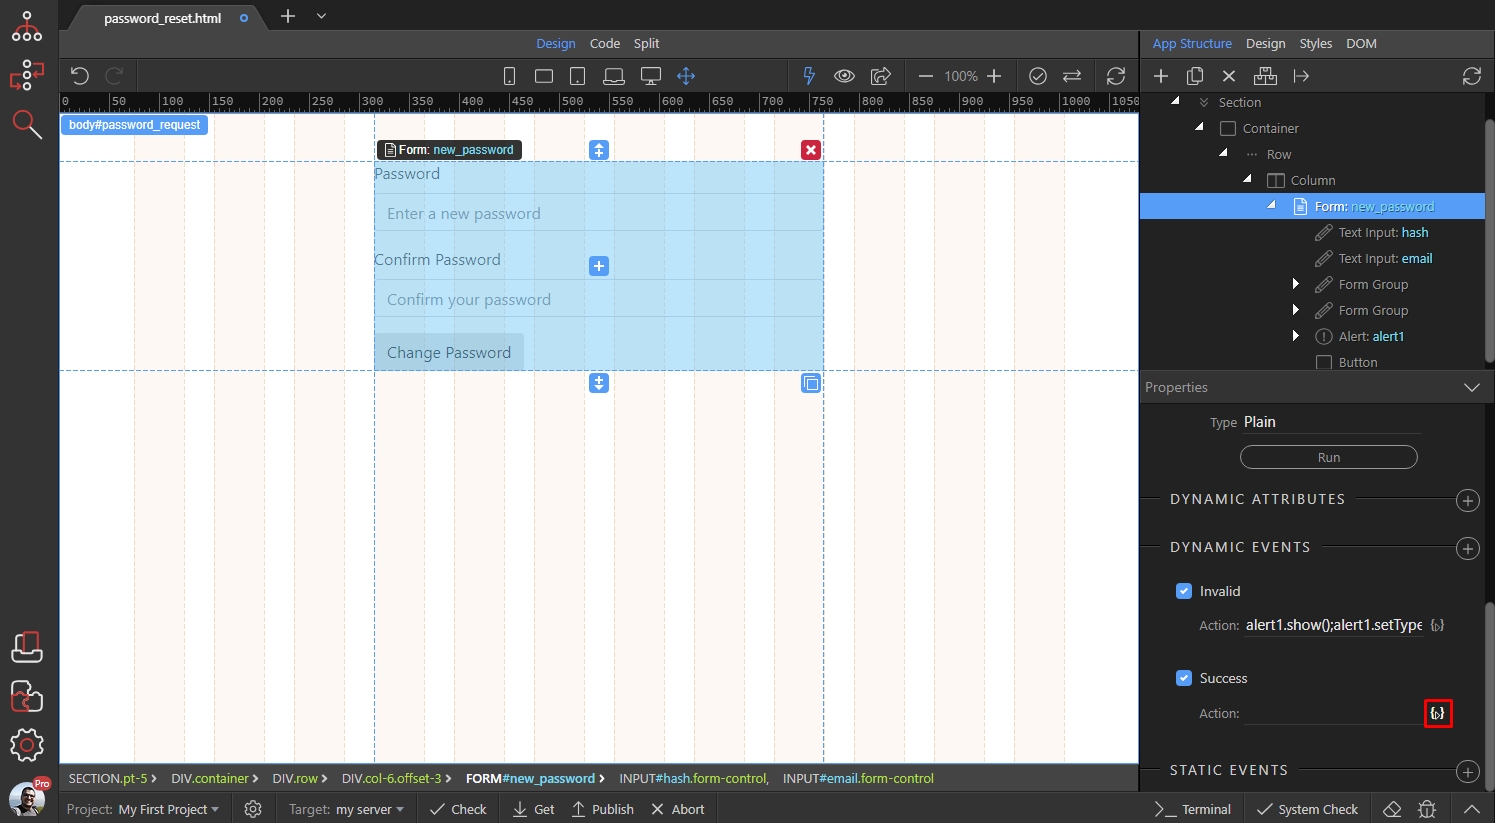
Under Alert, select the Show action and add it:
Section titled “Under Alert, select the Show action and add it:”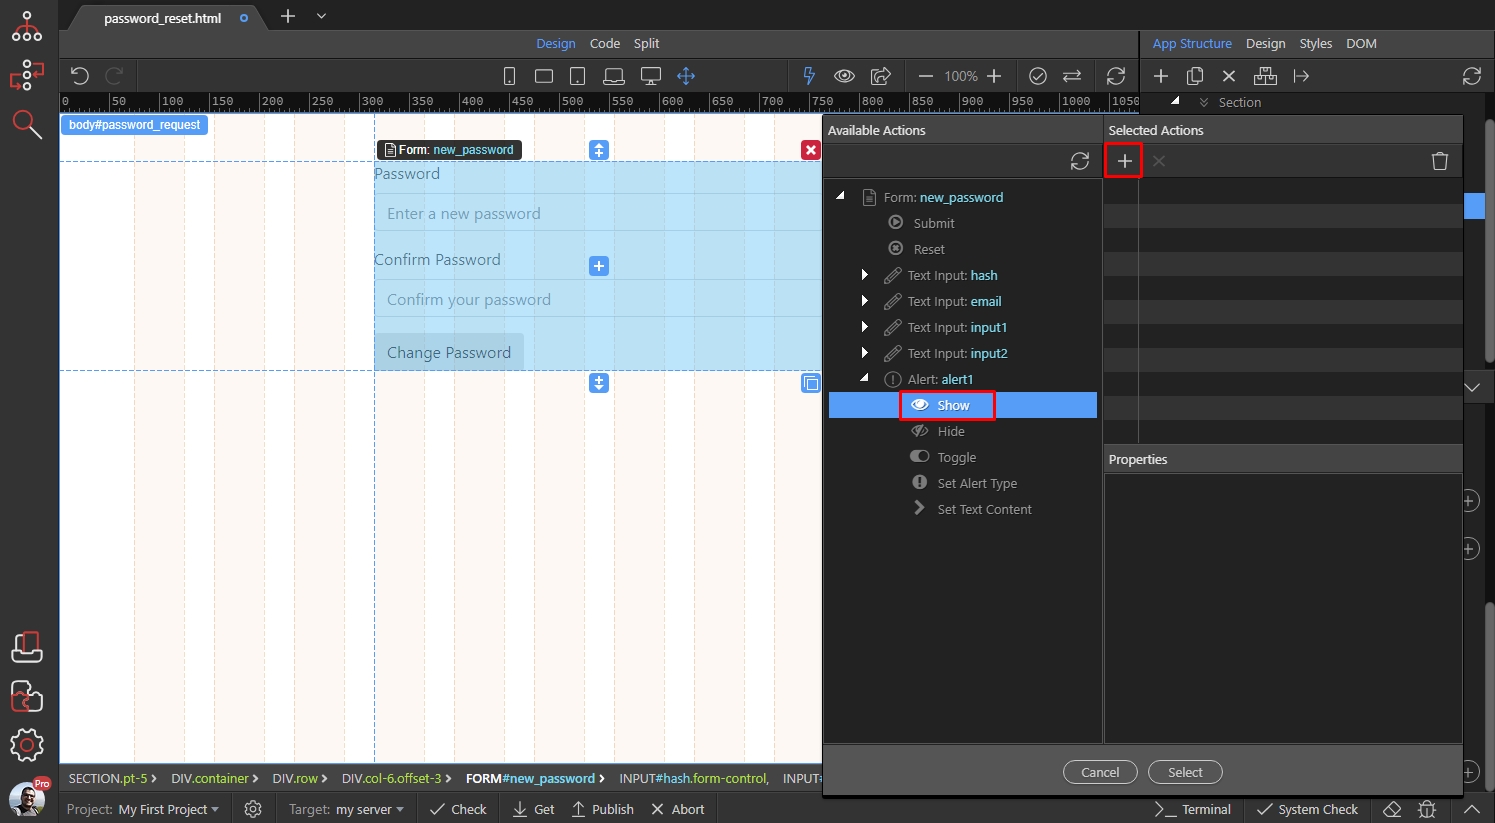
Then add the Set Alert Type action:
Section titled “Then add the Set Alert Type action:”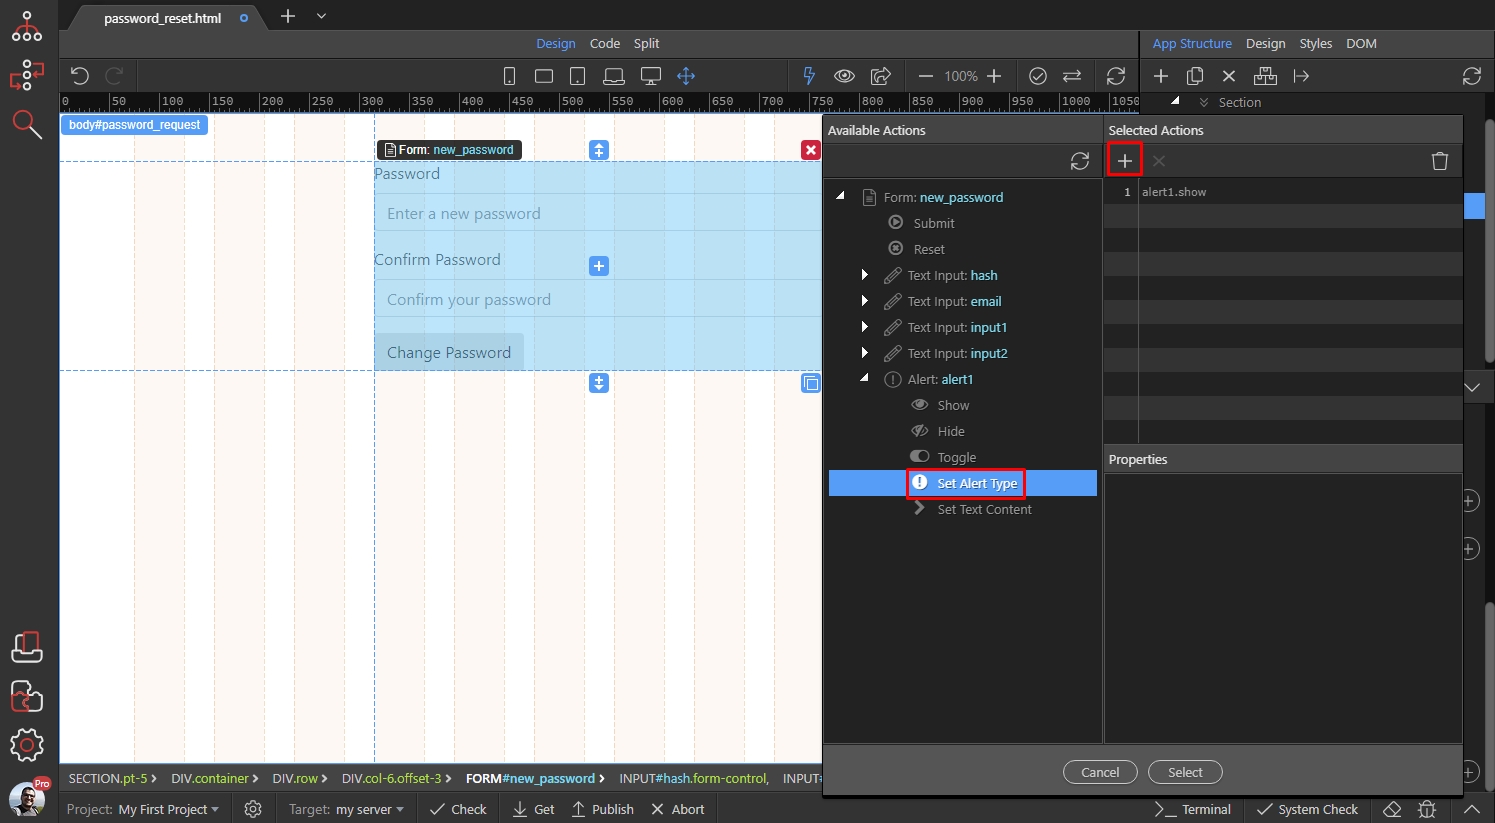
We set its type to Success (green):
Section titled “We set its type to Success (green):”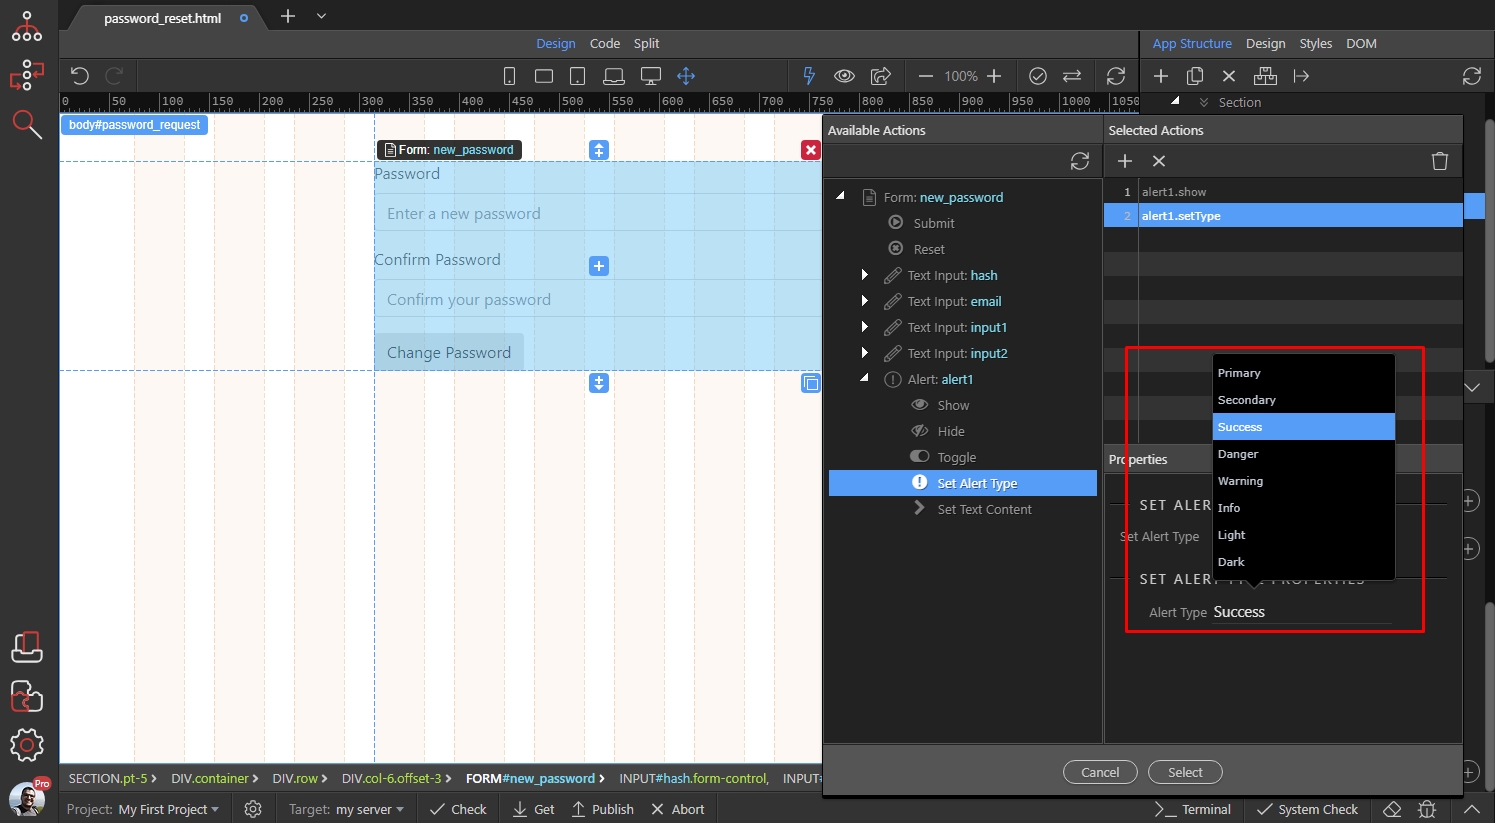
And then we add the Set Text Content action:
Section titled “And then we add the Set Text Content action:”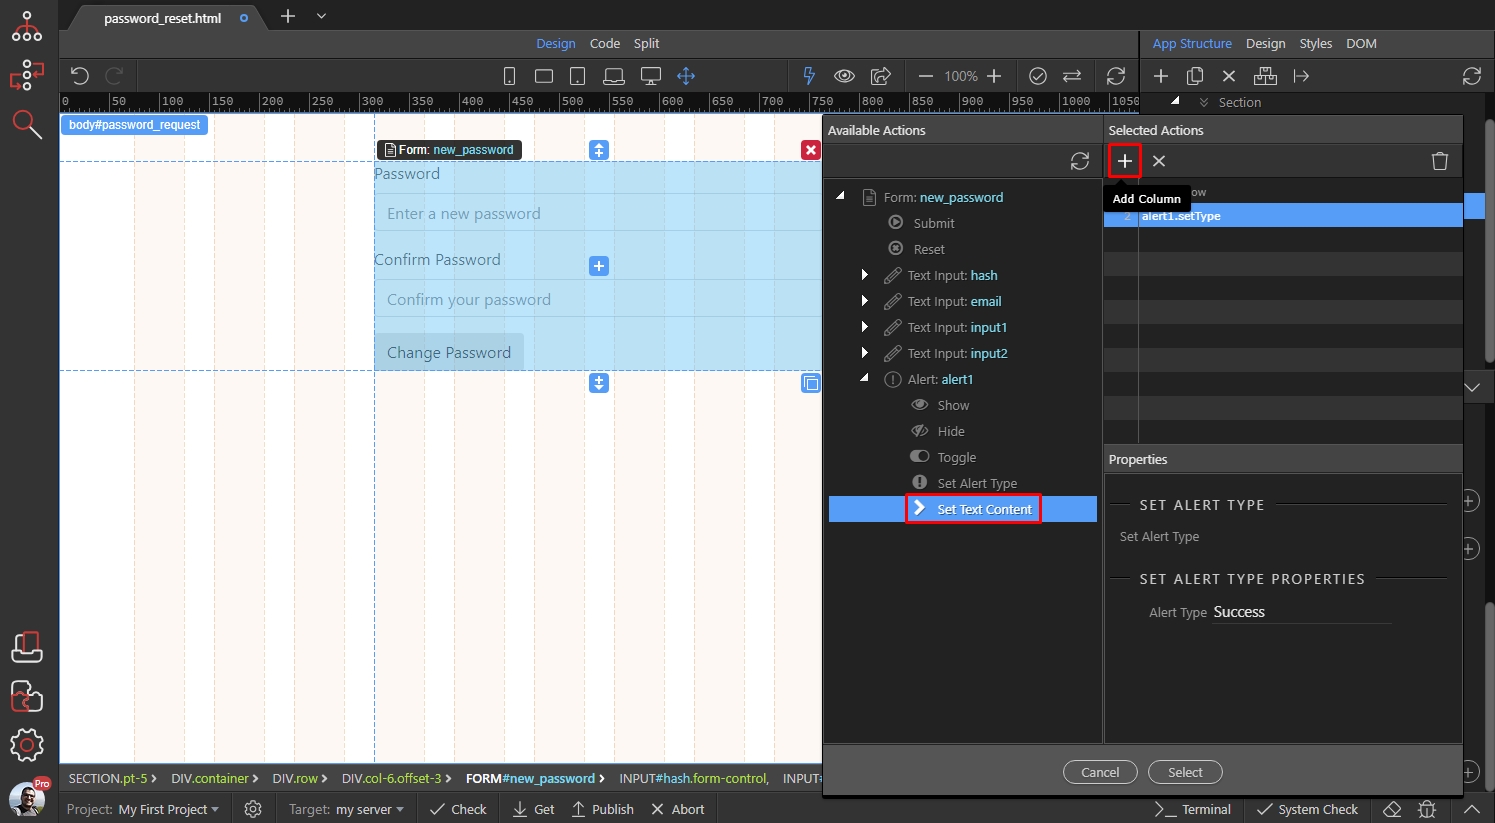
Step 107
Section titled “Step 107”Enter the text that should be displayed, when the password has successfully been changed. Make sure to wrap it in single quotes, when you enter static text: 'Your password has been changed!'