
Using OAuth2 Connector with Google
Overview Using the OAuth2 Connector in Wappler you can add a “social login” option to your website, so the users can directly log in using their Google account. In this tutorial, we will show you how
Overview
Section titled “Overview”Using the OAuth2 Connector in Wappler you can add a “social login” option to your website, so the users can directly log in using their Google account.
In this tutorial, we will show you how to create accounts for new users and also how to log the registered users in, using their Google account data - like email and Google ID.
Setting up a google developer account
Section titled “Setting up a google developer account”First, go to https://developers.google.com/identity/sign-in/web/sign-in and sign in using your Google account.
Create new project
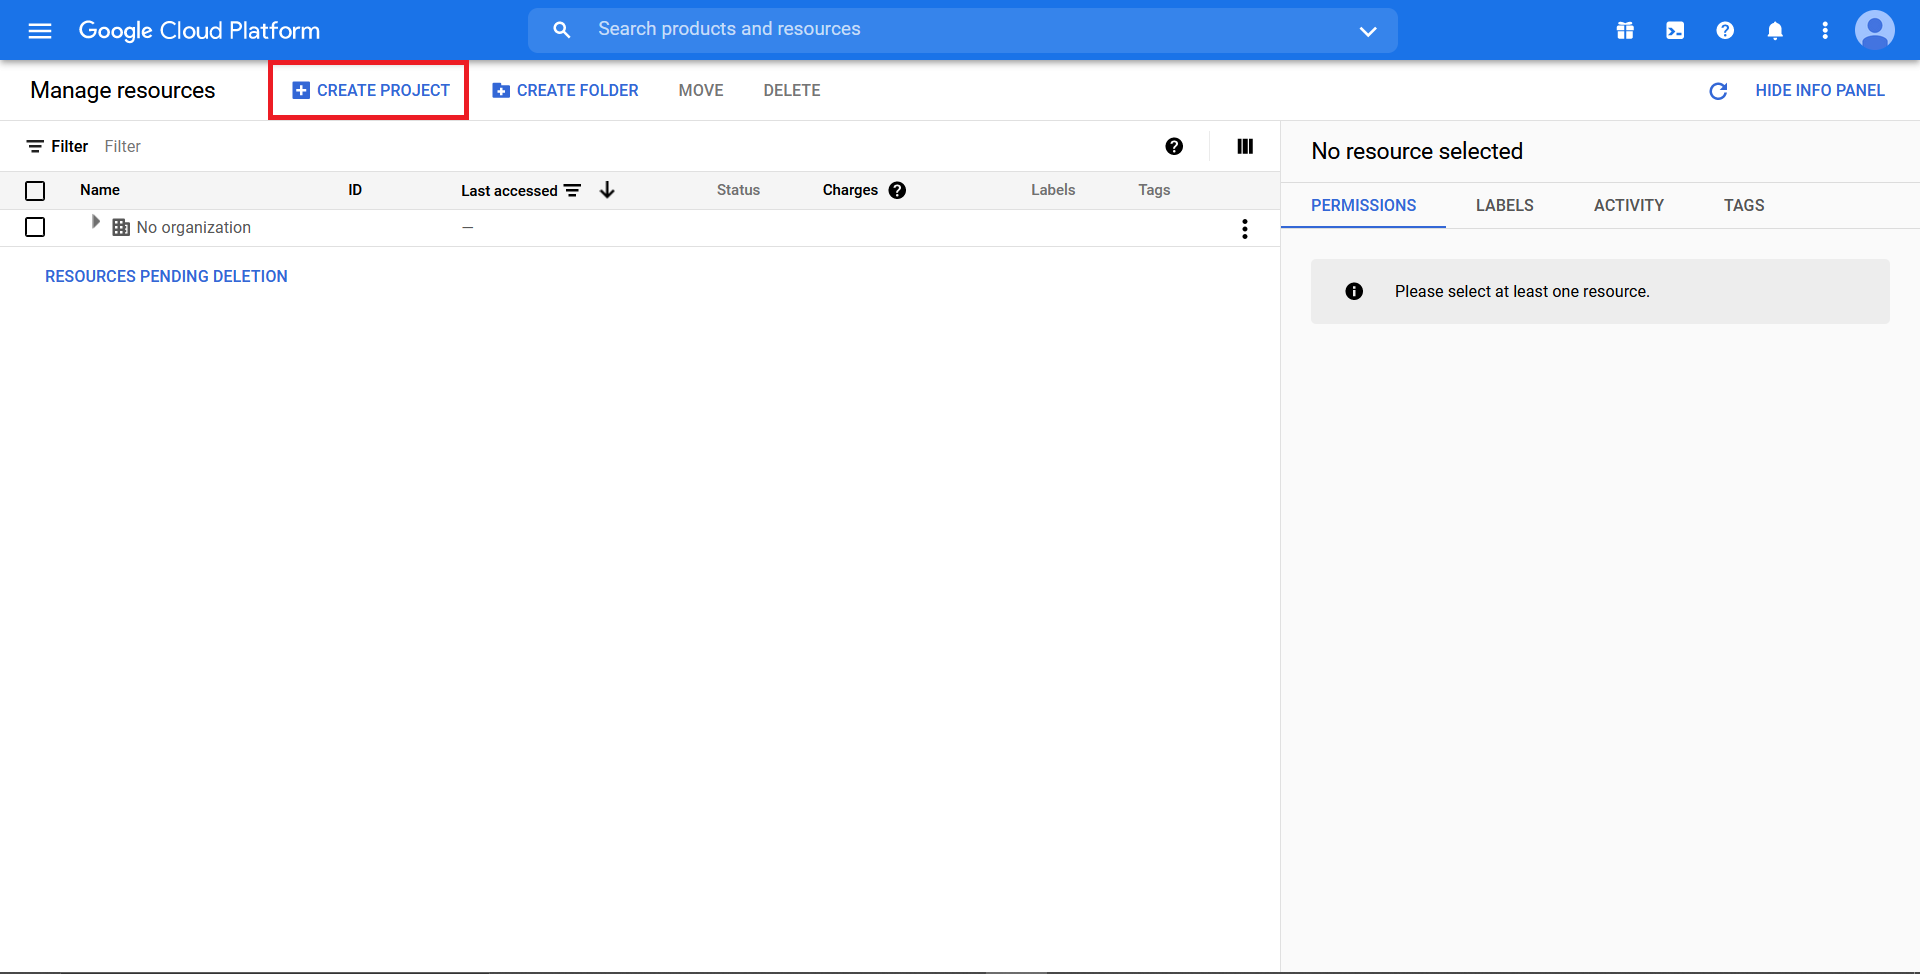
Section titled “Create new project”Then, got to https://console.cloud.google.com. A website similar to the screenshot below will open, and click “Create Project”.
Step 5
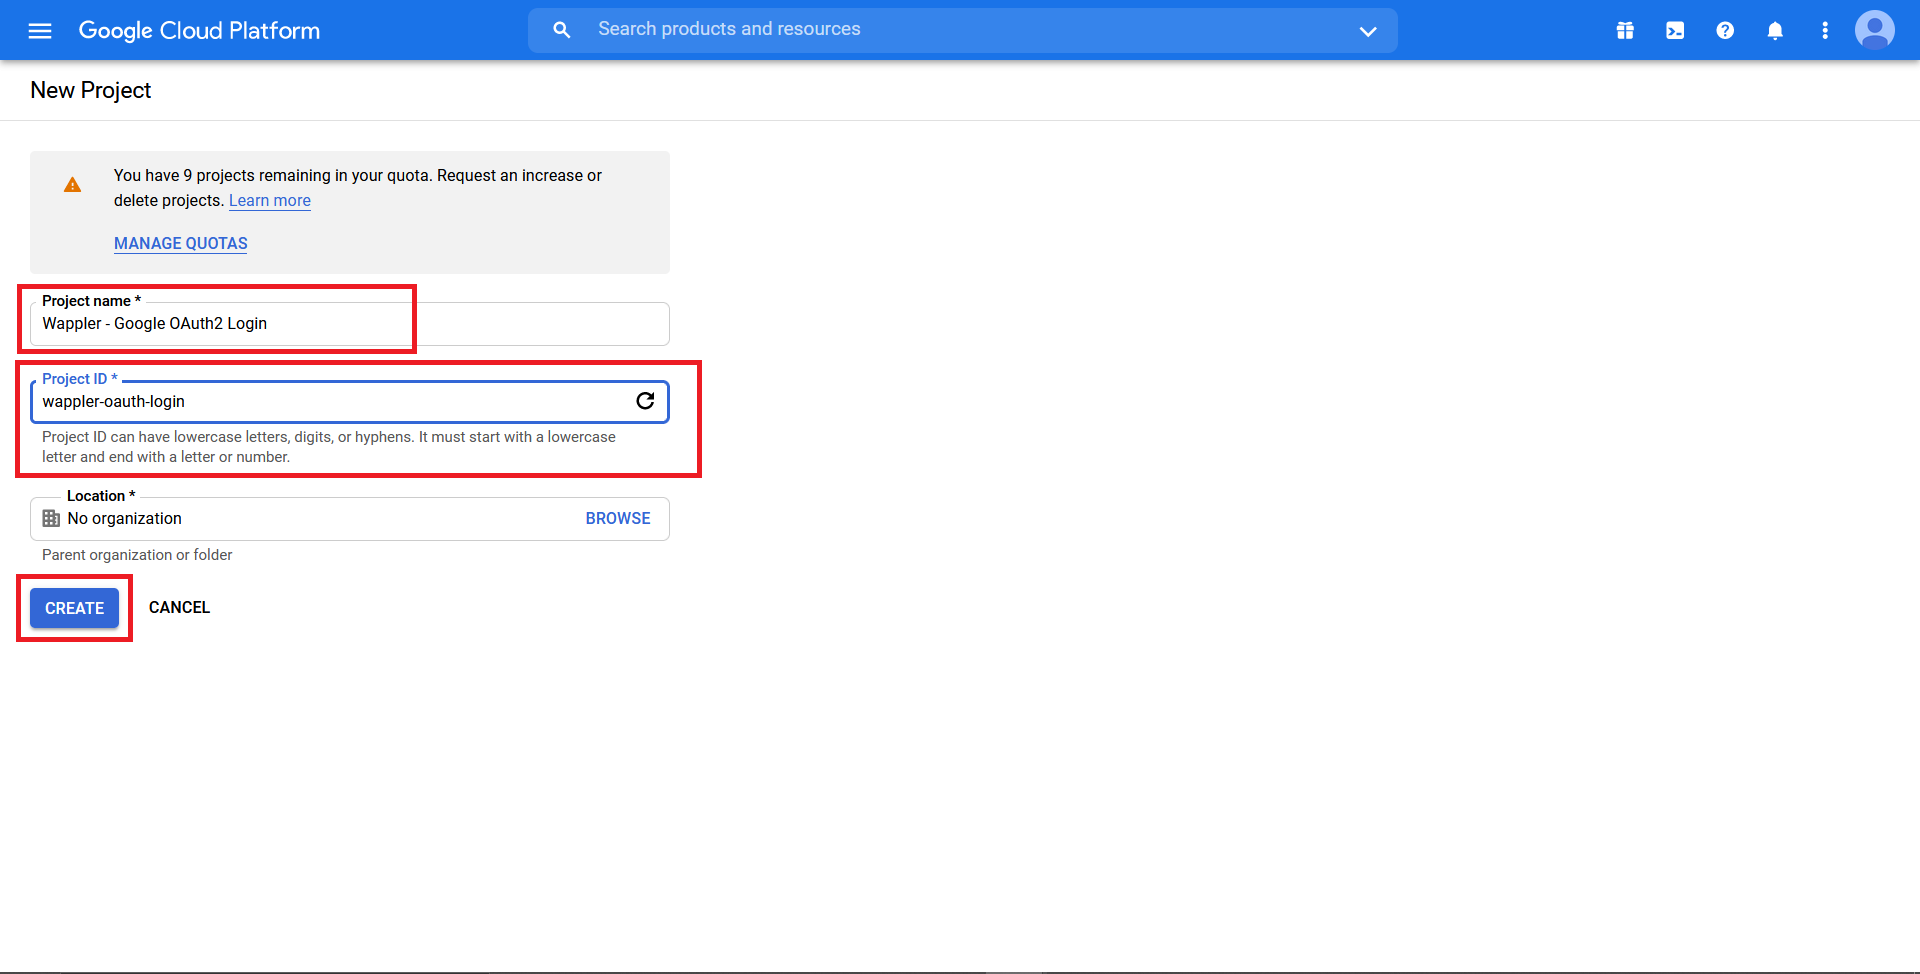
Section titled “Step 5”Enter the desired “Project name” and “Project ID”. In this case, we named it Wappler - Google OAuth2 Login, with project ID wappler-oauth-login. Click “Create”.
You will be redirected to the dashboard of your project.
Section titled “You will be redirected to the dashboard of your project.”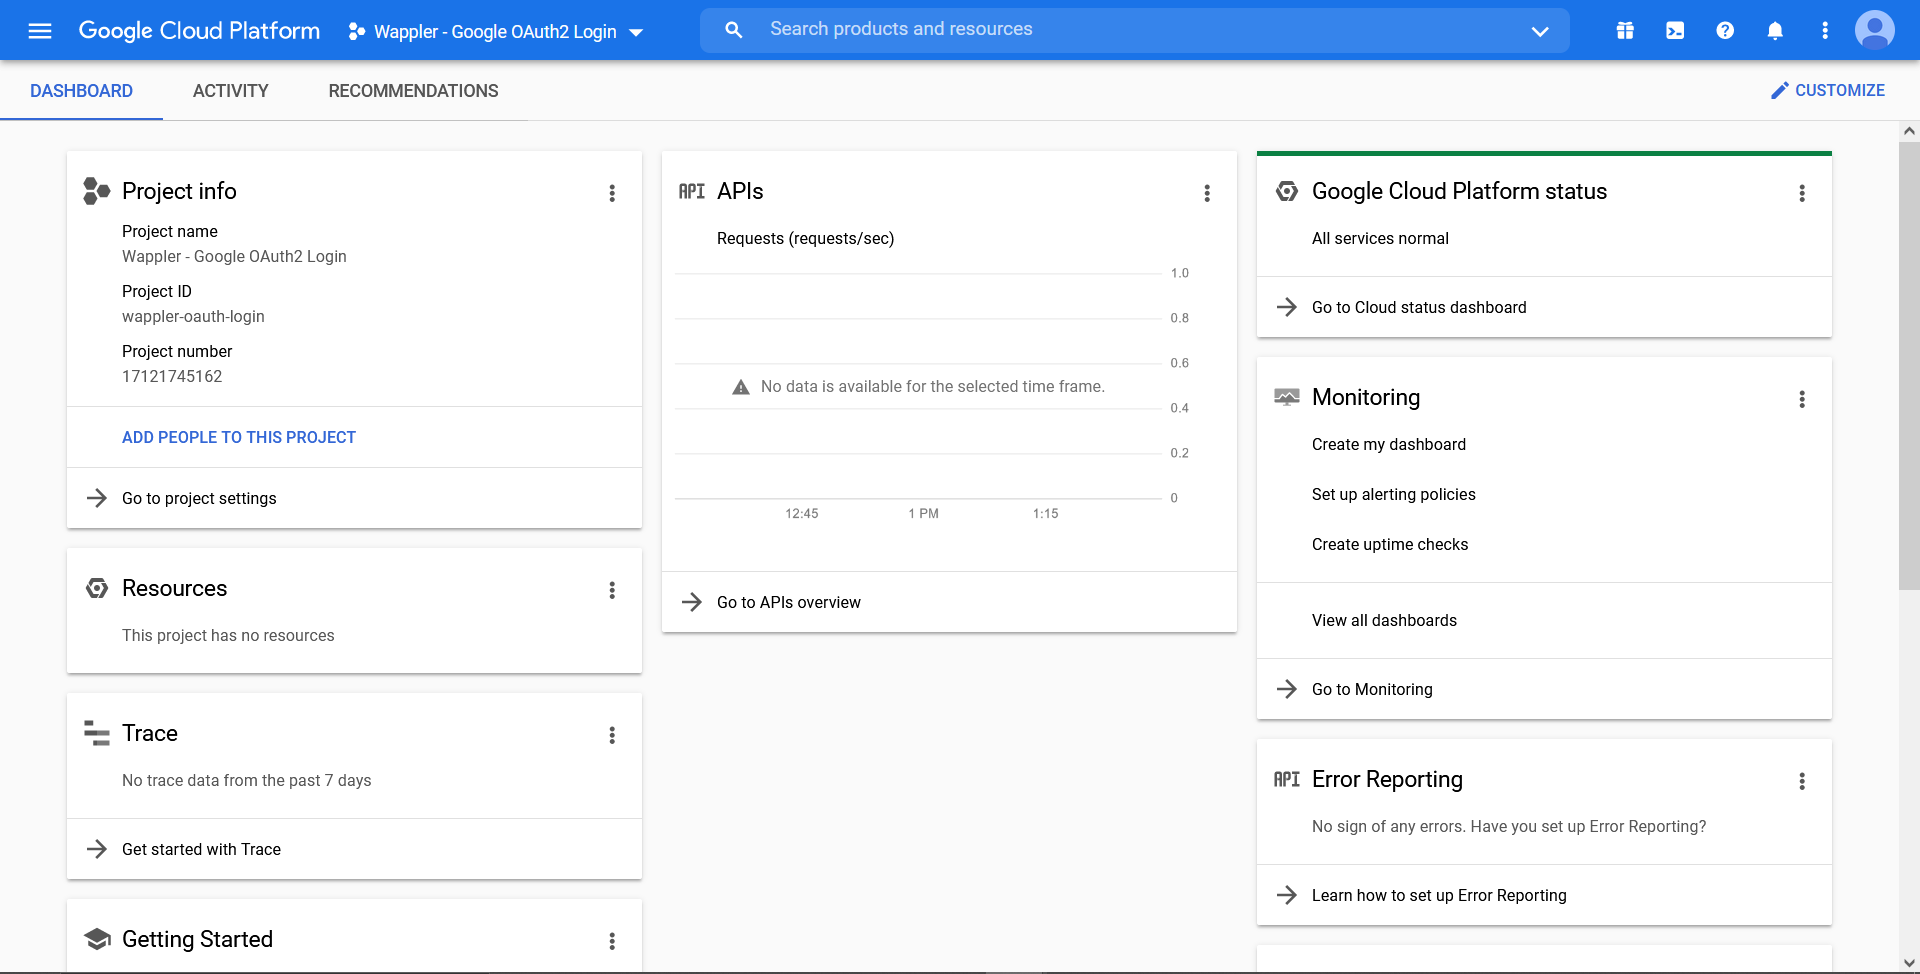
Setting up OAuth consent screen
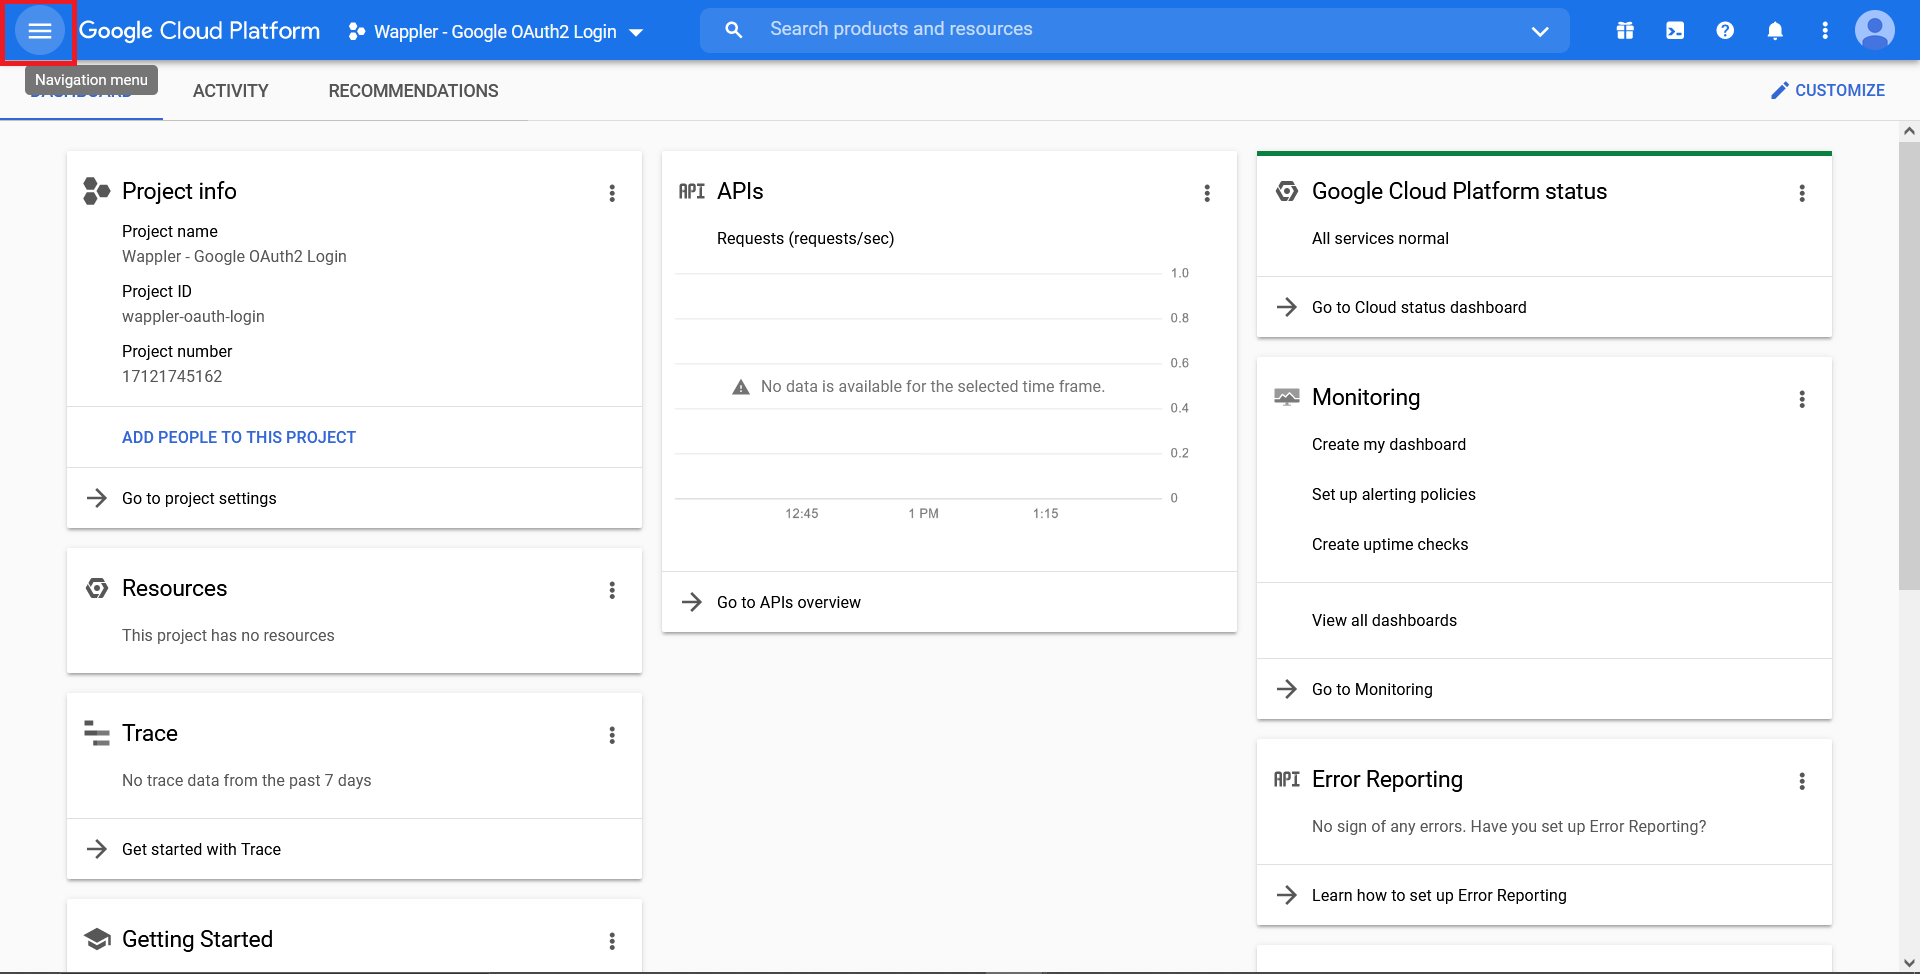
Section titled “Setting up OAuth consent screen”Click on the top left “Navigation Menu” button.
Click “APIs & Services”.
Section titled “Click “APIs & Services”.”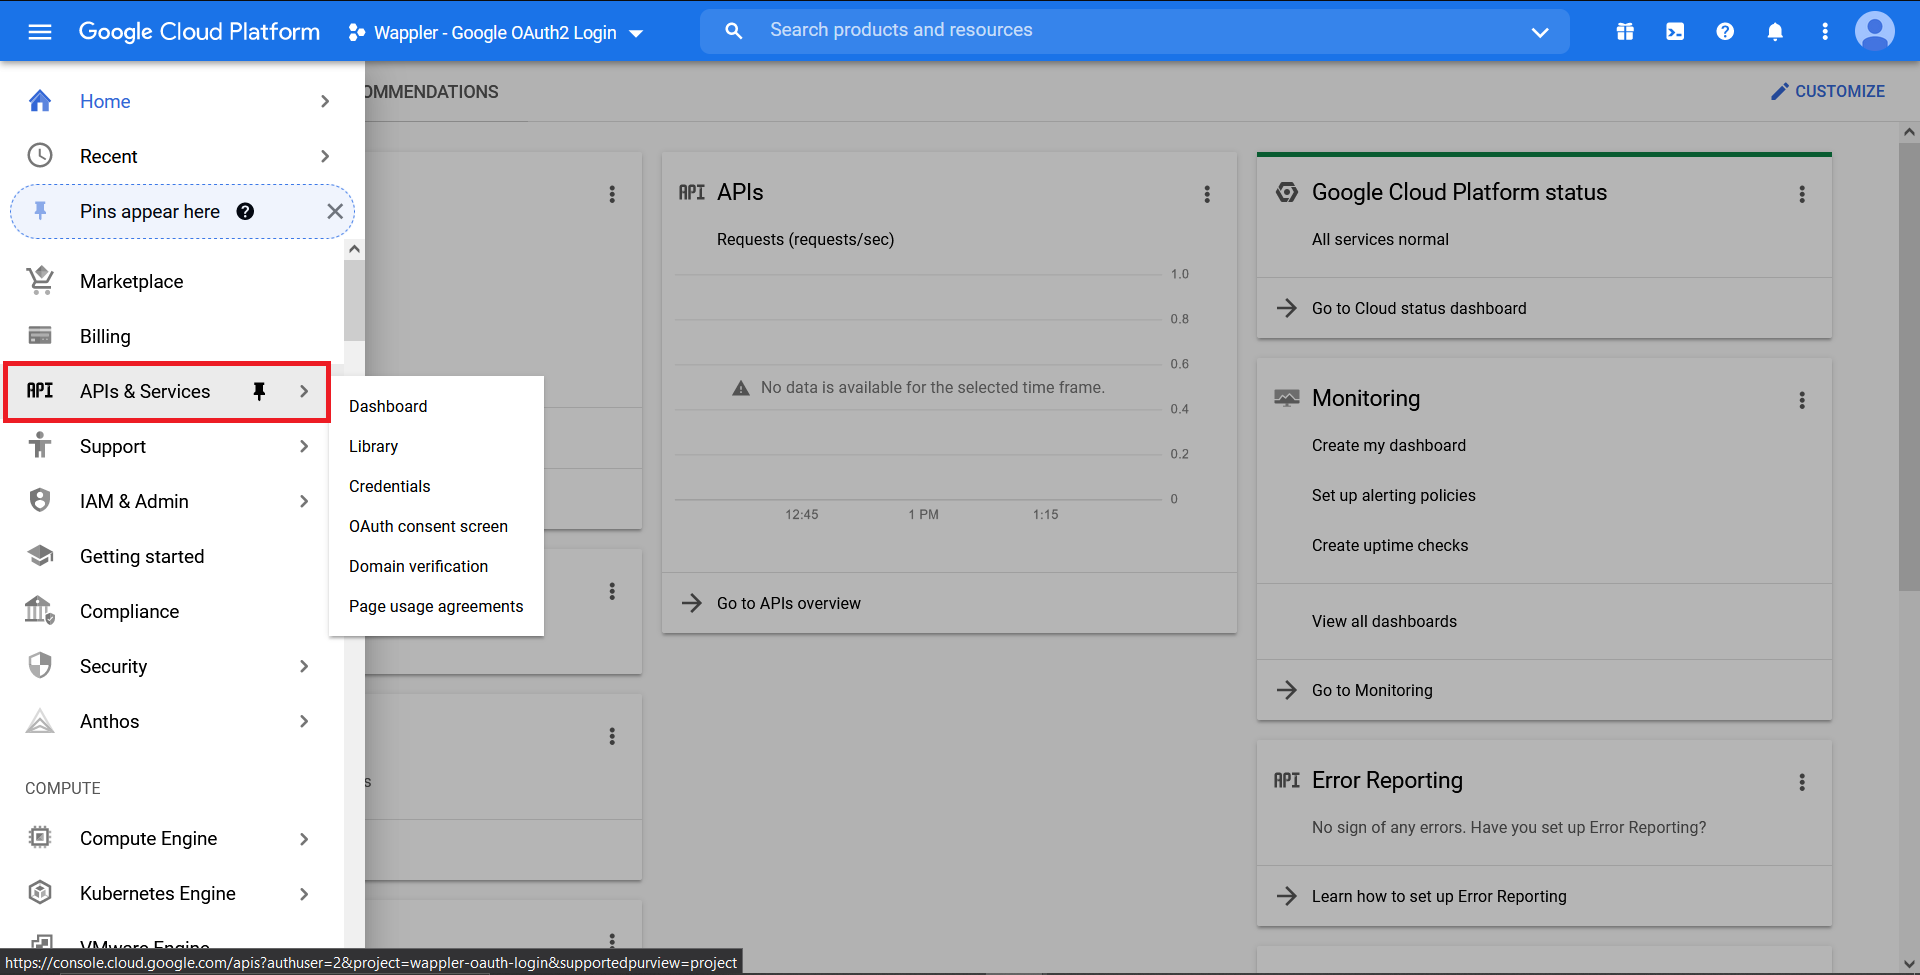
Step 10
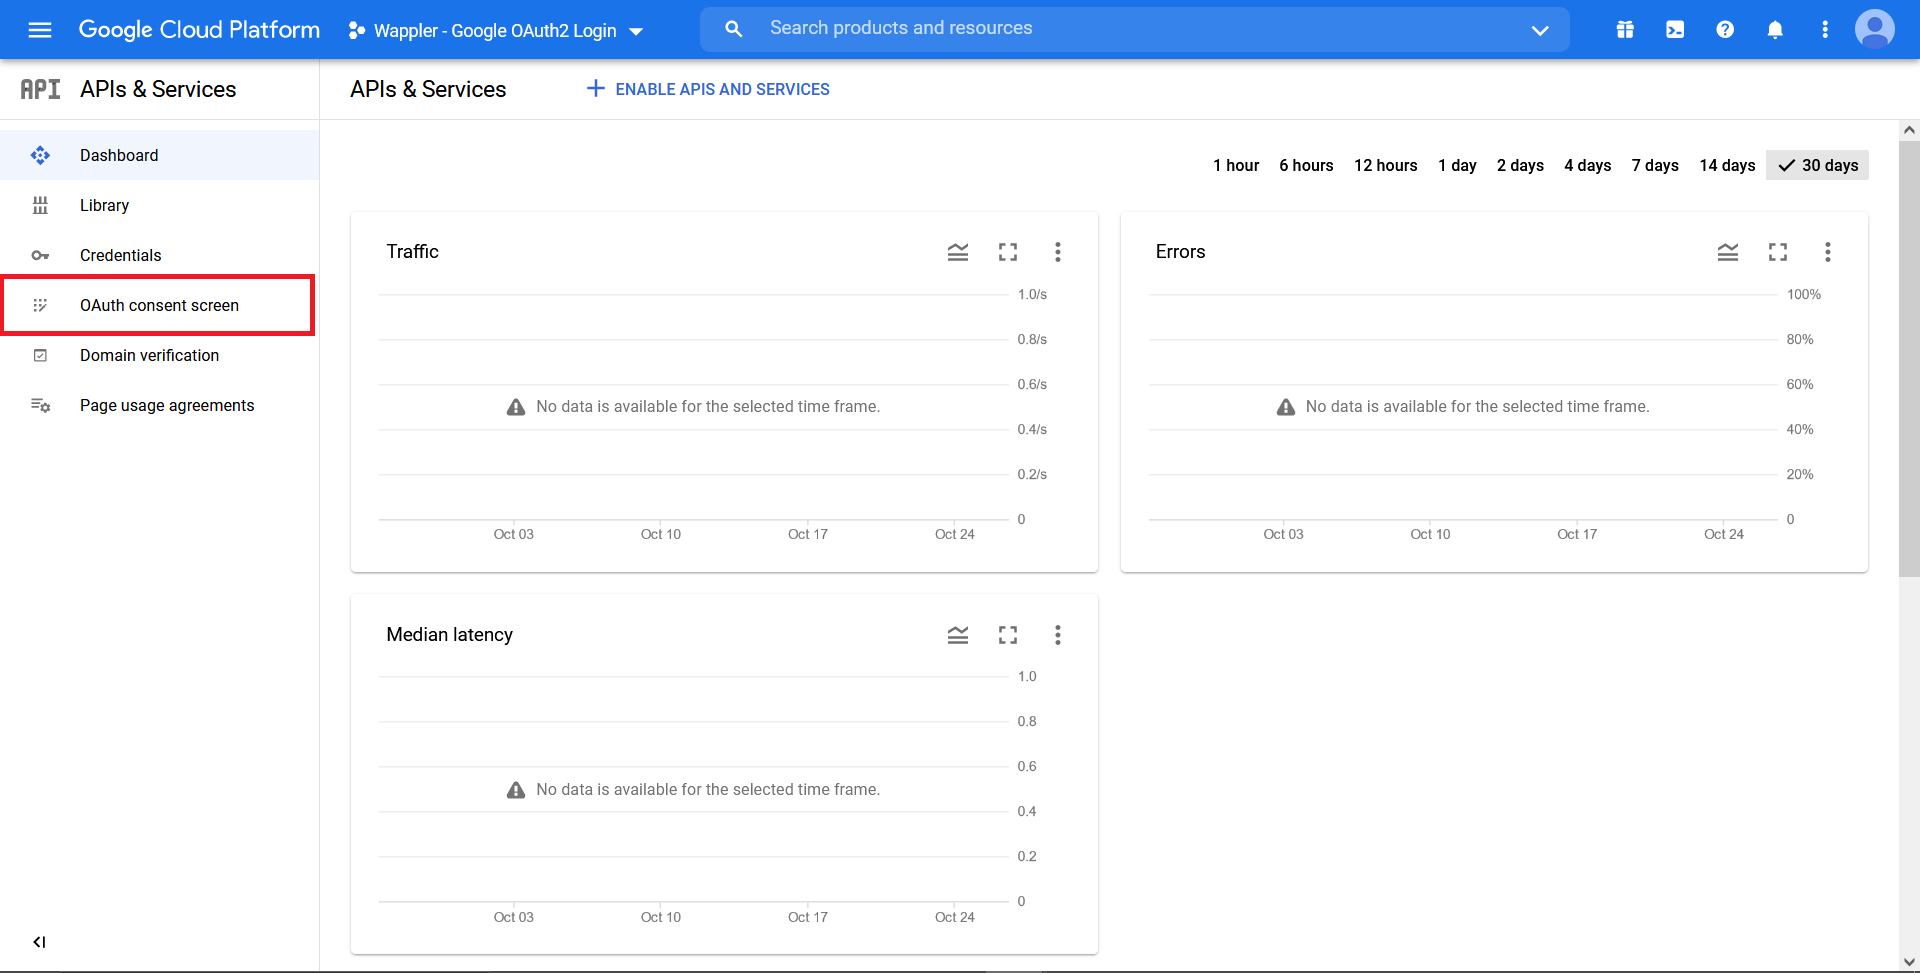
Section titled “Step 10”You will be redirected to the APIs & Services site. Before we can request any credentials, we need to set up the OAuth consent screen. Click on the “OAuth consent screen”.
In the “User Type”, choose External. Click “Create”.
Section titled “In the “User Type”, choose External. Click “Create”.”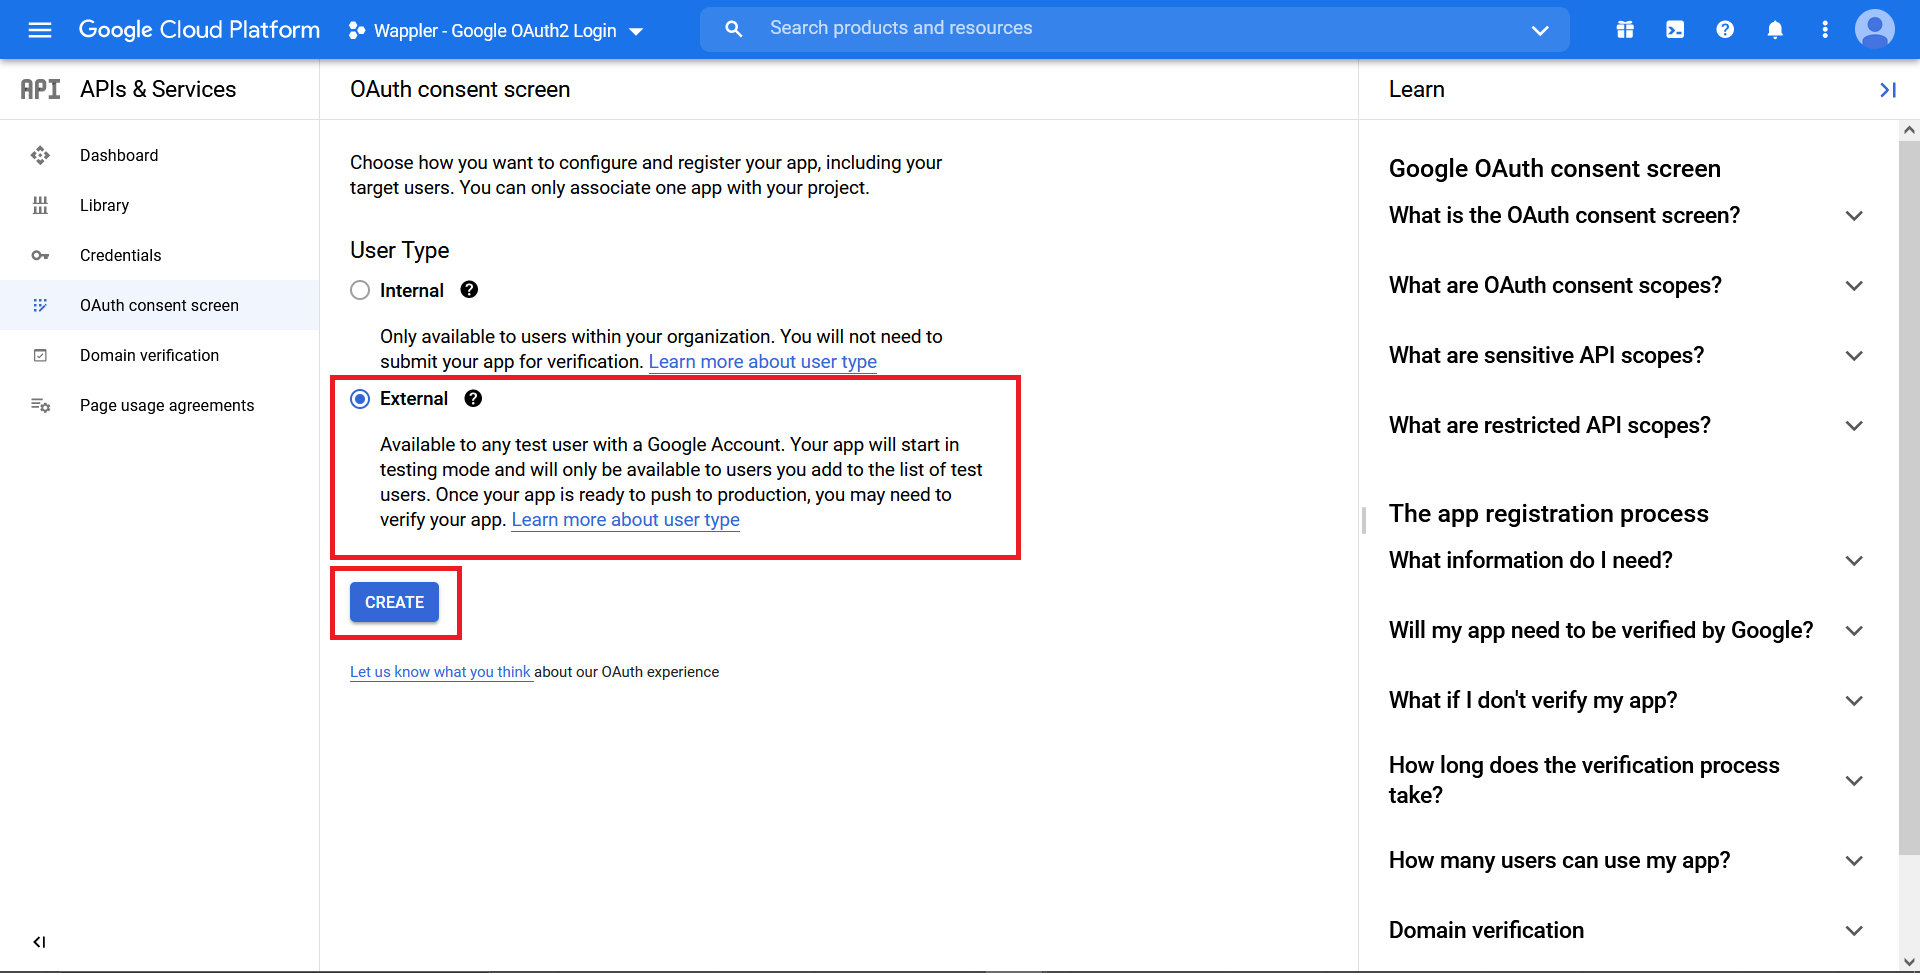
Enter the App name, in this case we named it my_social_login. Choose the “User support email”.
Section titled “Enter the App name, in this case we named it my_social_login. Choose the “User support email”.”
Scroll the page down, and fill in the “Developer contact information”. Click “Save and Continue”.
Section titled “Scroll the page down, and fill in the “Developer contact information”. Click “Save and Continue”.”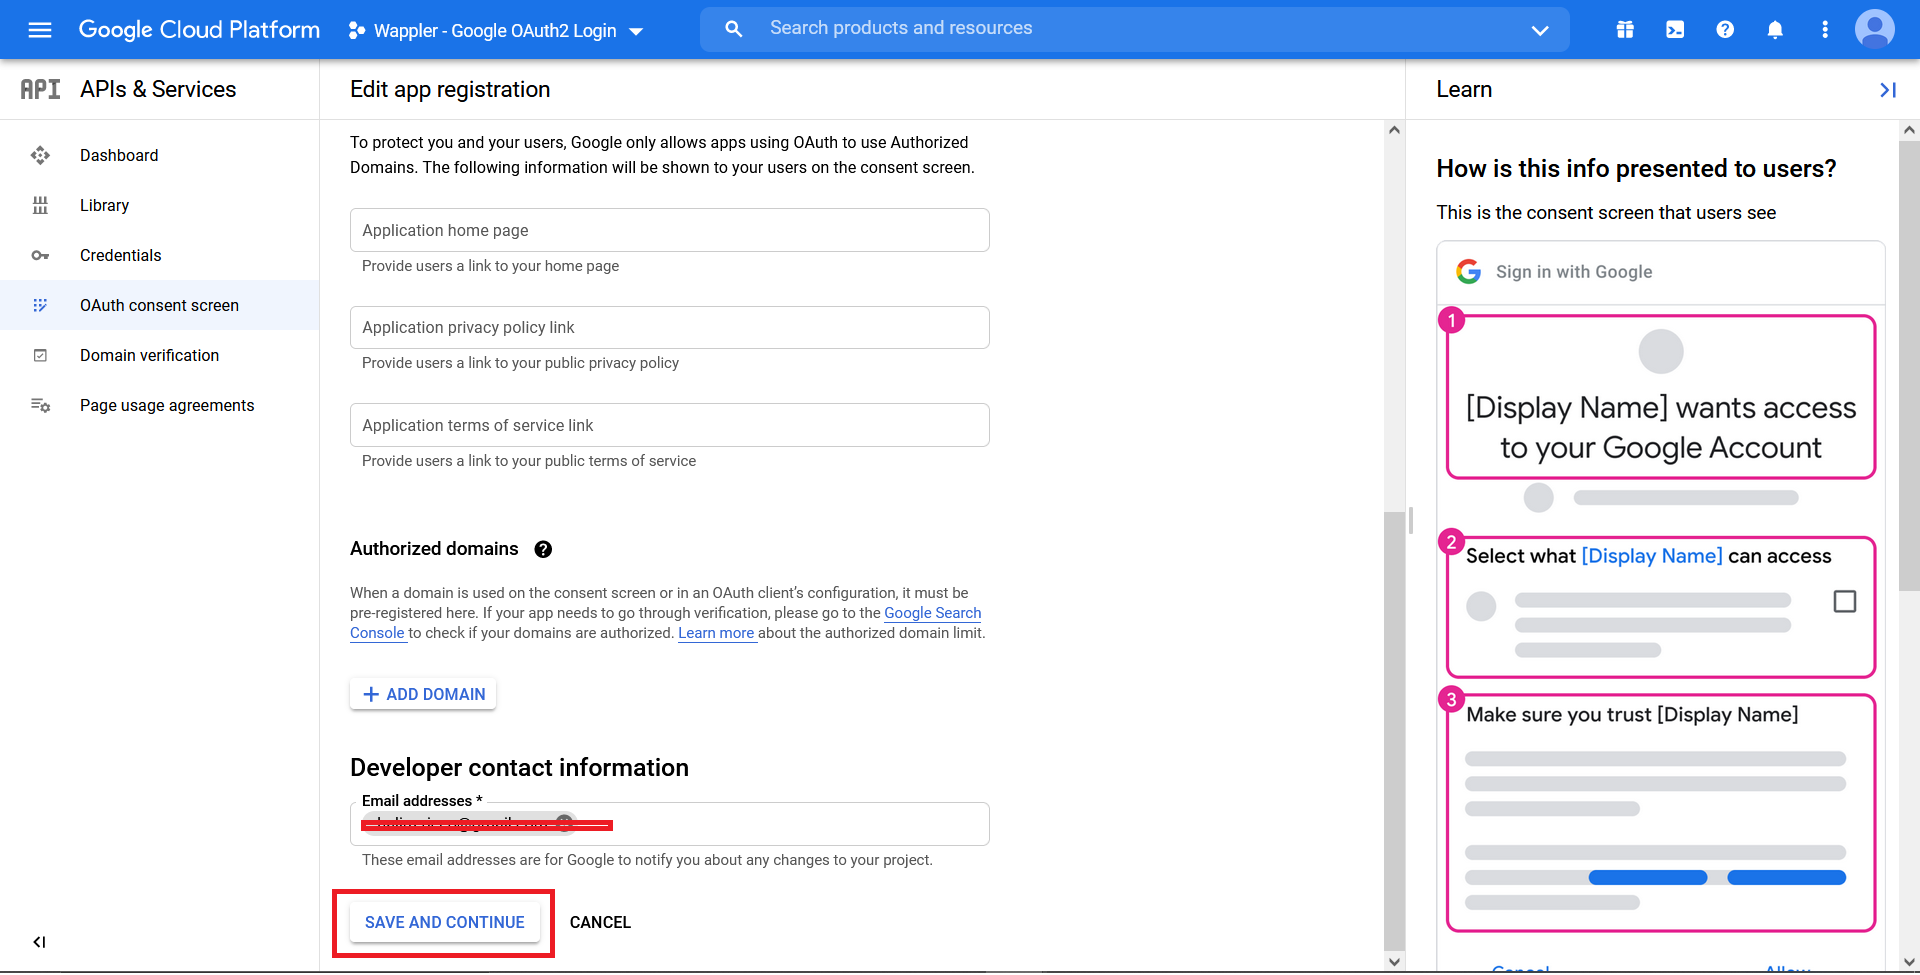
In the “Scopes” section, click “Add or Remove Scopes”.
Section titled “In the “Scopes” section, click “Add or Remove Scopes”.”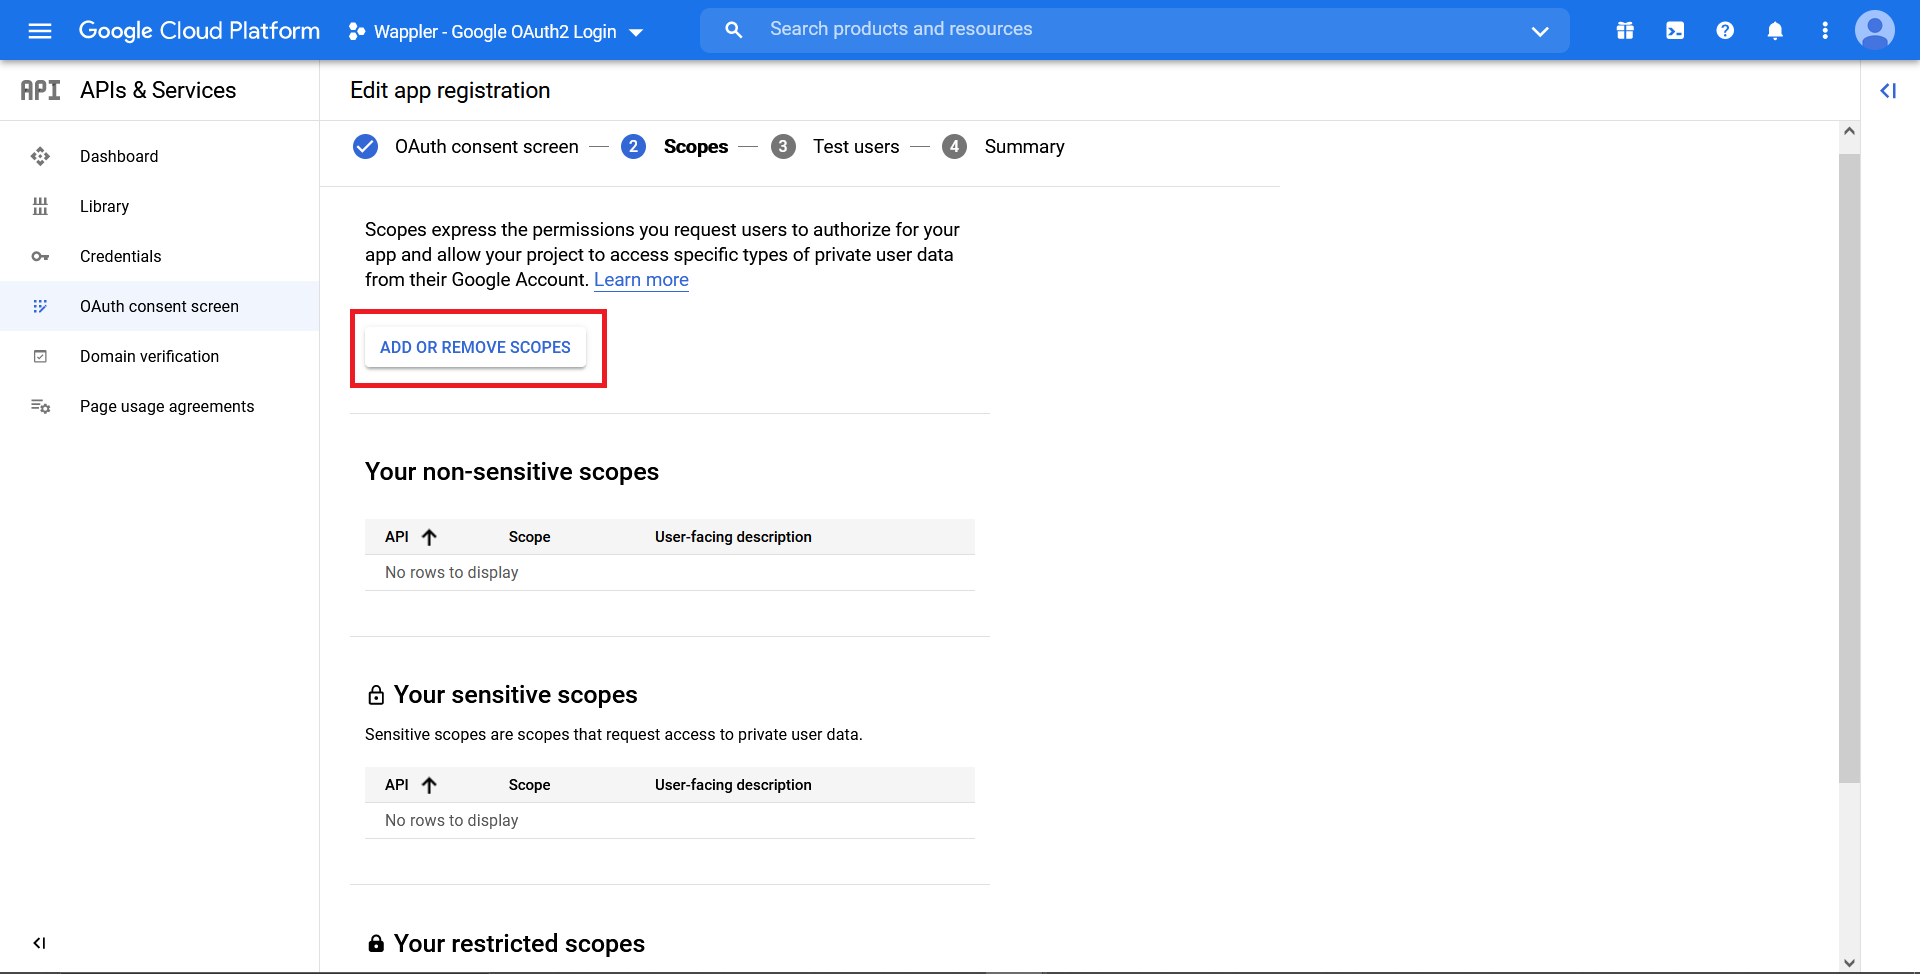
Step 15
Section titled “Step 15”We want the API to give information on the user’s email, profile, and personal information such as name, etc. So, tick the first 3 API, namely the ../auth/userinfo.email, ../auth/userinfo.profile, and openid. You can of course adjust this as per your need. This is just an example.

Scroll down and click “Update”.
Section titled “Scroll down and click “Update”.”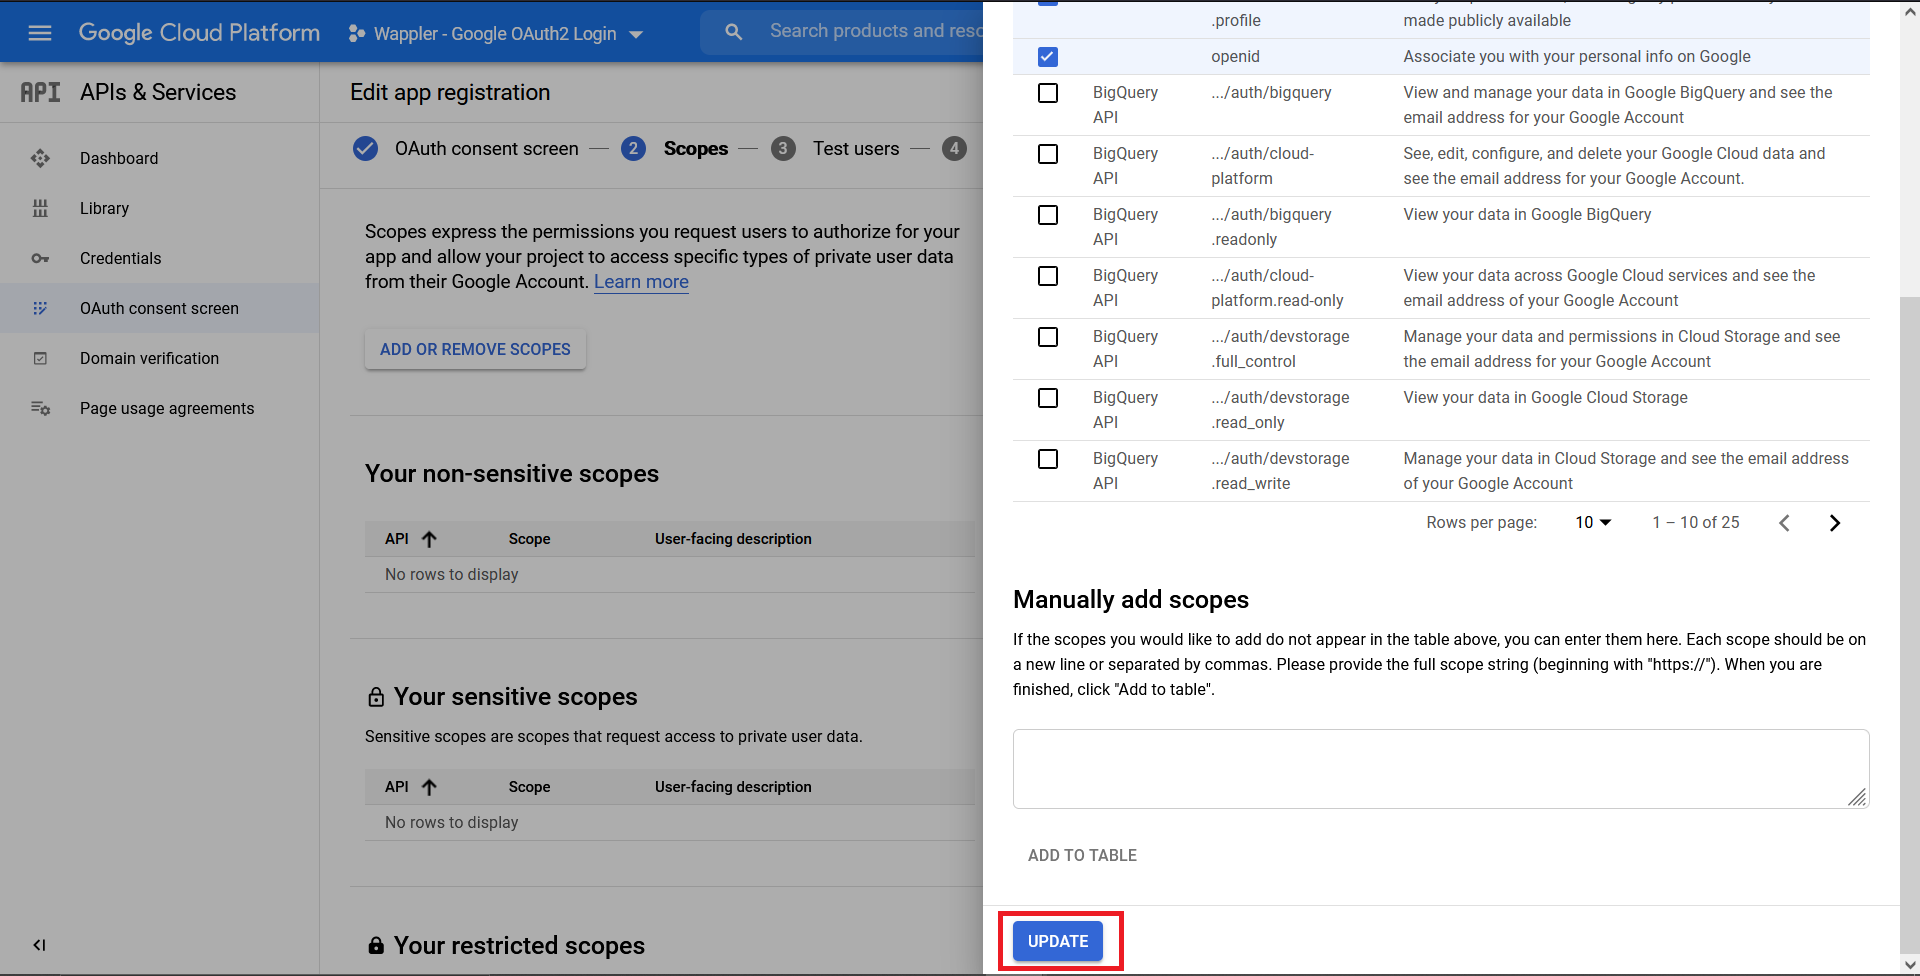
Click “Save and Continue”.
Section titled “Click “Save and Continue”.”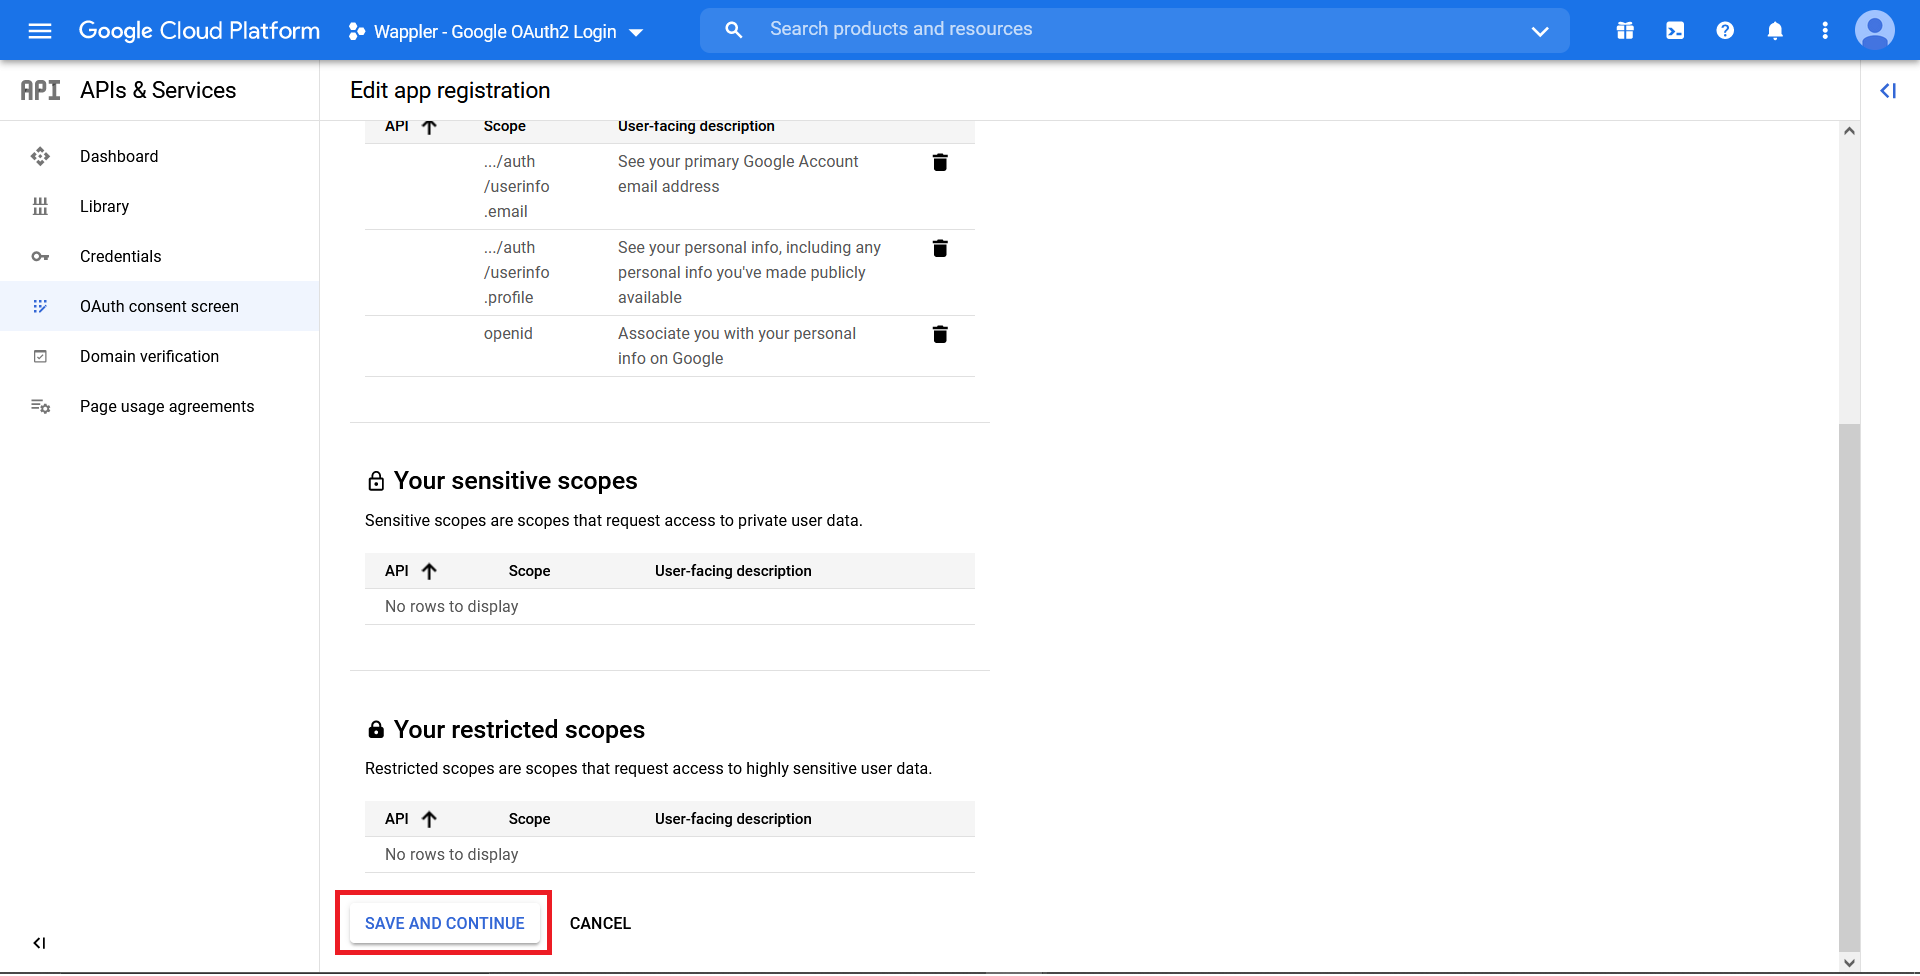
In the “Test users” section, click on the “Add Users” button.
Section titled “In the “Test users” section, click on the “Add Users” button.”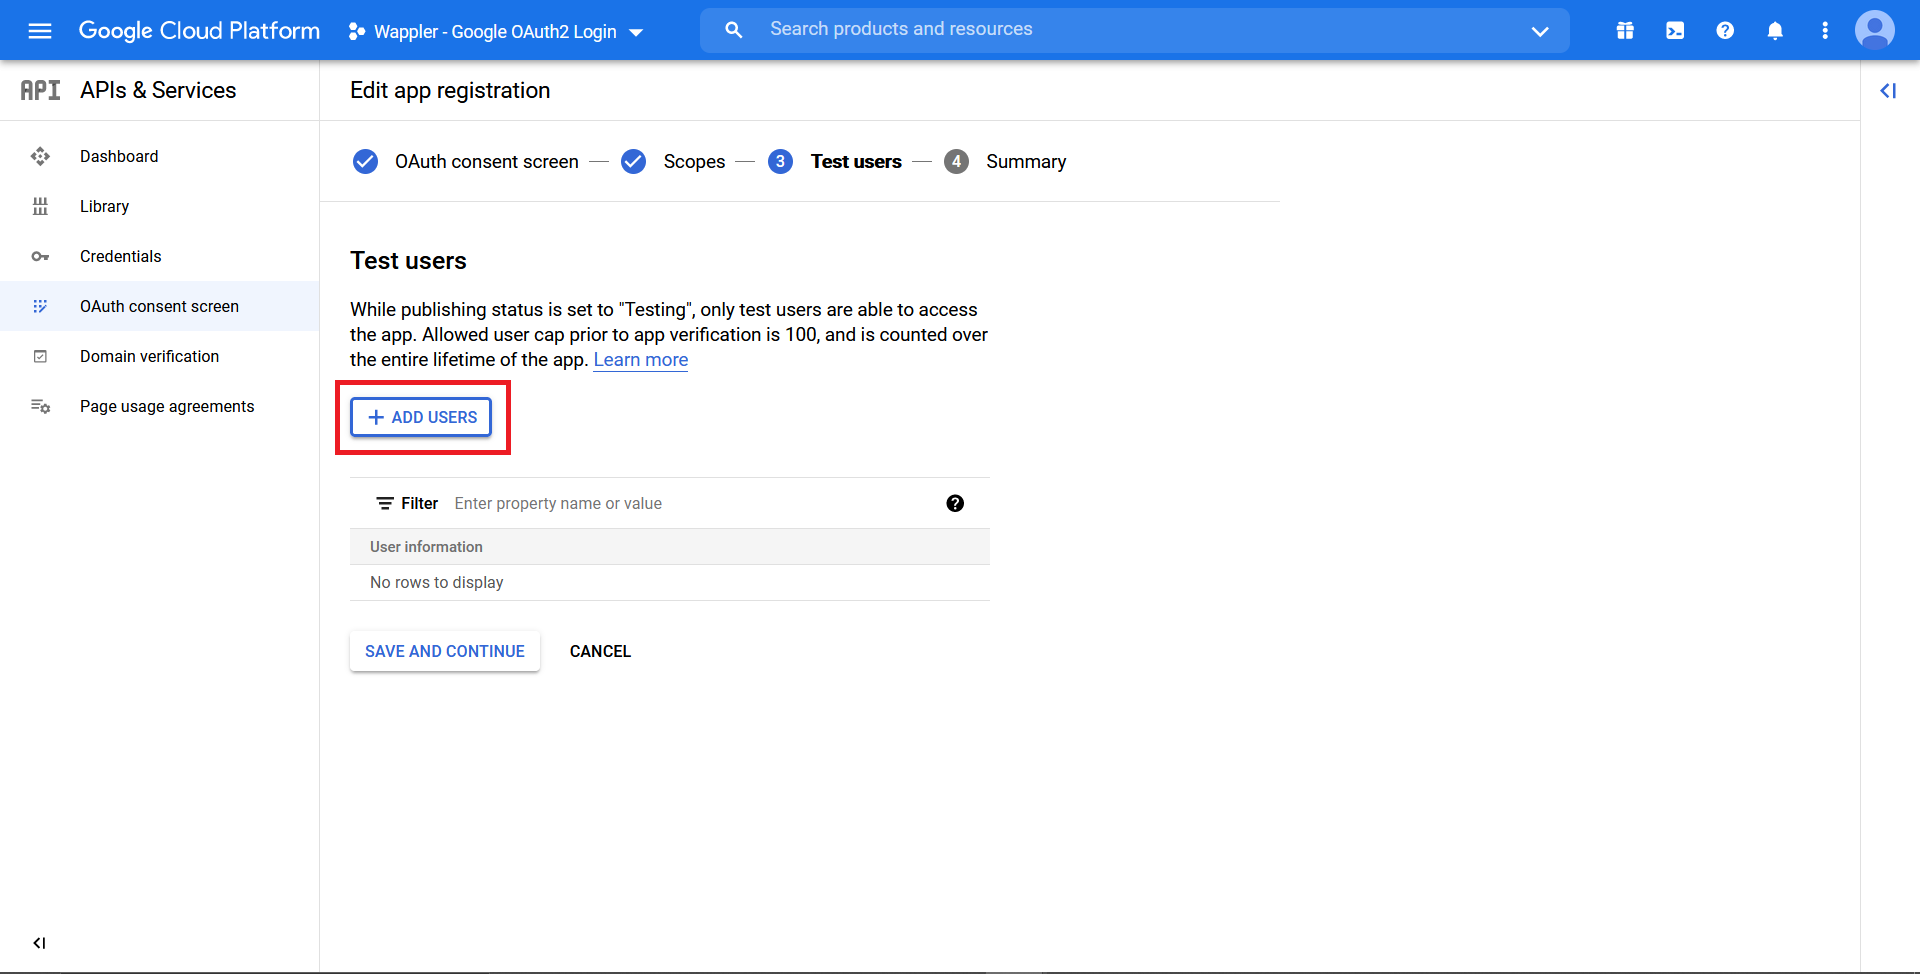
Enter the email address that you want to use later on to test your login function. Click “Add”.
Section titled “Enter the email address that you want to use later on to test your login function. Click “Add”.”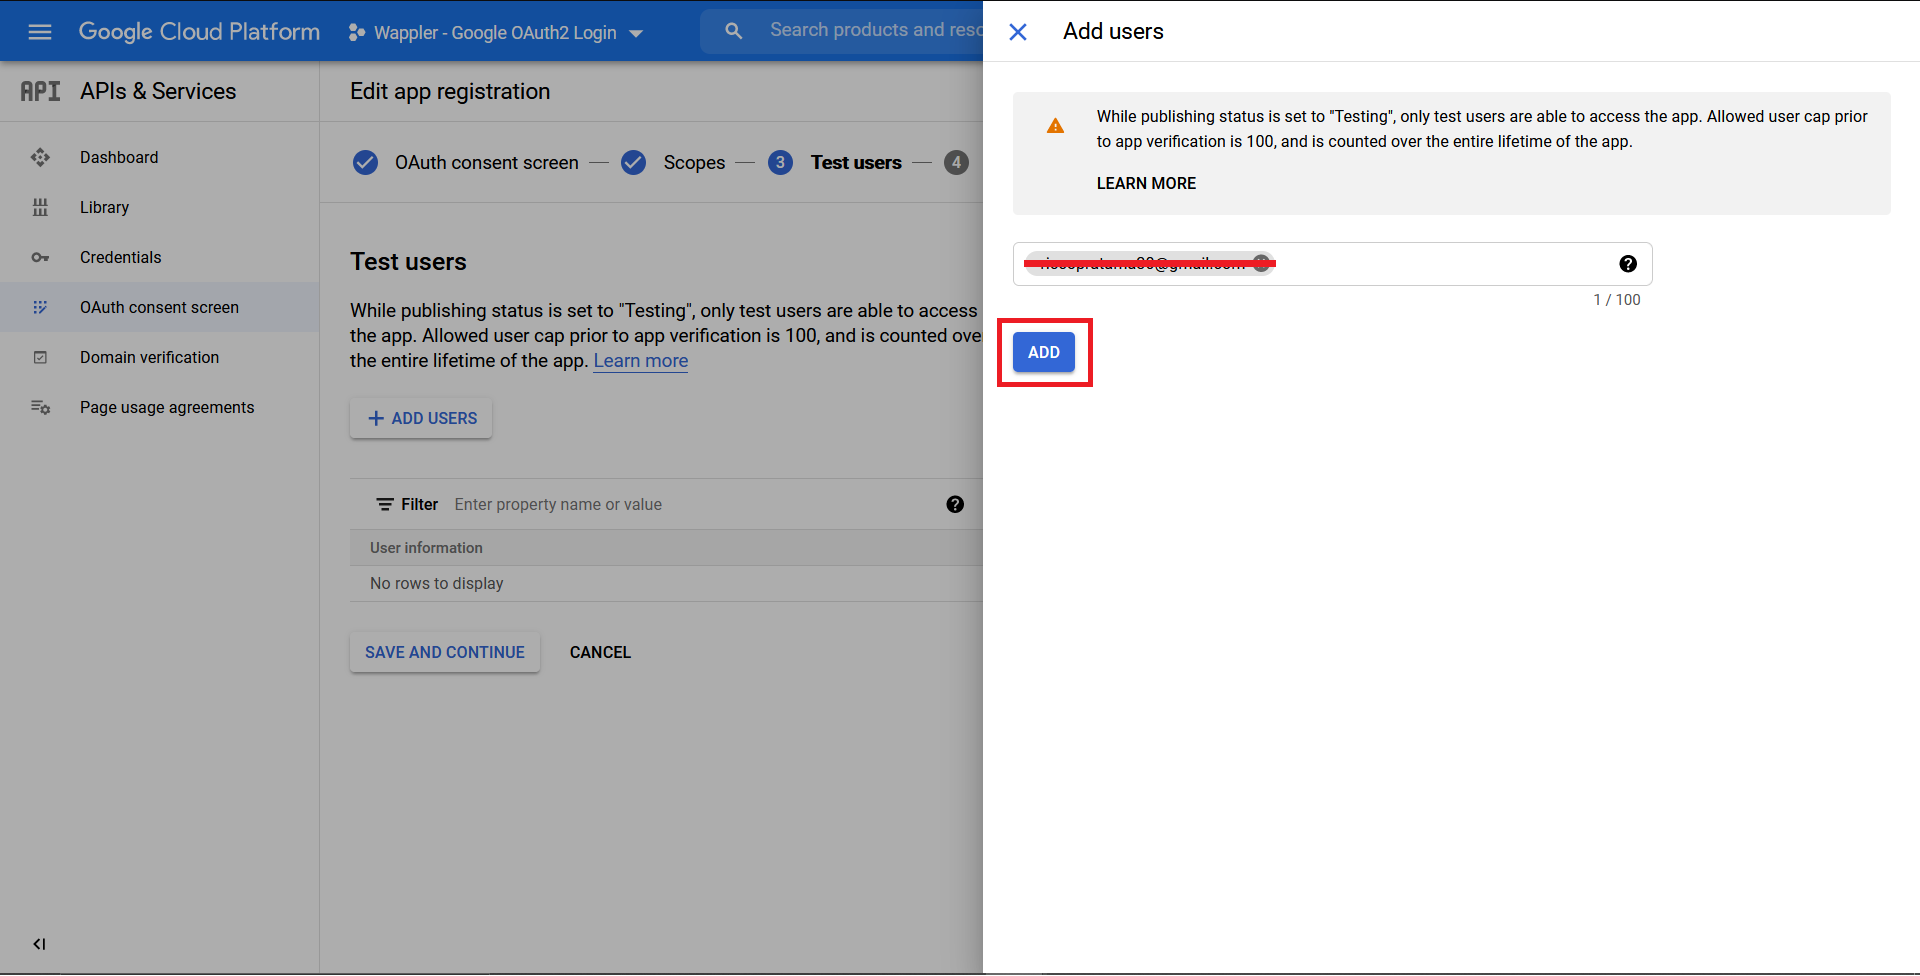
After that, click “Save and Continue”.
Section titled “After that, click “Save and Continue”.”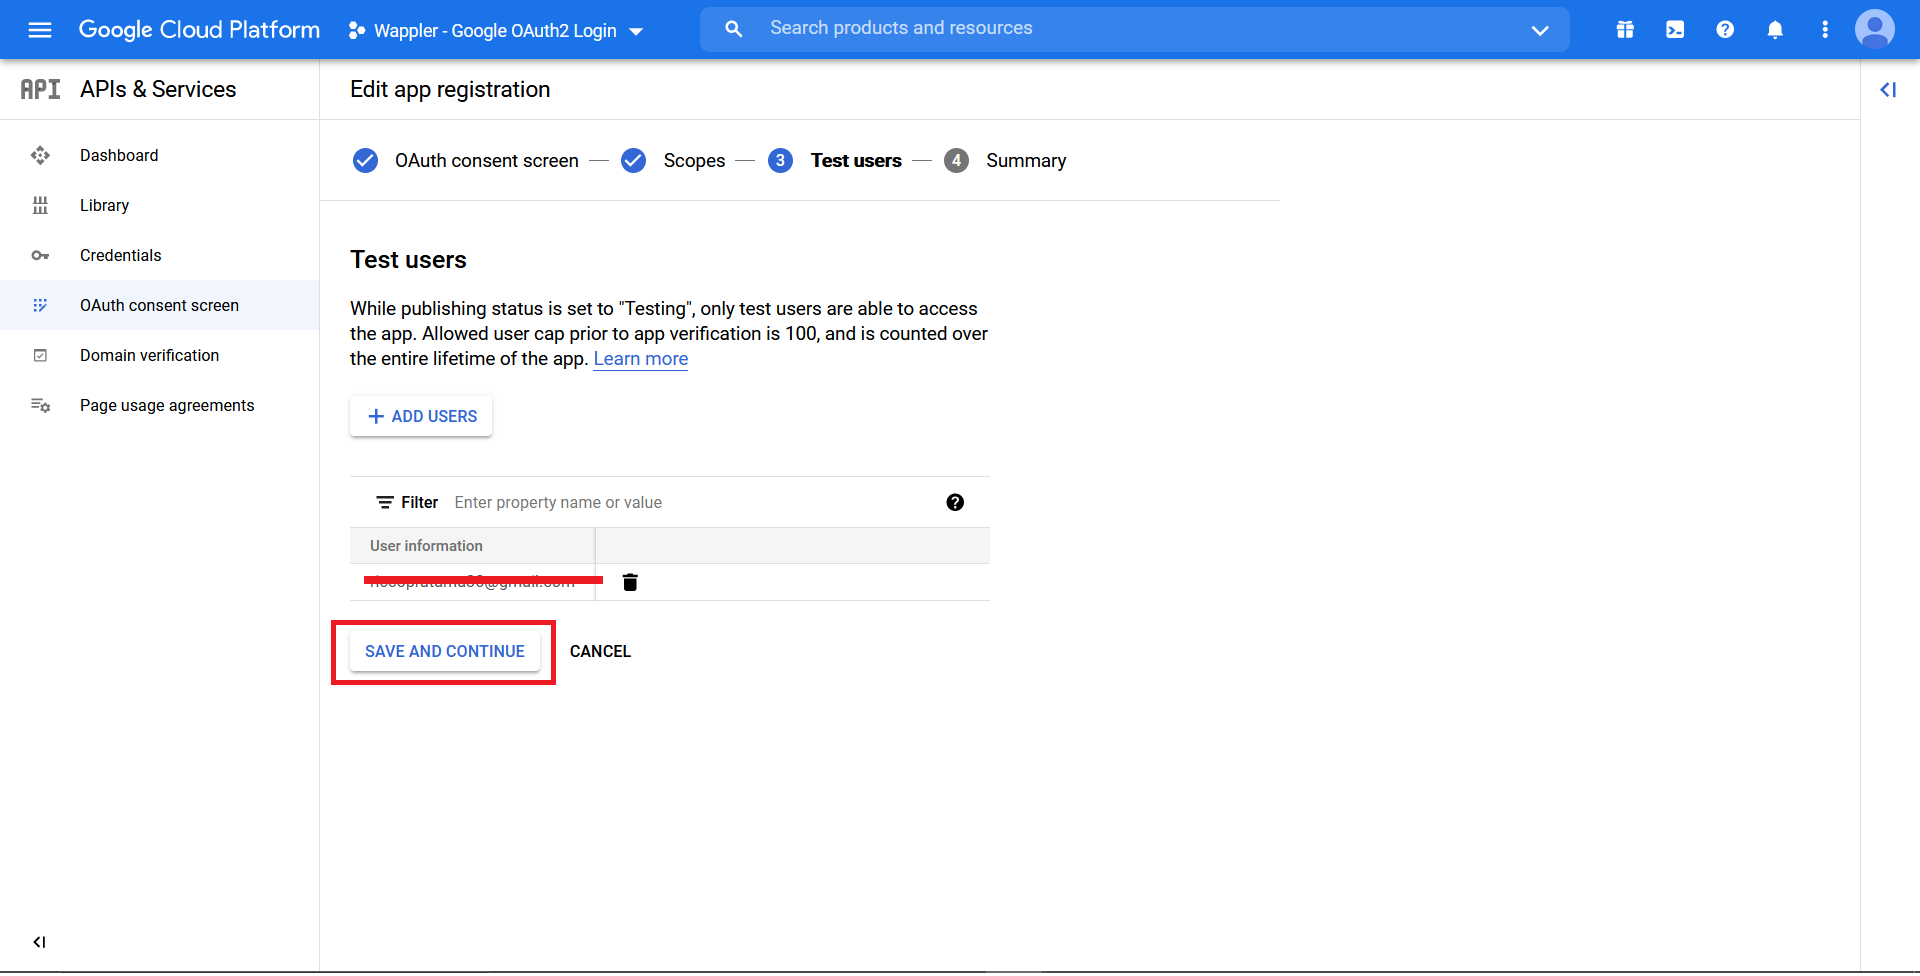
You are done setting up the OAuth Consent Screen. Now click on “Back to Dashboard”.
Section titled “You are done setting up the OAuth Consent Screen. Now click on “Back to Dashboard”.”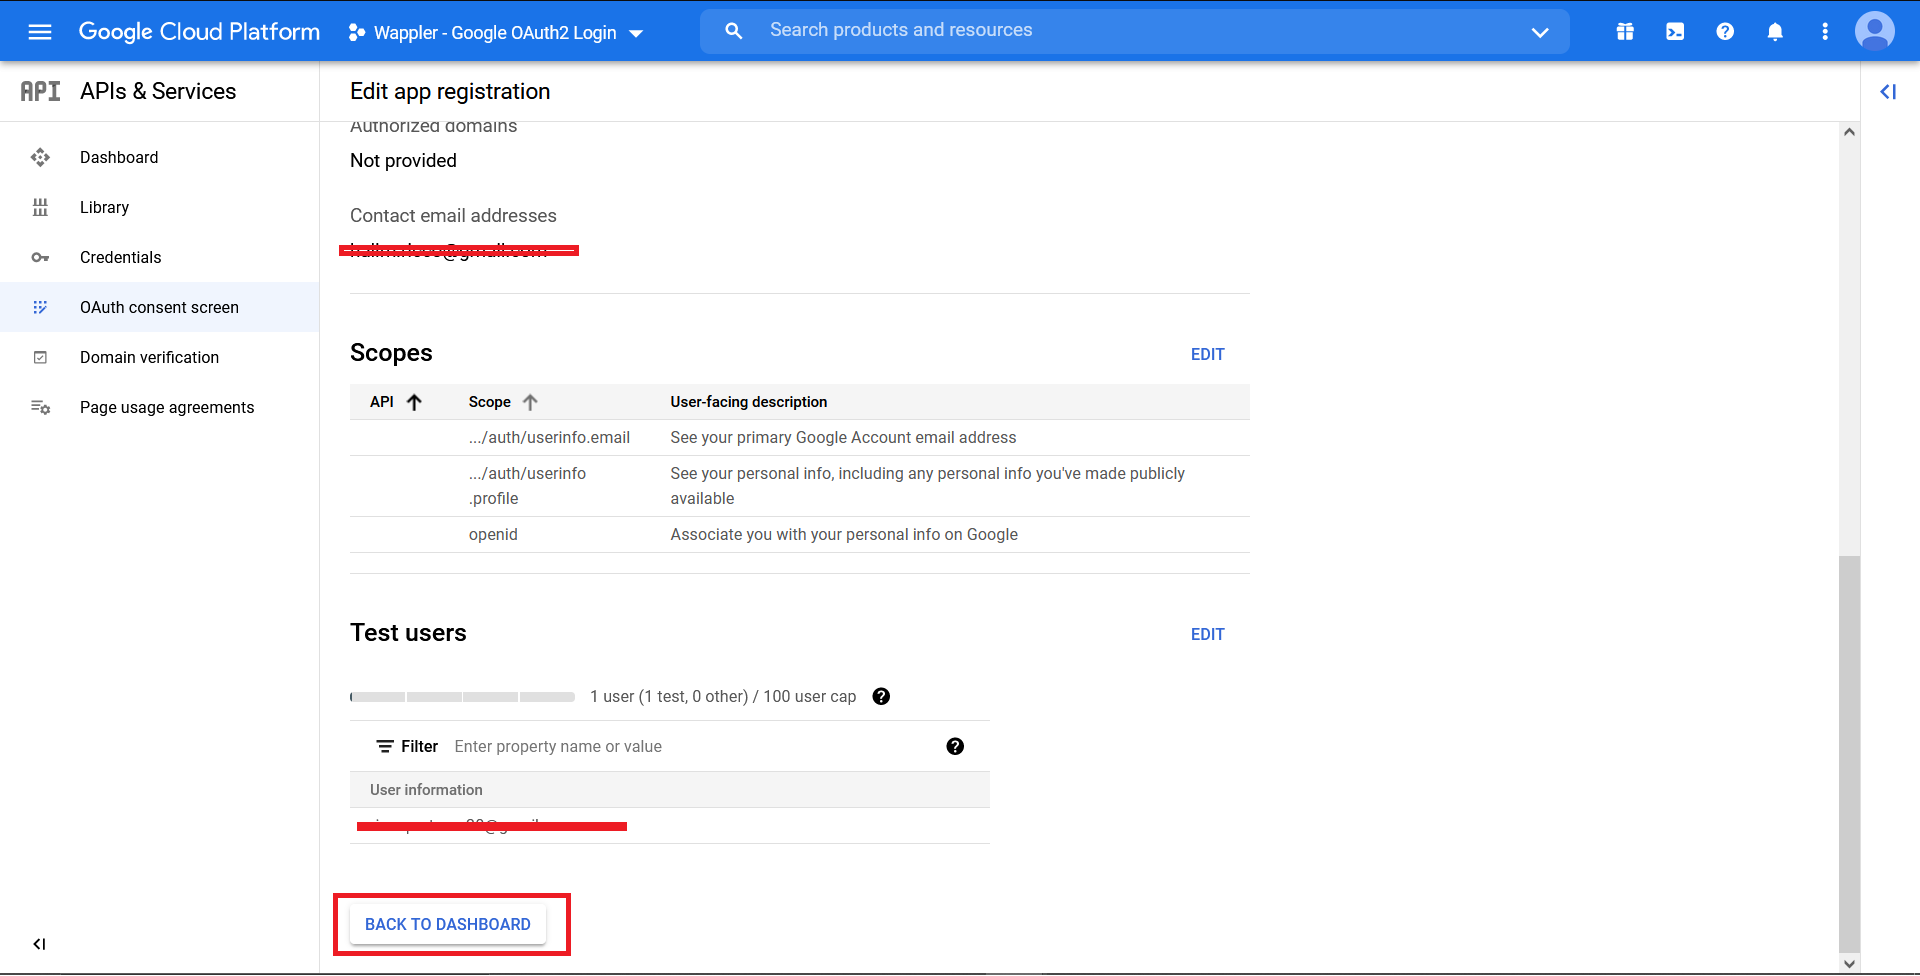
Create new OAuth2 credentials
Section titled “Create new OAuth2 credentials”On the left menu bar, click on “Credentials”.
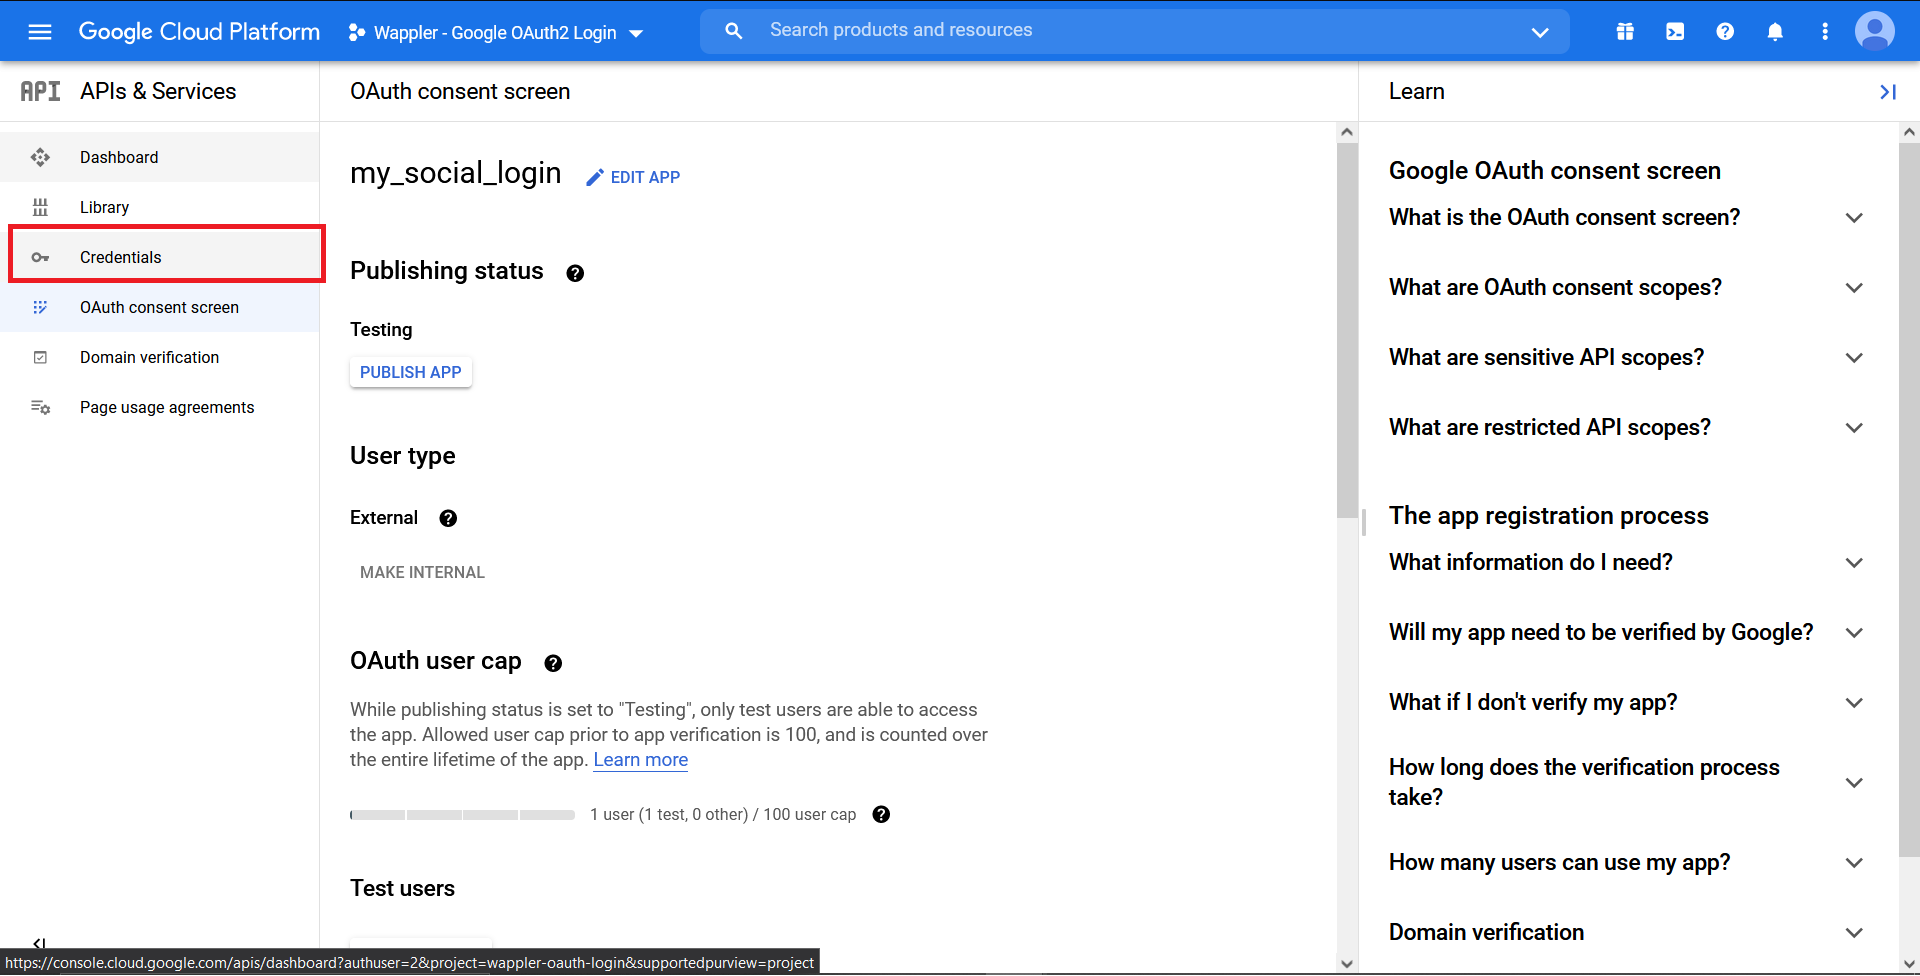
Click on “Create Credentials” button.
Section titled “Click on “Create Credentials” button.”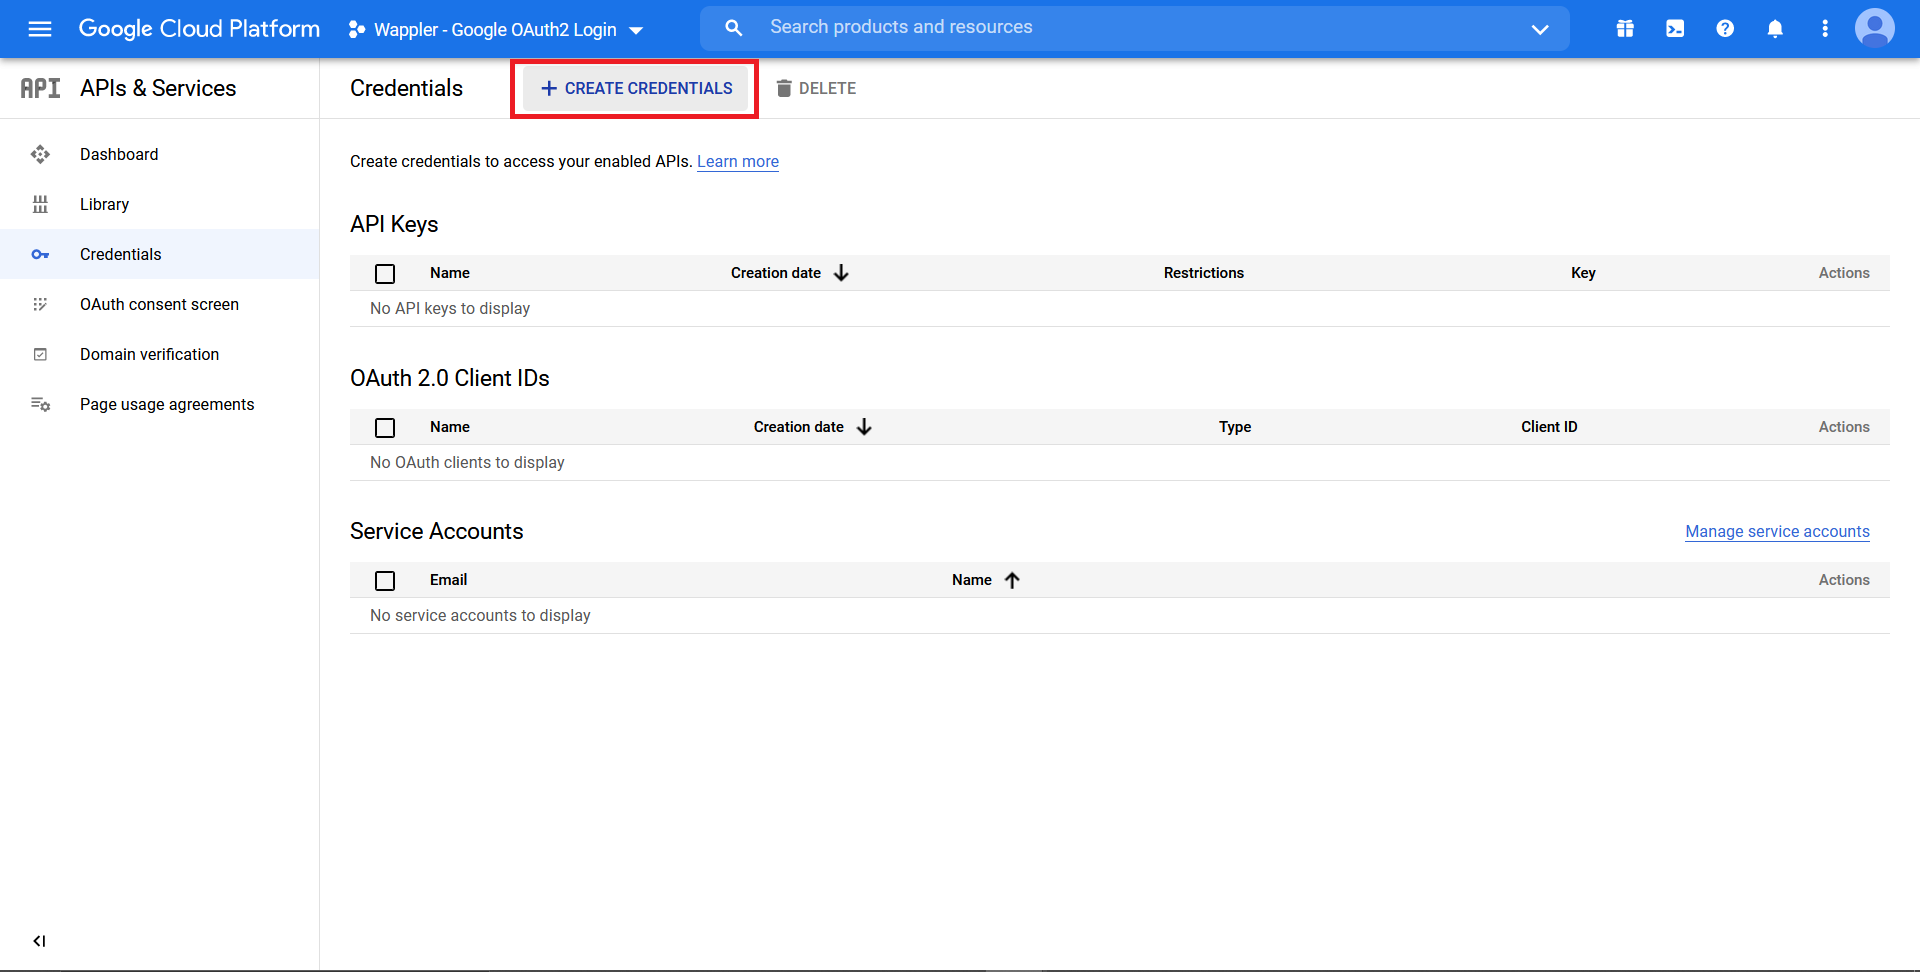
Since we need an OAuth, choose the “OAuth client ID”.
Section titled “Since we need an OAuth, choose the “OAuth client ID”.”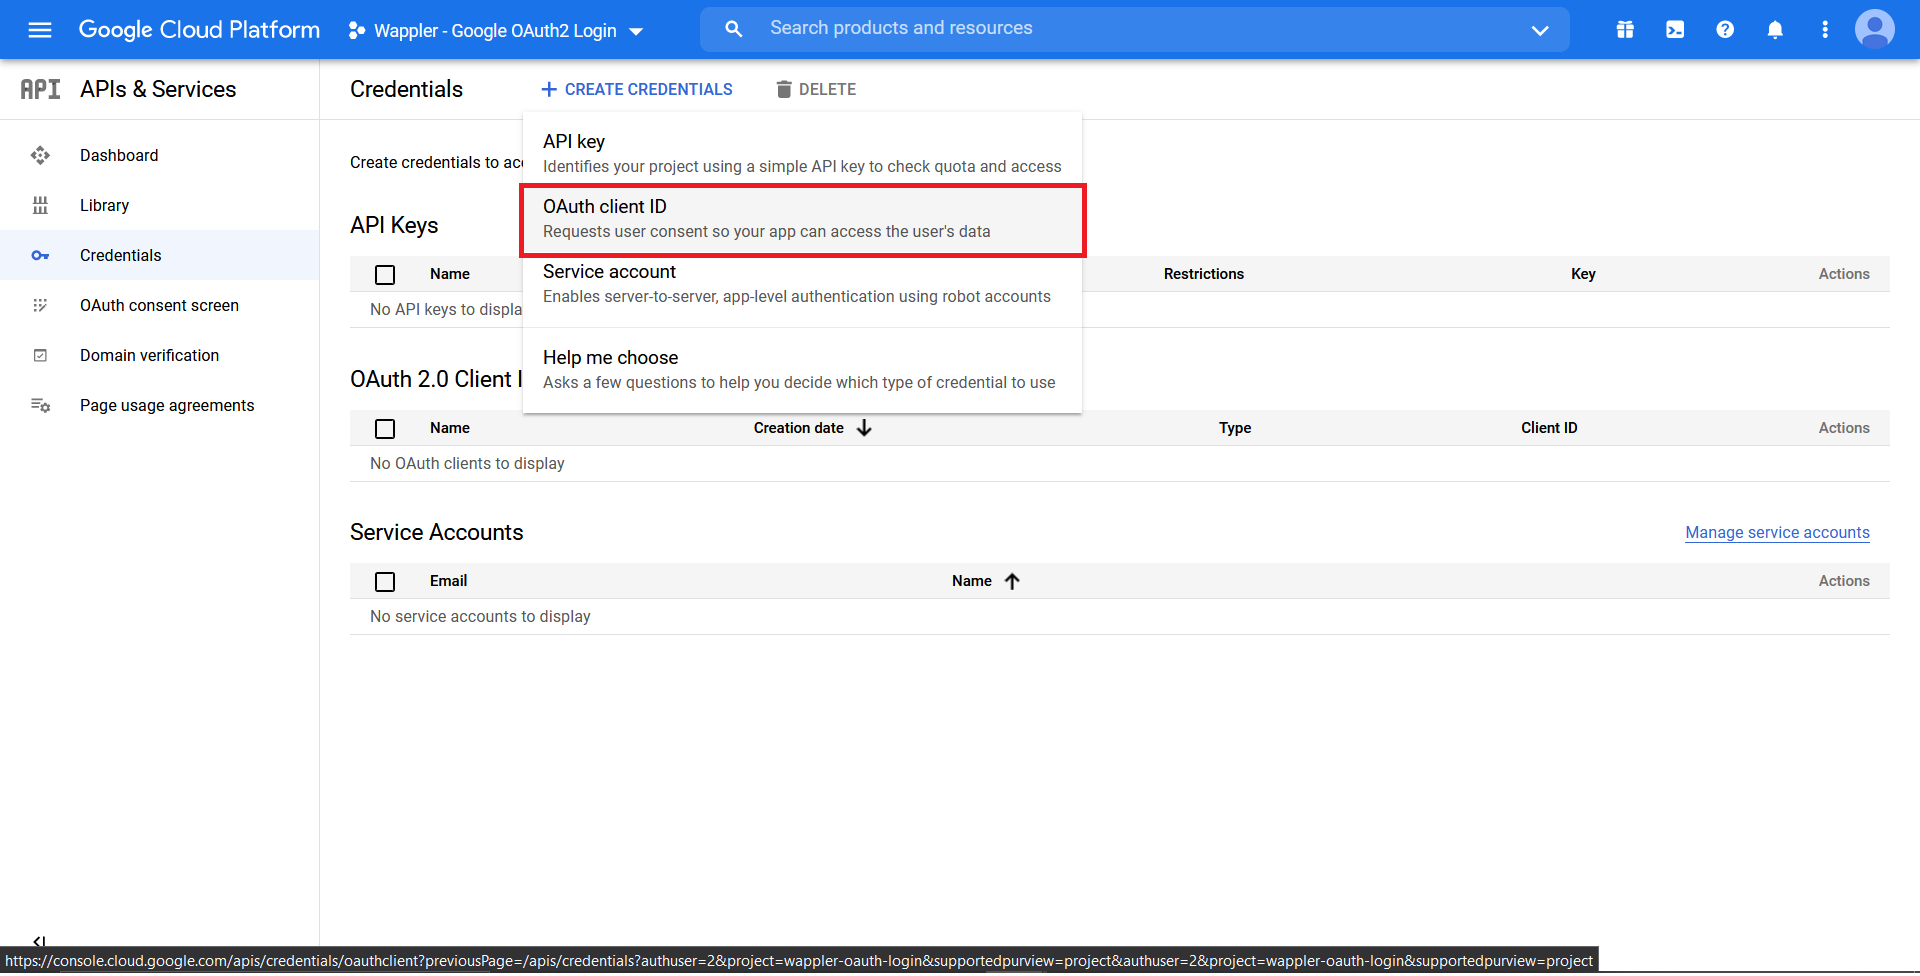
In the “Application type”, choose “Web application”.
Section titled “In the “Application type”, choose “Web application”.”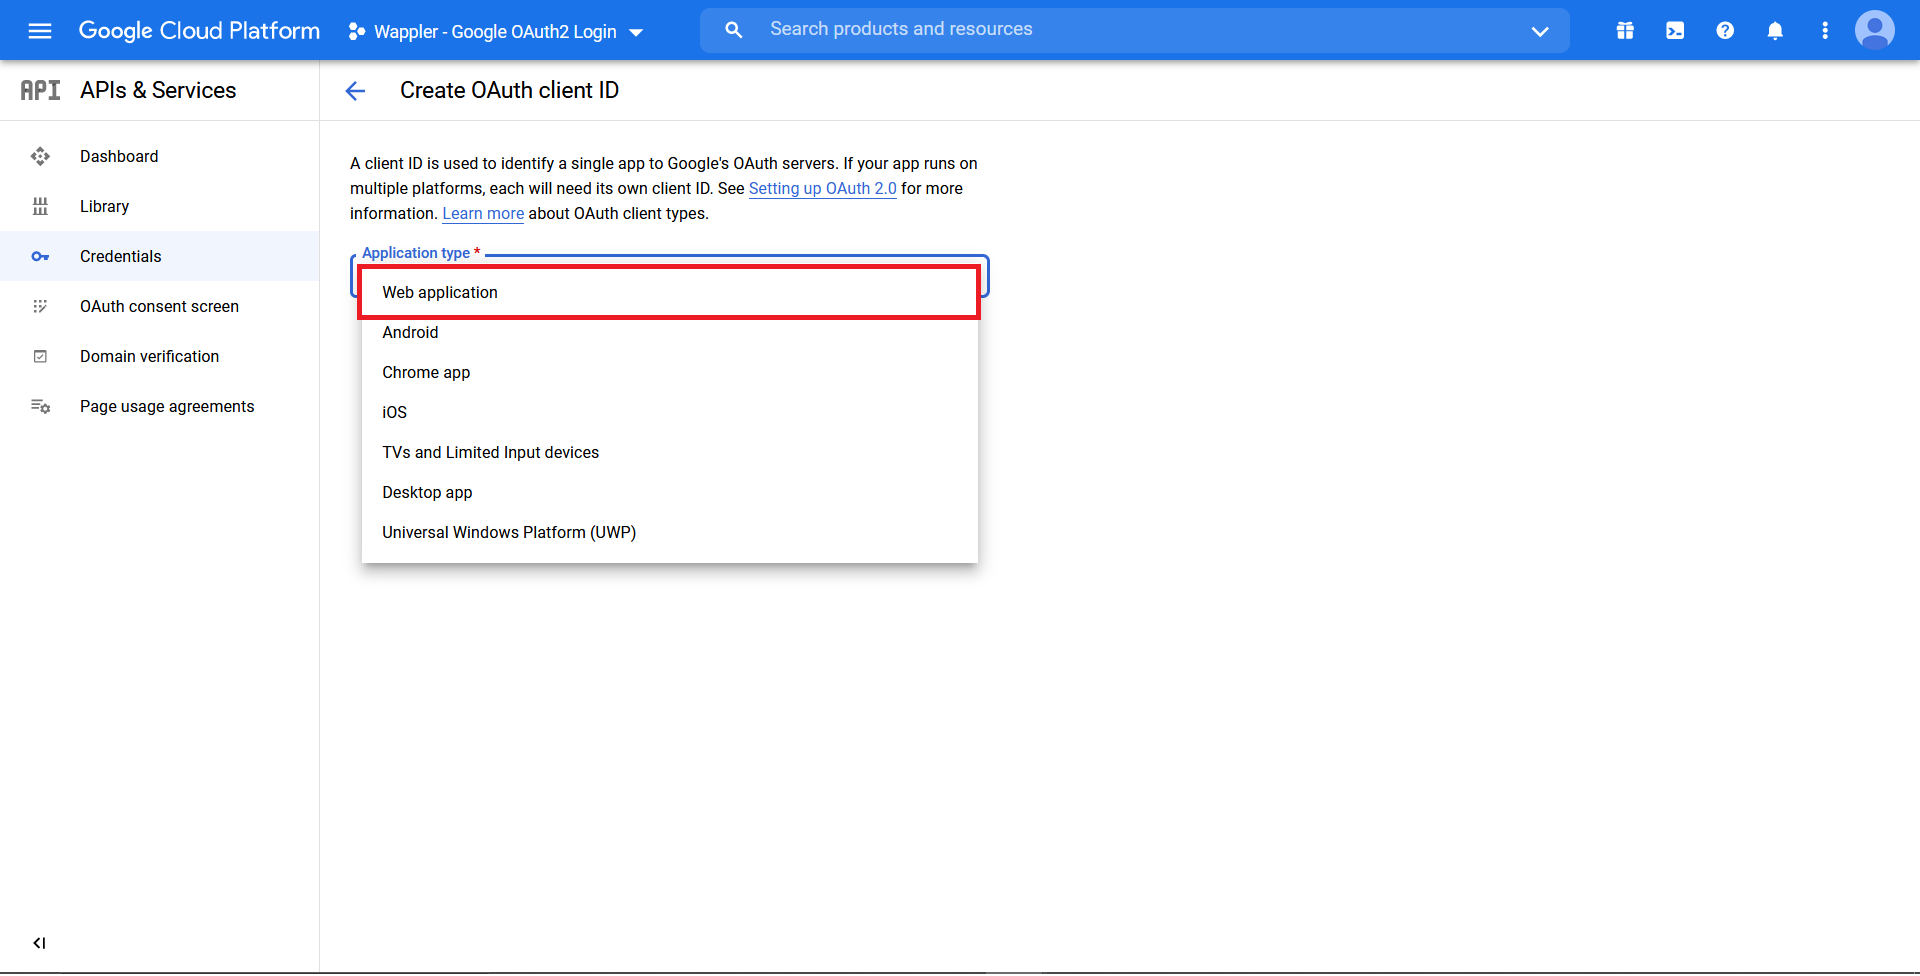
Click “Create”.
Section titled “Click “Create”.”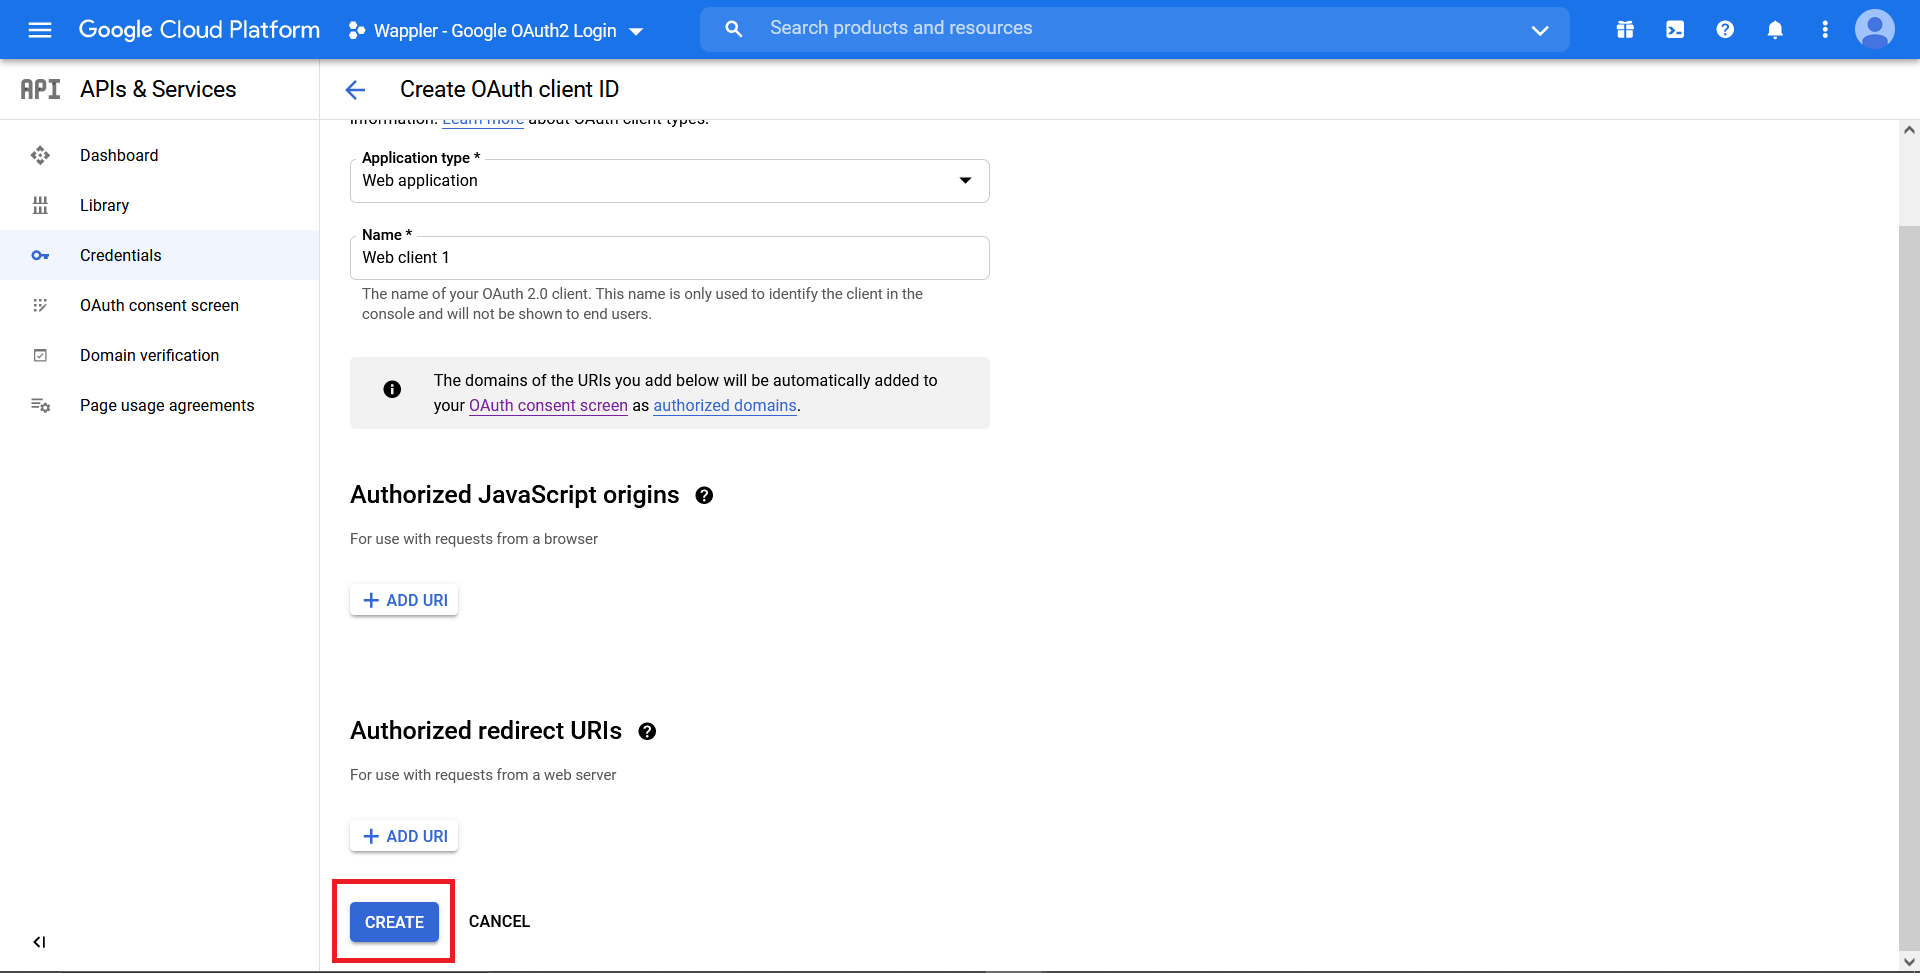
Step 28
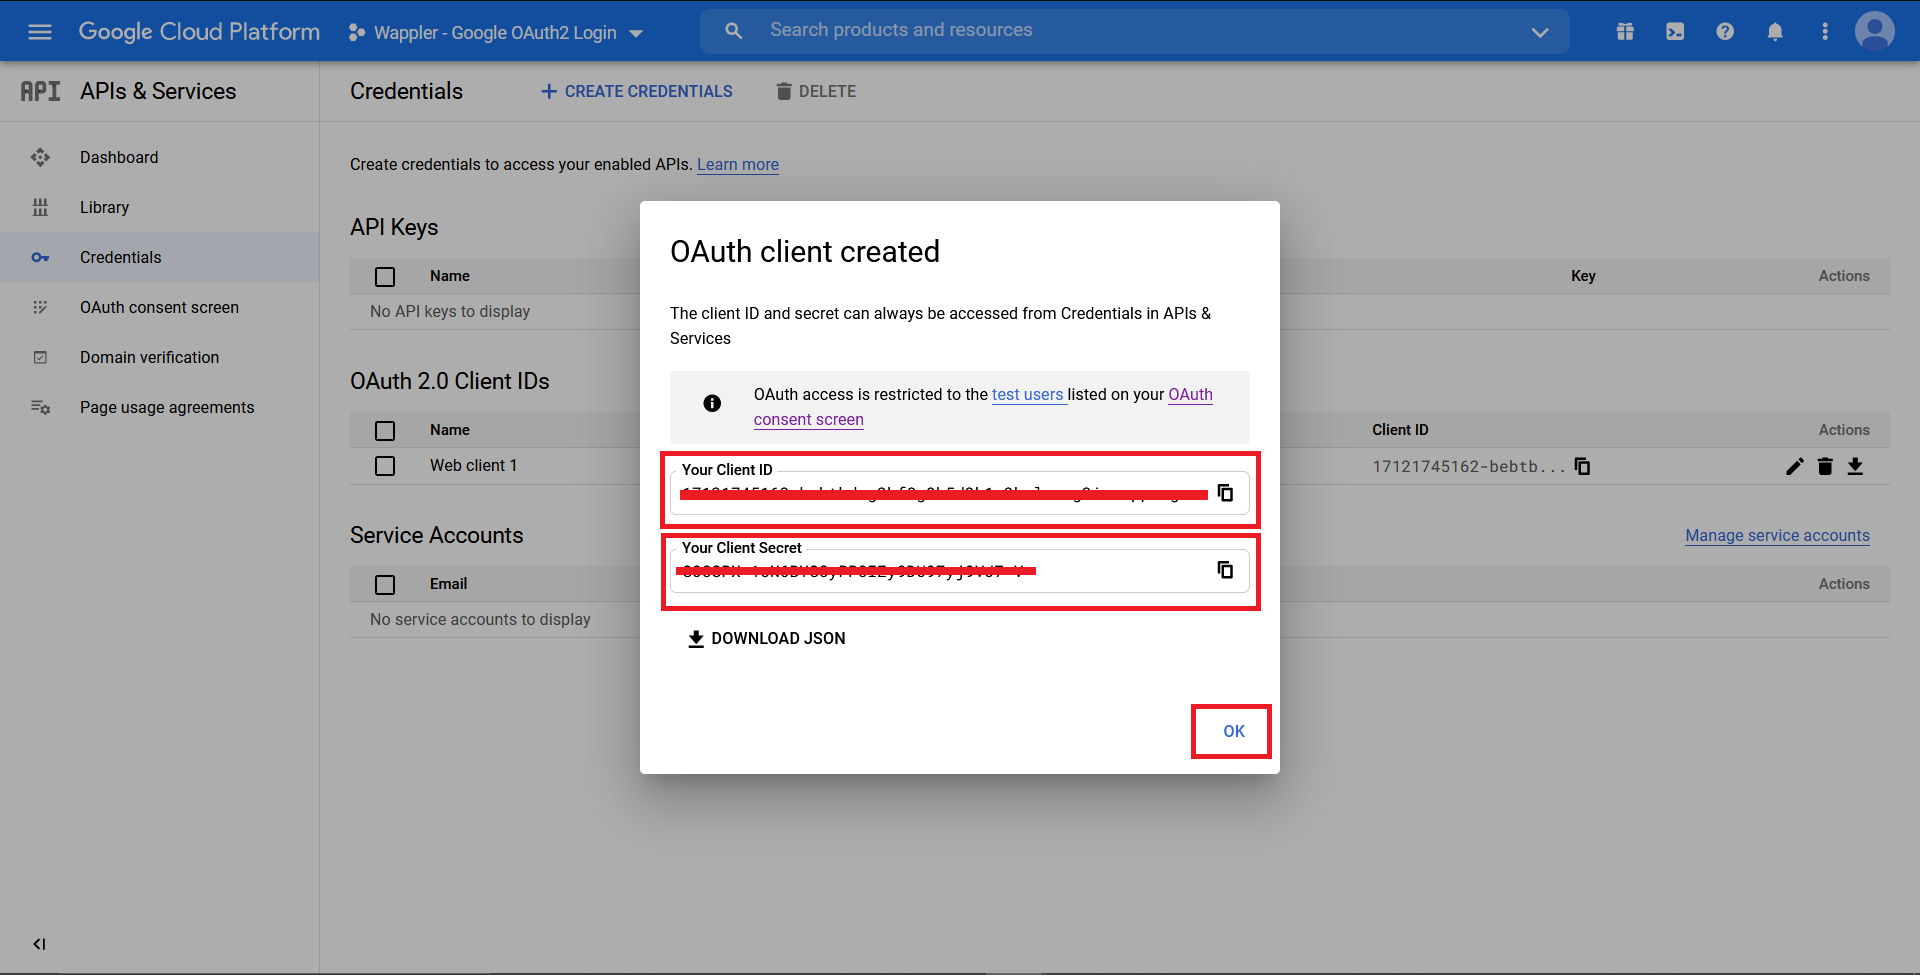
Section titled “Step 28”A box with “Client ID” and “Client Secret” credentials will pop up. Copy both of them as we will need it later on.
Setting up server action
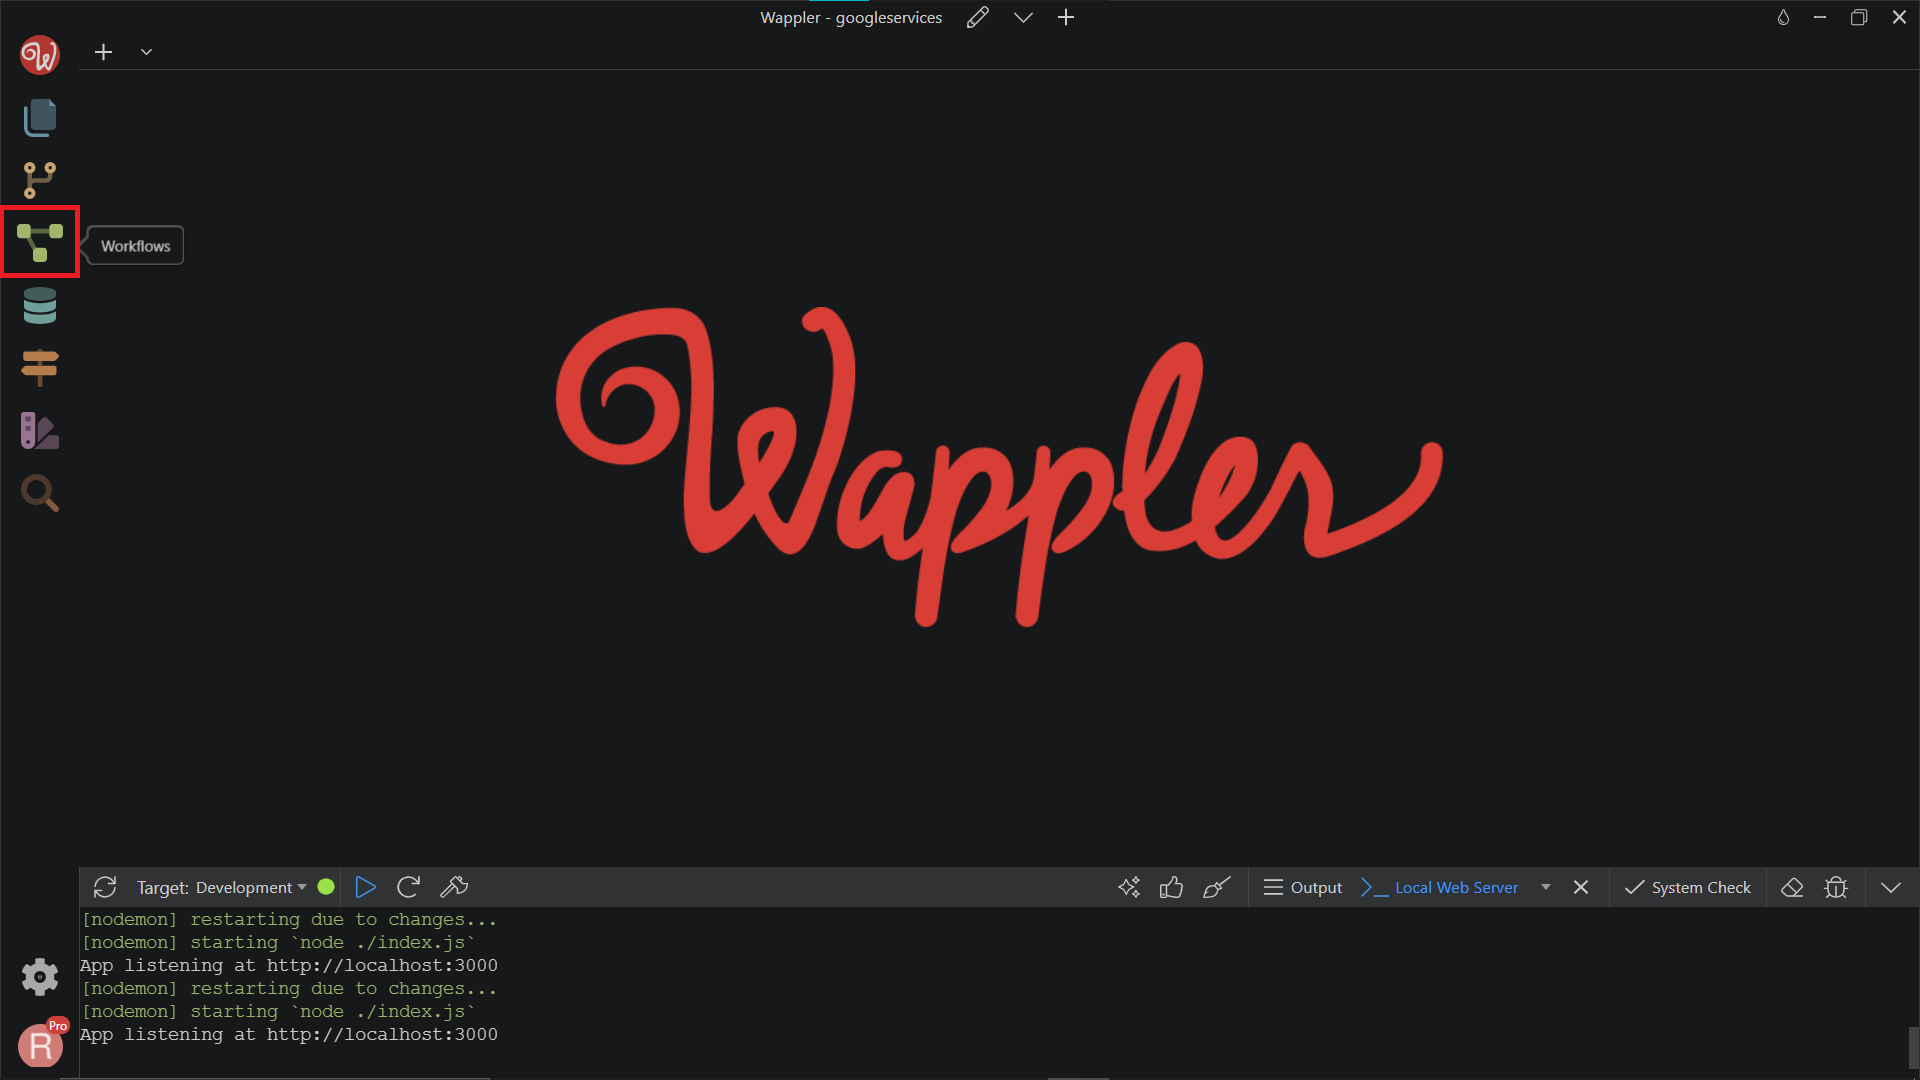
Section titled “Setting up server action”Now, head over to Wappler, and click on the “Workflows”.
Under the Globals component, right-click on the OAuth2, and click Add OAuth2 Provider.
Section titled “Under the Globals component, right-click on the OAuth2, and click Add OAuth2 Provider.”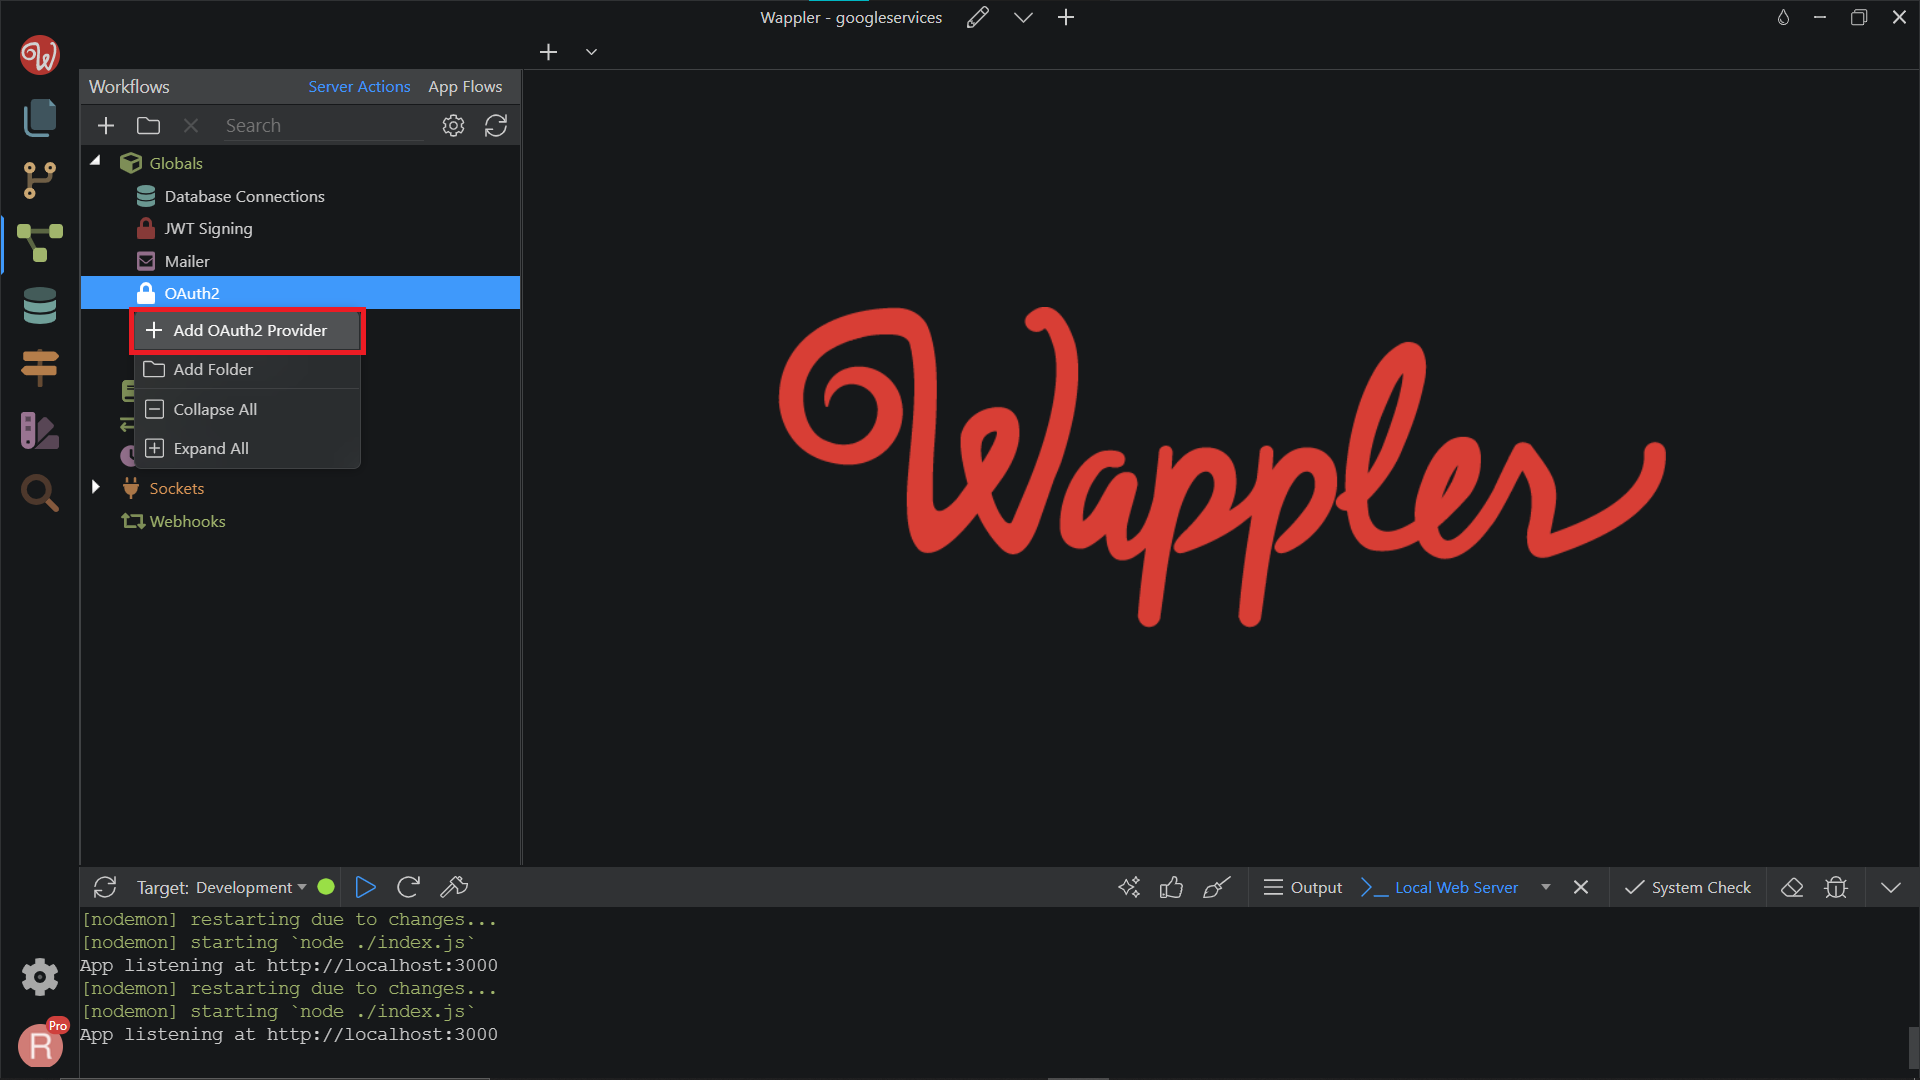
Step 32
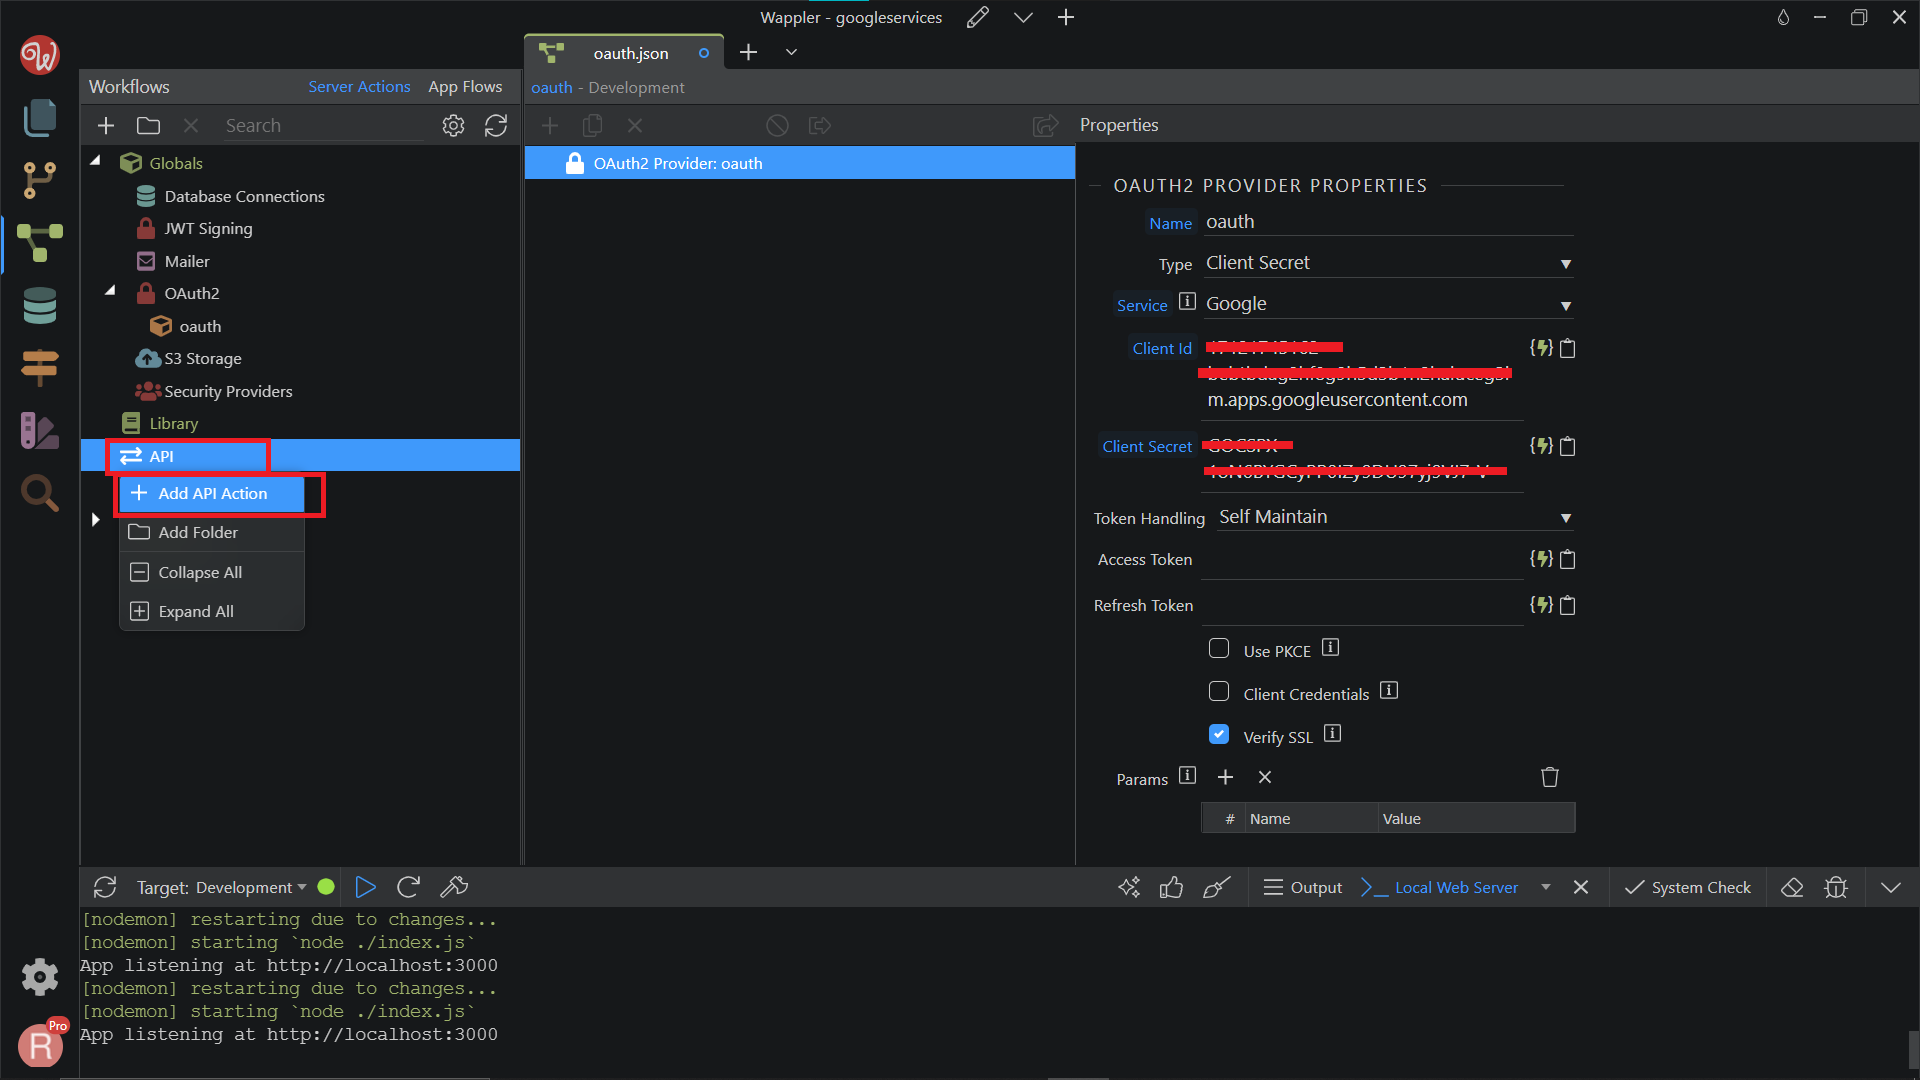
Section titled “Step 32”We named it oauth. In the Properties tab, change the Name to oauth , the Type to Client Secret , Service to Google . For the Client Id and Client Secret, we need to paste in the credentials that we have copied before. Change the Token Handling to Self Maintain. Also checked the Verify SSL checkbox.

Add API action
Section titled “Add API action”Next, go to the API action, right-click, Add API Action.
Give a meaningful name to it, we named it login_google . Then, click Open in Browser.
Section titled “Give a meaningful name to it, we named it login_google . Then, click Open in Browser.”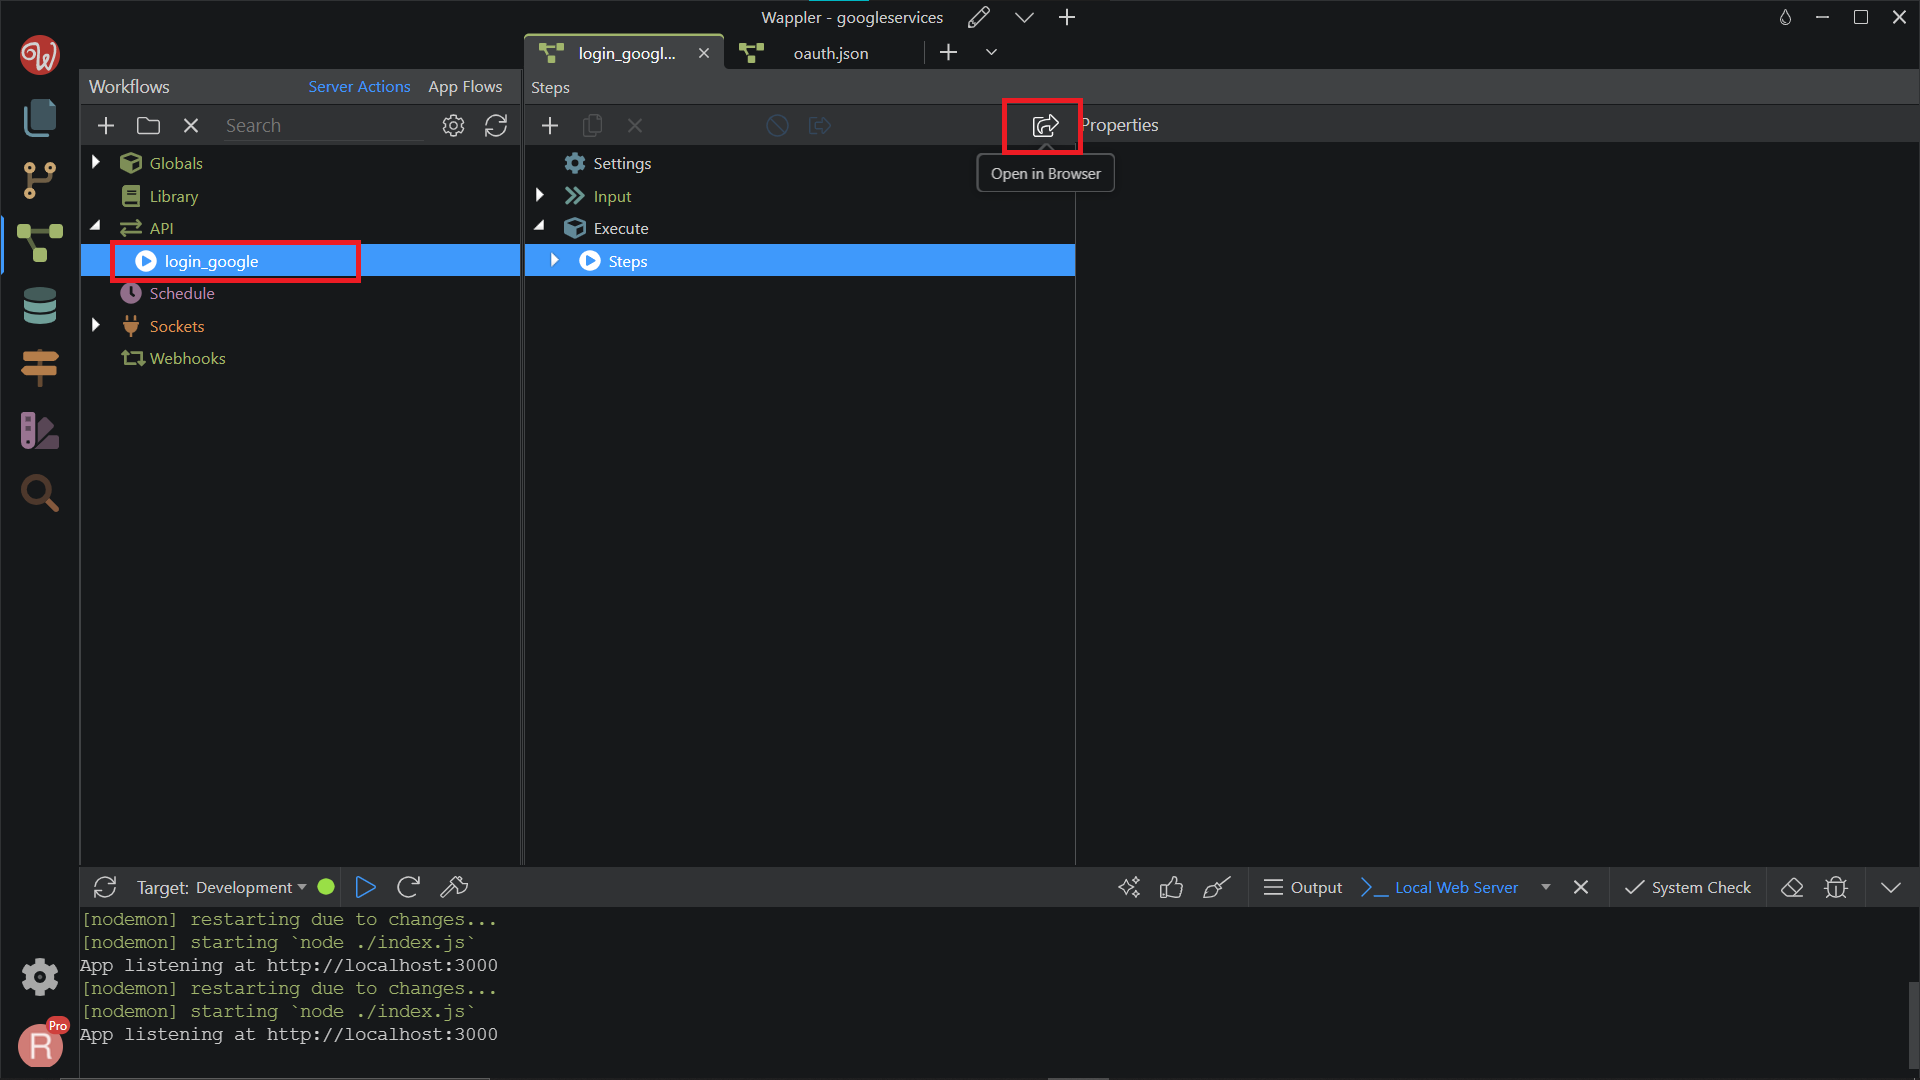
Step 36
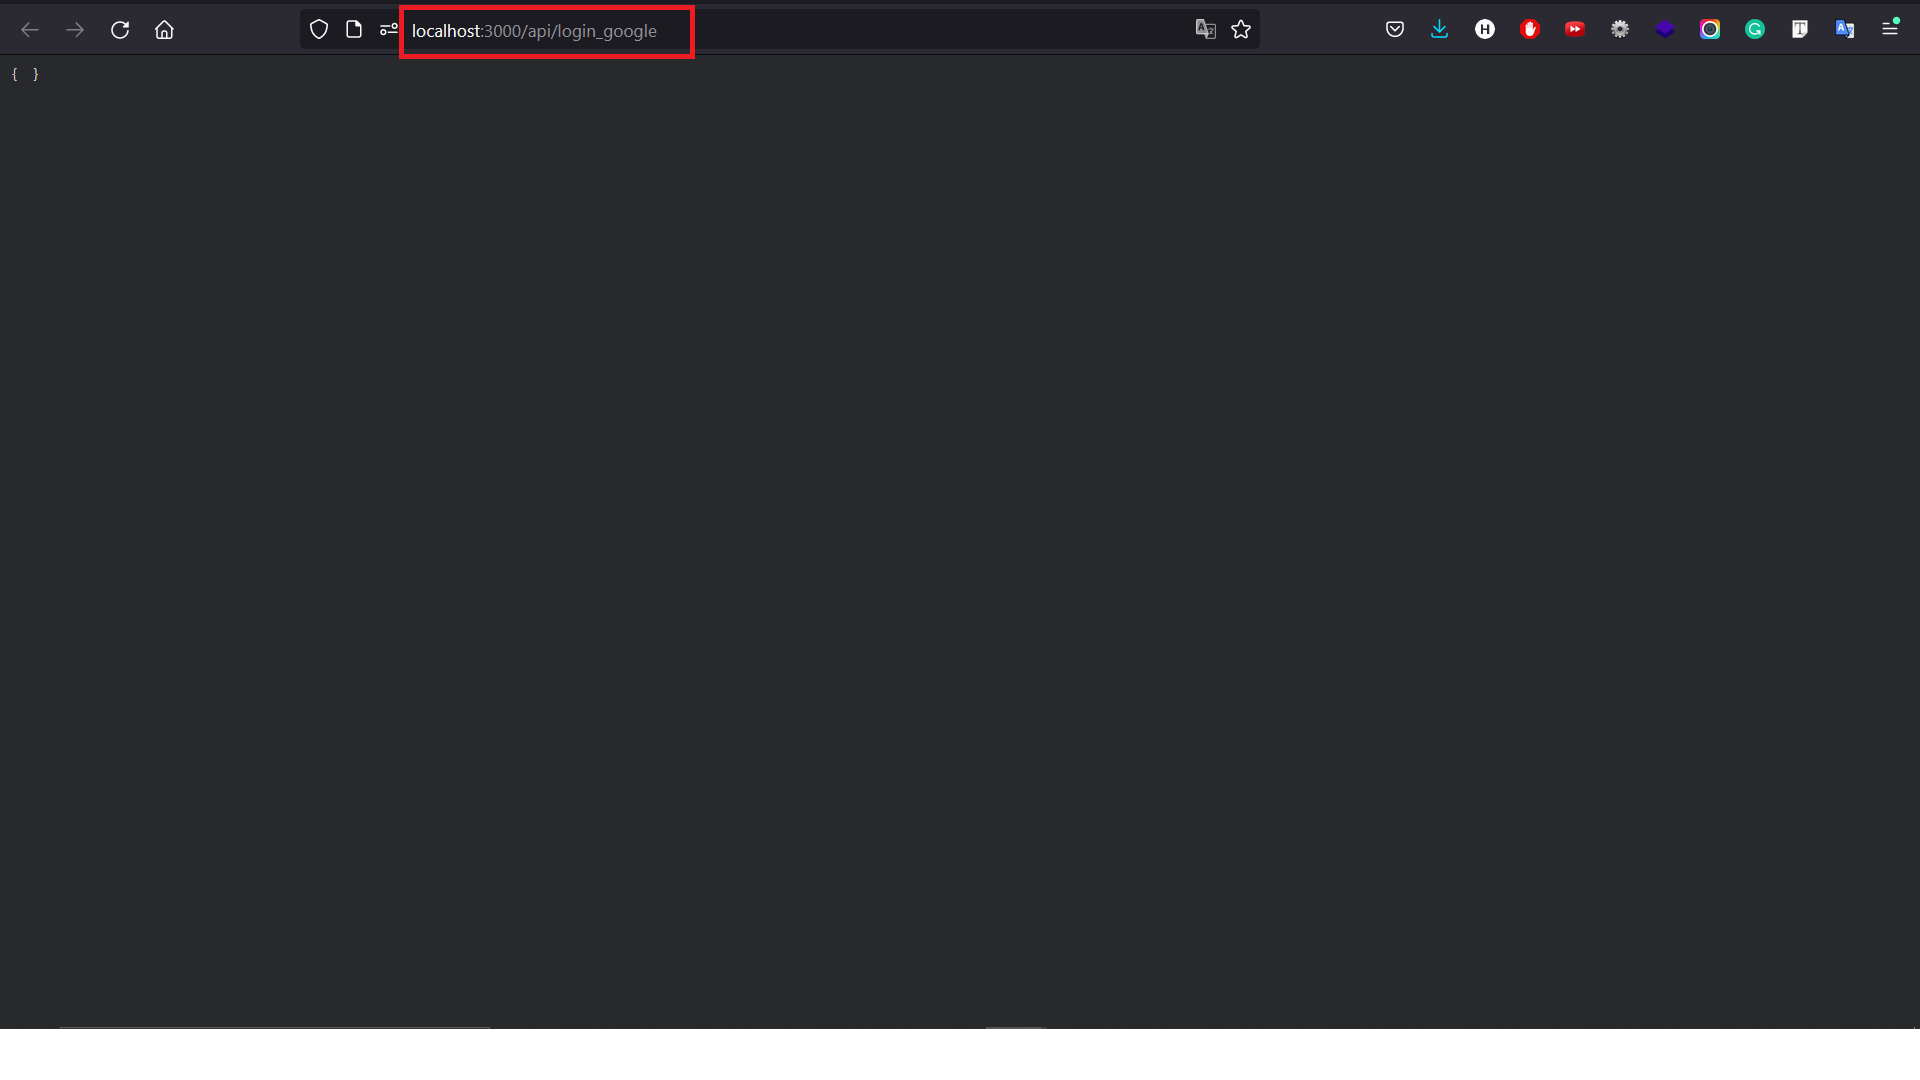
Section titled “Step 36”A new tab will open with the link on the address bar, copy the link. We need to put this link on the developer account, saying that this link is safe and created by us.
Step 37
Section titled “Step 37”Go back to the Google Developer website, click “Credentials”, and click the OAuth2 Client IDs that we have made before.
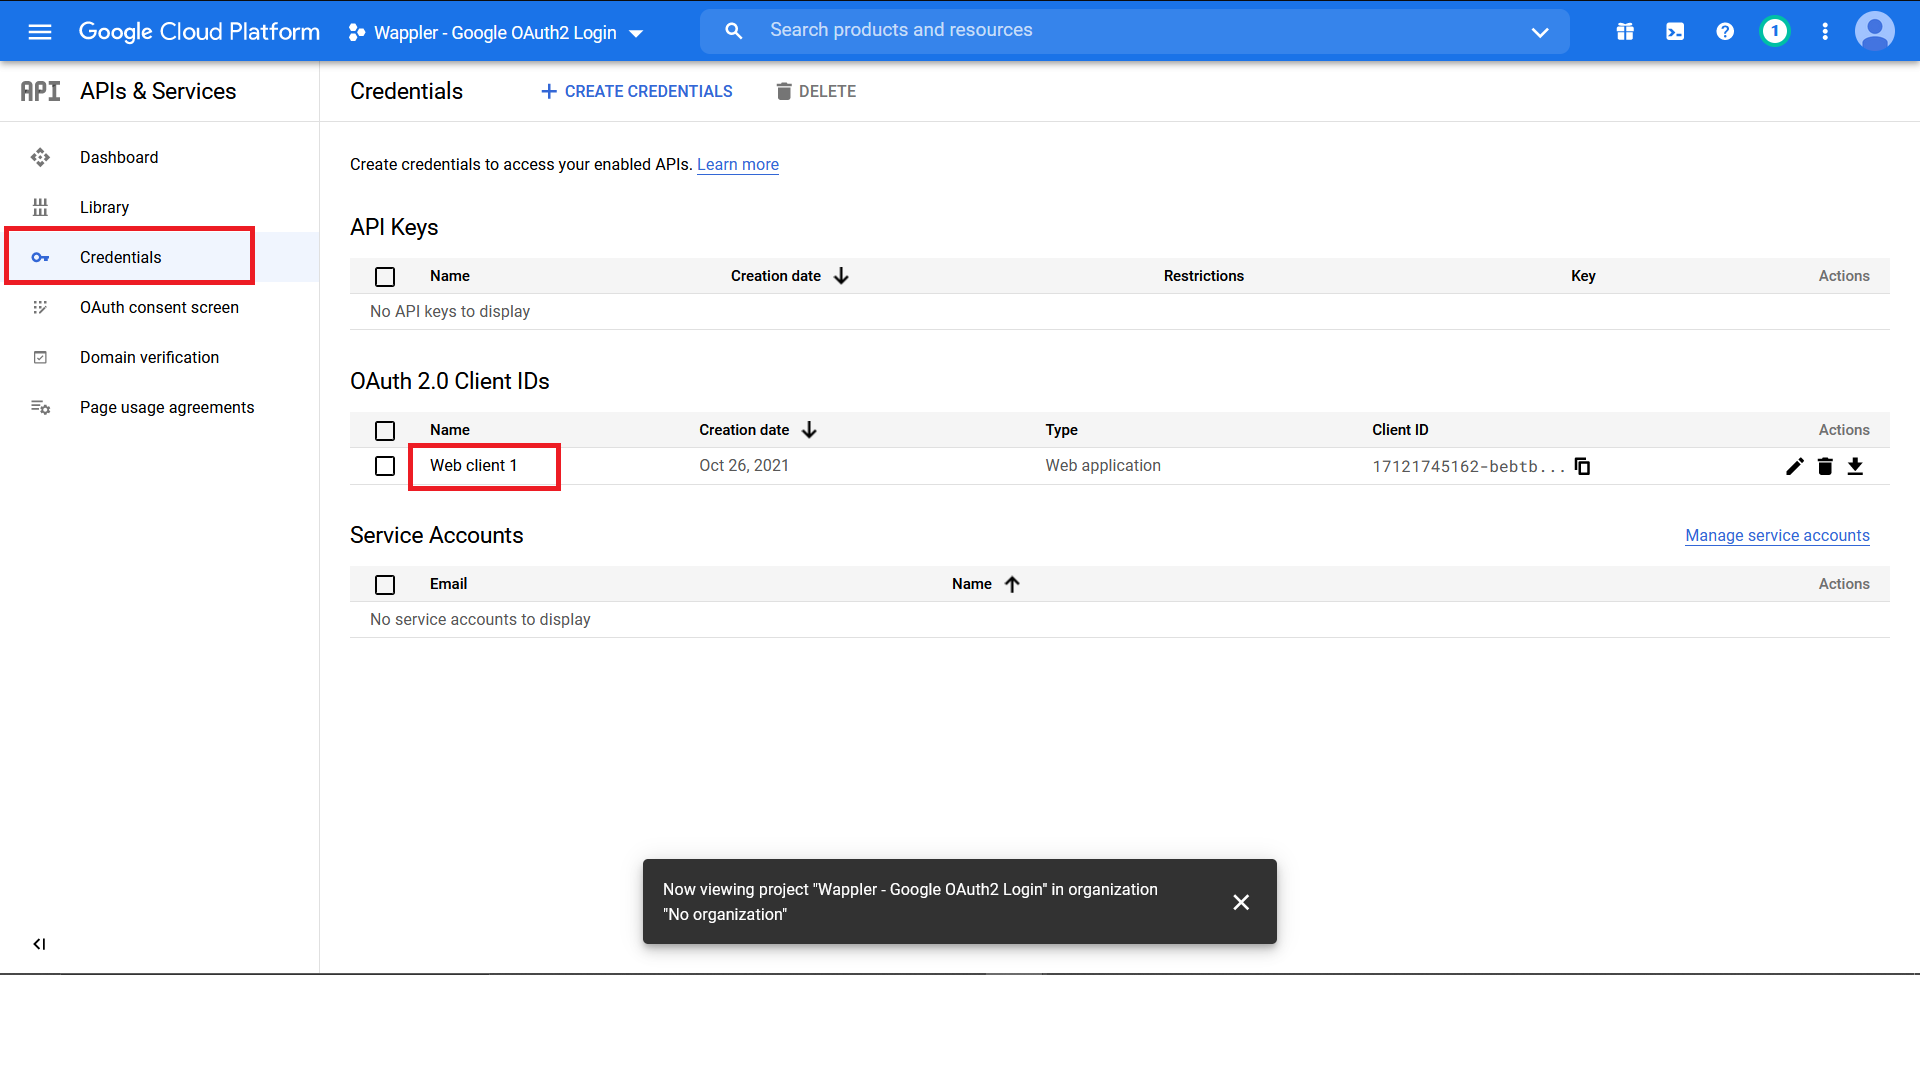
Scroll down until you find “Authorized redirect URIs”. Click “Add URI”.
Section titled “Scroll down until you find “Authorized redirect URIs”. Click “Add URI”.”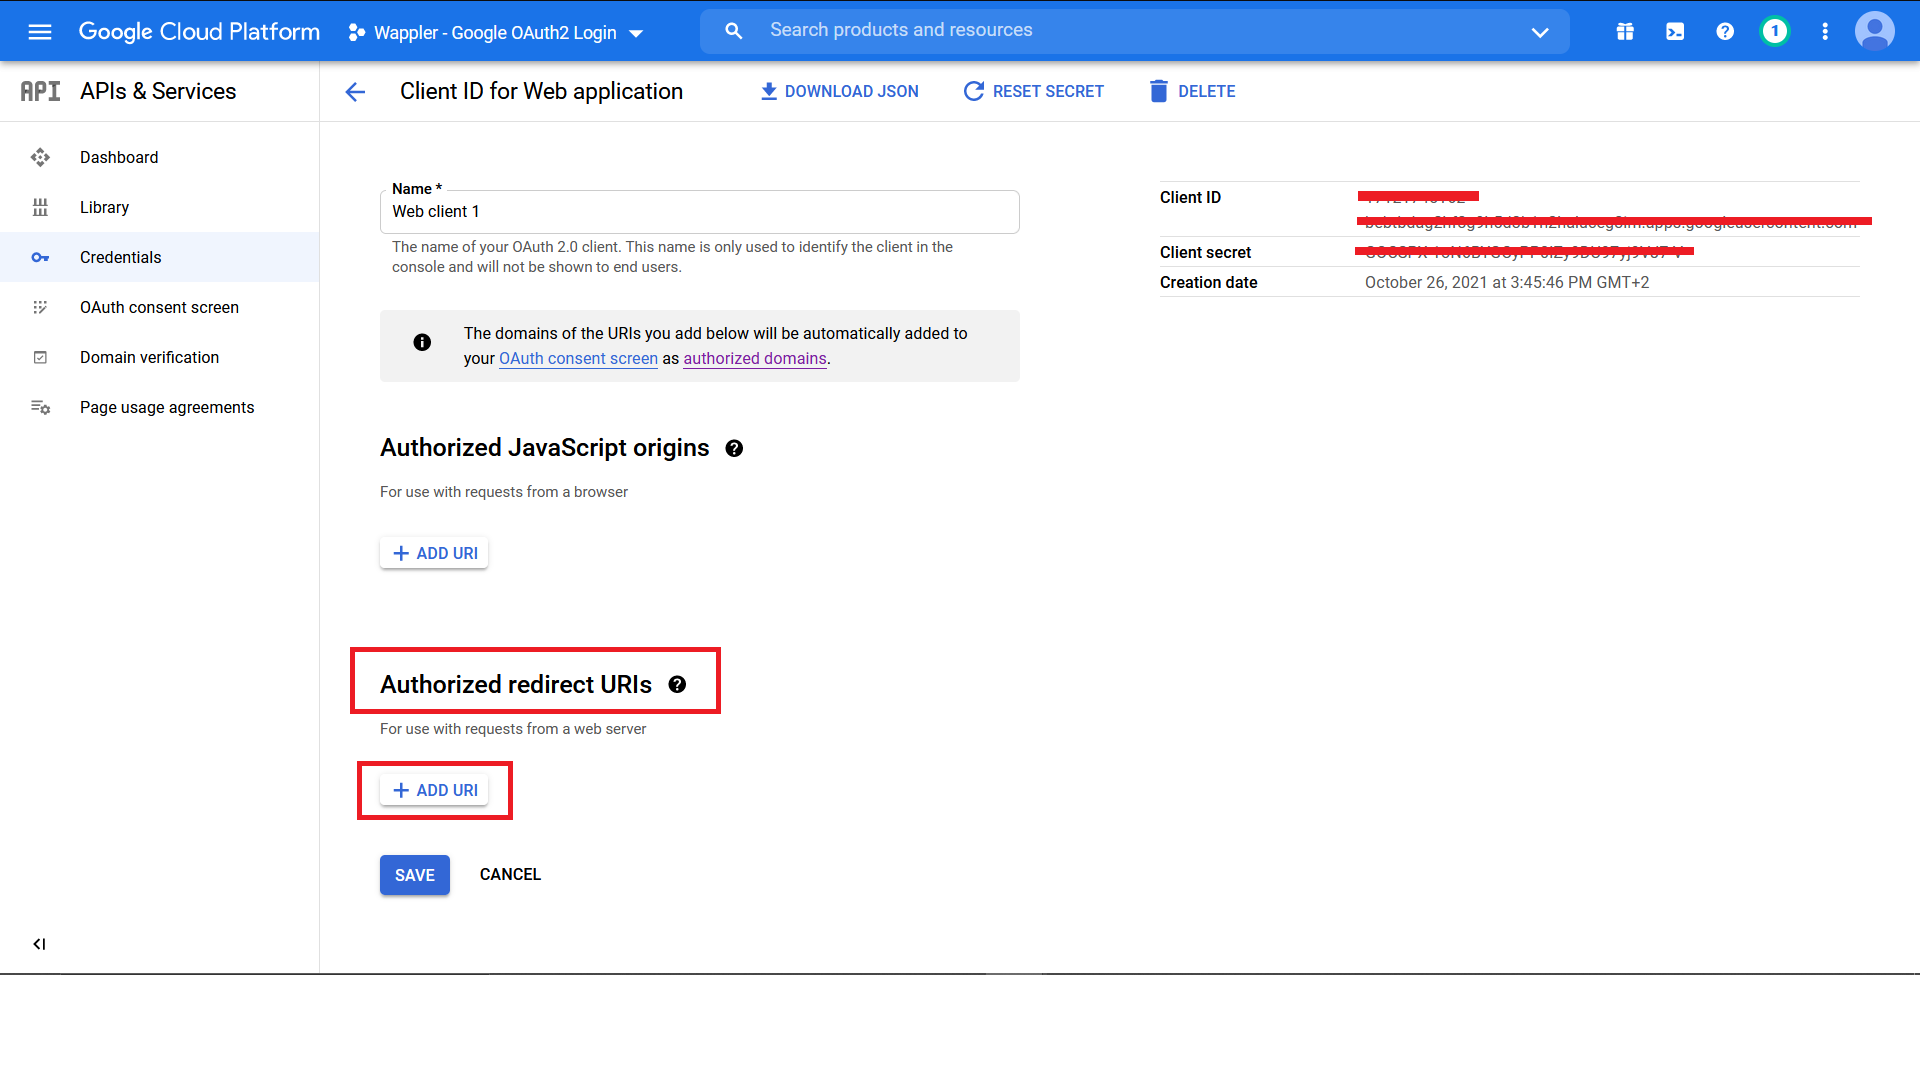
Paste the URL that we copied before. Click “Save”.
Section titled “Paste the URL that we copied before. Click “Save”.”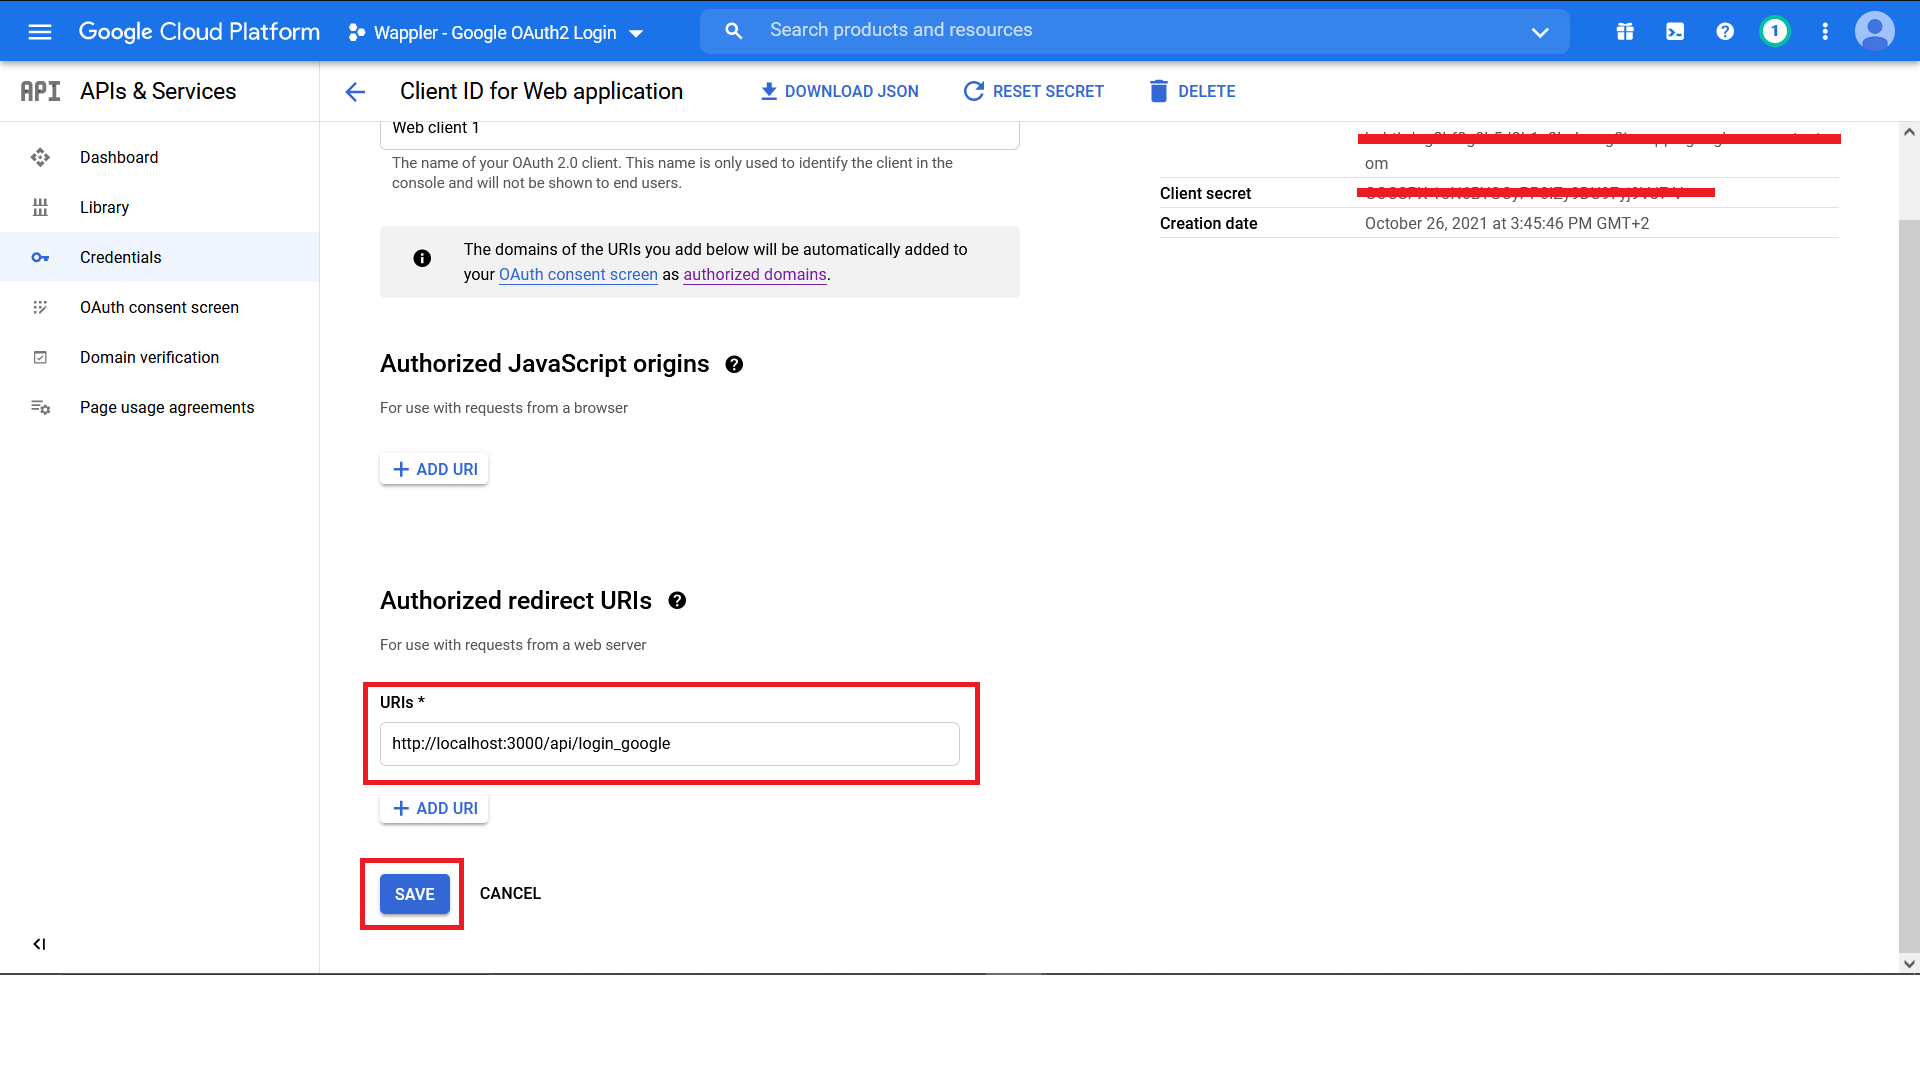
Now, go back to Wappler, in the login_google API, right-click on the Steps.
Section titled “Now, go back to Wappler, in the login_google API, right-click on the Steps.”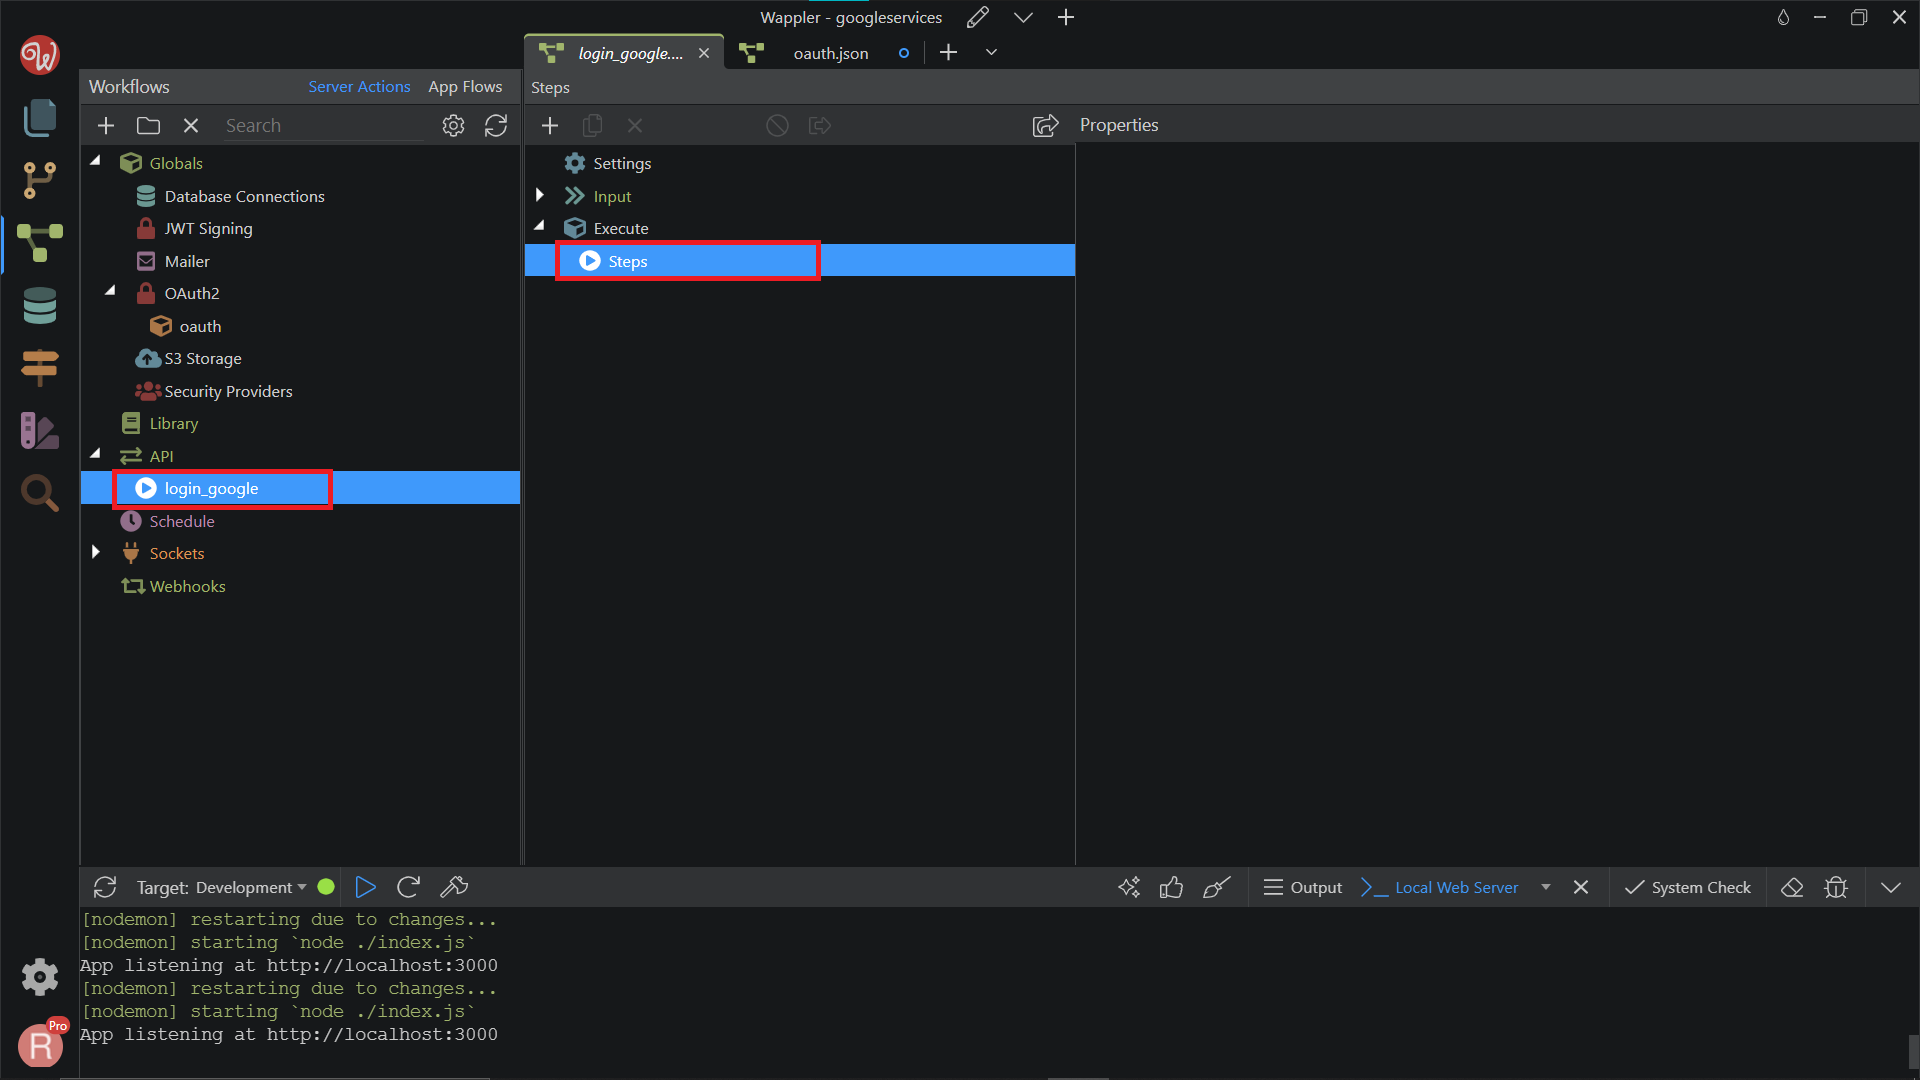
Search and add OAuth2 Authorize.
Section titled “Search and add OAuth2 Authorize.”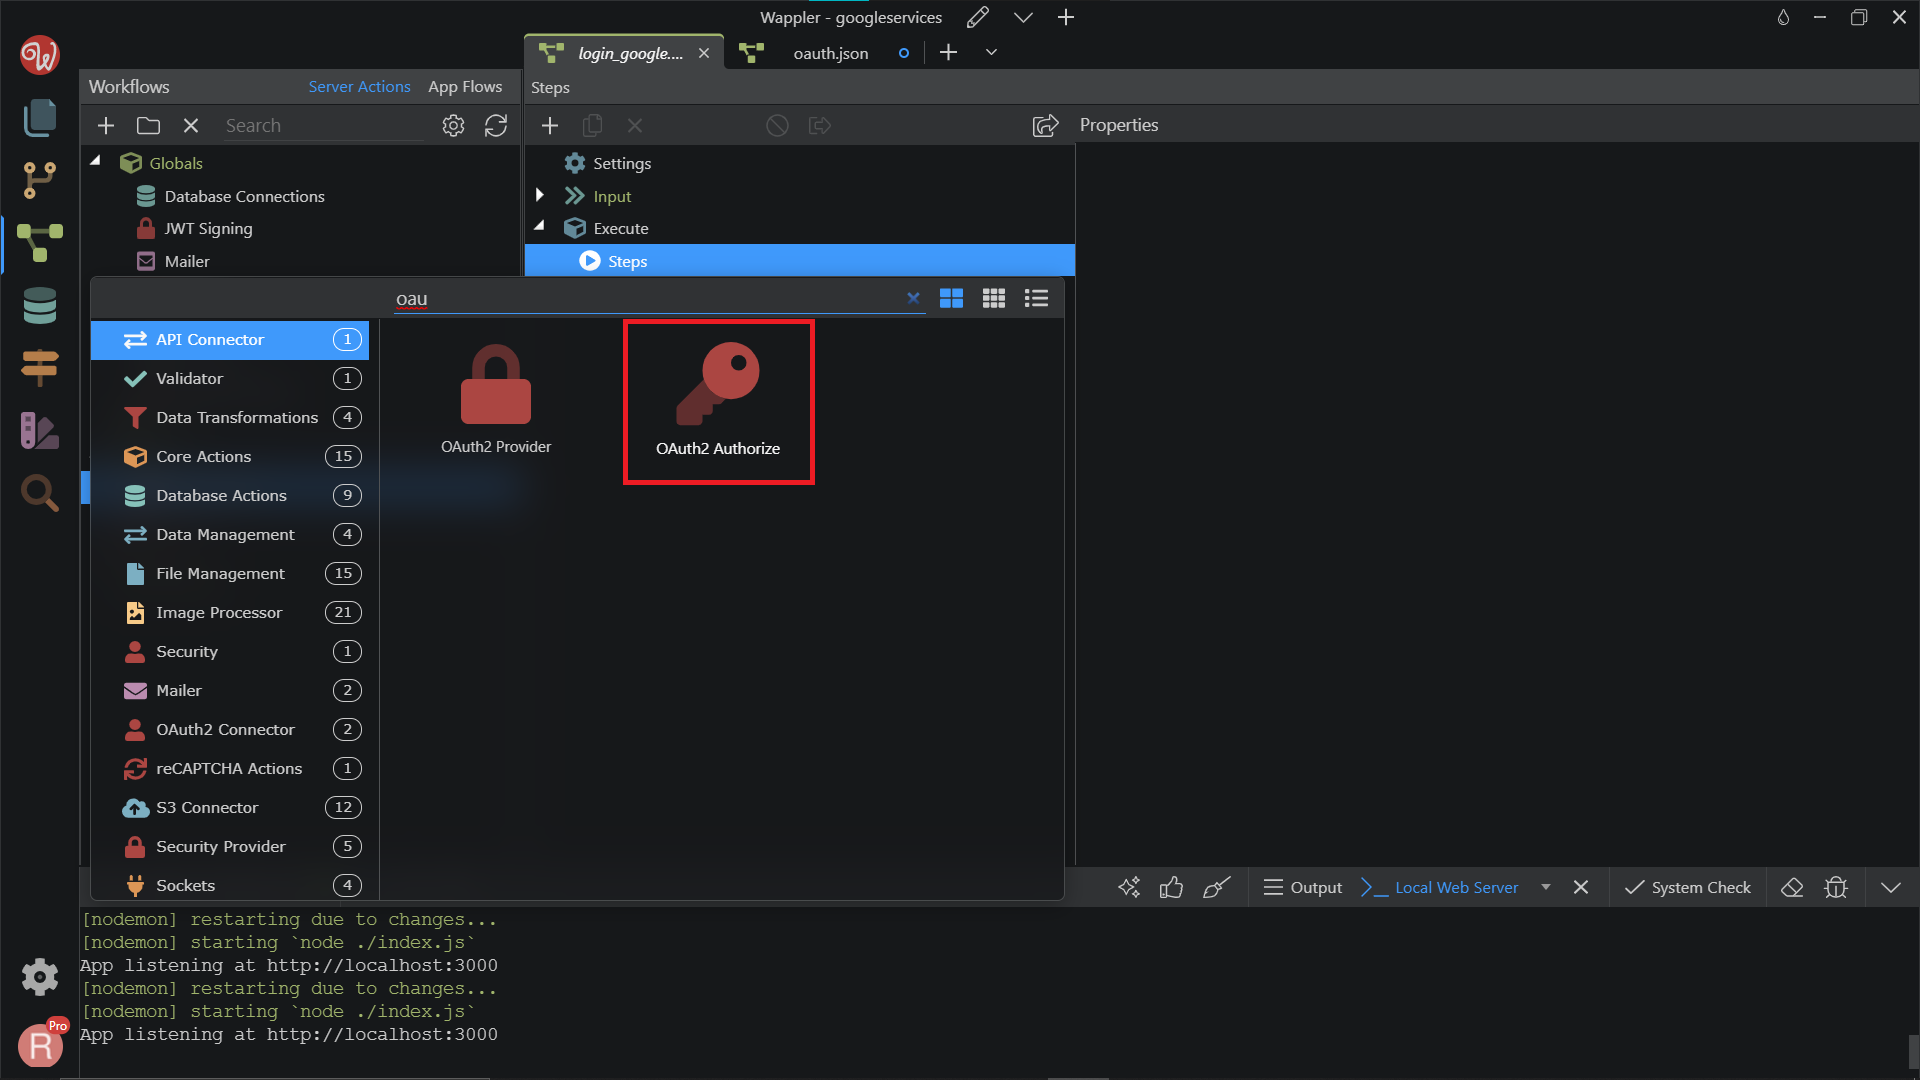
Step 42
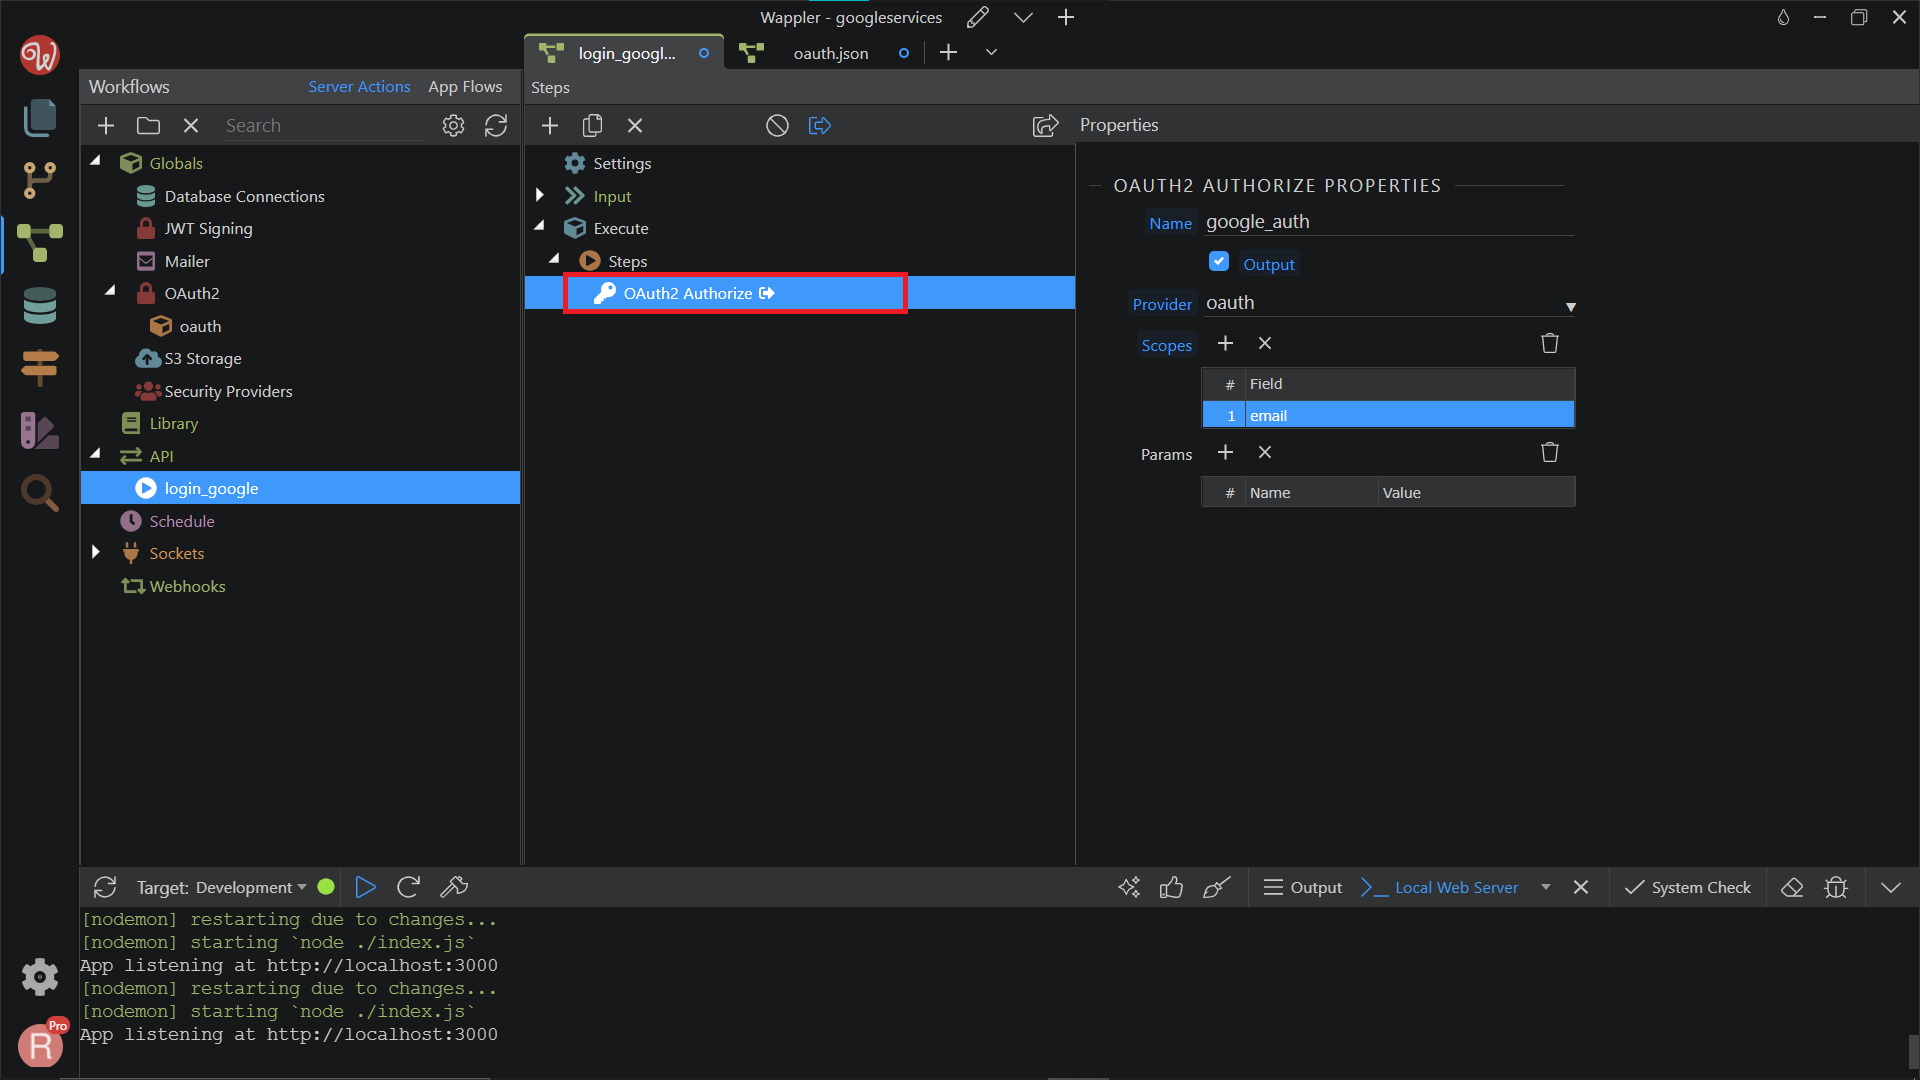
Section titled “Step 42”We change the name to google_auth, and choose the OAuth2 Provider that we have created before. For the Scopes, click Add New Scopes. We’d like to access the user’s email, so we can compare it with the users database table later, so we enter email.
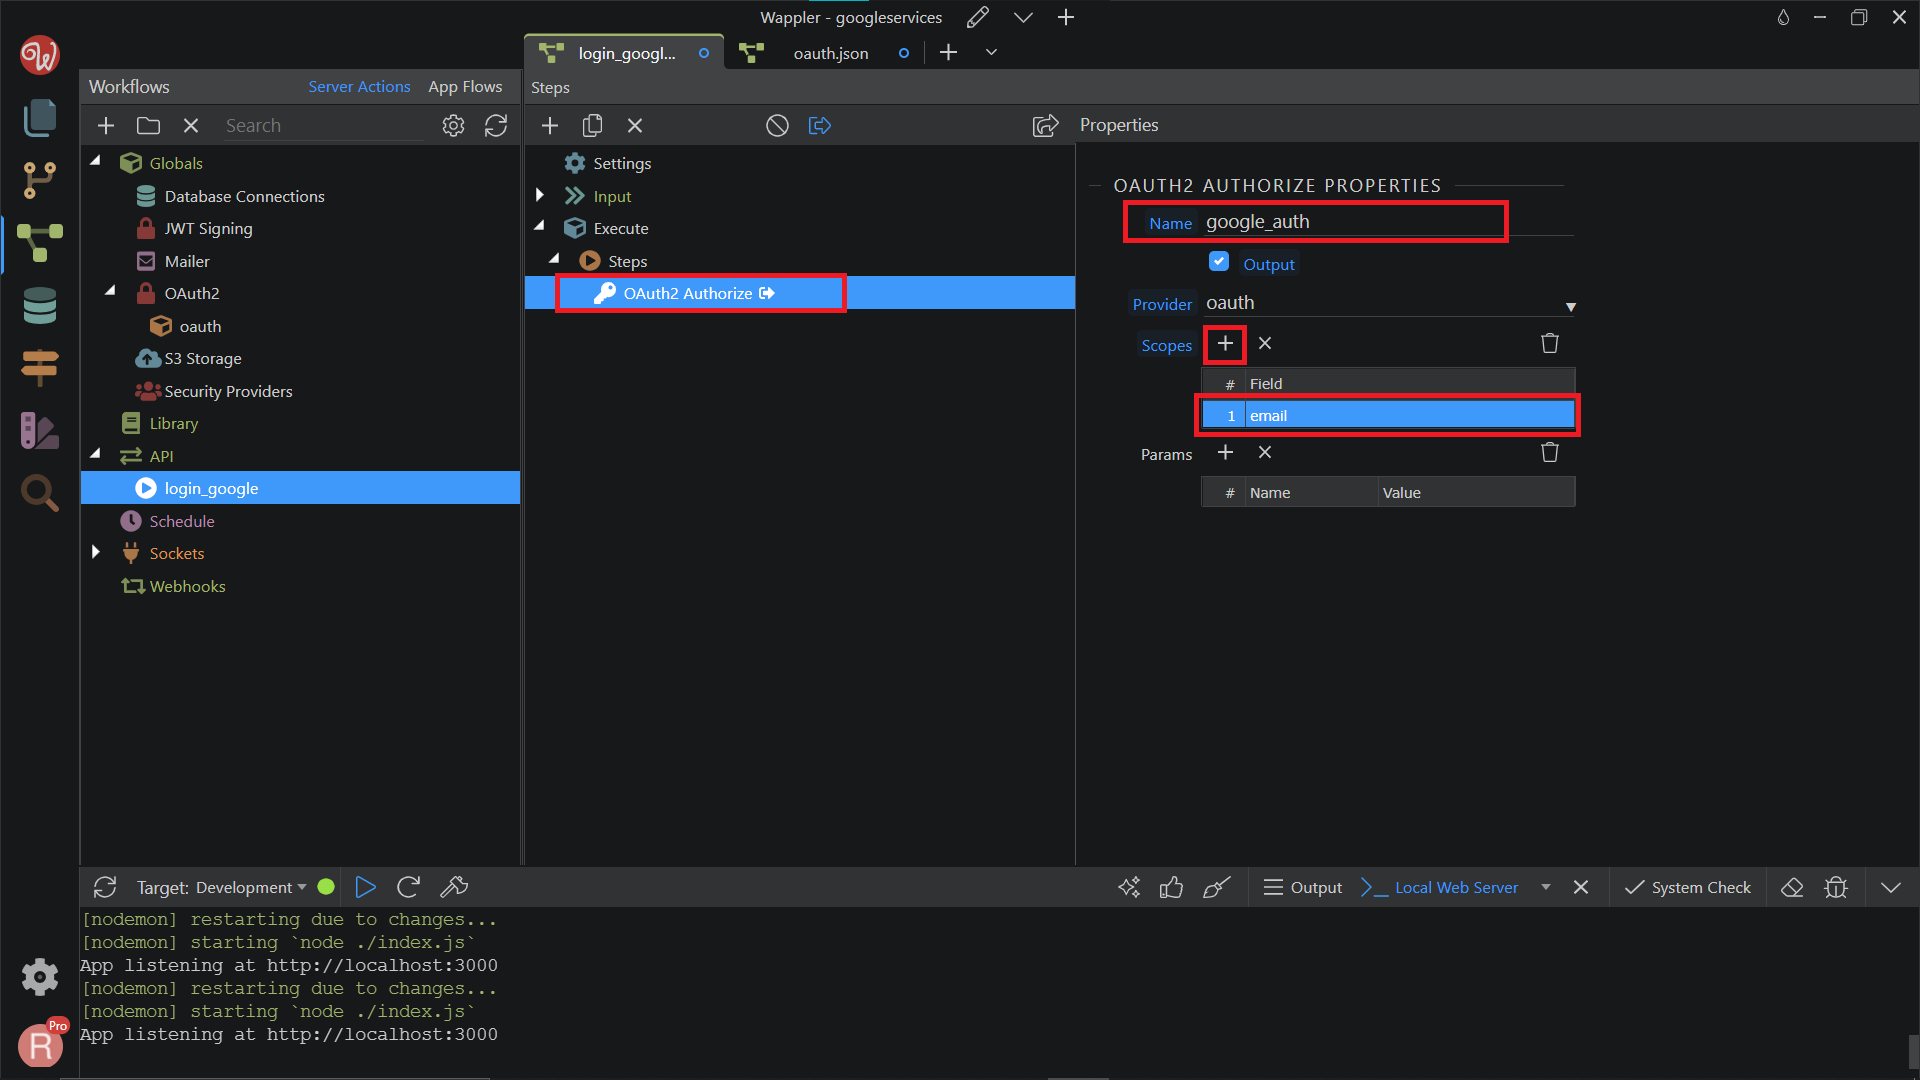
We are done setting up the user authorization, now we need to get the user info.
Section titled “We are done setting up the user authorization, now we need to get the user info.”Right-click on the OAuth2 Authorize to add new Steps.
Search and add API Action.
Section titled “Search and add API Action.”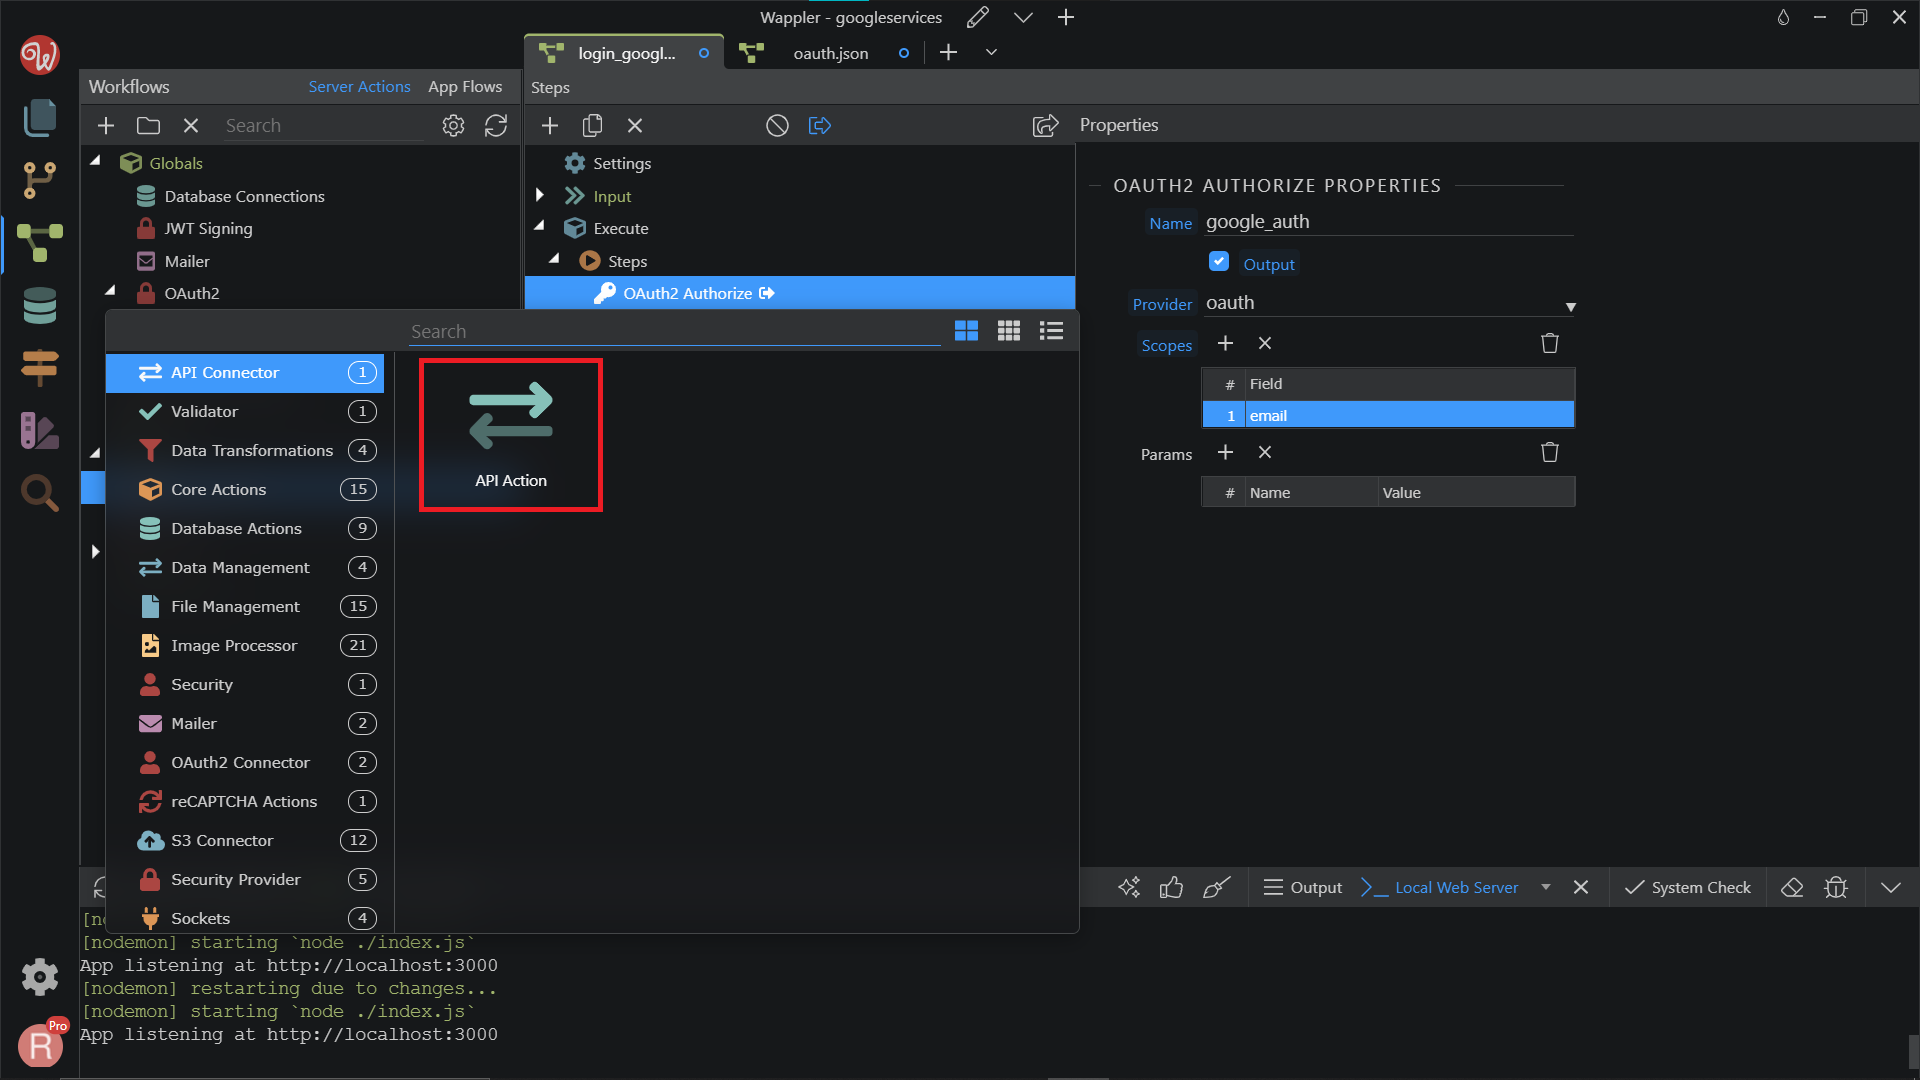
Step 45
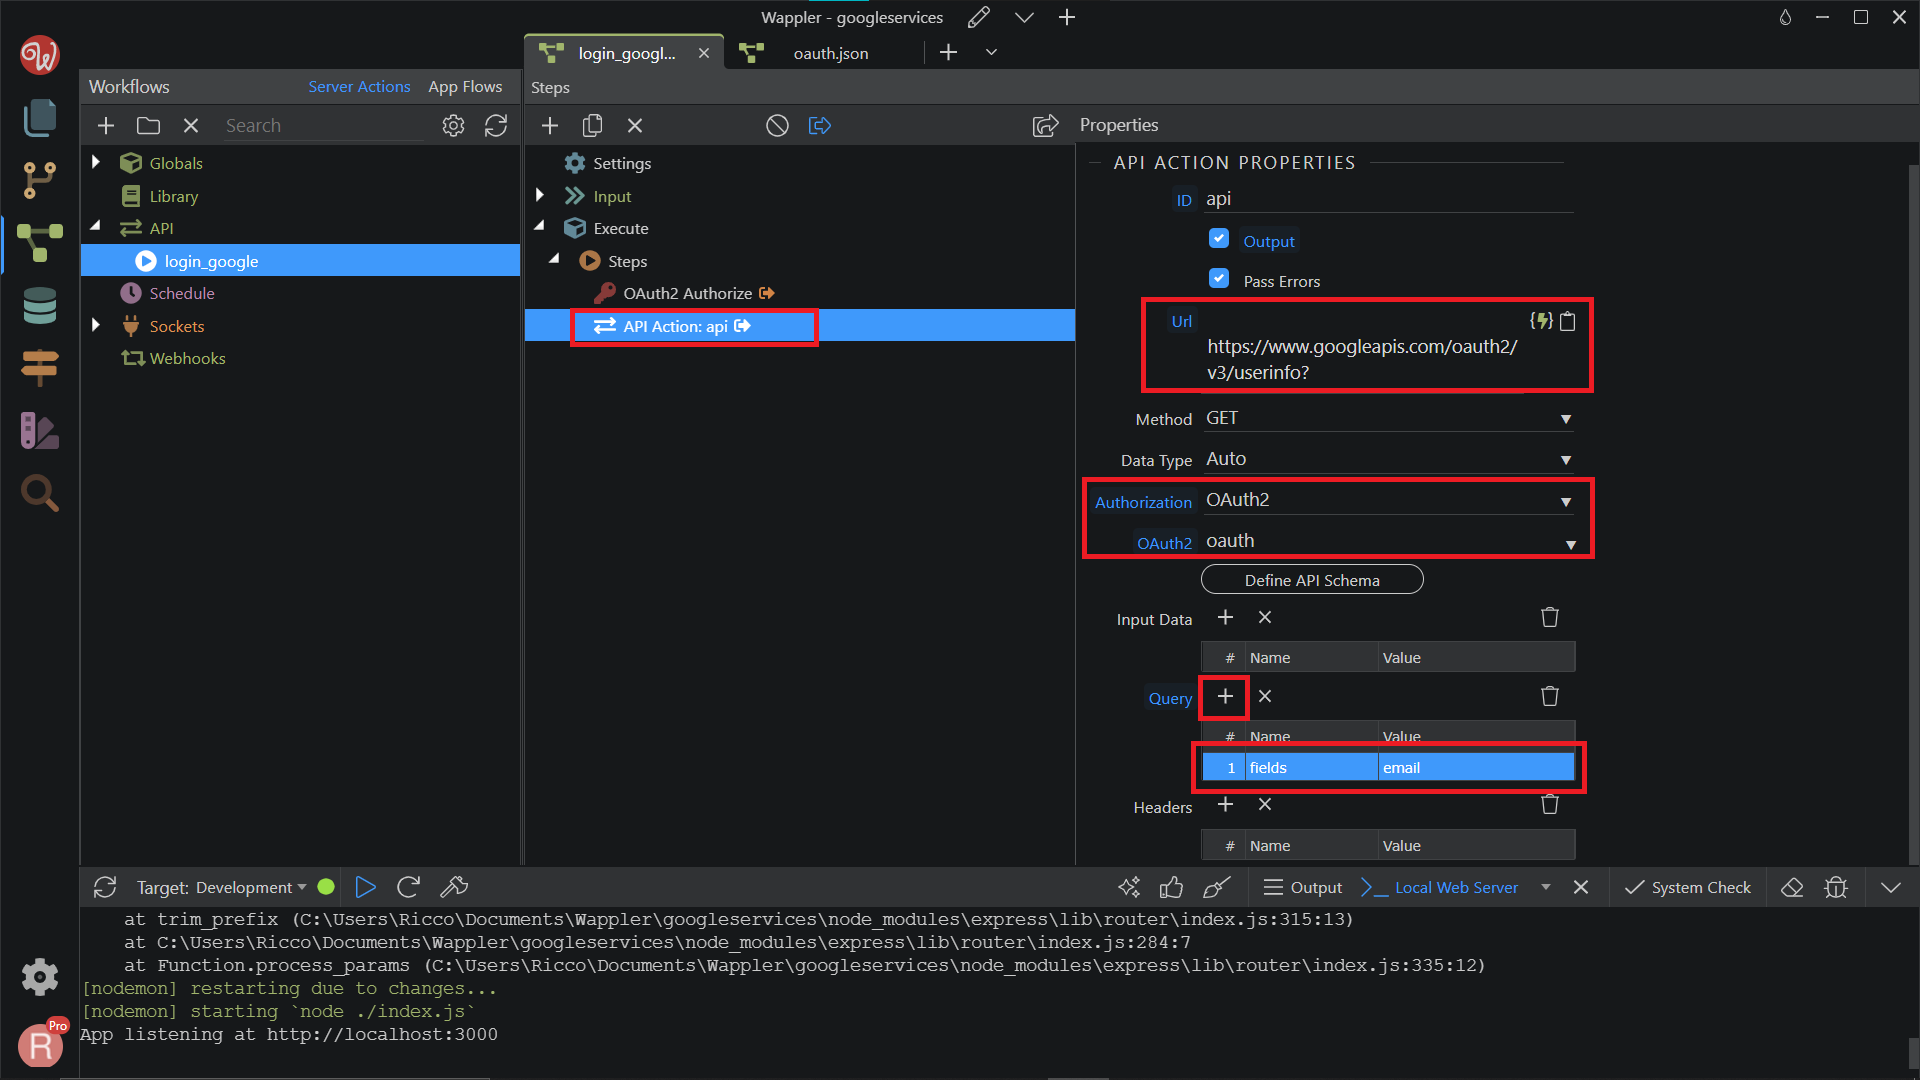
Section titled “Step 45”In the API URL field add https://www.googleapis.com/oauth2/v3/userinfo? - this is the URL you need to access to get the user info. For the Authorization, choose the OAuth2 from the dropdown. In the OAuth2 field, select our OAuth2 Provider, which is oauth. In the Query Parameters add Name: fields and a Value for it: email .
Save your server action, and click the Open In Browser button.
Section titled “Save your server action, and click the Open In Browser button.”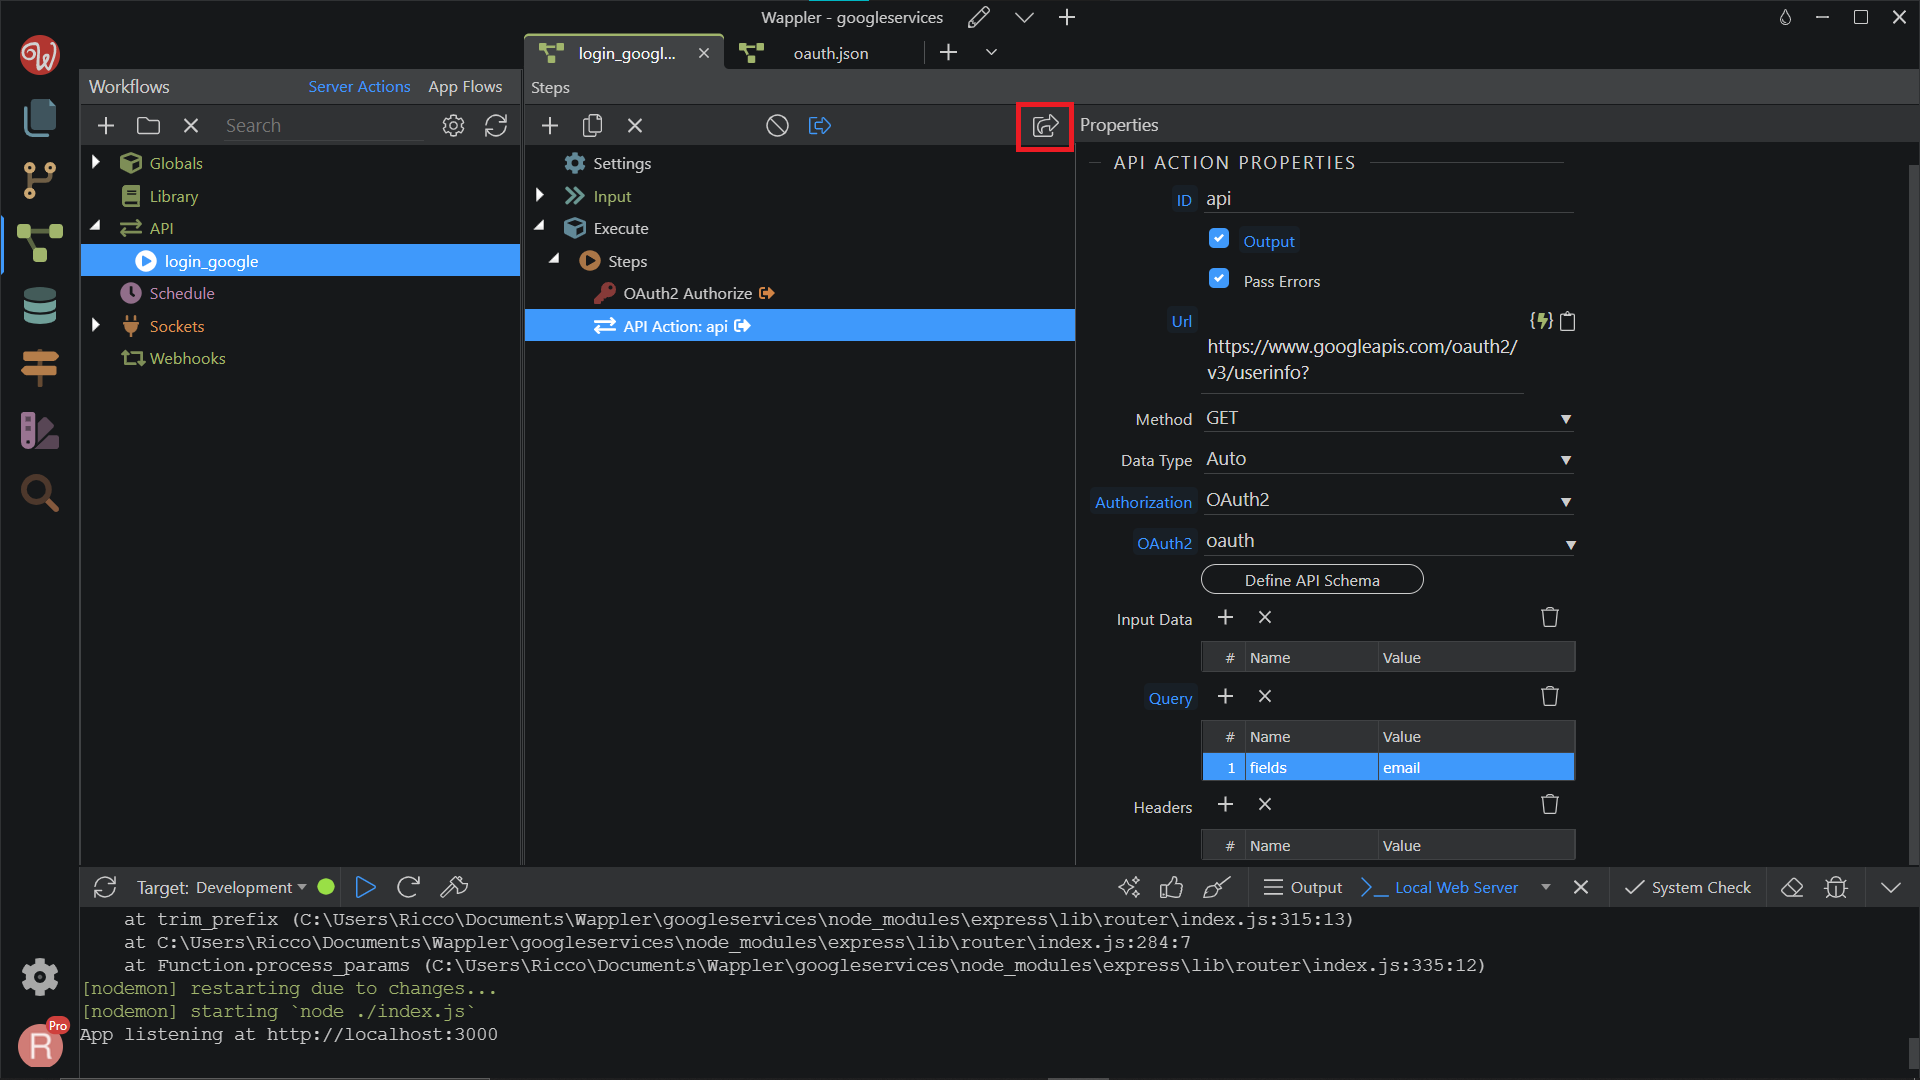
Step 47
Section titled “Step 47”You will be asked to Continue with your Google Account. Choose or log in with your Google account that you put on the test user before.
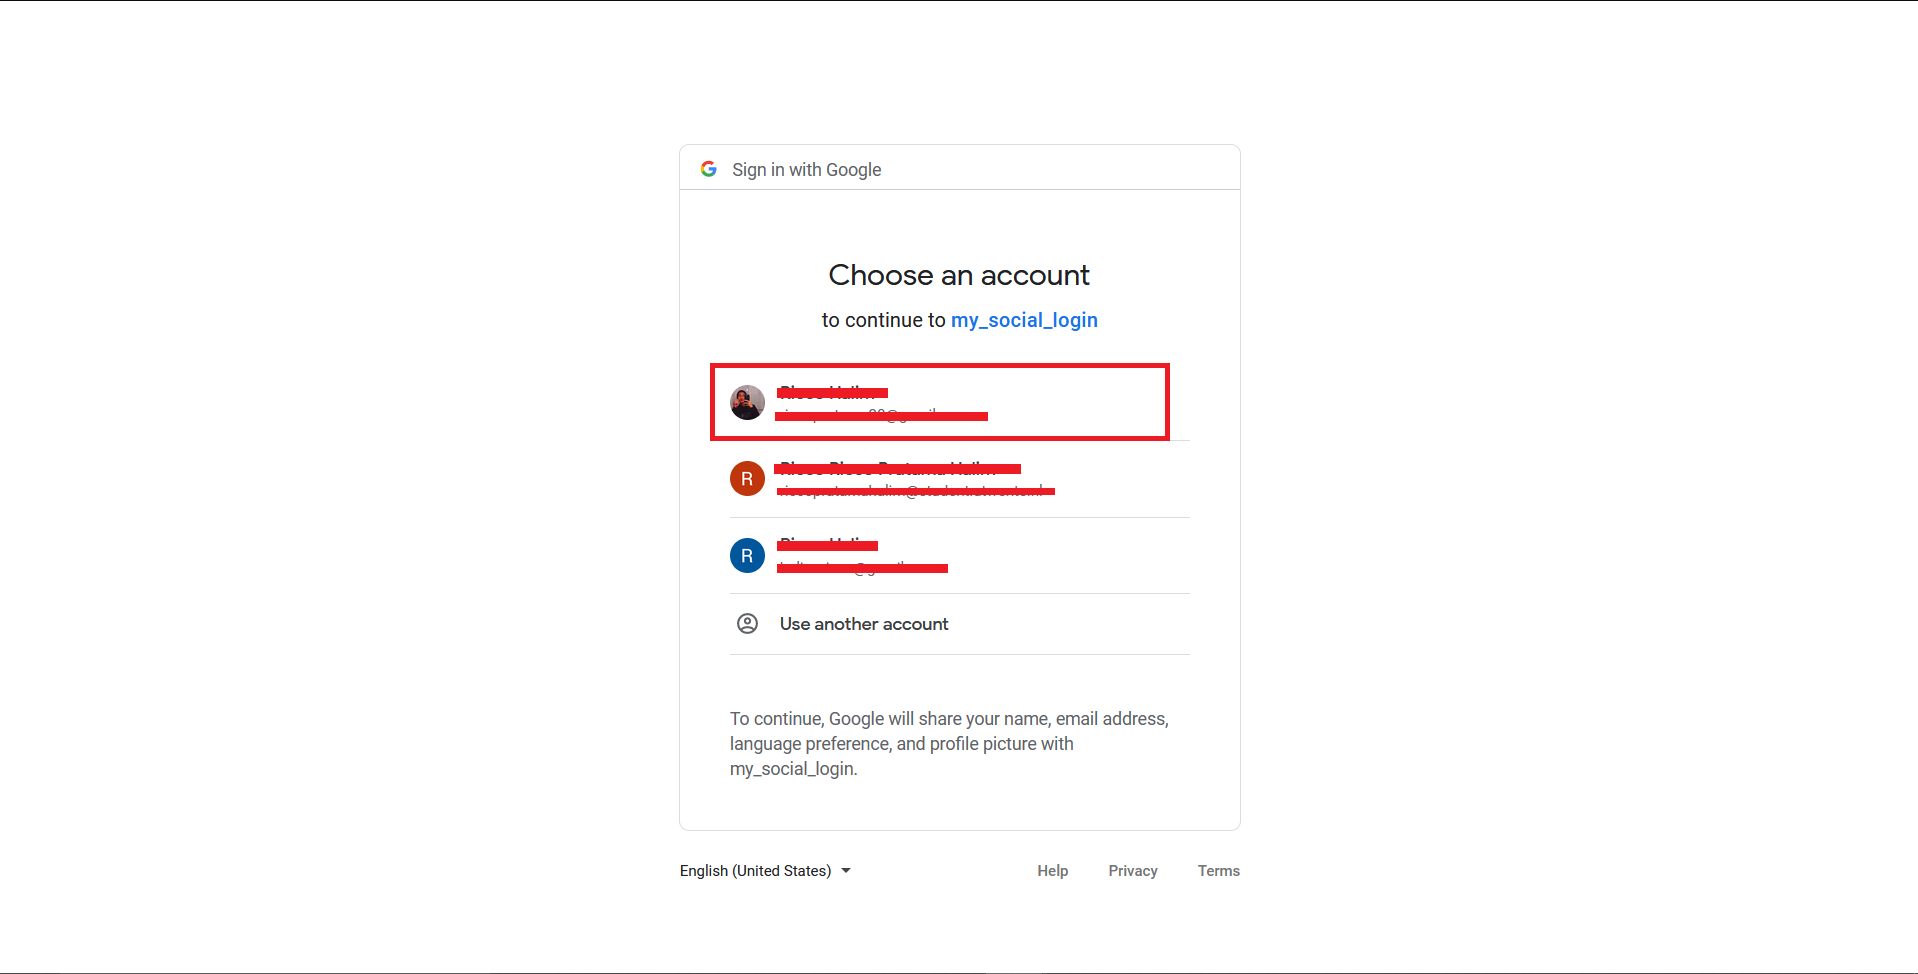
Step 48
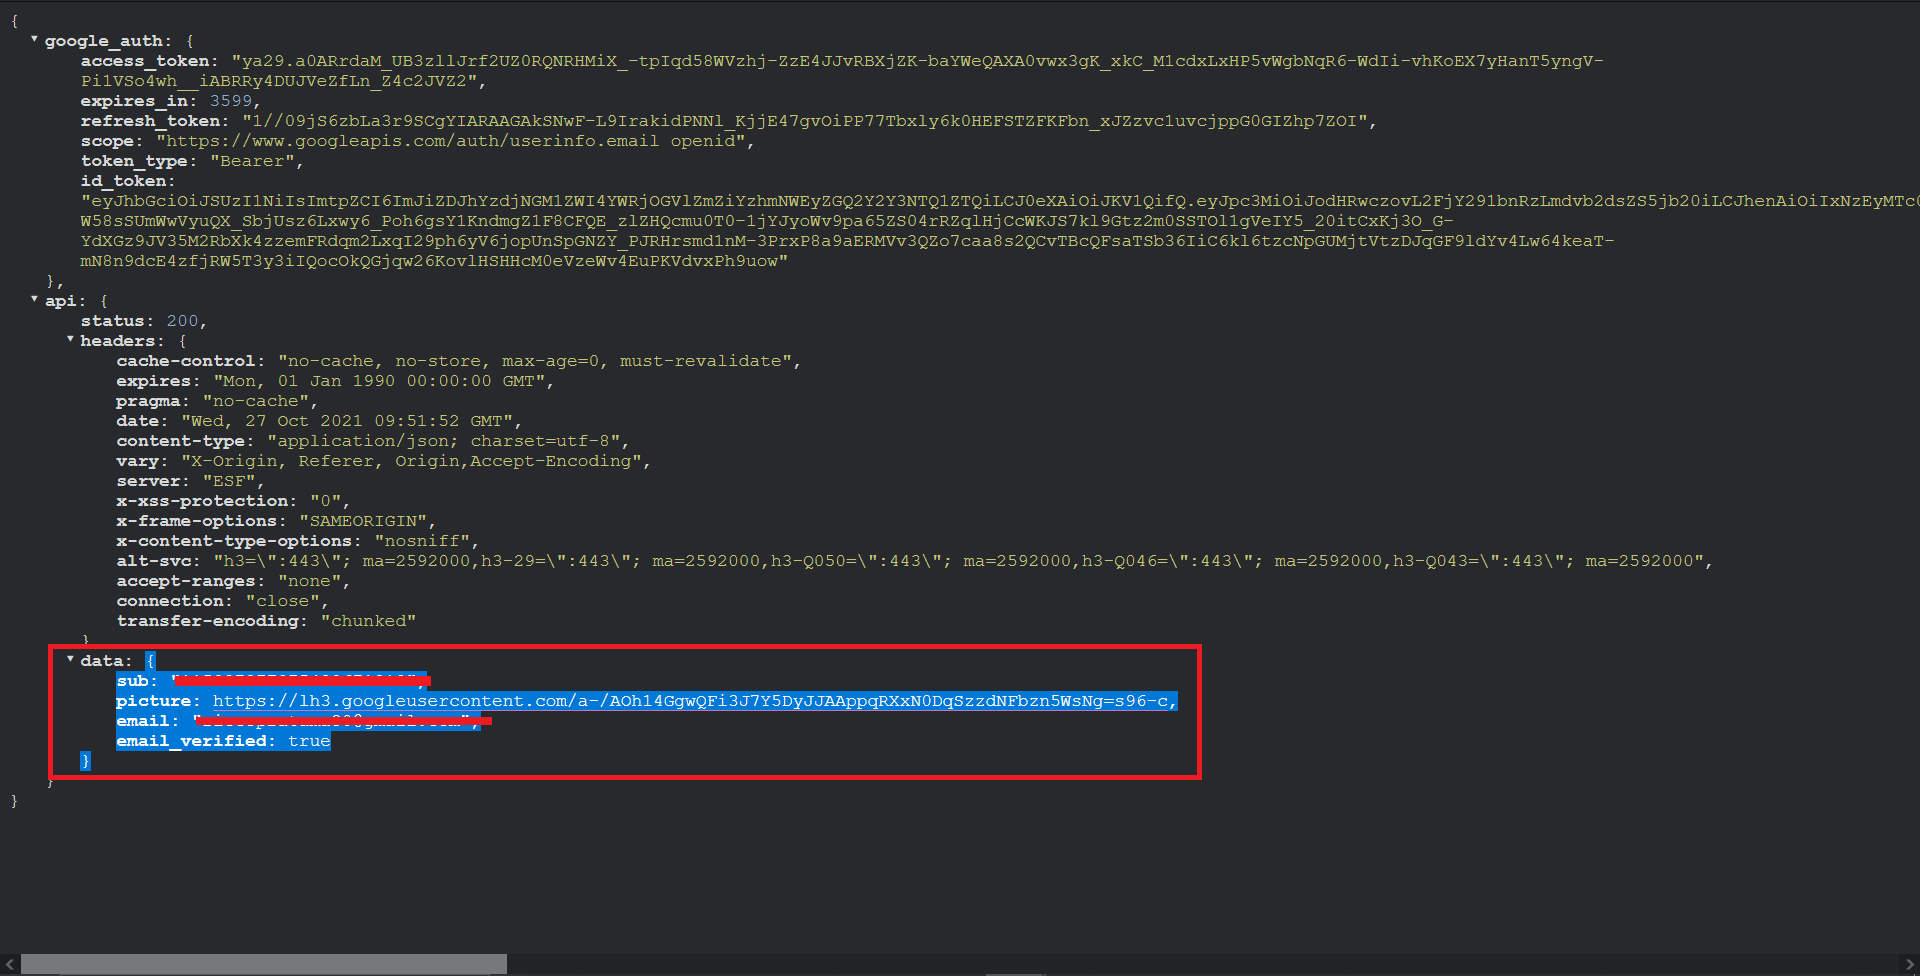
Section titled “Step 48”You will see the response from the steps we just set up. We need to copy everything inside the "data": in the returned JSON response, just as shown on the screenshot.
Then, back to the Server Connect panel, click the Define API Schema button.
Section titled “Then, back to the Server Connect panel, click the Define API Schema button.”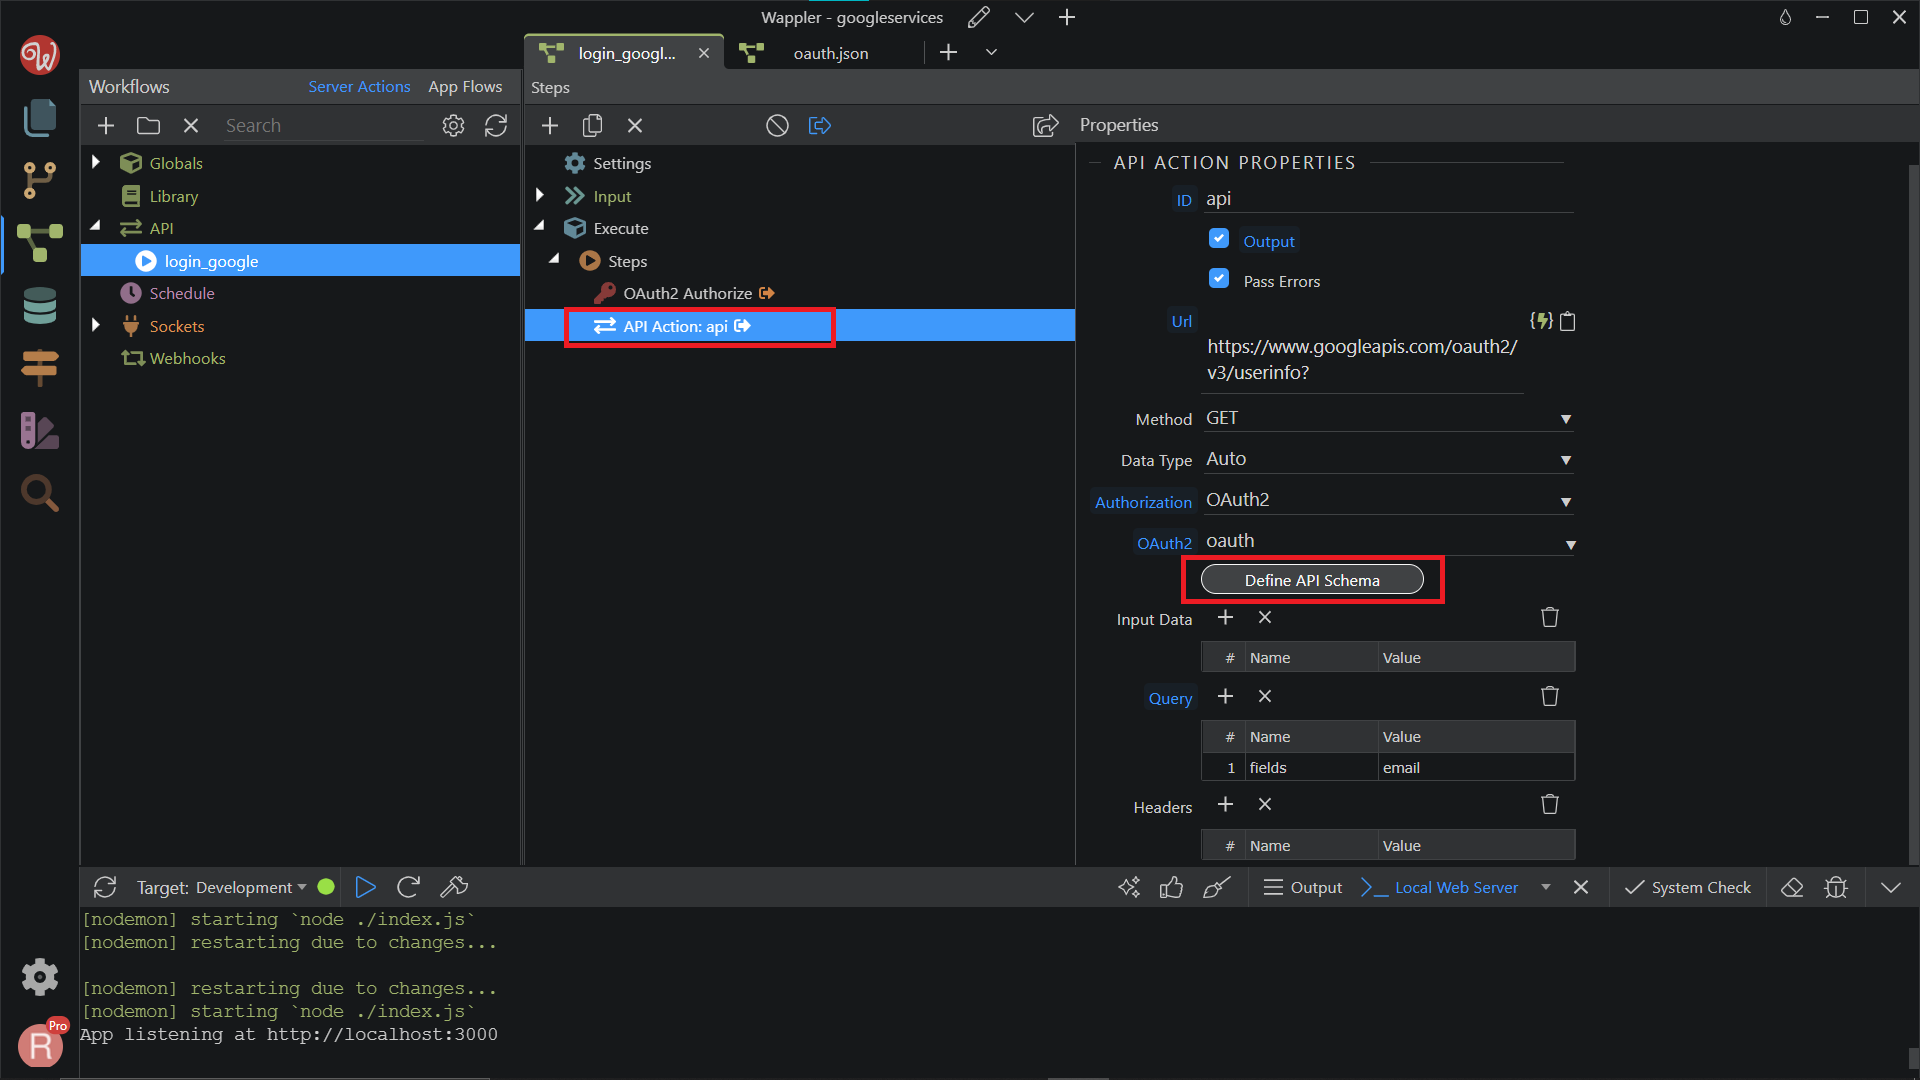
Expand the Source window by clicking the arrow button.
Section titled “Expand the Source window by clicking the arrow button.”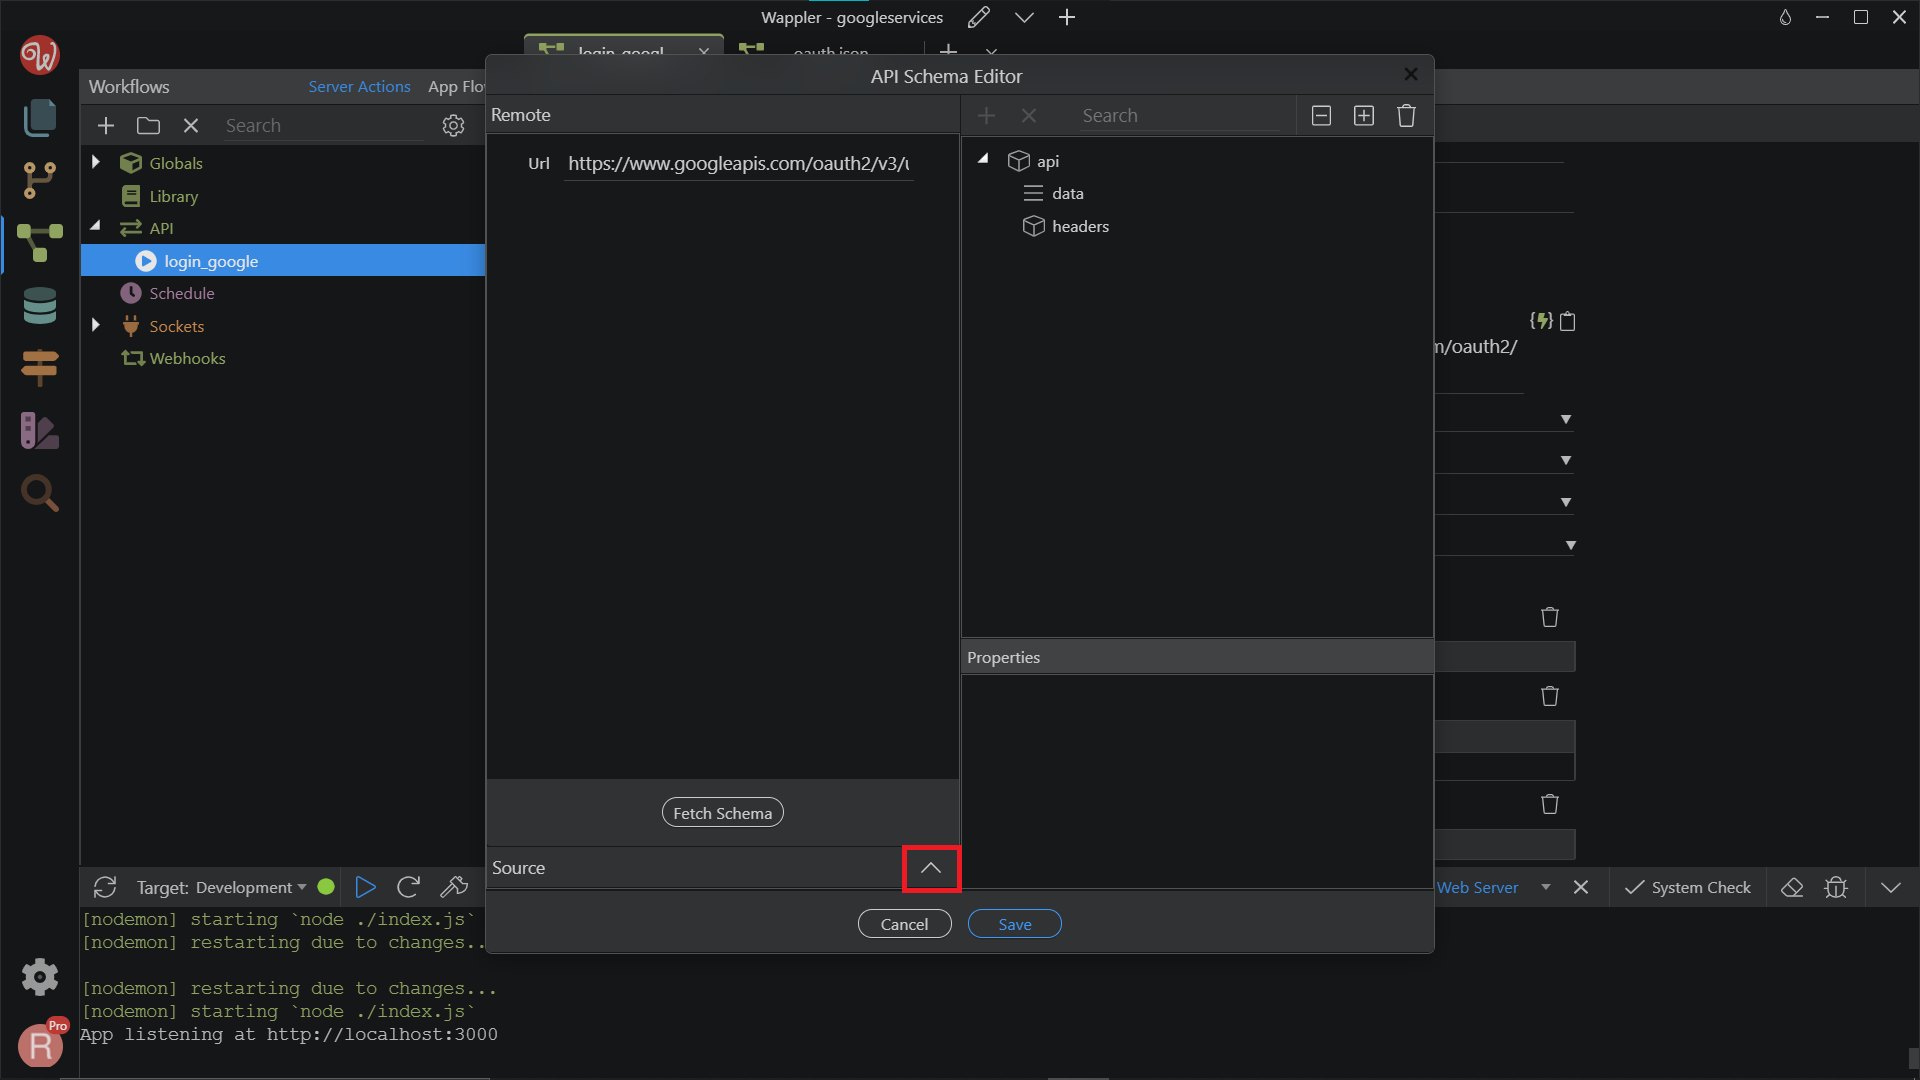
Paste what you just copied in the Source panel, then click the Run button.
Section titled “Paste what you just copied in the Source panel, then click the Run button.”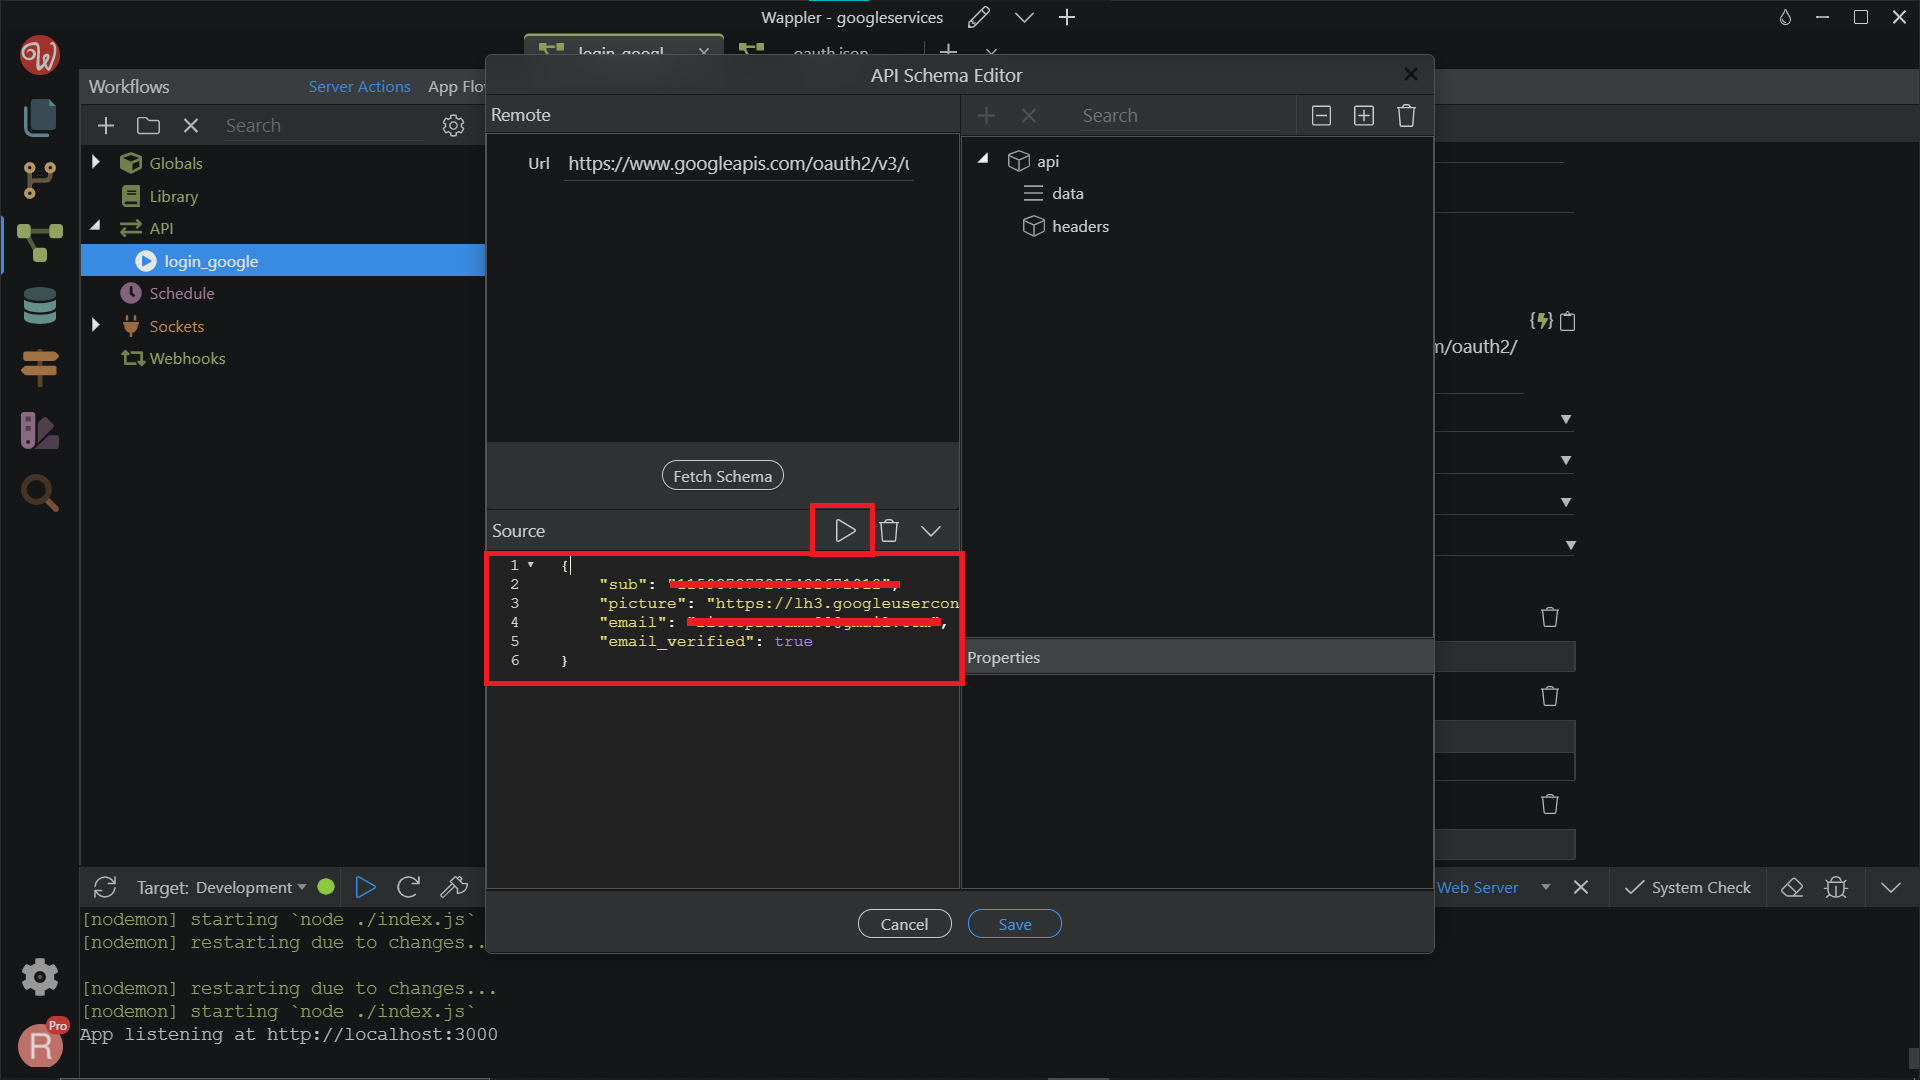
Then your API Schema will be generated. Click Save.
Section titled “Then your API Schema will be generated. Click Save.”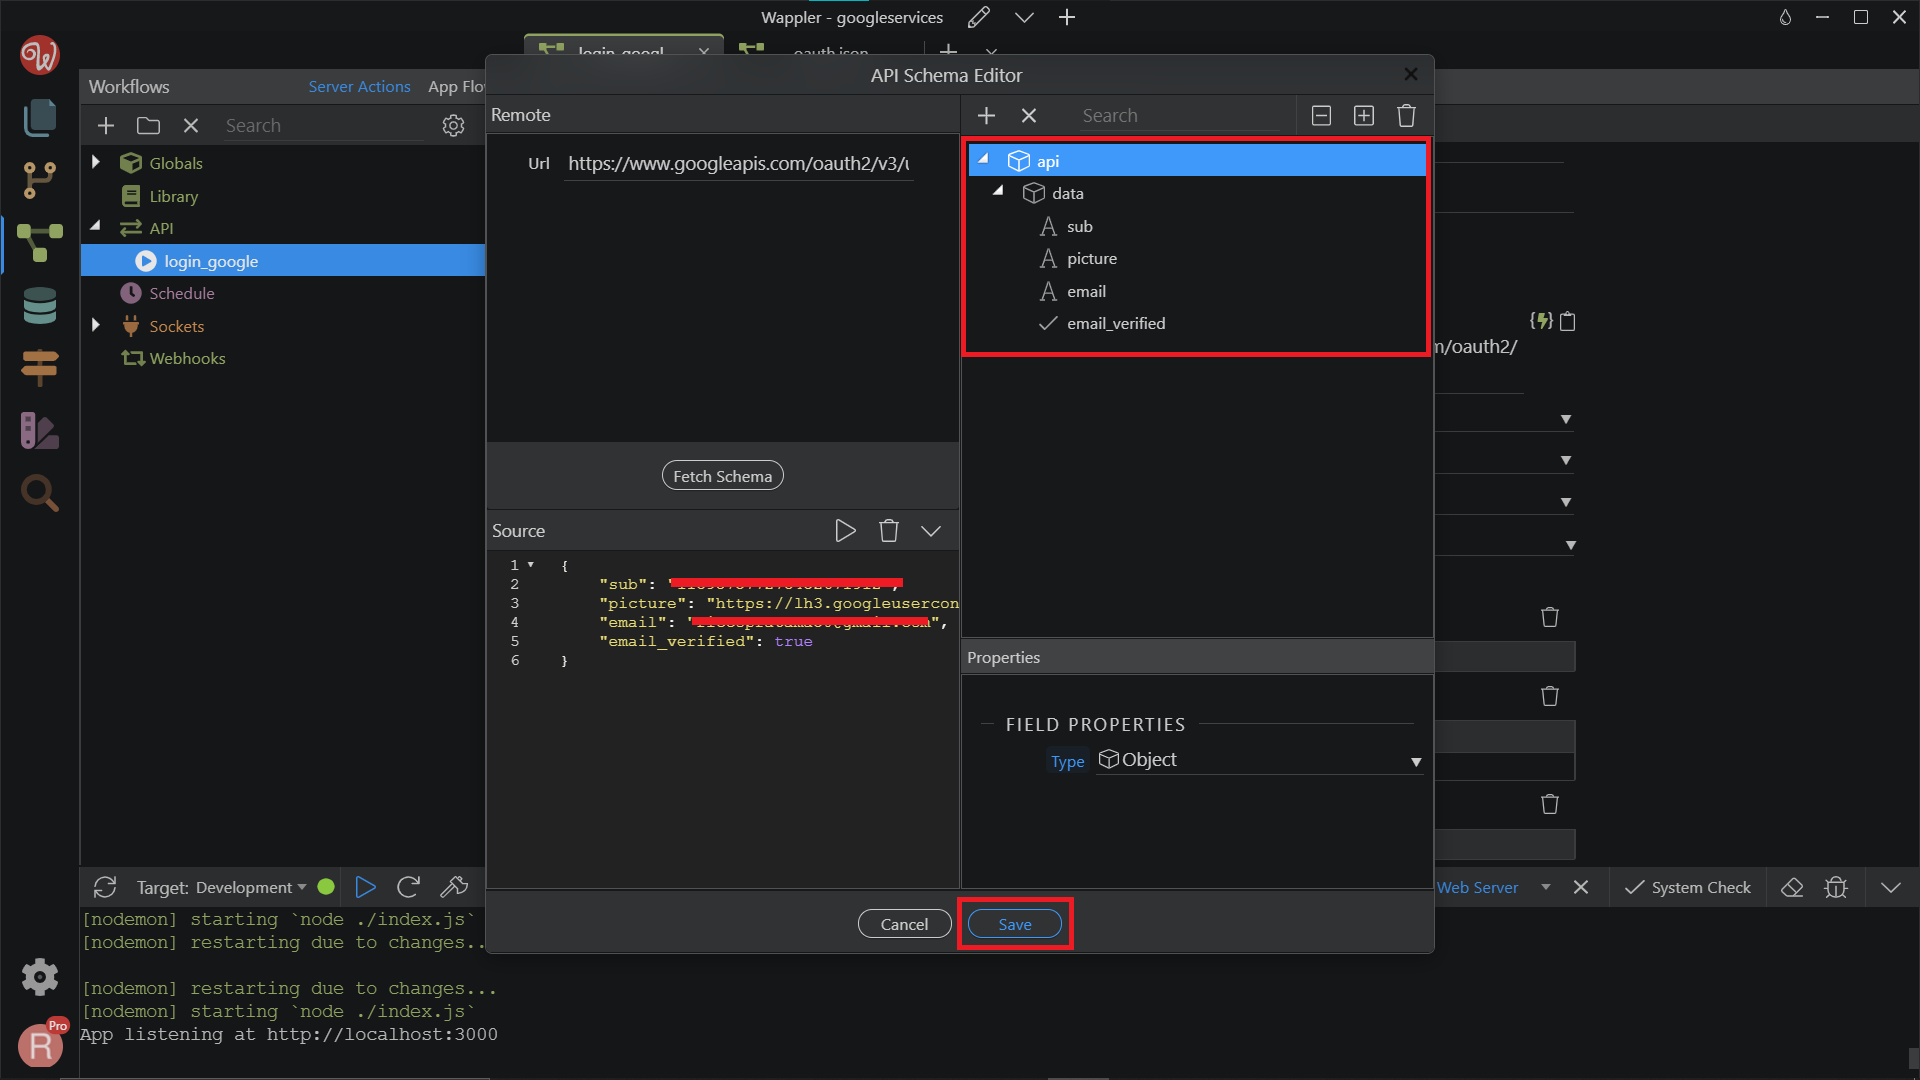
Check if the user exists in the database
Section titled “Check if the user exists in the database”Now as we’ve set up Google authorization and have access to the user details, we can check if he/she already exists in our database.
After the API Action step add a Database Connection and a Single Query Steps. You already know how to do this, so we skip these two steps.
Search and add Database Single Query component.
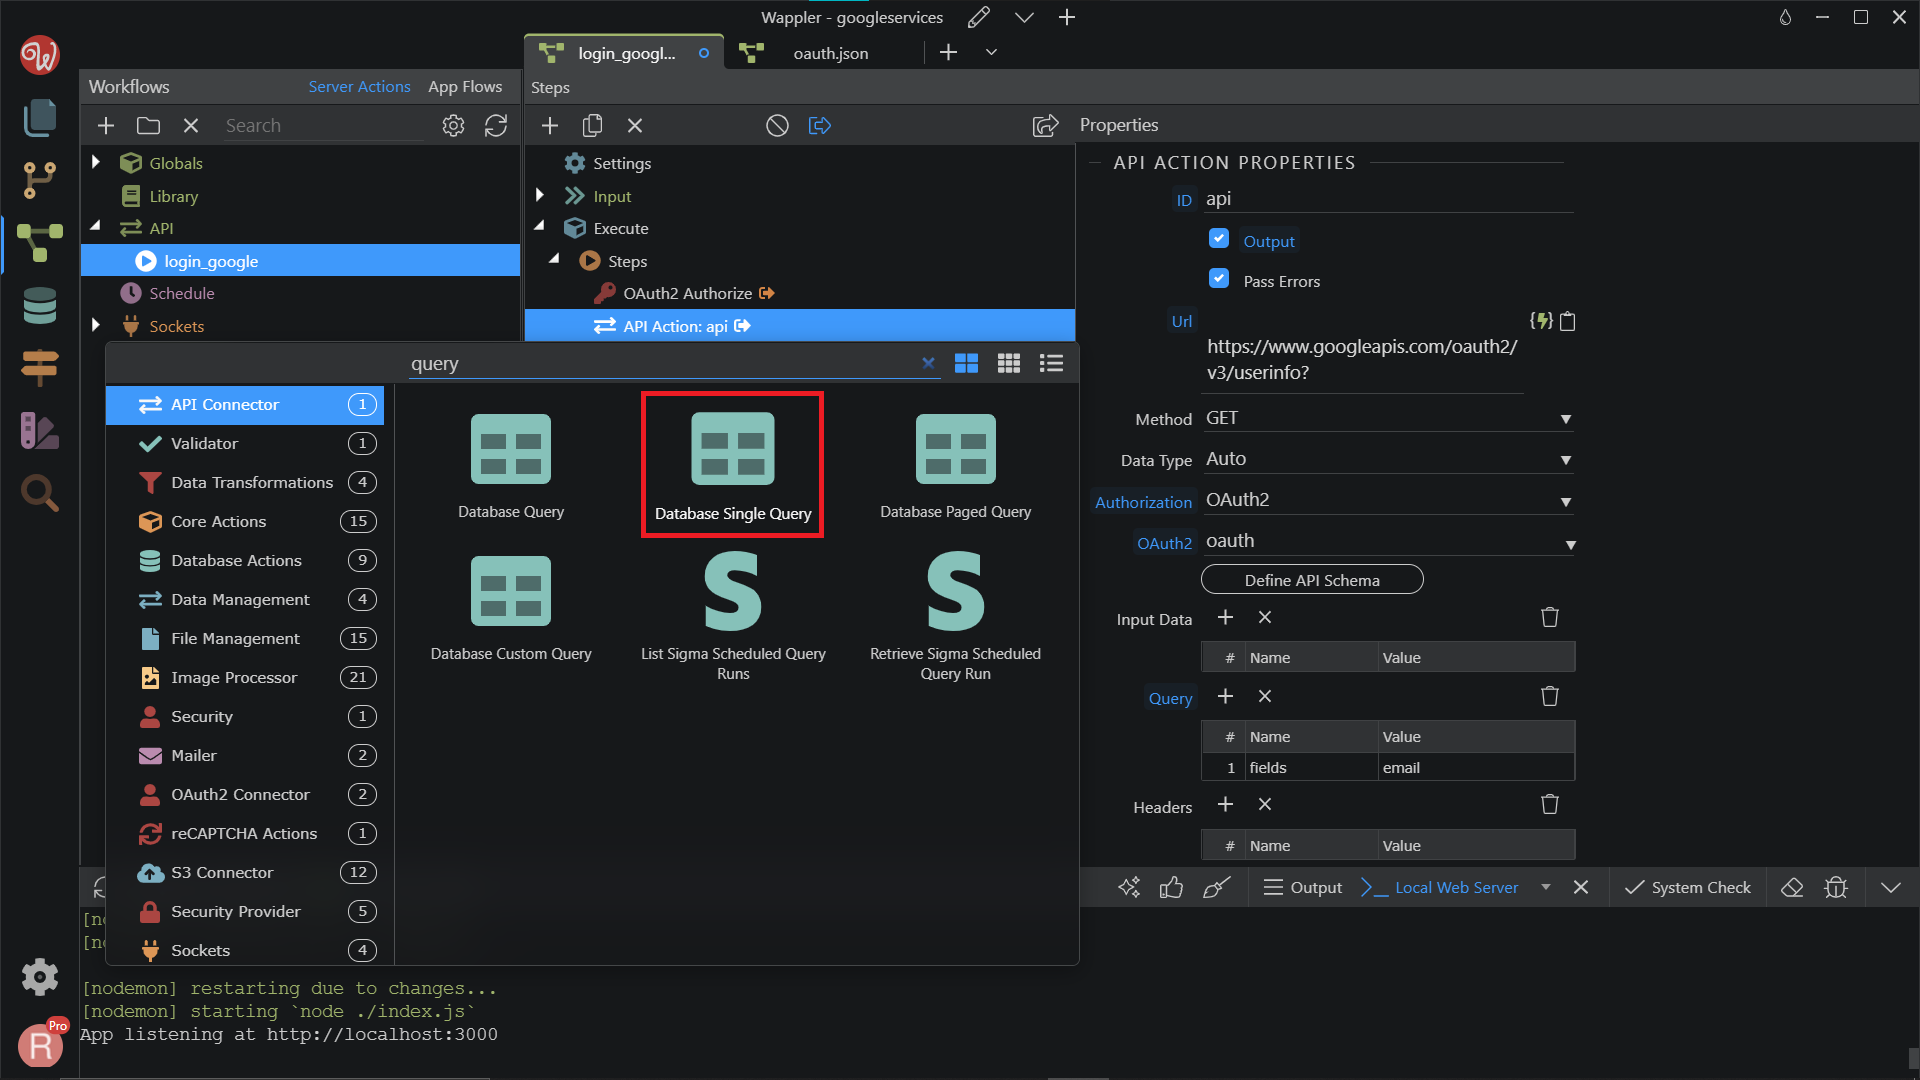
Change the name to checkuser , Connection to your database name, and click on the Query Builder.
Section titled “Change the name to checkuser , Connection to your database name, and click on the Query Builder.”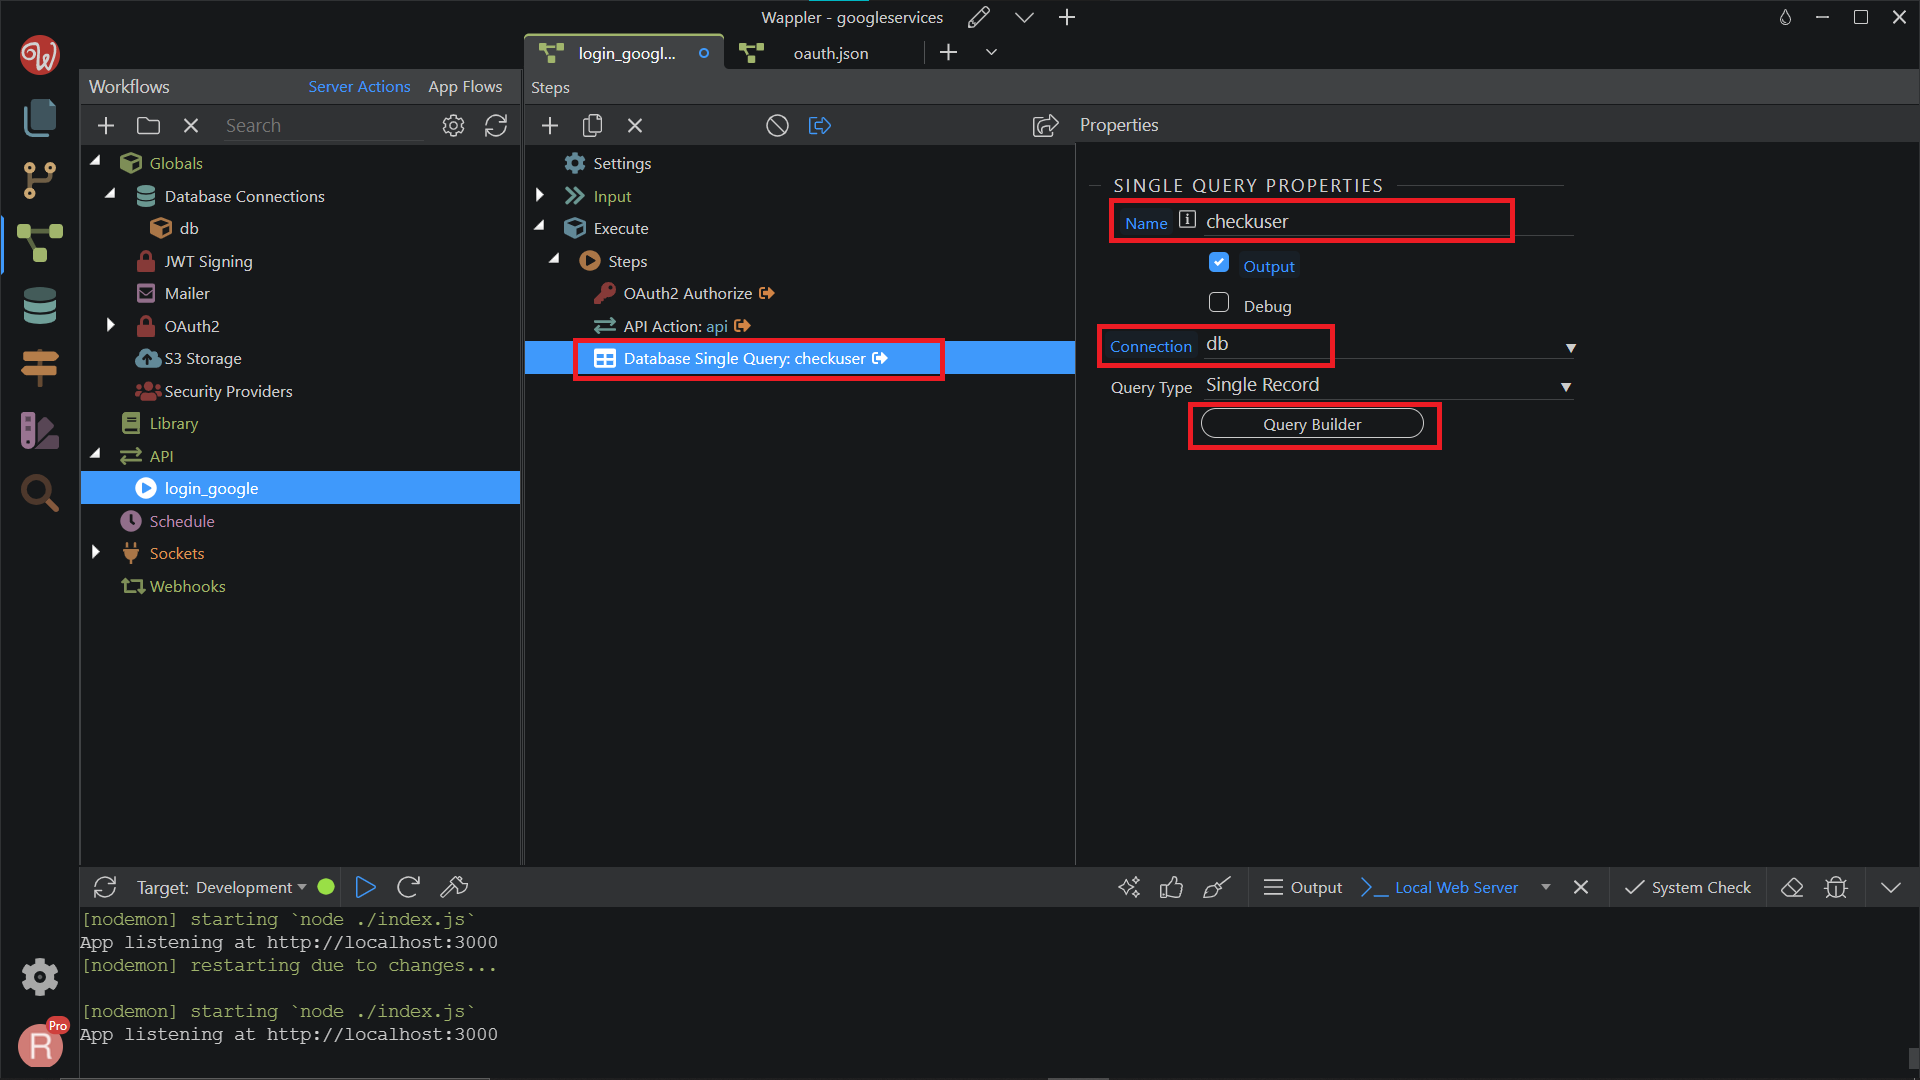
Add your users table.
Section titled “Add your users table.”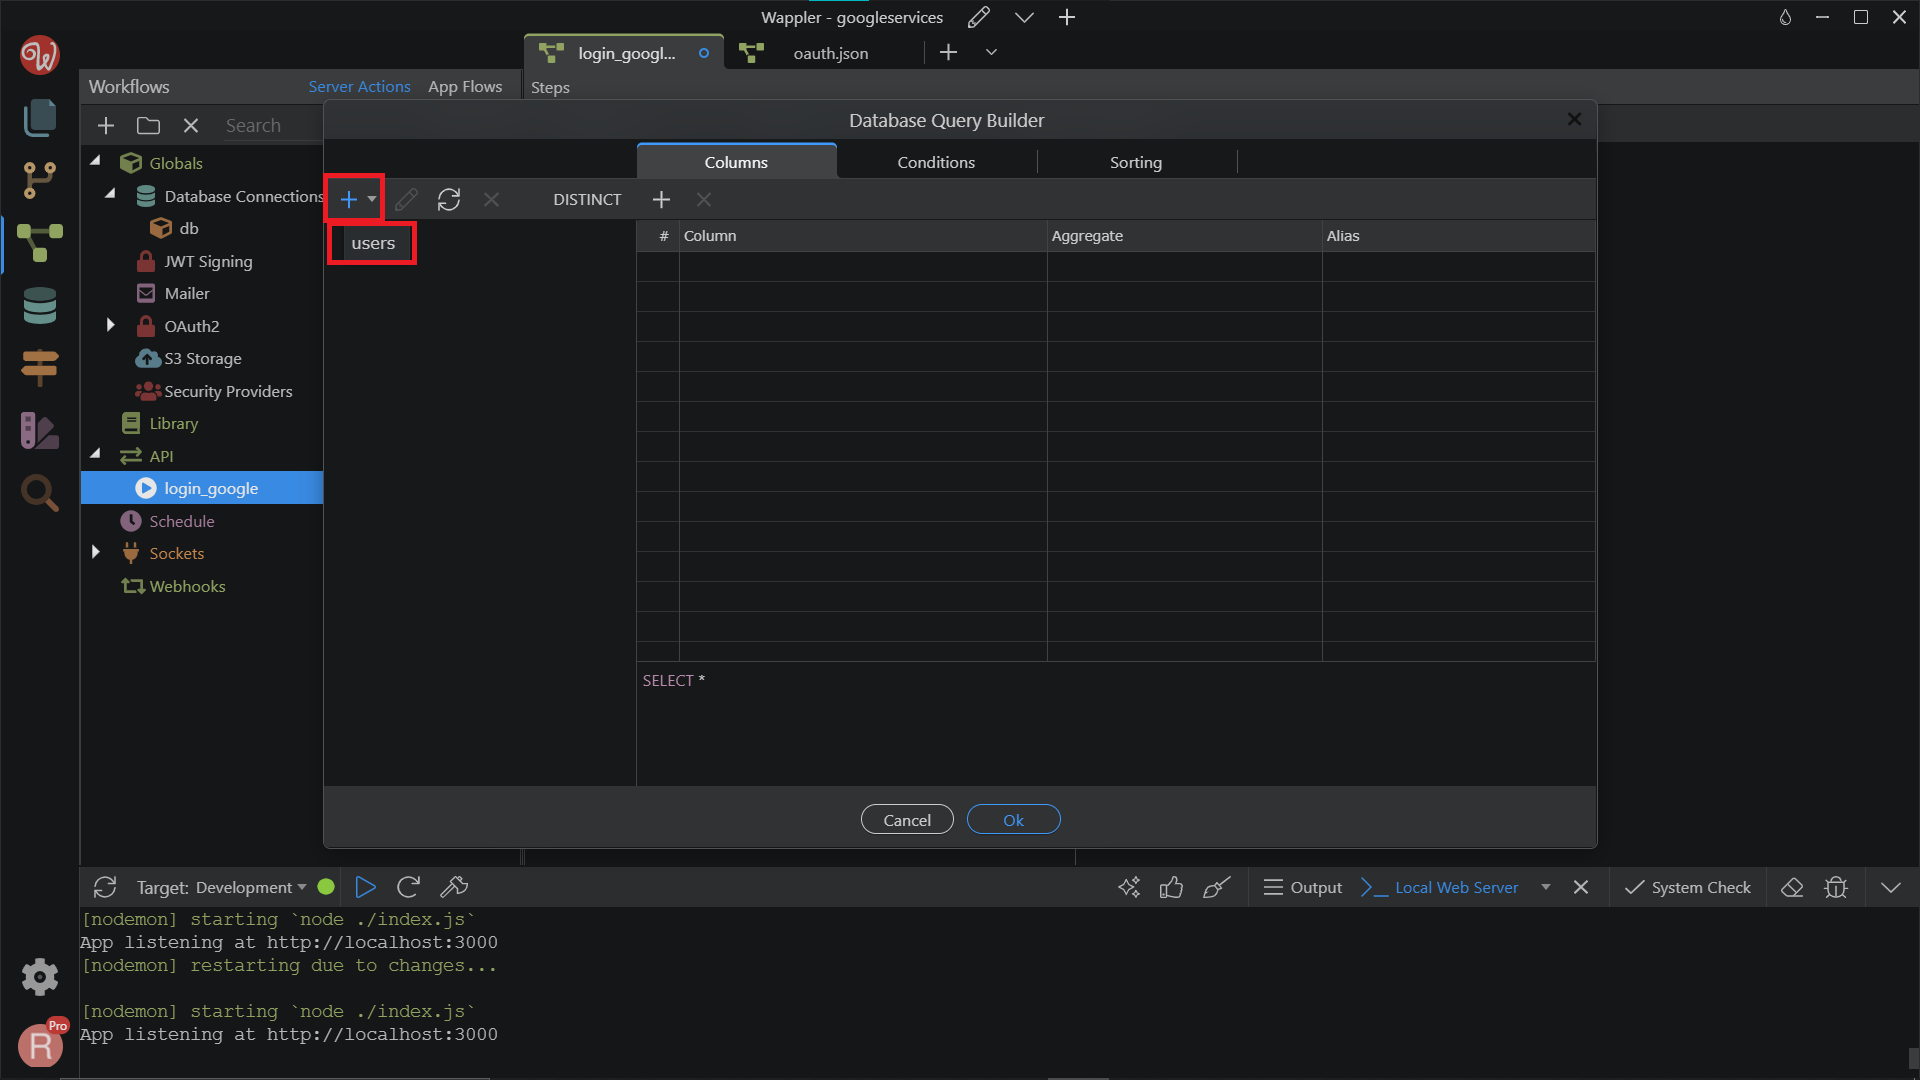
Add all the columns.
Section titled “Add all the columns.”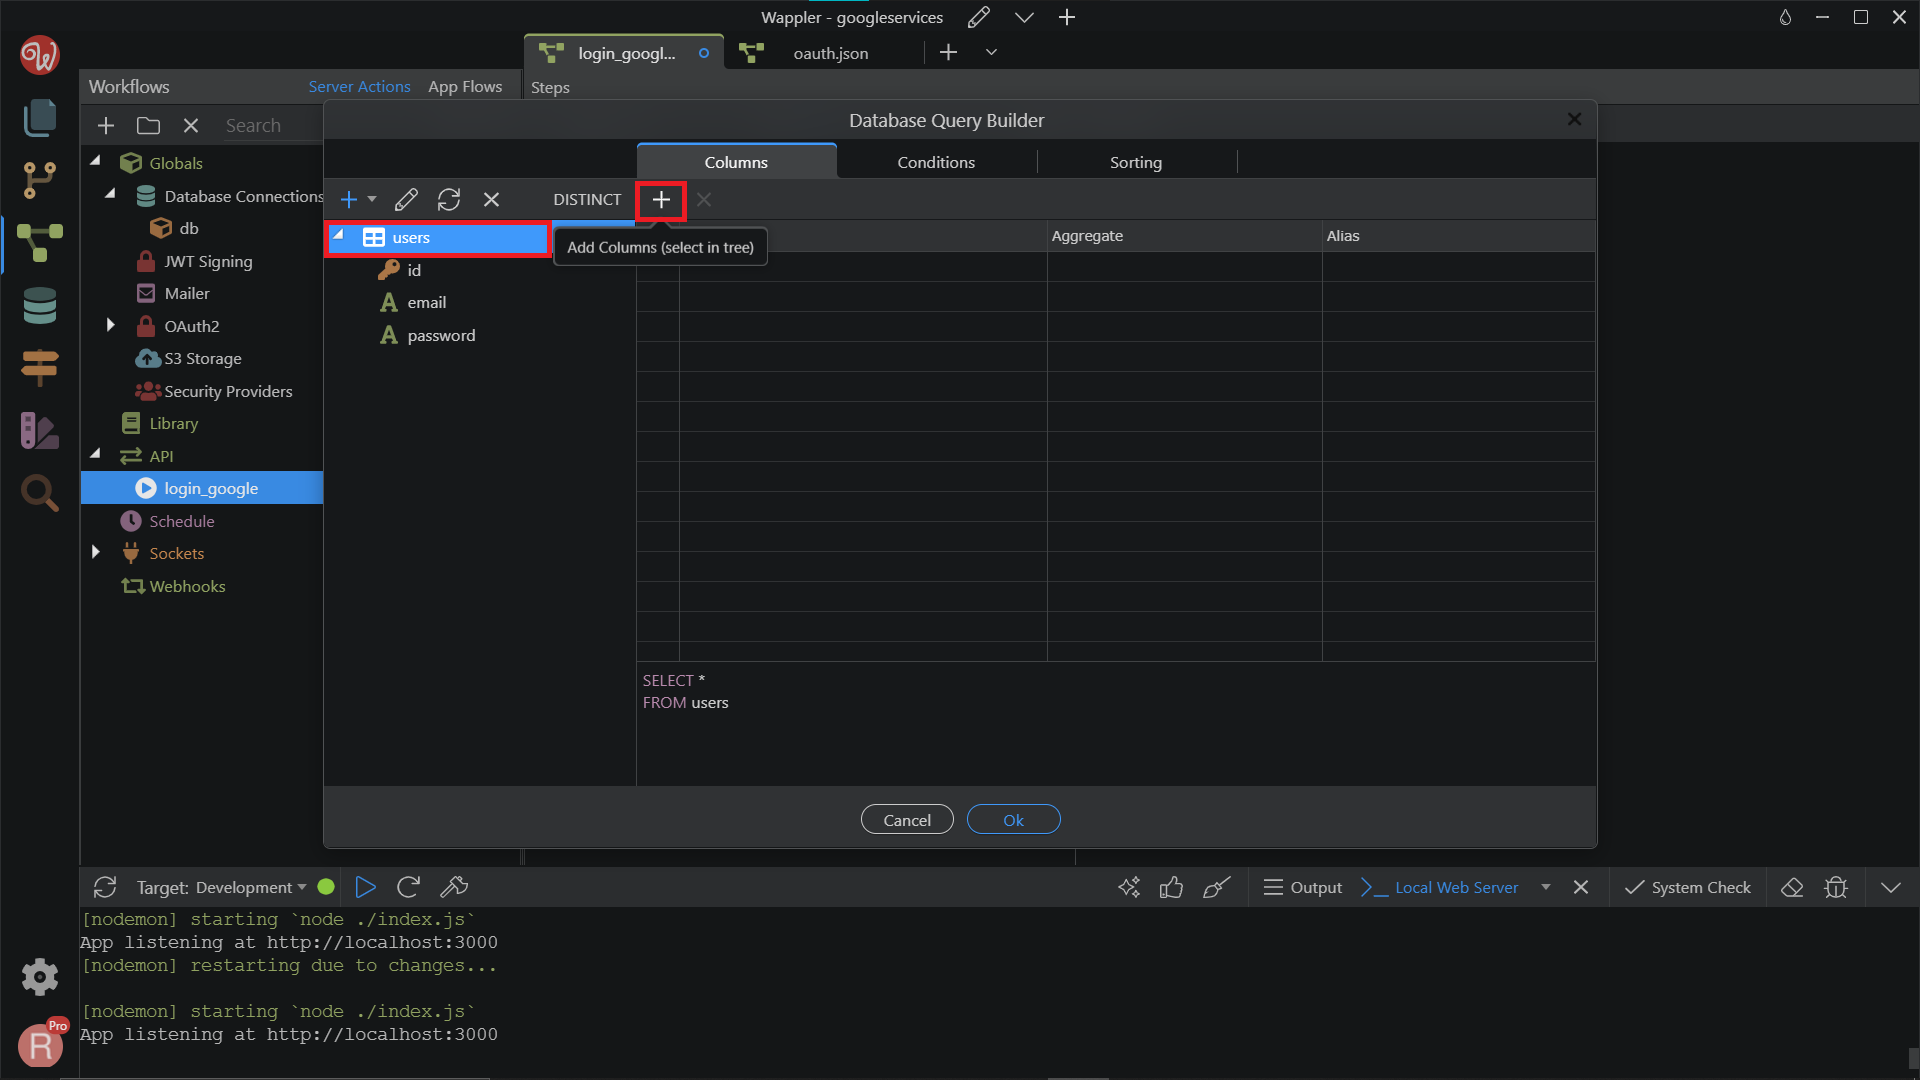
Now, click on the Conditions menu to filter the query.
Section titled “Now, click on the Conditions menu to filter the query.”
Step 59
Section titled “Step 59”We want to check if the user exists in the database. We will do this check by his/her email, so select the email column from your database table, select equal to and click the dynamic data picker icon.

We want to check the user’s Google email returned by the API Action, so select API > data > email.
Section titled “We want to check the user’s Google email returned by the API Action, so select API > data > email.”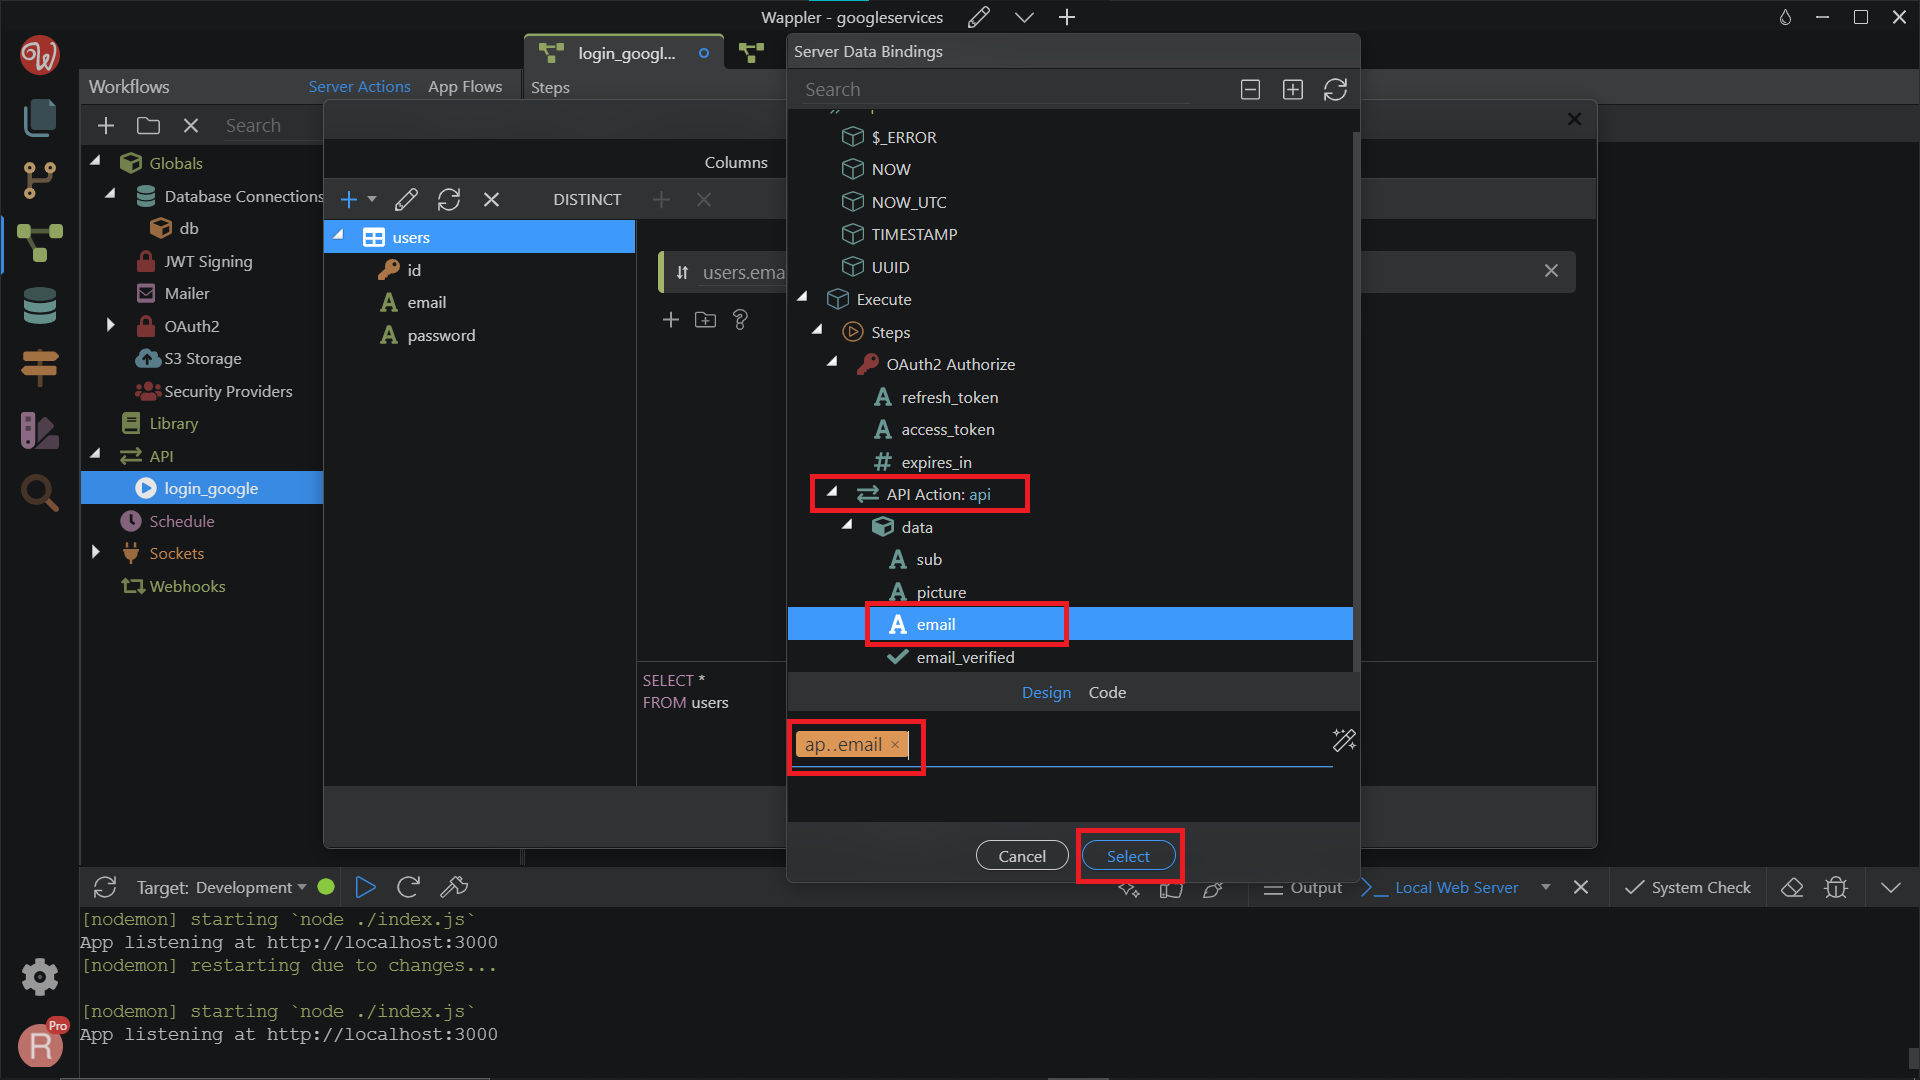
Click OK.
Section titled “Click OK.”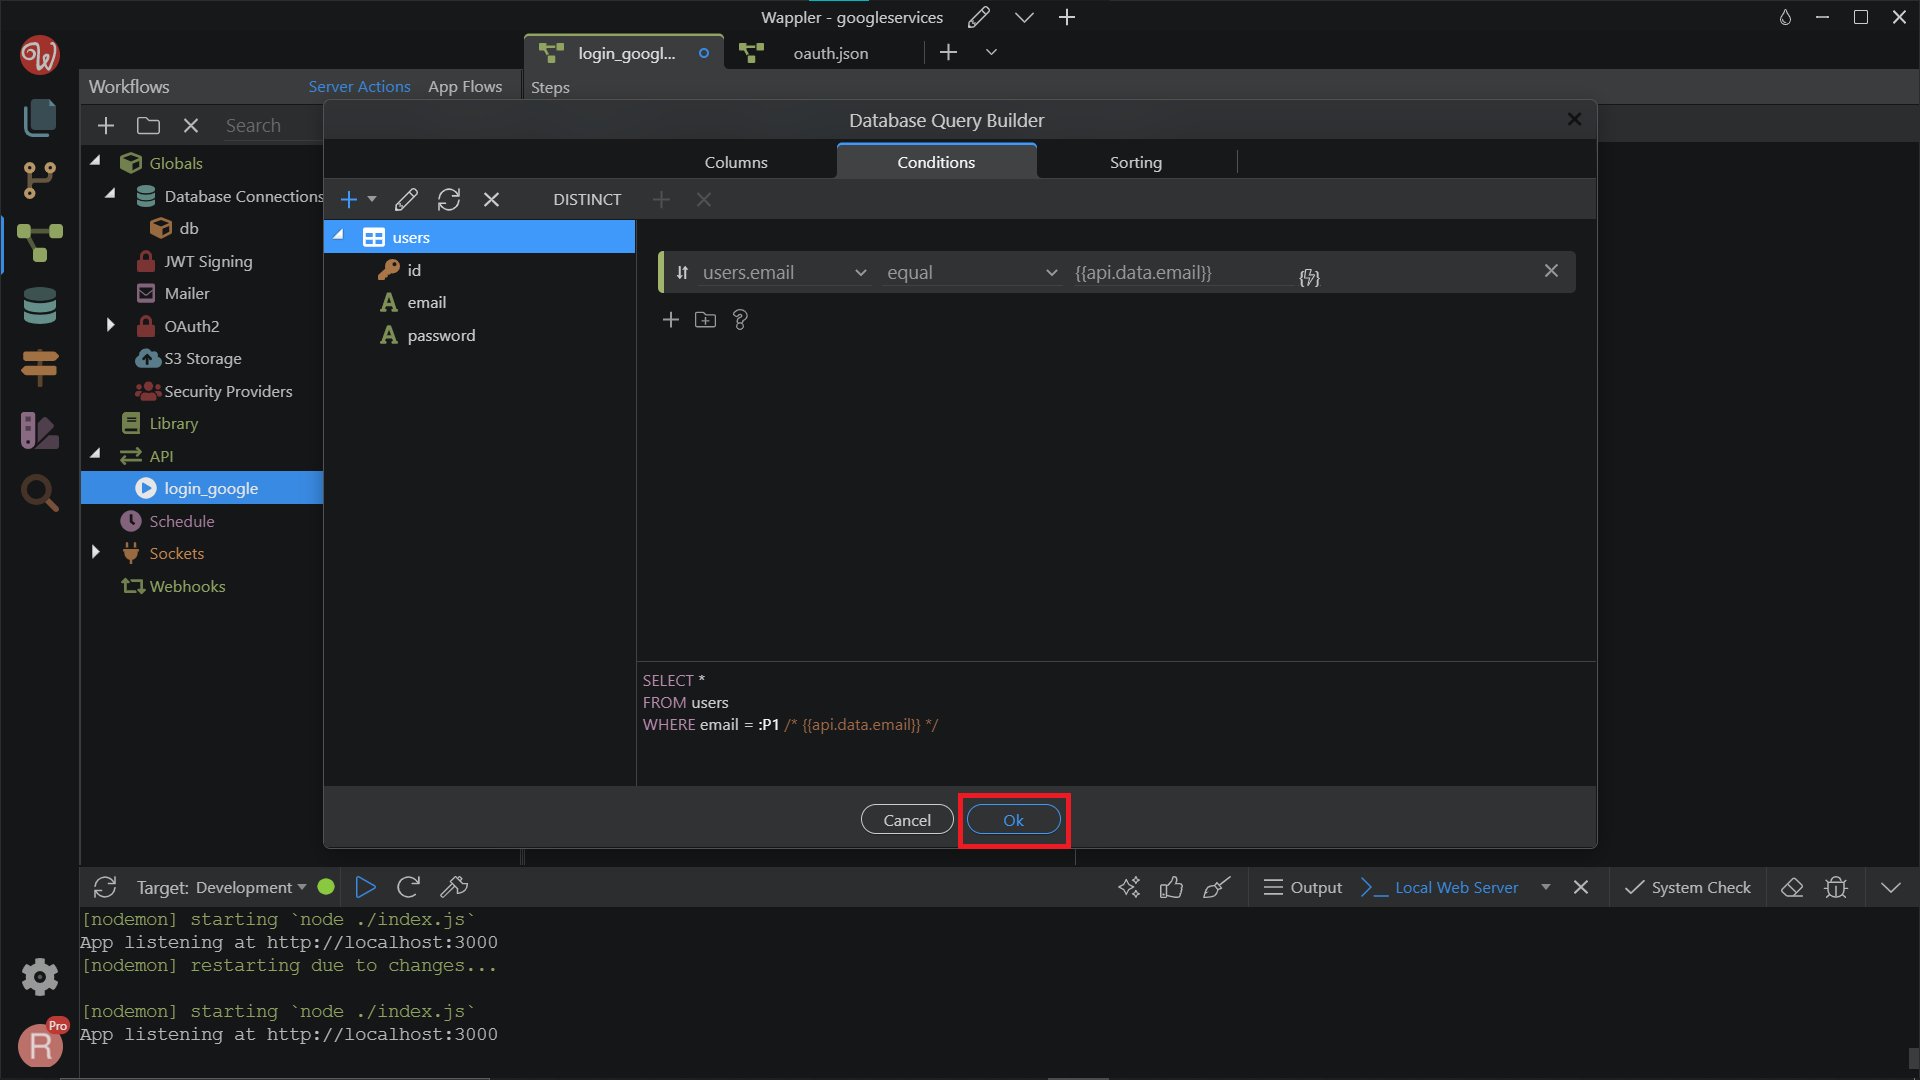
Step 62
Section titled “Step 62”Now, we want to add a Condition component. Right-click on the Database Single Query. Search and add Condition.
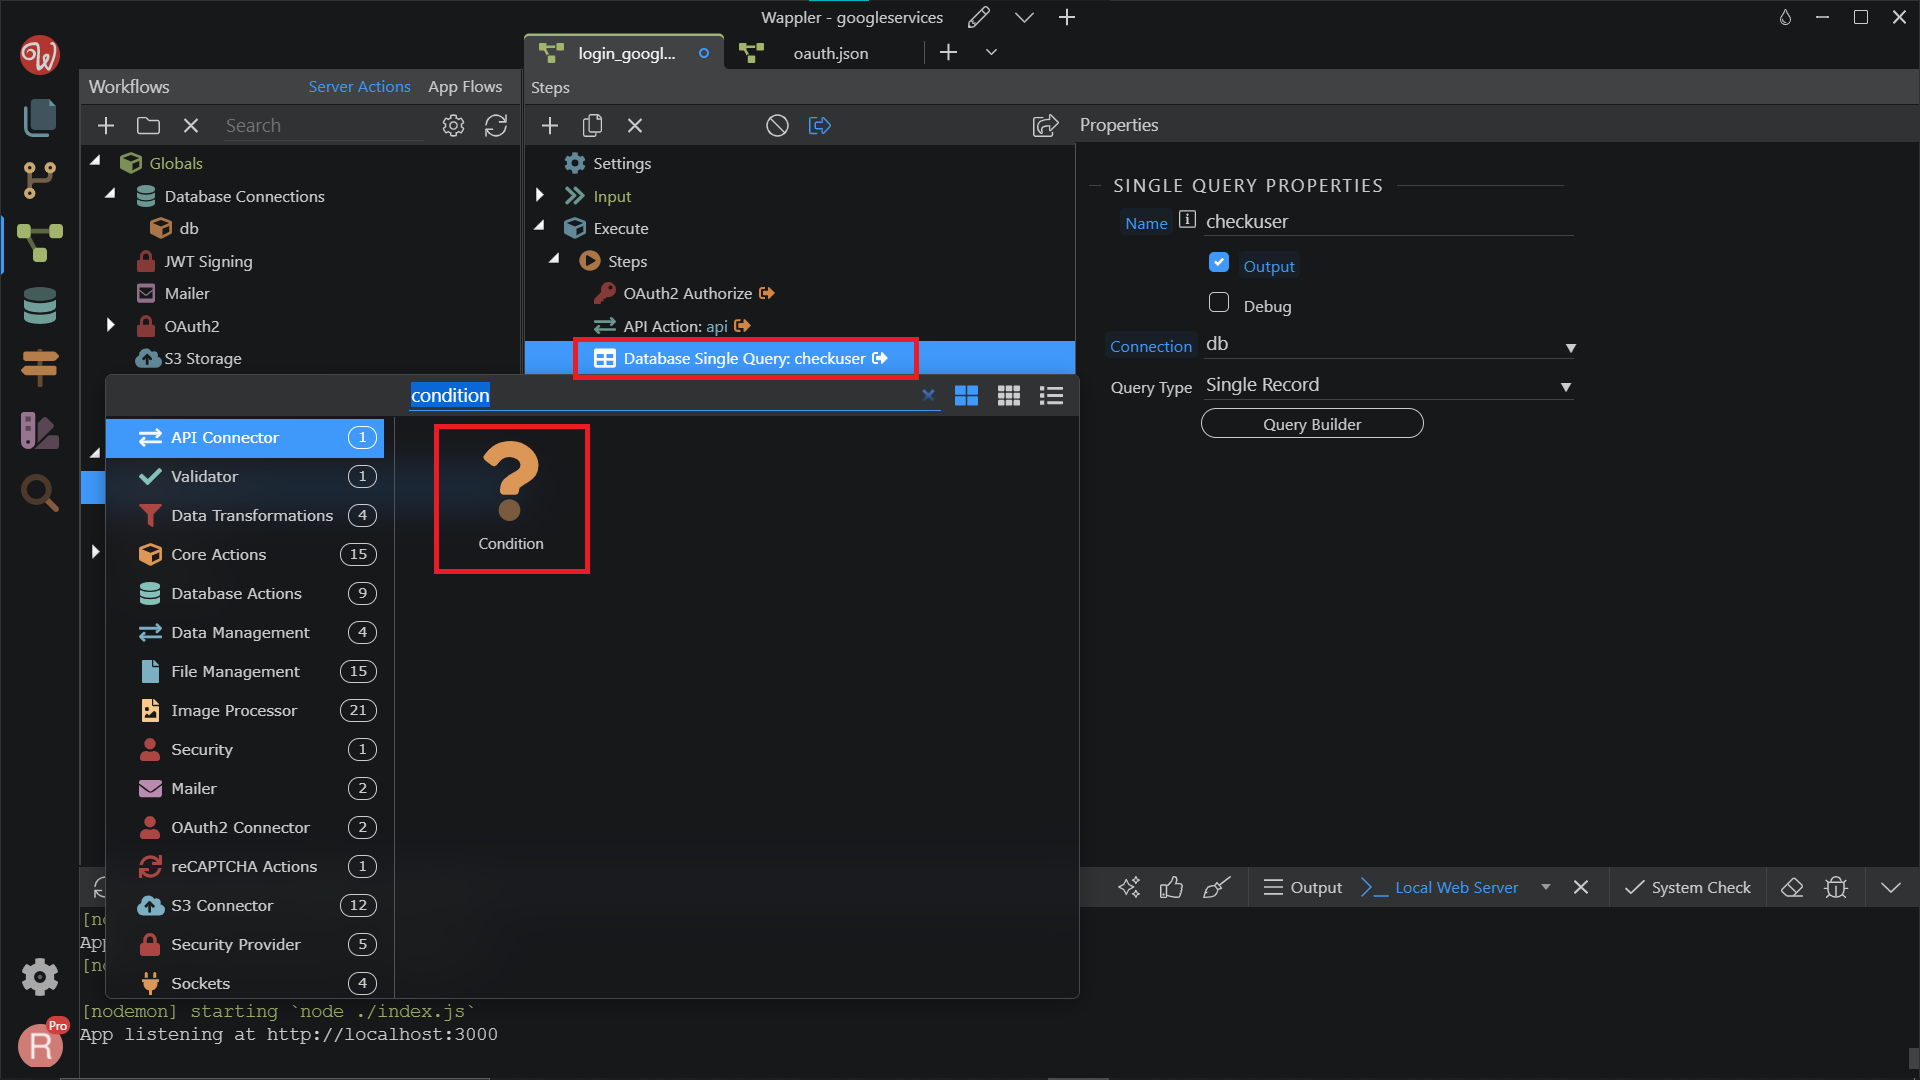
Click the dynamic data picker icon, to select an expression for the condition.
Section titled “Click the dynamic data picker icon, to select an expression for the condition.”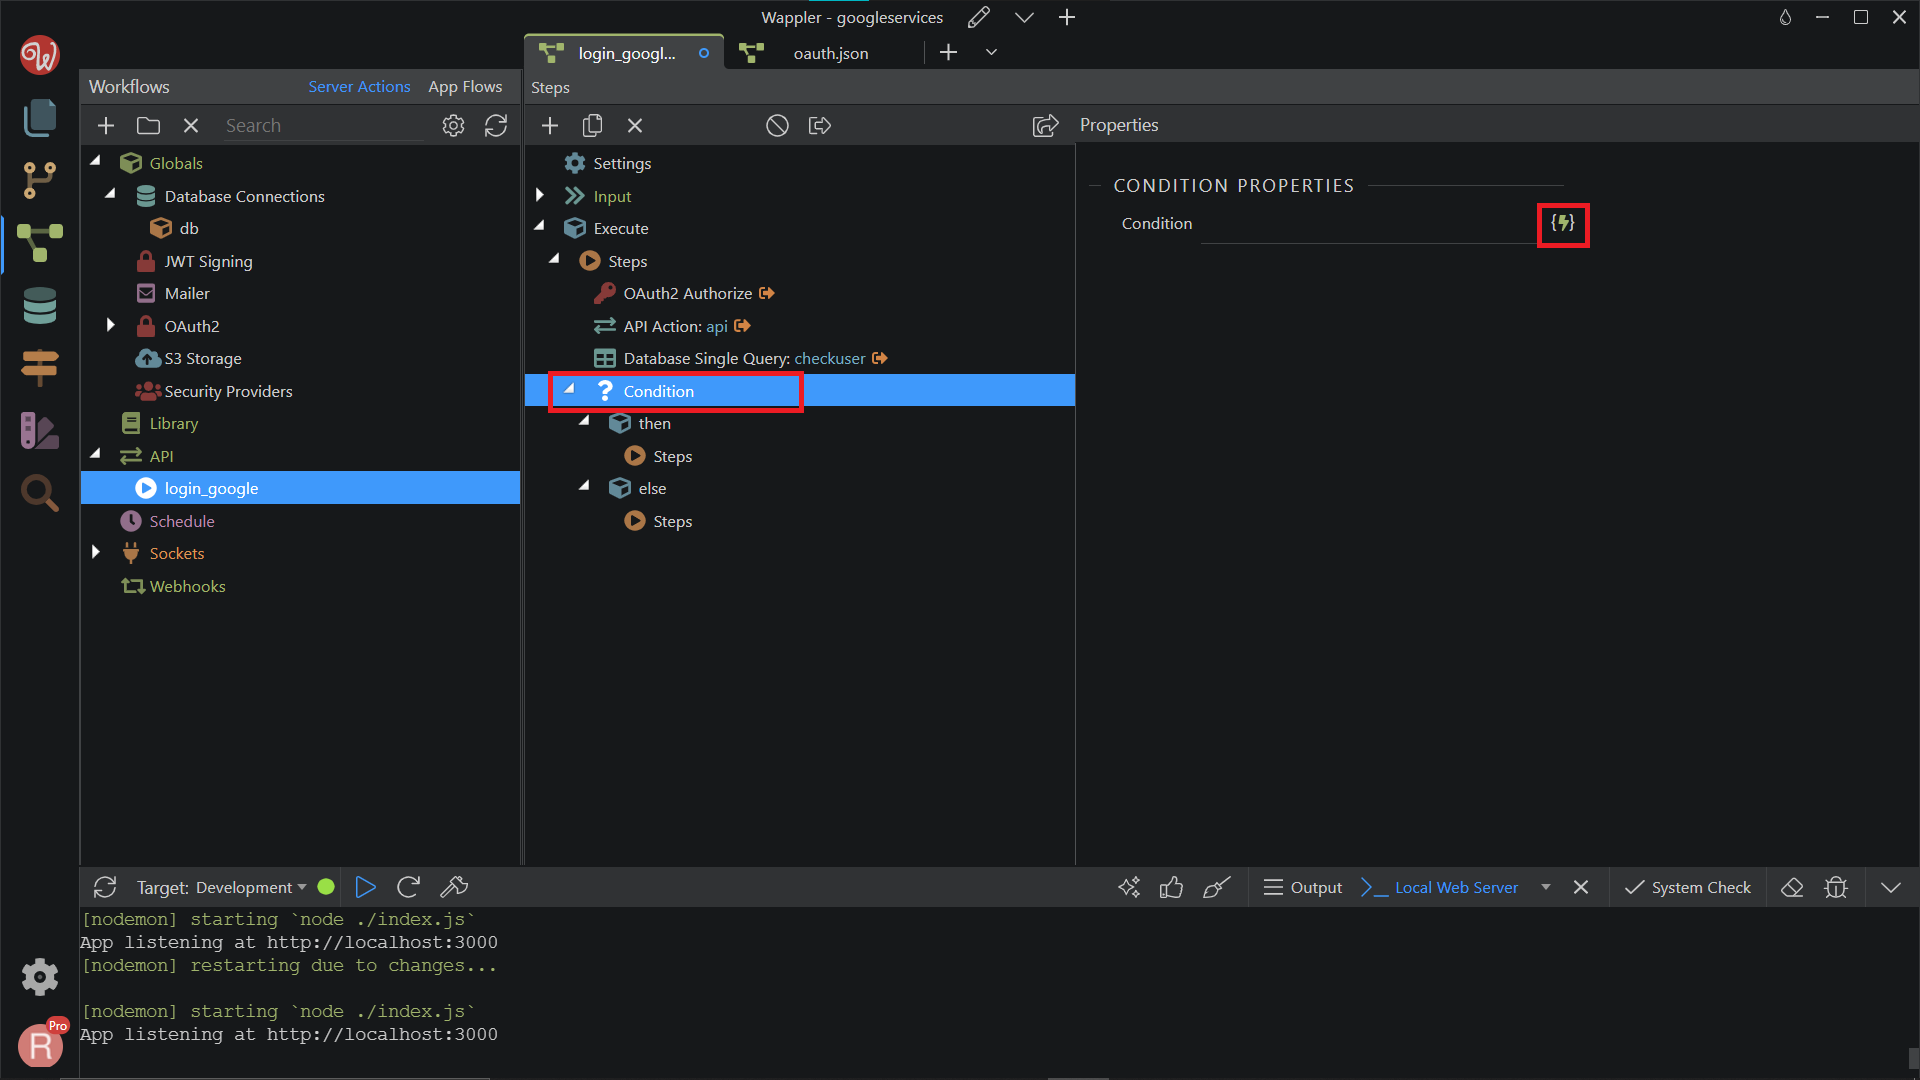
Select the database single query checkuser as a condition. Click Select.
Section titled “Select the database single query checkuser as a condition. Click Select.”
Step 65
Section titled “Step 65”If the query returns a result - the condition will be trued, if no record is returned (i.e. no user found) the condition will be false.
Login existing users
Section titled “Login existing users”If the user exists in our database, then we want to log him/her in after the Google authorization using the existing login details.
First, we want to add a Security Providers component to log users in. Right-click in the Security Providers, and Add Security Provider.
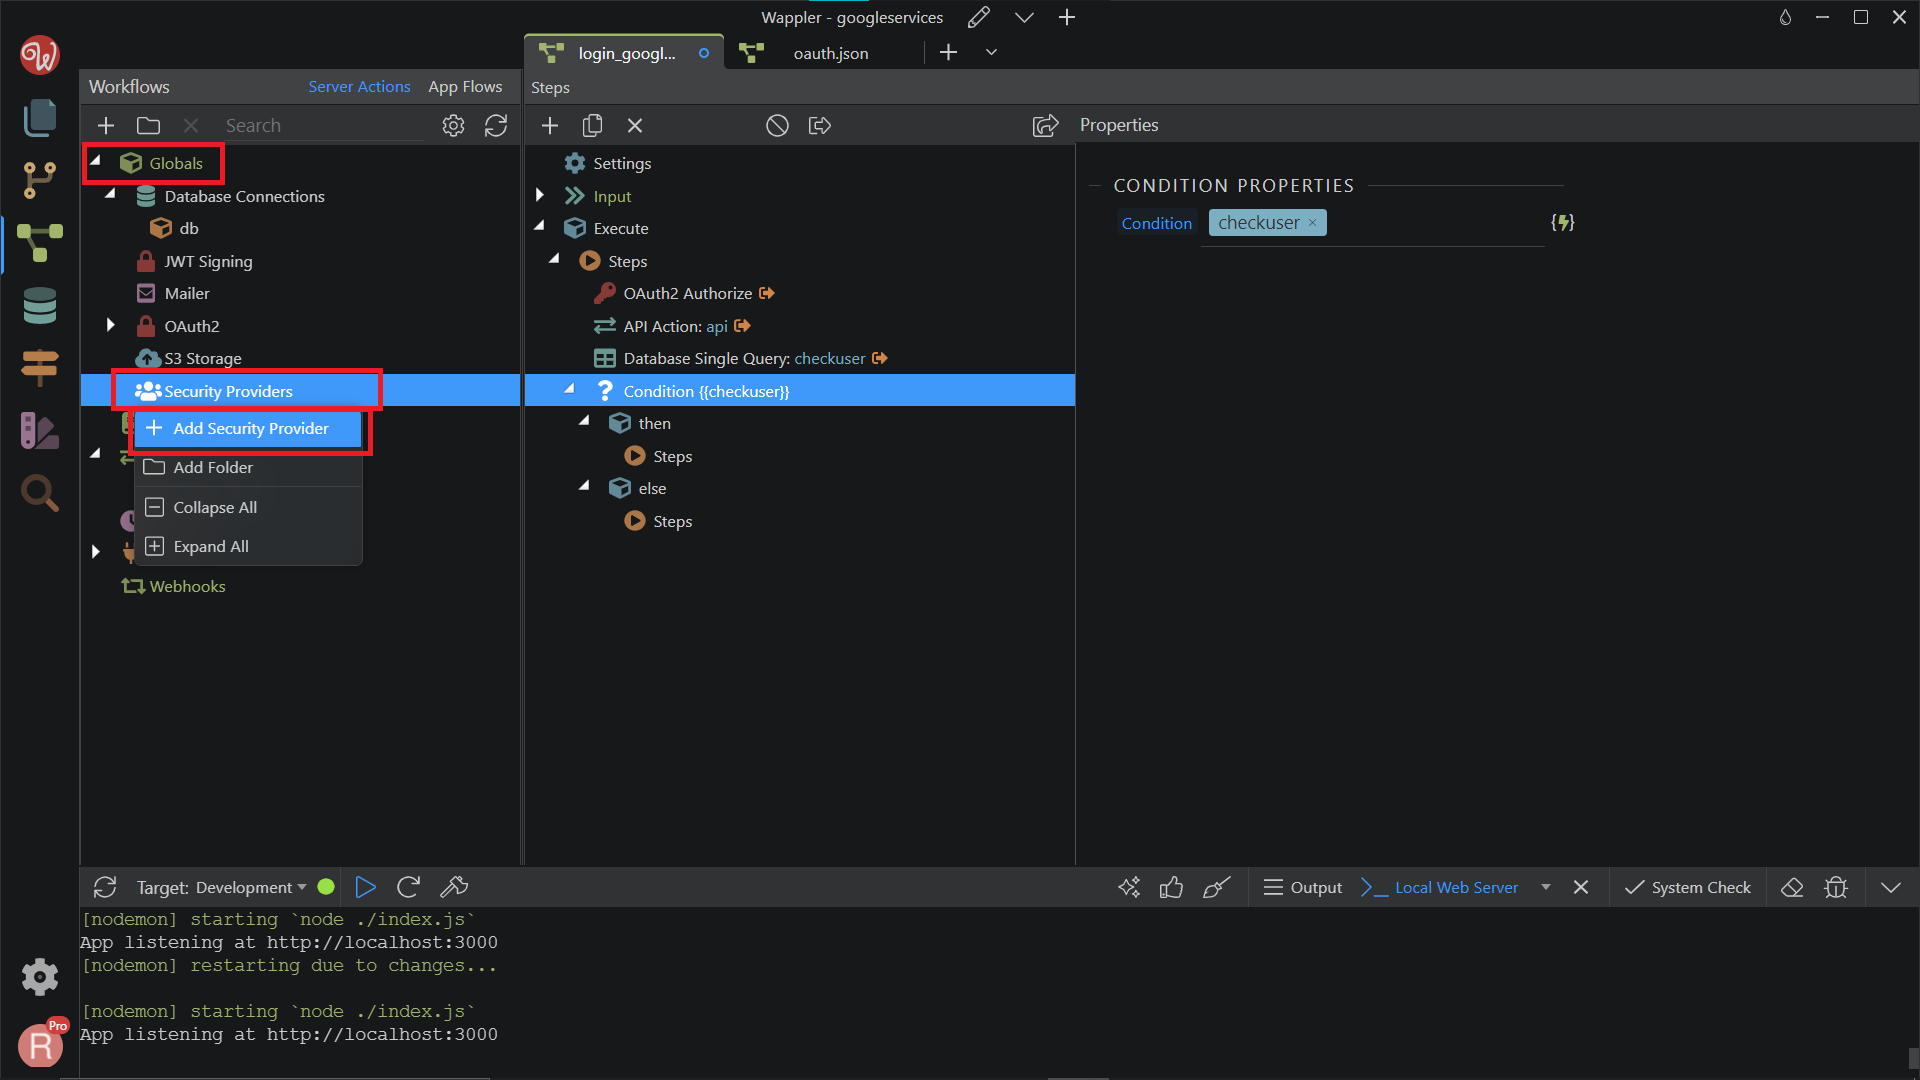
Step 67
Section titled “Step 67”We named it security_google here. In the Properties, change the Type to Database, and the Connection to your database name. After that, click on the Users & Permissions button.
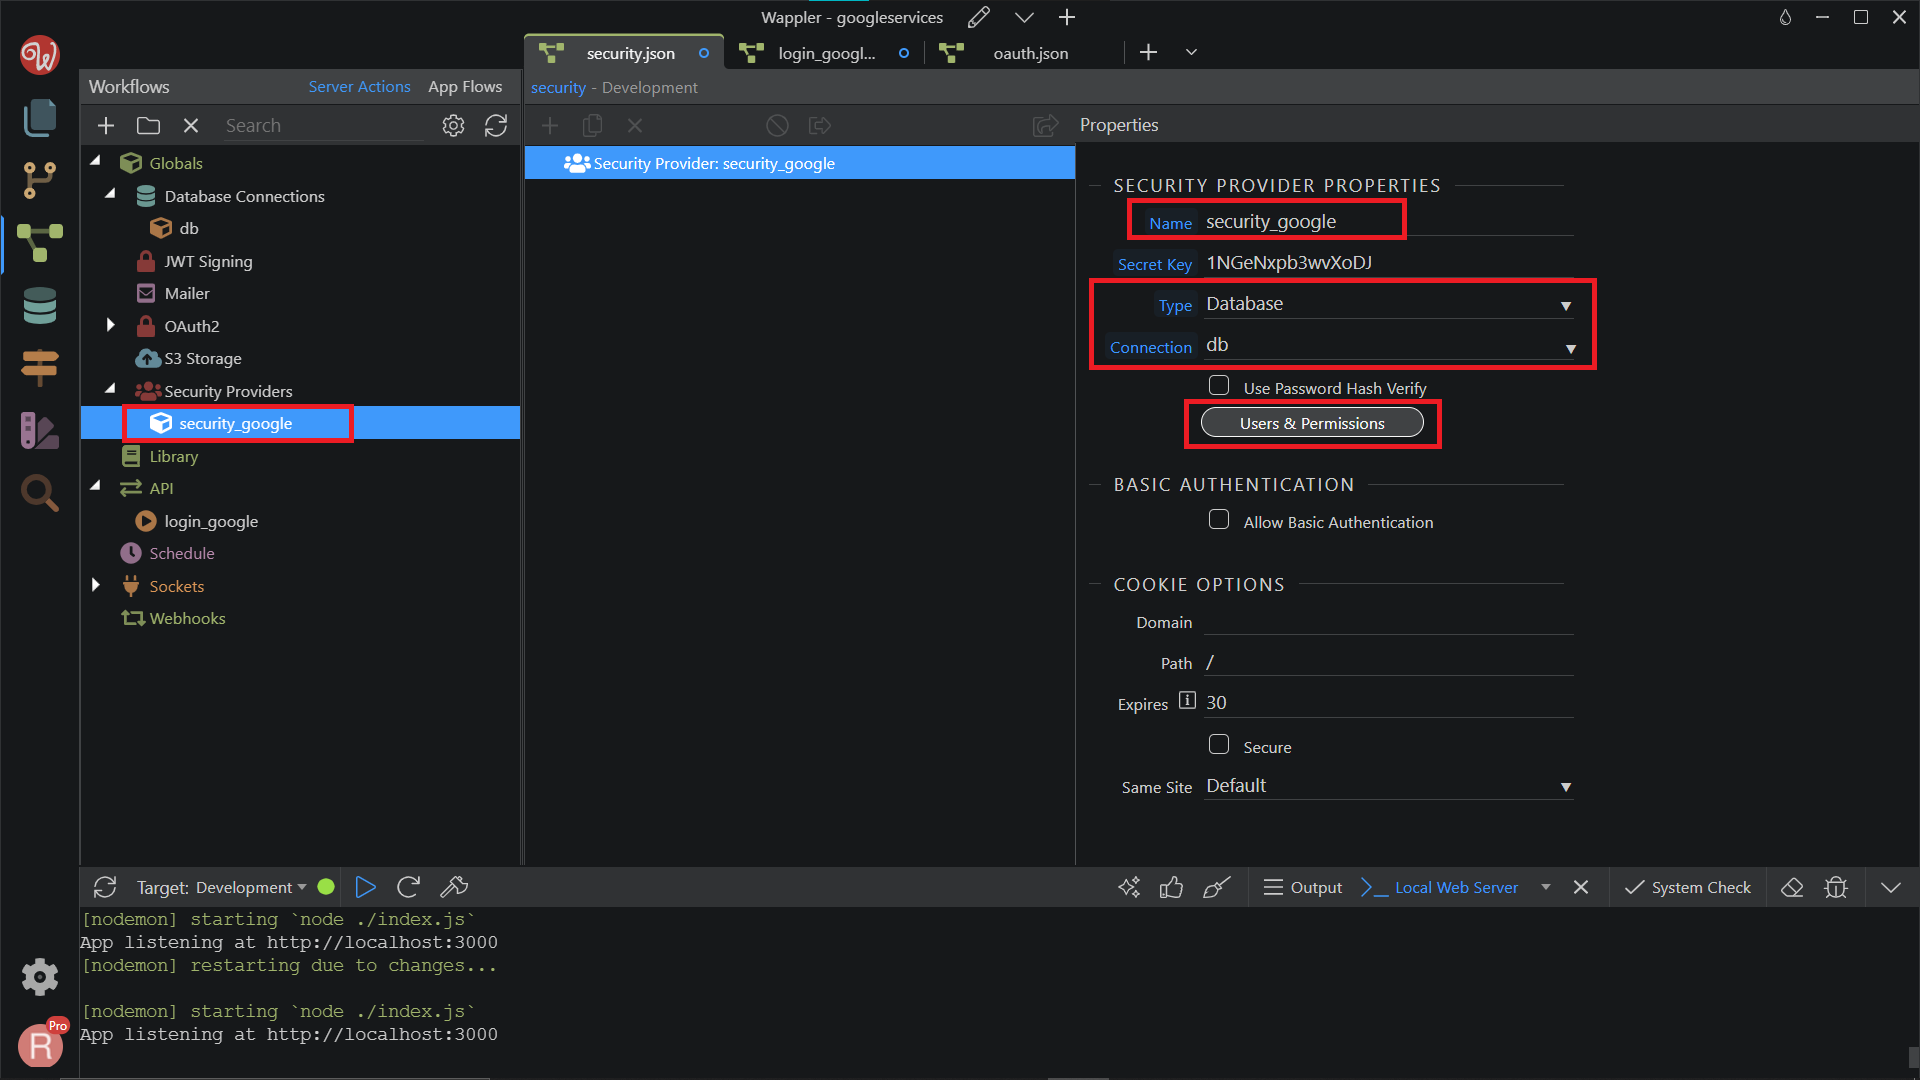
Select your users table and set up the ID, username, and password columns. Click OK.
Section titled “Select your users table and set up the ID, username, and password columns. Click OK.”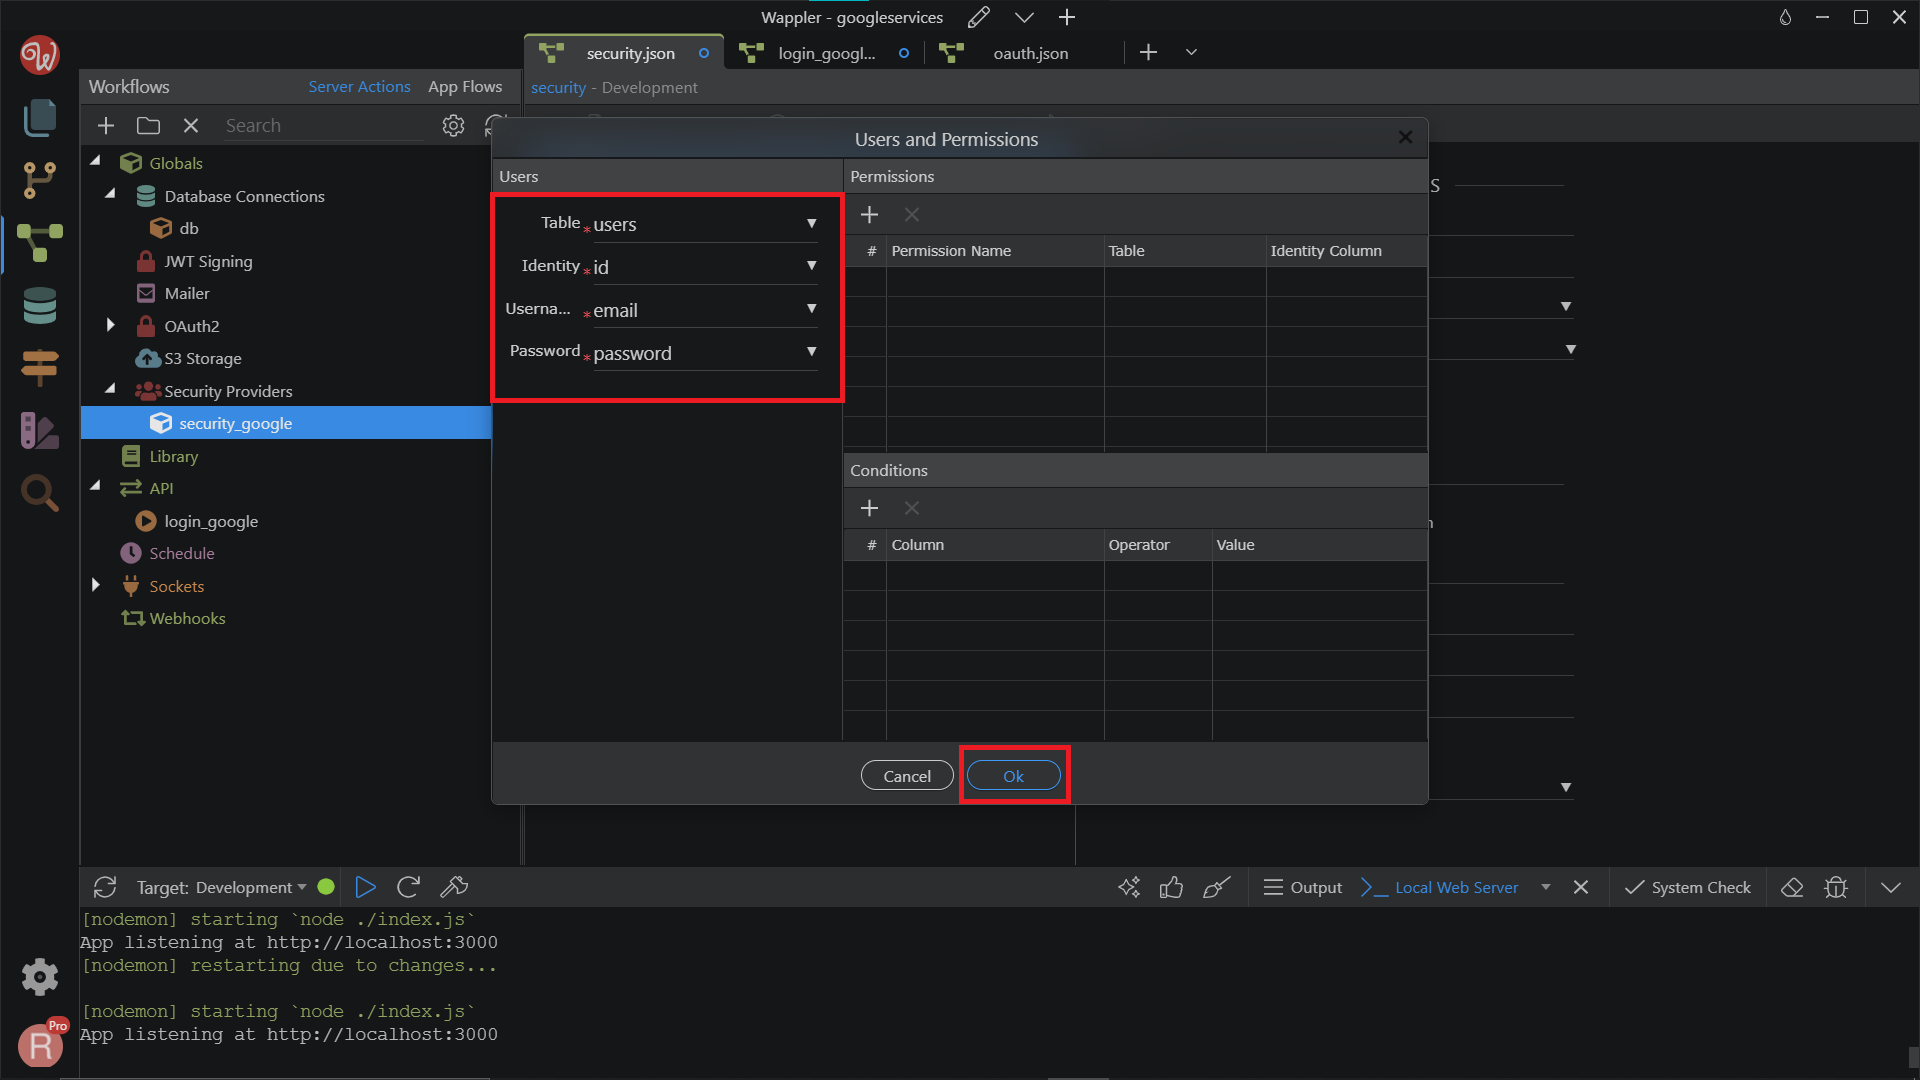
Save the file.
Section titled “Save the file.”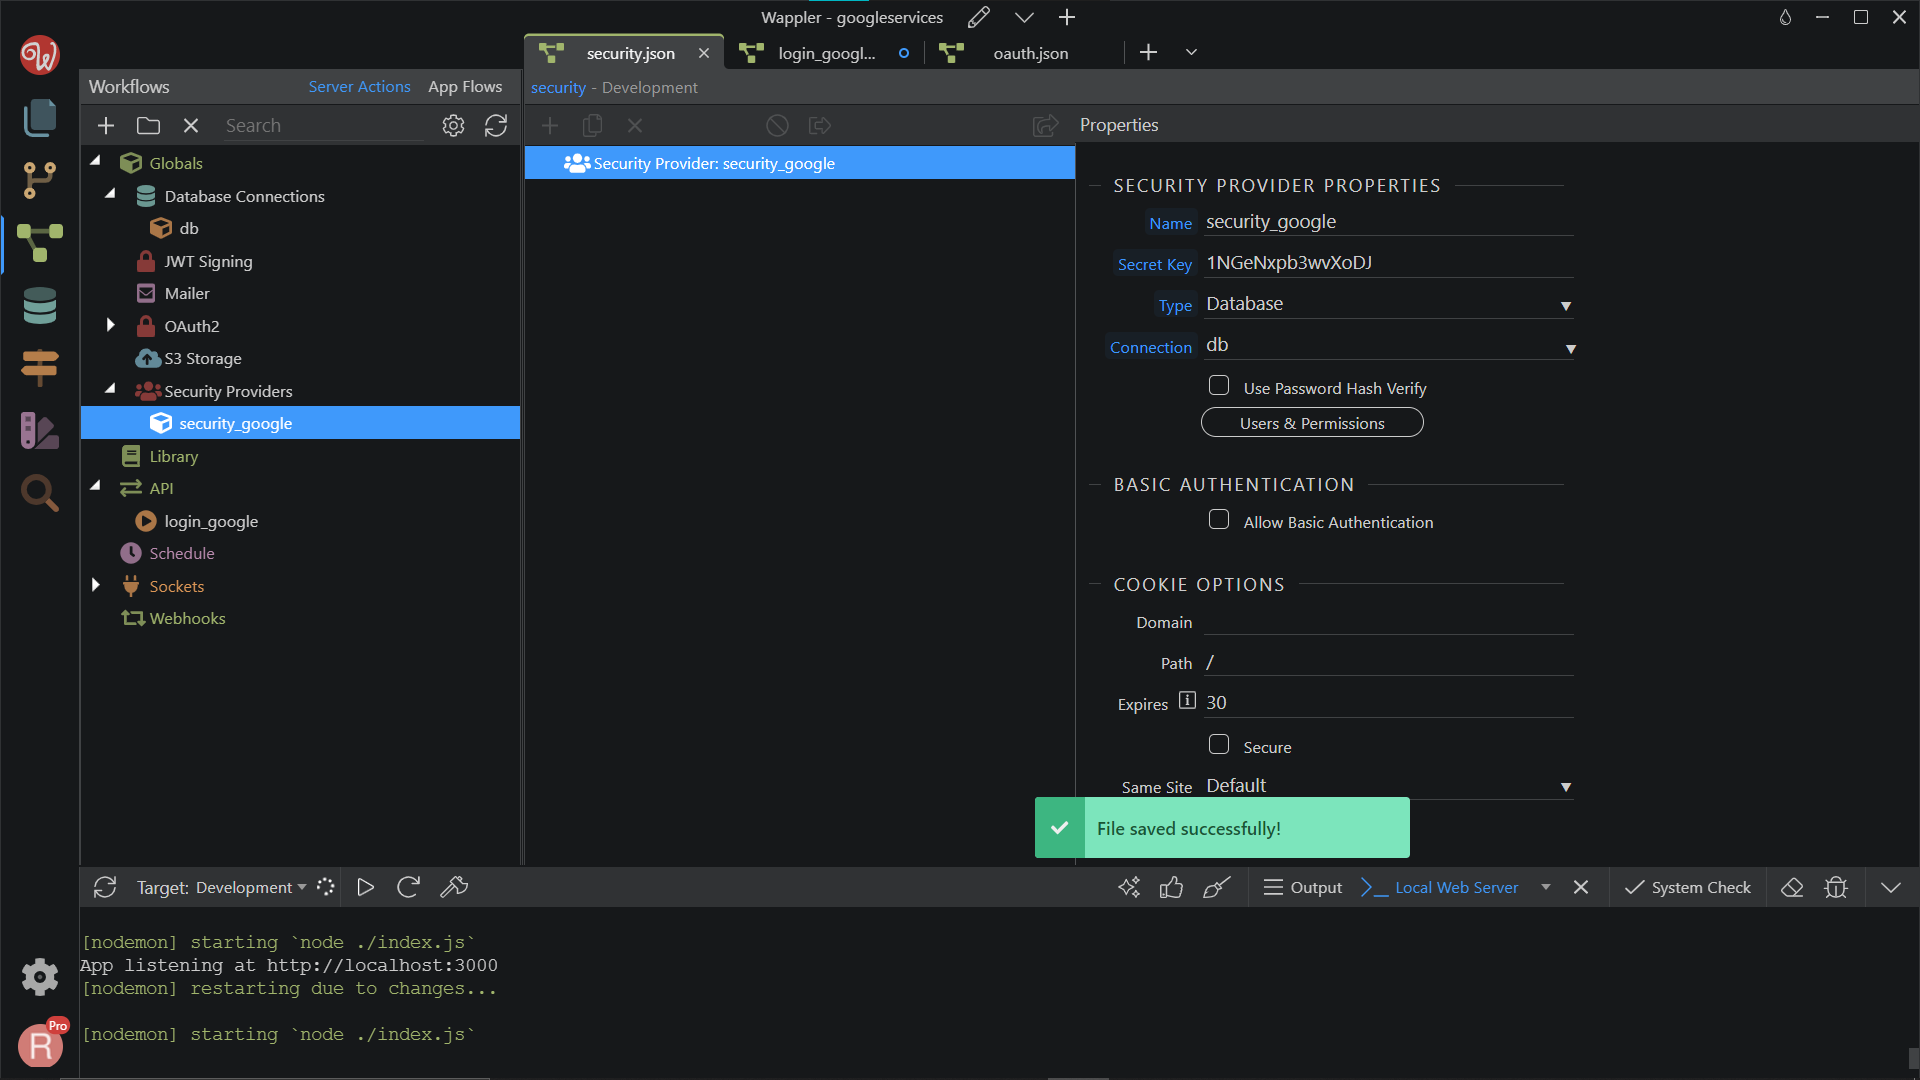
Go back to your login_google API, right-click Steps under Then, in the Condition.
Section titled “Go back to your login_google API, right-click Steps under Then, in the Condition.”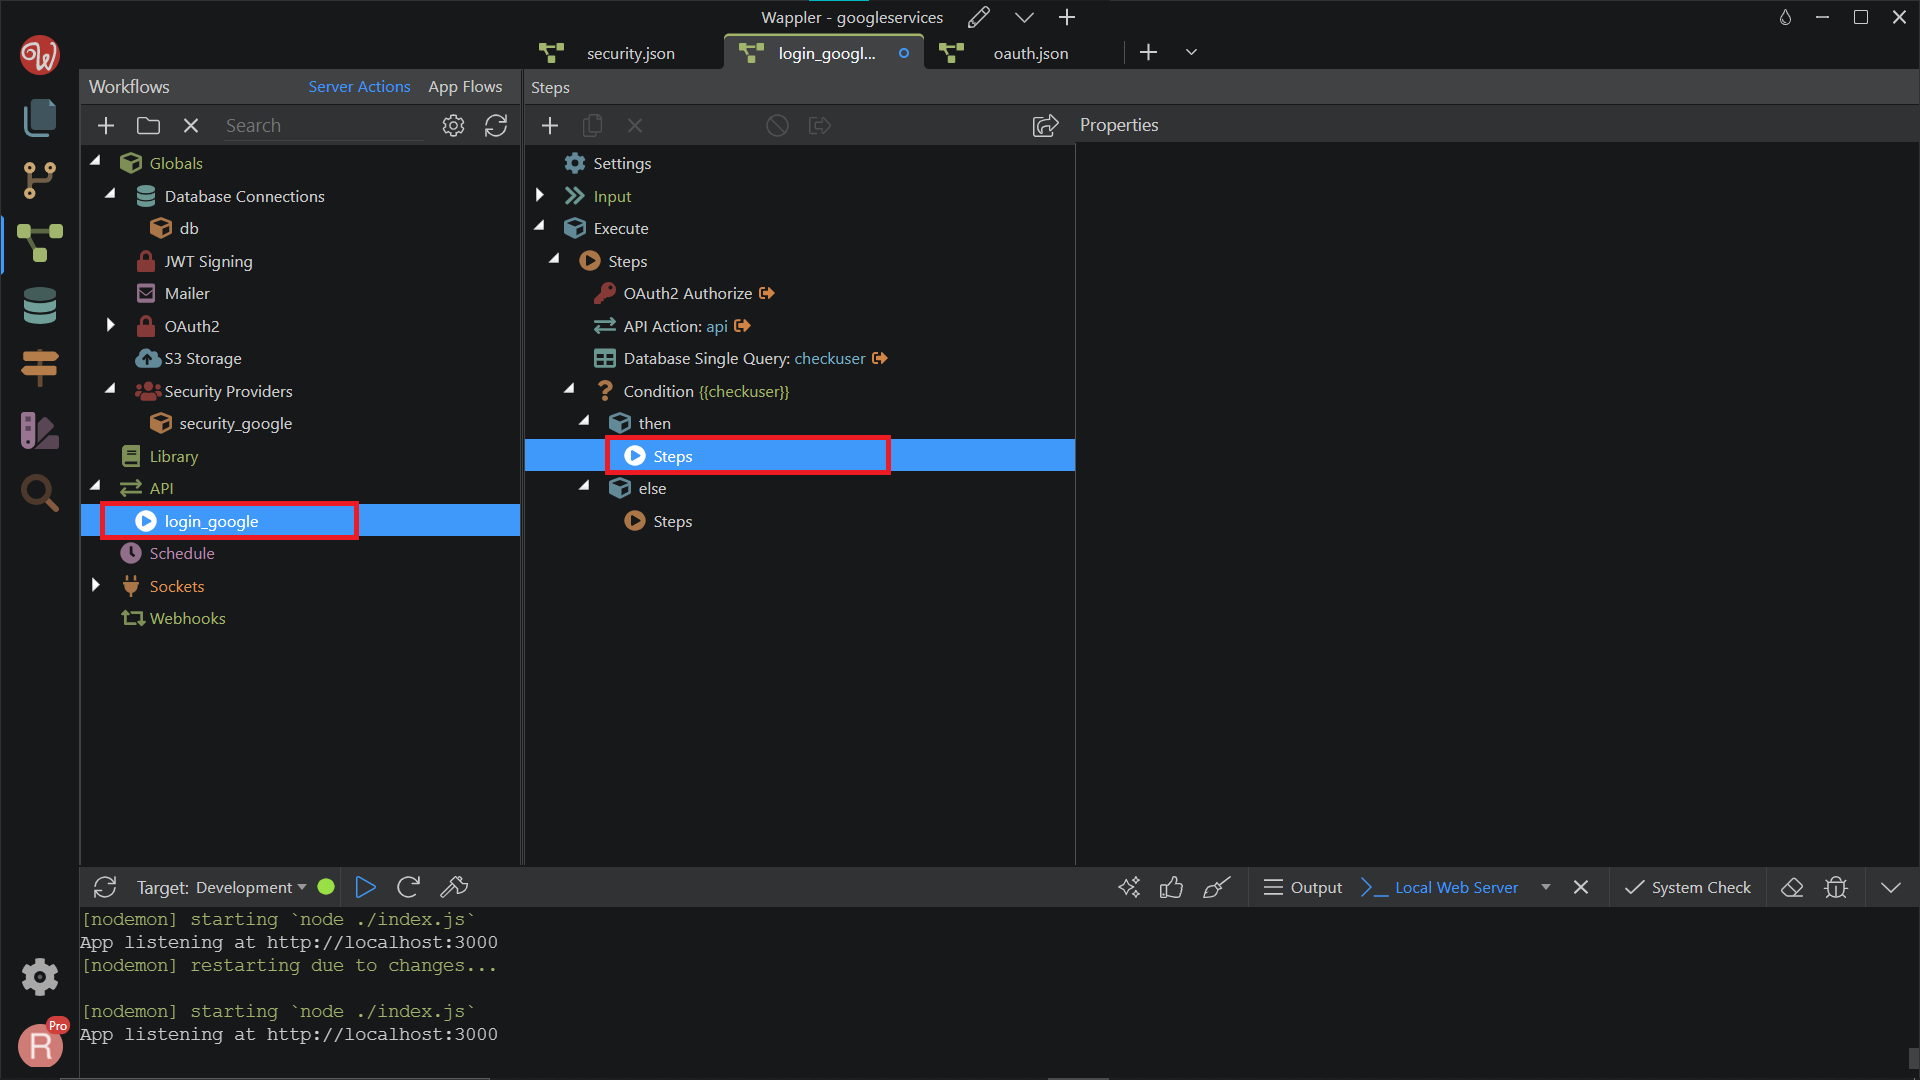
Search and add Security Login.
Section titled “Search and add Security Login.”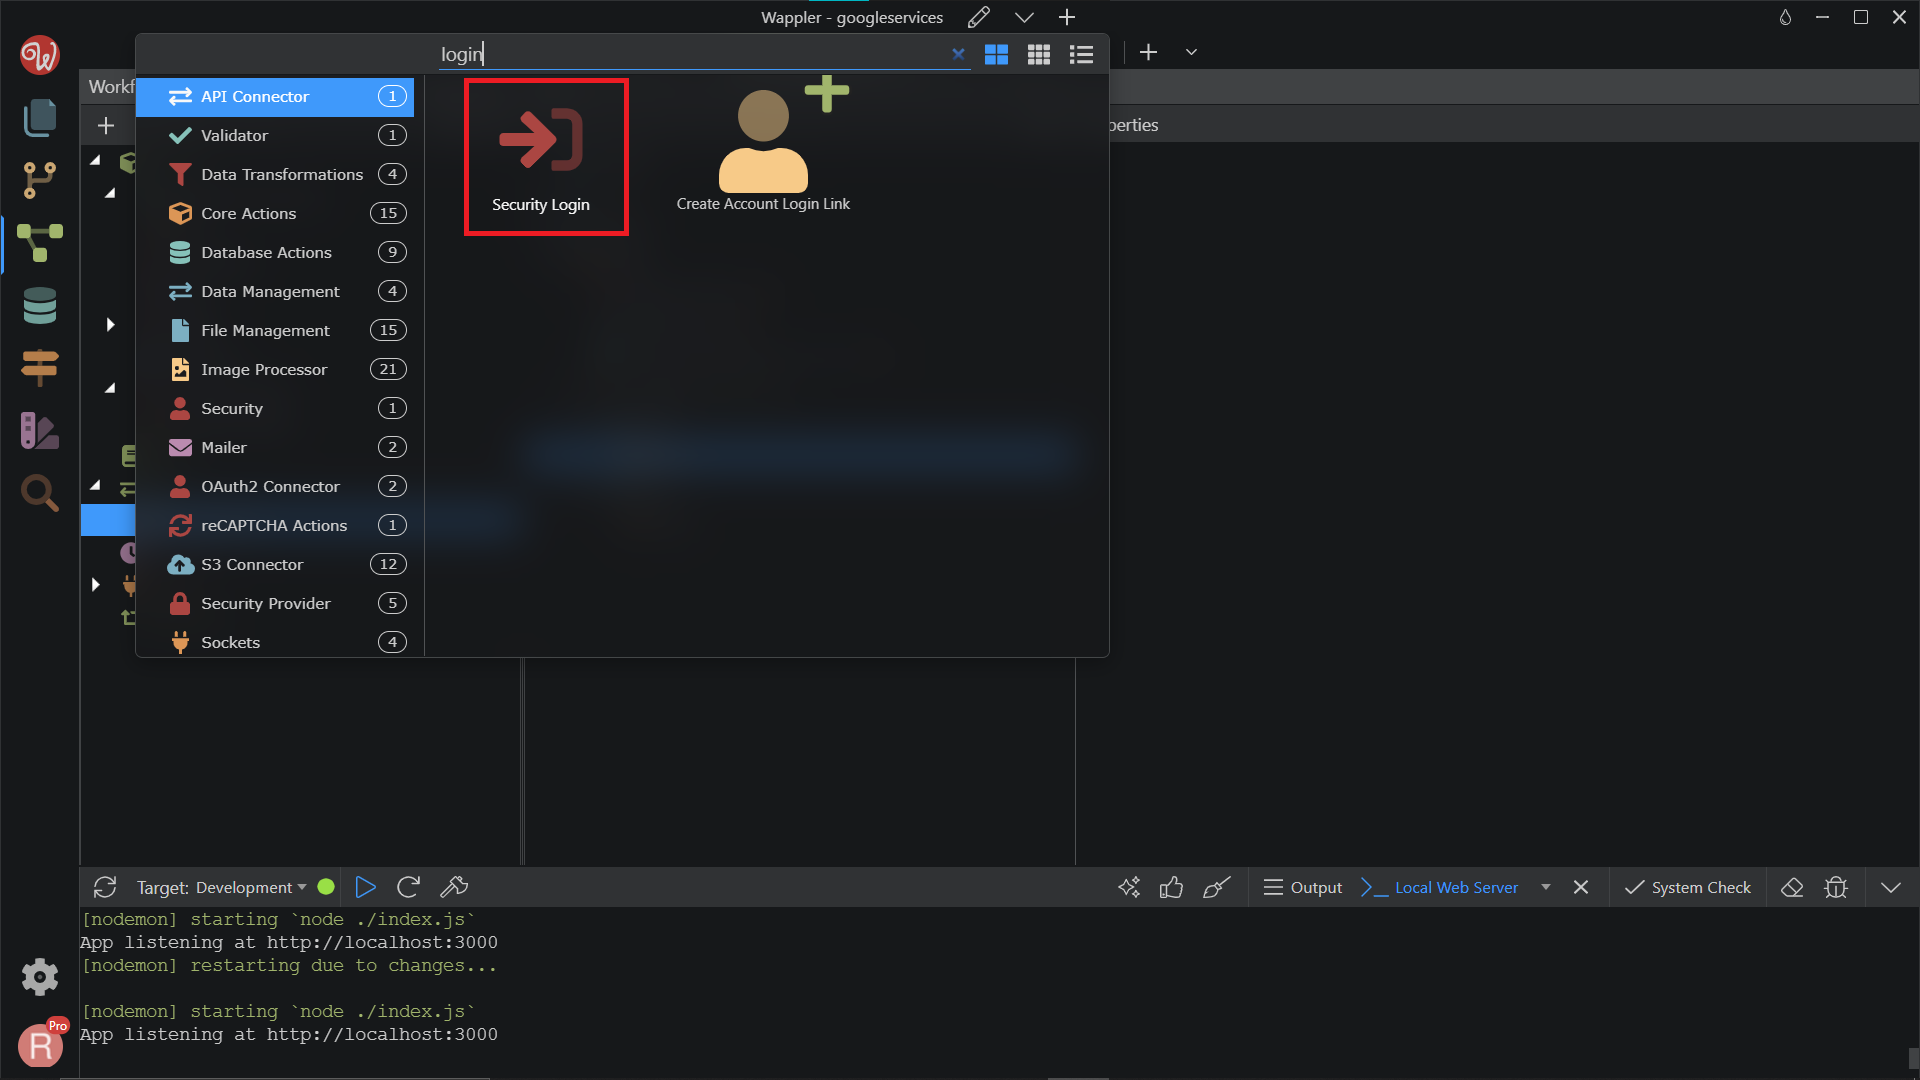
Step 72
Section titled “Step 72”On the Properties, change the Provider to security_google. Then, click the dynamic data picker in order to select the value for the username.
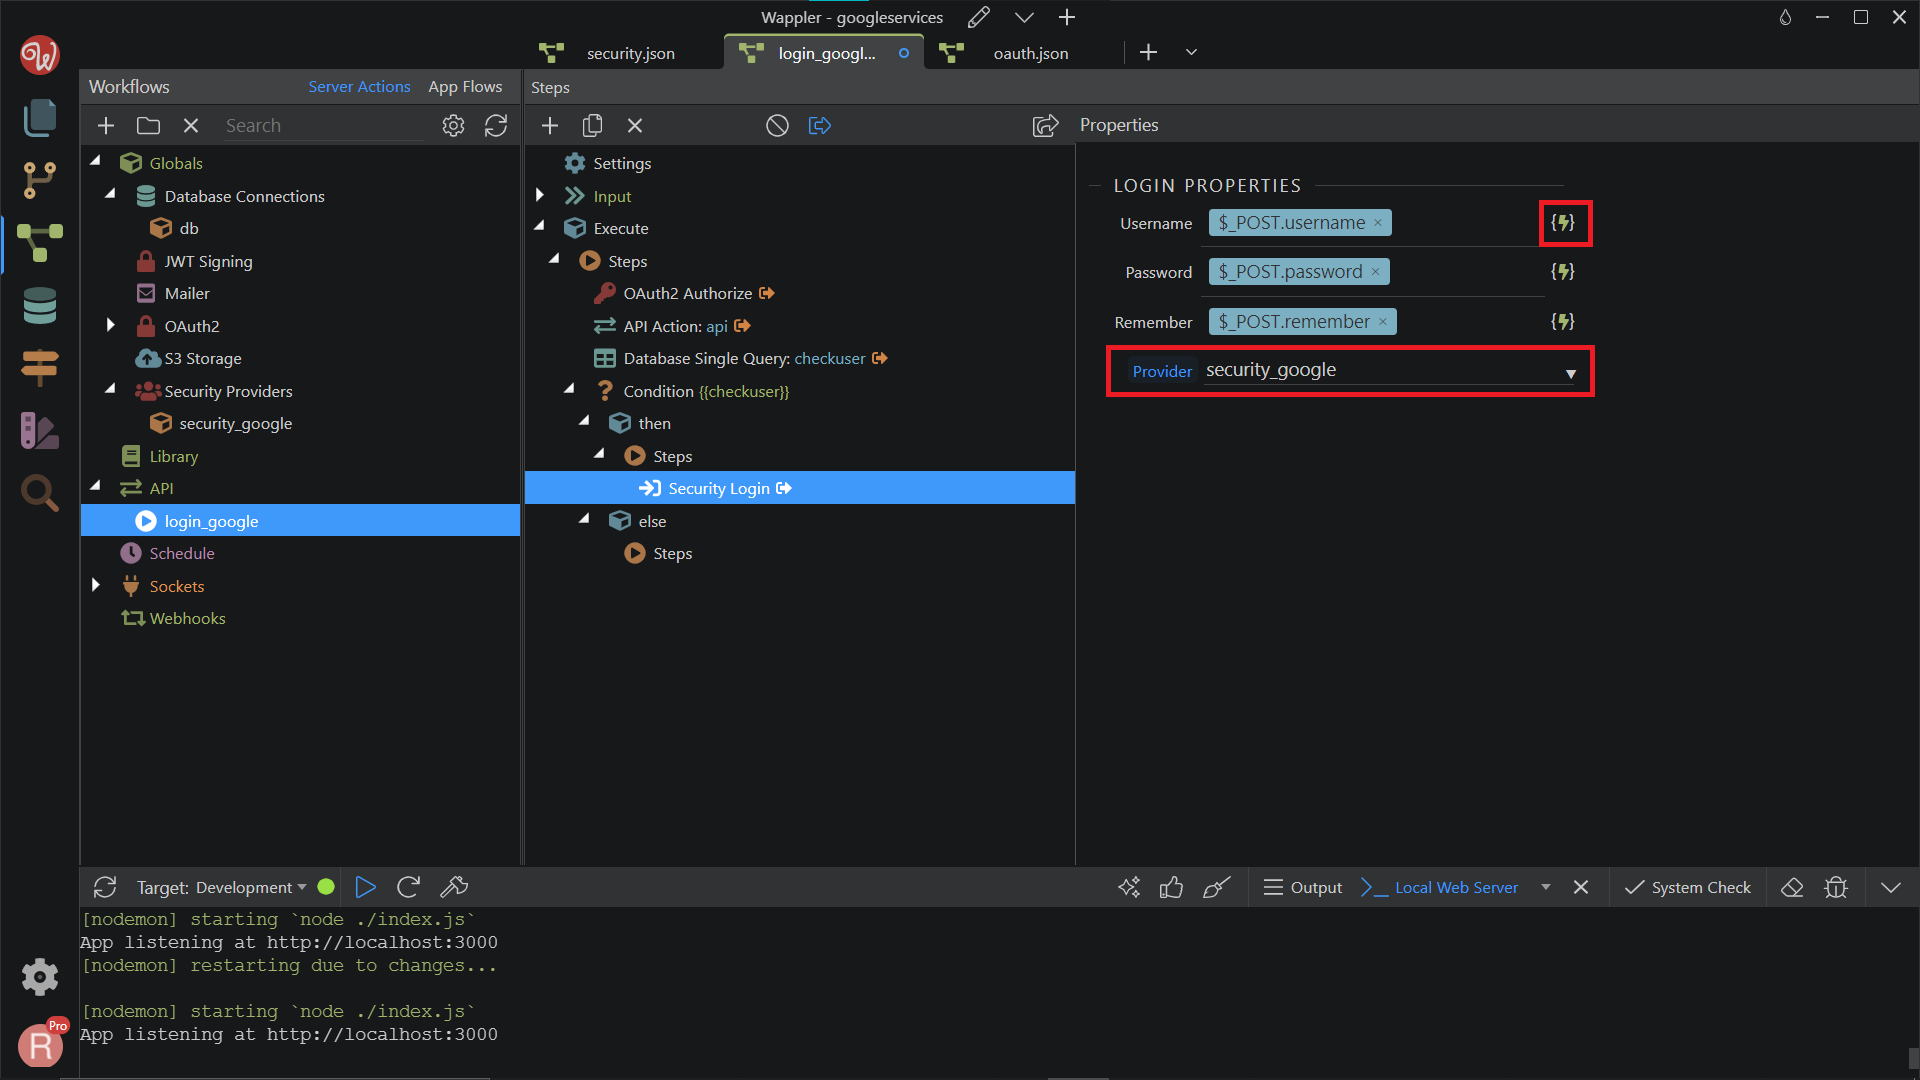
This should be the email, returned by our database single query. Click Select.
Section titled “This should be the email, returned by our database single query. Click Select.”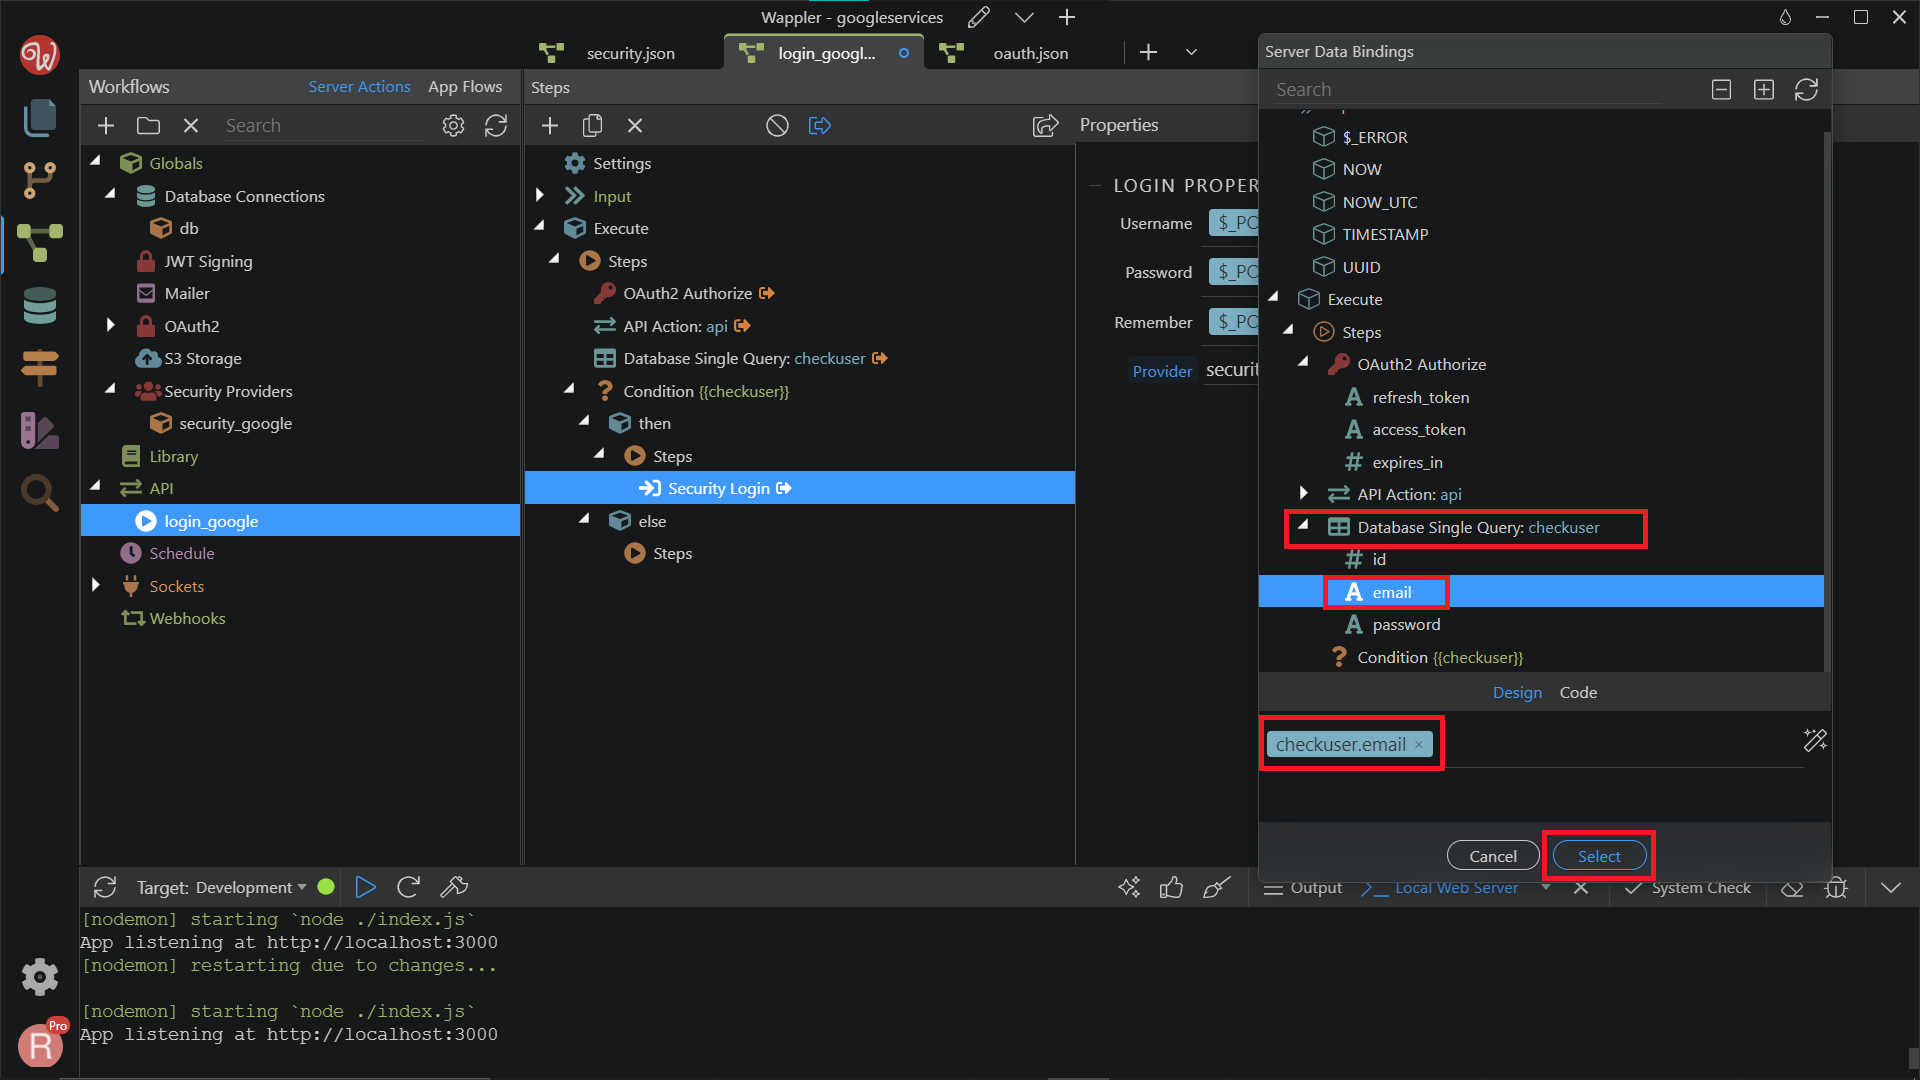
Do the same for the password of the login step.
Section titled “Do the same for the password of the login step.”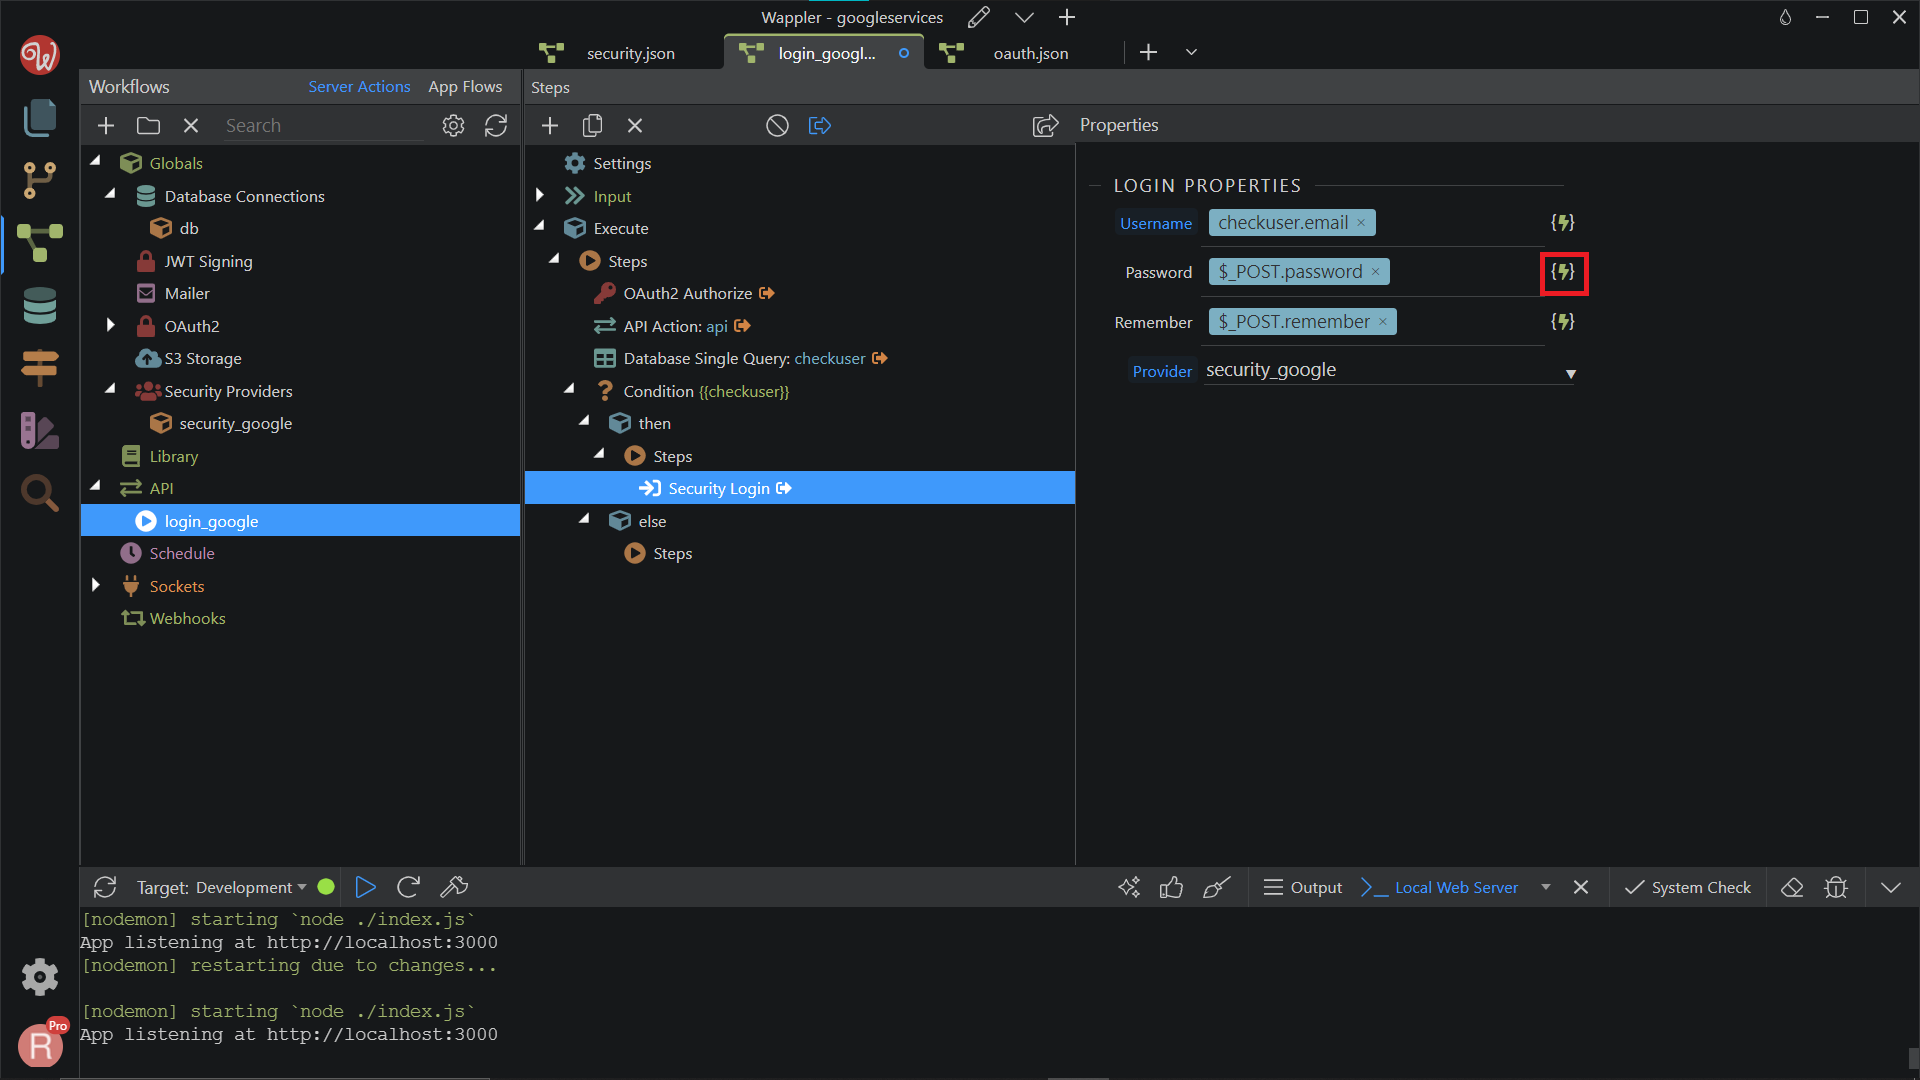
Select the password returned from the database single query. Click Select.
Section titled “Select the password returned from the database single query. Click Select.”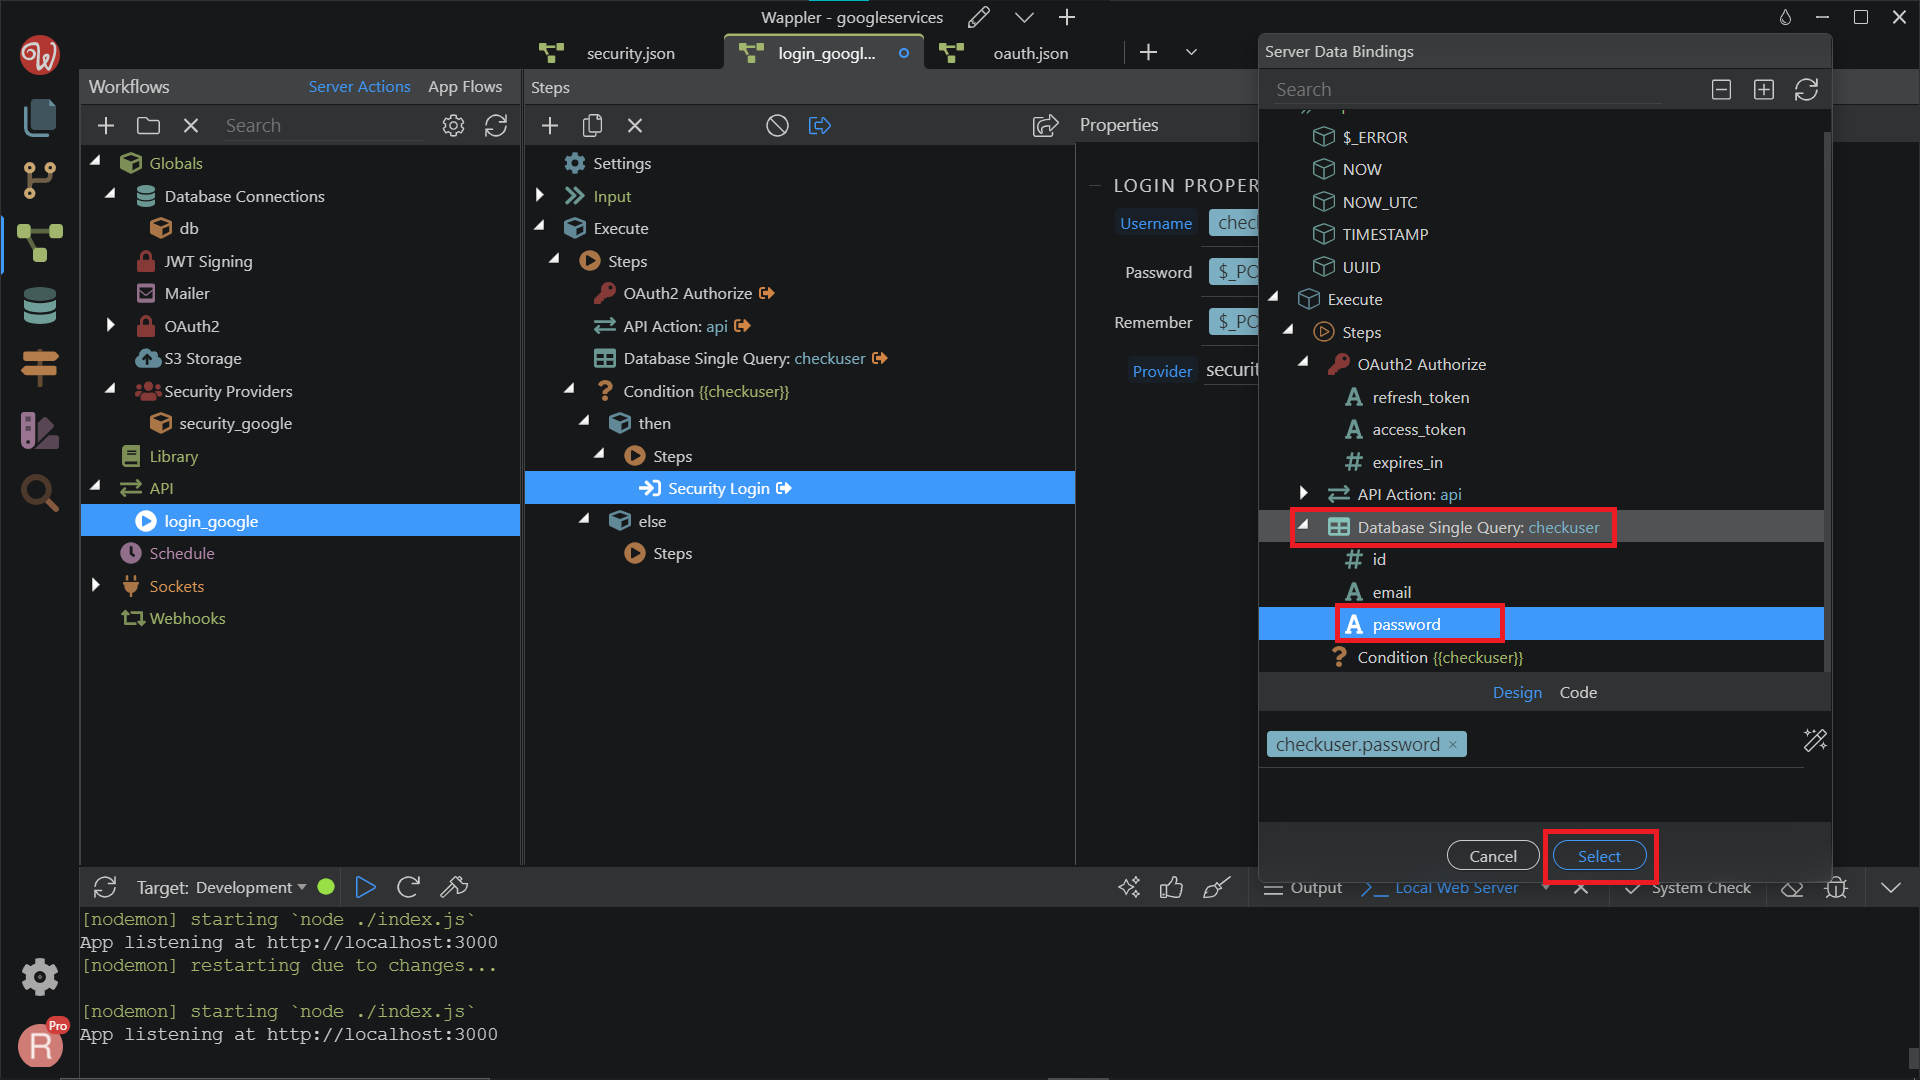
Step 76
Section titled “Step 76”Now if the user exists, his/her login data will be filled by the database query and he/she will be logged in automatically.
Create new users when they don’t exist in the database
Section titled “Create new users when they don’t exist in the database”If the database query returns no results, we need to create the user based on the email and ID returned by Google.
Right-click steps under Else in the Condition.
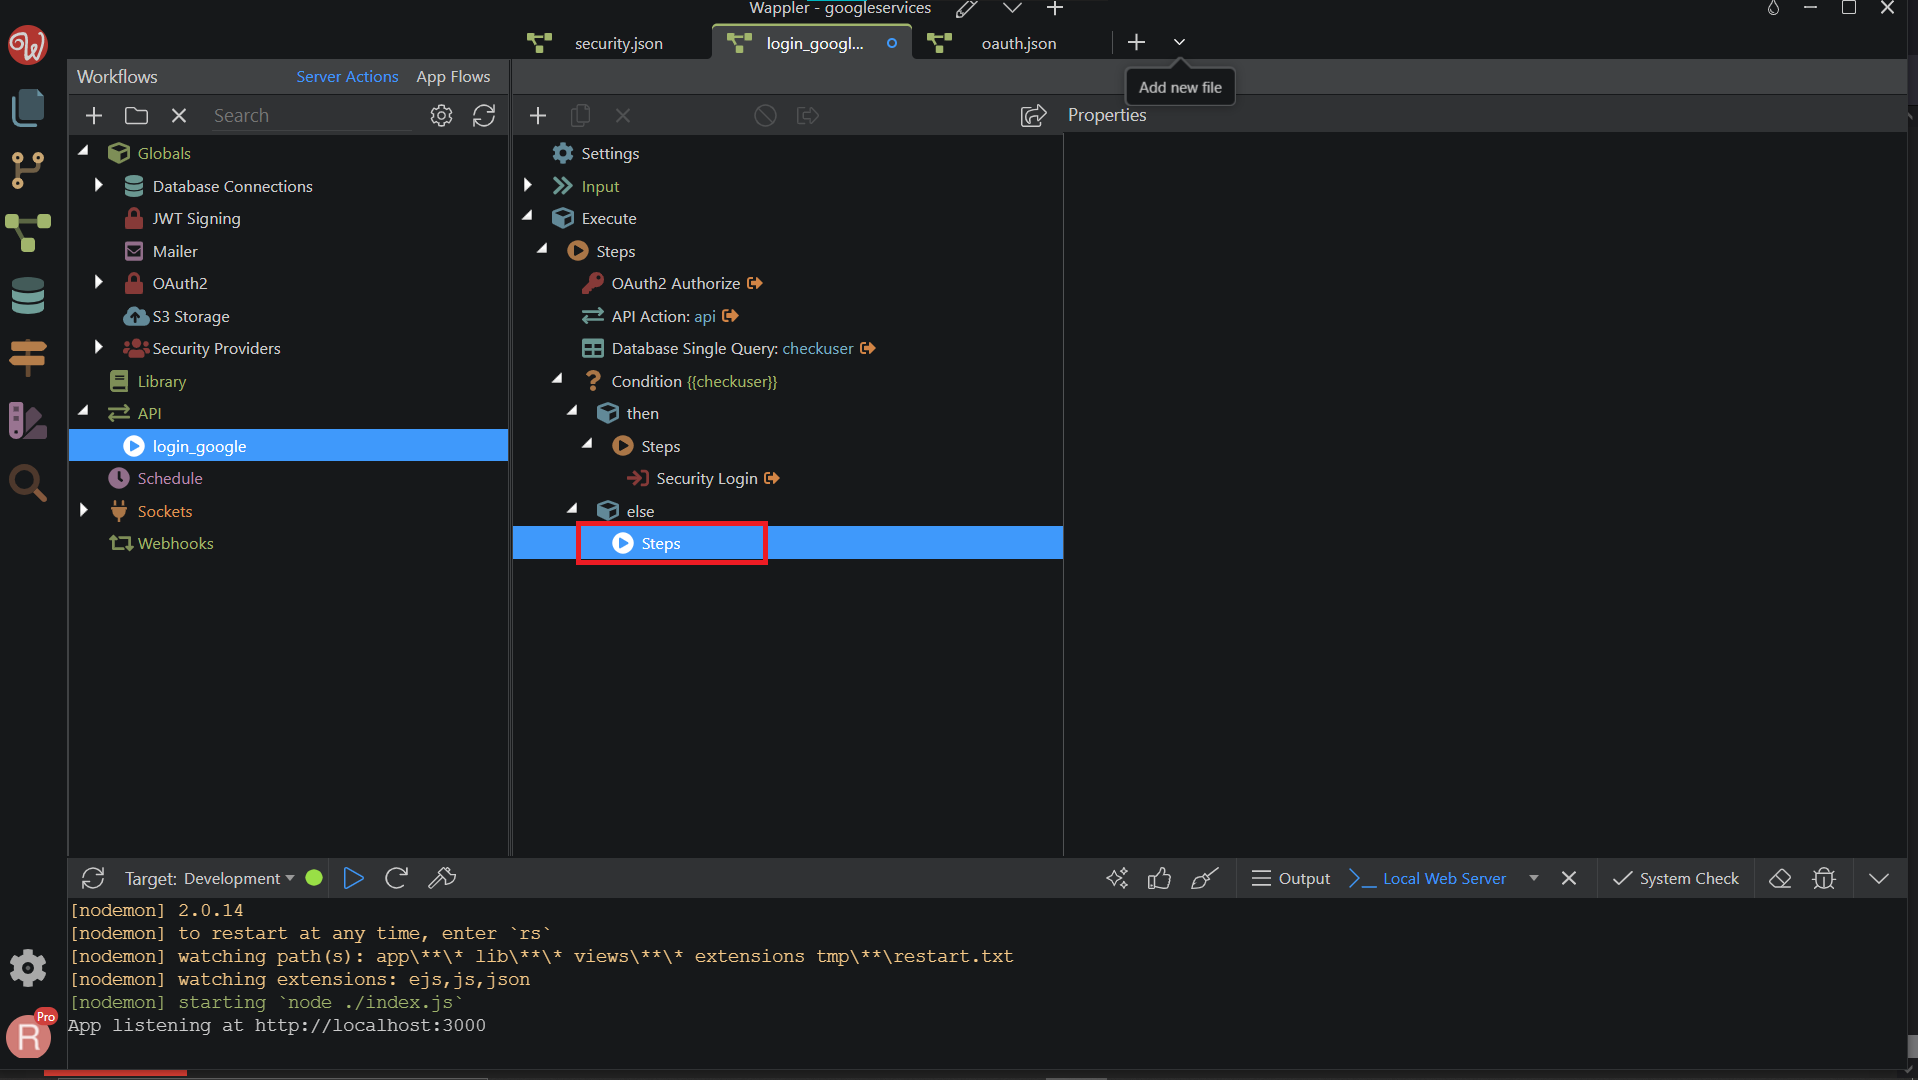
Search and add Database Insert.
Section titled “Search and add Database Insert.”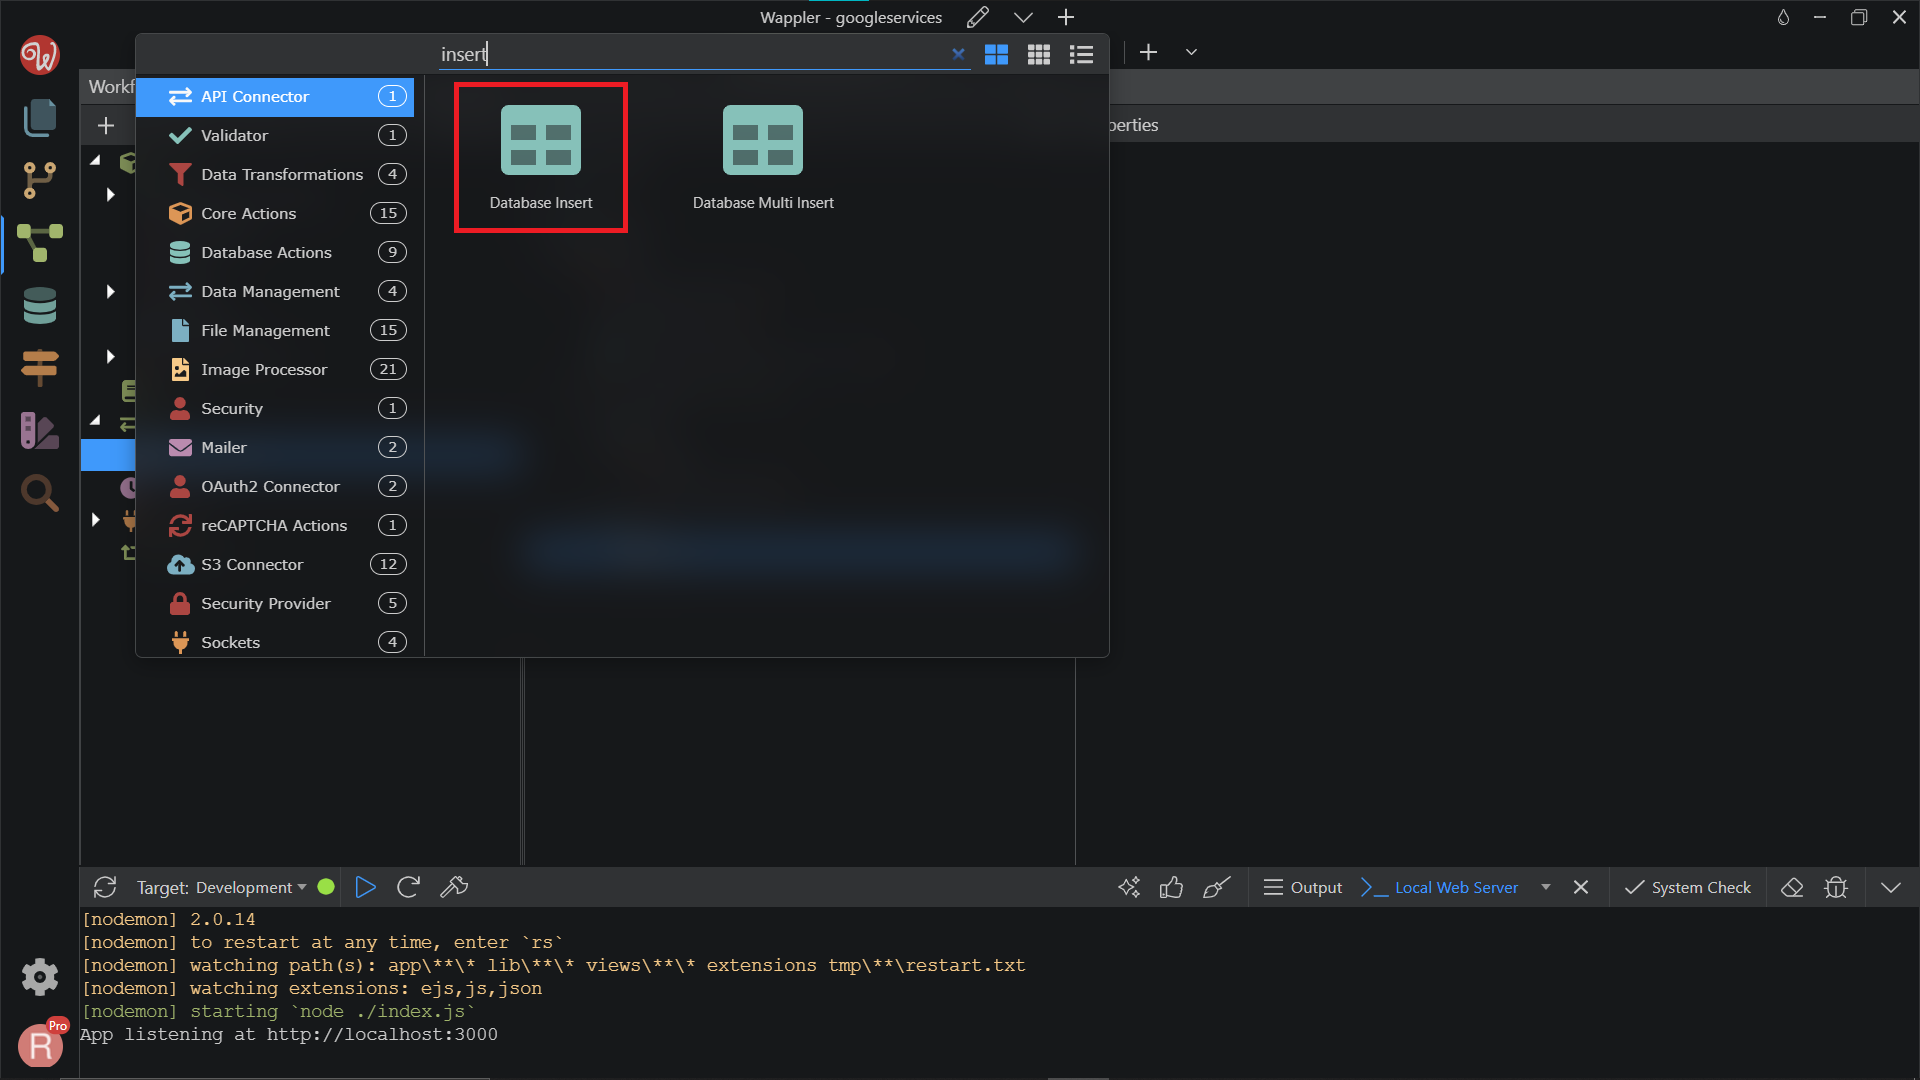
Click Insert Options.
Section titled “Click Insert Options.”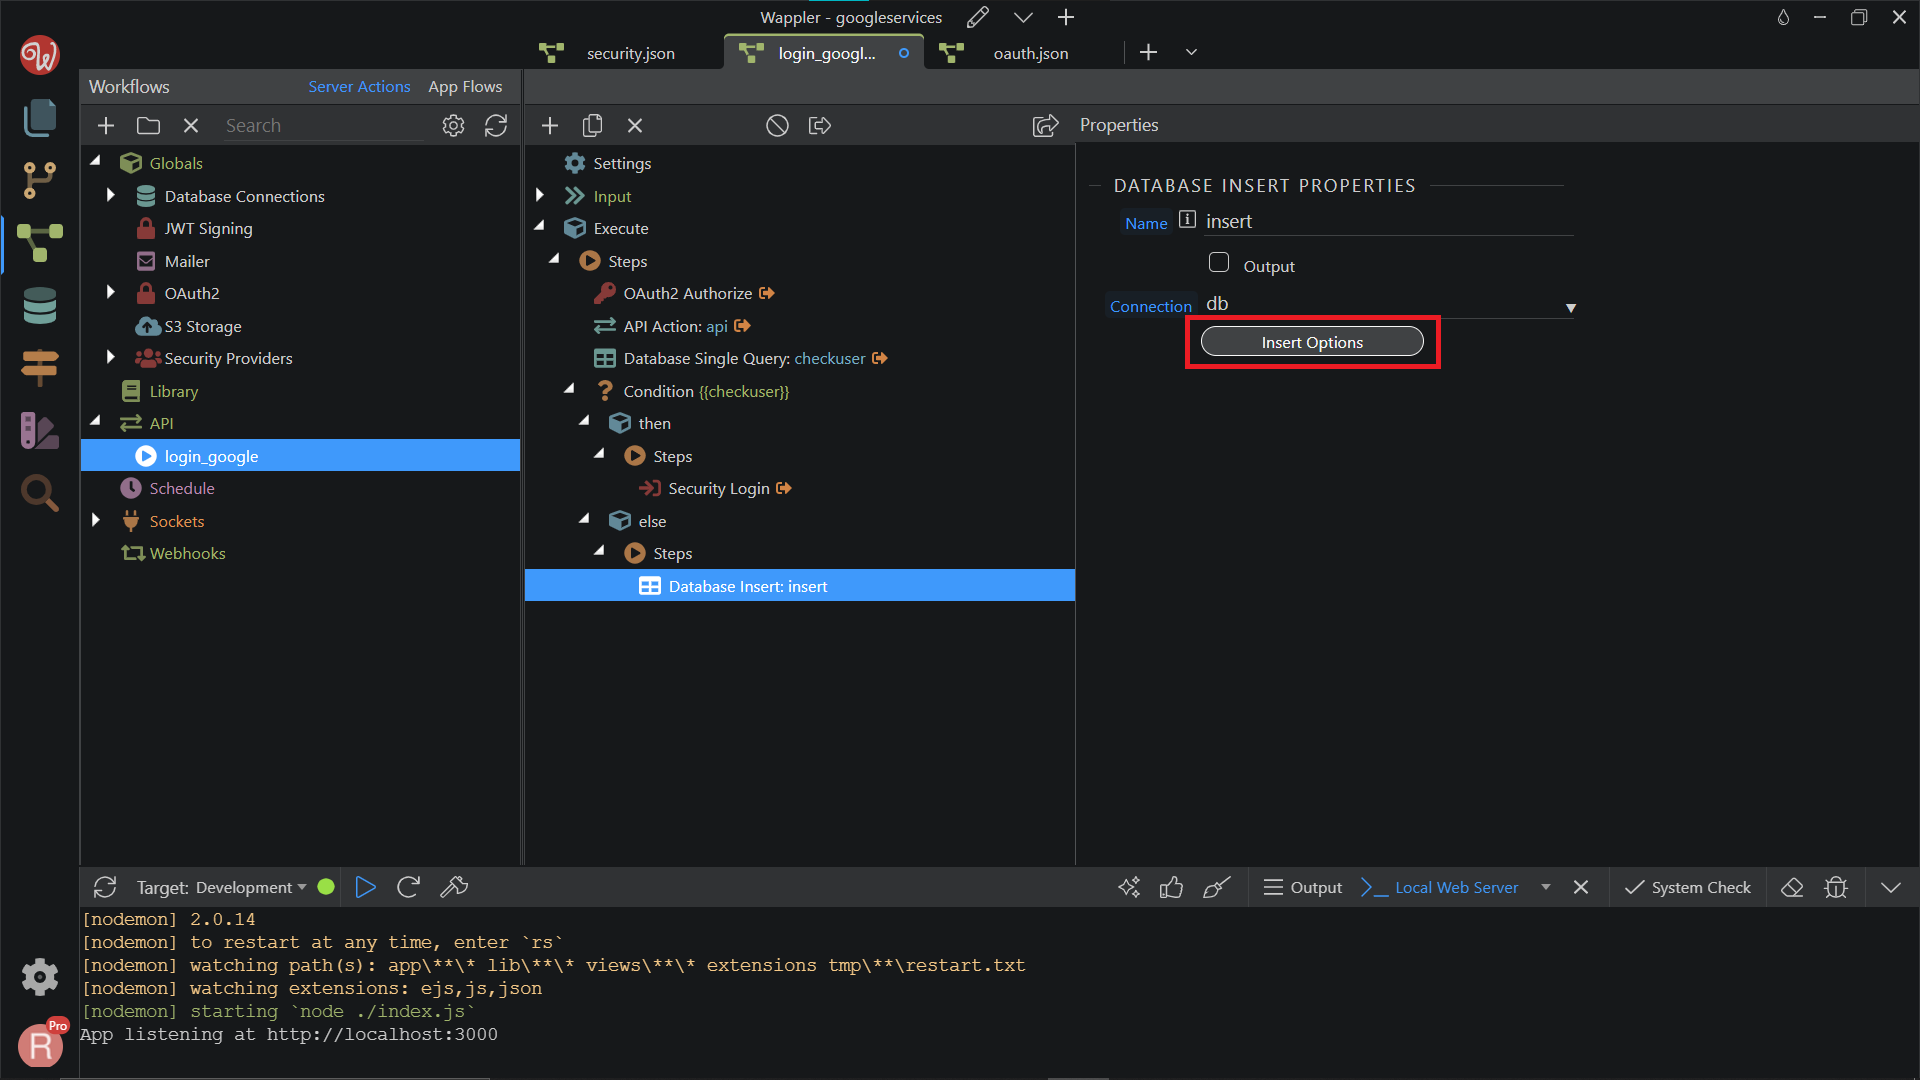
Add your users table from the dropdown.
Section titled “Add your users table from the dropdown.”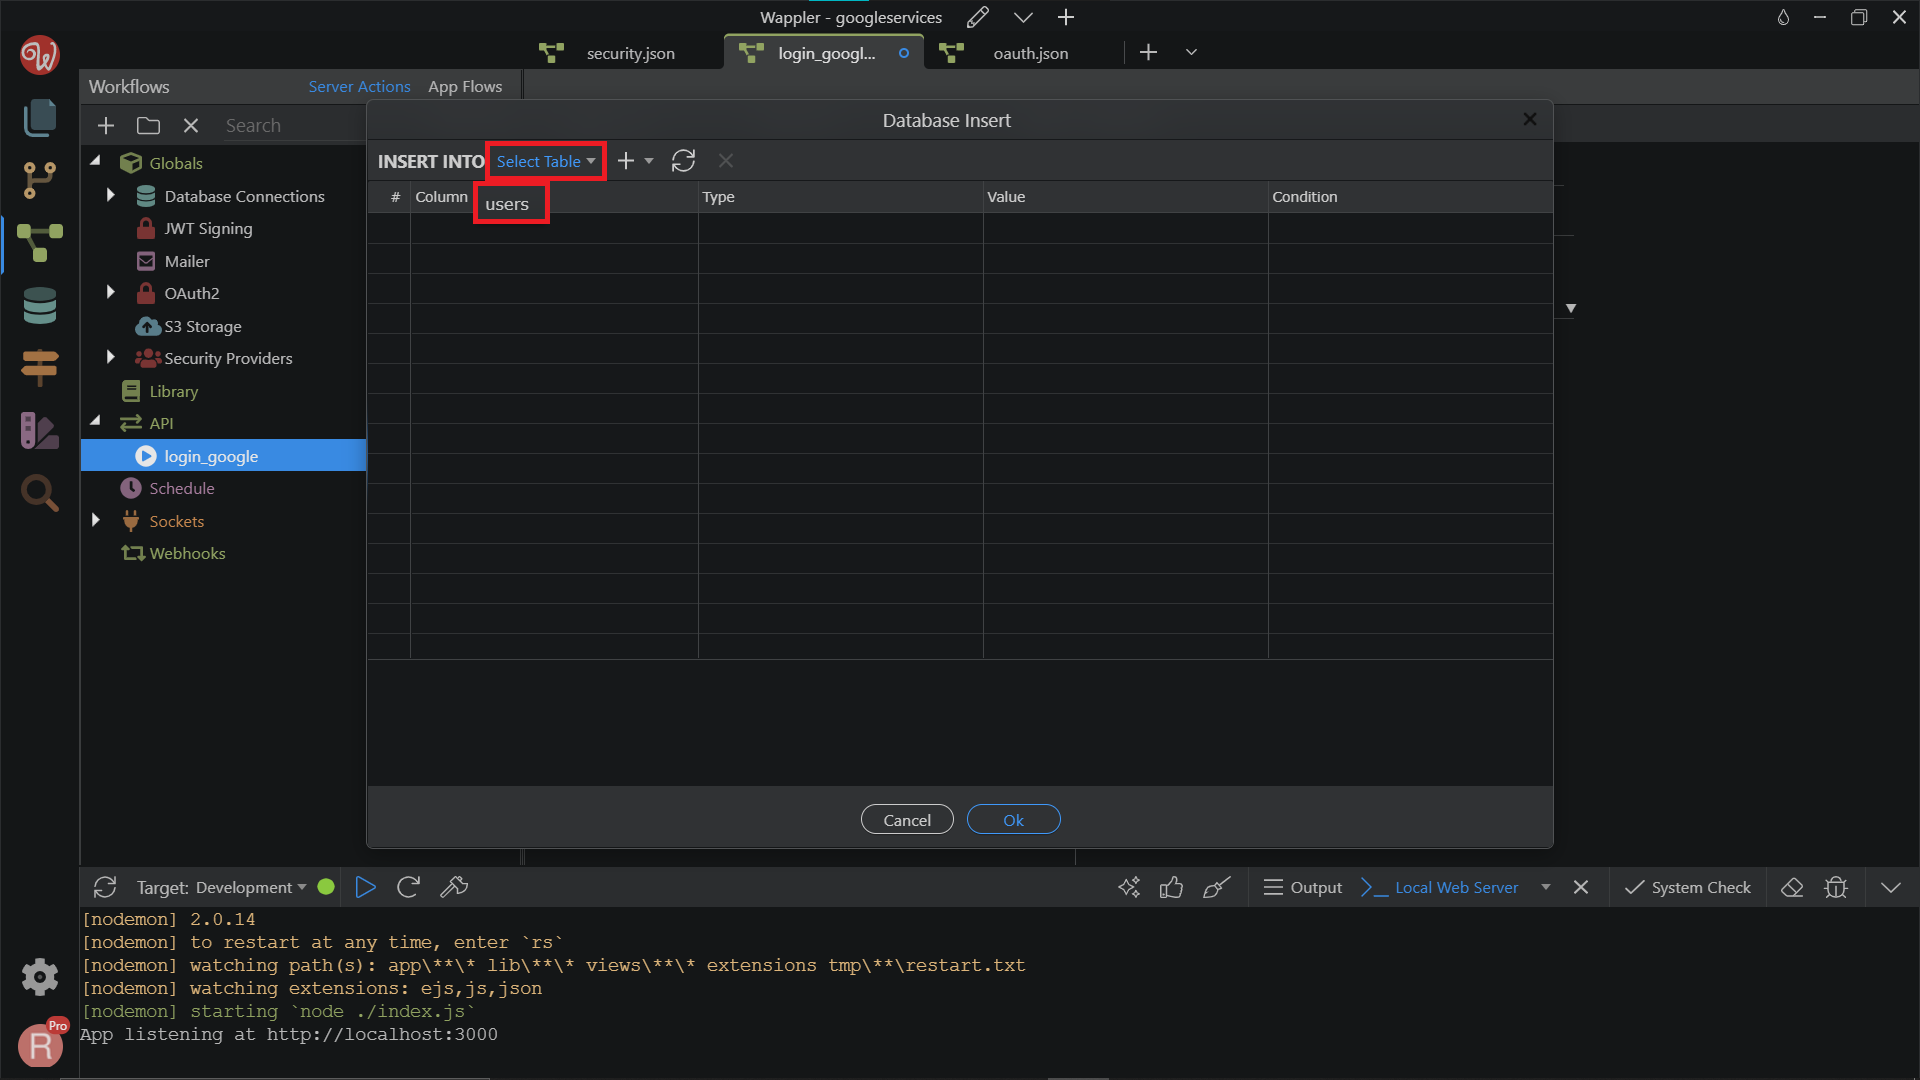
Click the dynamic data picker, to select a value to be inserted in the email field.
Section titled “Click the dynamic data picker, to select a value to be inserted in the email field.”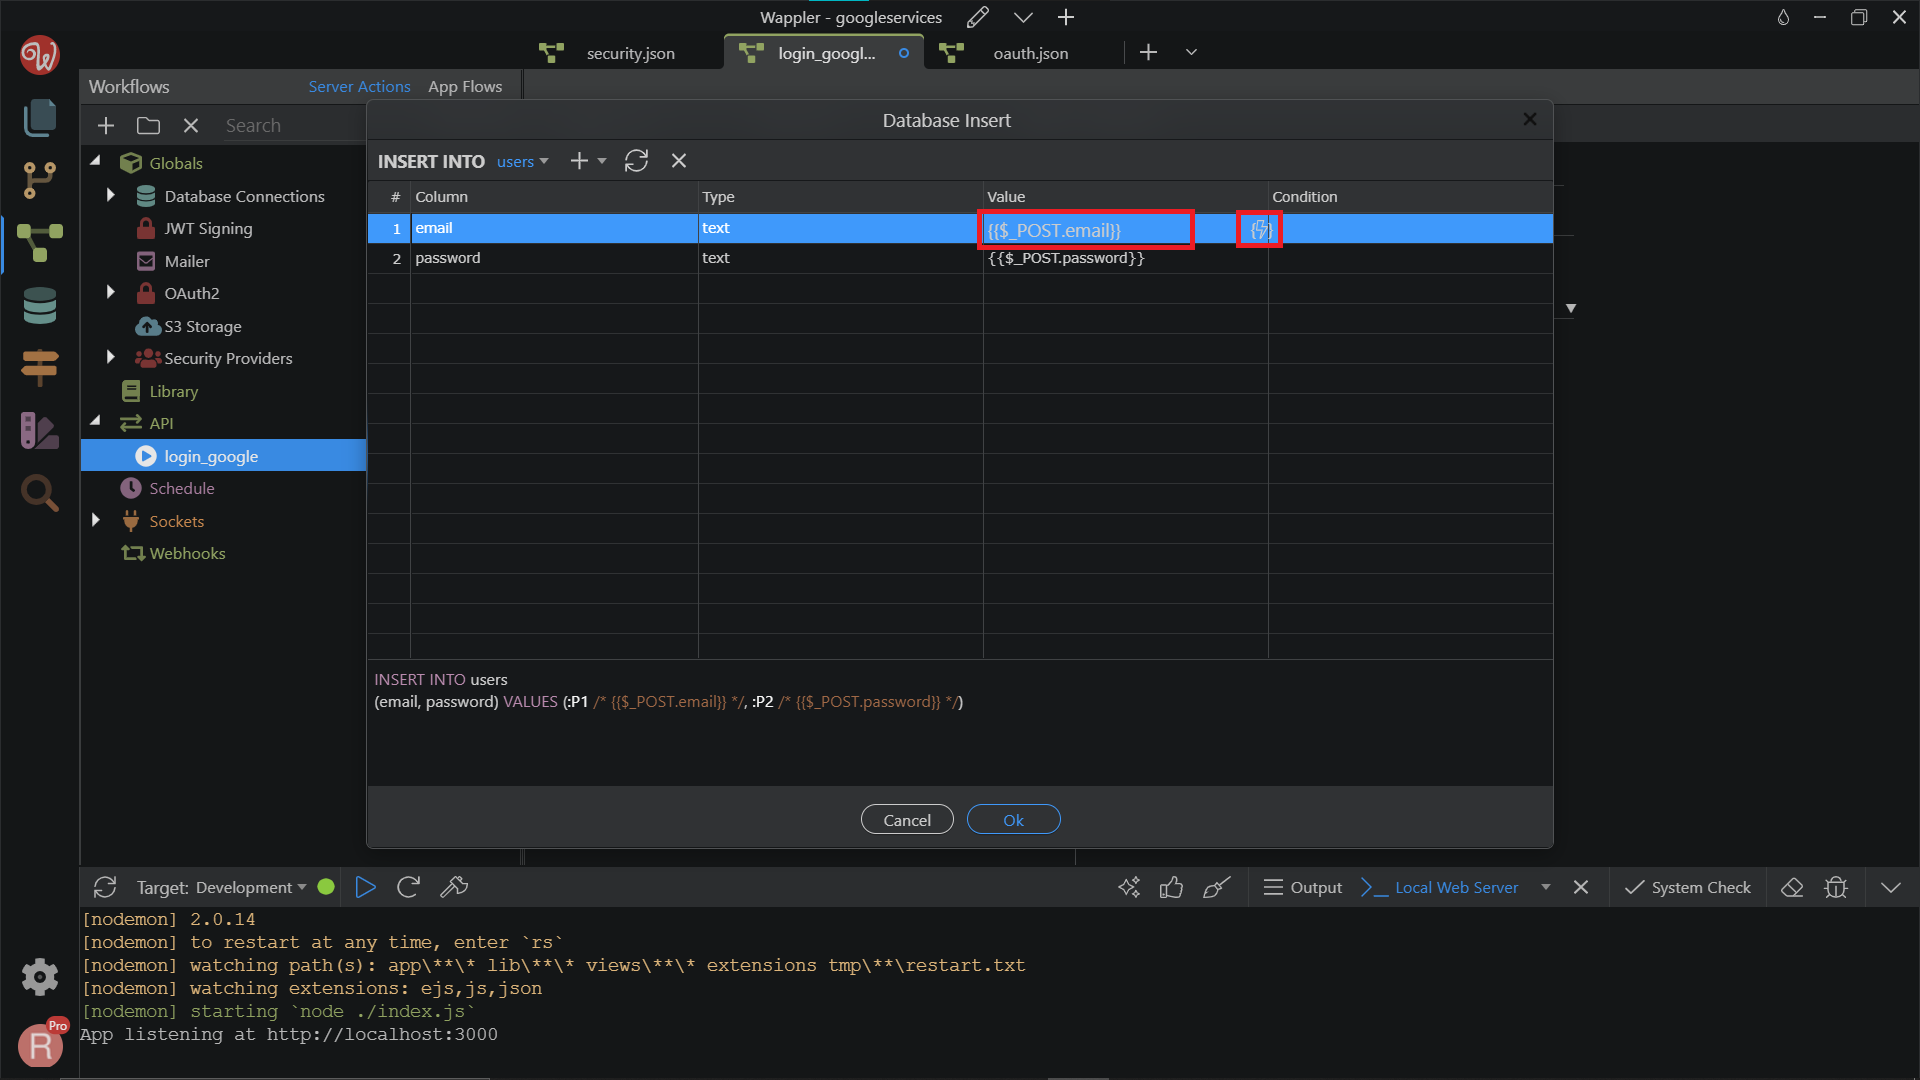
We need to insert the Google profile email, returned by the API Action. Click Select.
Section titled “We need to insert the Google profile email, returned by the API Action. Click Select.”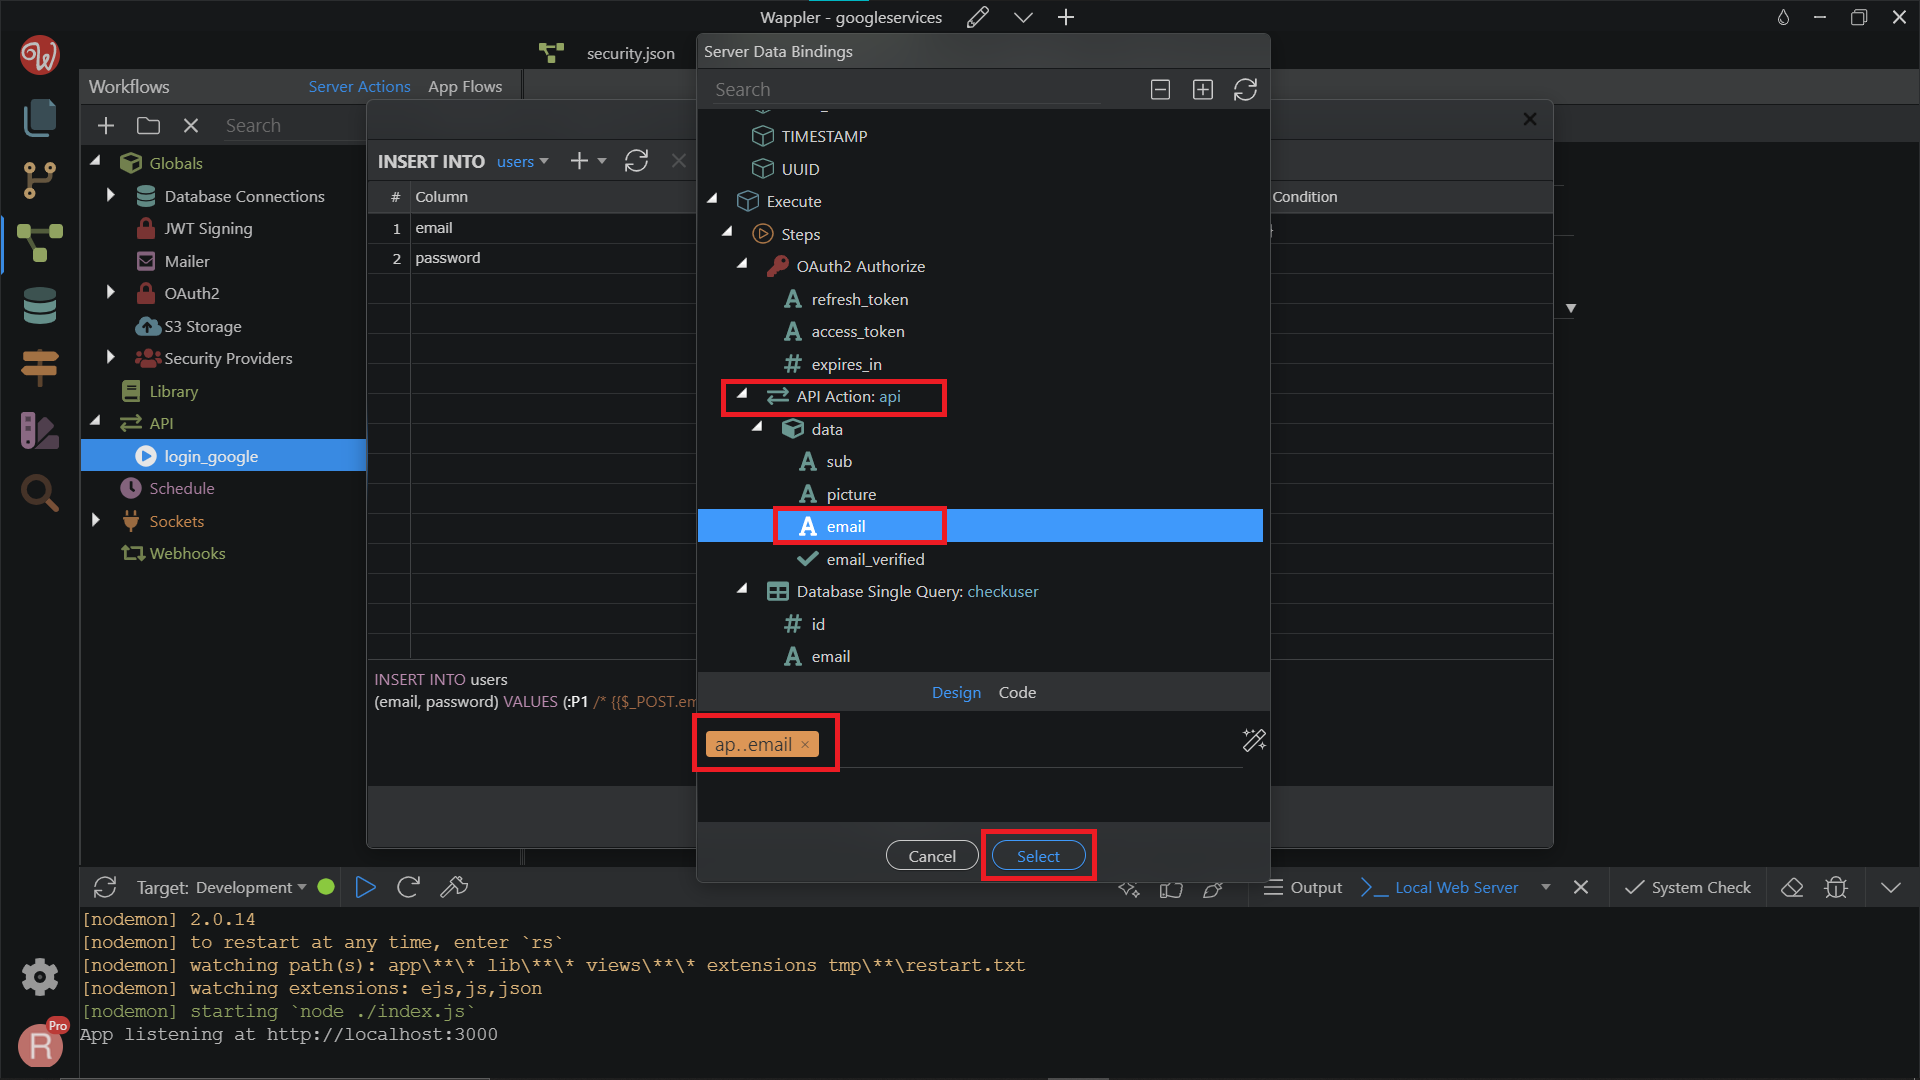
Do the same for the password.
Section titled “Do the same for the password.”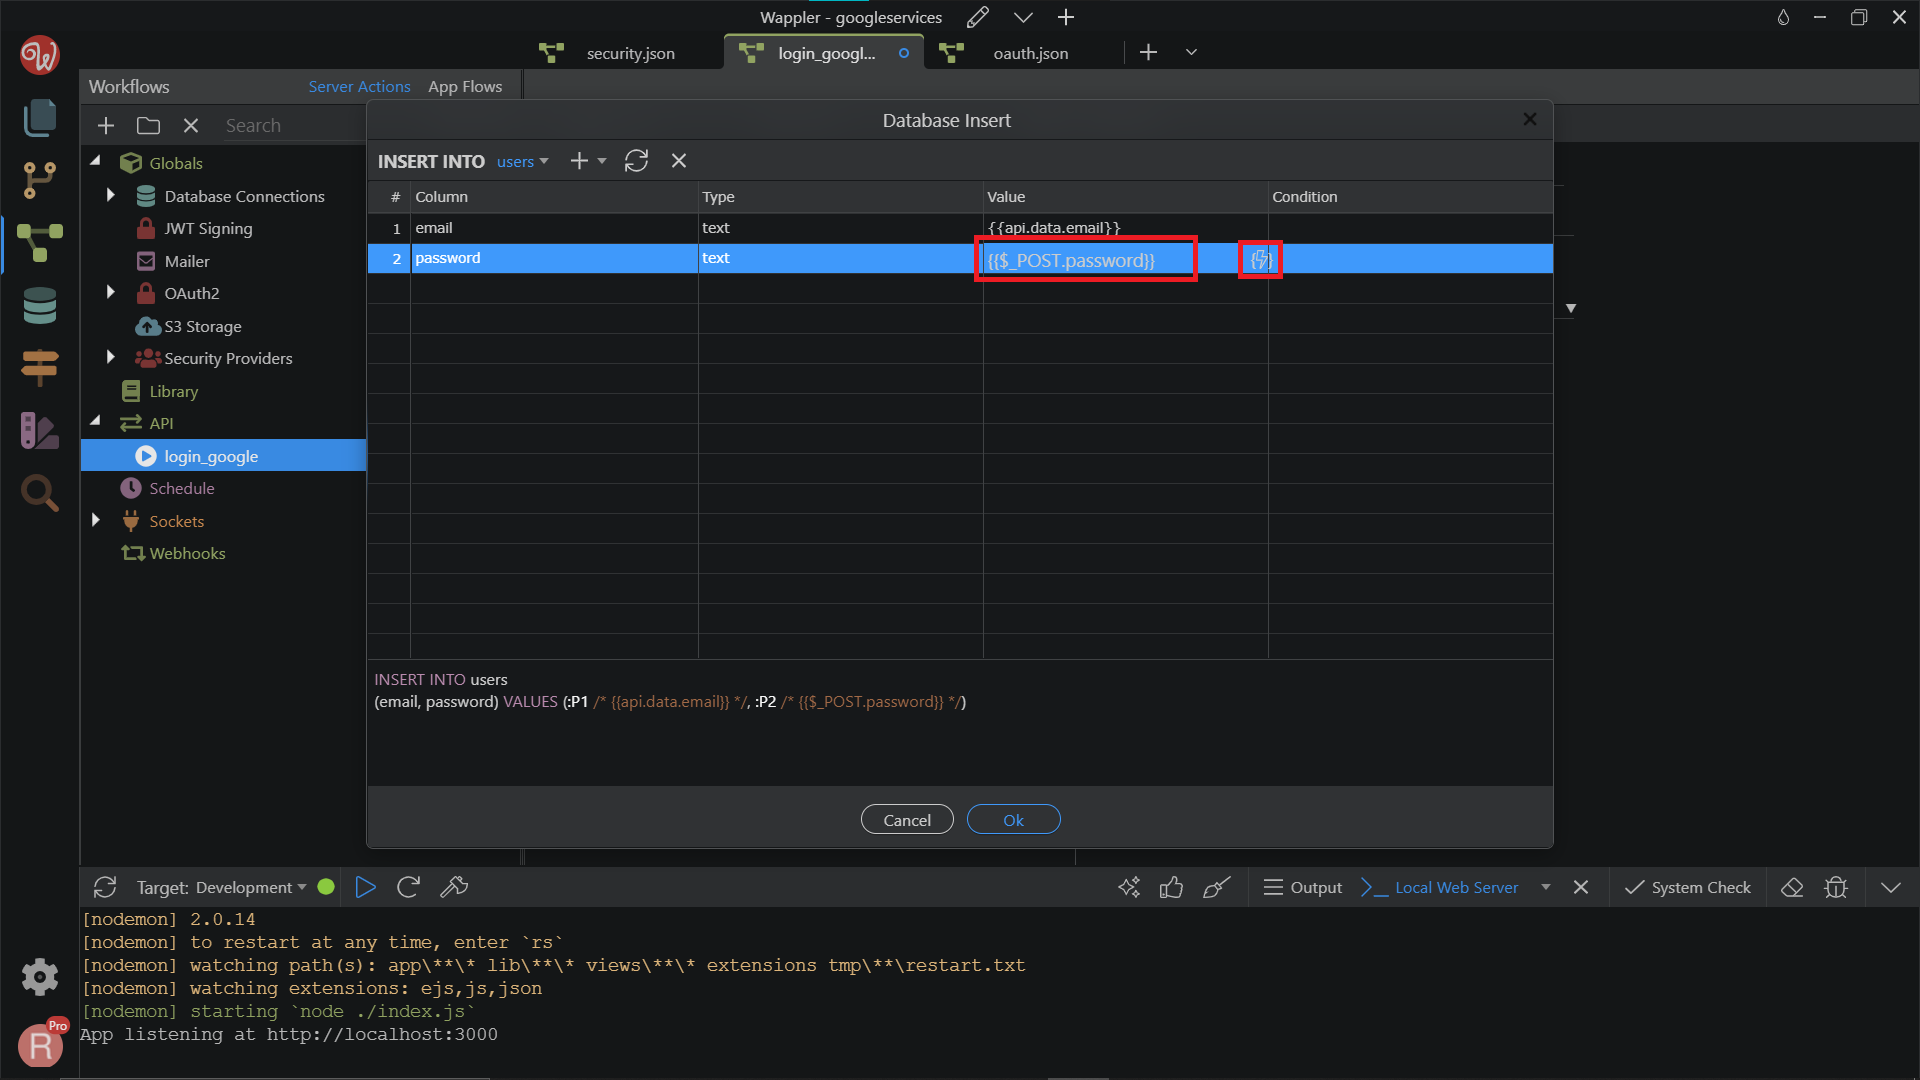
Here we use the Google profile sub ID, returned by the API Action. Click Select.
Section titled “Here we use the Google profile sub ID, returned by the API Action. Click Select.”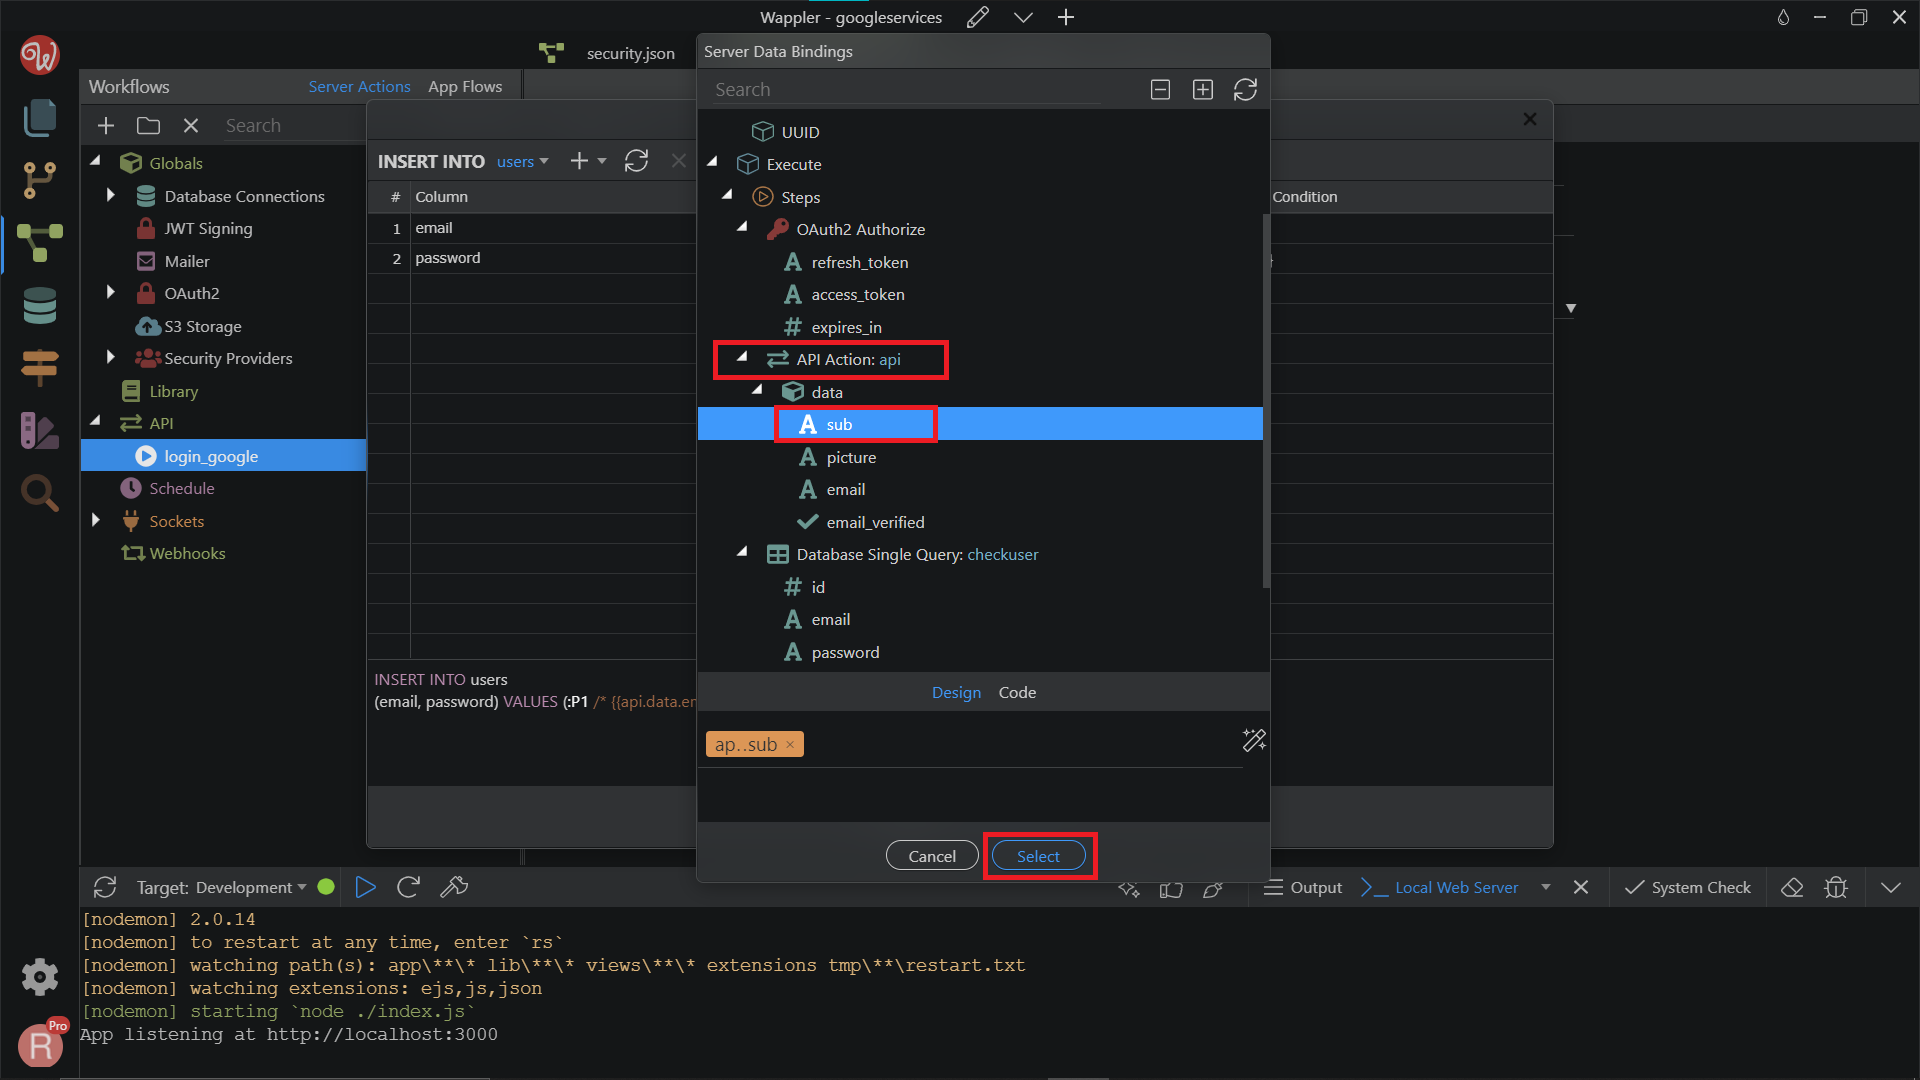
Click OK.
Section titled “Click OK.”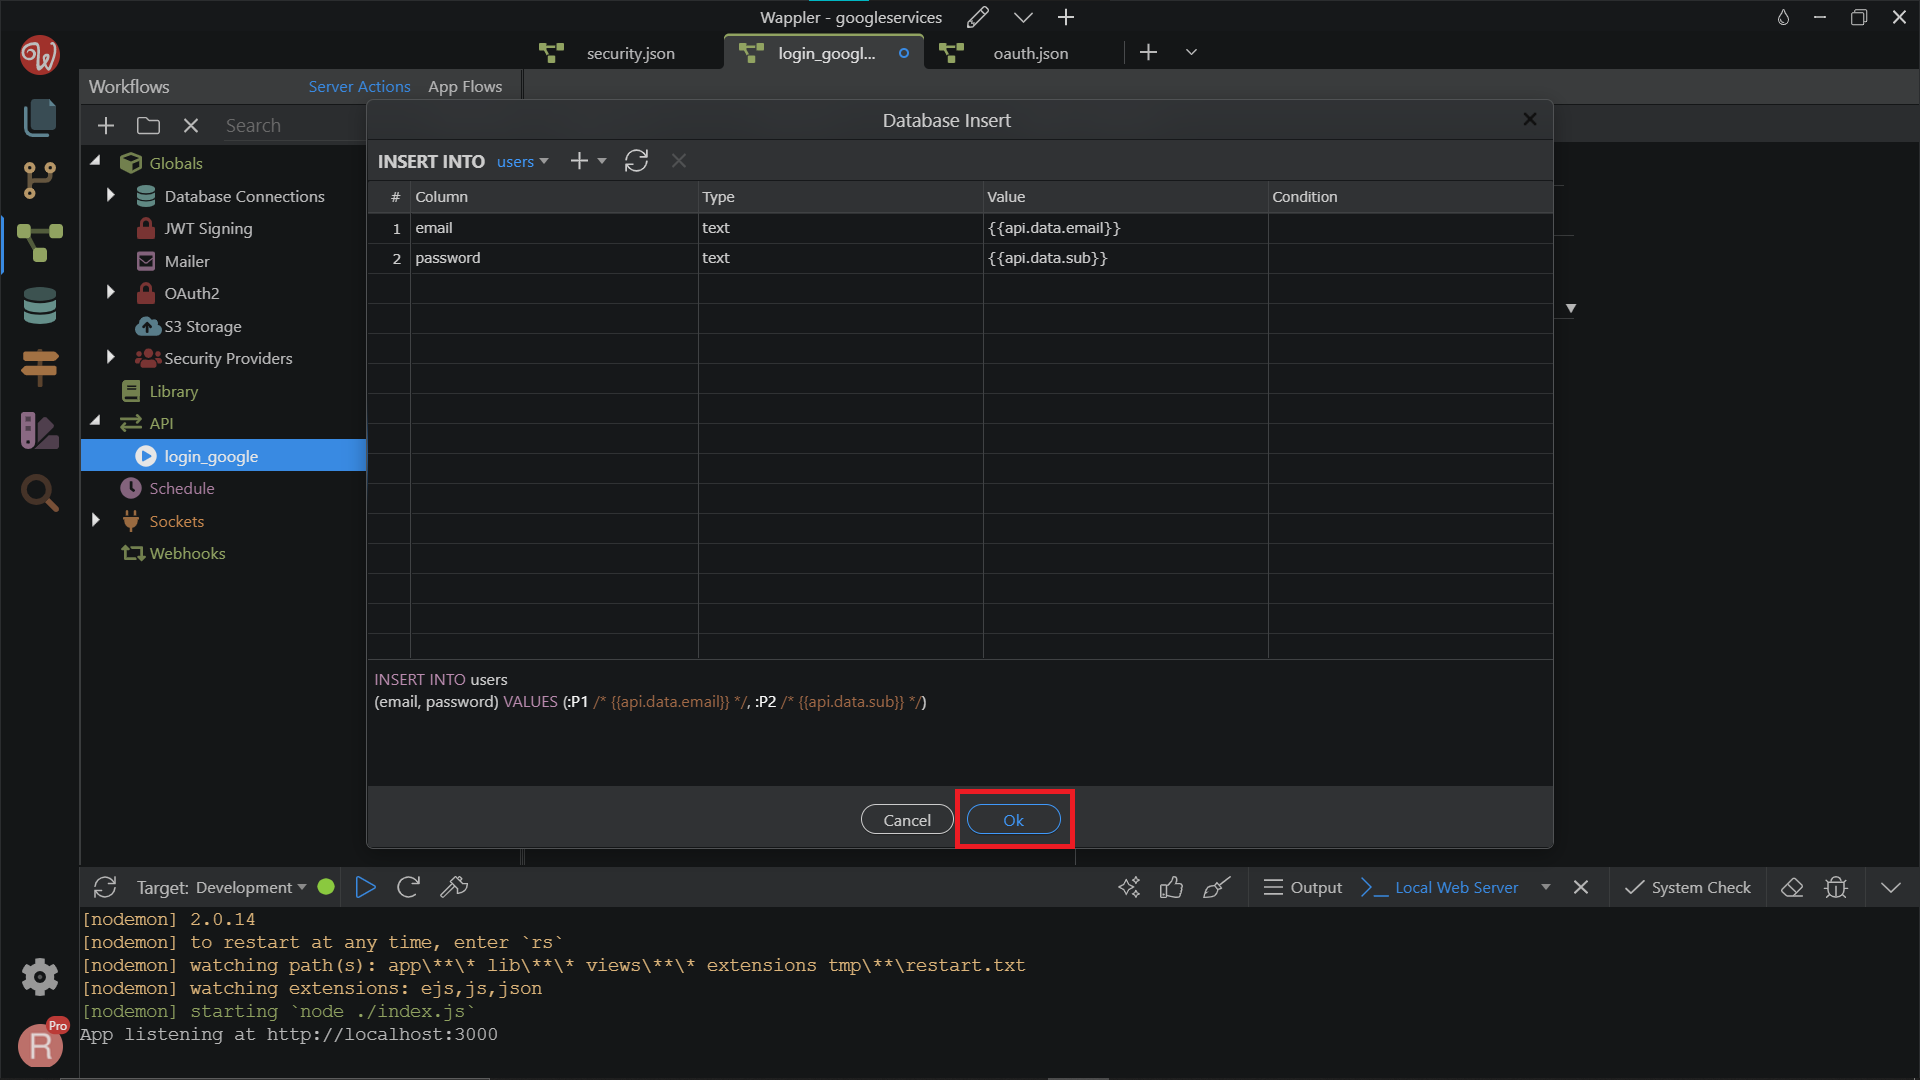
Next, we need to auto-login the newly created user. Right-click the Database Insert step.
Section titled “Next, we need to auto-login the newly created user. Right-click the Database Insert step.”Now if the user does not exist in the database his/her details will be inserted as follows: Google profile email will be used for login and Google profile ID as a password.
Next, we need to auto-login the newly created user. Right-click the Database Insert step.
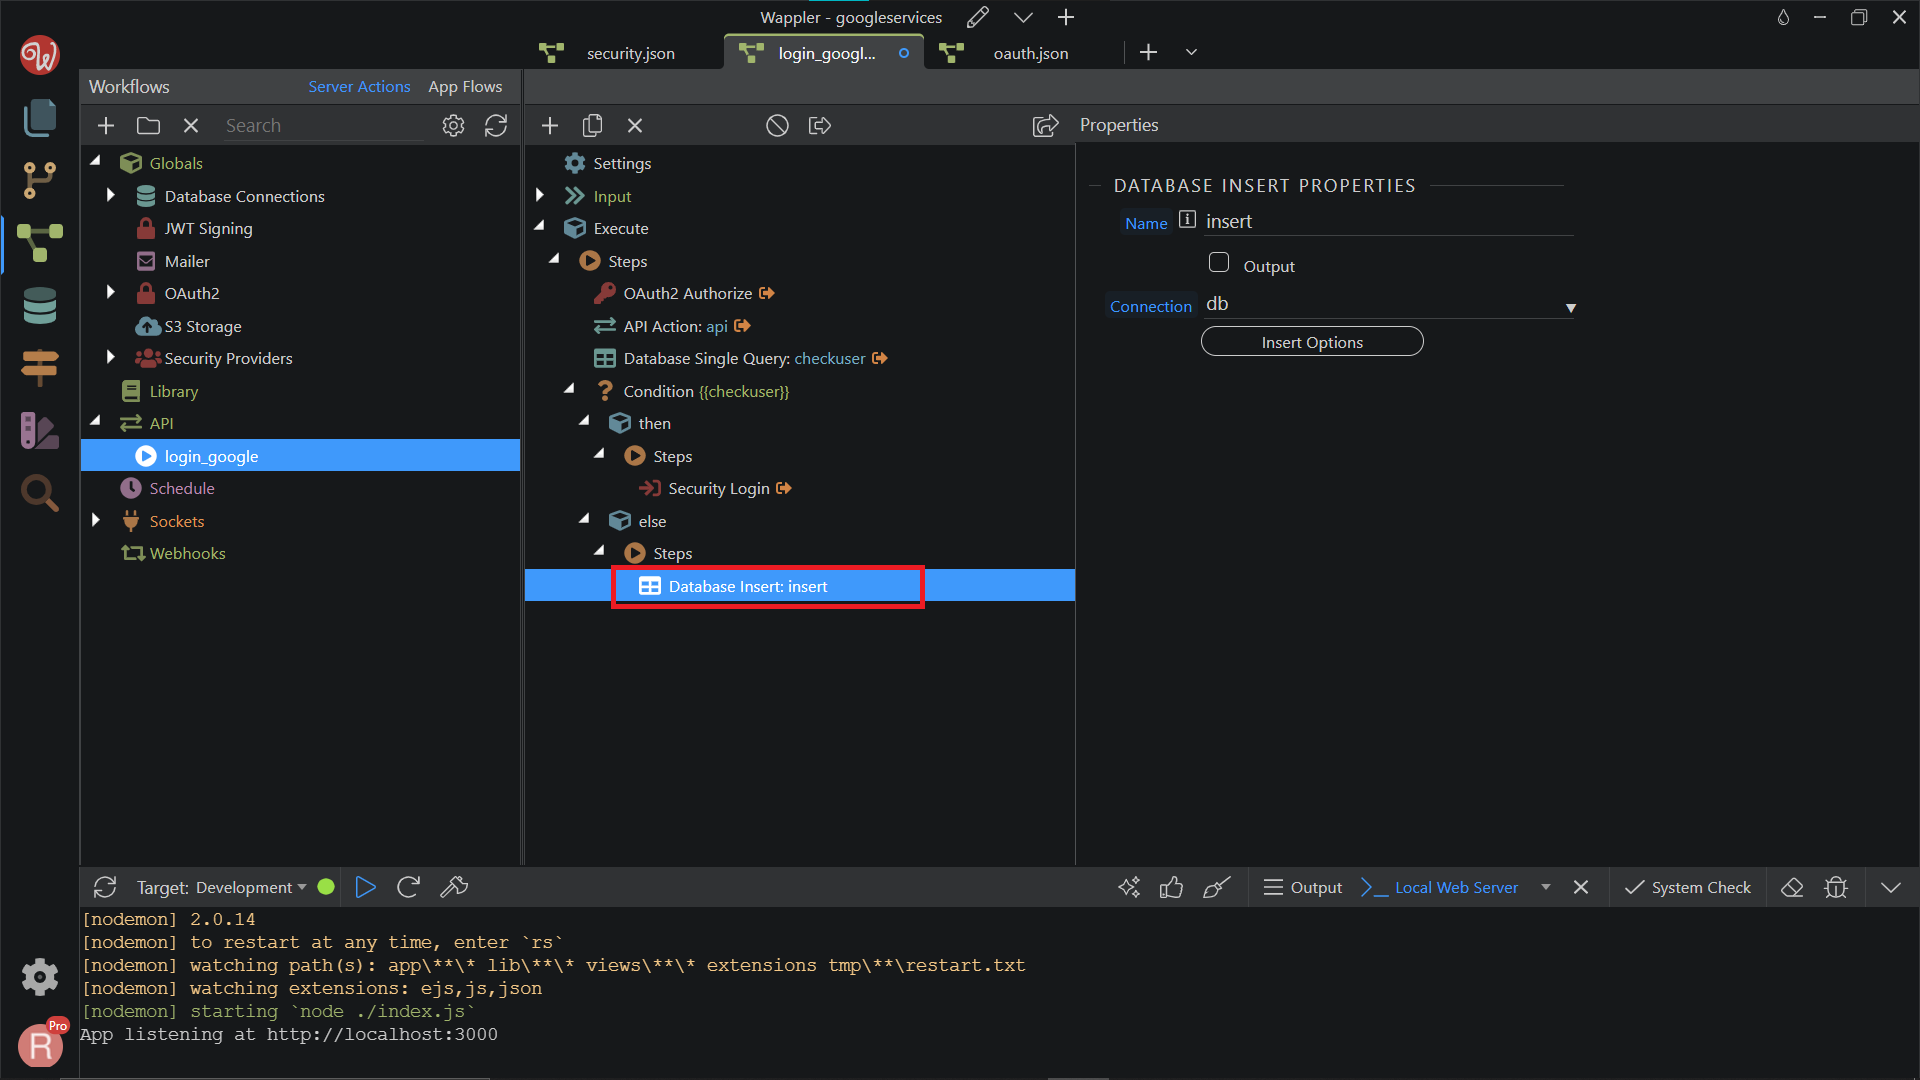
Search and add a Security Login component.
Section titled “Search and add a Security Login component.”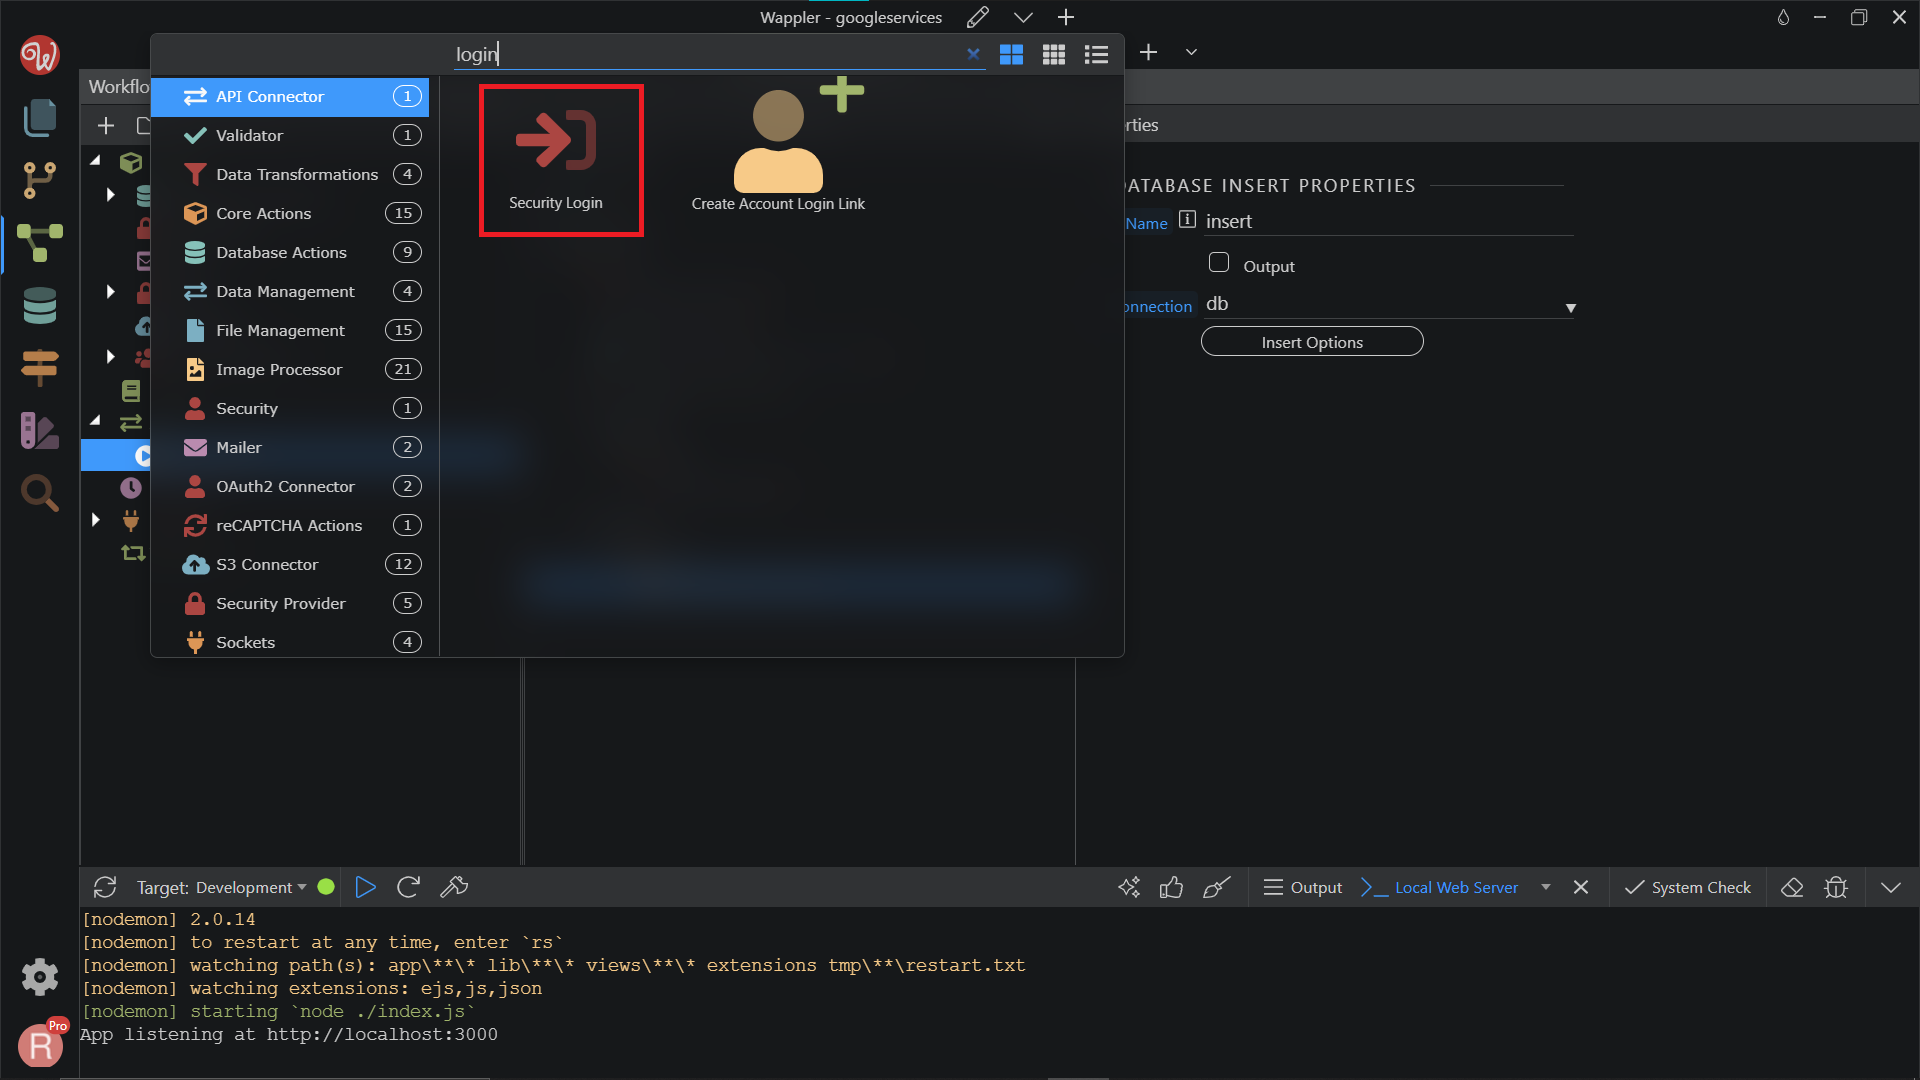
Step 88
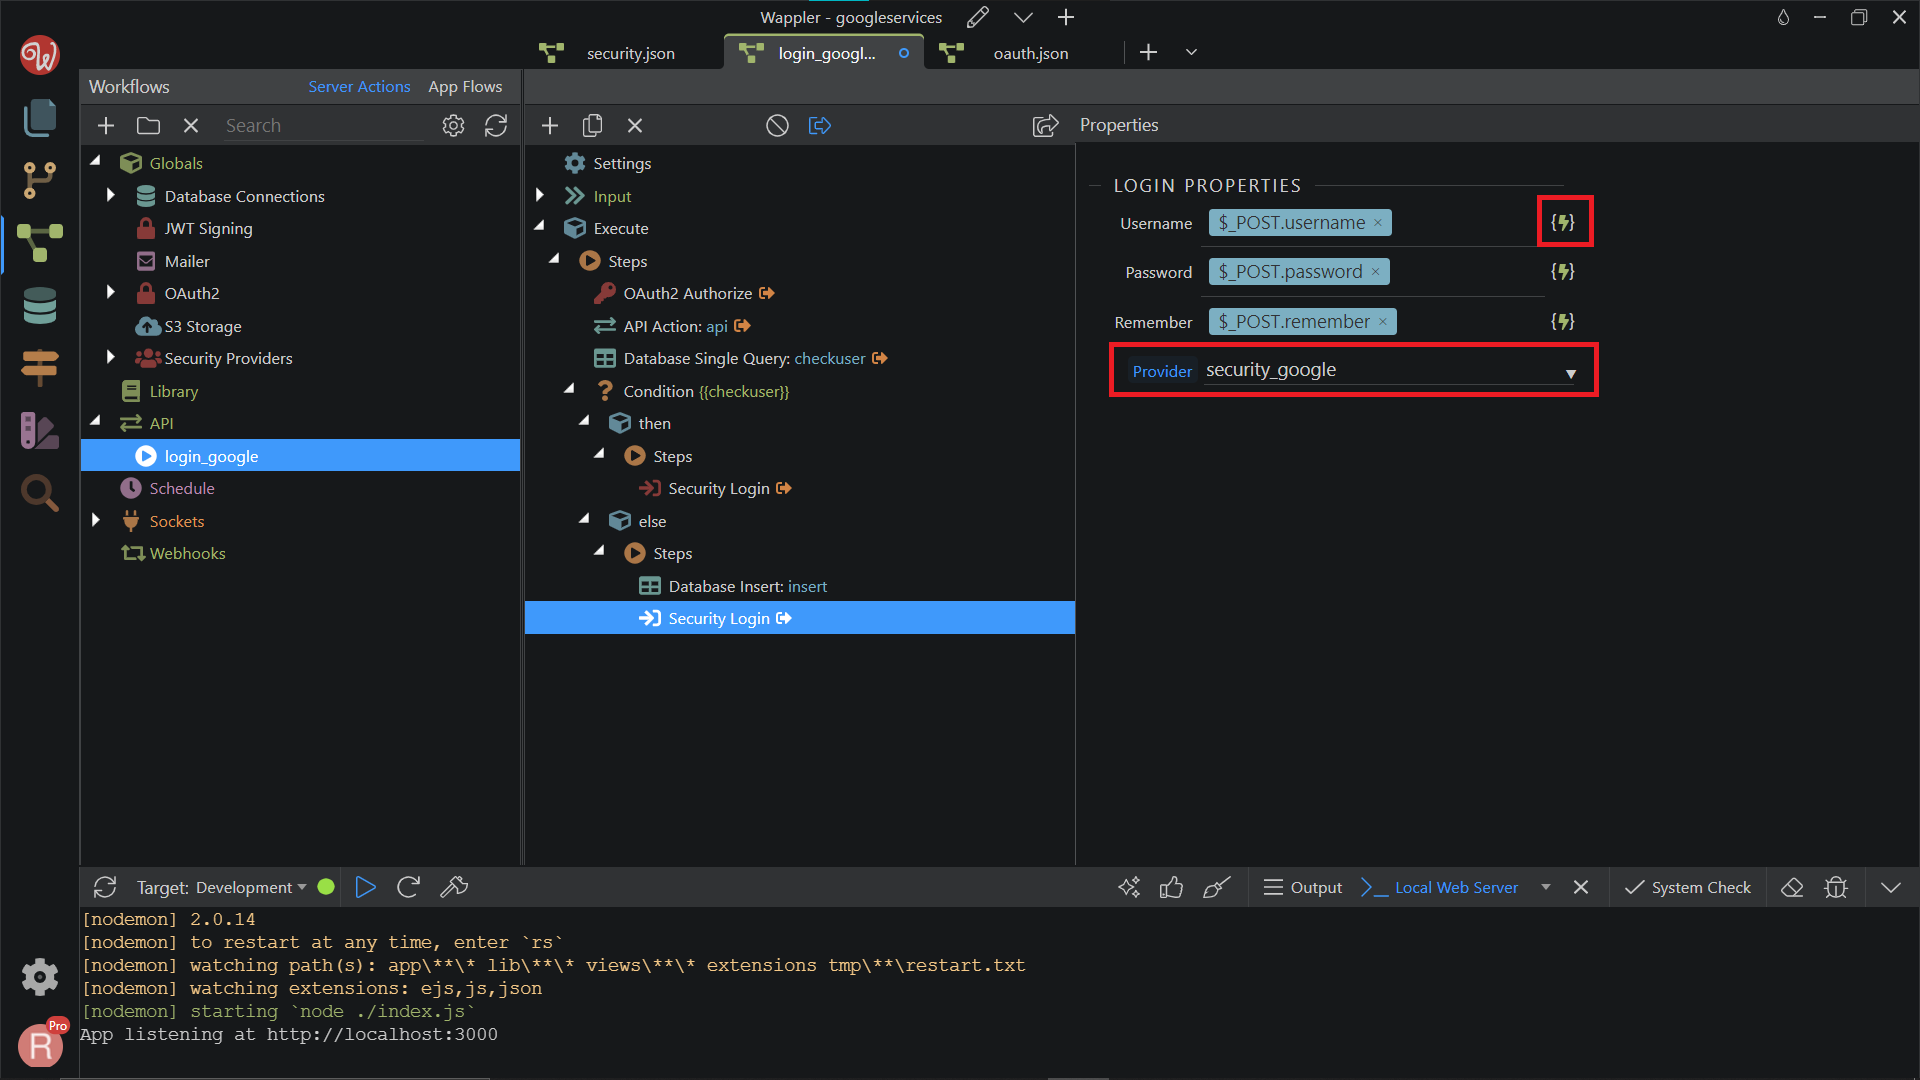
Section titled “Step 88”Change the Provider to security_google. Click the dynamic data picker button, to select a value for the username.
Step 89
Section titled “Step 89”This should be the same email value, returned by the API Action, which we used in the Insert step. Click Select.
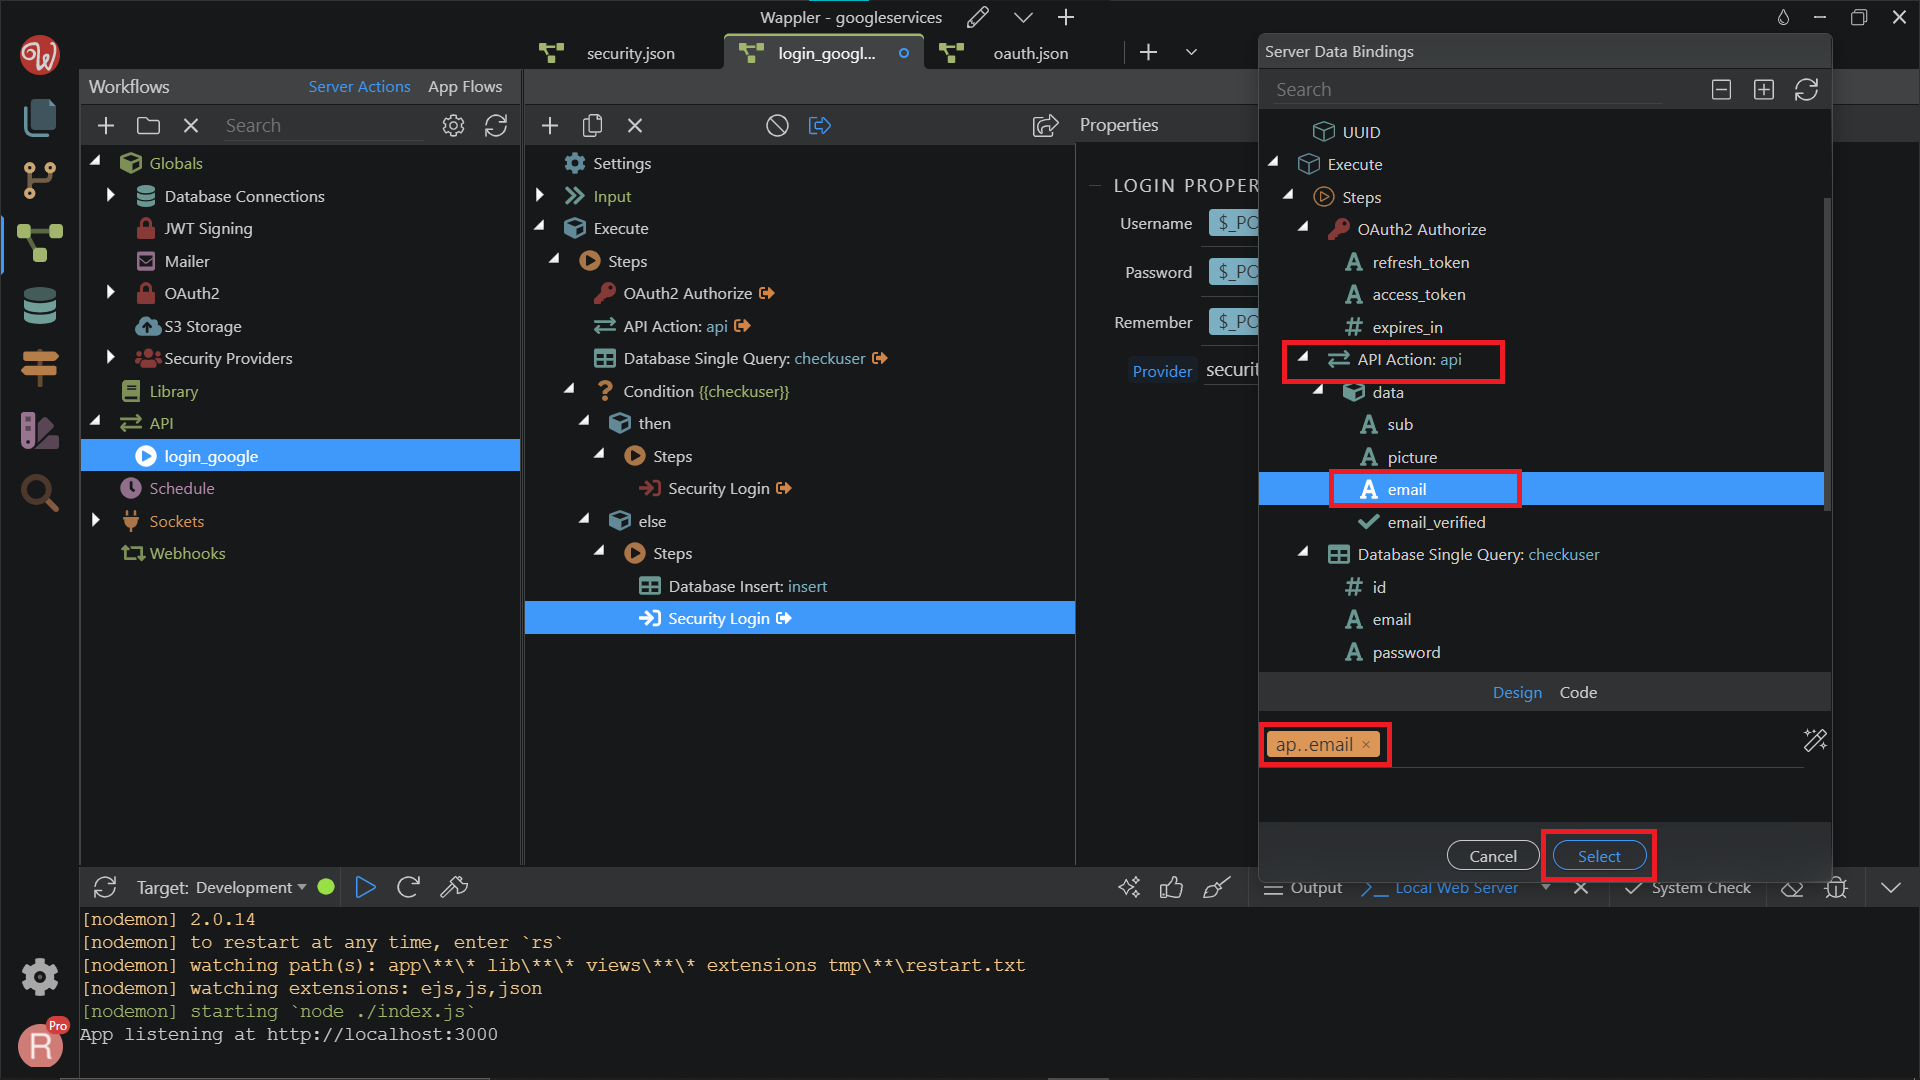
Do the same for the password.
Section titled “Do the same for the password.”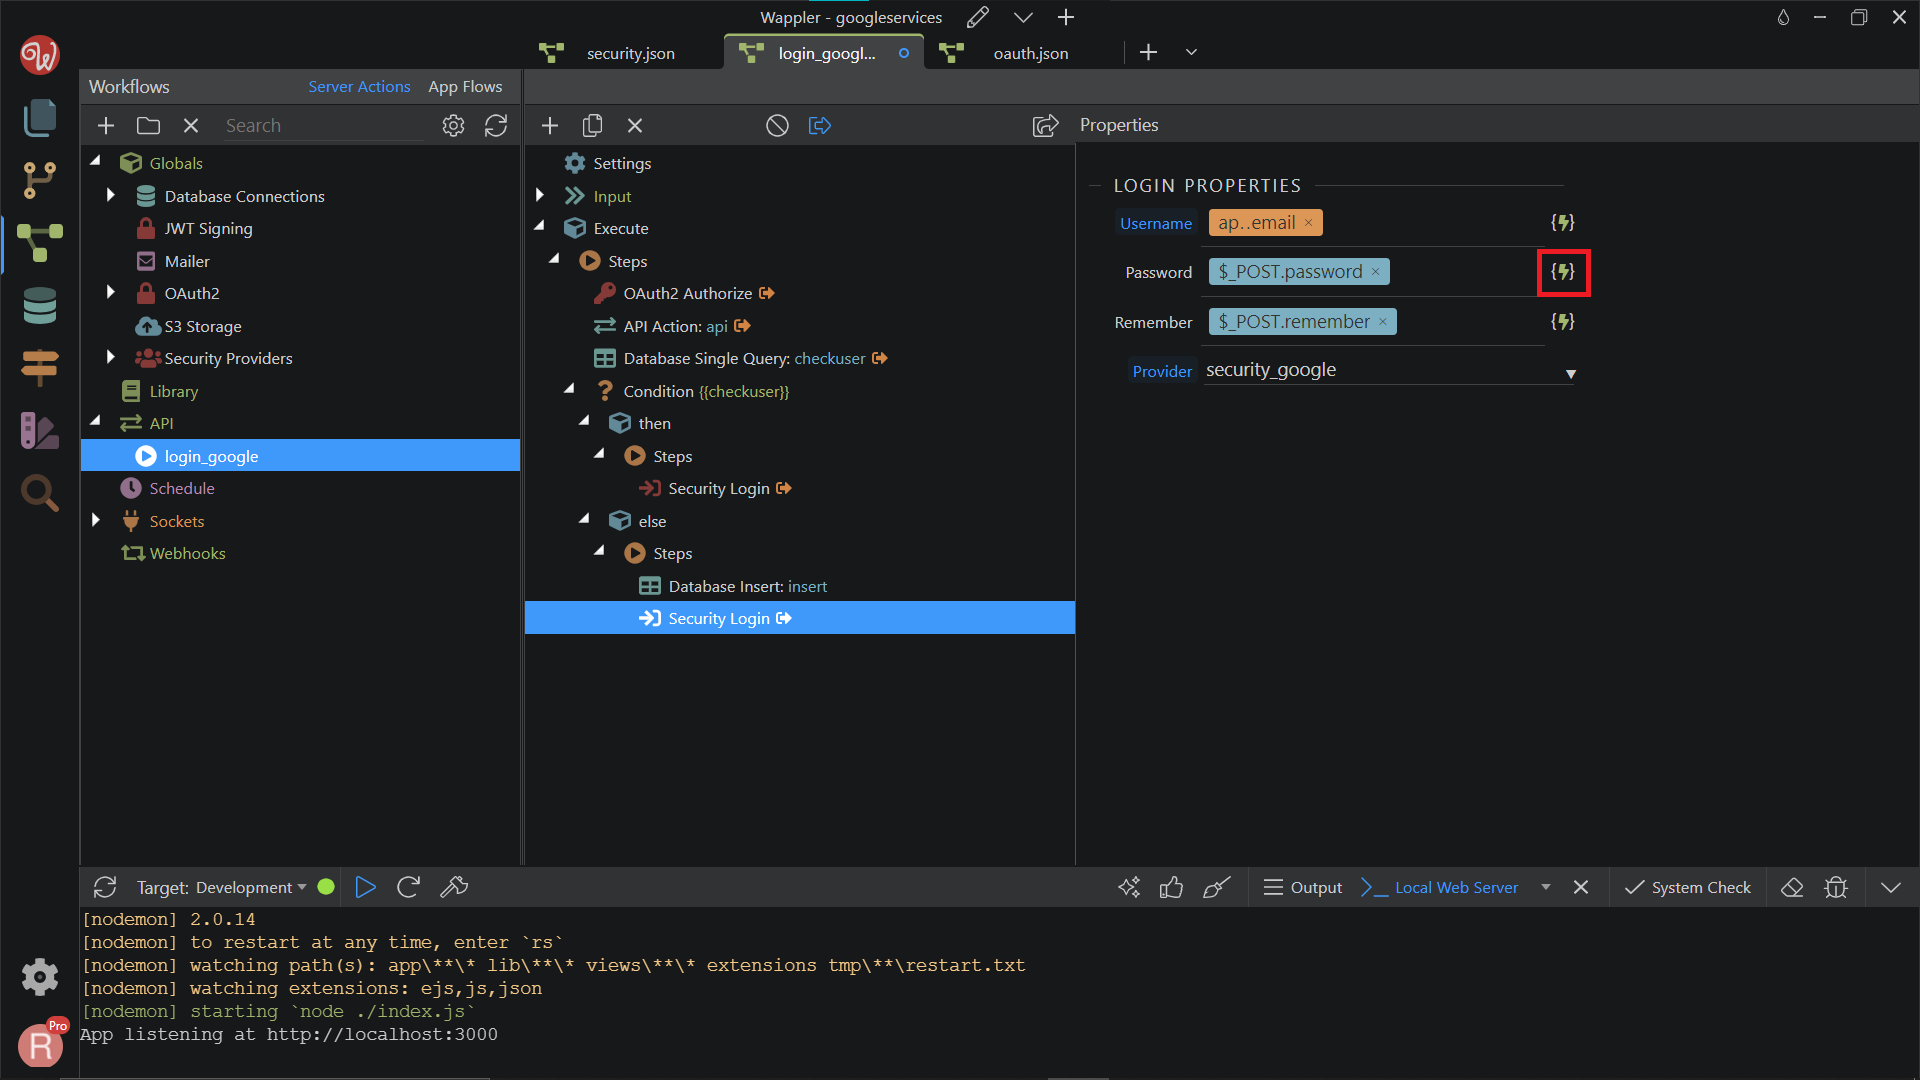
And select the same ID value, returned by the API Action, which we used in the Insert step.
Section titled “And select the same ID value, returned by the API Action, which we used in the Insert step.”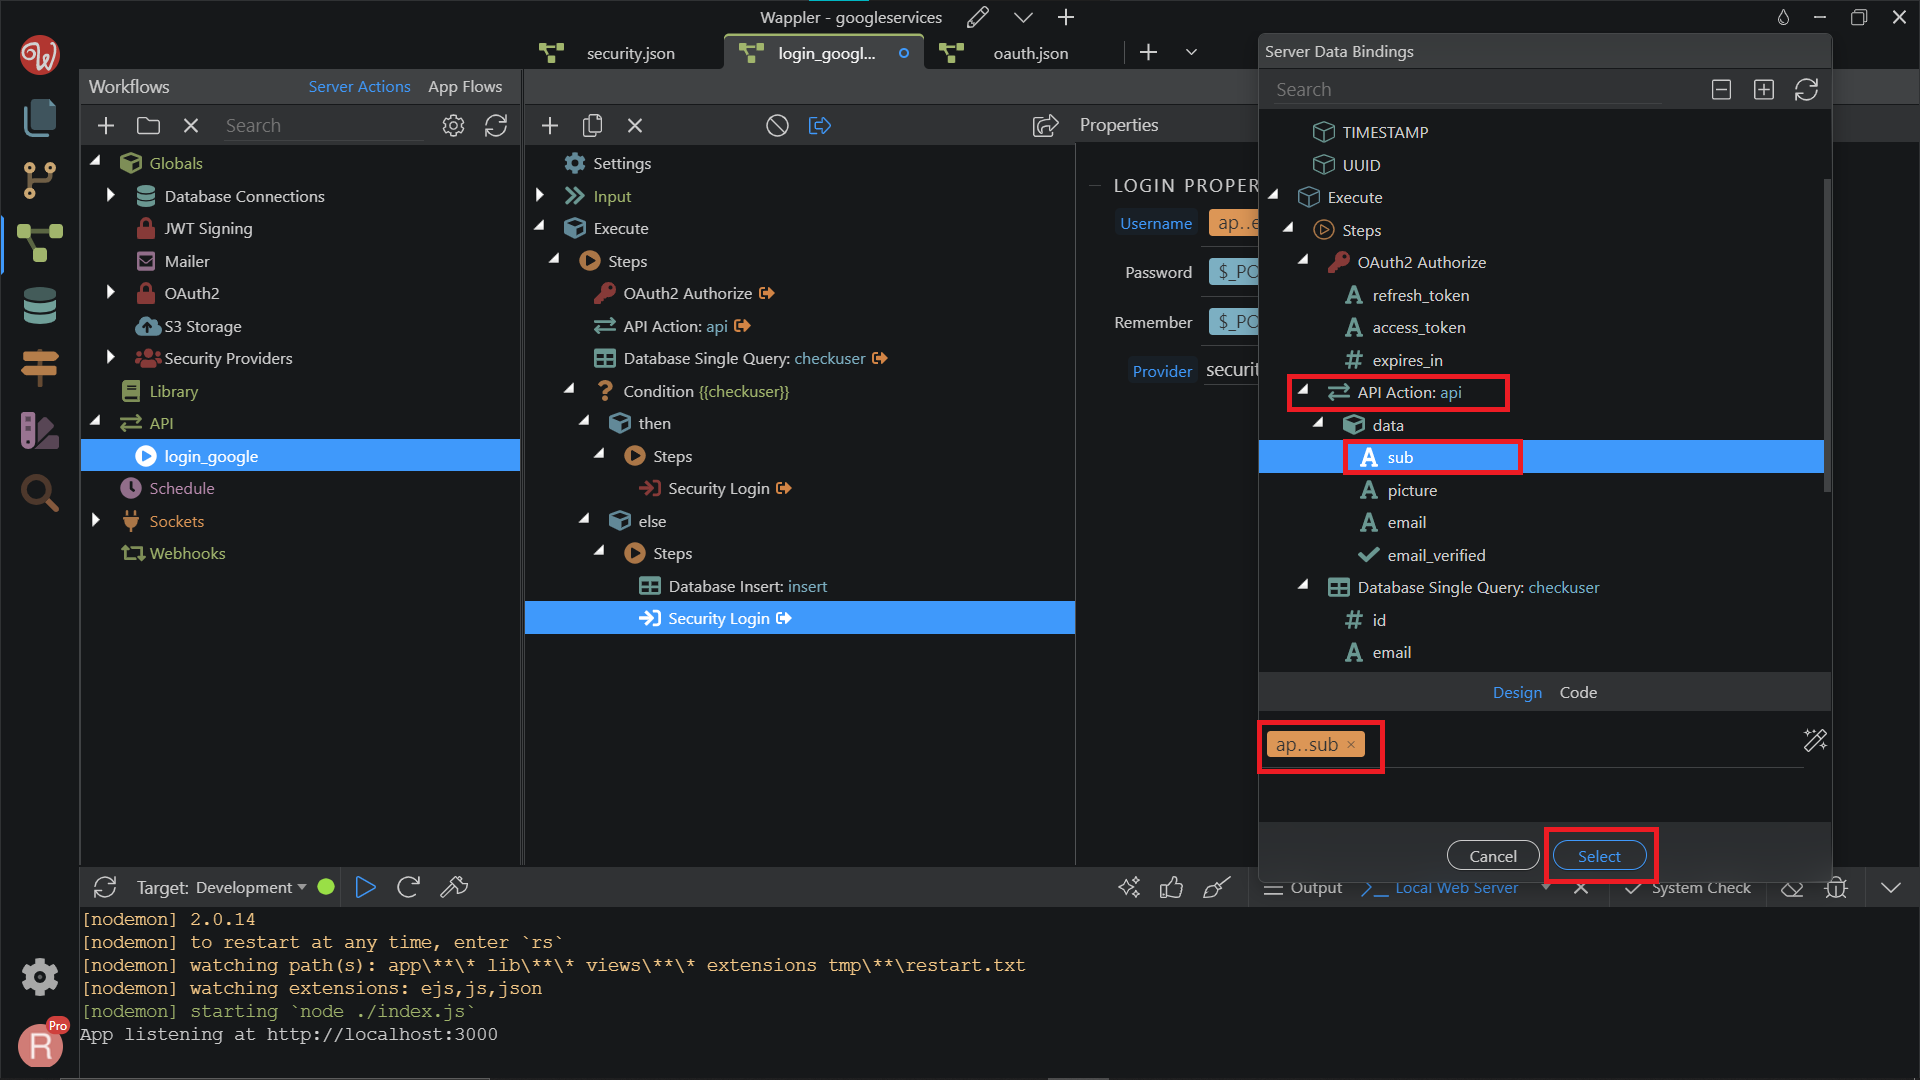
Now our users will be auto-logged in after they are added to the database.
Section titled “Now our users will be auto-logged in after they are added to the database.”Redirect users after logging in
Section titled “Redirect users after logging in”We need to redirect the users after they’ve been successfully logged in. Right-click the Condition step, search and add Redirect component.
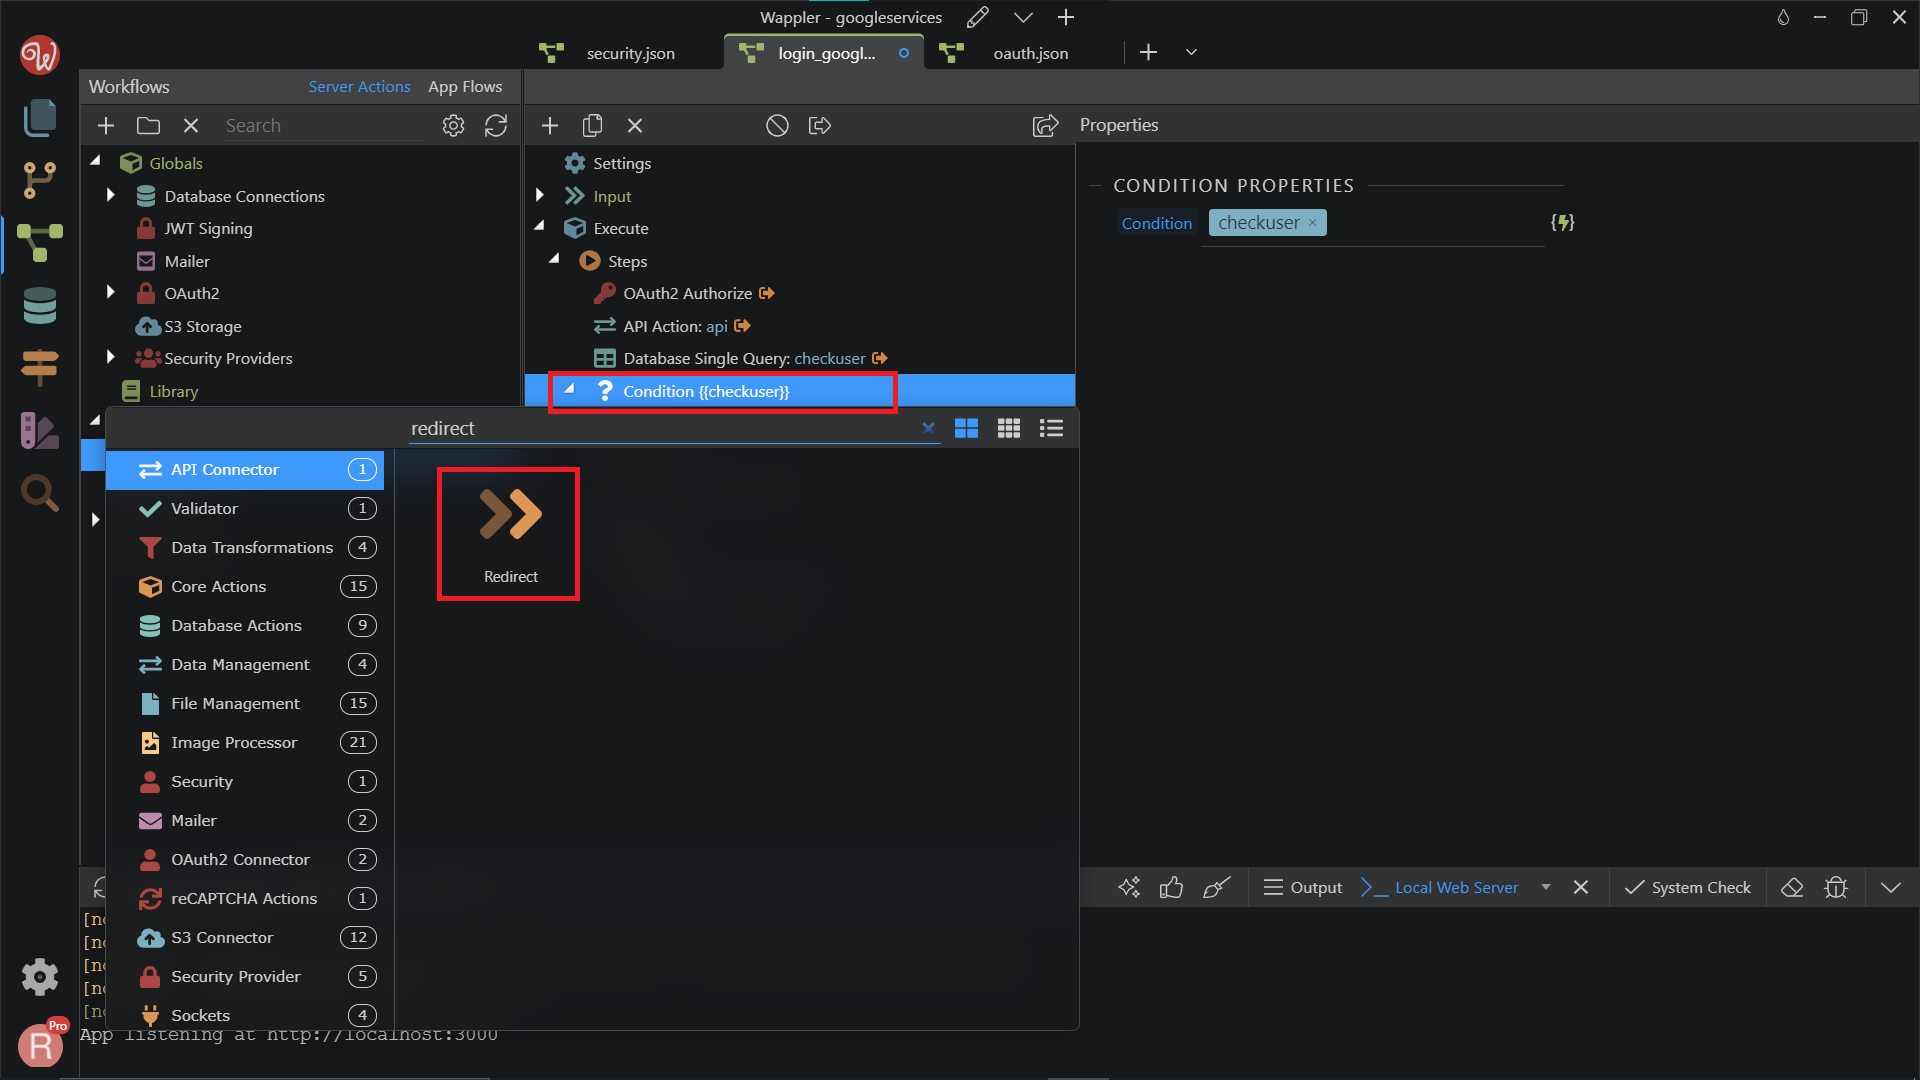
Change the name to redirect_user, and fill in the URL you want the user to see after logging in.
Section titled “Change the name to redirect_user, and fill in the URL you want the user to see after logging in.”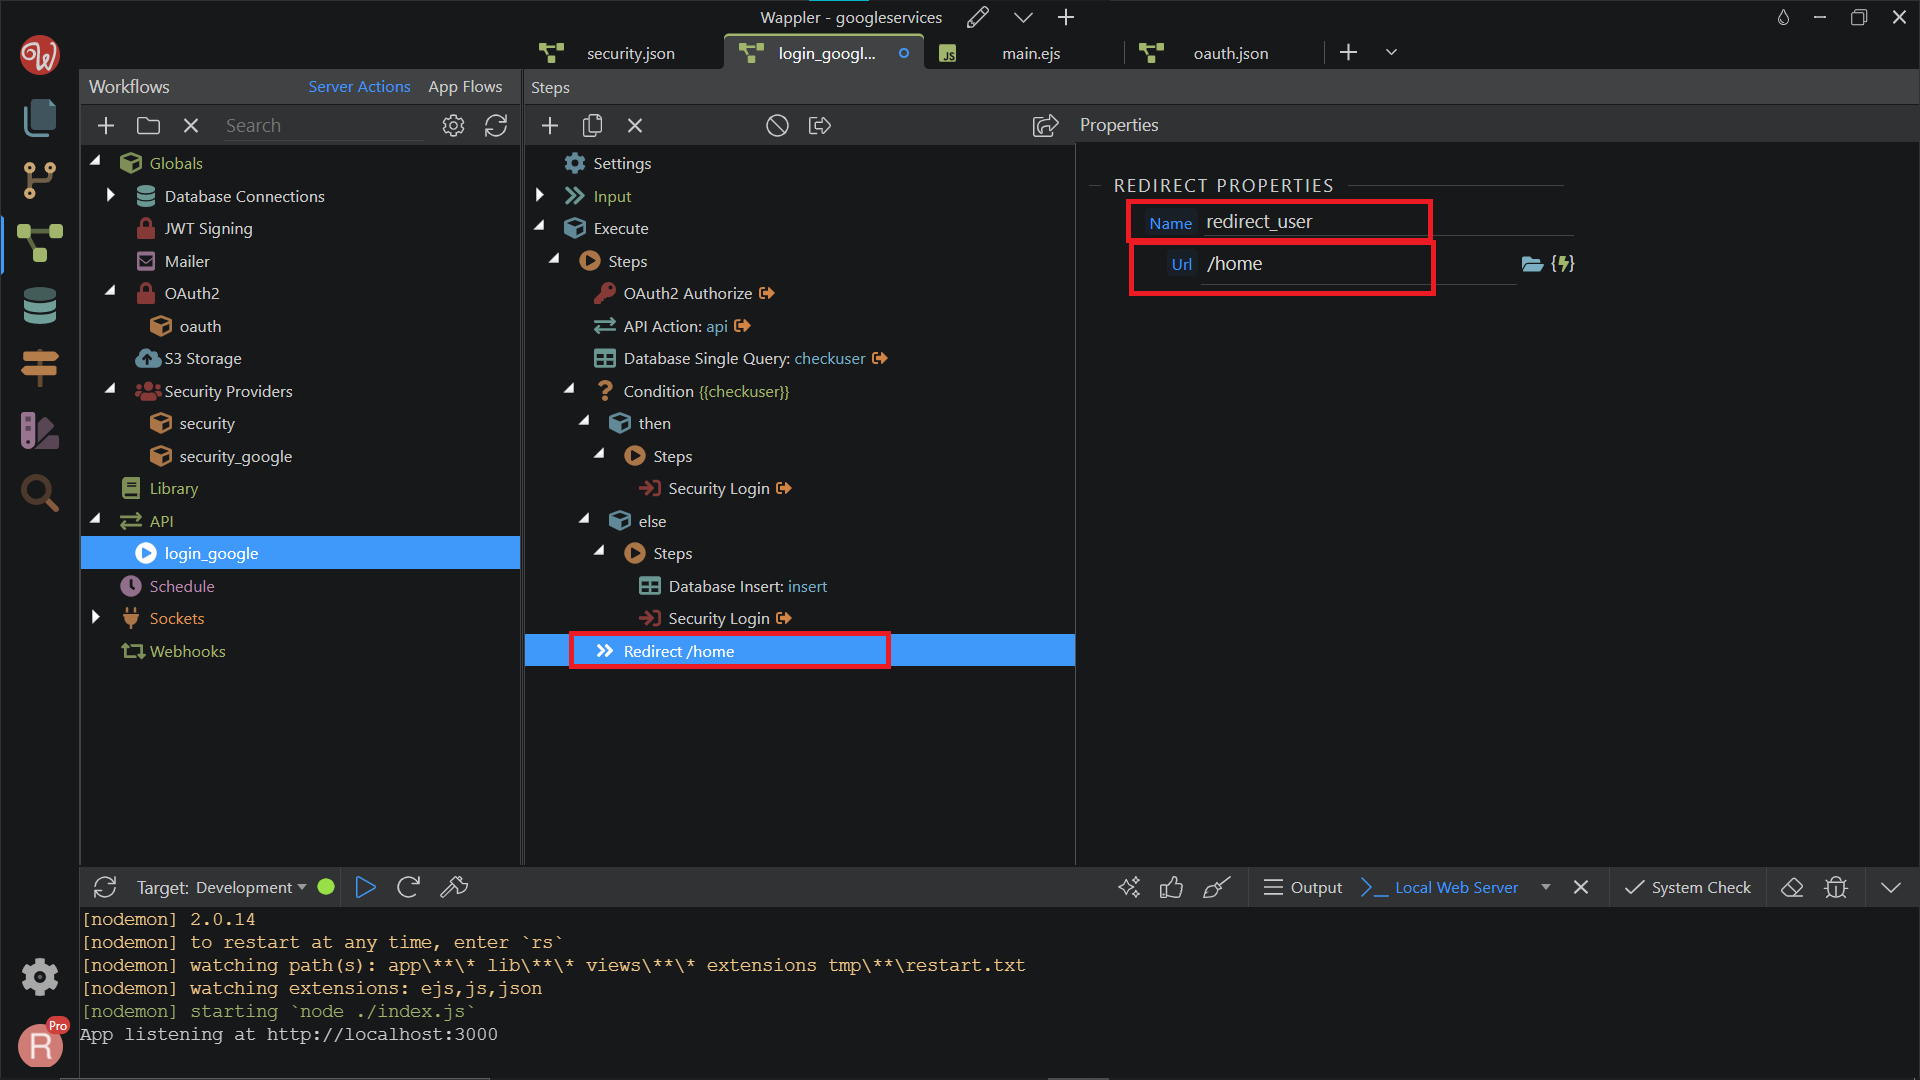
We are done with the serverside setup.
Section titled “We are done with the serverside setup.”Setting up the login page
Section titled “Setting up the login page”For the front-end part, you want to create an Anchor Button or a regular link component to run the Google login server action. Of course, you can always add styling to make it looks good. Next, we want to make a new Routing to our API action. Click on the Routing tab on the left.
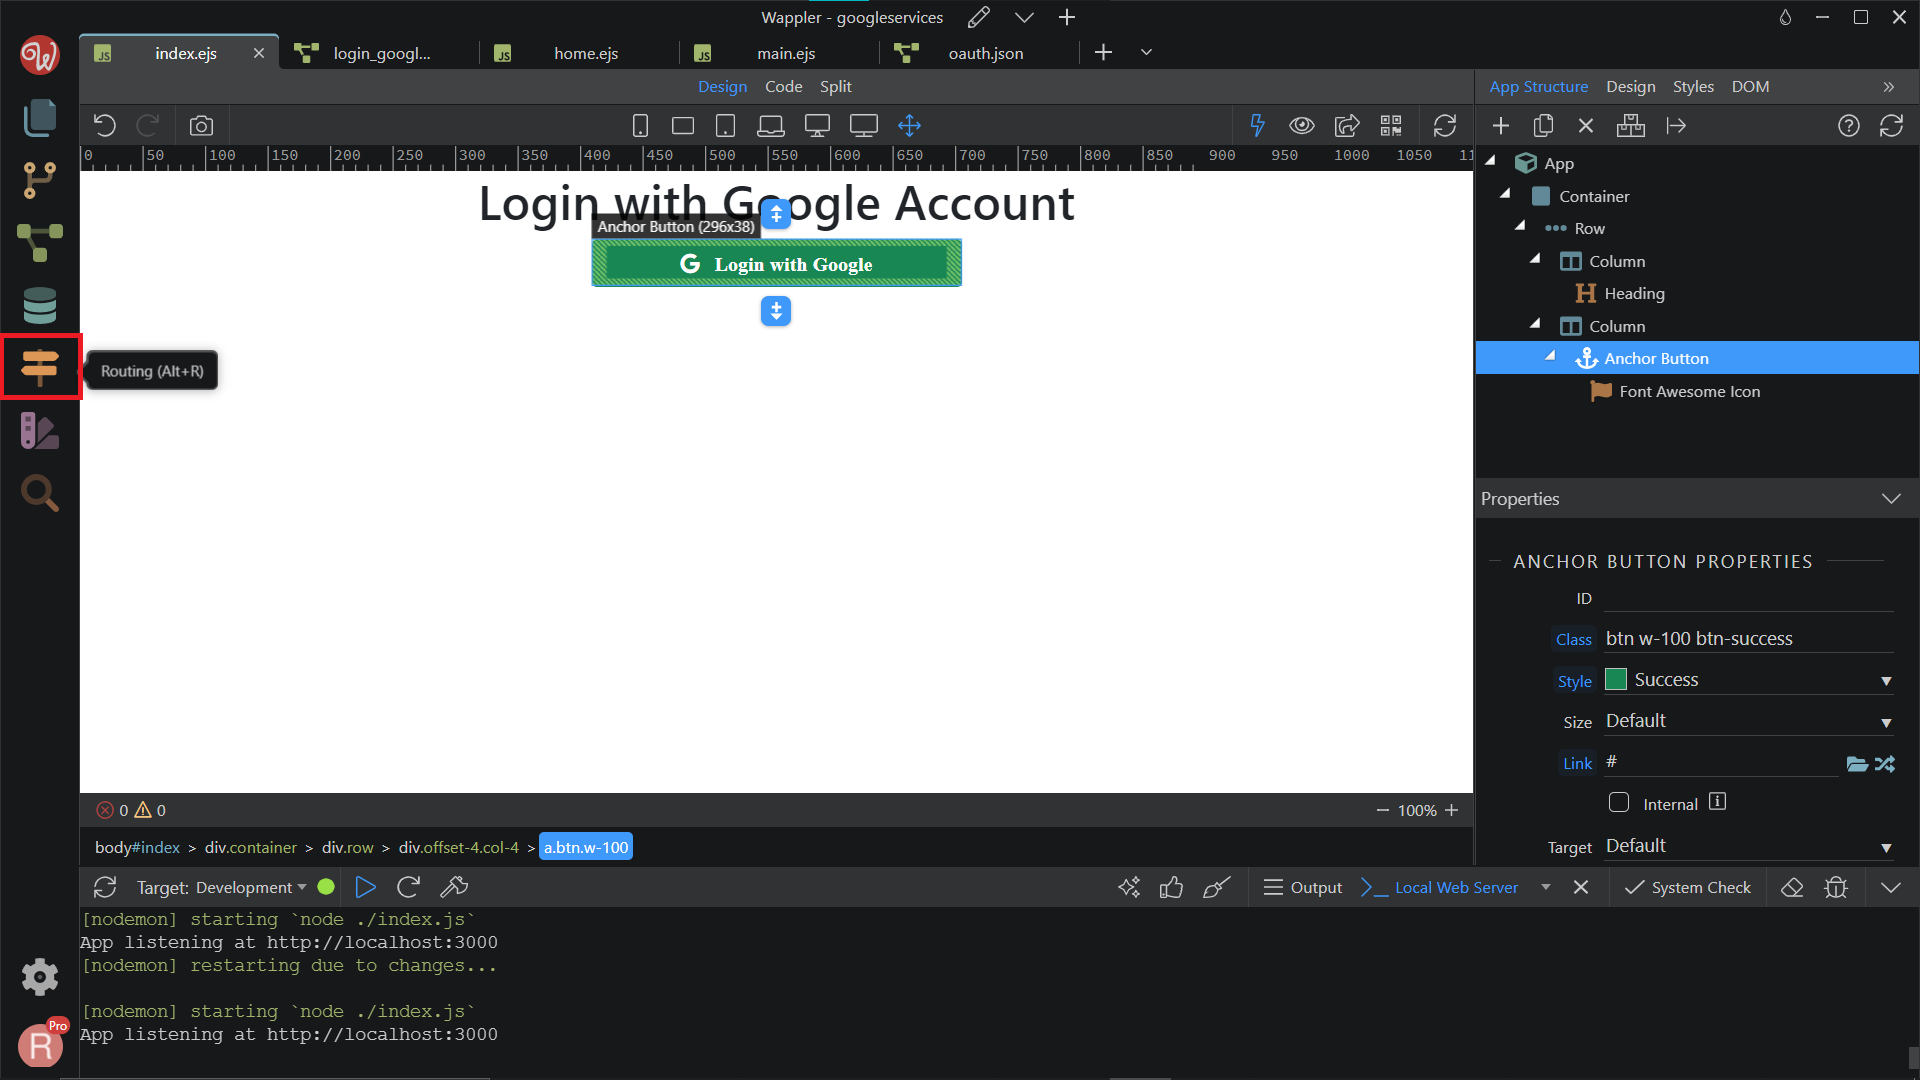
Click the lightning icon, New Server Connect Route.
Section titled “Click the lightning icon, New Server Connect Route.”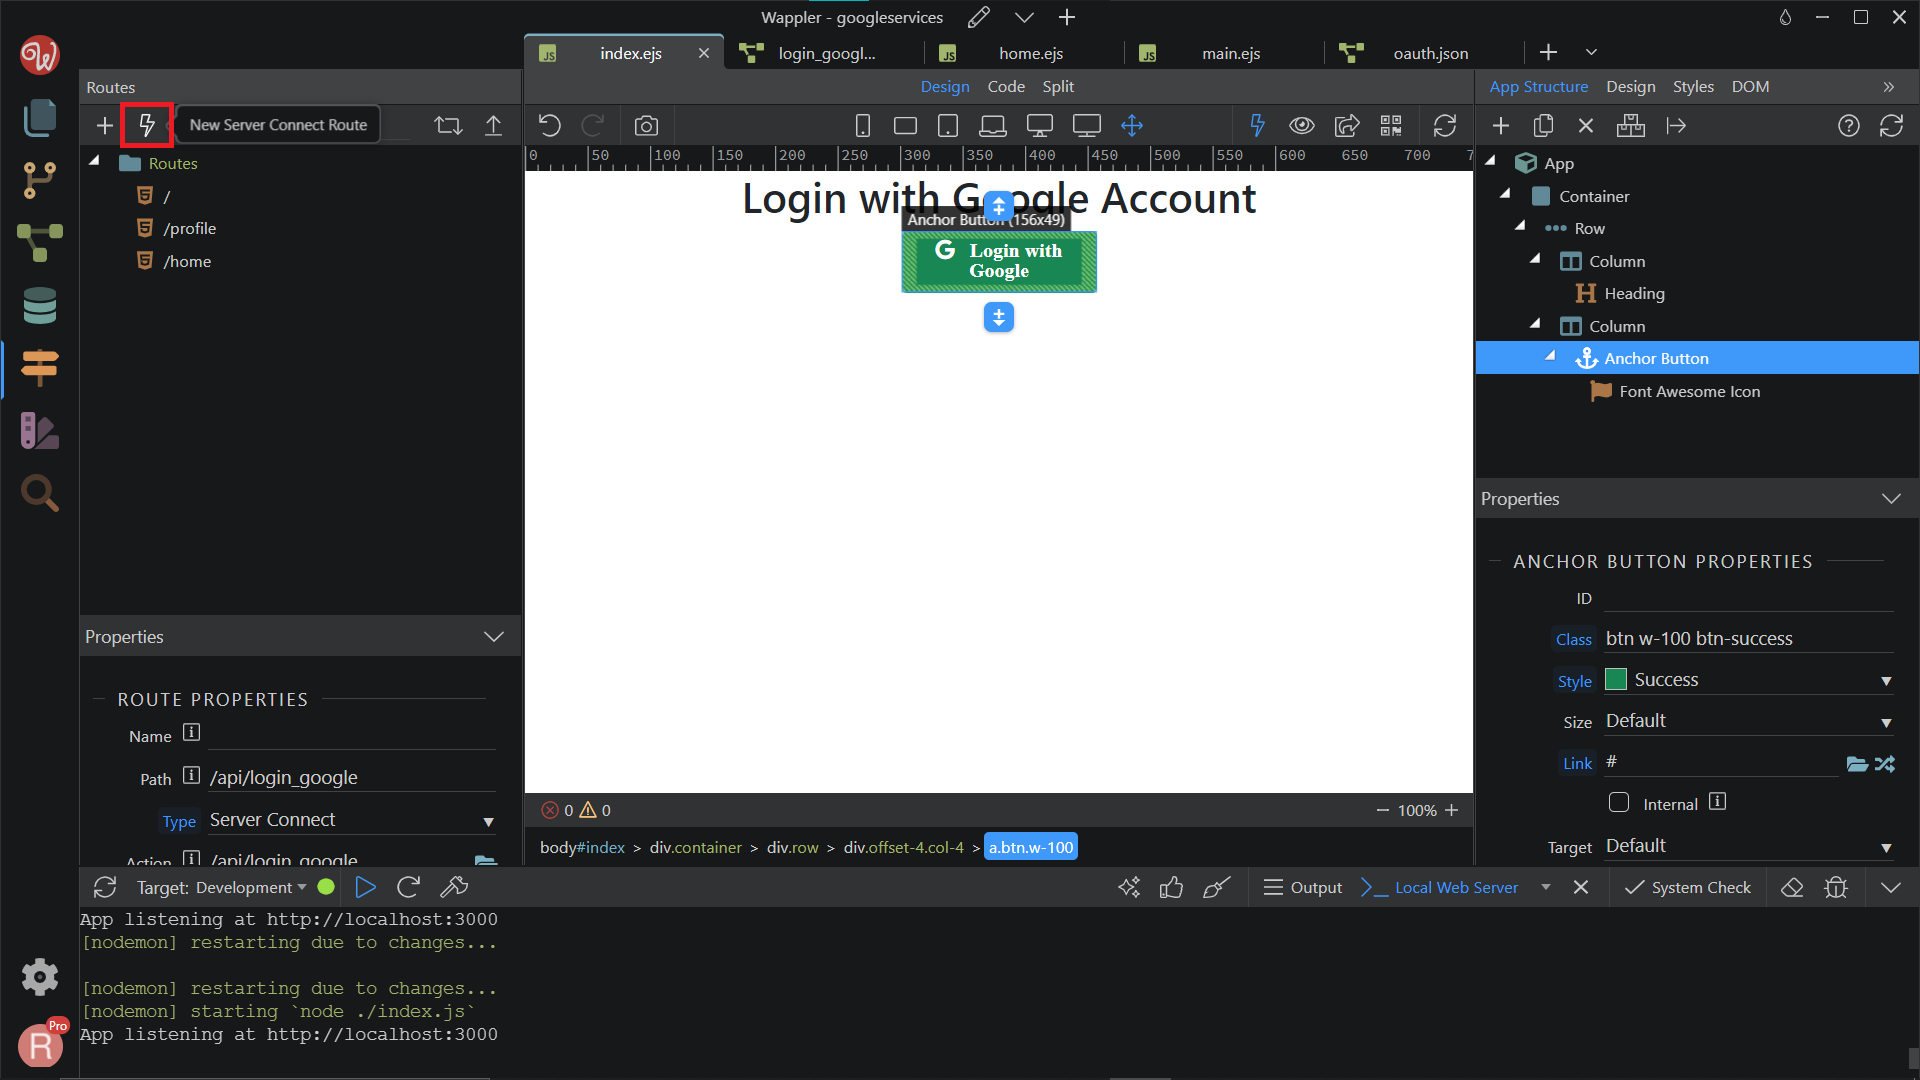
Choose the Server Connect action, in this case the login_google. Click Select.
Section titled “Choose the Server Connect action, in this case the login_google. Click Select.”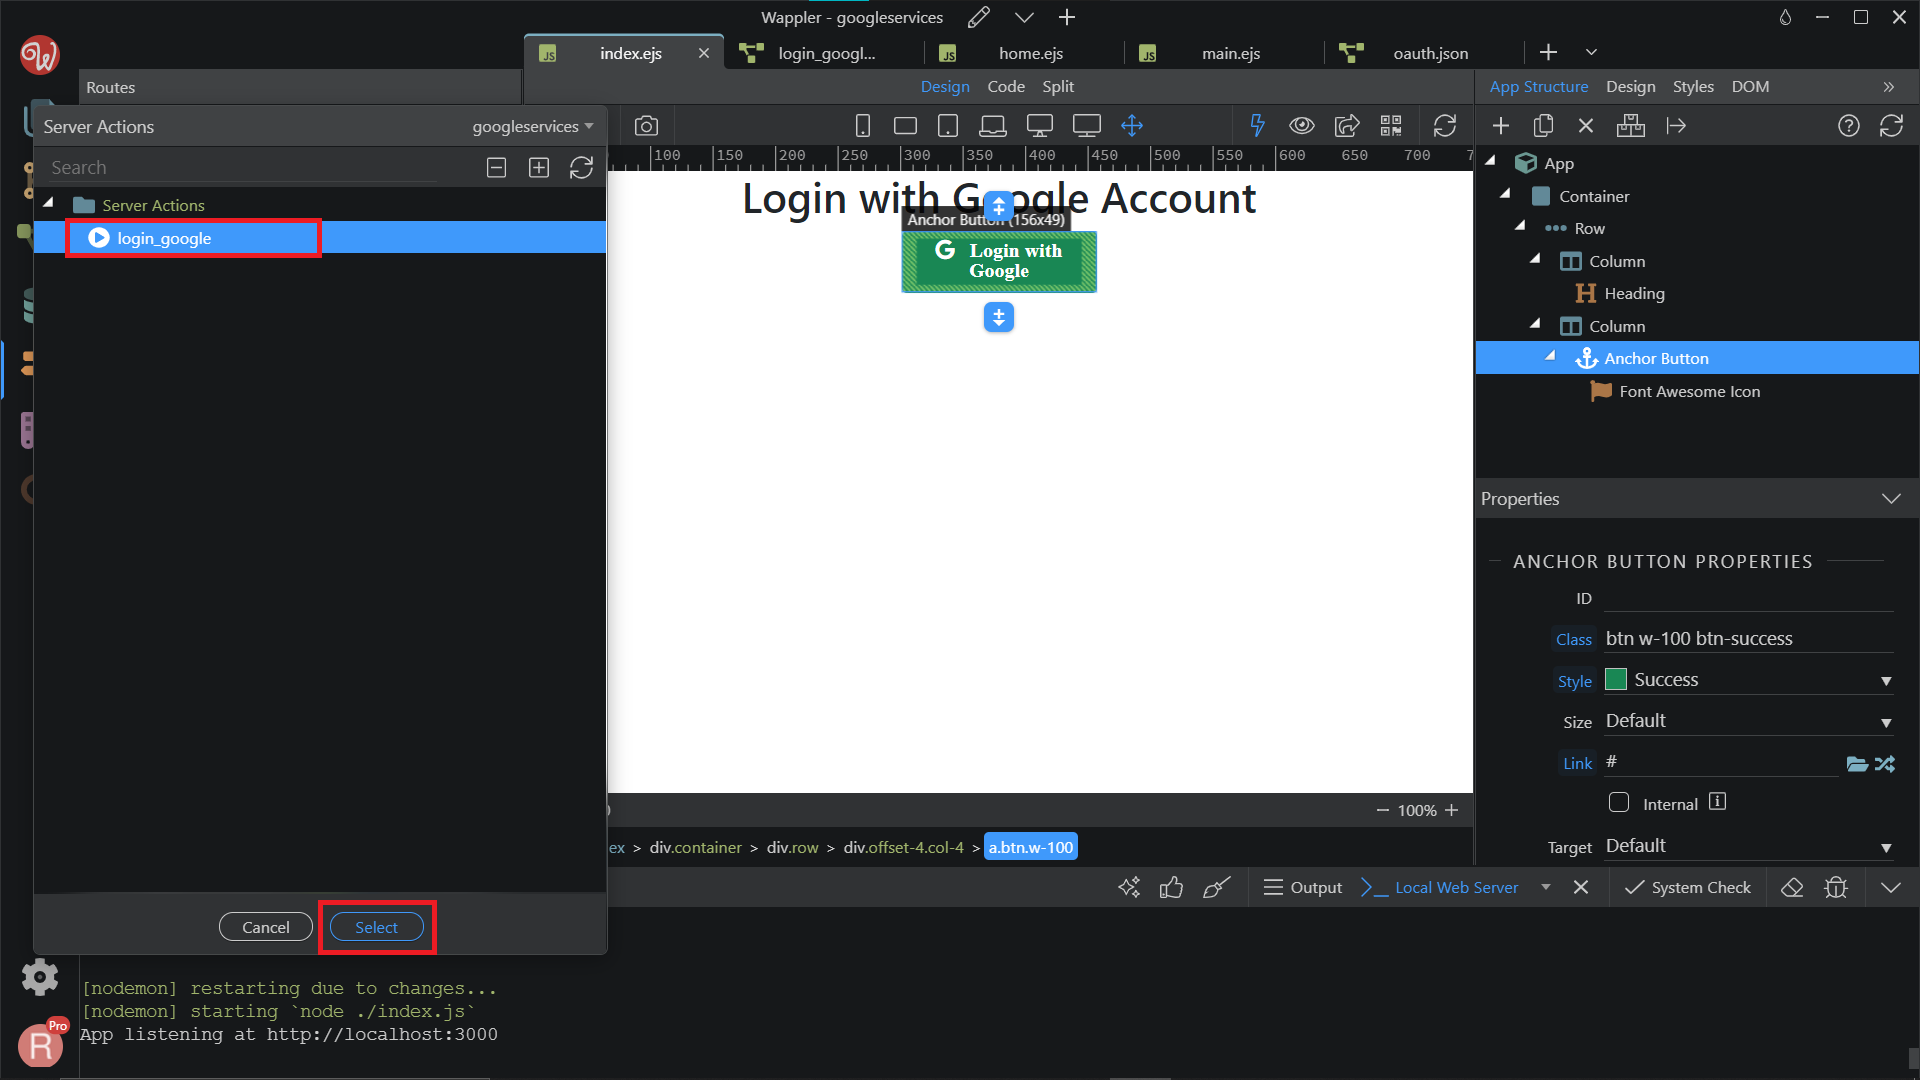
Step 99
Section titled “Step 99”Now, you can see the Routes created, at /api/login_google. In the Route Properties, make sure the Type is already Server Connect. Then, click on the Link element that we have created before, click on the Routes icon.
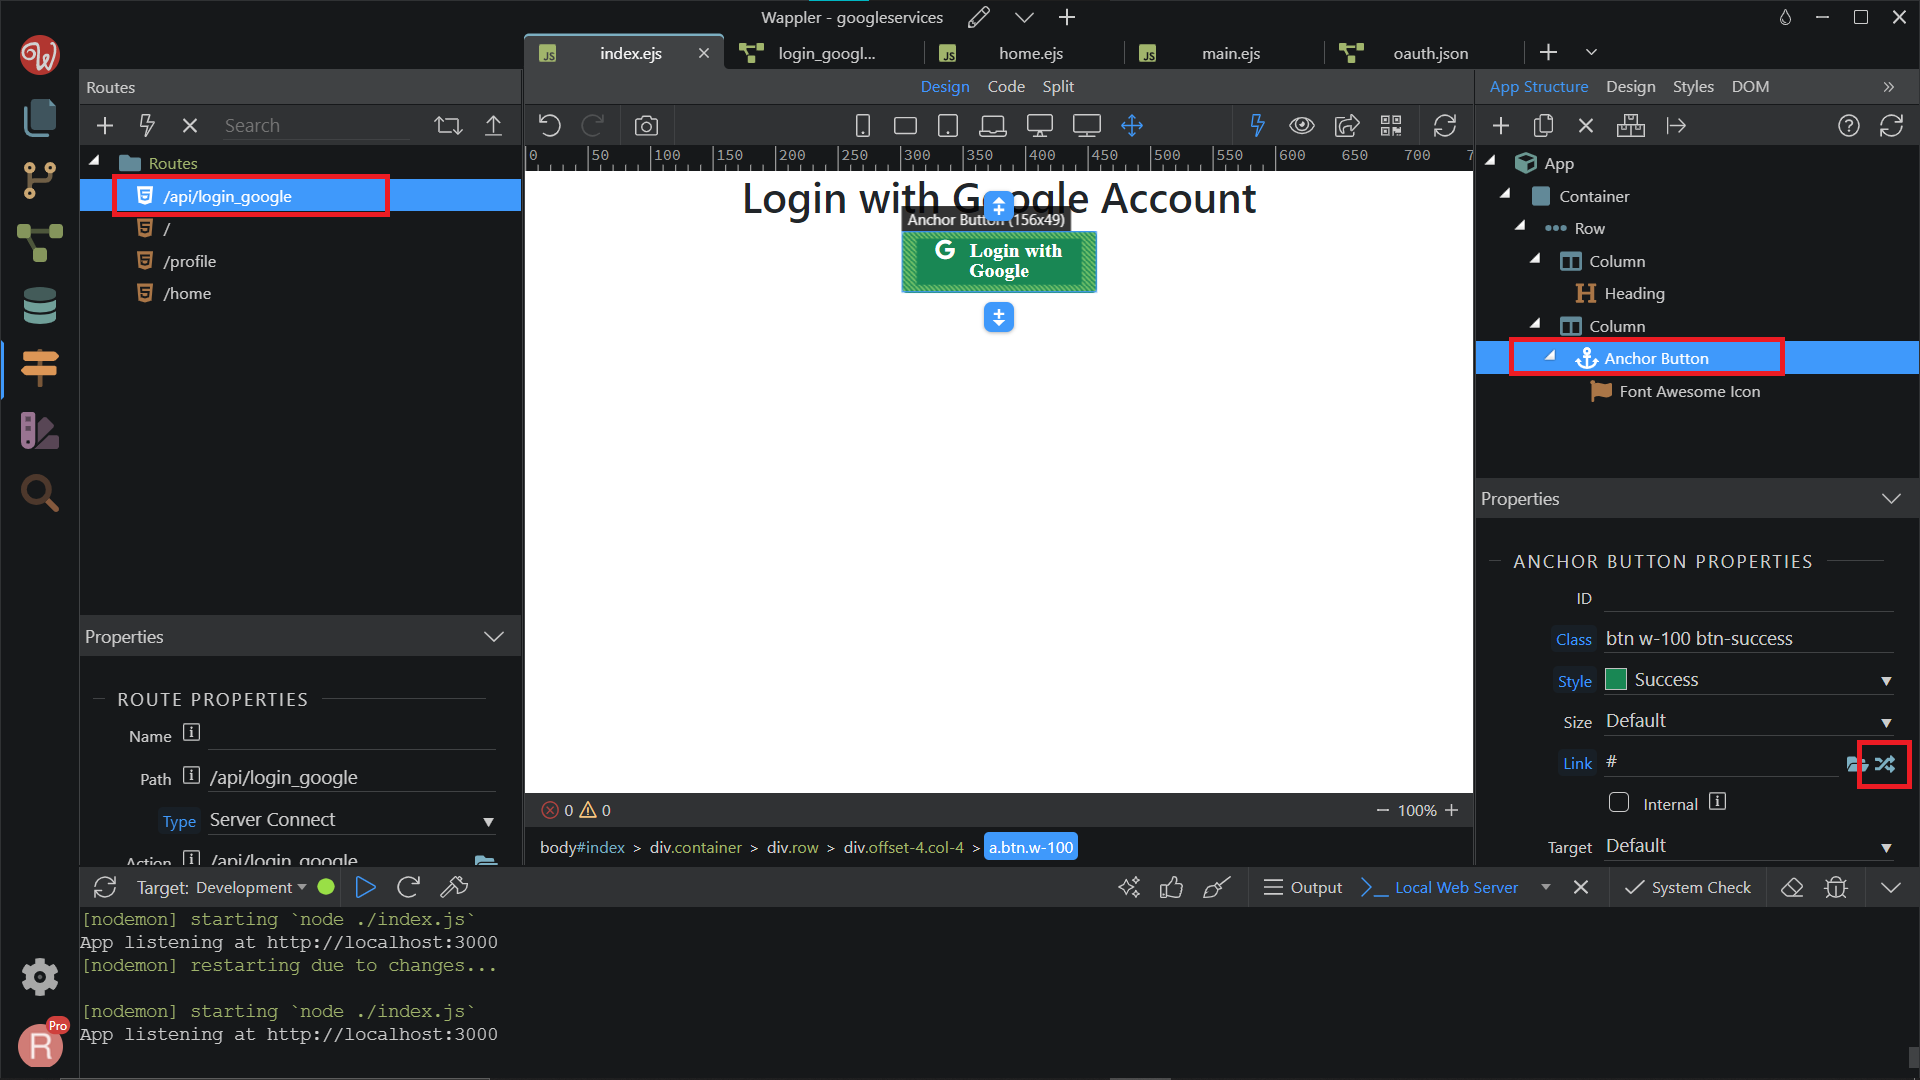
Choose the /api/login_google routes that we have created before. Click Select.
Section titled “Choose the /api/login_google routes that we have created before. Click Select.”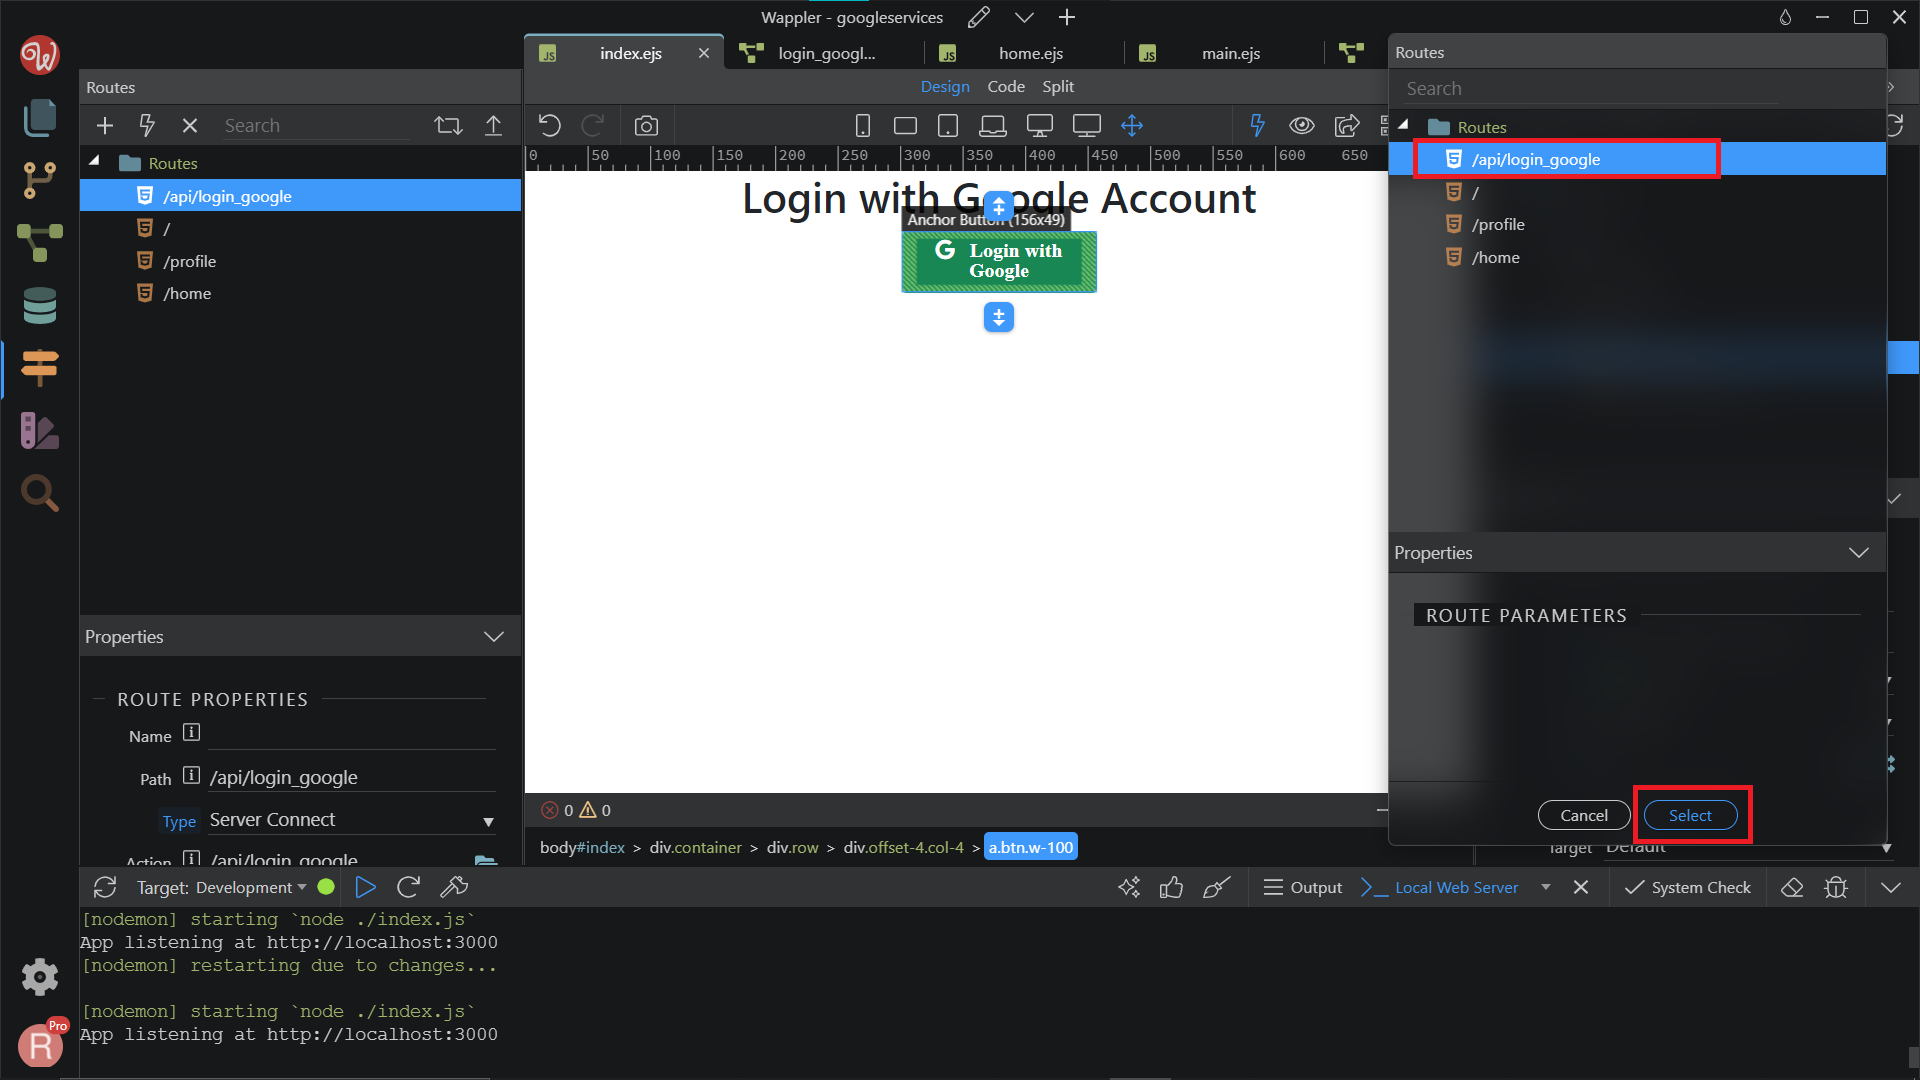
Save your page and you are done.
Section titled “Save your page and you are done.”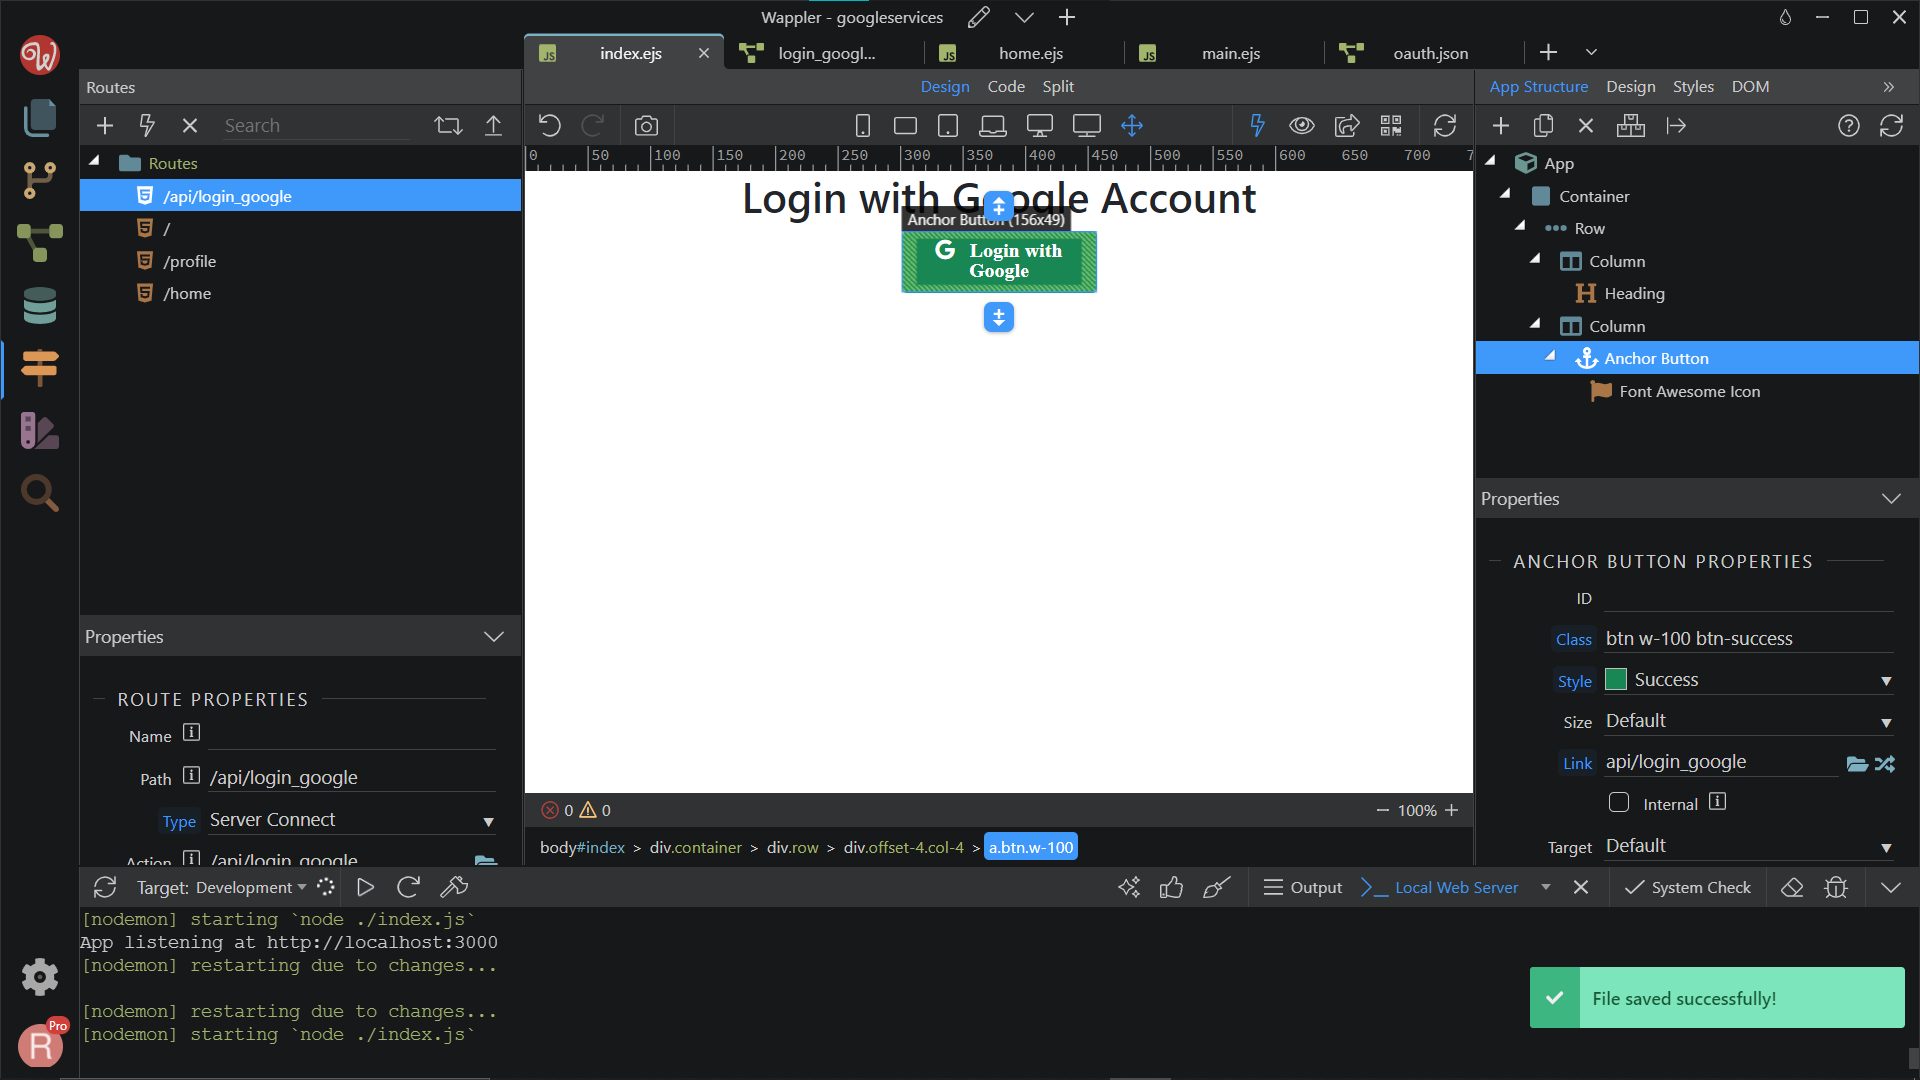
Step 102
Section titled “Step 102”This is just a basic example of how to use the OAuth2 Provider with Google, so you can extend this as per your needs.