
Stripe Integration Part 1 - Customer Creation
Here is my first part in Stripe Integration These will be a bare bones implementation and I will make the assumption that the user has basic skills in creating forms, using server connect etc I really
Here is my first part in Stripe Integration
Section titled “Here is my first part in Stripe Integration”These will be a bare bones implementation and I will make the assumption that the user has basic skills in creating forms, using server connect etc
I really aim these as a basic tutorial but more importantly a discussion point on the subject
This first section covers creating a customer and is quite straight forward
The stripe customers data object can be seen here
Once in your stripe dashboard all the data can be retrieved via API calls so it is not necessary to store everything locally
For the customer API I am only going to store Name and Email.
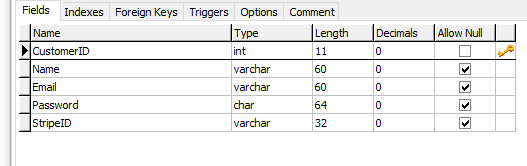
I will, then store the customer ID as allocated by stripe in a table along with a table unique ID which will be used for manipulation within Wappler, name , email address and password (SHA256).
Technically the Stripe allocated ID could be used as the primary key but old habits die hard, i decided to implement a separate key
So to start we have a simple database table. CustomerID is auto increment
Next I created a standard bootstrap server connect form with 3 inputs
Section titled “Next I created a standard bootstrap server connect form with 3 inputs”Name
Email
Password
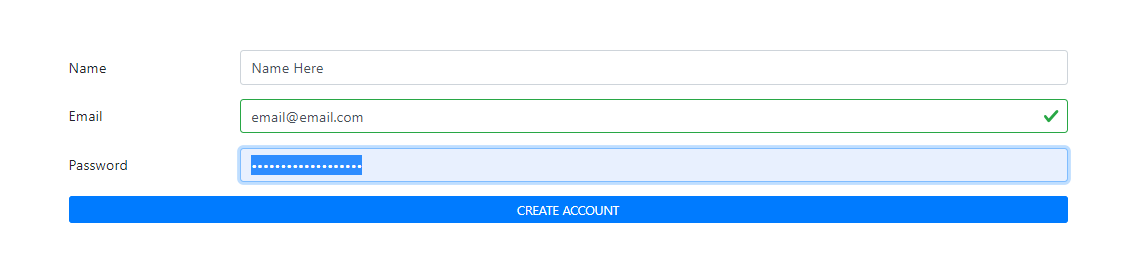
The form type is set to post and is set to run a server cation I have called create_customer
Section titled “The form type is set to post and is set to run a server cation I have called create_customer”The form type is set to post and is set to run a server cation I have called create_customer
          <form id="form1" method="post" is="dmx-serverconnect-form" action="dmxConnect/api/stripe/create_customer.php" dmx-on:success="notifies1.success(form1.data.api1.data.id)">
            <div class="form-group row">
              <label for="id_name" class="col-sm-2 col-form-label">Name</label>
              <div class="col-sm-10">
                <input type="text" class="form-control" id="id_name" name="Name" aria-describedby="input1_help" placeholder="Enter Name">
              </div>
            </div>
            <div class="form-group row">
              <label for="id_Email" class="col-sm-2 col-form-label">Email</label>
              <div class="col-sm-10">
                <input type="email" class="form-control" id="id_Email" name="Email" aria-describedby="input1_help" placeholder="Enter Email" required="">
              </div>
            </div>
            <div class="form-group row">
              <label for="id_password" class="col-sm-2 col-form-label">Password</label>
              <div class="col-sm-10">
                <input type="password" class="form-control" id="id_password" name="Password" aria-describedby="input1_help" placeholder="Enter Password">
              </div>
            </div><button class="btn btn-sm btn-primary btn-block" type="submit">CREATE ACCOUNT</button>
          </form>
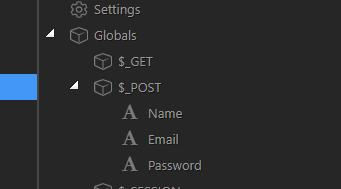
We can manually create or import the 3 inputs as POST variables
Next we make a database connection
Section titled “Next we make a database connection”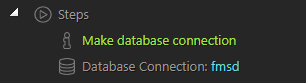
Step 5
Section titled “Step 5”We next make sure that the registered email address is not already registered in the system We do that by reference to the above table using a standard validation routine.

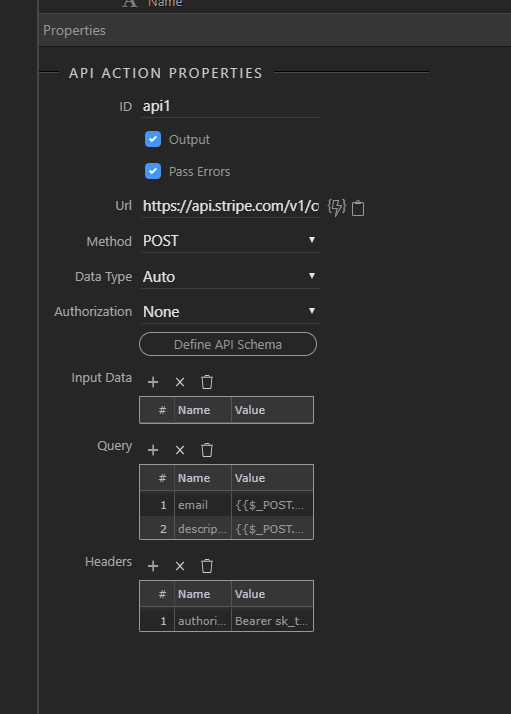
Next we create an API action. URL: https://api.stripe.com/v1/customers
Section titled “Next we create an API action. URL: https://api.stripe.com/v1/customers”Next we create an API action.
URL: https://api.stripe.com/v1/customers
Bearer sk_test_xxxxxxxxxxxxxxxxxxxxxxx
Section titled “Bearer sk_test_xxxxxxxxxxxxxxxxxxxxxxx”We create a header called authorization (note it’s a Z not an S)
The value is the word ‘Bearer’ followed by your secret API key
Bearer sk_test_xxxxxxxxxxxxxxxxxxxxxxx
I also pass the values om the Name and Email Address to the API as query parameters
Name: email: Value: $_POST.email
Name: description Value $_POST.Name
This will populate the email and description elements of the Stripe customer checkout
Lastly we store the details in our database table including the customer ID as returned by Stripe and our SHA 256 encoded password which can be used to login to the account with Wappler.
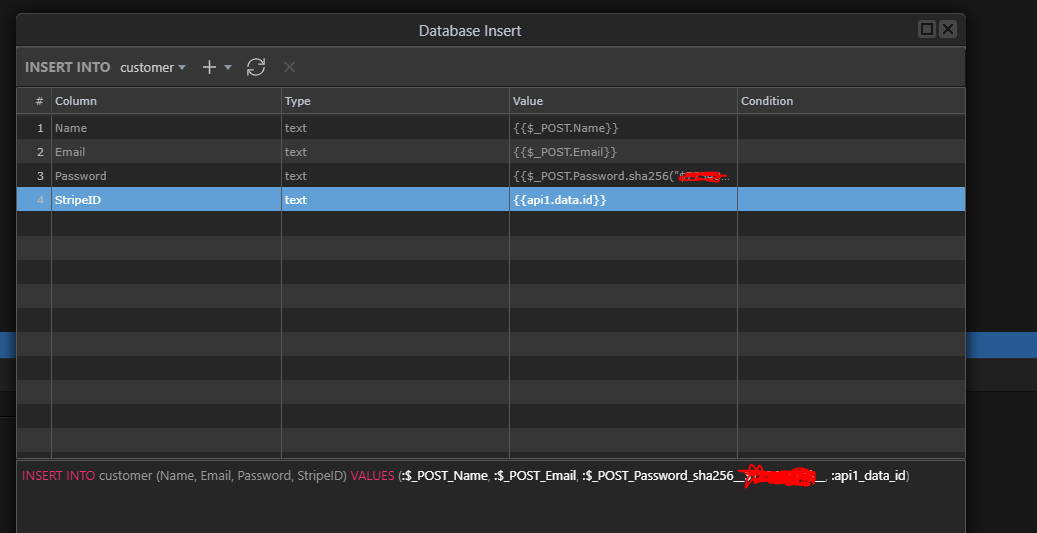
We can the use the standard Server form Server Connect Dynamic events to deal with success or failure.
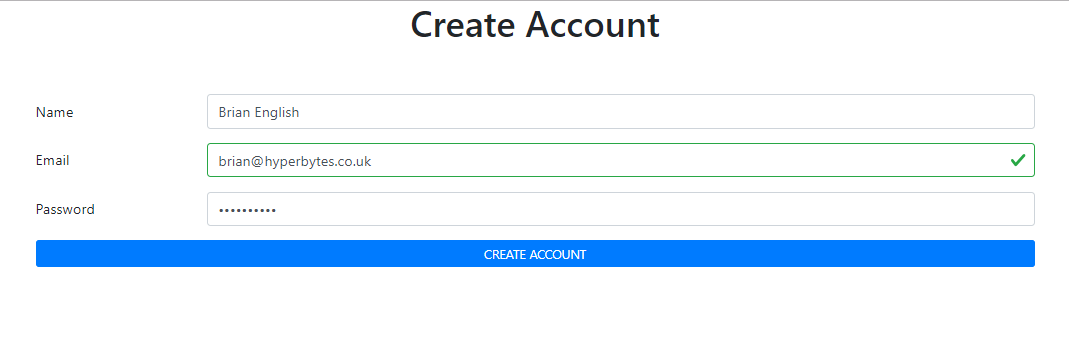
Section titled “We can the use the standard Server form Server Connect Dynamic events to deal with success or failure.”So to create customer we complete the form.
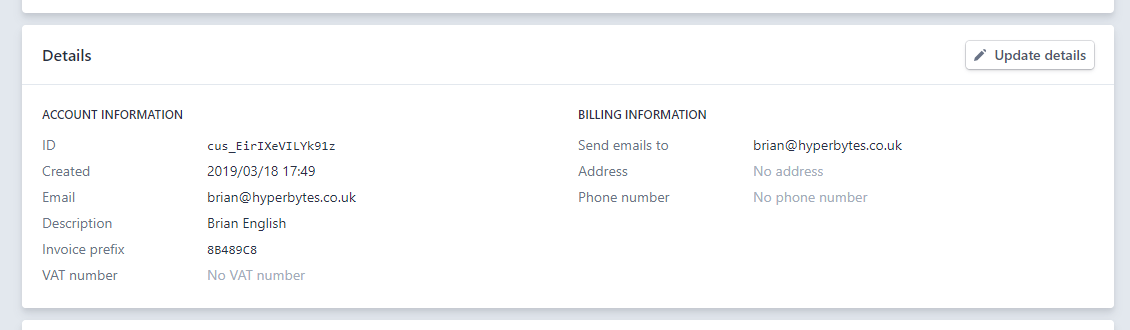
The customer object is created in the stripe dashboard.
Section titled “The customer object is created in the stripe dashboard.”
Step 10
Section titled “Step 10”You can also see the email details updated in the stripe dashboard and the description showing the account holders name.
Step 11
Section titled “Step 11”and the database table showing the name, email, encrypted password and the unique customer ID returned by the API

This really wasn’t that hard once i got to understand how stripe works (never used it before)
Section titled “This really wasn’t that hard once i got to understand how stripe works (never used it before)”We can now look at listing and retrieving the customer object then next I will be looking at creating a charge for an item
Any comments, please add them. Questions, I will try my best to answer them but I am no oracle in this area.