Getting Started with Stripe Integration in Wappler
Intro Stripe is one of the top payment processing providers which allows you to create full e-commerce solutions. Thanks to the client and server-side Stripe integration in Wappler it’s now easier tha
Stripe is one of the top payment processing providers which allows you to create full e-commerce solutions. Thanks to the client and server-side Stripe integration in Wappler it’s now easier than ever to add buy now buttons, checkout pages and even create entire stores.
Stripe Account
Section titled “Stripe Account”The first think you need to do, in order to start using Stripe is to create an account. Go to: https://dashboard.stripe.com/register and create your account:
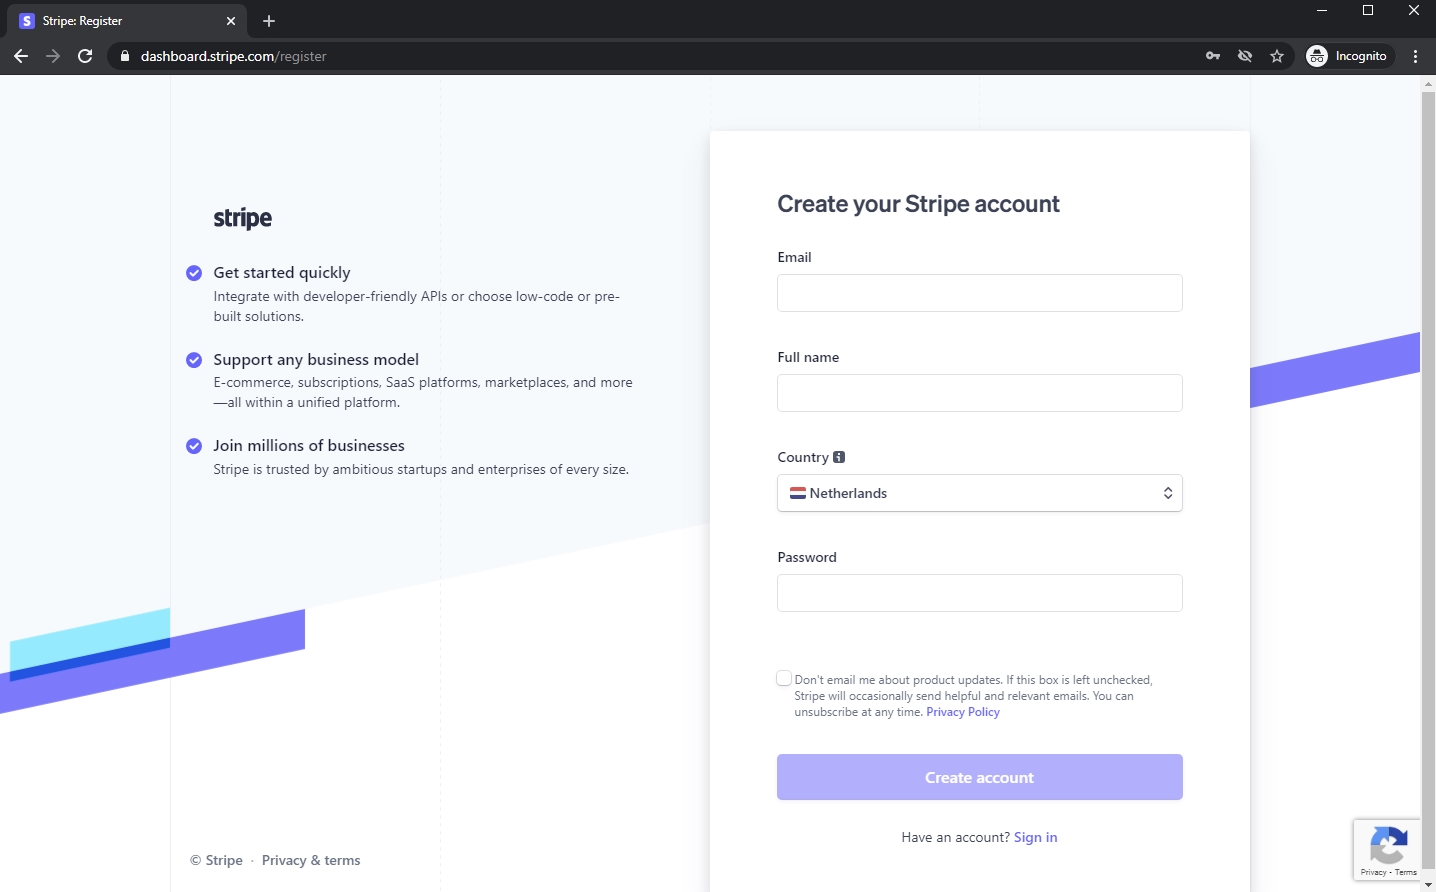
Then, log in using your newly created account.
Section titled “Then, log in using your newly created account.”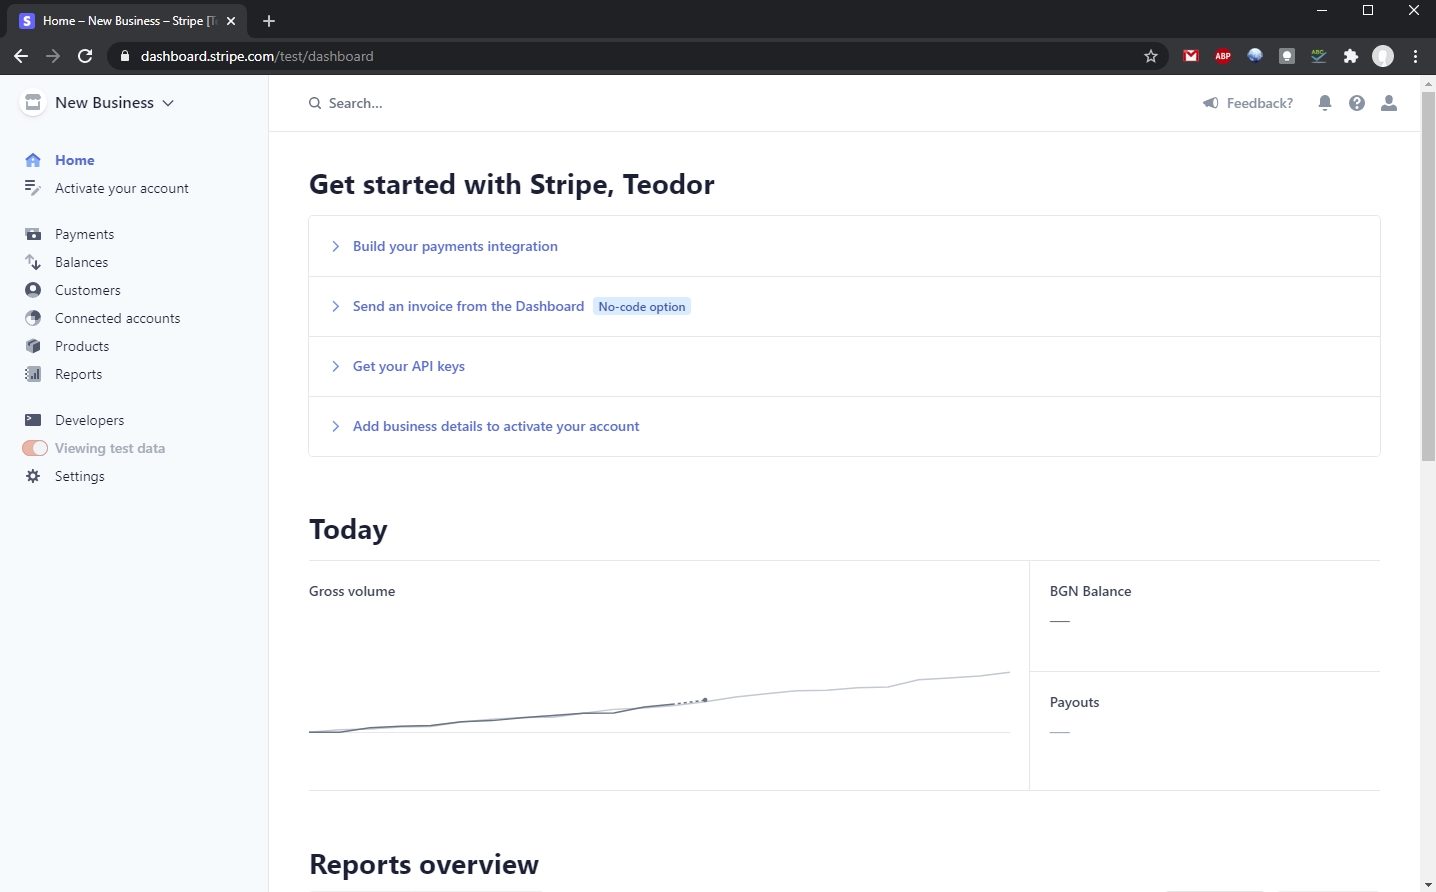
Step 5
Section titled “Step 5”Then you need to give your business a name. This is required so that you can sell your products.
Click Settings:

Then under Business Settings select Account Details:
Section titled “Then under Business Settings select Account Details:”
And enter an Account Name (Company name):
Section titled “And enter an Account Name (Company name):”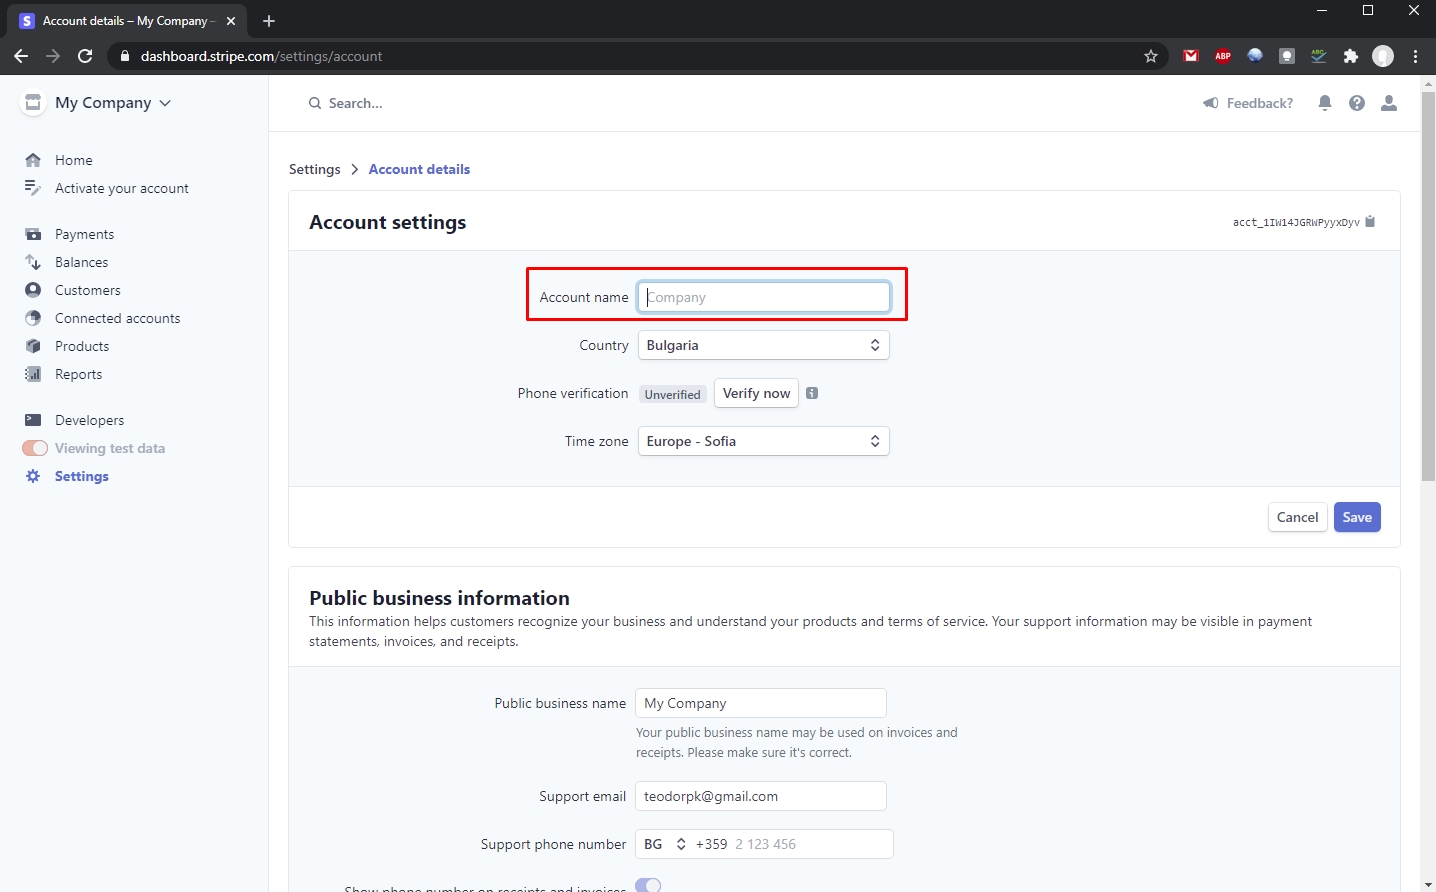
Setup the rest of the settings as you need and click Save when you are done:
Section titled “Setup the rest of the settings as you need and click Save when you are done:”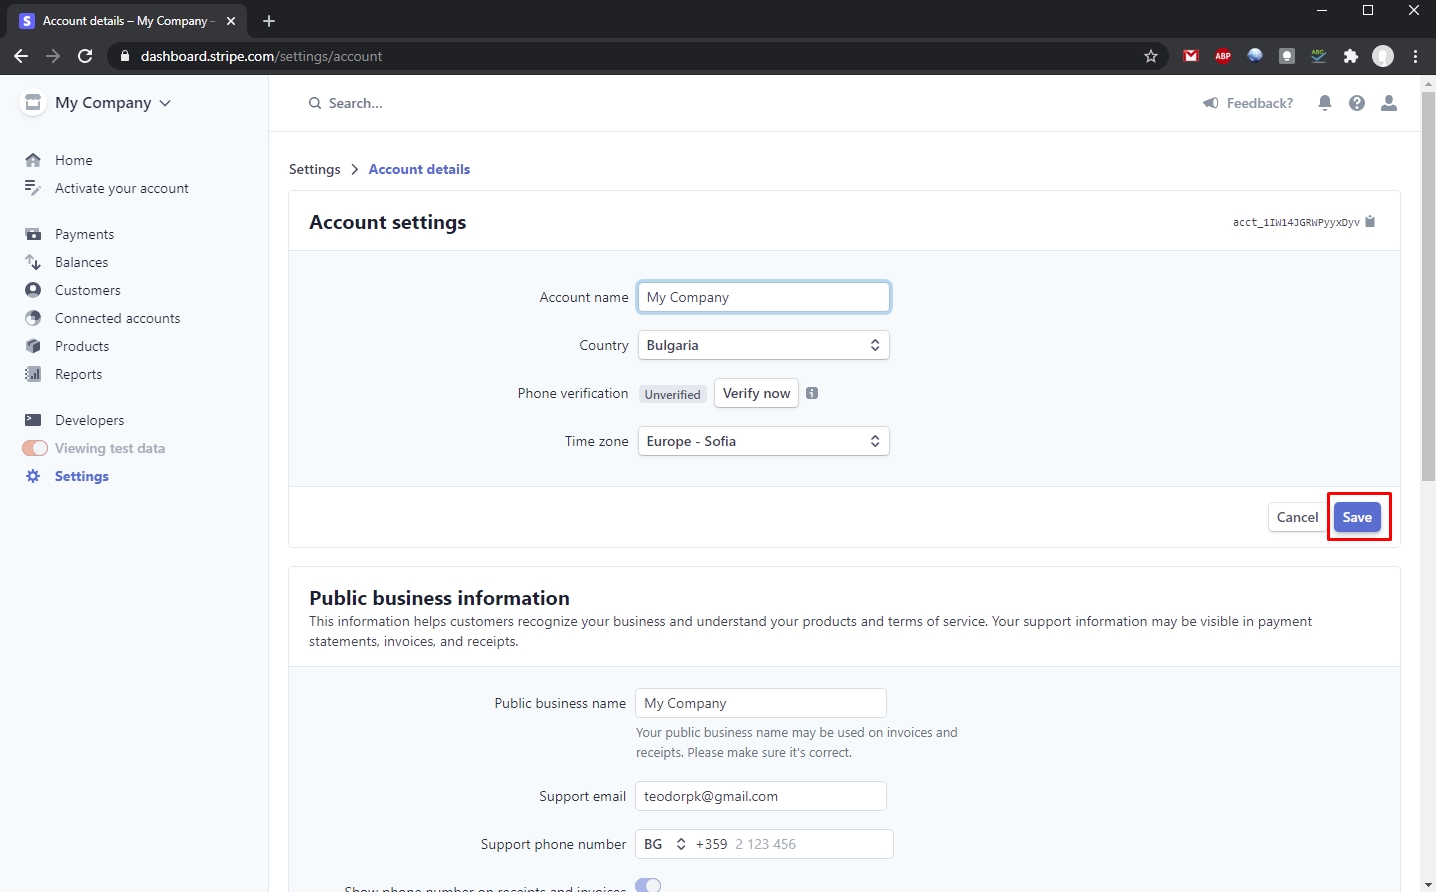
Step 9
Section titled “Step 9”Now you are ready to start selling products.
Note that our account is in test mode currently, which means the payments won’t be made - so it’s like a sandbox. Once you setup and test everything you can verify your business and then you can go live.
Products and Prices
Section titled “Products and Prices”The next step is to create a product and add price to it. Click Products:
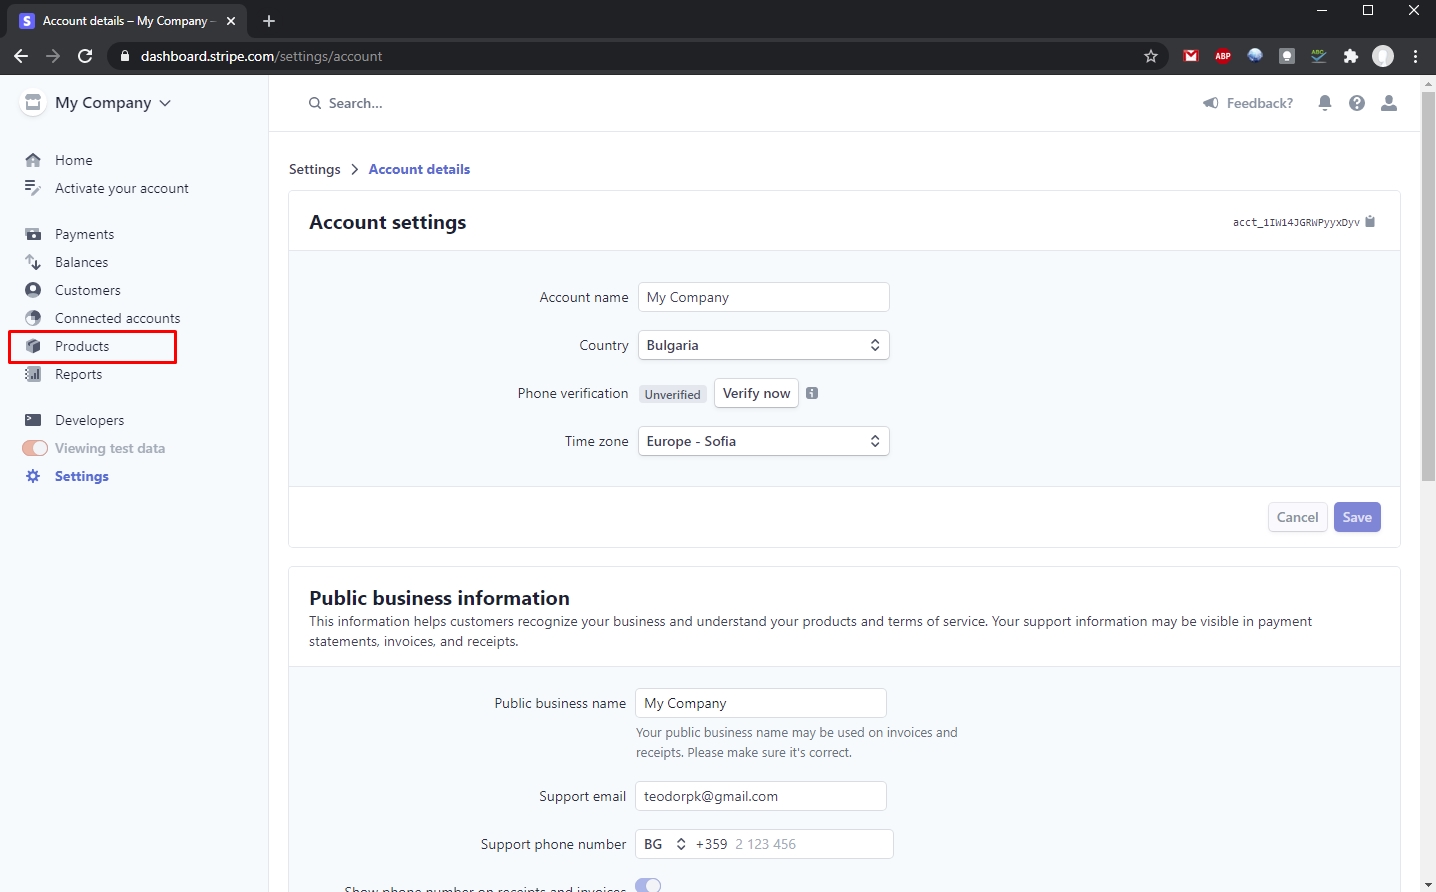
Here you can create new products or manage the existing ones. Click the Add product button:
Section titled “Here you can create new products or manage the existing ones. Click the Add product button:”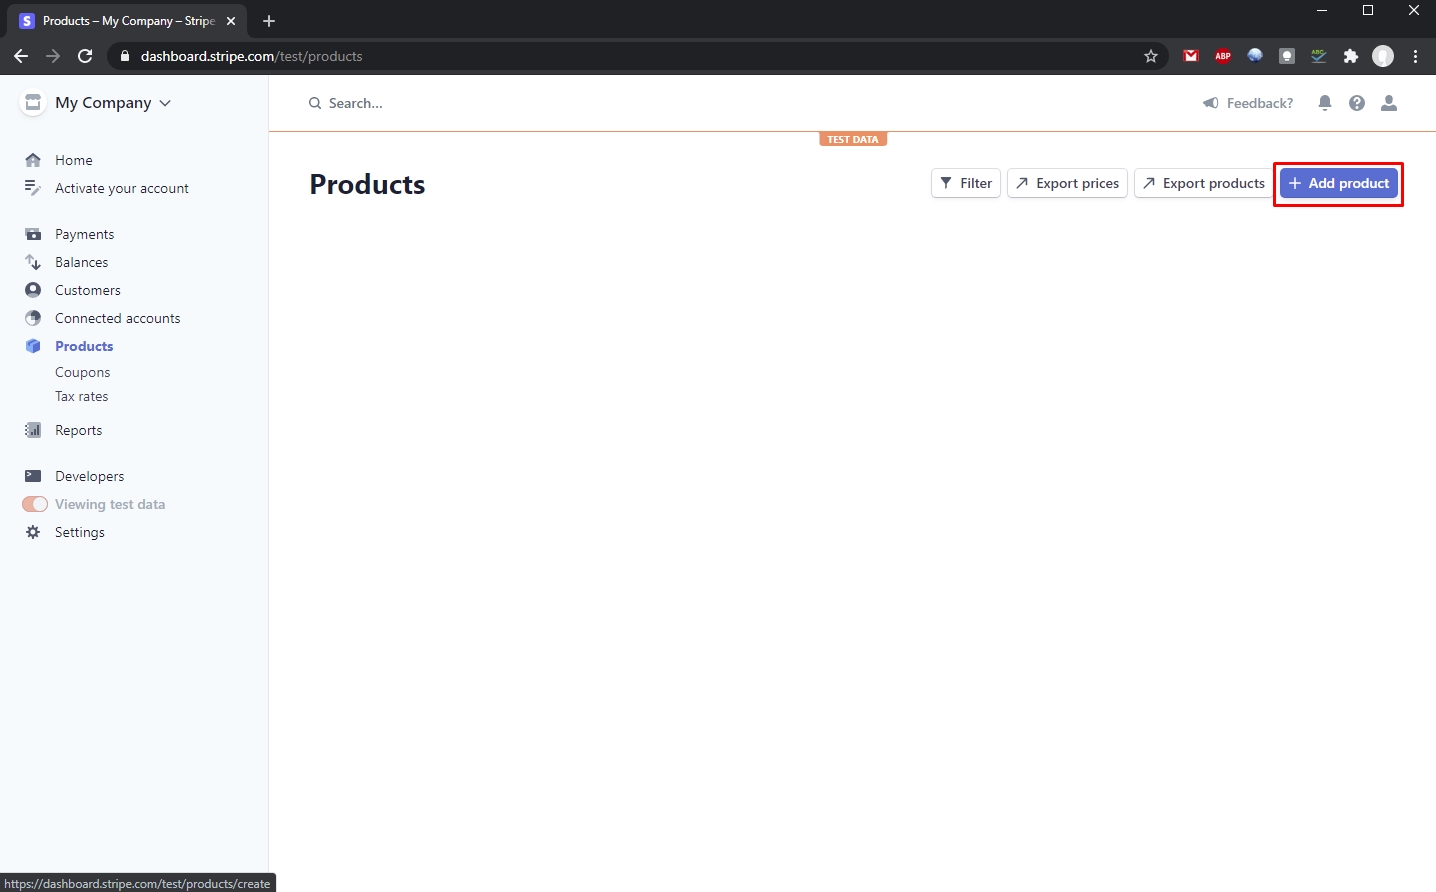
Here you can enter your product information:
Section titled “Here you can enter your product information:”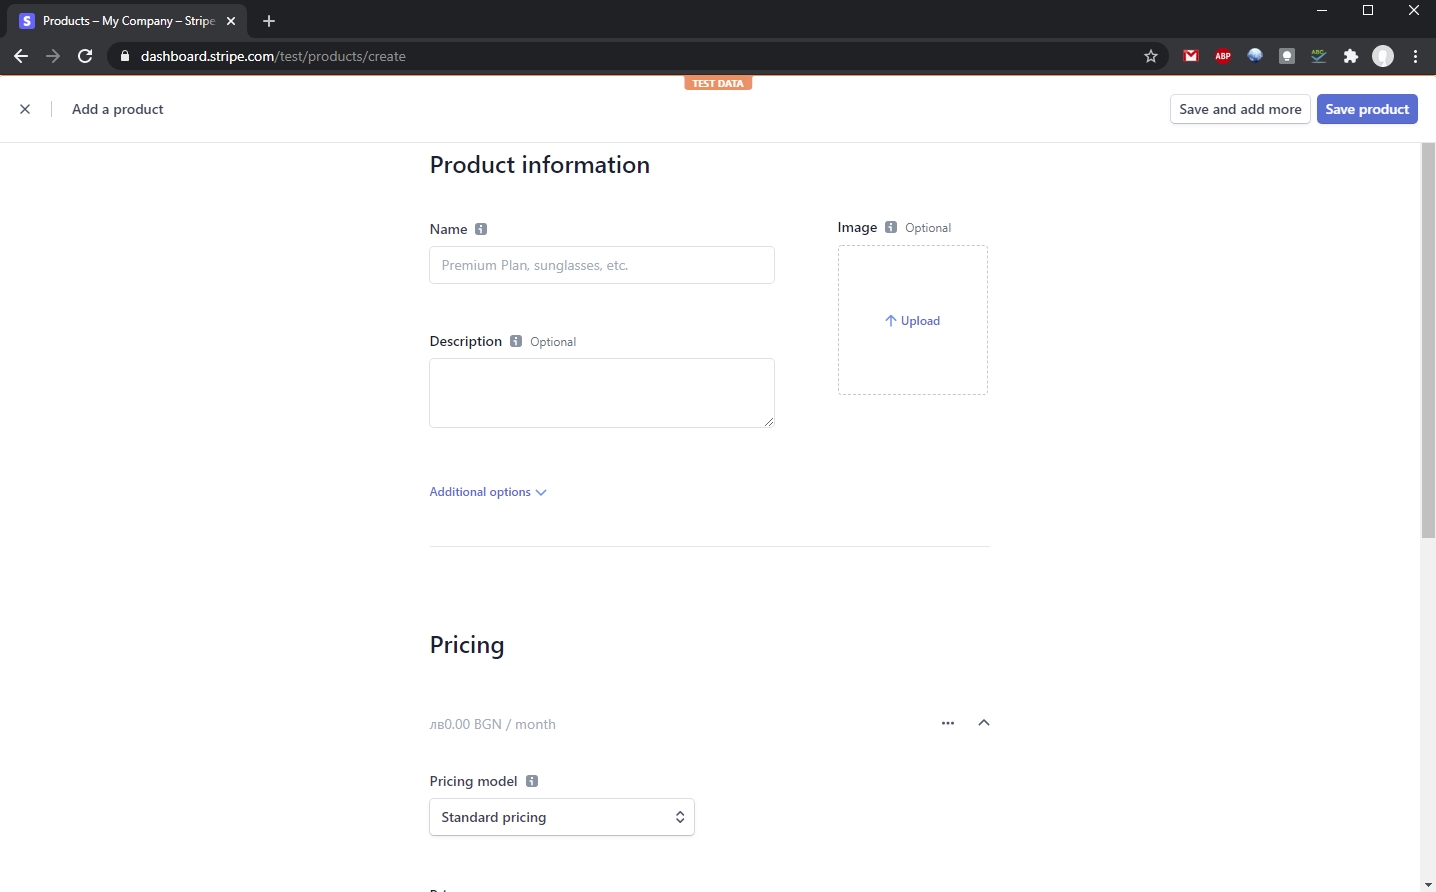
Step 13
Section titled “Step 13”Enter the Name of your product and add an optional Description. Both of these will be displayed on the checkout page:
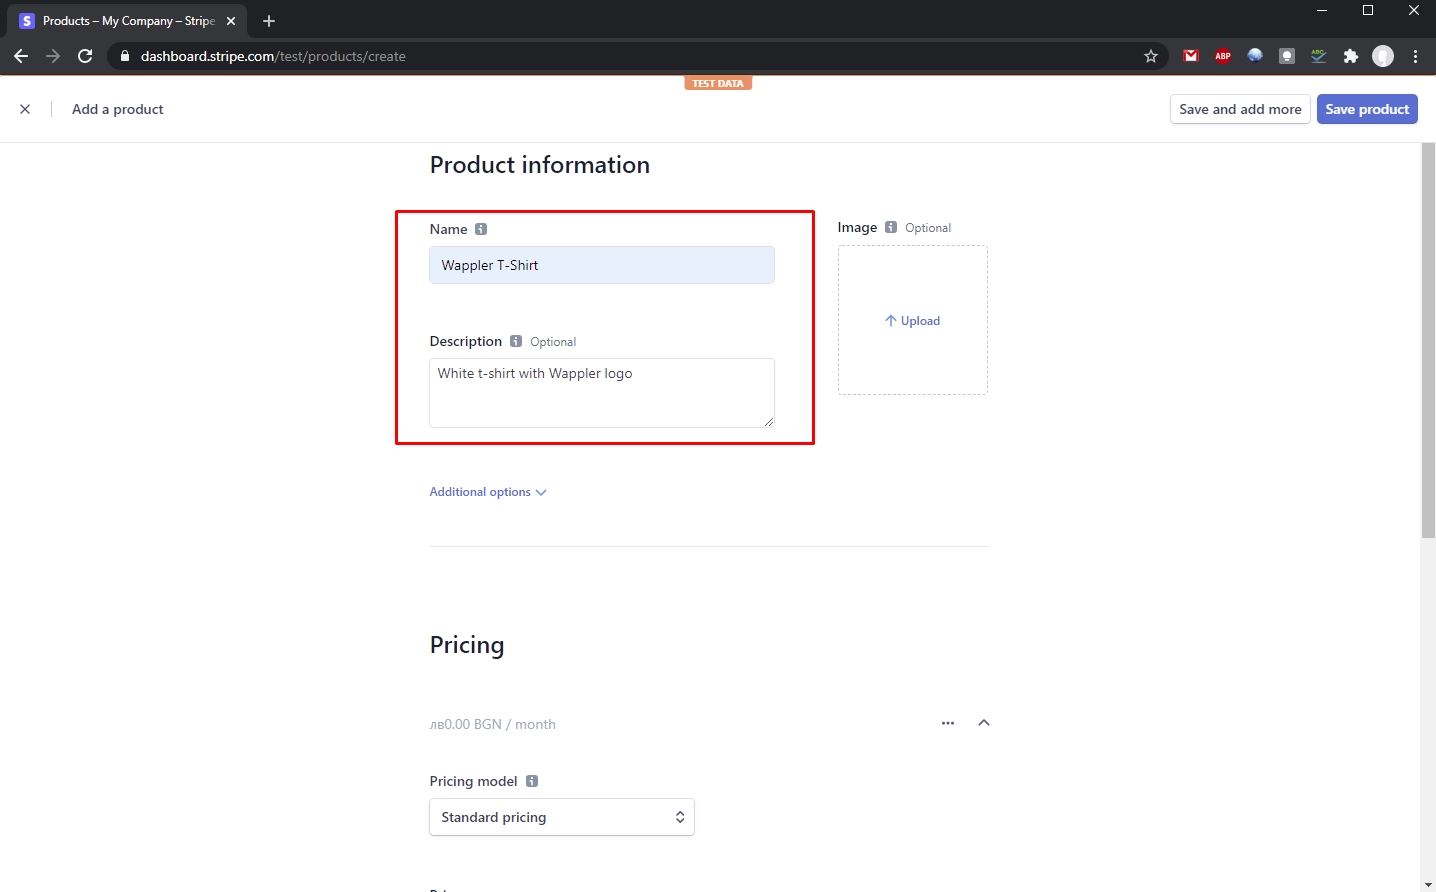
You can also add an image for your product, which will also be displayed on the checkout page:
Section titled “You can also add an image for your product, which will also be displayed on the checkout page:”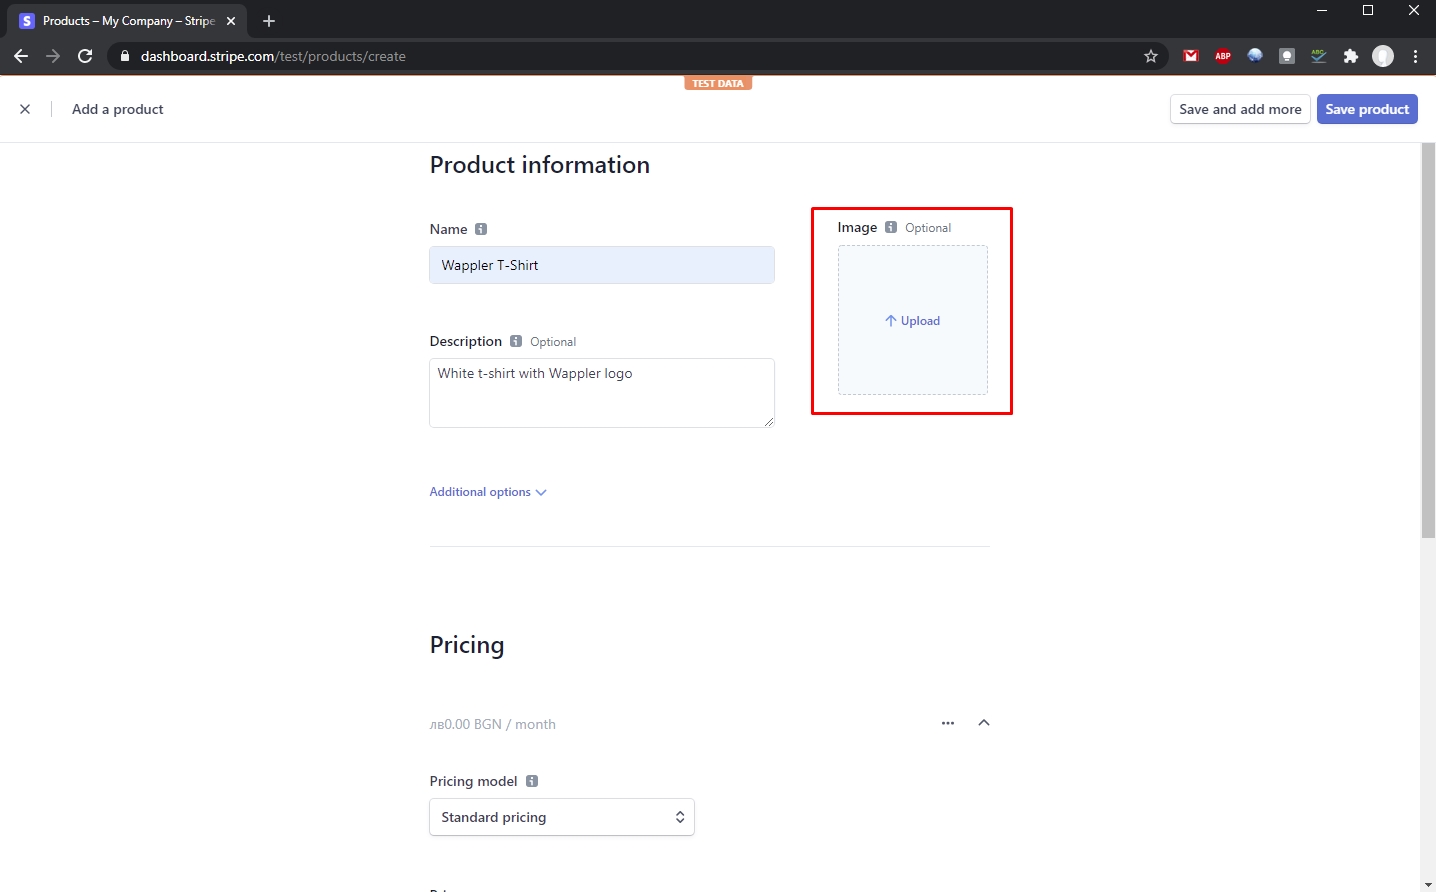
We are done with the product basic info:
Section titled “We are done with the product basic info:”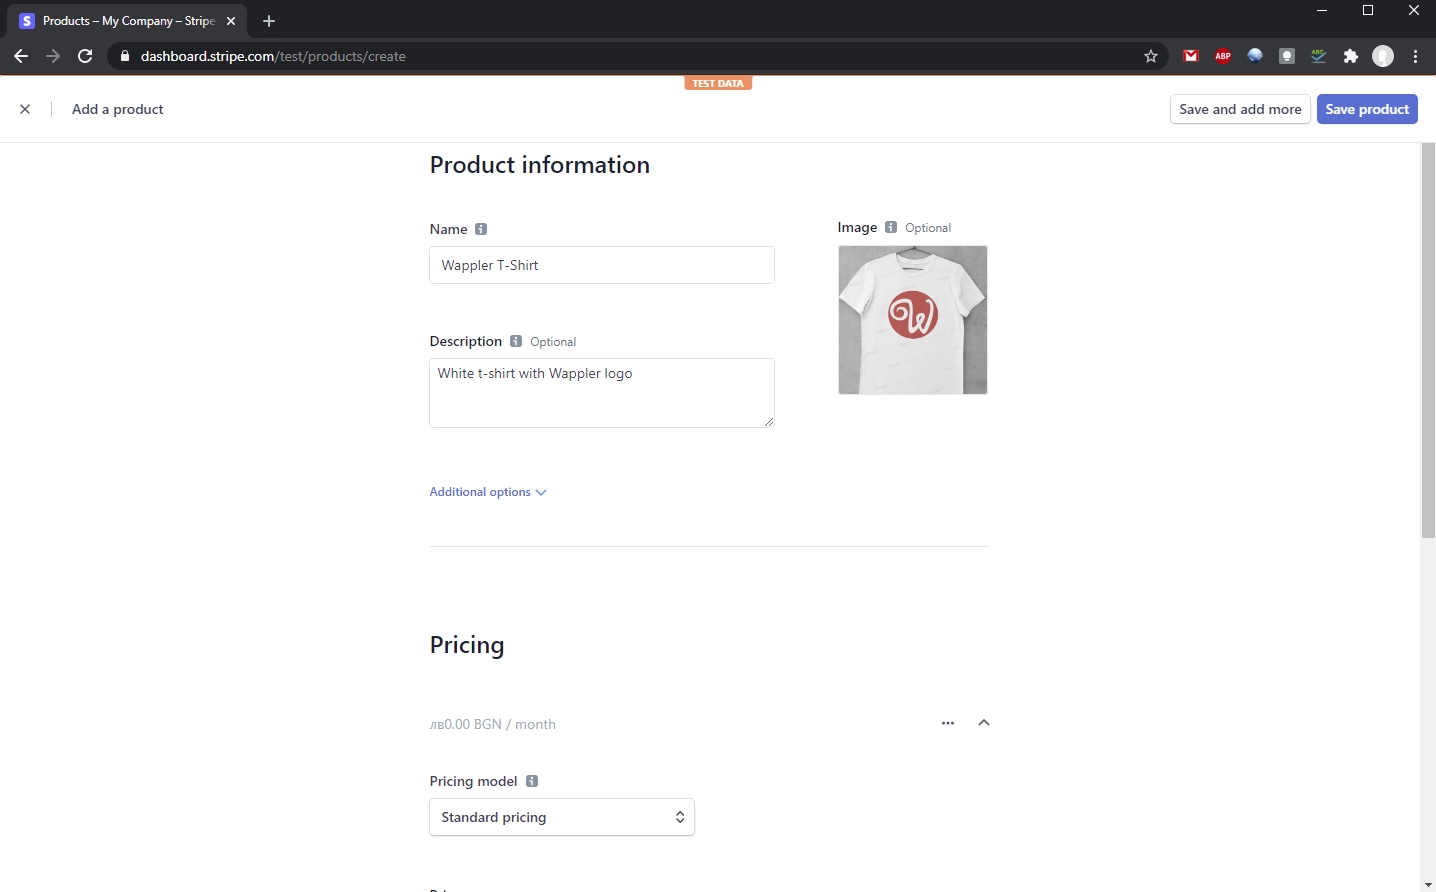
Step 16
Section titled “Step 16”Now, let’s add a price for this item.
Scroll down to Pricing and select the Pricing model. Select the Standard Pricing option if you charge the same price for each item:

Then select the currency you want to use:
Section titled “Then select the currency you want to use:”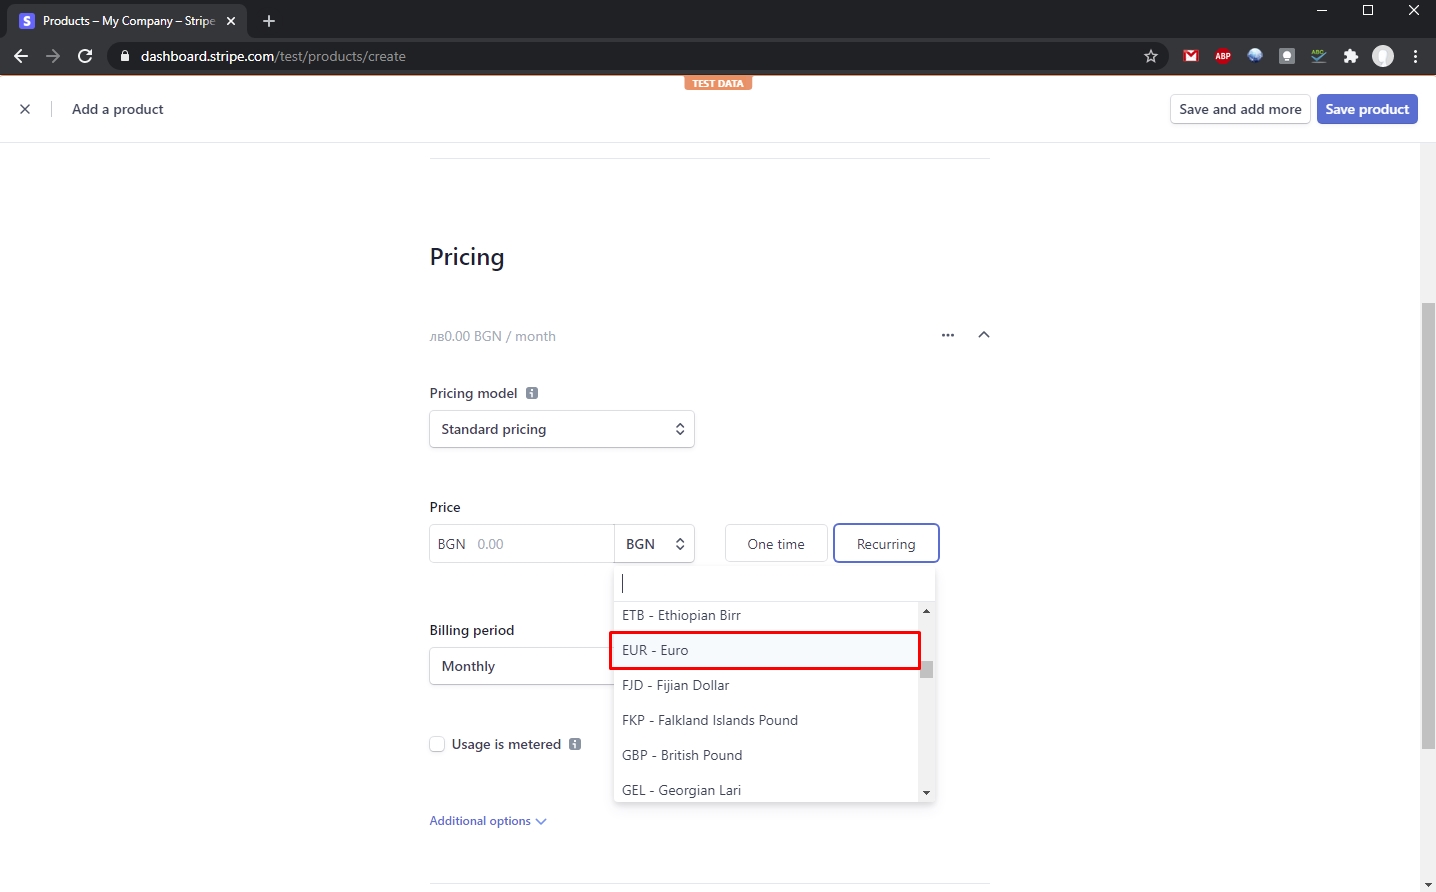
Enter the price and select One time payment:
Section titled “Enter the price and select One time payment:”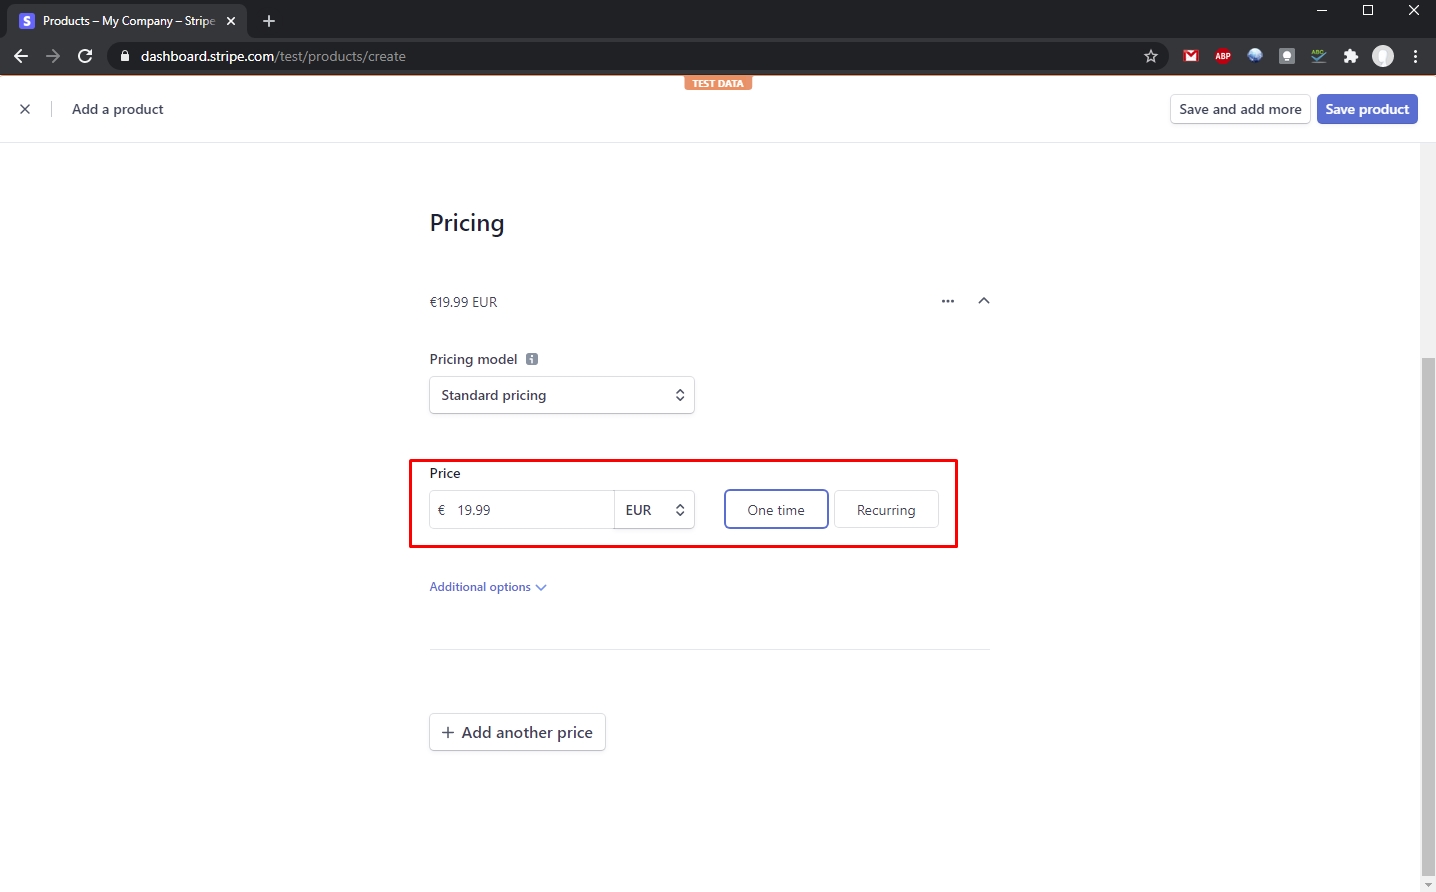
Click Save product:
Section titled “Click Save product:”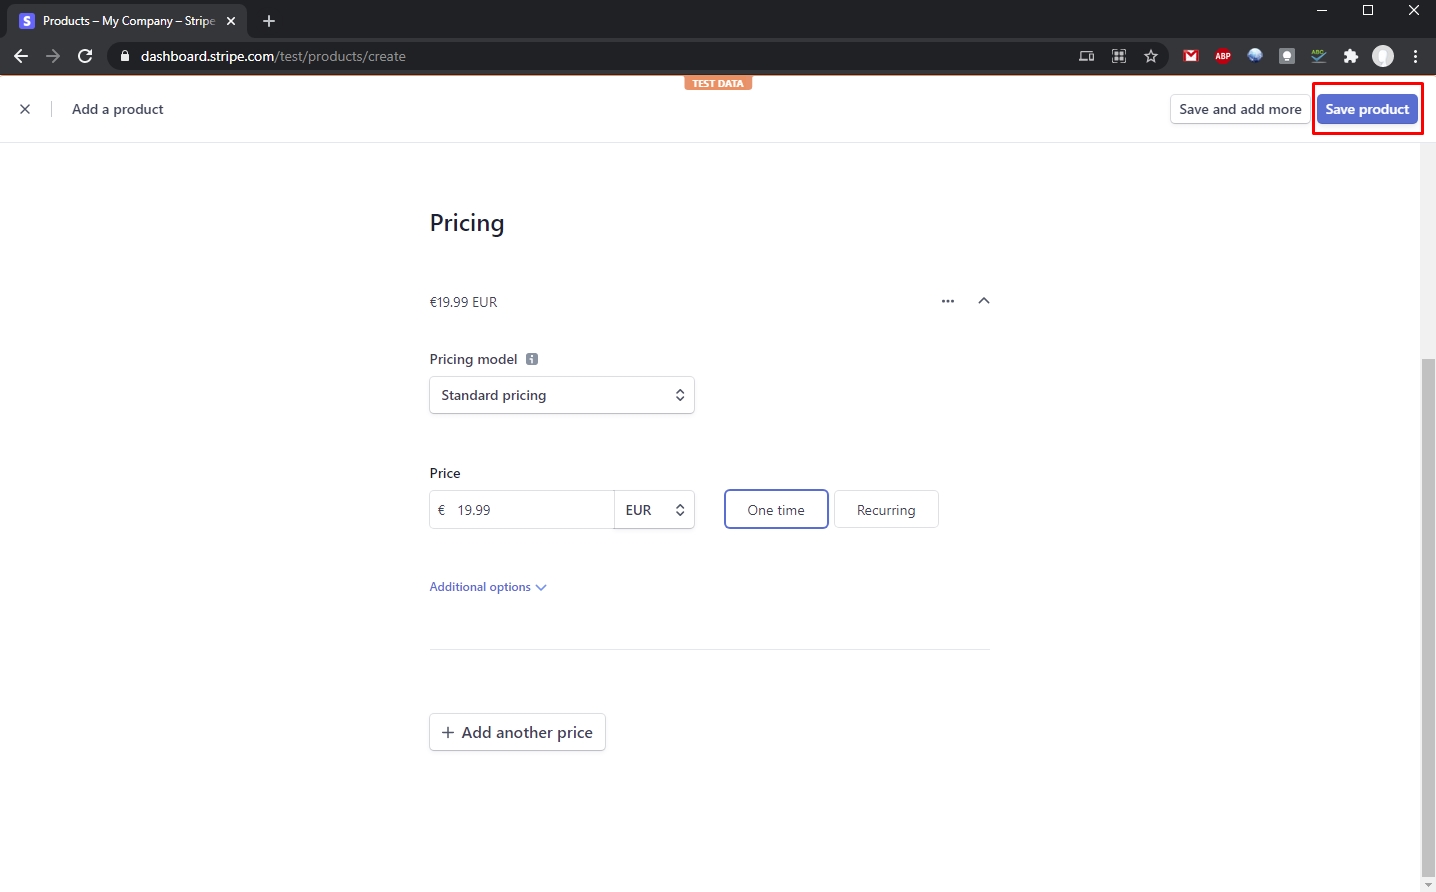
Step 20
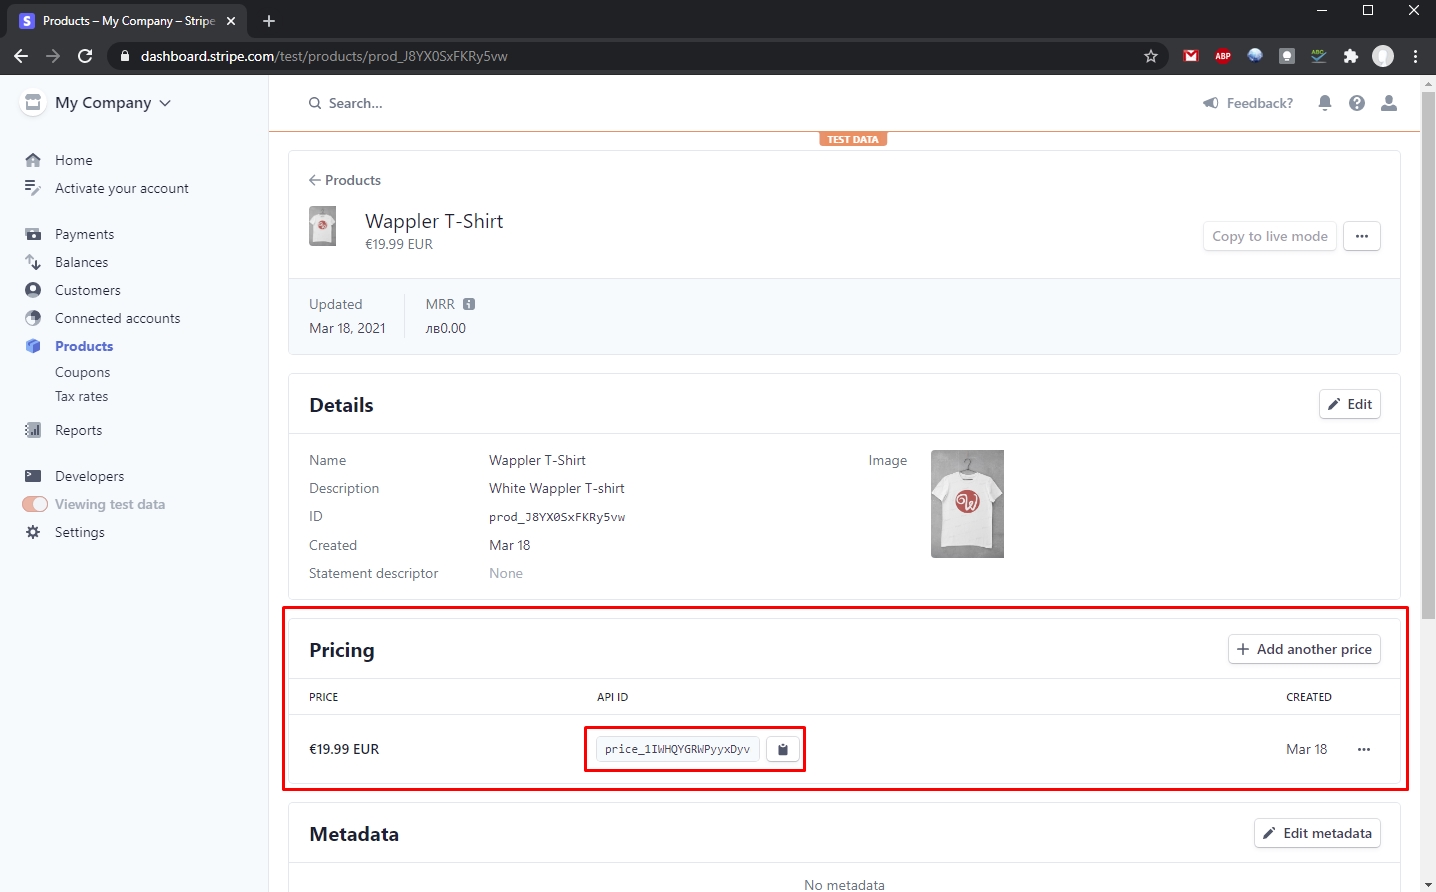
Section titled “Step 20”And you have your first product ready for sale. You can see that an ID has been assigned to the product price we added. This ID will be used for the checkout process. You can add different prices in different currencies and use their IDs where needed:
Your products can be found in the Products menu:
Section titled “Your products can be found in the Products menu:”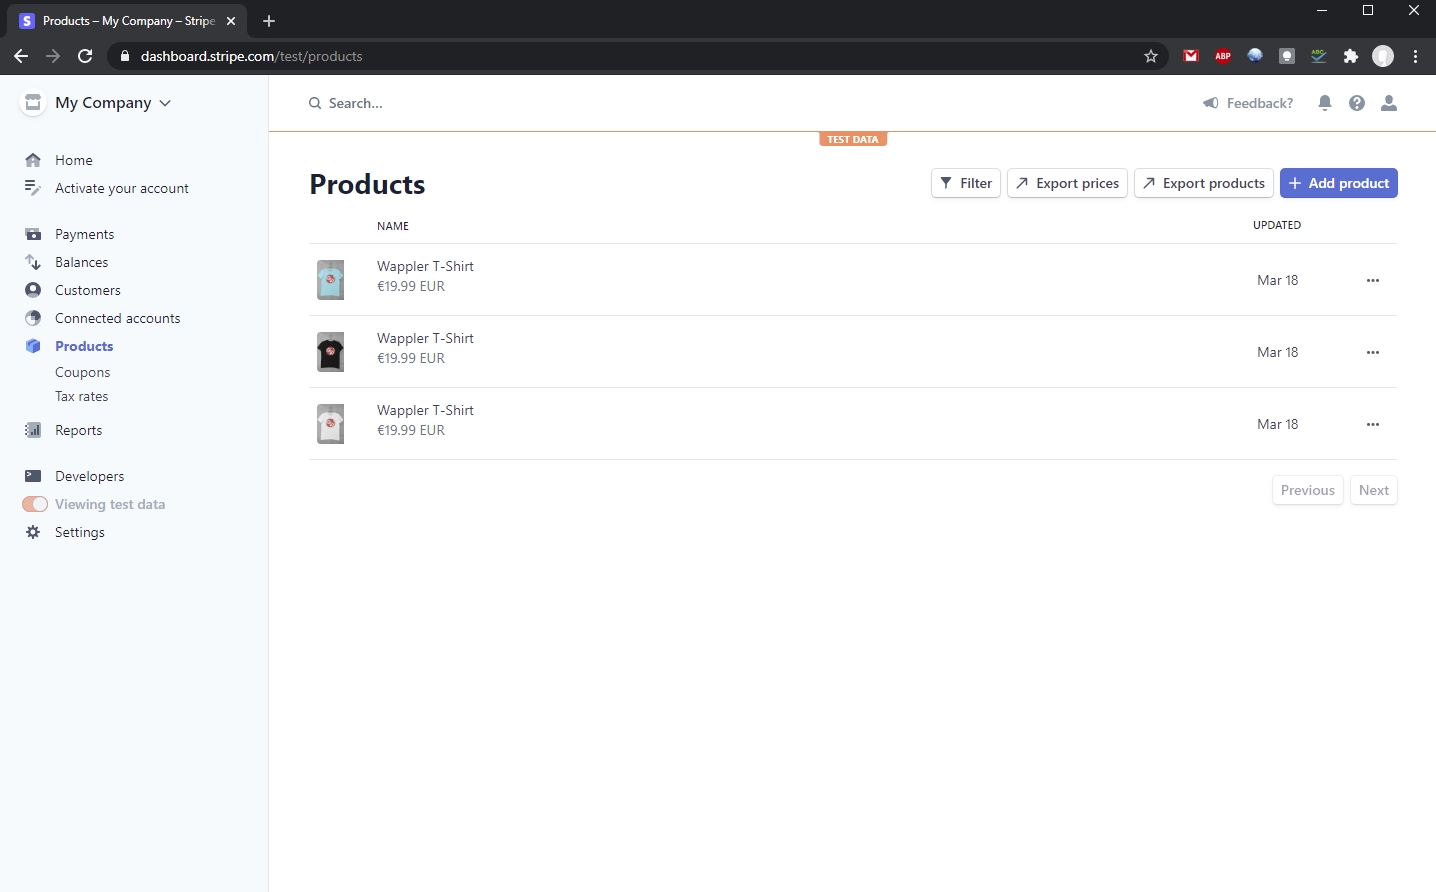
Client-Side Integration
Section titled “Client-Side Integration”With the client-only integration, you define your products directly in the Stripe Dashboard and reference them by ID on the client side. This approach makes it possible to integrate Checkout into your website without any server-side code.
The client-only integration has several limitations:
- Only card payments are supported. Other payment methods are not supported.
- Coupons, Discounts, Promotion codes, and Tax rates are not supported.
- Creating one-time payments with existing Customers is not supported.
- Placing a hold on a card before charging it is not supported.
- One-time and recurring payments in a single transaction is not supported.
Enabling Client-Only Integration
Section titled “Enabling Client-Only Integration”To start using the client-side integration, you need to enable it in the Settings. In Stripe Dashboard, click Settings:
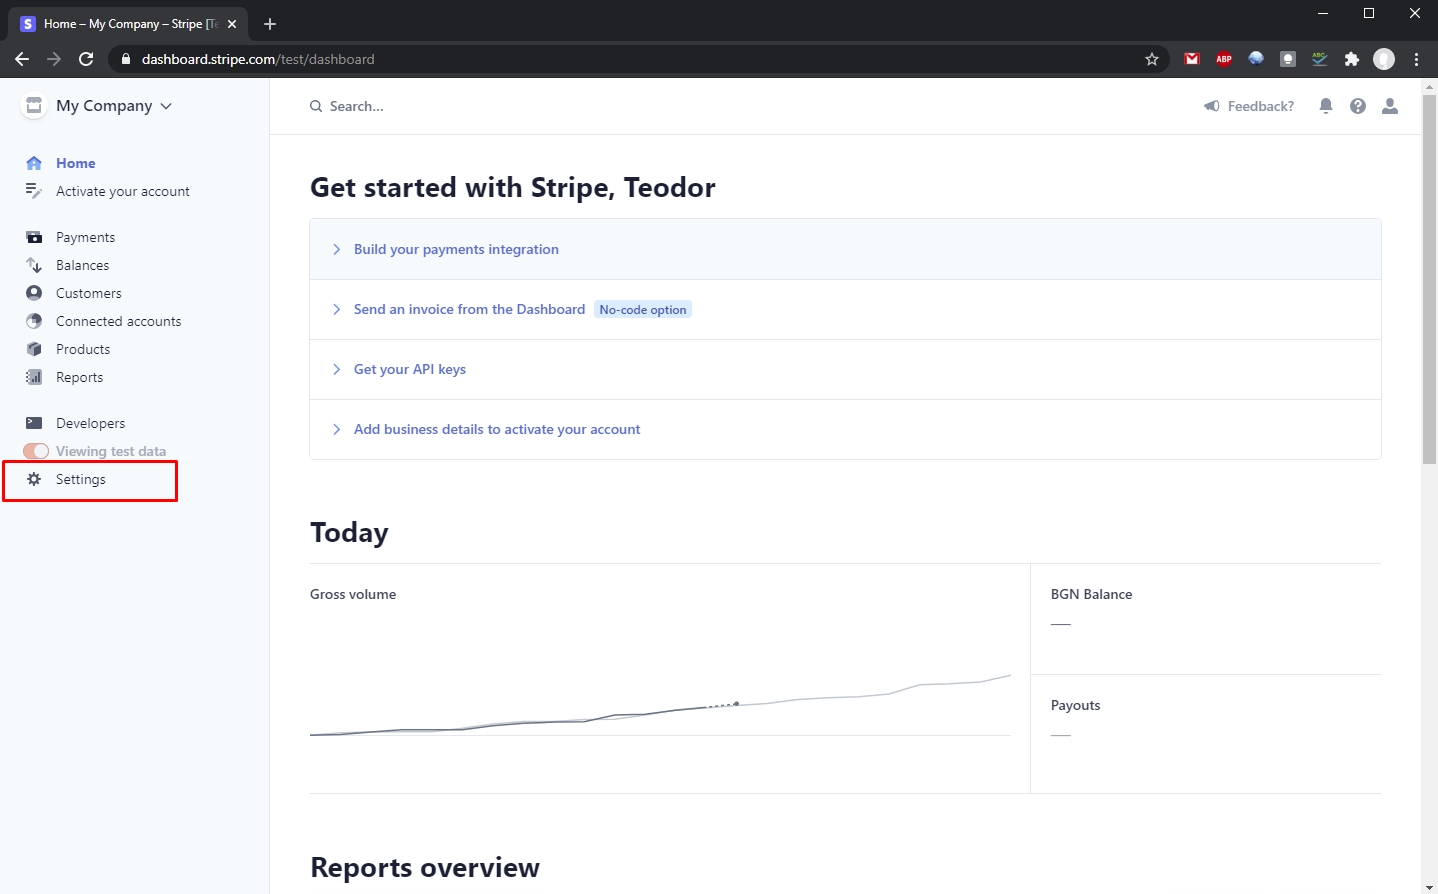
Then click Checkout settings:
Section titled “Then click Checkout settings:”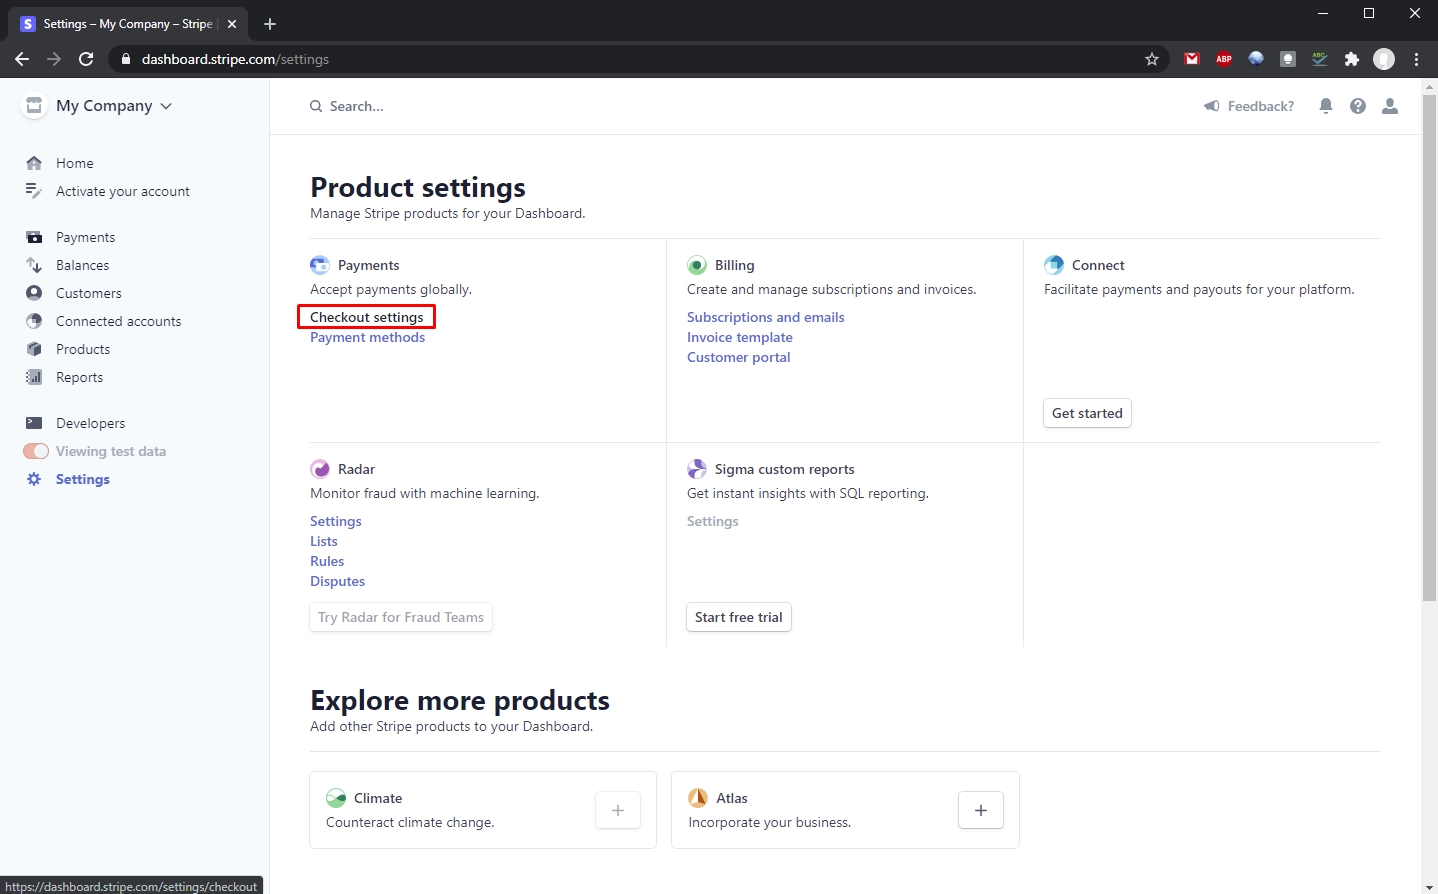
And enable client-only integration:
Section titled “And enable client-only integration:”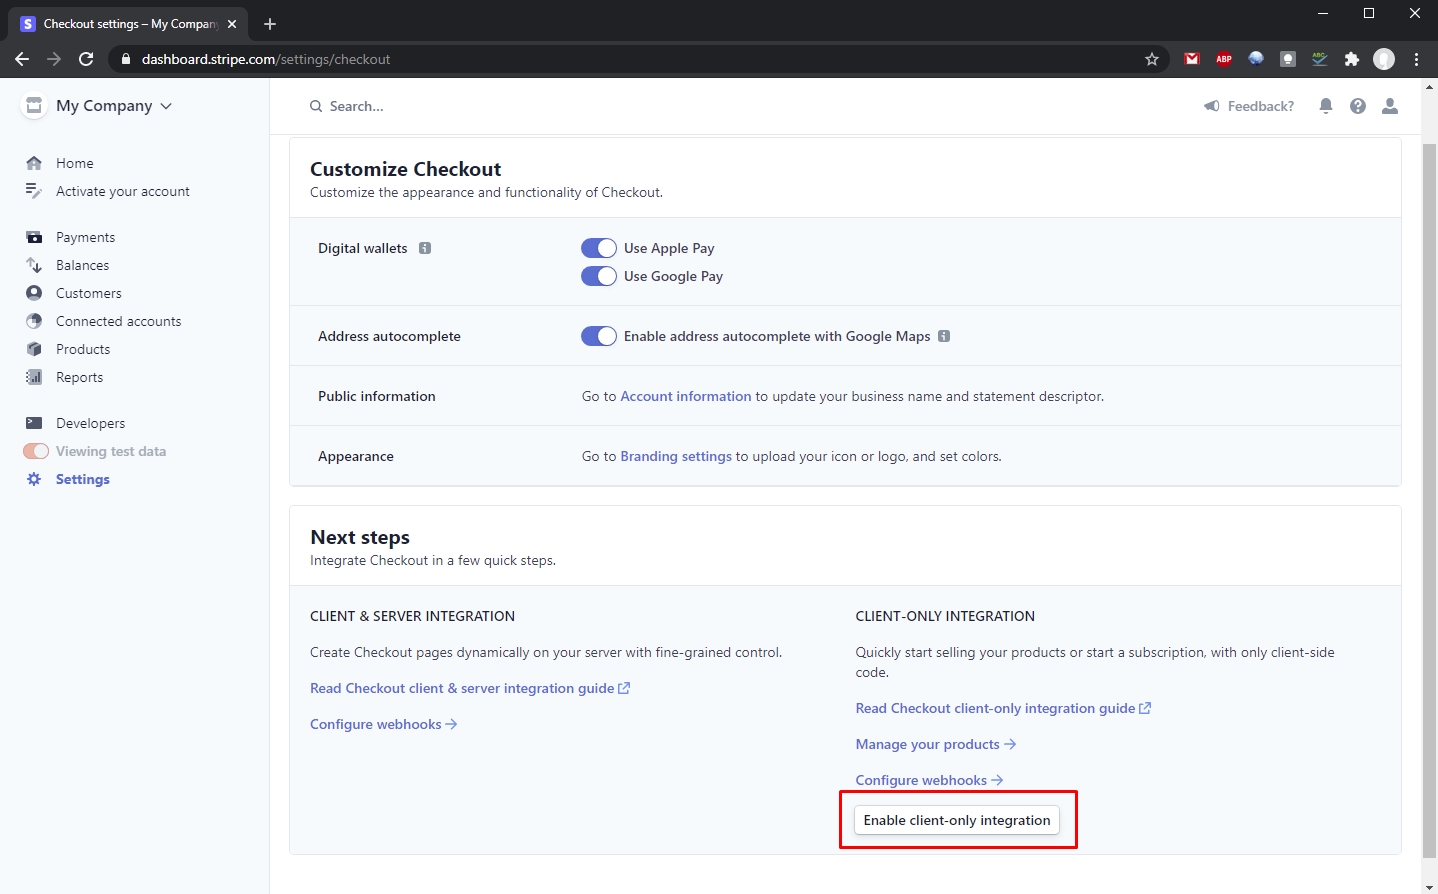
Click the Allow button, to confirm this:
Section titled “Click the Allow button, to confirm this:”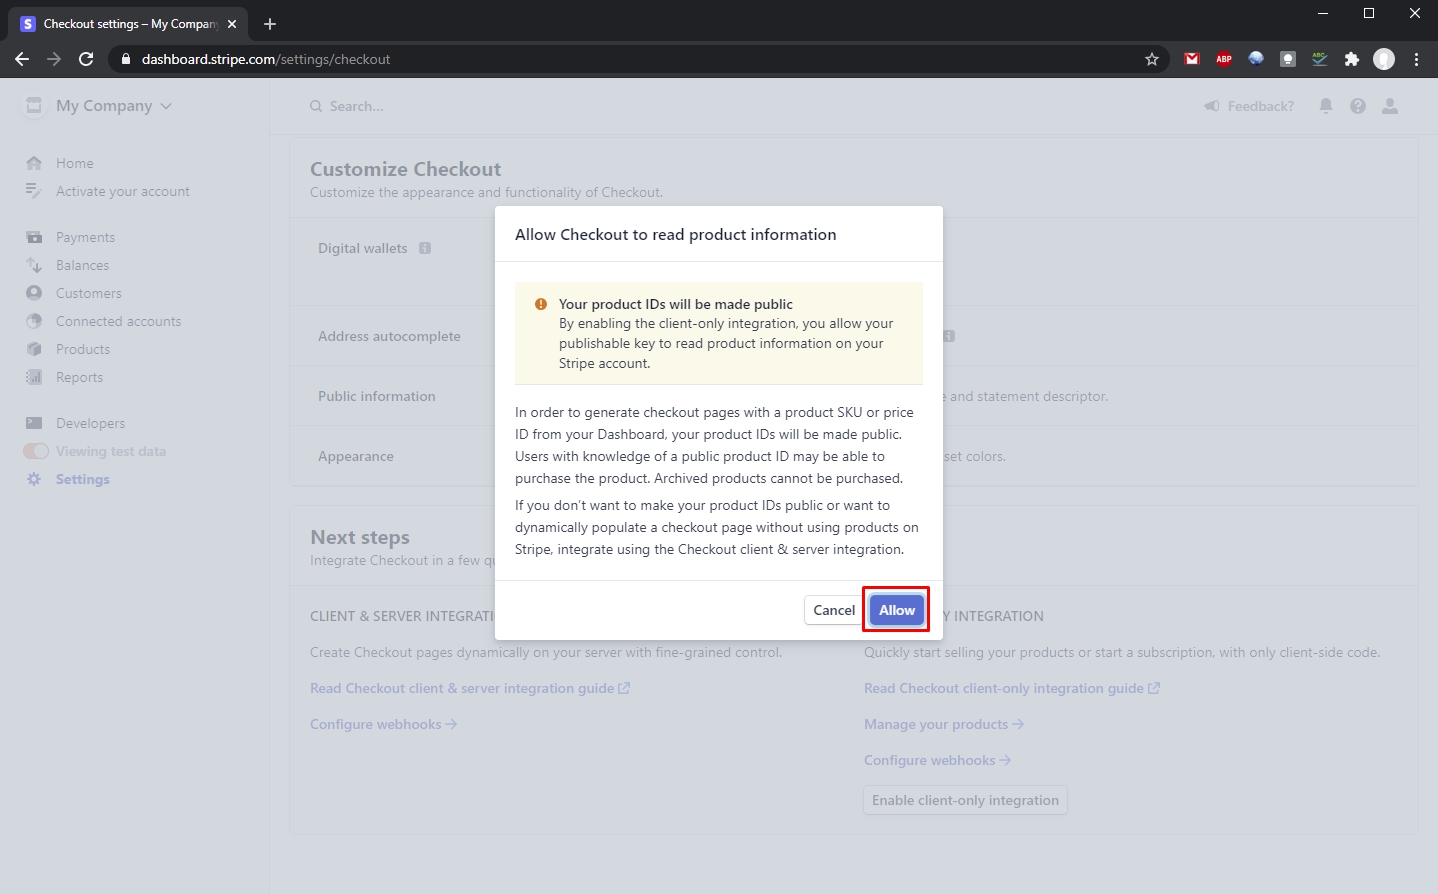
And here you can add your live domains, which you want to be used when in Live Mode:
Section titled “And here you can add your live domains, which you want to be used when in Live Mode:”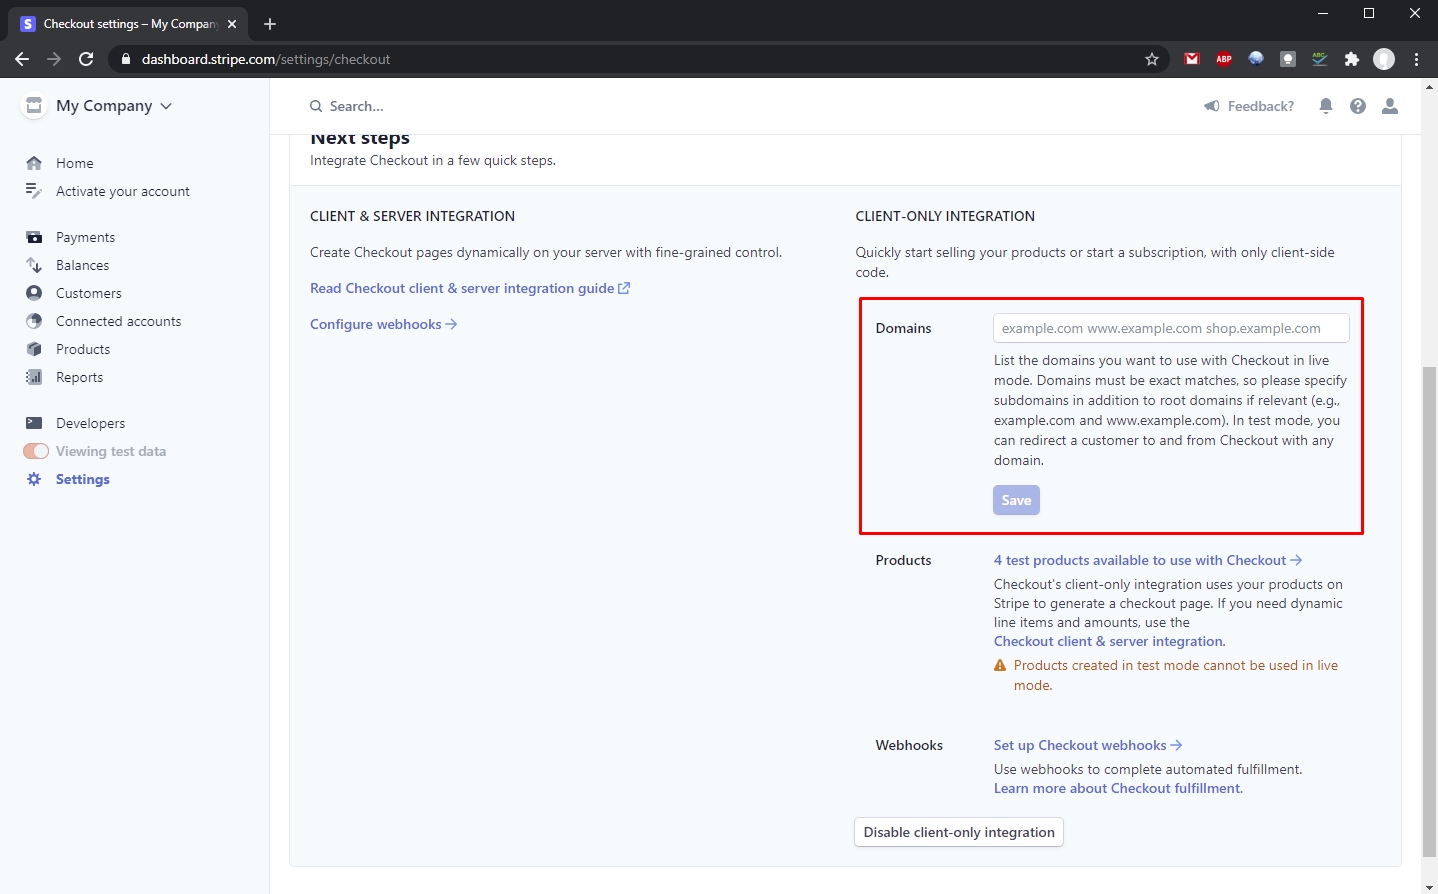
Here you can also customize the look and feel of your checkout page:
Section titled “Here you can also customize the look and feel of your checkout page:”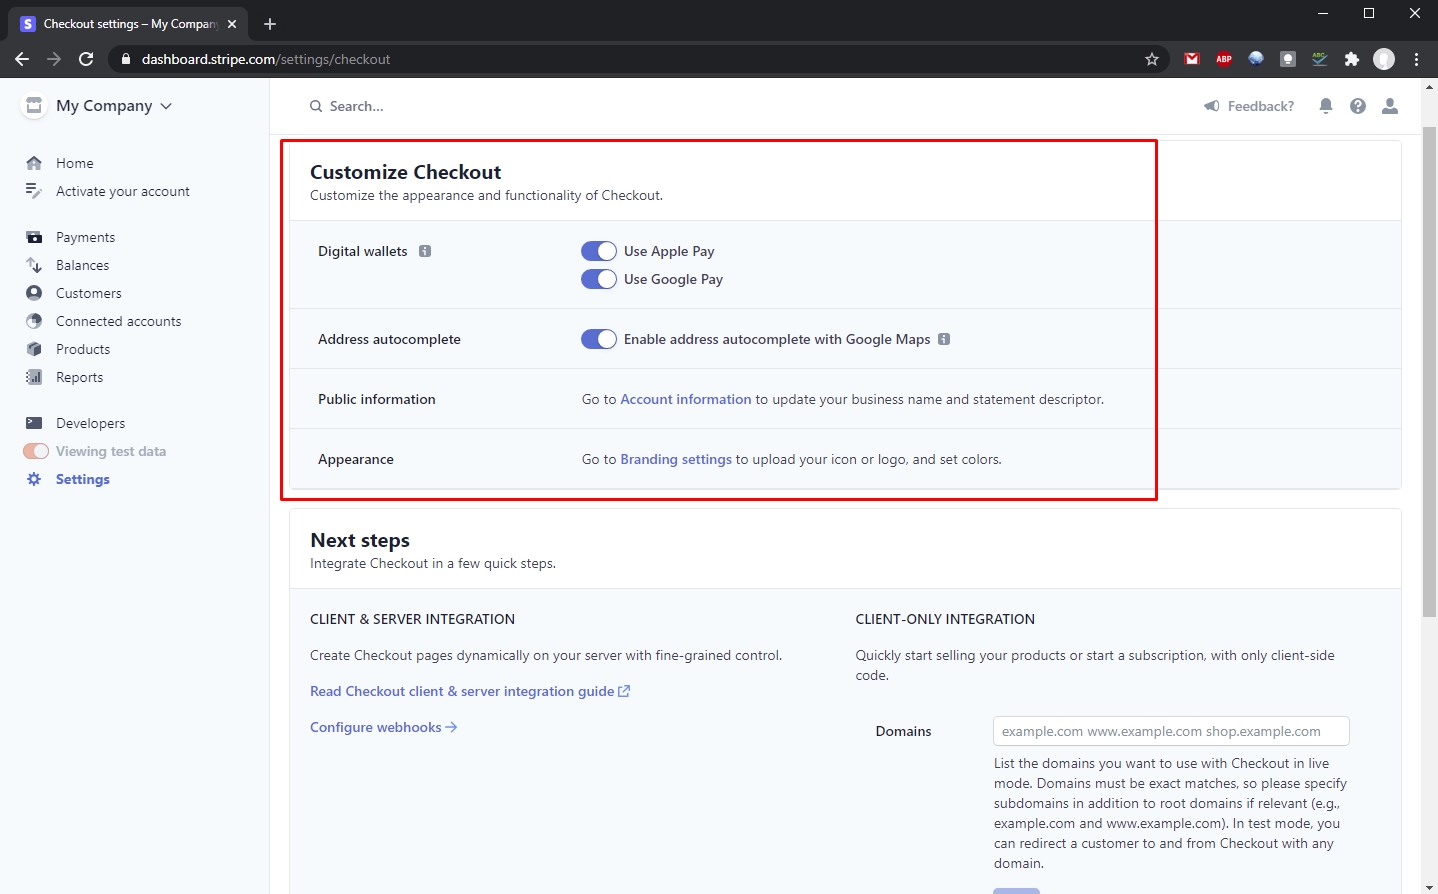
Single Product Purchases
Section titled “Single Product Purchases”The simplest way to sell a product with stripe’s client-only integration is adding a Buy Now button on your page. Useful if you are selling a single item on your site so people just click the Buy Now button to purchase it.
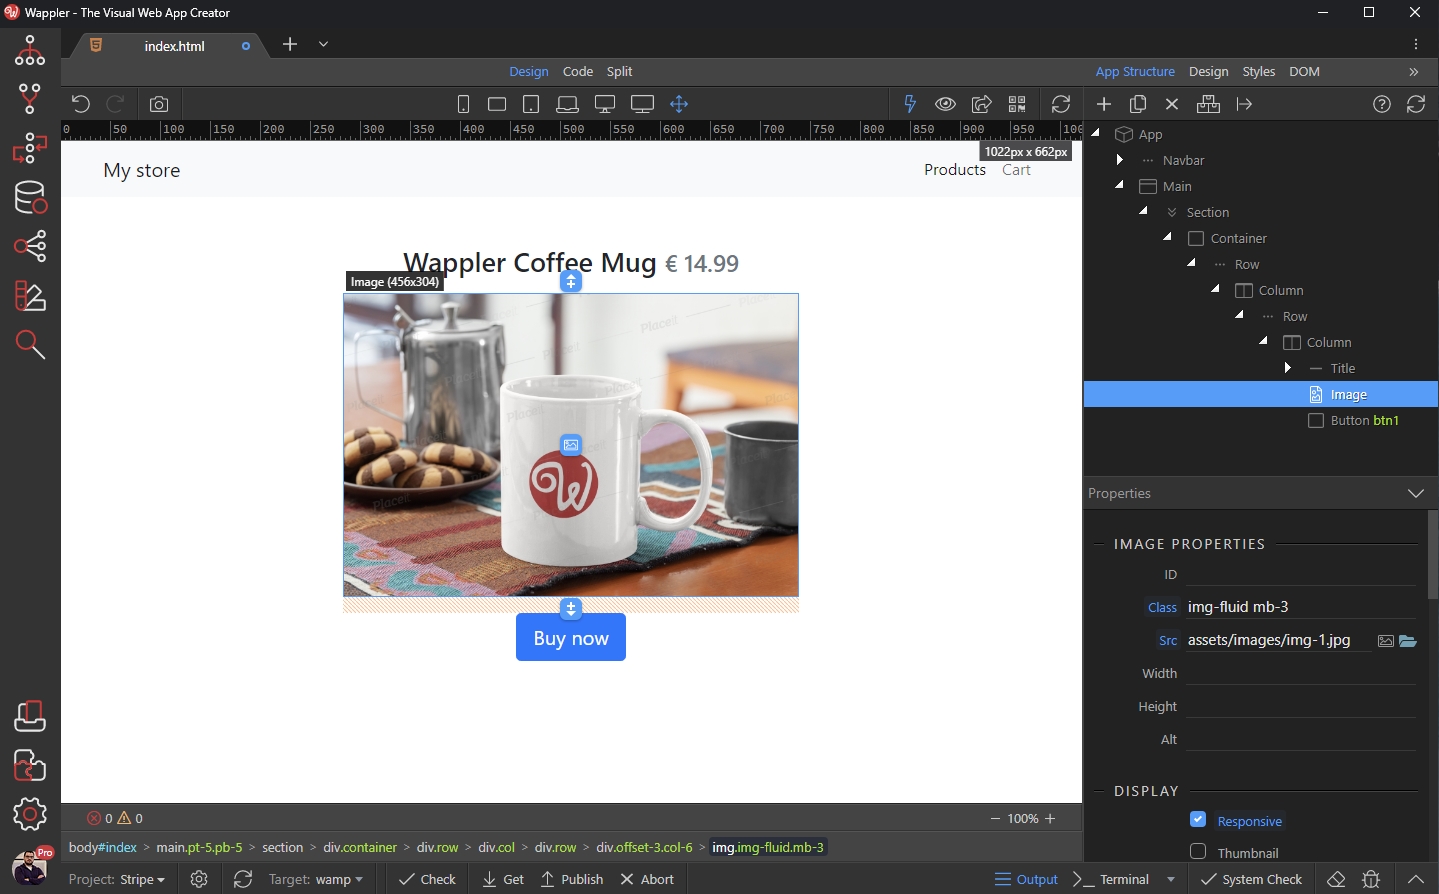
In Wappler, we created a really simple containing an Image, Title and a Button. The content is static, so we added these manually.
We will use the Buy Now button to purchase the product:
Add new component in App Structure:
Section titled “Add new component in App Structure:”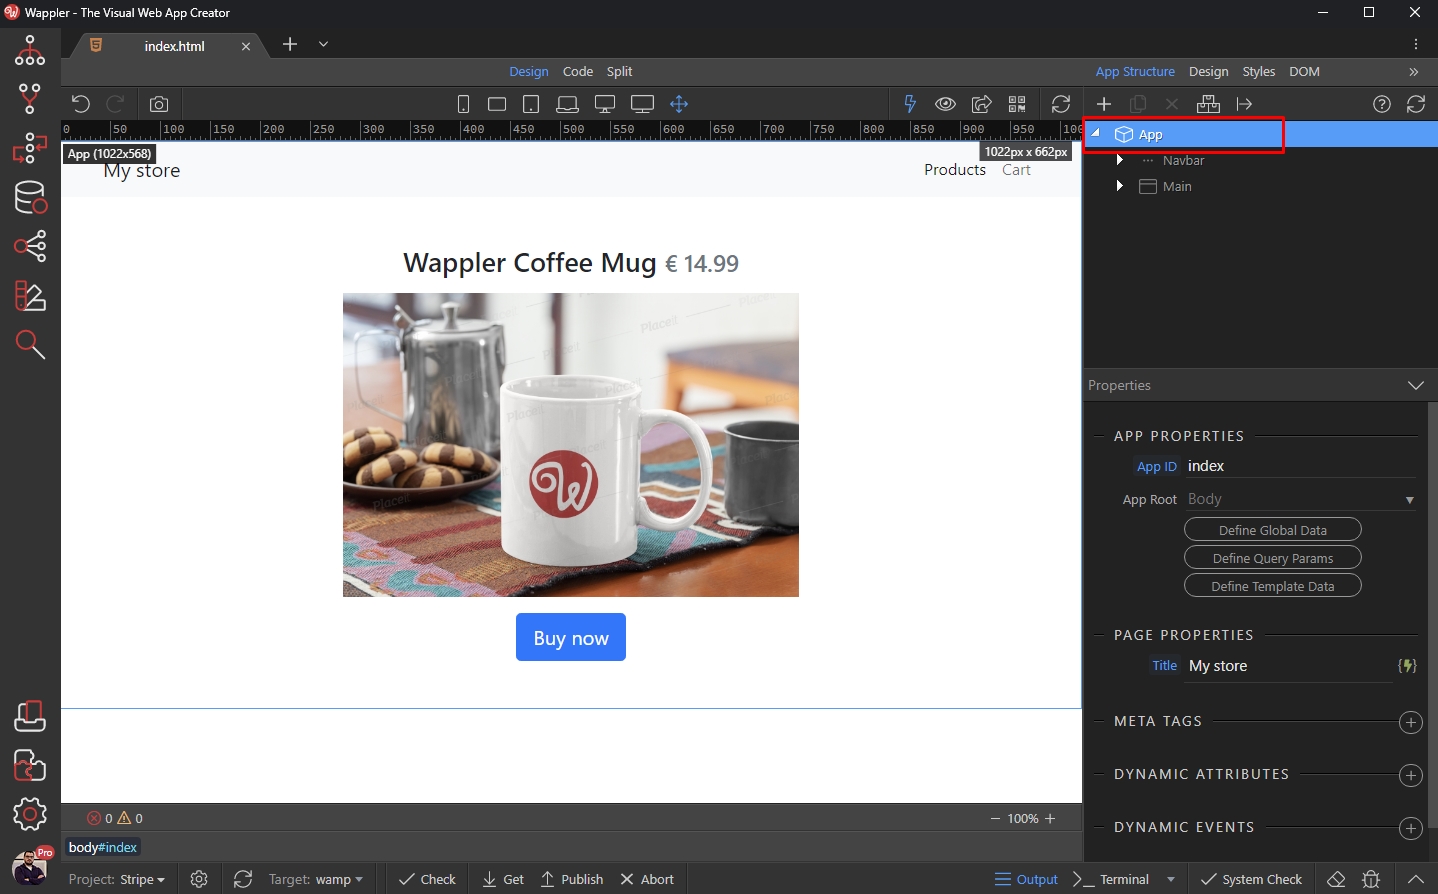
Open the Stripe category and select Stripe:
Section titled “Open the Stripe category and select Stripe:”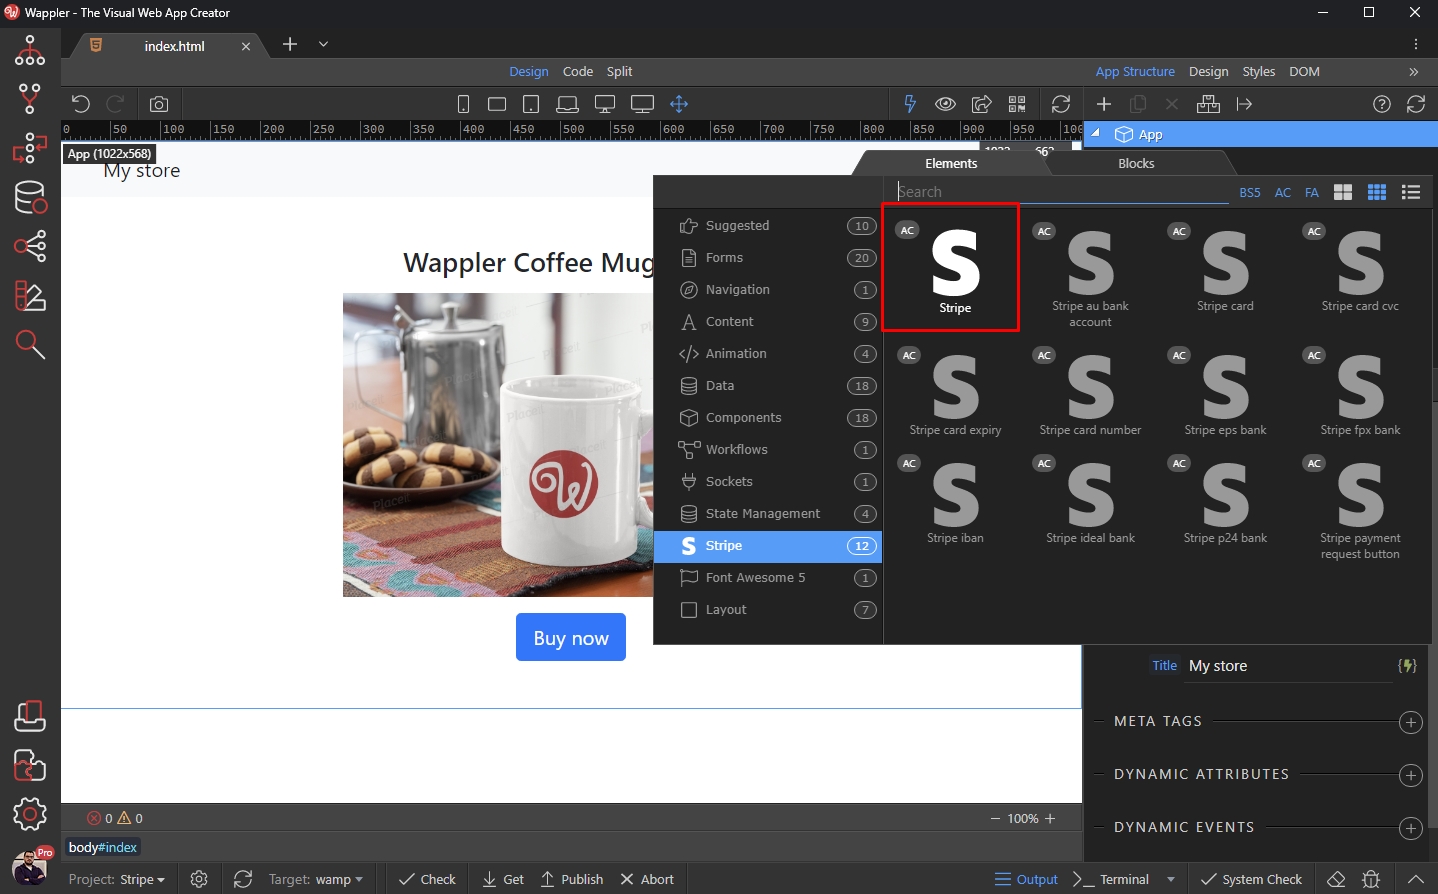
First you need to add your API key. It can be found on https://dashboard.stripe.com/apikeys
Section titled “First you need to add your API key. It can be found on https://dashboard.stripe.com/apikeys”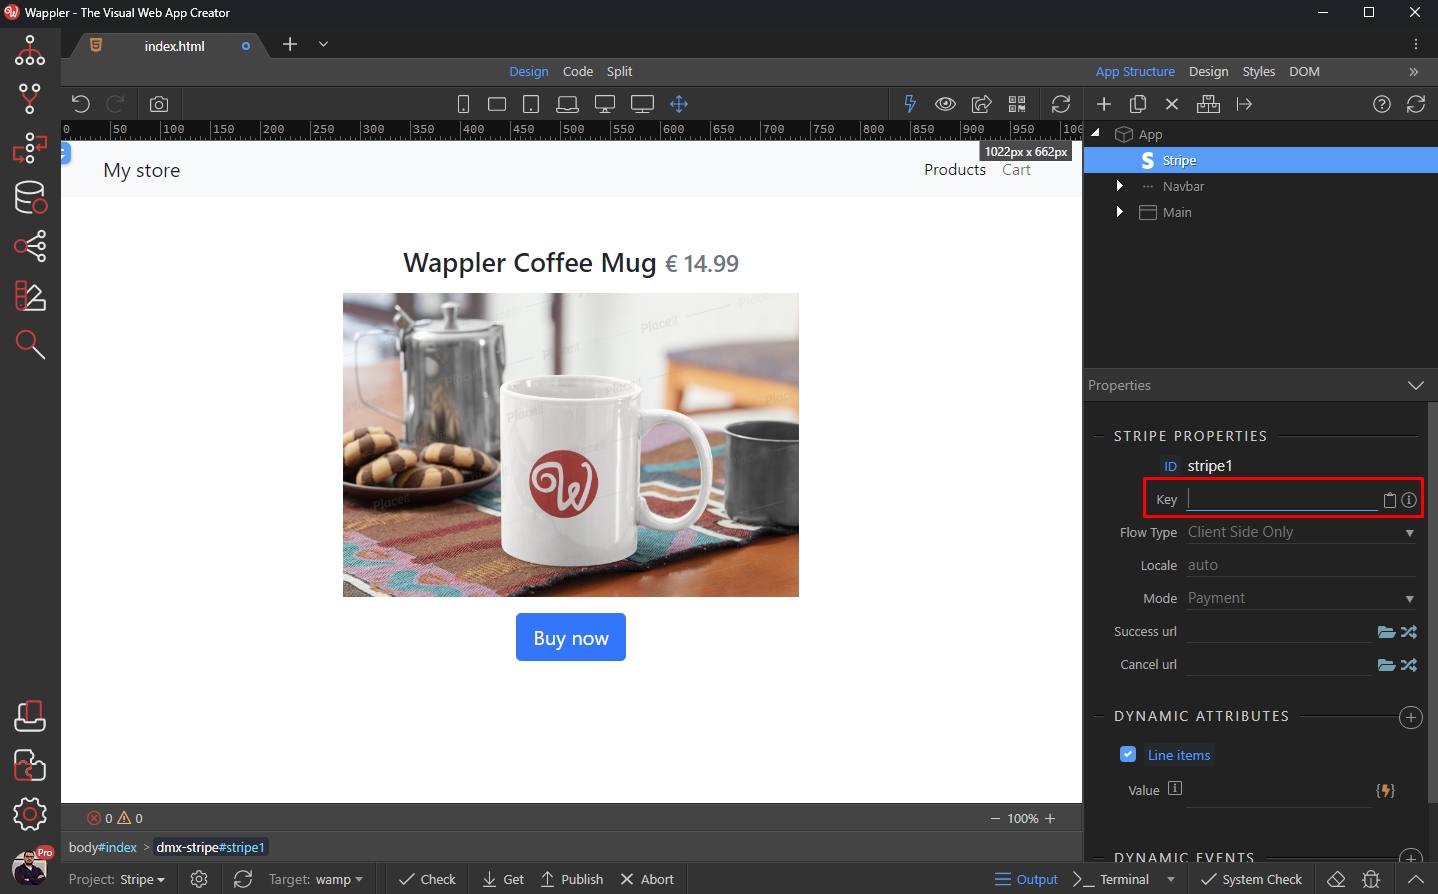
You need to copy the Publishable key, and paste it in the Key field:
Section titled “You need to copy the Publishable key, and paste it in the Key field:”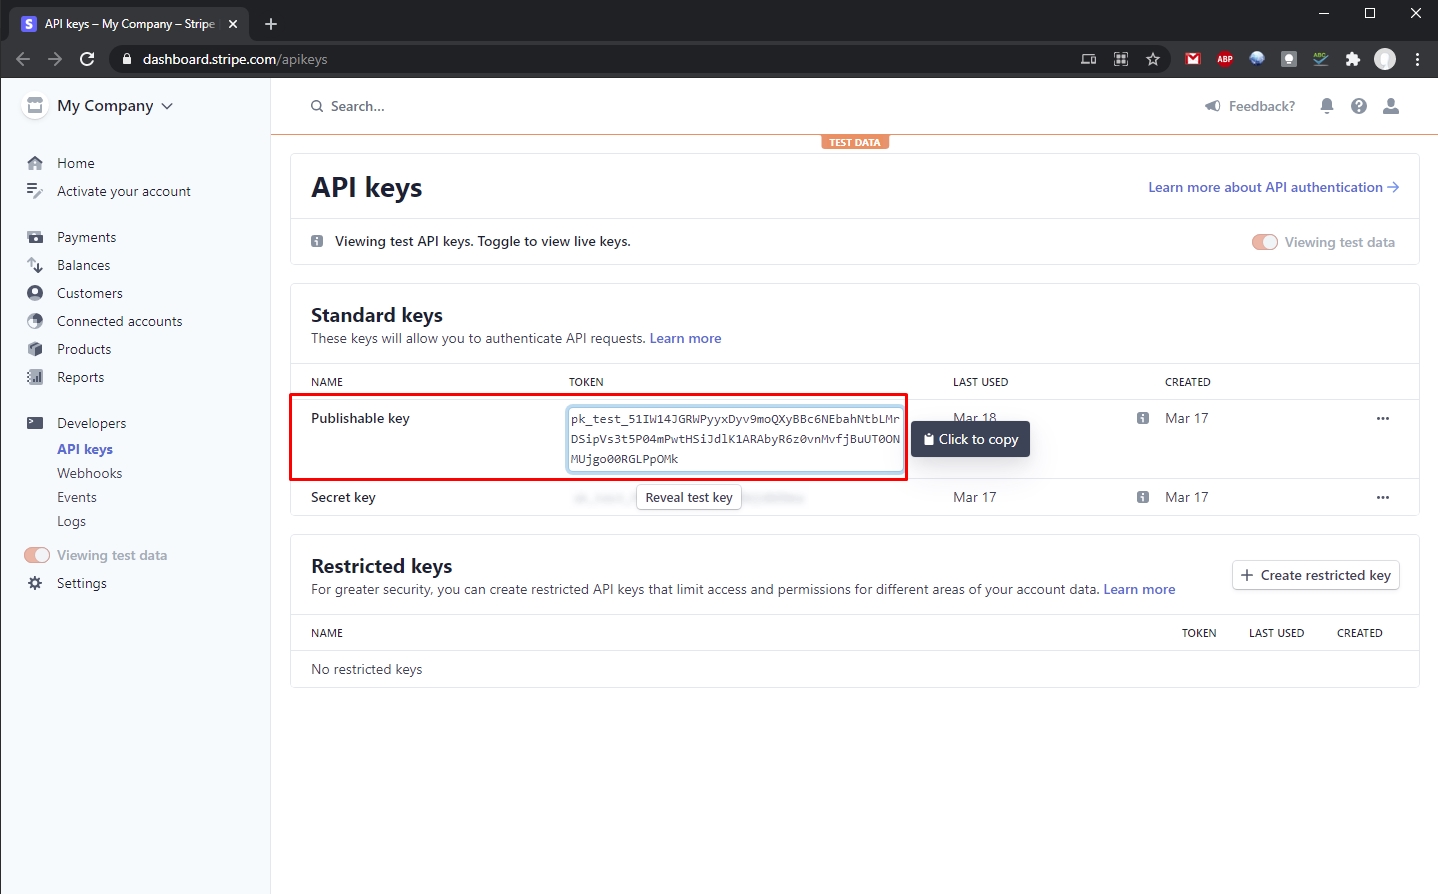
Then select the Flow Type - in this case we need Client Side Only:
Section titled “Then select the Flow Type - in this case we need Client Side Only:”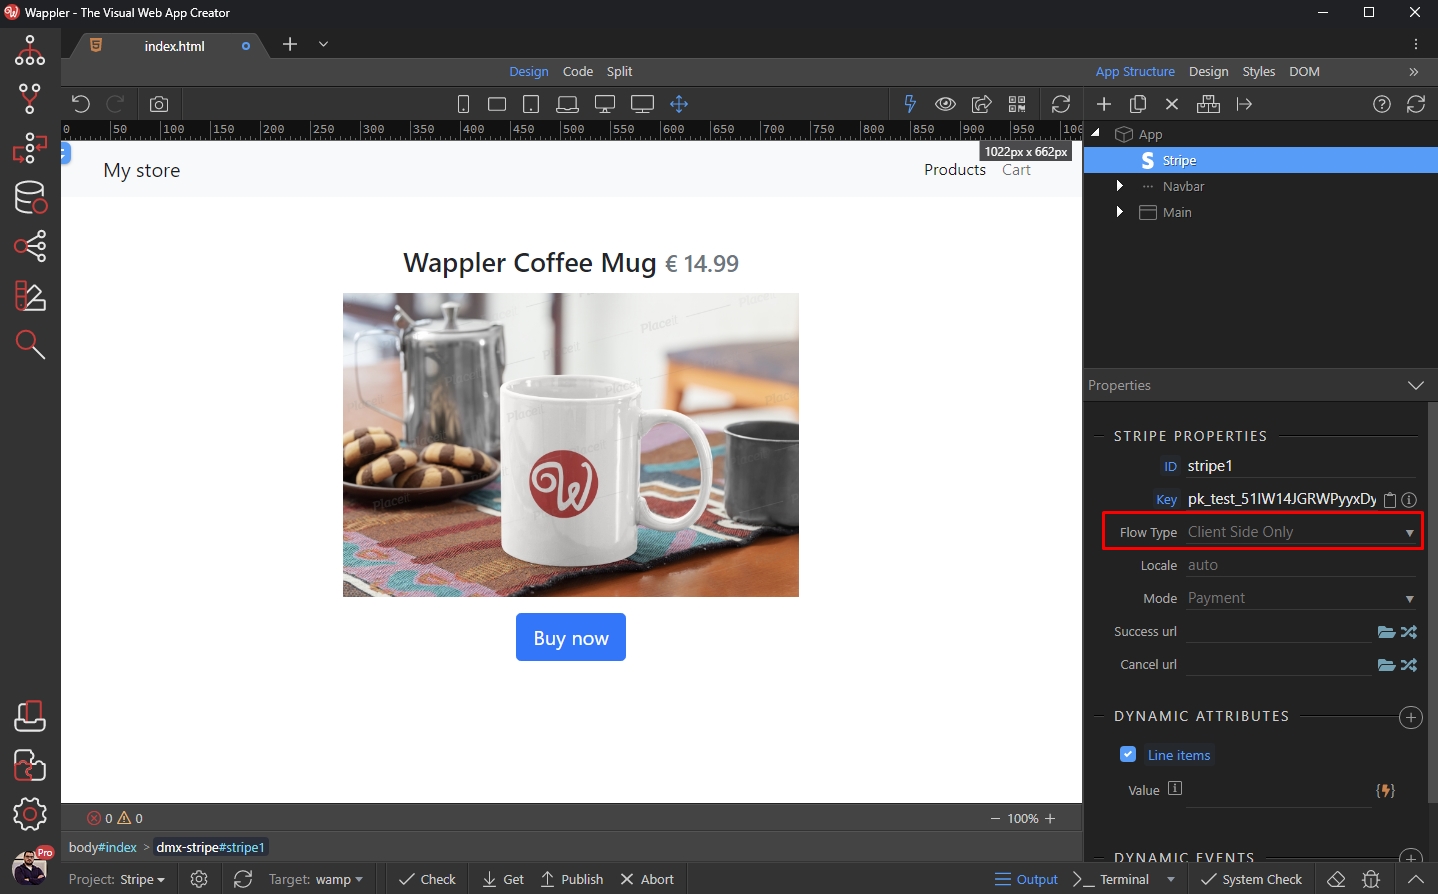
Set the Mode to Payment:
Section titled “Set the Mode to Payment:”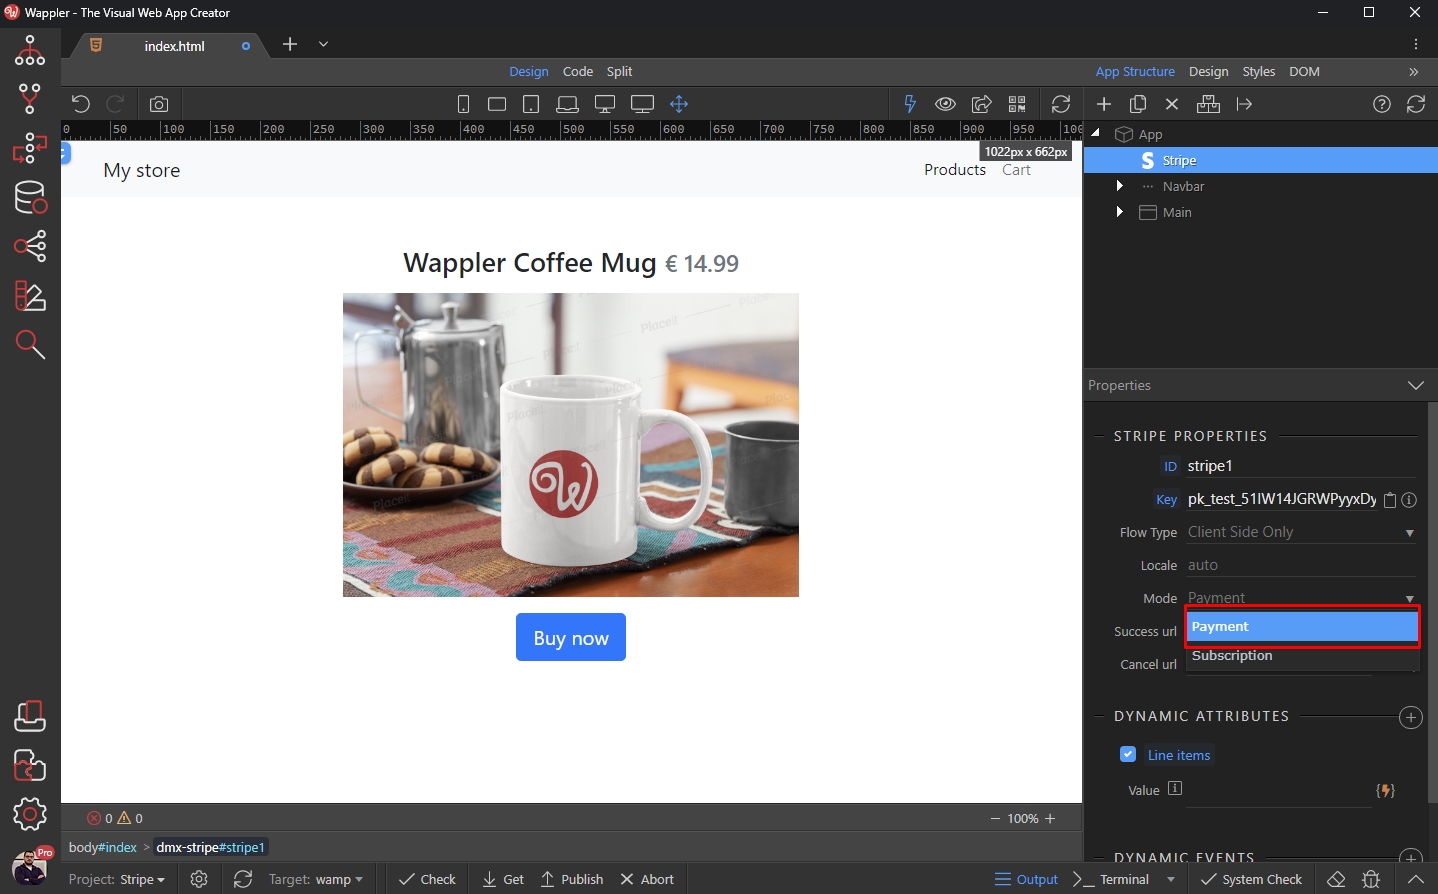
And select two pages for success and cancel order URLs:
Section titled “And select two pages for success and cancel order URLs:”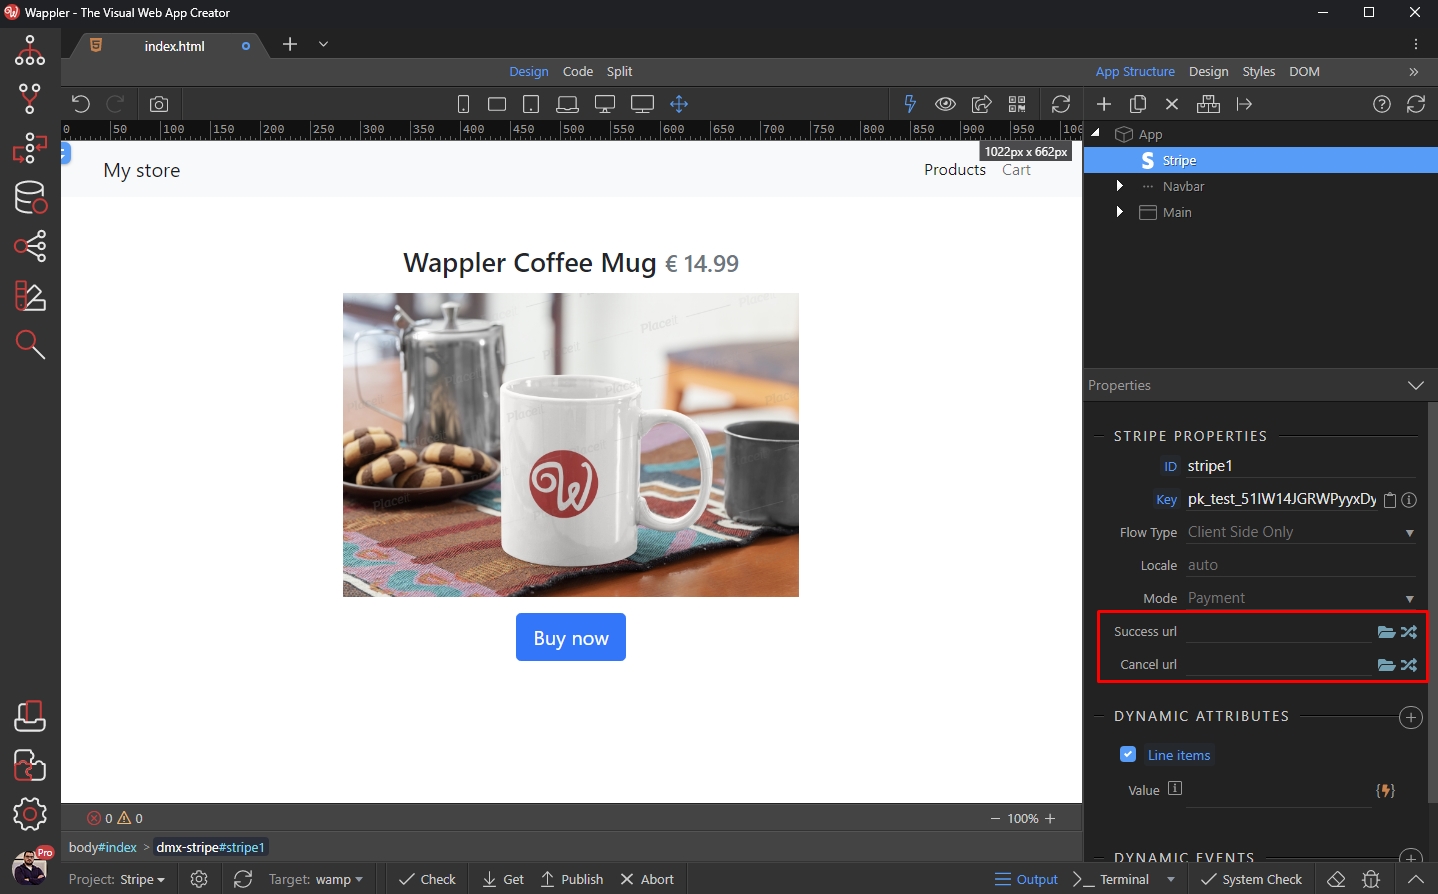
Step 39
Section titled “Step 39”These are the URL where the users will be redirected after a successful payment or if they cancel the order during the checkout. Both are simple pages in our site:
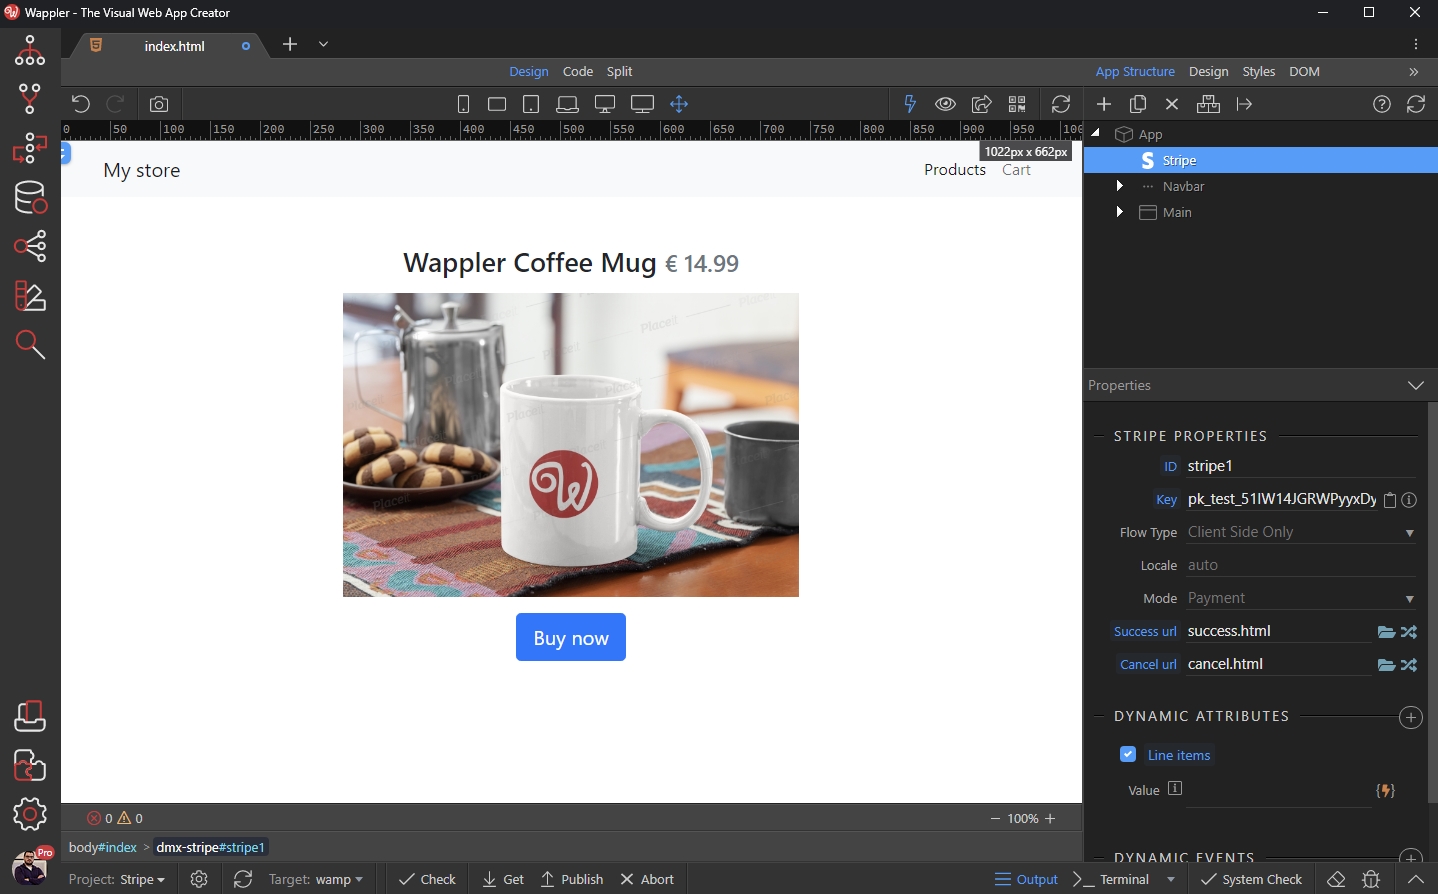
Step 40
Section titled “Step 40”The next thing we need to do is to pass the product price ID to the checkout. We need to enter the price ID in the Line Items field:
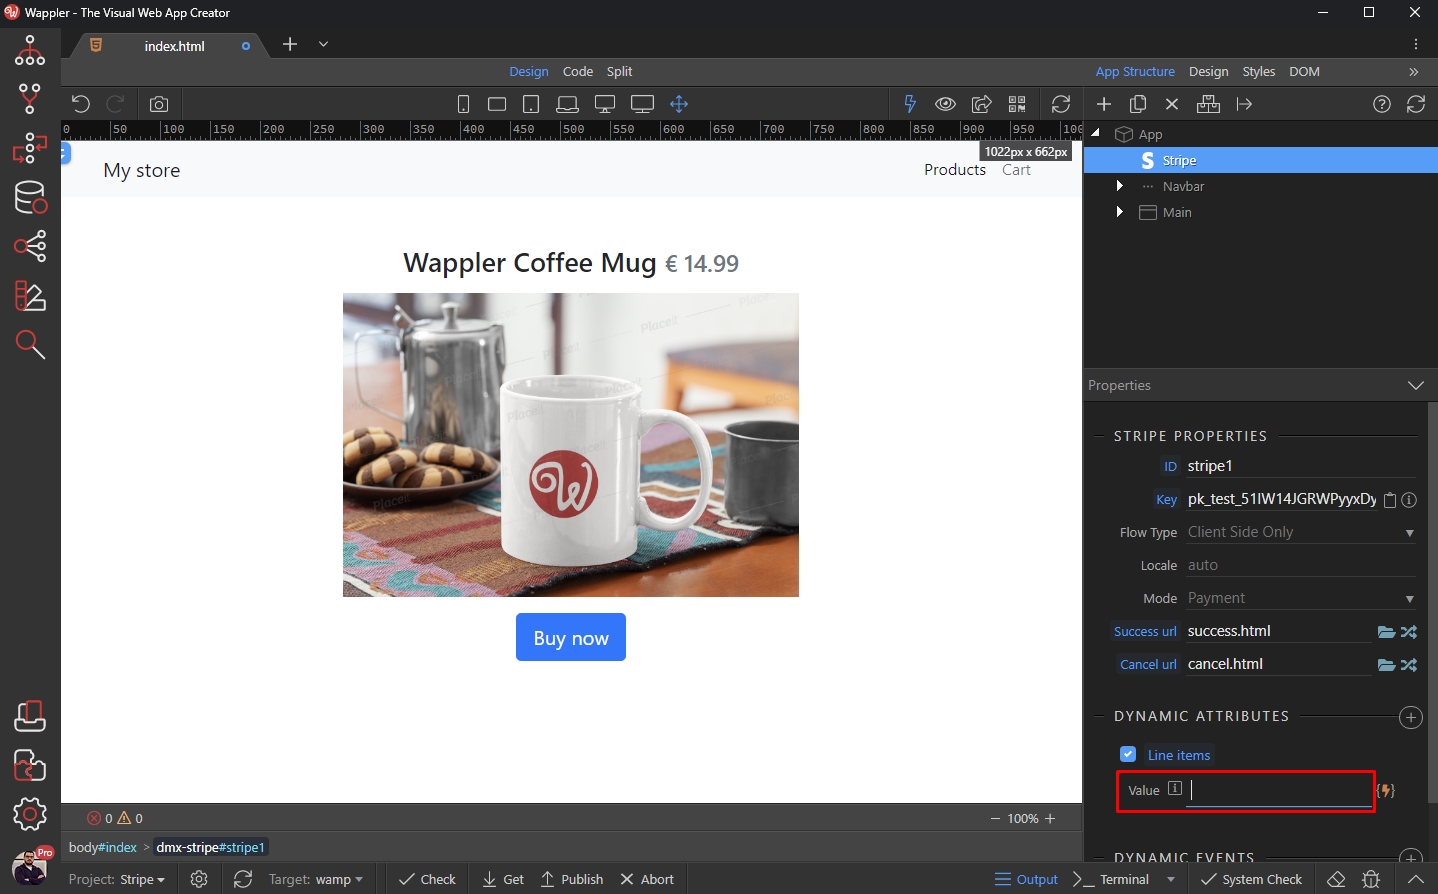
Open Stripe Dashboard and load your products. Select the one you want to sell on the page:
Section titled “Open Stripe Dashboard and load your products. Select the one you want to sell on the page:”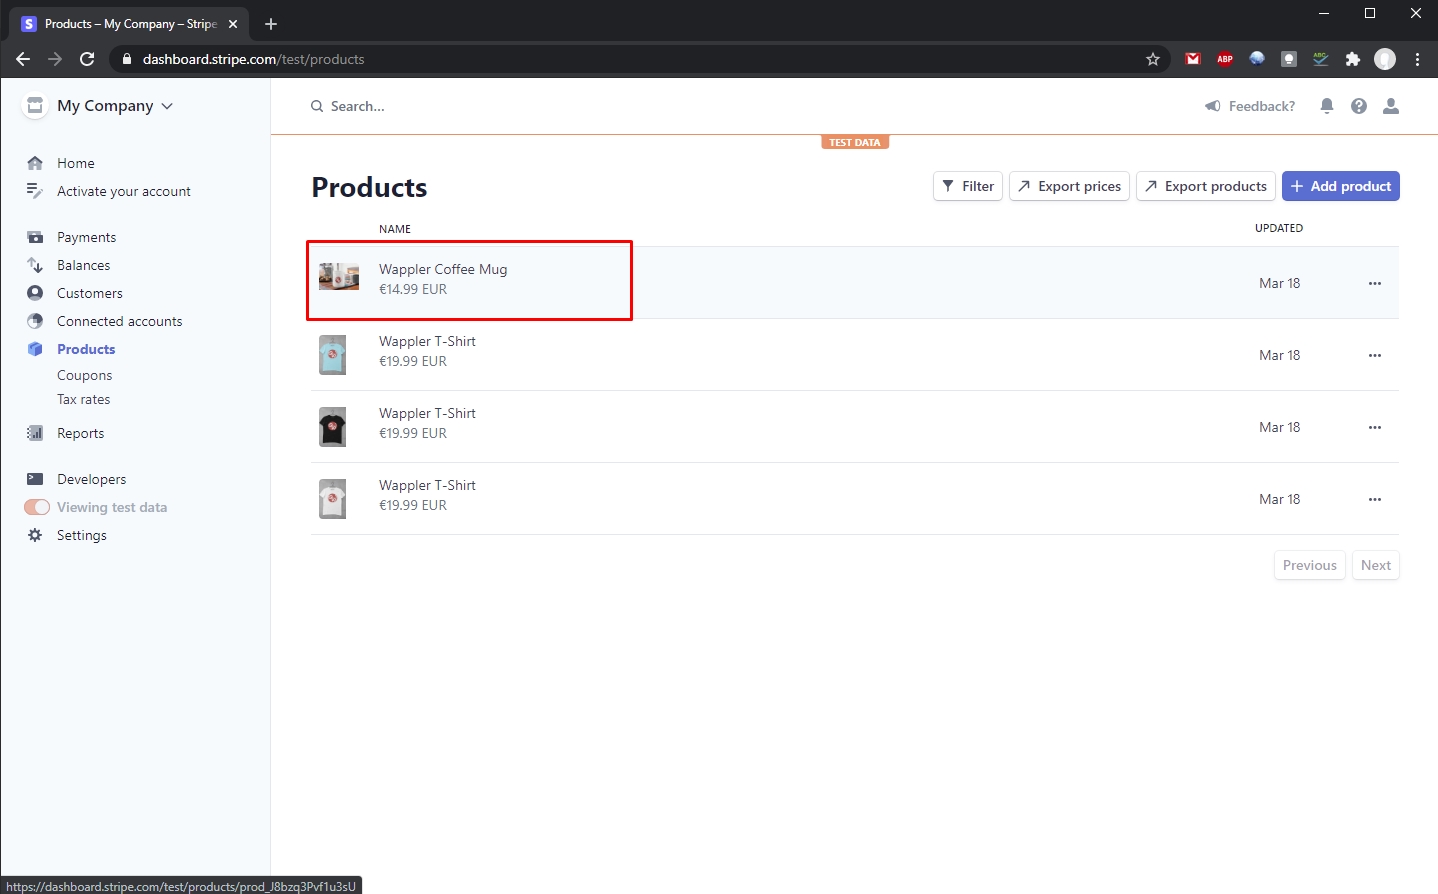
Scroll down to the product price and copy the price ID to your clipboard:
Section titled “Scroll down to the product price and copy the price ID to your clipboard:”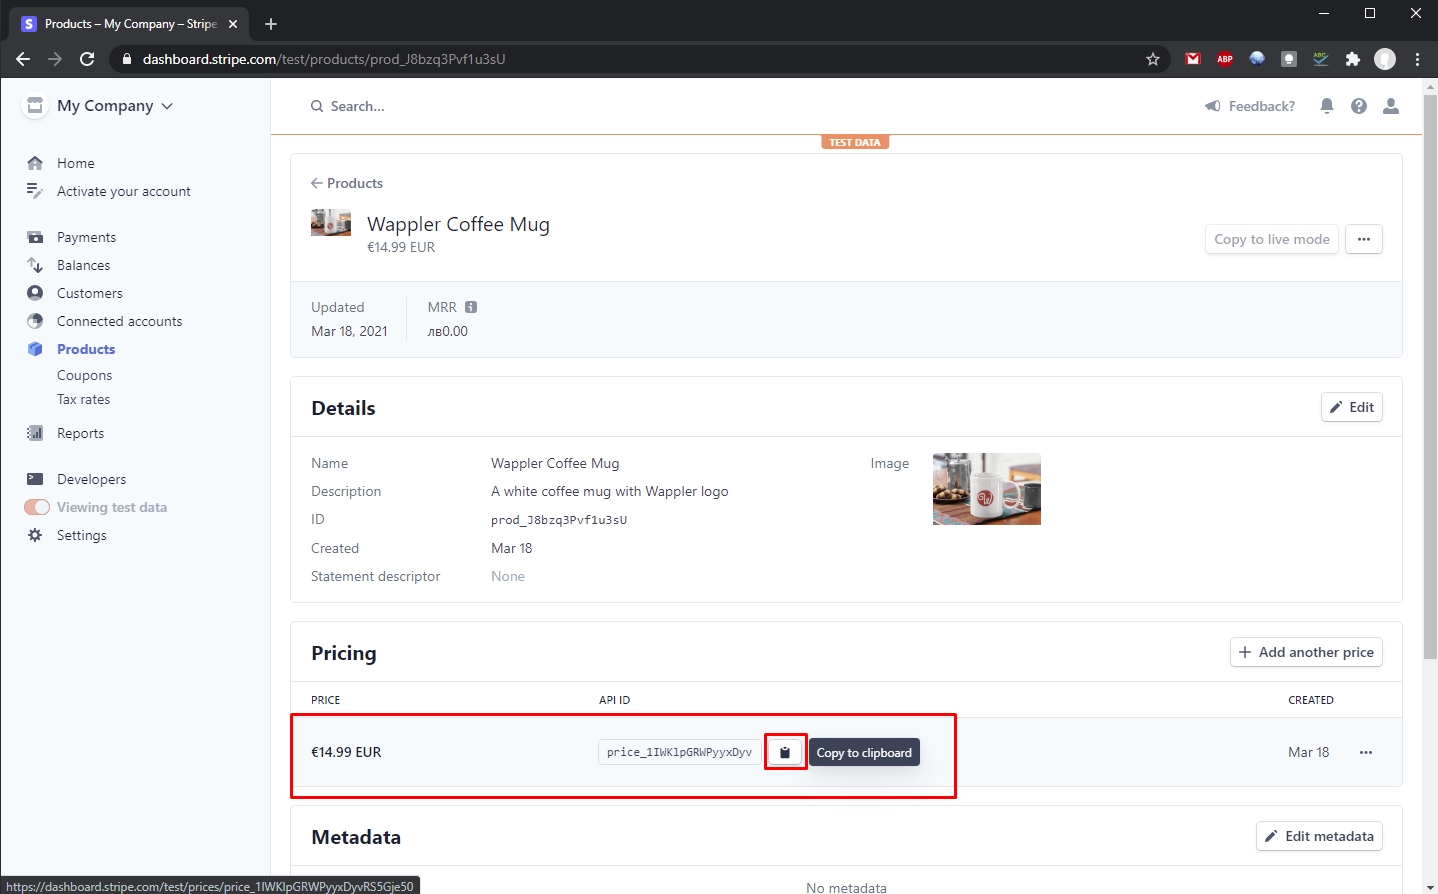
Then paste it in the Line Items field:
Section titled “Then paste it in the Line Items field:”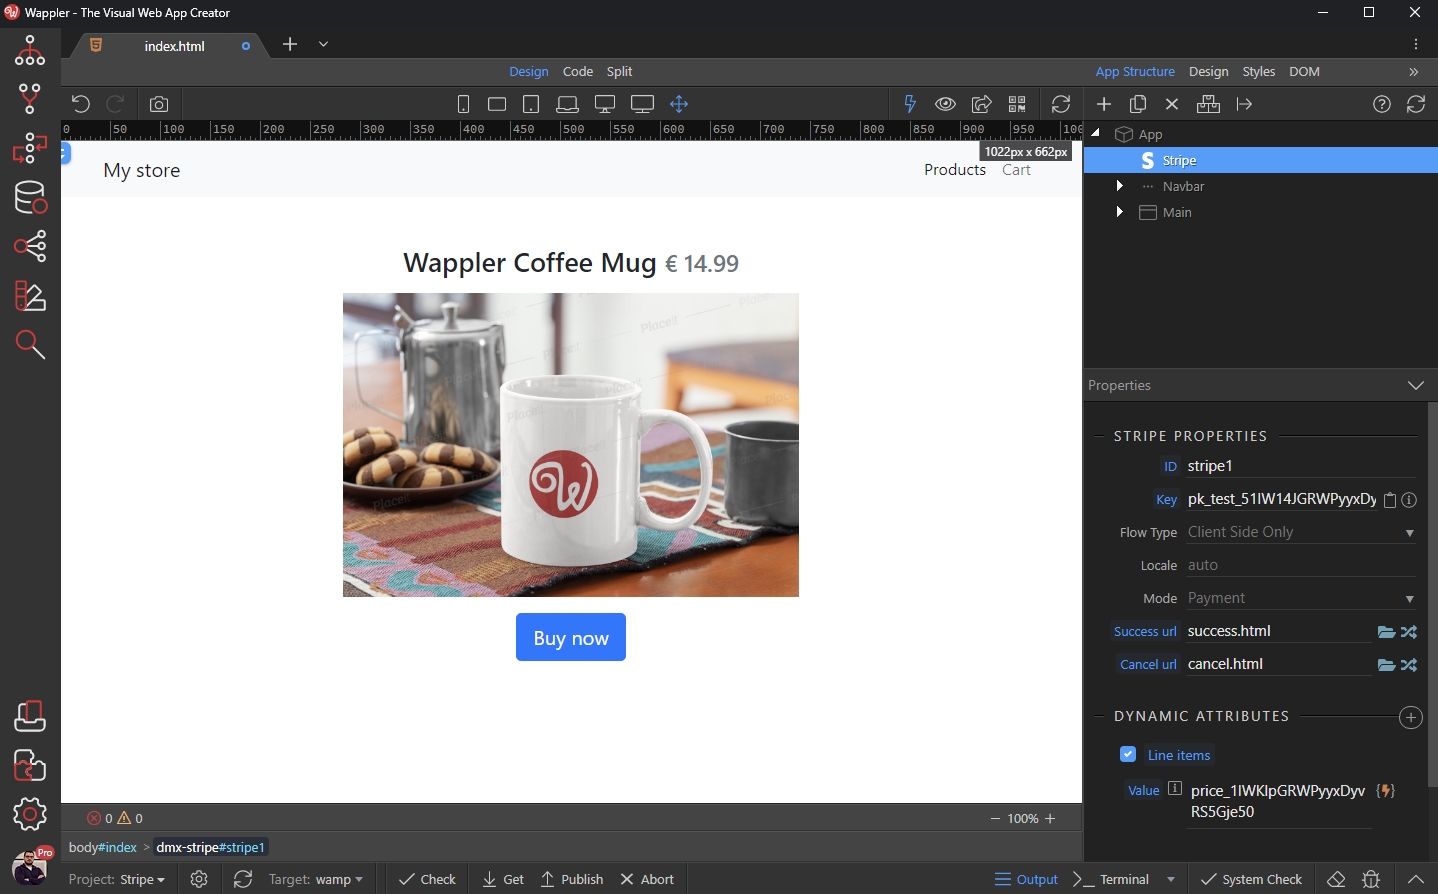
We are done setting up the Stripe Component. Let’s make the Buy Now button functional now. Select the button:
Section titled “We are done setting up the Stripe Component. Let’s make the Buy Now button functional now. Select the button:”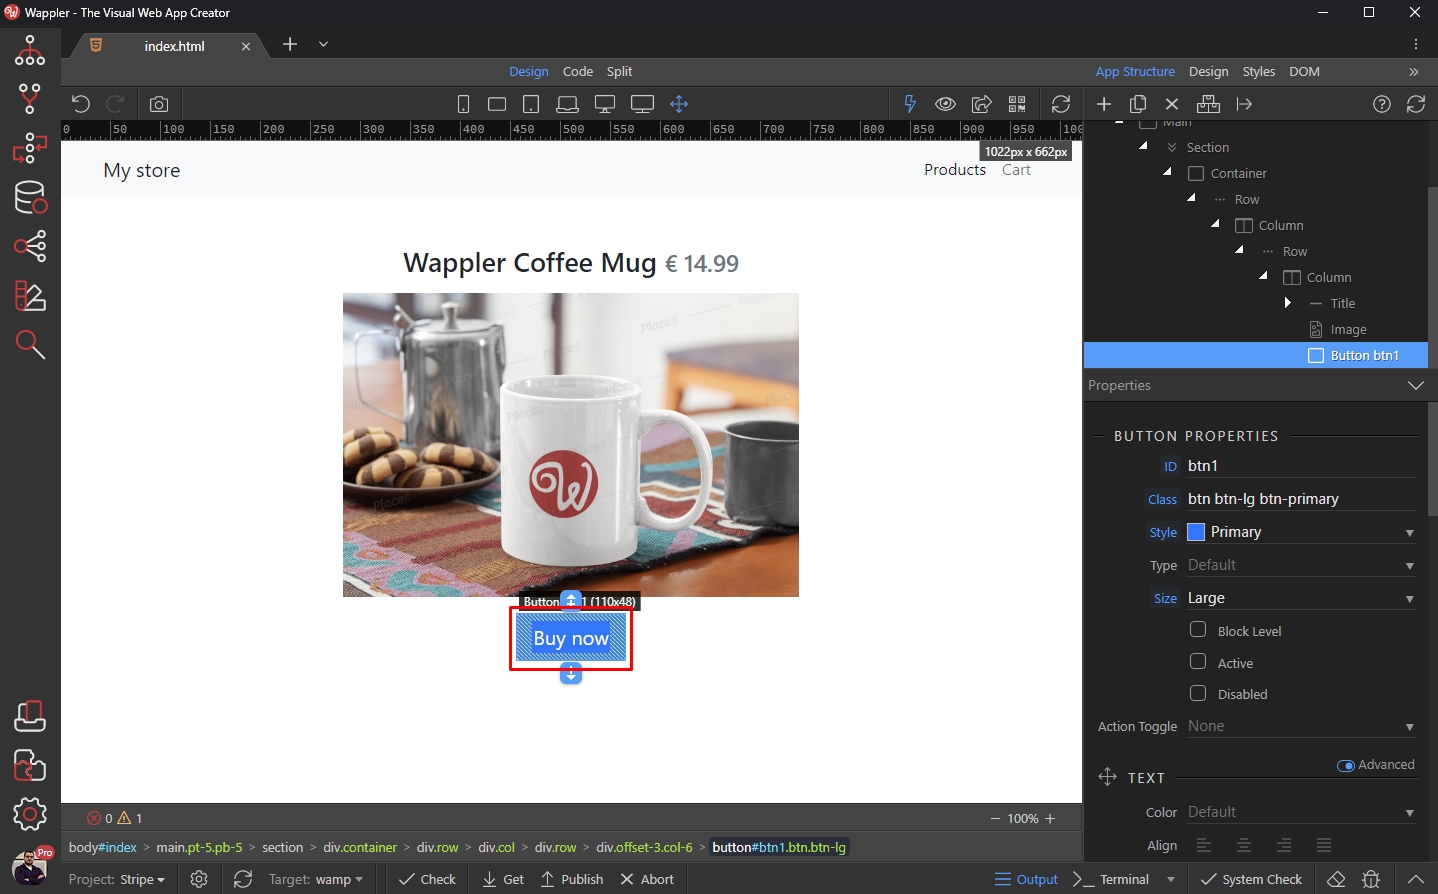
Add new Dynamic Event:
Section titled “Add new Dynamic Event:”
Select Mouse > Click:
Section titled “Select Mouse > Click:”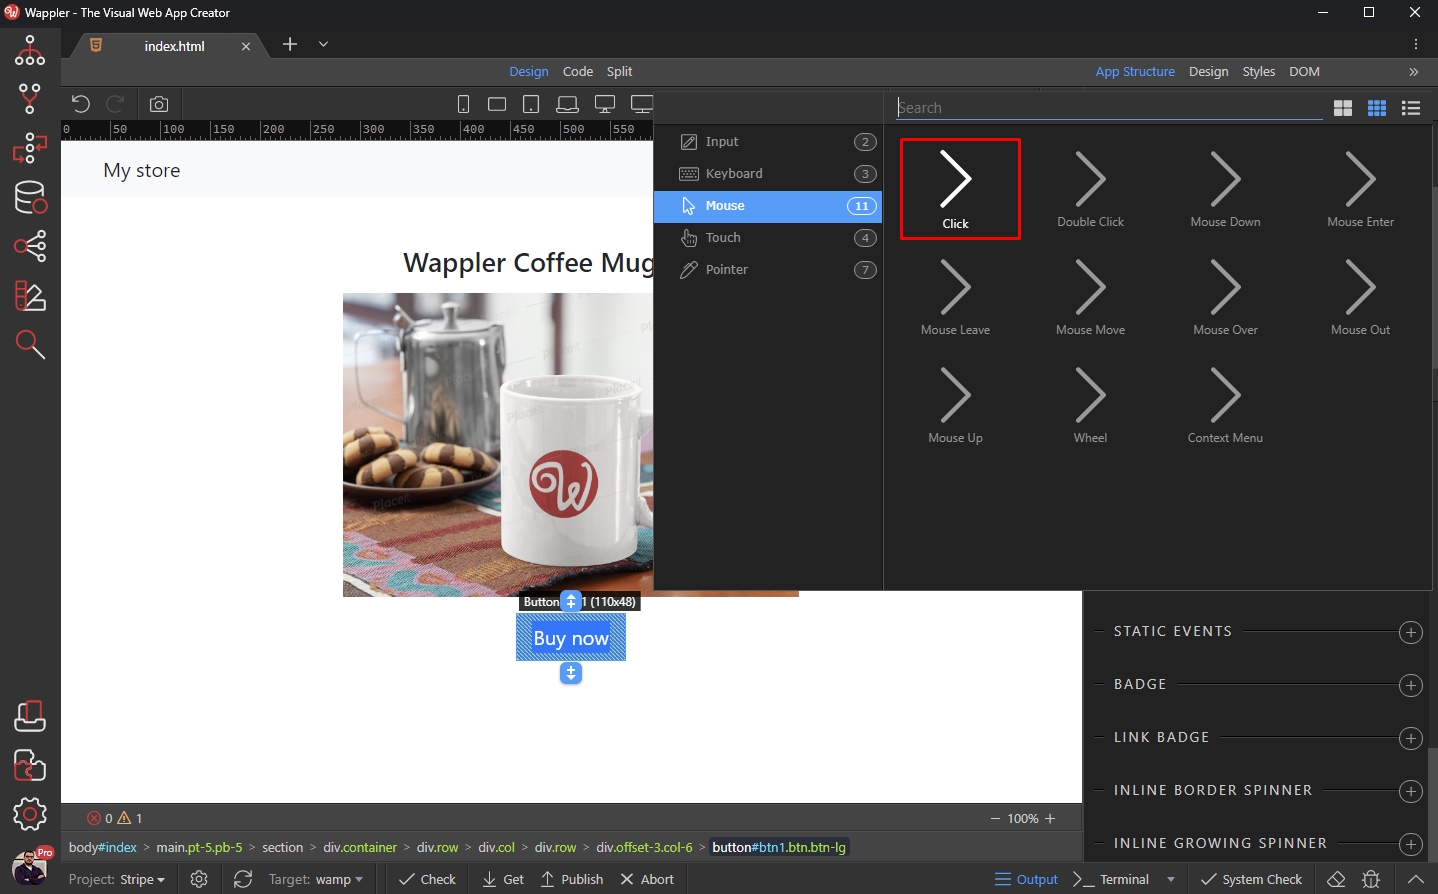
And select a dynamic action:
Section titled “And select a dynamic action:”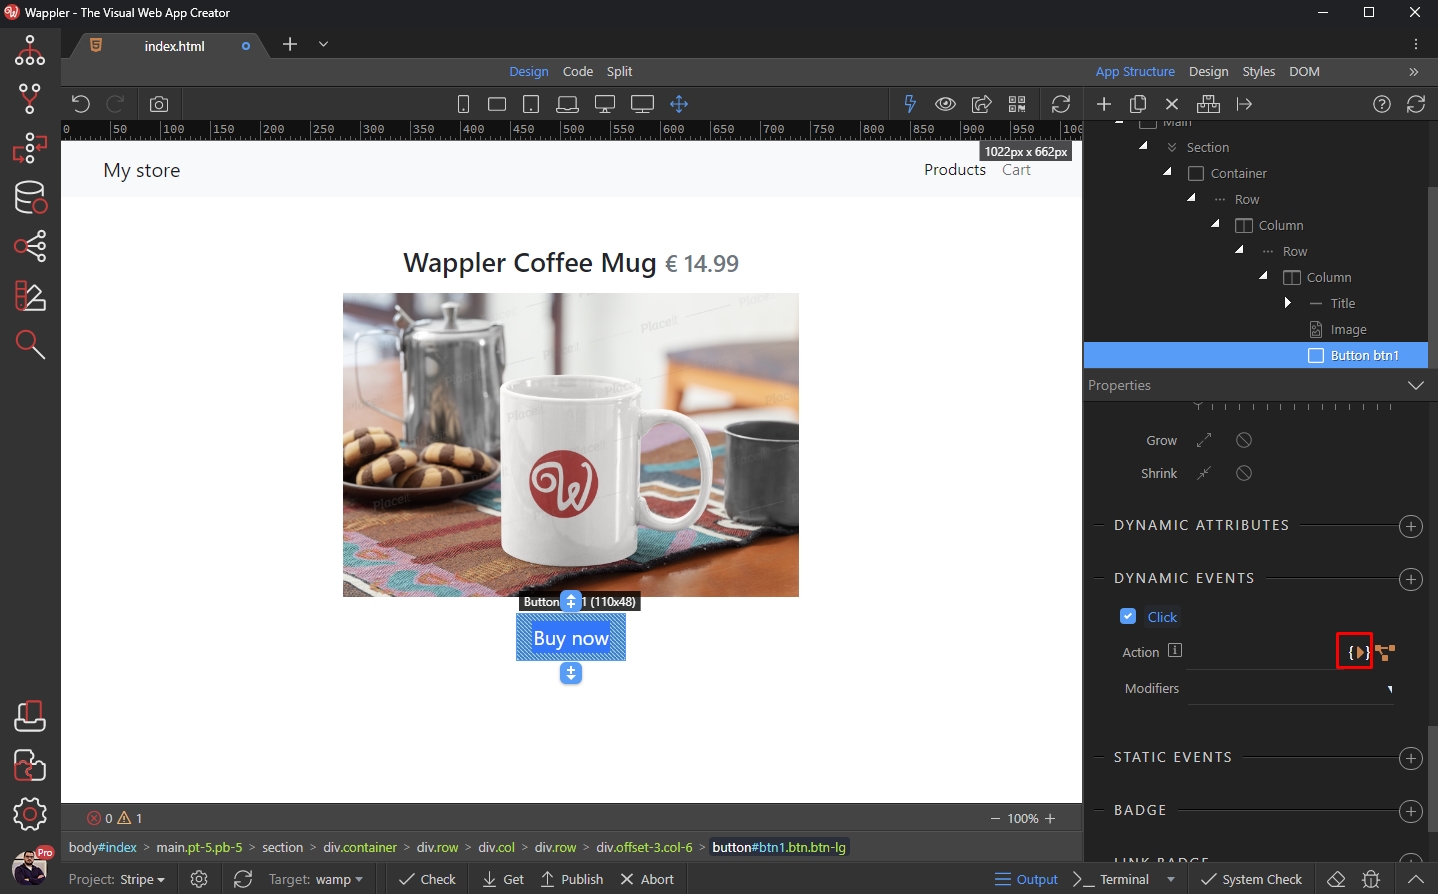
Under the Stripe Component select Checkout:
Section titled “Under the Stripe Component select Checkout:”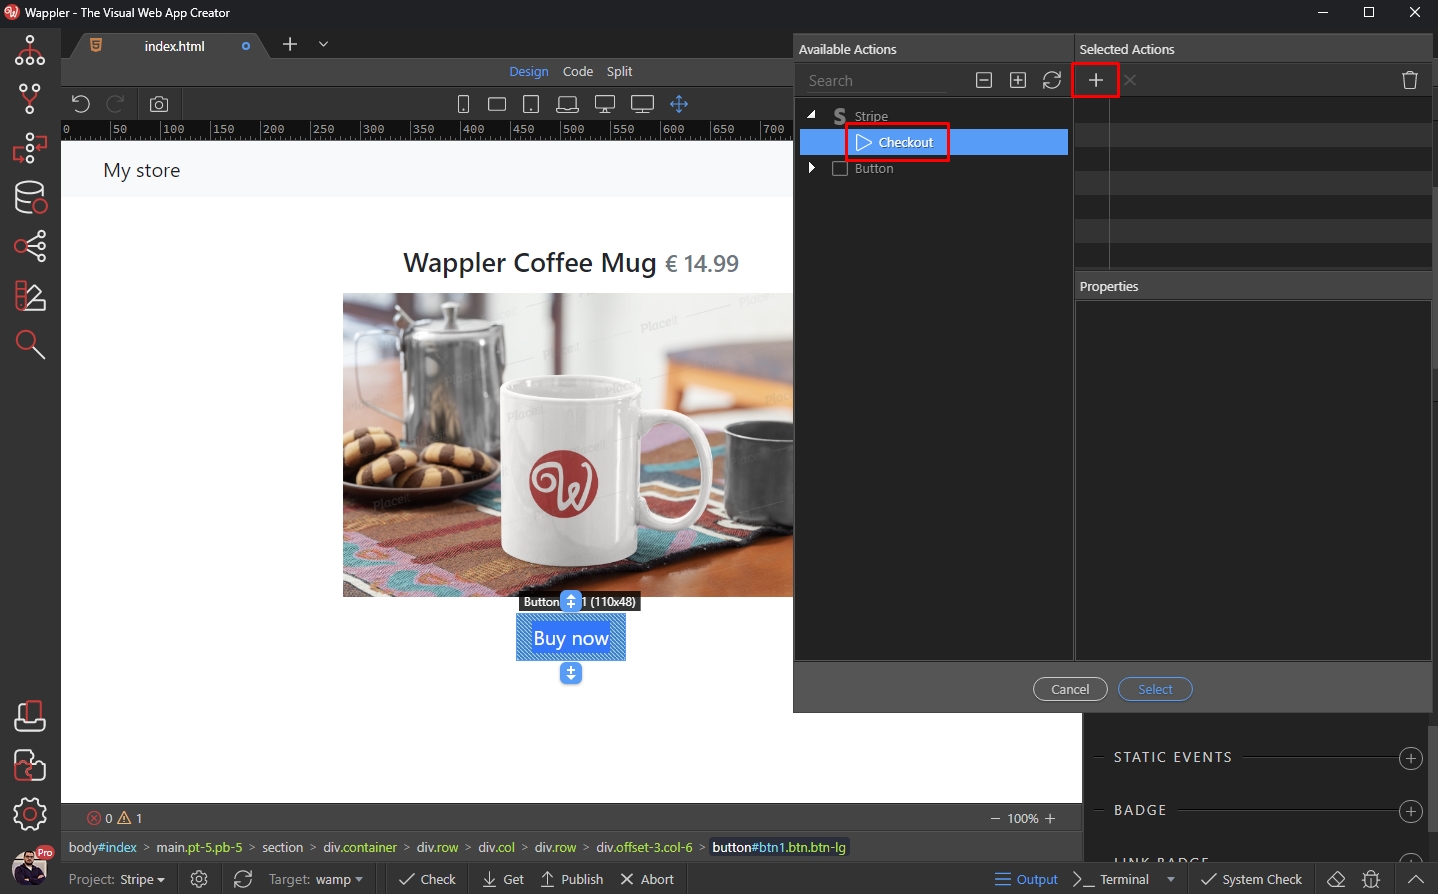
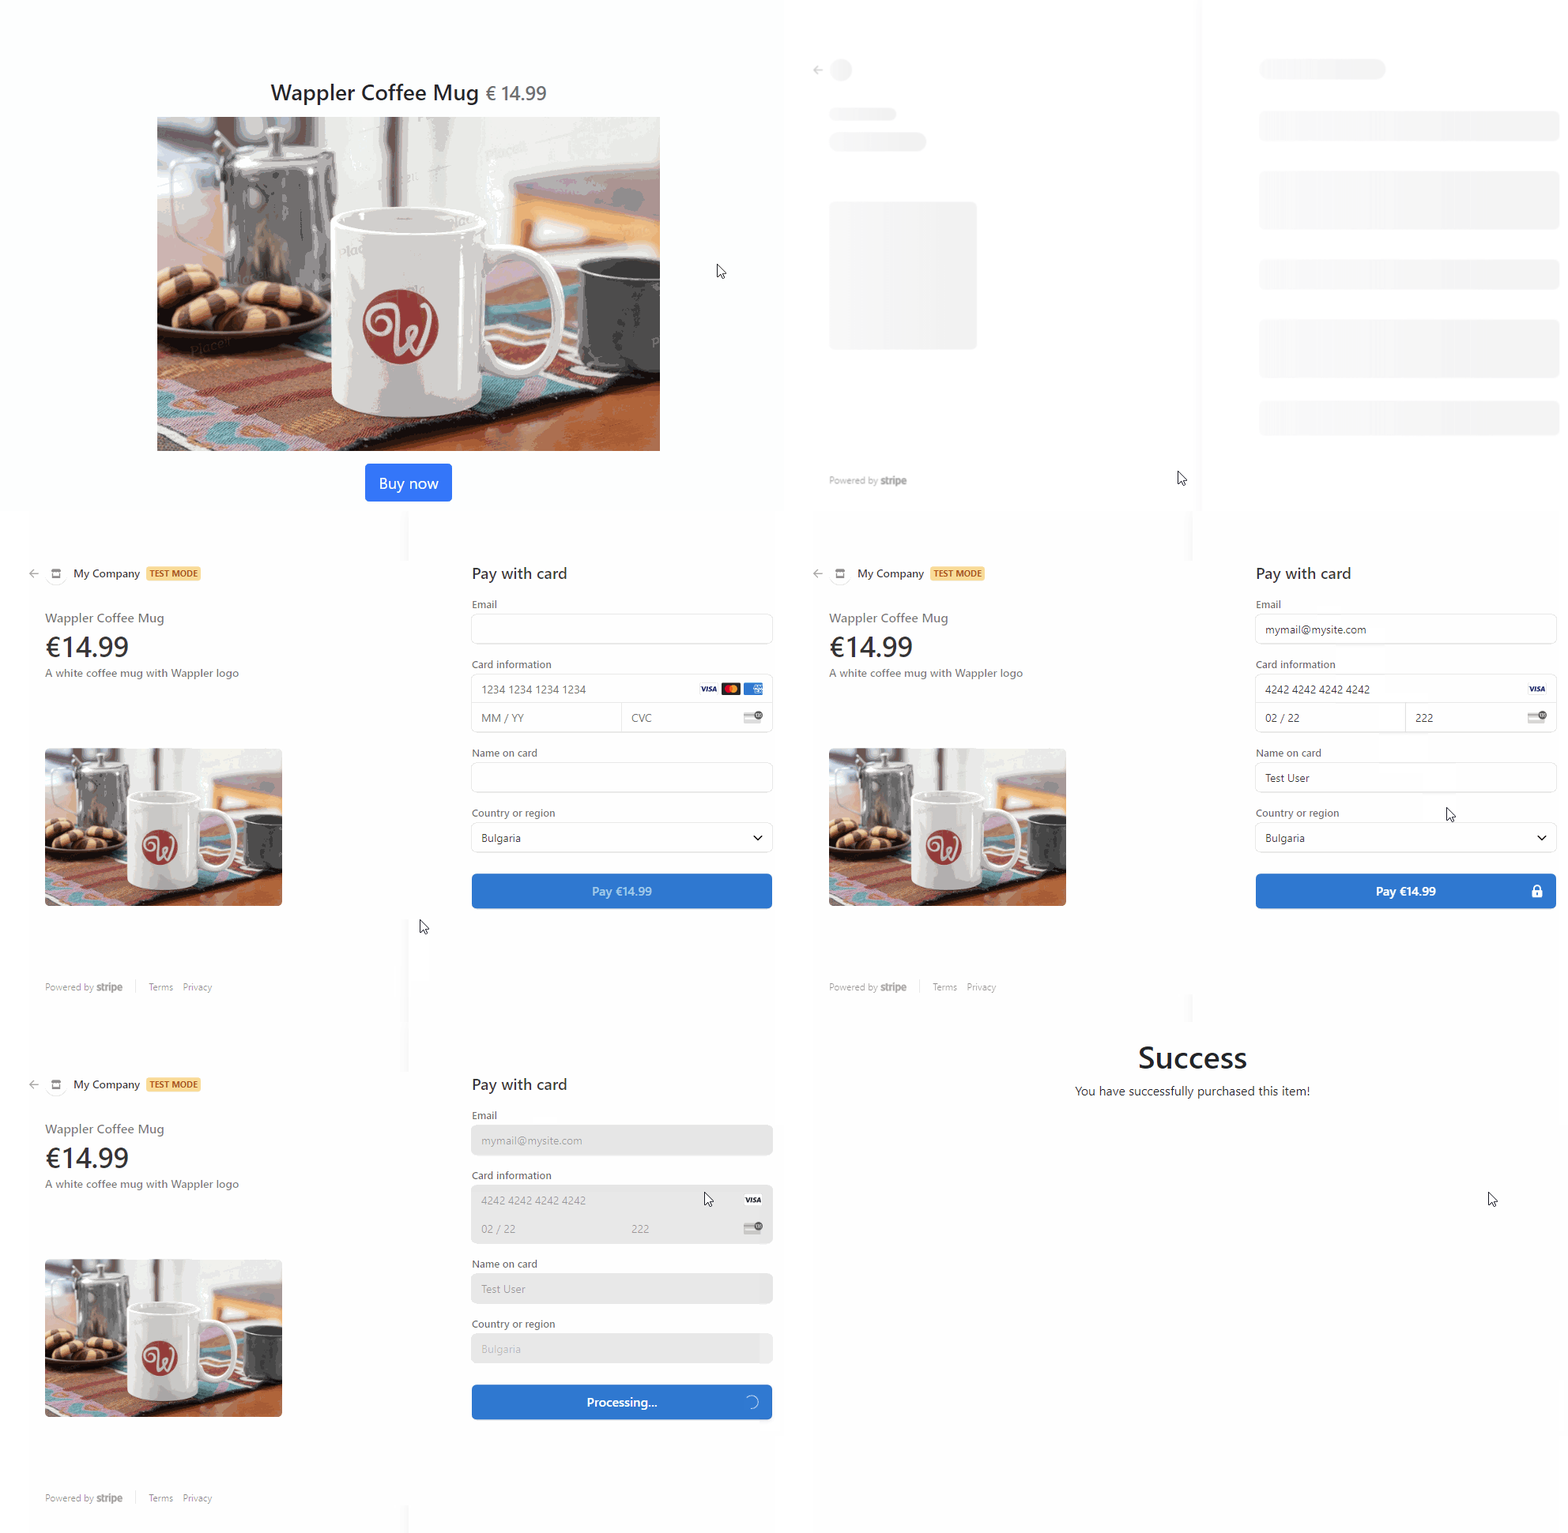
Then click the Select button and you are done. You can preview the results in the browser:
Section titled “Then click the Select button and you are done. You can preview the results in the browser:”Then click the Select button and you are done.
You can preview the results in the browser:
Multi Products Purchase
Section titled “Multi Products Purchase”Client-side integration also allows you to make multi-products / multi-quantity purchases. You can build a shopping cart using the Data Store component and pass the contents of the Data Store component to the Checkout page.
This can be done again without any server-side code.
We created a simple page layout, containing 3 columns with Images, Titles and Add To Cart buttons. All of this is static (no dynamic data involved):
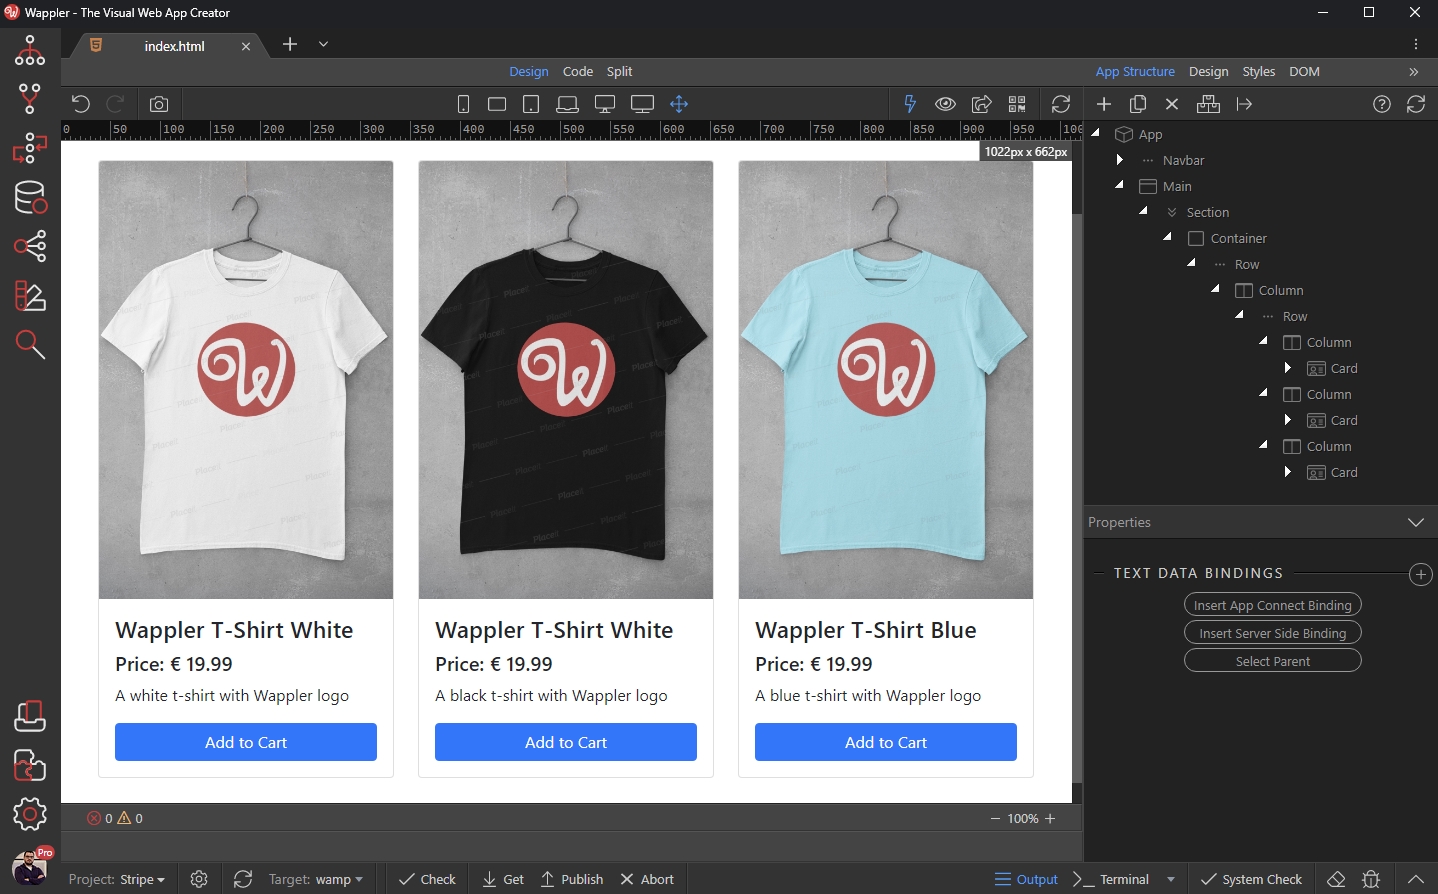
First, we add the Data Store component on the page. Add new component in App Structure:
Section titled “First, we add the Data Store component on the page. Add new component in App Structure:”In order to be able to checkout multiple products with Stripe, we need to store the items in a shopping cart. We can create a shopping cart using the Data Store Component - this tutorial explains how to use dynamic data, but in this case it’s similar - just adding static content.
First, we add the Data Store component on the page. Add new component in App Structure:

Open Data and select Data Store:
Section titled “Open Data and select Data Store:”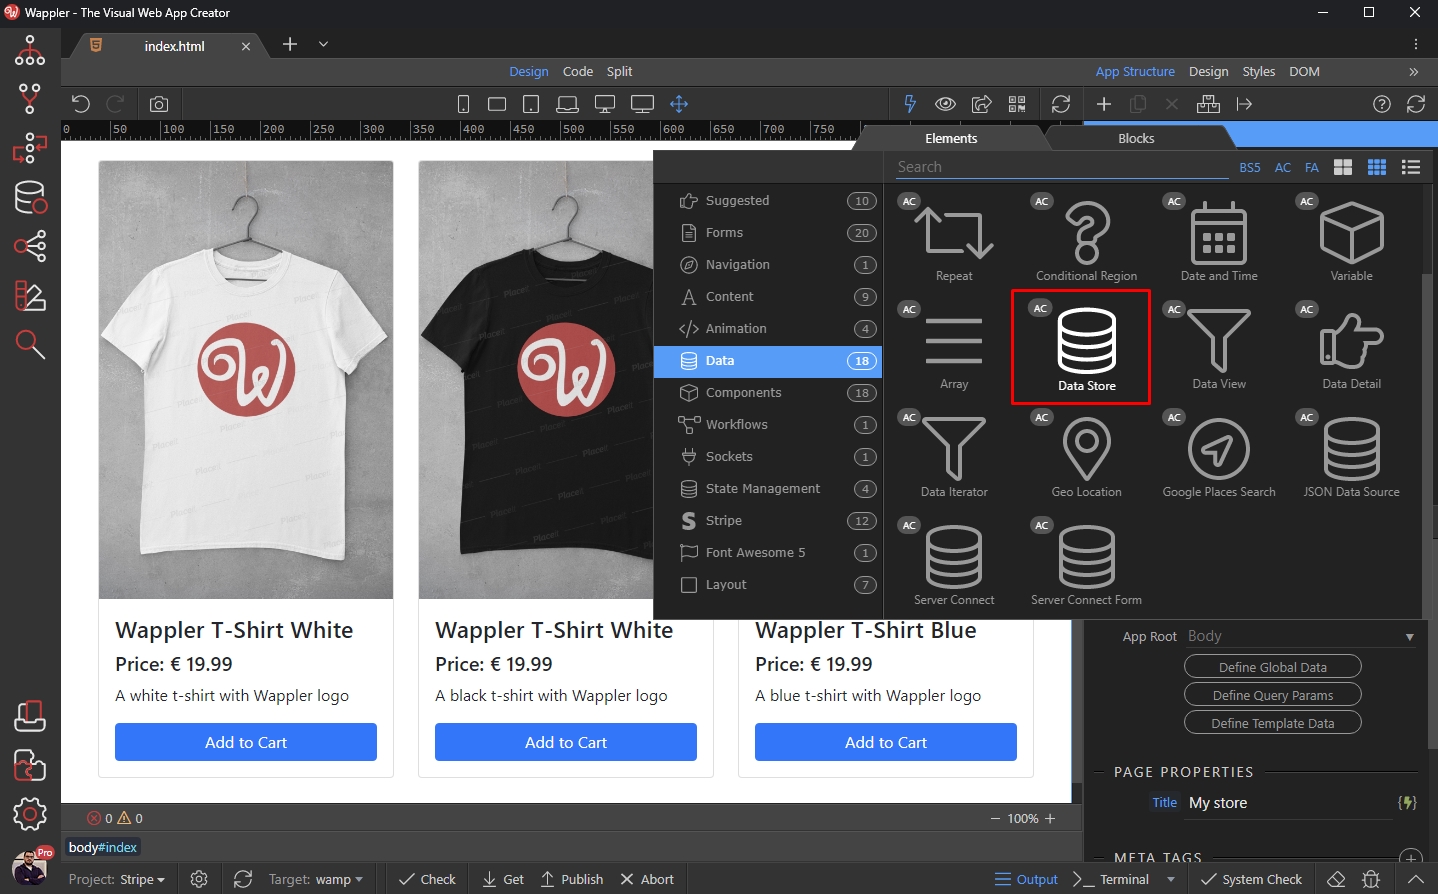
We add a name for the Data Store component (dsCart) and click Define Data Store Schema:
Section titled “We add a name for the Data Store component (dsCart) and click Define Data Store Schema:”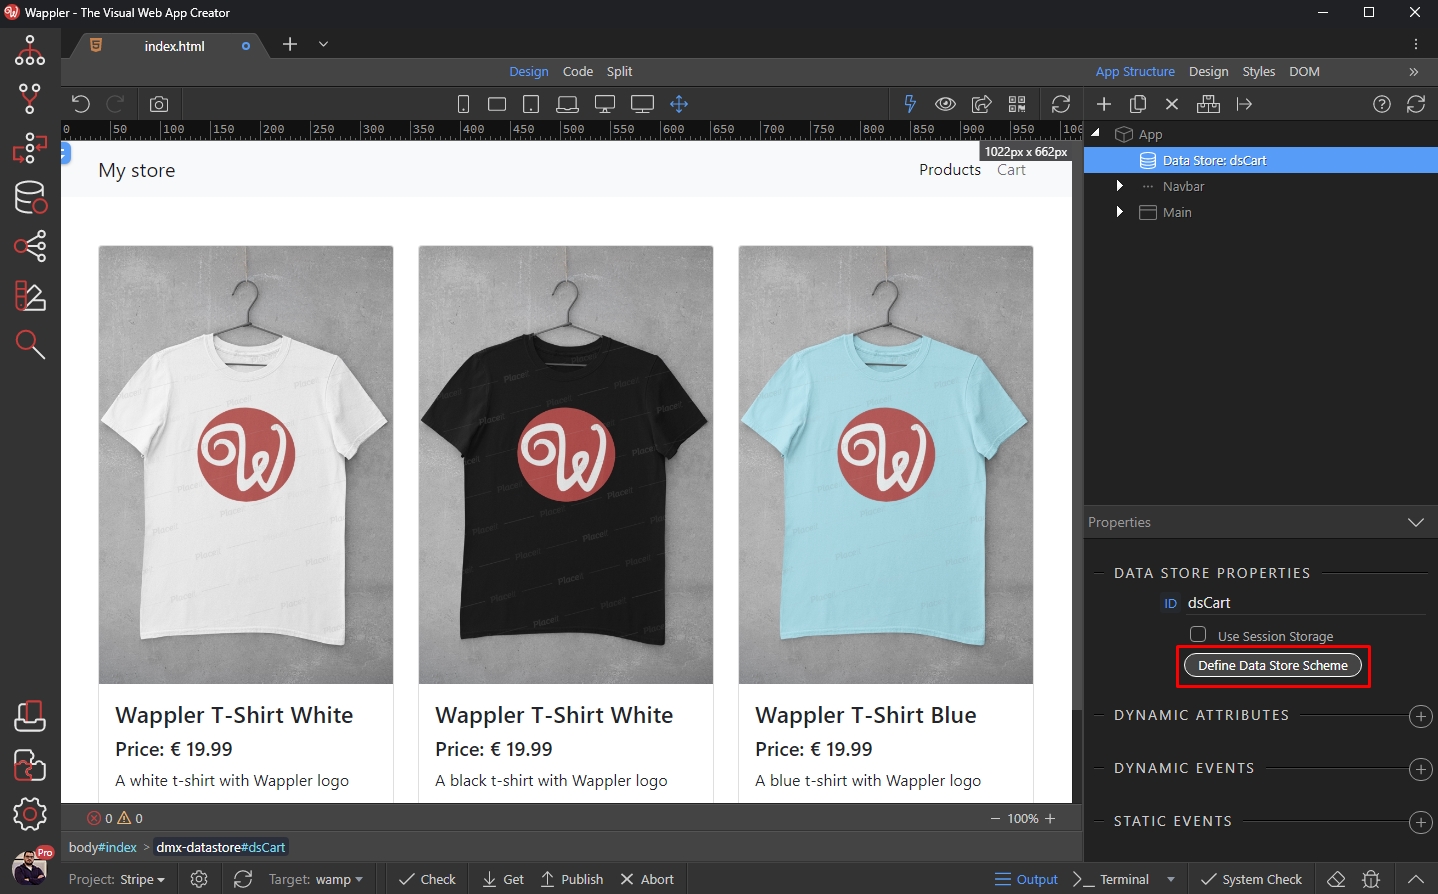
Add two variables:
Section titled “Add two variables:”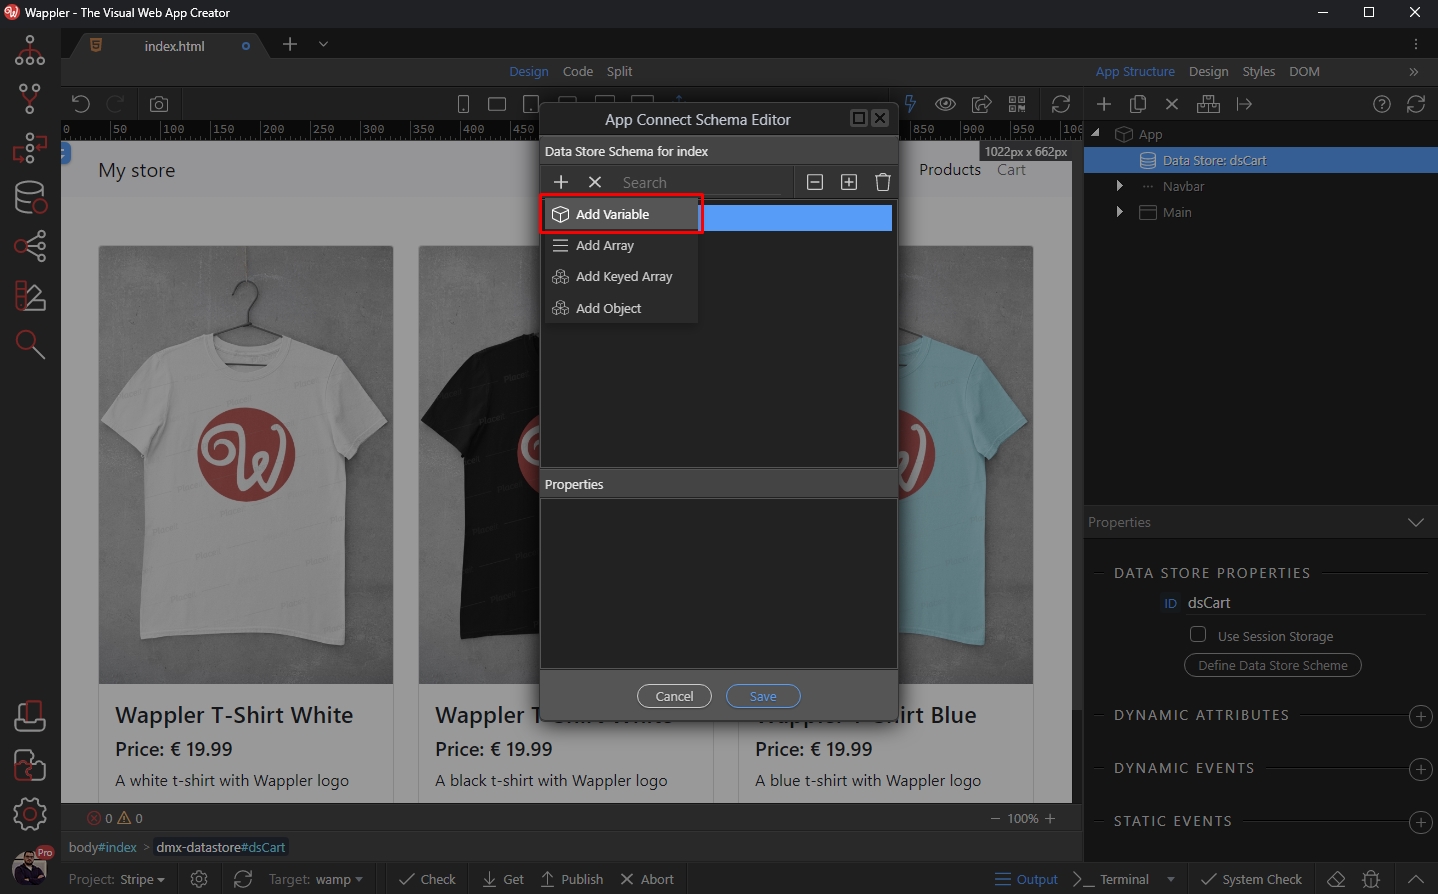
Step 56
Section titled “Step 56”They need to be called price and quantity and are used for the checkout.
price will store the product price ID.
quantity will store the quantity per each product.
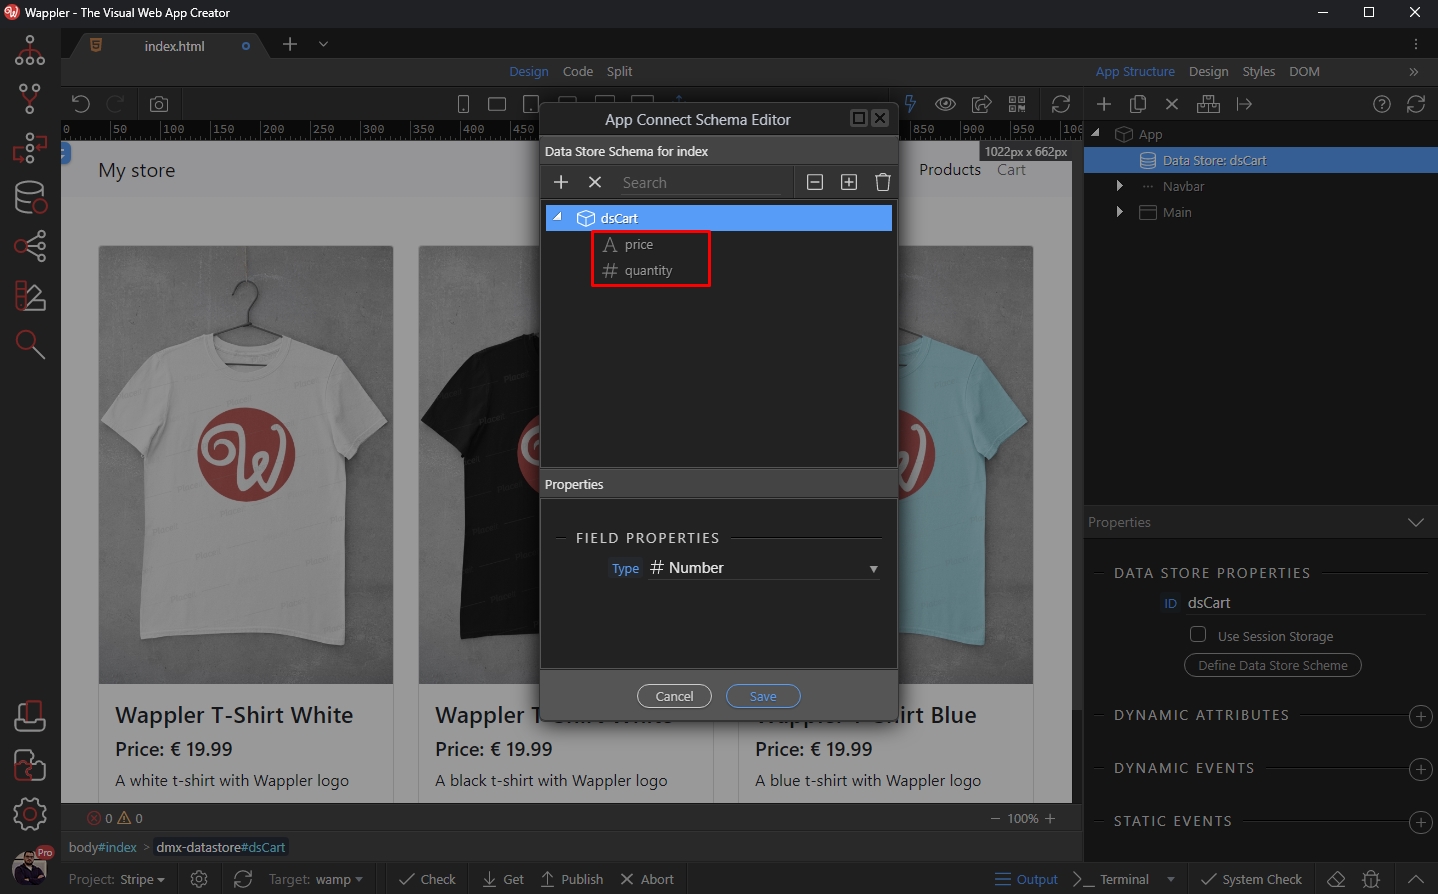
Then you can add more variables, which can be used to show the shopping cart data on the page:
Section titled “Then you can add more variables, which can be used to show the shopping cart data on the page:”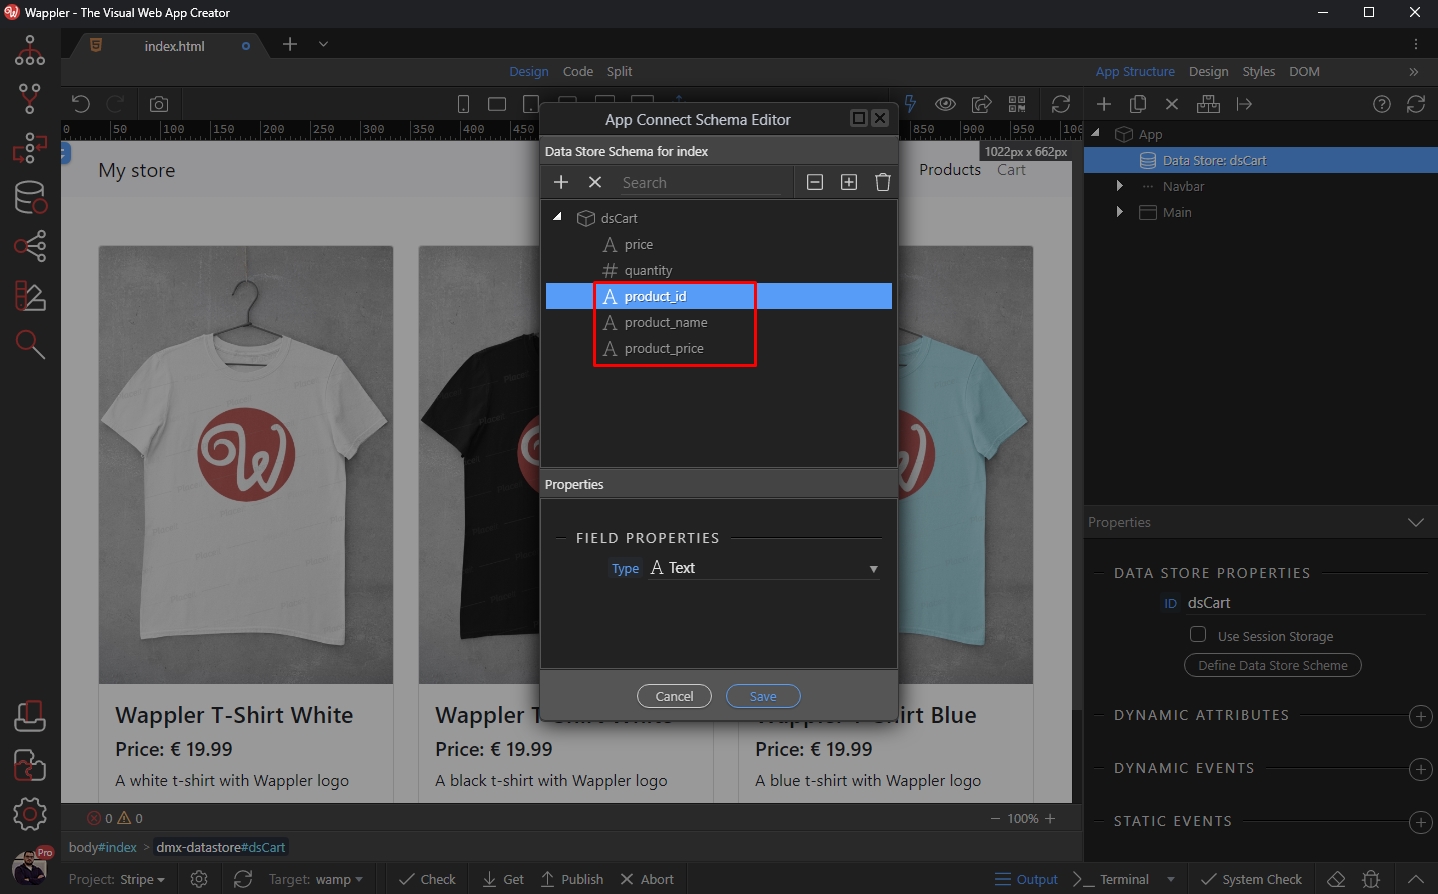
Step 58
Section titled “Step 58”In our example - product_id, product_name and product_price which are only needed to show some info to the users (not required for the checkout):
Click Save:
Section titled “Click Save:”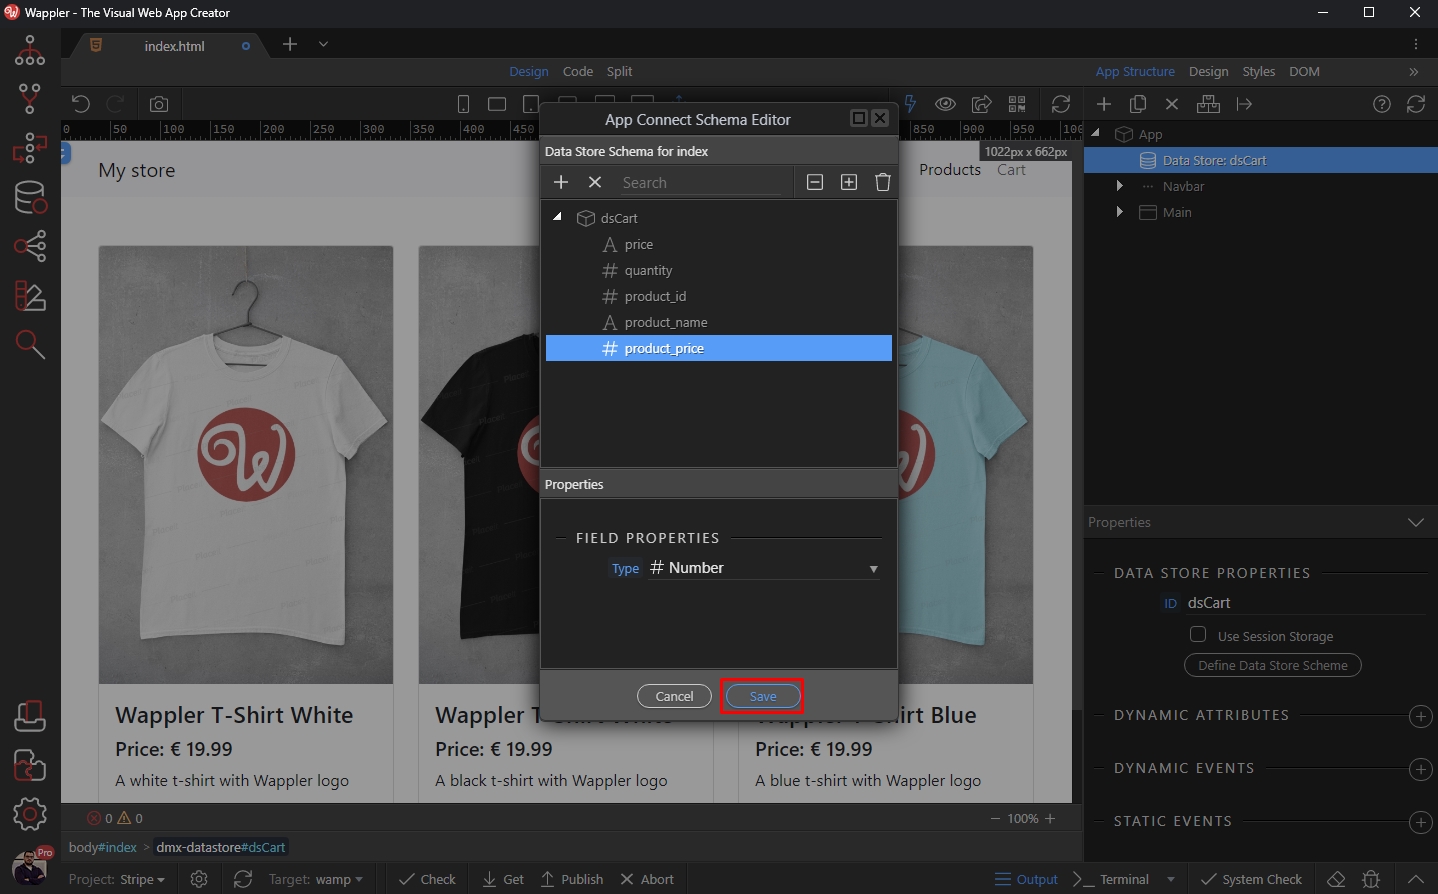
The next step is to add the product to the Data Store. Select the Add To Cart button for the first product:
Section titled “The next step is to add the product to the Data Store. Select the Add To Cart button for the first product:”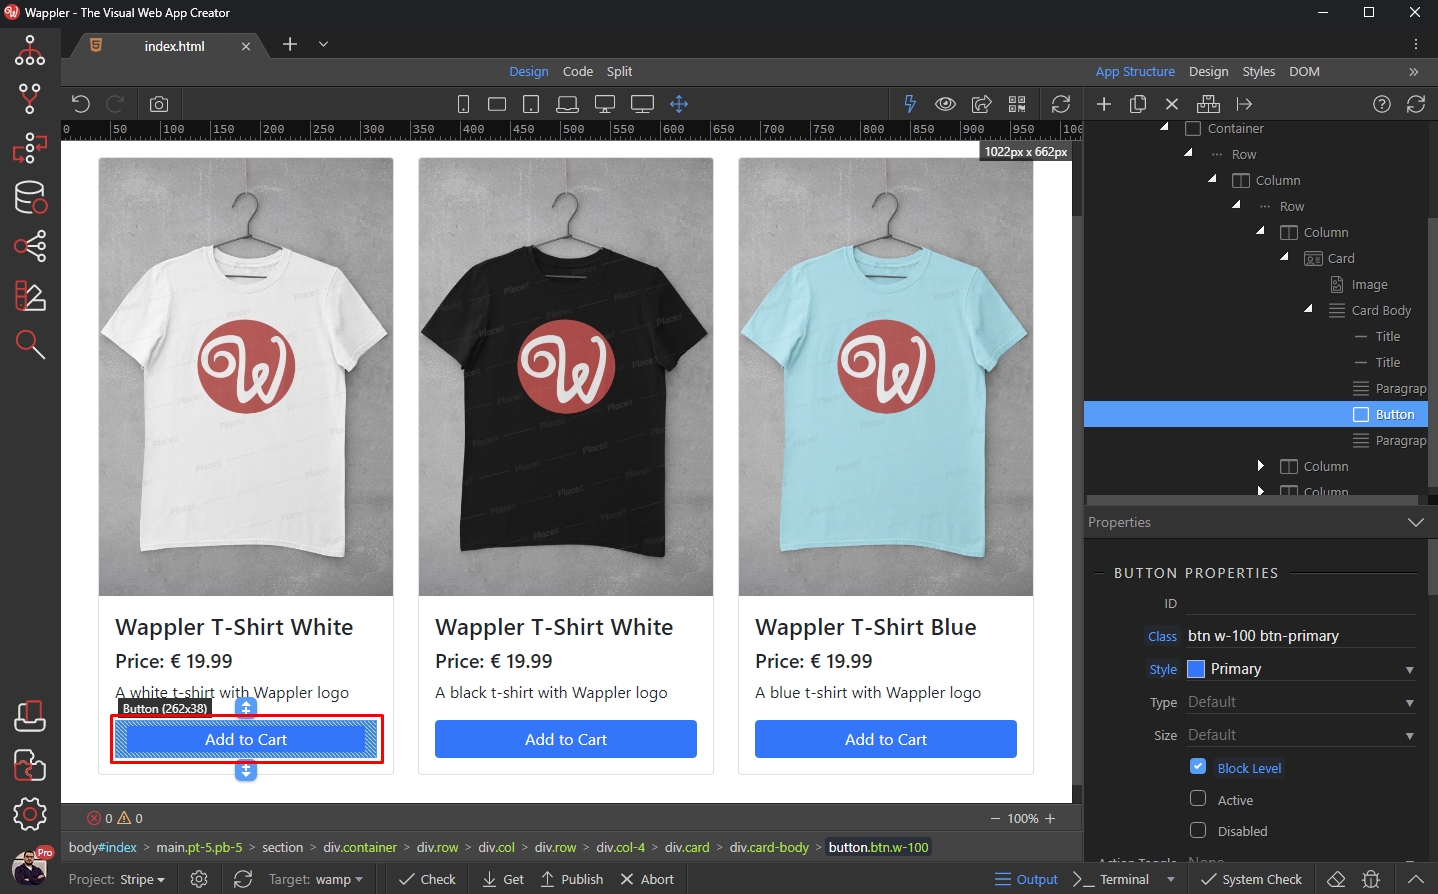
Click new dynamic event:
Section titled “Click new dynamic event:”
Select Mouse > Click:
Section titled “Select Mouse > Click:”
And select a dynamic action:
Section titled “And select a dynamic action:”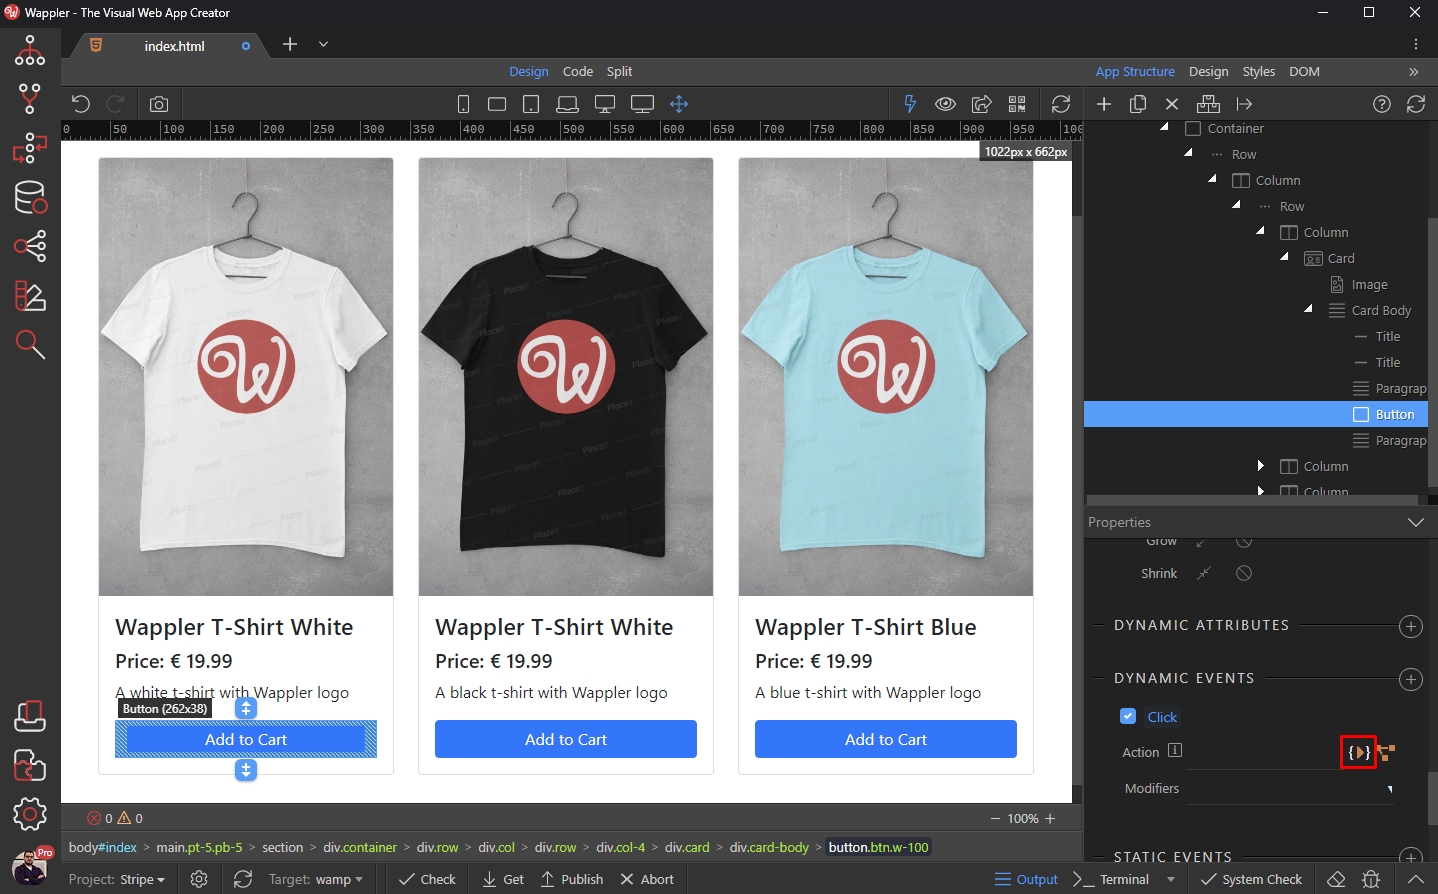
Under Data Store component, select Update or Insert:
Section titled “Under Data Store component, select Update or Insert:”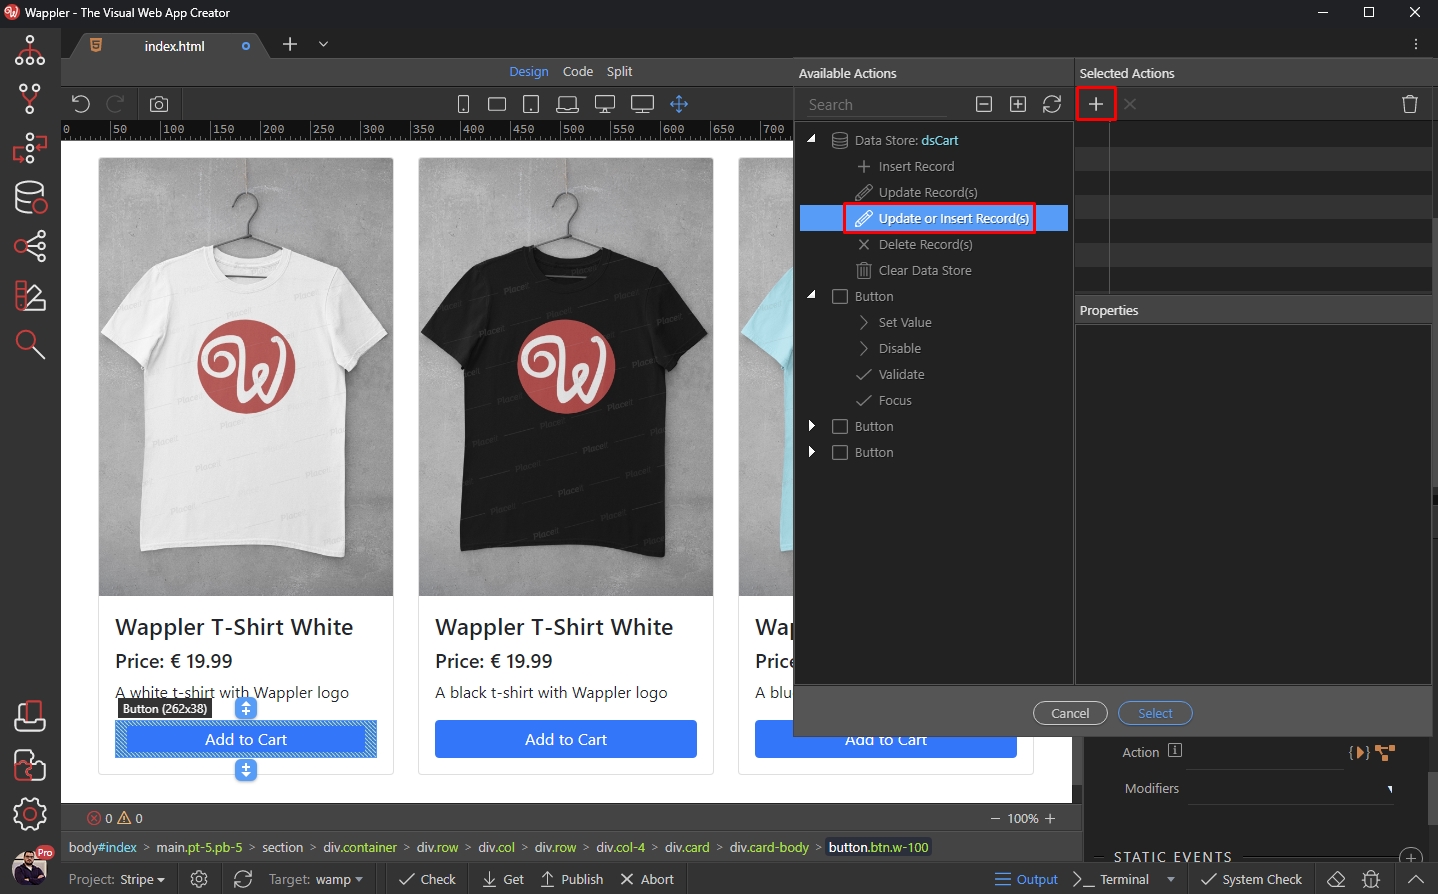
In the product_id enter 1 - as this is our first product:
Section titled “In the product_id enter 1 - as this is our first product:”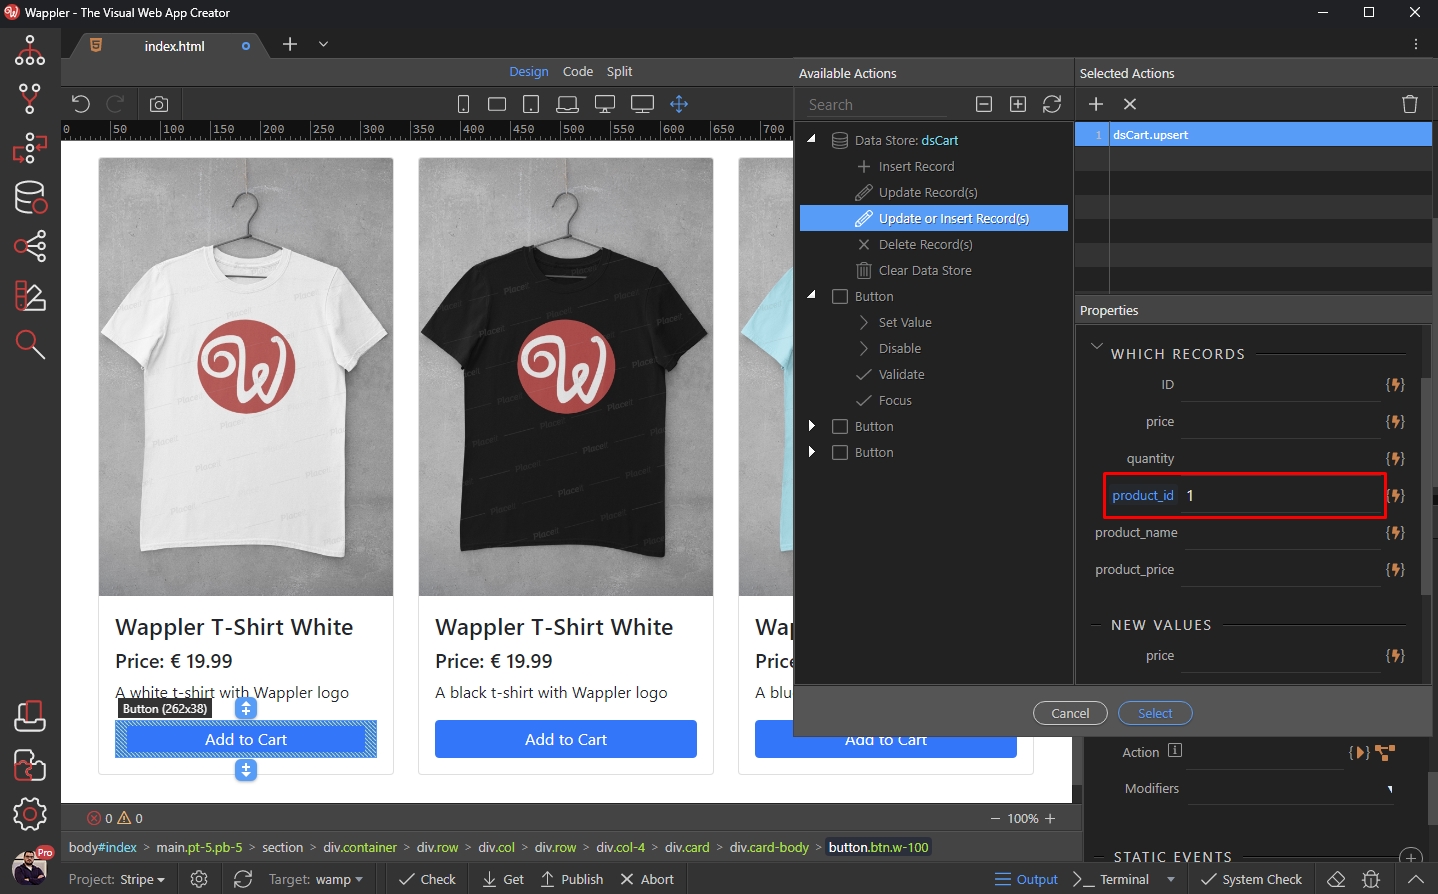
The next thing we need to do is to pass the product price ID to the Data Store:
Section titled “The next thing we need to do is to pass the product price ID to the Data Store:”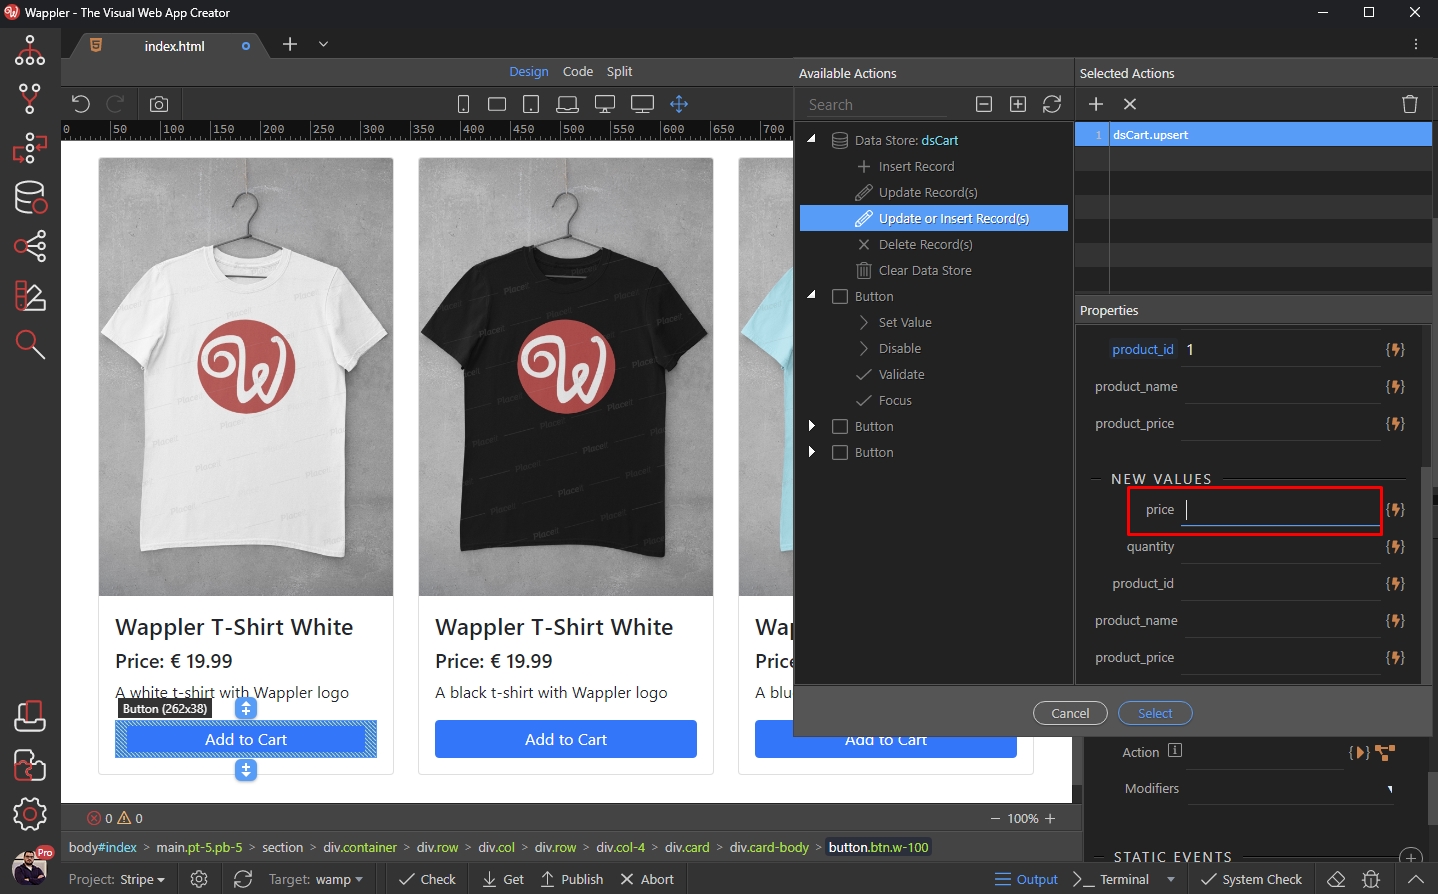
Open Stripe Dashboard and load your products. Select the one you want to sell on the page:
Section titled “Open Stripe Dashboard and load your products. Select the one you want to sell on the page:”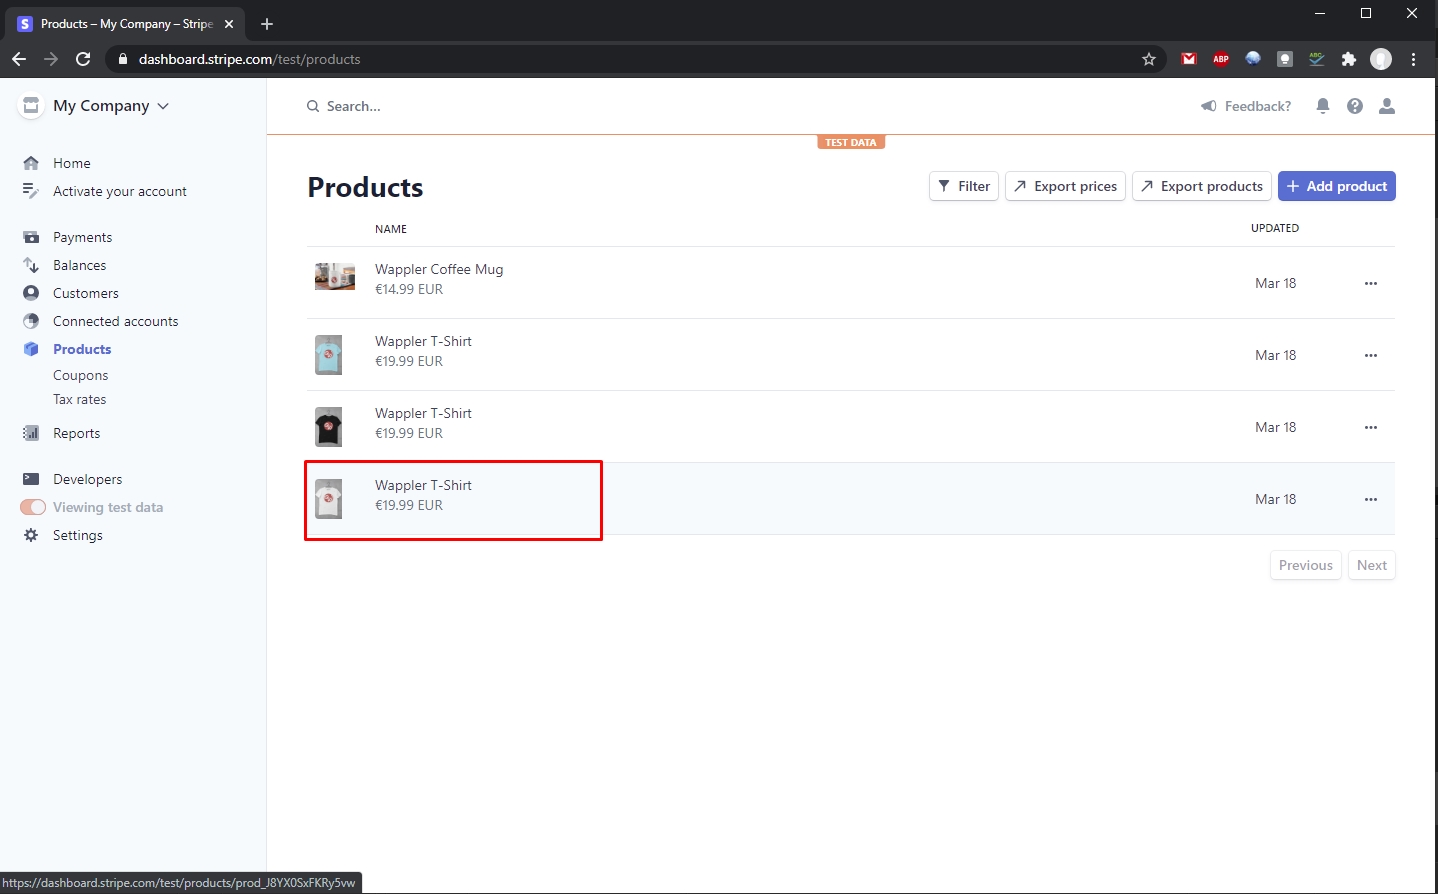
Scroll down to the product price and copy the price ID to your clipboard:
Section titled “Scroll down to the product price and copy the price ID to your clipboard:”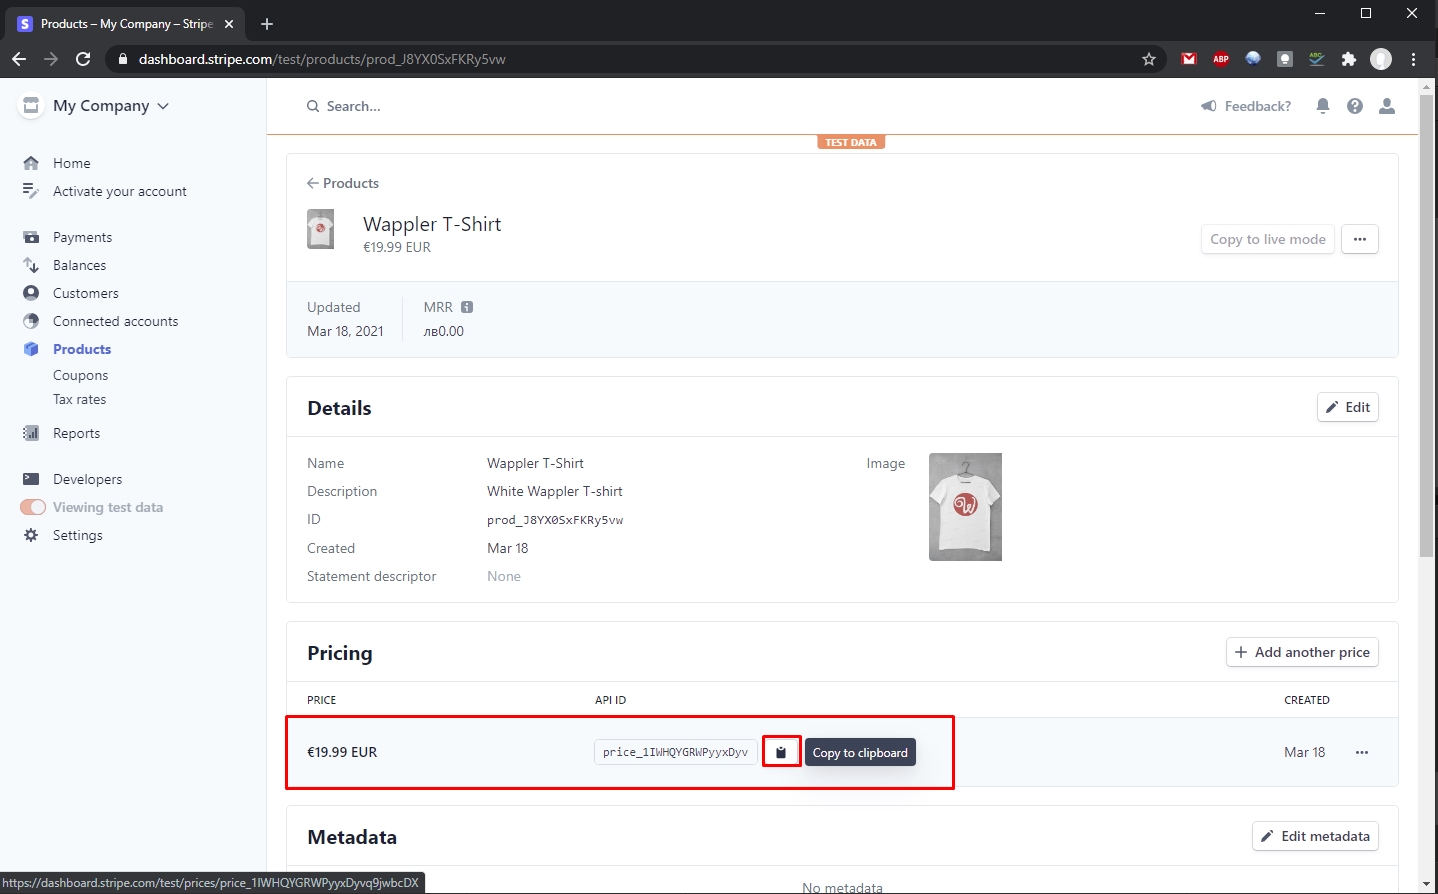
Then paste it in the price field in Data Store:
Section titled “Then paste it in the price field in Data Store:”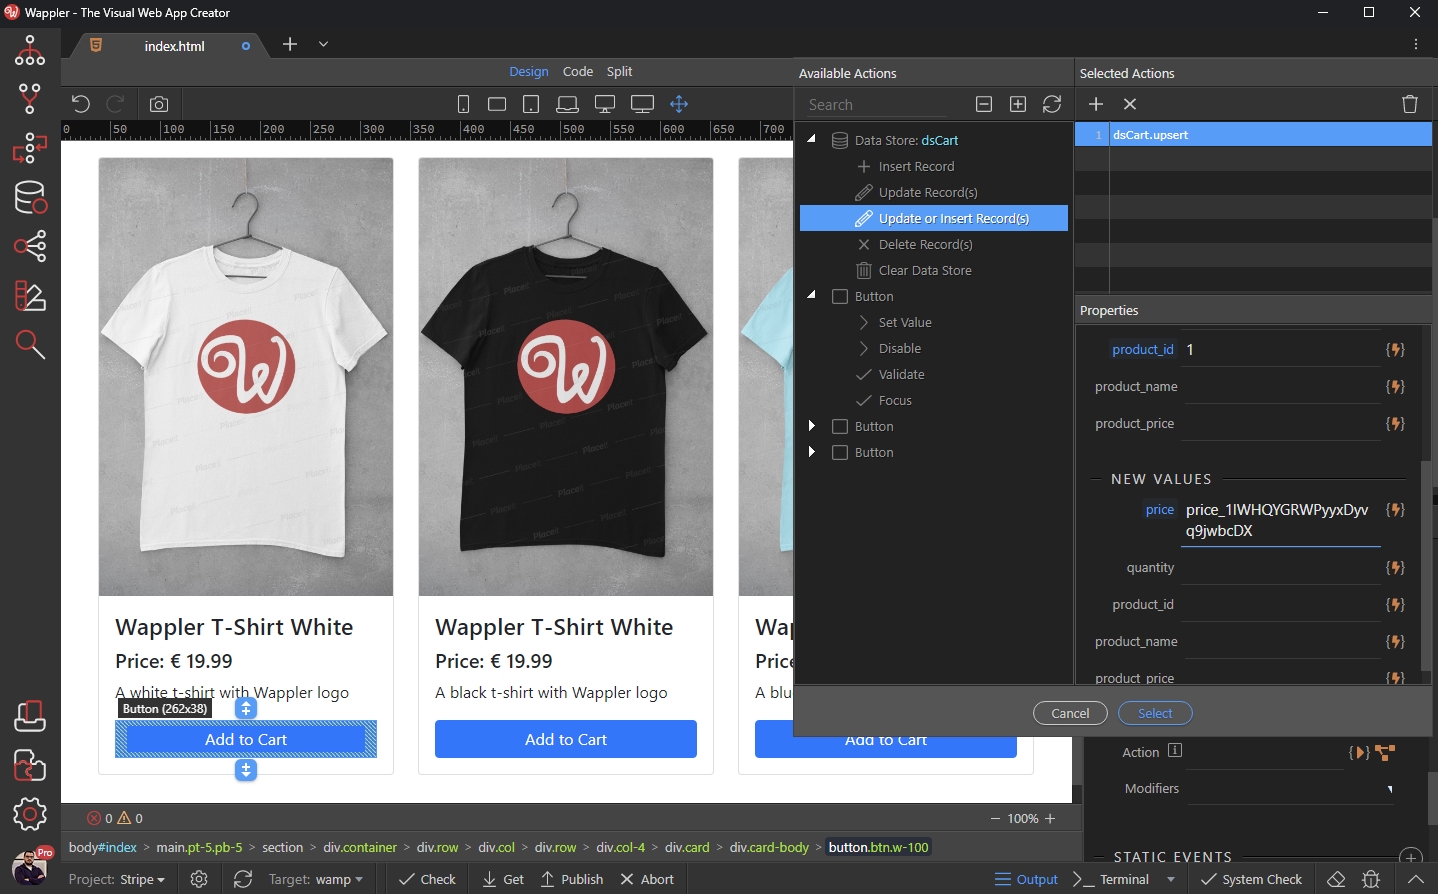
Step 70
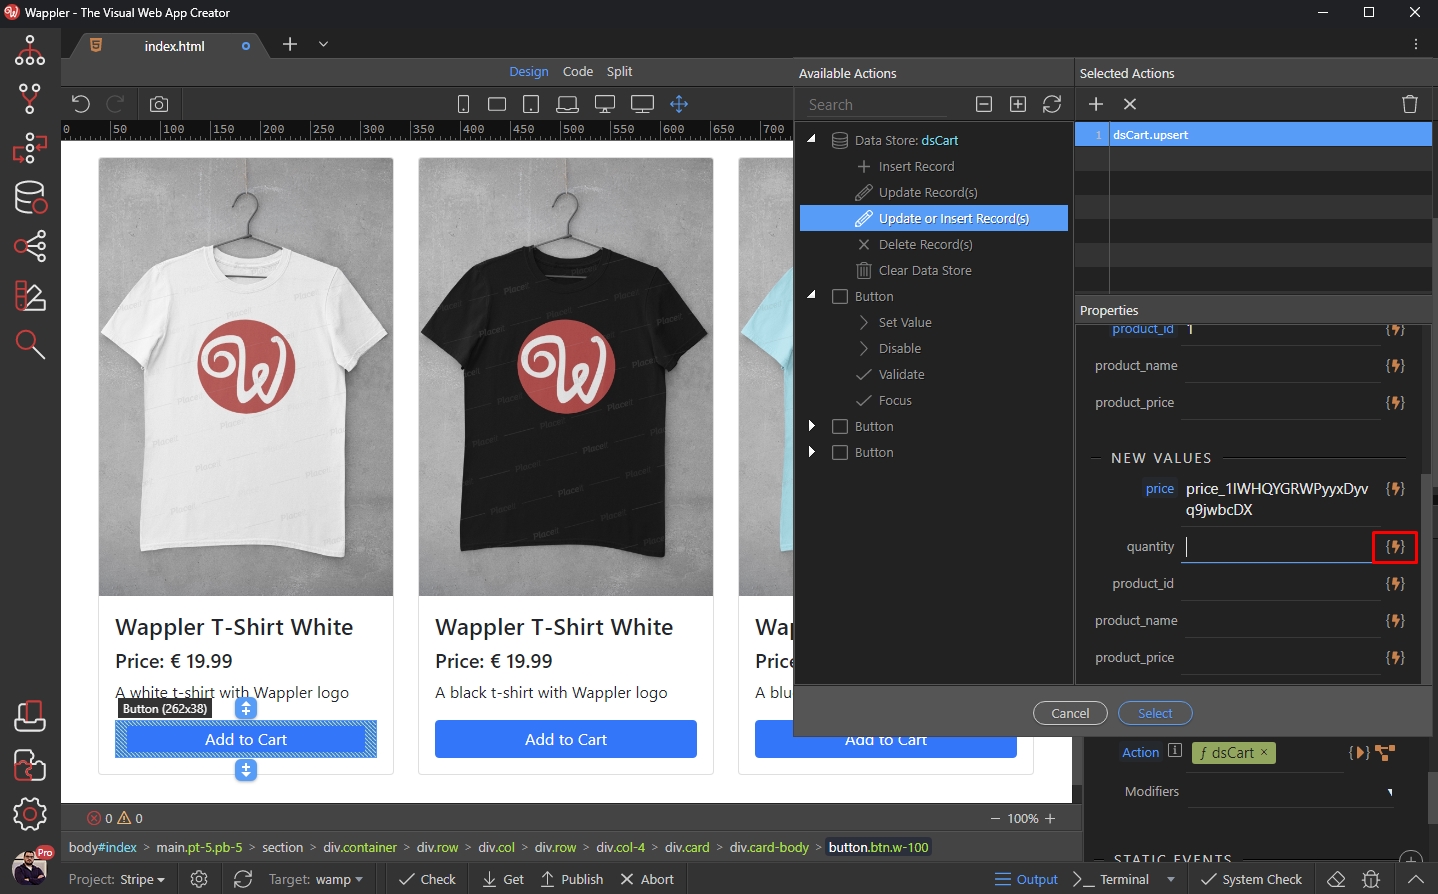
Section titled “Step 70”Then, quantity - as we are using Insert or Update (upsert) we need to update the quantity, if the same item is added twice.
Click the dynamic data picker for the quantity:
Click Code:
Section titled “Click Code:”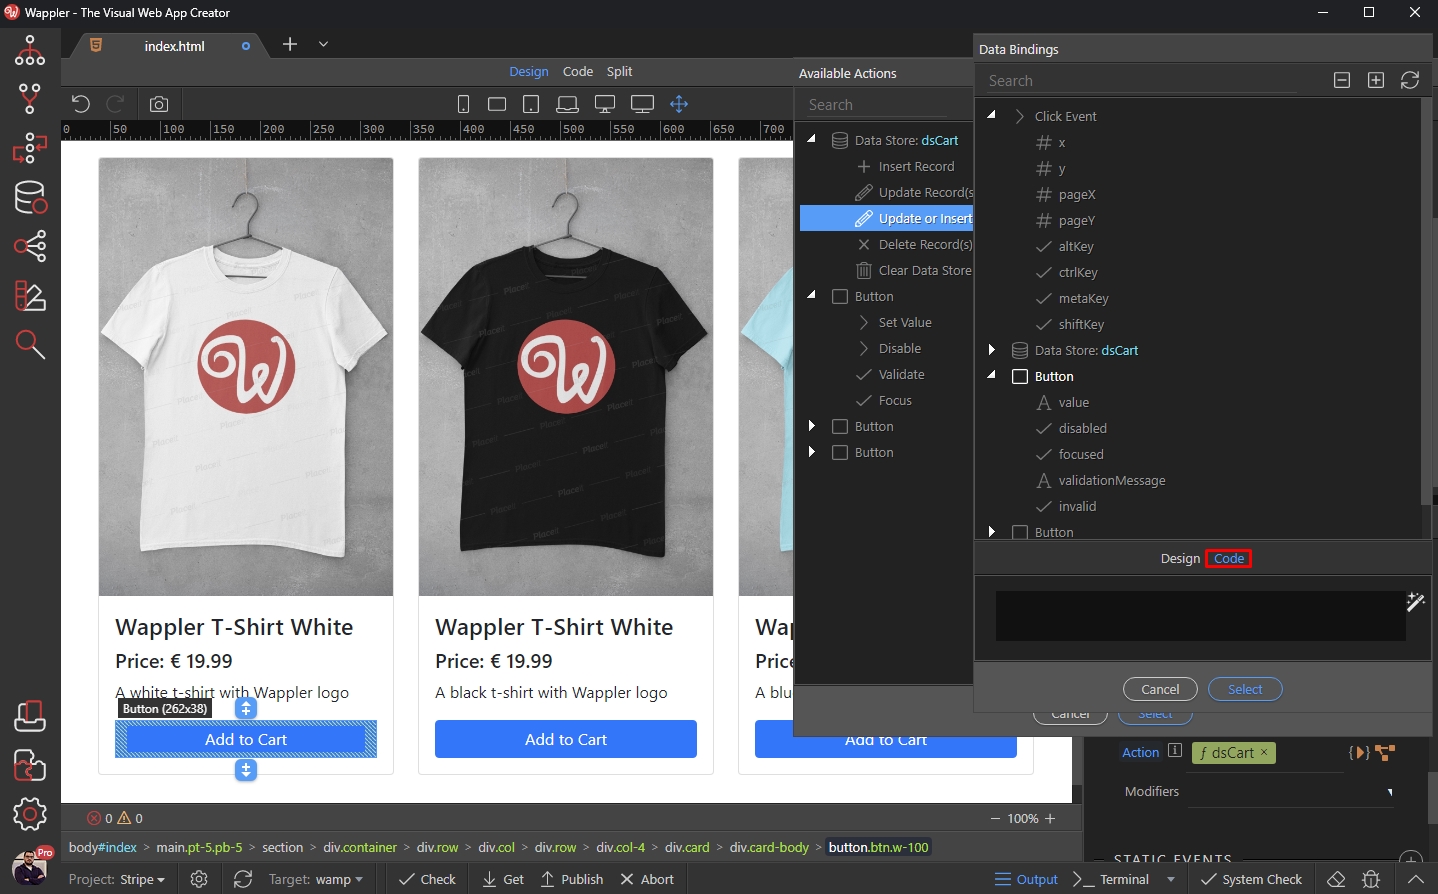
And enter:
Section titled “And enter:”`quantity + 1`

Step 73
Section titled “Step 73”The rest of the fields, as mentioned can vary as these will only be used to display the Data Store data on the page in the shopping cart page. We enter the Product Name and Price:
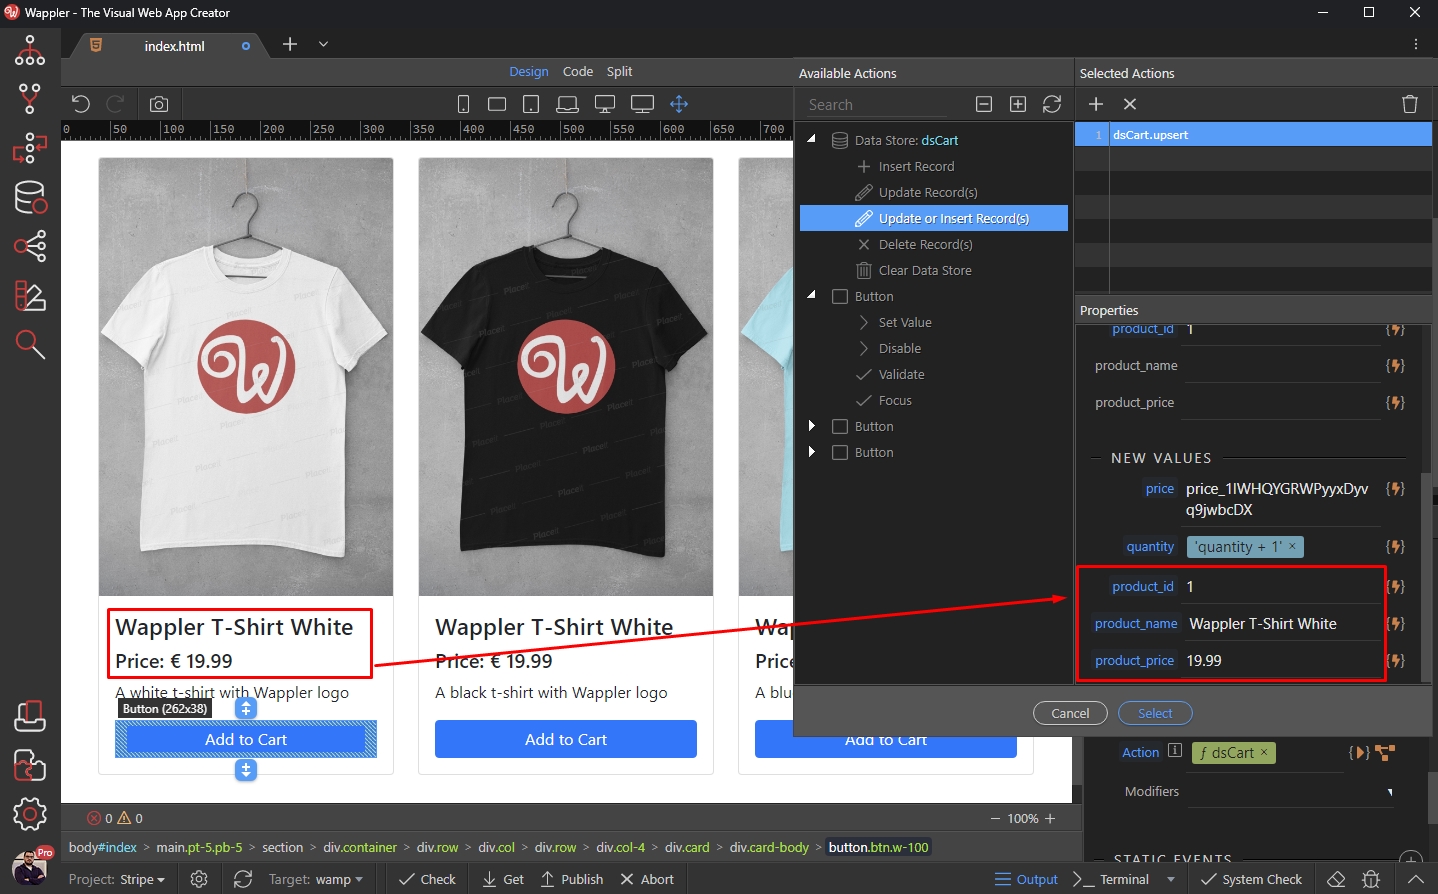
Click Select:
Section titled “Click Select:”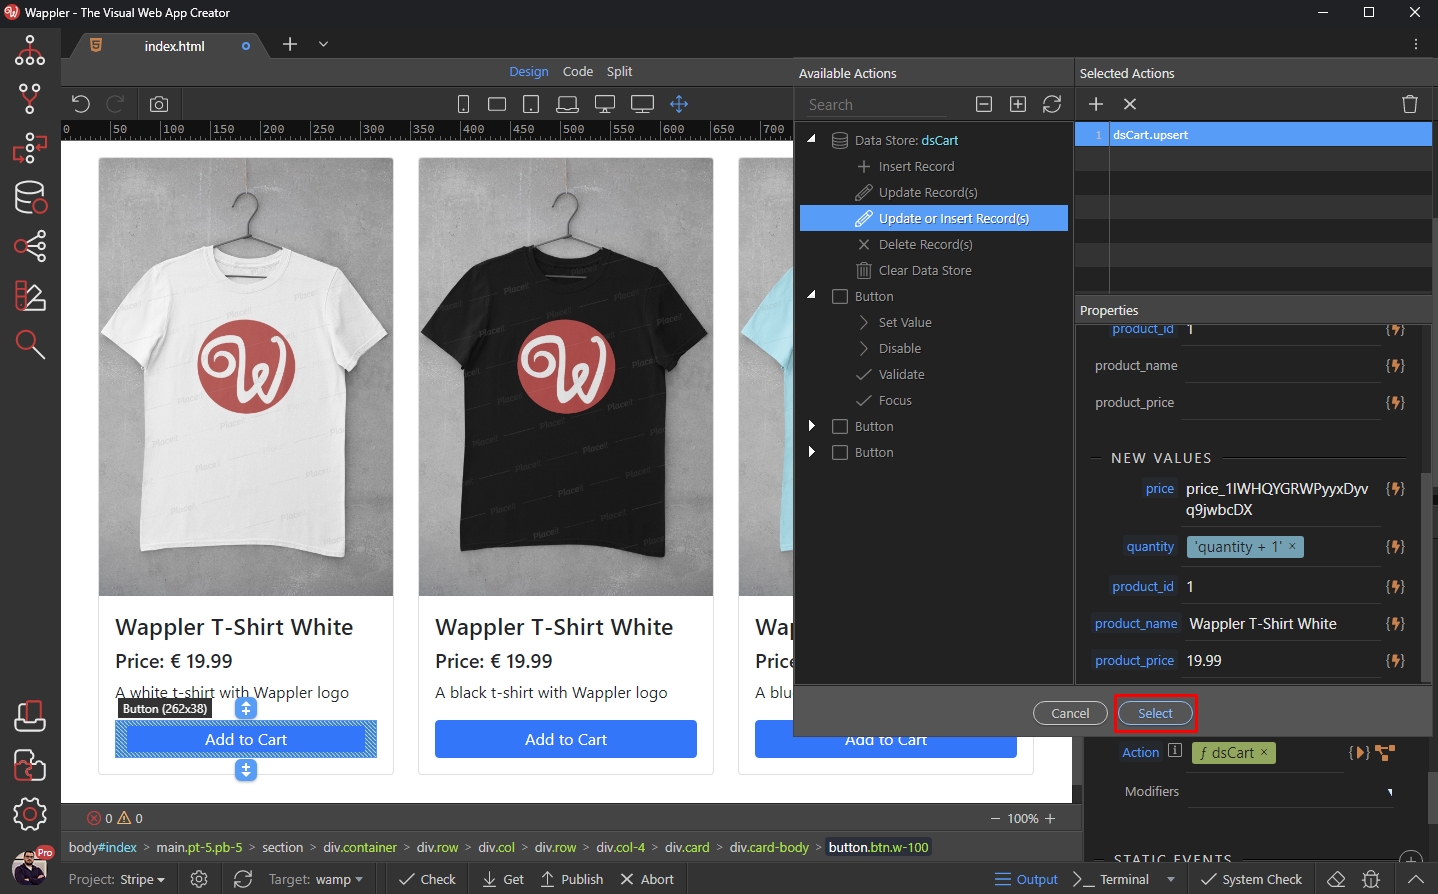
Step 75
Section titled “Step 75”We do the same for the other two products, entering the corresponding product price IDs from stripe and the rest of the info for them:
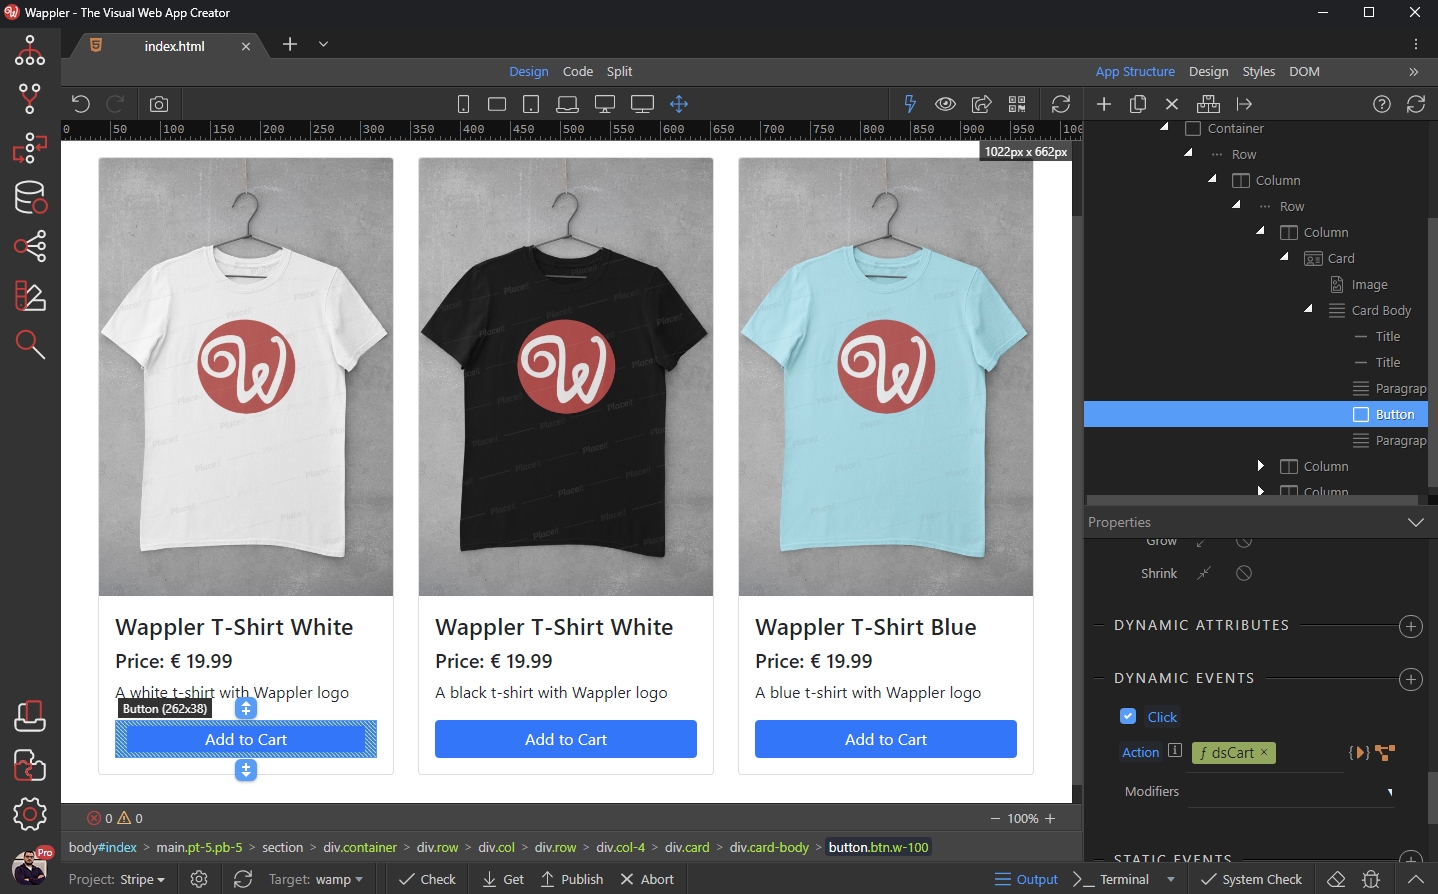
As per creating a shopping cart using the Data Store Component we added a simple Shopping Cart page:
Section titled “As per creating a shopping cart using the Data Store Component we added a simple Shopping Cart page:”As per creating a shopping cart using the Data Store Component we added a simple Shopping Cart page:
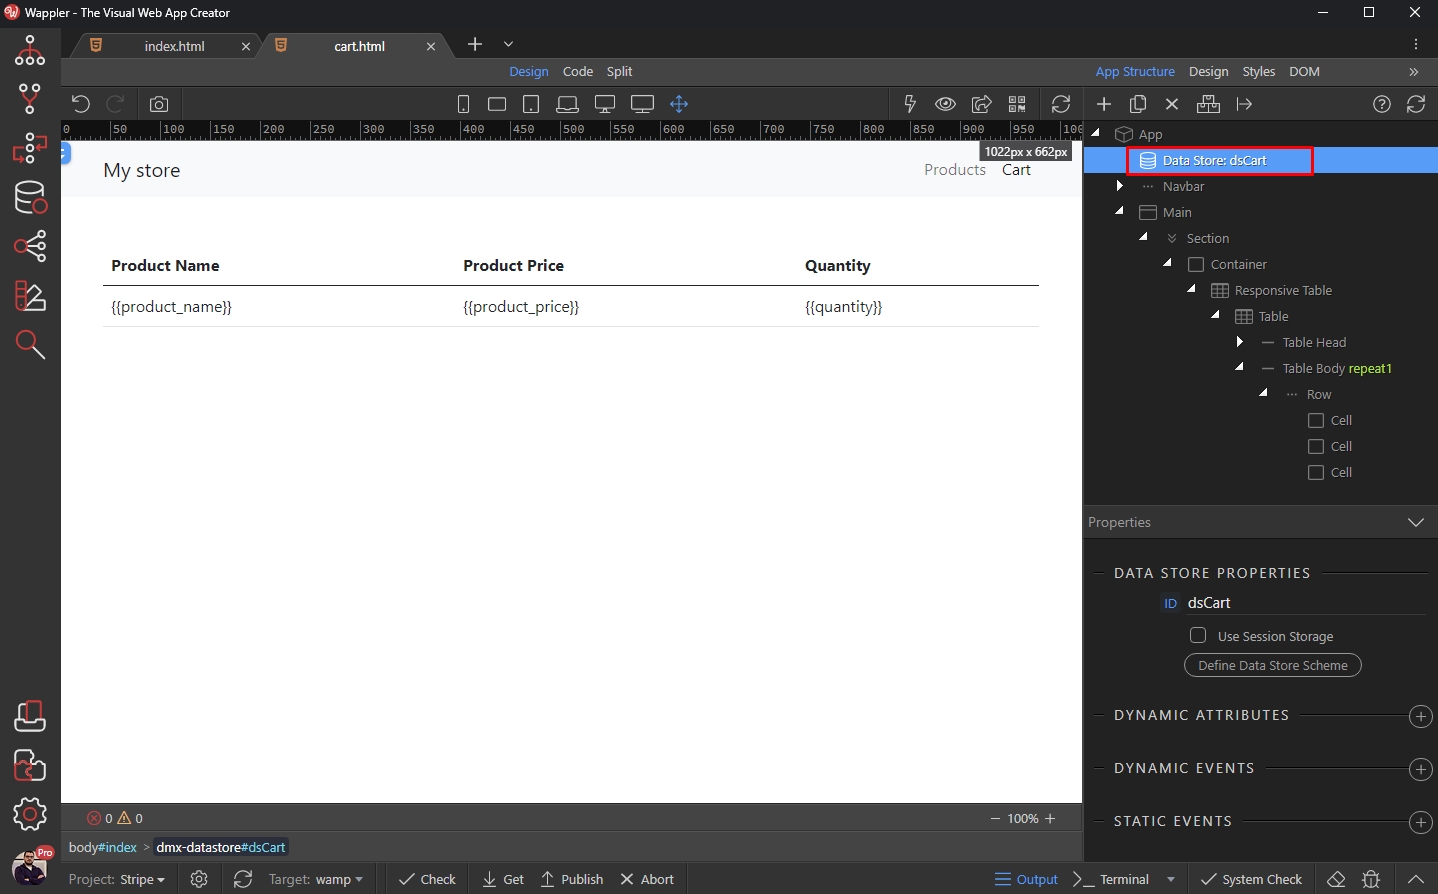
We added a dynamic table using the Data Store component as a source:
Section titled “We added a dynamic table using the Data Store component as a source:”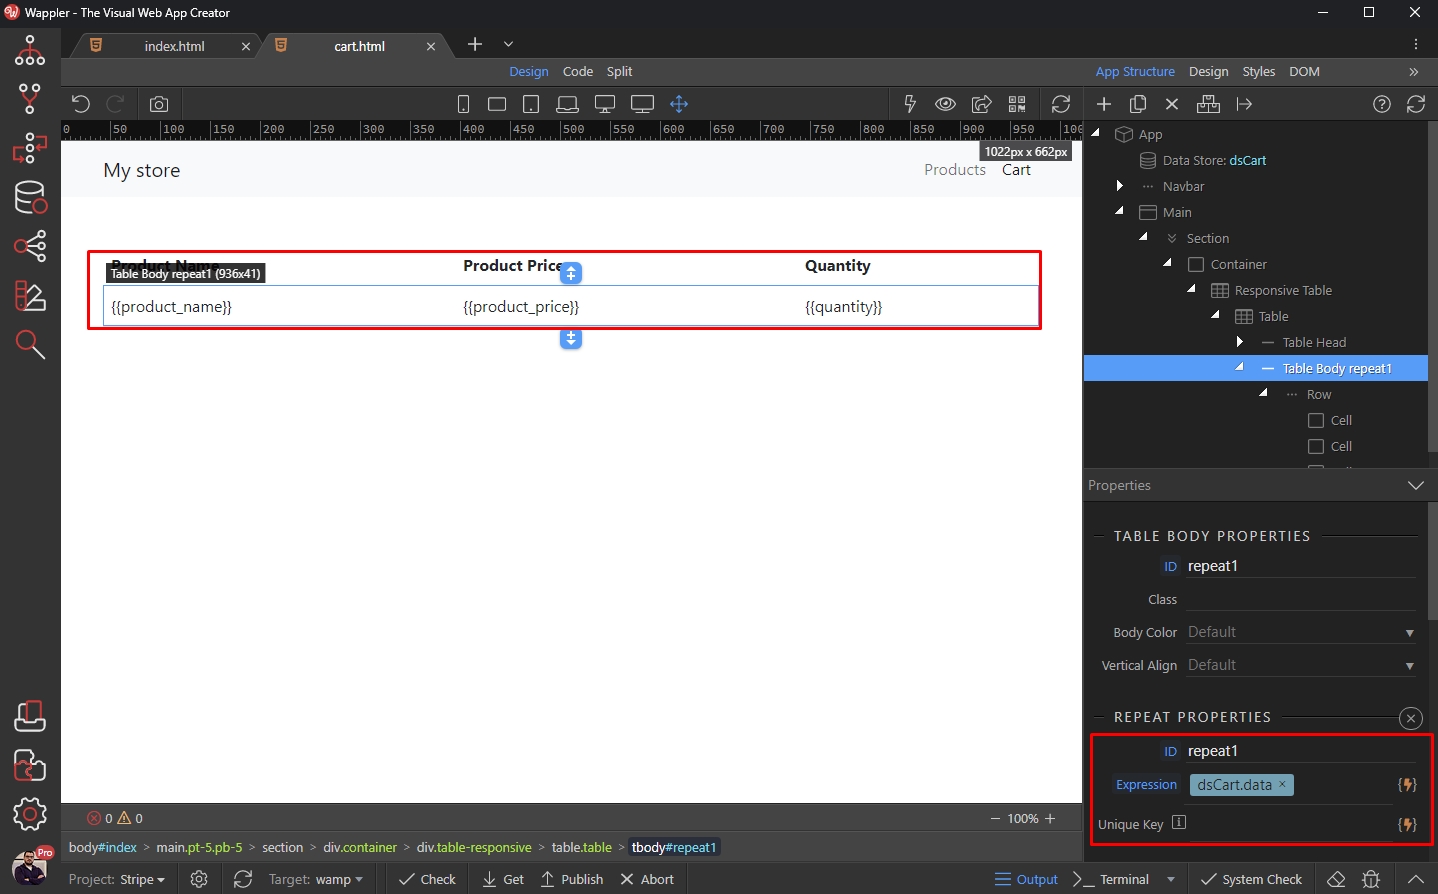
So please check the tutorial mentioned above.
Section titled “So please check the tutorial mentioned above.”Now, let’s add the Stripe component on the page. Click Add New component in App Structure:

Open Stripe and select the Stripe Component:
Section titled “Open Stripe and select the Stripe Component:”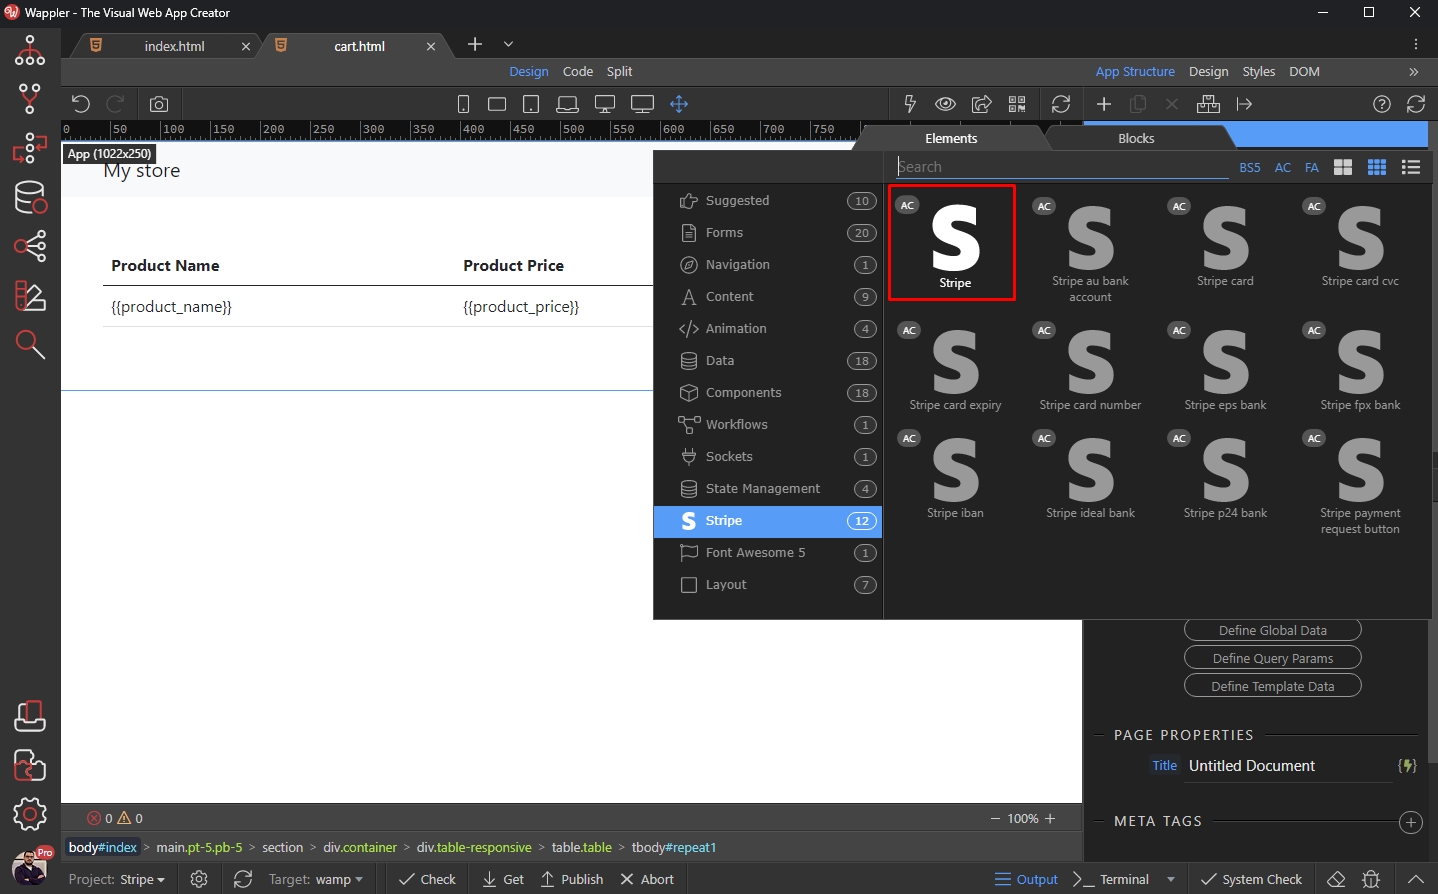
Paste your Stripe API Key in the Key field:
Section titled “Paste your Stripe API Key in the Key field:”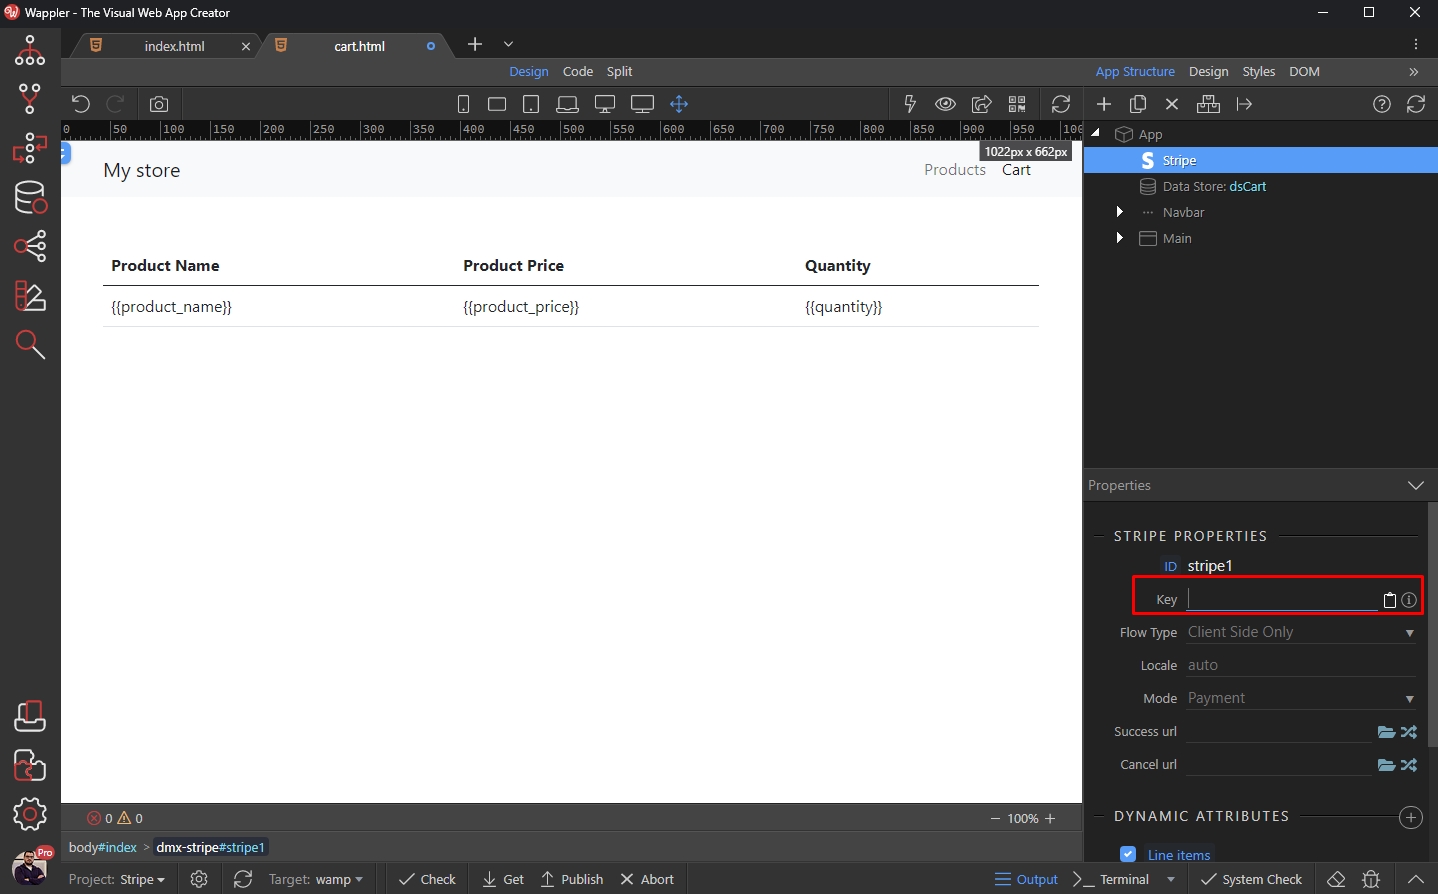
It can be found on https://dashboard.stripe.com/apikeys
Section titled “It can be found on https://dashboard.stripe.com/apikeys”Then enter the other options - Flow Type: client side; Mode: payment; and select the success and cancel URLs, where the users should be redirected:
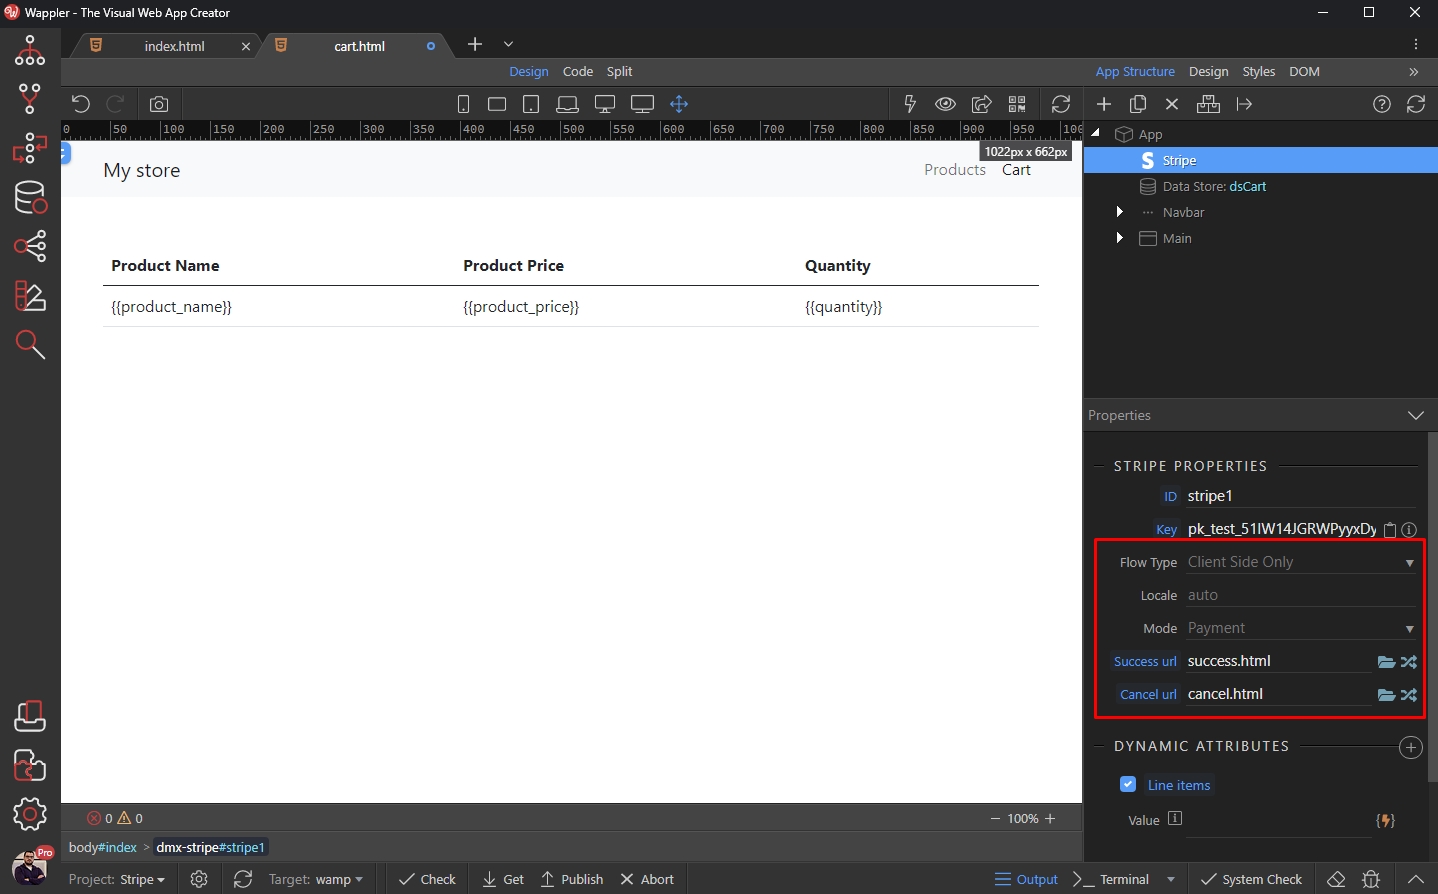
Step 82
Section titled “Step 82”Click the dynamic data picker for the Line Items. This is where we send the items from our shopping cart to the checkout page:
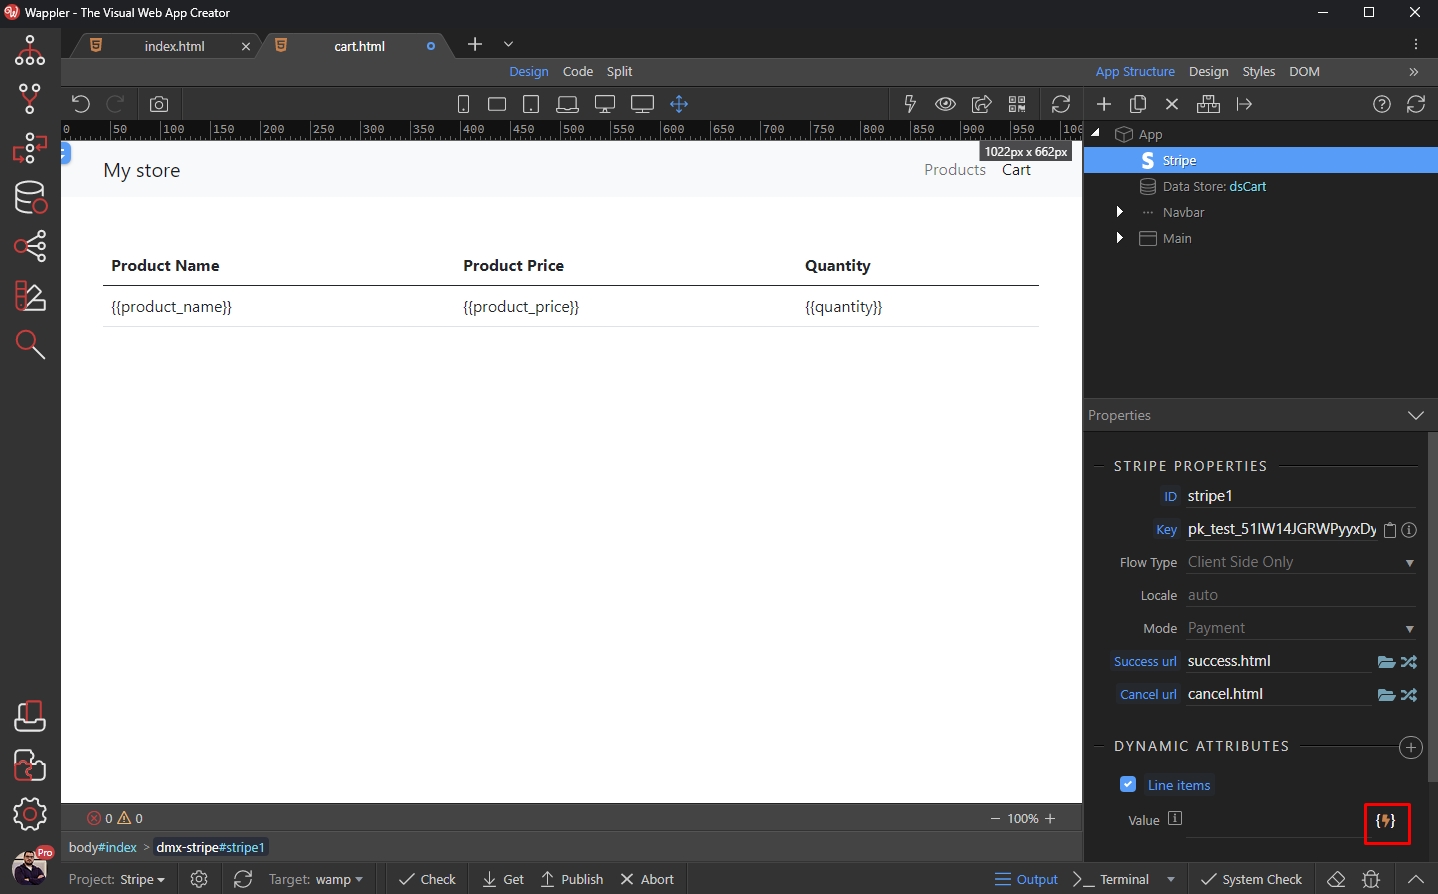
Select the data element under Data Store:
Section titled “Select the data element under Data Store:”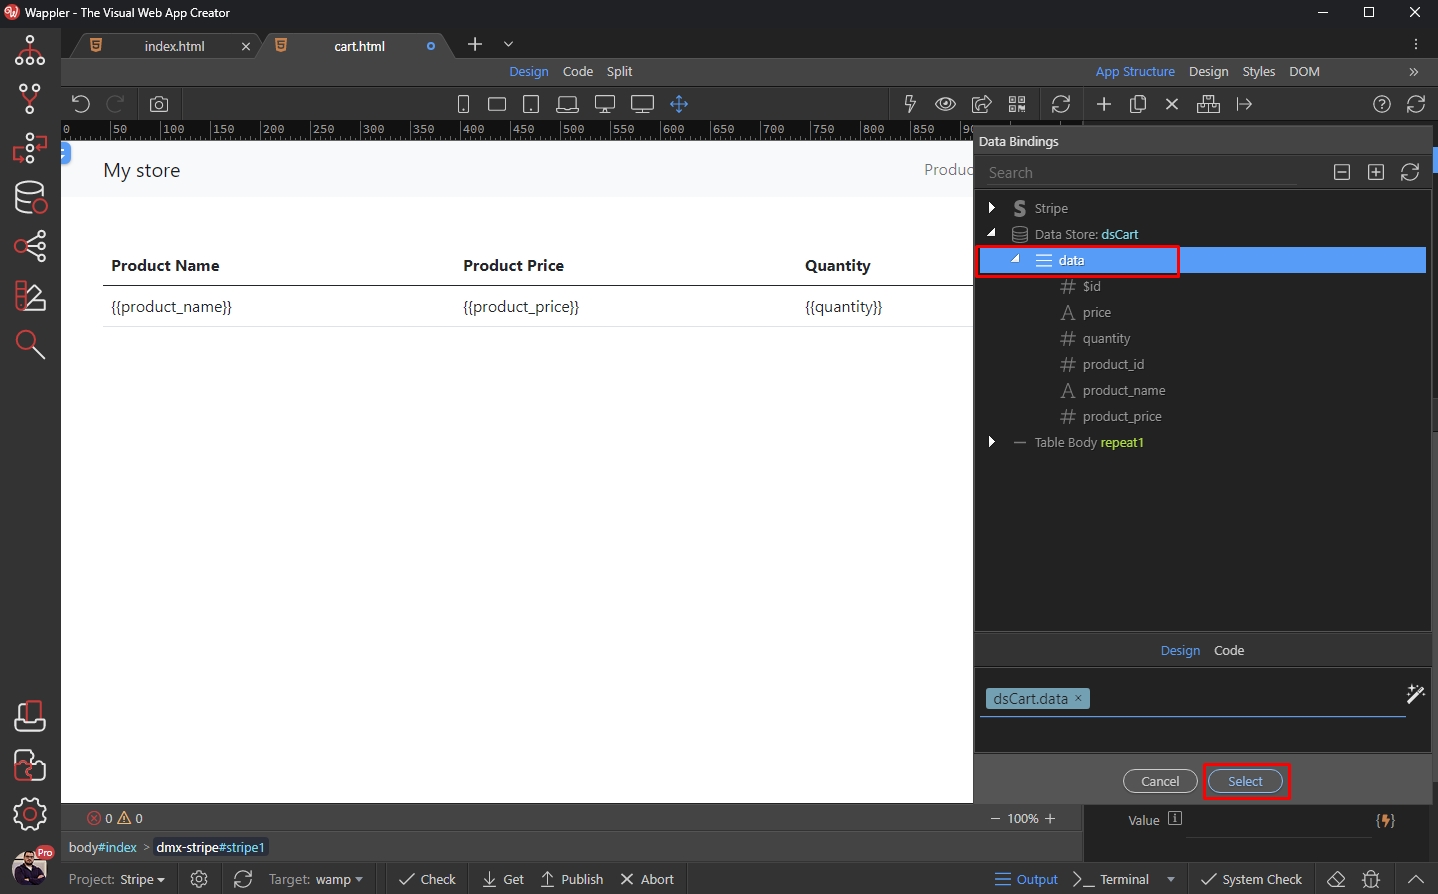
And then add a checkout button on the page. Add a dynamic event for it:
Section titled “And then add a checkout button on the page. Add a dynamic event for it:”And then add a checkout button on the page.
Add a dynamic event for it:
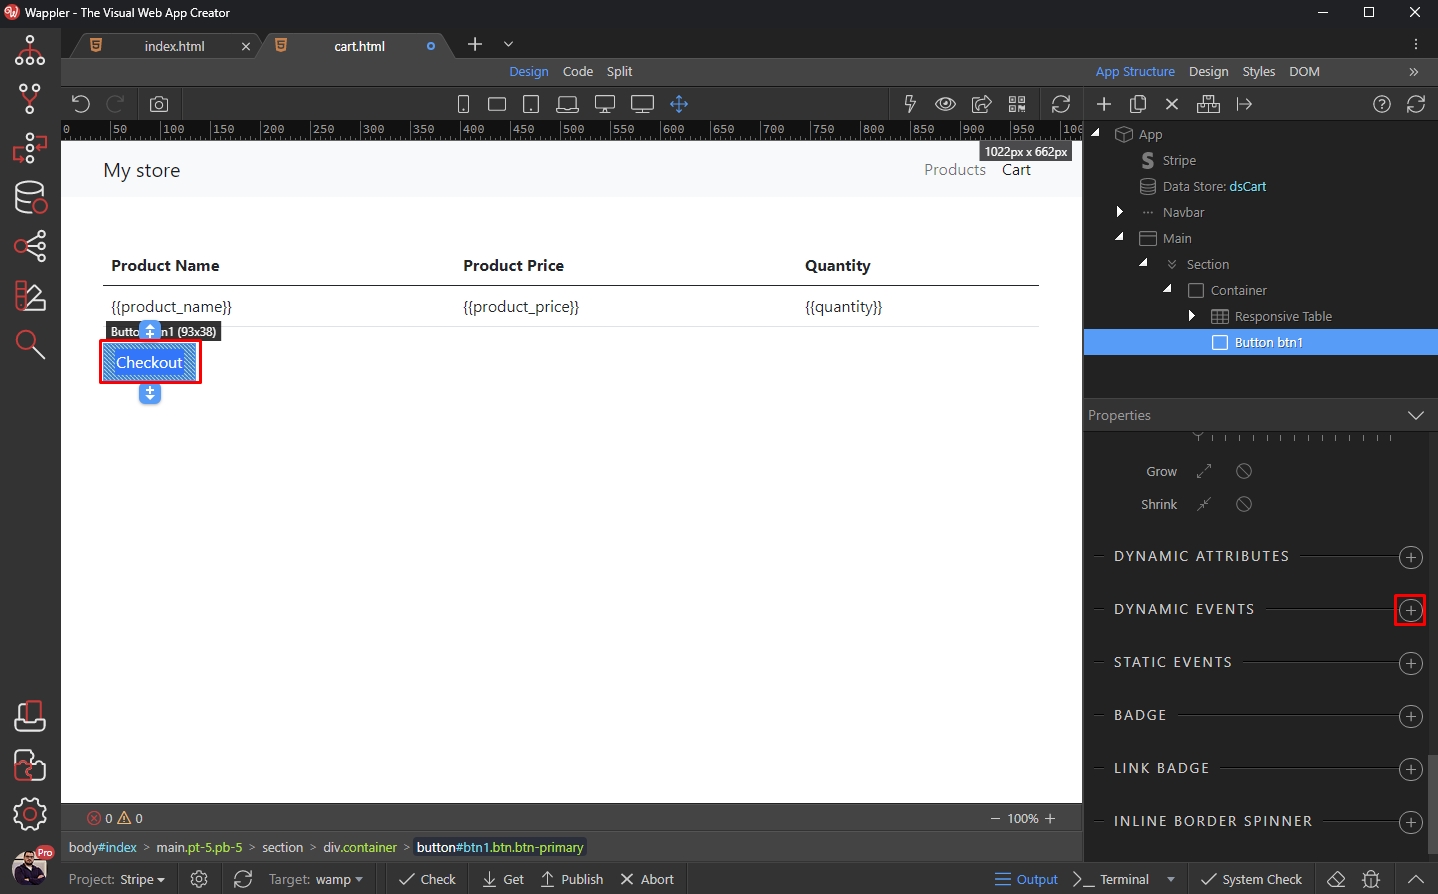
Select Mouse > Click:
Section titled “Select Mouse > Click:”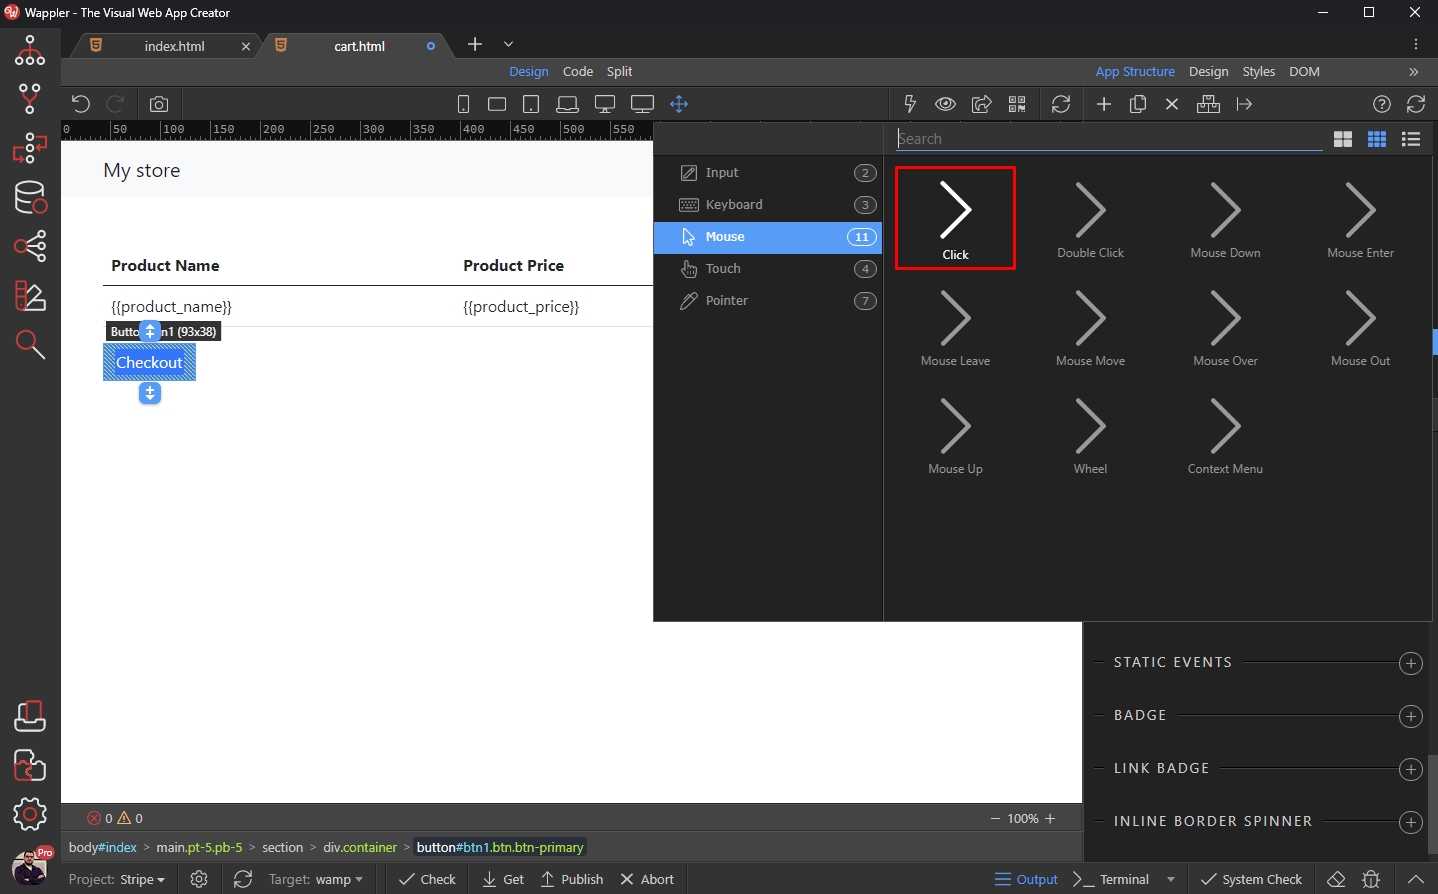
Select dynamic action picker:
Section titled “Select dynamic action picker:”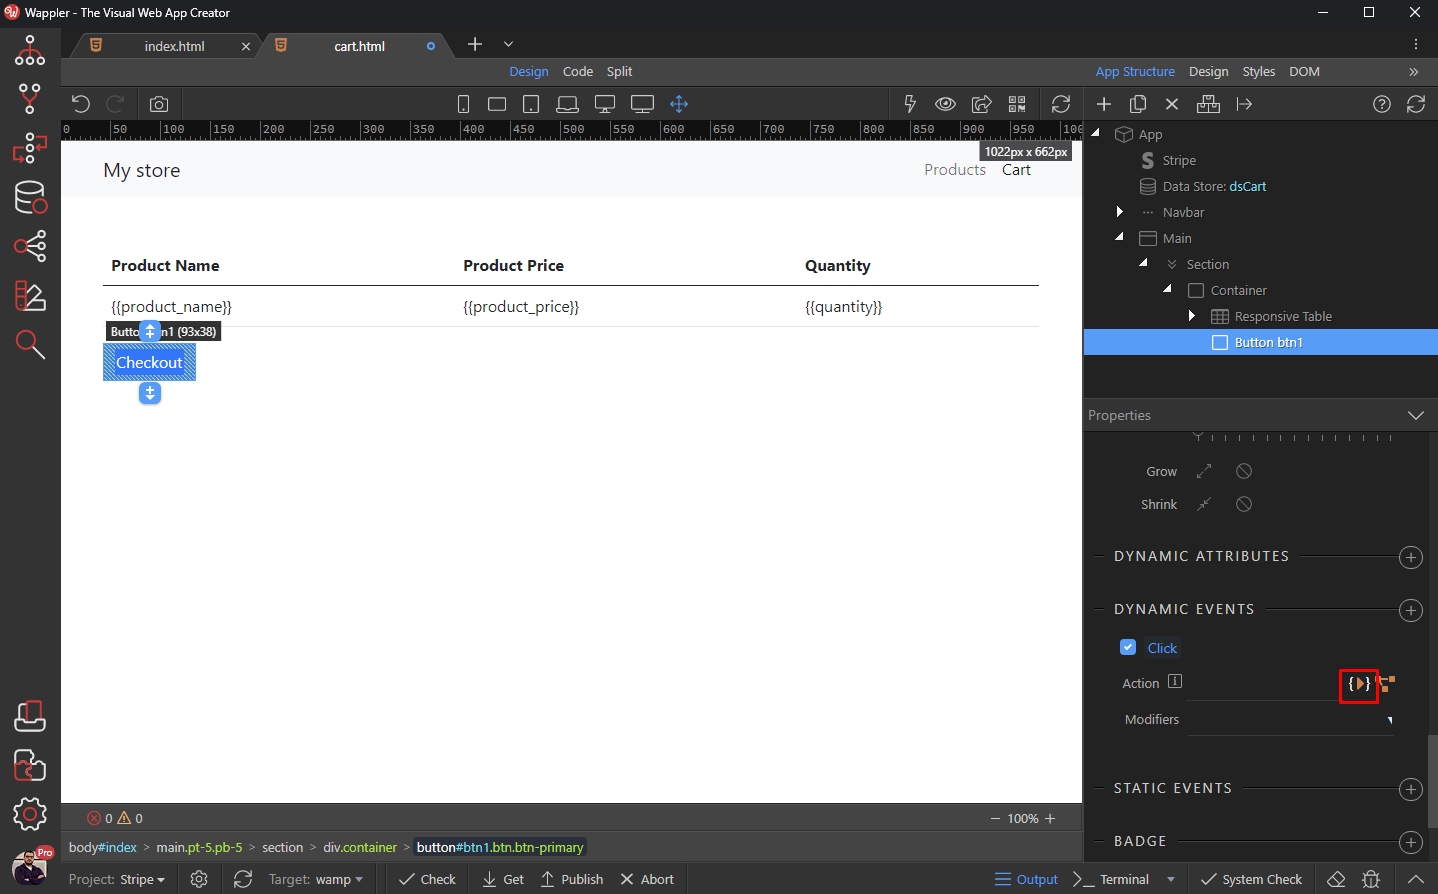
Under Stripe, select Checkout:
Section titled “Under Stripe, select Checkout:”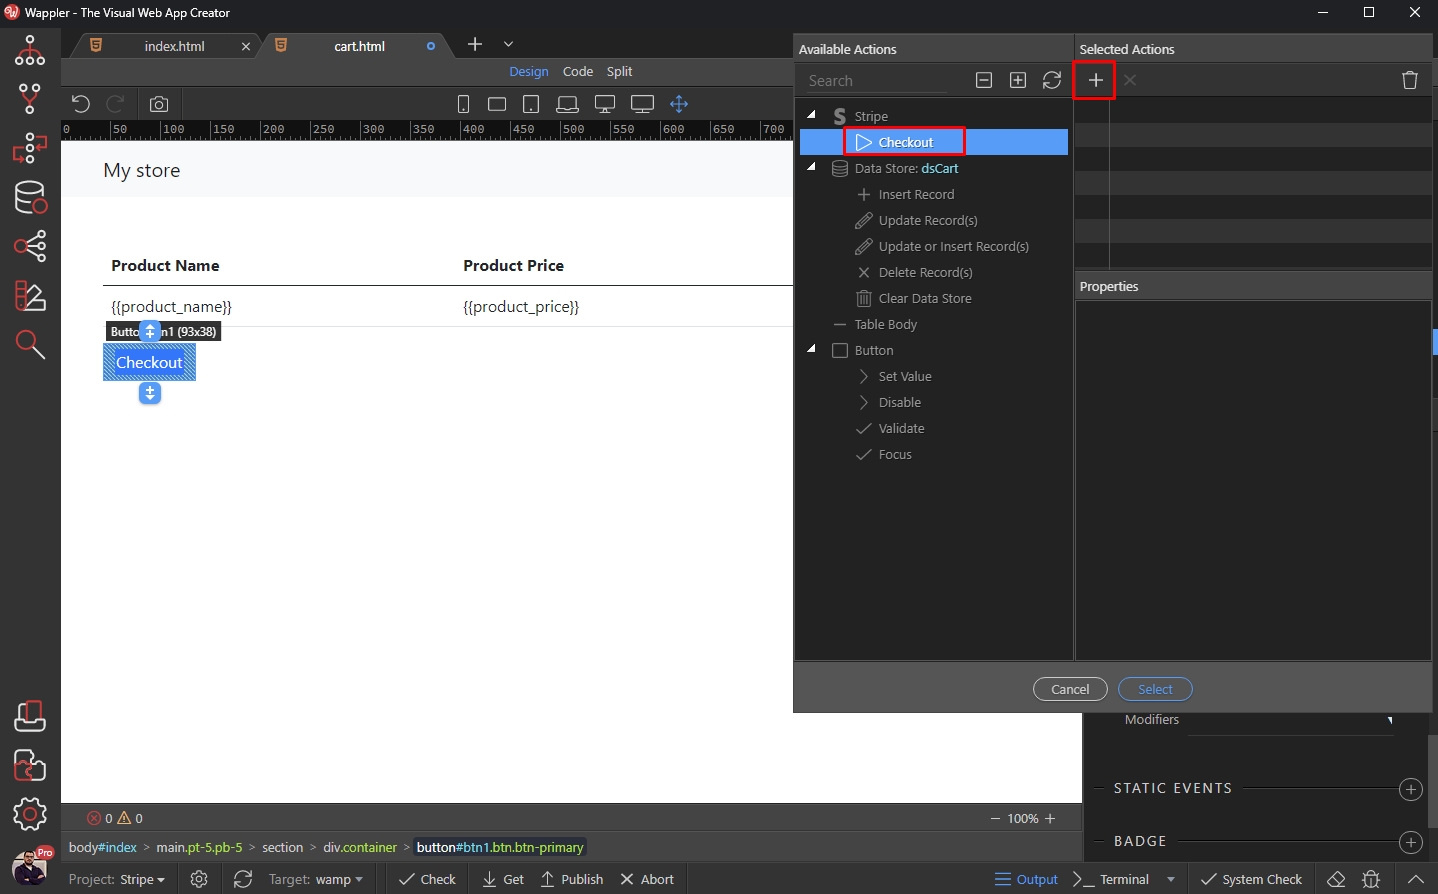
Click Select and you are done.
Section titled “Click Select and you are done.”You can preview the results:
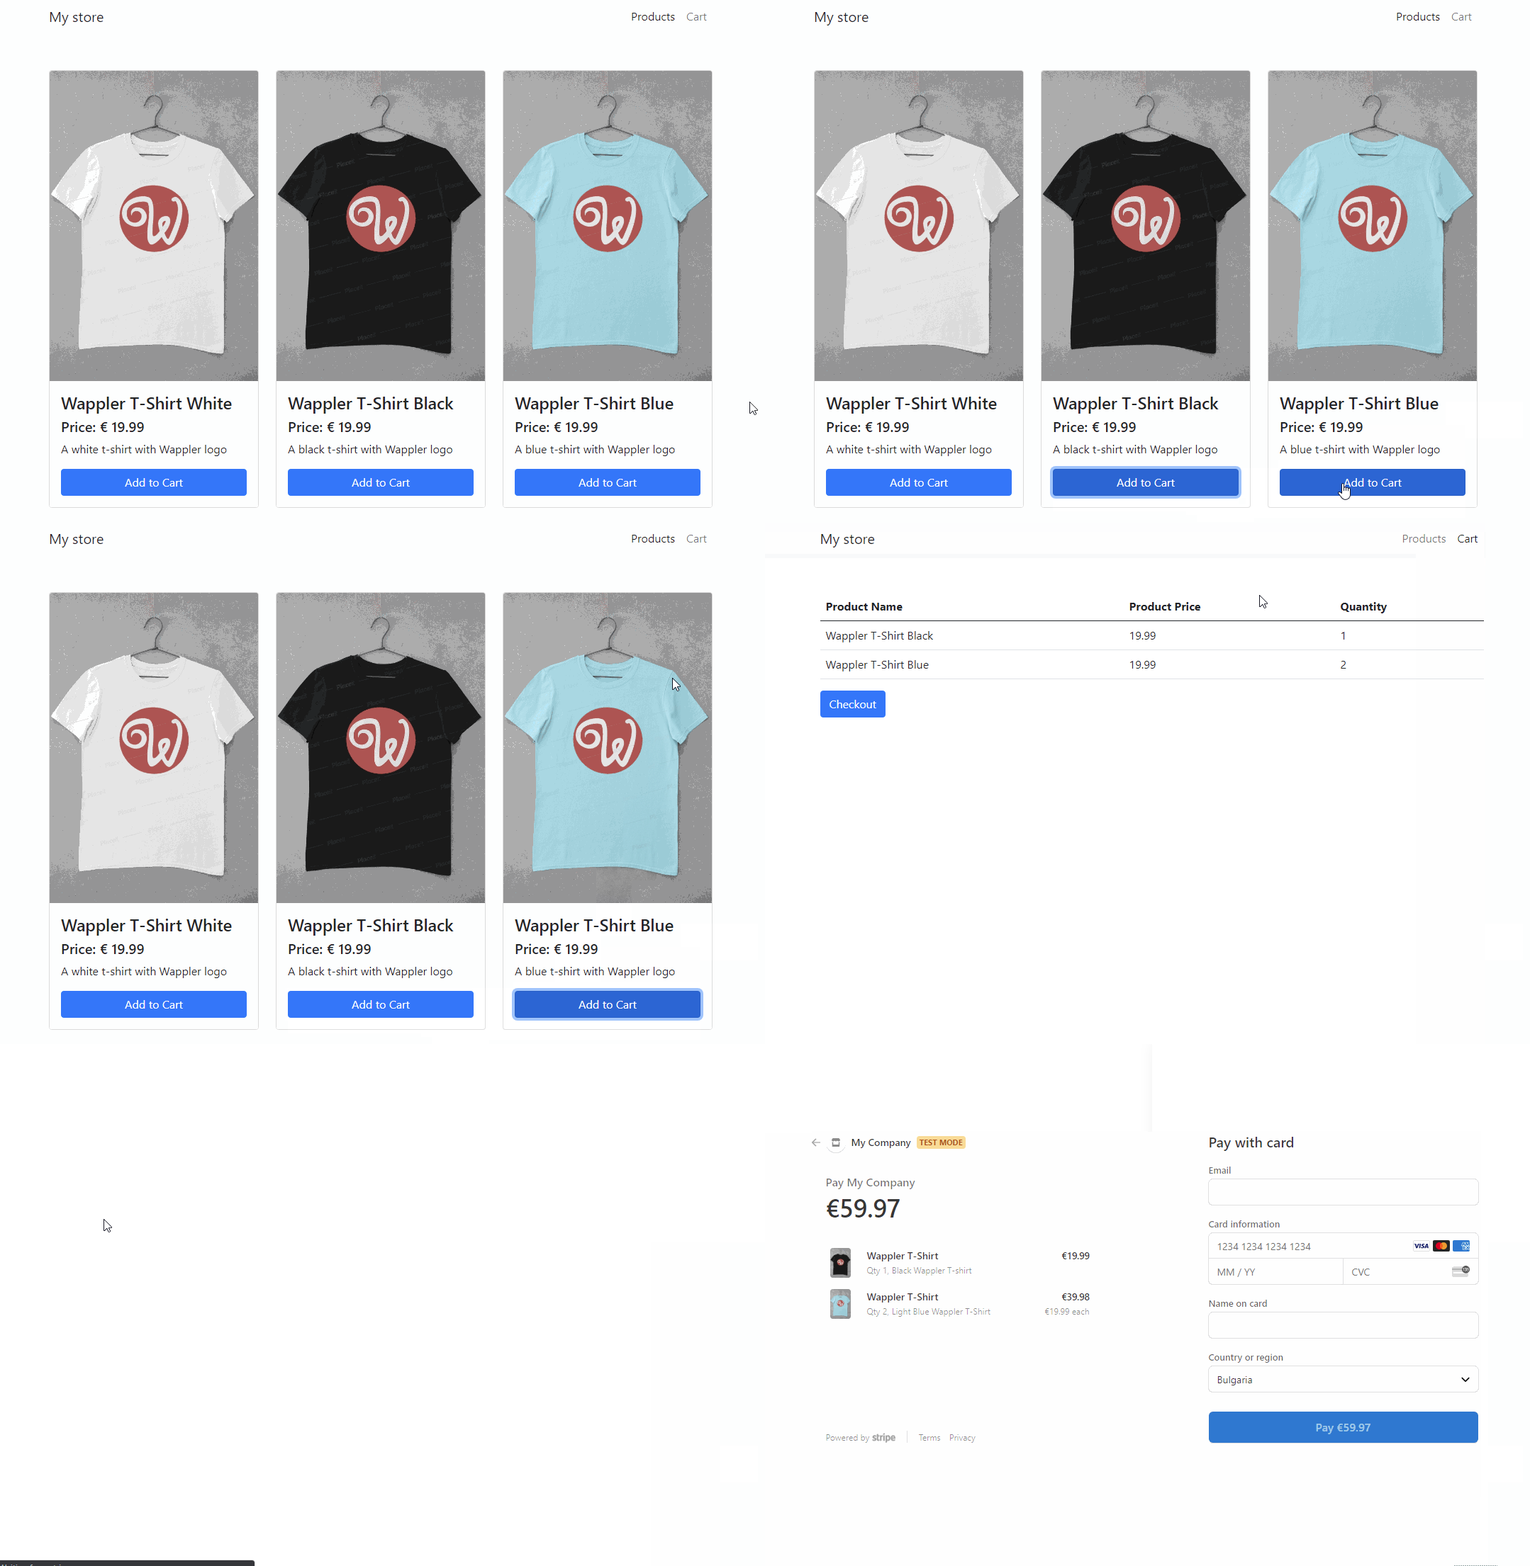
Server-Side Integration
Section titled “Server-Side Integration”You can also create a server-side checkout it gives more flexibility and options than the client-side integration.
First, let’s create a server action. Right click API in the Server Connect and add API Action:

We call it stripe_checkout.
Section titled “We call it stripe_checkout.”Then select Server Connect Settings:
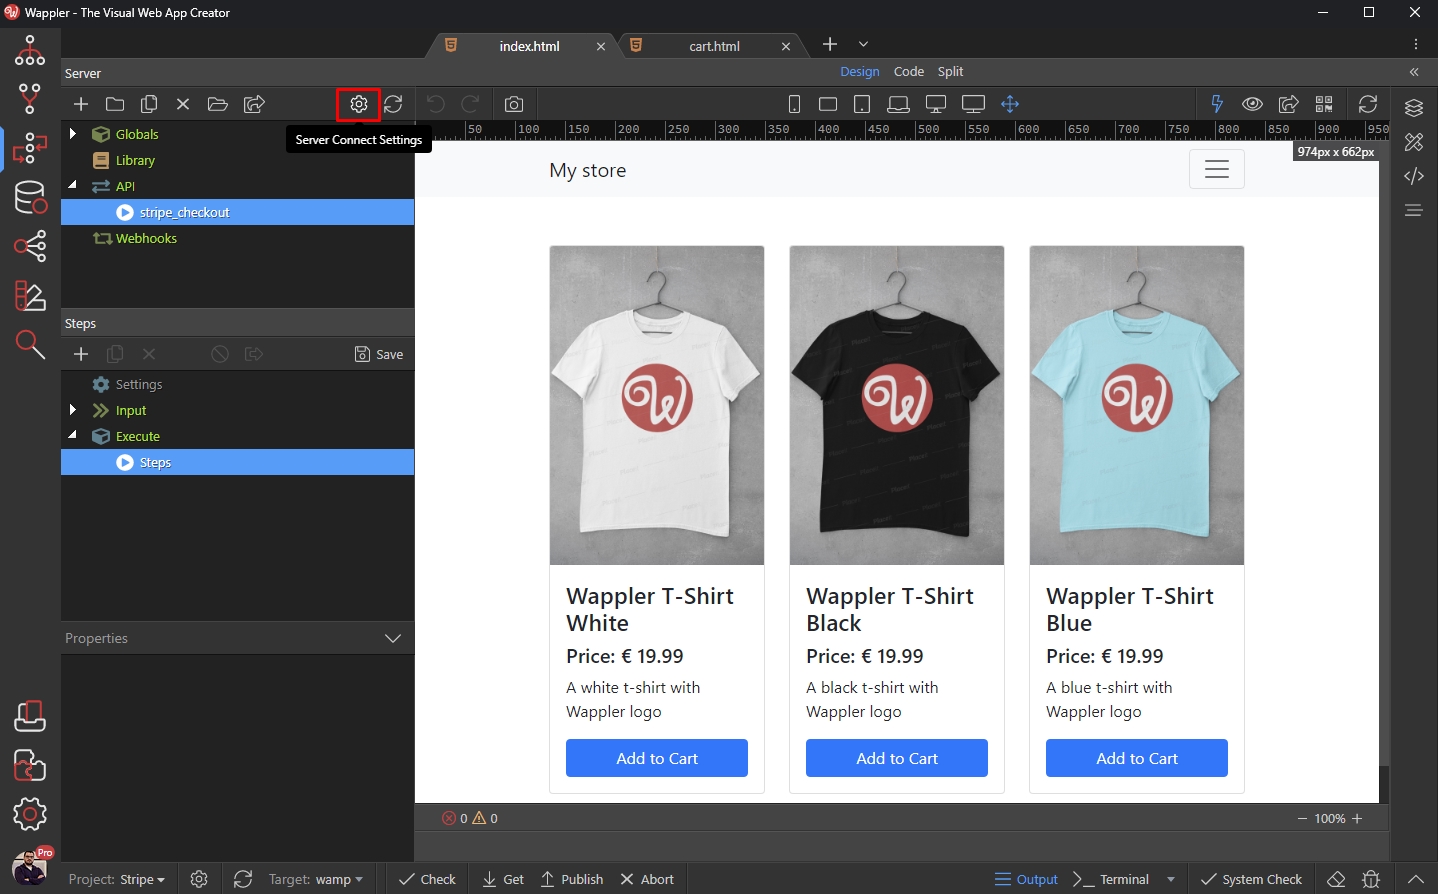
Open the Stripe Tab:
Section titled “Open the Stripe Tab:”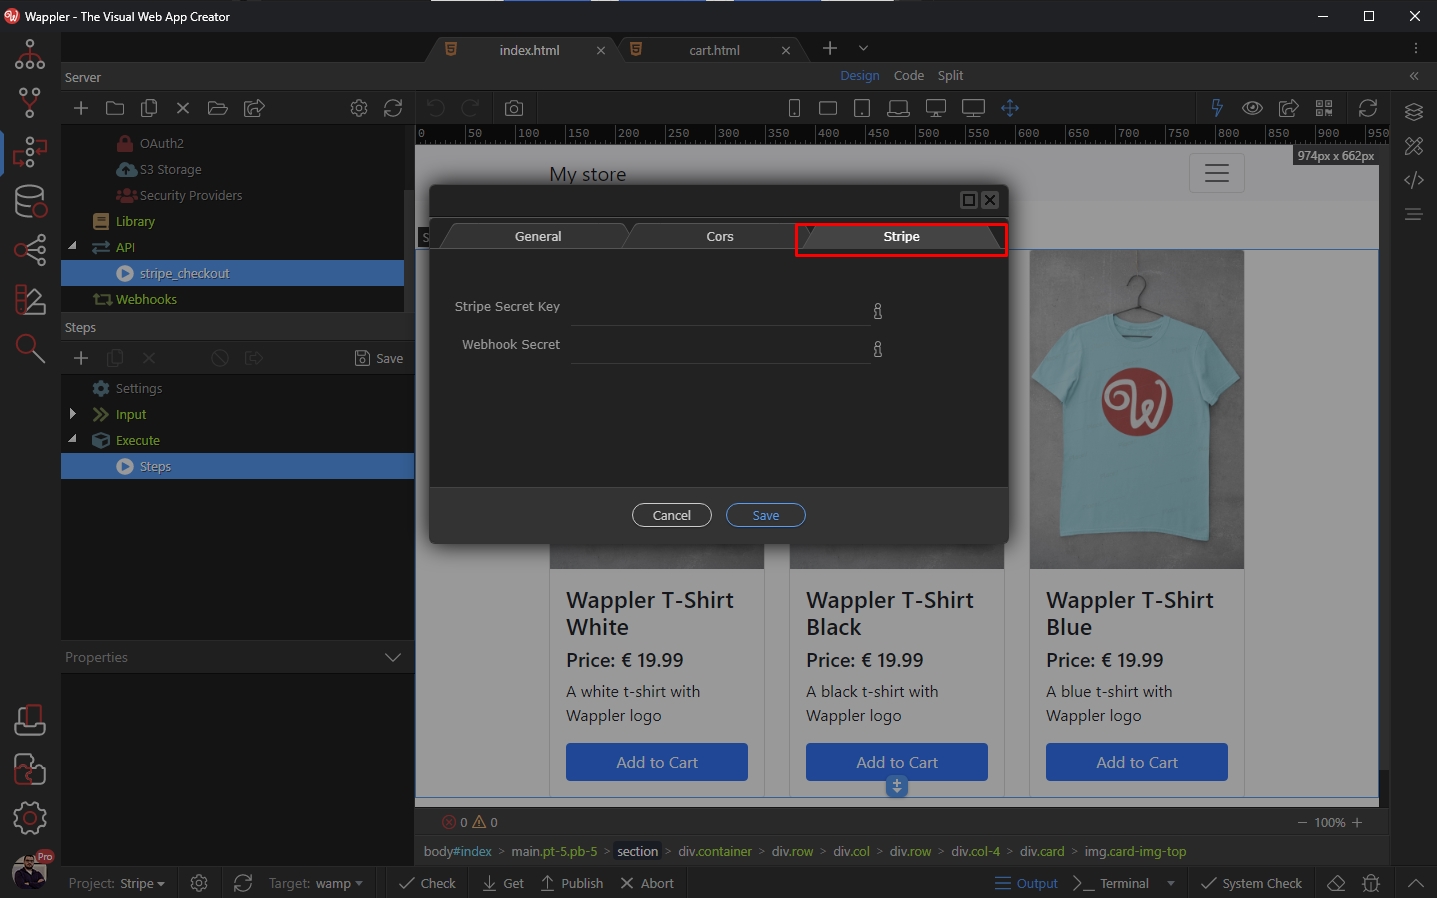
Step 93
Section titled “Step 93”Here you need to enter your Stripe API Secret Key, which can be found on https://dashboard.stripe.com/test/apikeys
Copy the Secret Key:

Paste it in the Secret Key field and click Save:
Section titled “Paste it in the Secret Key field and click Save:”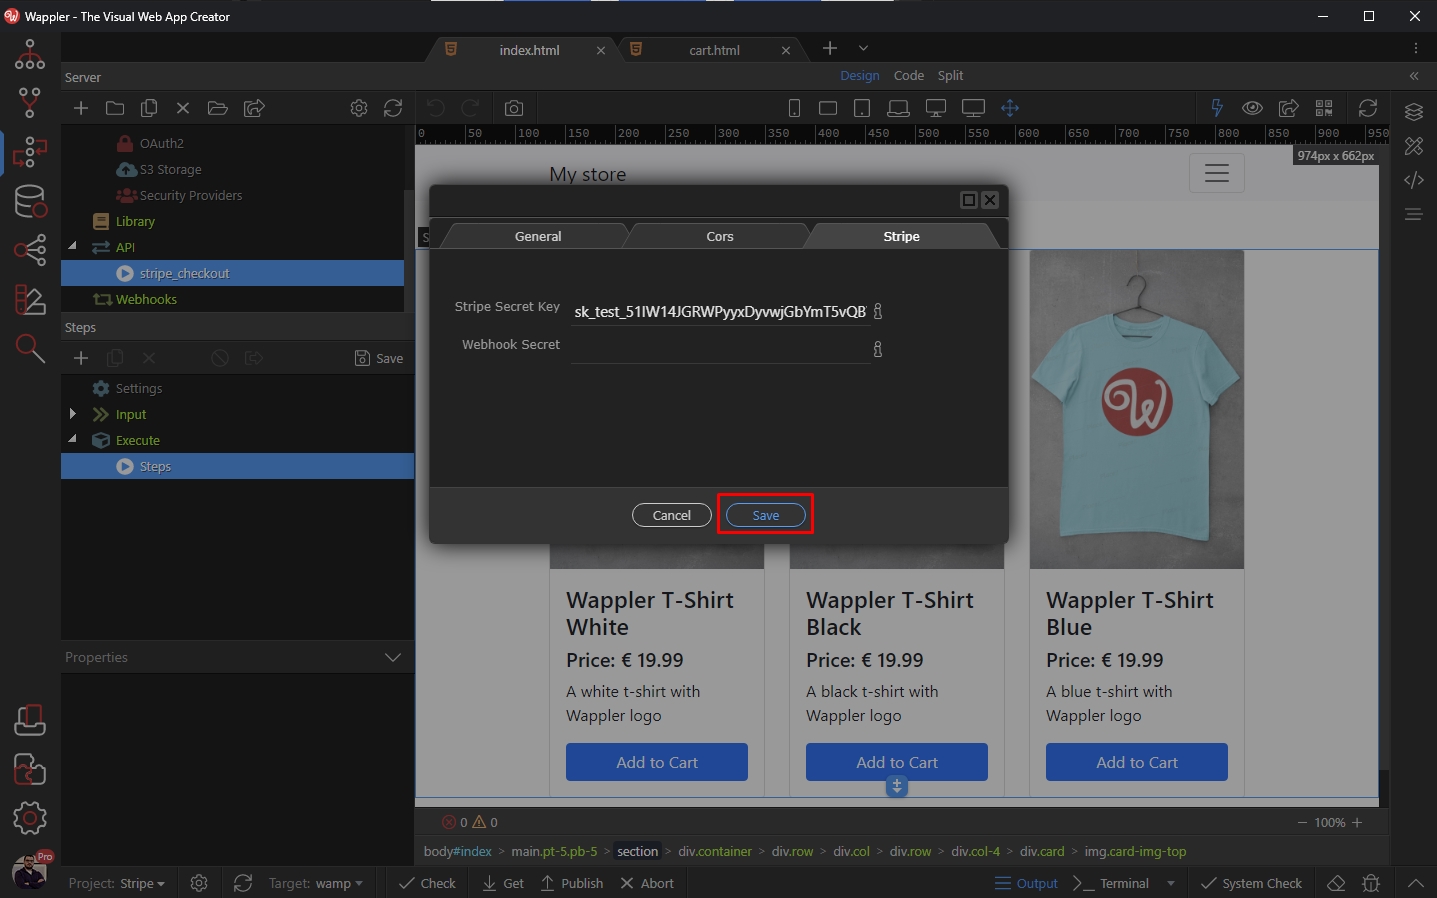
Then right steps:
Section titled “Then right steps:”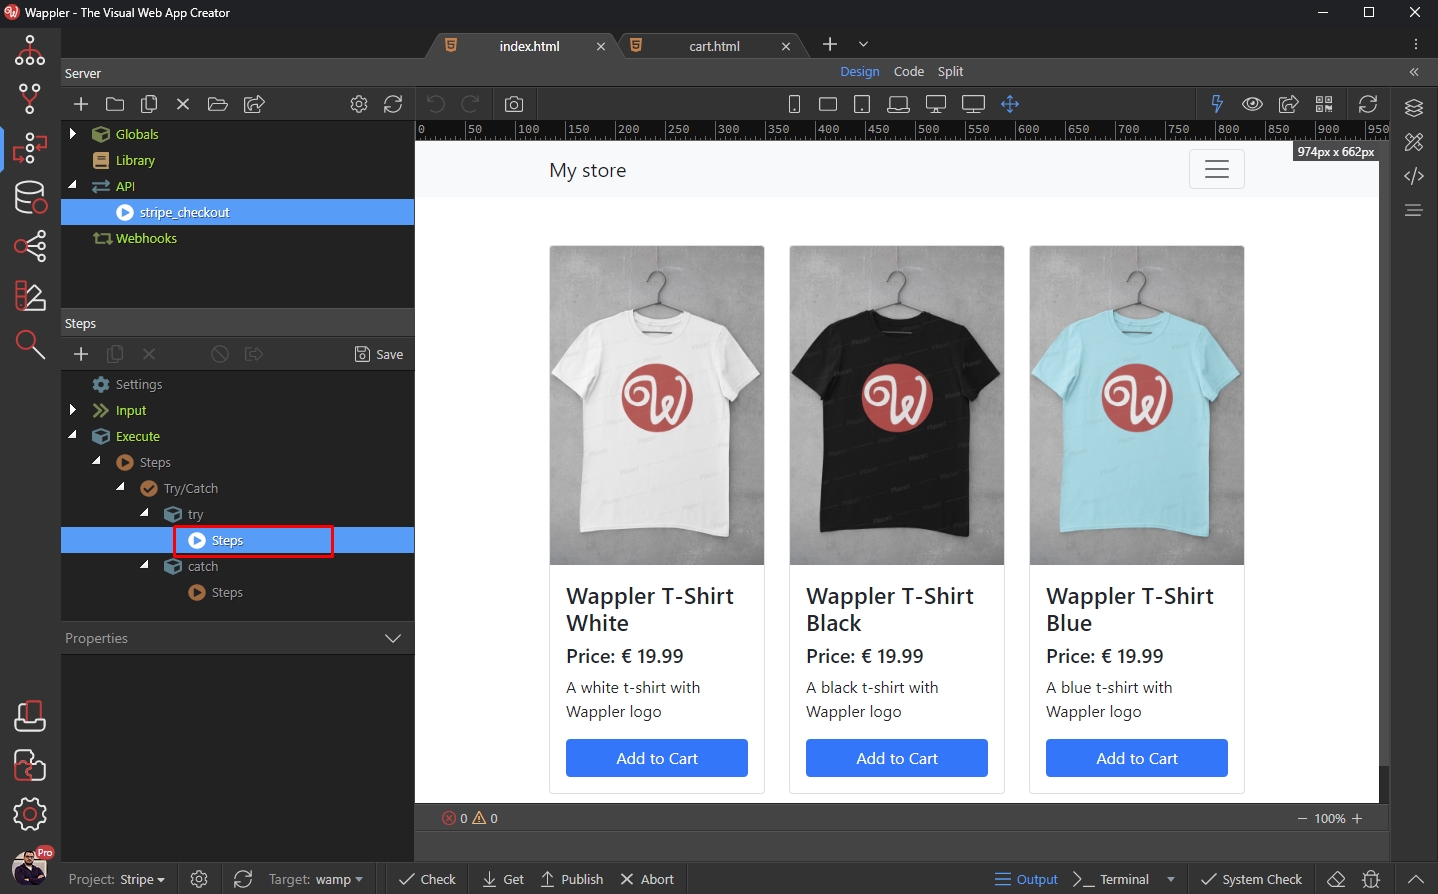
Expand Stripe, select Checkout and click Create Checkout Session:
Section titled “Expand Stripe, select Checkout and click Create Checkout Session:”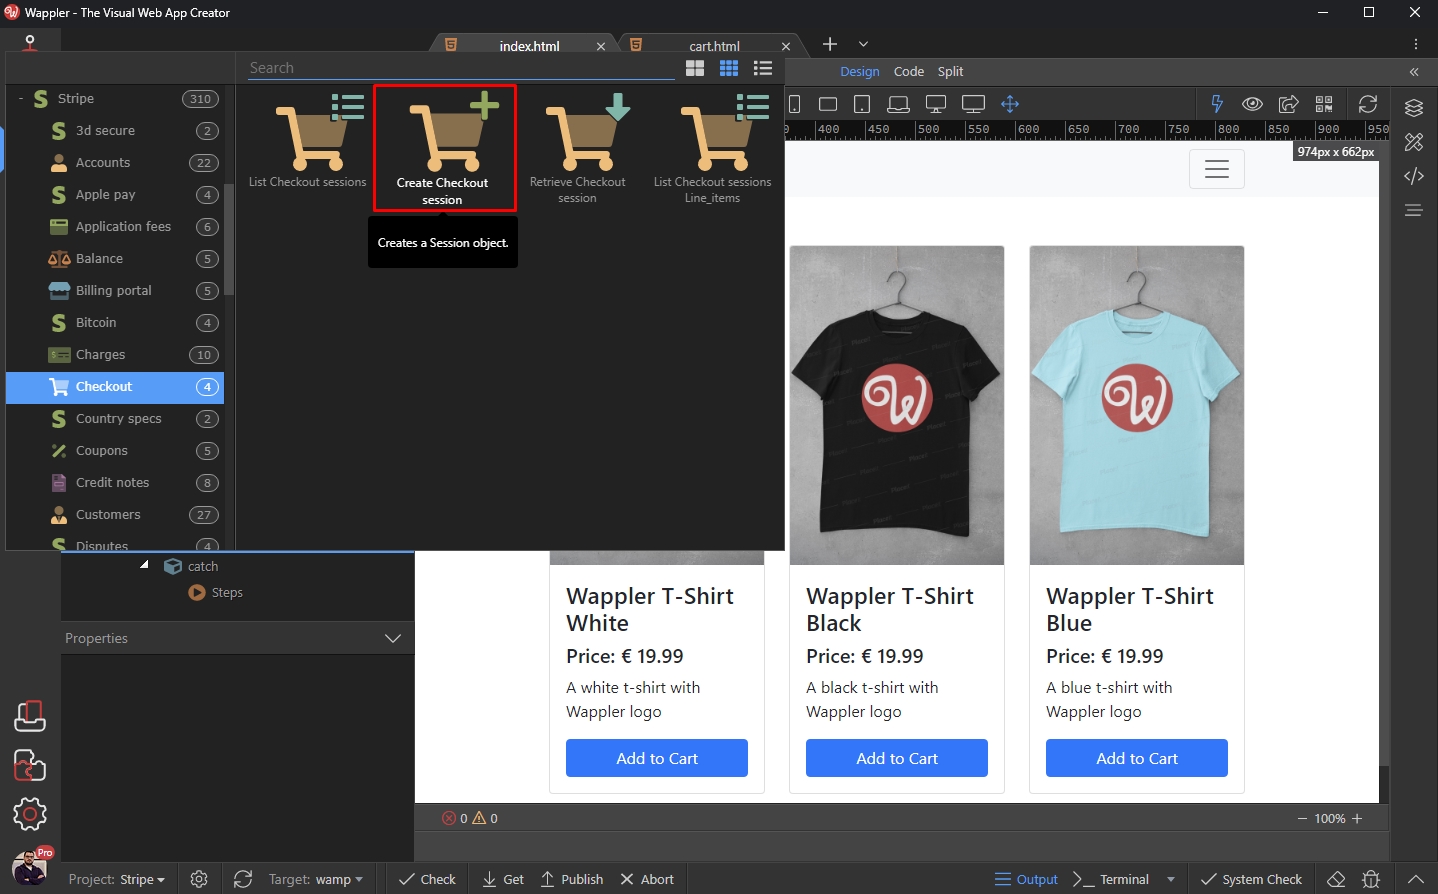
Step 97
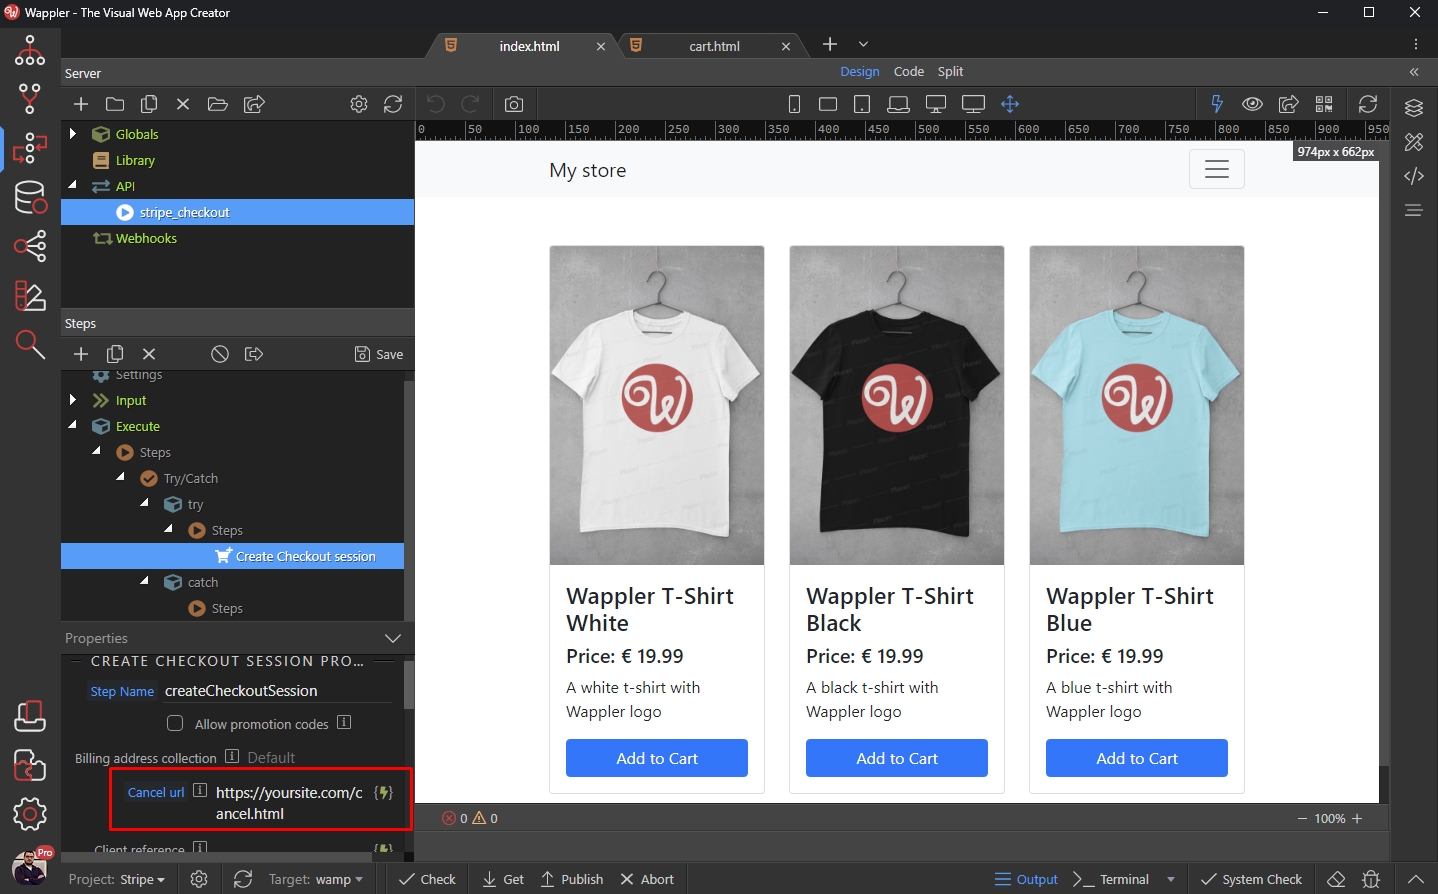
Section titled “Step 97”Scroll down the properties and add a cancel URL - the URL when the users should be redirected, when they cancel the checkout. Note this needs to be a full site URL:
Step 98
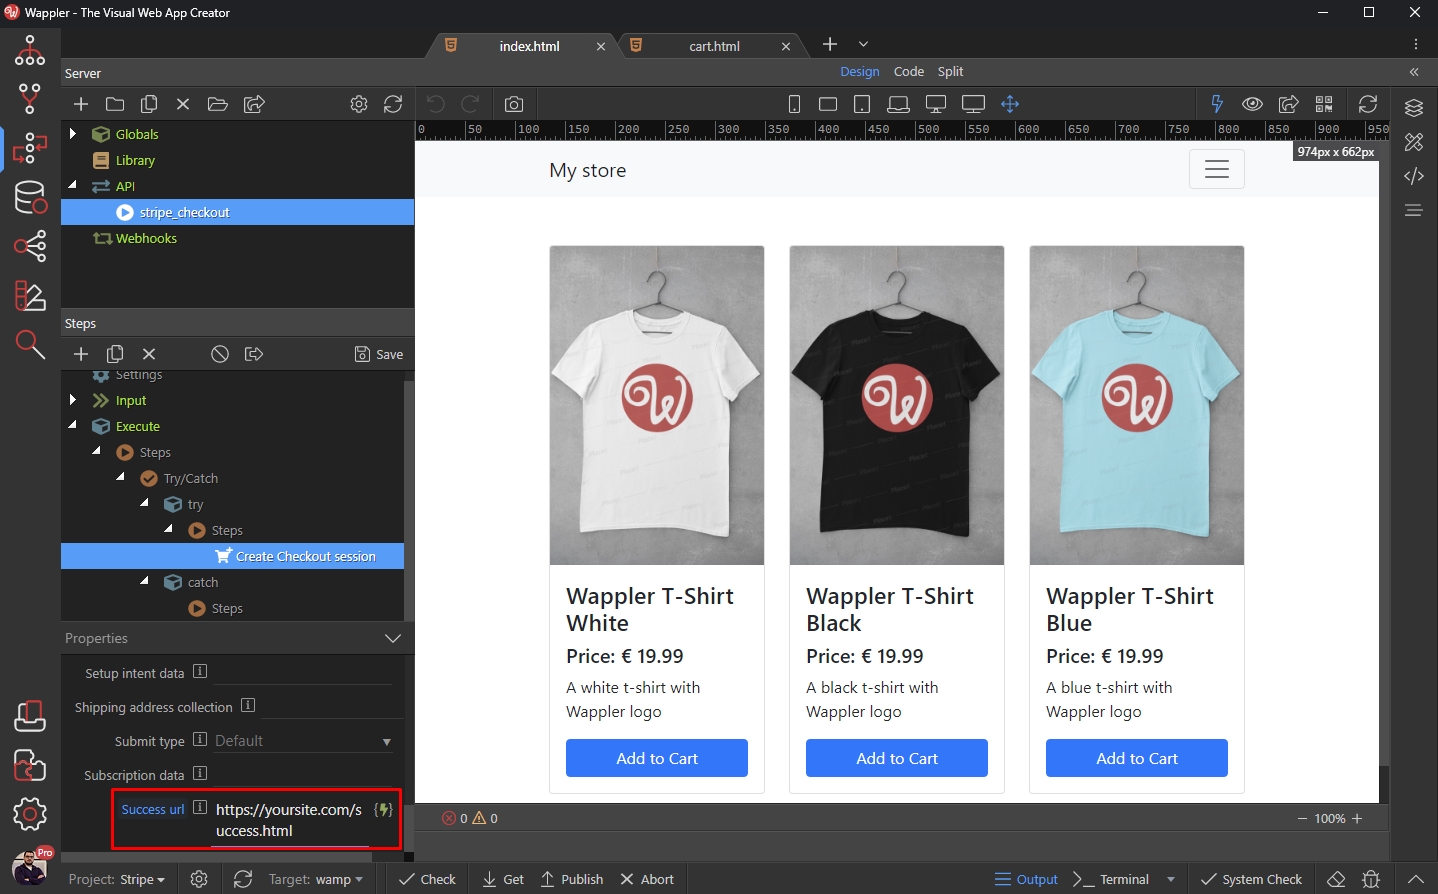
Section titled “Step 98”Then do the same for the success URL - the URL when the users should be redirected, after a successful payment Note this needs to be a full site URL:
Then right click the Create Checkout Session step:
Section titled “Then right click the Create Checkout Session step:”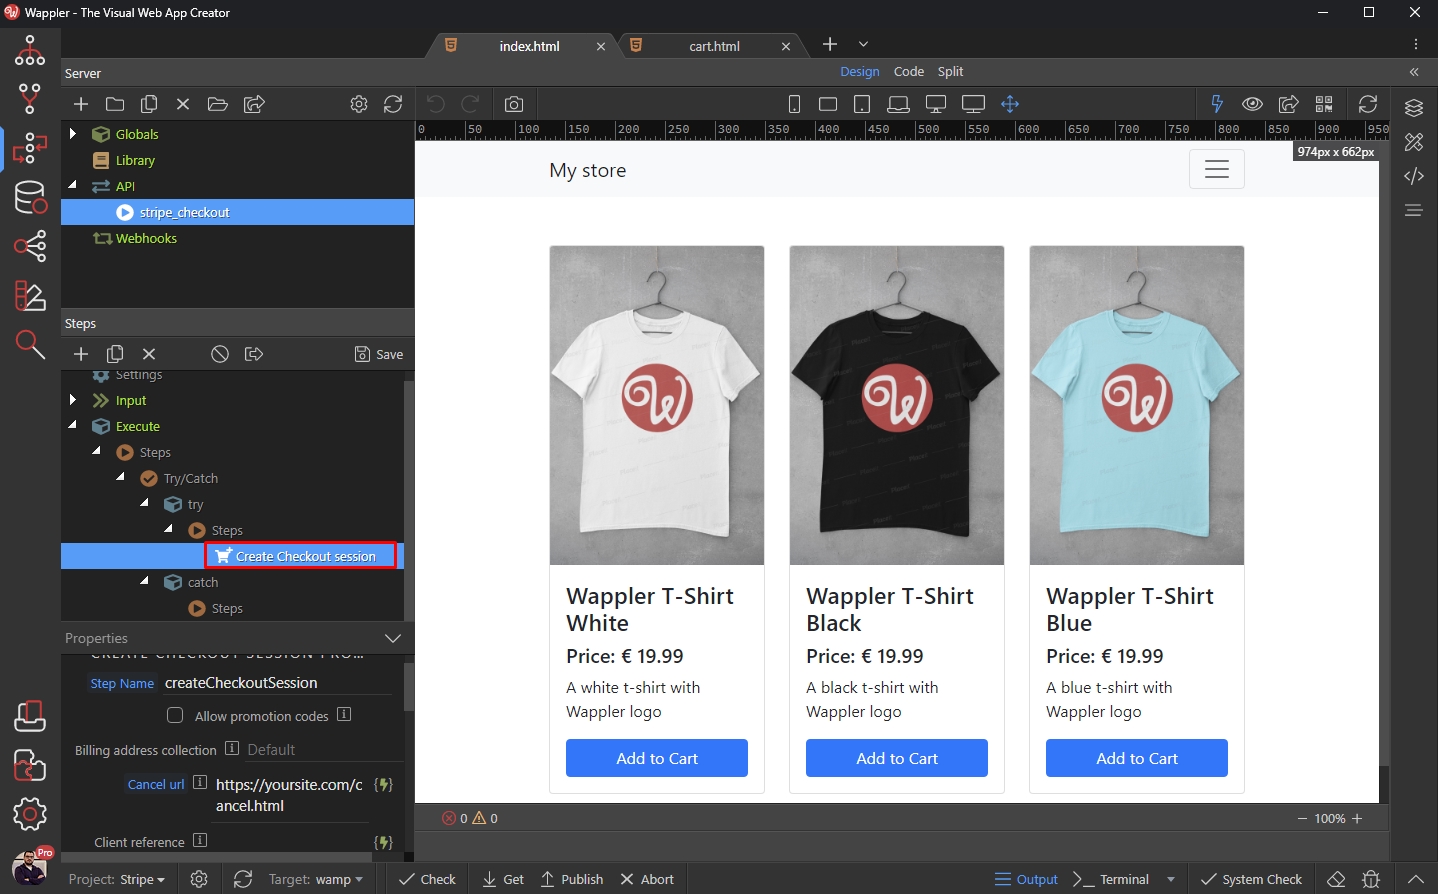
Add a Set Value step:
Section titled “Add a Set Value step:”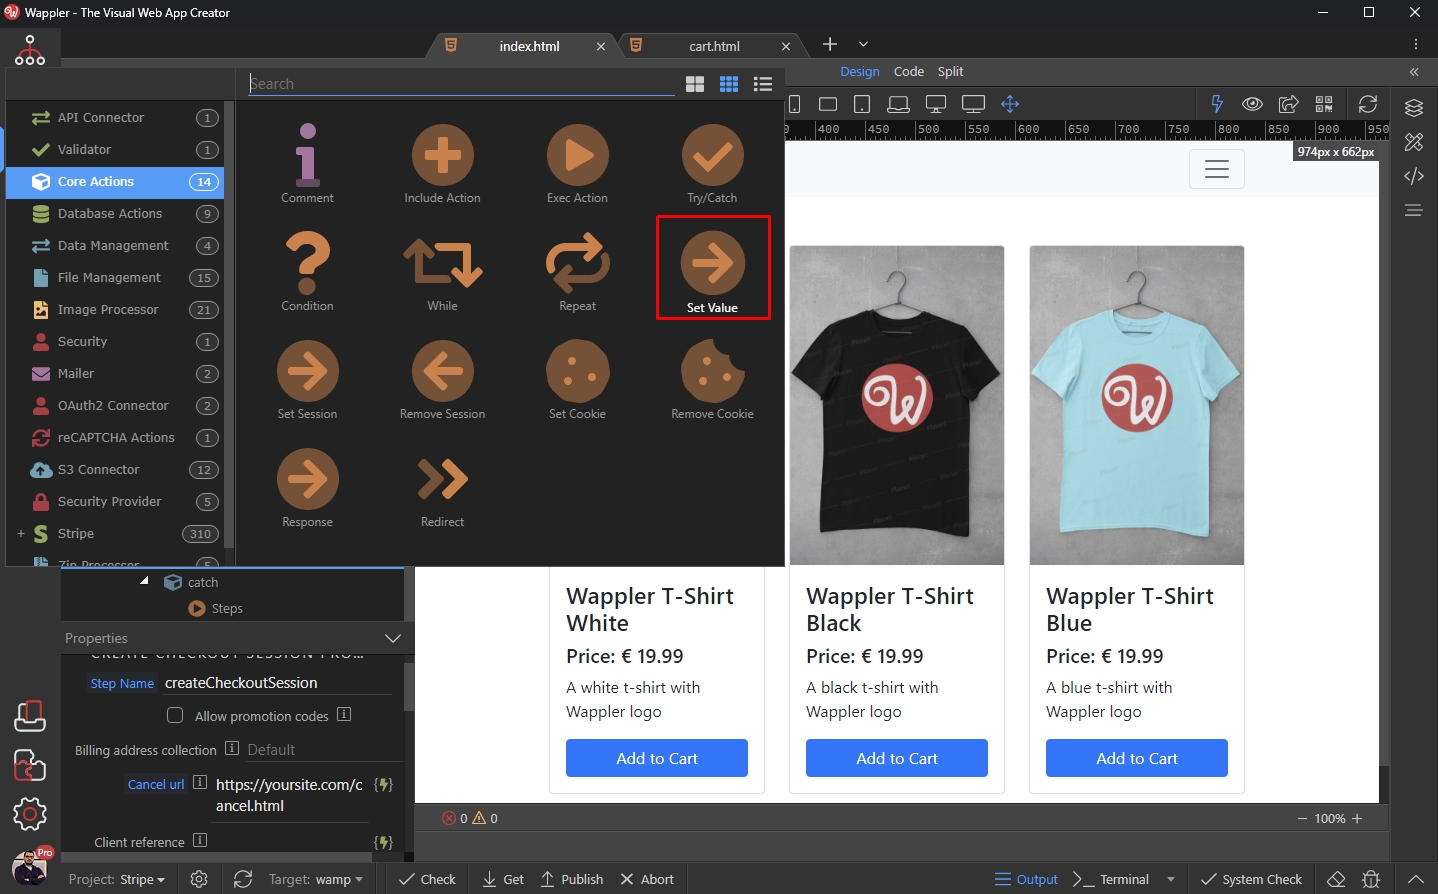
You should call it id:
Section titled “You should call it id:”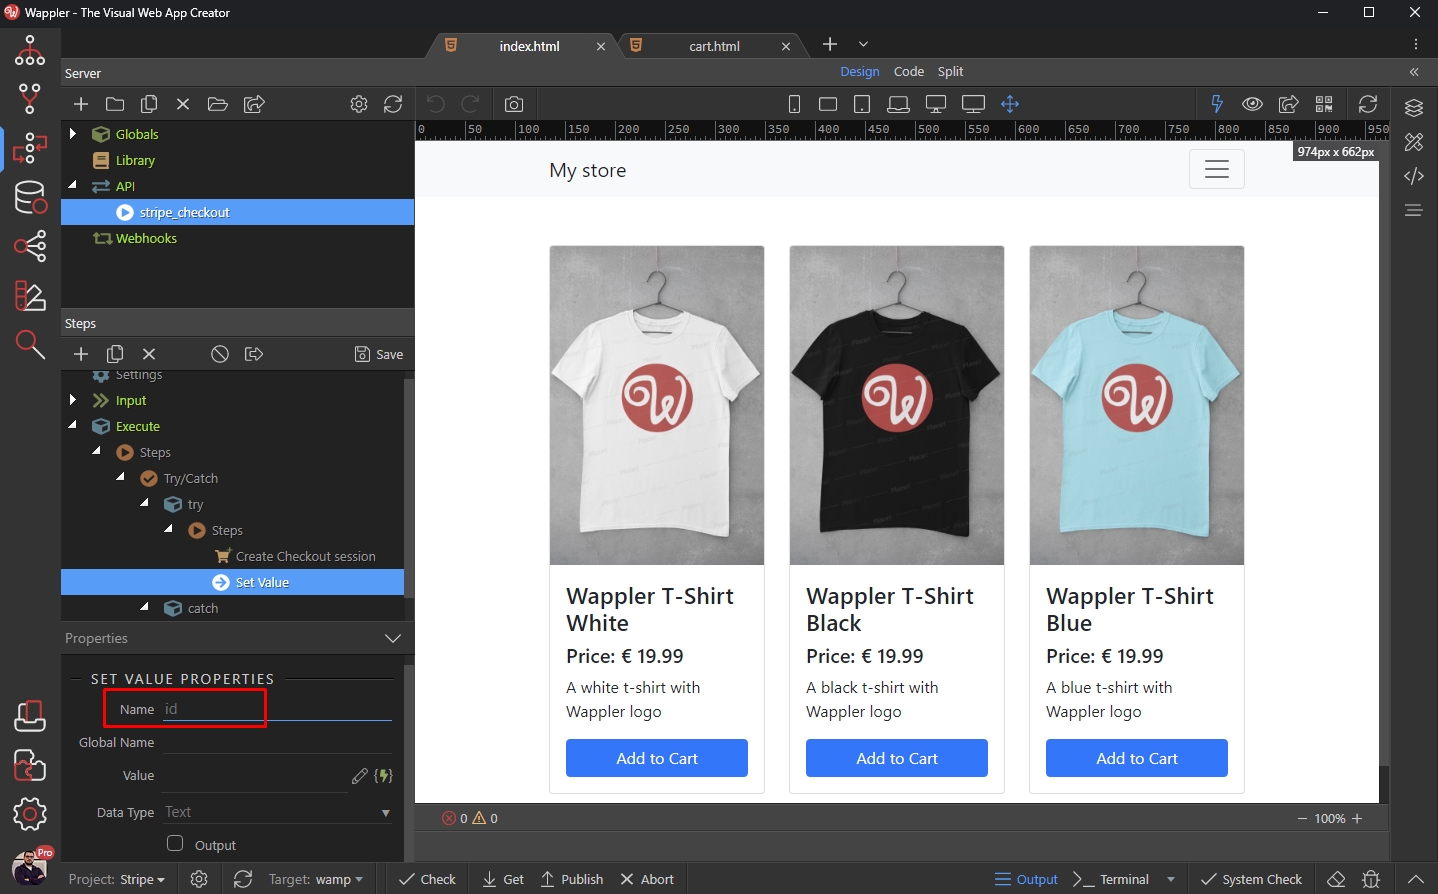
Select a dynamic value for it:
Section titled “Select a dynamic value for it:”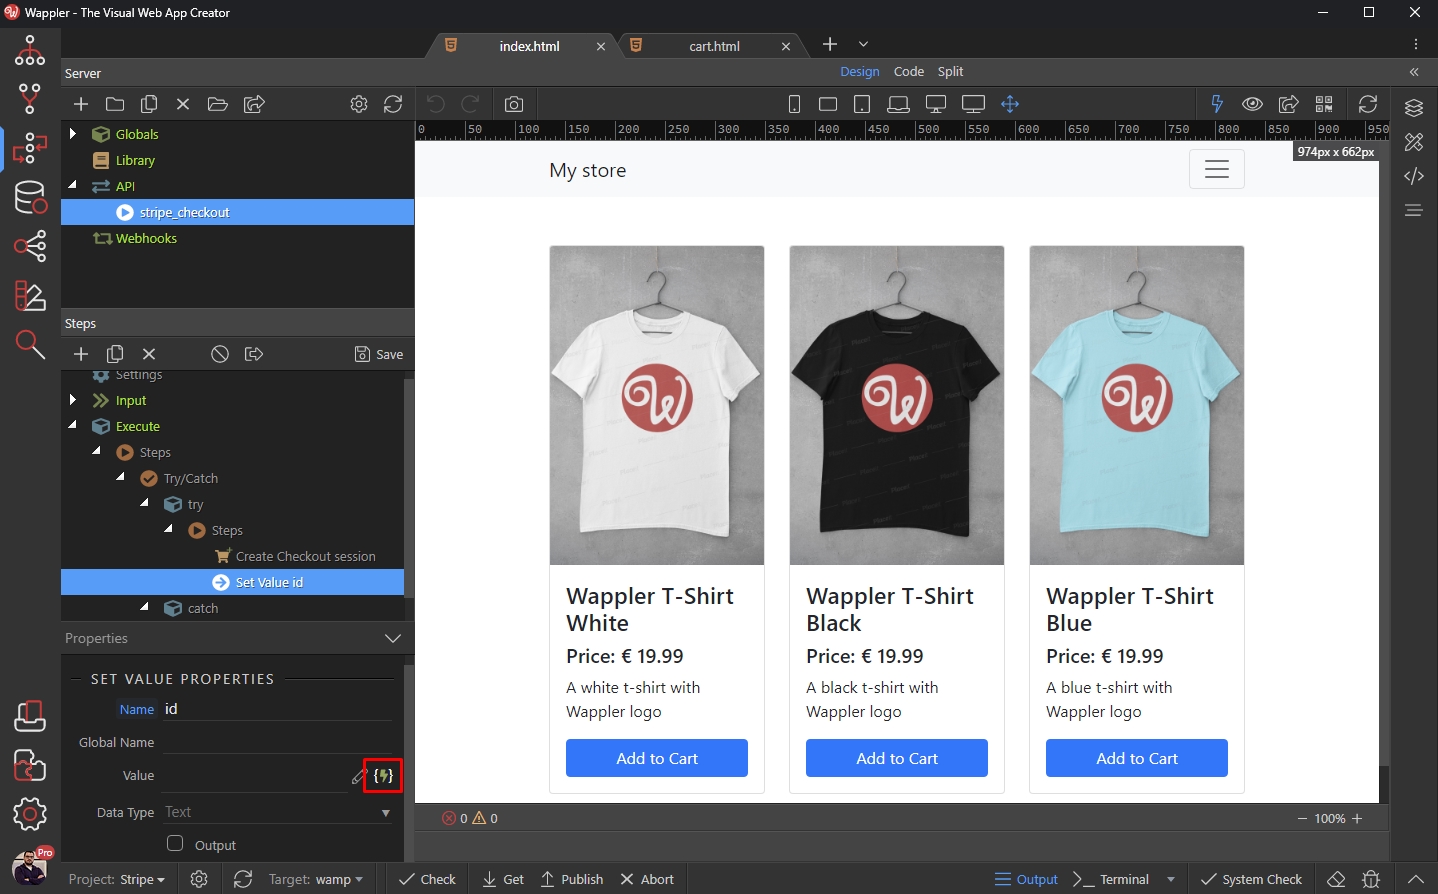
Under the Create Checkout Session step, select id. Make sure to enable the Output option for this step.
Section titled “Under the Create Checkout Session step, select id. Make sure to enable the Output option for this step.”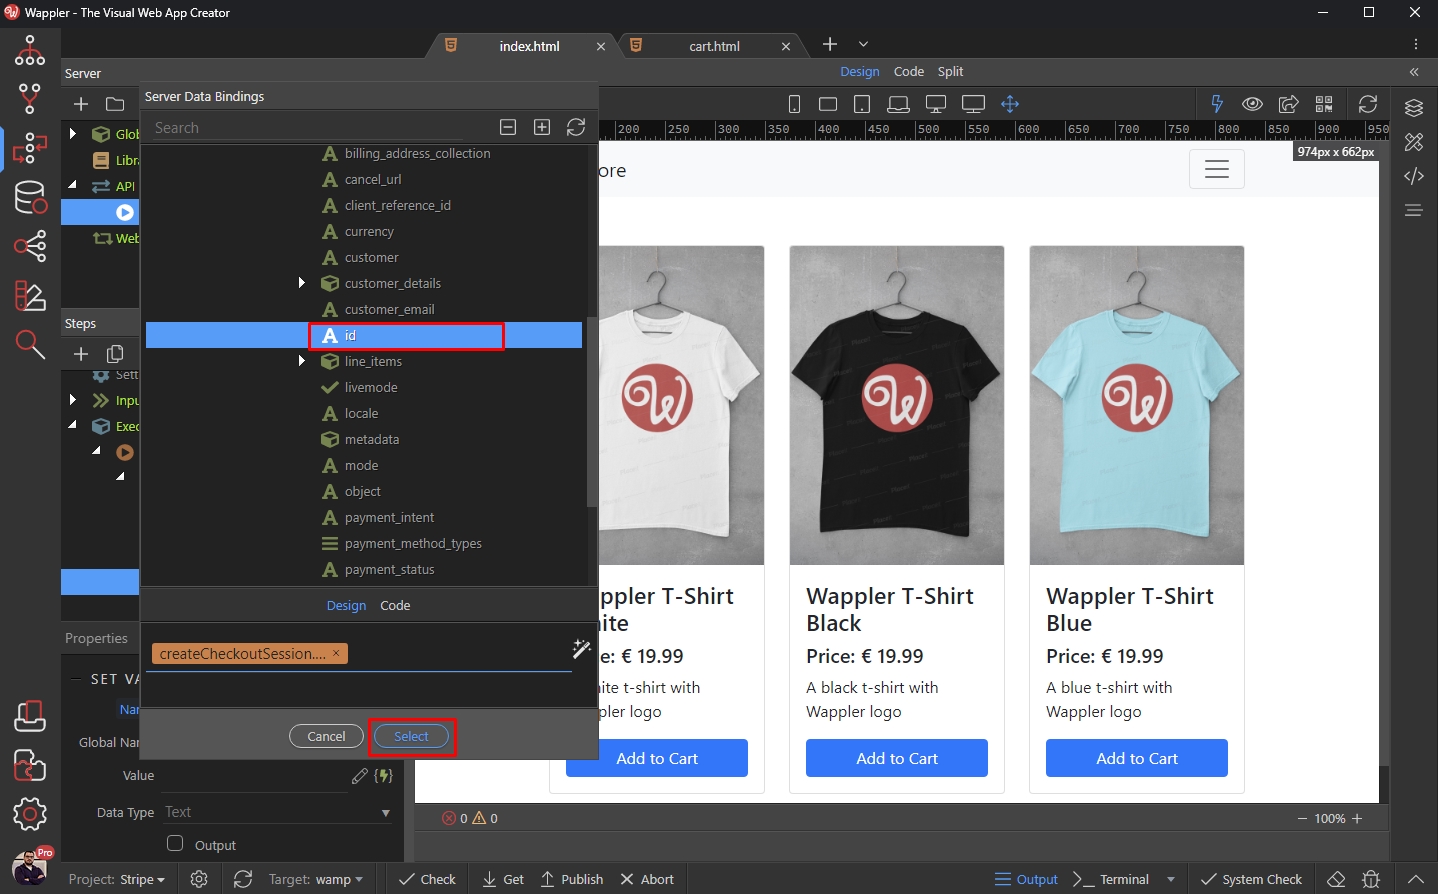
As we are done setting up the checkout step, lets setup the error handling. Under catch right click Steps:
Section titled “As we are done setting up the checkout step, lets setup the error handling. Under catch right click Steps:”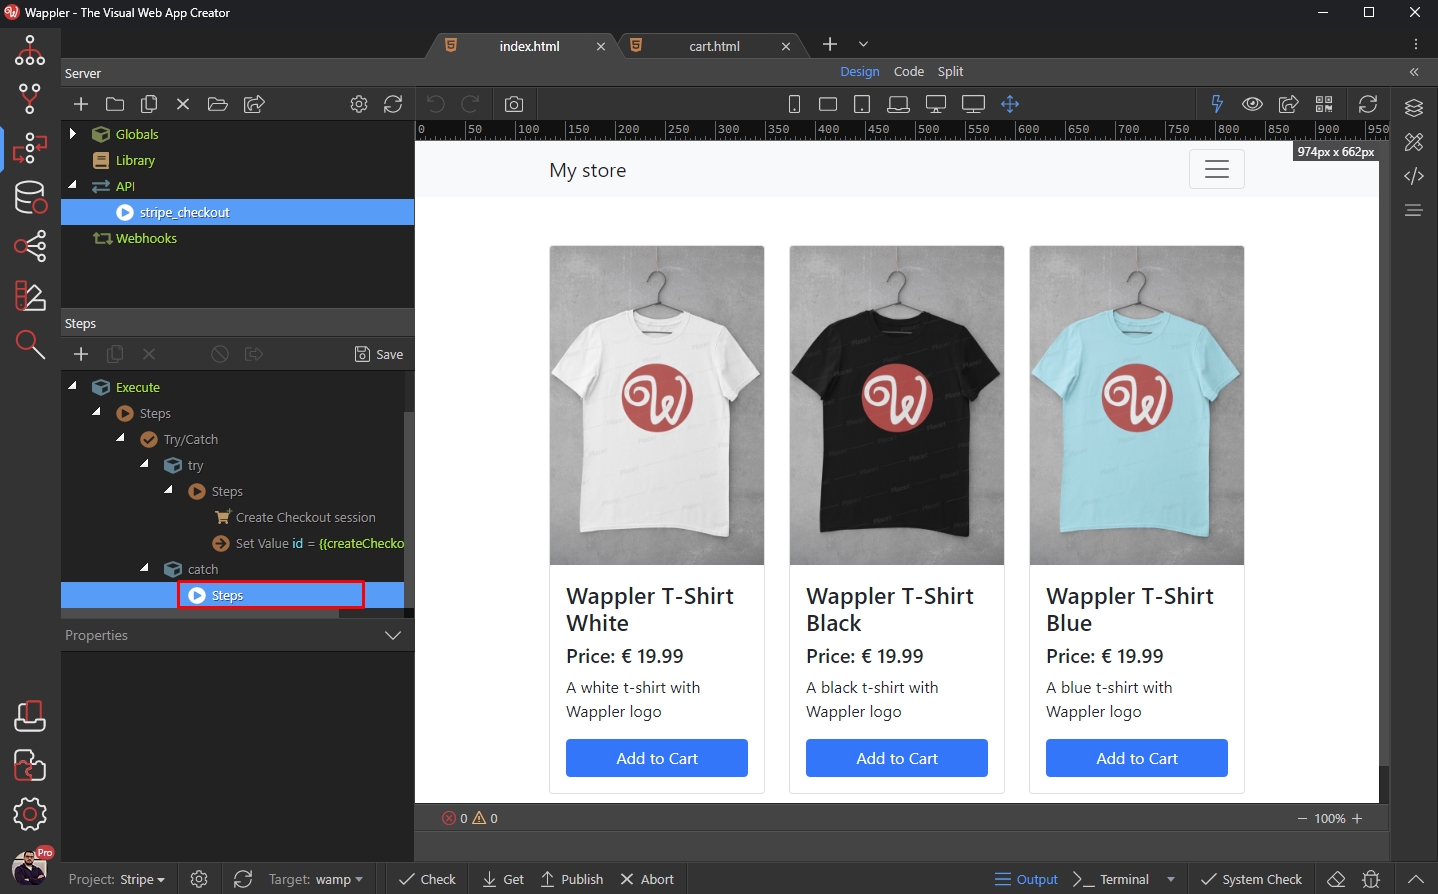
And add a Set Value step:
Section titled “And add a Set Value step:”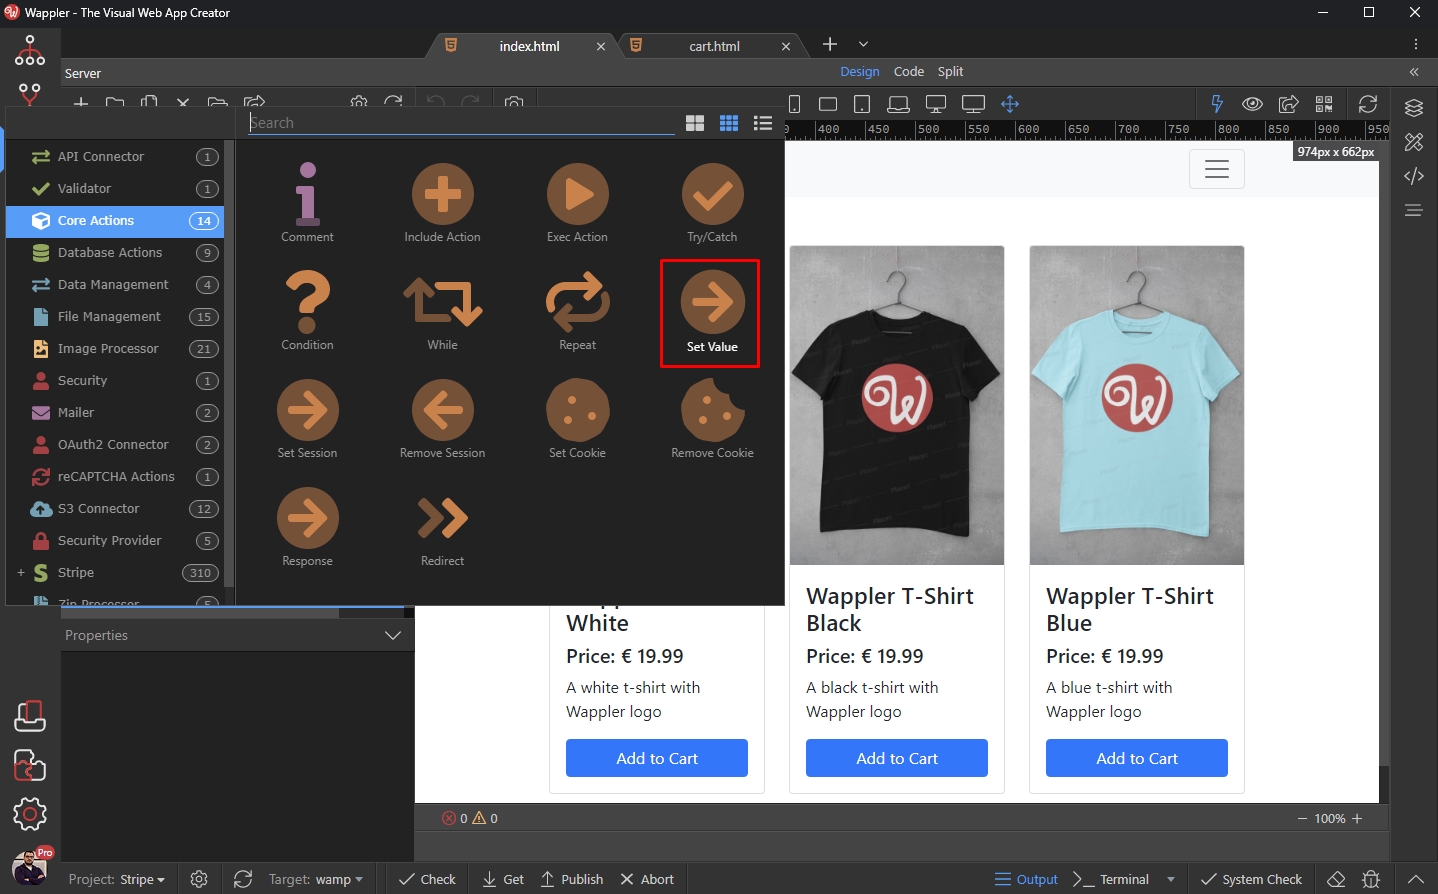
We call it error:
Section titled “We call it error:”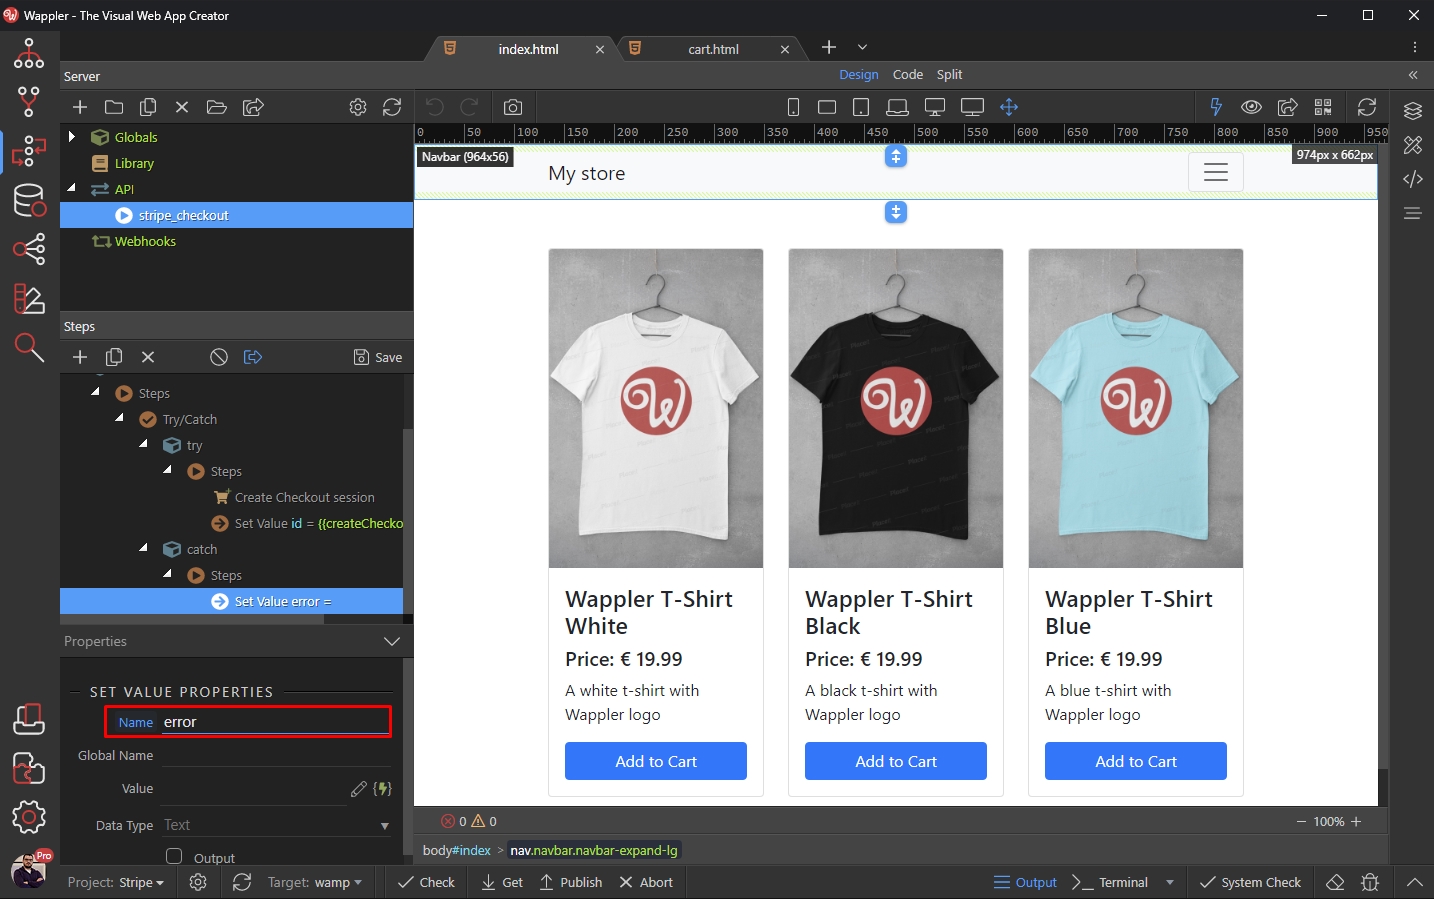
Then we enter There was an error:
Section titled “Then we enter There was an error:”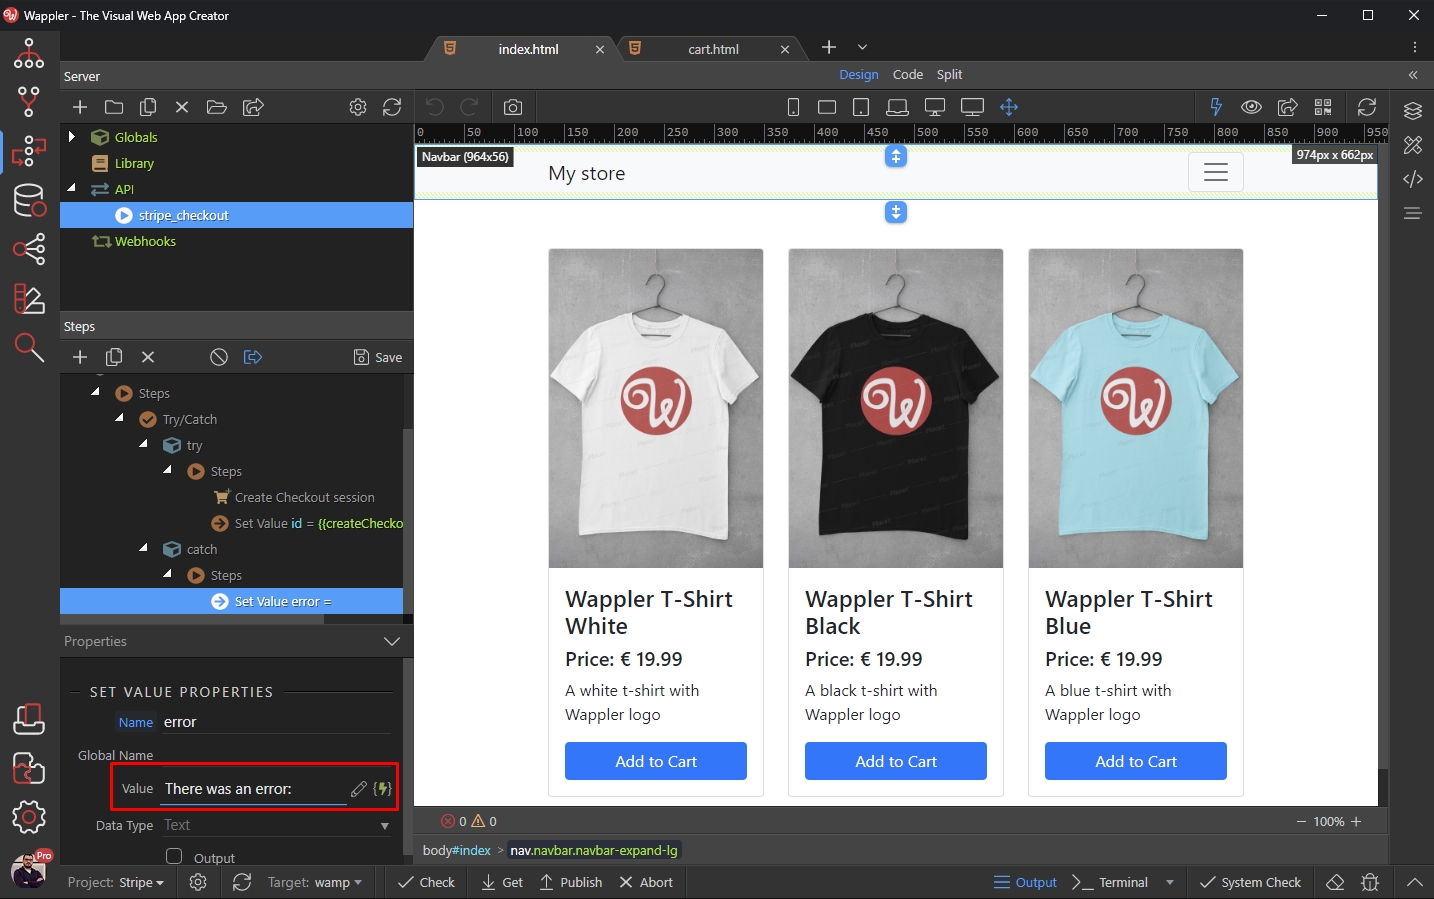
And click the dynamic data binding to select the error:
Section titled “And click the dynamic data binding to select the error:”
Select $_ERROR and click Select:
Section titled “Select $_ERROR and click Select:”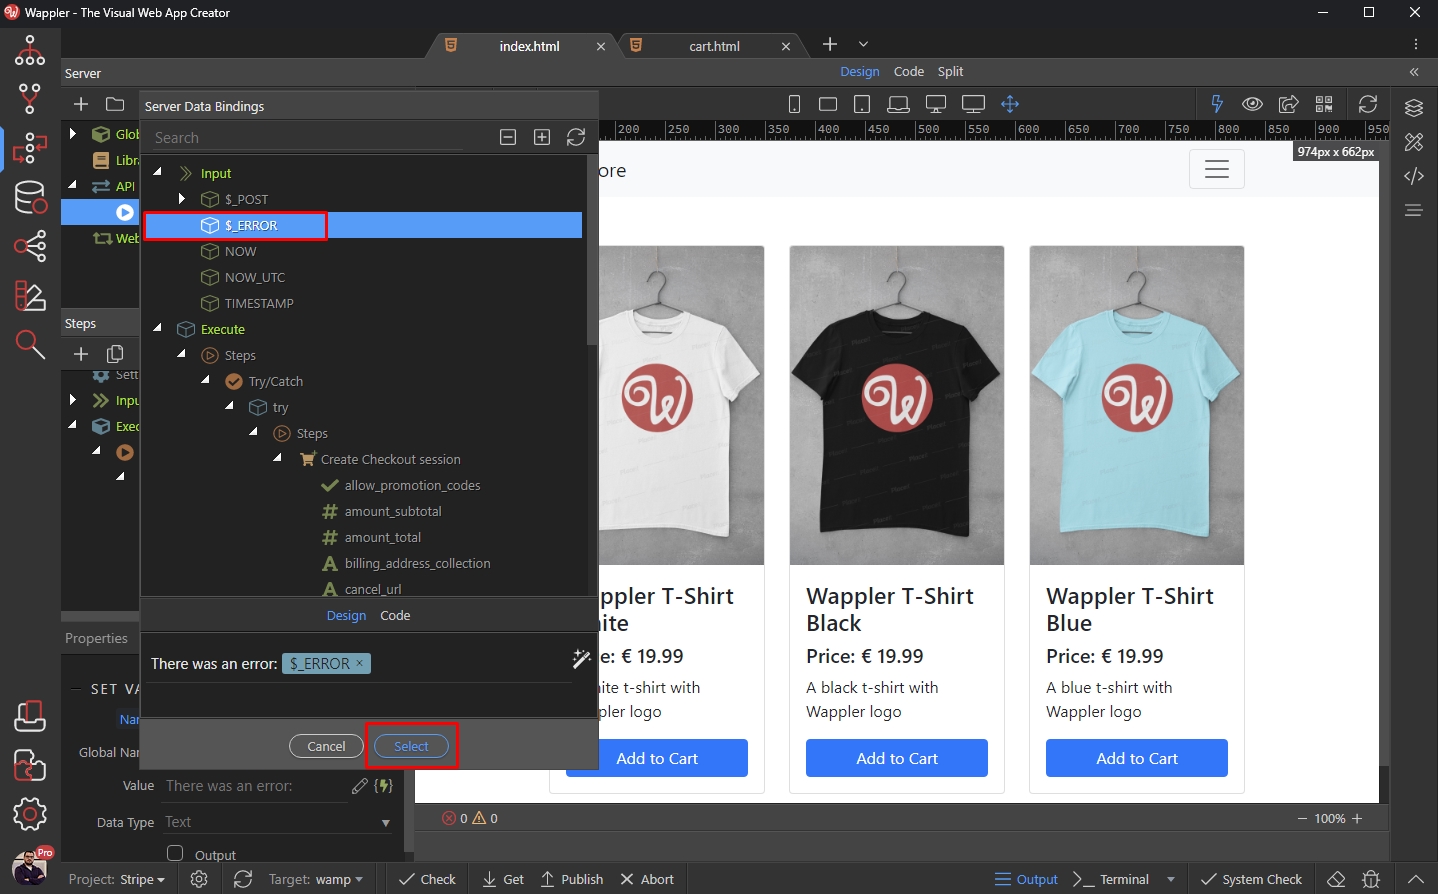
Save your server action and close server connect panel:
Section titled “Save your server action and close server connect panel:”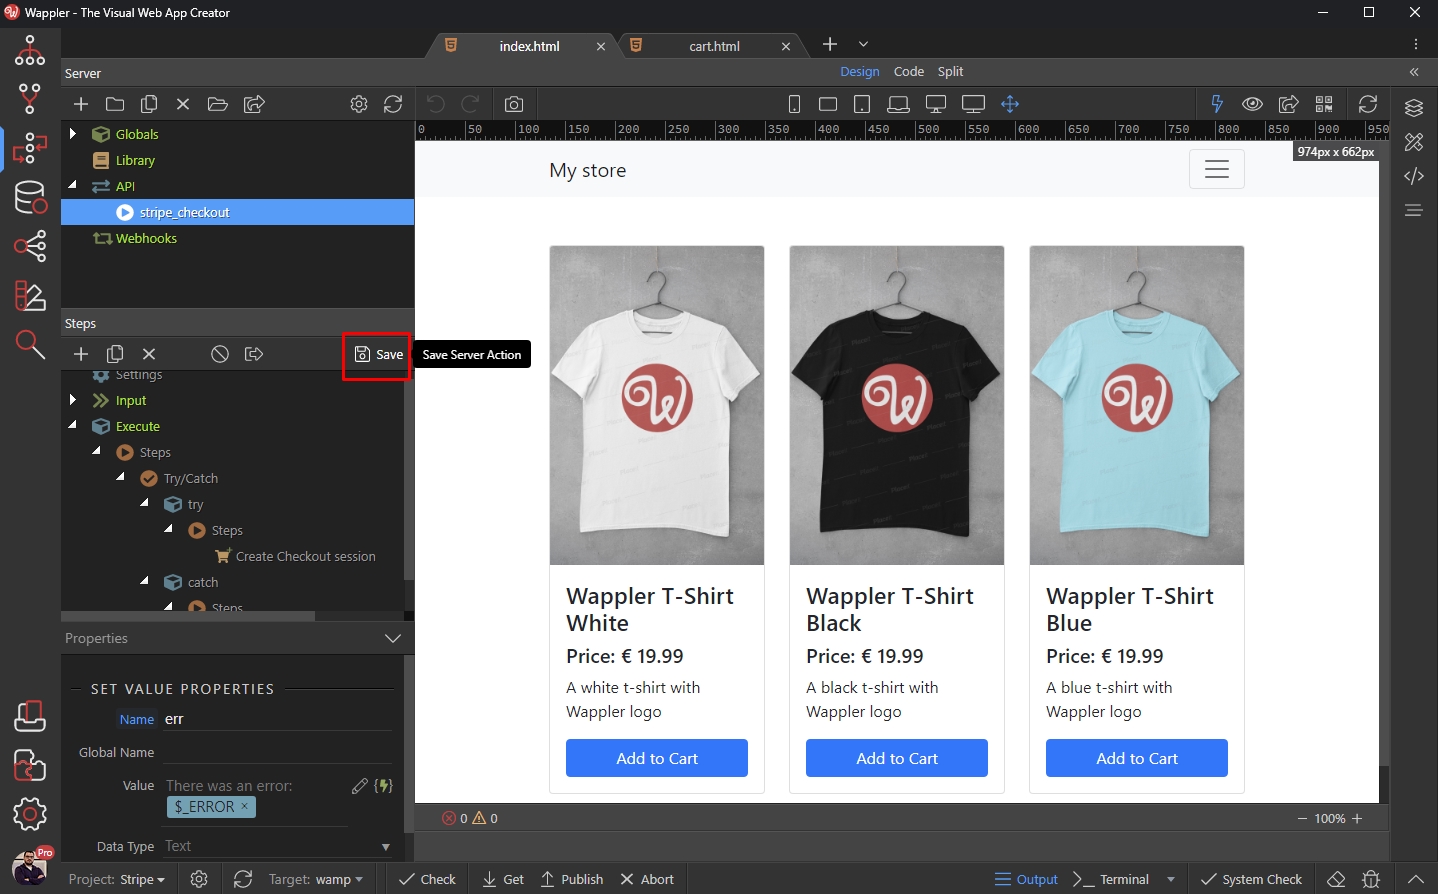
We use the same cart page as shown in the static steps of this tutorial. Add new component in App Structure:
Section titled “We use the same cart page as shown in the static steps of this tutorial. Add new component in App Structure:”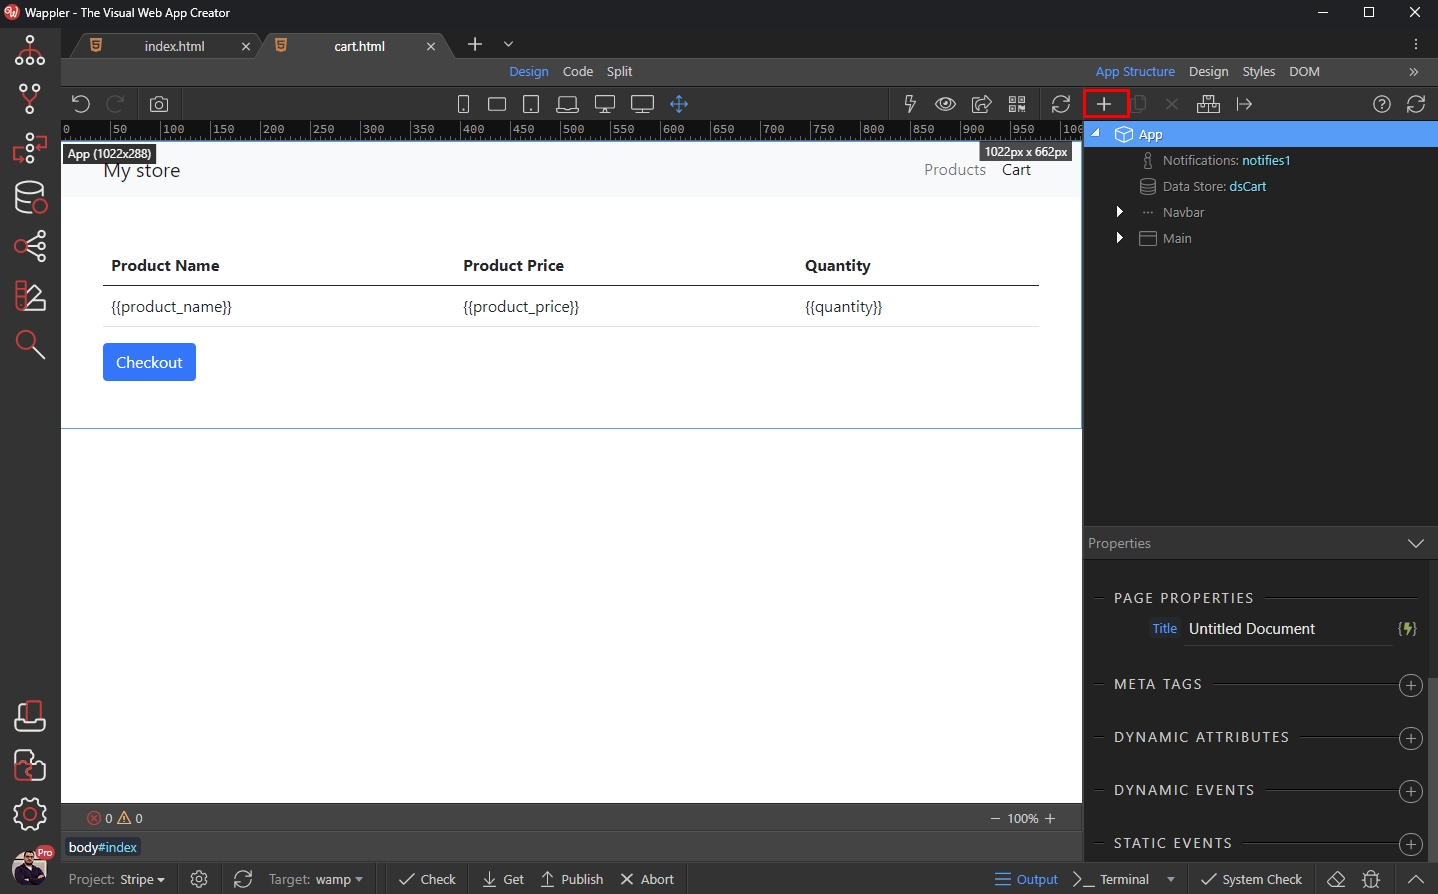
Open Stripe and select the Stripe Component:
Section titled “Open Stripe and select the Stripe Component:”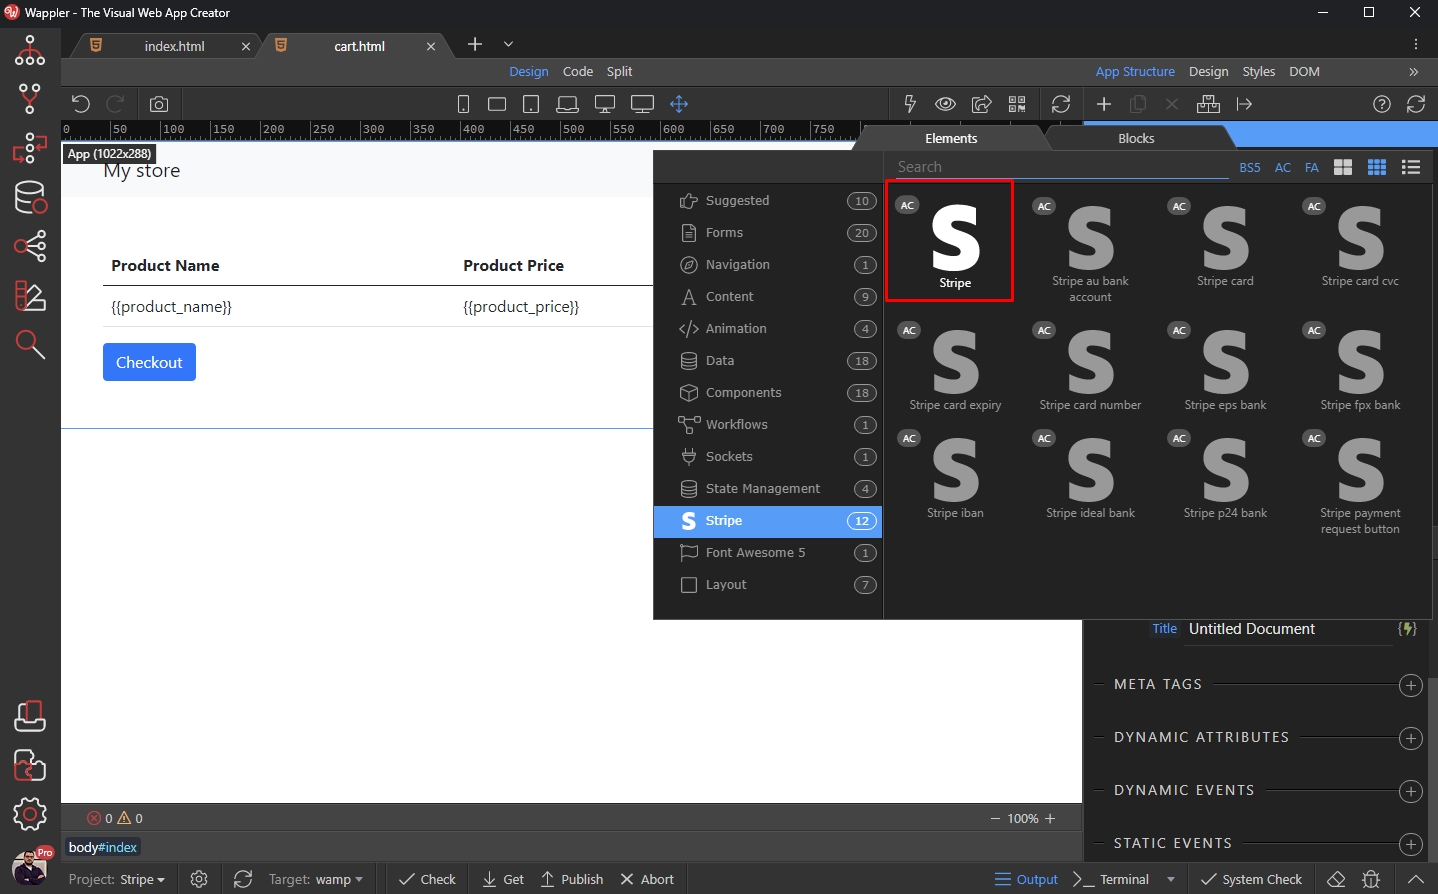
Then enter your Public API Key. It can be found on https://dashboard.stripe.com/apikeys
Section titled “Then enter your Public API Key. It can be found on https://dashboard.stripe.com/apikeys”Then enter your Public API Key.
It can be found on https://dashboard.stripe.com/apikeys
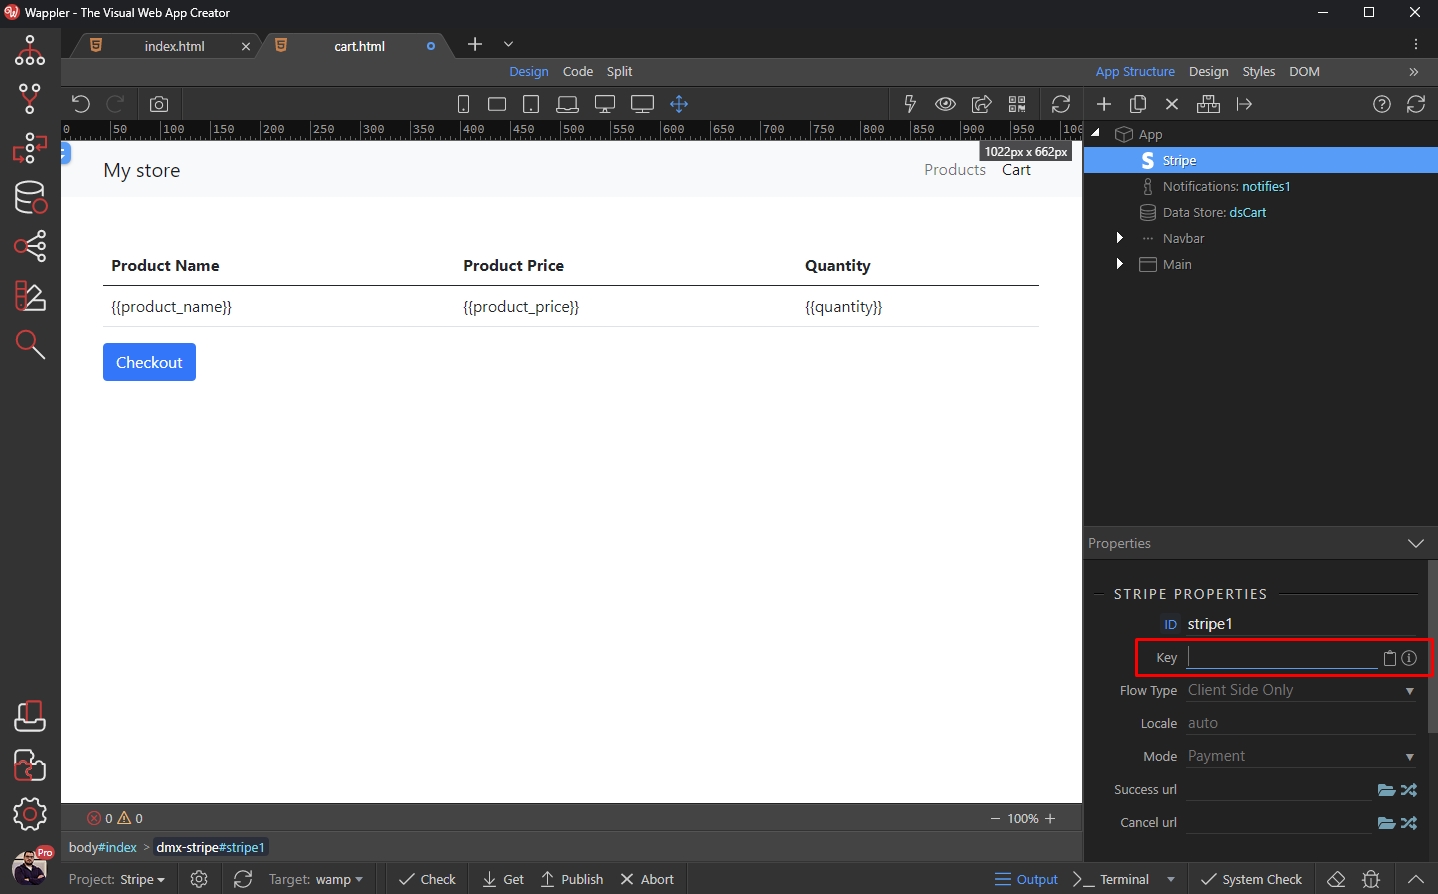
Open the Flow Type menu, and select Server Side:
Section titled “Open the Flow Type menu, and select Server Side:”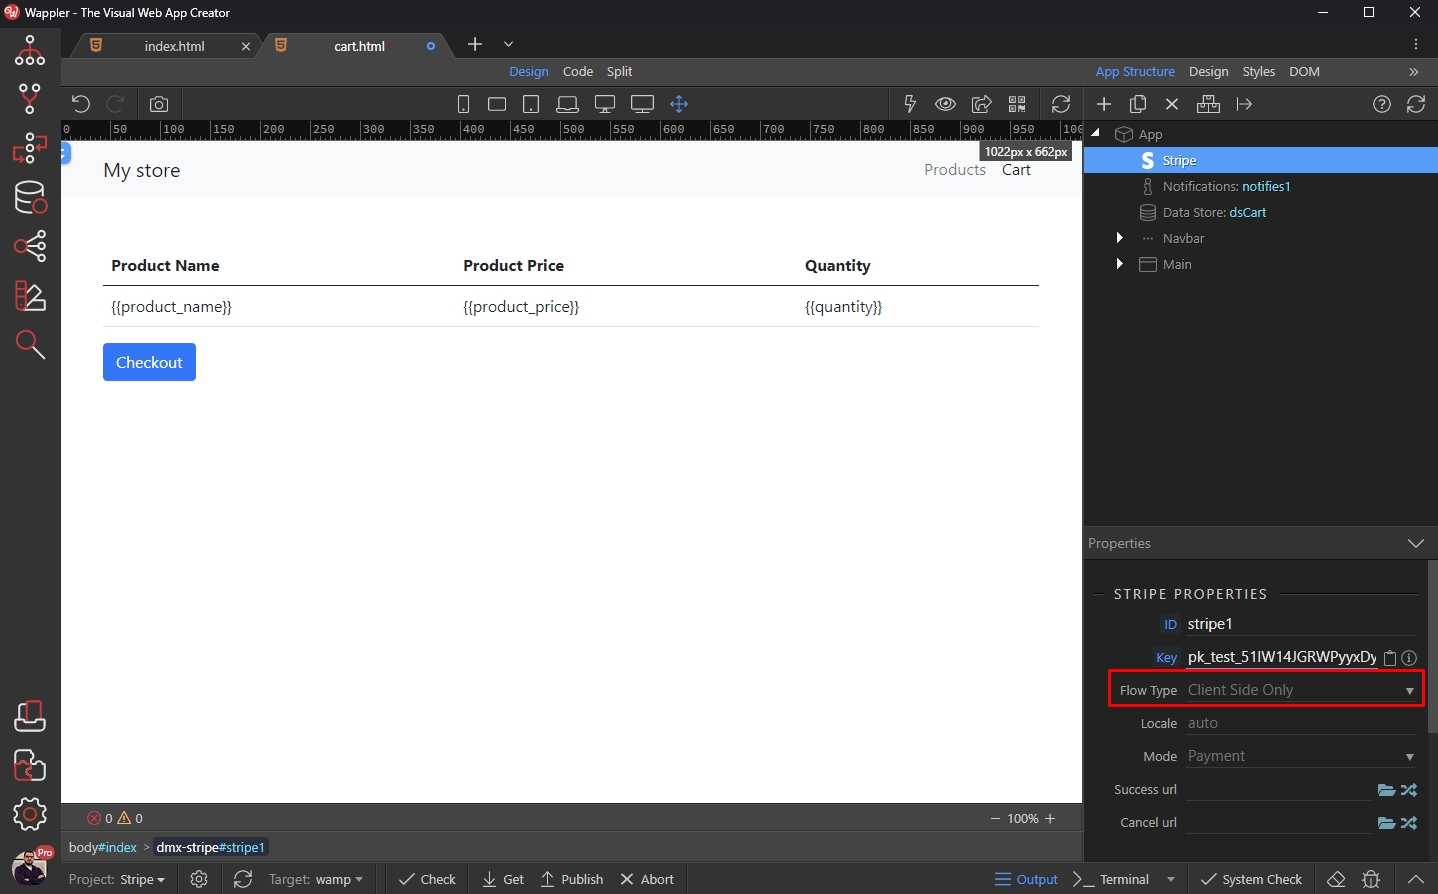
Then click the dynamic data picker for the Session URL option:
Section titled “Then click the dynamic data picker for the Session URL option:”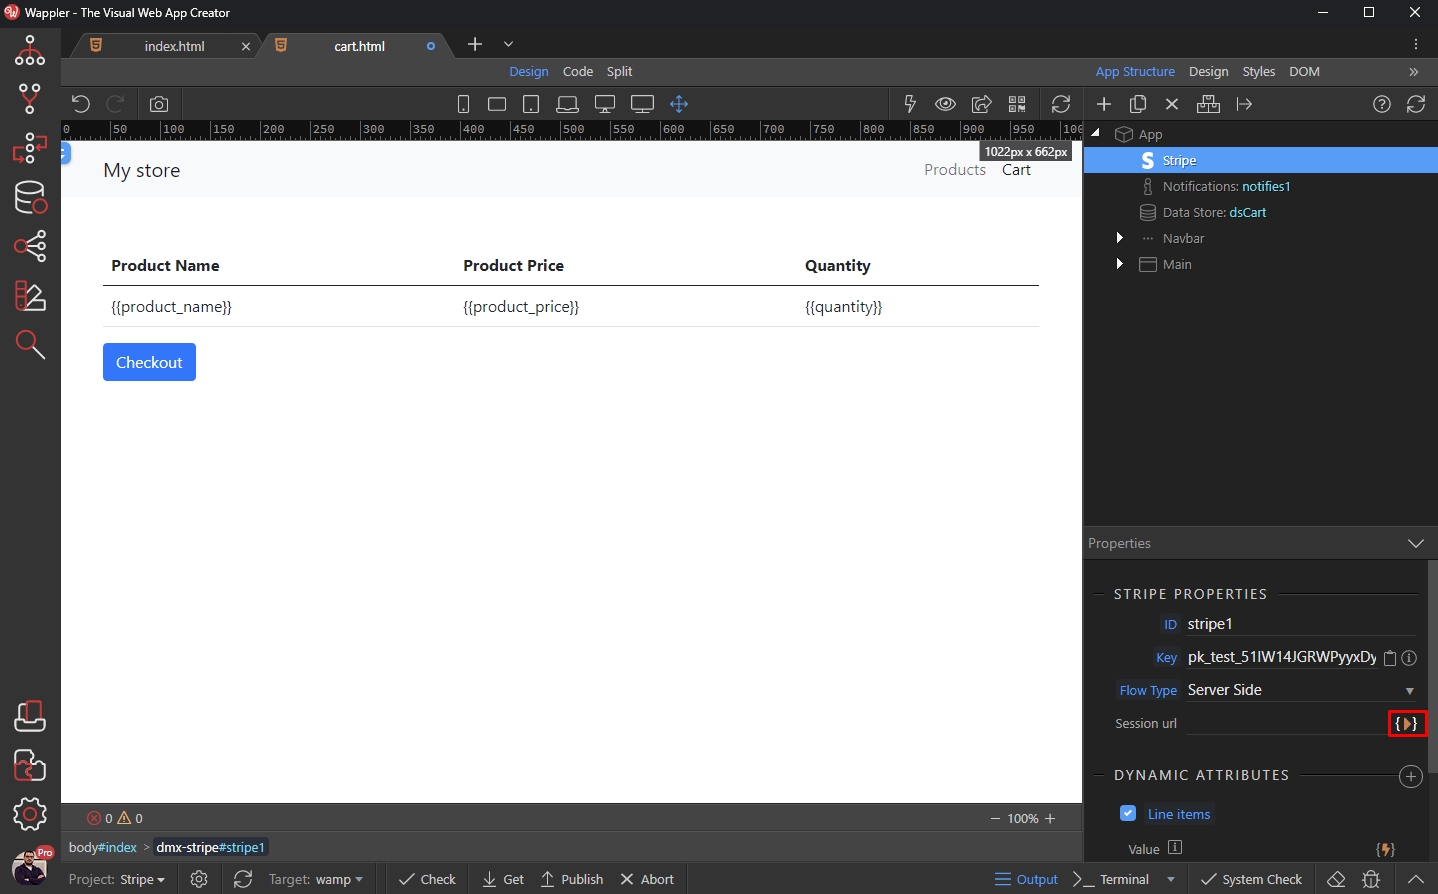
And select the Server Action which we already created:
Section titled “And select the Server Action which we already created:”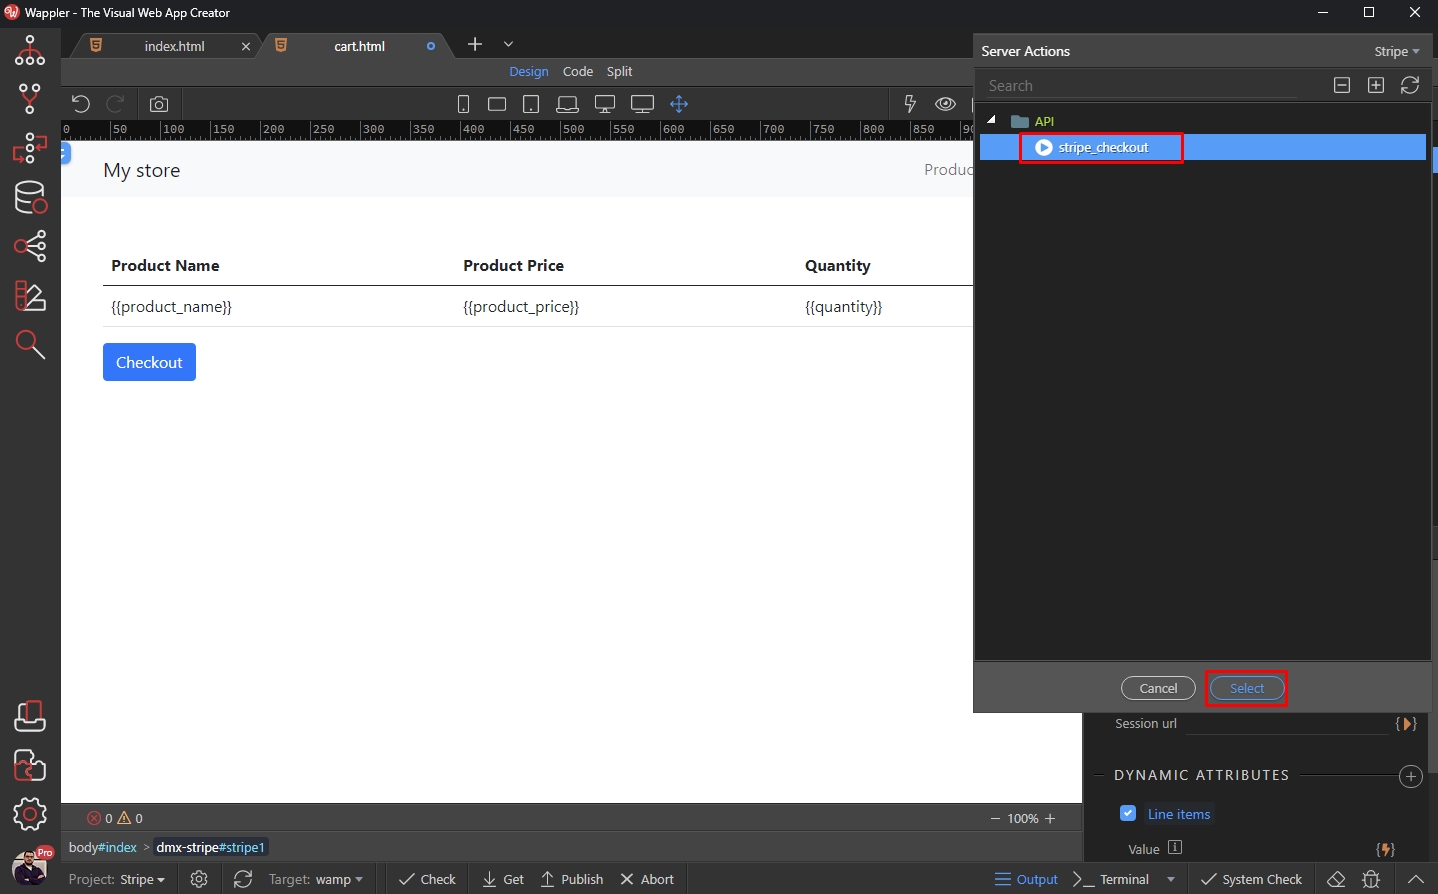
And then select the Line Items:
Section titled “And then select the Line Items:”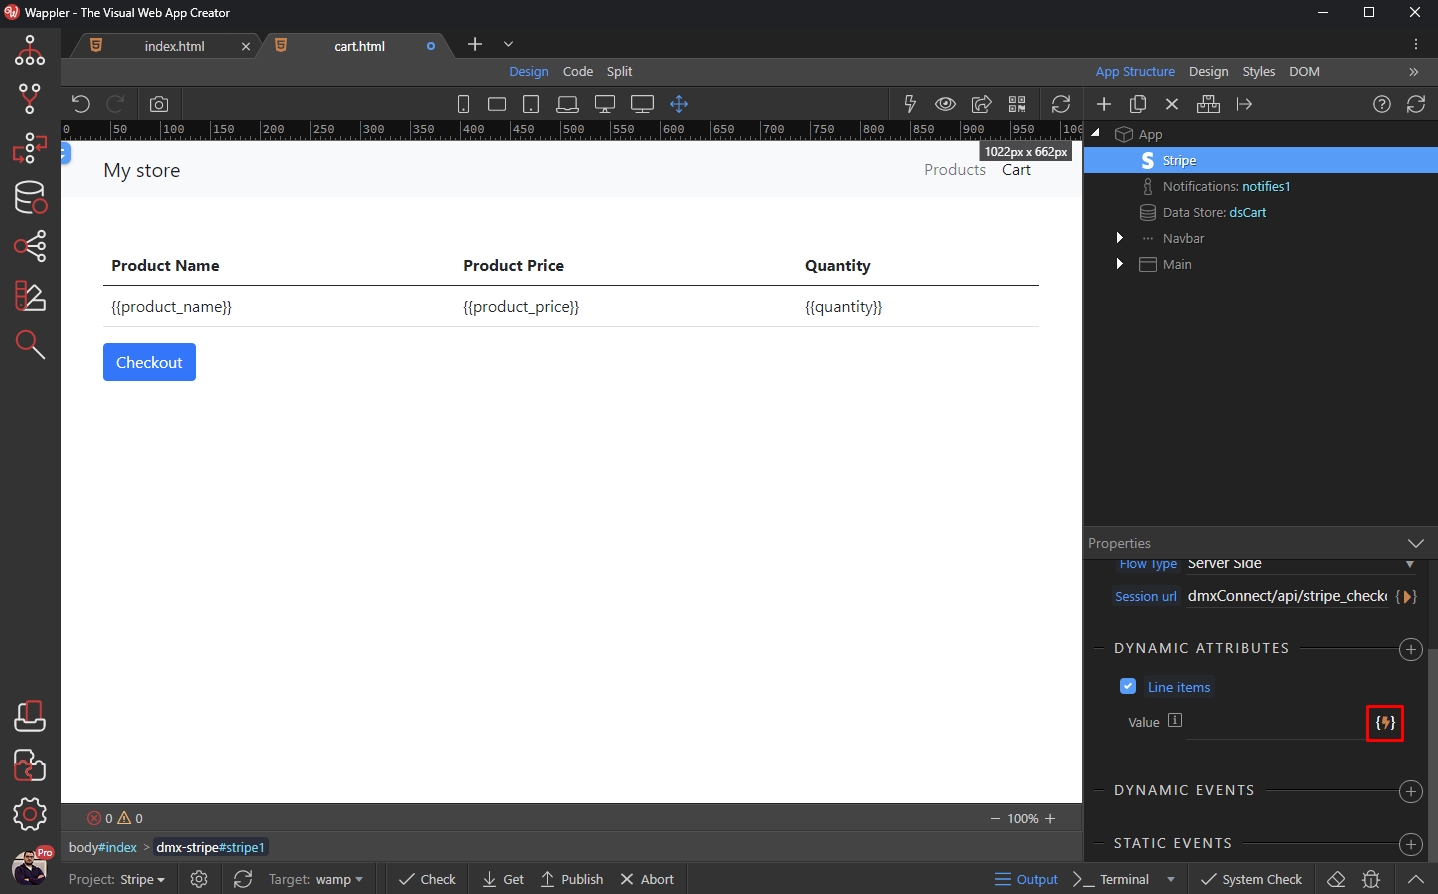
This should be the data element of the Data Store component on the page:
Section titled “This should be the data element of the Data Store component on the page:”
Save your page and you are done.
Section titled “Save your page and you are done.”Capturing Payment Errors
Section titled “Capturing Payment Errors”If an error occurs when the checkout button is clicked, you can display it on your page. In our example we will show you how to show the error in a notification.
First, add the Notifications Component on the page:

Select Components > Notifications:
Section titled “Select Components > Notifications:”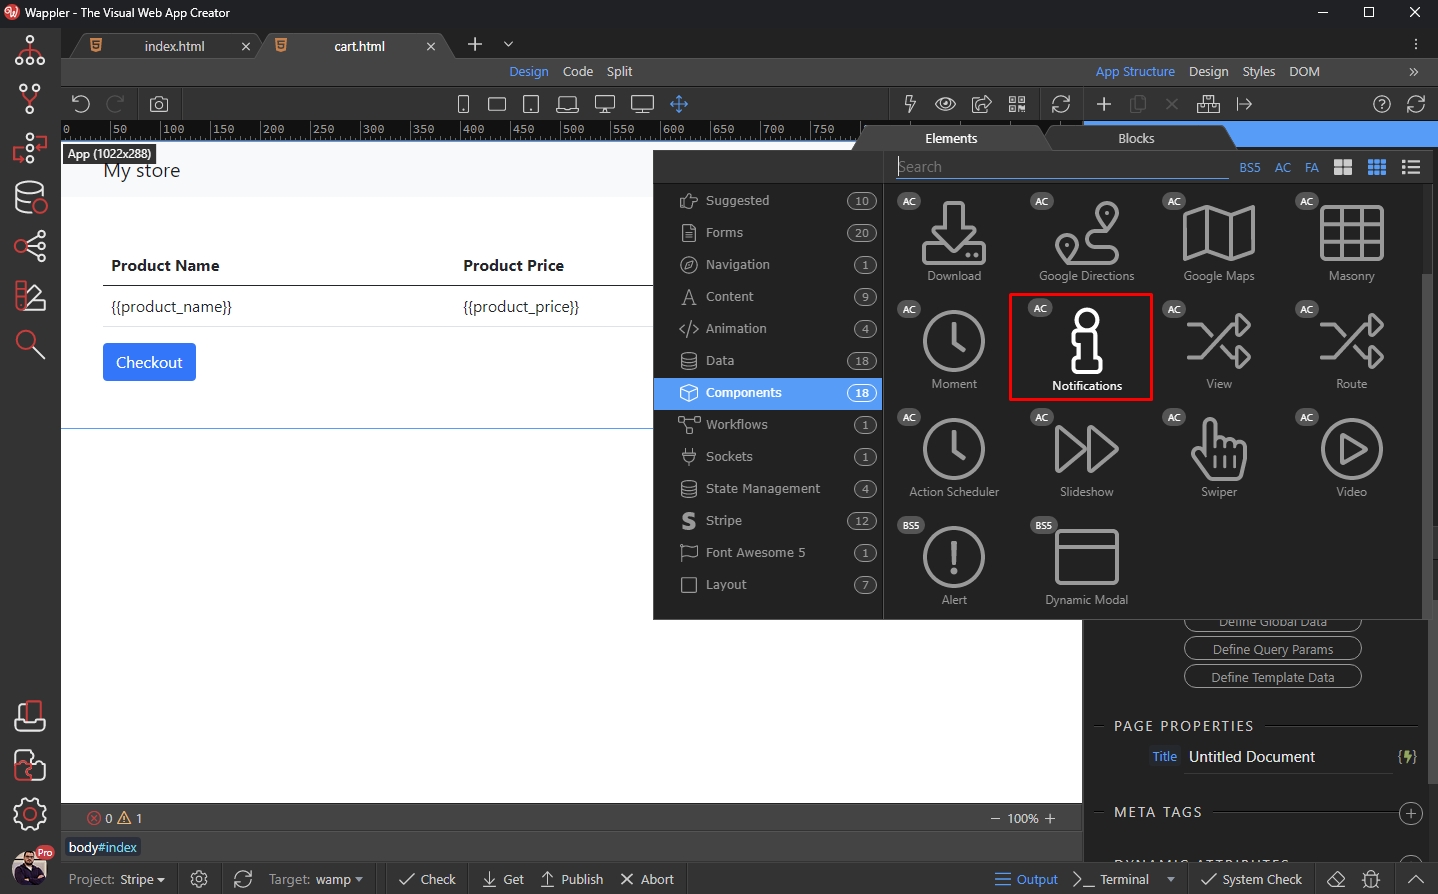
Then select the Stripe Component on the page:
Section titled “Then select the Stripe Component on the page:”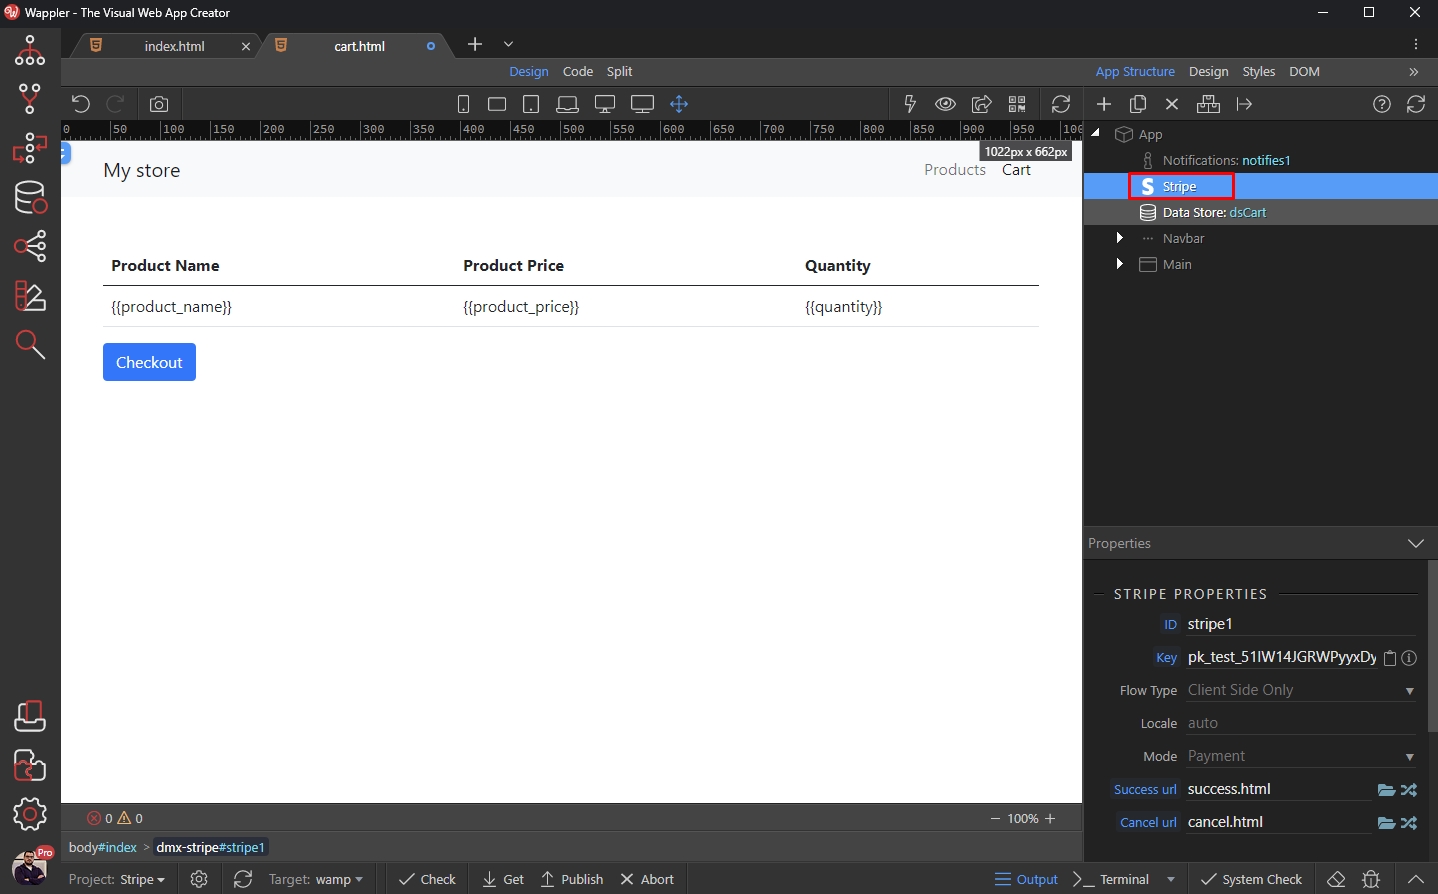
Add new dynamic event:
Section titled “Add new dynamic event:”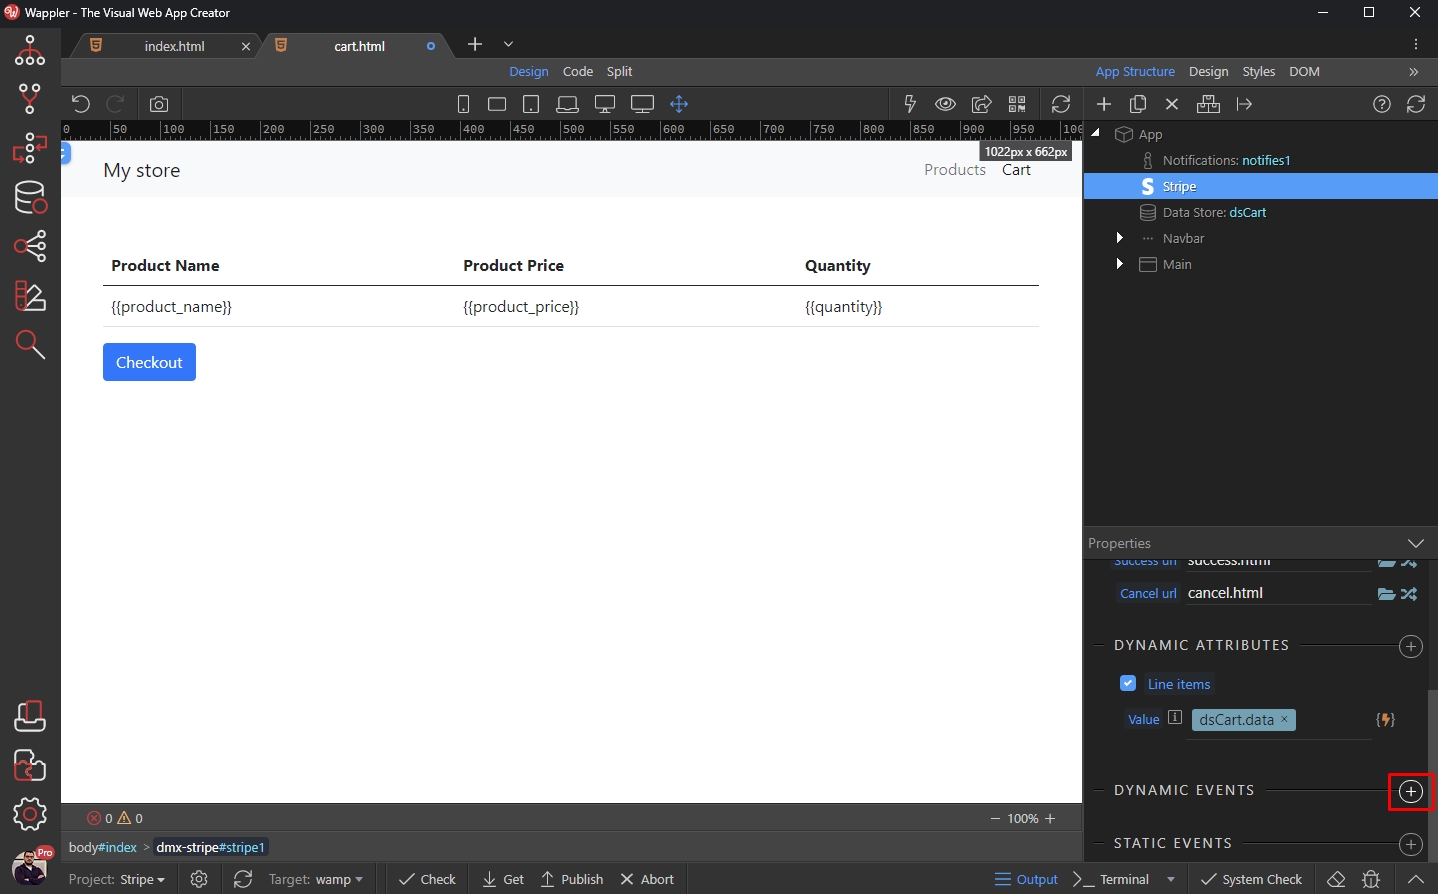
Select Stripe > Error:
Section titled “Select Stripe > Error:”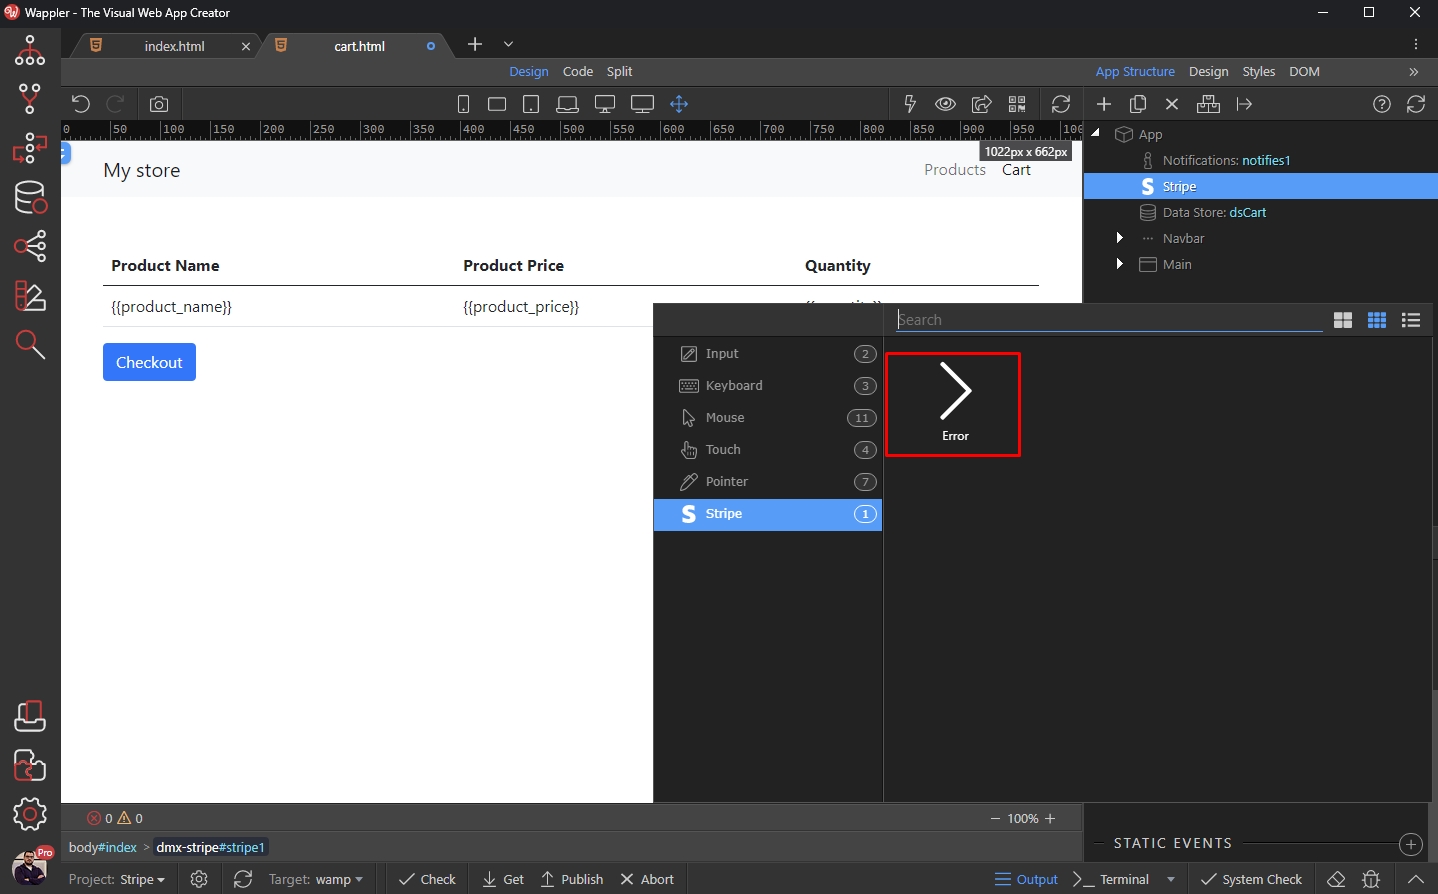
And select the Dynamic Action:
Section titled “And select the Dynamic Action:”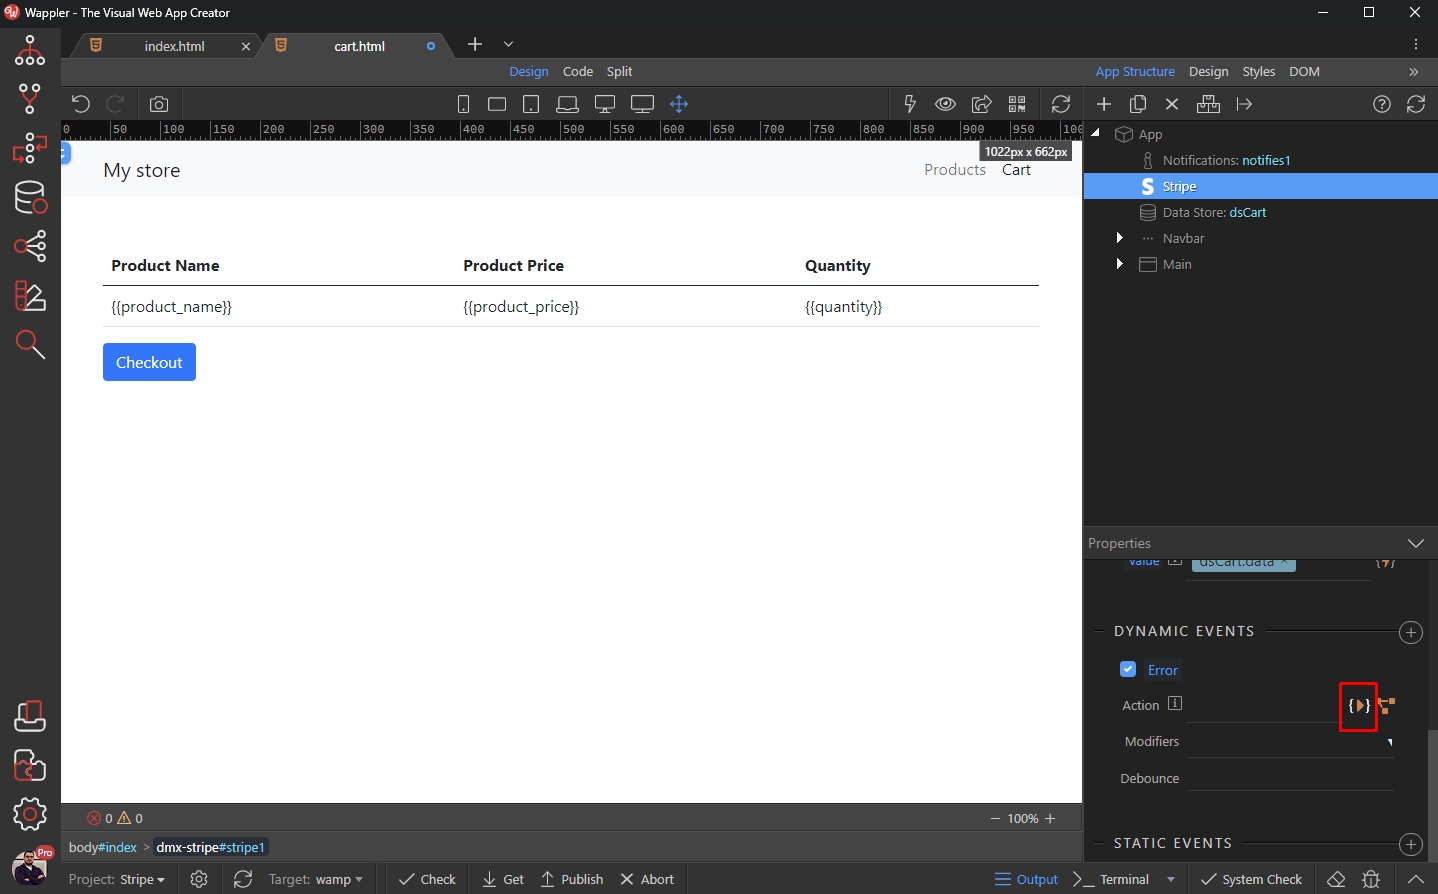
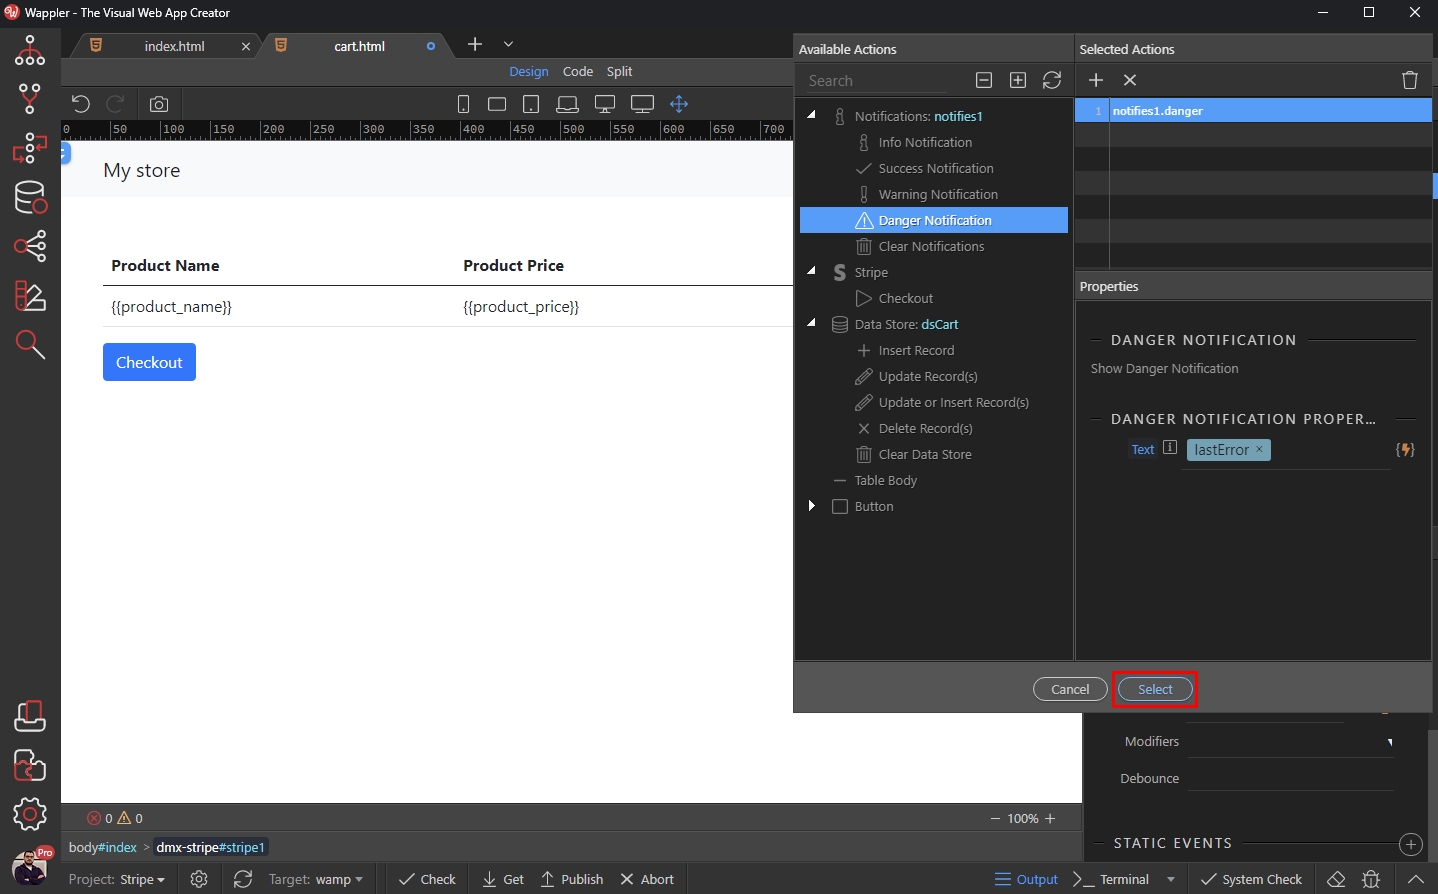
Add Danger Notification:
Section titled “Add Danger Notification:”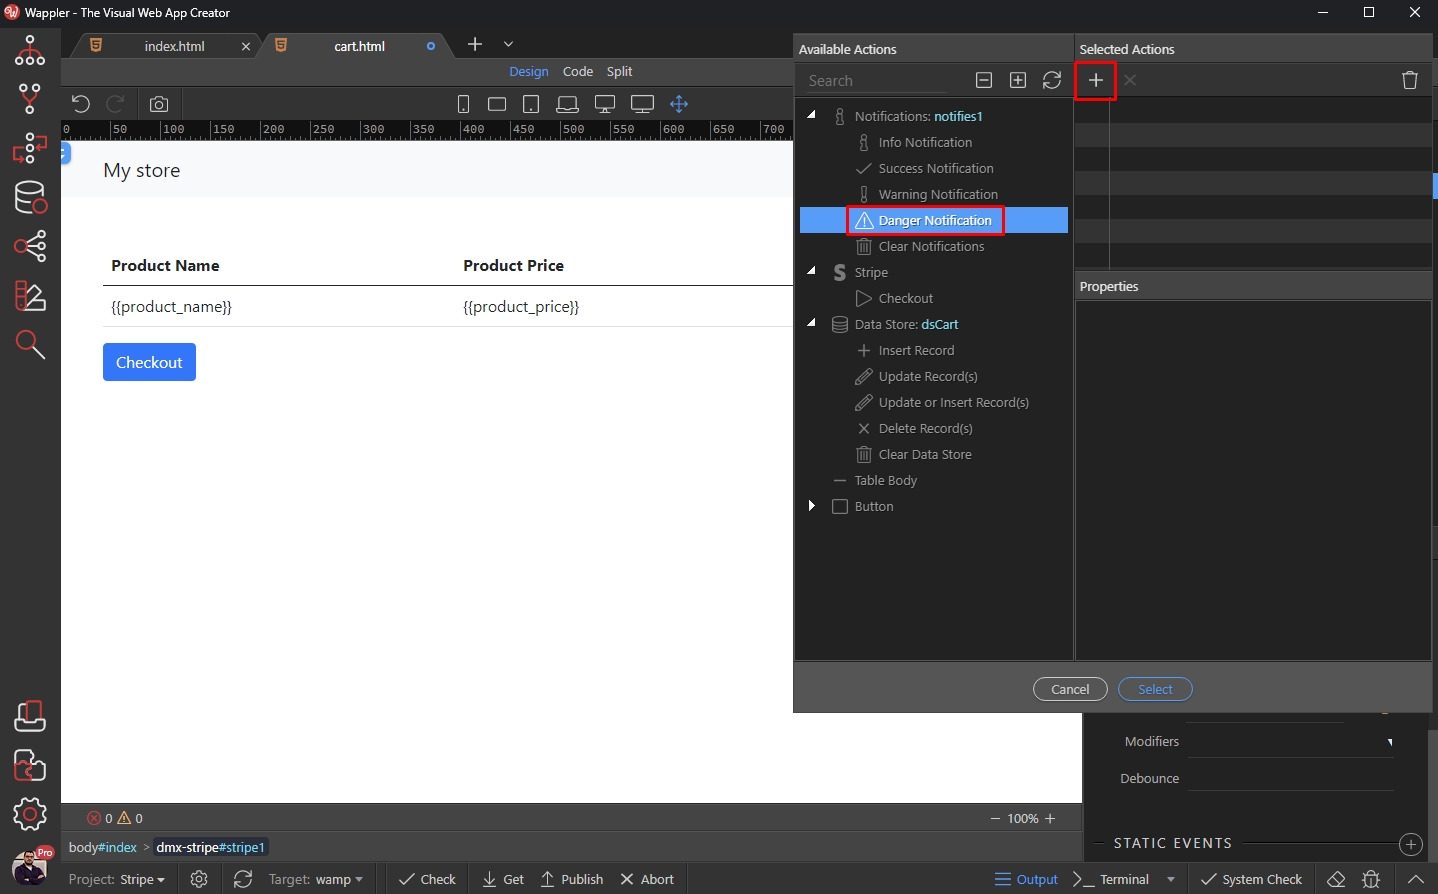
And click the dynamic data picker for the notification text:
Section titled “And click the dynamic data picker for the notification text:”
Select lastError under the Stripe Component:
Section titled “Select lastError under the Stripe Component:”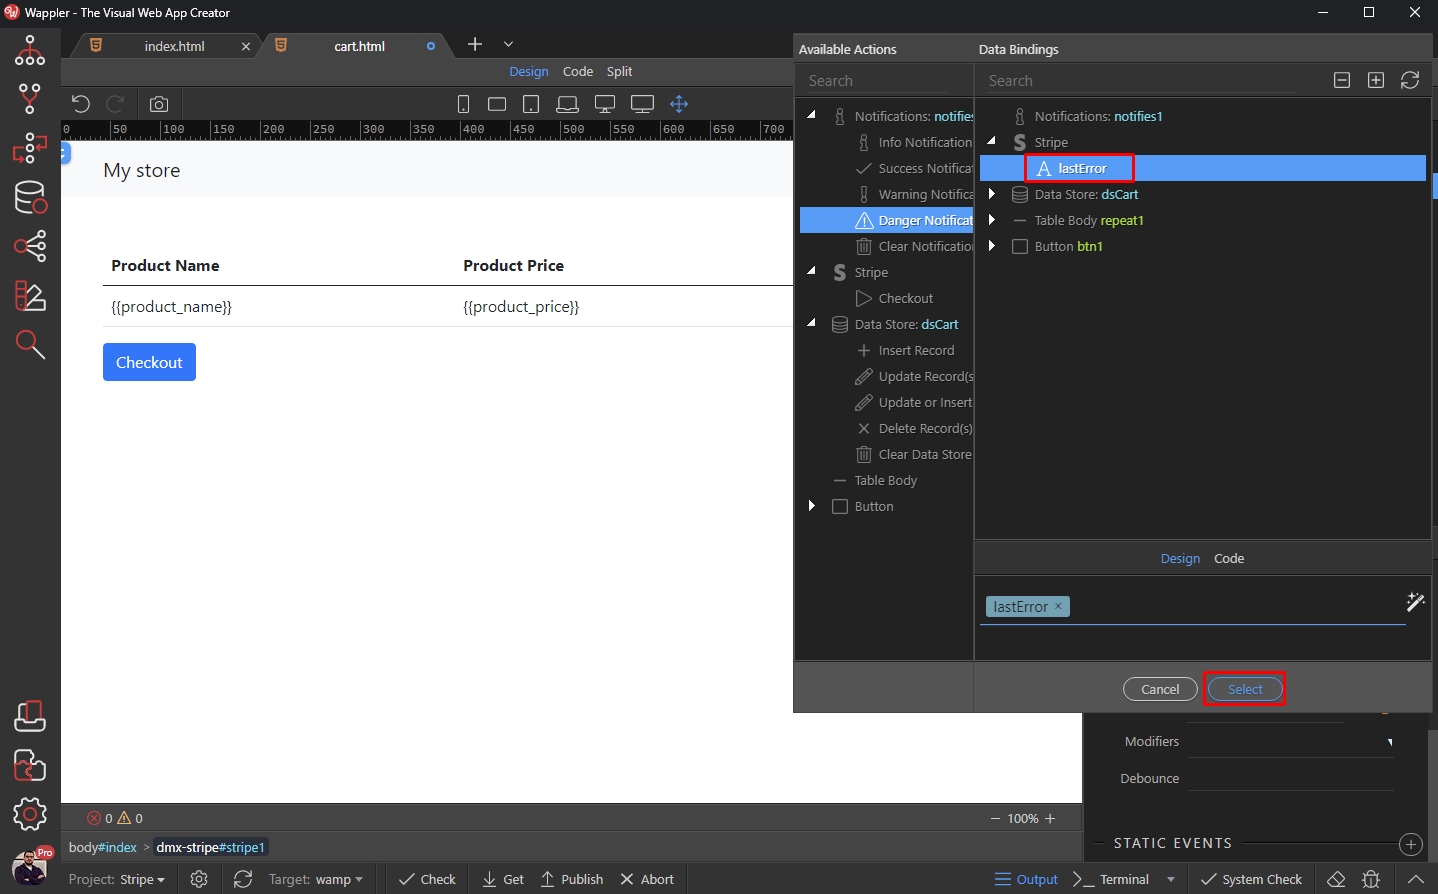
Click Select:
Section titled “Click Select:”