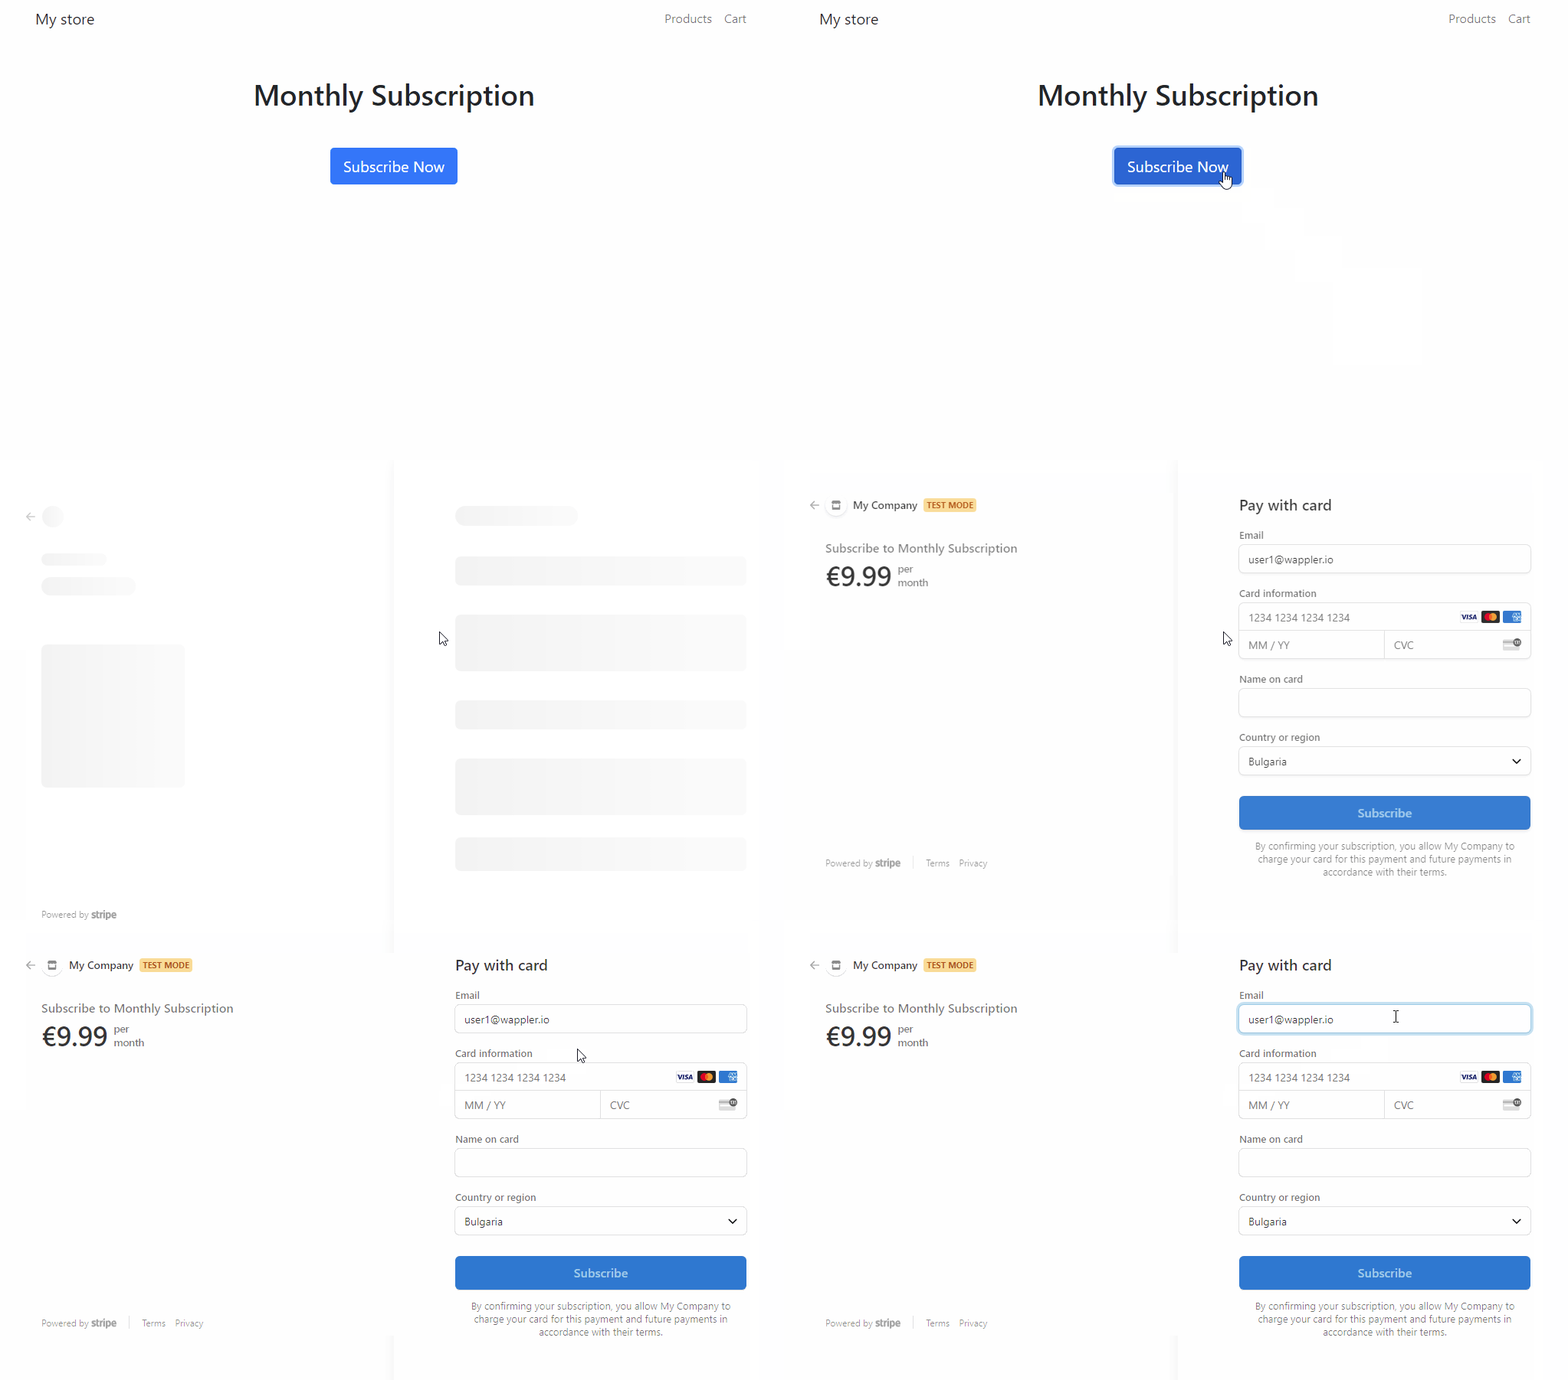
Stripe Subscriptions
Intro With Stripe you can setup subscriptions and checkout pages, where your users can subscribe for your services or products. Subscriptions and Prices The first step is to setup your subscription(s)
With Stripe you can setup subscriptions and checkout pages, where your users can subscribe for your services or products.
Subscriptions and Prices
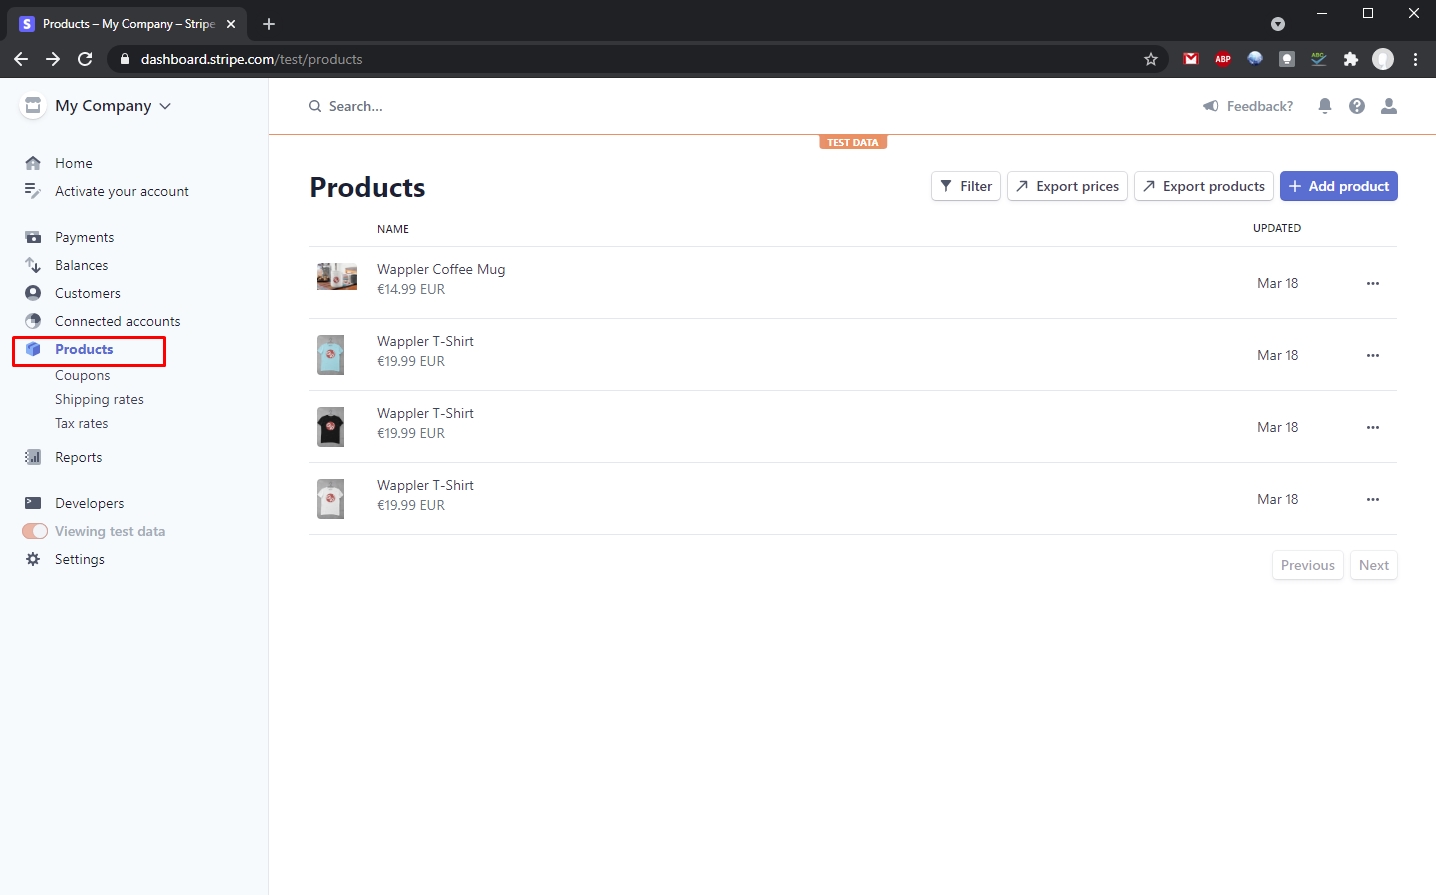
Section titled “Subscriptions and Prices”The first step is to setup your subscription(s) in Stripe Dashboard. Go to: https://dashboard.stripe.com/ and click Products:
Then click the Add Product button:
Section titled “Then click the Add Product button:”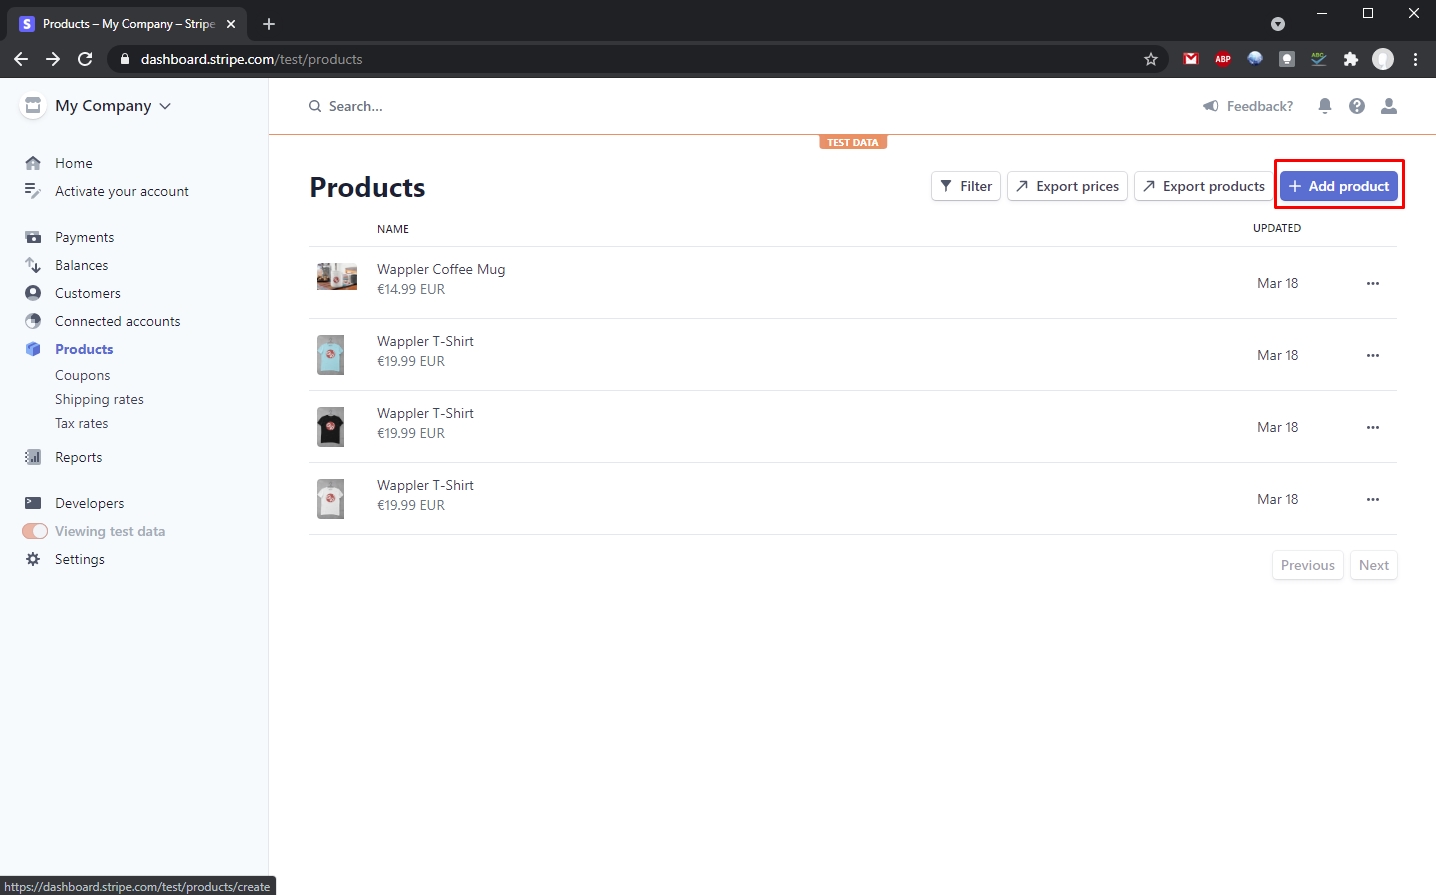
Add a name for your subscription. It will be displayed on the checkout page:
Section titled “Add a name for your subscription. It will be displayed on the checkout page:”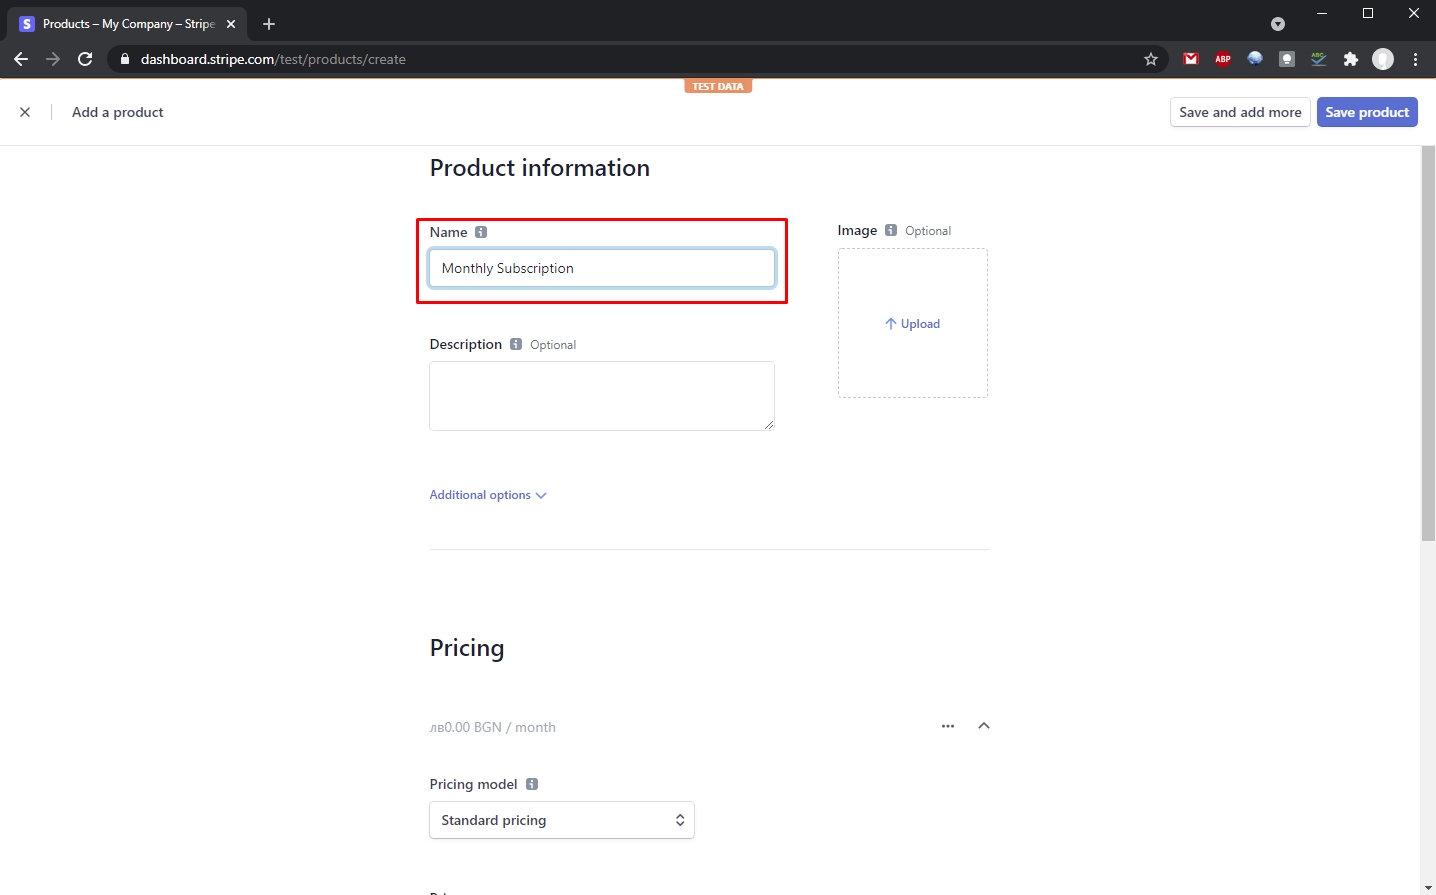
Then add an optional Description:
Section titled “Then add an optional Description:”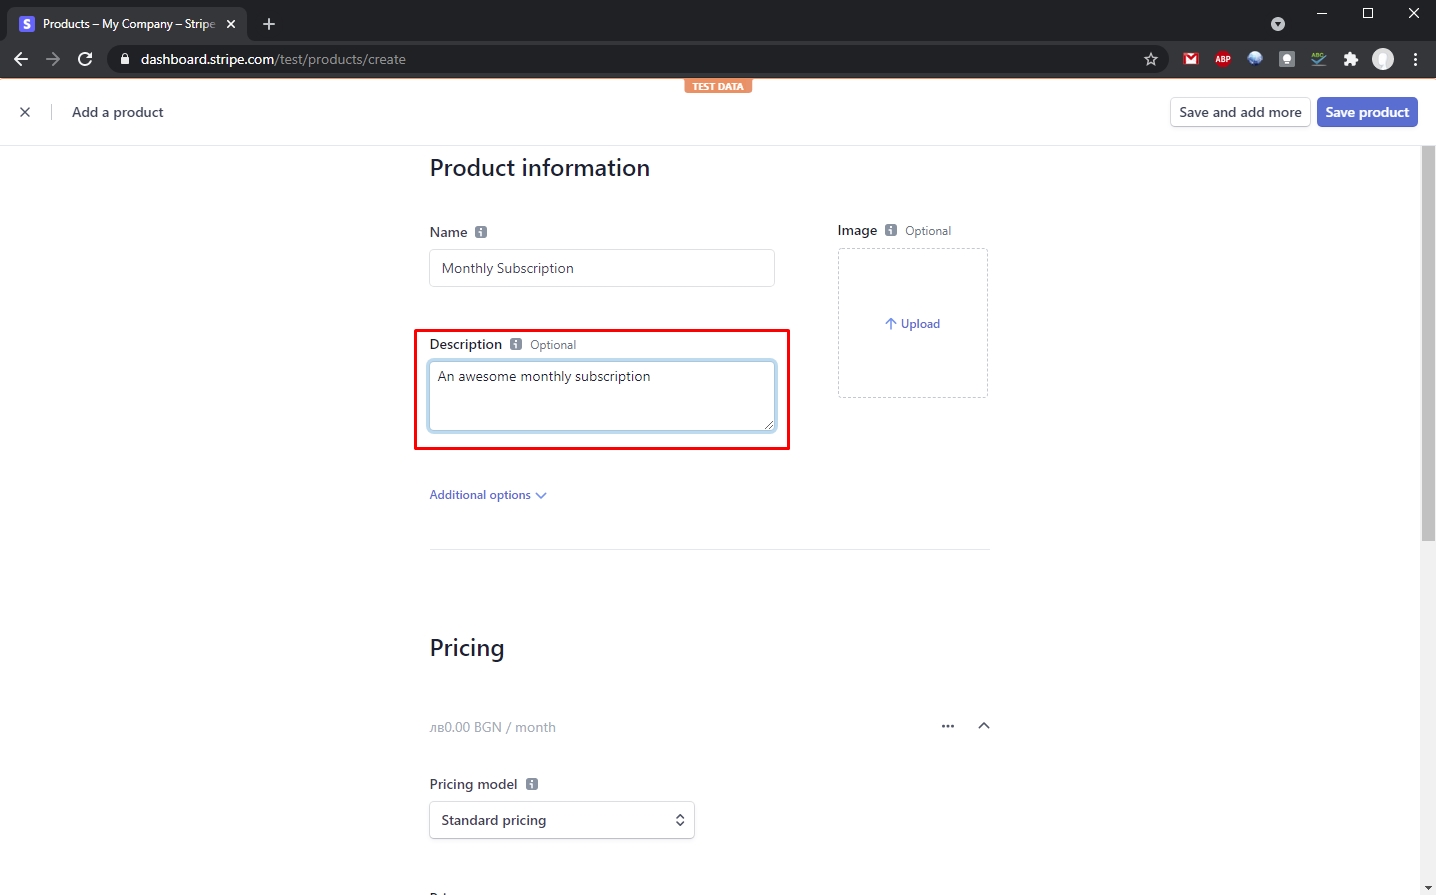
Optionally you can add an image to be displayed on the checkout page. We don’t want to add an image now.
Section titled “Optionally you can add an image to be displayed on the checkout page. We don’t want to add an image now.”Scroll down to the pricing section. Set the pricing model to Standard:
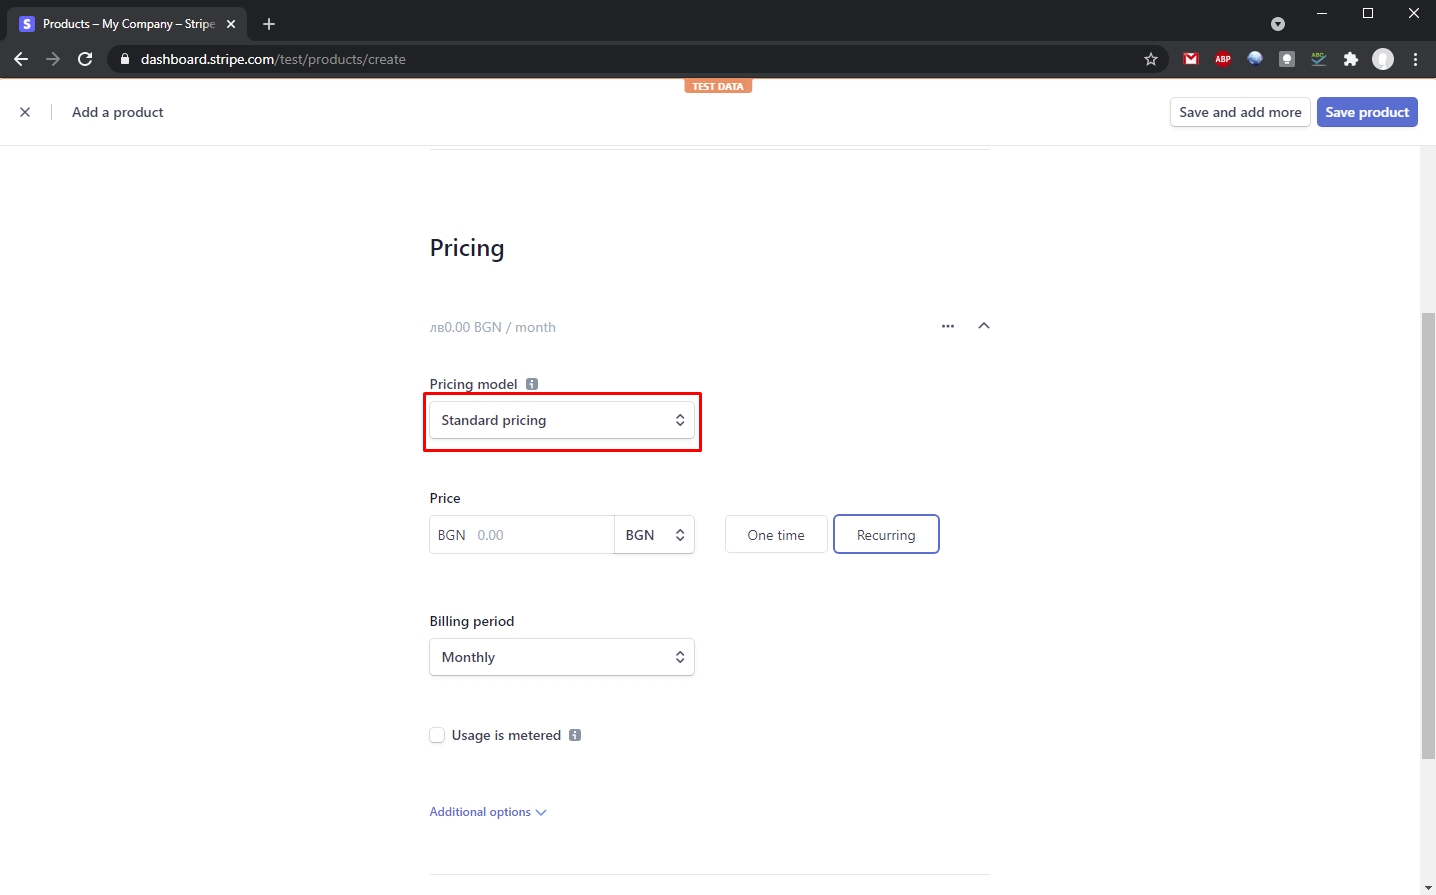
Select Recurring Payment:
Section titled “Select Recurring Payment:”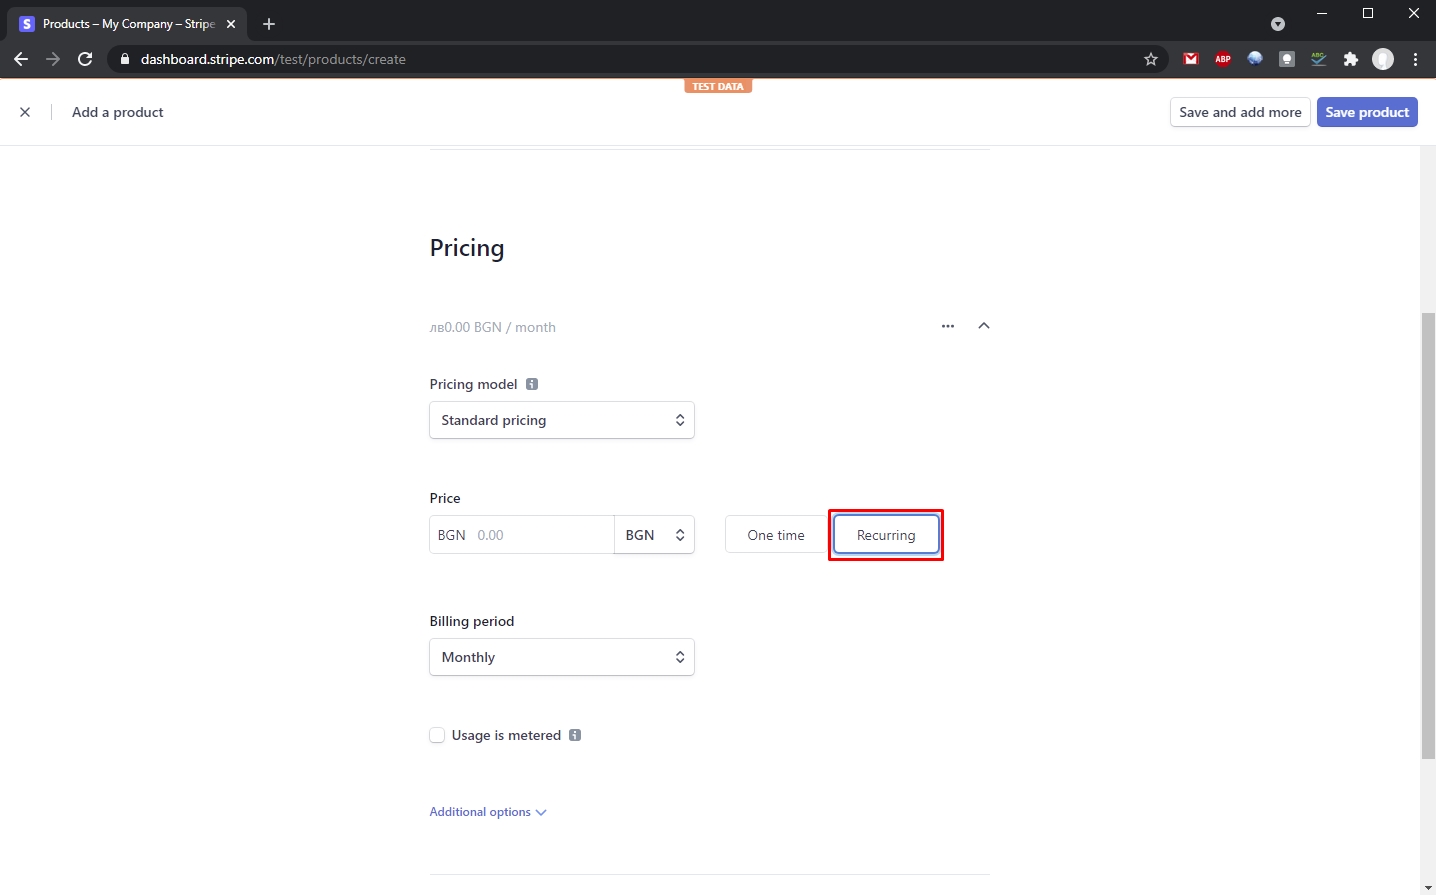
And then select your currency:
Section titled “And then select your currency:”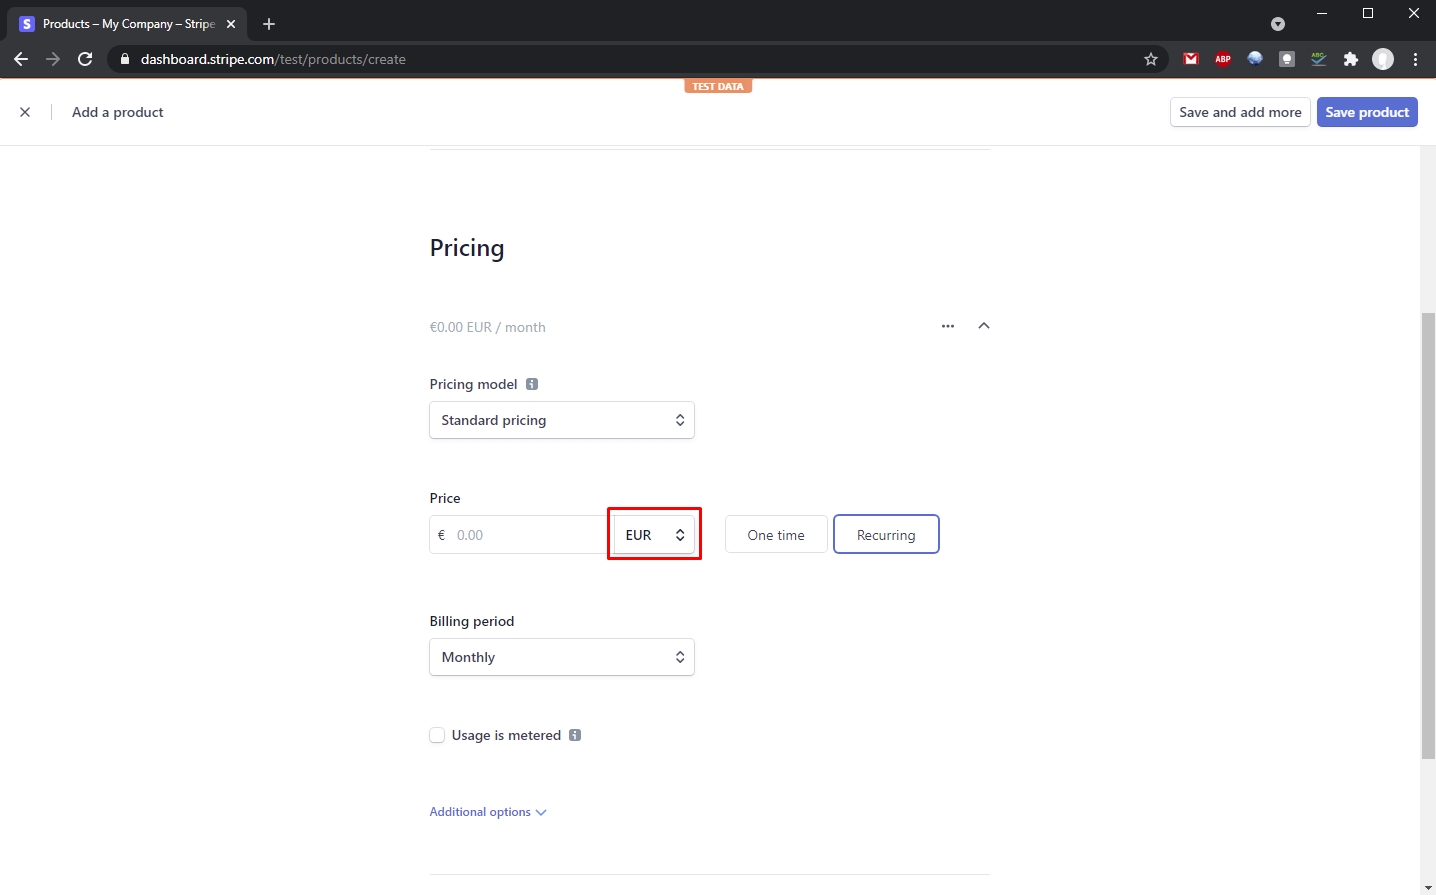
Enter the amount your customers should be charged for the selected billing periond:
Section titled “Enter the amount your customers should be charged for the selected billing periond:”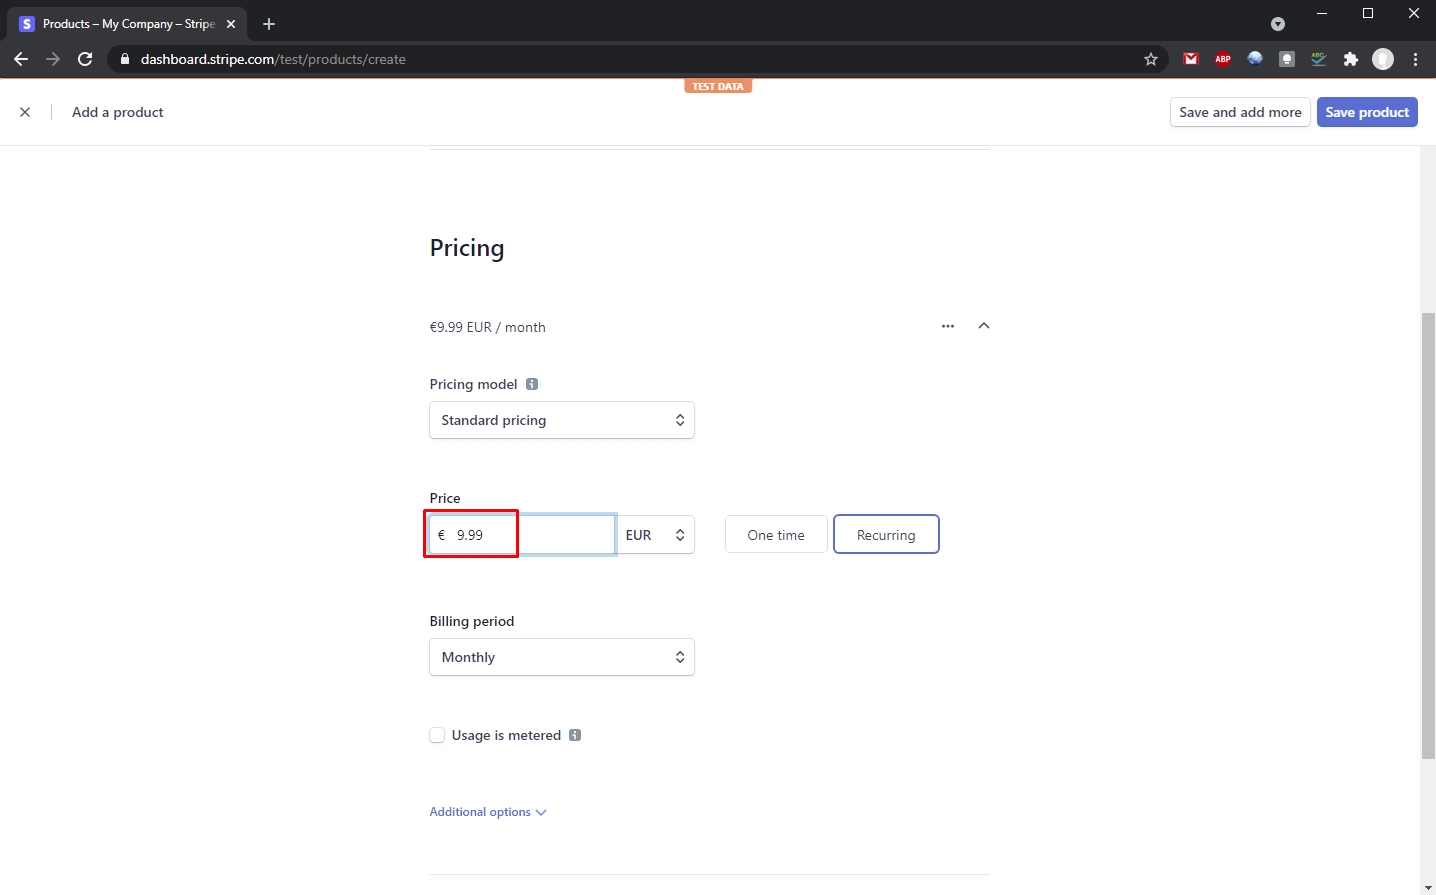
And select a billing period:
Section titled “And select a billing period:”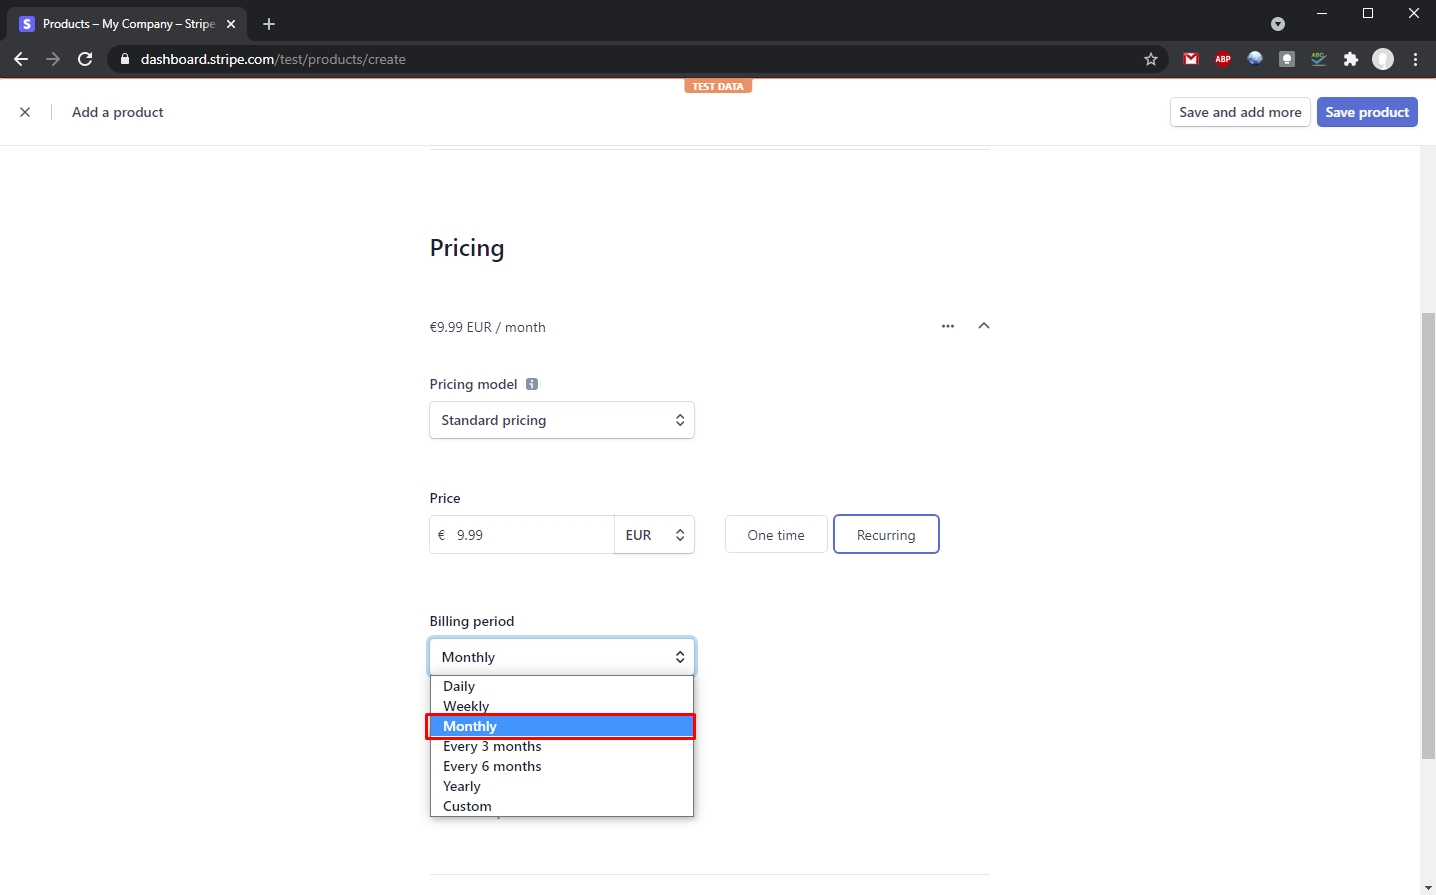
You can add another pricing (in different currency) if needed:
Section titled “You can add another pricing (in different currency) if needed:”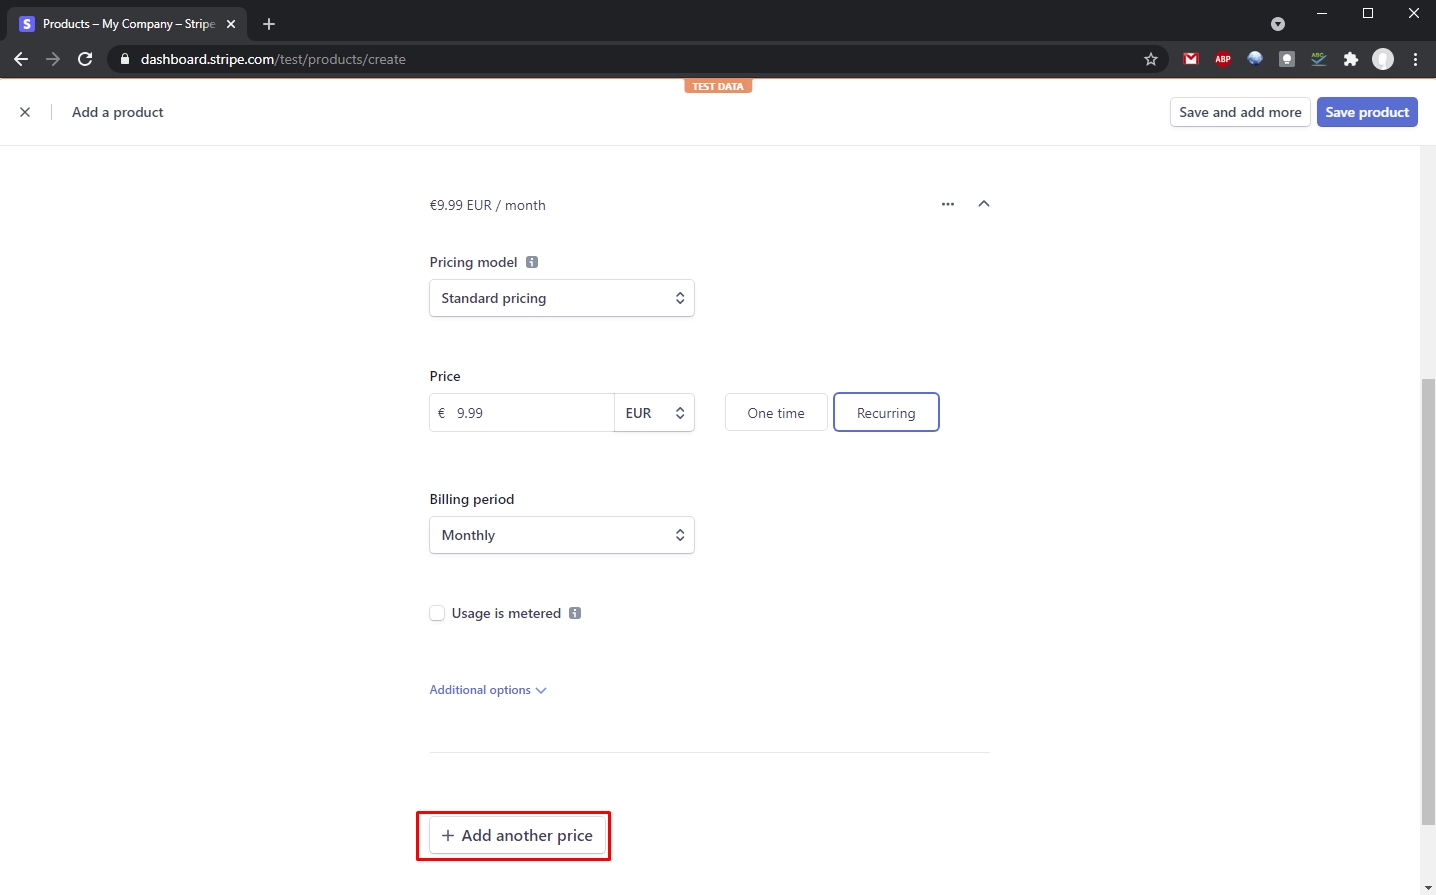
Then click the Save Product button:
Section titled “Then click the Save Product button:”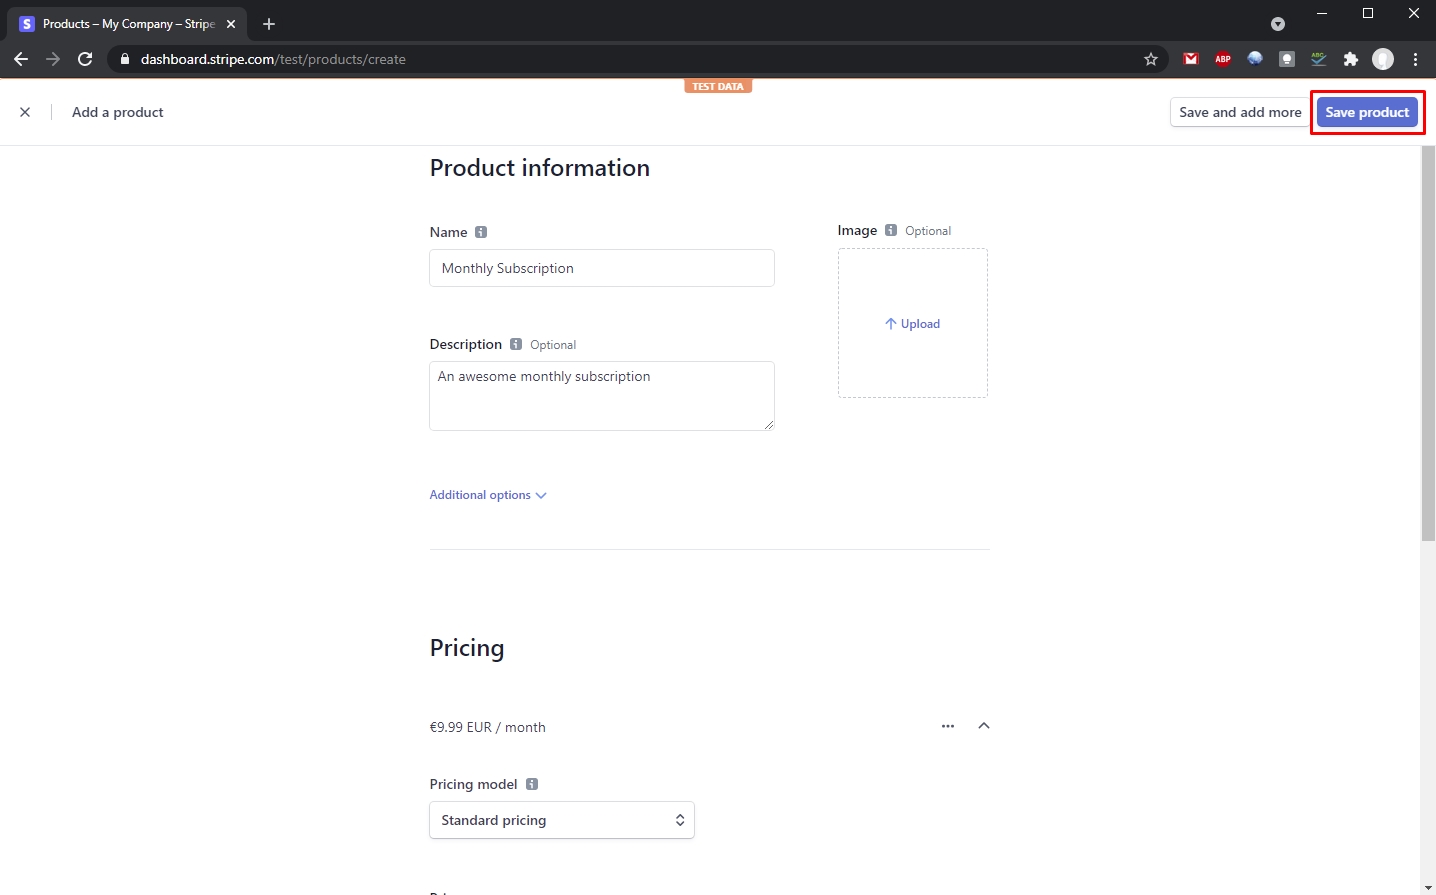
You will need the price id for the checkout, so copy it:
Section titled “You will need the price id for the checkout, so copy it:”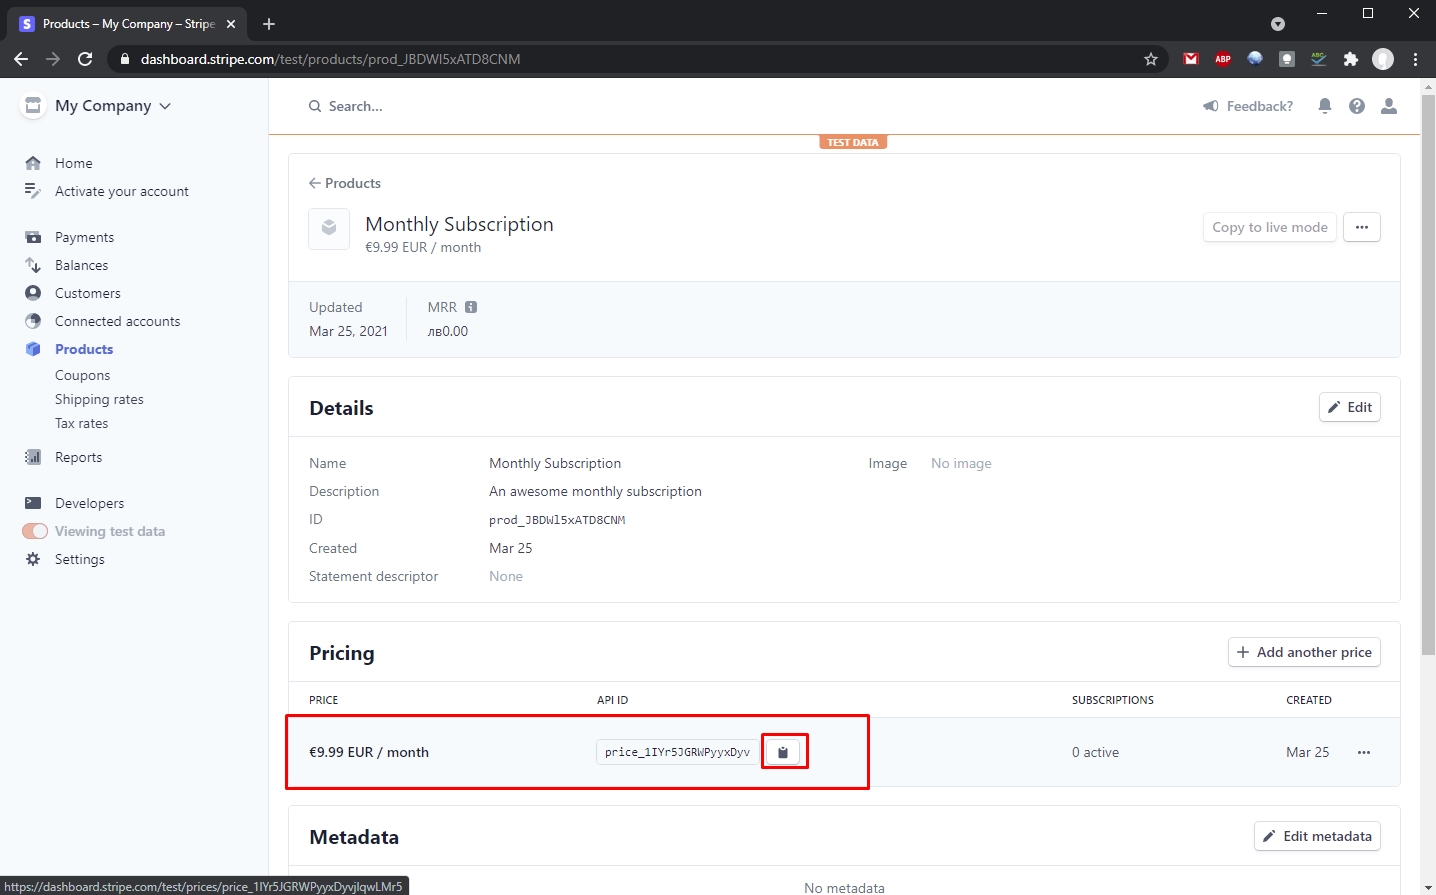
Client-side Flow
Section titled “Client-side Flow”You can use the client-side only flow for your subscriptions. This allows you to integrate Stripe Checkout on your site, without using any server-side code.
Make sure the Client-Only Integration is enabled in your Stripe account: Getting Started with Stripe Integration in Wappler
On our page we added a simple Subscribe Now button, which will be used by our users to subscribe for our services/products:
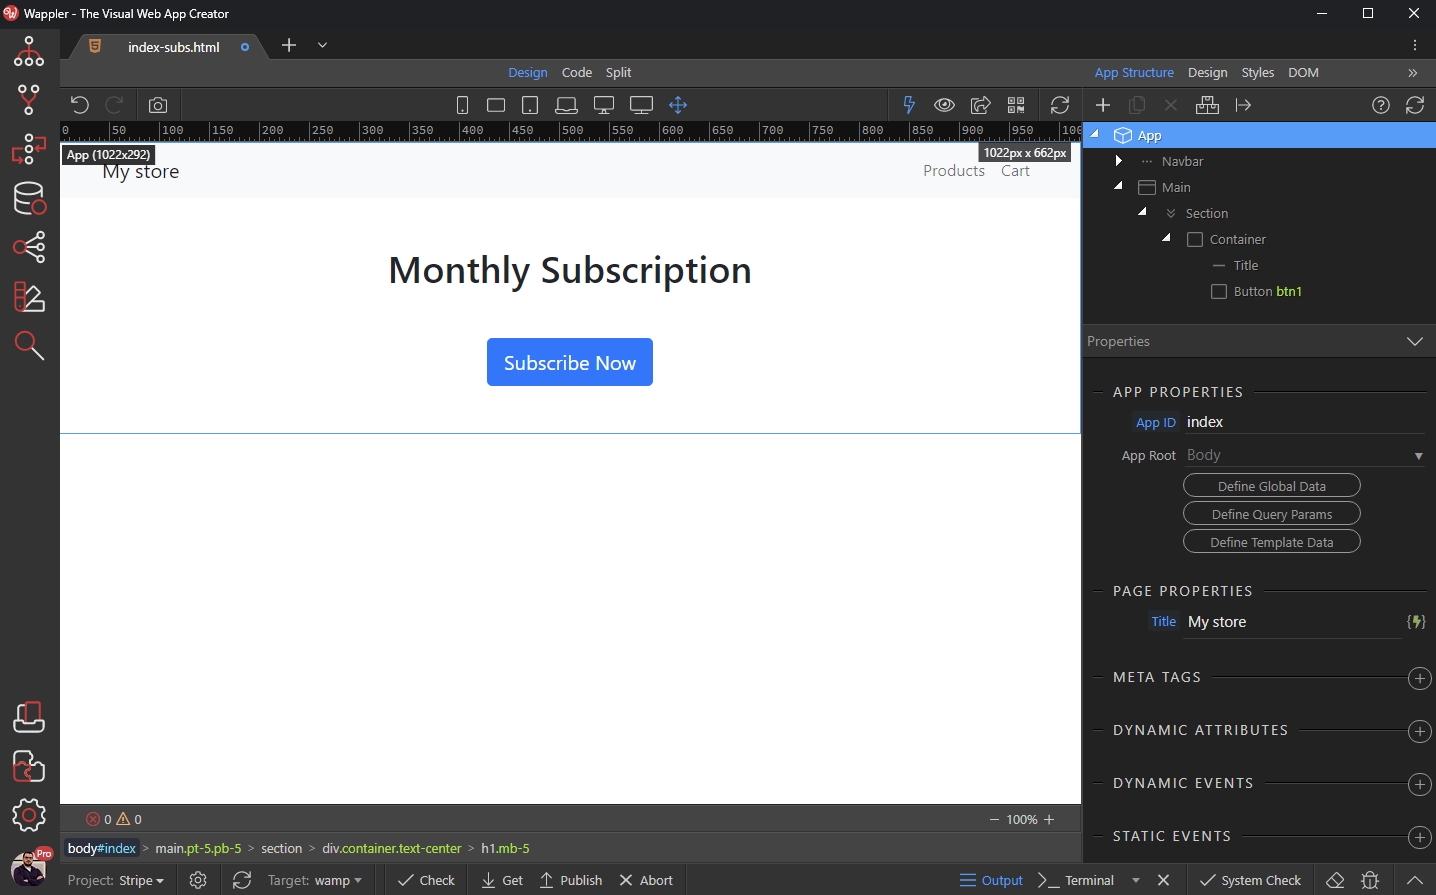
Click the Add New component button in App Structure:
Section titled “Click the Add New component button in App Structure:”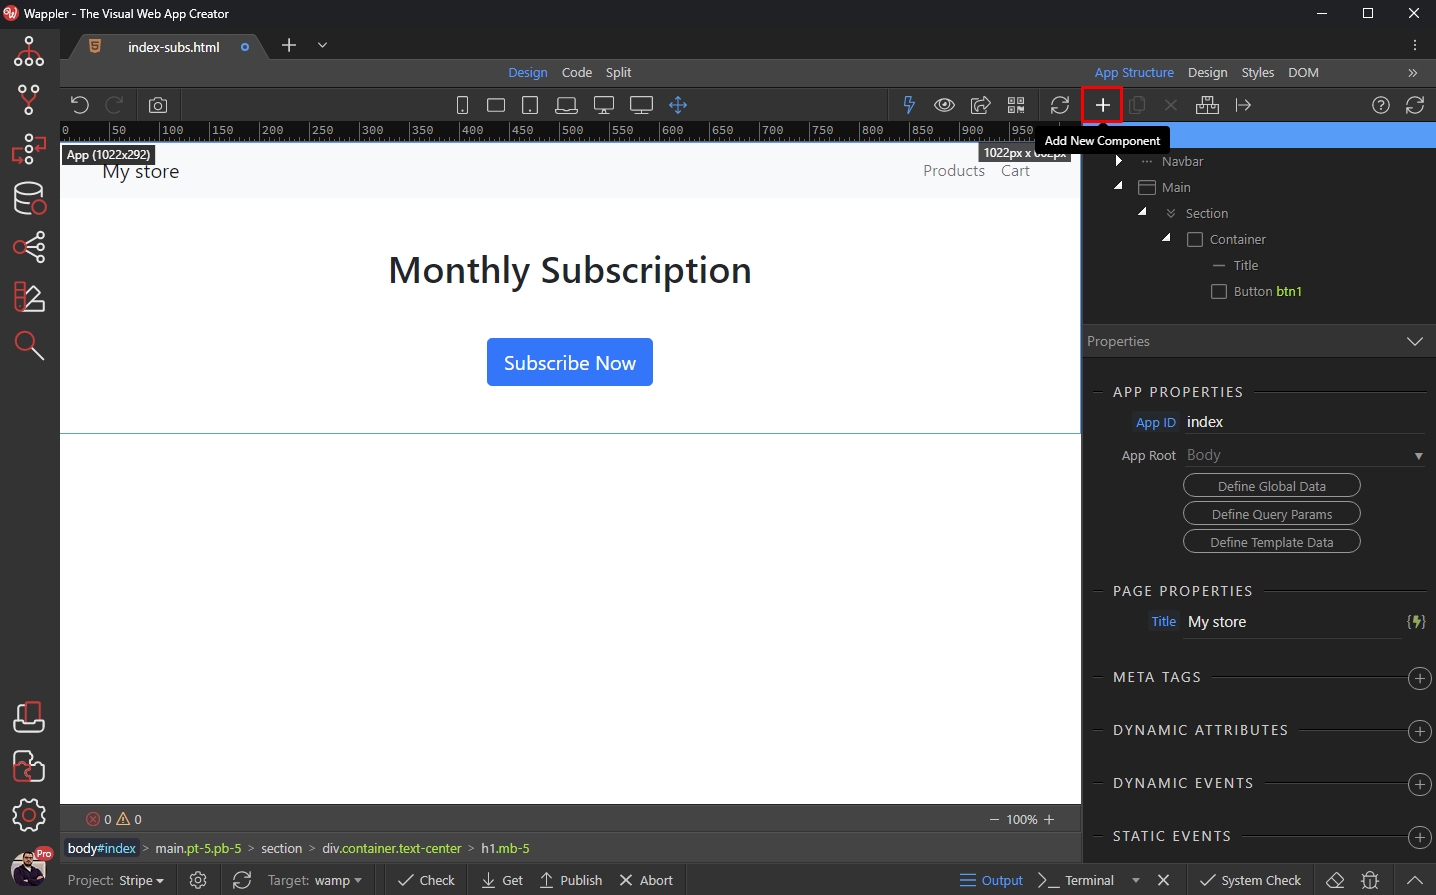
Open the Stripe Category and select Stripe:
Section titled “Open the Stripe Category and select Stripe:”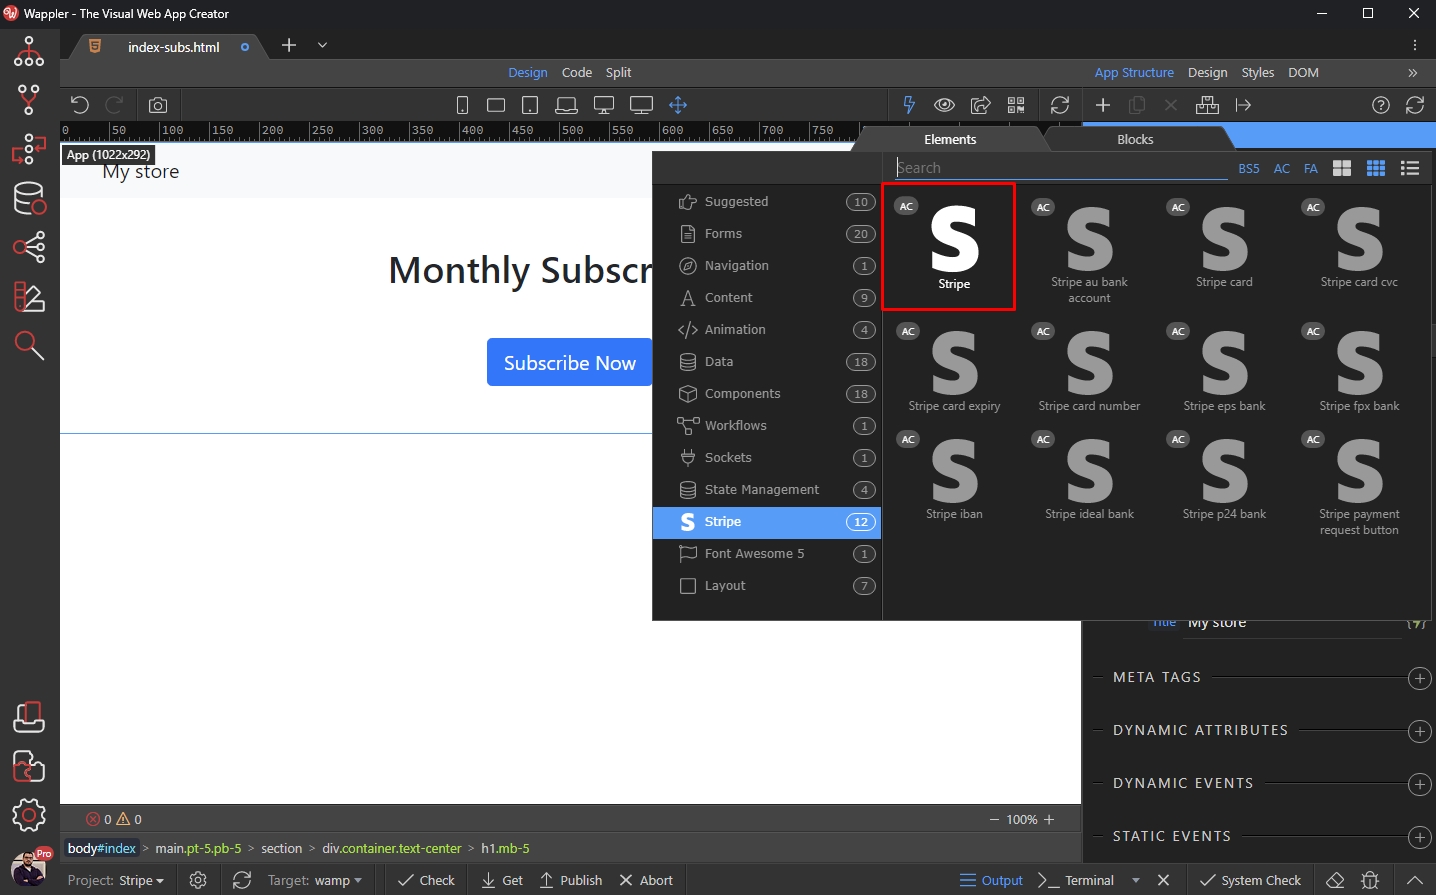
Enter your Publishable API key. It can be found on https://dashboard.stripe.com/apikeys
Section titled “Enter your Publishable API key. It can be found on https://dashboard.stripe.com/apikeys”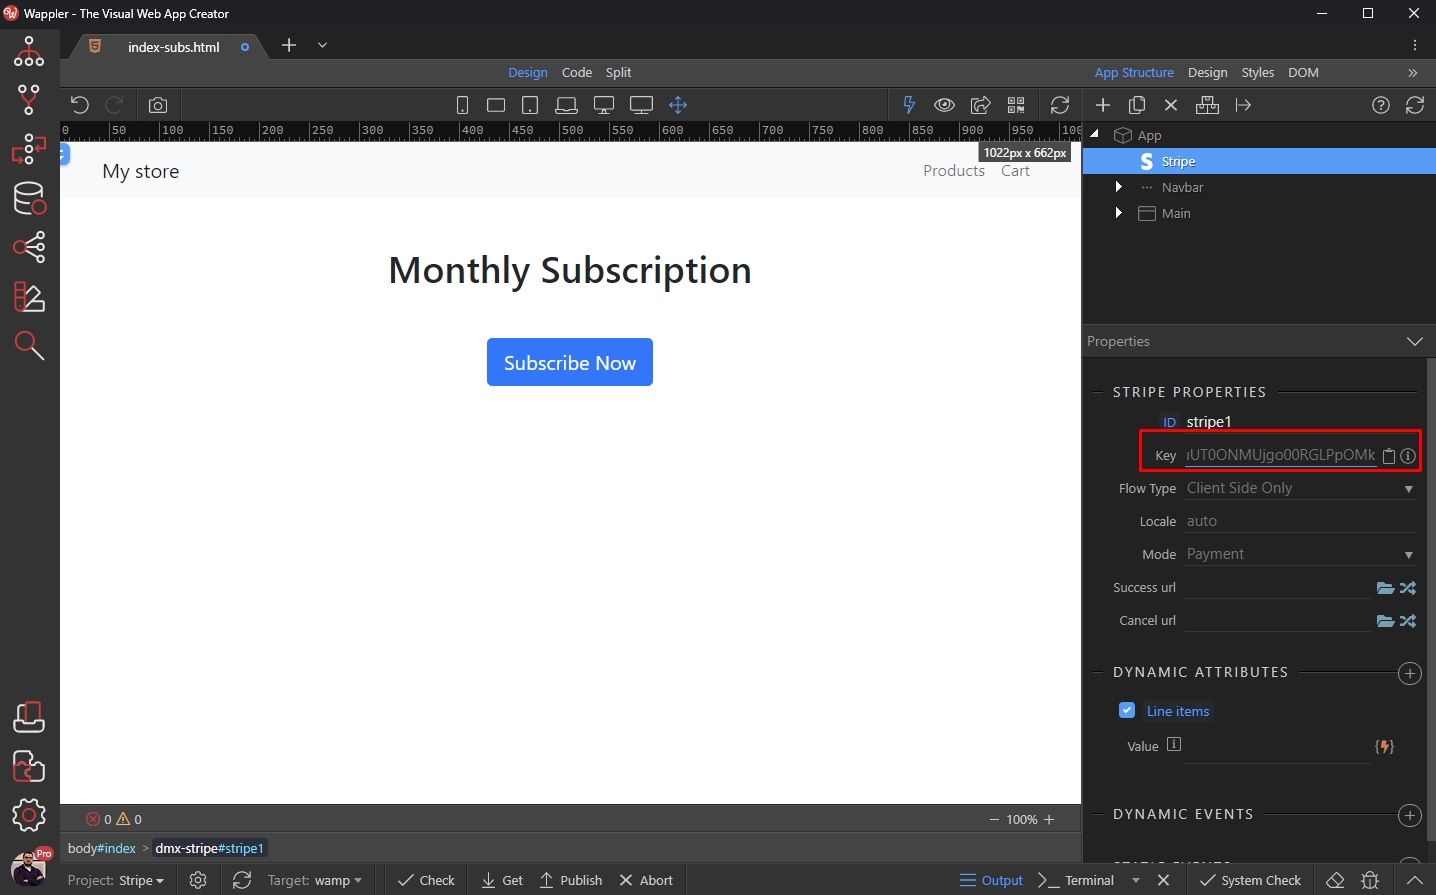
Select Client Side Only in the Flow Type menu:
Section titled “Select Client Side Only in the Flow Type menu:”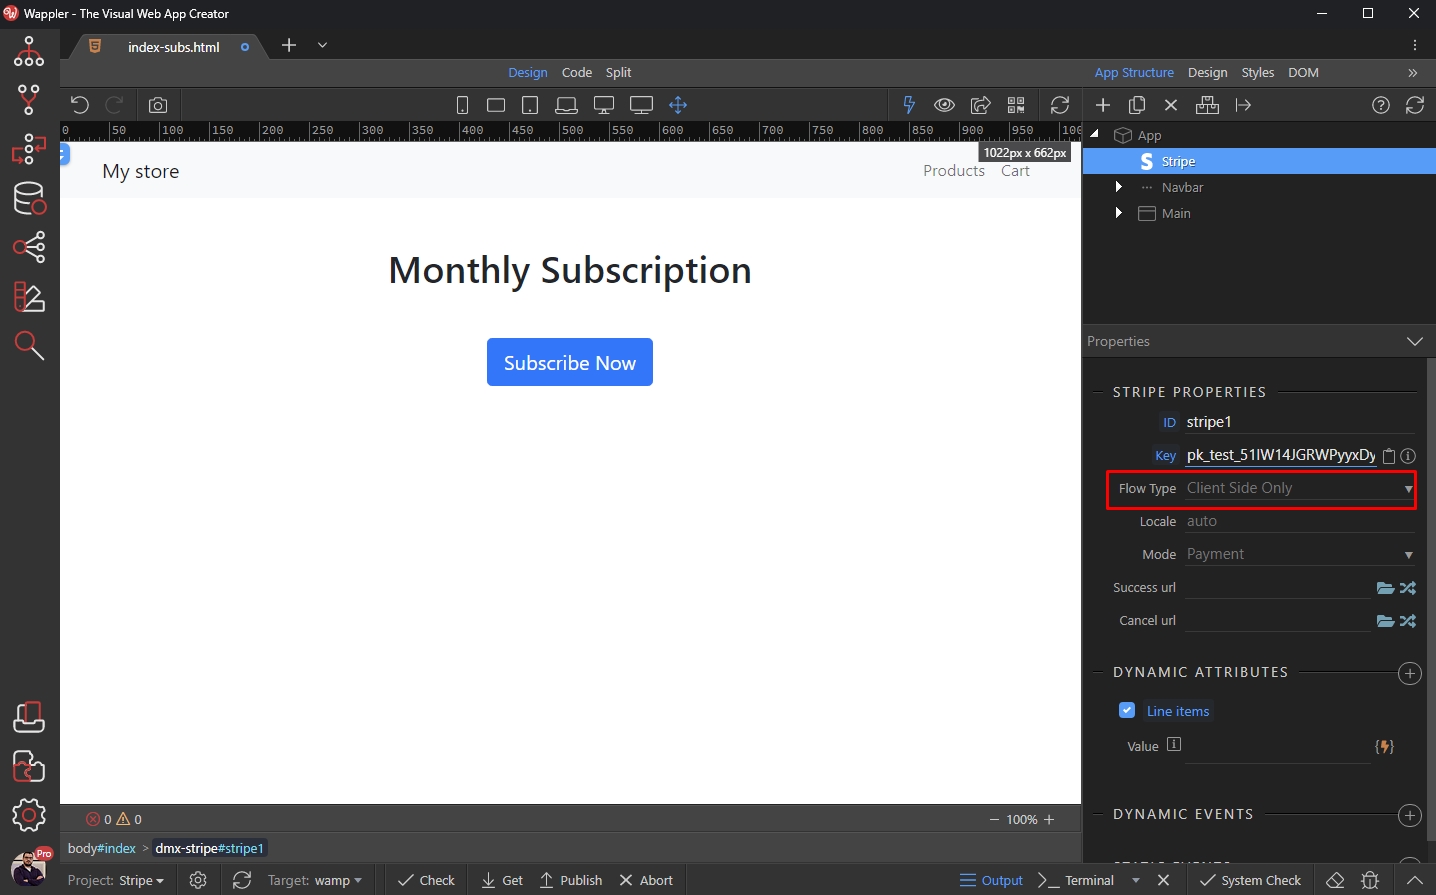
Open the Mode menu:
Section titled “Open the Mode menu:”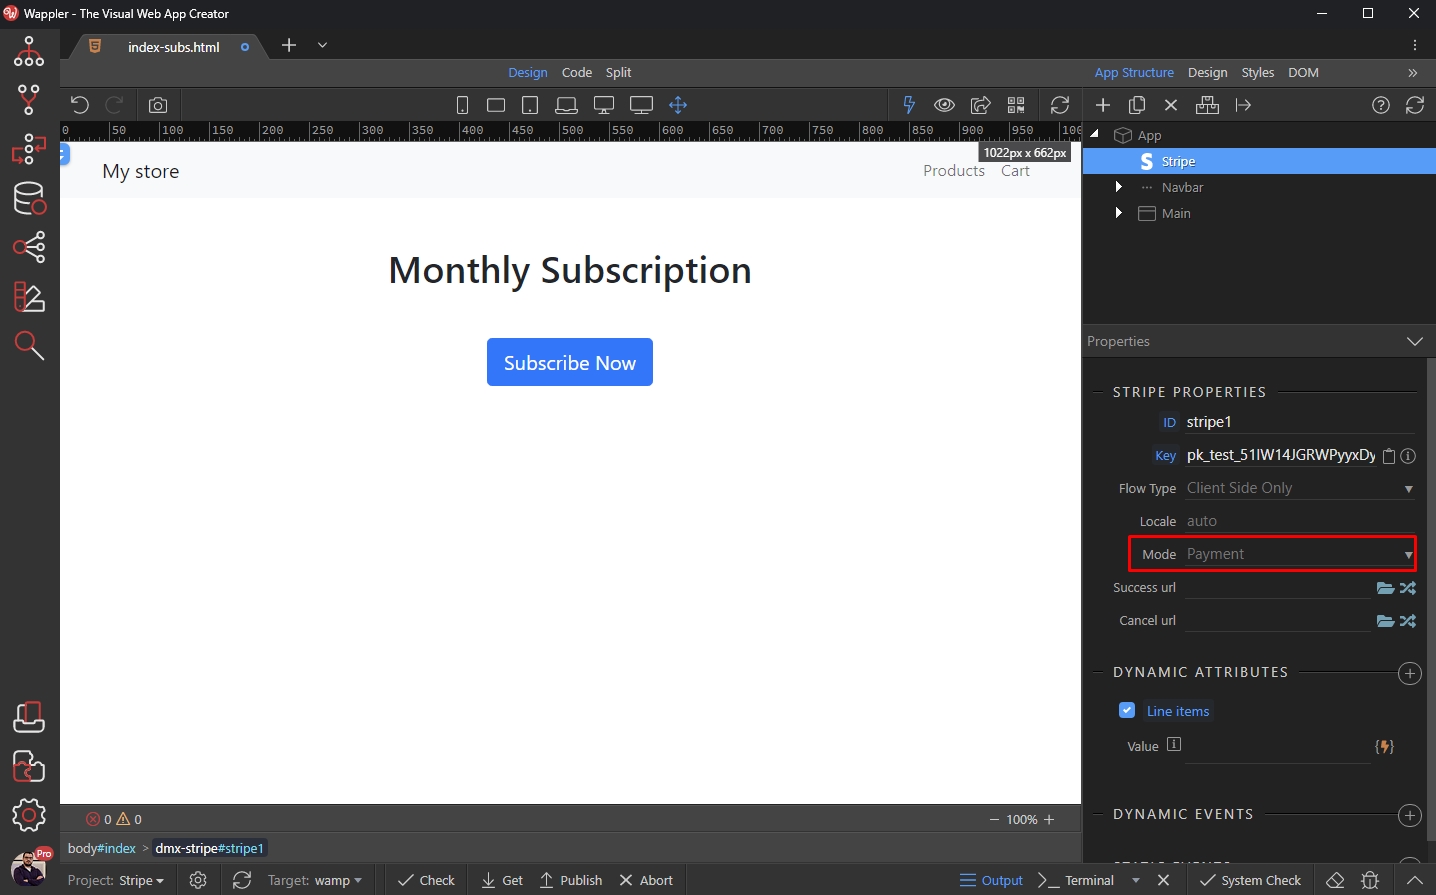
And select Subscription:
Section titled “And select Subscription:”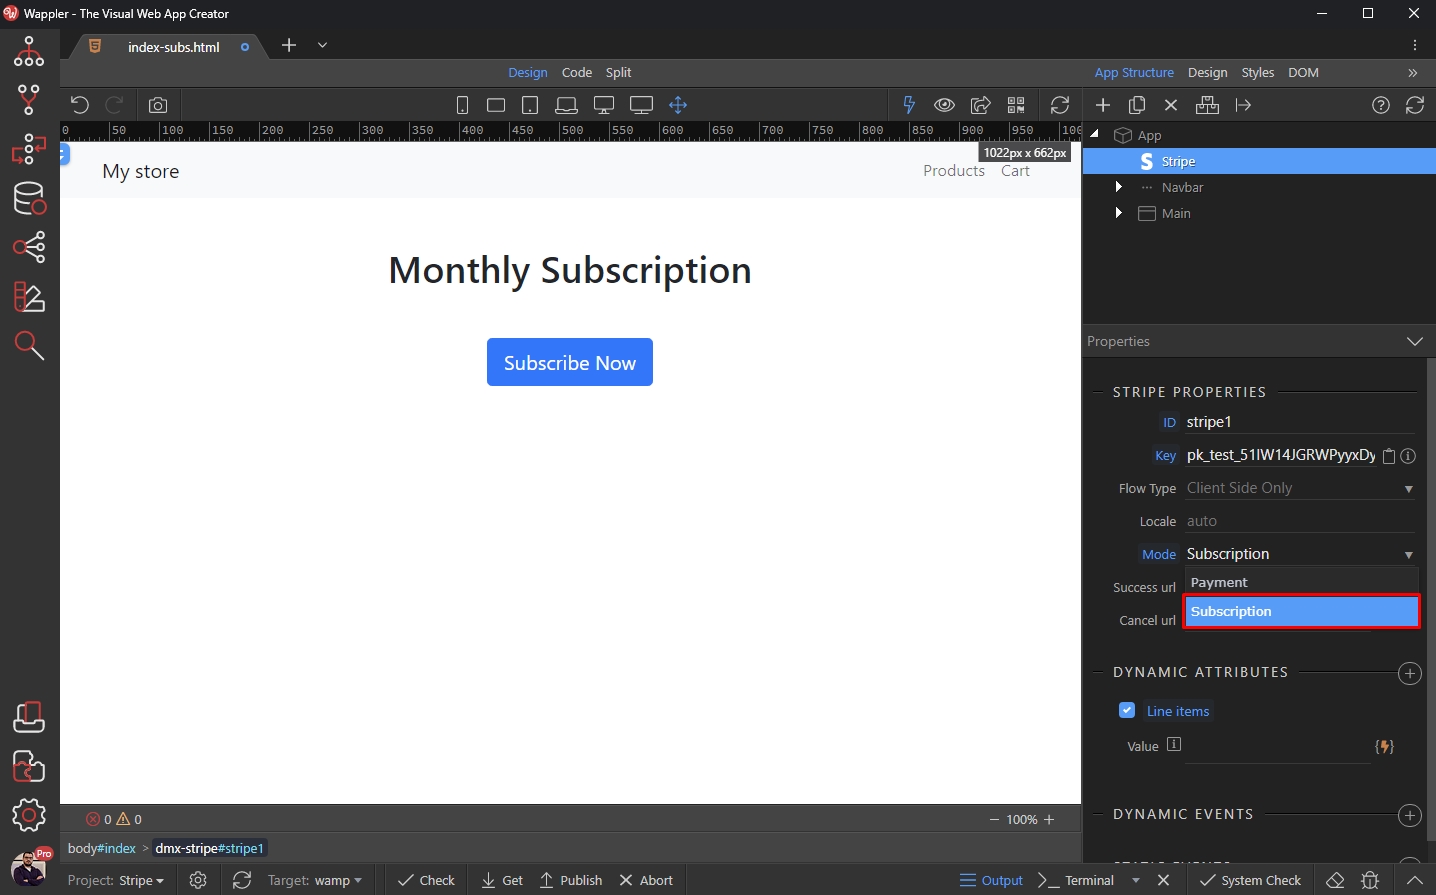
Step 23
Section titled “Step 23”Enter the success and cancel URLs. These are the URLs where the users will be redirected after a successful payment or if they cancel the order during the checkout:
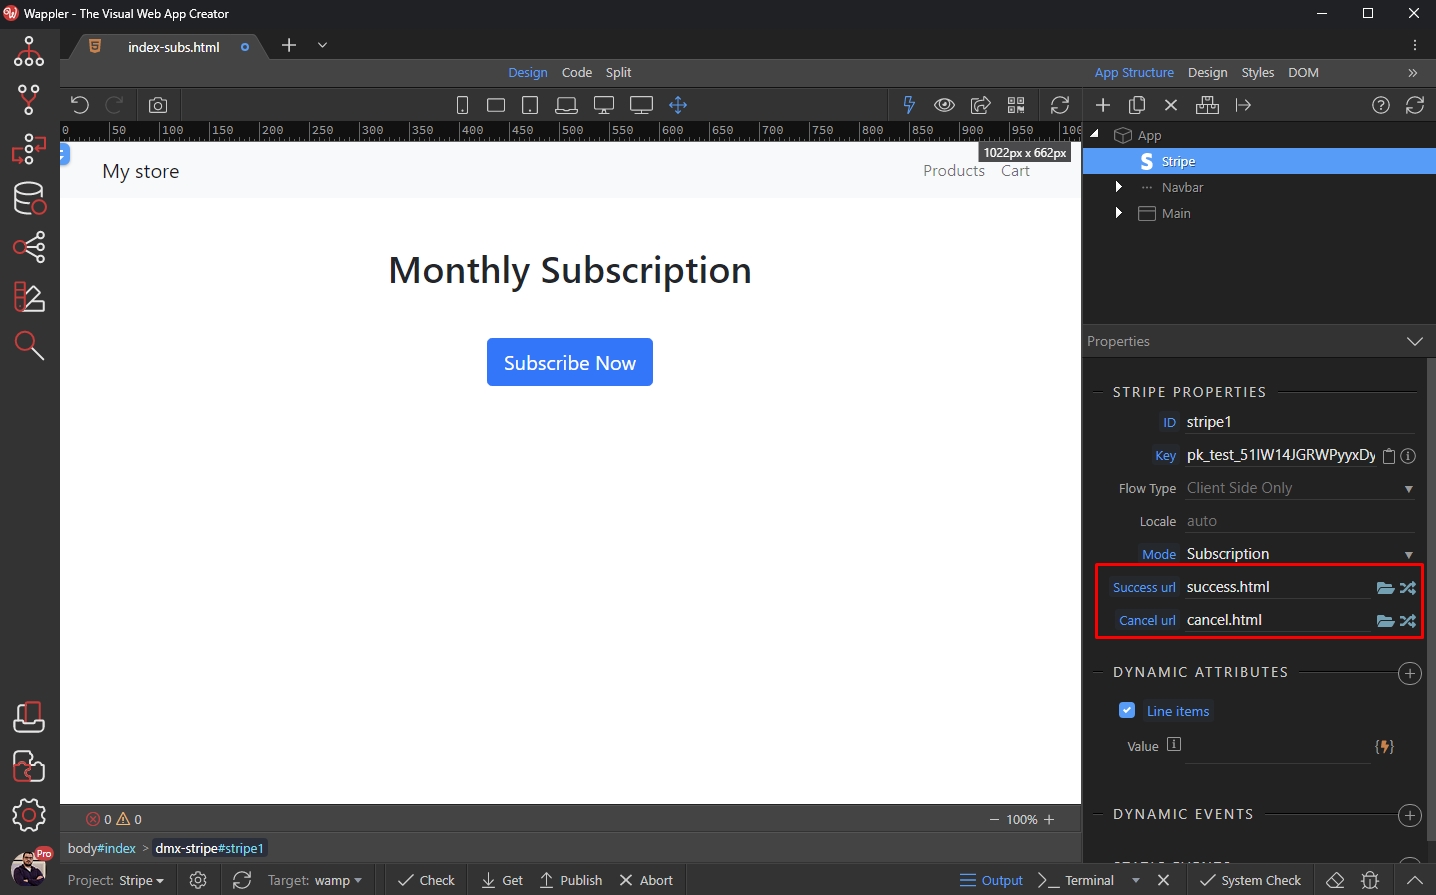
In the Line Items, paste the Subscription Price ID which you copied earlier from the Stripe Dashboard:
Section titled “In the Line Items, paste the Subscription Price ID which you copied earlier from the Stripe Dashboard:”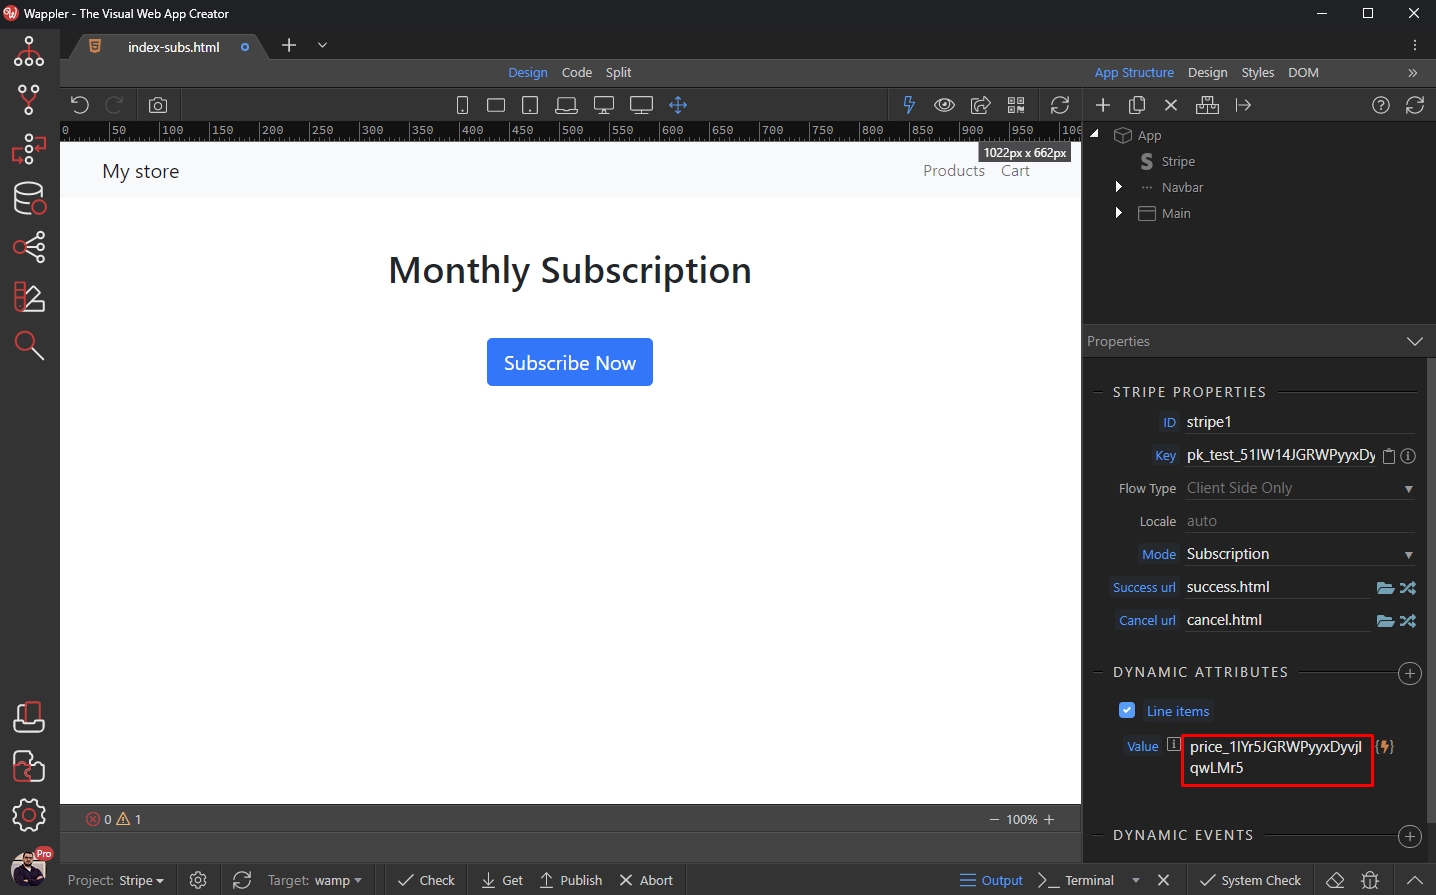
Now, let’s setup the Subscribe Now button. Click the button:
Section titled “Now, let’s setup the Subscribe Now button. Click the button:”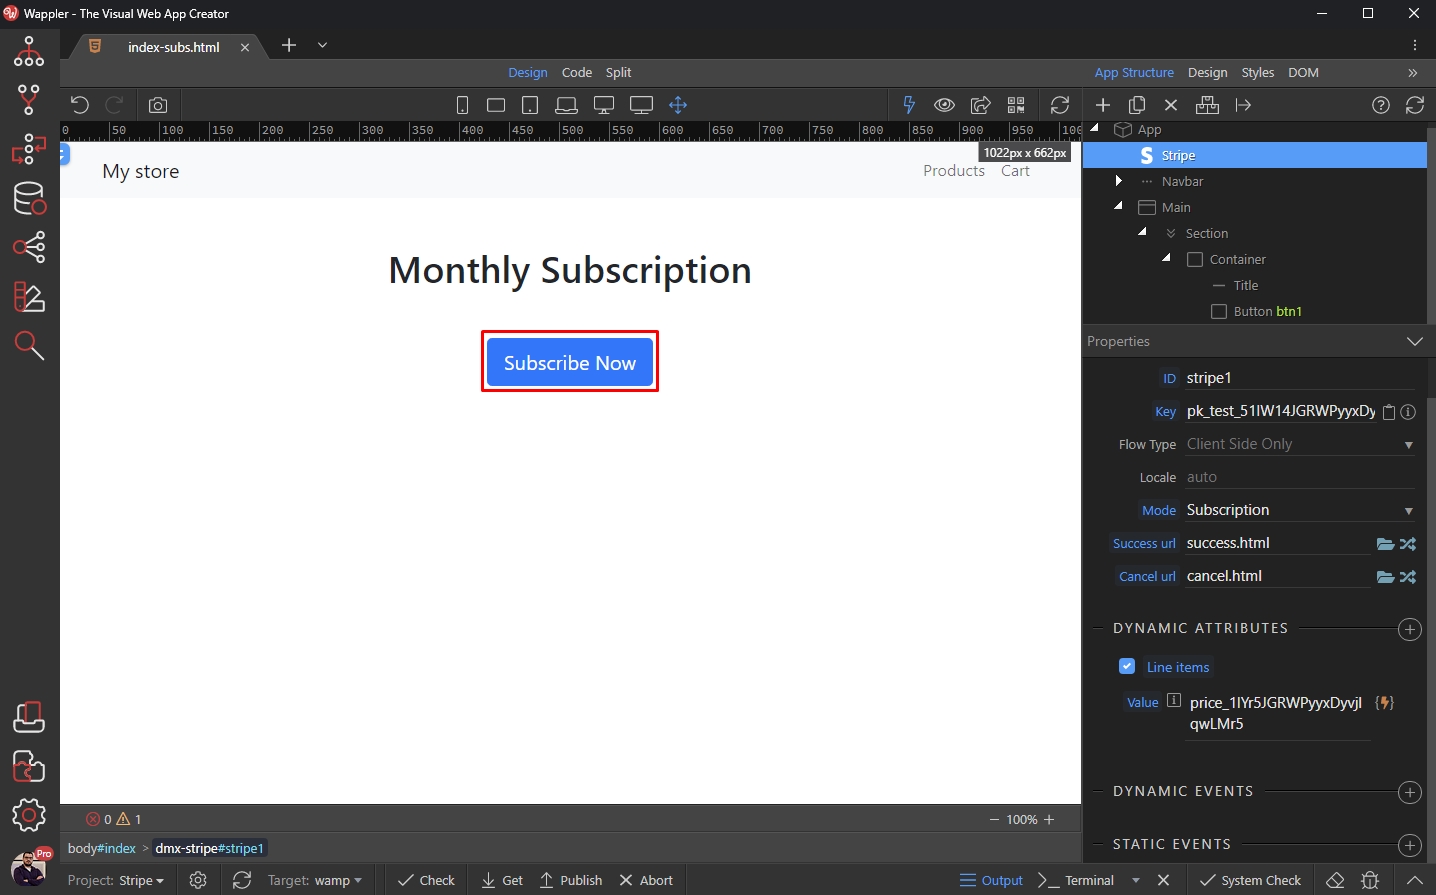
Add new dynamic event:
Section titled “Add new dynamic event:”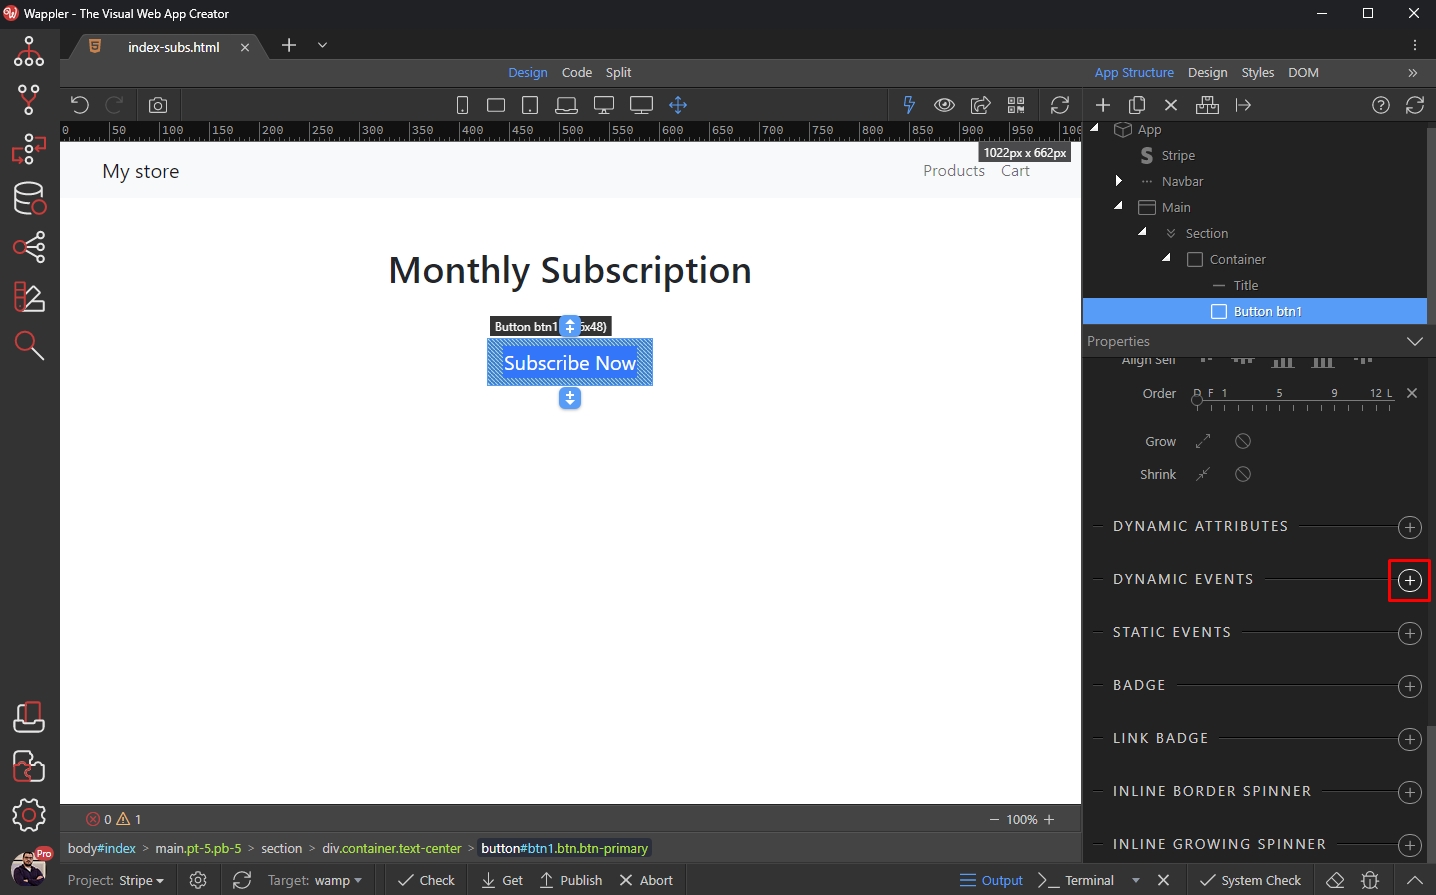
Select Mouse > Click:
Section titled “Select Mouse > Click:”
And select an action:
Section titled “And select an action:”
Select and add Checkout under the Stripe Component:
Section titled “Select and add Checkout under the Stripe Component:”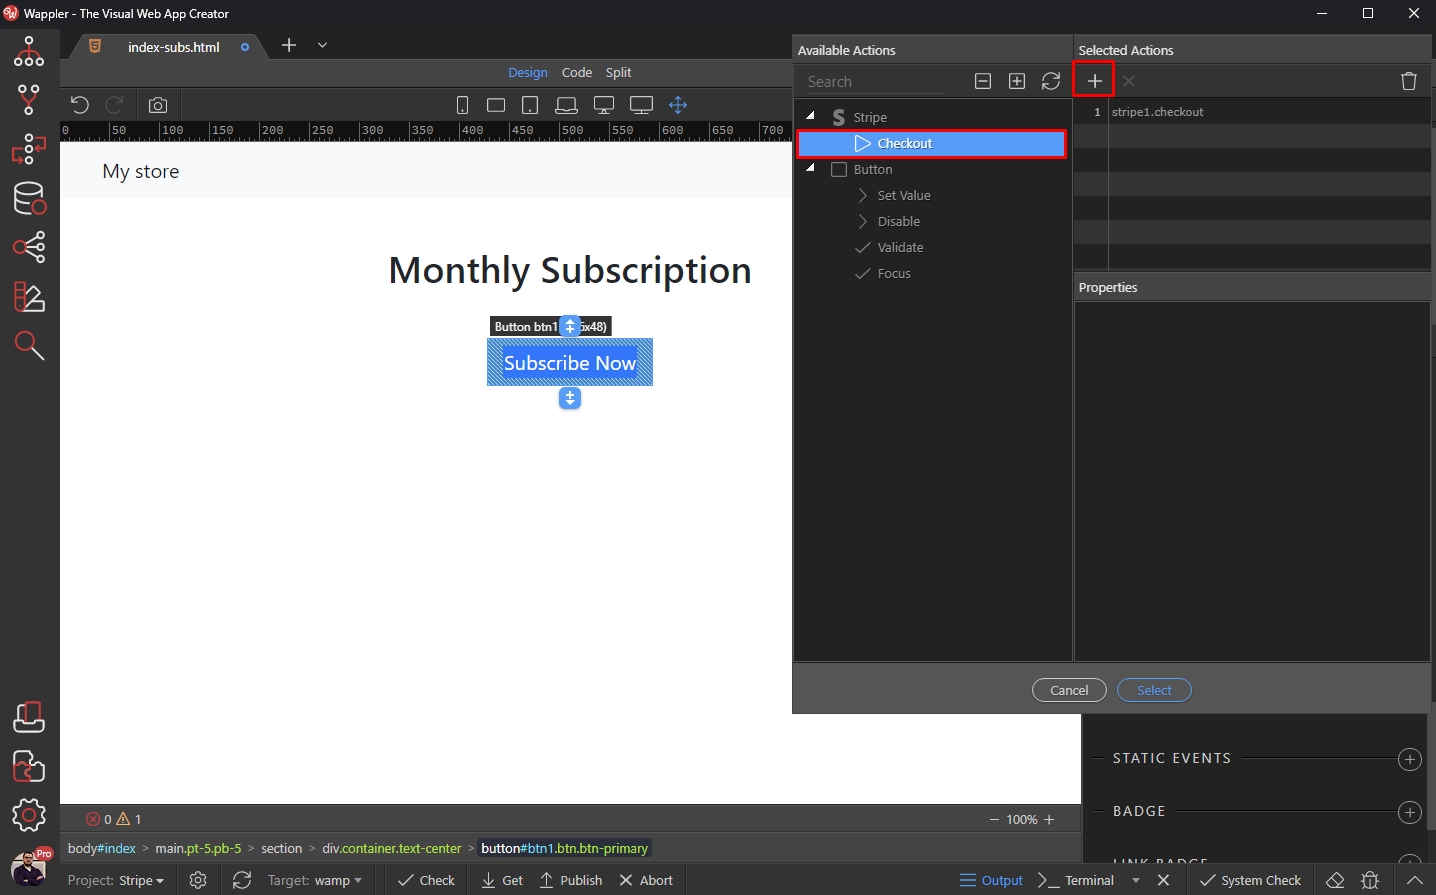
Click Select:
Section titled “Click Select:”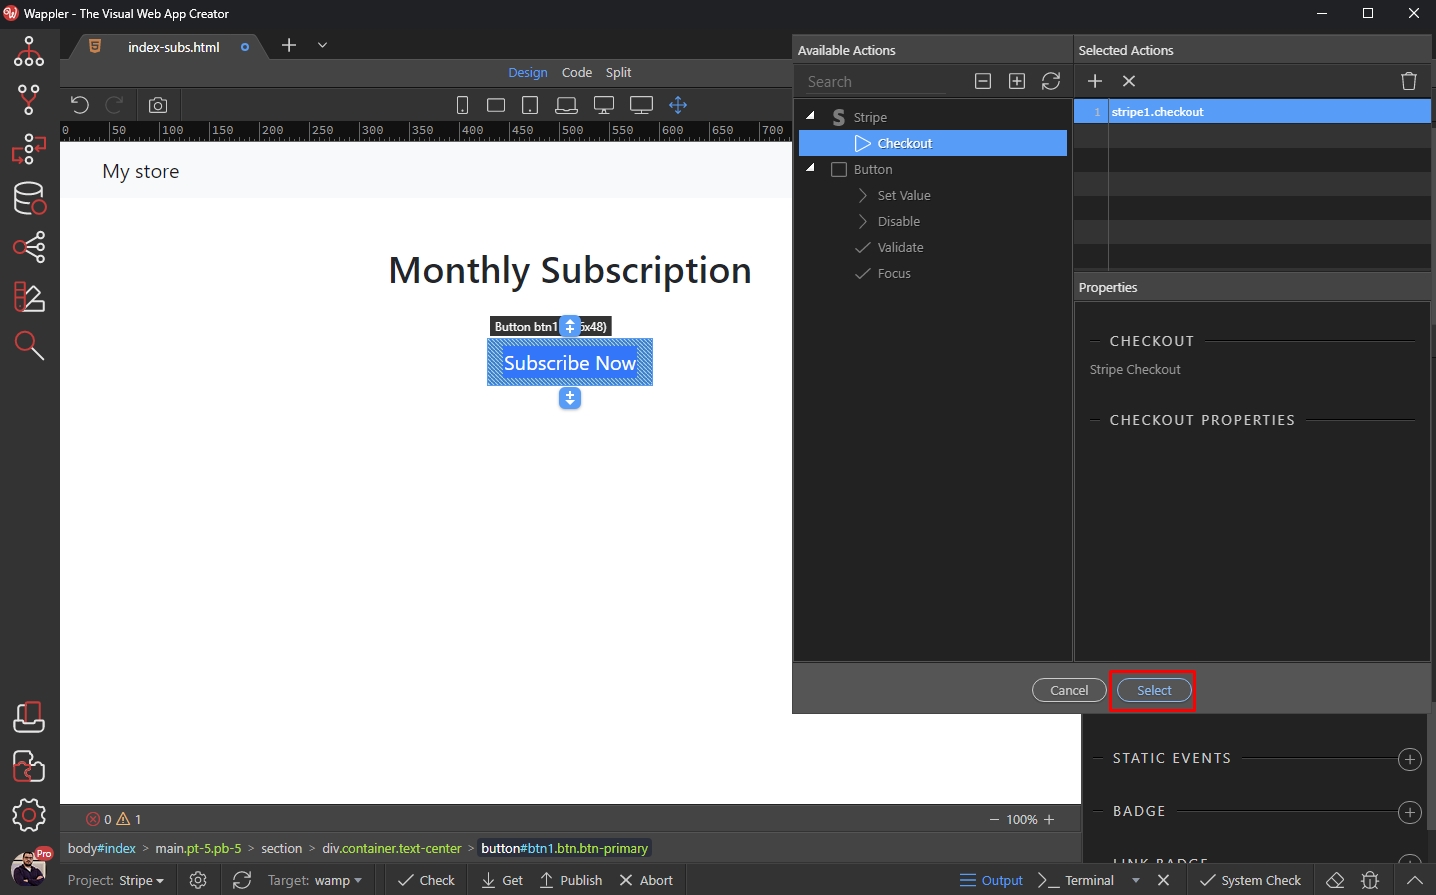
And you are done. Clicking the Subscribe button takes your users to the checkout page, where they can pay:
Section titled “And you are done. Clicking the Subscribe button takes your users to the checkout page, where they can pay:”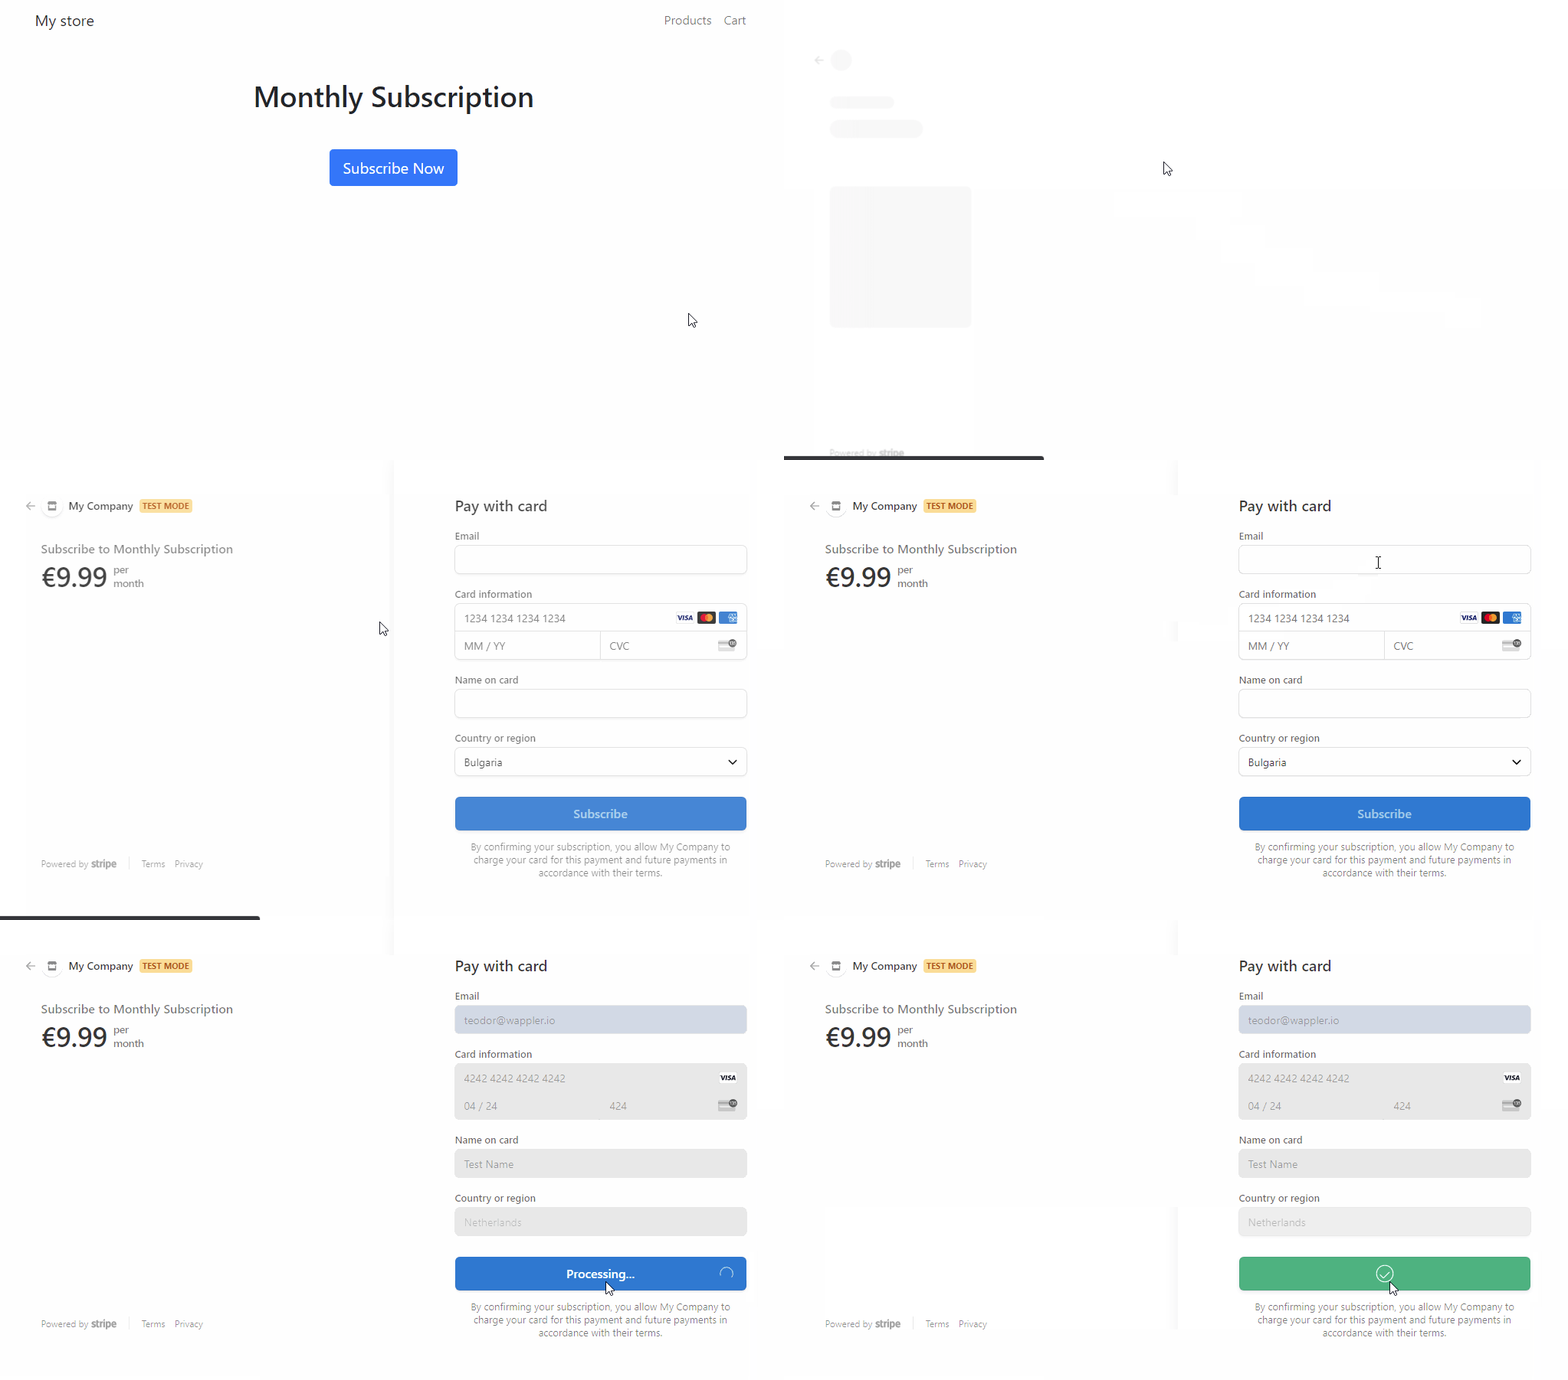
Server-side Flow
Section titled “Server-side Flow”You can also create a server-side checkout it gives more flexibility and options than the client-side integration.
In our example we will show you how to work with logged users and get their details for the checkout.
In our example we will get the logged in user’s details - such as user email, from a database query.
Getting User’s Details
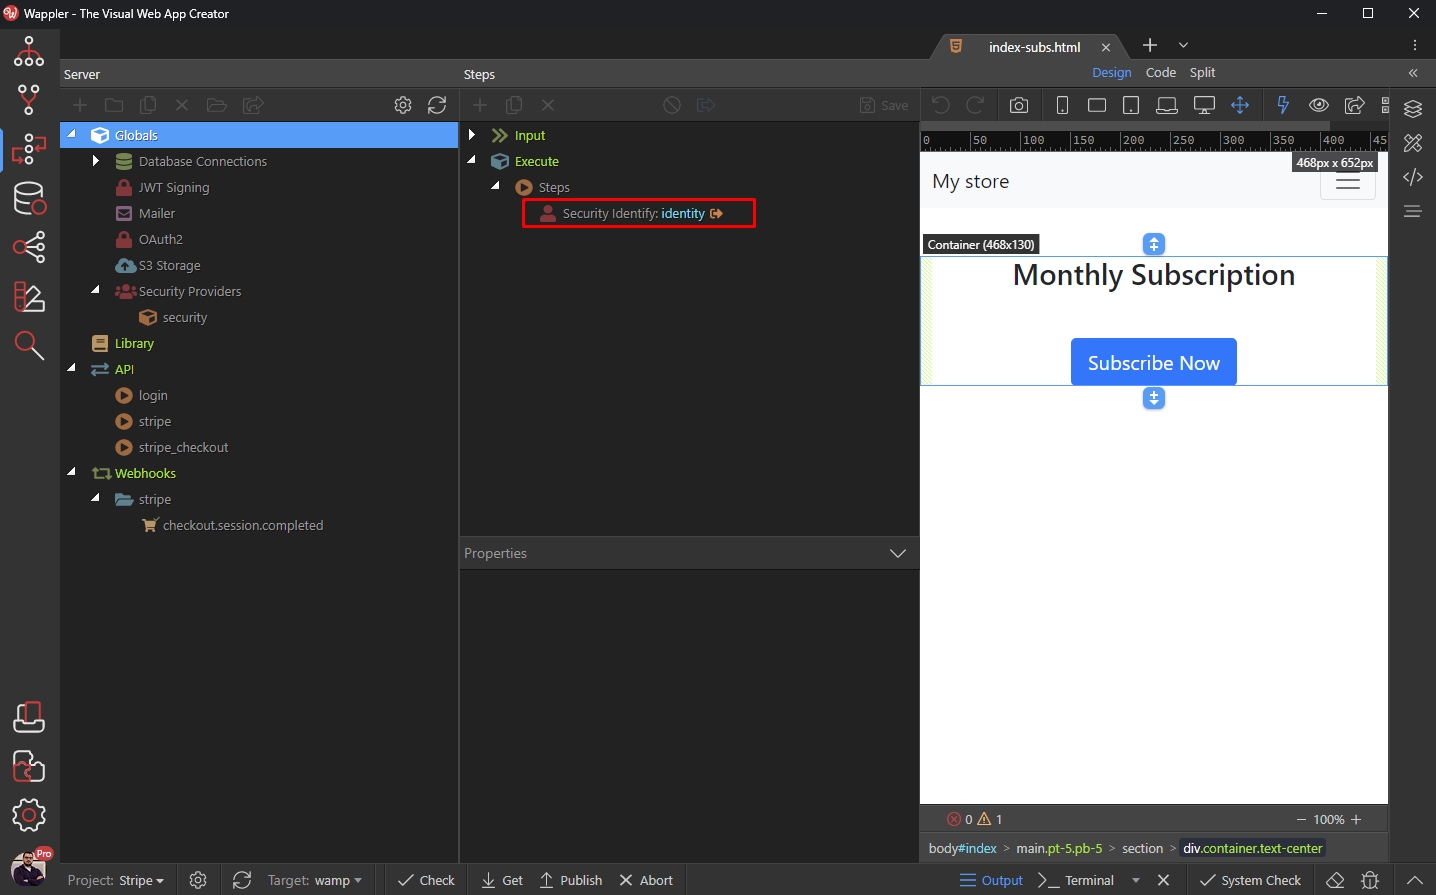
Section titled “Getting User’s Details”We already created a login server action as usual (you already know how to do this) and added a global Identify step in Globals. We will use the Identify value to filter a query in the server-side checkout flow:
Create a new API Action:
Section titled “Create a new API Action:”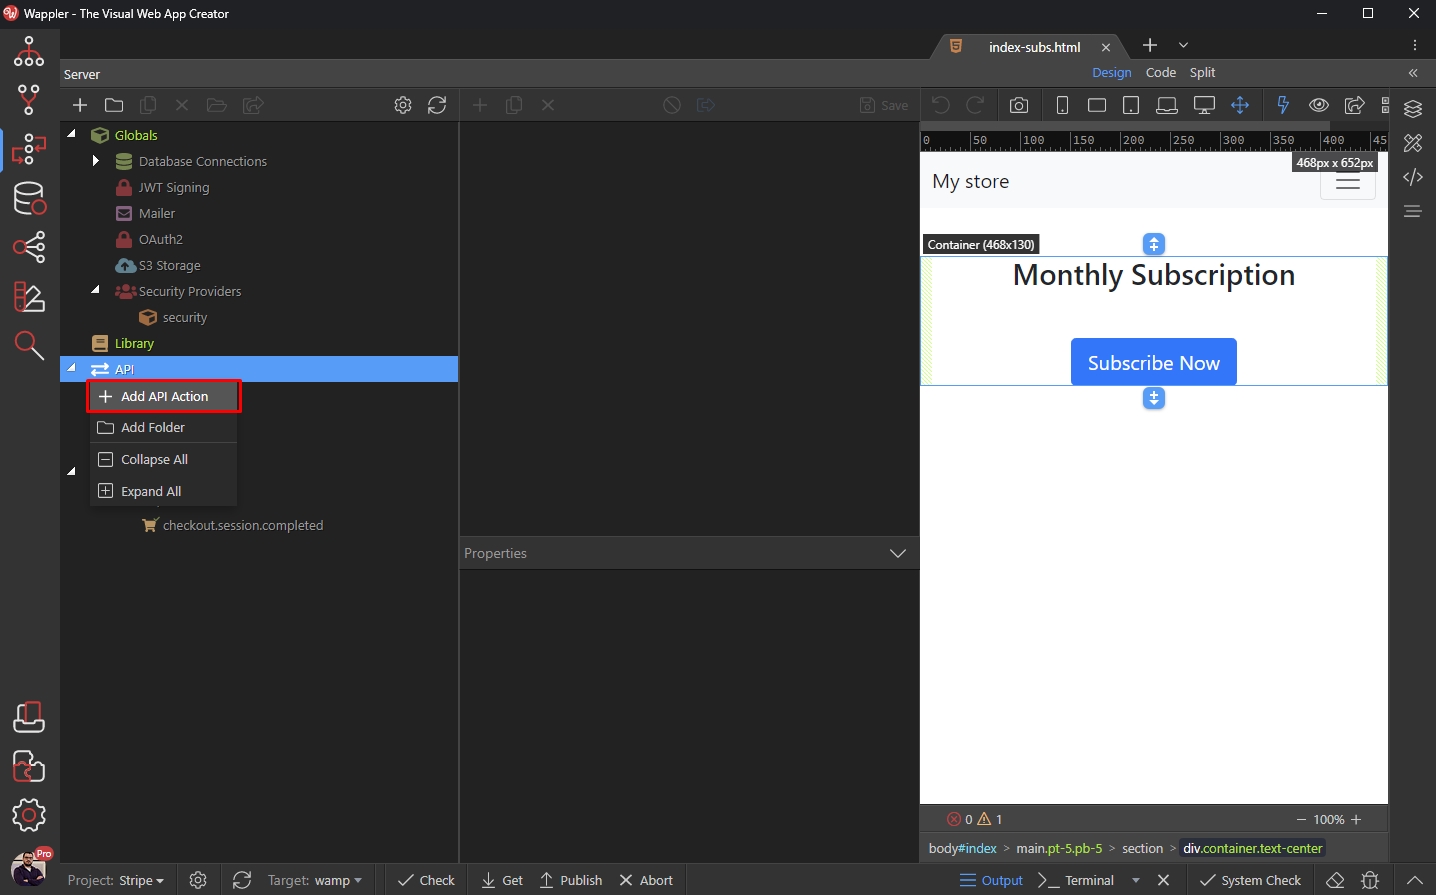
We call it - stripe_subscription. Right click Steps:
Section titled “We call it - stripe_subscription. Right click Steps:”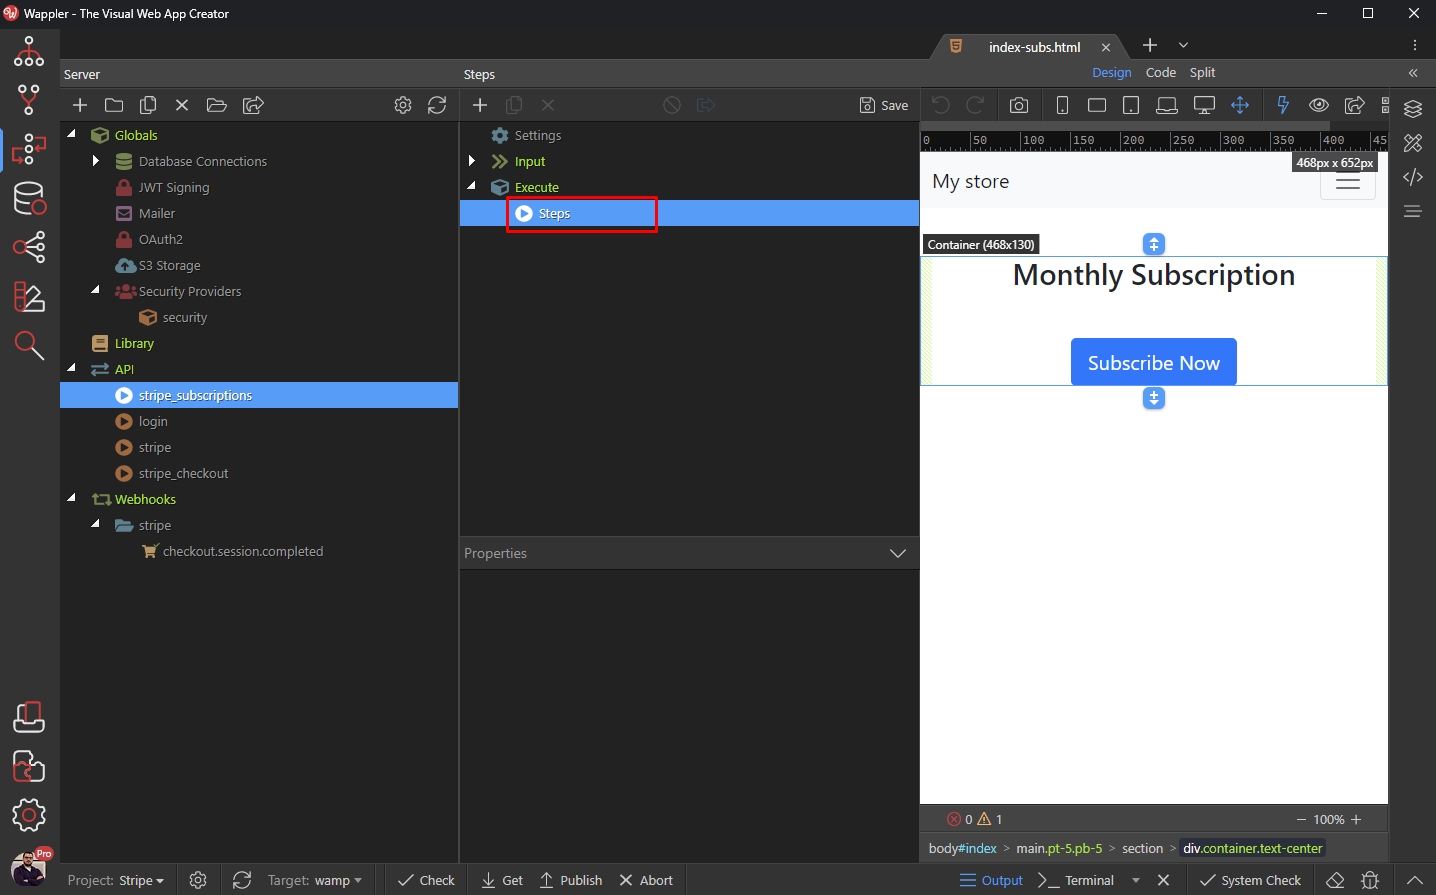
Add a Single Database Query:
Section titled “Add a Single Database Query:”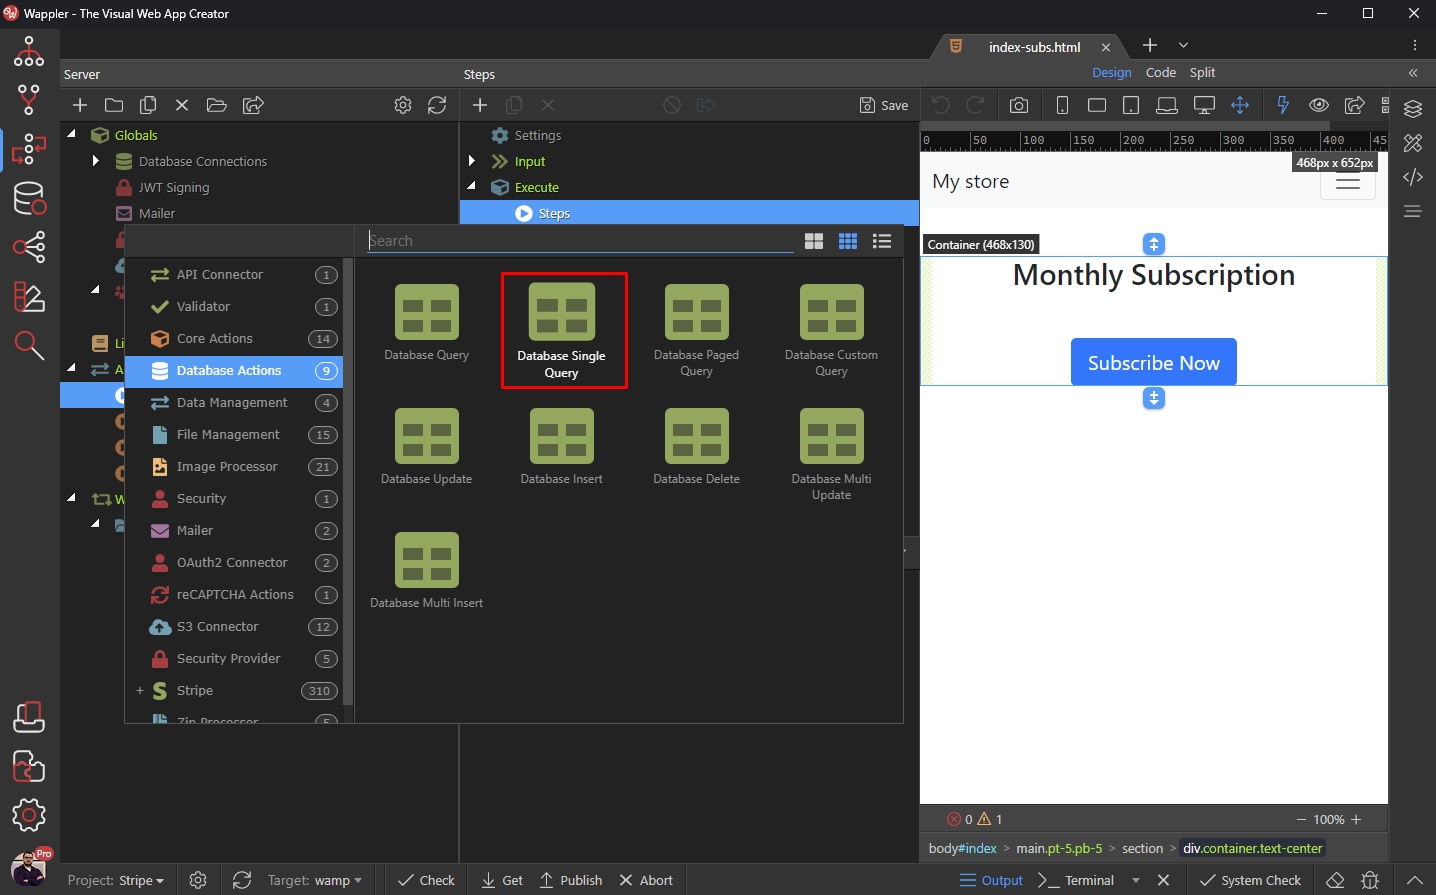
Open the Query Builder:
Section titled “Open the Query Builder:”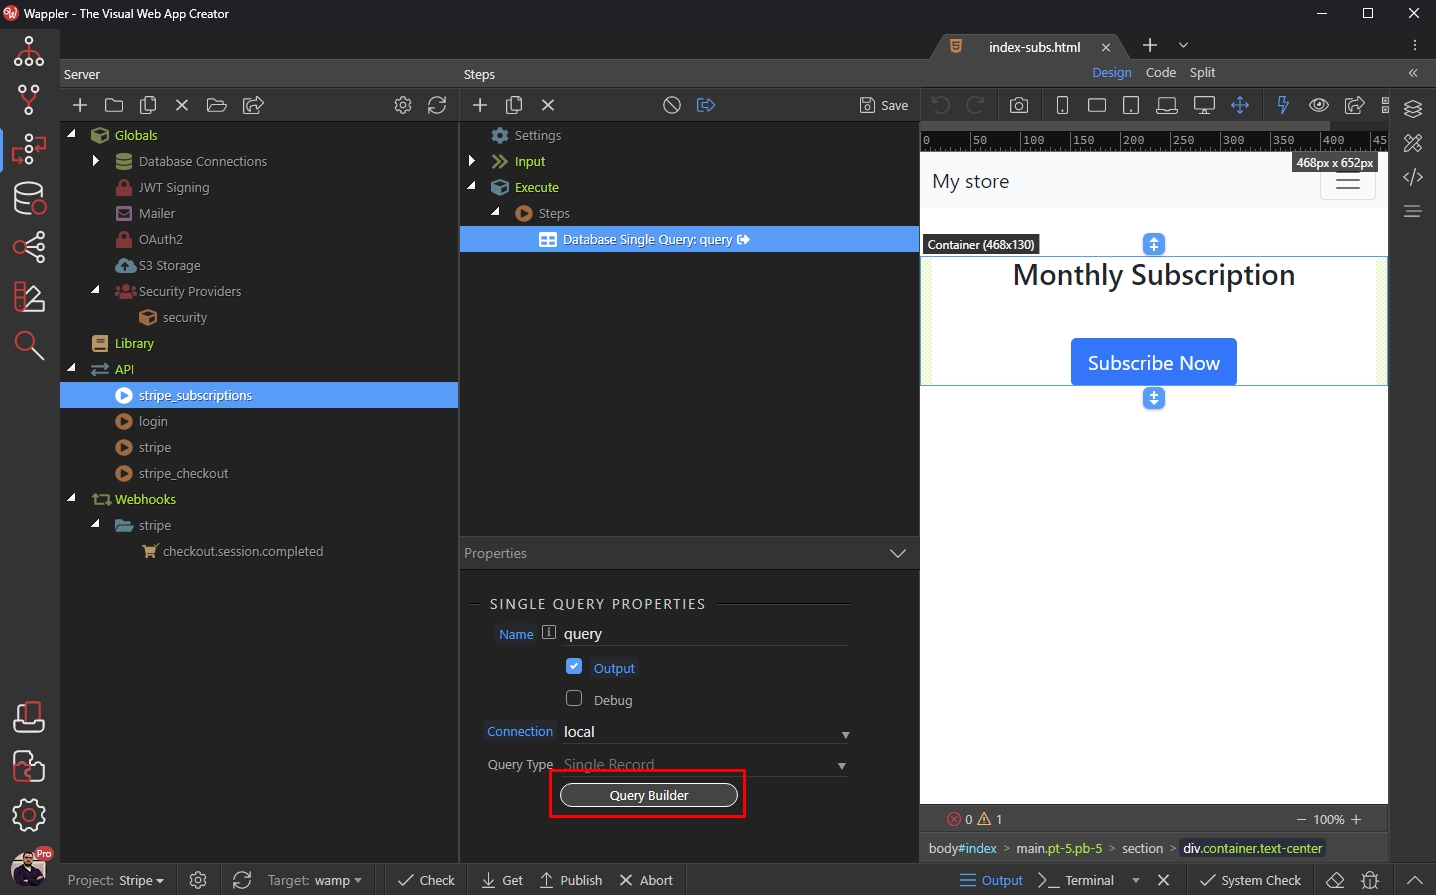
Add your users table and add the columns you need:
Section titled “Add your users table and add the columns you need:”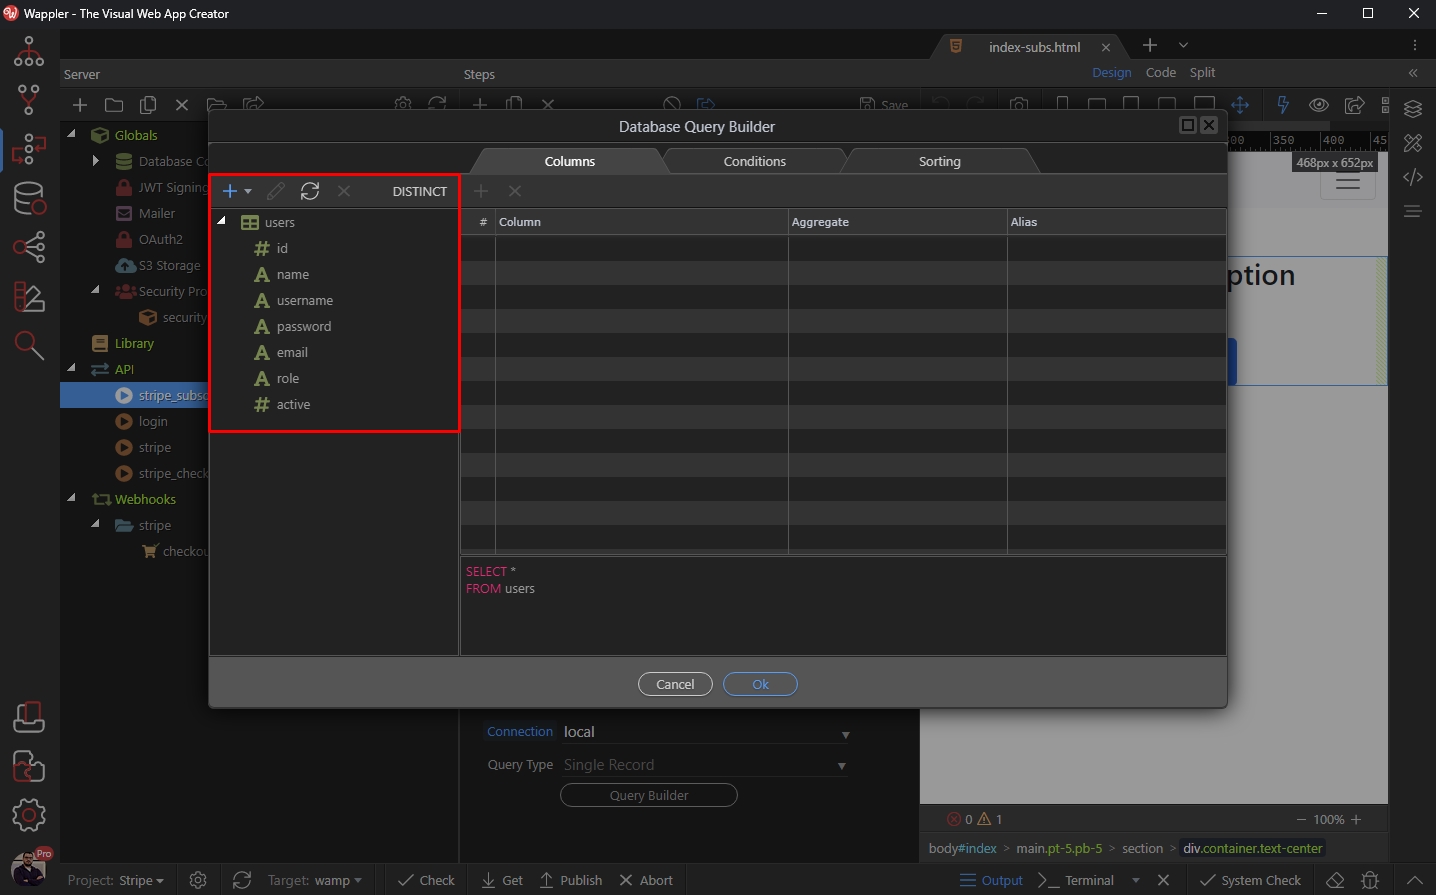
We select the user id and email:
Section titled “We select the user id and email:”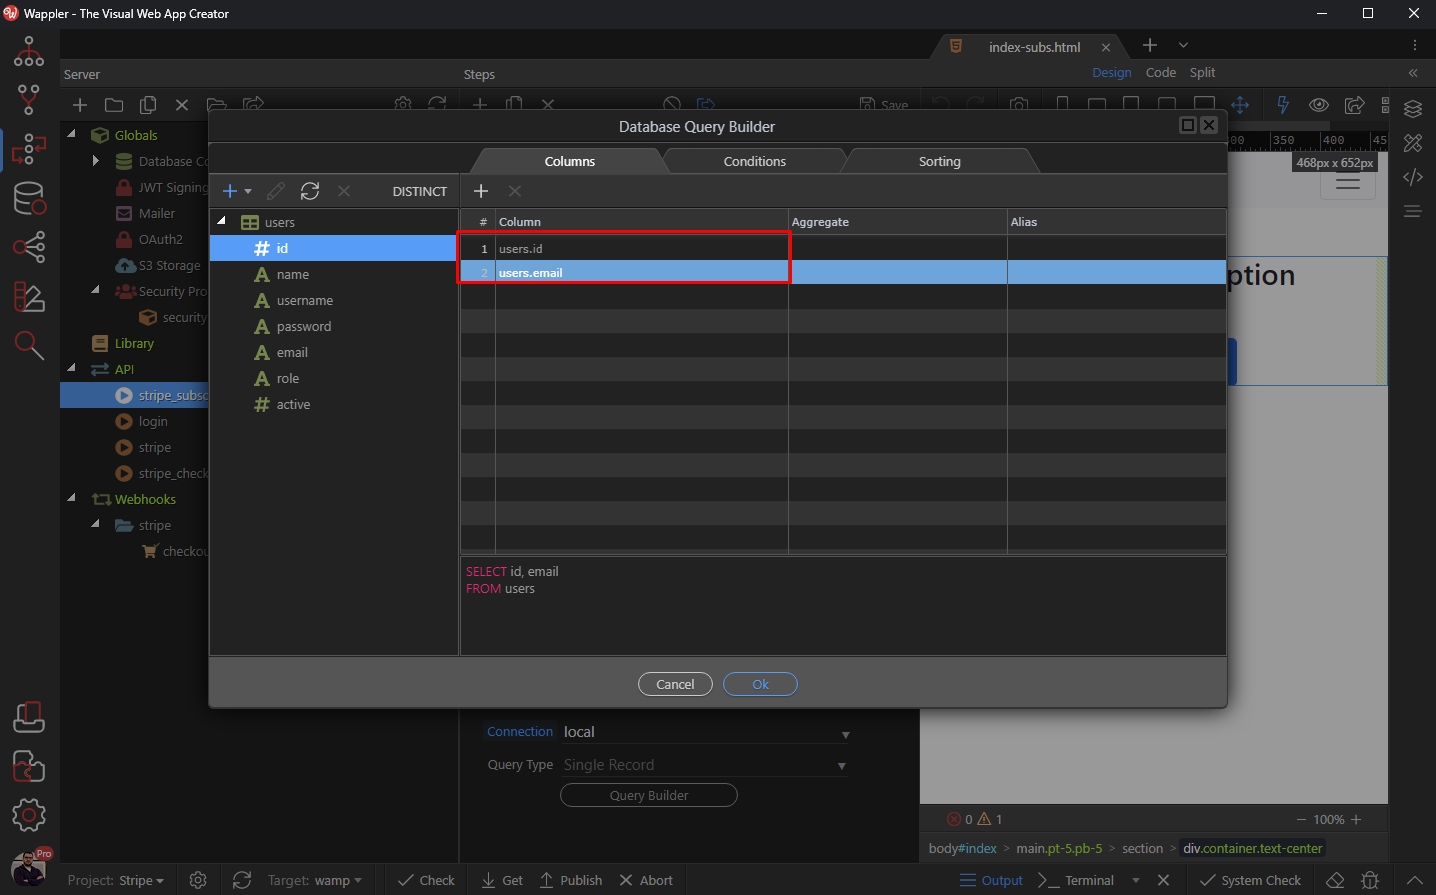
Open the Conditions tab, and select a column to filter by:
Section titled “Open the Conditions tab, and select a column to filter by:”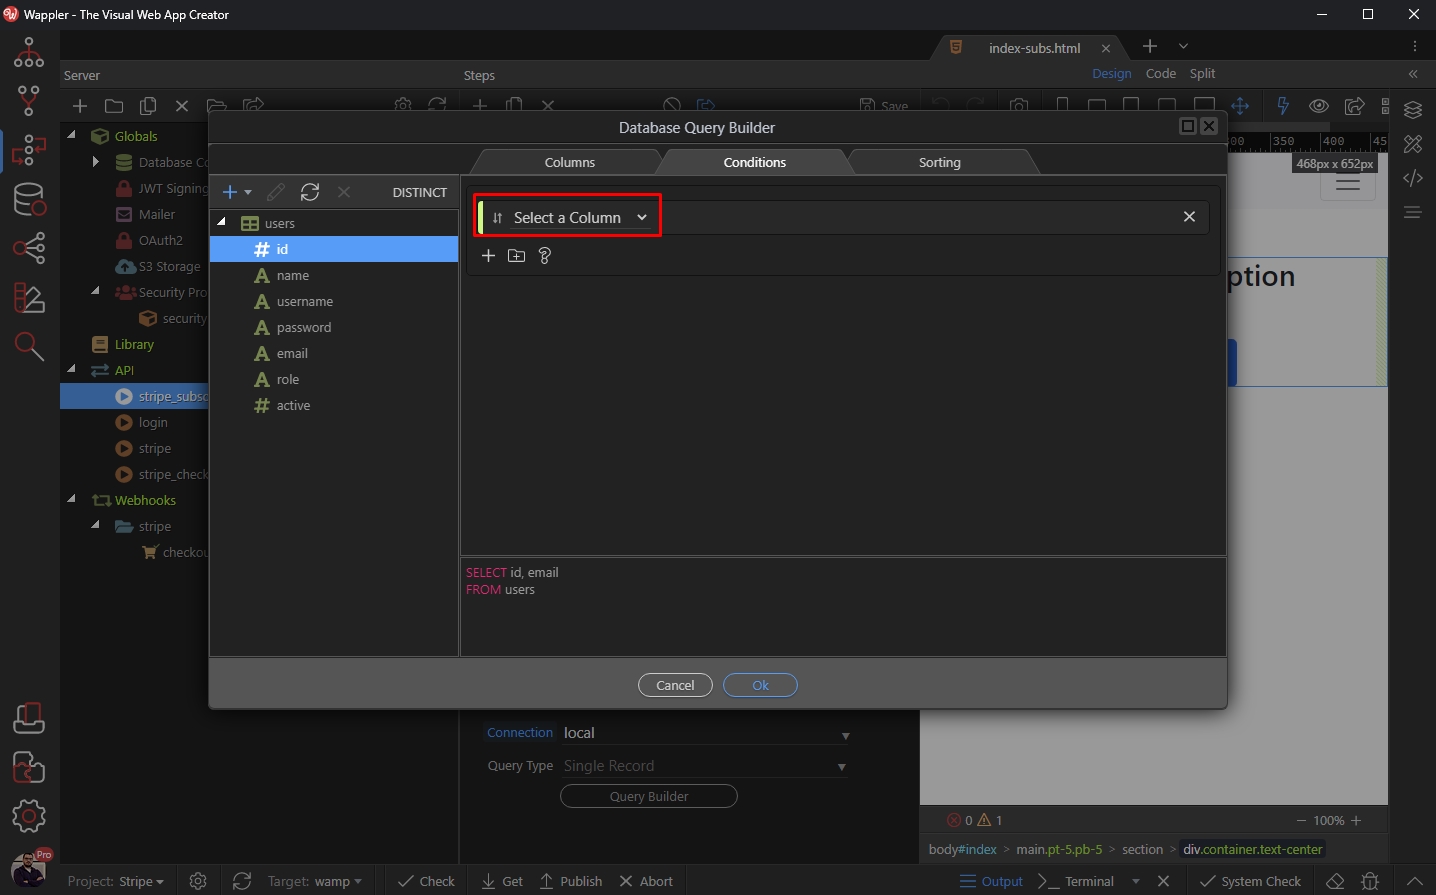
This is the id column. Select a dynamic value for the filter value:
Section titled “This is the id column. Select a dynamic value for the filter value:”This is the id column.
Select a dynamic value for the filter value:
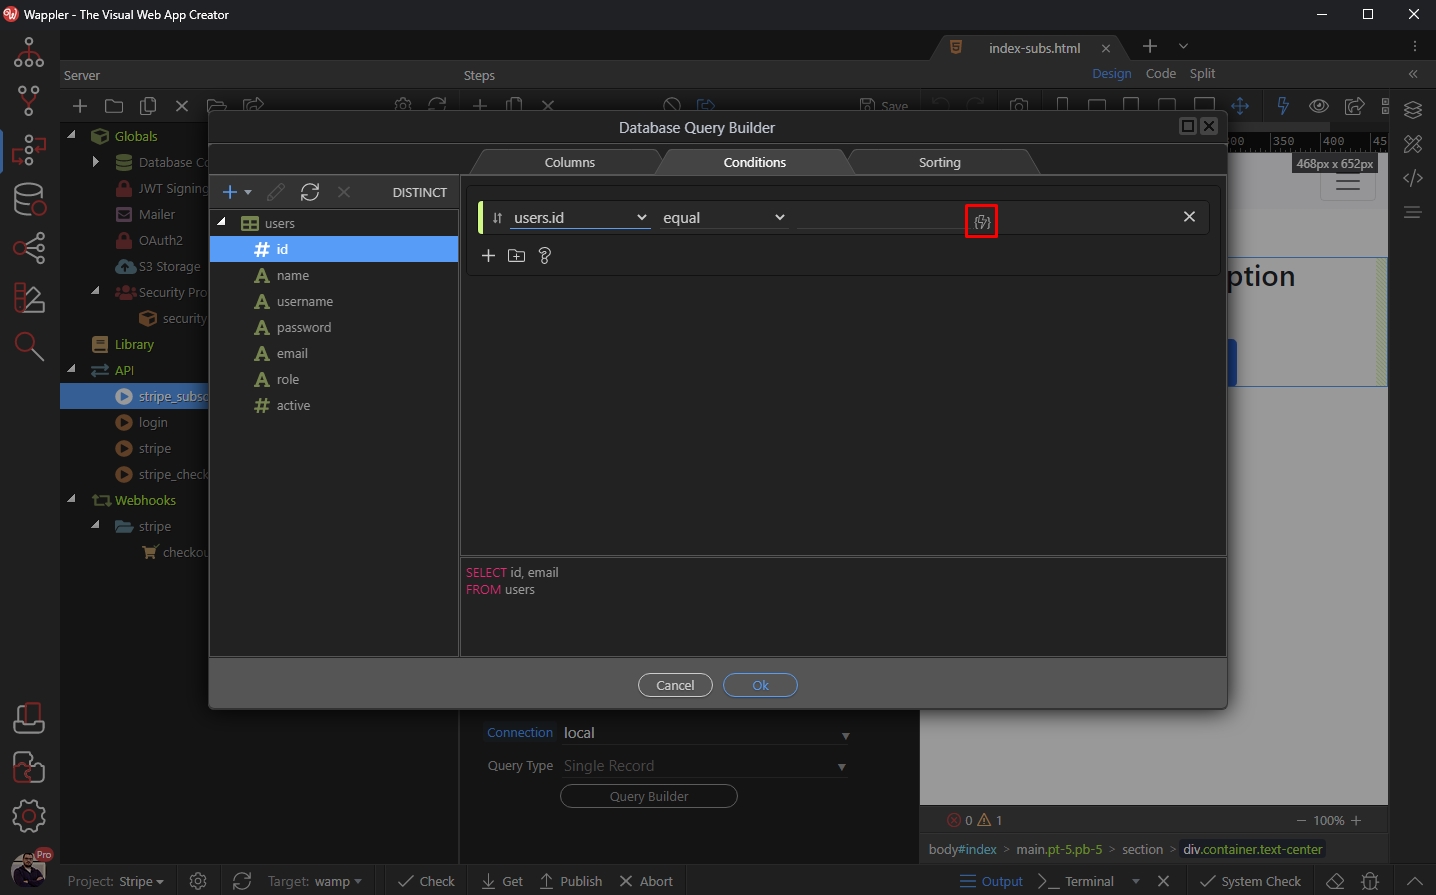
And pick the Global Identify step:
Section titled “And pick the Global Identify step:”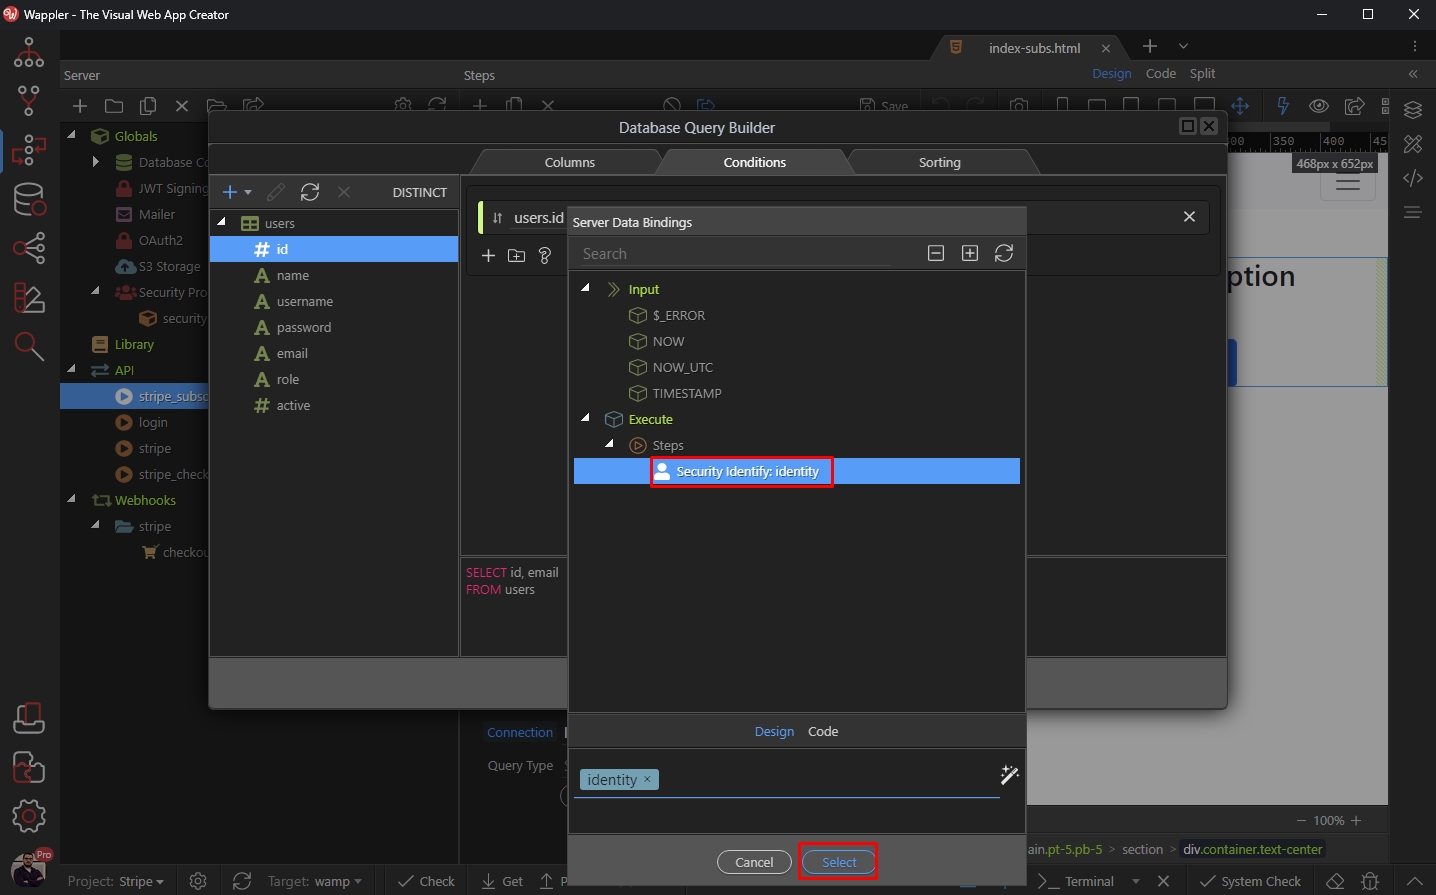
Click OK:
Section titled “Click OK:”
Now Right Click the database query step:
Section titled “Now Right Click the database query step:”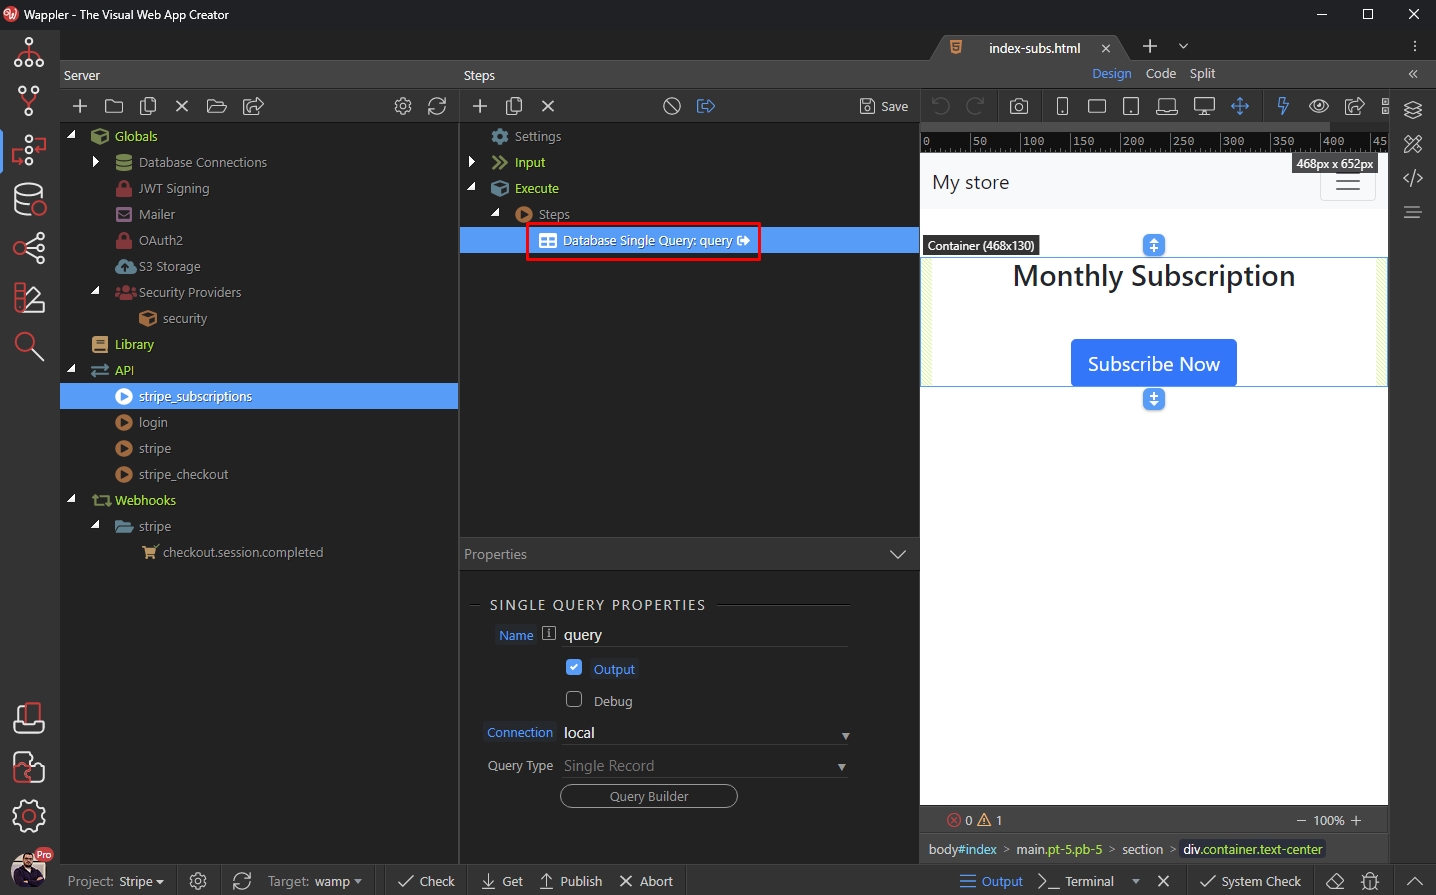
Open Stripe > Customers and select List Customers:
Section titled “Open Stripe > Customers and select List Customers:”Open Stripe > Customers and select List Customers:
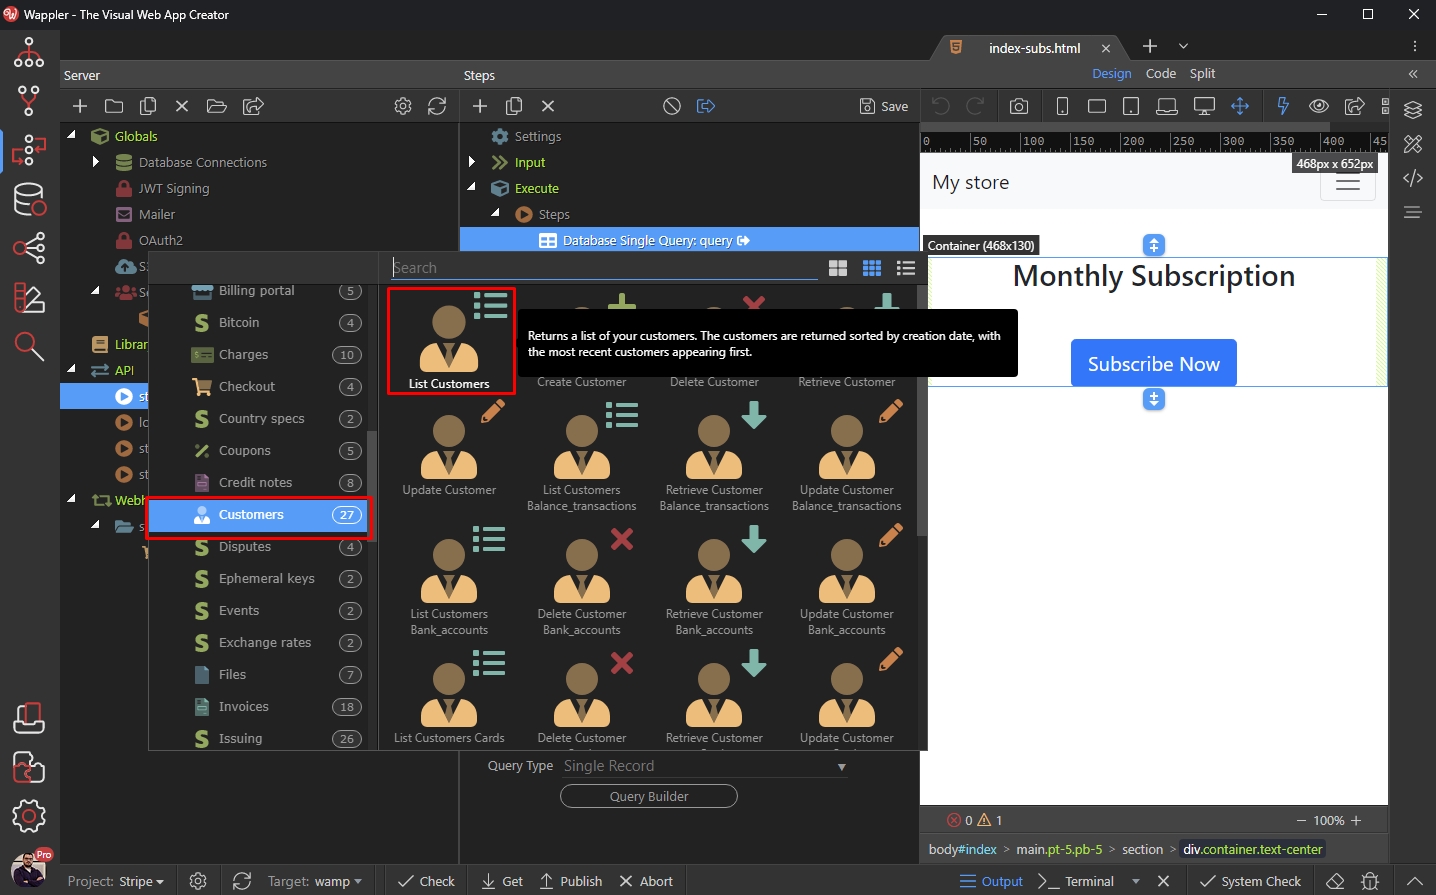
Step 47
Section titled “Step 47”This will return a list of our Stripe Customers. We want to filter it using the logged user email, returned by the query step. Select the dynamic data picker for the Email:
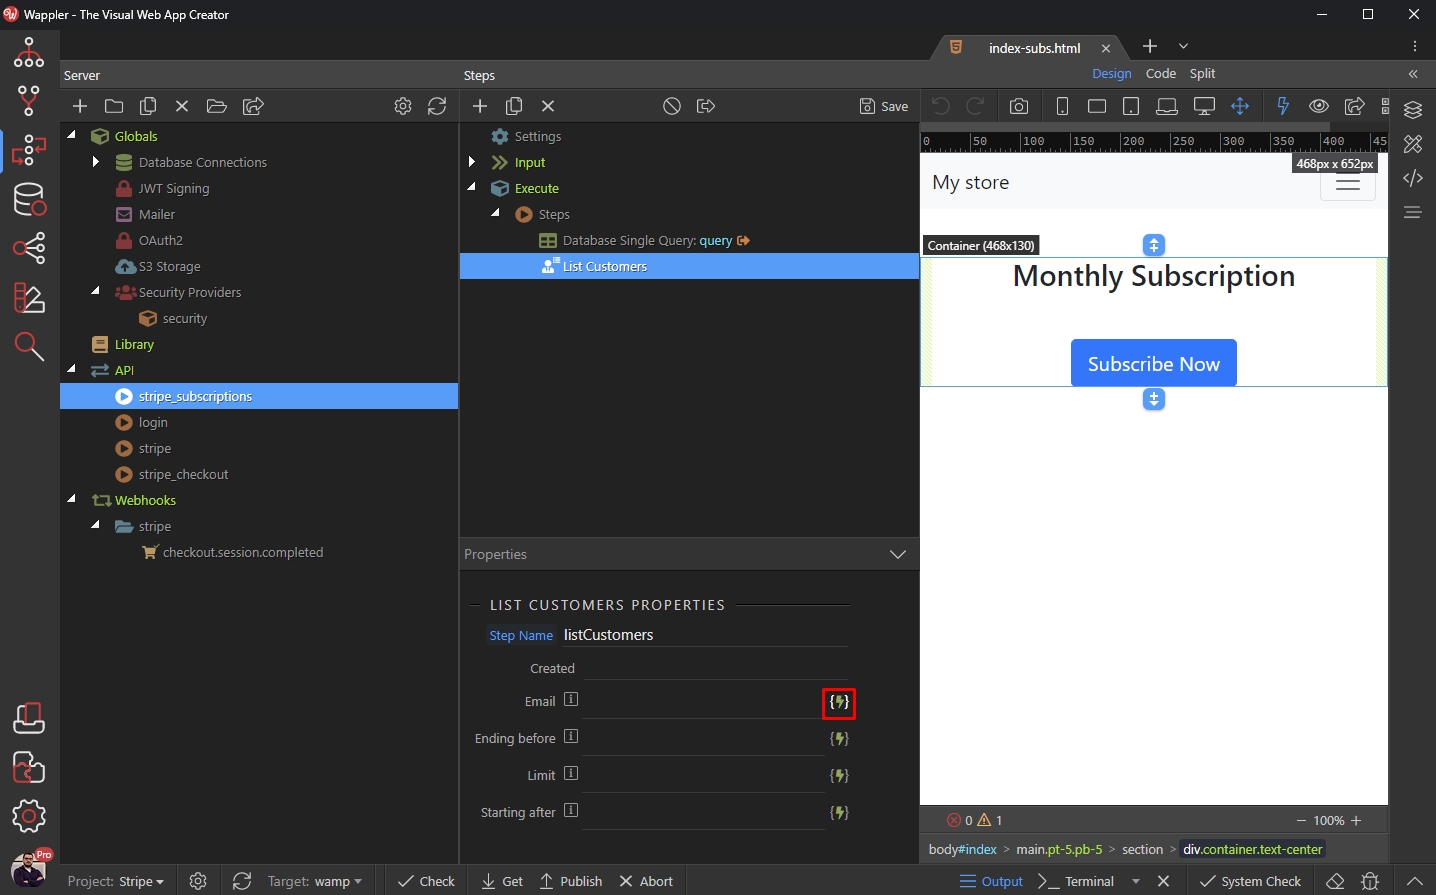
And select the email value returned by the query step:
Section titled “And select the email value returned by the query step:”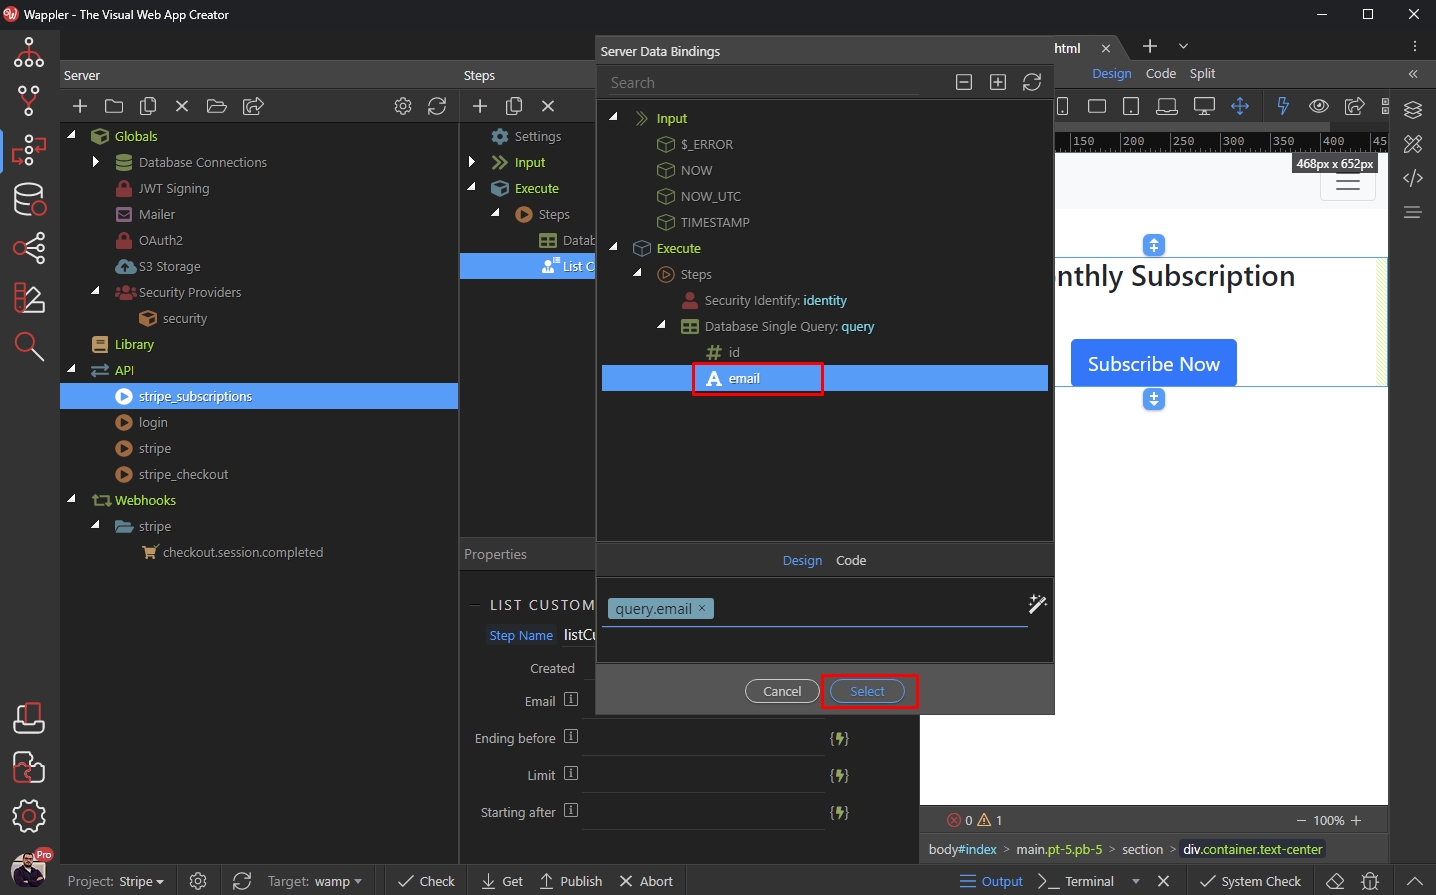
Step 49
Section titled “Step 49”If our user exists in Stripe, then its details will be available for steps after that. If the user does not exist it will be created.
Checkout Session
Section titled “Checkout Session”The next step is to create the checkout session. Right click the List Customers step:

Open Stripe > Checkout and Create Checkout Session:
Section titled “Open Stripe > Checkout and Create Checkout Session:”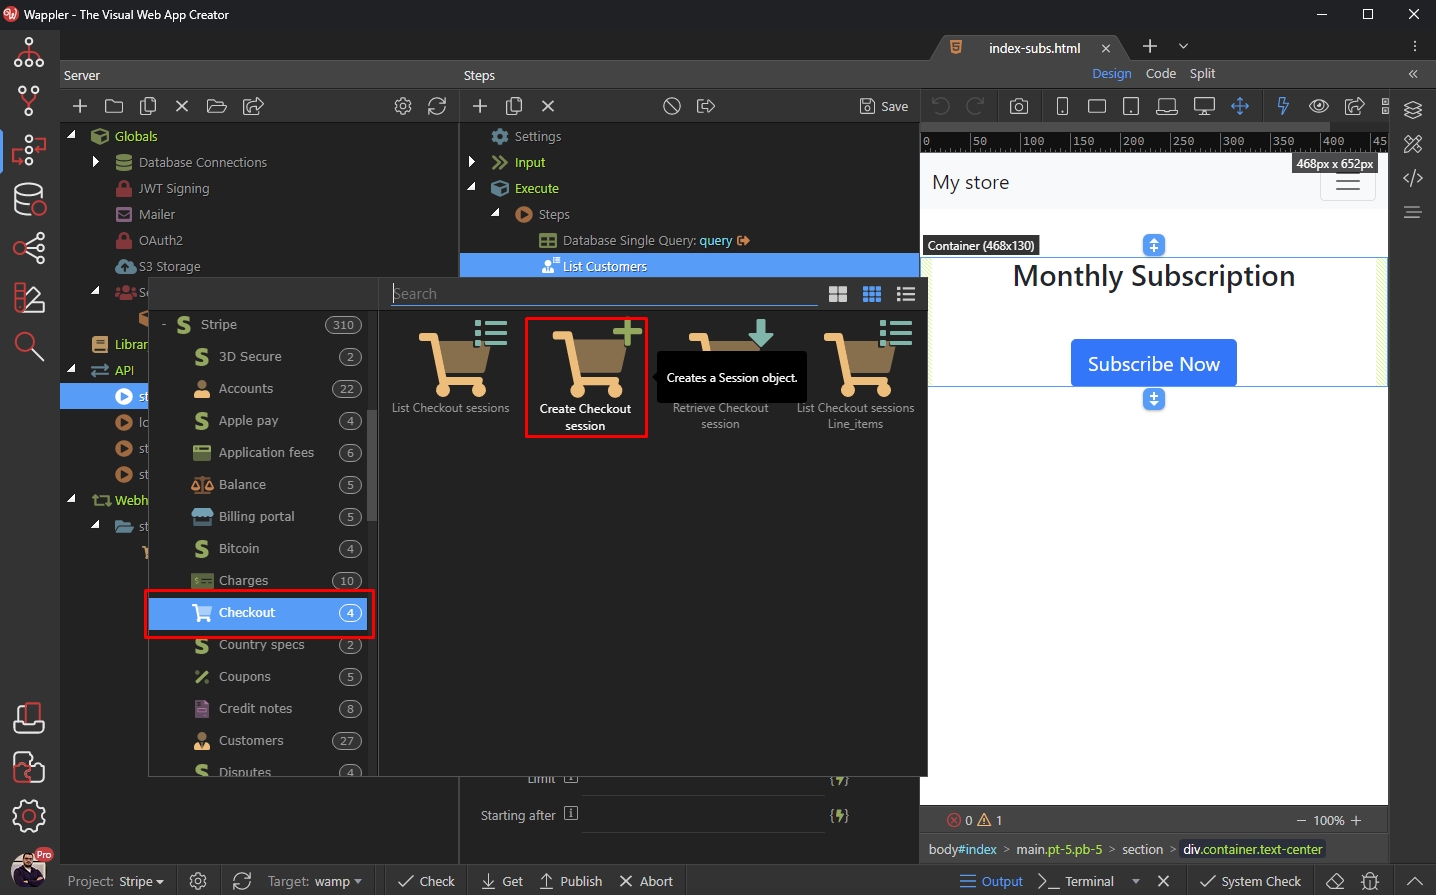
Step 52
Section titled “Step 52”Here, we need to add the Customer info which we retrieve using the List Customers step. Click the dynamic data picker for the Customer option:
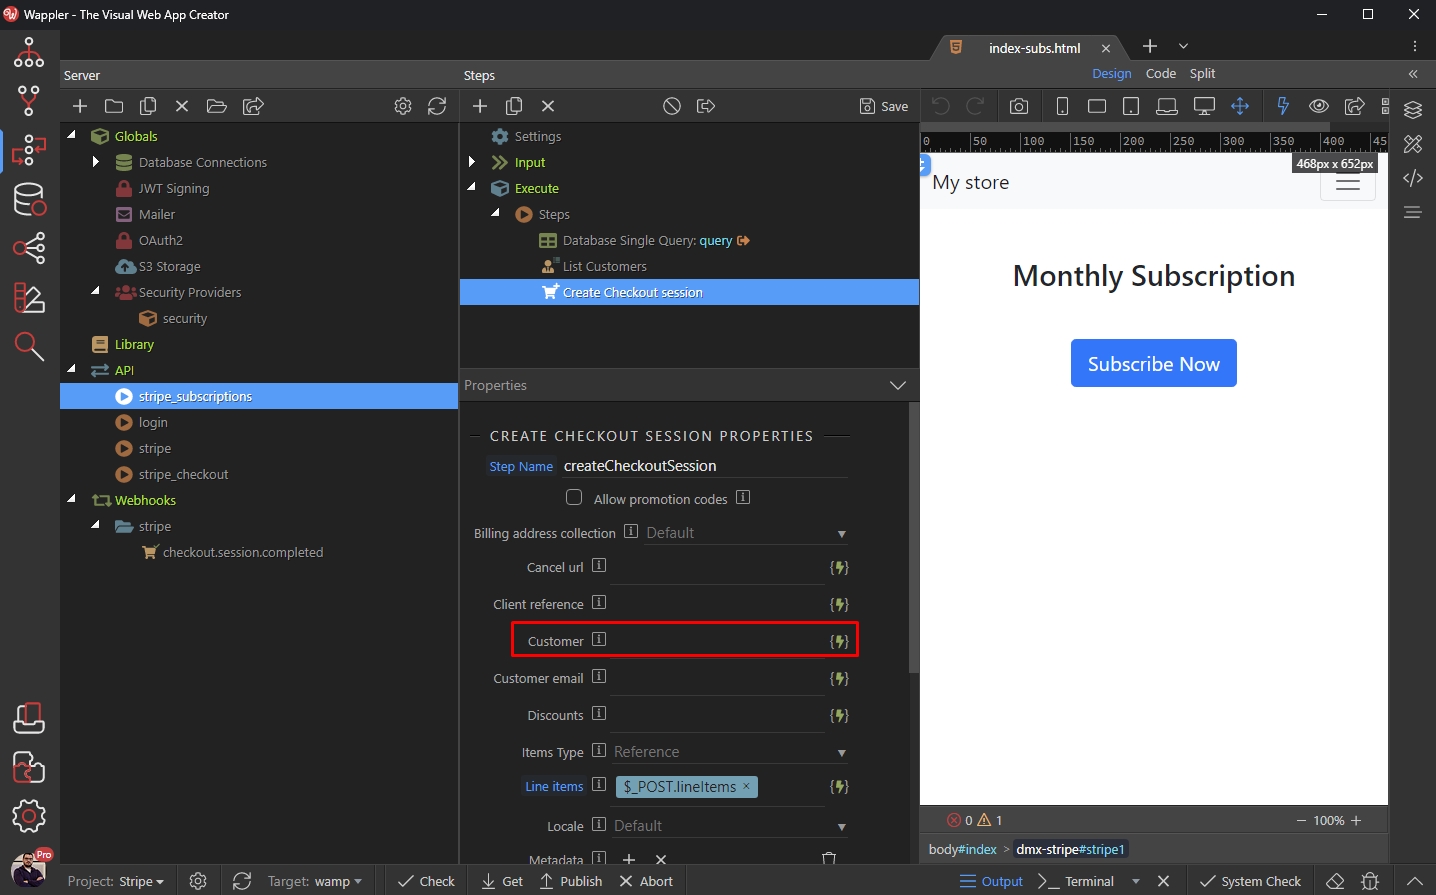
Under List Customers > data select id:
Section titled “Under List Customers > data select id:”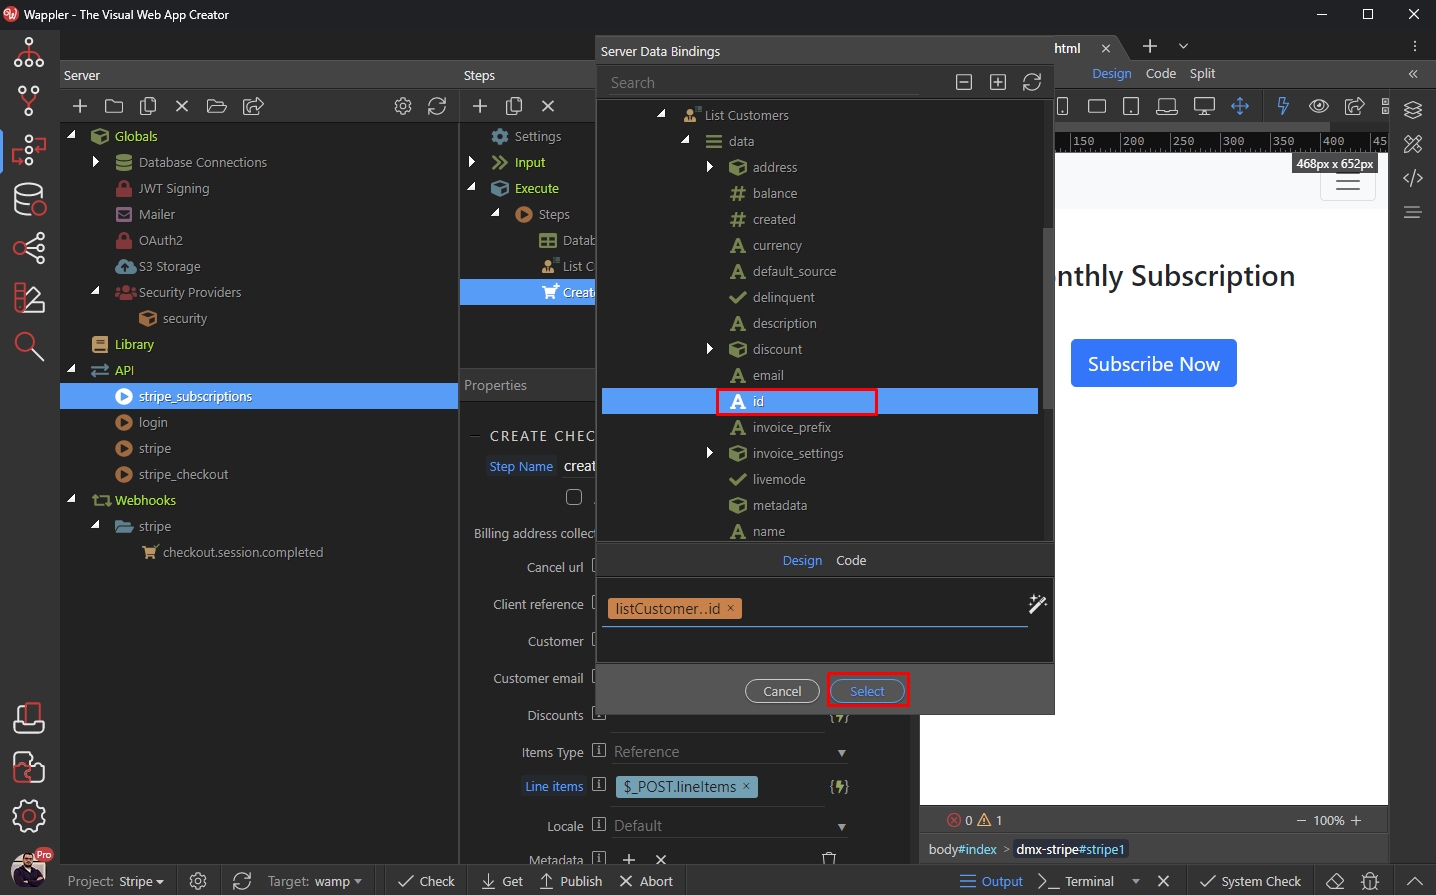
Then open the Items Type menu and select Prices ID List:
Section titled “Then open the Items Type menu and select Prices ID List:”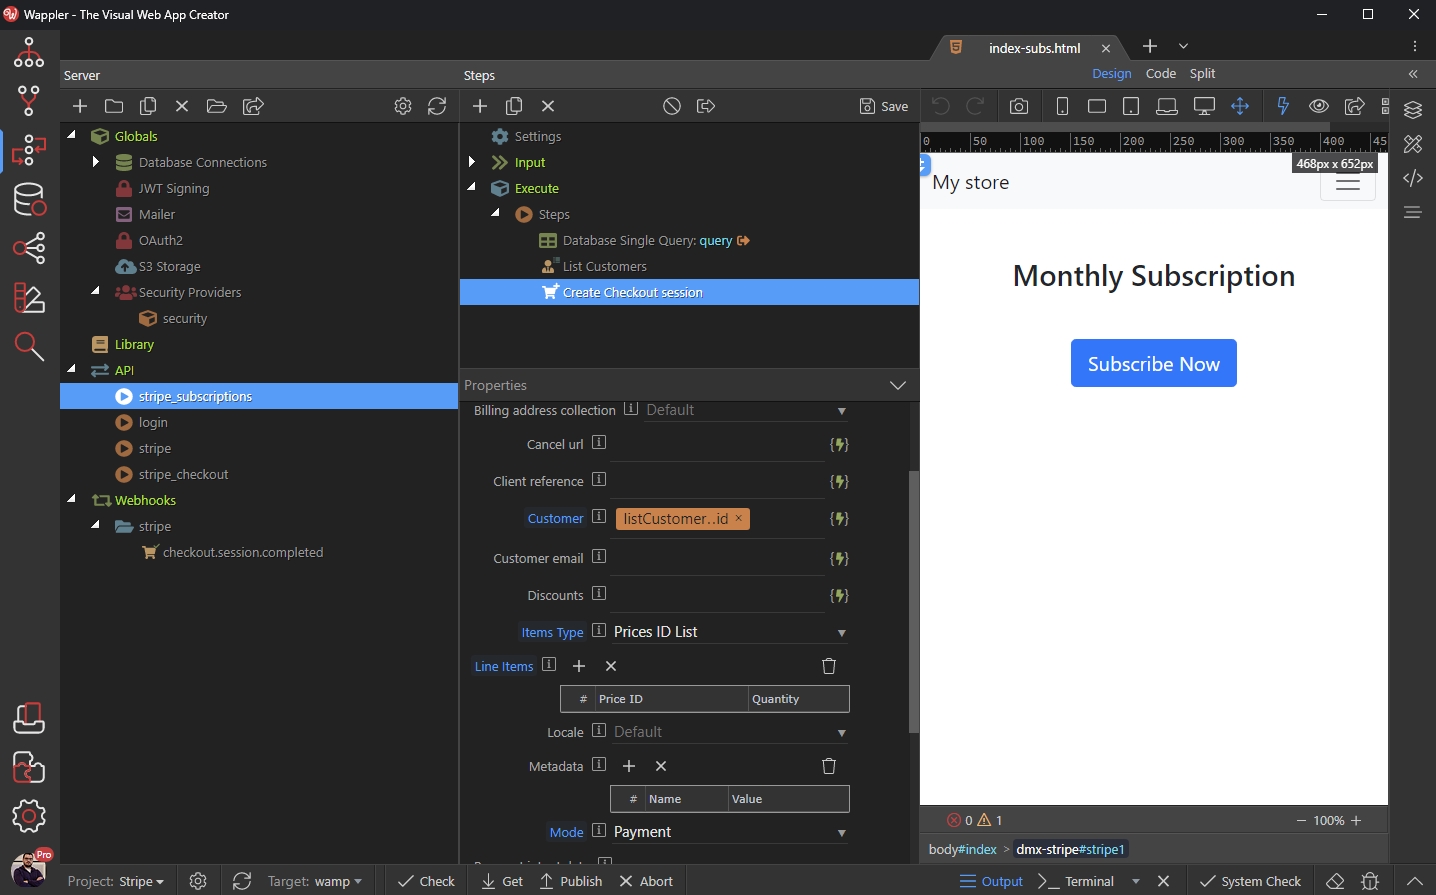
Click the add new list item button:
Section titled “Click the add new list item button:”Using this option allows you to enter the Subscription Price Id here directly. Useful when we only have one subscription plan only (as it is in our example). If you have more subscription plans you can pass them dynamically from the front end Stripe component.
Click the add new list item button:
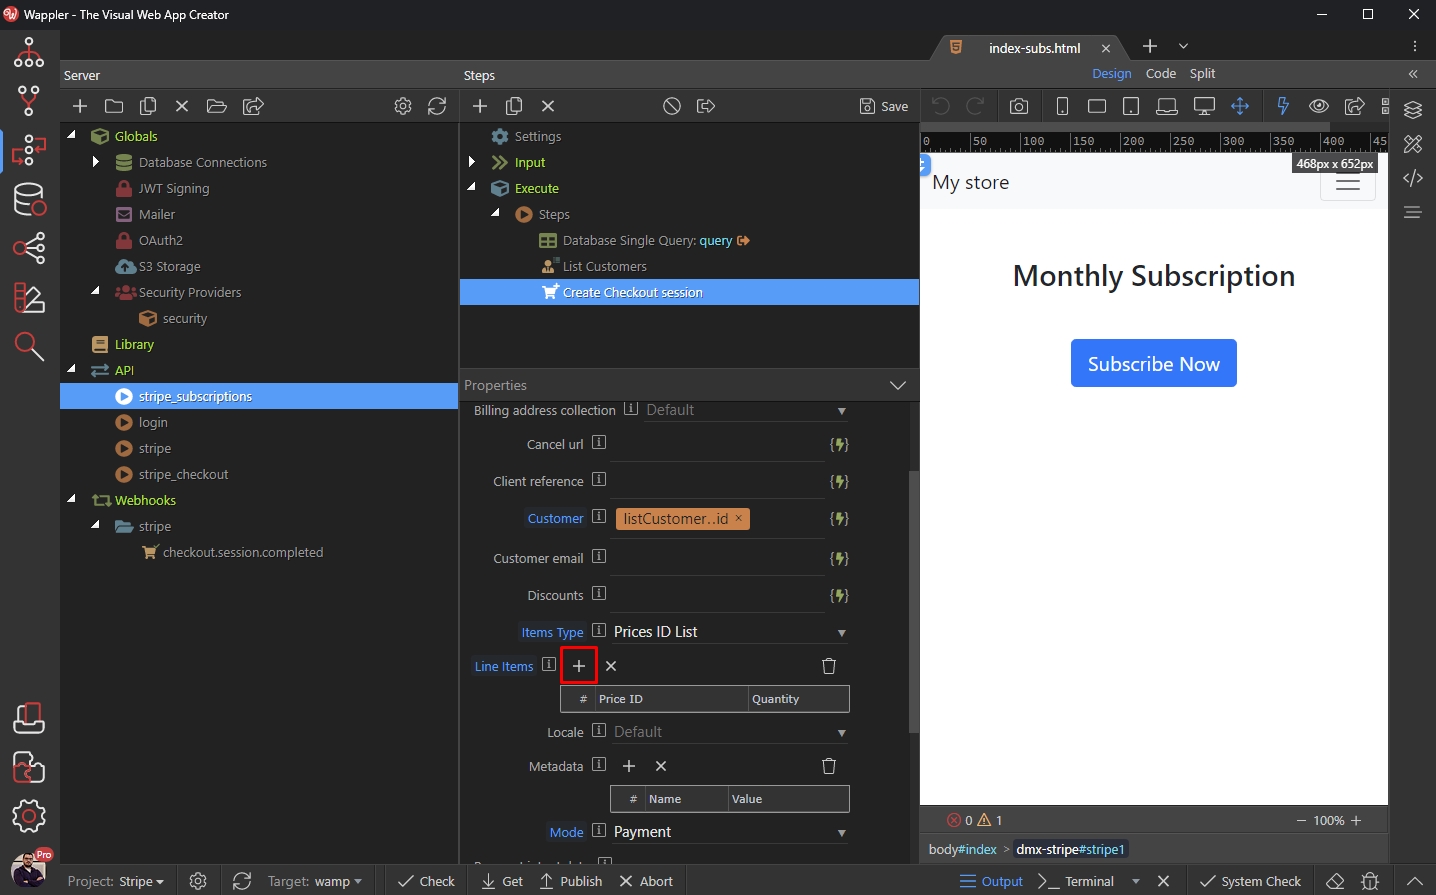
And paste your subscription price id here:
Section titled “And paste your subscription price id here:”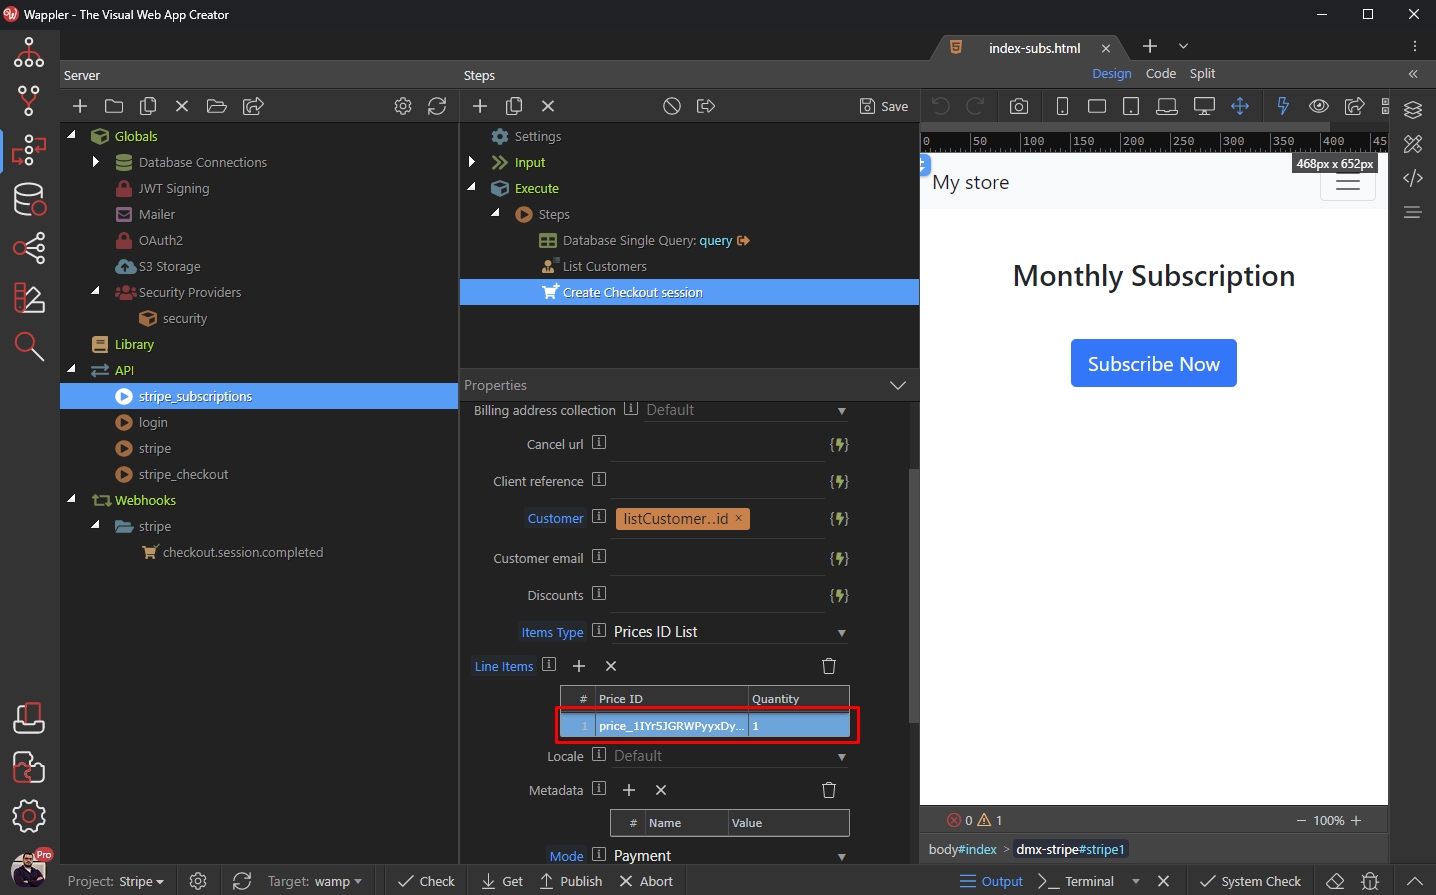
Then open the Mode menu:
Section titled “Then open the Mode menu:”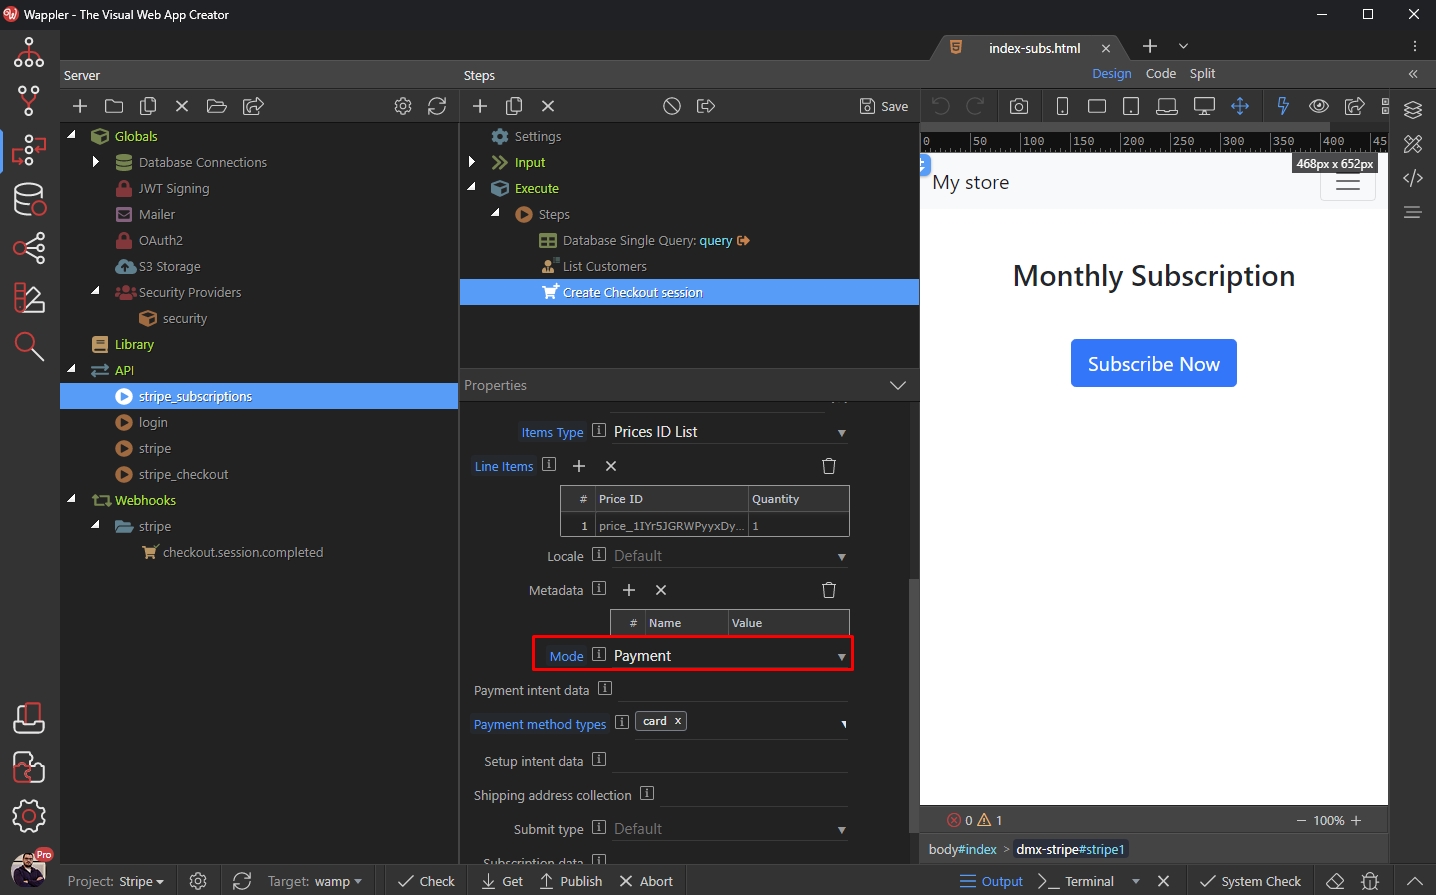
And select Subscription:
Section titled “And select Subscription:”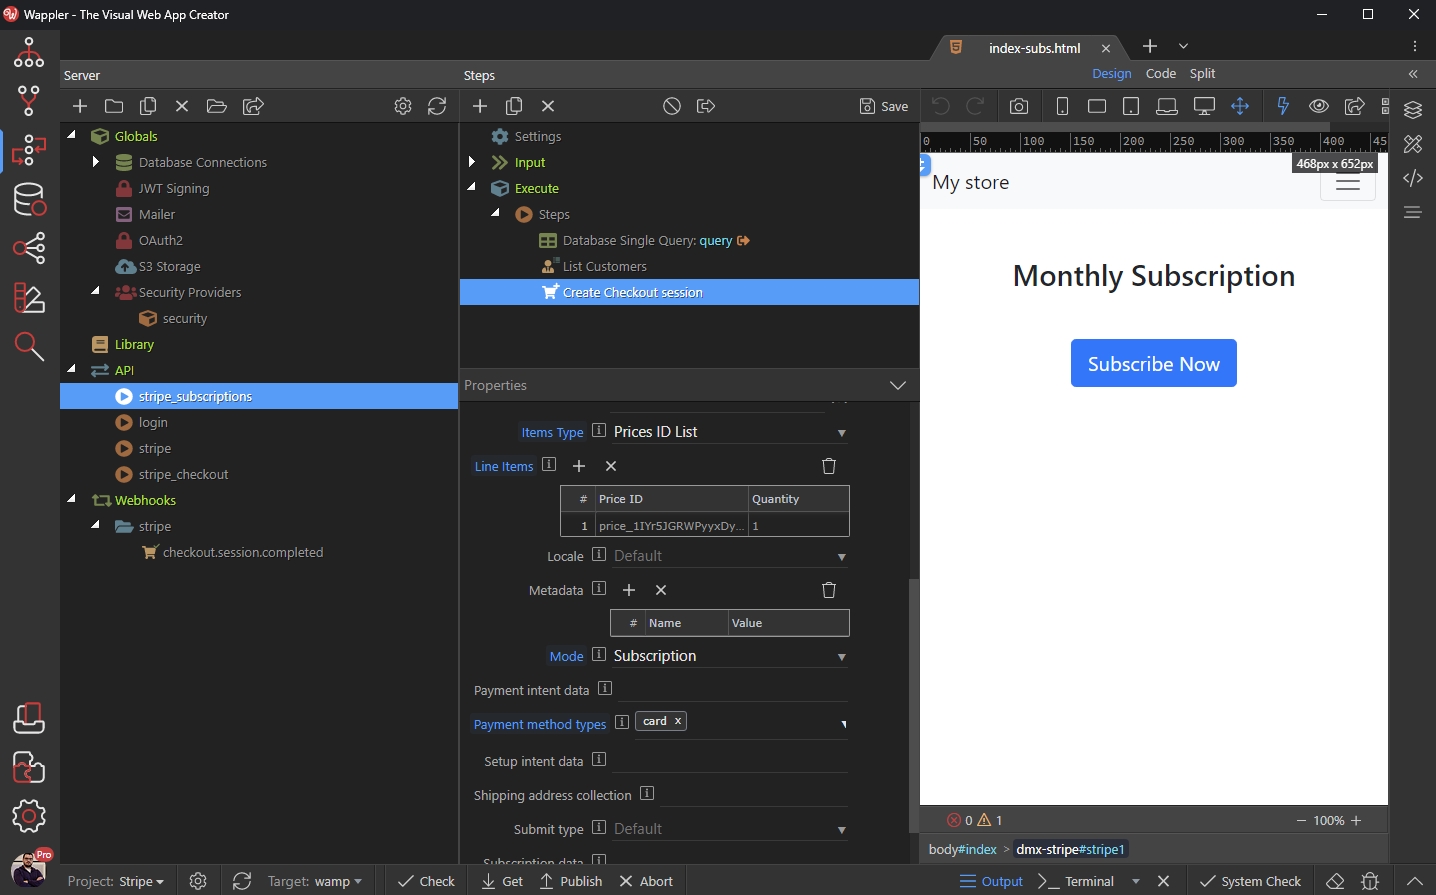
Don’t forget to fill your success and cancel URLs in the appropriate UI fields.
Section titled “Don’t forget to fill your success and cancel URLs in the appropriate UI fields.”Then right click the Create Checkout Session step:
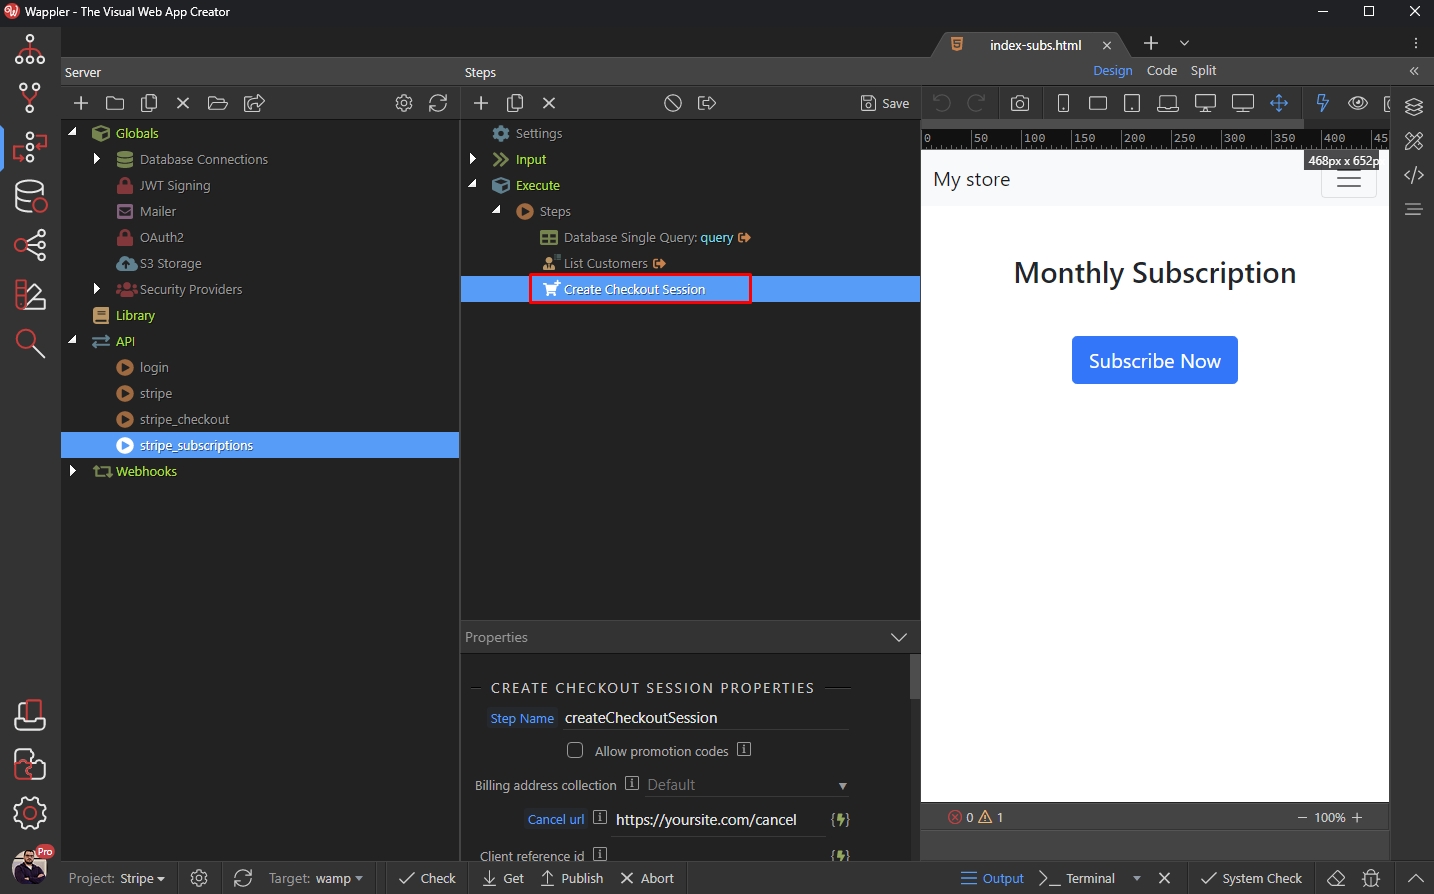
And add a Set Value step:
Section titled “And add a Set Value step:”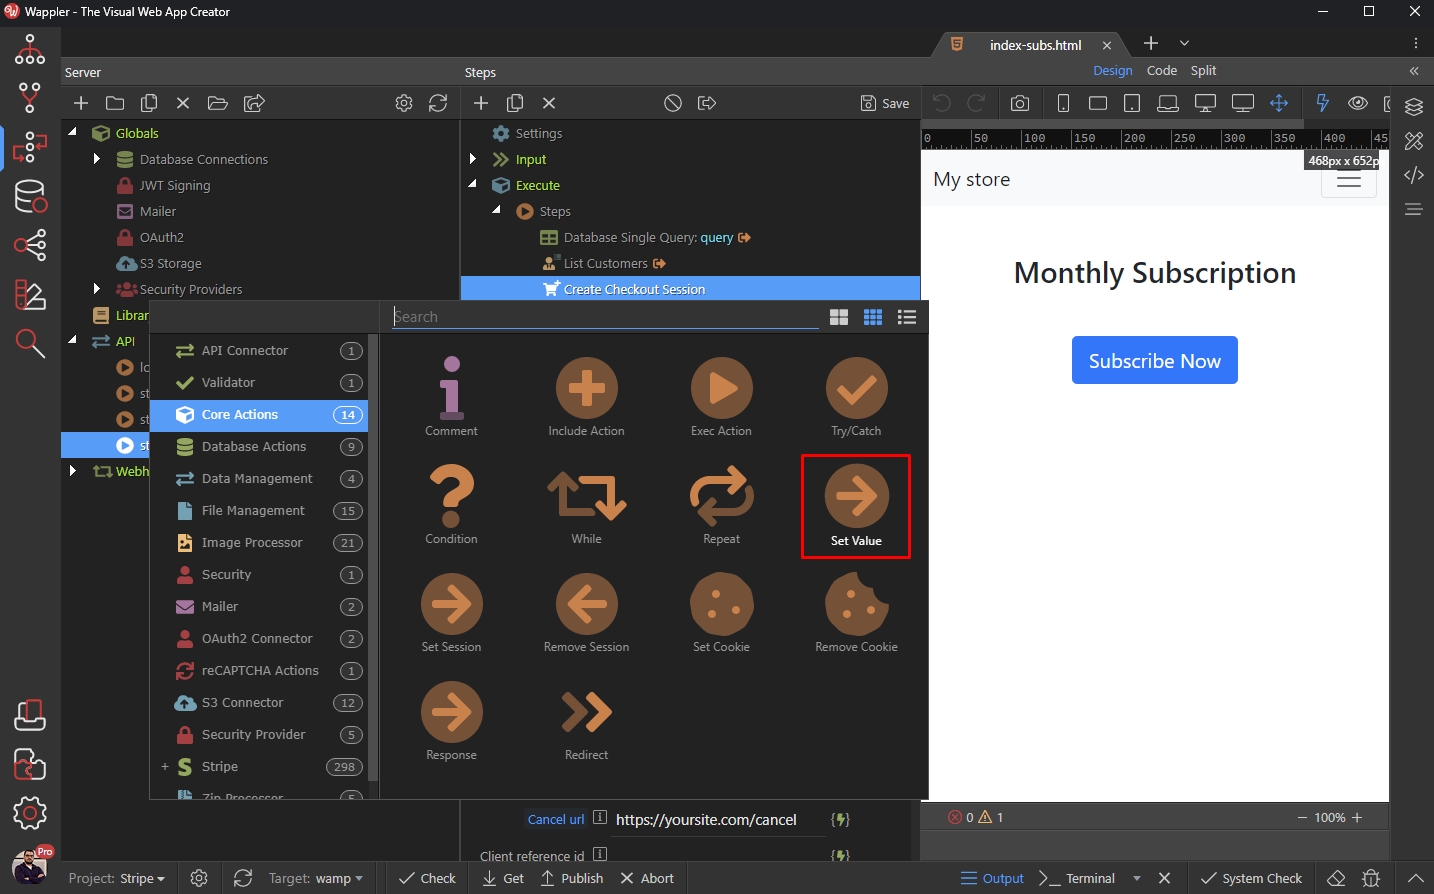
Its name should be id:
Section titled “Its name should be id:”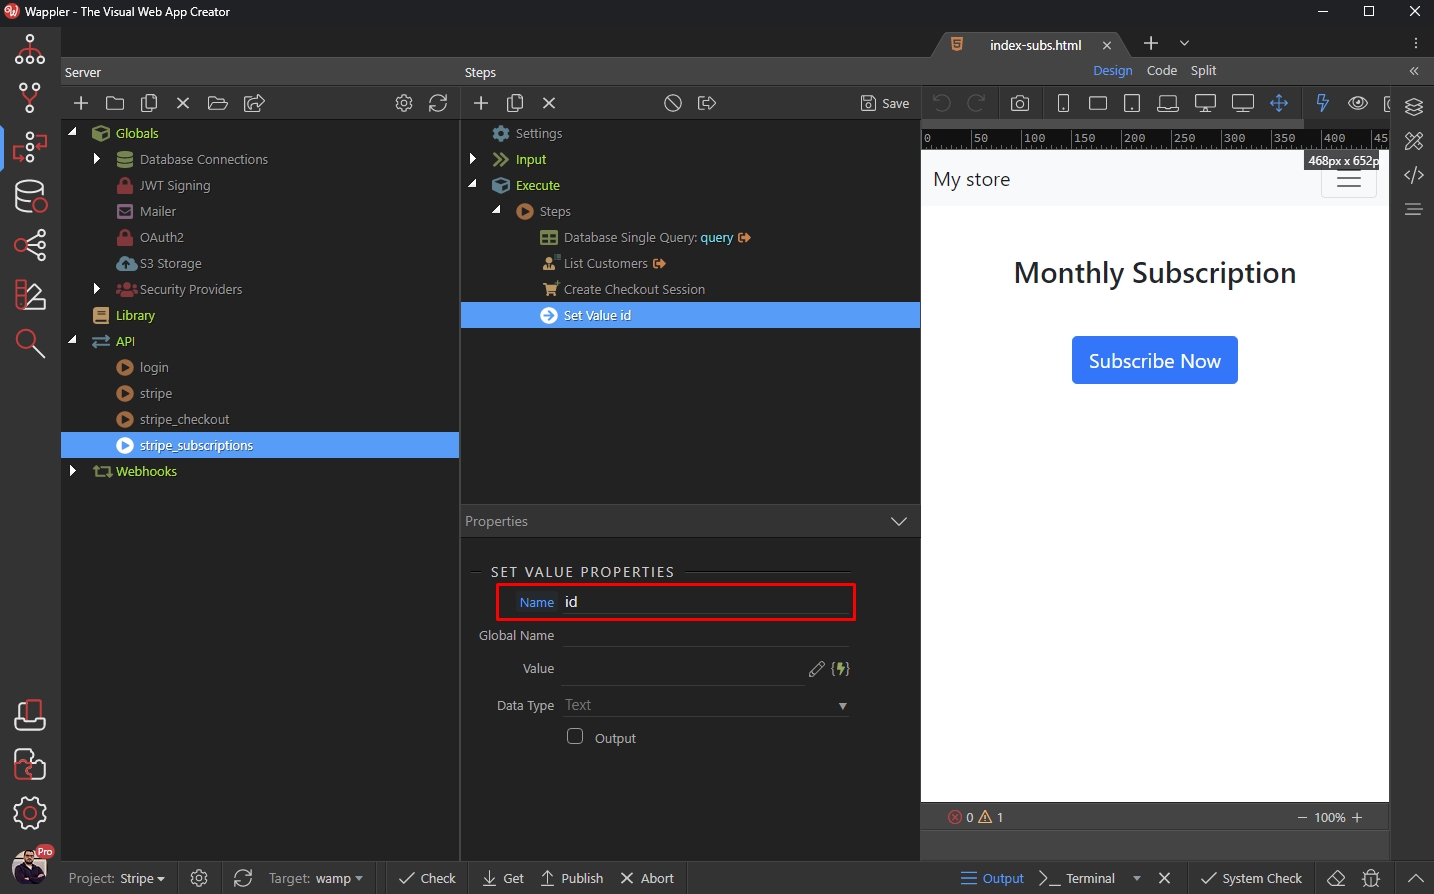
Select a dynamic value for it:
Section titled “Select a dynamic value for it:”
And under the Checkout Session step select id:
Section titled “And under the Checkout Session step select id:”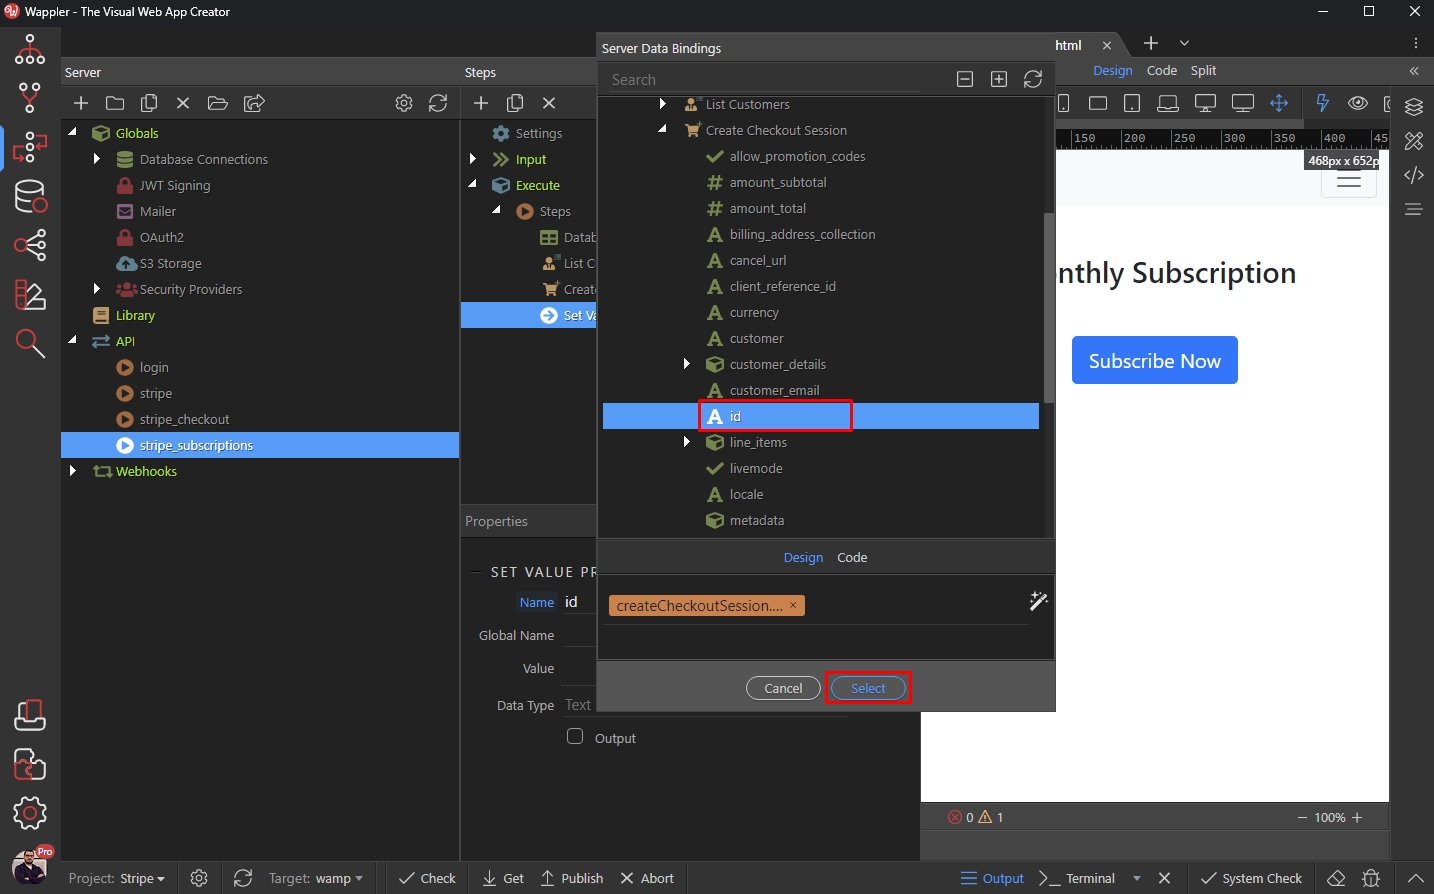
Enable Output for the Set Value step and save your API Action:
Section titled “Enable Output for the Set Value step and save your API Action:”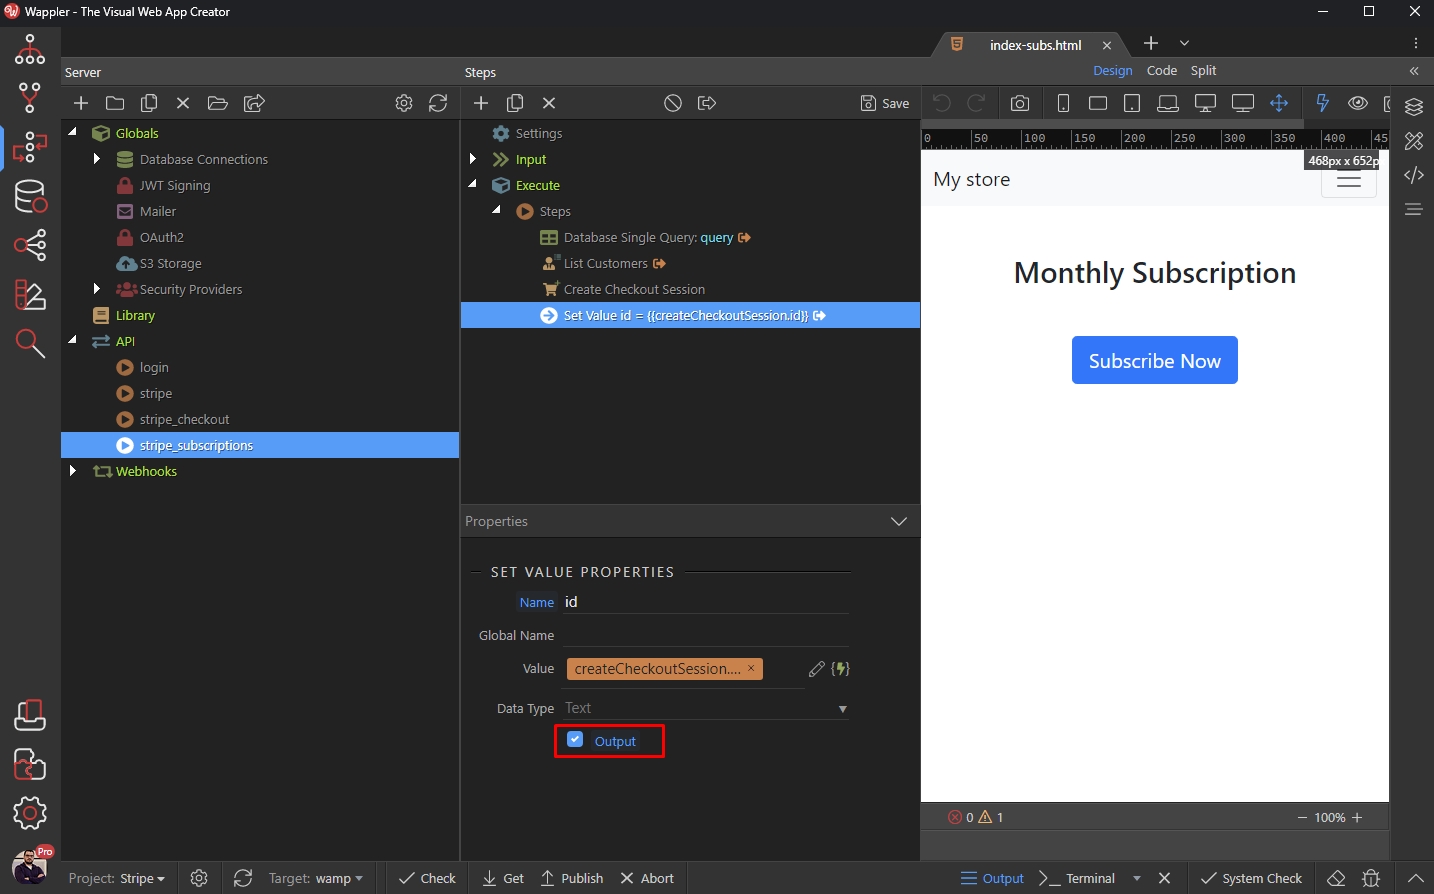
Close the Server Connect panel. Add a new component in App Structure:
Section titled “Close the Server Connect panel. Add a new component in App Structure:”Close the Server Connect panel.
Add a new component in App Structure:
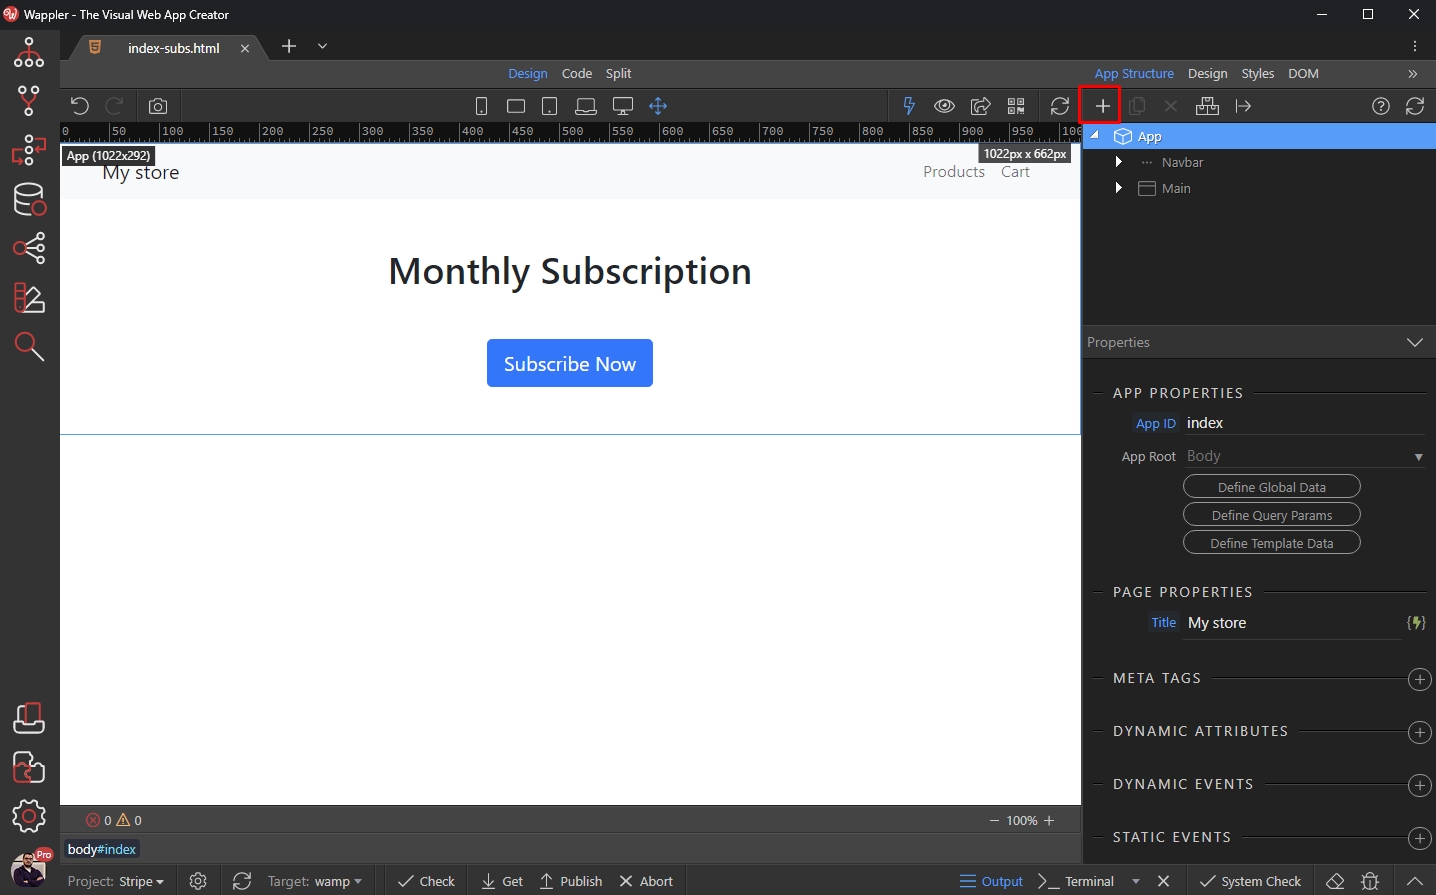
Open Stripe and select the Stripe Component:
Section titled “Open Stripe and select the Stripe Component:”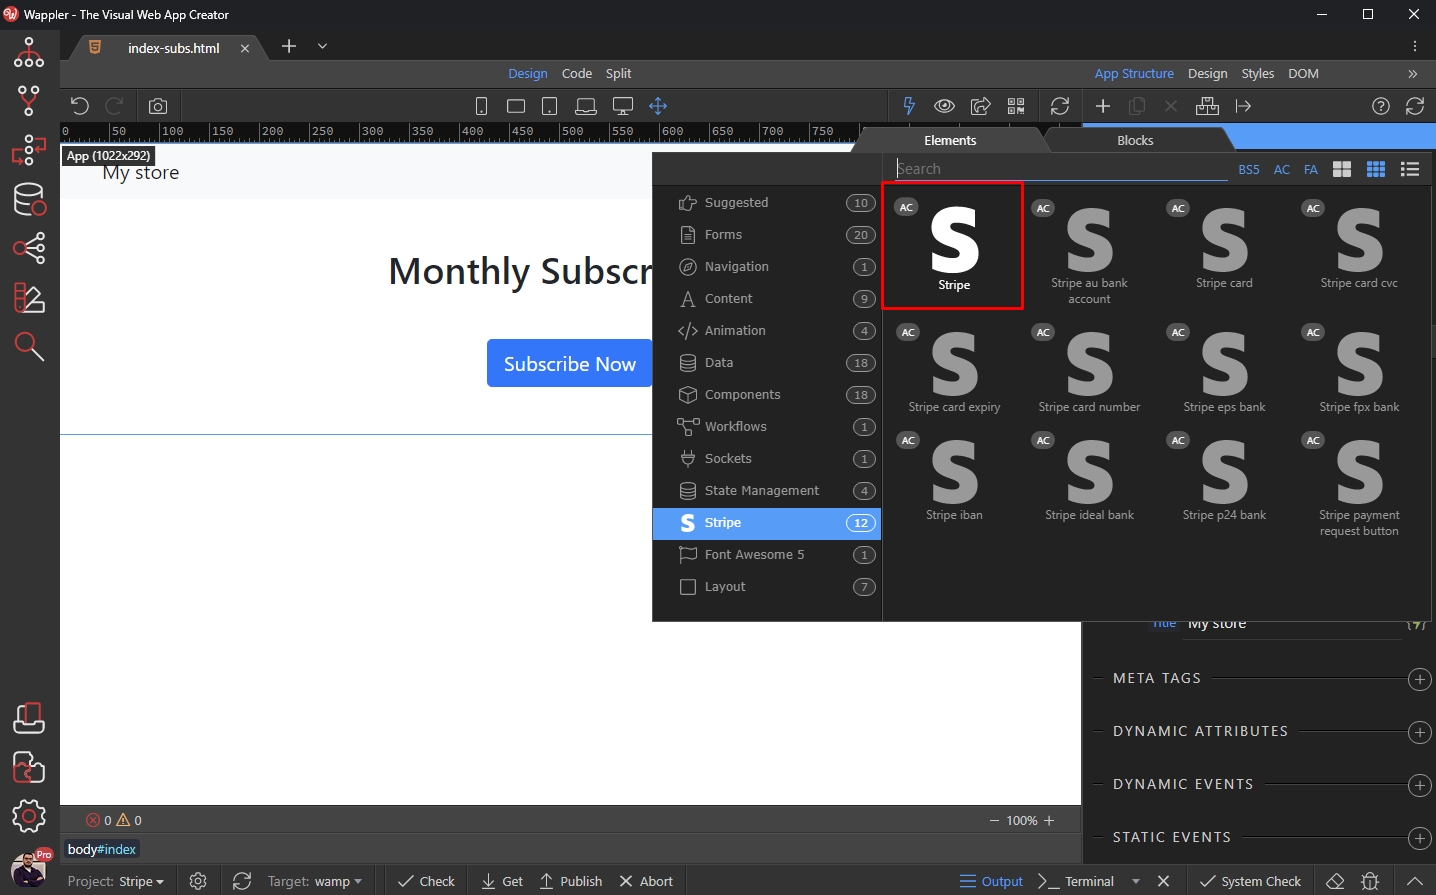
Enter your Publishable API key. It can be found on https://dashboard.stripe.com/apikeys
Section titled “Enter your Publishable API key. It can be found on https://dashboard.stripe.com/apikeys”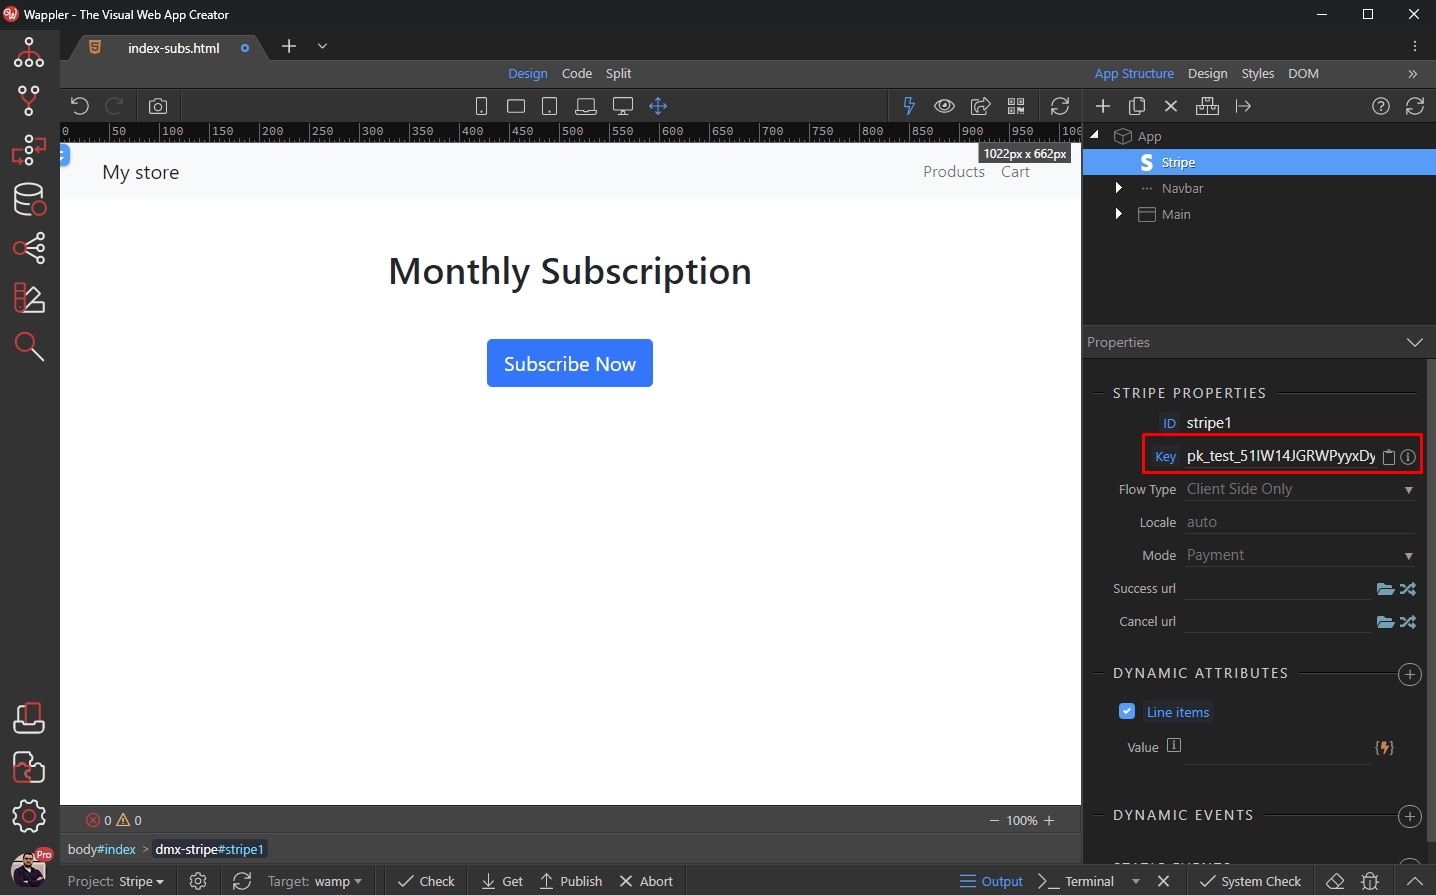
Set the Flow Type to Server Side:
Section titled “Set the Flow Type to Server Side:”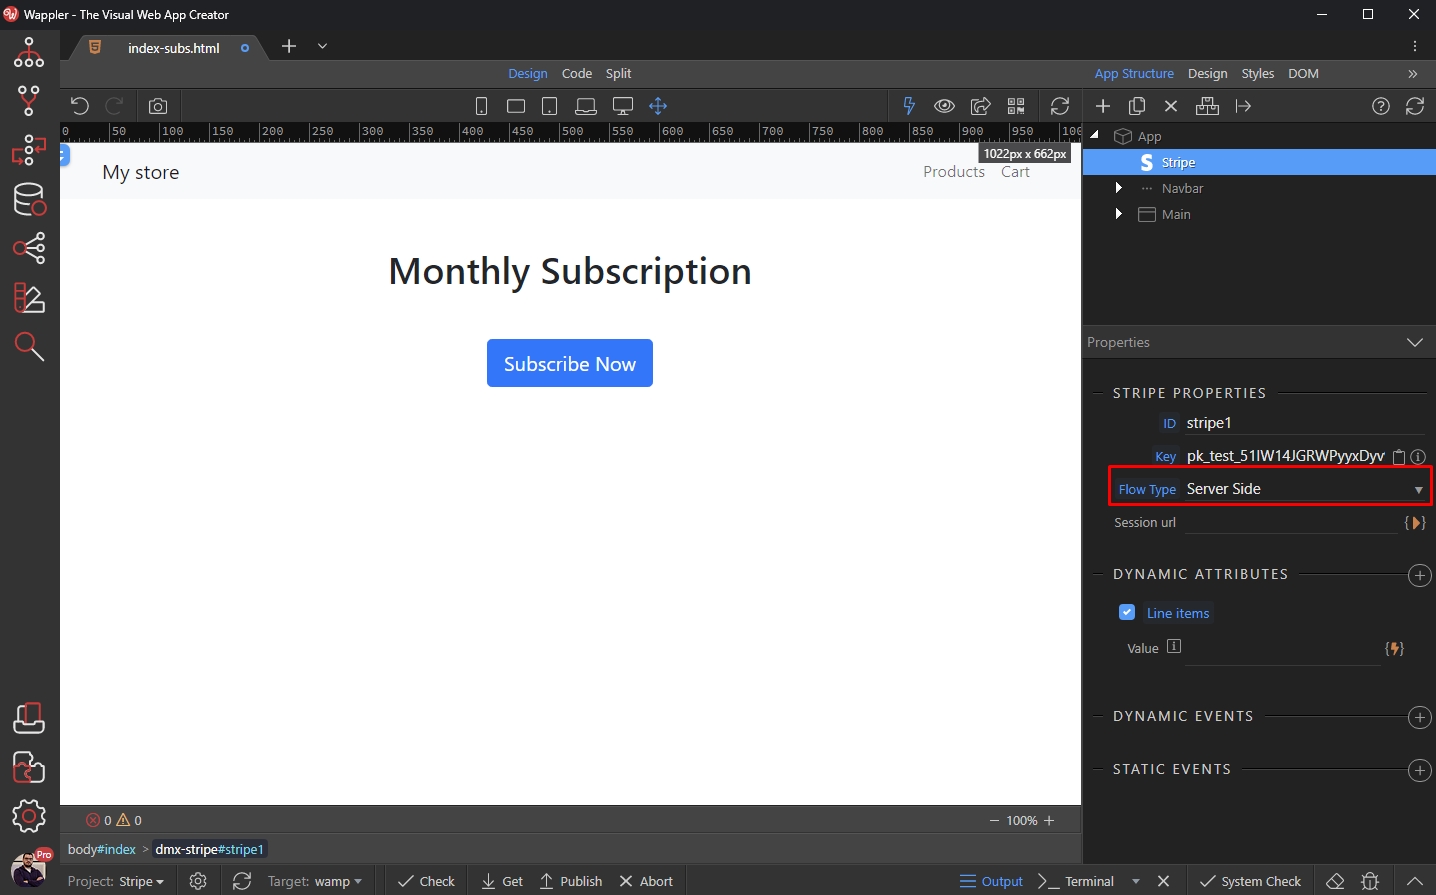
And pick your Session url:
Section titled “And pick your Session url:”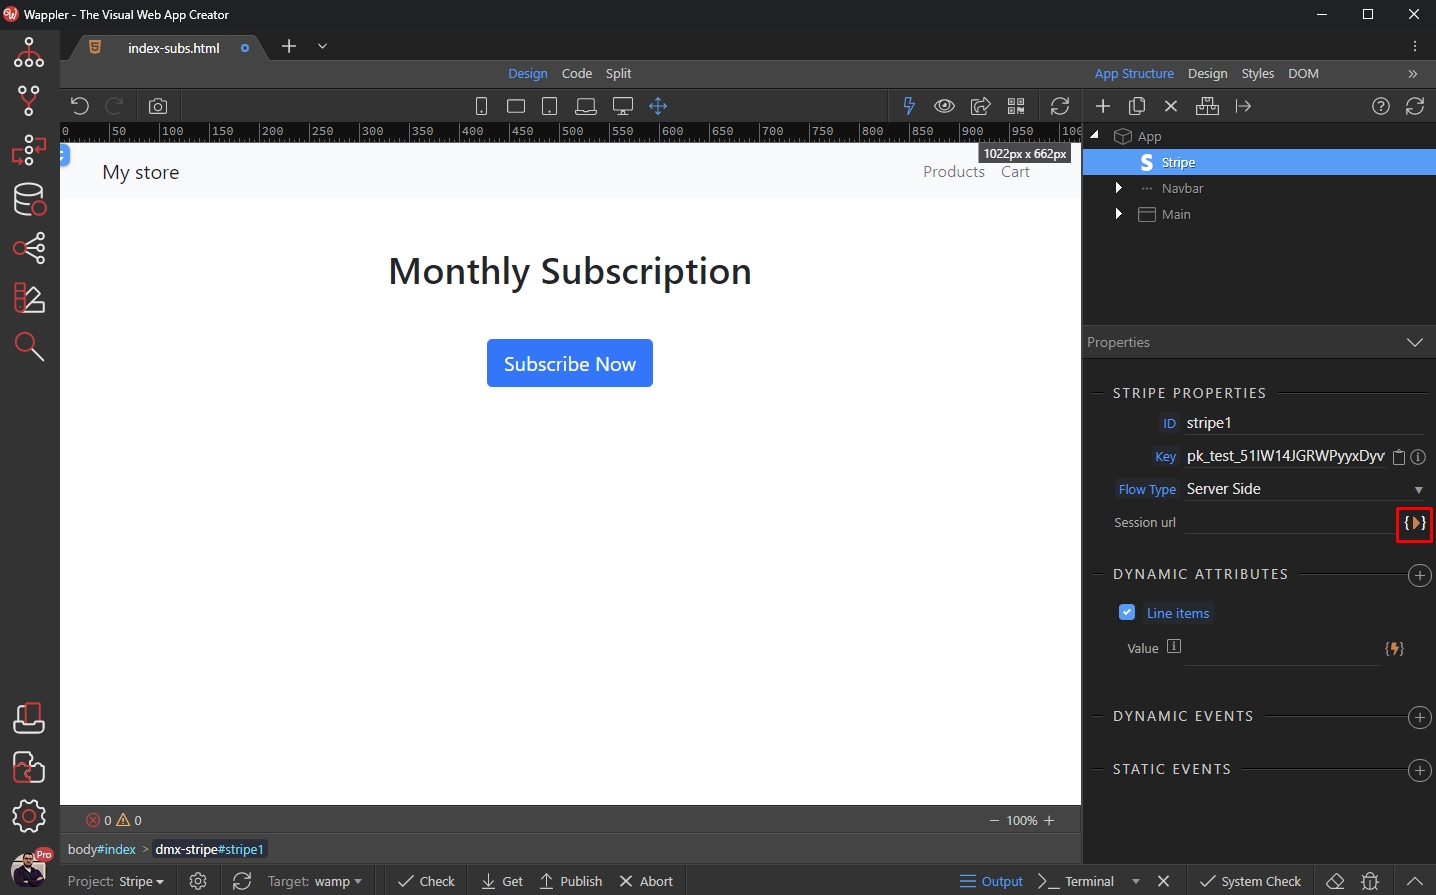
This is the stripe_subscription API Action which we just created:
Section titled “This is the stripe_subscription API Action which we just created:”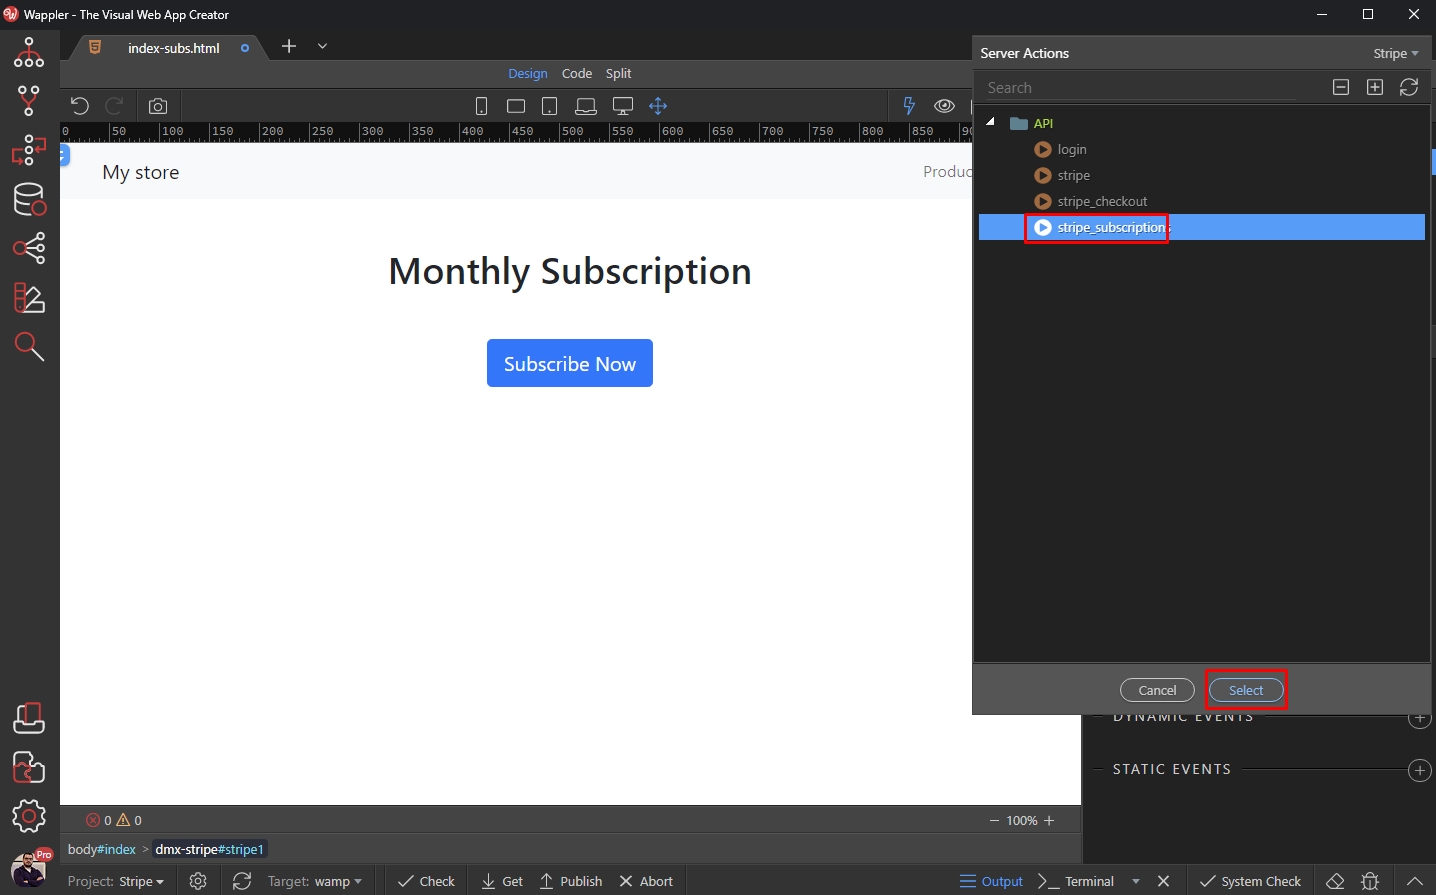
Then select your button:
Section titled “Then select your button:”
Add new Dynamic Event:
Section titled “Add new Dynamic Event:”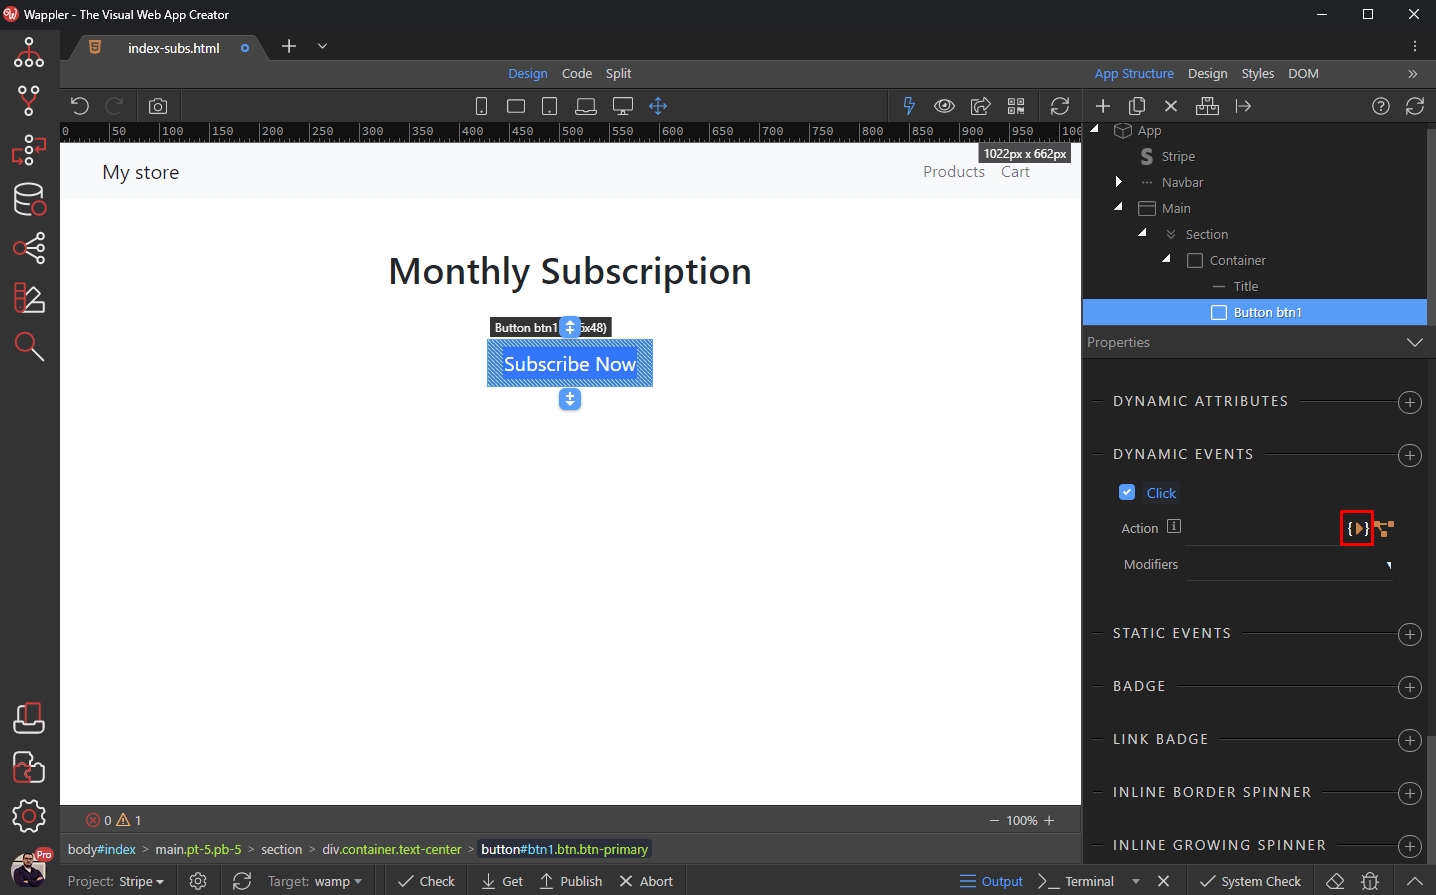
Select Checkout under the Stripe Component and add it:
Section titled “Select Checkout under the Stripe Component and add it:”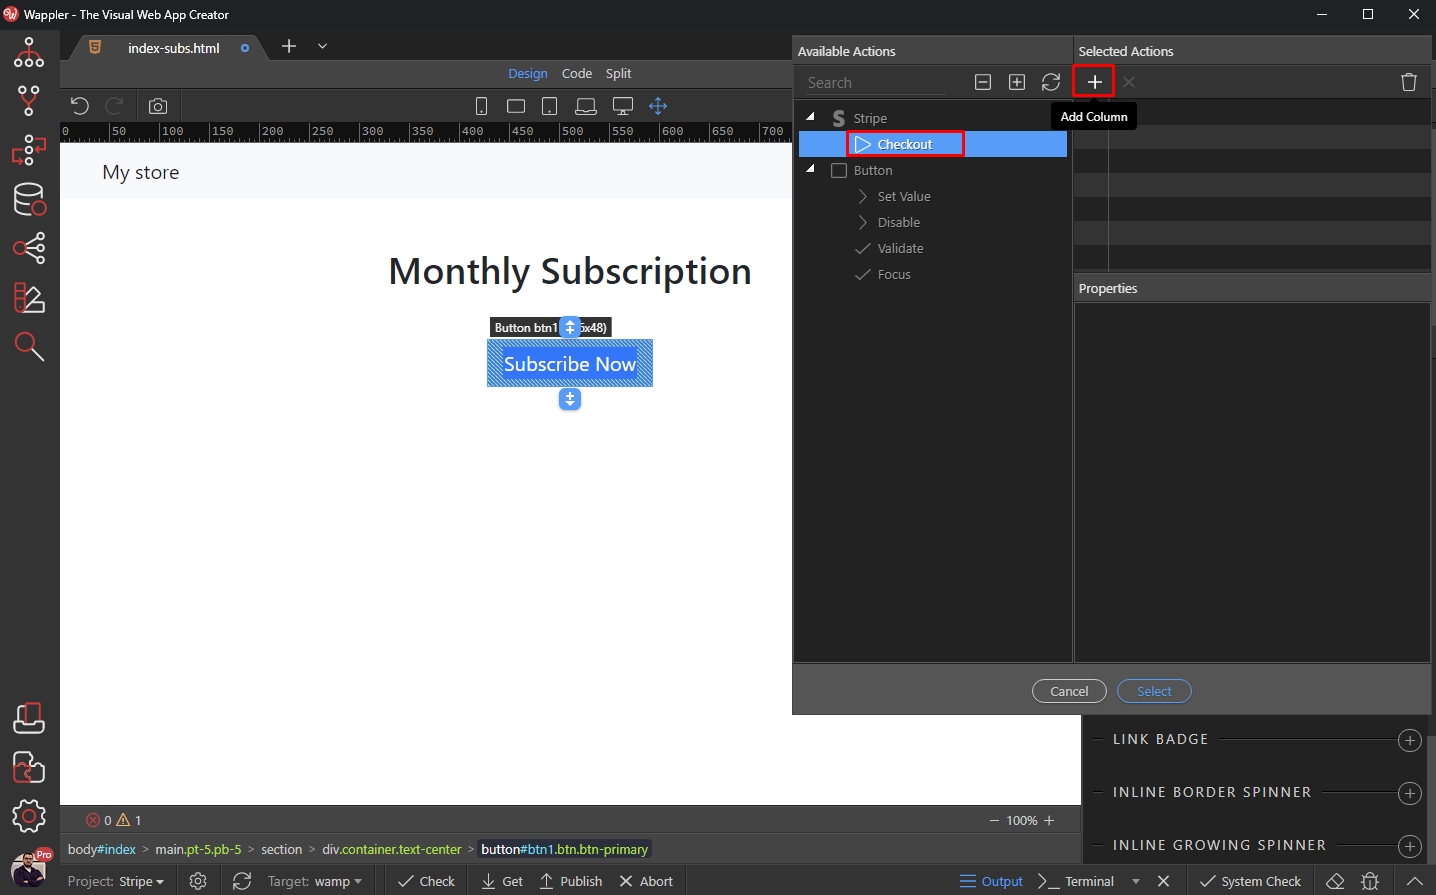
And click Select:
Section titled “And click Select:”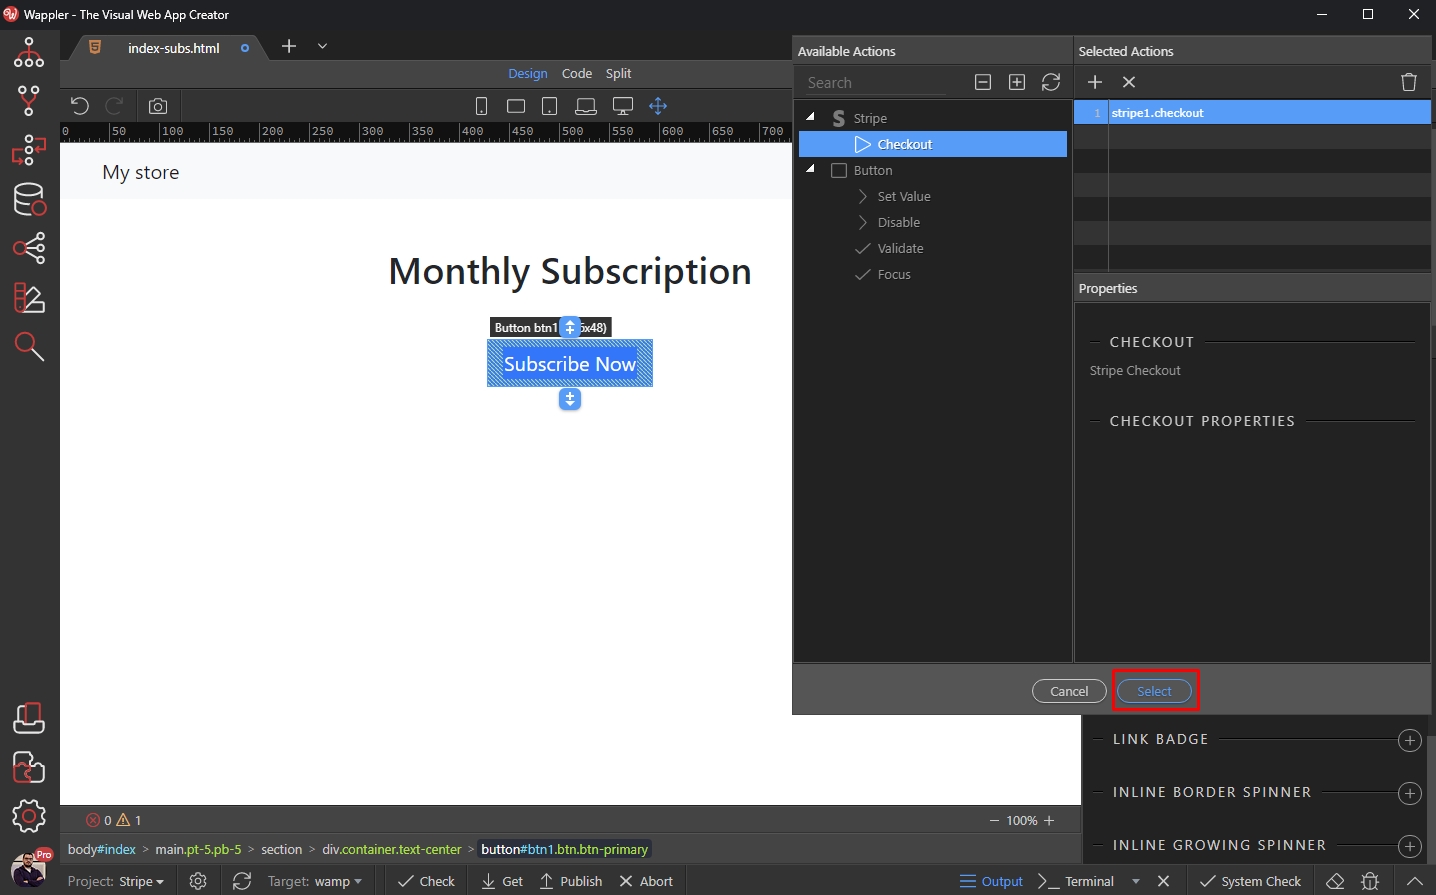
Step 75
Section titled “Step 75”And you are done. Clicking the Subscribe button takes your users to the checkout page, where they can pay. If the customer exists in Stripe, the email will be filled in: