
Stripe Checkout with Custom Products
Intro Sometimes you have your own products database which doesn’t use products and prices defined in Stripe. You already know how to create a shopping cart using the Data Store Component and you can u
Sometimes you have your own products database which doesn’t use products and prices defined in Stripe. You already know how to create a shopping cart using the Data Store Component and you can use your shopping cart built this way with Stripe Checkout.
Page Overview
Section titled “Page Overview”We’ve built our page and use the Data Store Component to save the shopping cart items as explained in the tutorial above:

The Data Store has a column, which stores our product IDs:
Section titled “The Data Store has a column, which stores our product IDs:”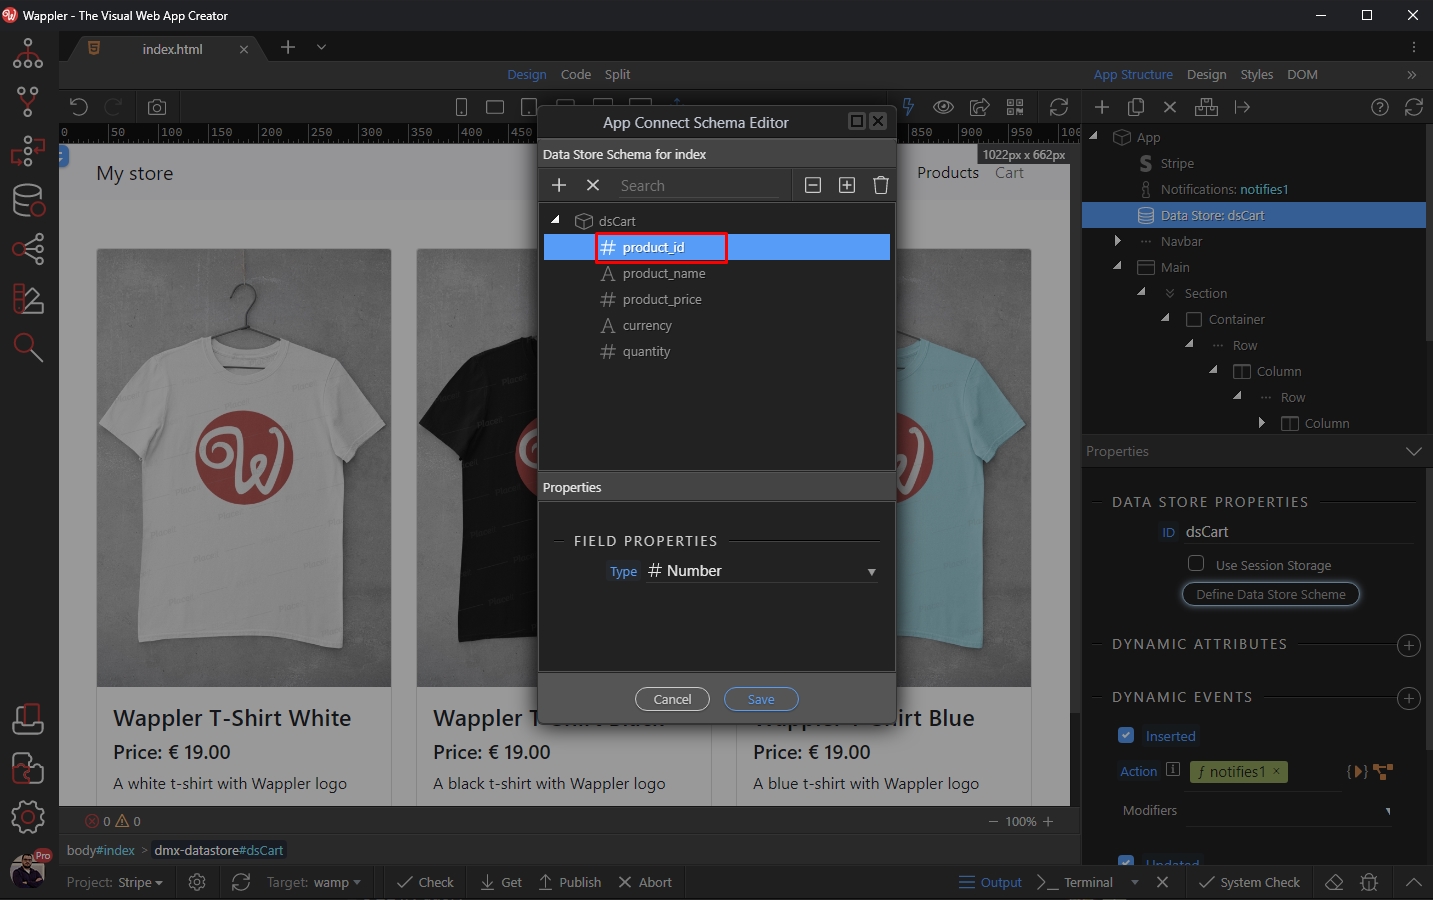
Step 5
Section titled “Step 5”Nothing unusual.
What you need to do is to send these produc IDs to the server action and use them to filter a database query, which will then send the products to Stripe Checkout.
Server-side Setup
Section titled “Server-side Setup”The first thing you need to do is to create a new API Action:
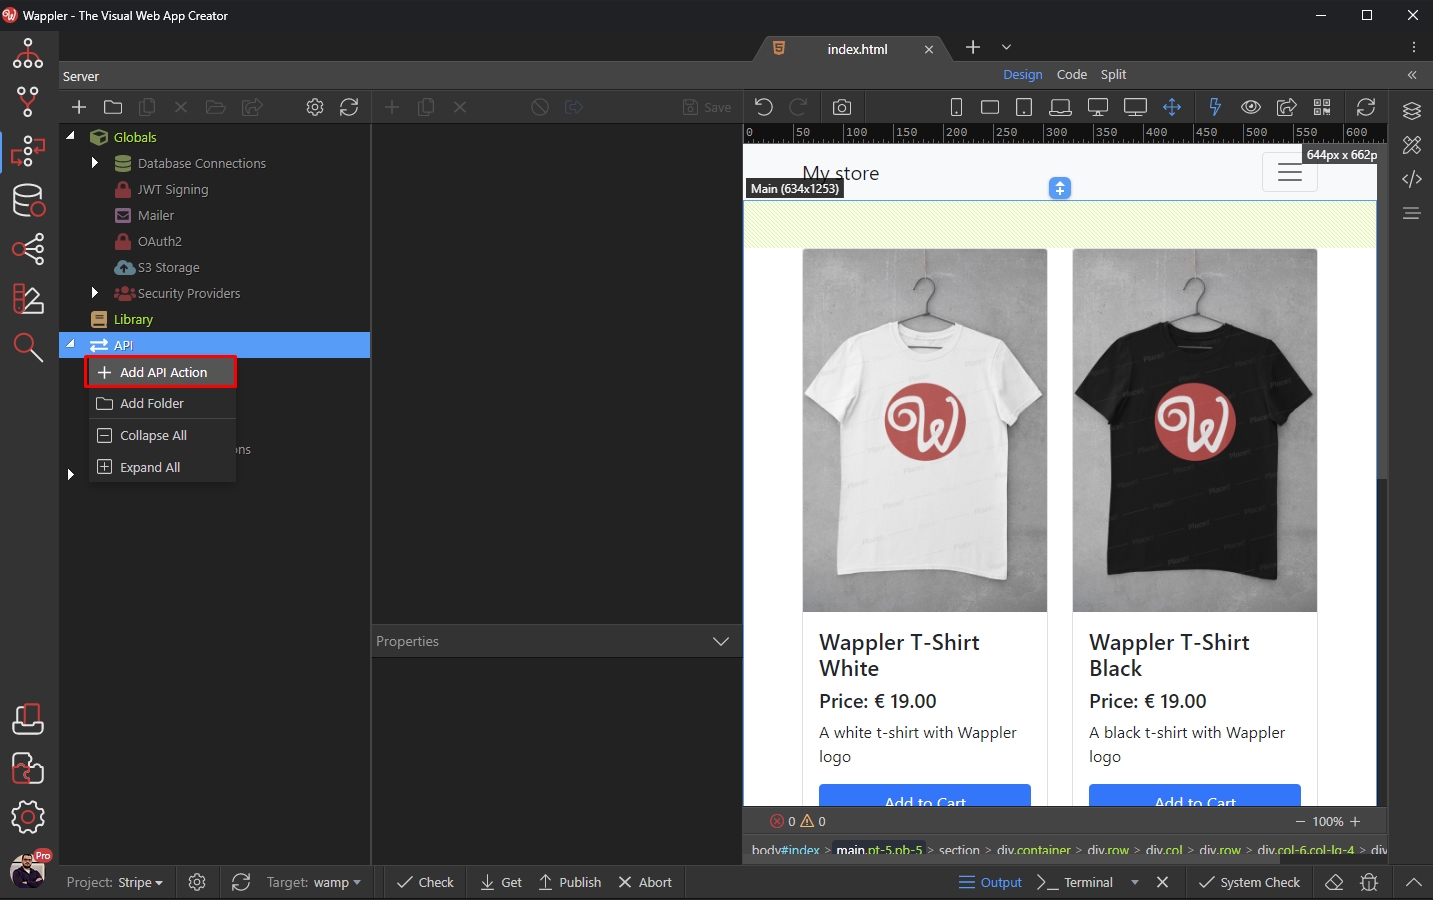
We call it cart_checkout:
Section titled “We call it cart_checkout:”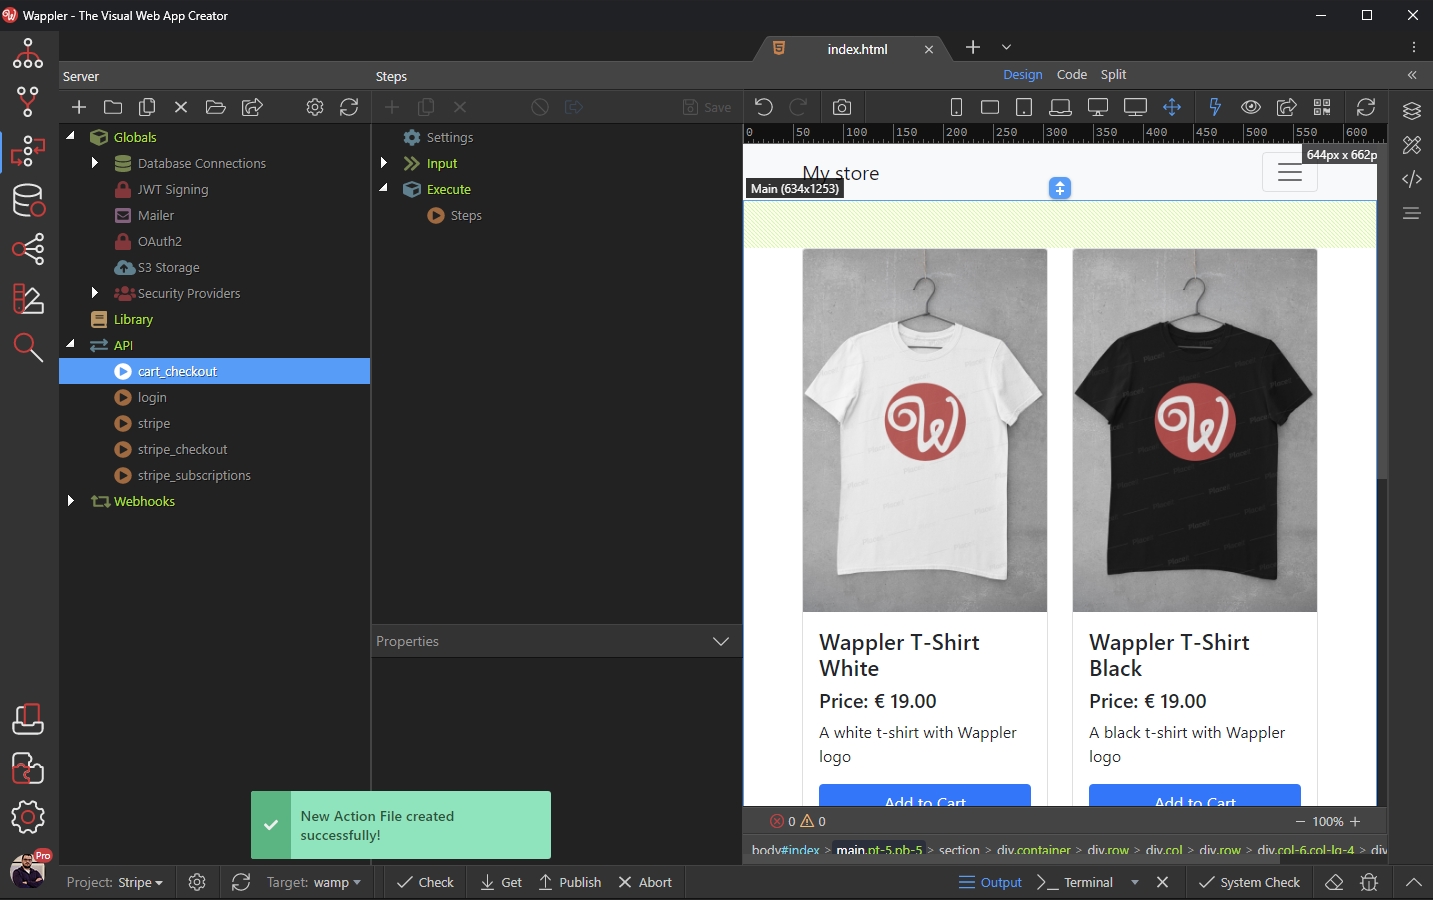
Setup $_POST Variables
Section titled “Setup $_POST Variables”Now, right click the $_POST variables:
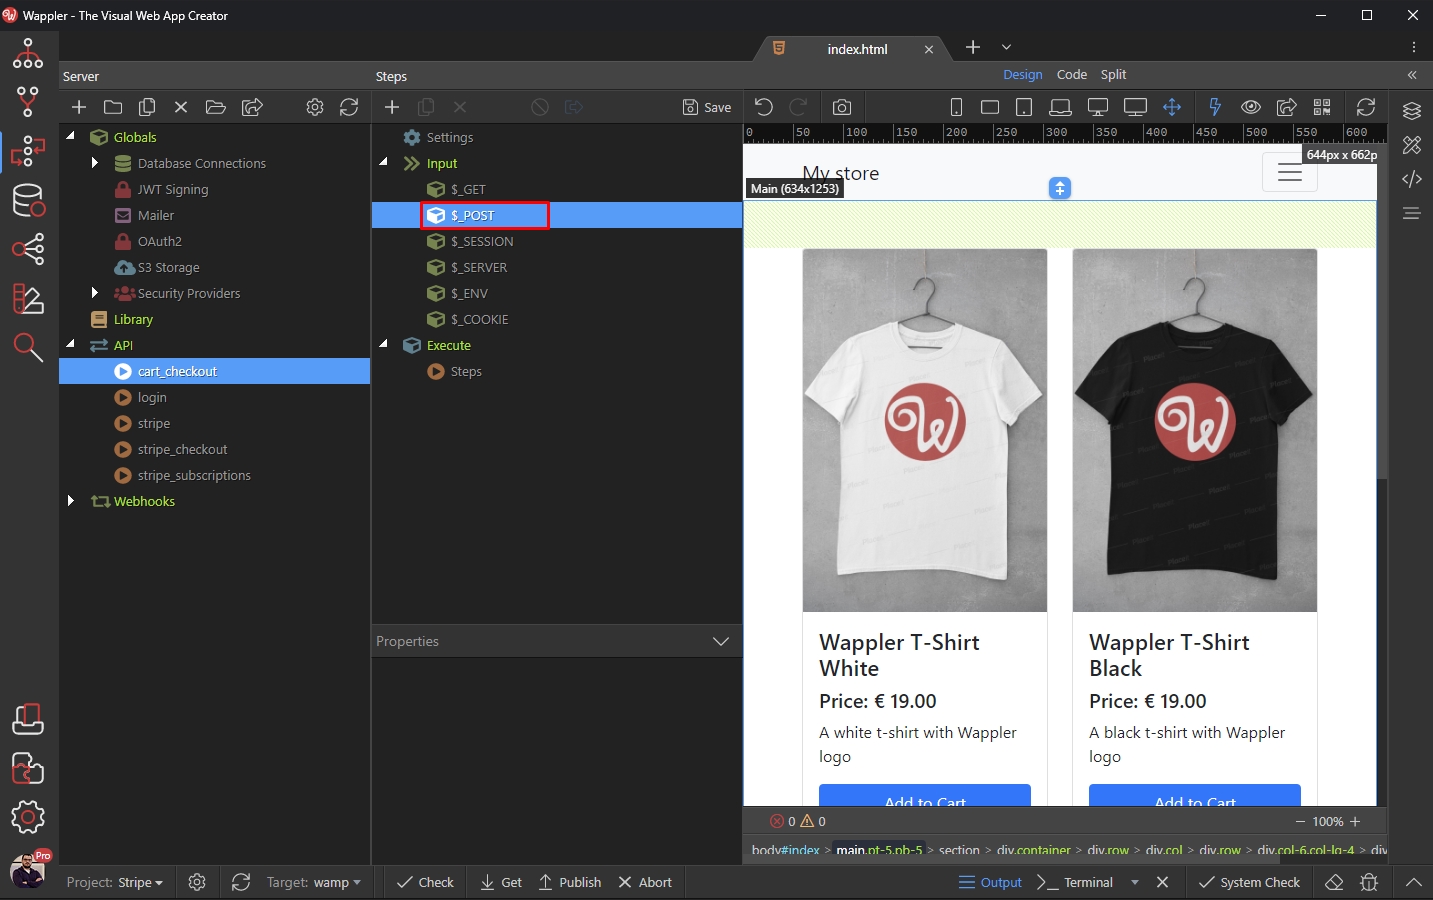
And add an Array:
Section titled “And add an Array:”
This array should be called lineItems and not any other way:
Section titled “This array should be called lineItems and not any other way:”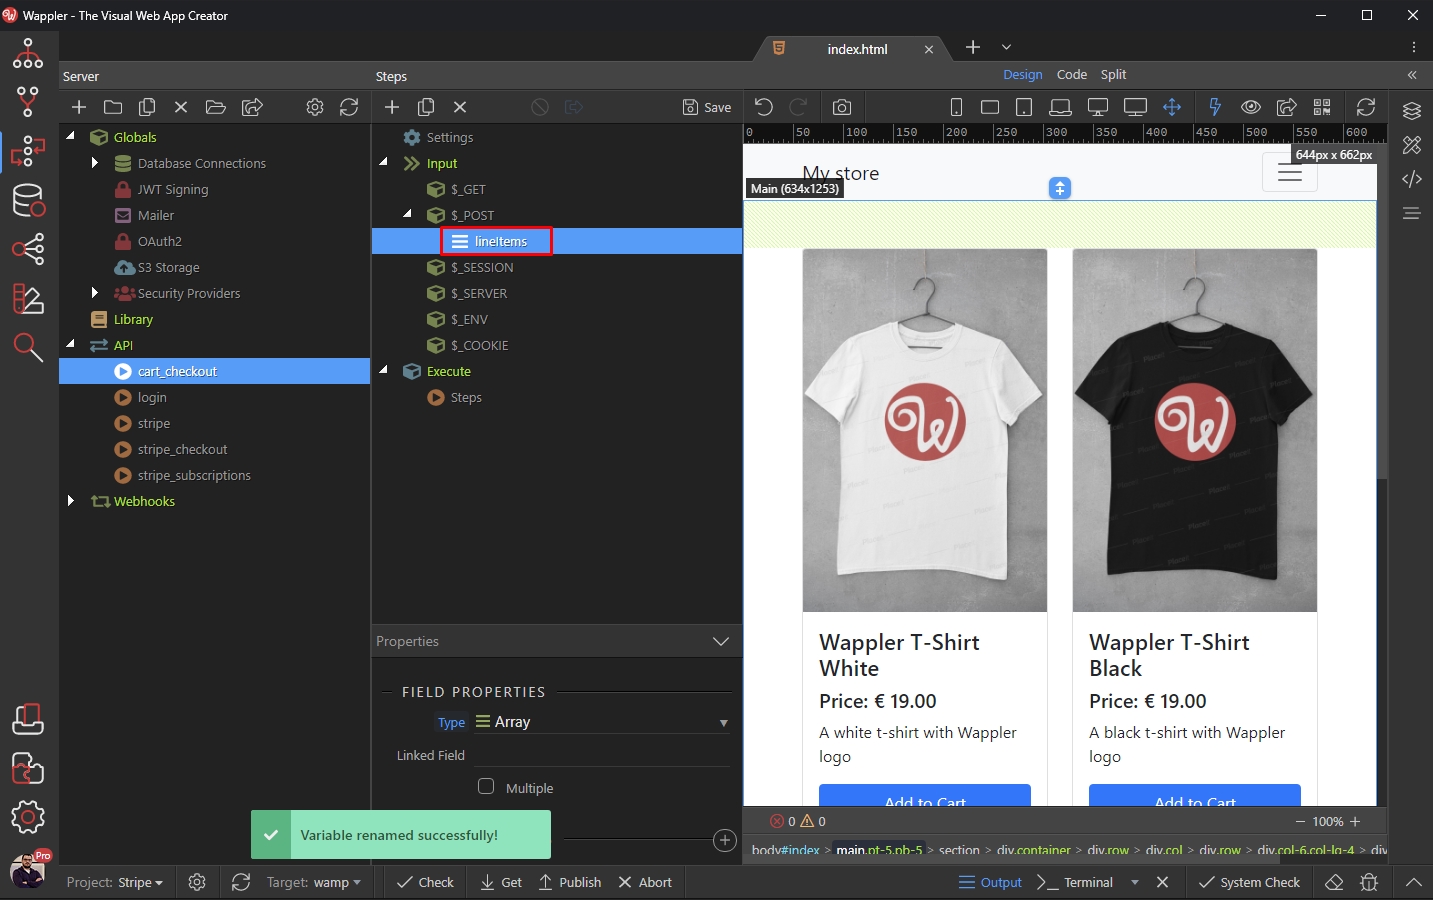
Right click the Array we just added and add a variable inside it:
Section titled “Right click the Array we just added and add a variable inside it:”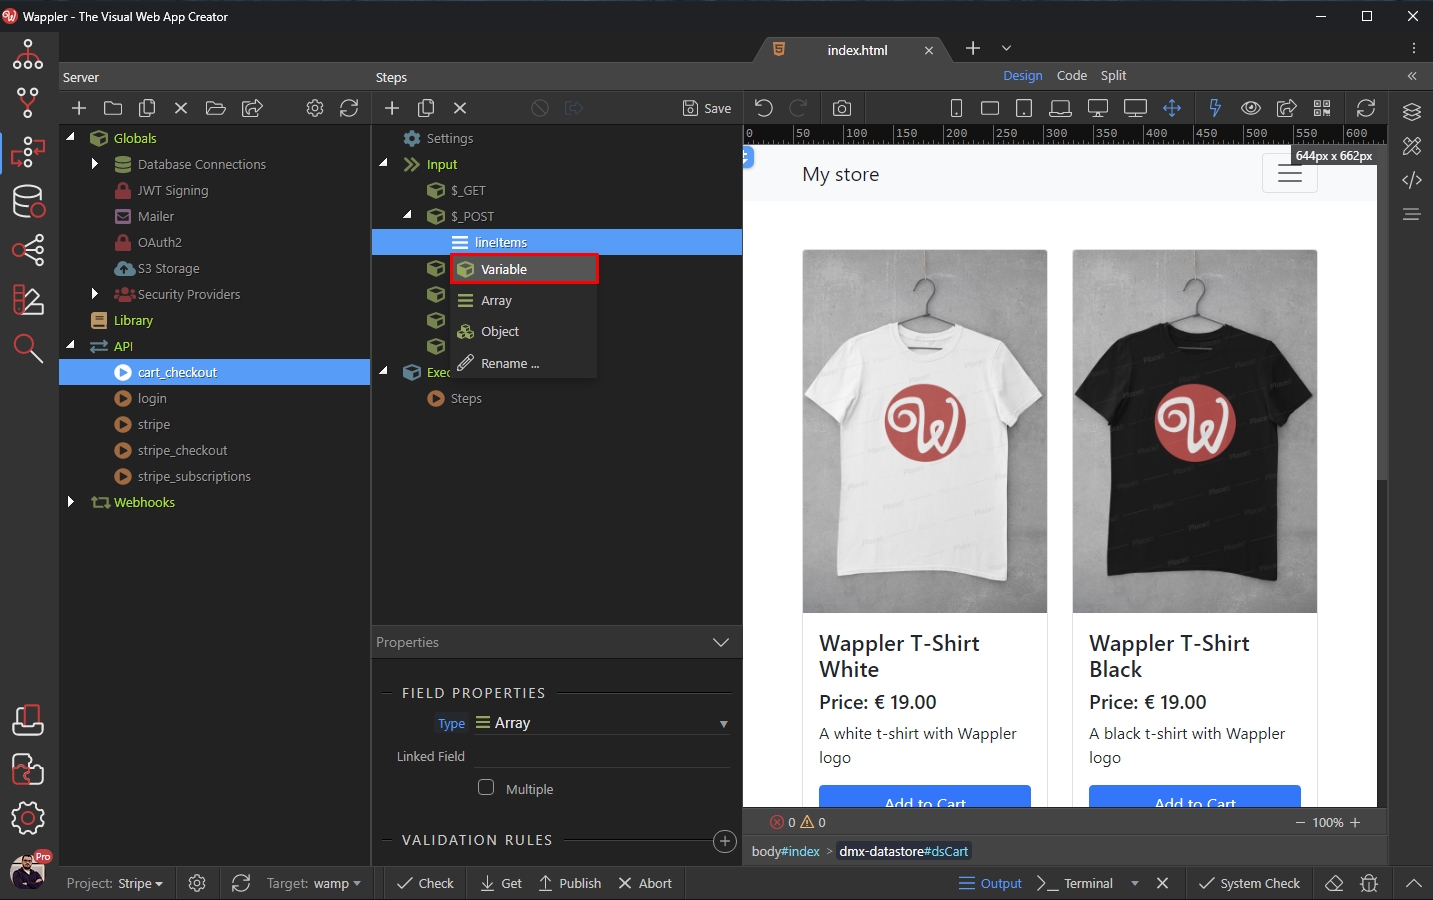
Step 13
Section titled “Step 13”We call this variable the same way as the Data Store column storing the product ids is called. In our case (check the second screenshot in the tutorial) it is called product_id:
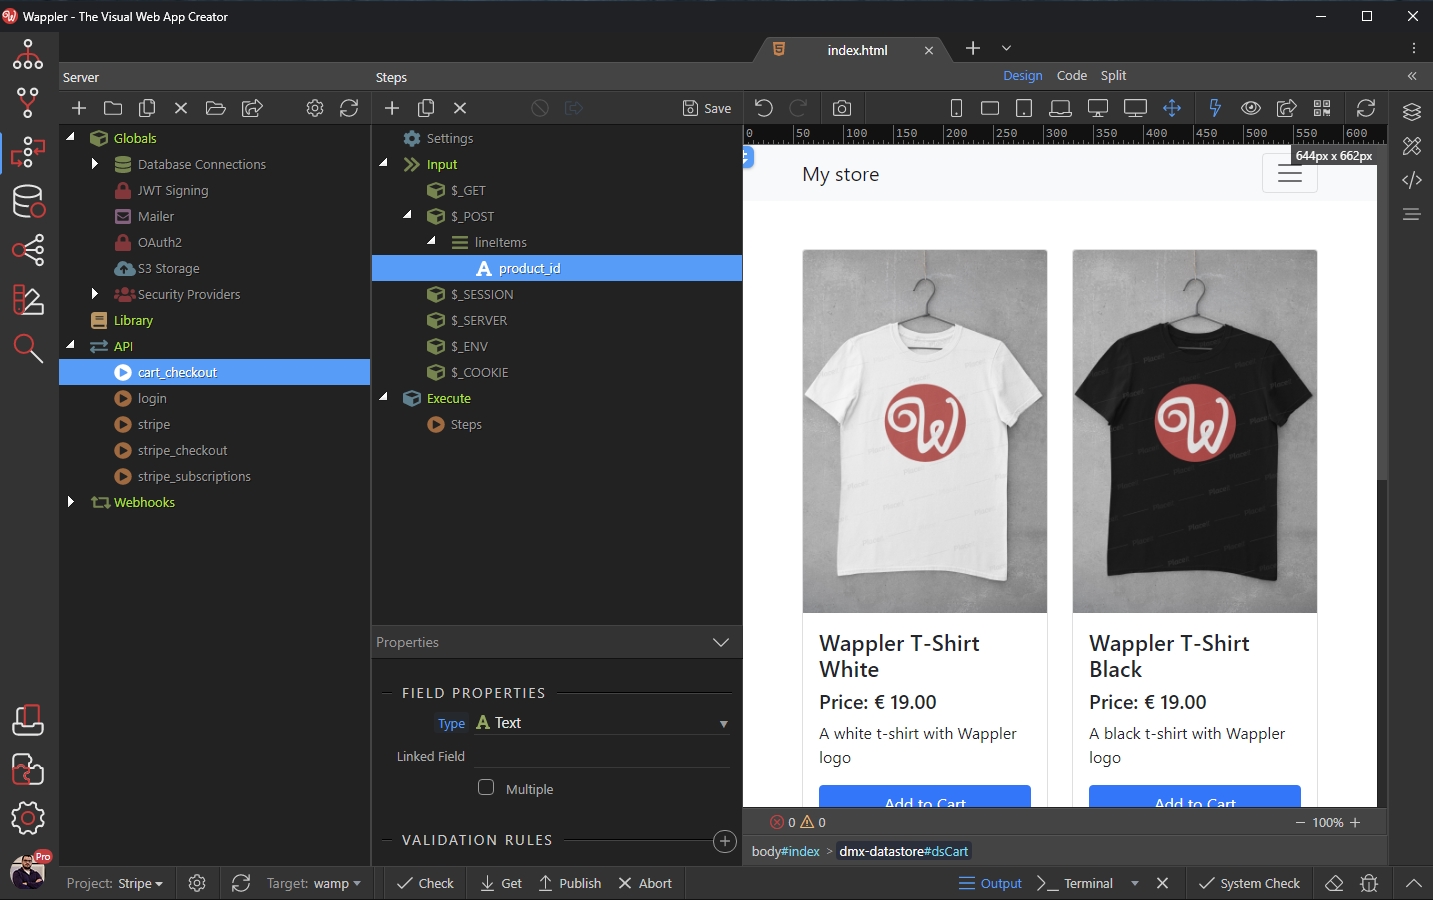
Setup Database Query
Section titled “Setup Database Query”We will use a database query as a source for the checkout. It will be filtered by the items added in the Data Store - i.e. items added to the users shopping cart.
Right click steps:

Add a database query:
Section titled “Add a database query:”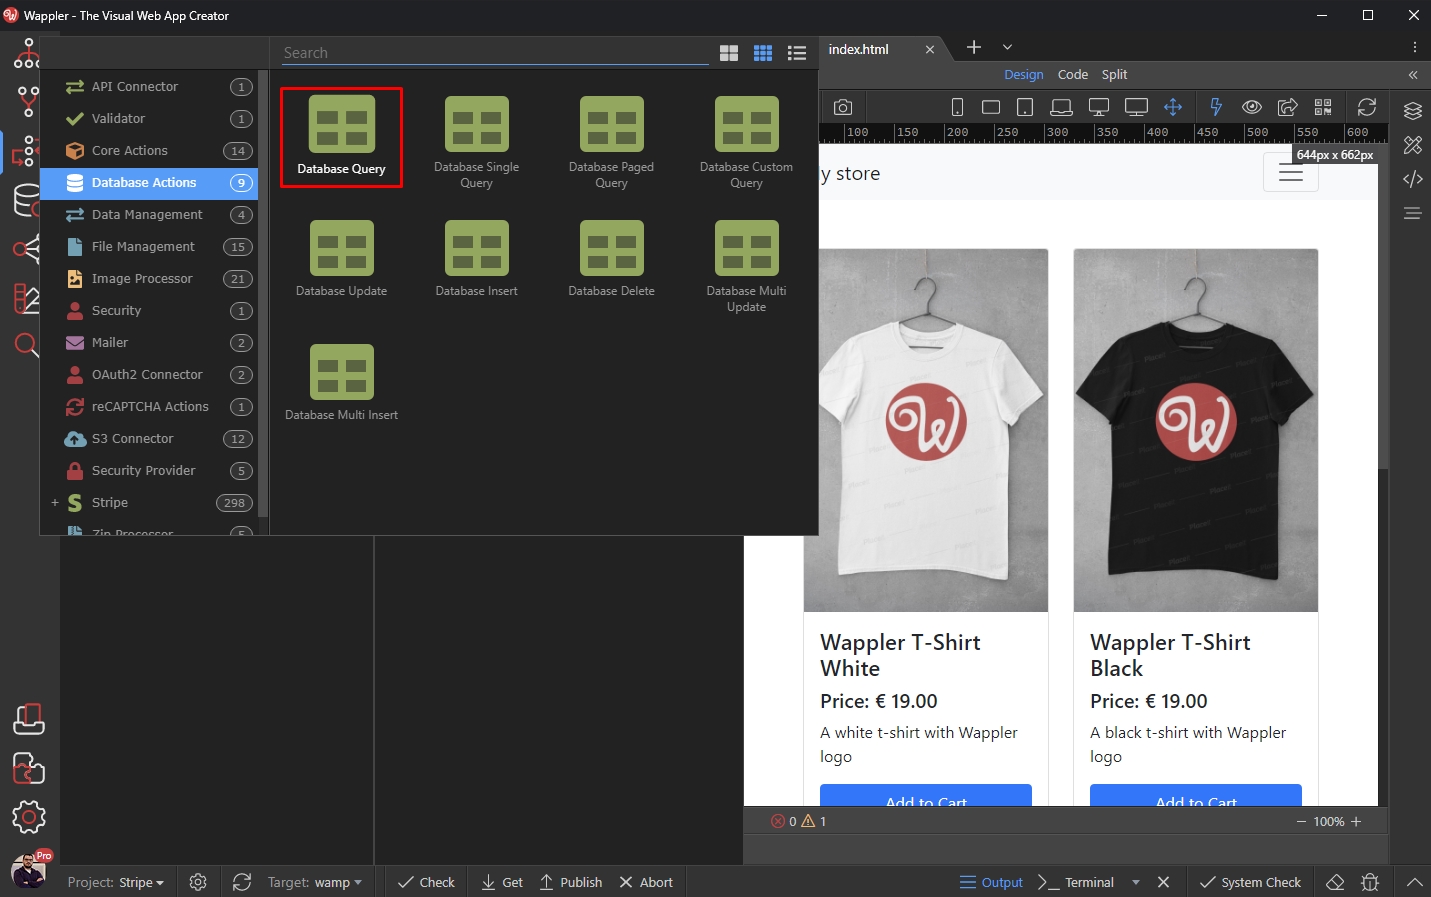
And open the Query Builder:
Section titled “And open the Query Builder:”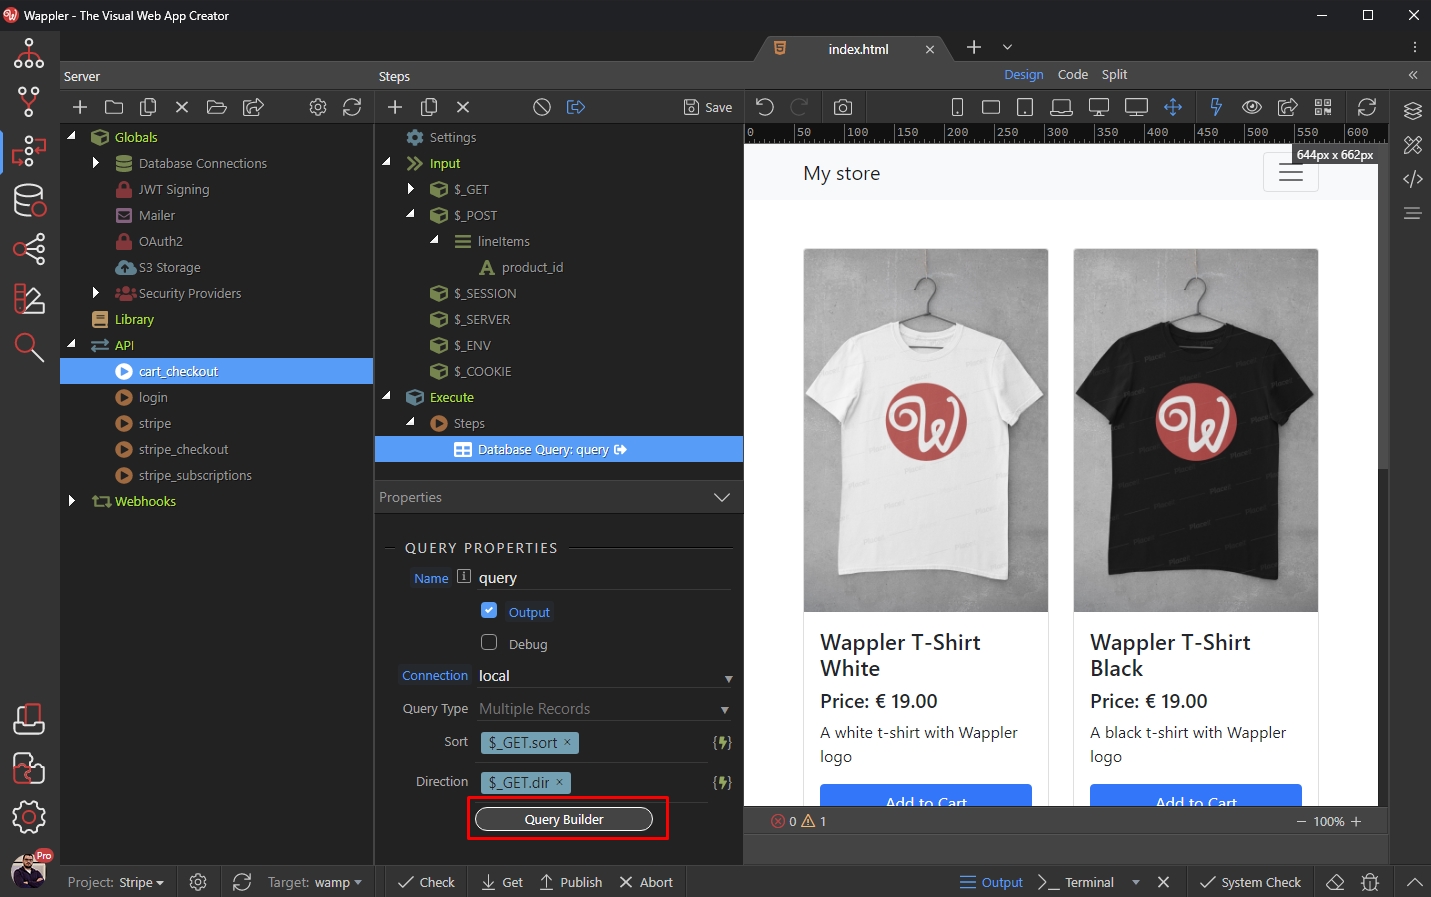
Add your products table in the builder:
Section titled “Add your products table in the builder:”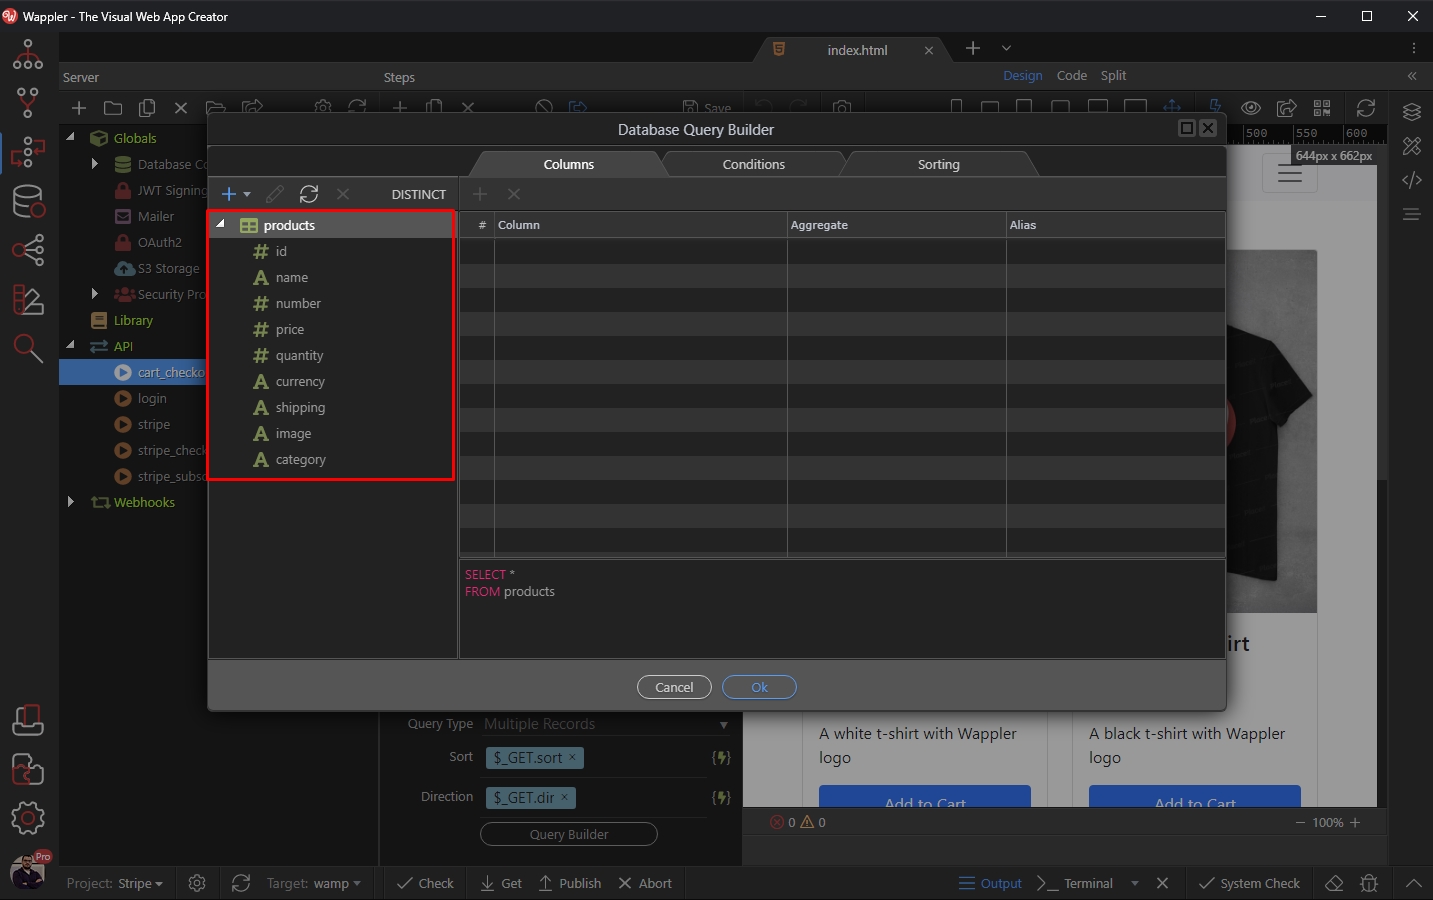
Step 19
Section titled “Step 19”Stripe checkout expects 4 values to be sent to it:
title (mandatory) - The name of the product
amount (mandatory) - The price of the product
currency - The currency.
quantity - The quantity that should be added to the cart. If not provided, it defaults to 1
Don’t worry if your database table columns are not called like that. In such cases you can use the Alias column:

Step 20
Section titled “Step 20”You can see our column is called name and we use an alias of title same for the price - we are using an alias of amount
Open the conditions tab and select a column to filter the products by. We want to filter by the product id column:
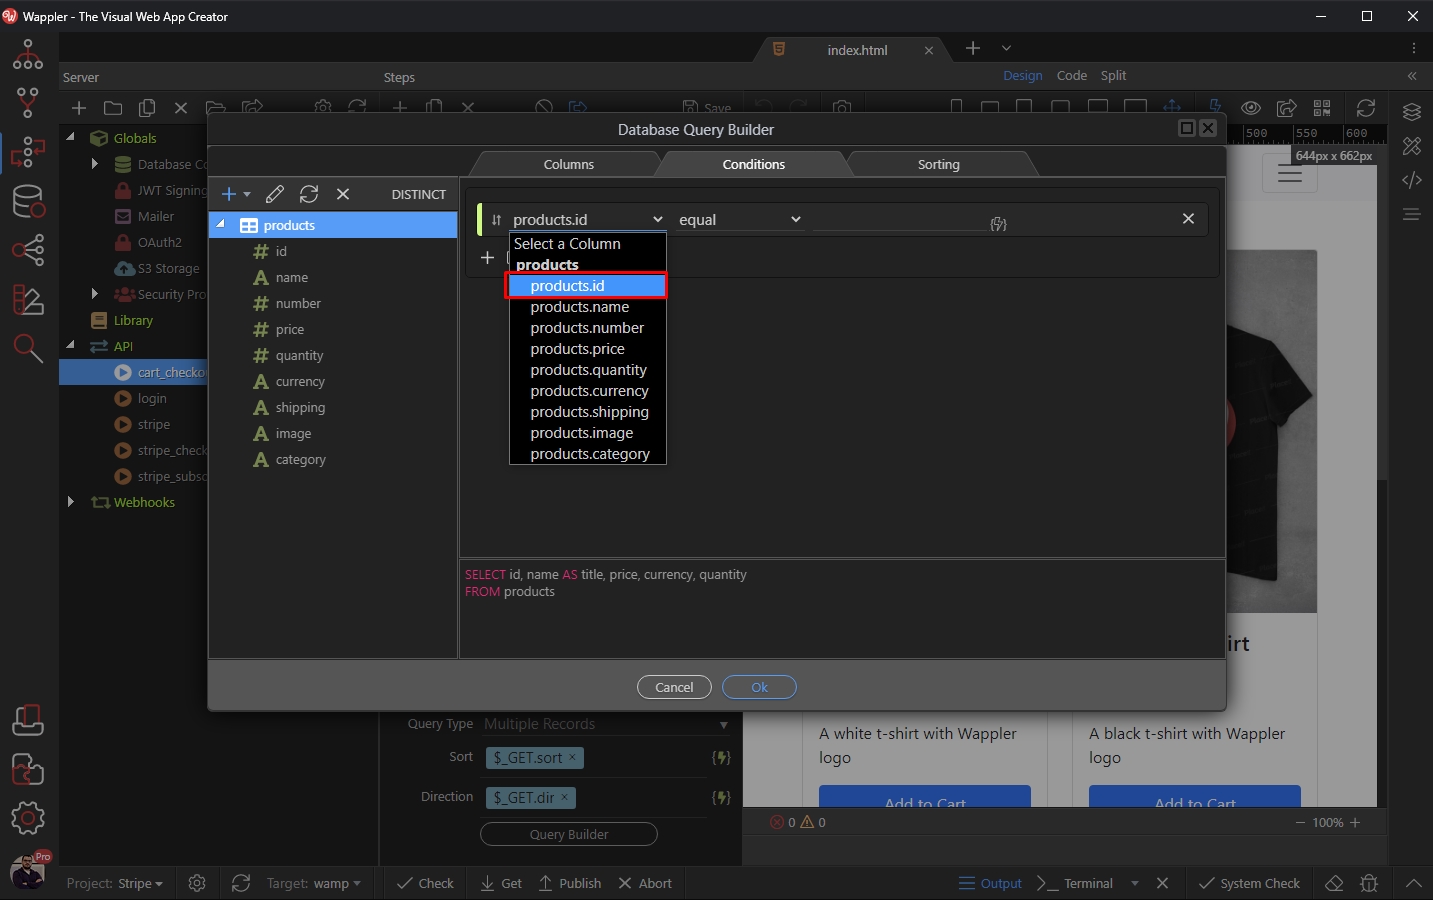
Select the IN operator:
Section titled “Select the IN operator:”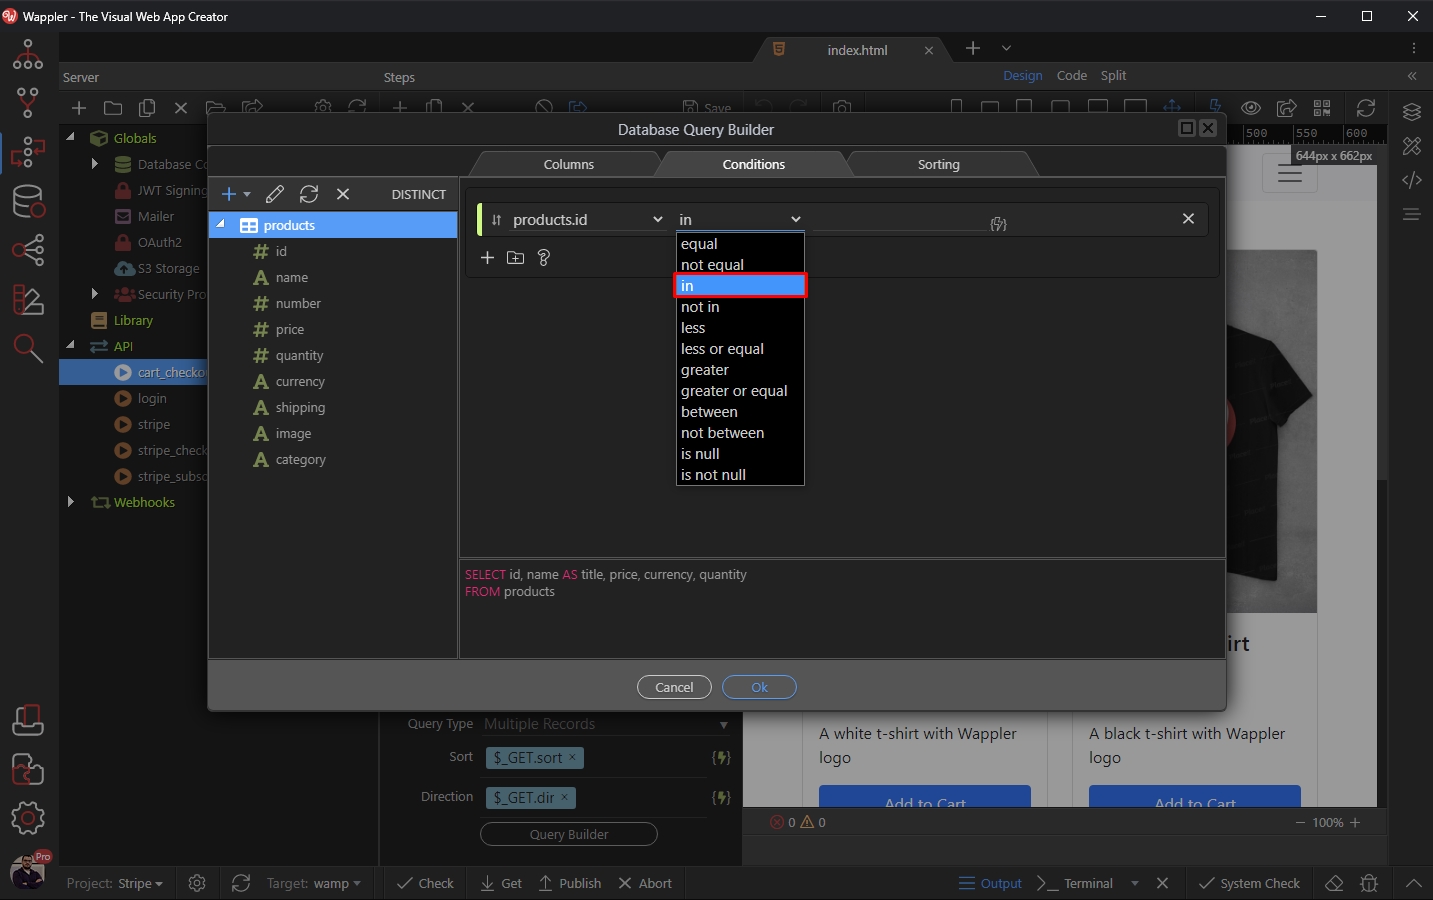
And click the dynamic data picker:
Section titled “And click the dynamic data picker:”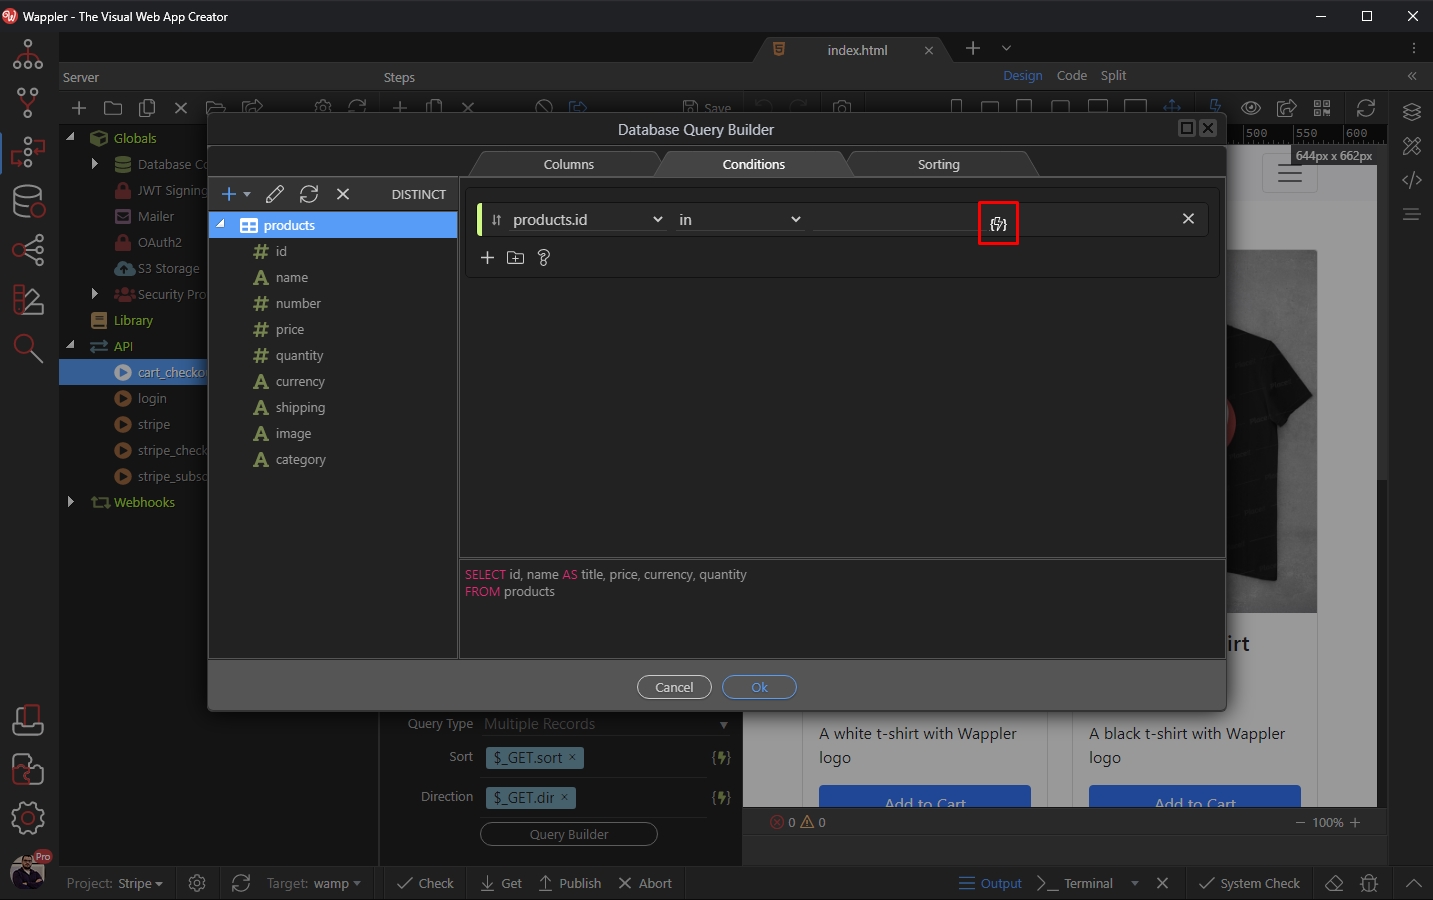
Select the lineItems array under $_POST and click the formatter icon:
Section titled “Select the lineItems array under $_POST and click the formatter icon:”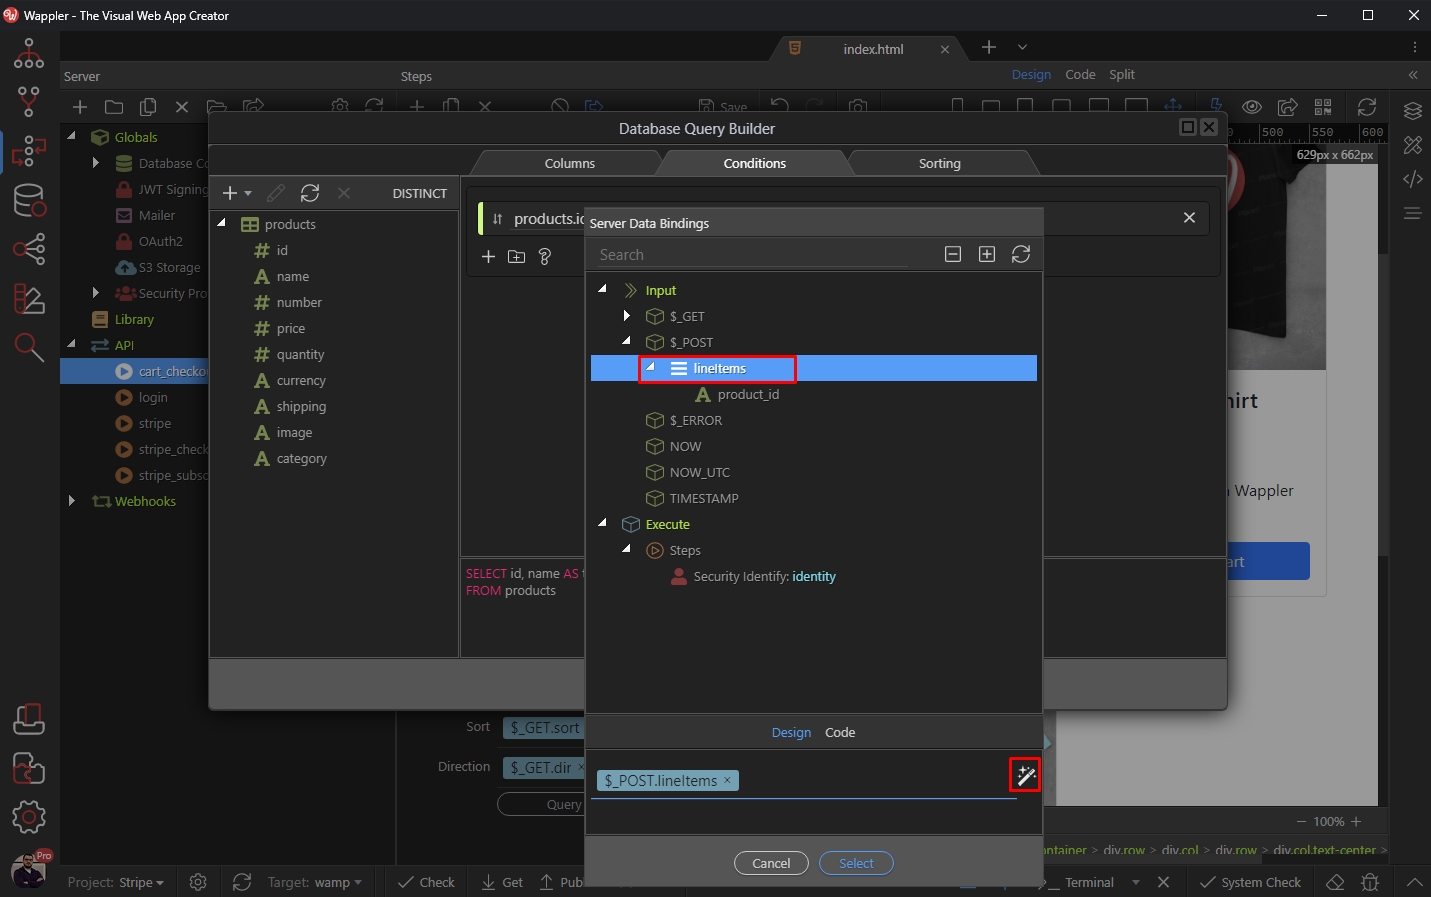
Then right click the array, open Collections and select Flatten:
Section titled “Then right click the array, open Collections and select Flatten:”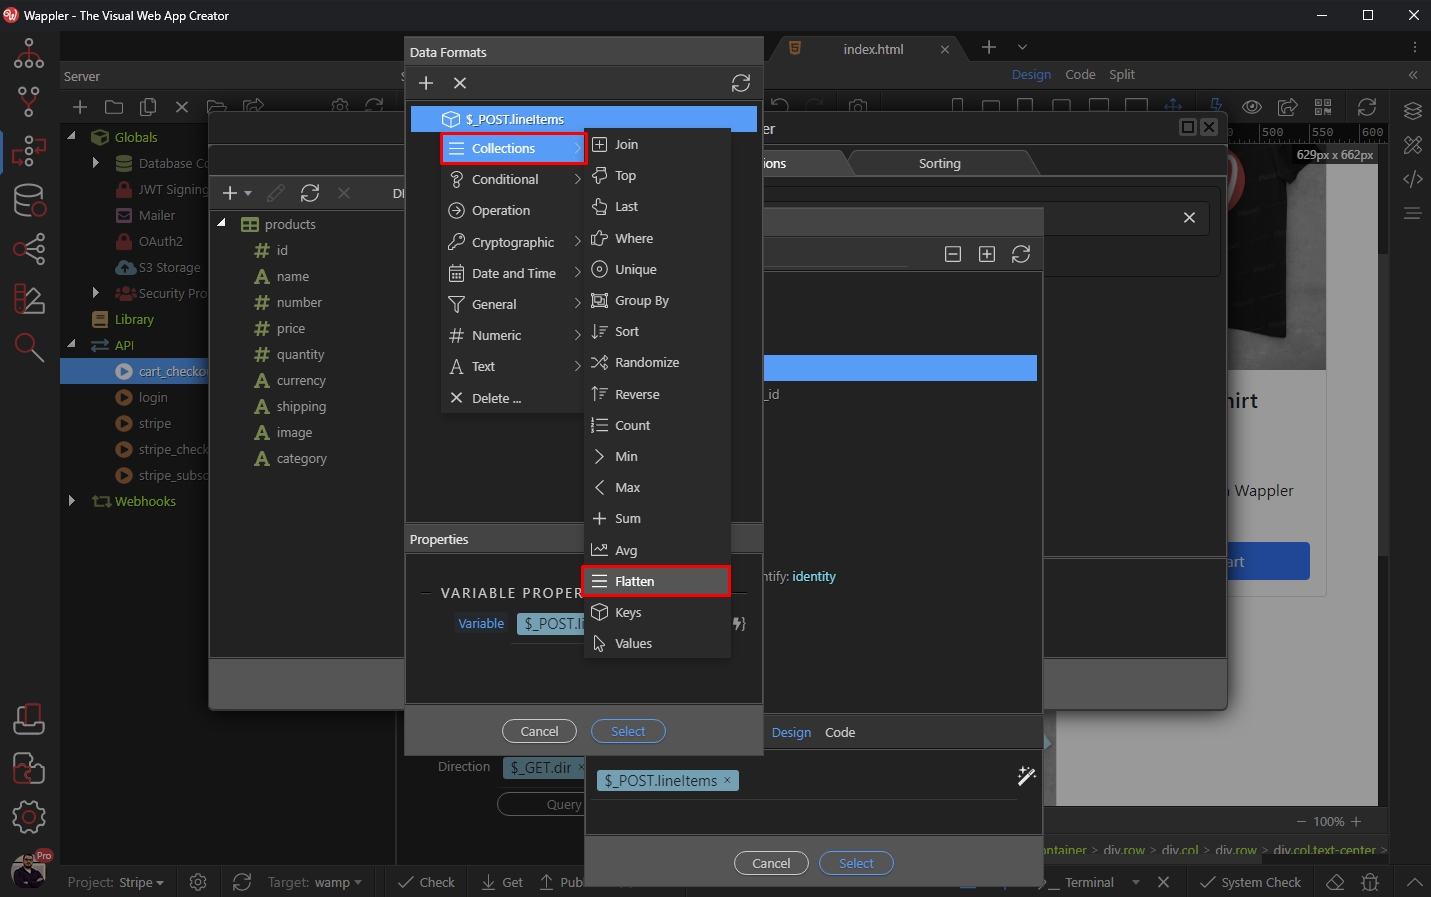
Step 25
Section titled “Step 25”In the property field, enter the variable used to pass the product ids, in our case we enter product_id, then click Select:
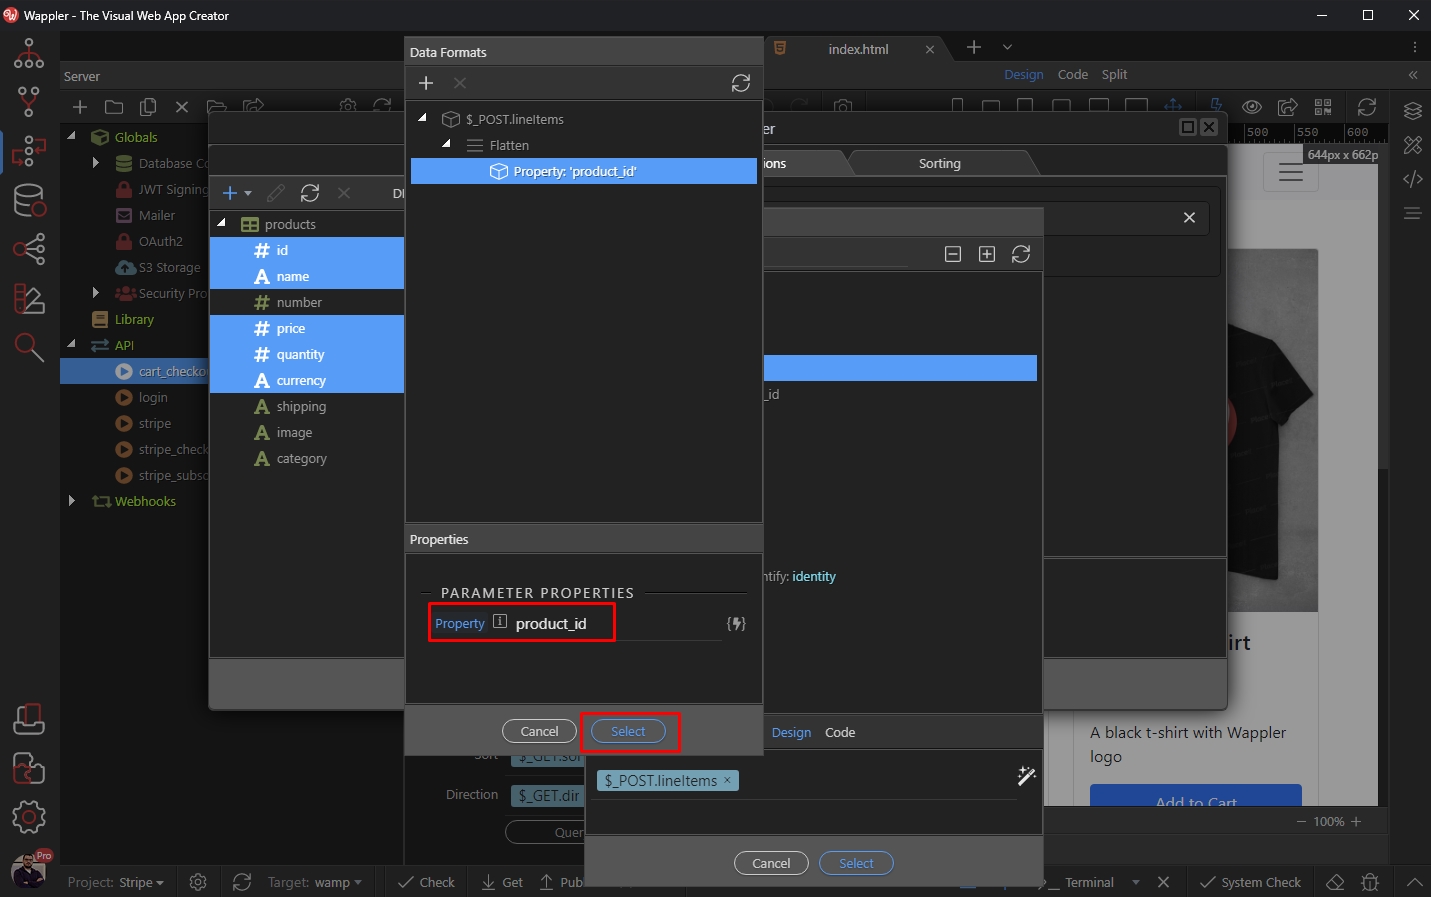
Step 26
Section titled “Step 26”You are done setting up the database query. Now your database query will be filtered by the product ids stored in the data store component (in the shopping cart).
Checkout session
Section titled “Checkout session”Now right click the database query step:
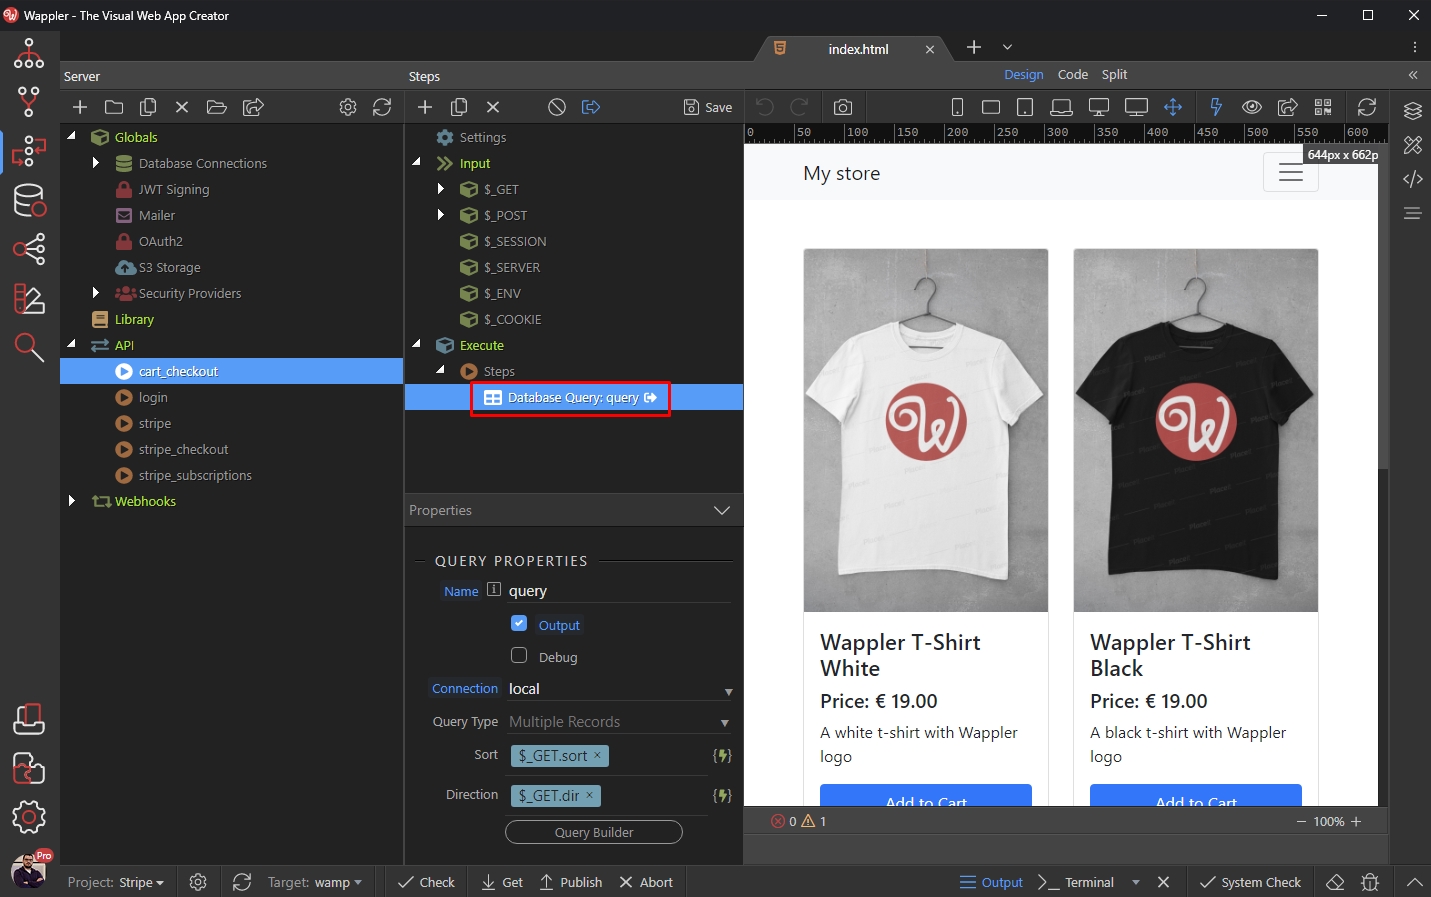
Select Stripe > Checkout and select Create Checkout Session:
Section titled “Select Stripe > Checkout and select Create Checkout Session:”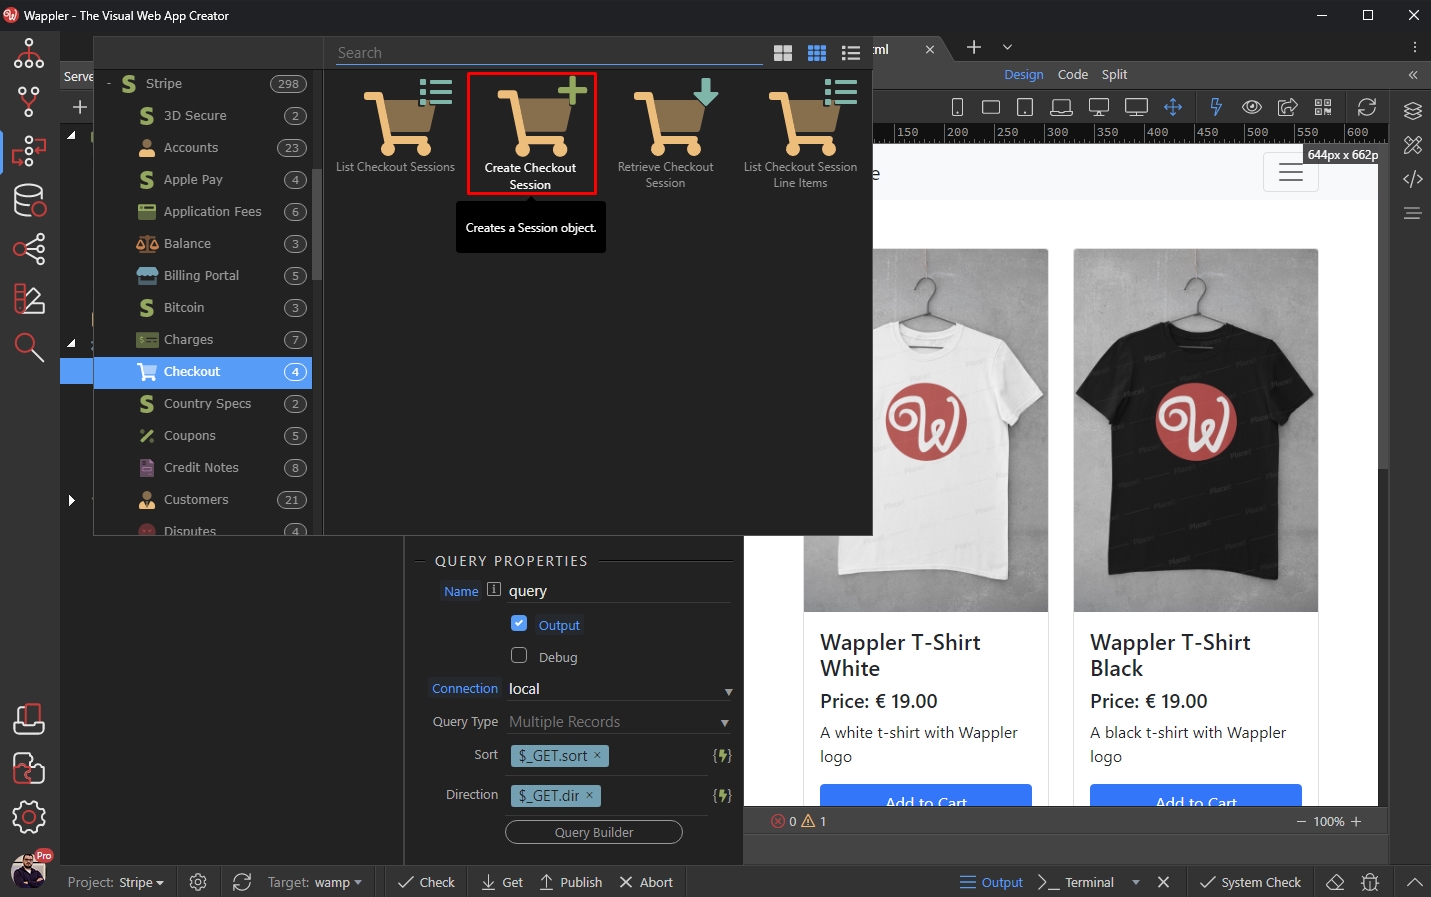
Open the Items Type menu and select Custom Reference:
Section titled “Open the Items Type menu and select Custom Reference:”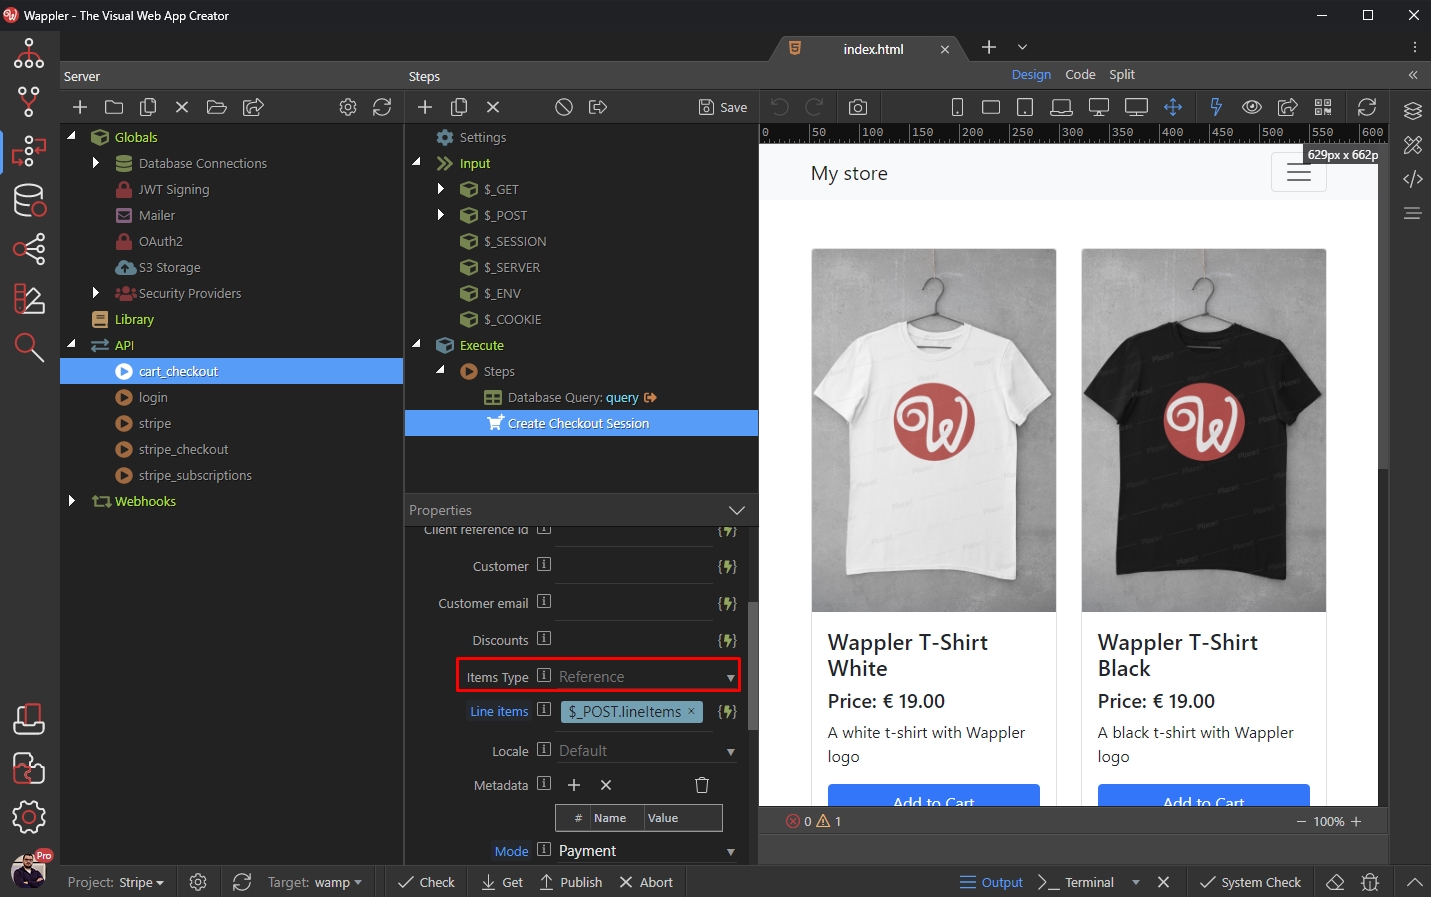
Then select the dynamic data picker icon:
Section titled “Then select the dynamic data picker icon:”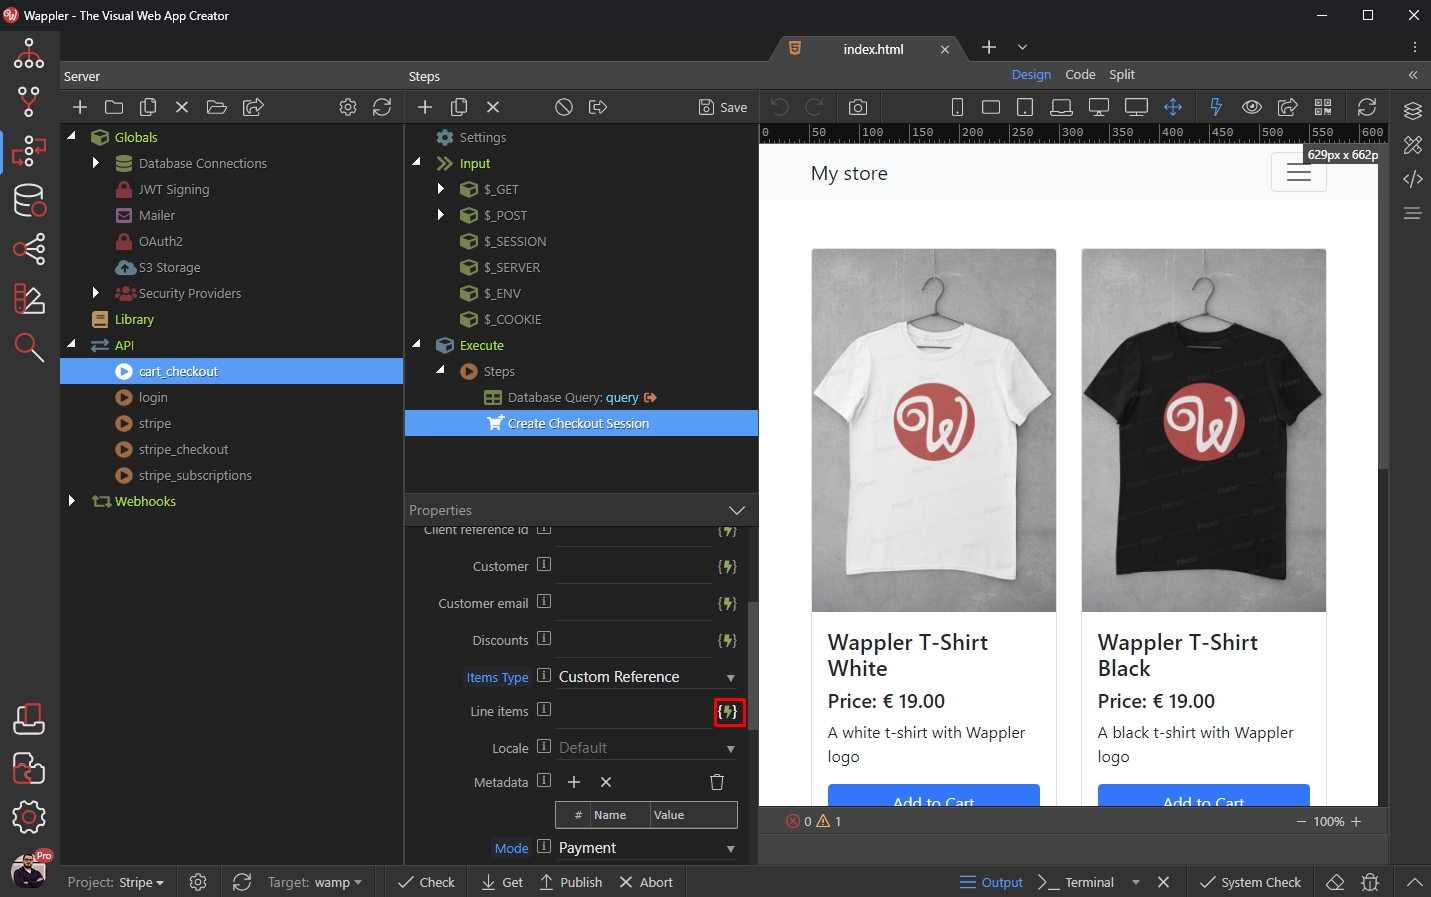
Select your database query and click Select:
Section titled “Select your database query and click Select:”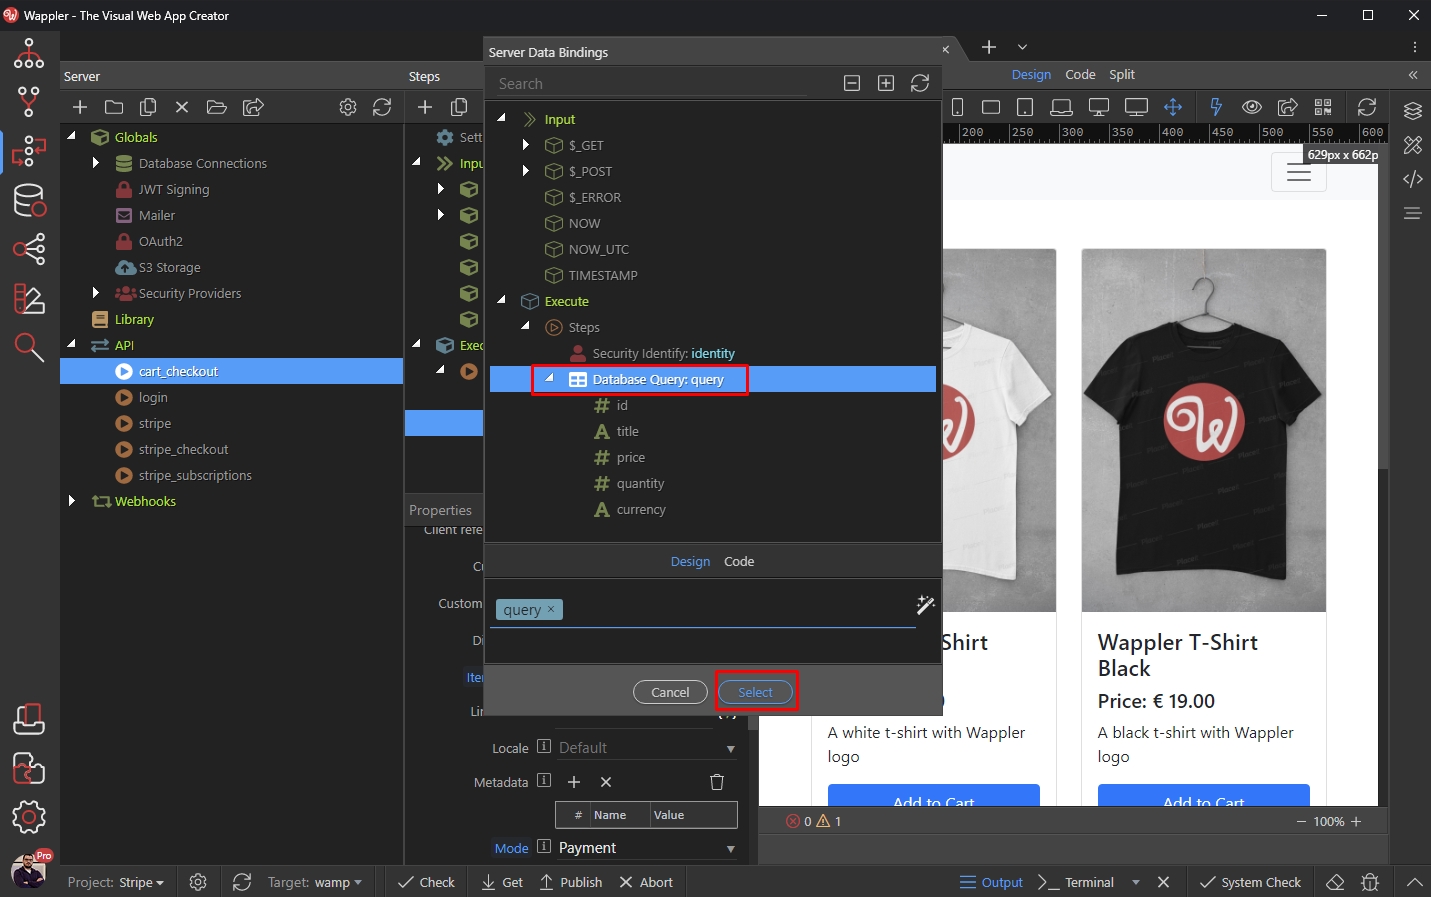
Setup the success and cancel URLs and you are done. Right click the Checkout Session step:
Section titled “Setup the success and cancel URLs and you are done. Right click the Checkout Session step:”Setup the success and cancel URLs and you are done.
Right click the Checkout Session step:
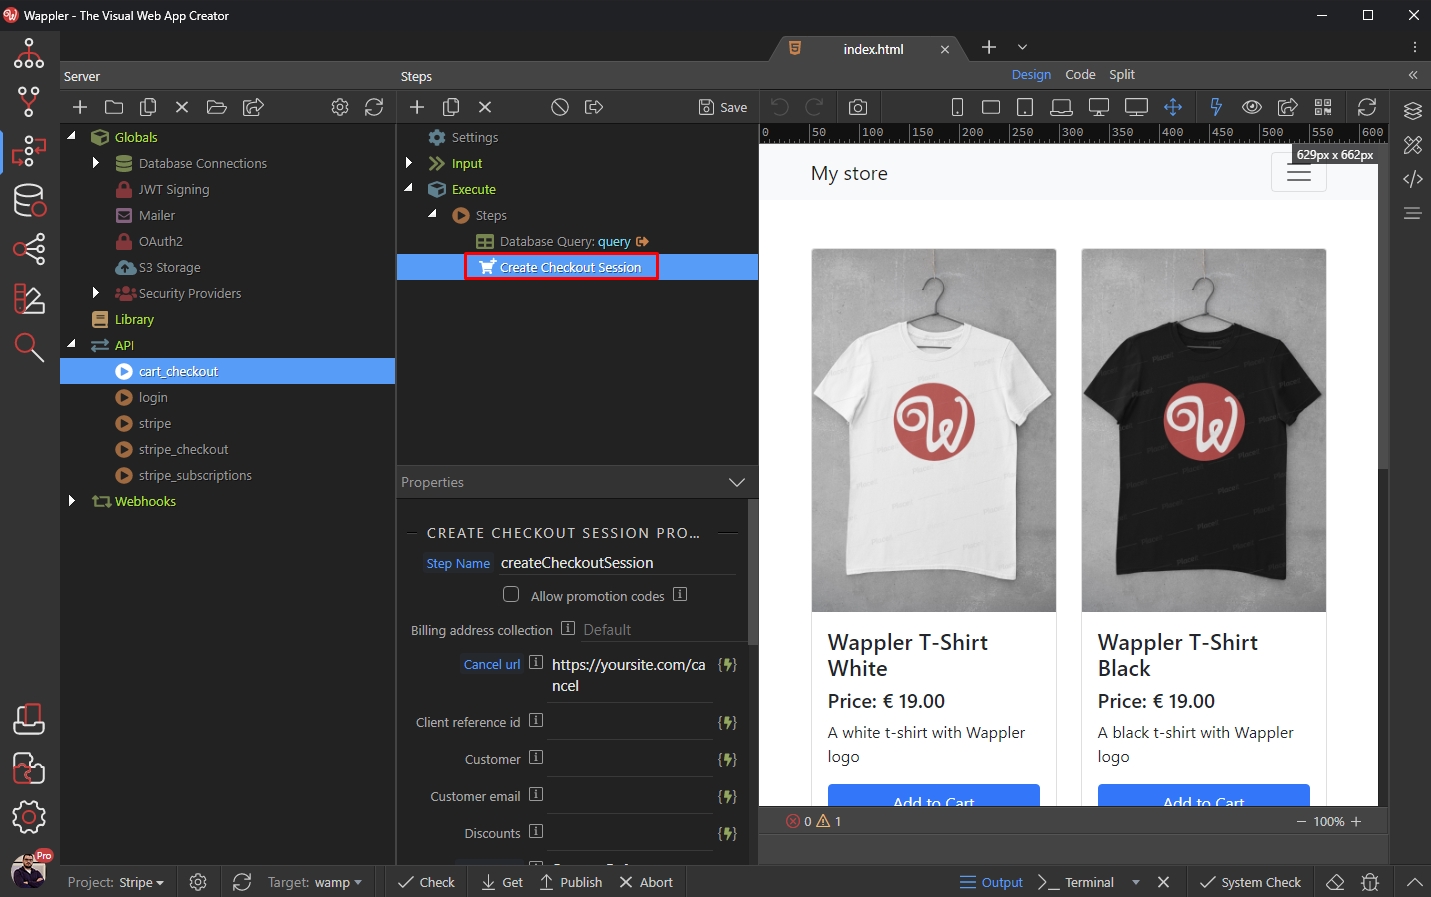
And add a Set Value step:
Section titled “And add a Set Value step:”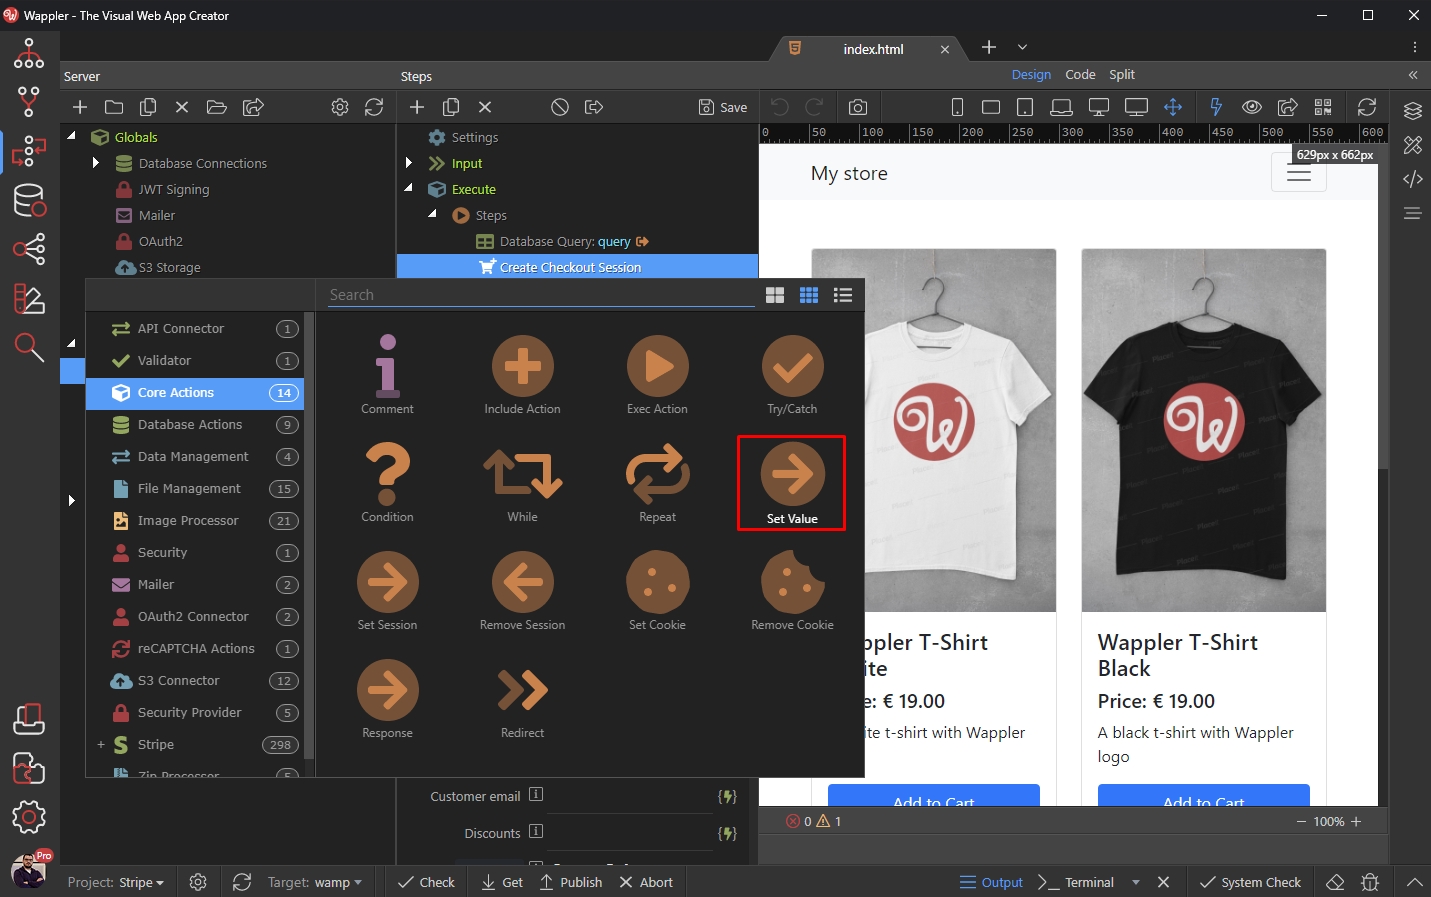
This step should be called id:
Section titled “This step should be called id:”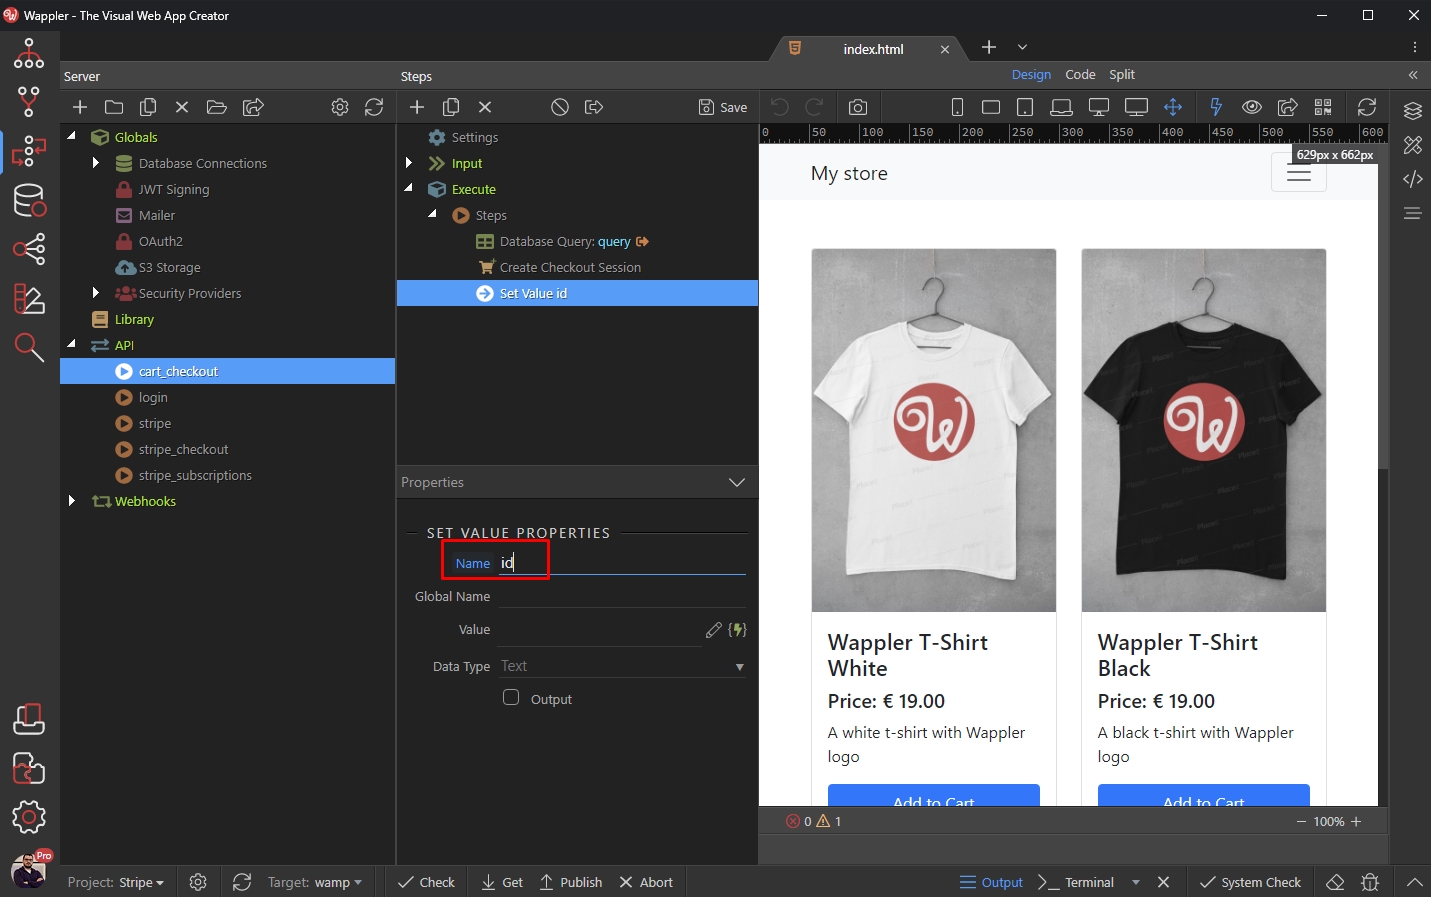
Select the dynamic data picker for its value:
Section titled “Select the dynamic data picker for its value:”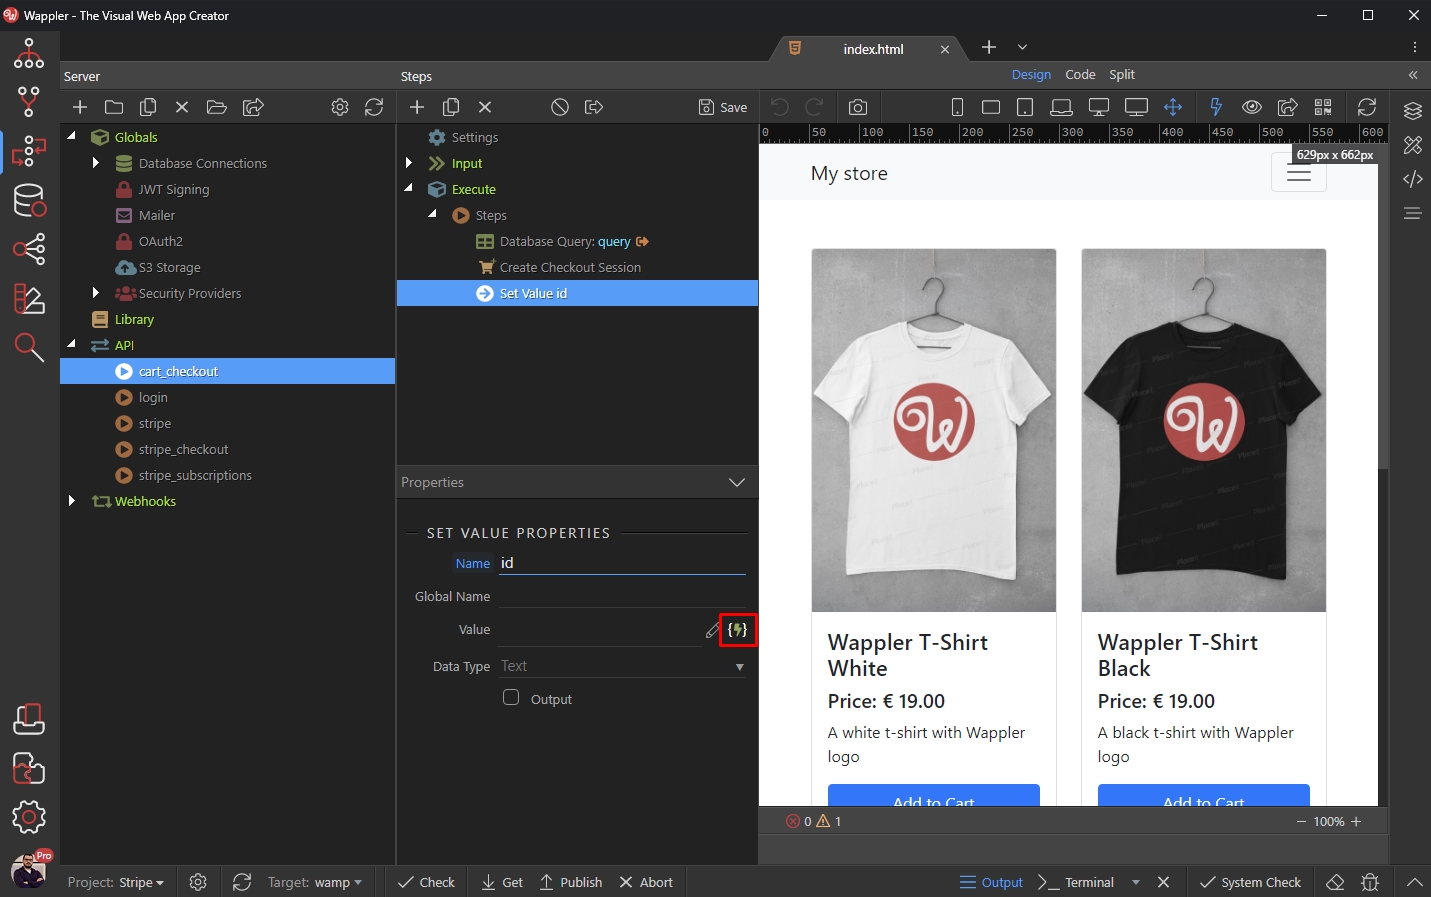
And select id under Checkout Session step:
Section titled “And select id under Checkout Session step:”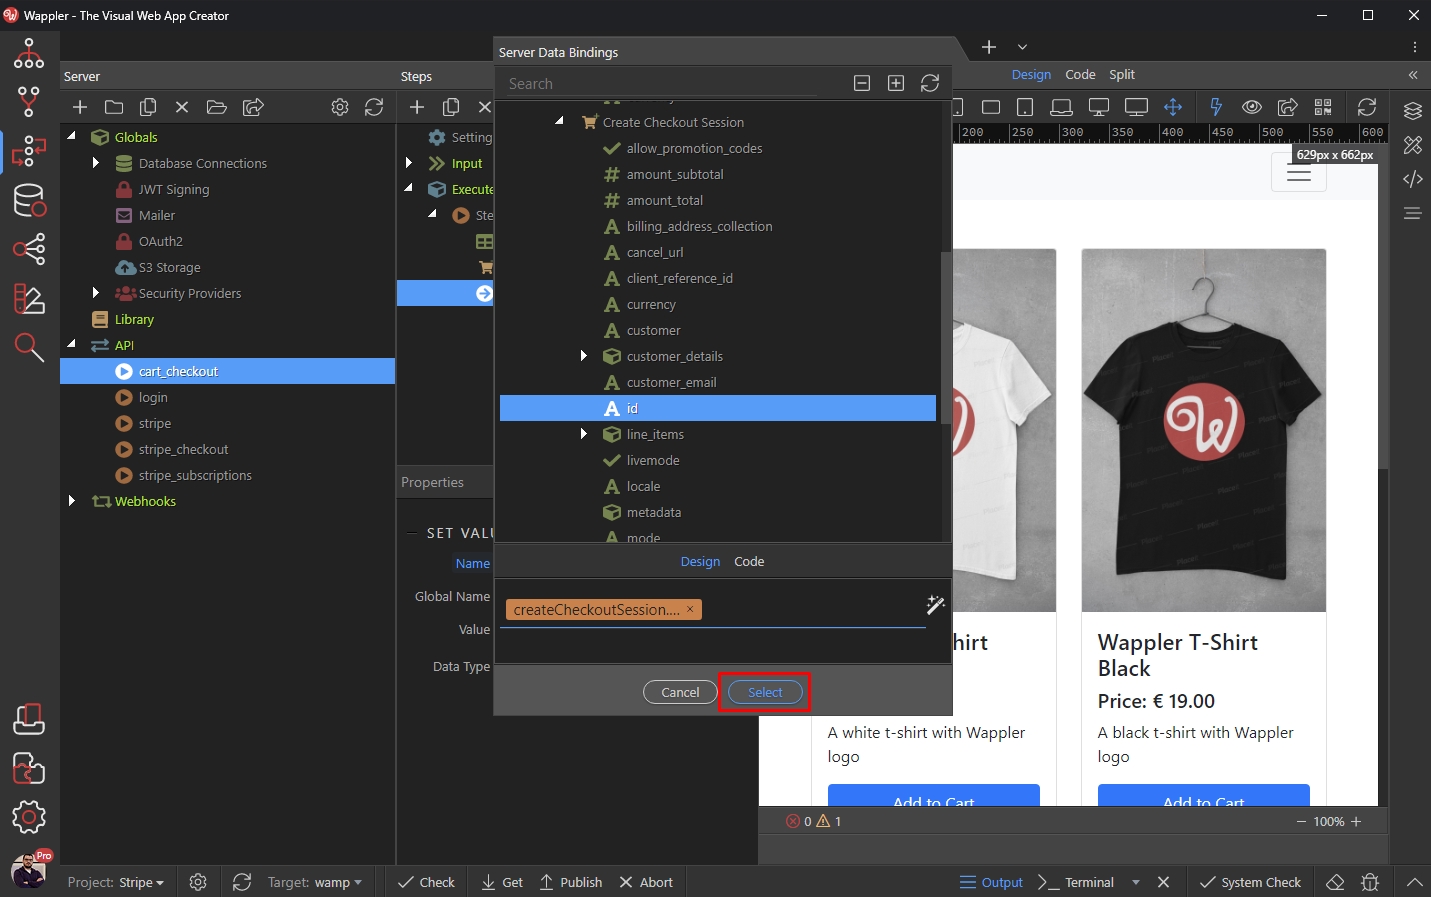
Make sure to enable output for the Set Value step:
Section titled “Make sure to enable output for the Set Value step:”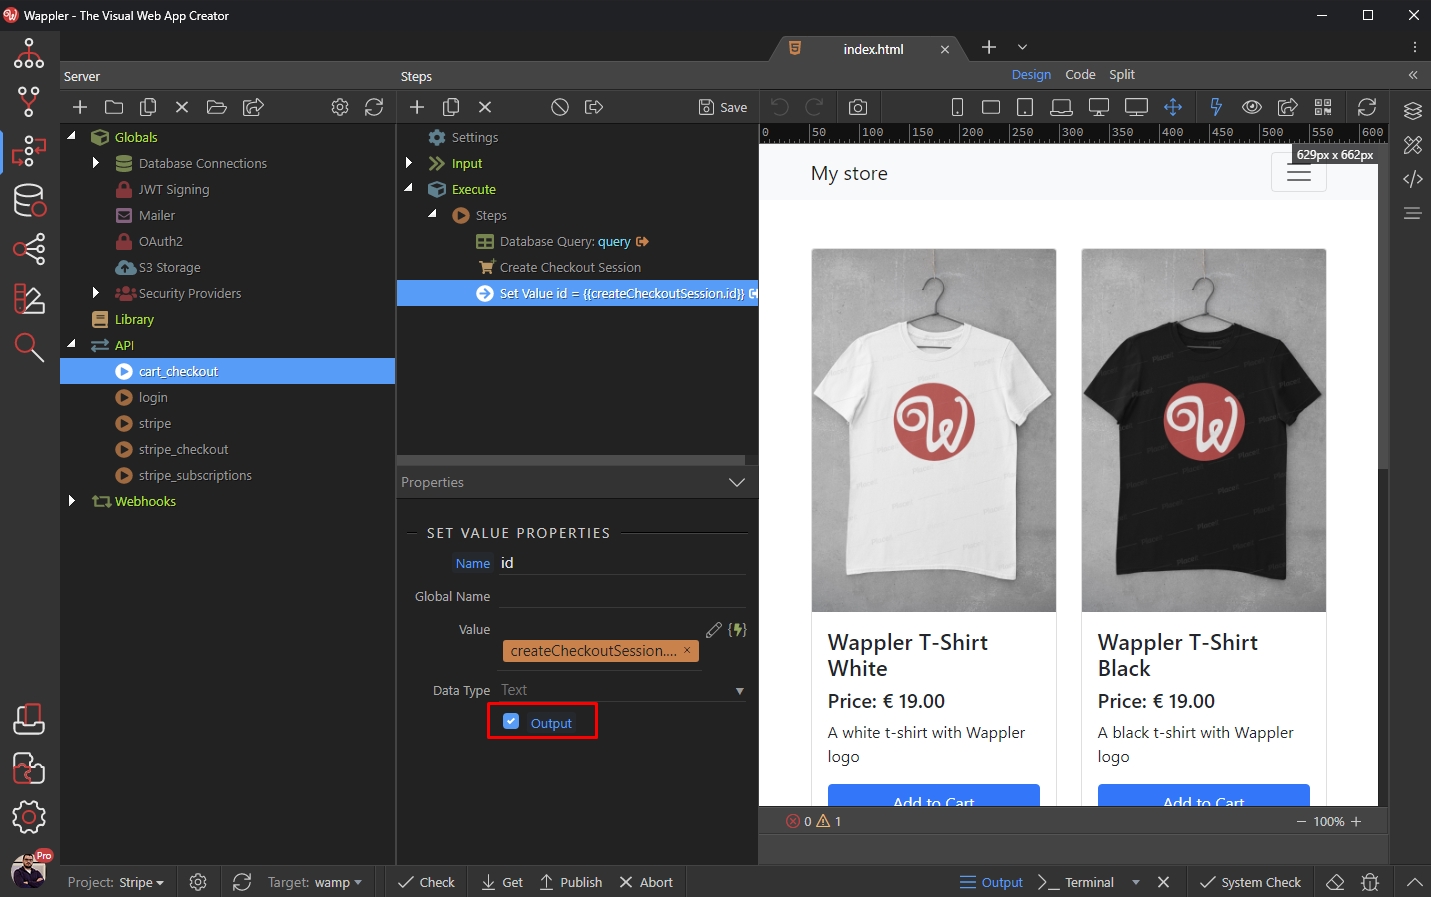
Save your API Action:
Section titled “Save your API Action:”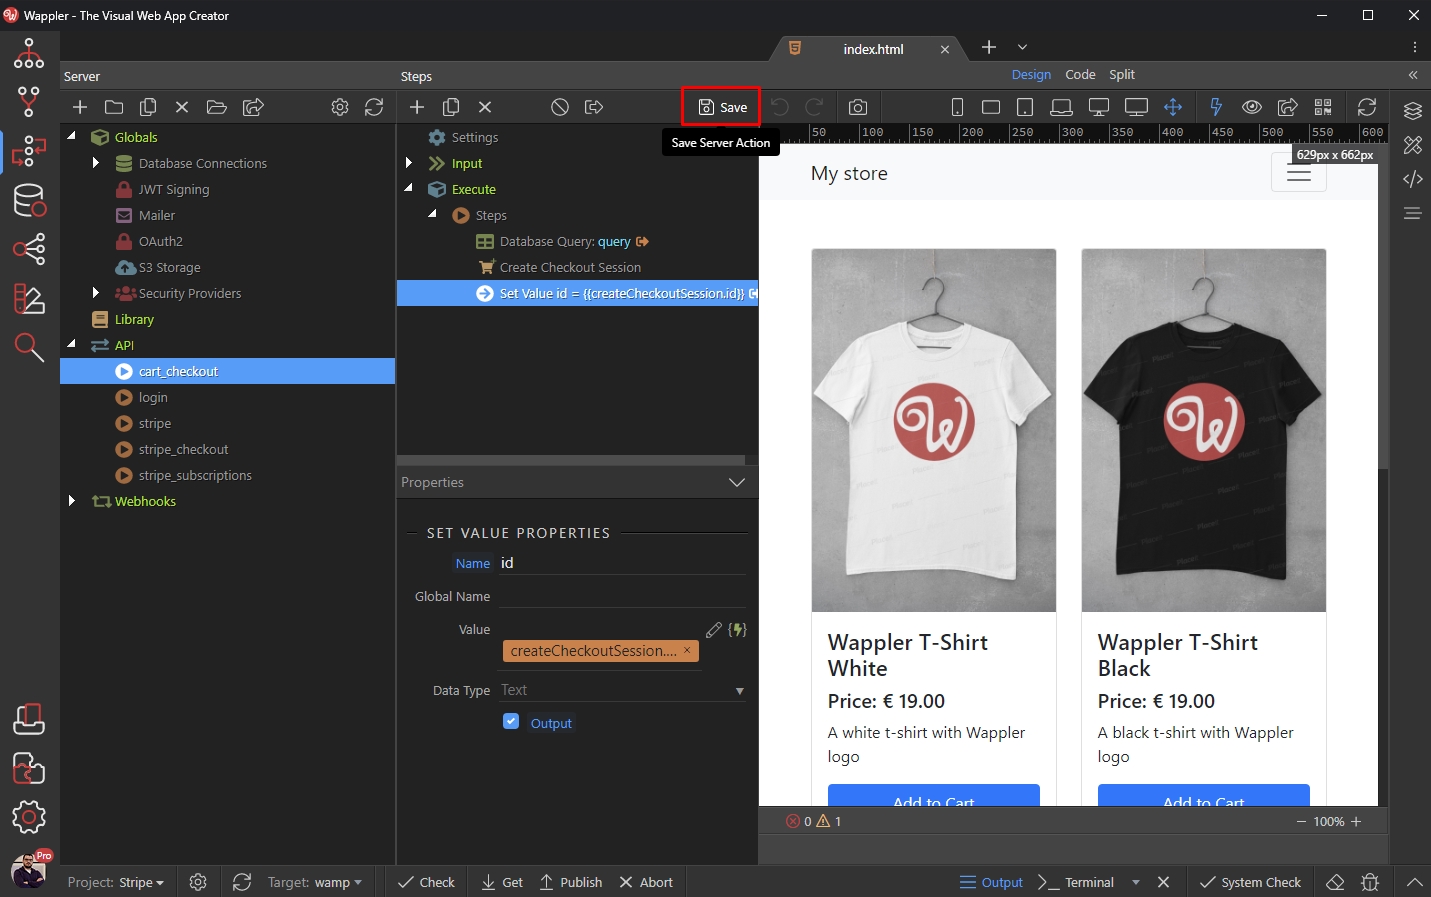
Checkout Button
Section titled “Checkout Button”Close the Server Connect panel and Open App Connect. Add new component:
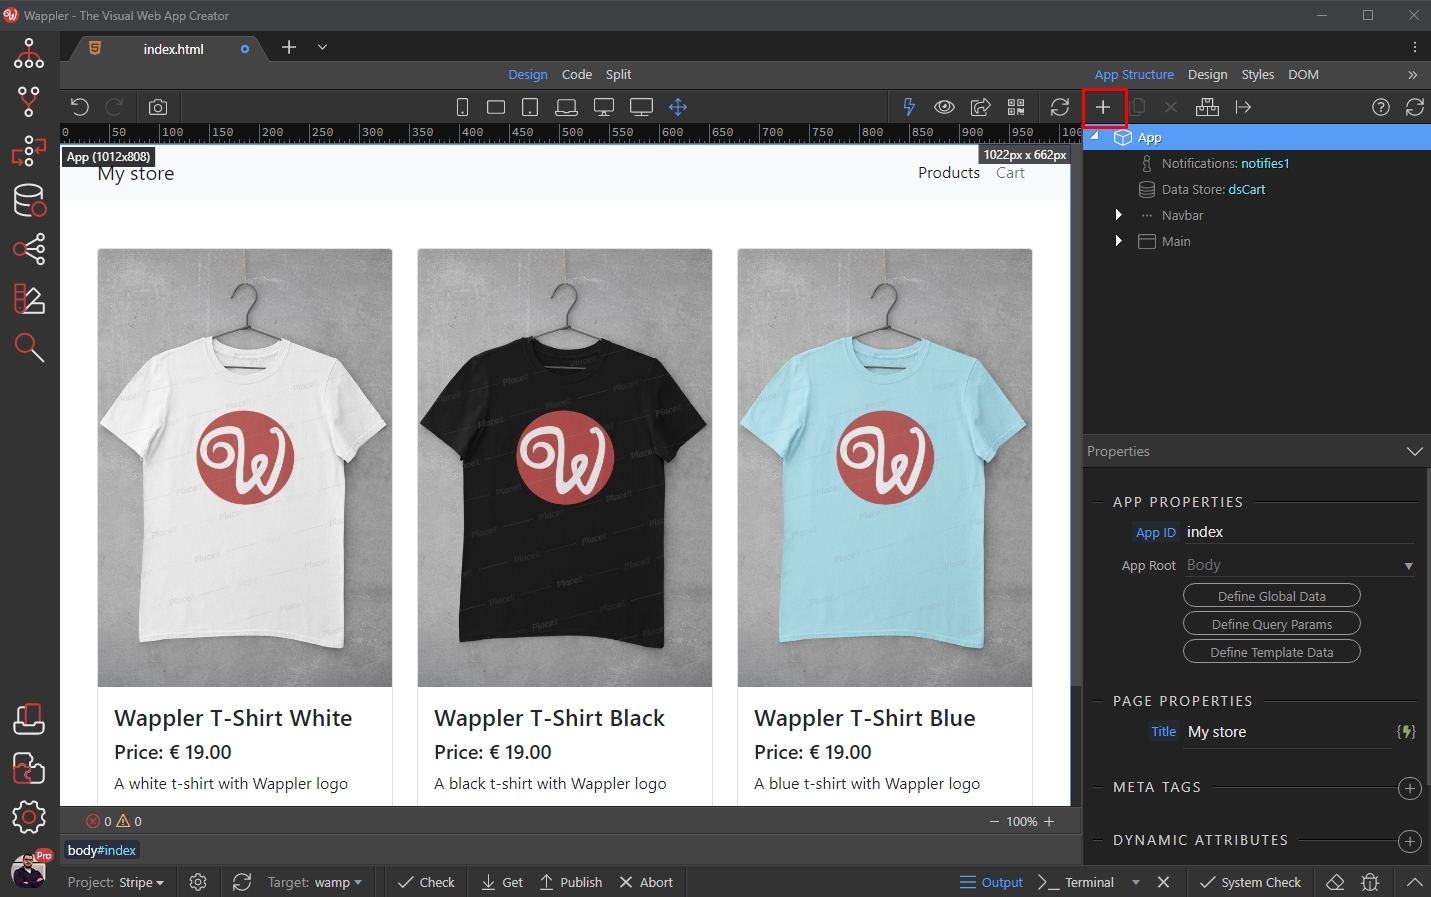
Open Stripe and select the Stripe Component:
Section titled “Open Stripe and select the Stripe Component:”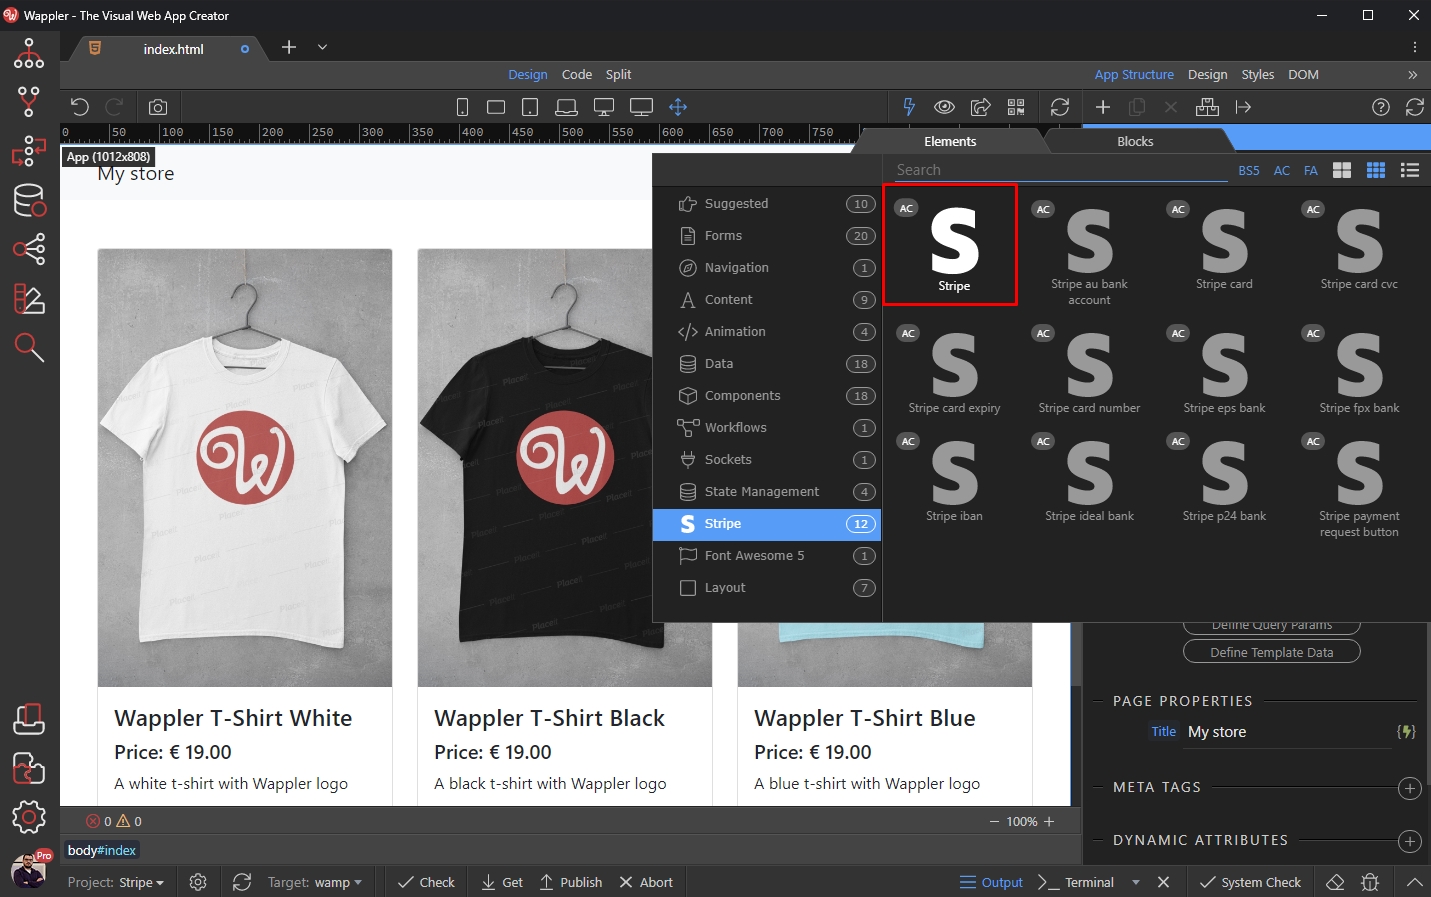
Enter the Stripe Publishable Key, which can be found in your Stripe Dashboard:
Section titled “Enter the Stripe Publishable Key, which can be found in your Stripe Dashboard:”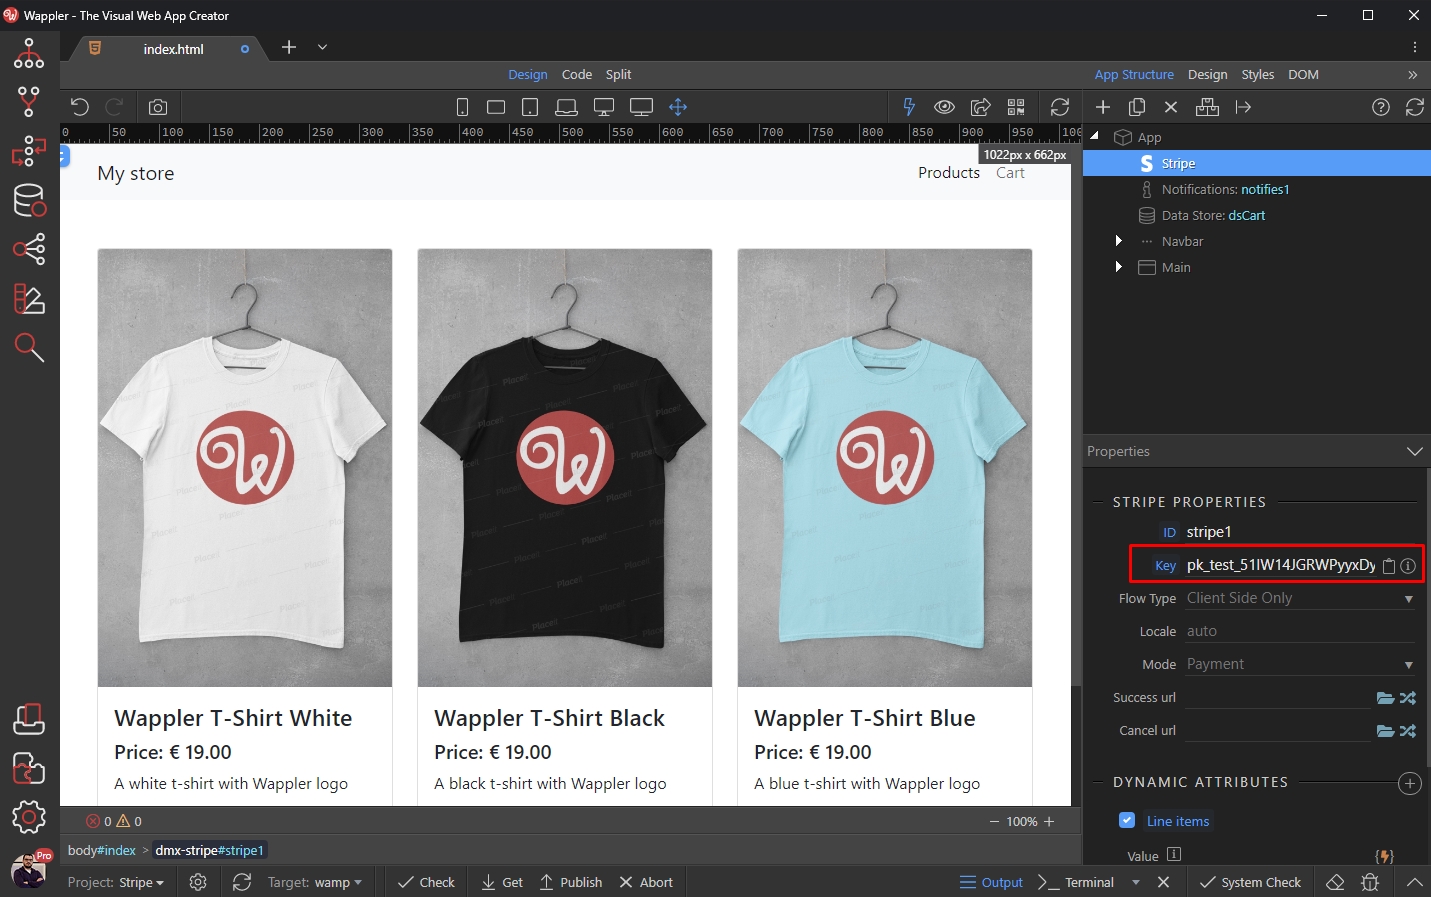
Set the Flow Type to Server Side:
Section titled “Set the Flow Type to Server Side:”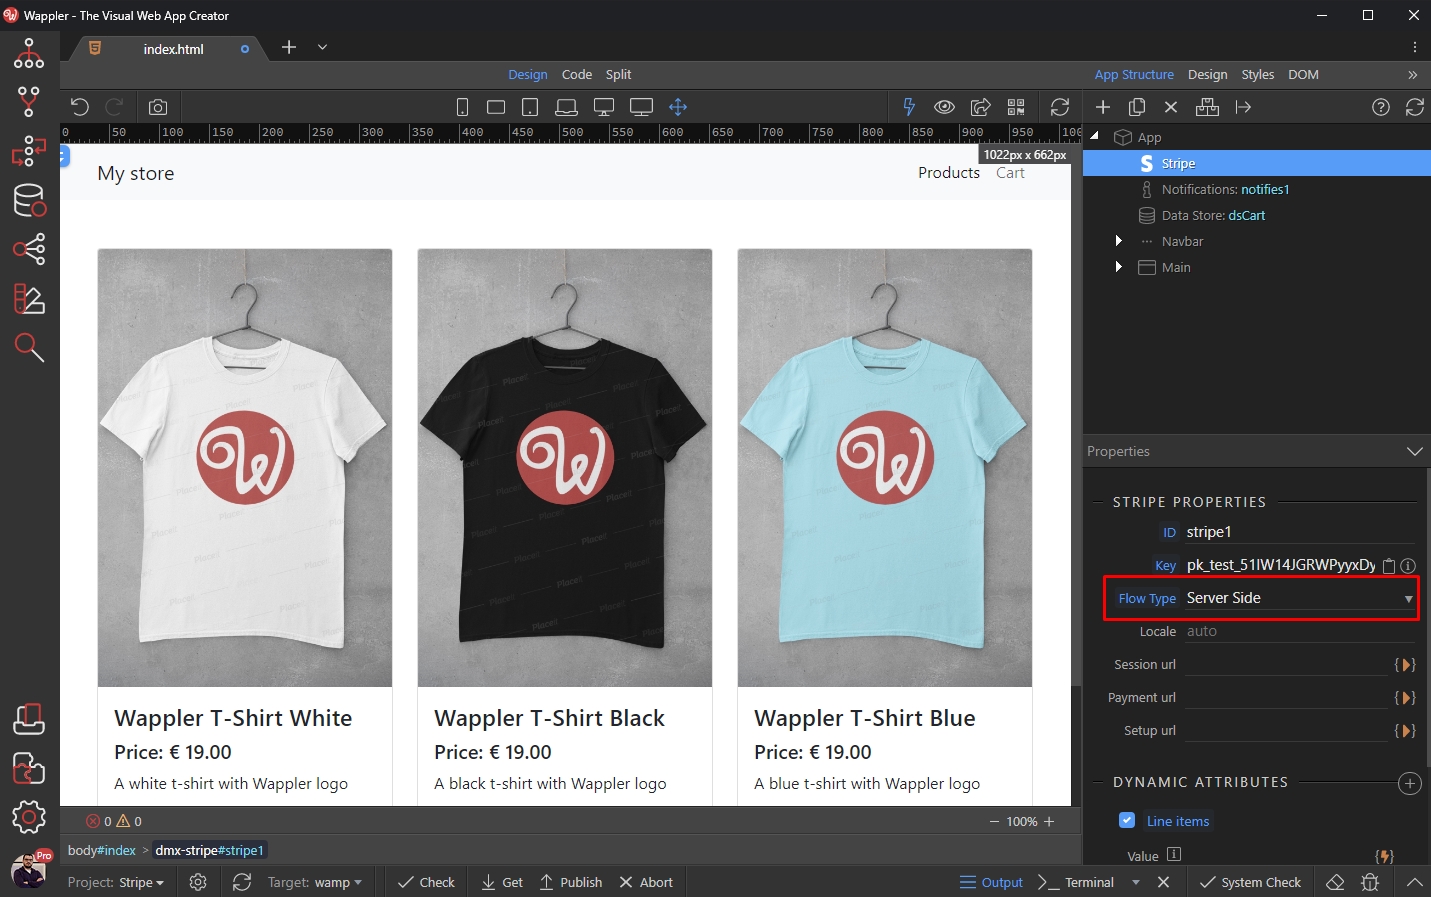
Then select your Session URL:
Section titled “Then select your Session URL:”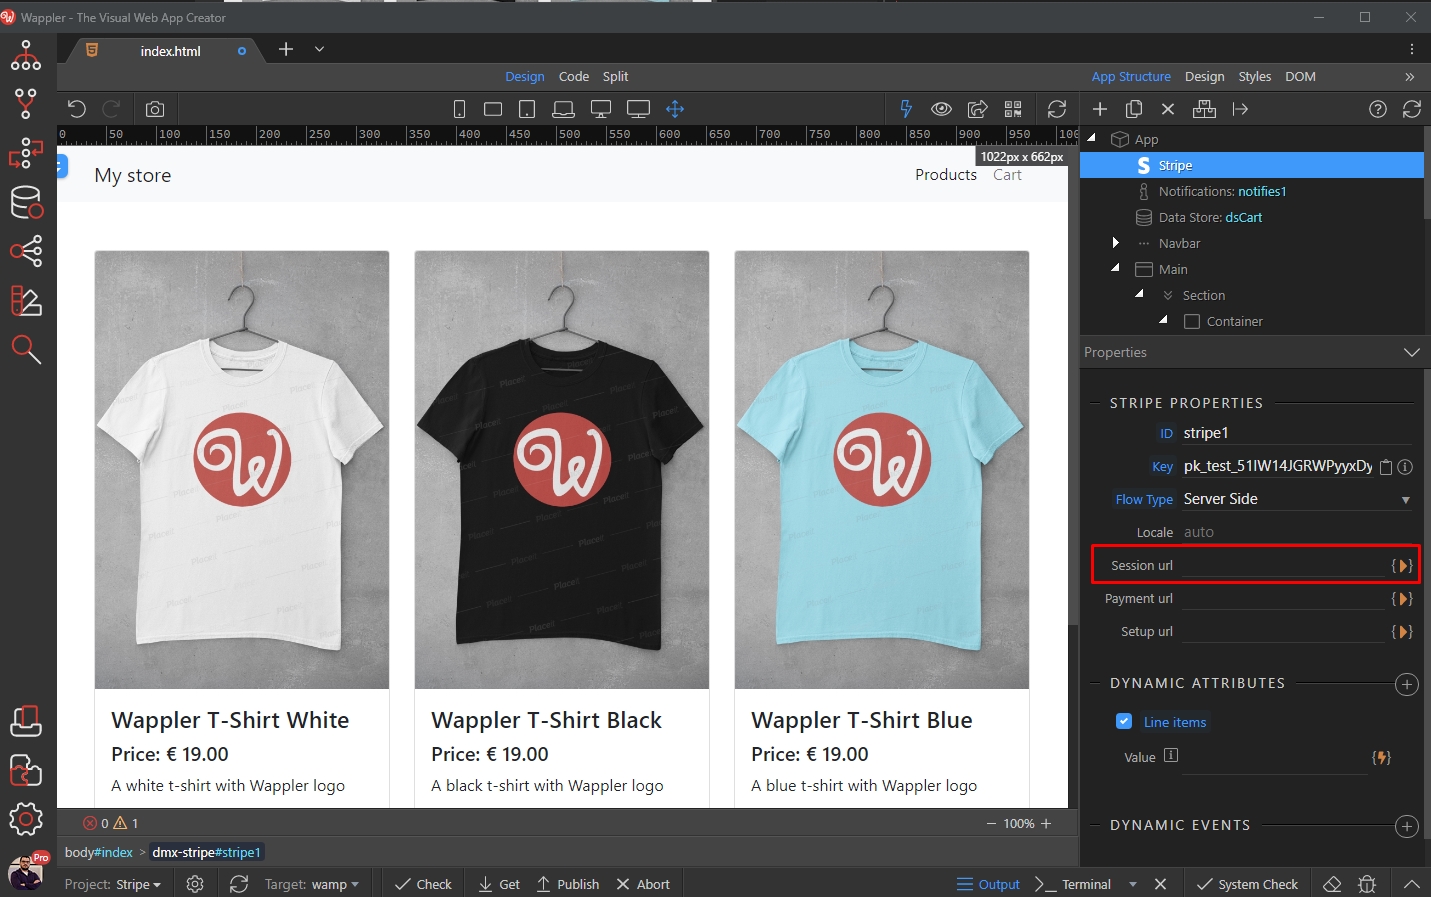
Select the API Action which we created in Server Connect panel:
Section titled “Select the API Action which we created in Server Connect panel:”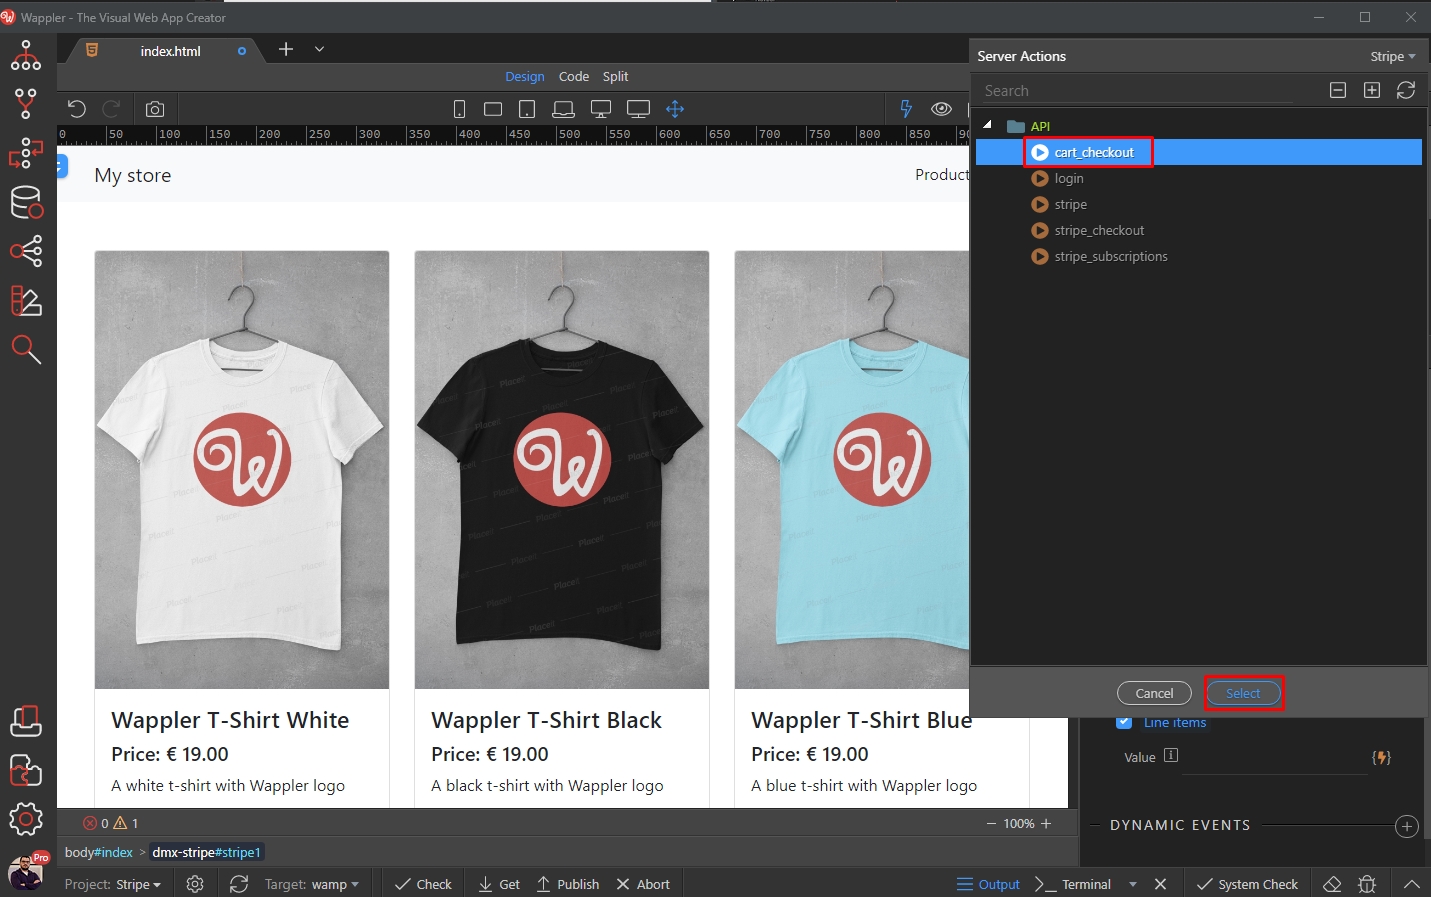
And then select a source for the Line Items:
Section titled “And then select a source for the Line Items:”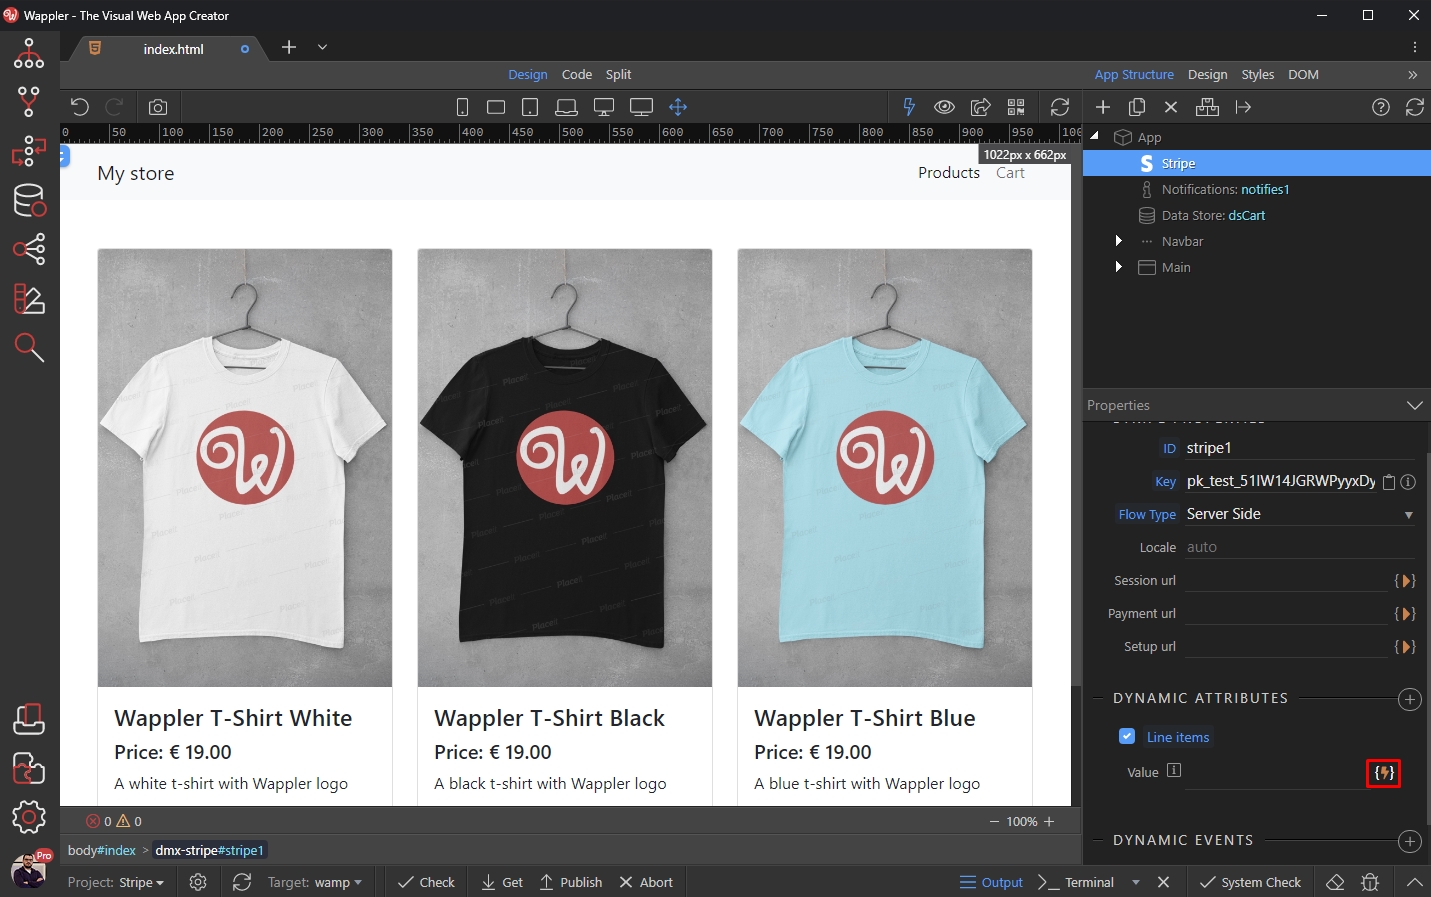
Select the data element under the Data Store component:
Section titled “Select the data element under the Data Store component:”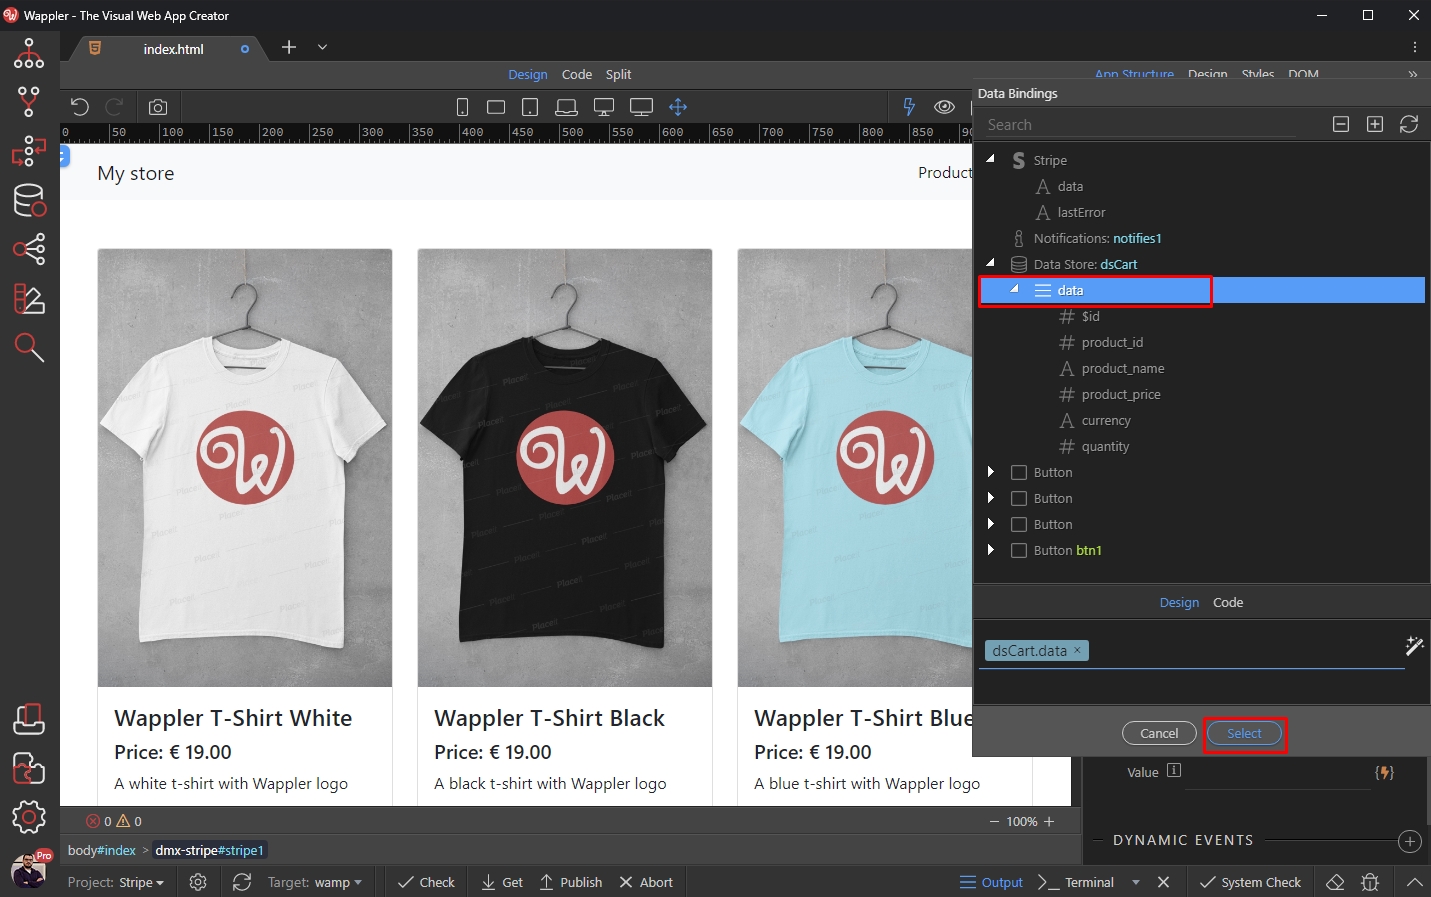
Finally select the checkout button and add new dynamic event:
Section titled “Finally select the checkout button and add new dynamic event:”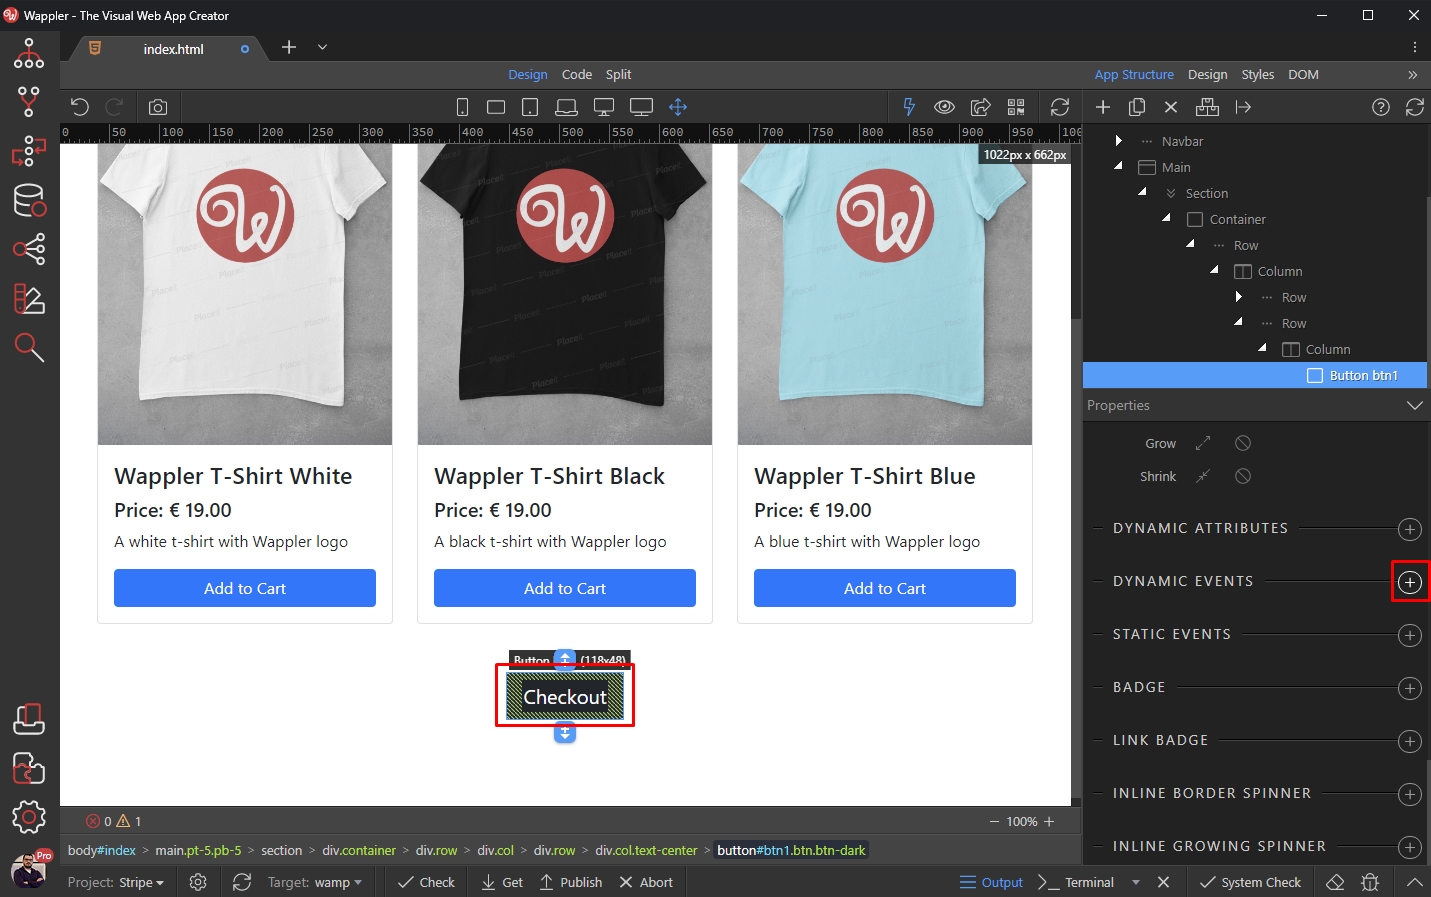
Select Mouse > Click:
Section titled “Select Mouse > Click:”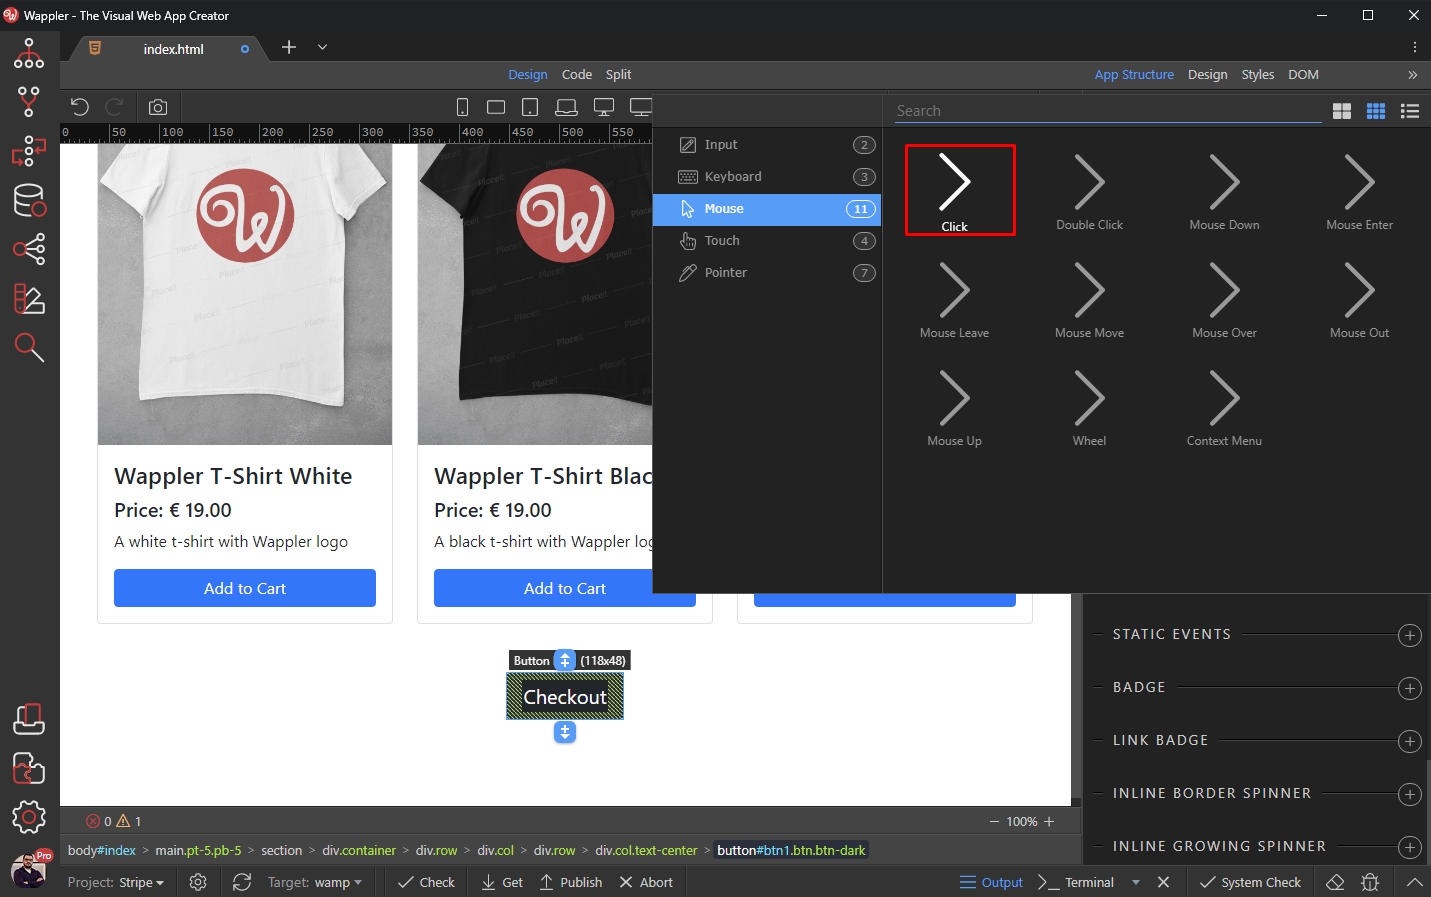
And pick a dynamic action:
Section titled “And pick a dynamic action:”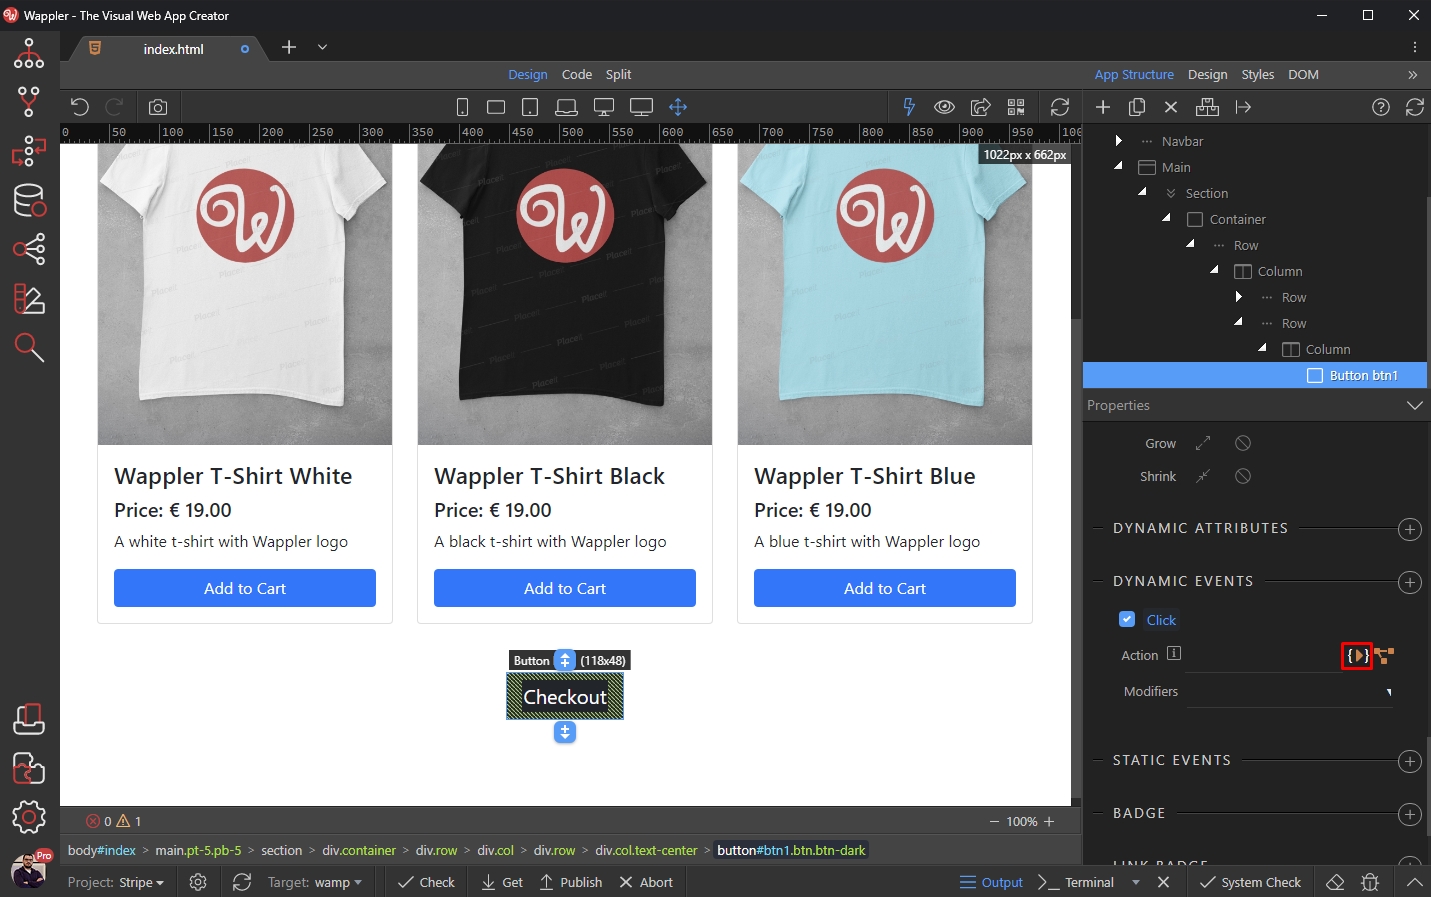
Select and Add Checkout under the Stripe Component and click the Select button:
Section titled “Select and Add Checkout under the Stripe Component and click the Select button:”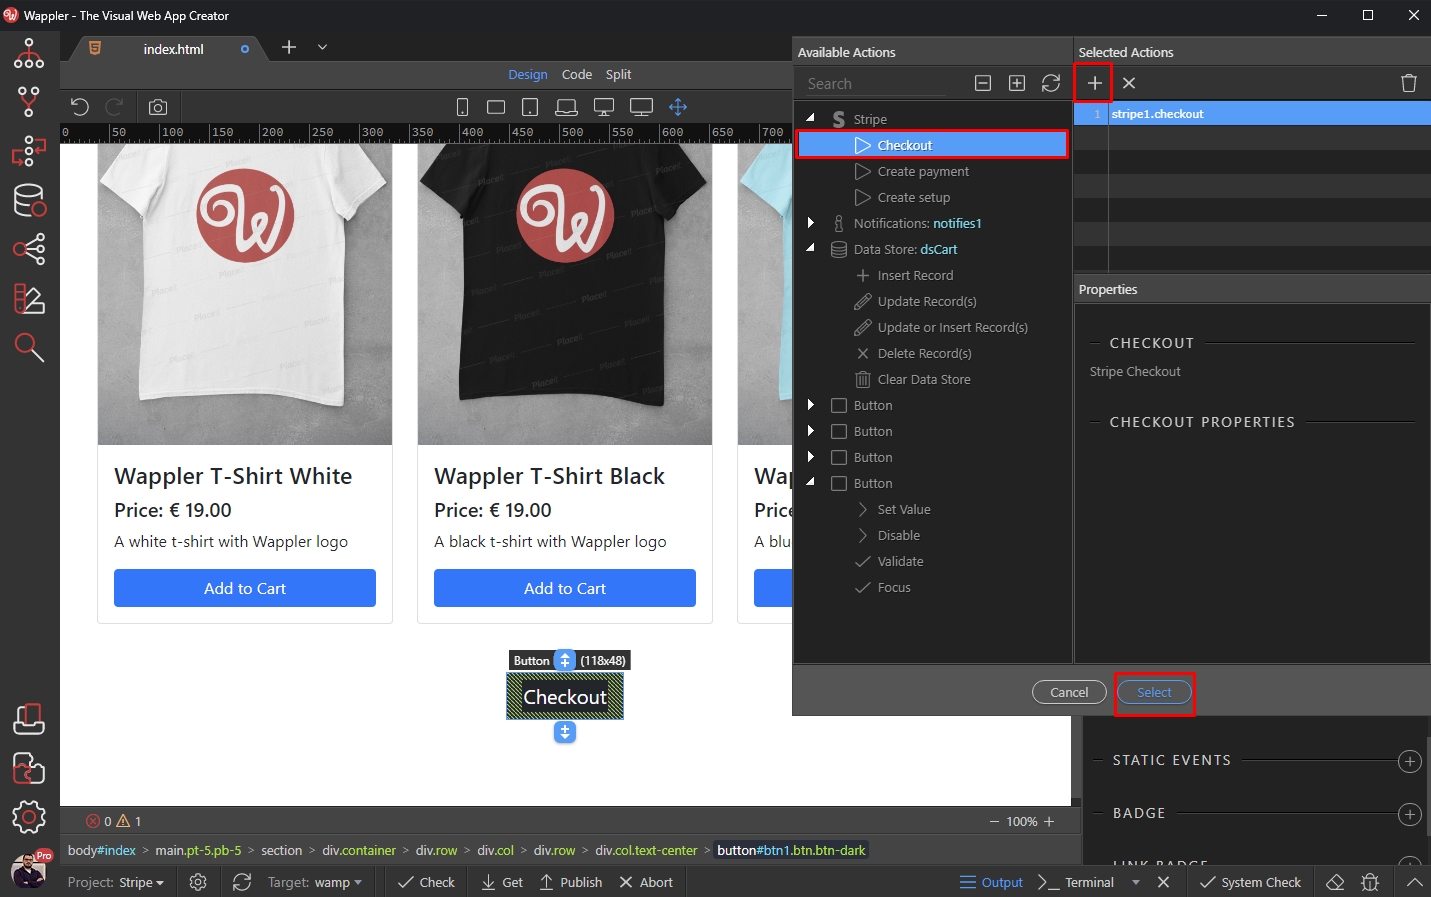
Step 52
Section titled “Step 52”Save your page and you are done.
The product ids stored in the data store will be sent to the server side, filter your database query and send the data to the Stripe checkout.