
Building a Real Time Chat Application
Intro Thanks to the WebSockets and NodeJS integration in Wappler you can build real-time apps. One example of what you can build is a real-time chat app. Sockets provide a real-time bi-directional com
Thanks to the WebSockets and NodeJS integration in Wappler you can build real-time apps. One example of what you can build is a real-time chat app.
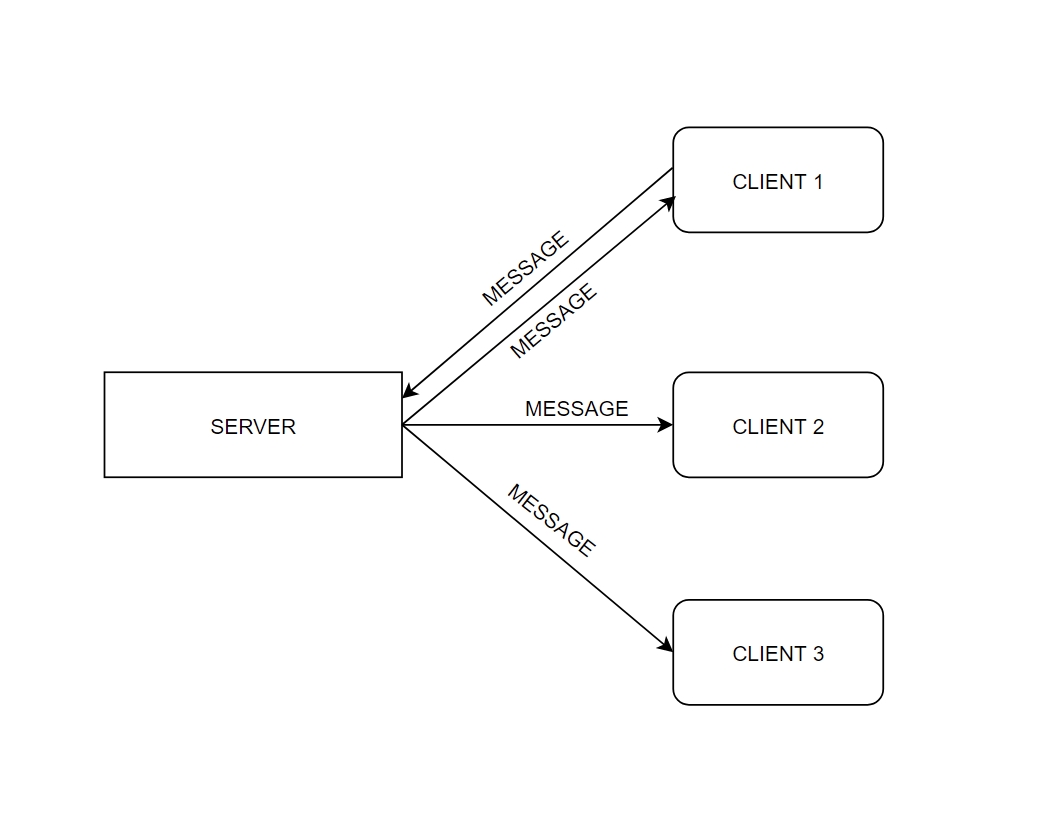
Sockets provide a real-time bi-directional communication channel between a client and a server. This means that the server can push messages to clients. Whenever an event occurs, the idea is that the server will get it and push it to the concerned connected clients.
Step 3
Section titled “Step 3”In this example we will show you a simple chat app, using Data Store to store the chat history locally in your browser local storage.
Server Side
Section titled “Server Side”First we need to setup the server-side part. Open the Server Connect panel and right click Sockets:

Add Socket Action:
Section titled “Add Socket Action:”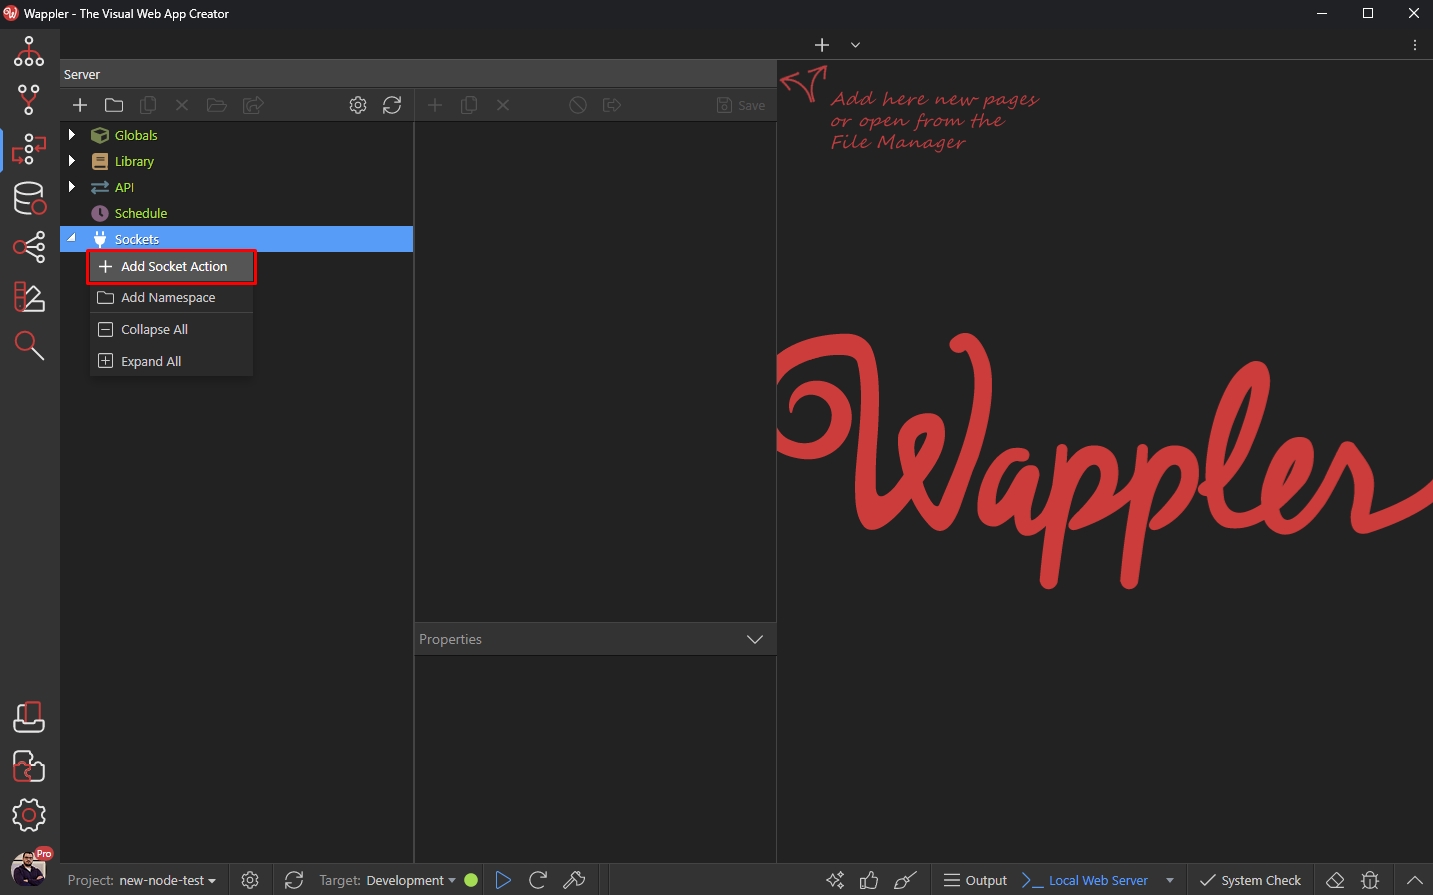
This socket action will be used as our chat message template, so we call it chat_message:
Section titled “This socket action will be used as our chat message template, so we call it chat_message:”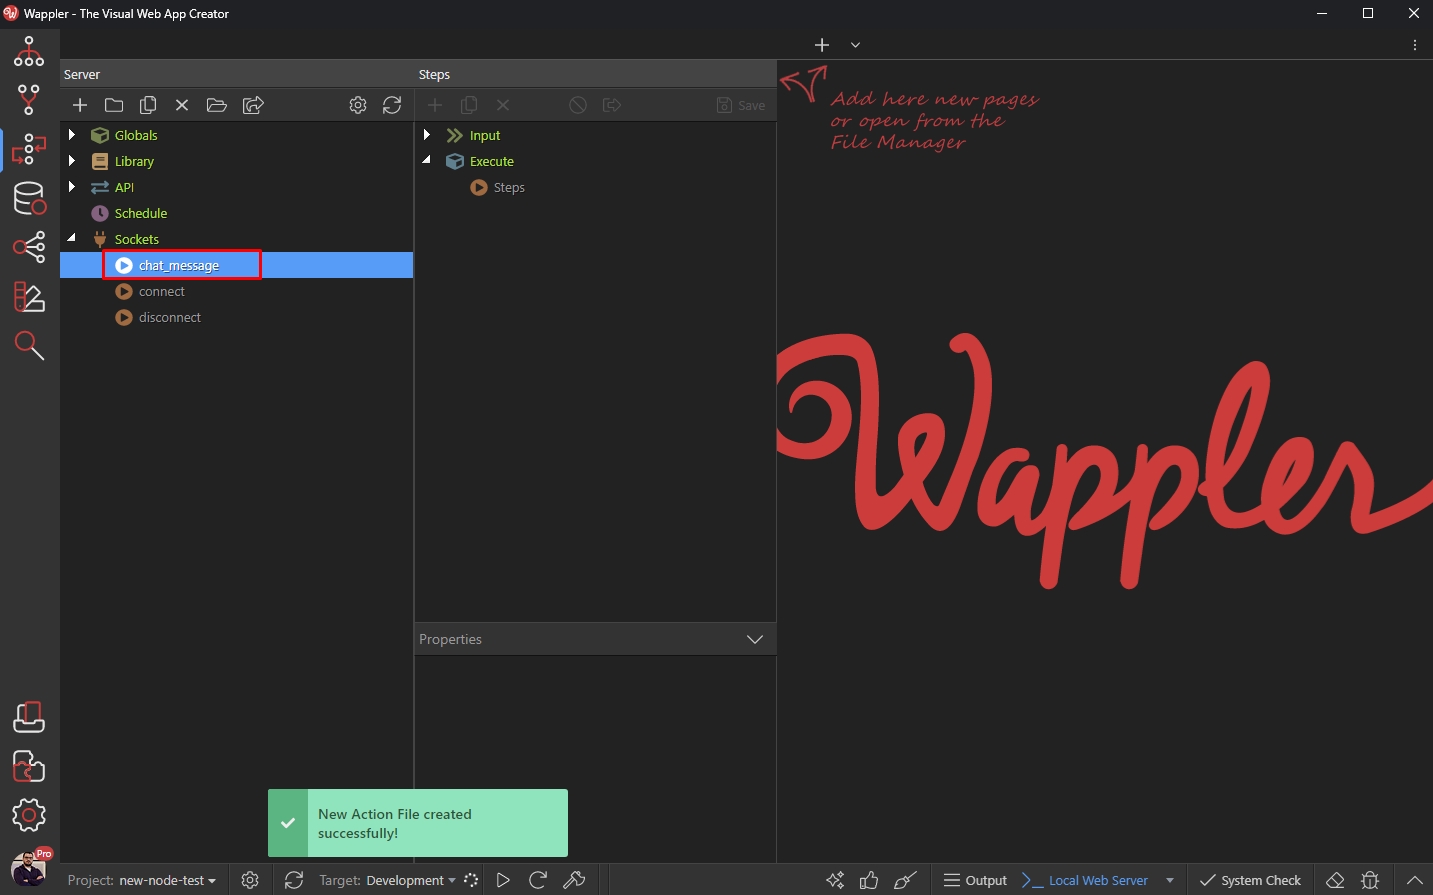
Open Input and right click $_PARAM:
Section titled “Open Input and right click $_PARAM:”
Step 8
Section titled “Step 8”Add two variables - username and message. These are the input variables for the message which will be emitted:
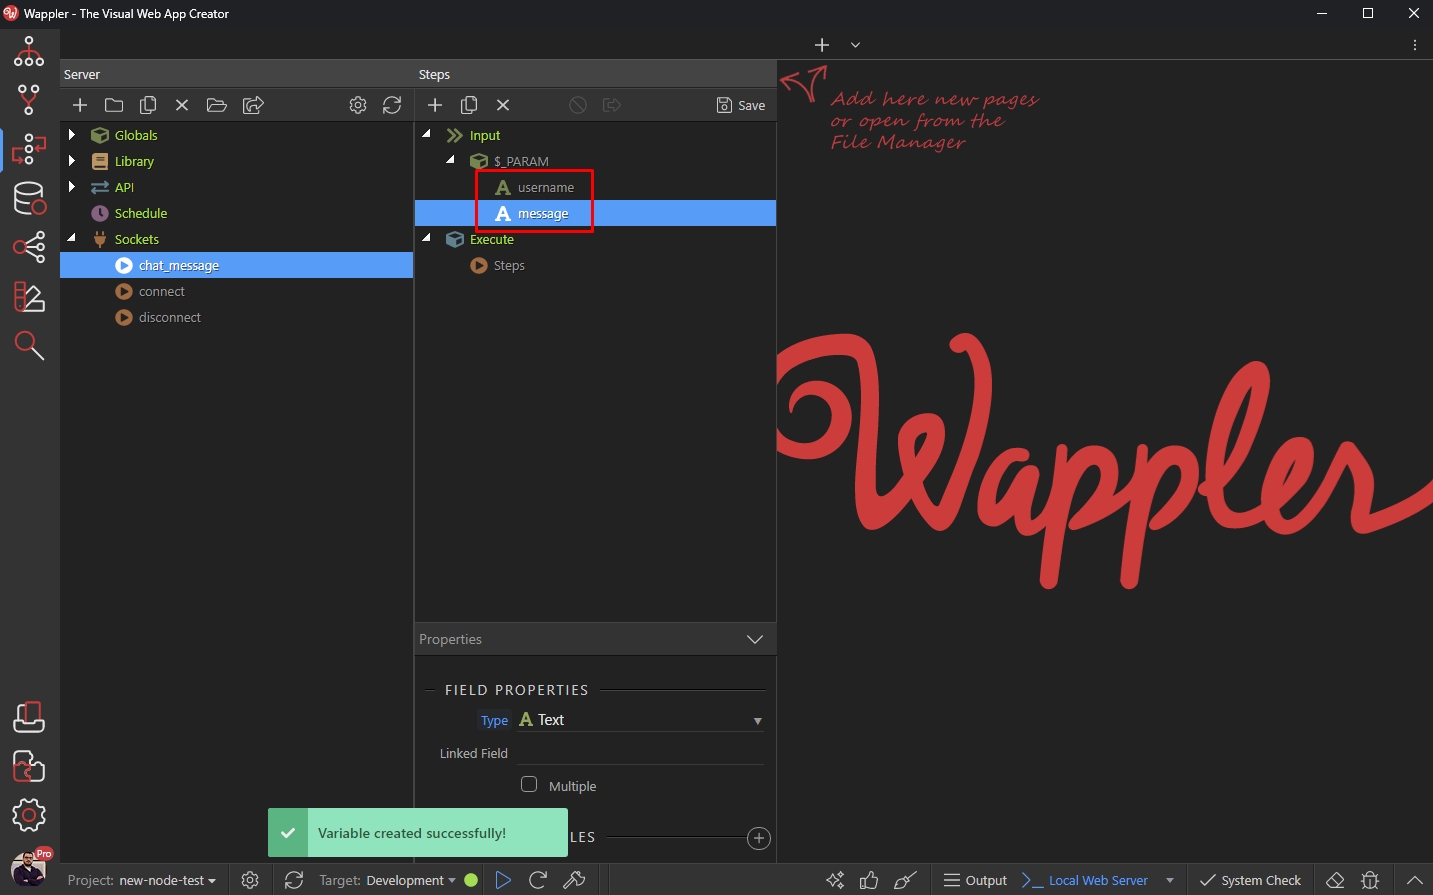
Then right click Steps:
Section titled “Then right click Steps:”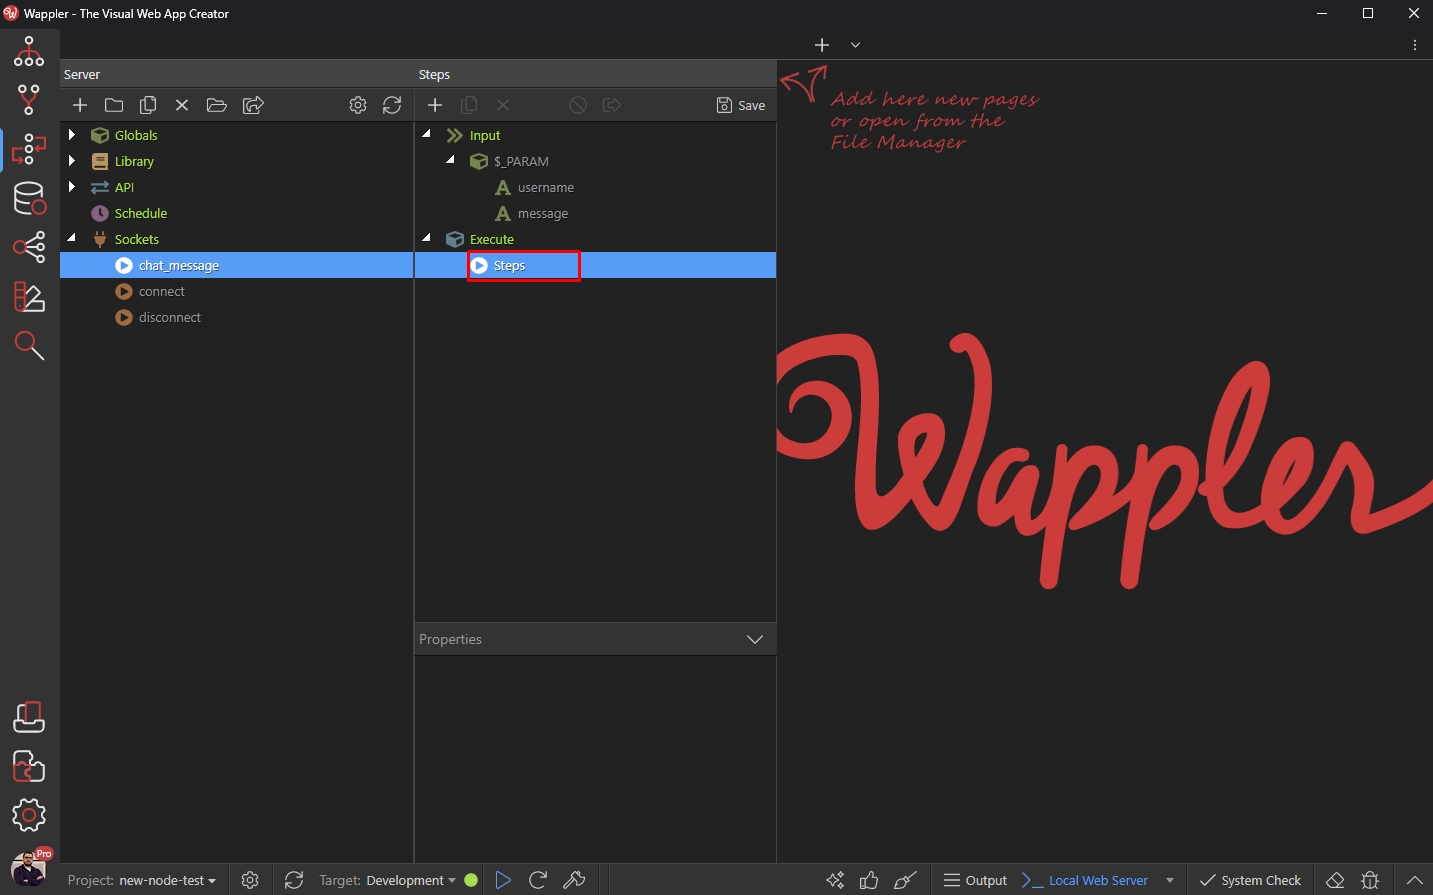
Open Sockets and select Emit:
Section titled “Open Sockets and select Emit:”
Open the Type dropdown and select the chat_message socket action we just created:
Section titled “Open the Type dropdown and select the chat_message socket action we just created:”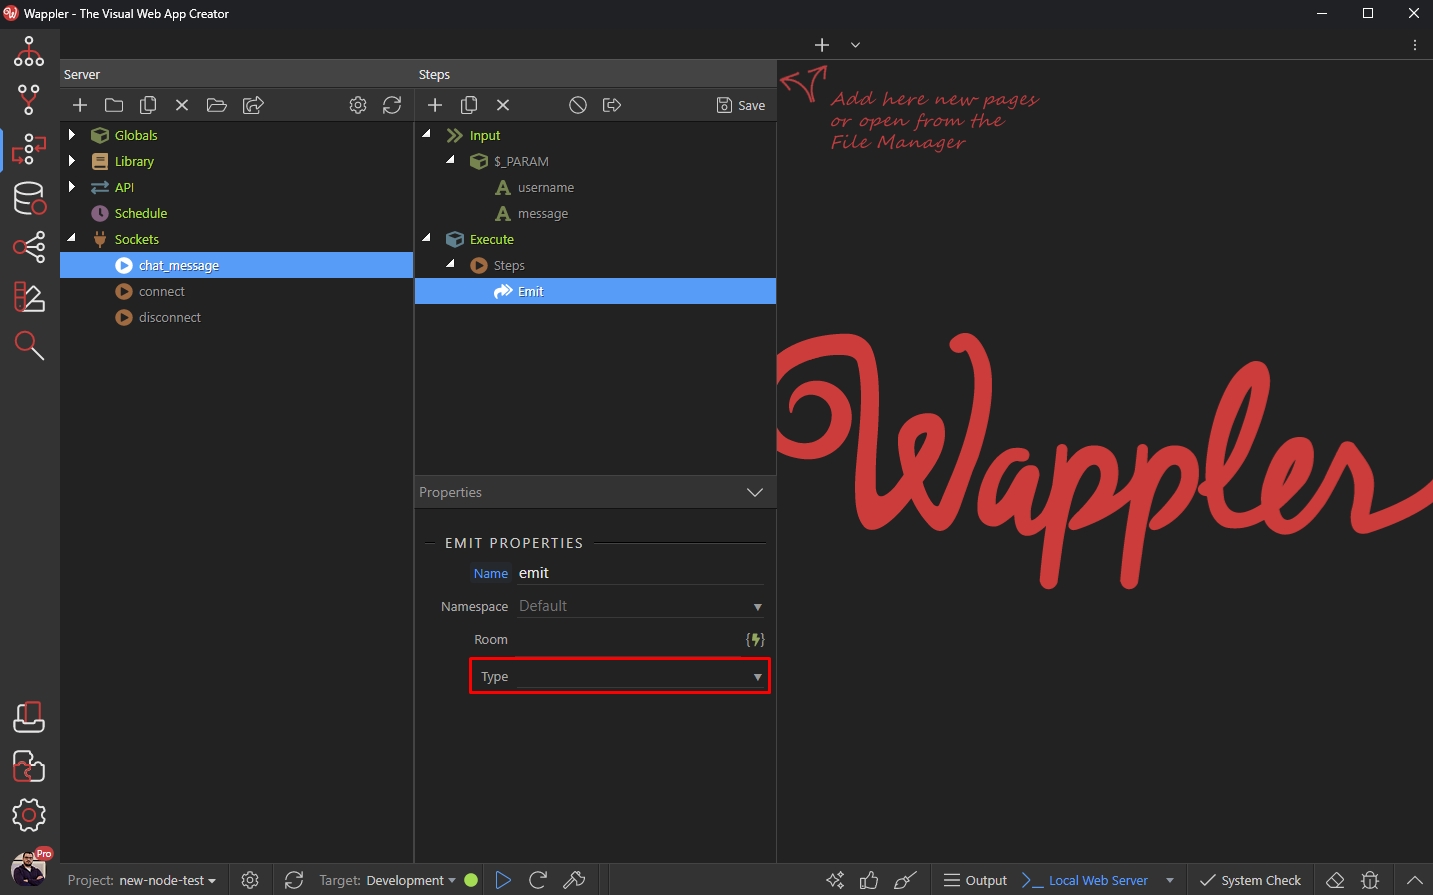
Click the dynamic data picker for the username input parameter:
Section titled “Click the dynamic data picker for the username input parameter:”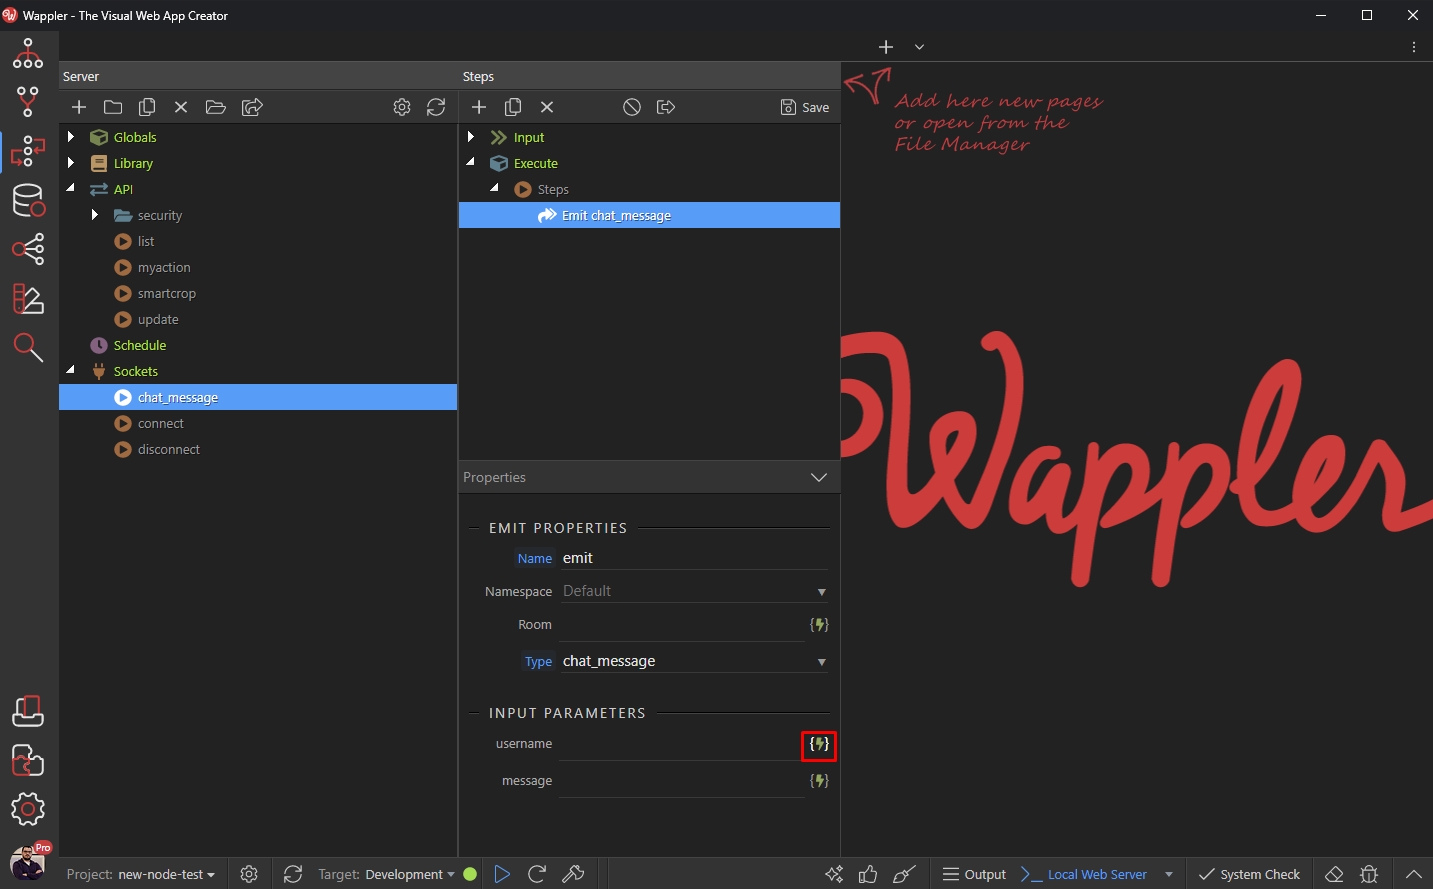
And select username under $_PARAM:
Section titled “And select username under $_PARAM:”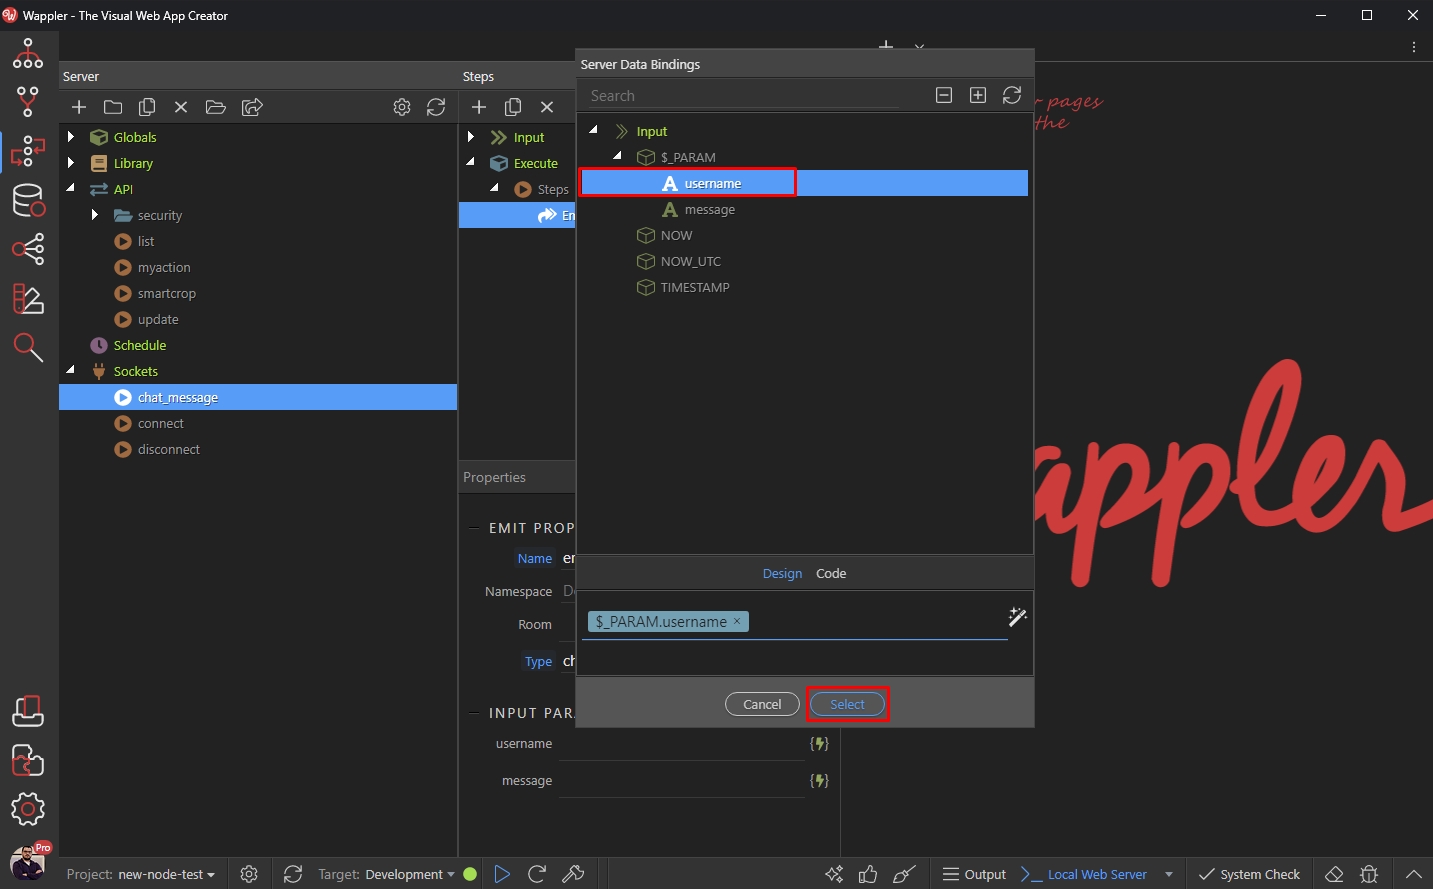
Do the same for the message input parameter:
Section titled “Do the same for the message input parameter:”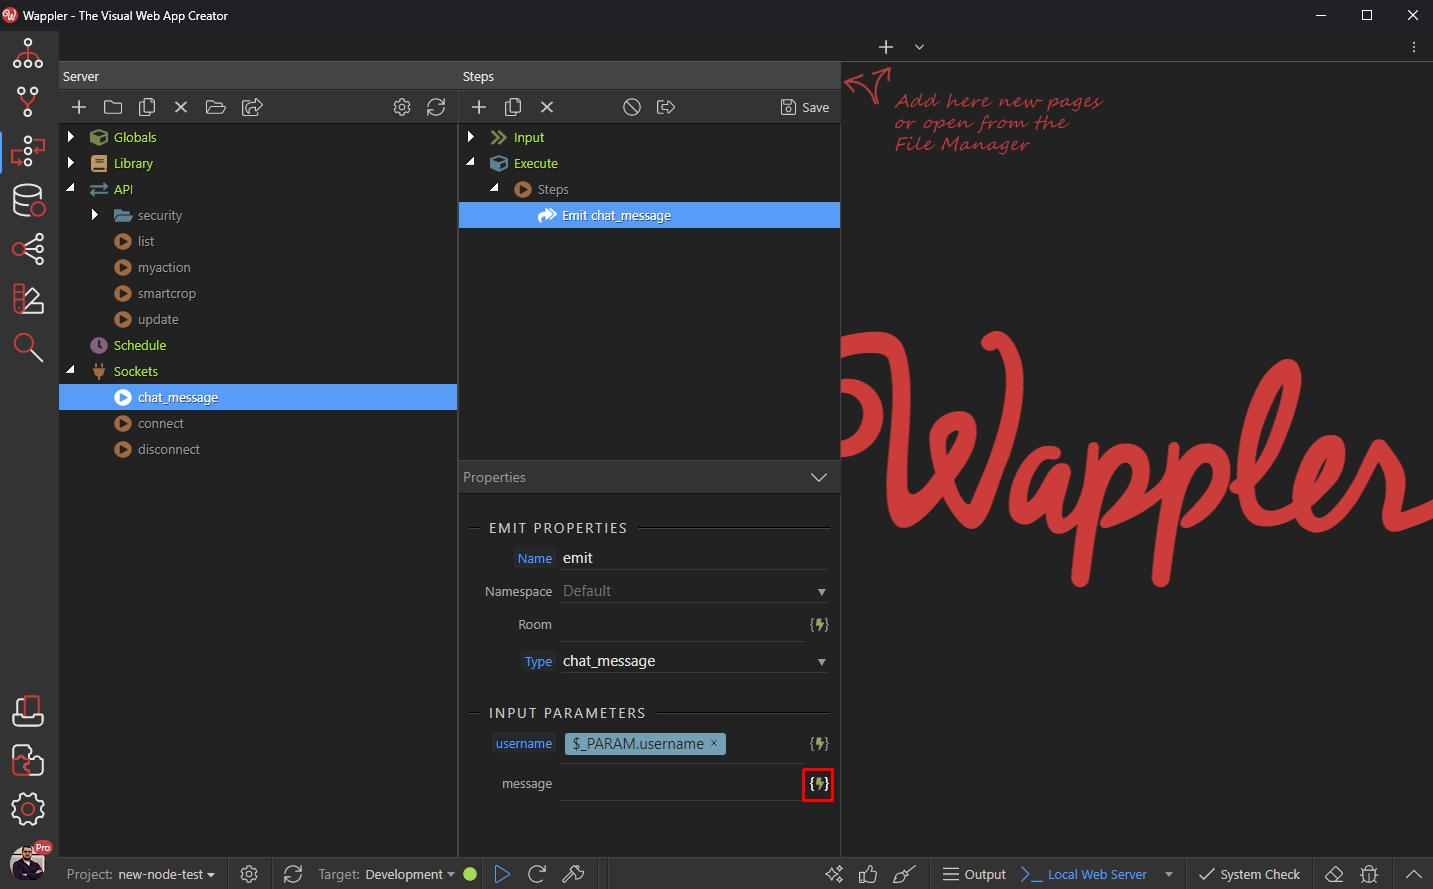
Select message under $_PARAM:
Section titled “Select message under $_PARAM:”
Save your Socket Action and you are done with the server side part:
Section titled “Save your Socket Action and you are done with the server side part:”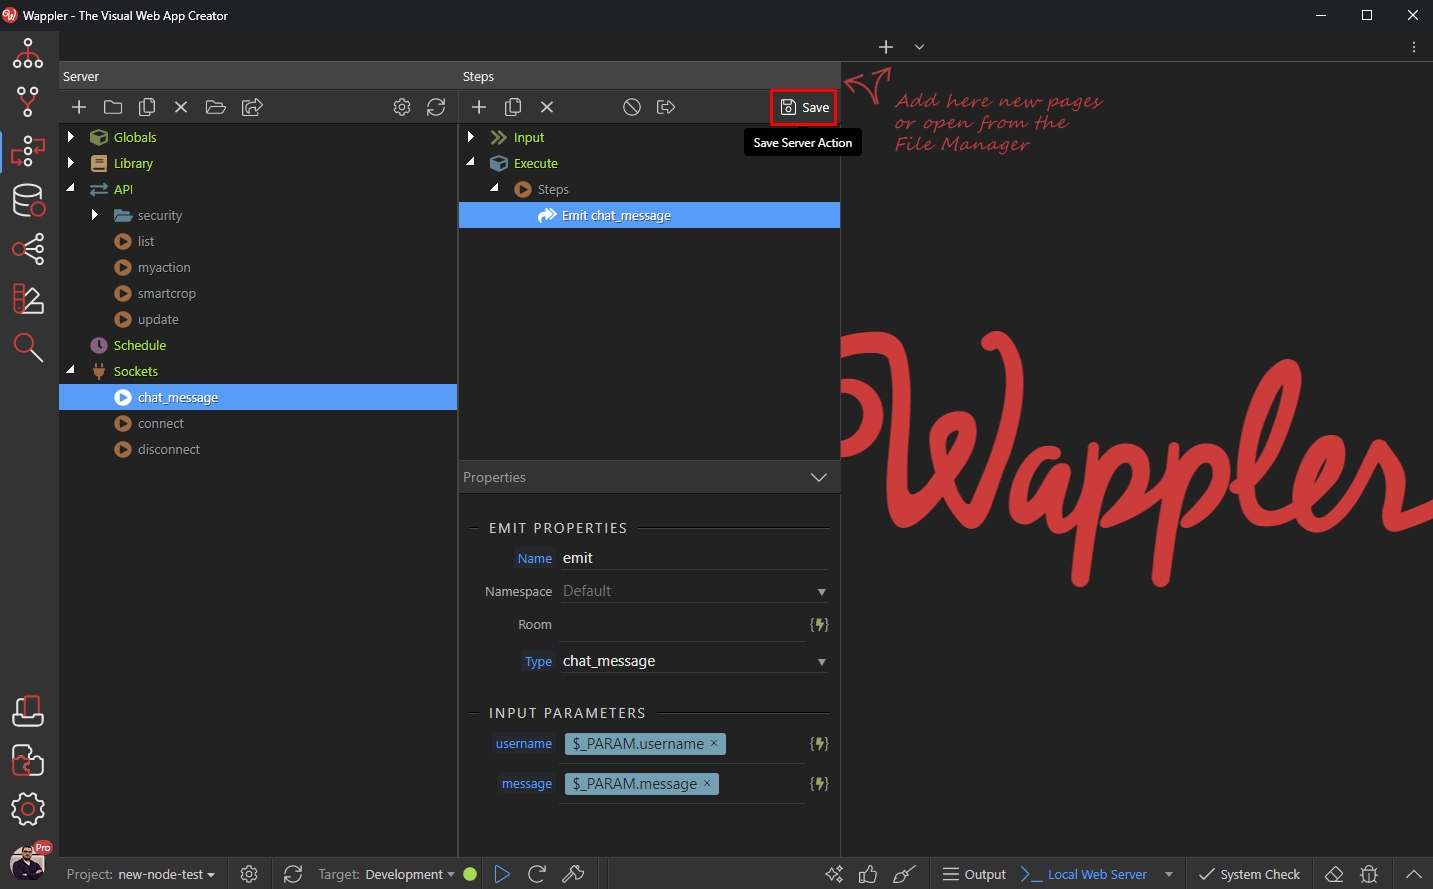
Client Side
Section titled “Client Side”First, let's create the page for our chat app.
Creating the Chat Page
Section titled “Creating the Chat Page”Open the Pages Manager:
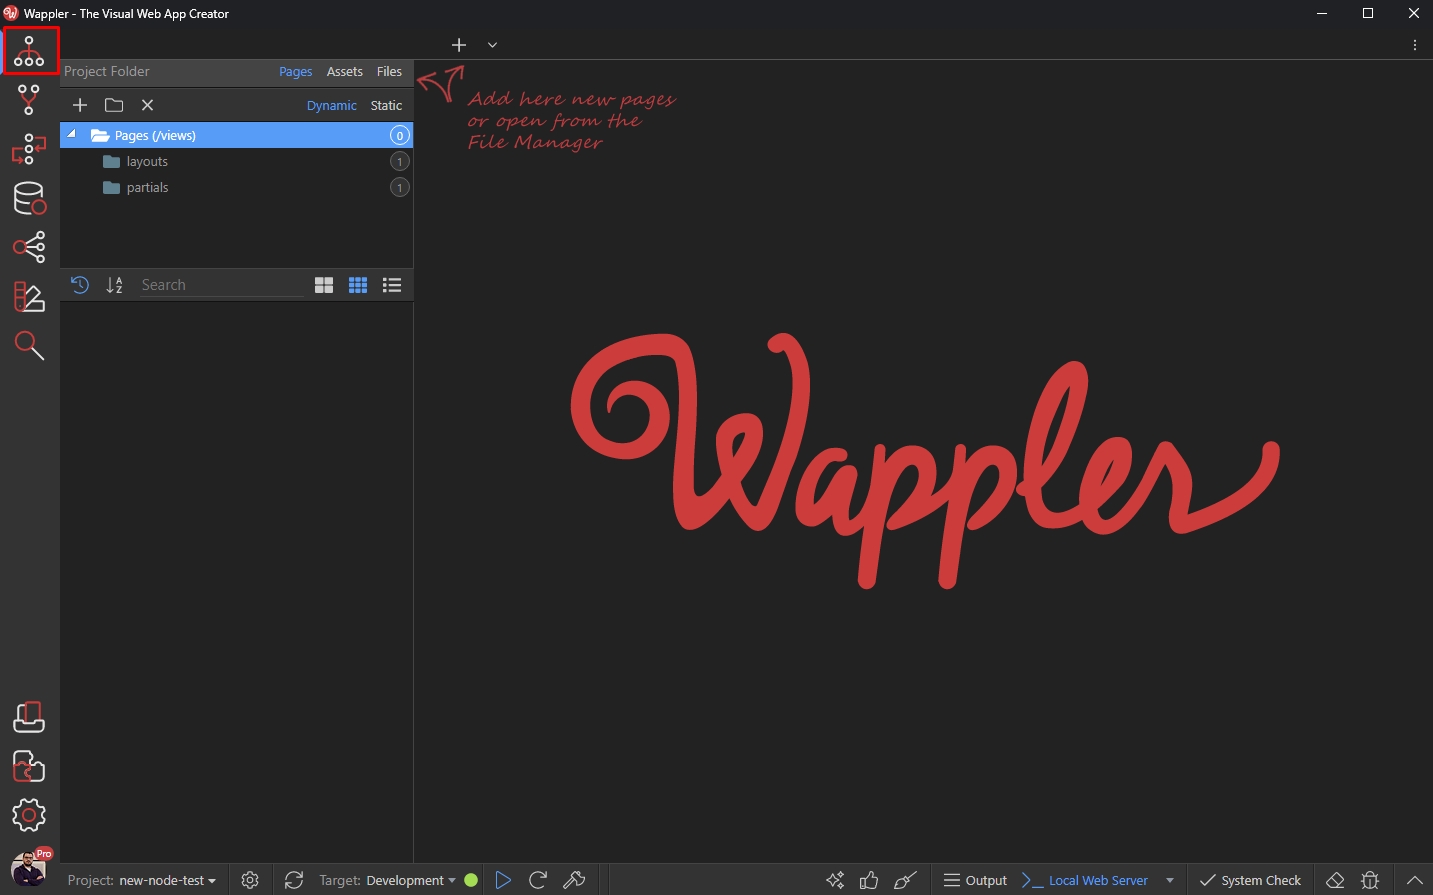
Select Pages and click the Create Page button:
Section titled “Select Pages and click the Create Page button:”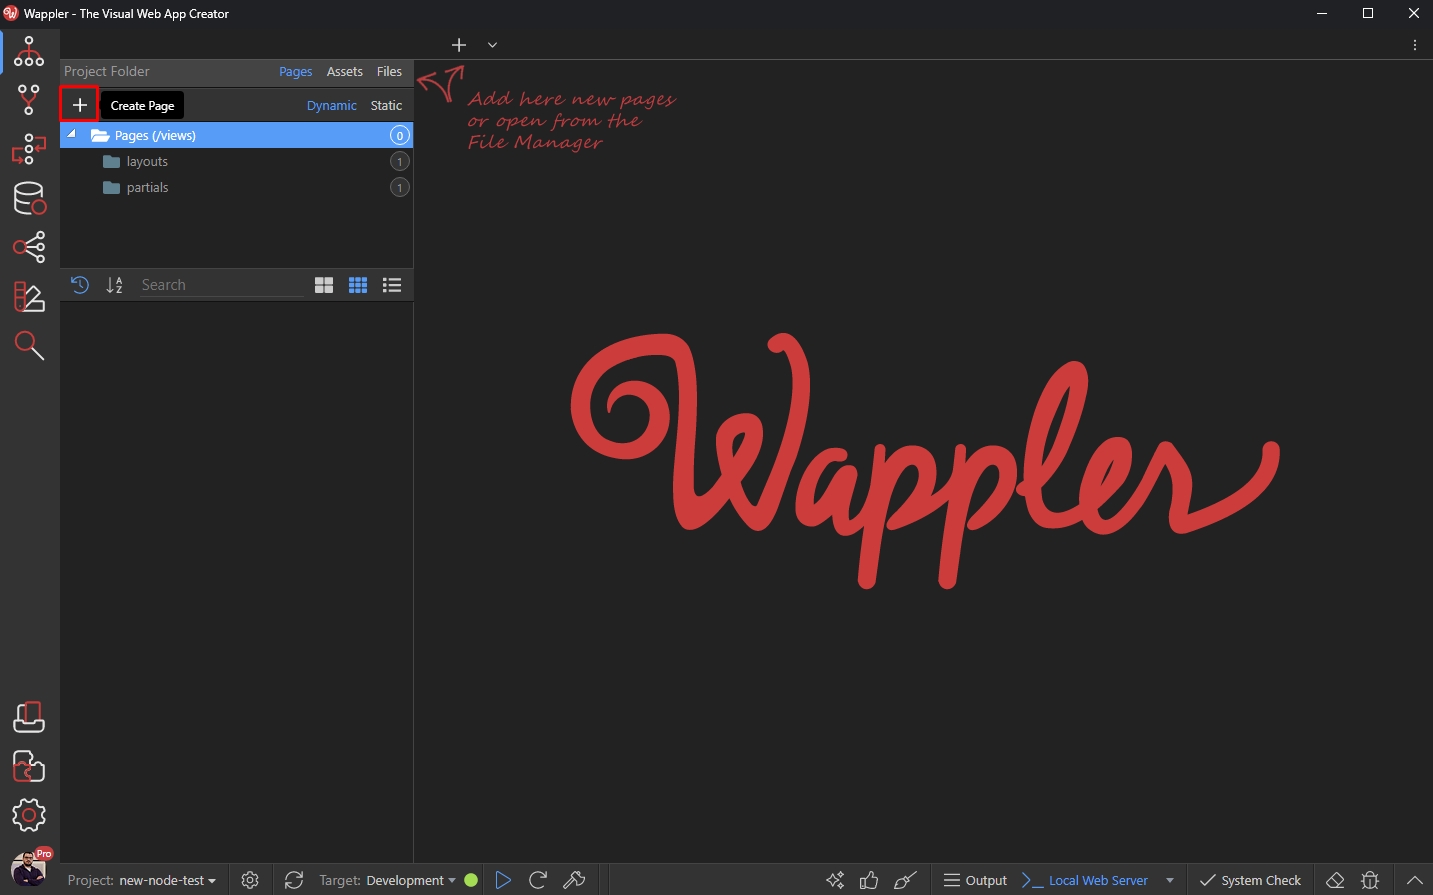
Add a name for your page, select a layout if you are using any and click Save:
Section titled “Add a name for your page, select a layout if you are using any and click Save:”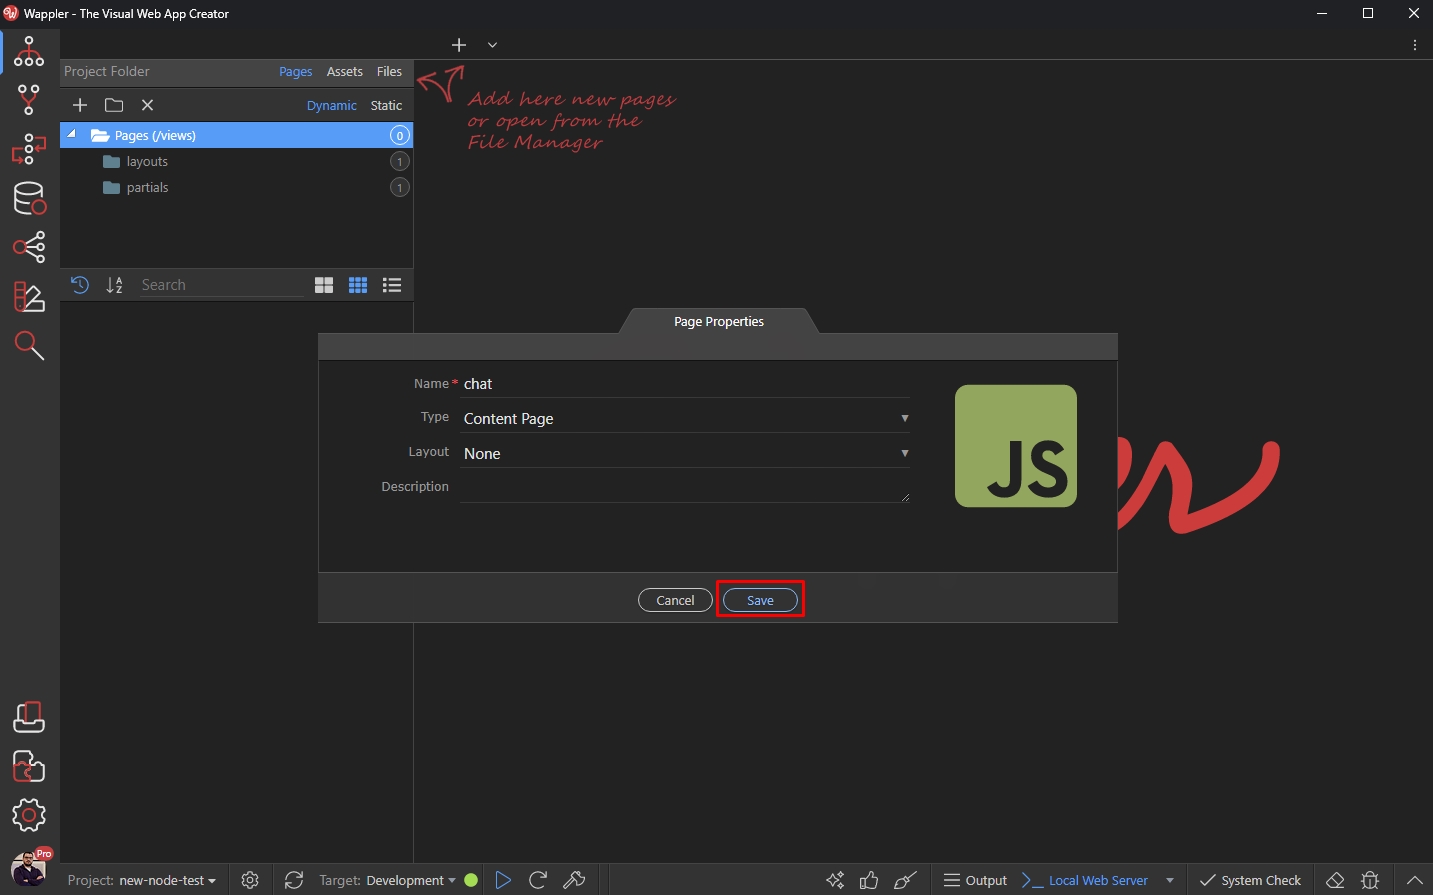
Step 22
Section titled “Step 22”Now you can close the Pages Manager panel.
Now as out page has been created, let's add the required App Connect components to it. In this example we will use the Data Store component to store the chat messages in the local storage of the browser.
Data Store Component
Section titled “Data Store Component”Open the App Connect panel, select App and add click the Add New button:
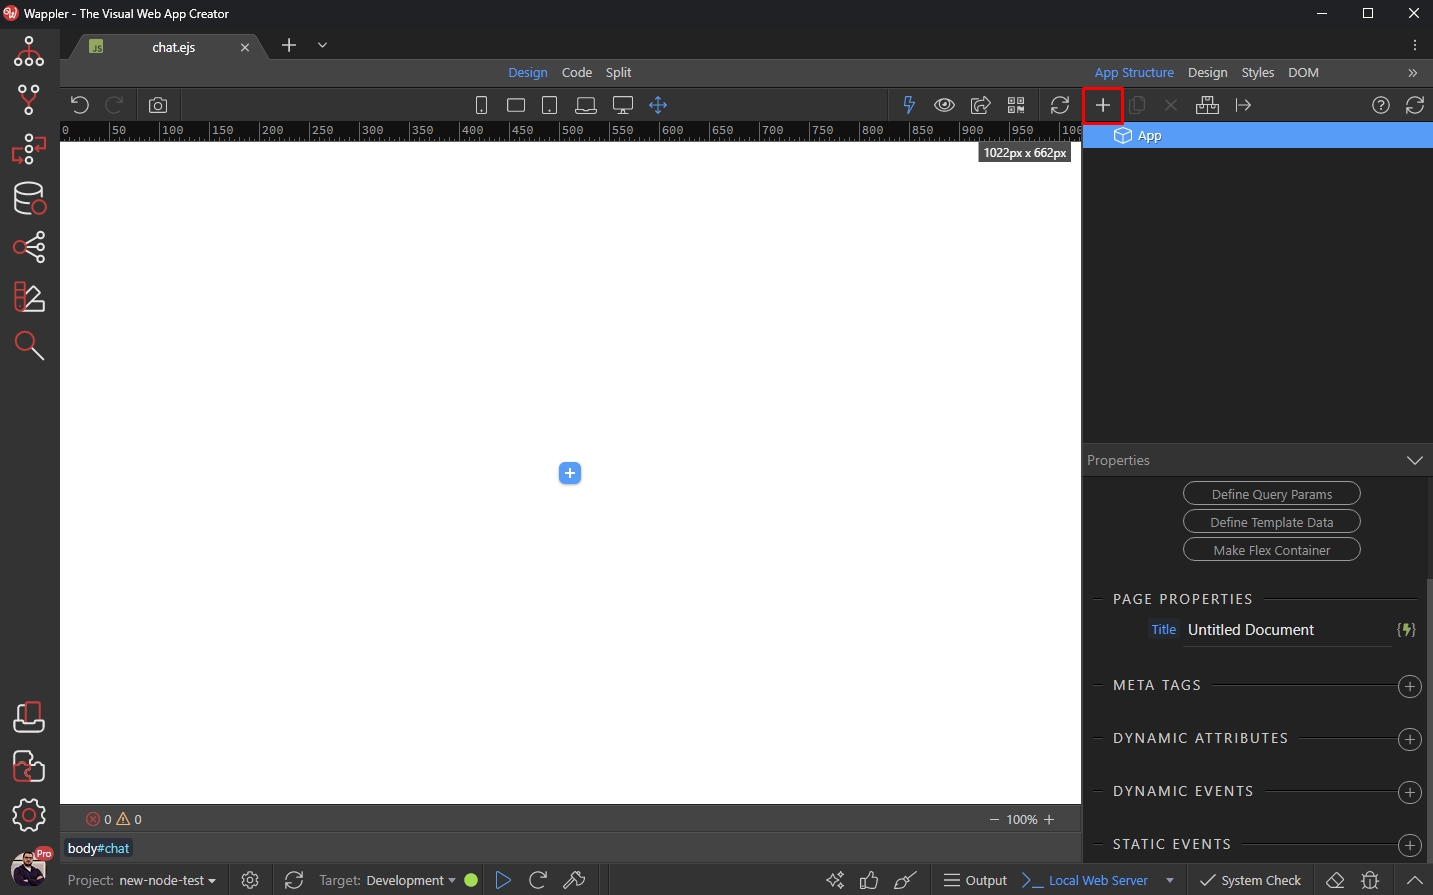
Open Data and select Data Store:
Section titled “Open Data and select Data Store:”
Add a name for the Data Store component and click the Define Data Store Schema button:
Section titled “Add a name for the Data Store component and click the Define Data Store Schema button:”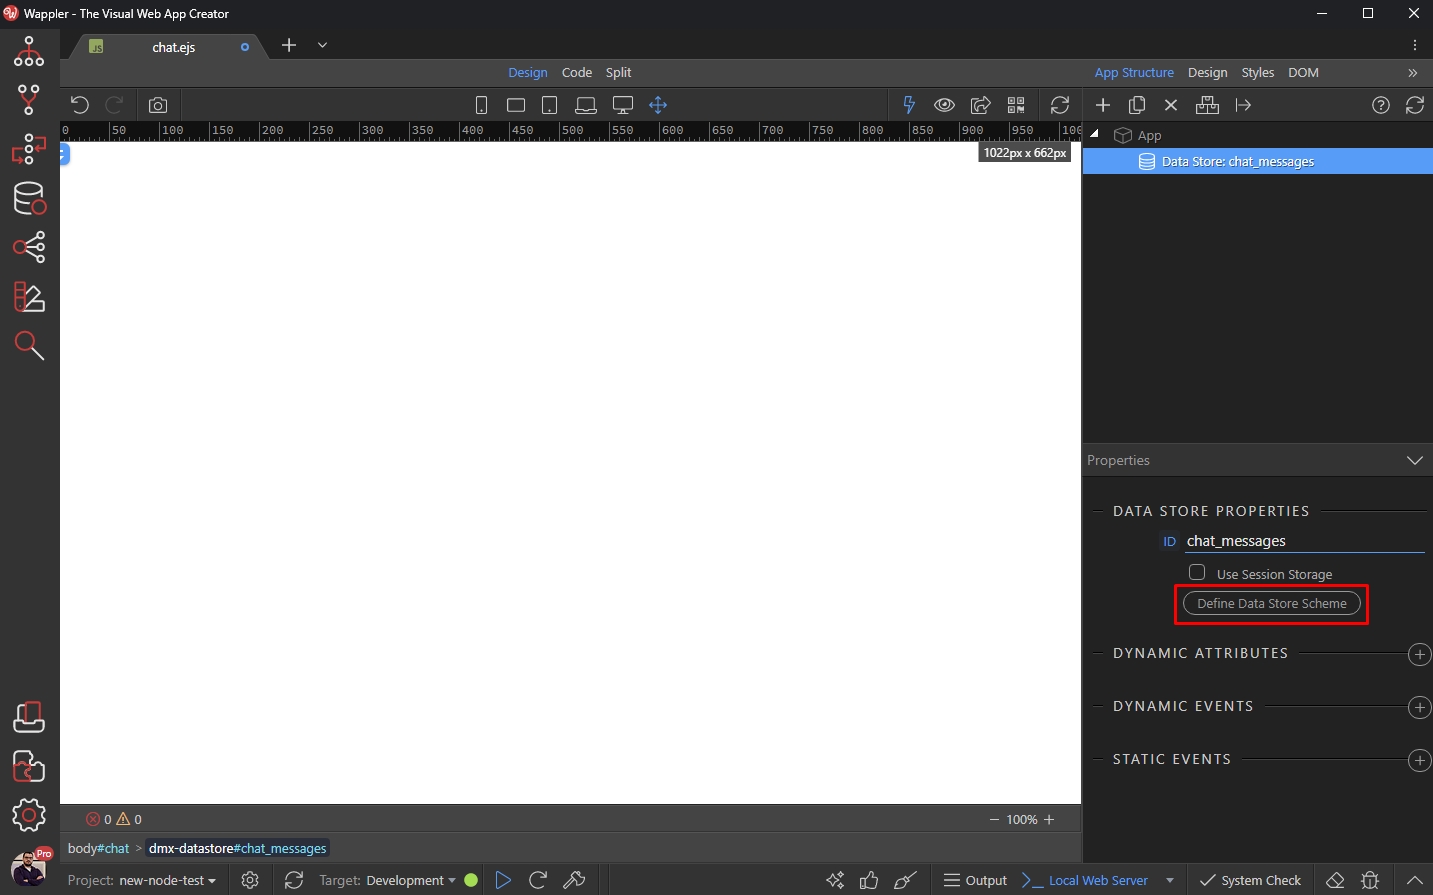
Right click the Data Store name and add two variables:
Section titled “Right click the Data Store name and add two variables:”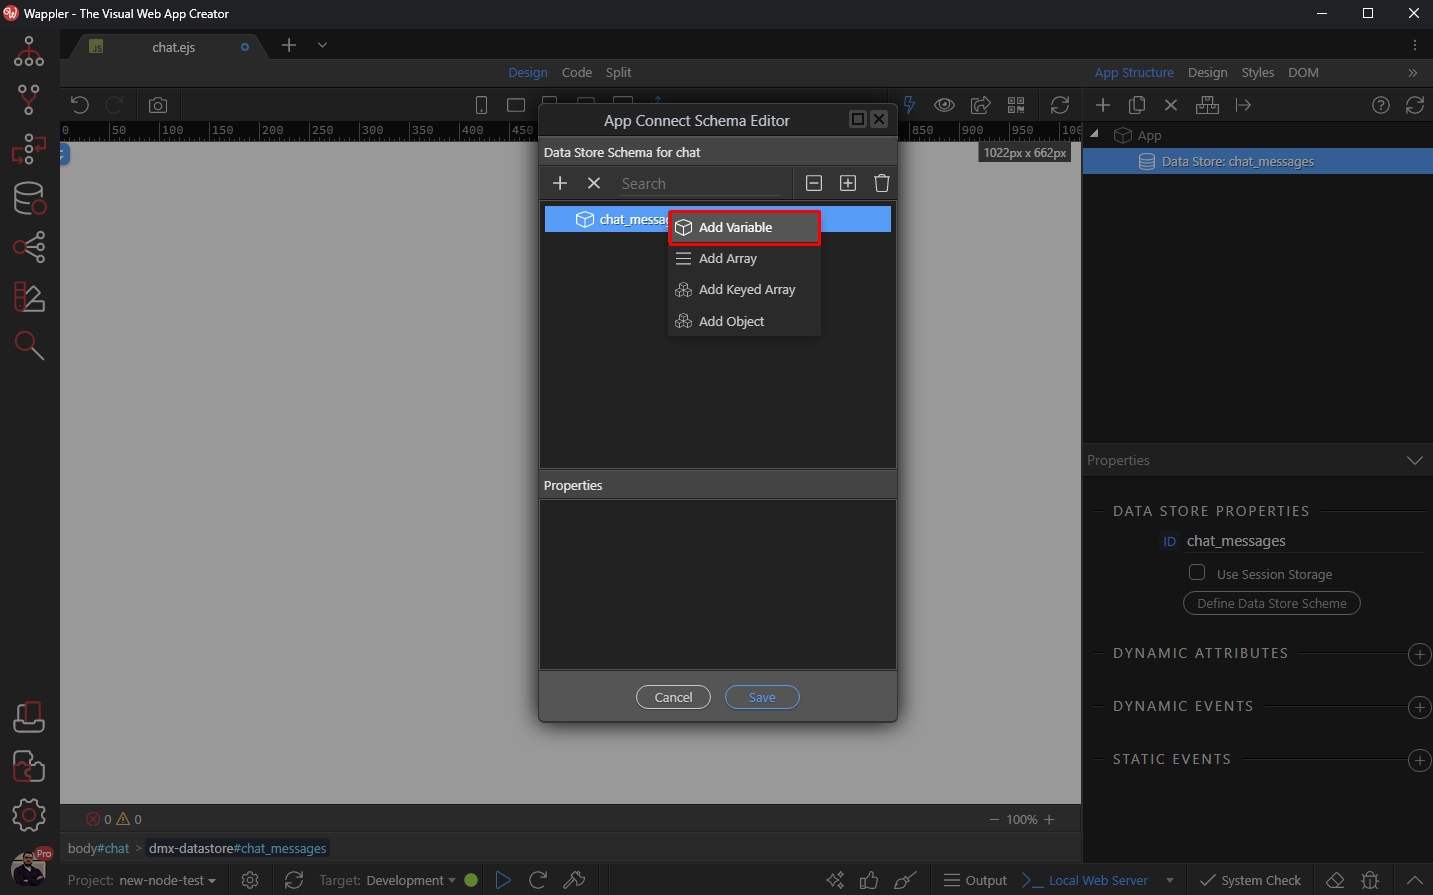
We want to store the user name and message, so we call them chat_user and chat_message:
Section titled “We want to store the user name and message, so we call them chat_user and chat_message:”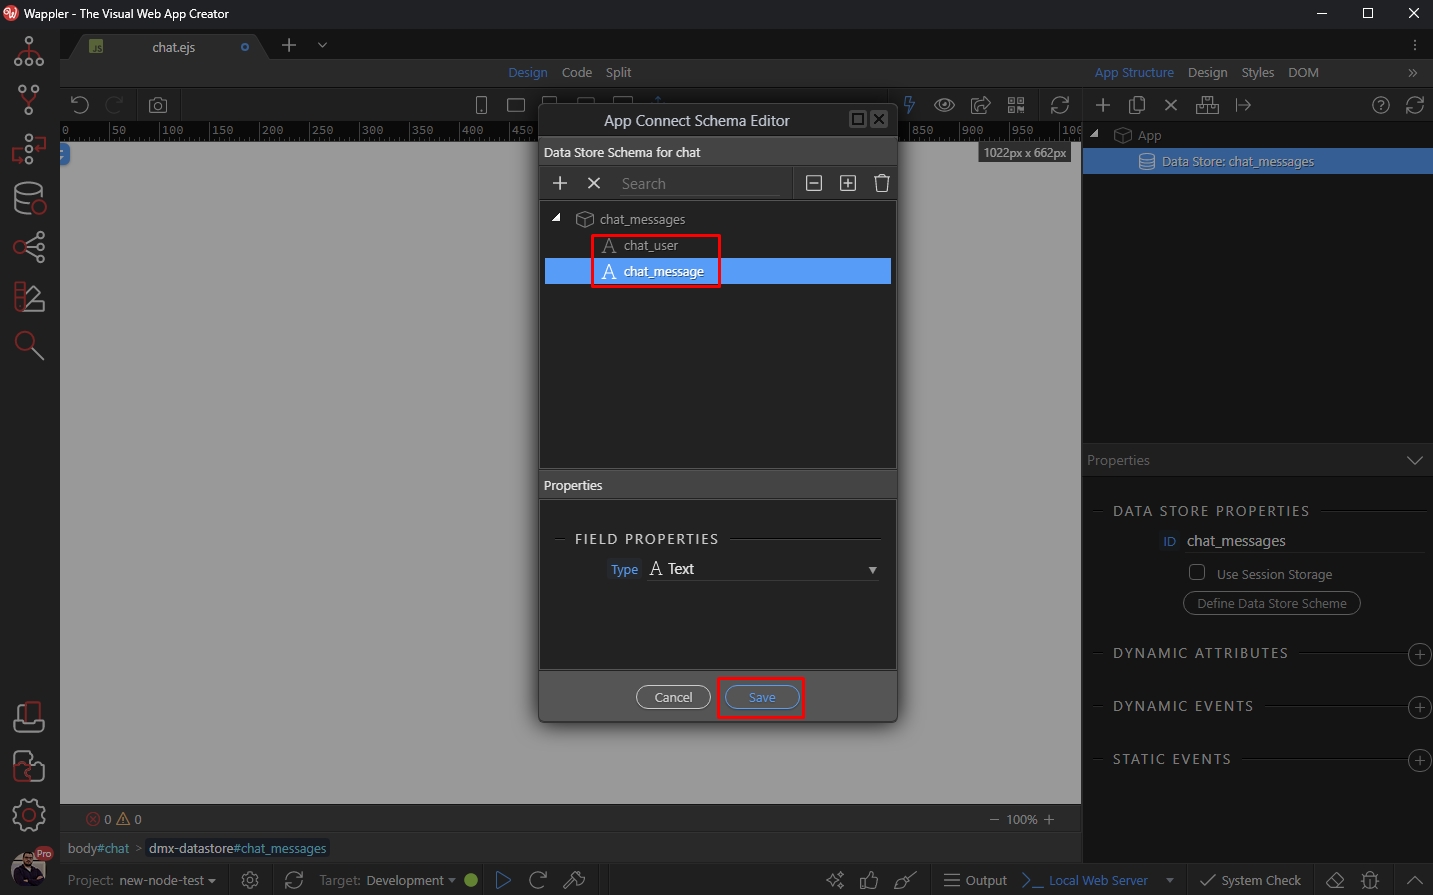
Sockets Component
Section titled “Sockets Component”Select App and click the Add New button:
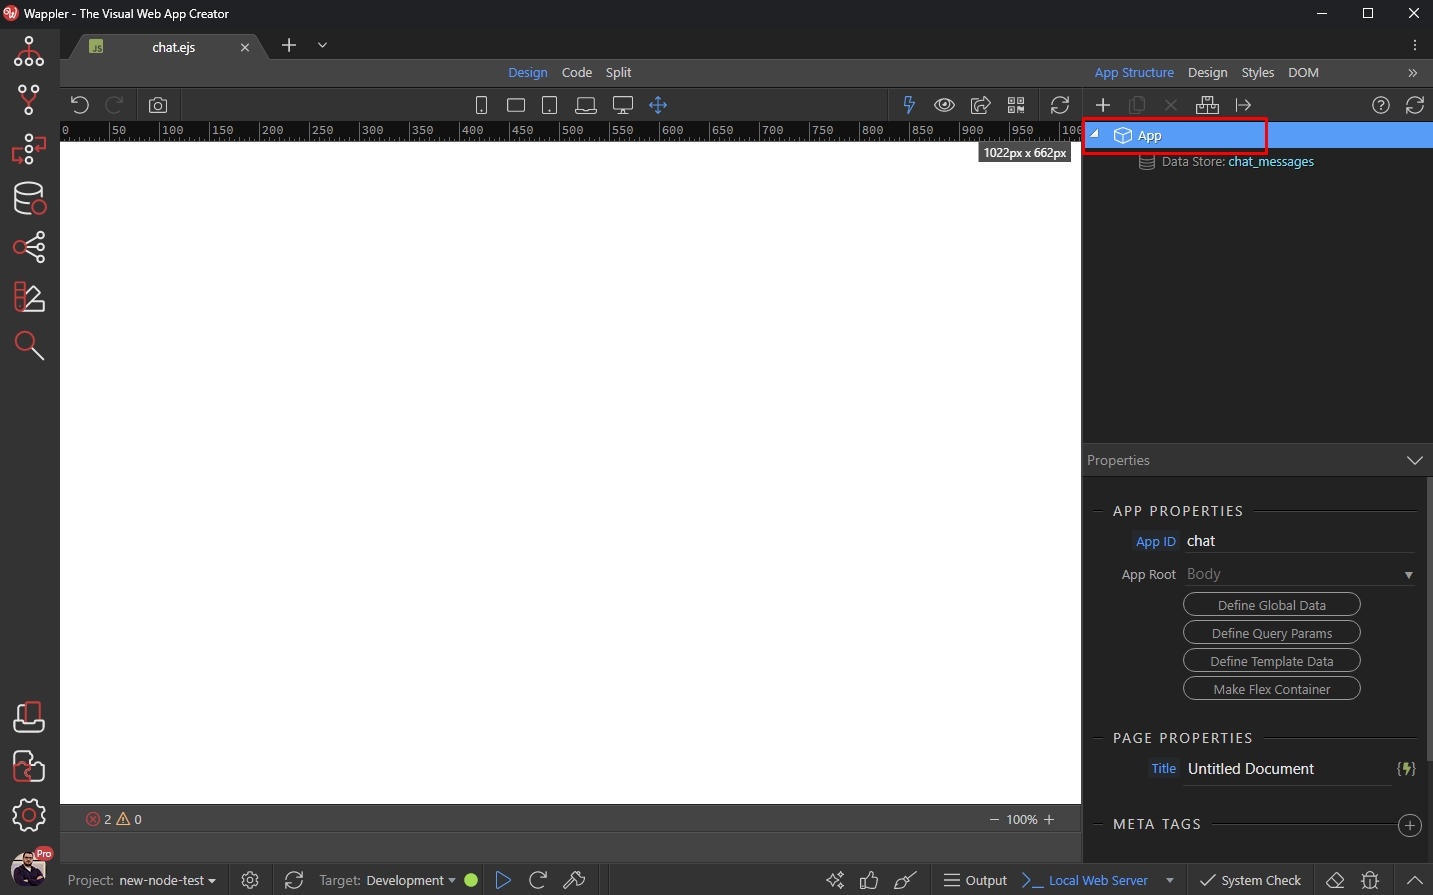
Open Sockets and select the Socket component:
Section titled “Open Sockets and select the Socket component:”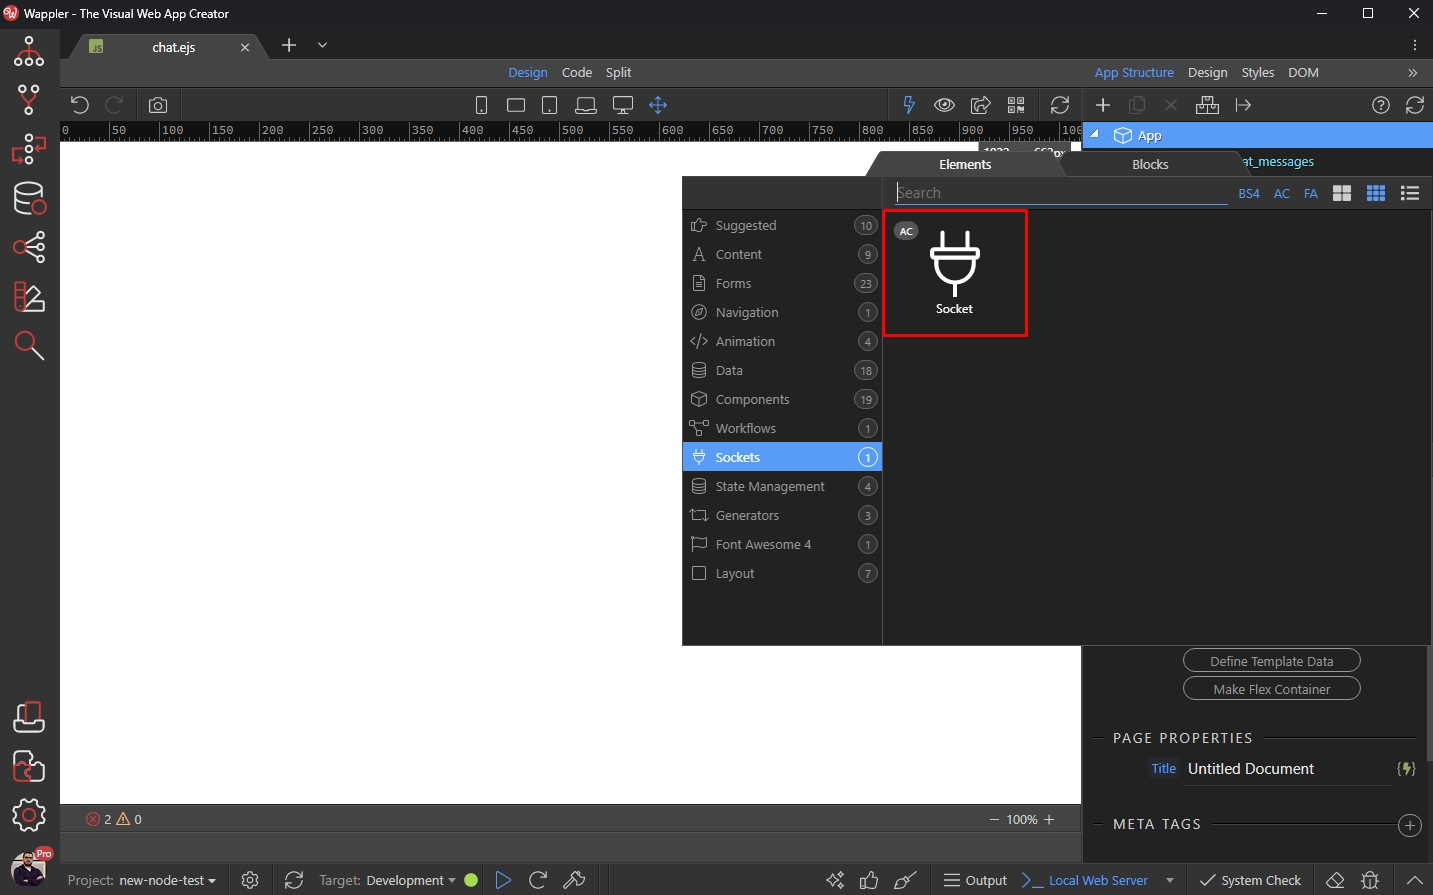
Add new dynamic event:
Section titled “Add new dynamic event:”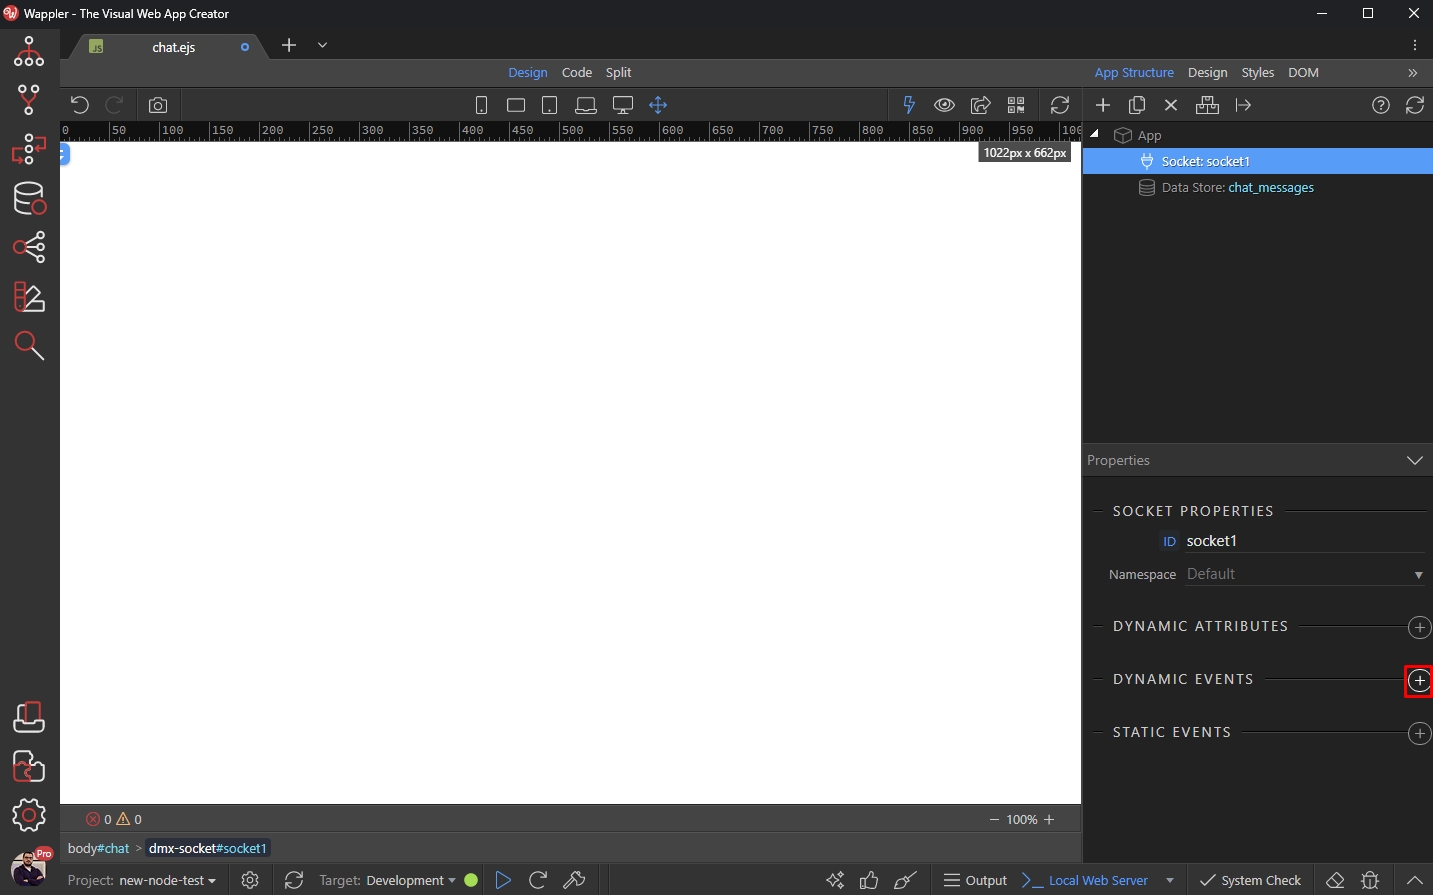
Under Sockets select Message:
Section titled “Under Sockets select Message:”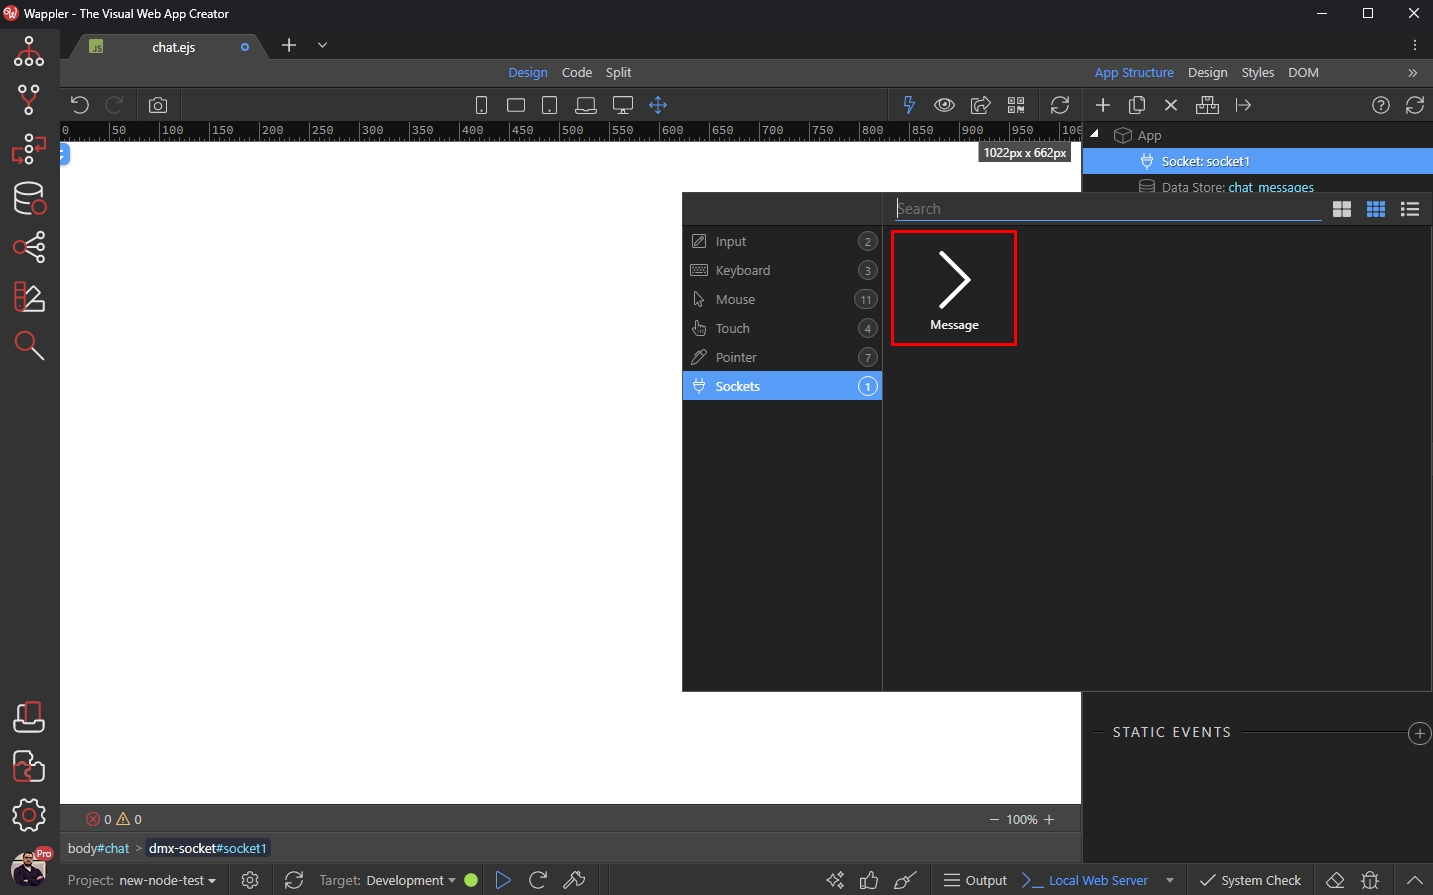
Step 33
Section titled “Step 33”Now we are going to set up what happens, when a new message has been received.
Open the Message Type menu and select the Socket Action (or message template) called chat_message which we created earlier:
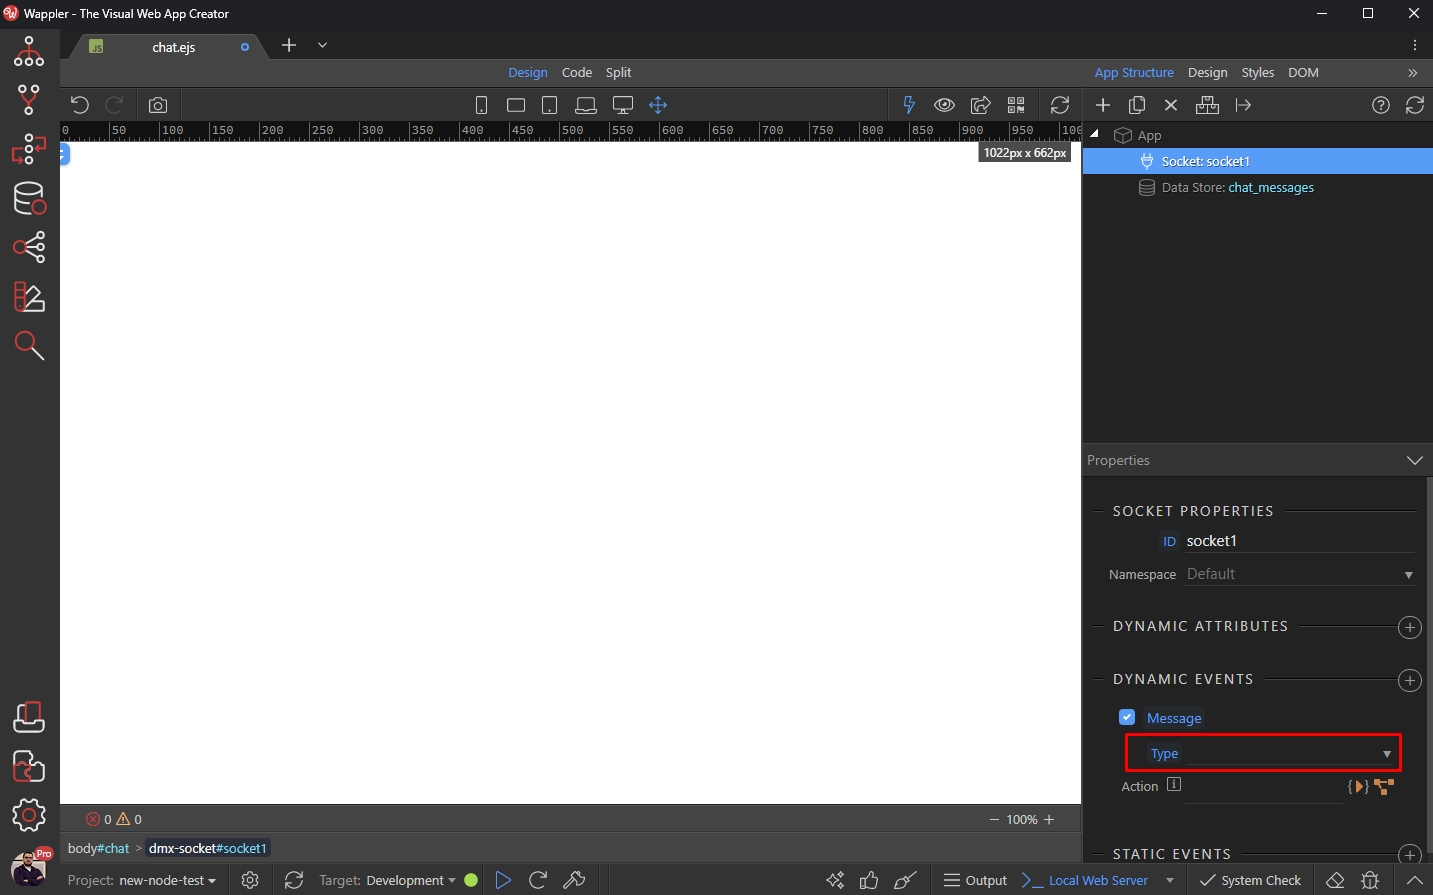
Click the dynamic action picker icon:
Section titled “Click the dynamic action picker icon:”
On new message, we want to add it to the Data Store. So, select Insert Record under the Data Store component:
Section titled “On new message, we want to add it to the Data Store. So, select Insert Record under the Data Store component:”
And select the data, which needs to be inserted for chat_user:
Section titled “And select the data, which needs to be inserted for chat_user:”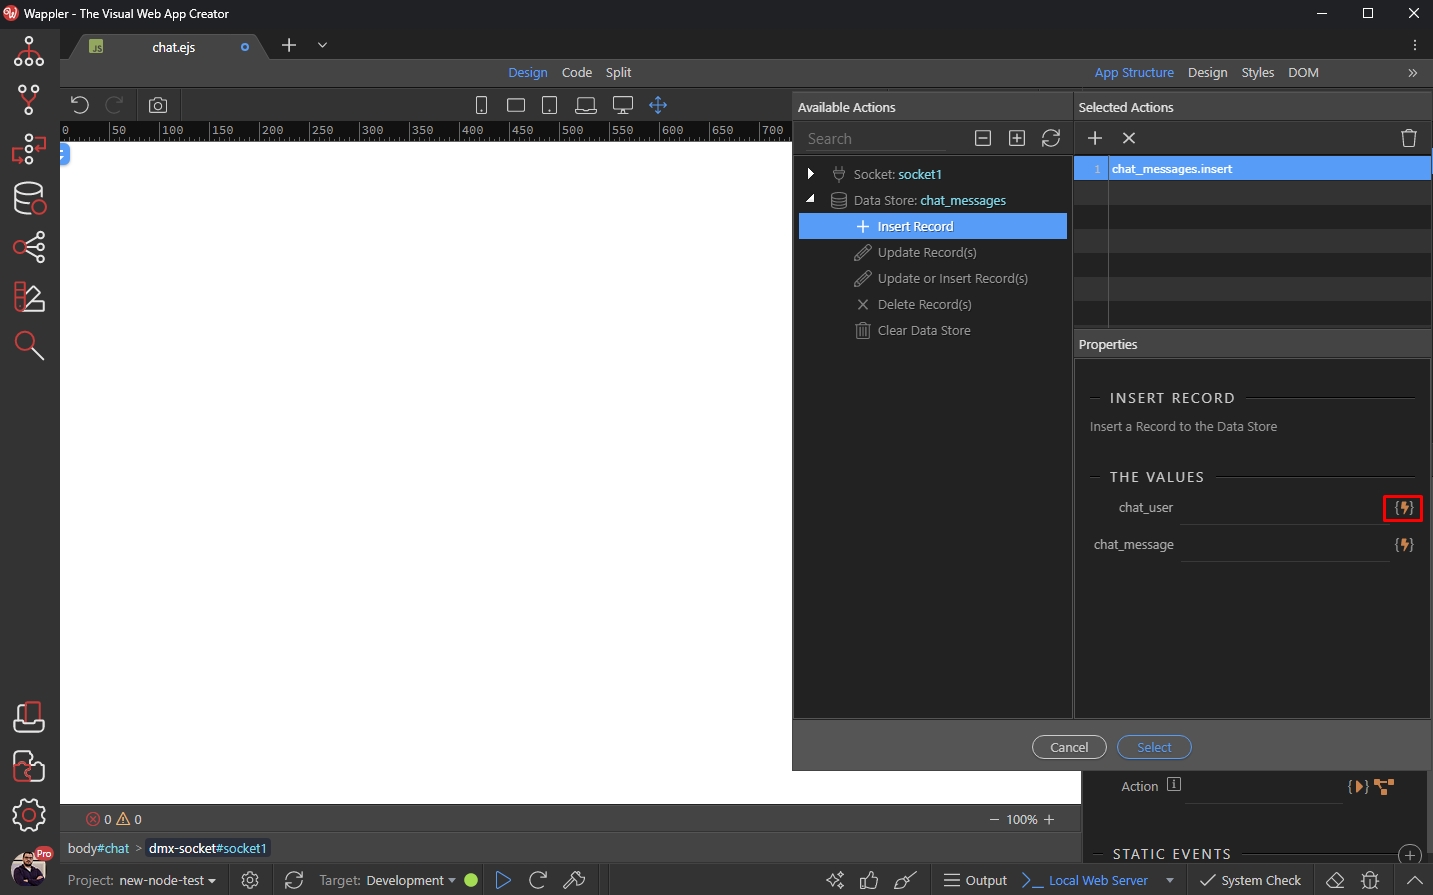
We select username under Message Event:
Section titled “We select username under Message Event:”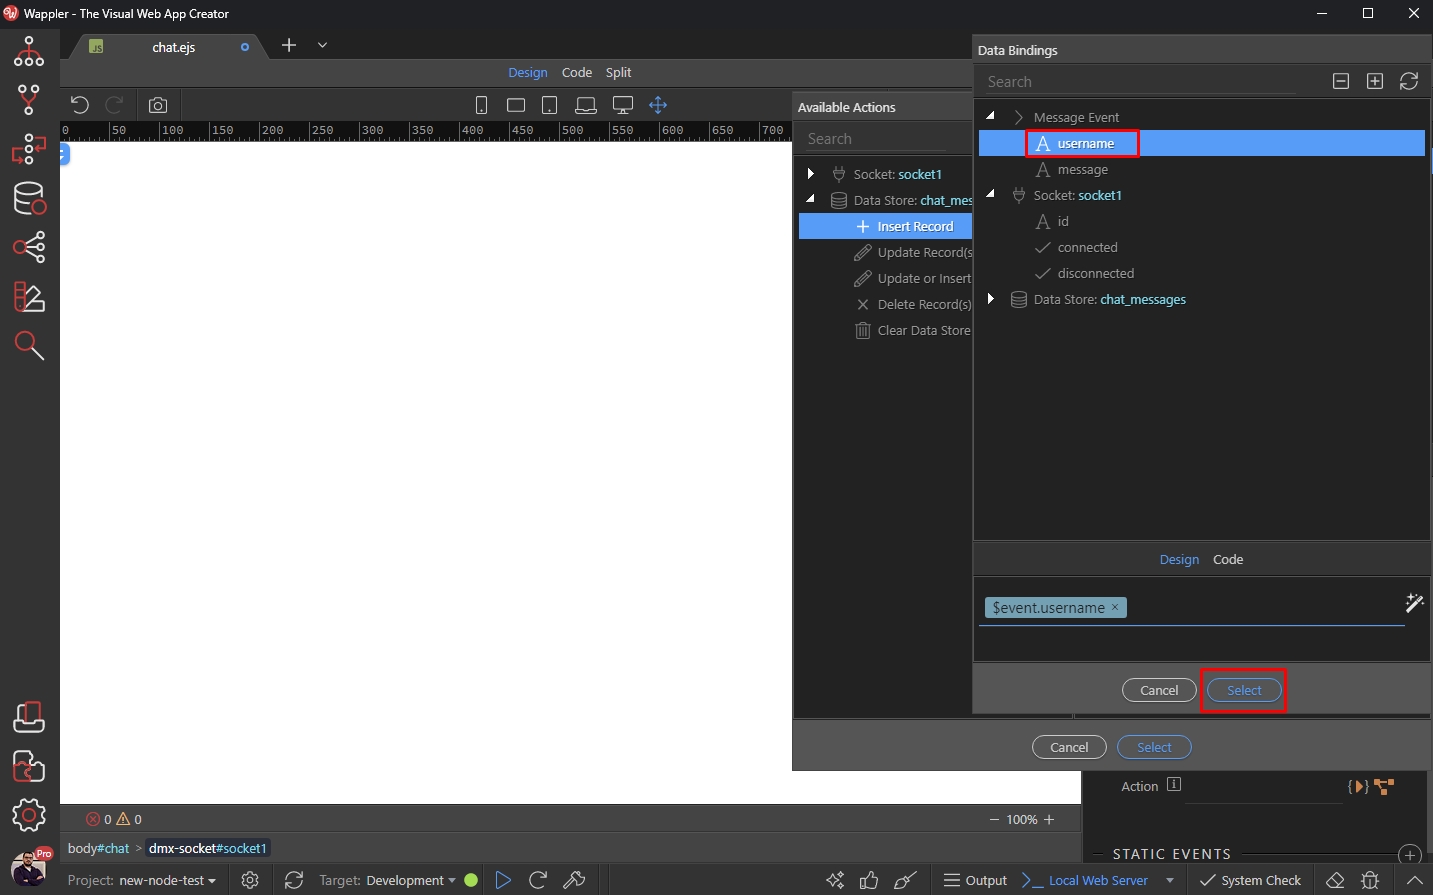
We do the same for the chat_message:
Section titled “We do the same for the chat_message:”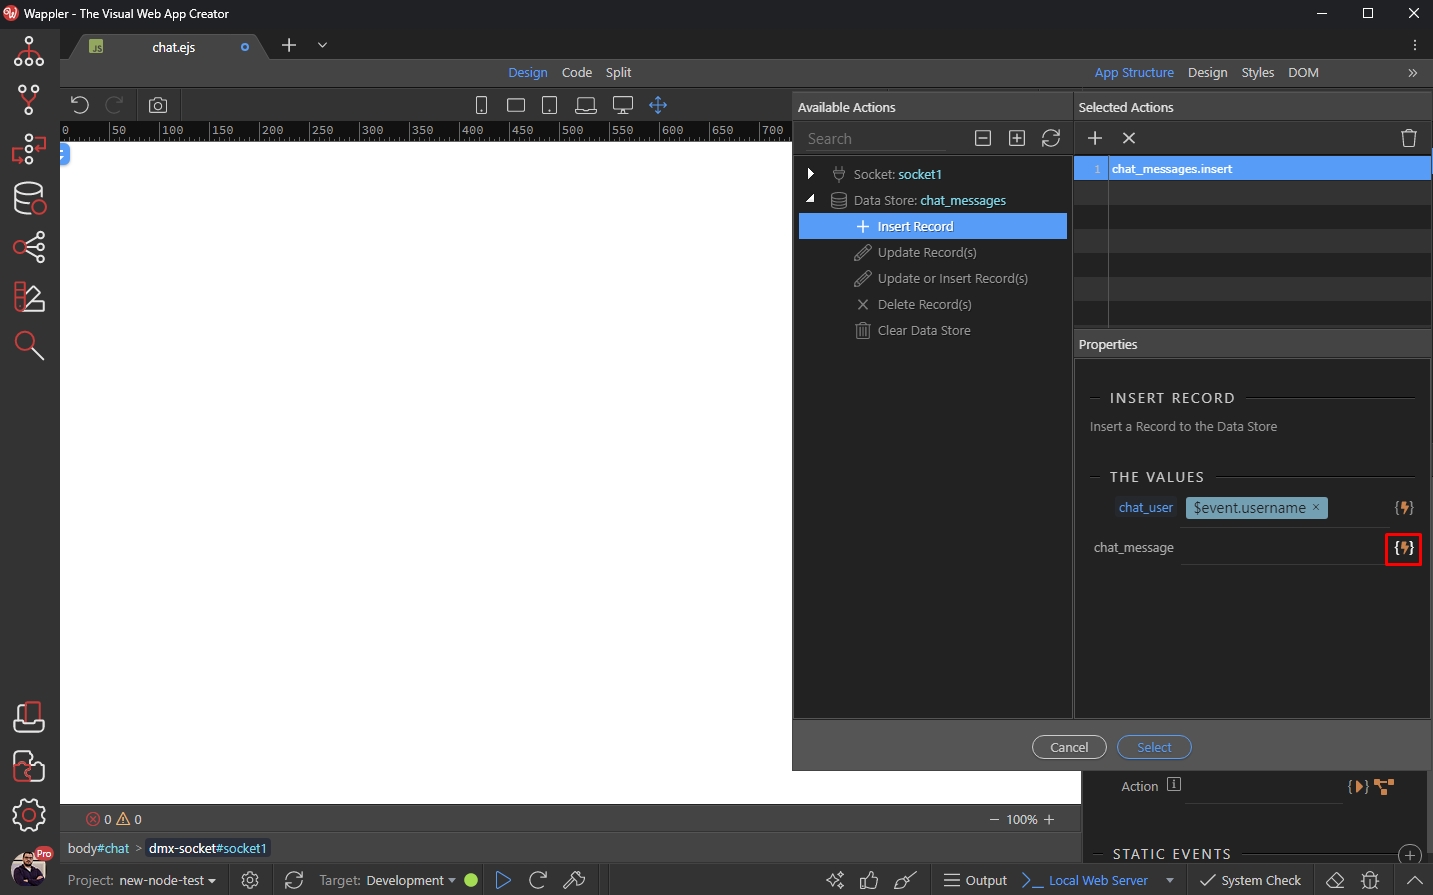
Select message under Message Event:
Section titled “Select message under Message Event:”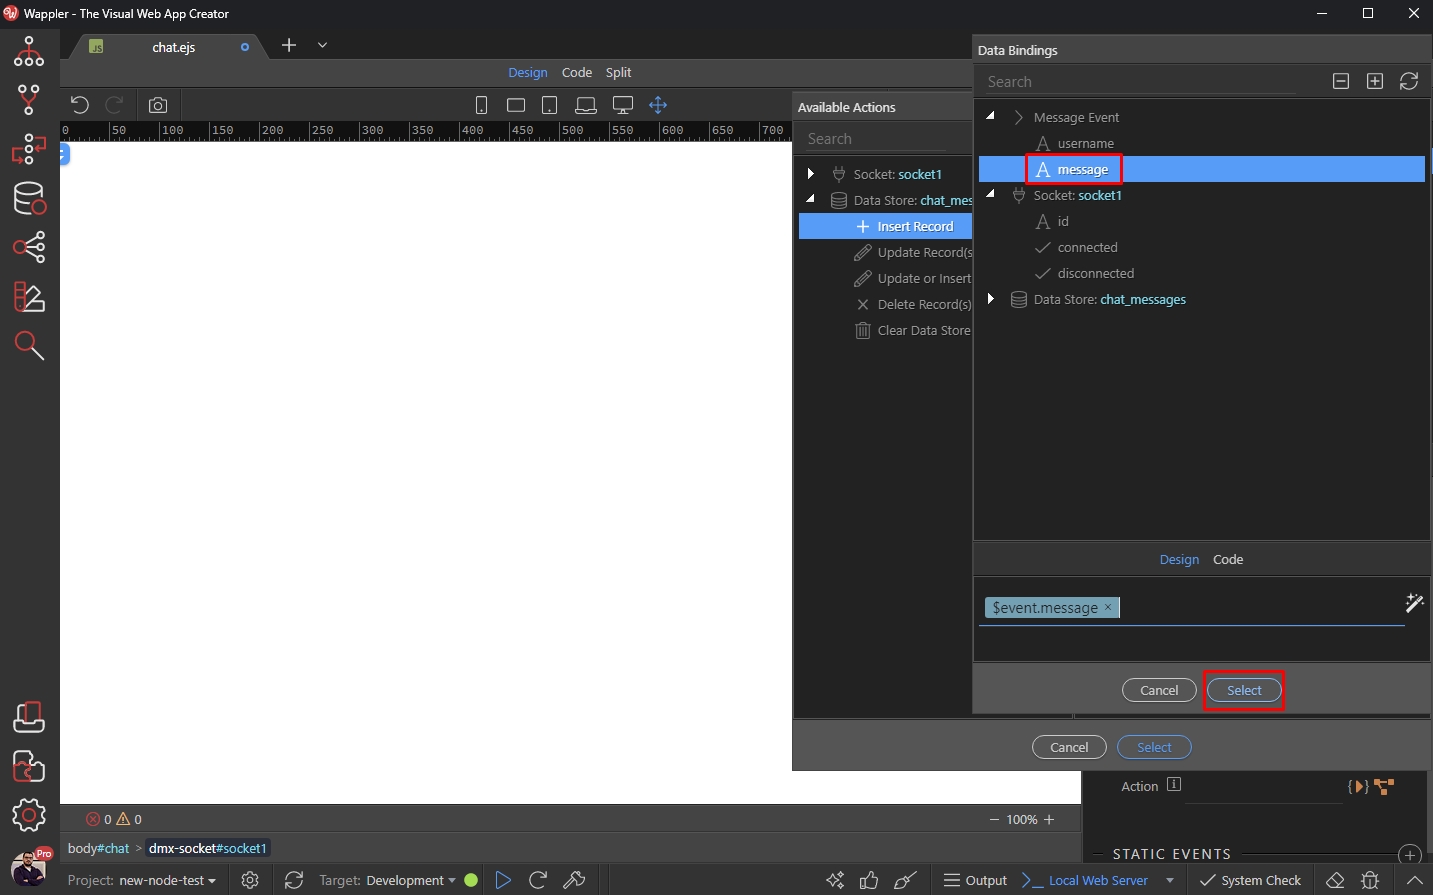
Click Select when you are done:
Section titled “Click Select when you are done:”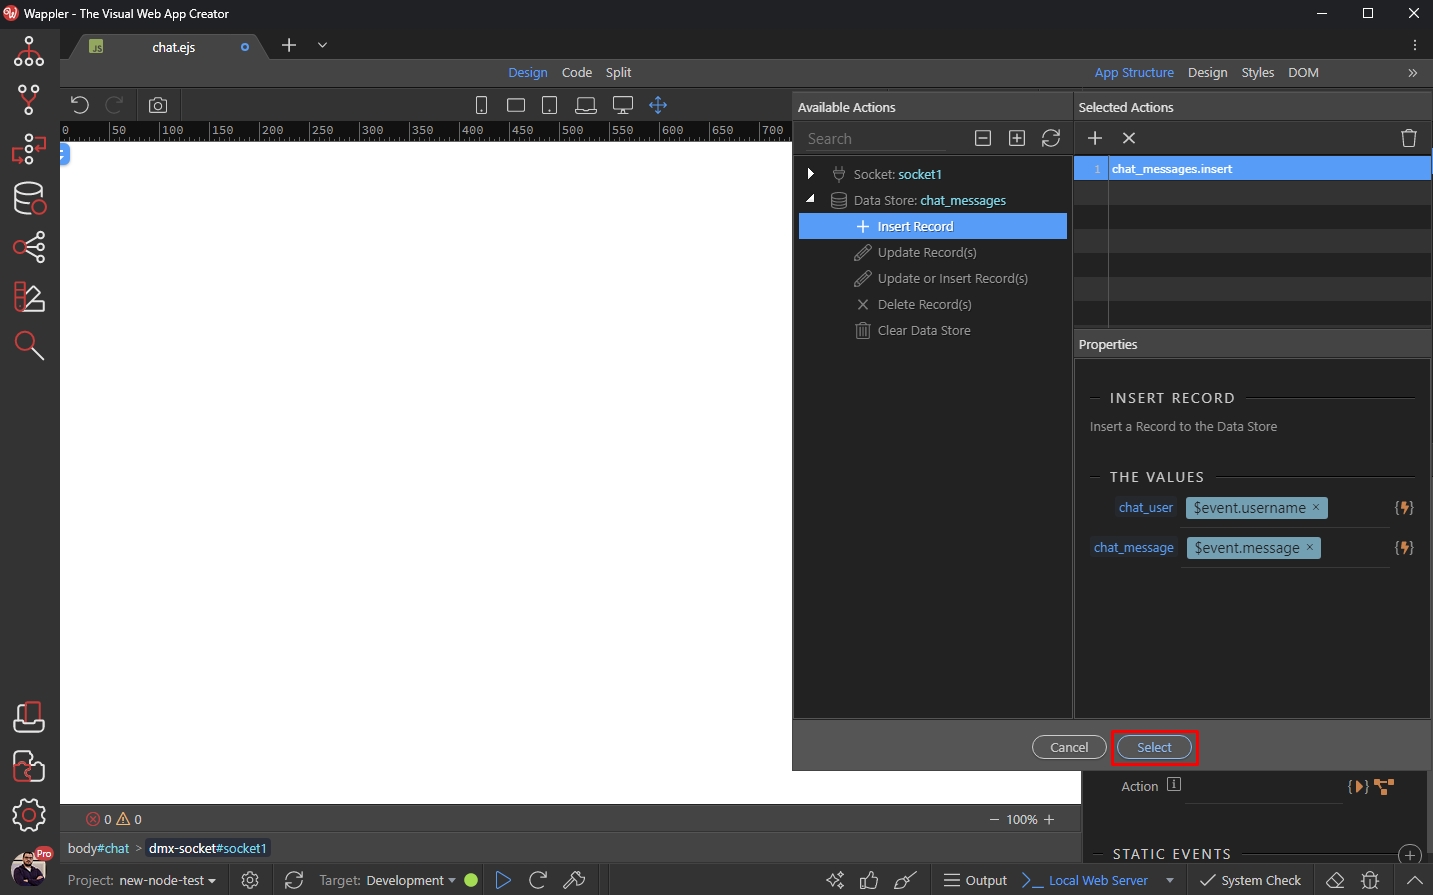
Step 41
Section titled “Step 41”Now the user name and message text will be stored in the Data Store, when a new message is received by the Sockets Component.
Session Storage
Section titled “Session Storage”We will store the username in a session variable, so that the user enters his username just once per each chat session.
Right Click App:
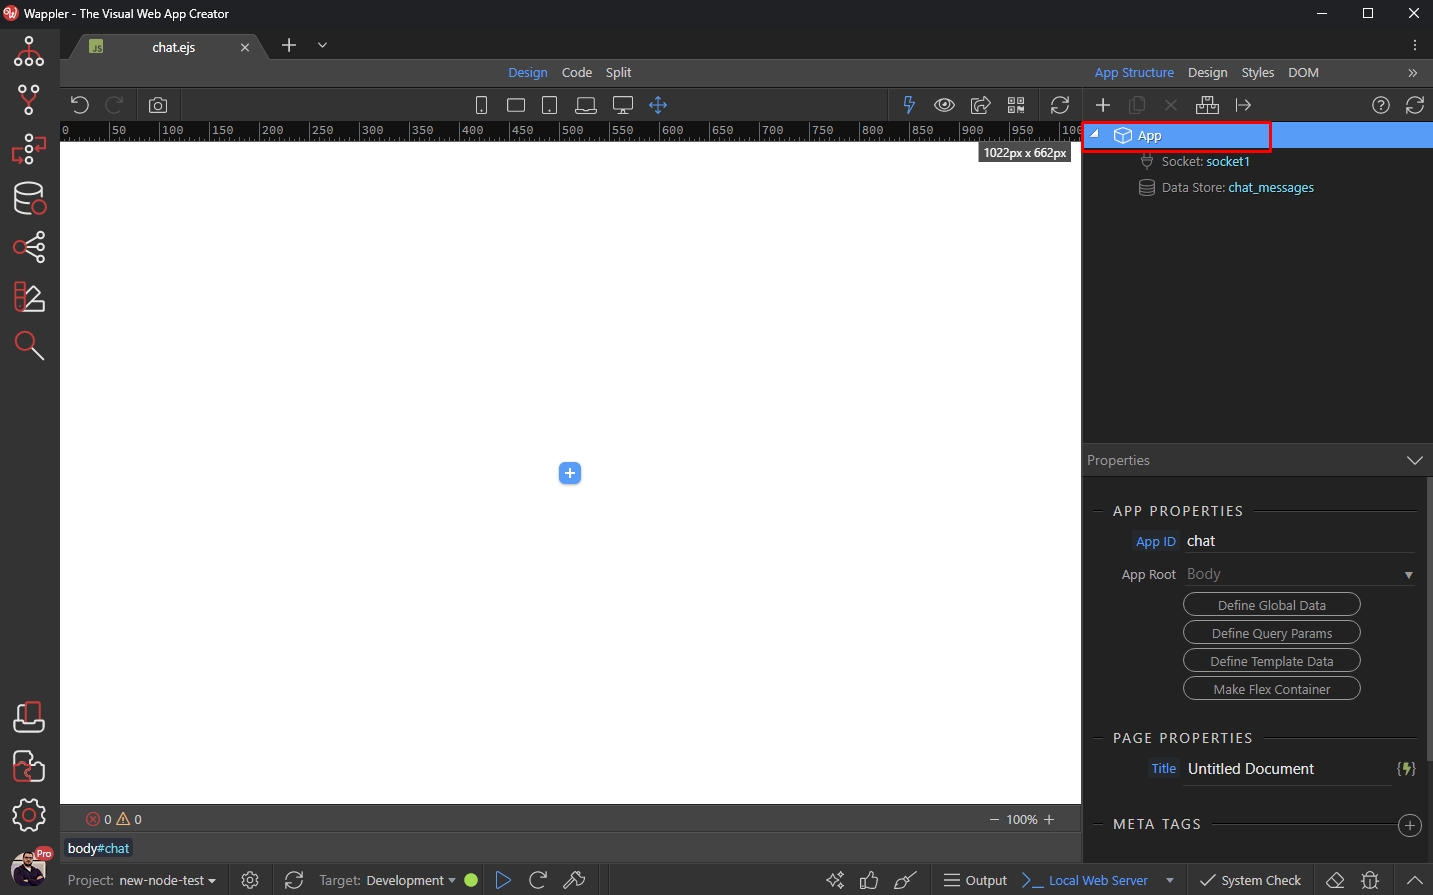
Open State Management and select Session Storage Manager:
Section titled “Open State Management and select Session Storage Manager:”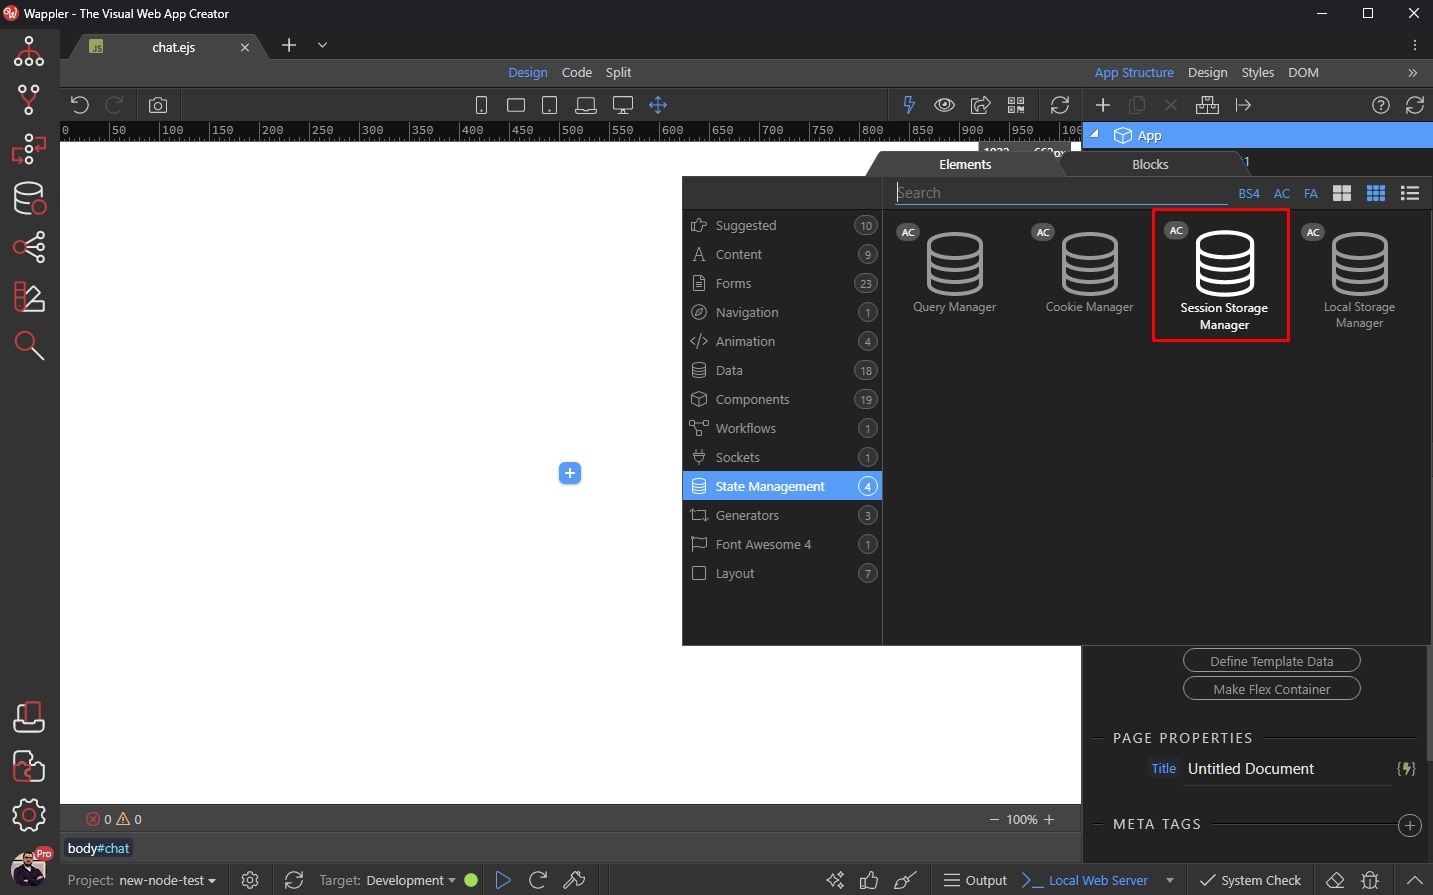
Click the Define Session Storage Items button:
Section titled “Click the Define Session Storage Items button:”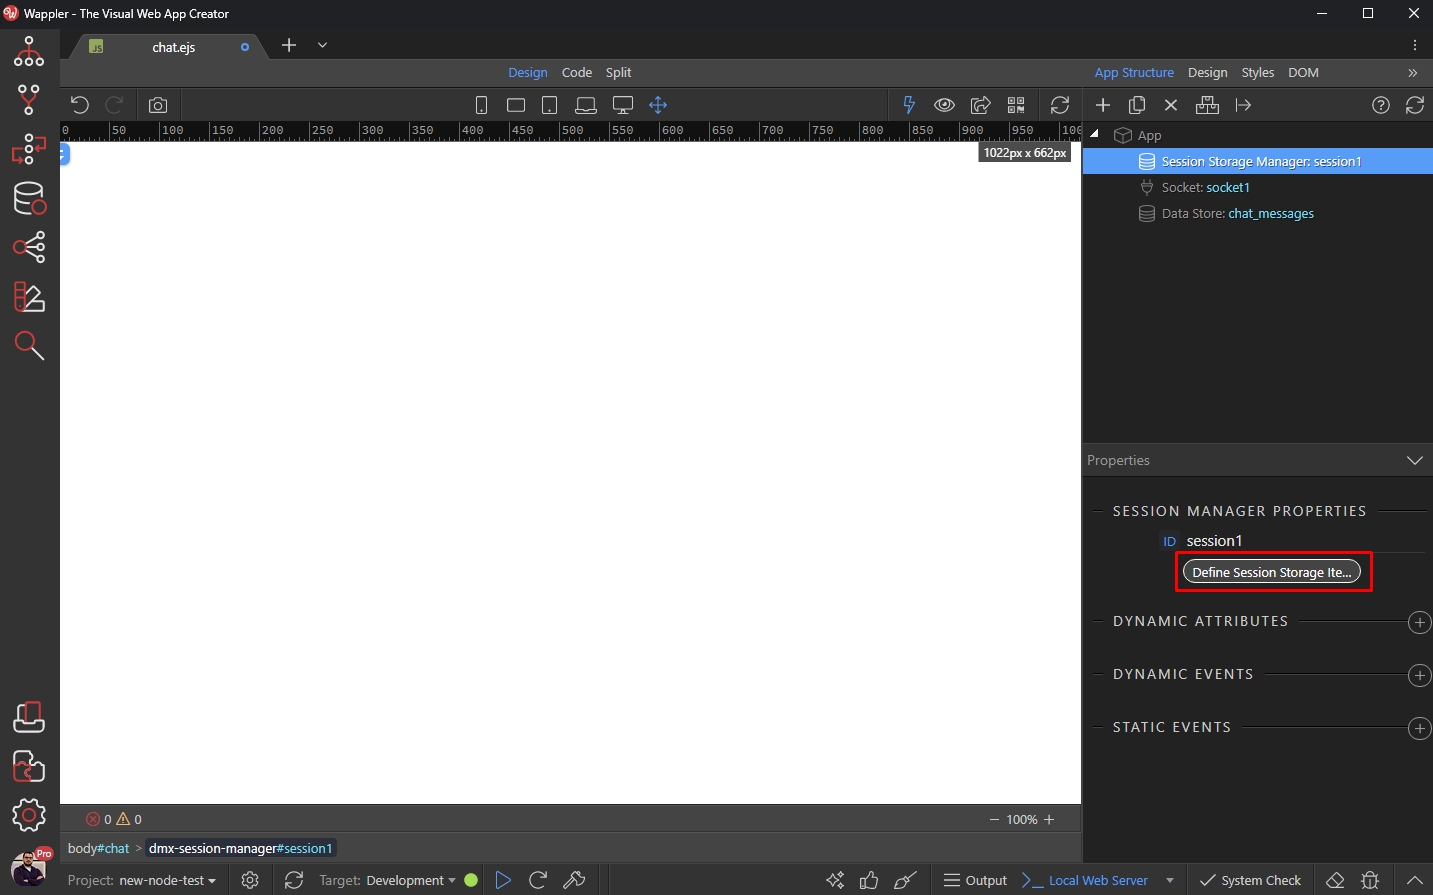
Right click the Session Storage and Add Variable:
Section titled “Right click the Session Storage and Add Variable:”
We call this variable username as it will store the username, which your user entered. Click Save:
Section titled “We call this variable username as it will store the username, which your user entered. Click Save:”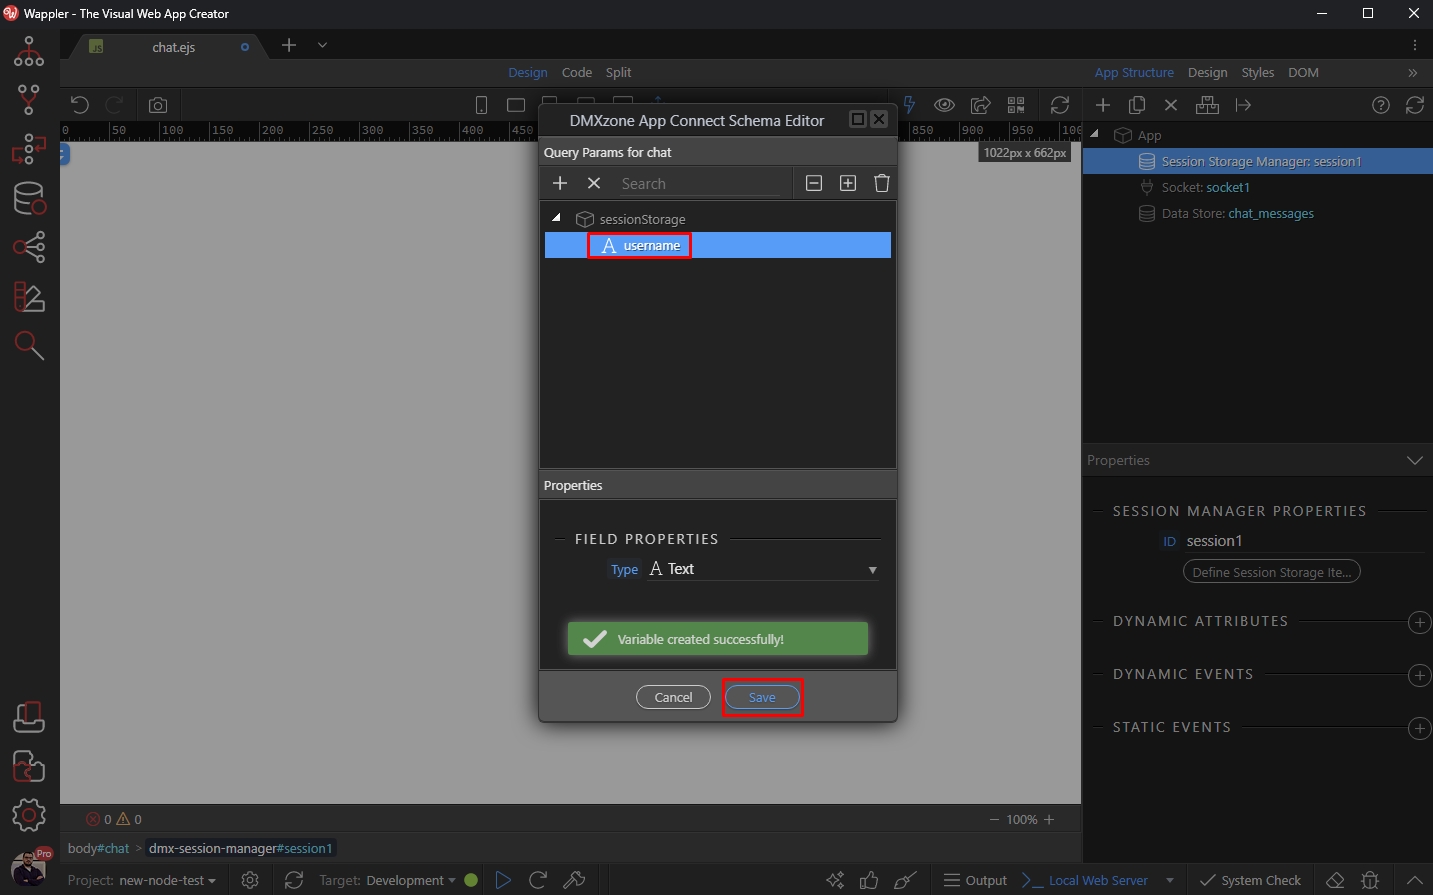
Page Layout
Section titled “Page Layout”We've set up all the required components on the page, now let's build the page layout. It will consist of two parts - an input where the users enter their username and another section where the user can send messages and view the other users' messages.
Let's start by adding a container on the page. Click the Add New button:
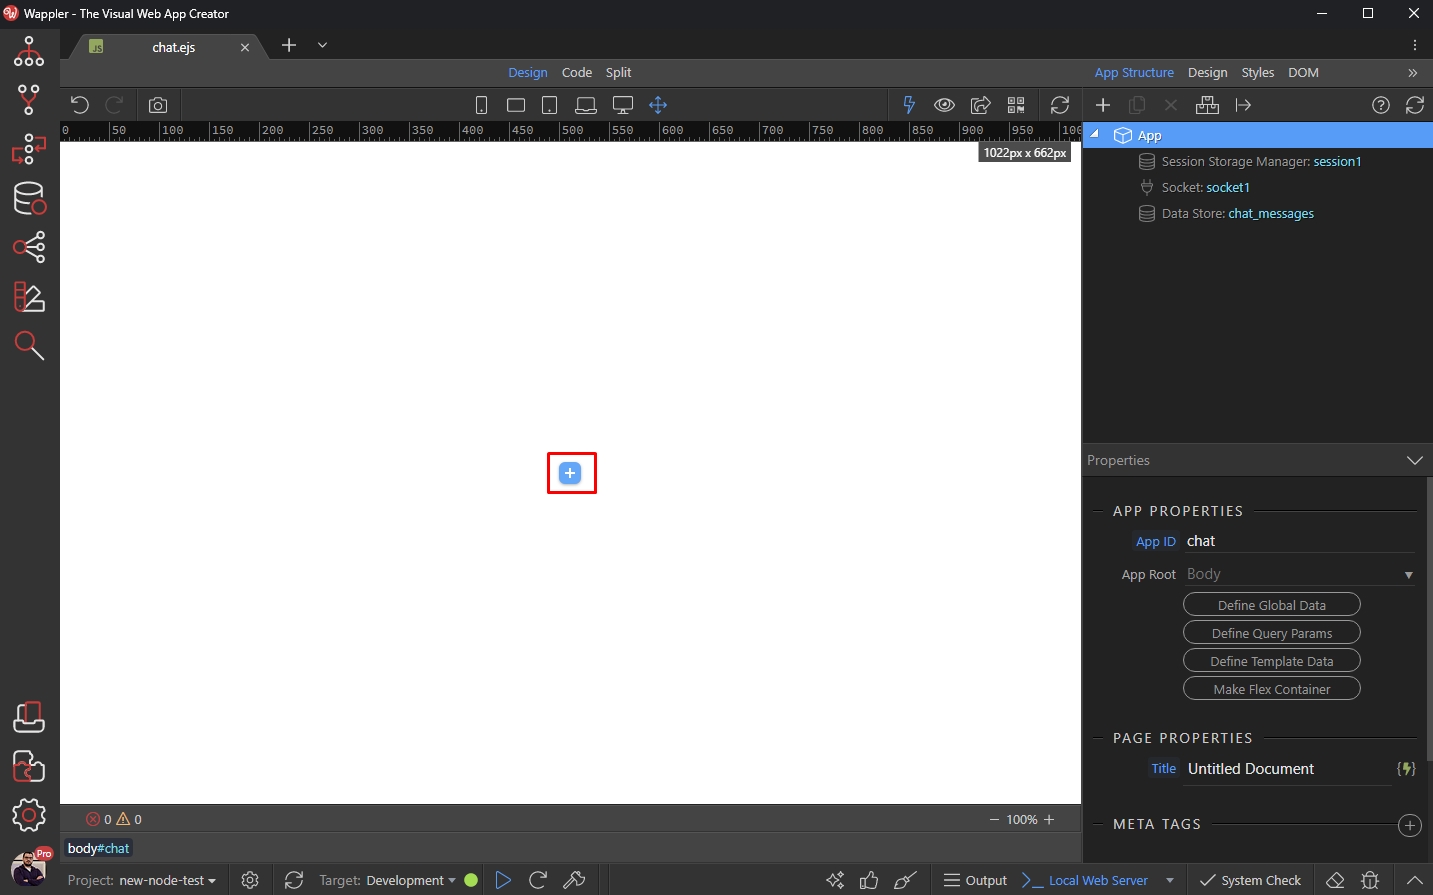
And select Container:
Section titled “And select Container:”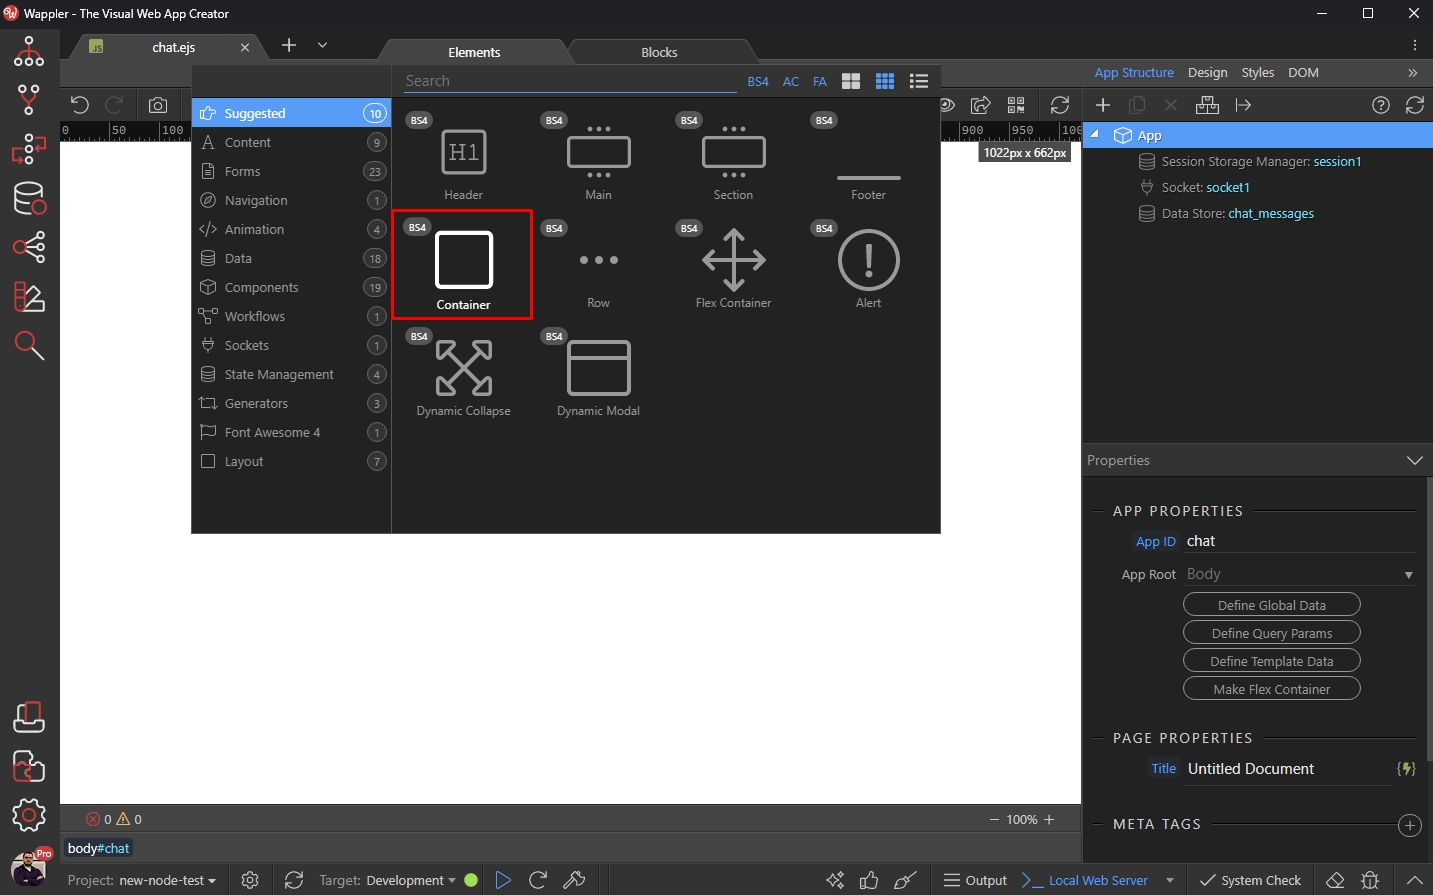
Then select the Header and two columns preset for the container layout:
Section titled “Then select the Header and two columns preset for the container layout:”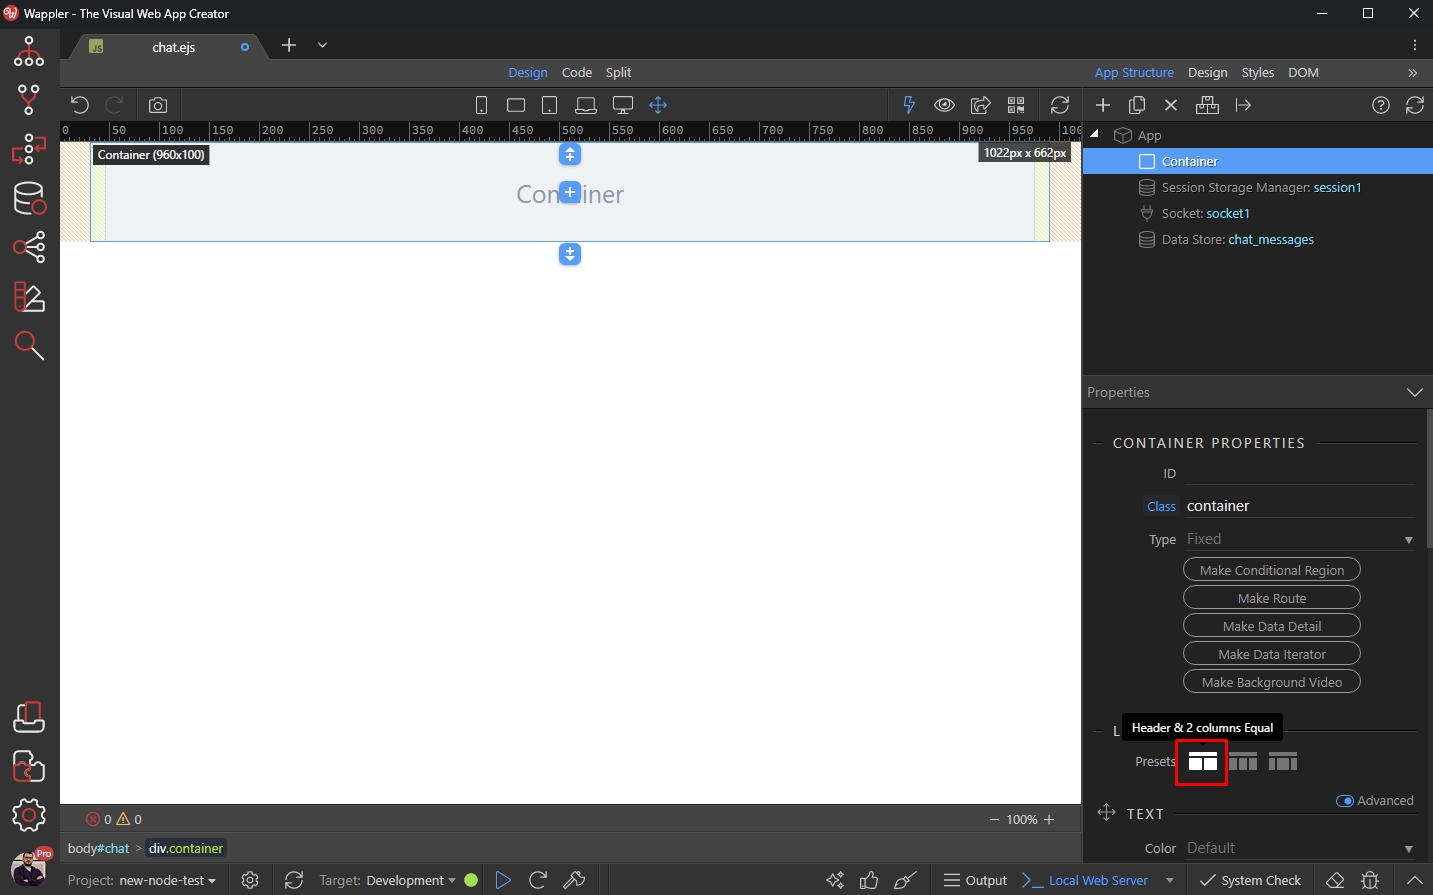
Username
Section titled “Username”The top row is where the username input will be placed. So click add new button in the column there:
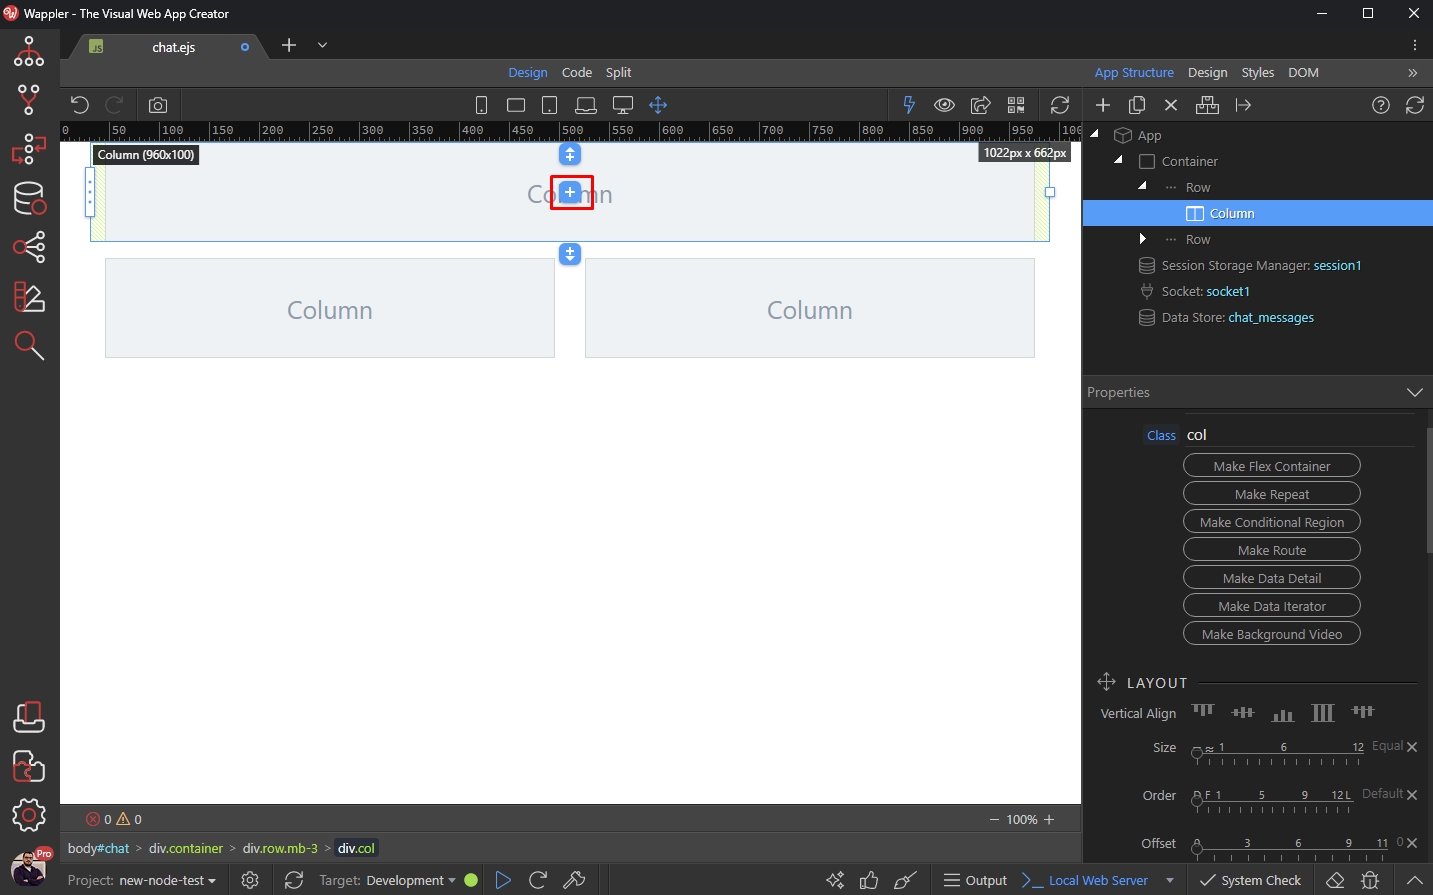
And add a text input:
Section titled “And add a text input:”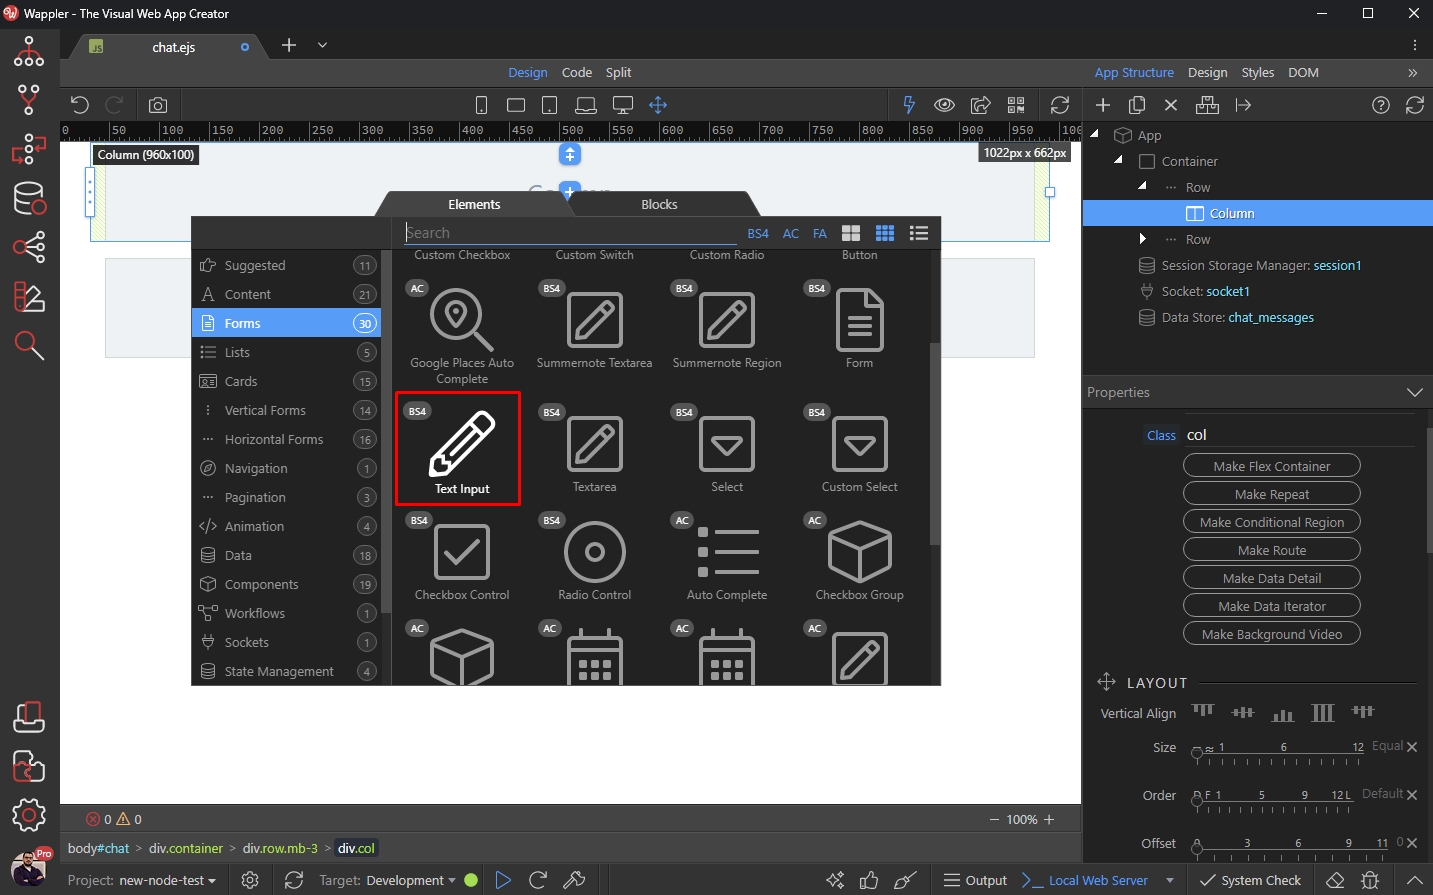
Step 54
Section titled “Step 54”Add an ID and name for it and and customize it, as per your needs. The styling of the input is not related to how the chat app will work:
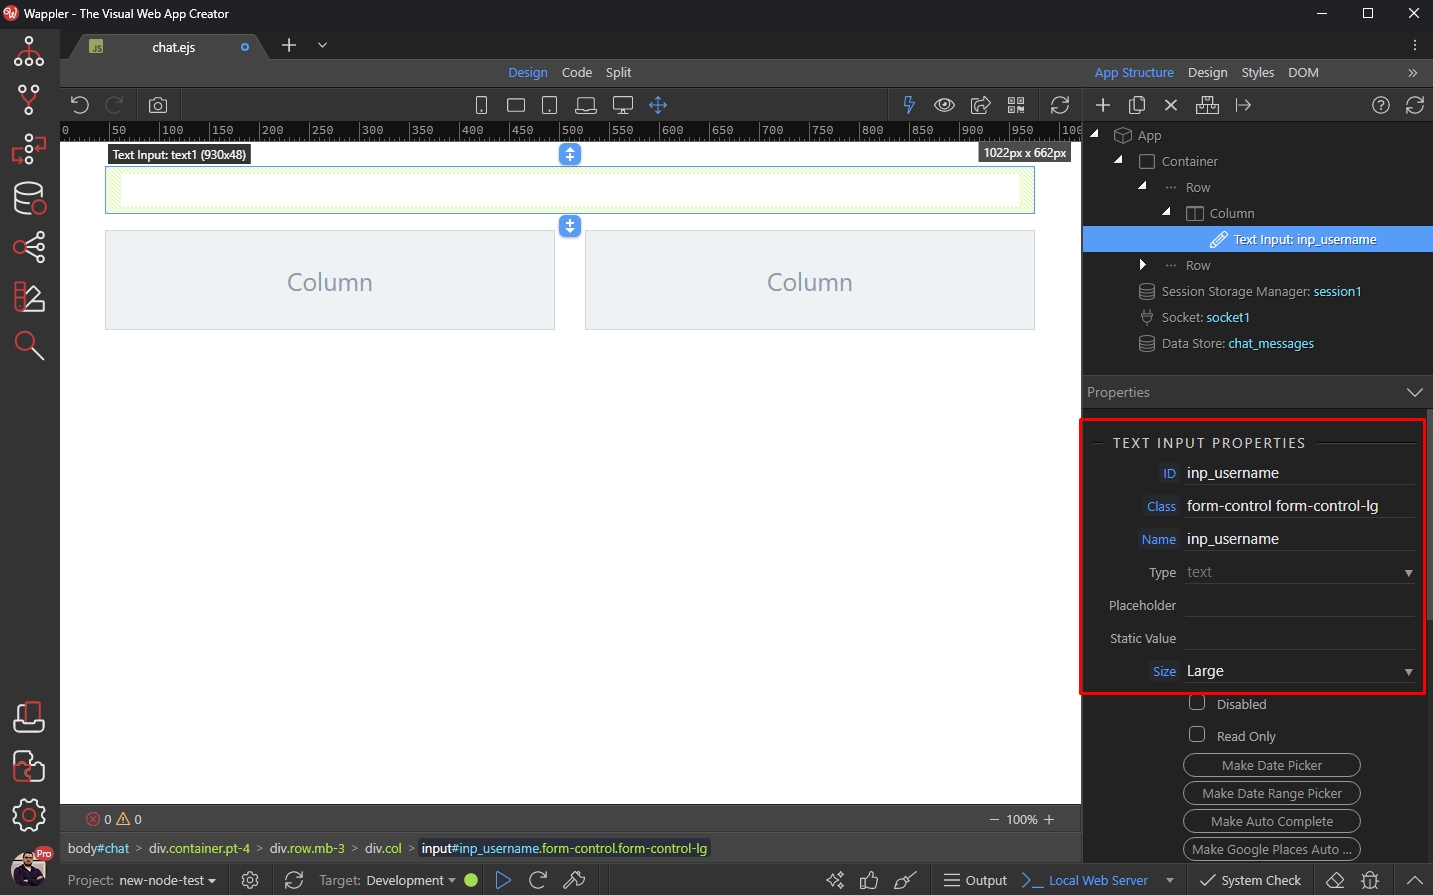
Then with the input selected click the Add After button:
Section titled “Then with the input selected click the Add After button:”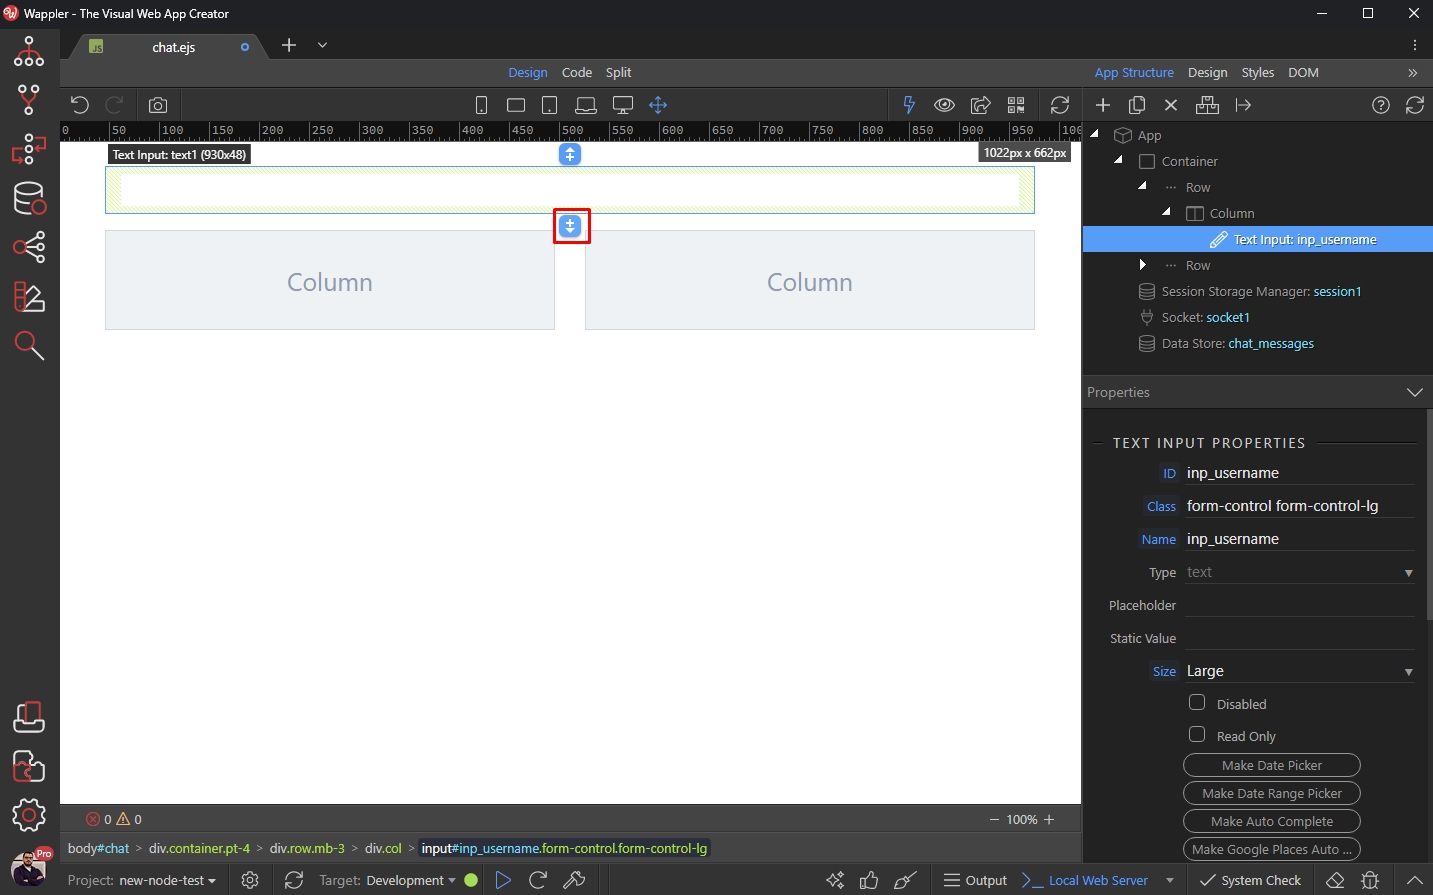
Add a button:
Section titled “Add a button:”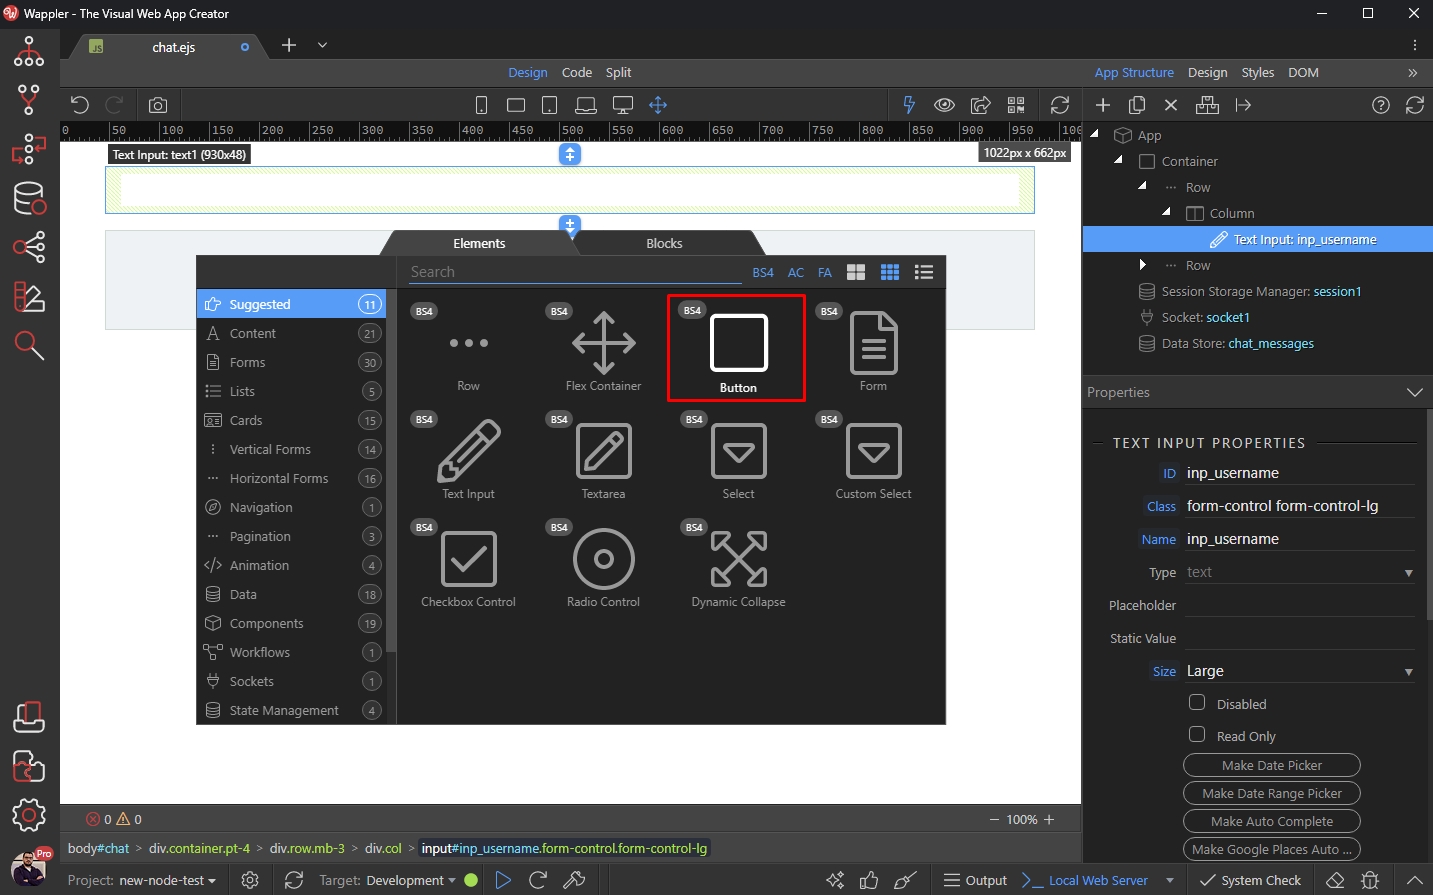
Step 57
Section titled “Step 57”This button will be used to enter the chat, after the username is entered. I.e. it will add the entered username to the session storage.
Style it as per your needs:
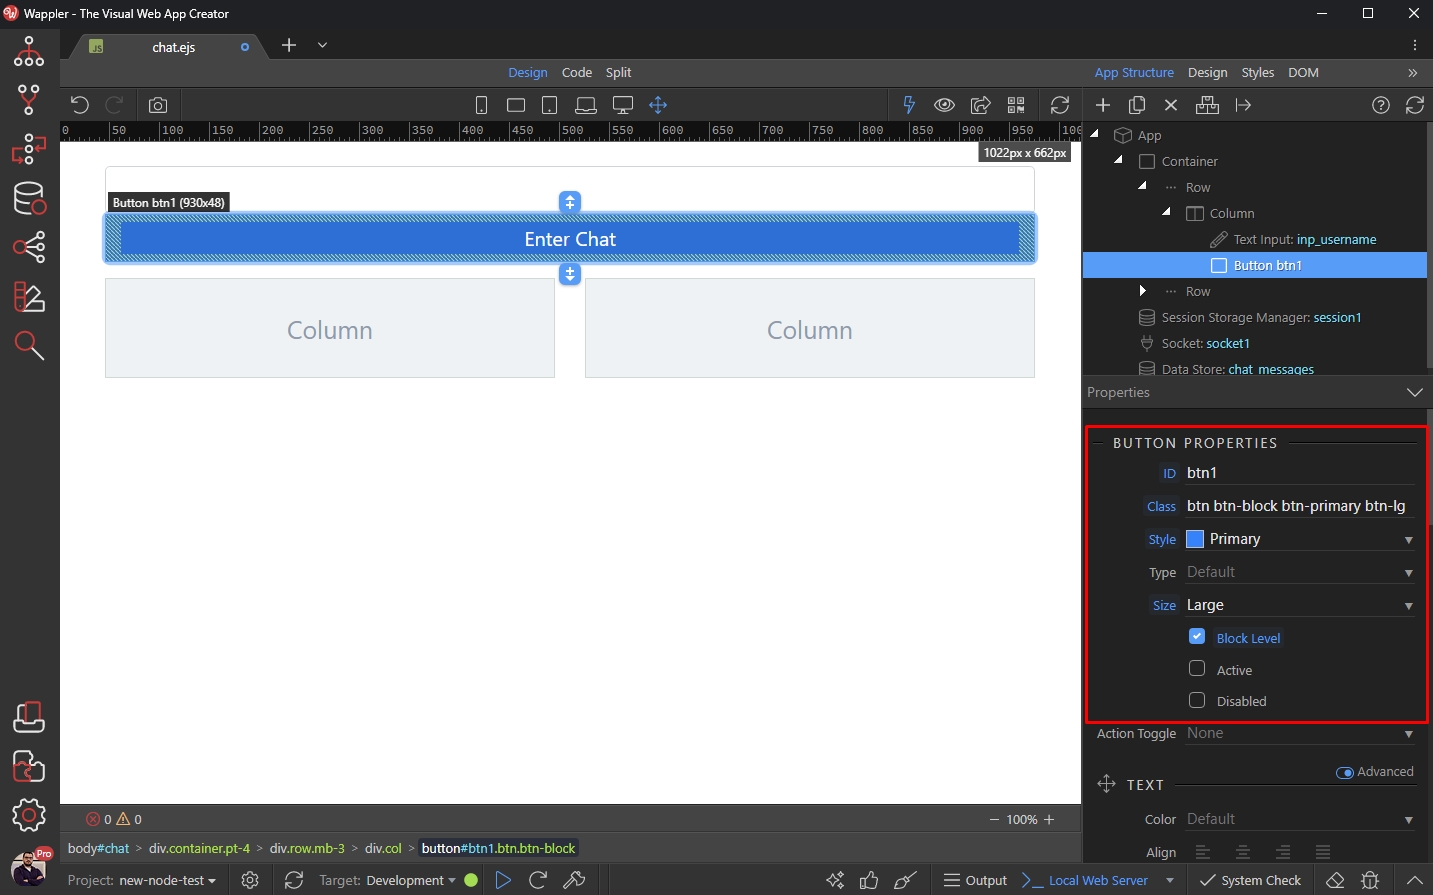
Then add new Dynamic Event:
Section titled “Then add new Dynamic Event:”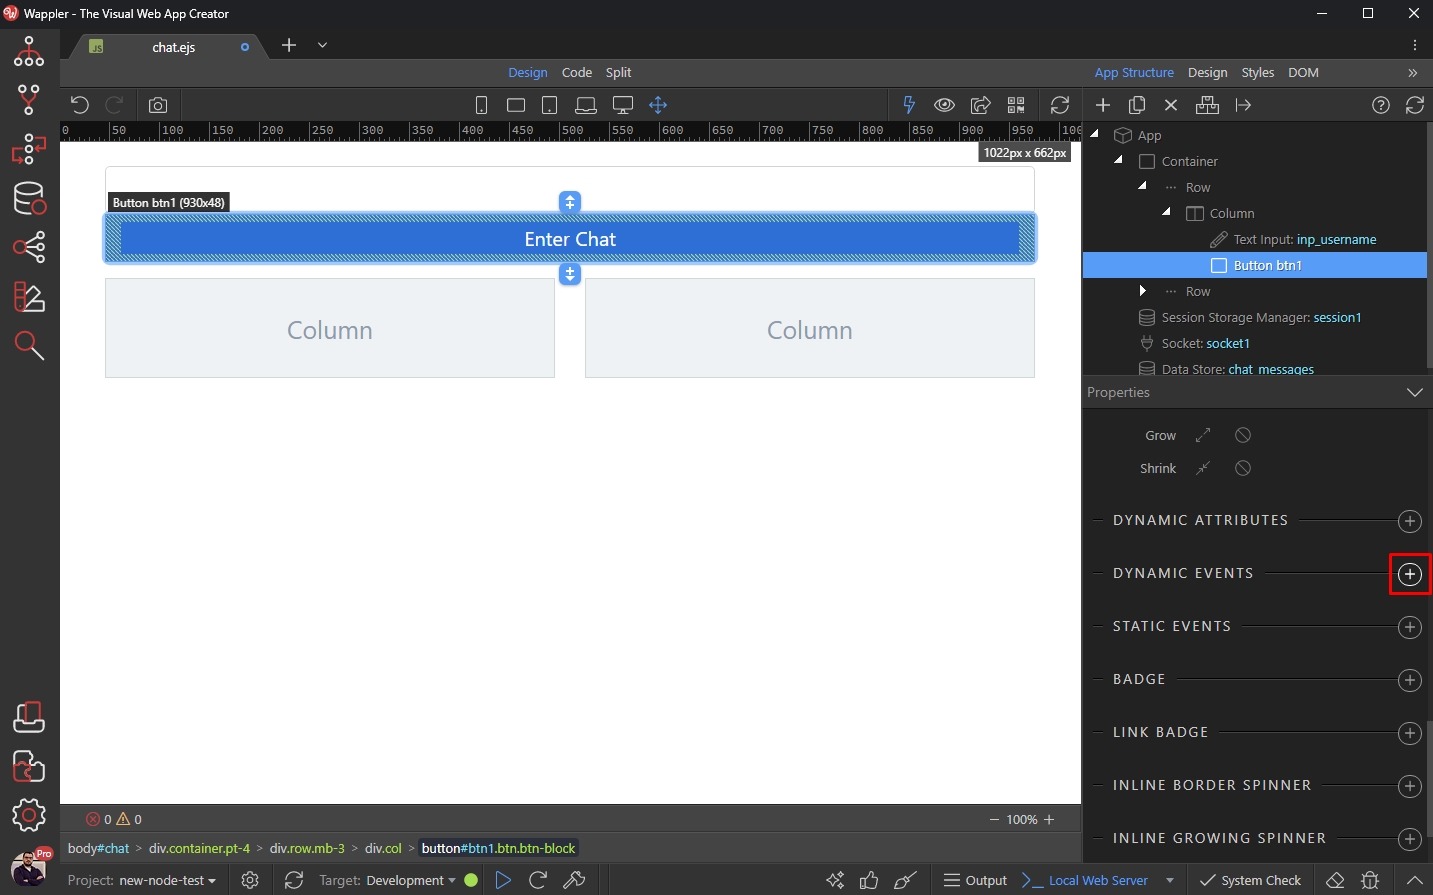
Select Mouse > Click:
Section titled “Select Mouse > Click:”
And click the dynamic action picker icon:
Section titled “And click the dynamic action picker icon:”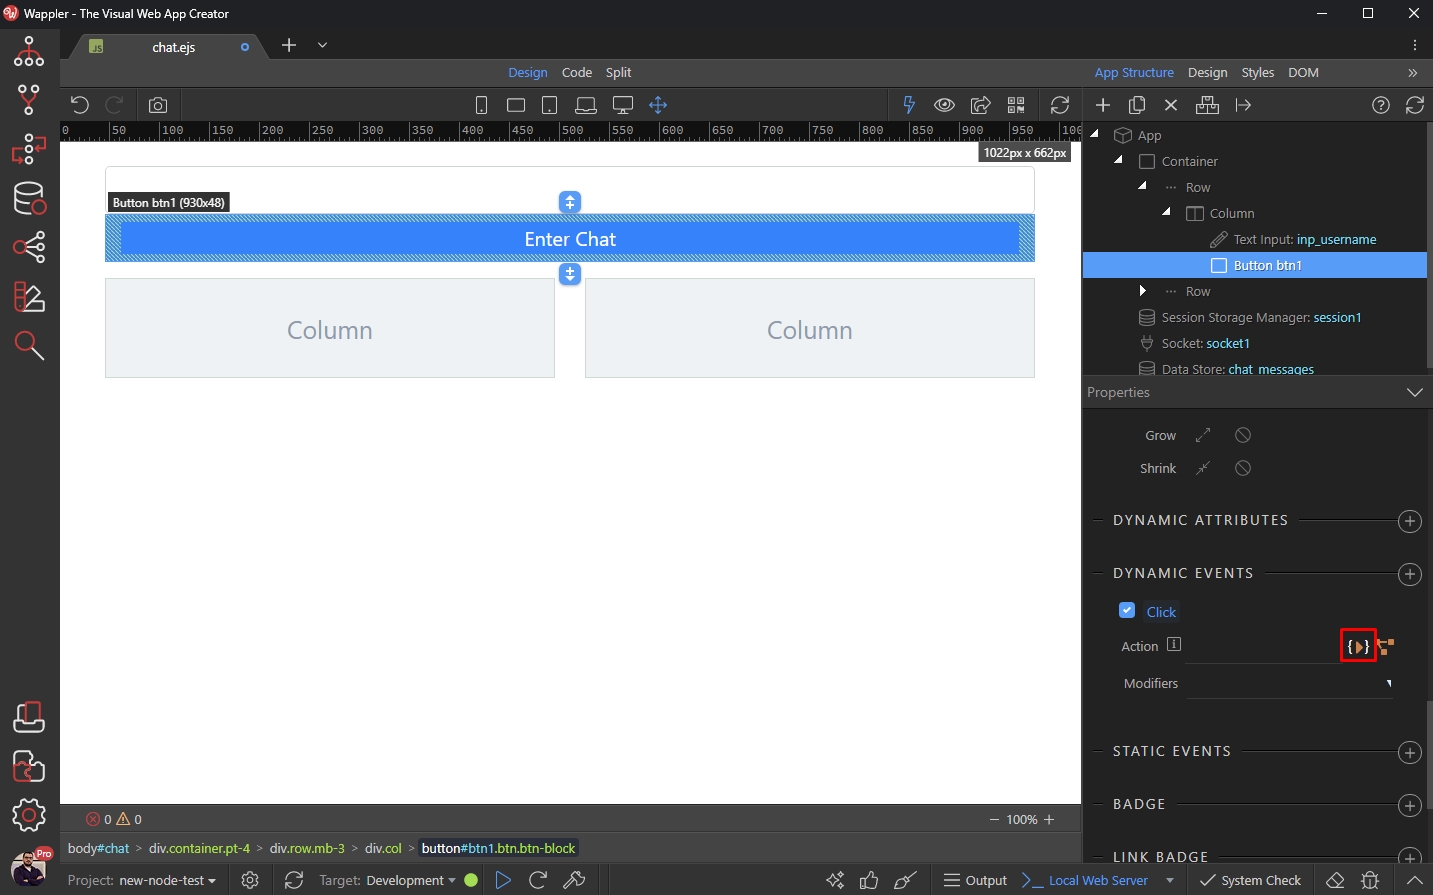
Select Set under the Session Storage component:
Section titled “Select Set under the Session Storage component:”
Choose a dynamic value for the username session variable:
Section titled “Choose a dynamic value for the username session variable:”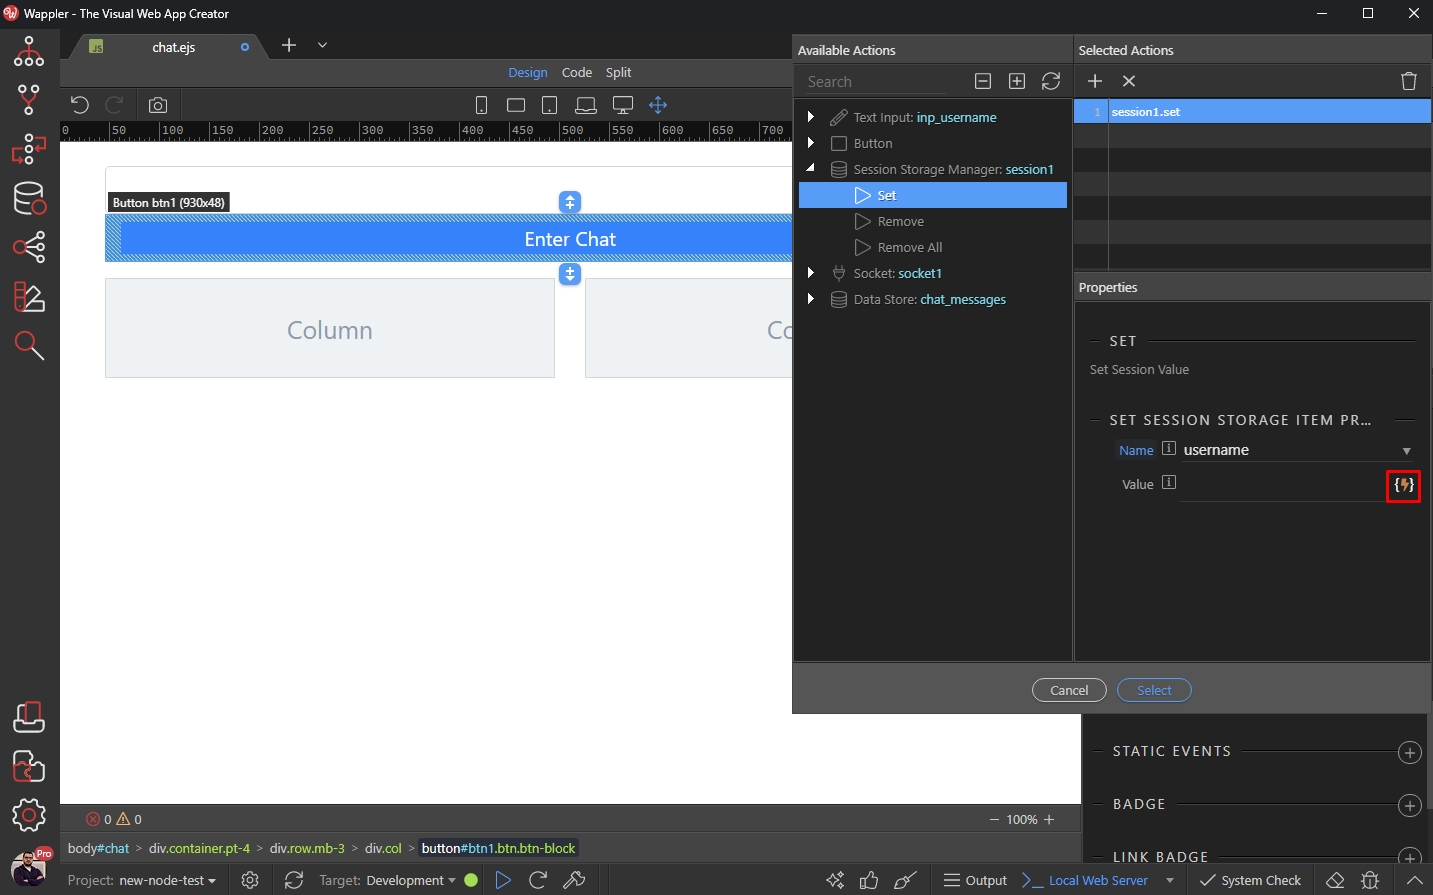
This should be the username input value:
Section titled “This should be the username input value:”
Click Select:
Section titled “Click Select:”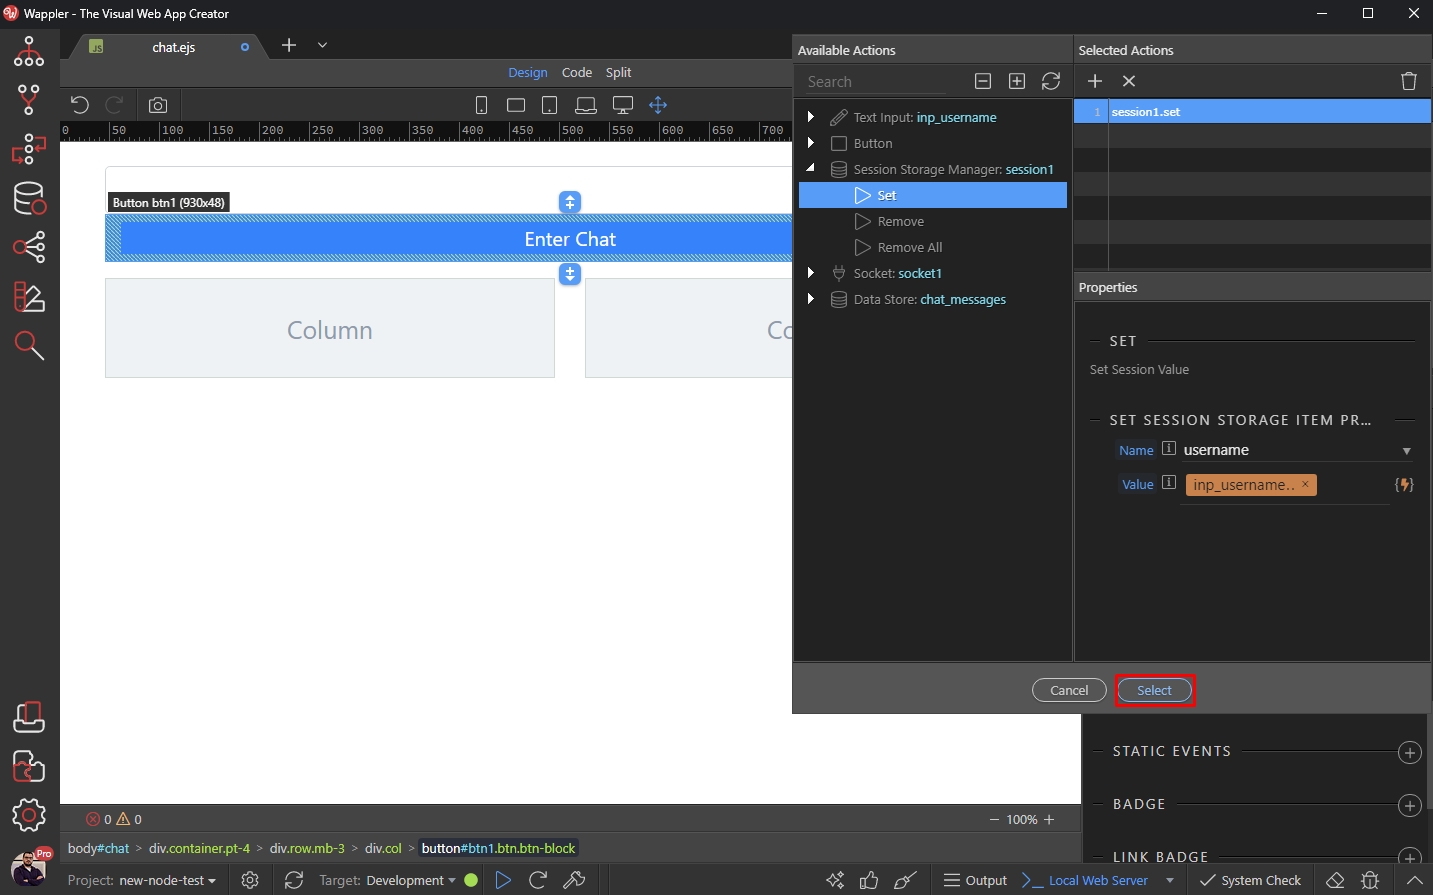
Message Input
Section titled “Message Input”The chat section of our app consists of two columns - one for the message input and another one which lists the chat messages.
Click the add new element button in the left column:
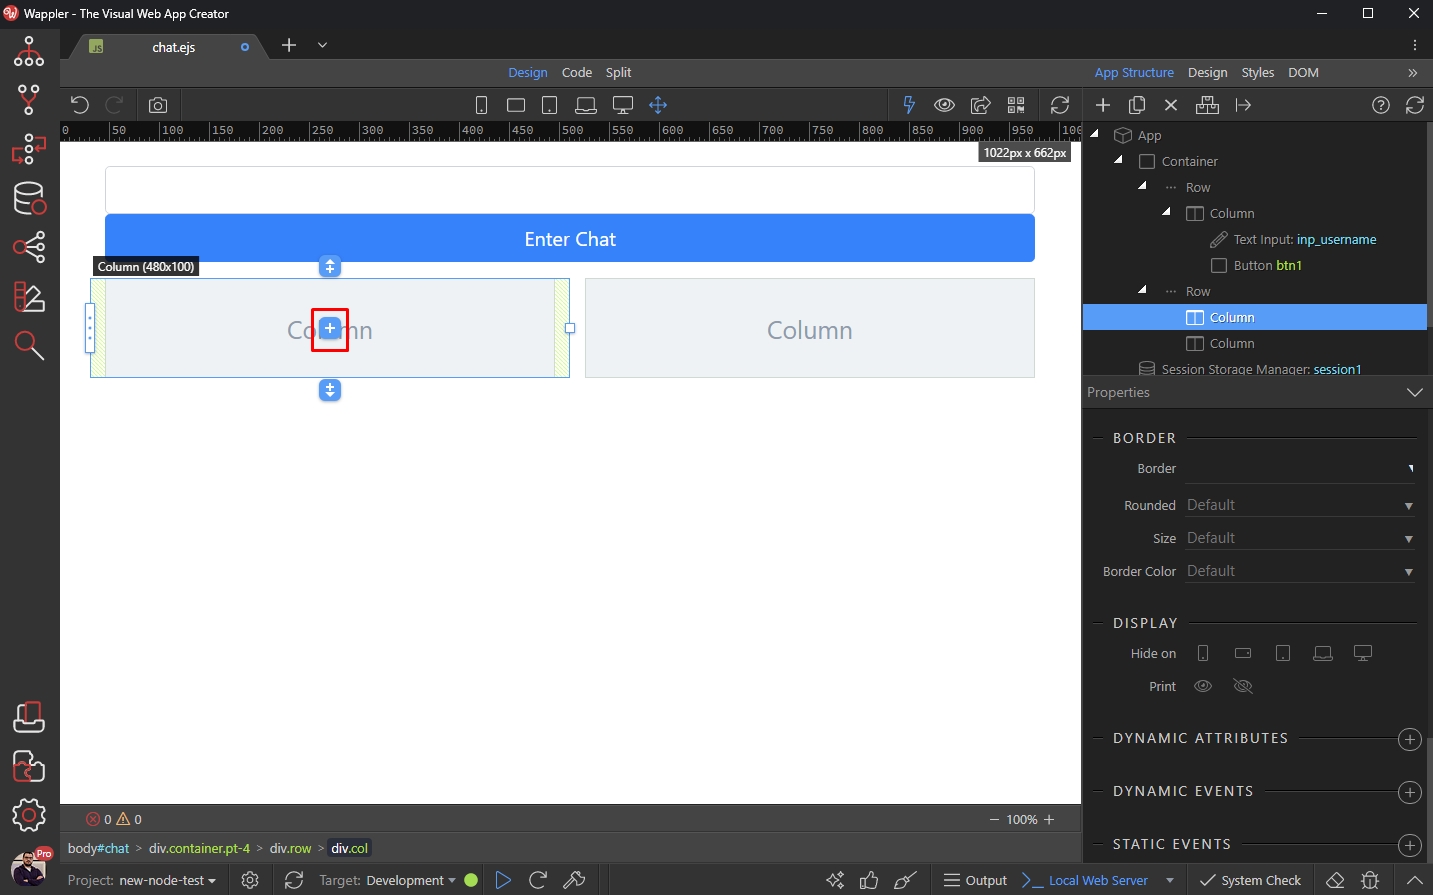
Add a textarea:
Section titled “Add a textarea:”
Add a name and ID for it:
Section titled “Add a name and ID for it:”
With the textarea still selected, click the add after button:
Section titled “With the textarea still selected, click the add after button:”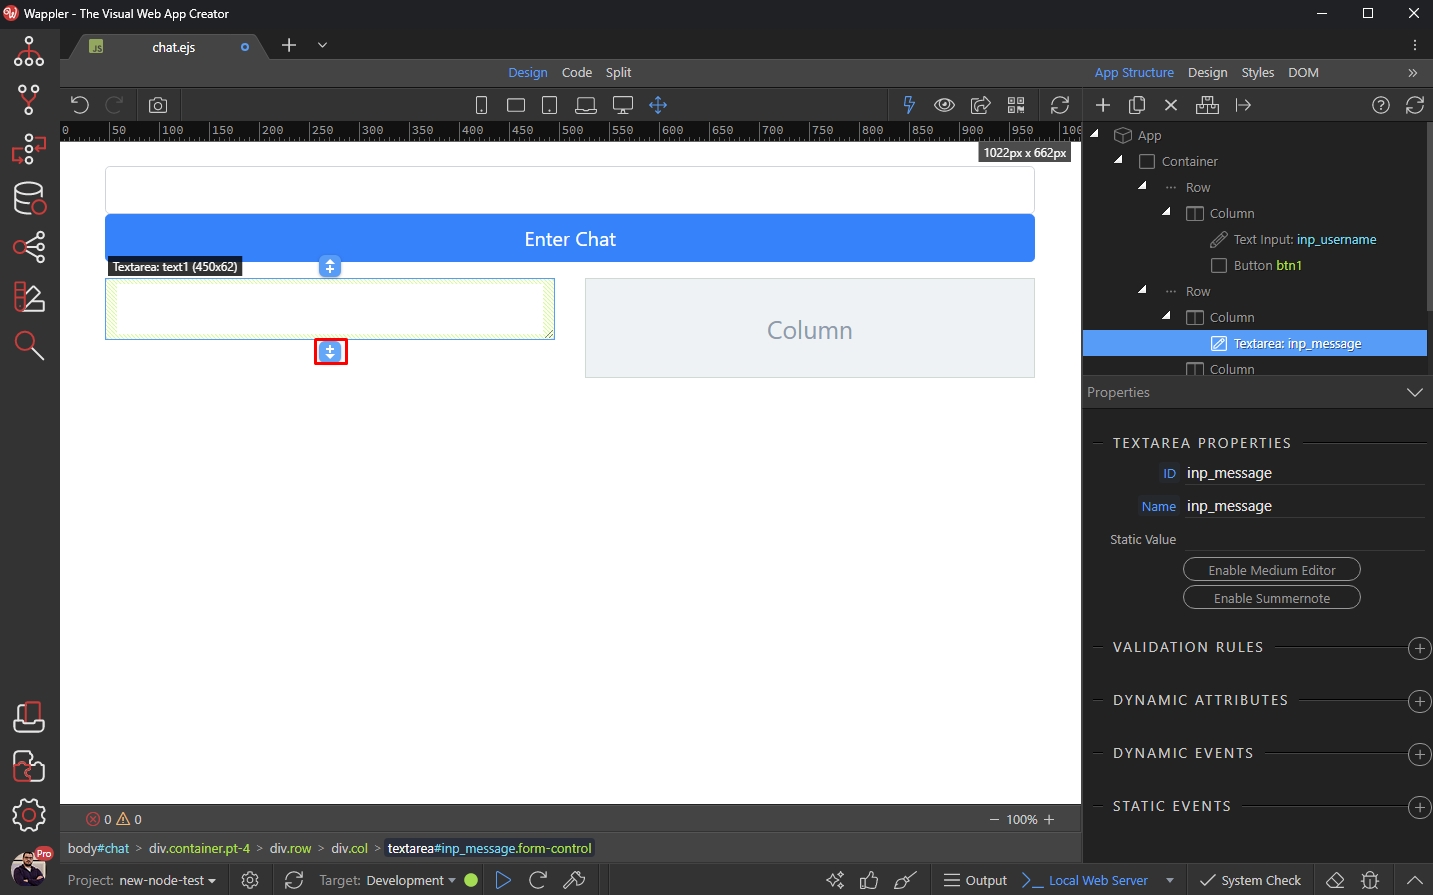
And add a button:
Section titled “And add a button:”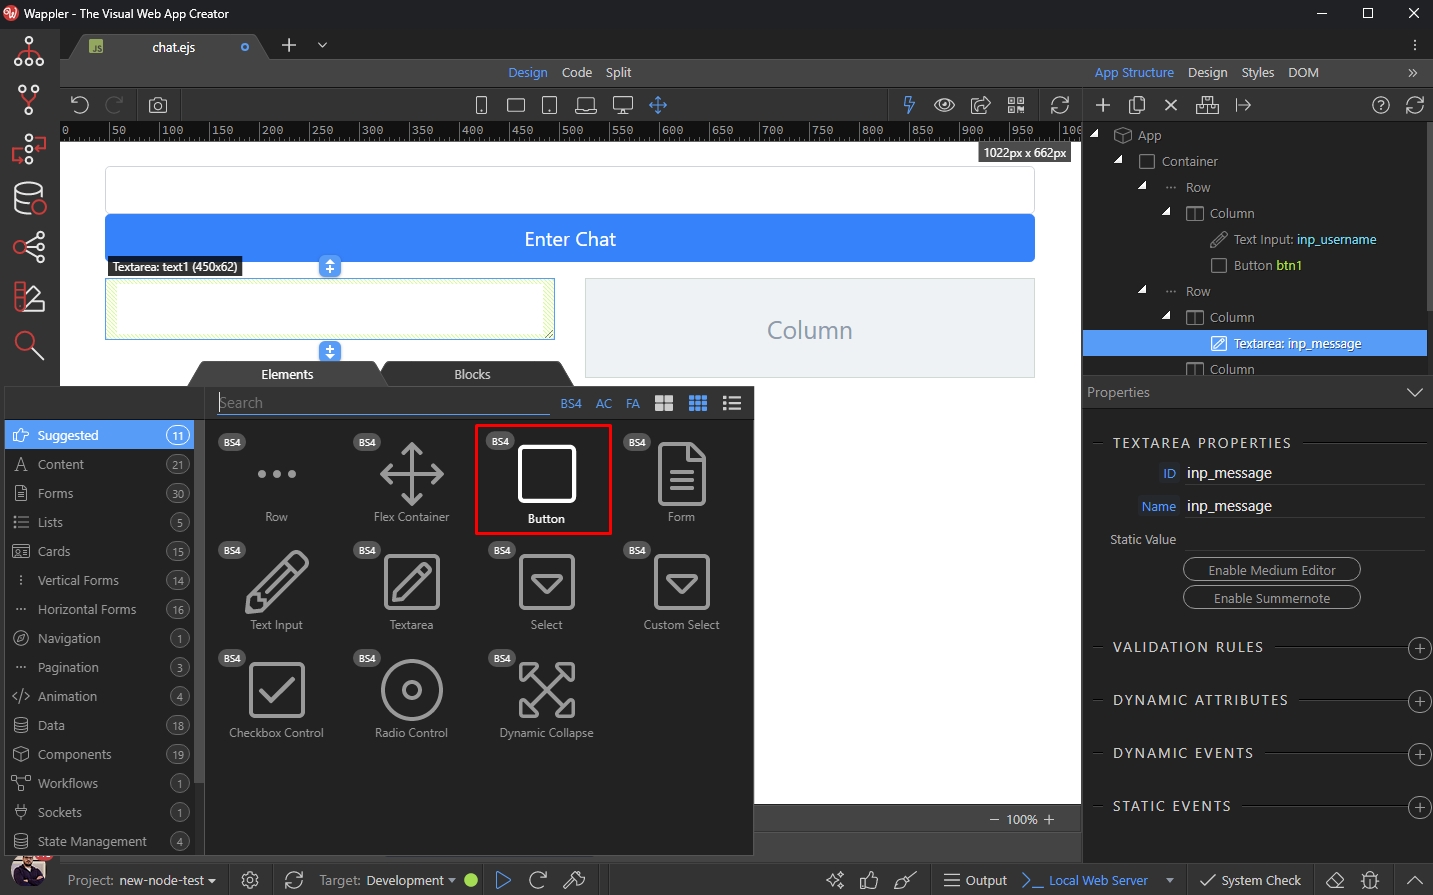
Style it as per your needs. This button will be used to send the message you enter in the textarea:
Section titled “Style it as per your needs. This button will be used to send the message you enter in the textarea:”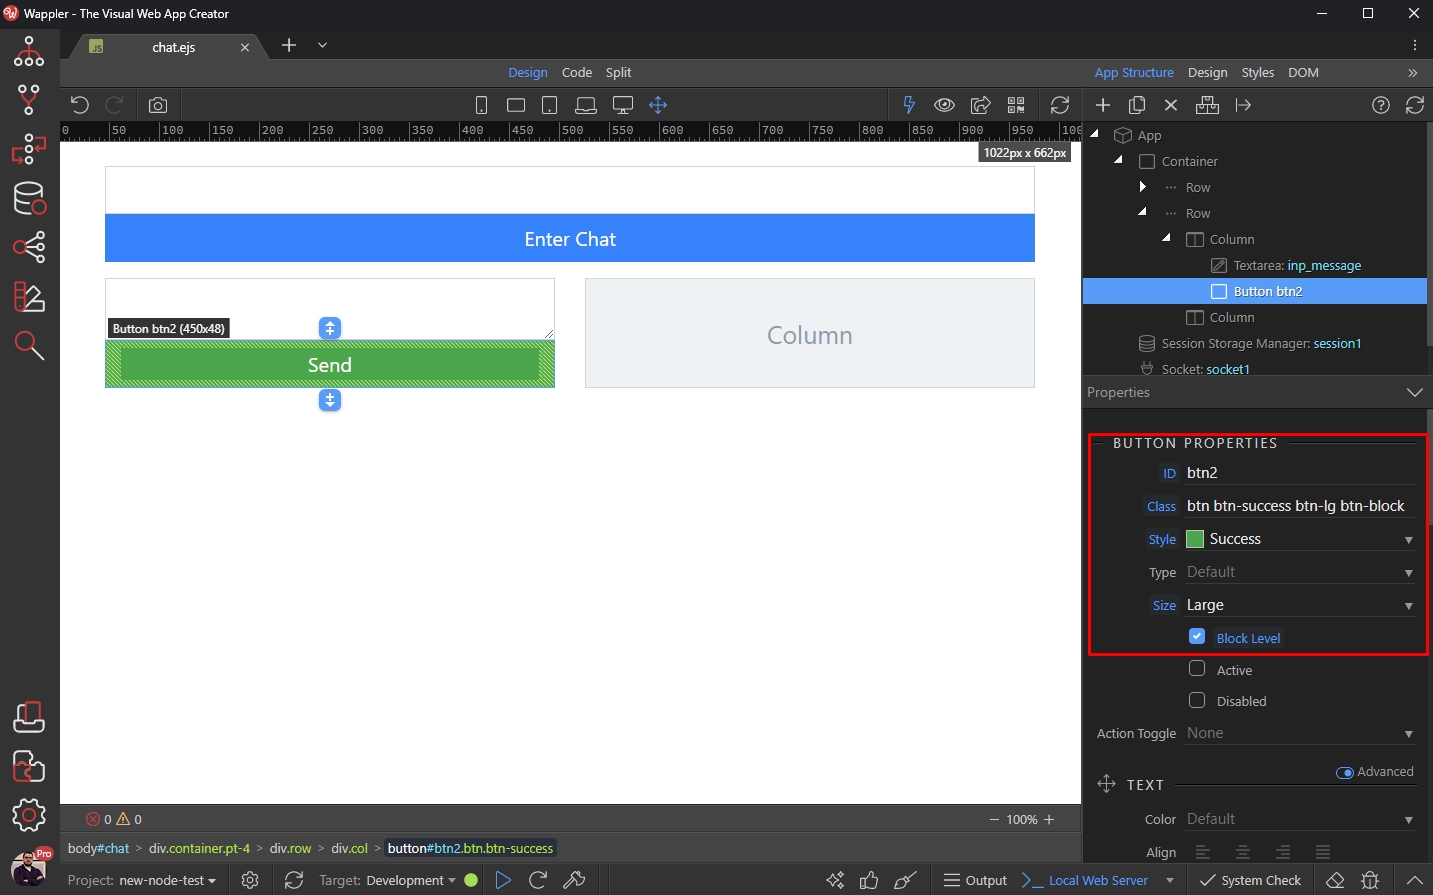
Add new dynamic event:
Section titled “Add new dynamic event:”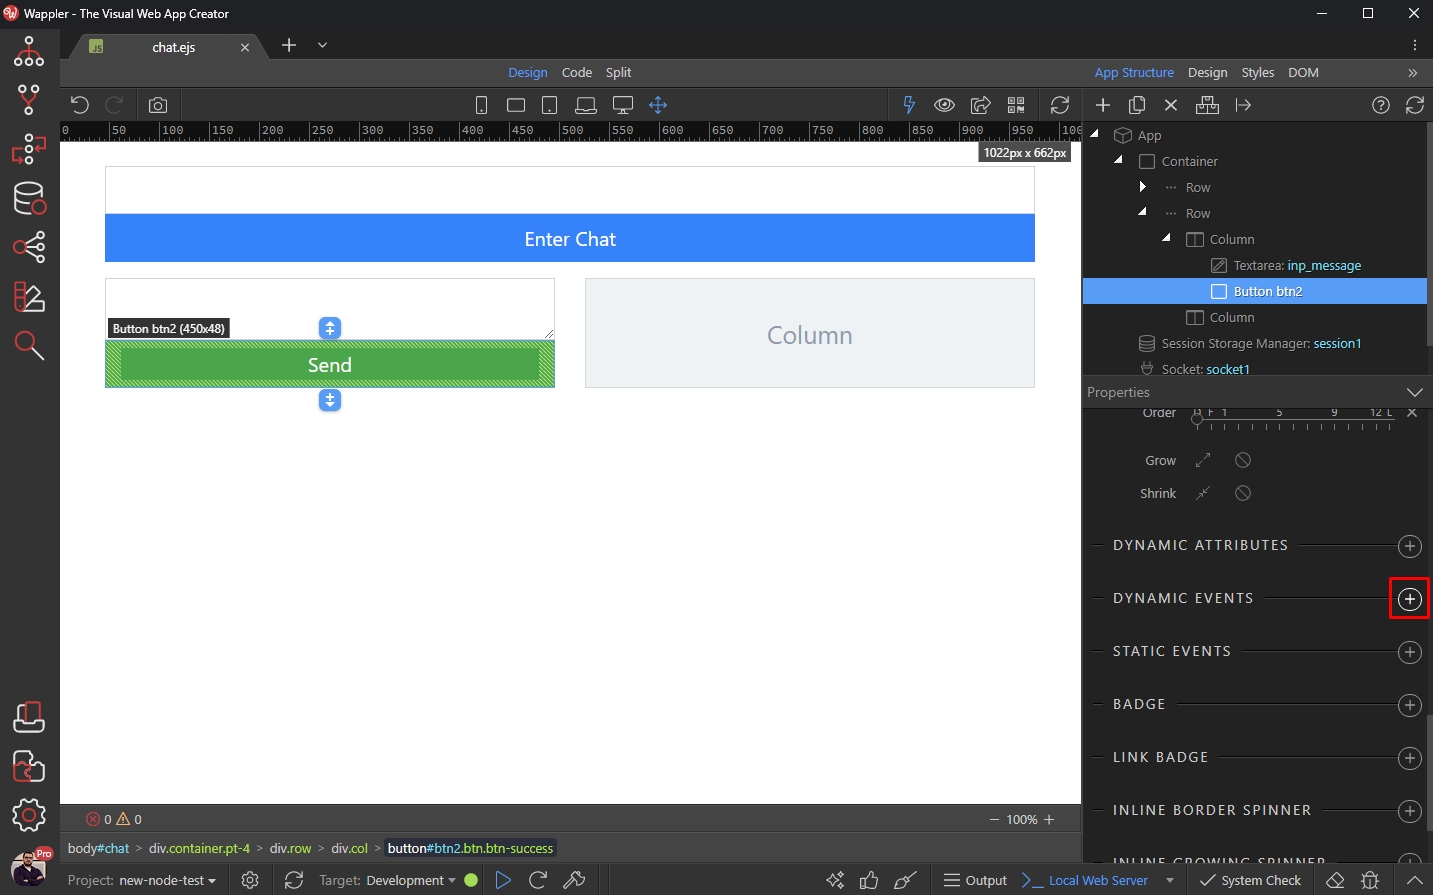
Select Mouse > Click:
Section titled “Select Mouse > Click:”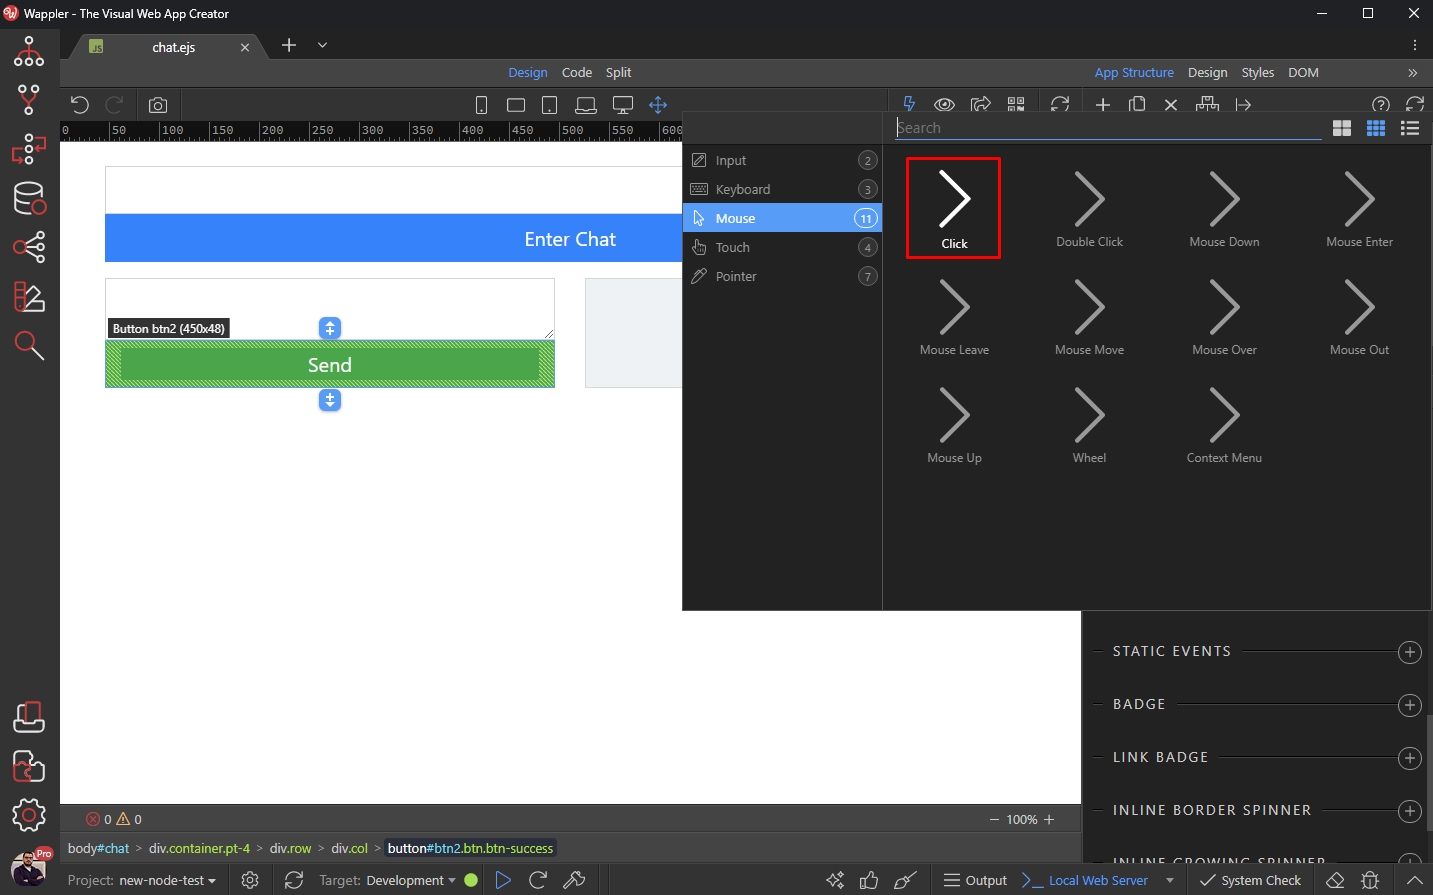
And click the dynamic action picker icon:
Section titled “And click the dynamic action picker icon:”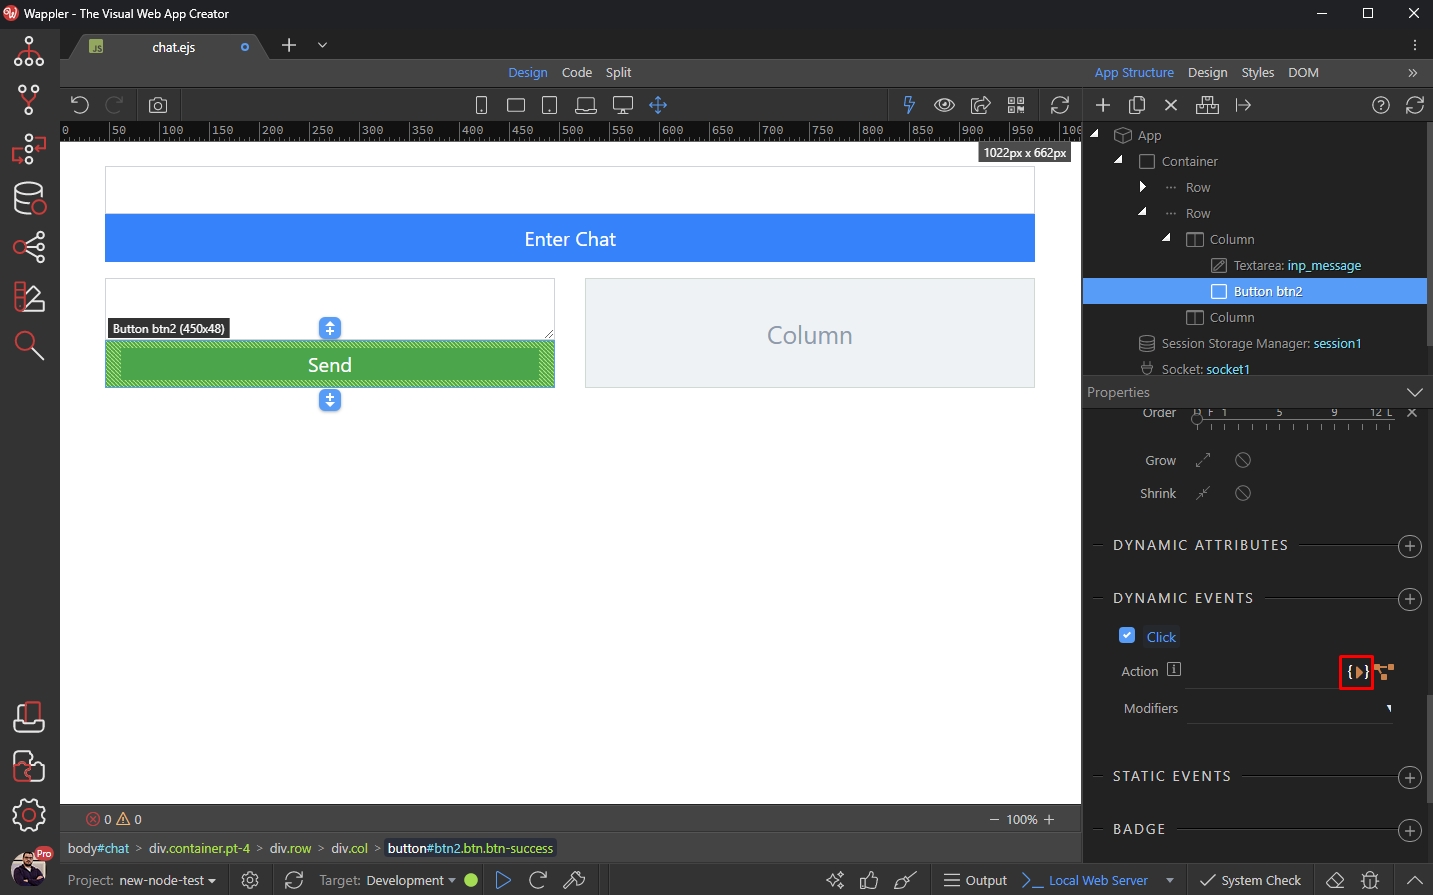
Select and add Emit under the Socket component:
Section titled “Select and add Emit under the Socket component:”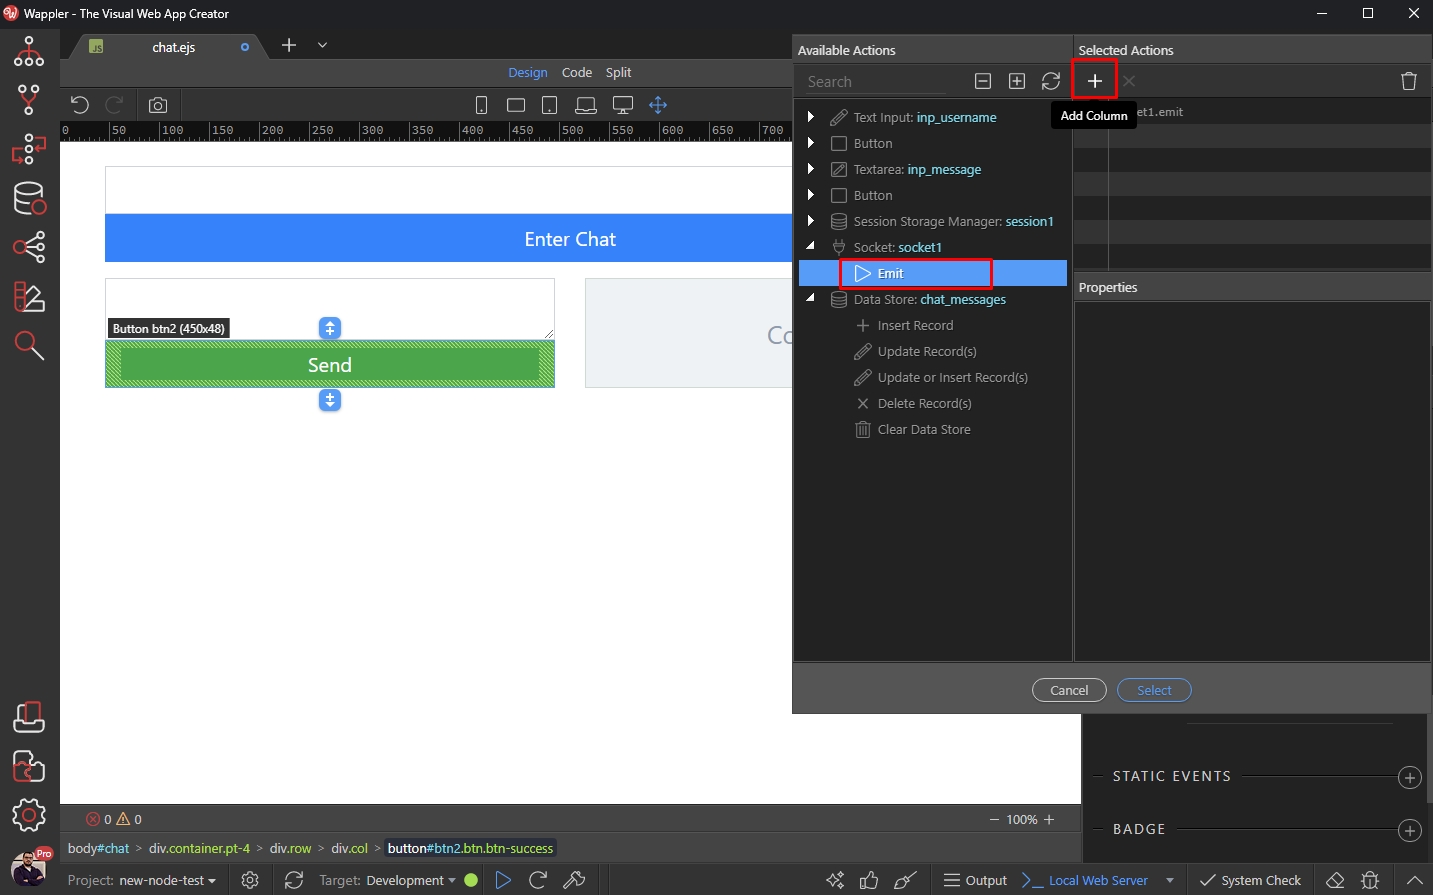
Open the Type menu and select the chat_message message template:
Section titled “Open the Type menu and select the chat_message message template:”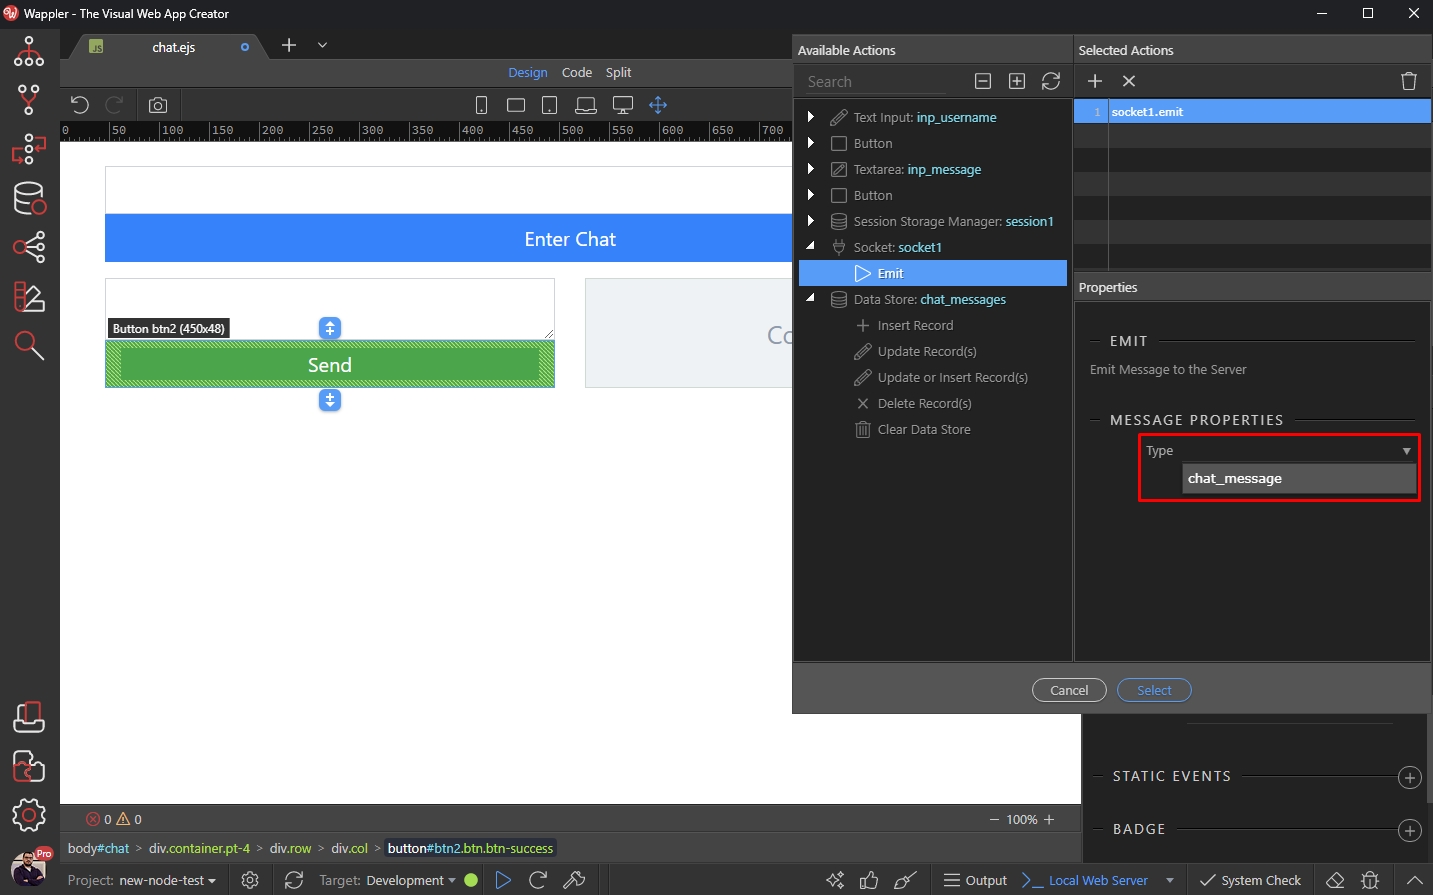
Step 77
Section titled “Step 77”Now let's select the dynamic data, which needs to be sent with the Emit action.
Click the dynamic data picker for the username:
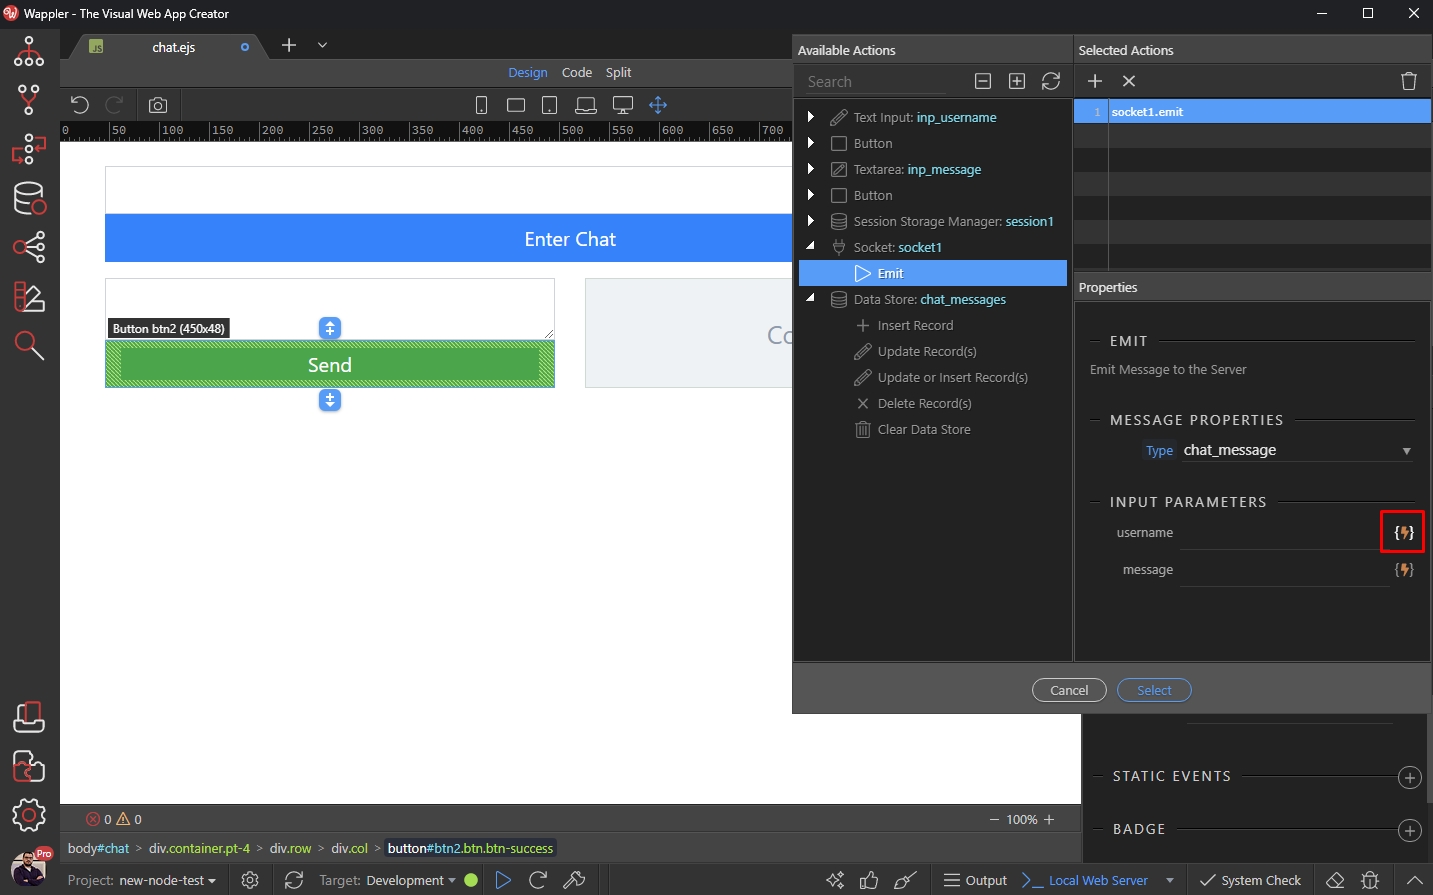
The username will be stored in a session variable, so we select the session variable where we are storing it:
Section titled “The username will be stored in a session variable, so we select the session variable where we are storing it:”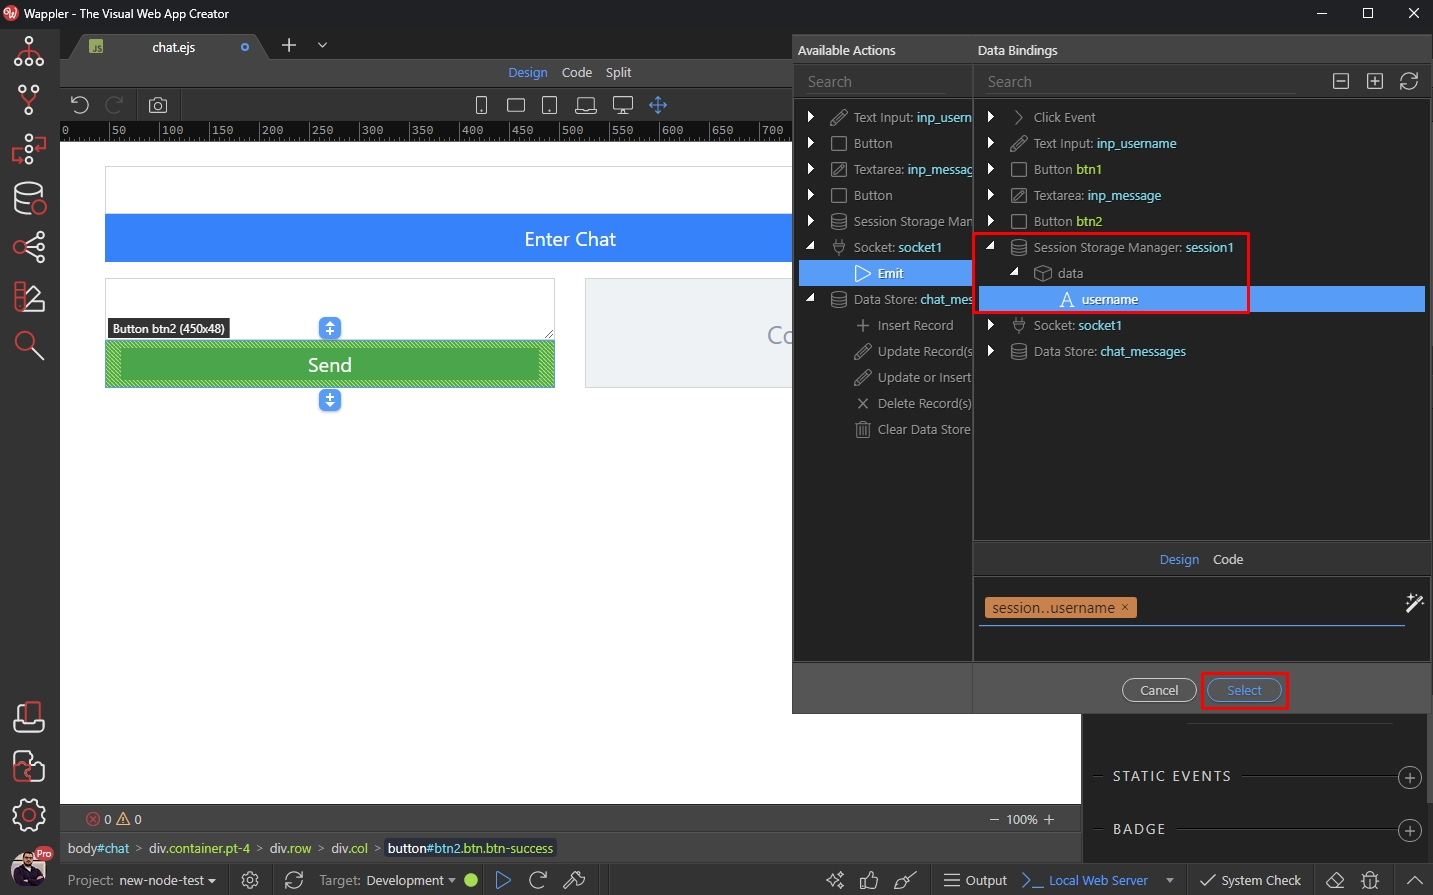
We do the same for the message:
Section titled “We do the same for the message:”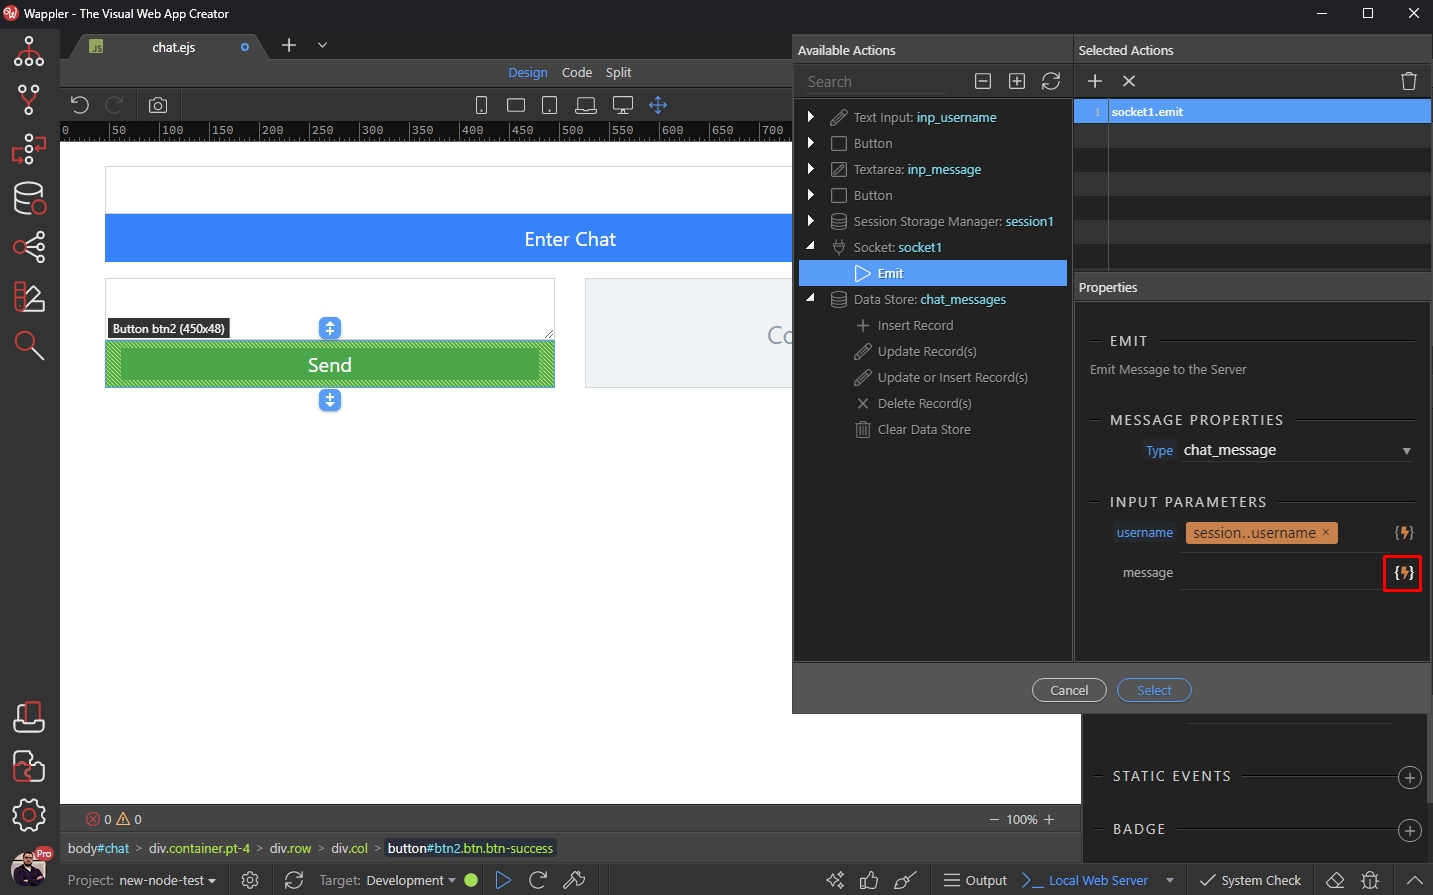
This should be the value of the message text area:
Section titled “This should be the value of the message text area:”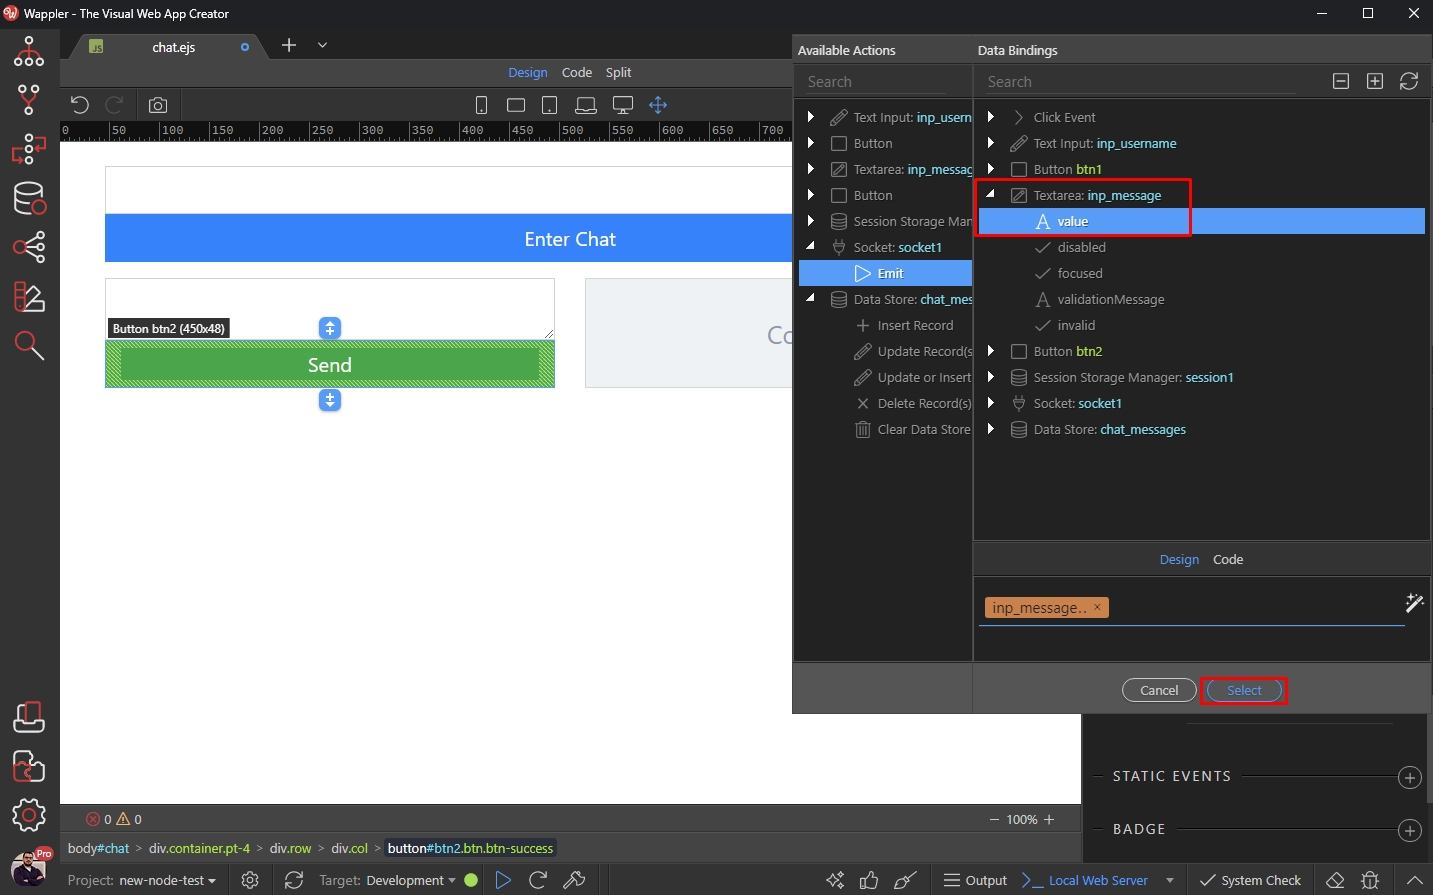
Step 81
Section titled “Step 81”You can clear the textarea value, after the message has been sent. Under textarea select set value and add it to the actions list:
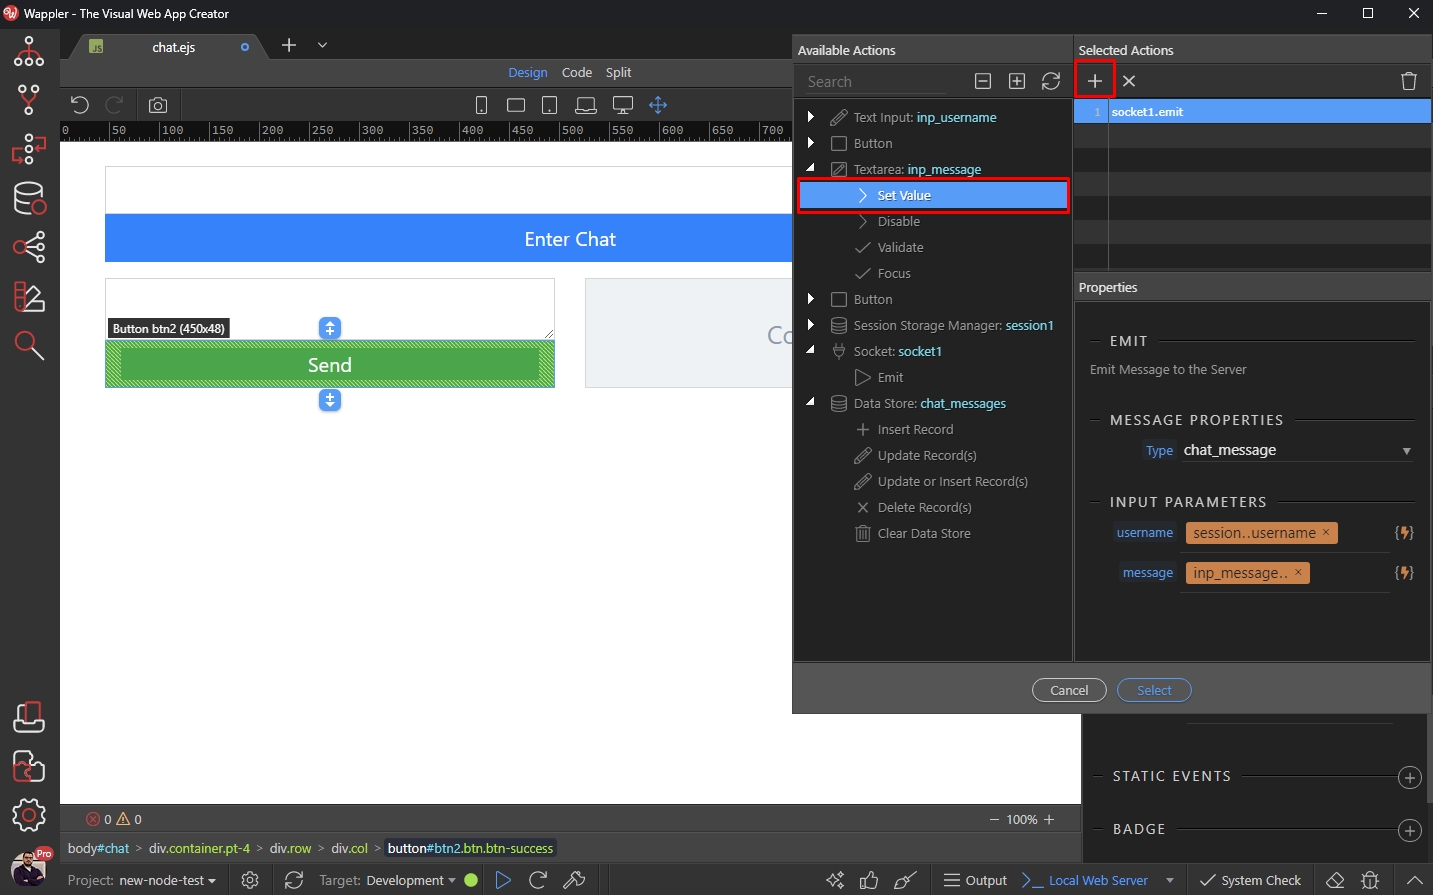
Just enter an emtpy space there and click select:
Section titled “Just enter an emtpy space there and click select:”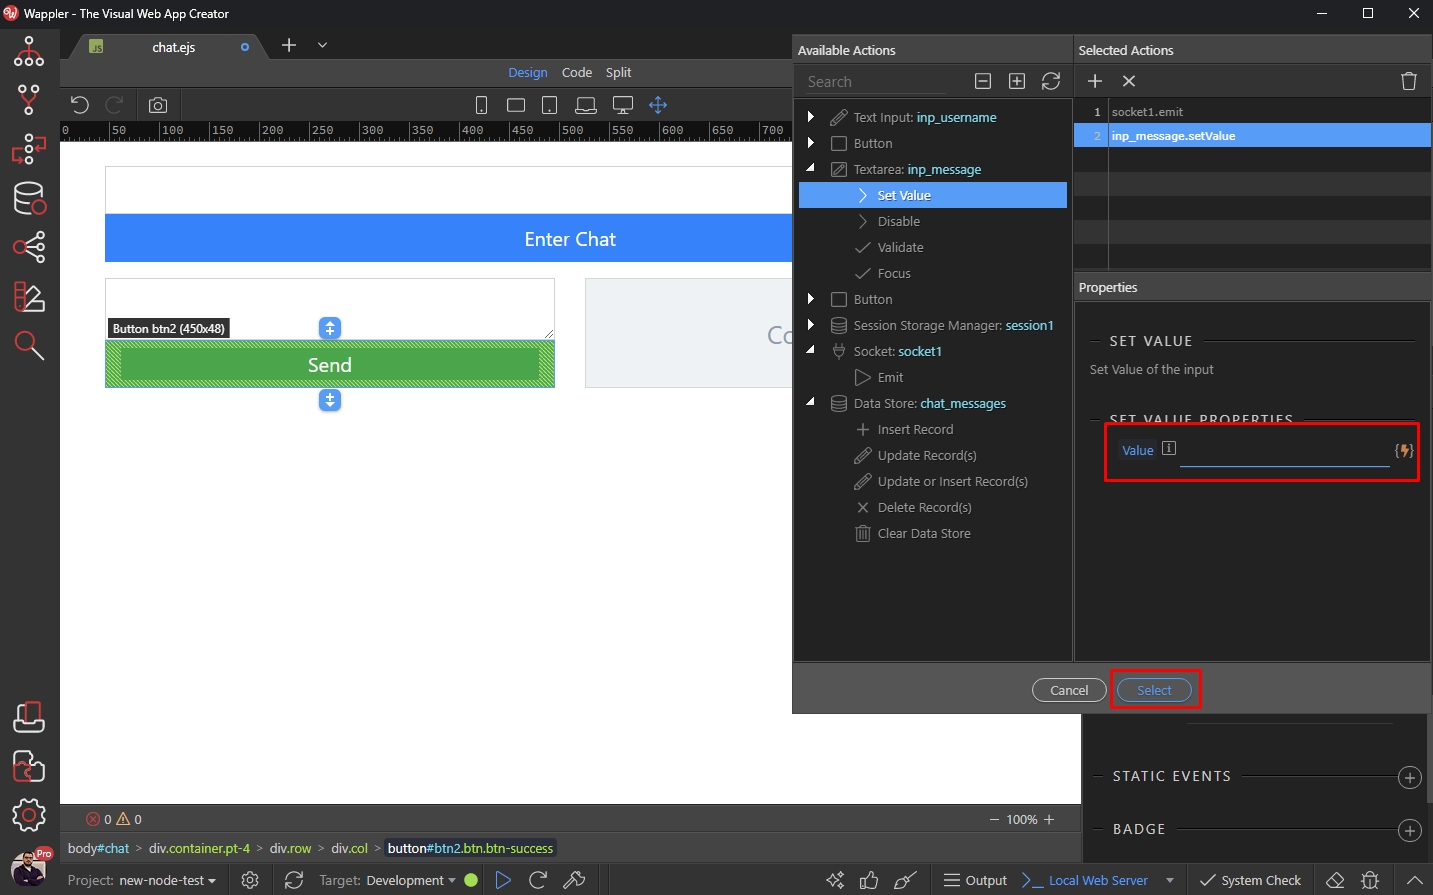
Chat Messages
Section titled “Chat Messages”Now, let's setup the repeat region, which will display the chat messages.
Click the add new element button in the right column:
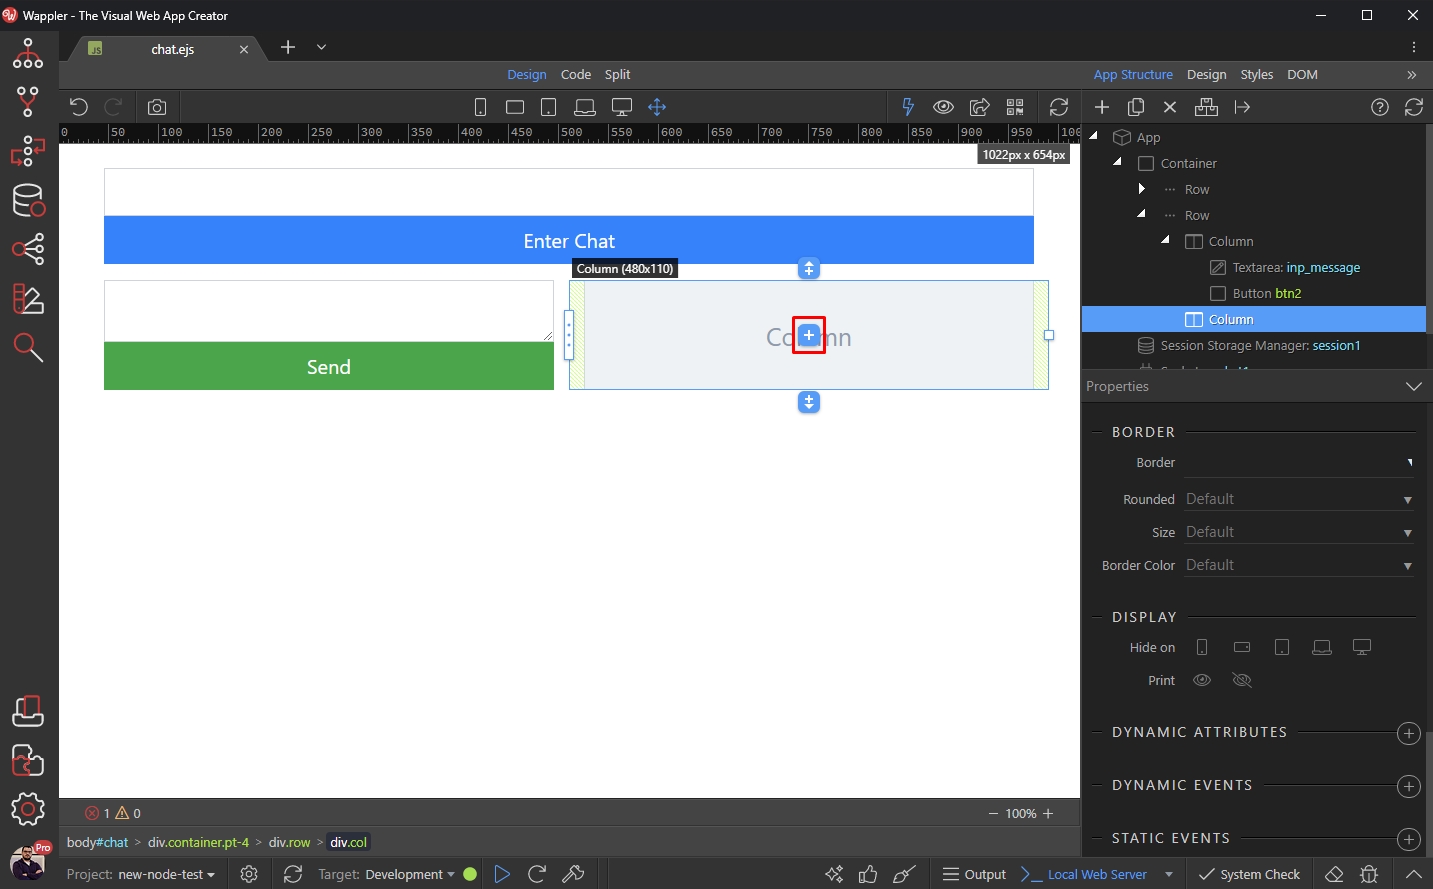
Add a row:
Section titled “Add a row:”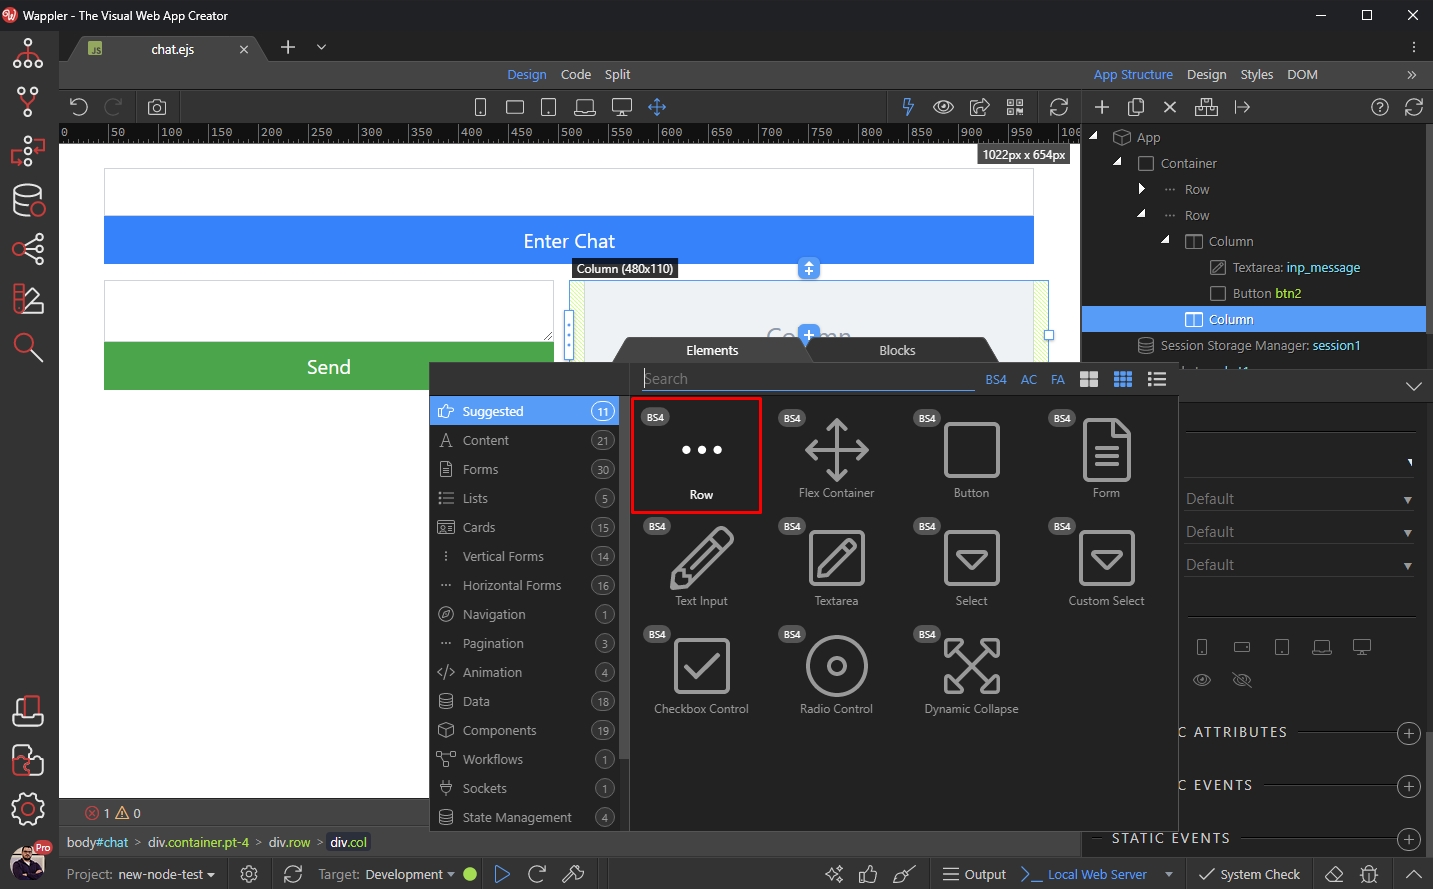
Then add a column in this row:
Section titled “Then add a column in this row:”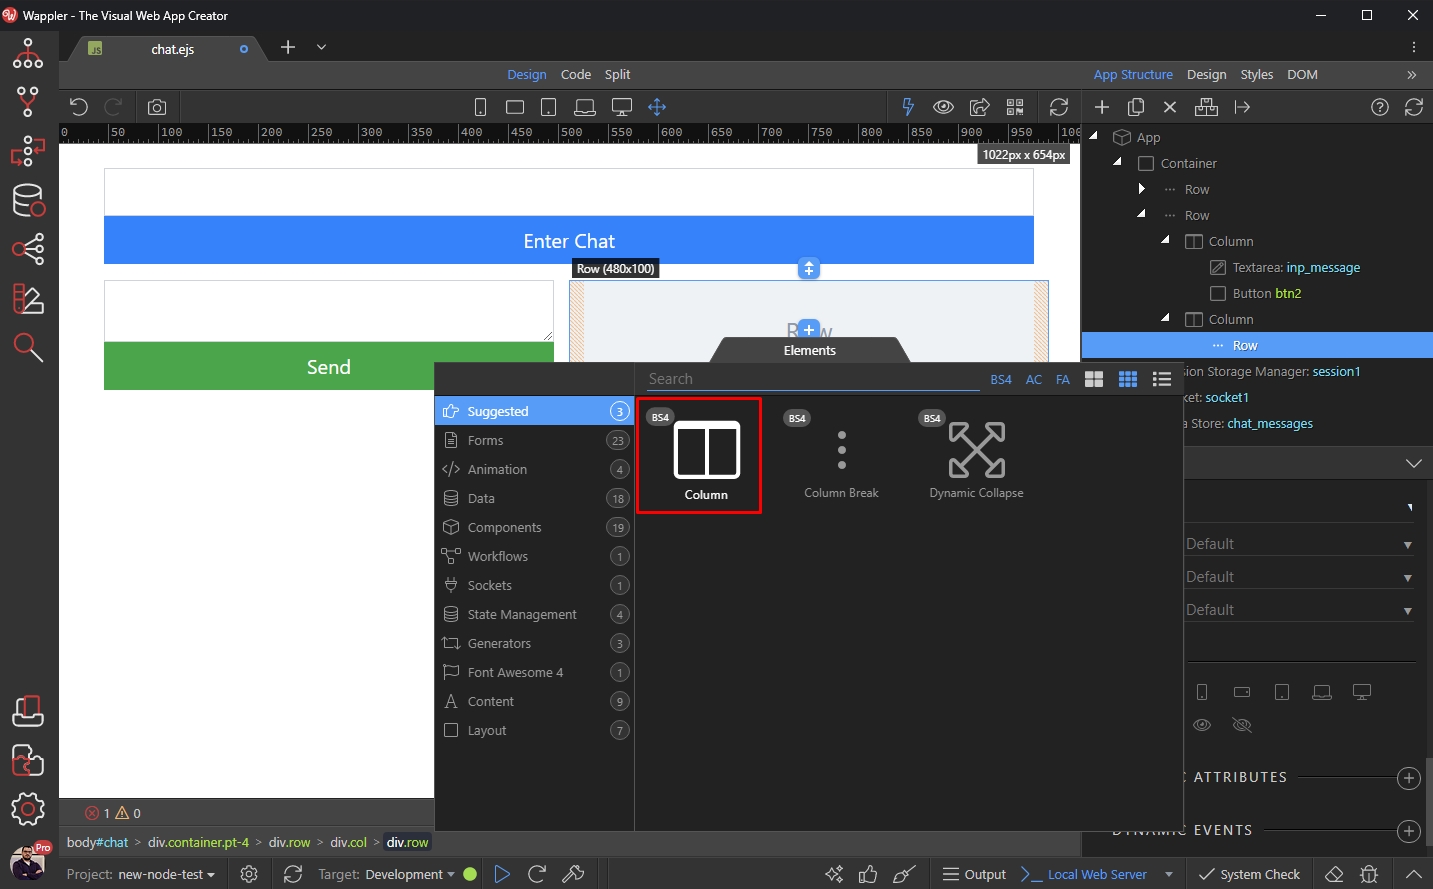
Set the column size to 12:
Section titled “Set the column size to 12:”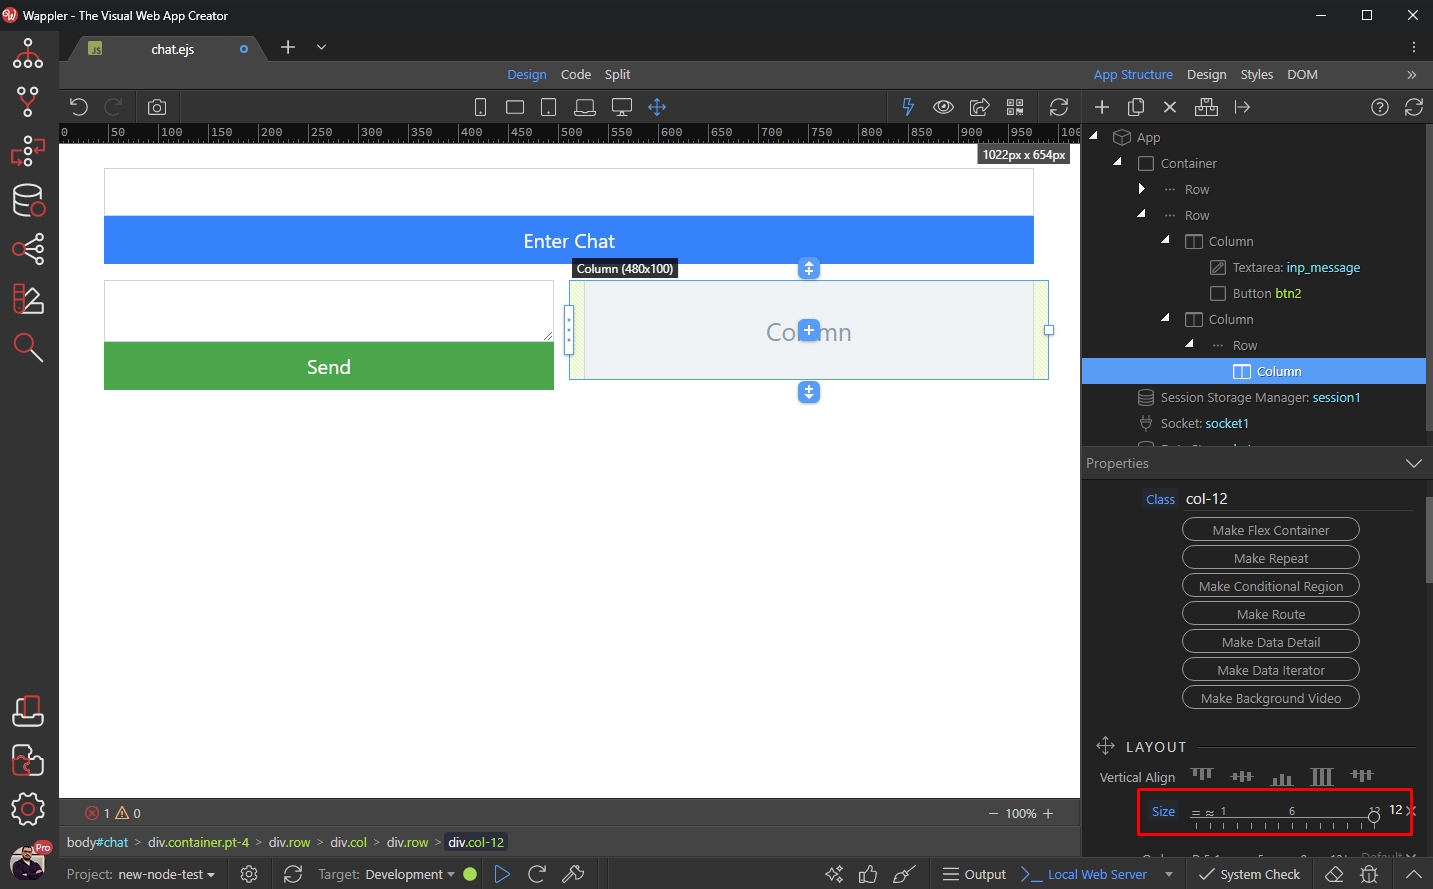
This column is the message body, we need to show the username and message here. So let's add them:
Section titled “This column is the message body, we need to show the username and message here. So let's add them:”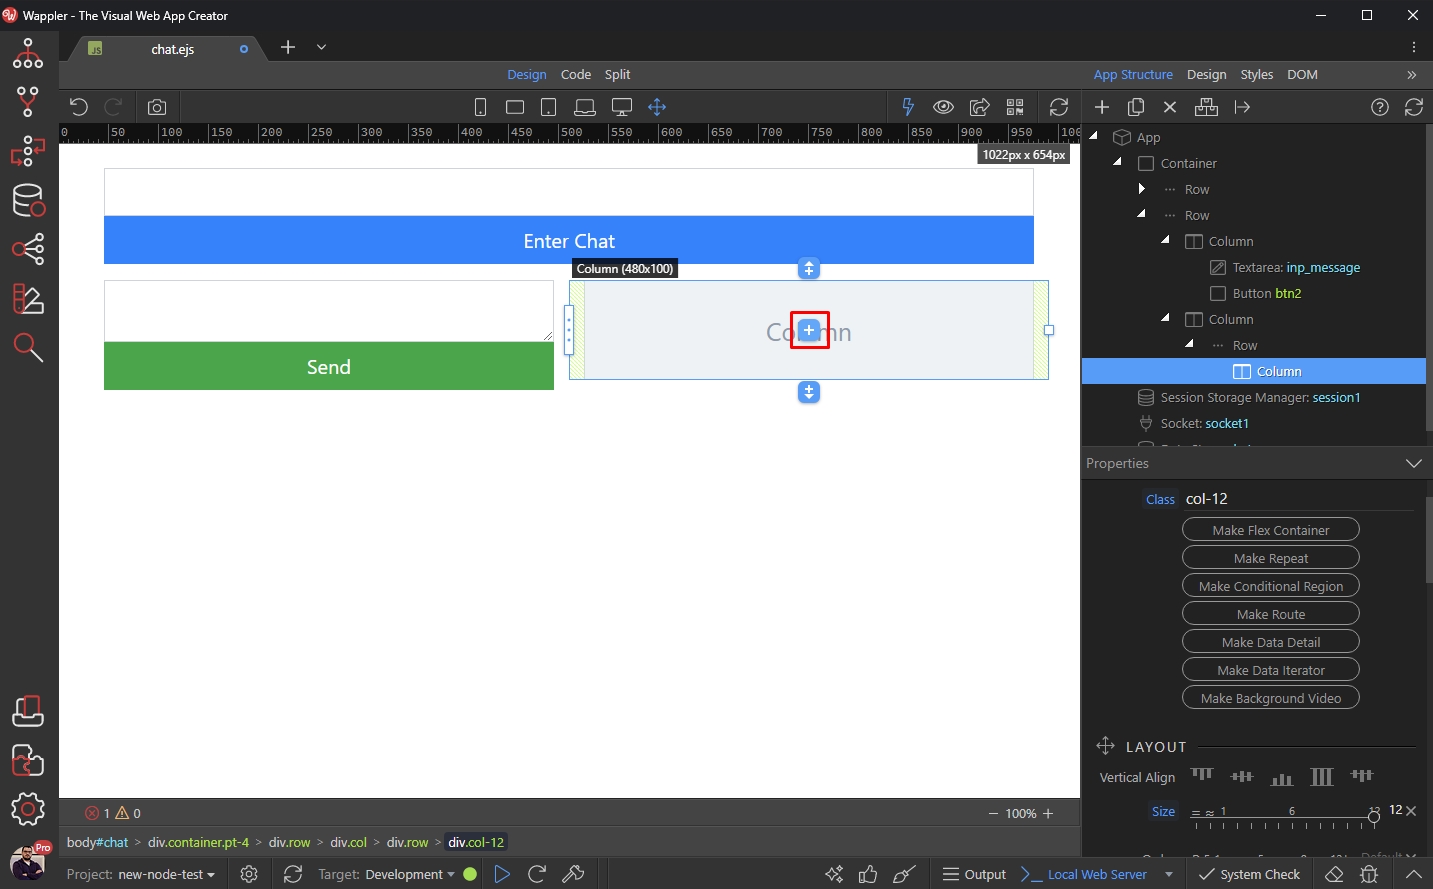
For the username we use a Title:
Section titled “For the username we use a Title:”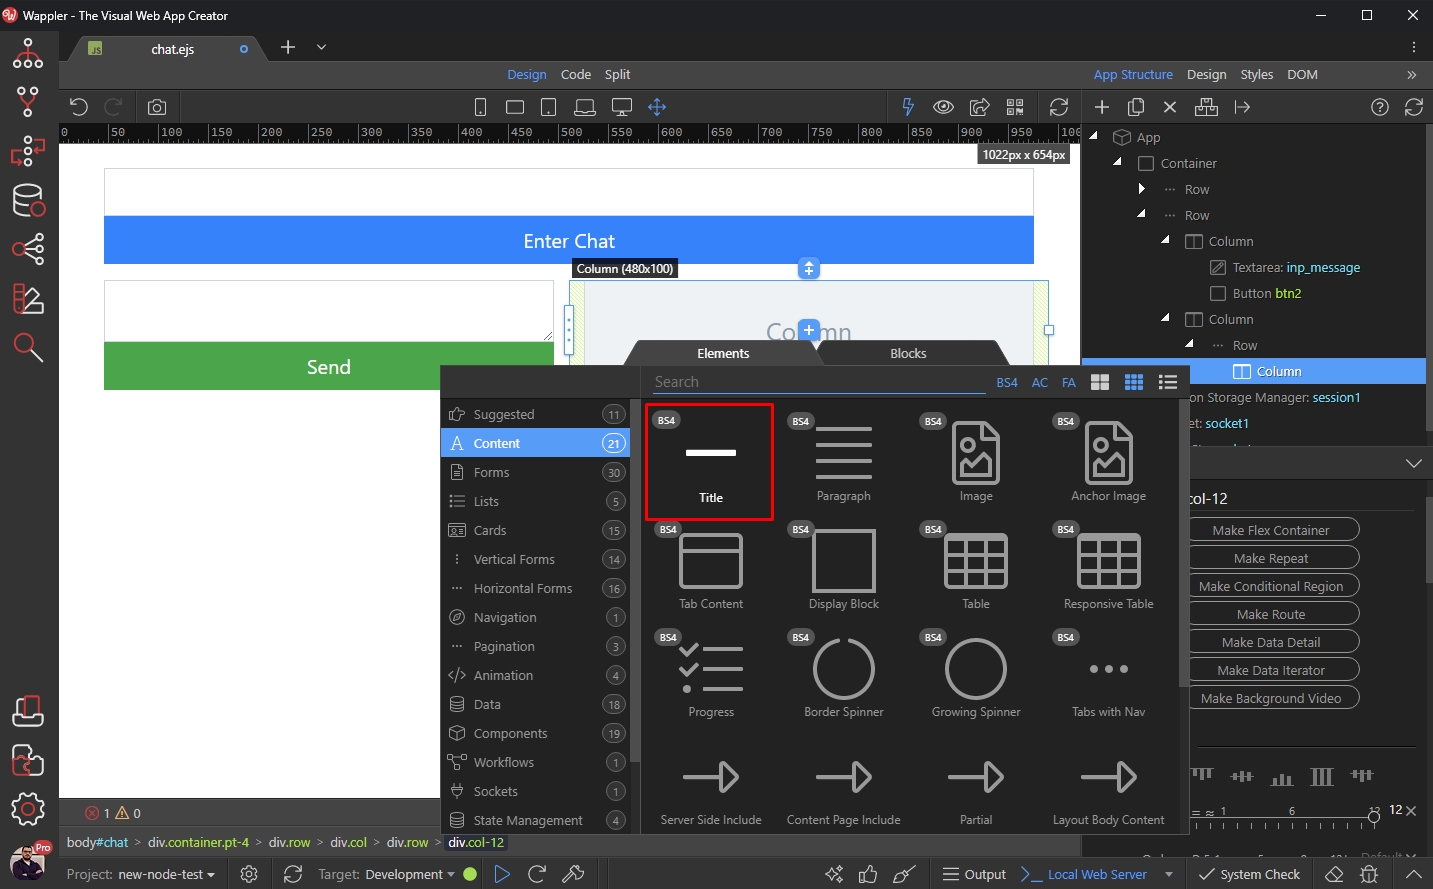
And set it to Heading 6:
Section titled “And set it to Heading 6:”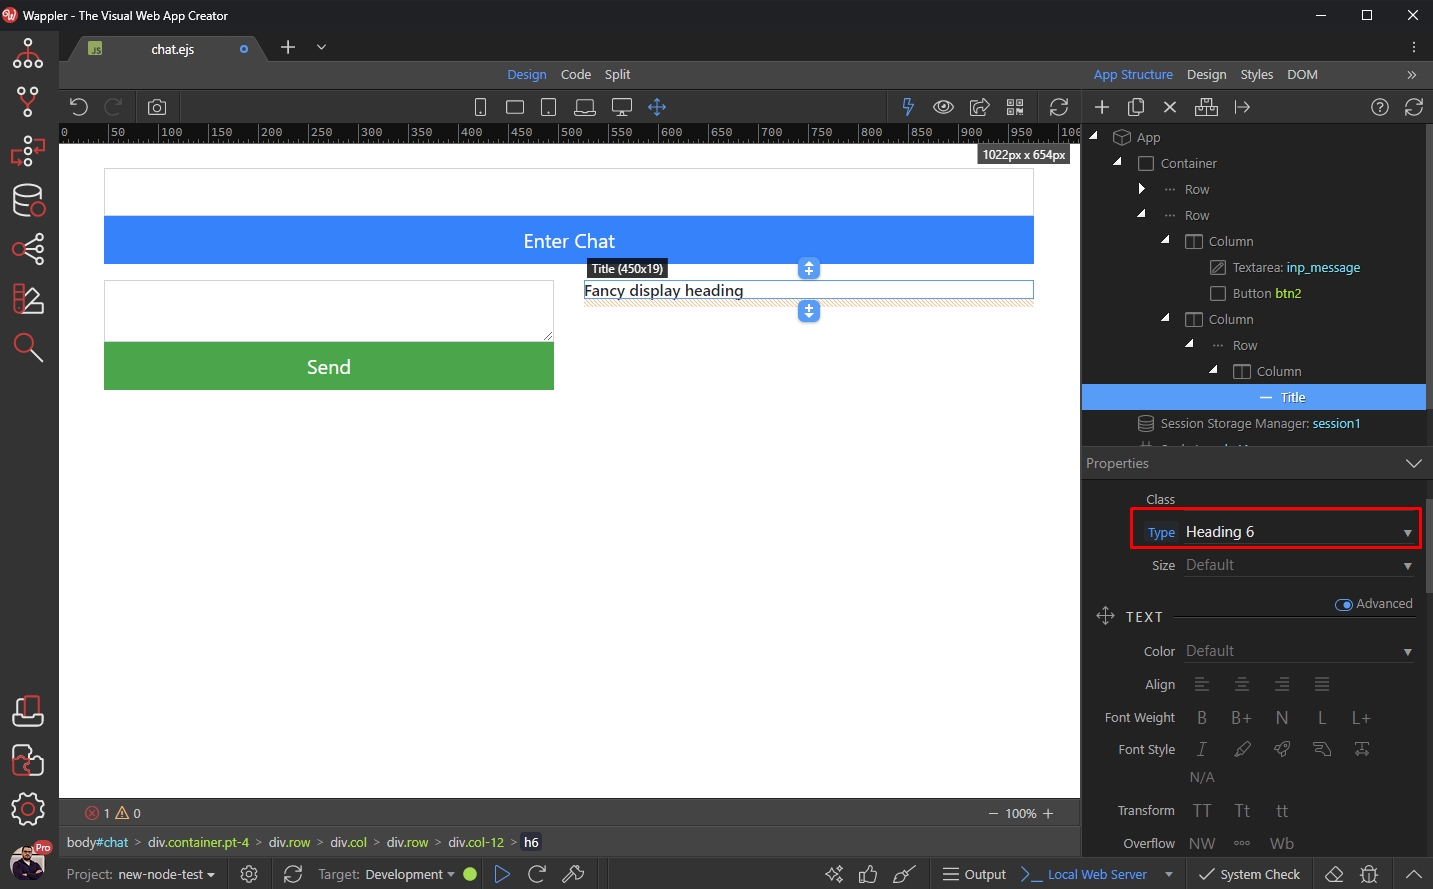
Add another element after the heading:
Section titled “Add another element after the heading:”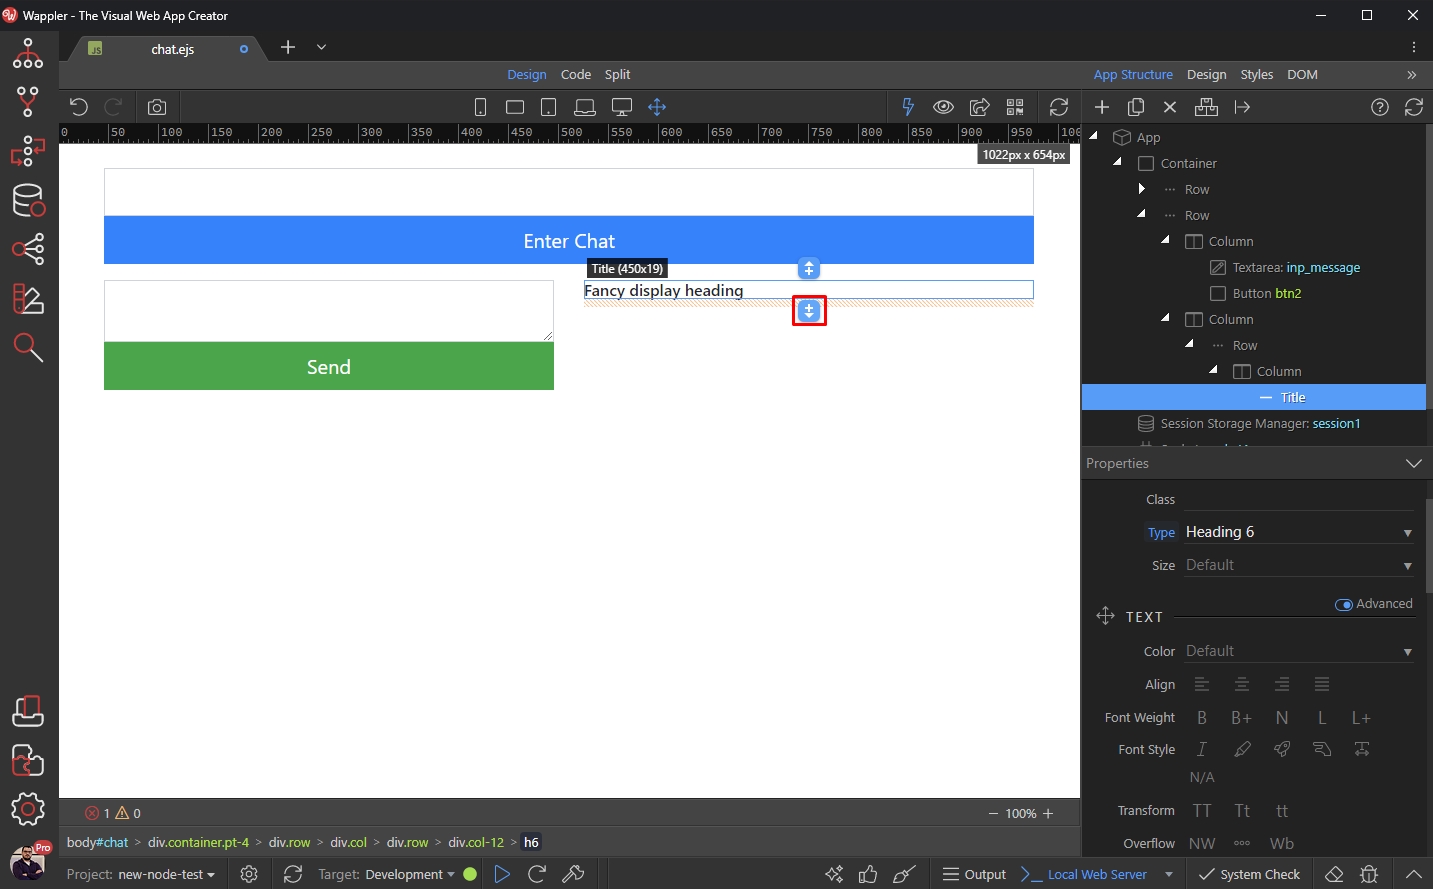
And select paragraph, this will be the message text:
Section titled “And select paragraph, this will be the message text:”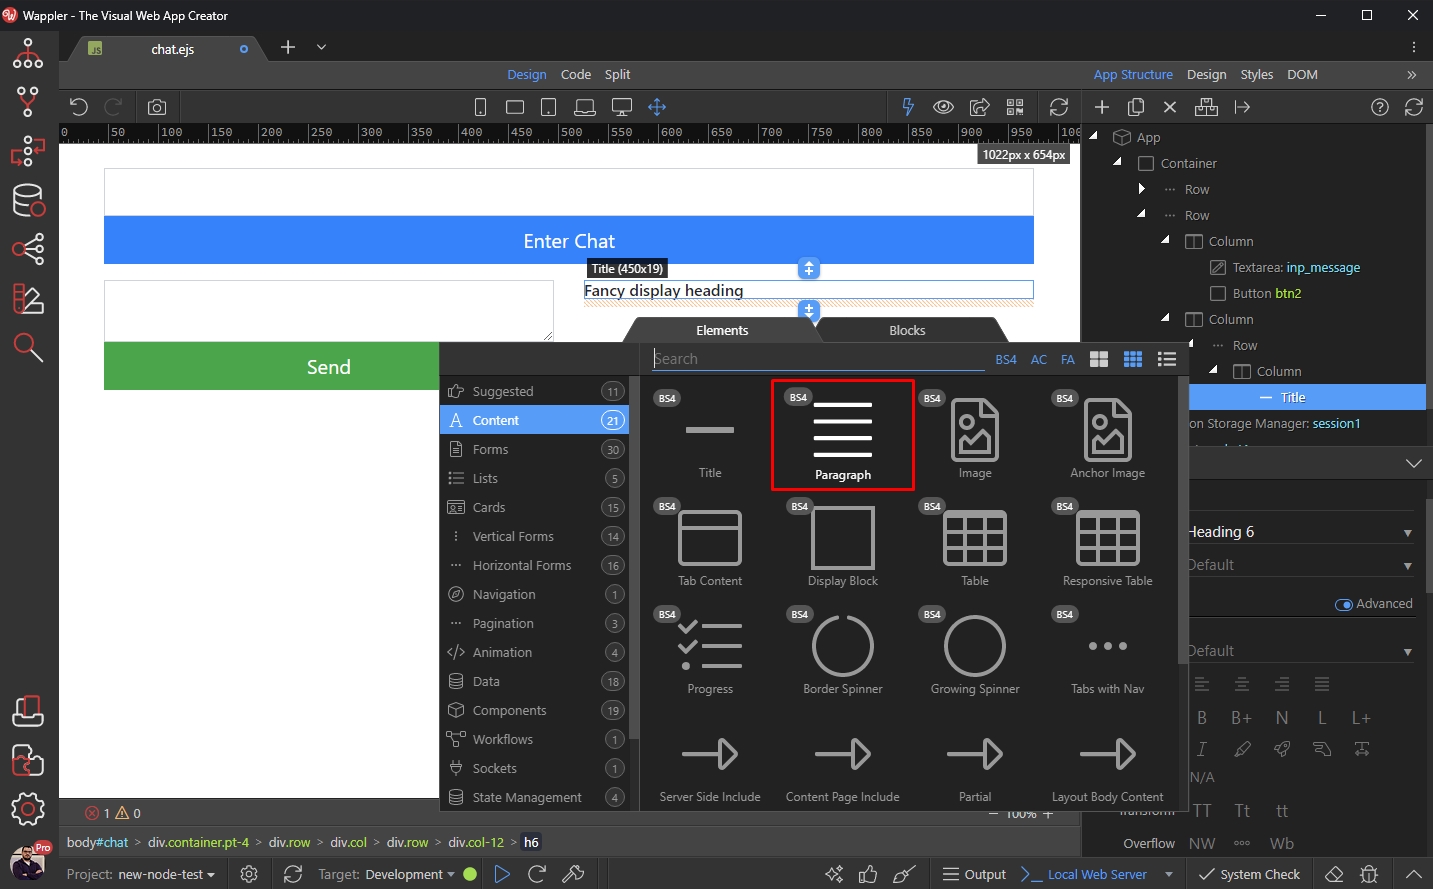
We set its style to Lead:
Section titled “We set its style to Lead:”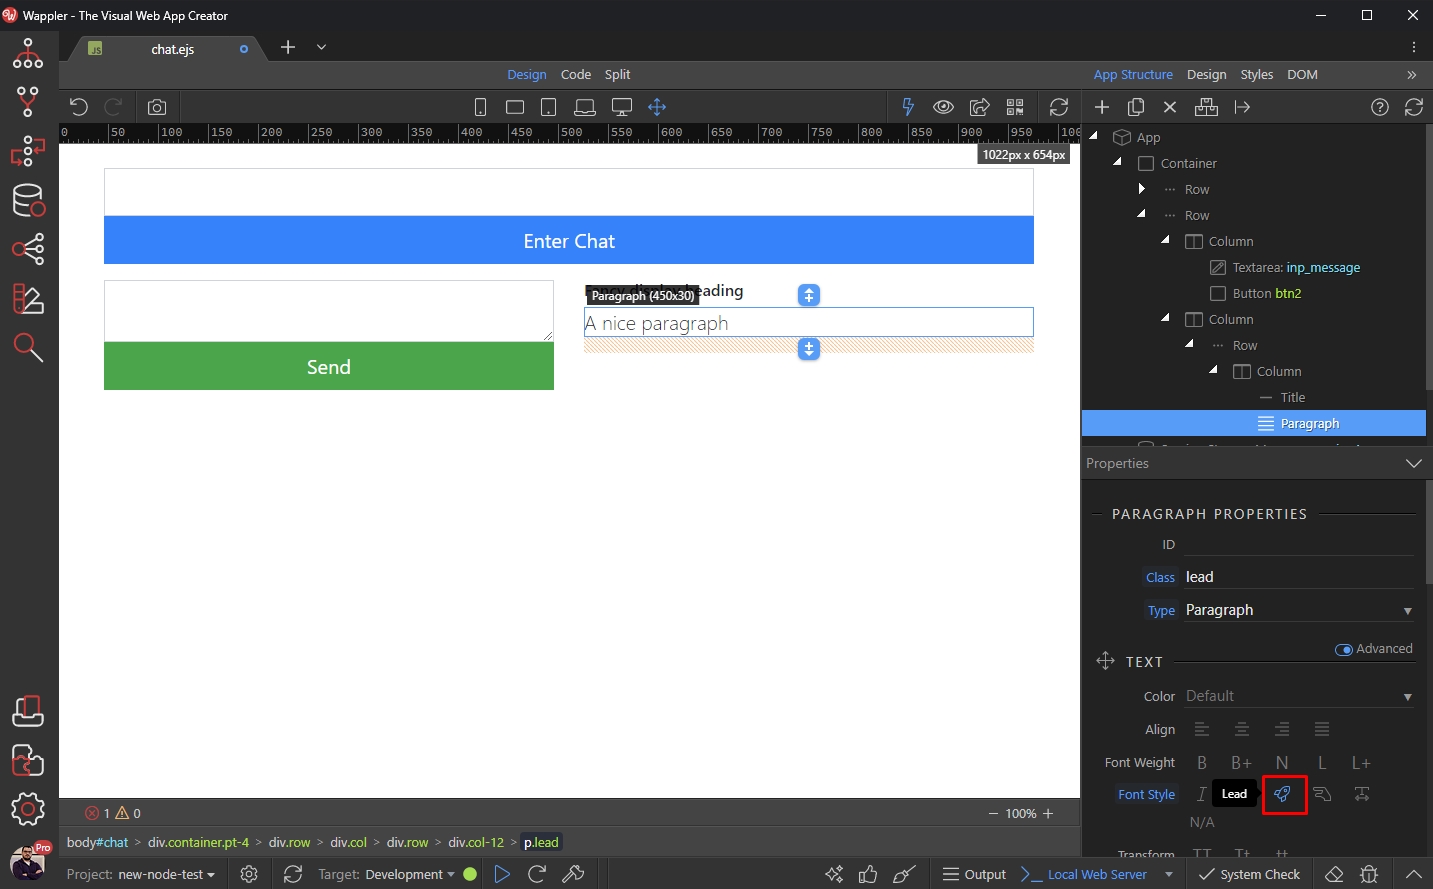
Then select the row, wrapping our message body column. Click Make Repeat children:
Section titled “Then select the row, wrapping our message body column. Click Make Repeat children:”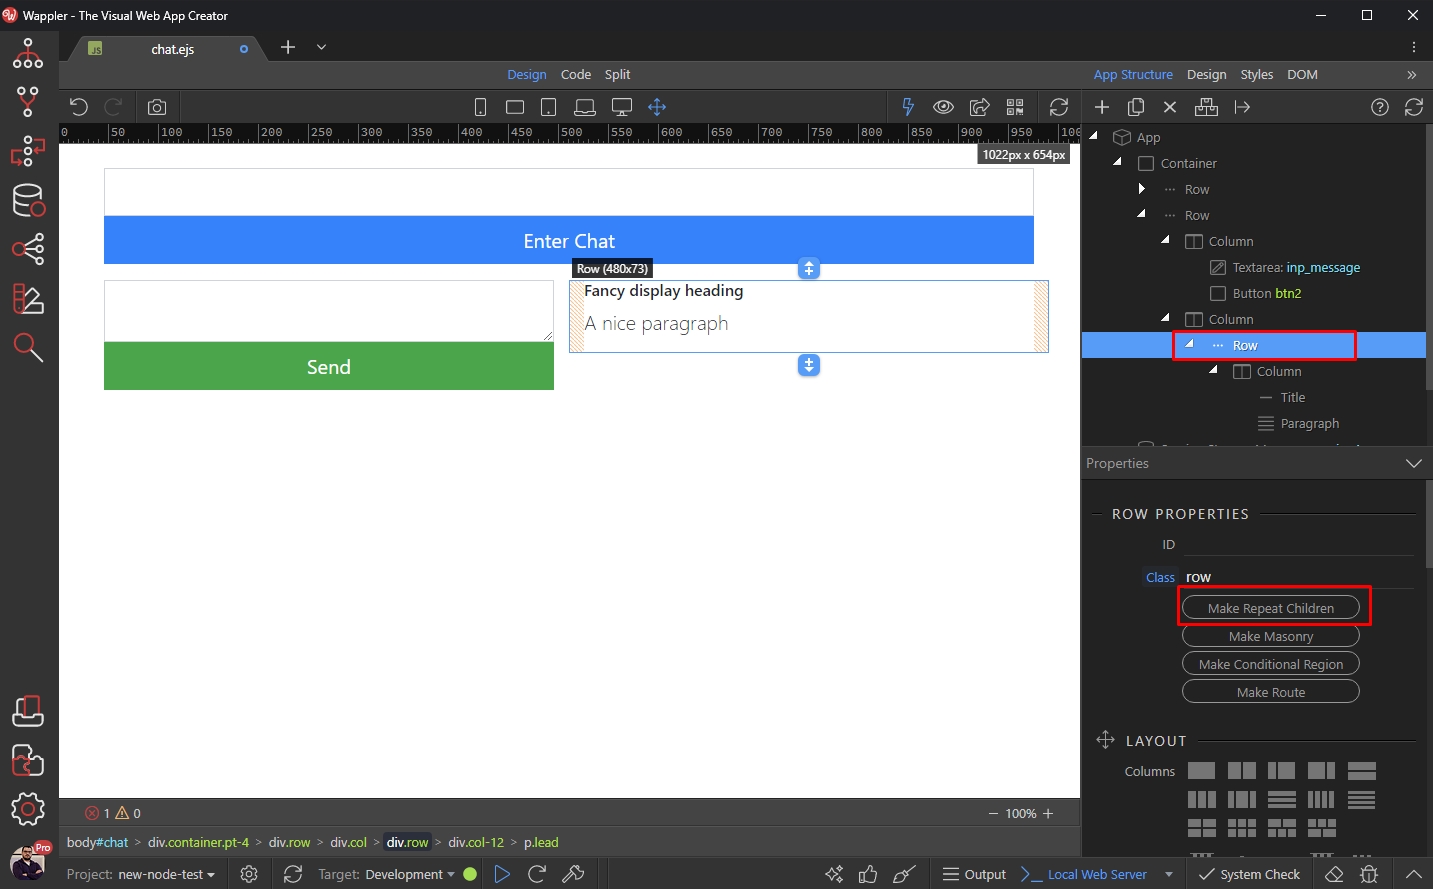
And select an expression for the repeat:
Section titled “And select an expression for the repeat:”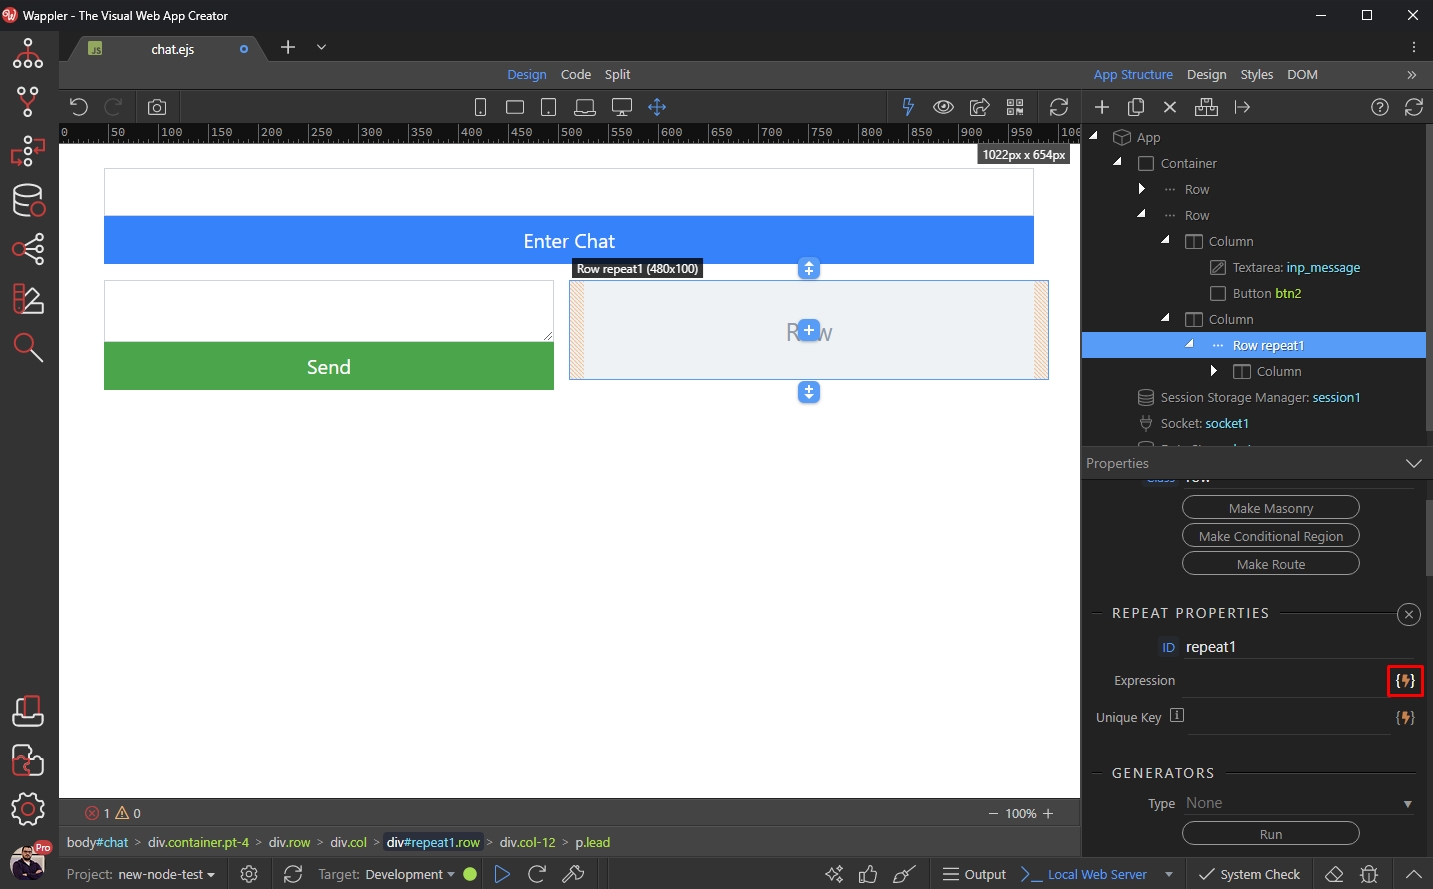
This should be the data element of the Data Store component:
Section titled “This should be the data element of the Data Store component:”
Turn the App Connect mode off in order to be able to bind the data inside the repeat region:
Section titled “Turn the App Connect mode off in order to be able to bind the data inside the repeat region:”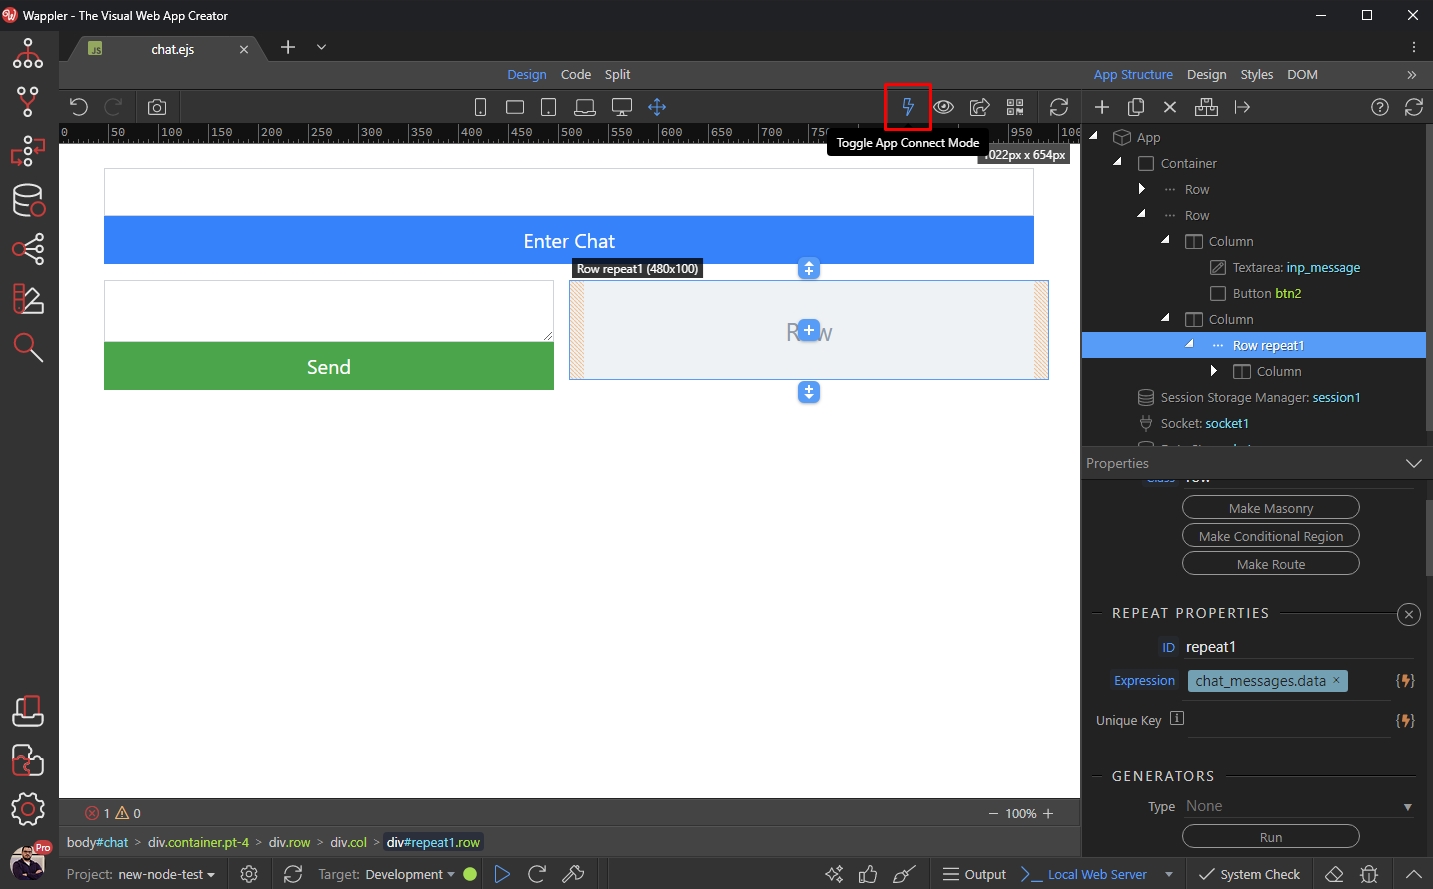
Double click the title and click the dynamic data icon:
Section titled “Double click the title and click the dynamic data icon:”
Select the chat_user binding from the repeat region:
Section titled “Select the chat_user binding from the repeat region:”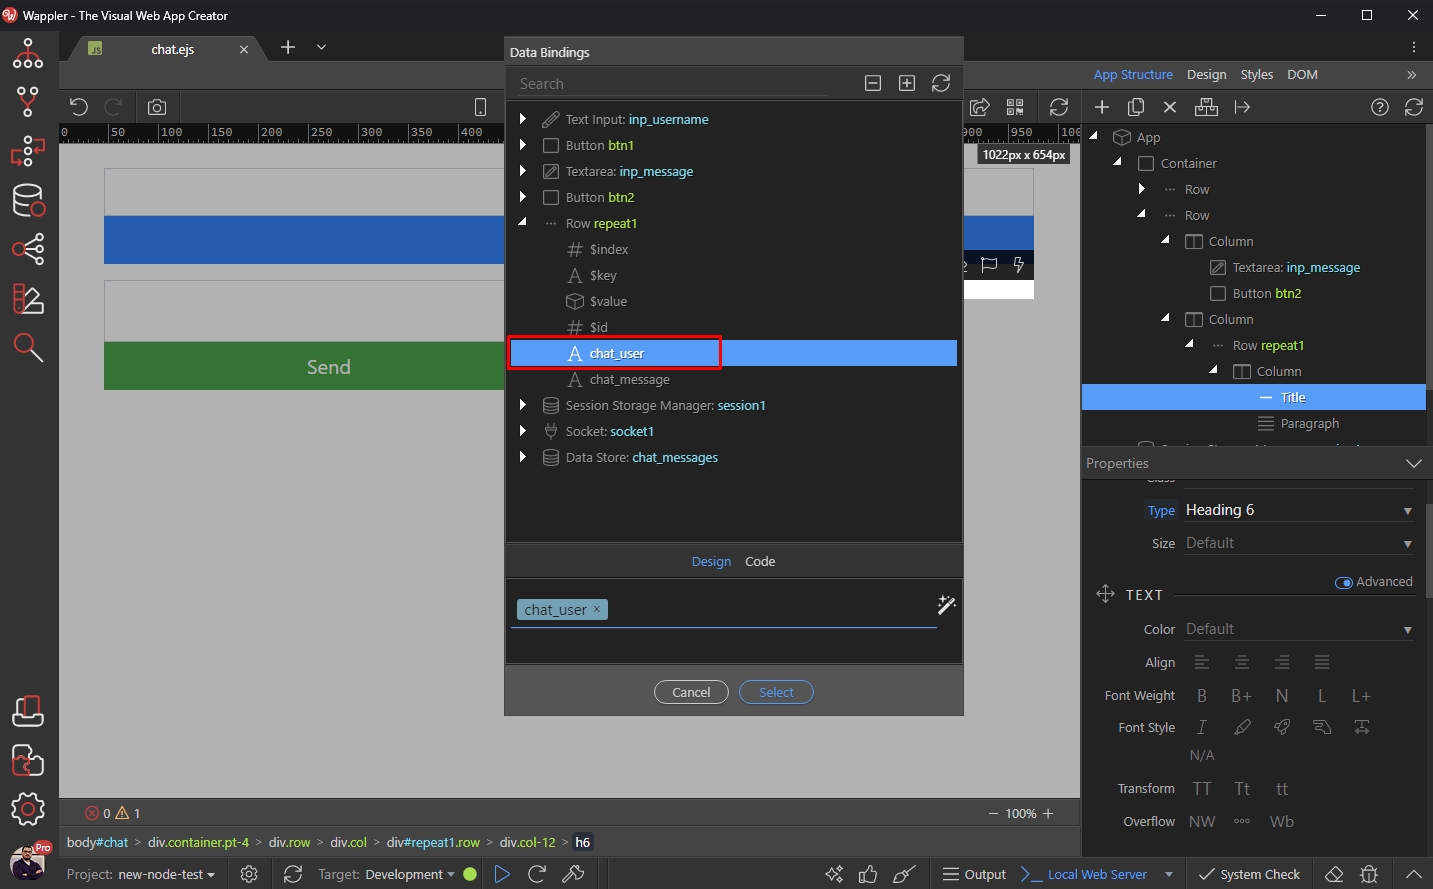
We do the same for the message paragraph:
Section titled “We do the same for the message paragraph:”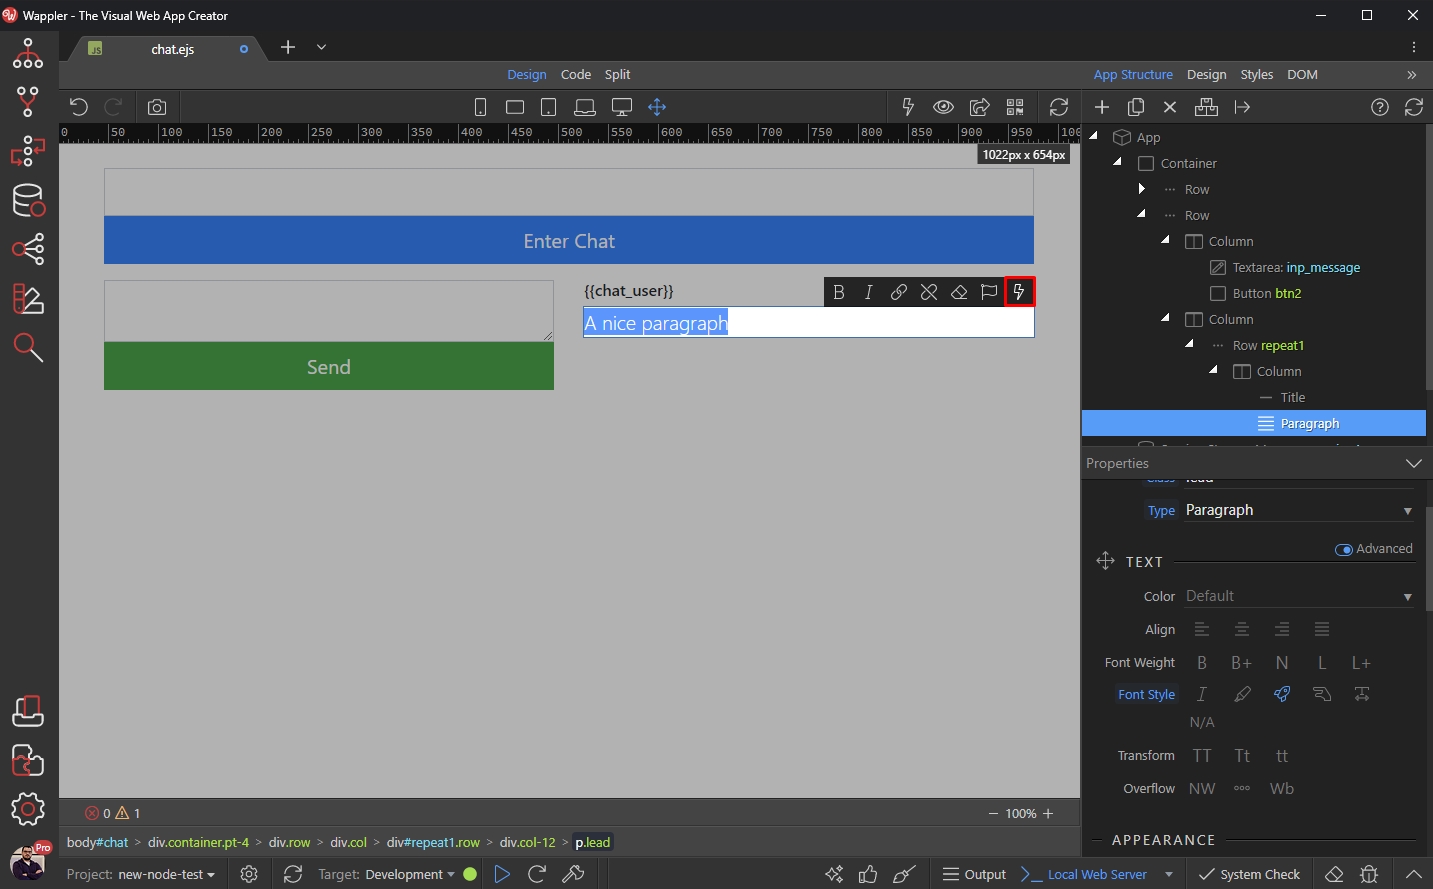
Select the chat_message binding from the repeat region:
Section titled “Select the chat_message binding from the repeat region:”
Our page layout is done:
Section titled “Our page layout is done:”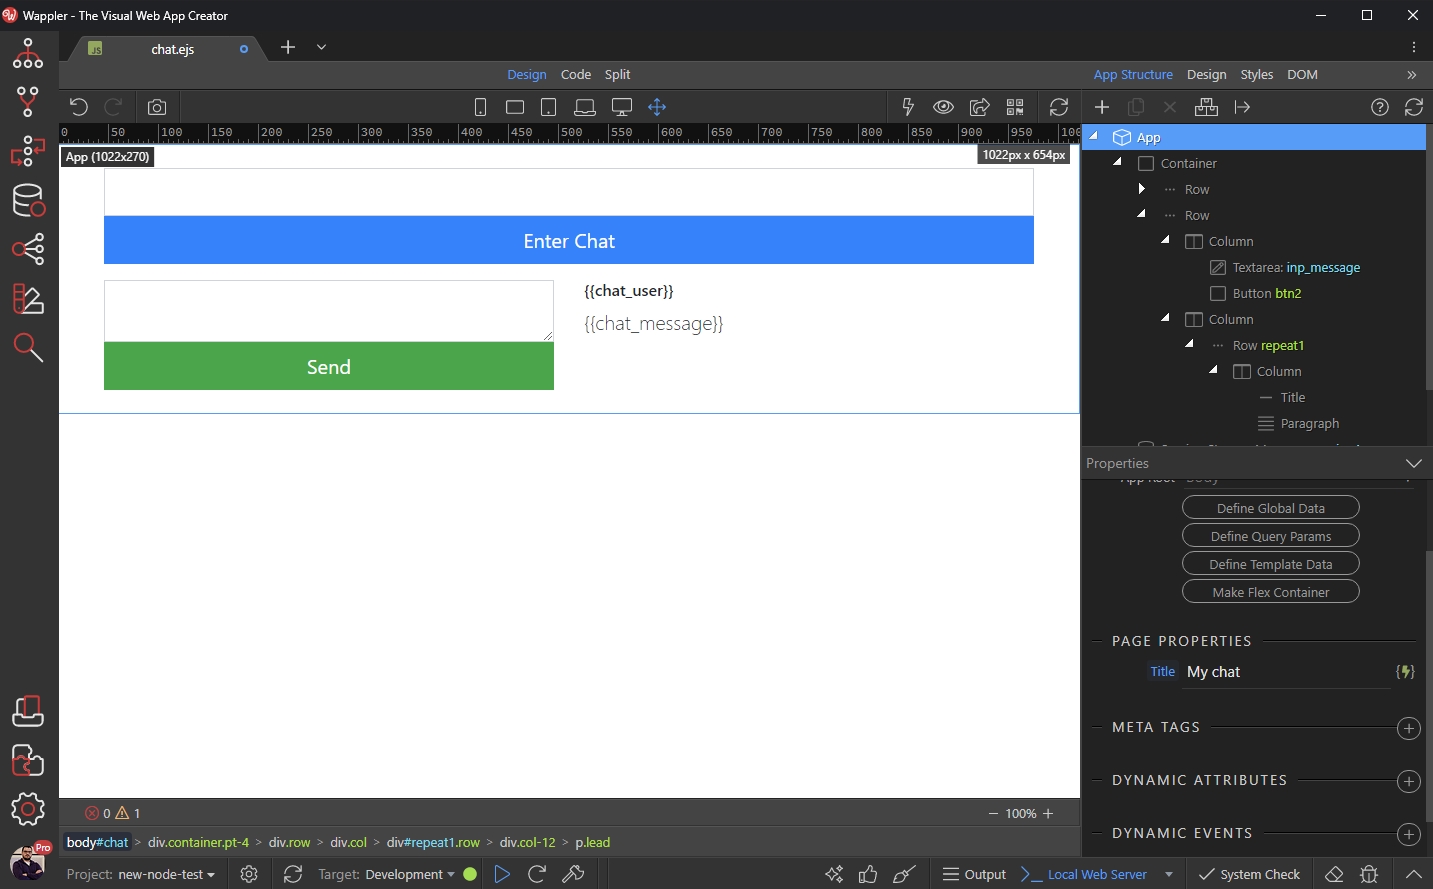
Conditional Regions
Section titled “Conditional Regions”We only want to show the username input when the user has not entered a username yet and also we want to show the chat area after the user entered a username. In order to do this we will use conditional regions.
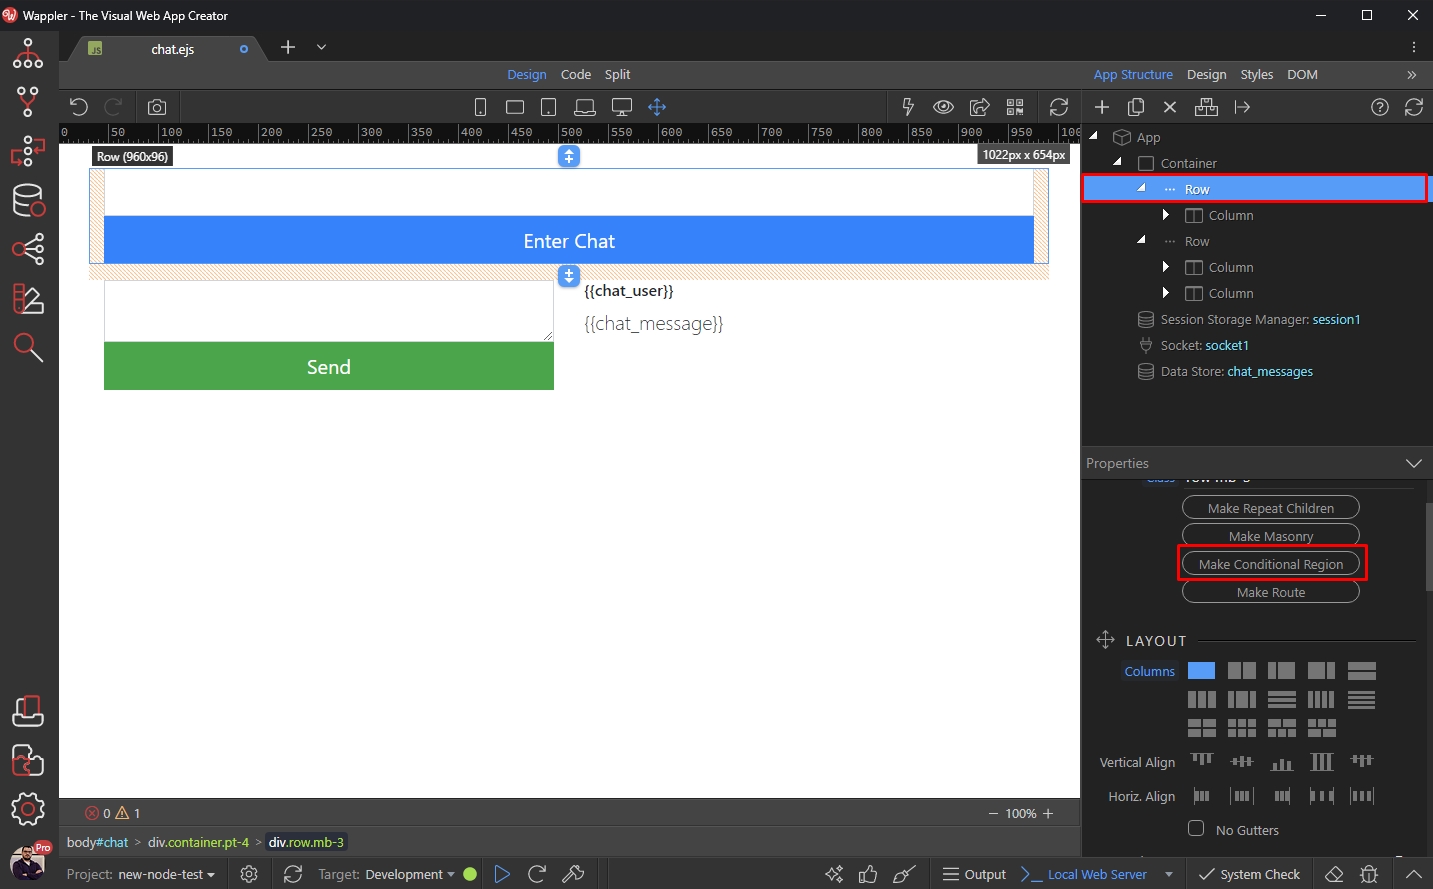
Select the row wrapping the username input and click Make Conditional Region:
Click the Dynamic Data Picker for the condition:
Section titled “Click the Dynamic Data Picker for the condition:”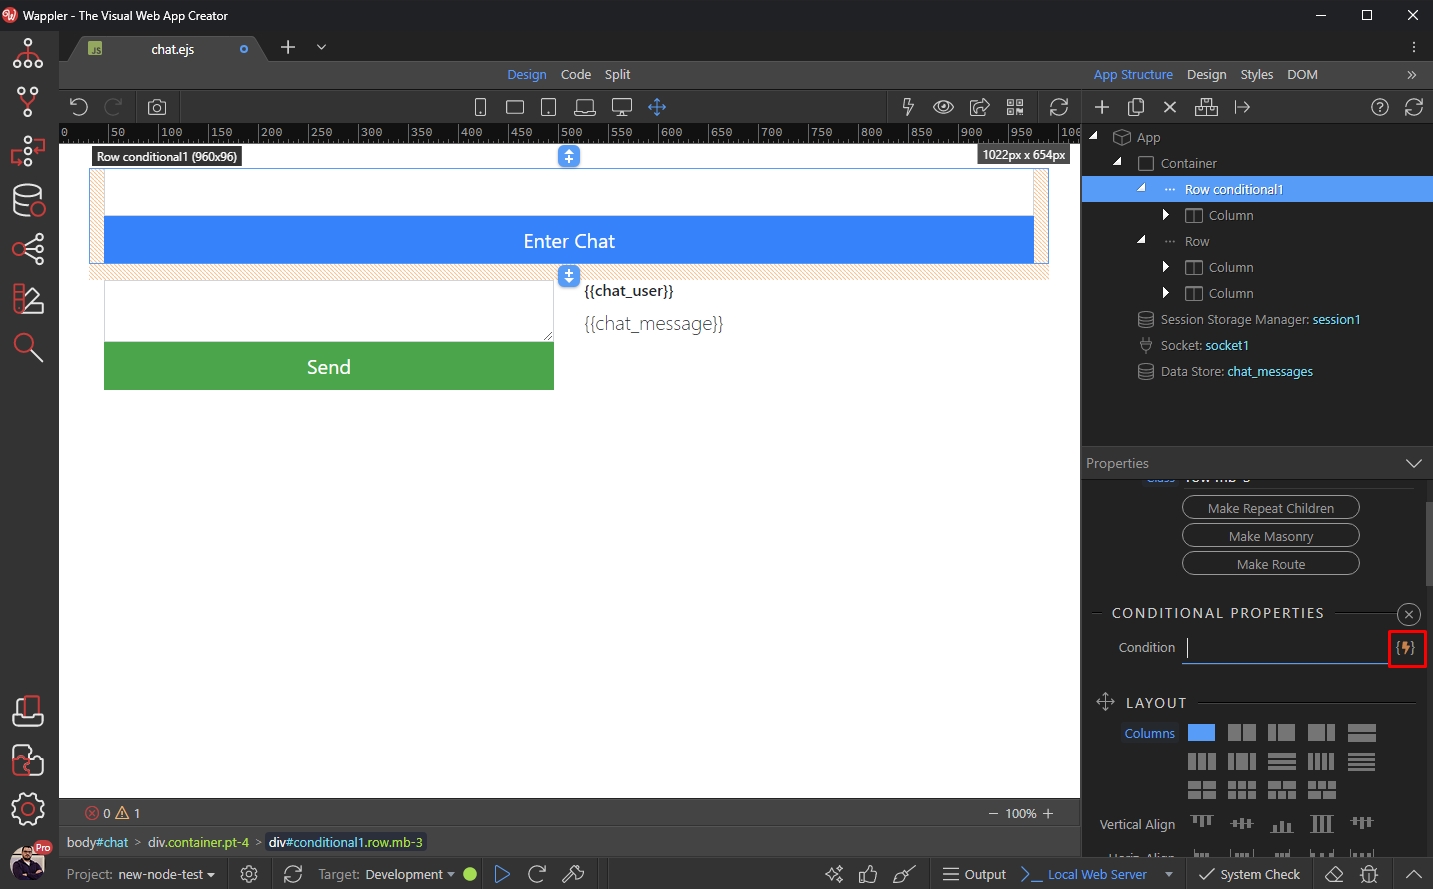
Step 106
Section titled “Step 106”We want to show the username input only when the session variable doesn't contain any username. So we select the session variable, where we store our username:
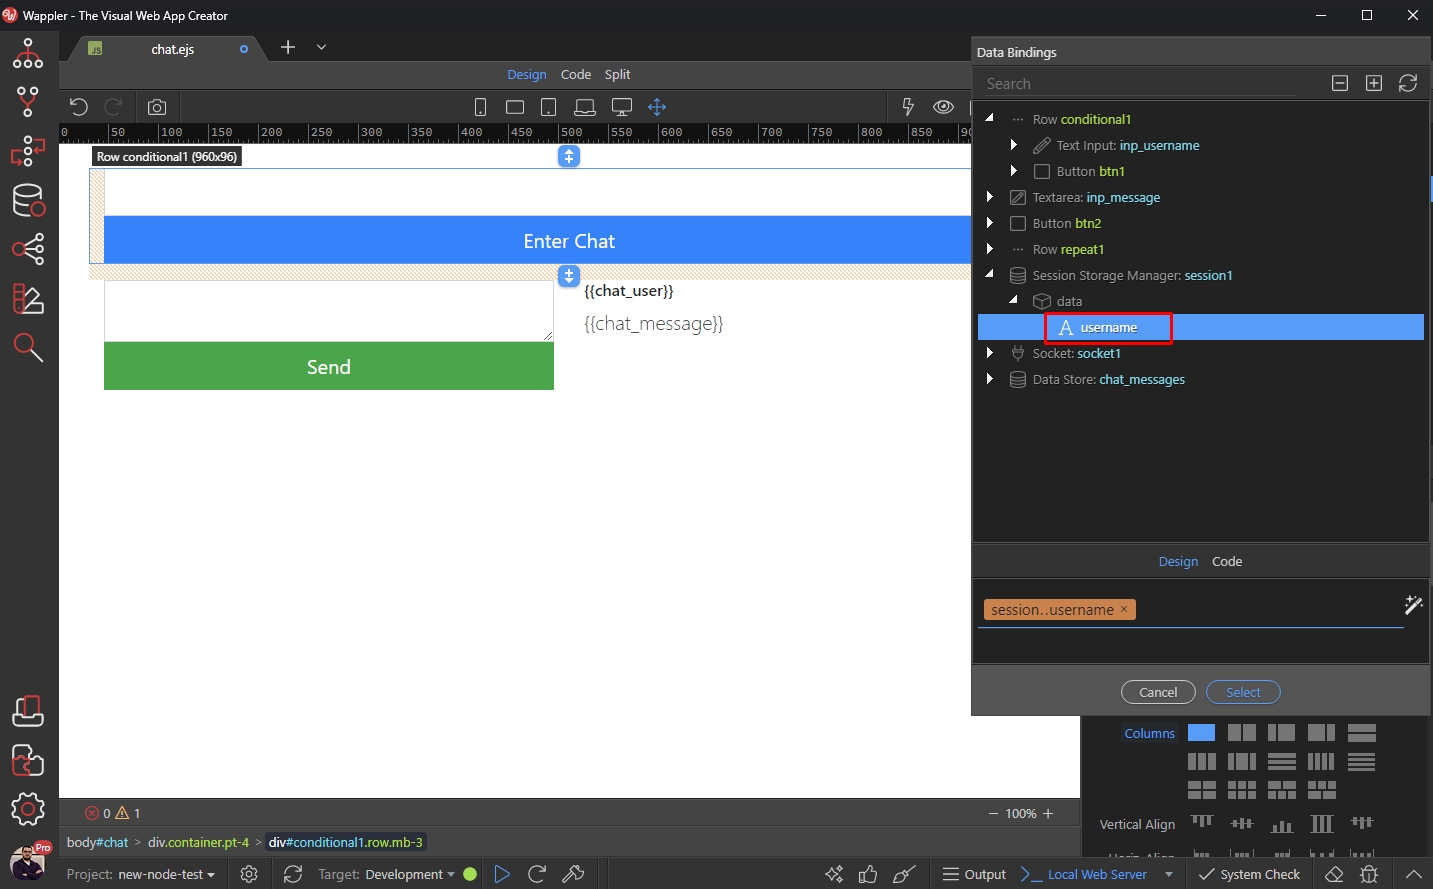
Then select Code and add an exclamation mark ! in front of the expression. Click Select:
Section titled “Then select Code and add an exclamation mark ! in front of the expression. Click Select:”
Select the row wrapping the chat area and click Make Conditional Region:
Section titled “Select the row wrapping the chat area and click Make Conditional Region:”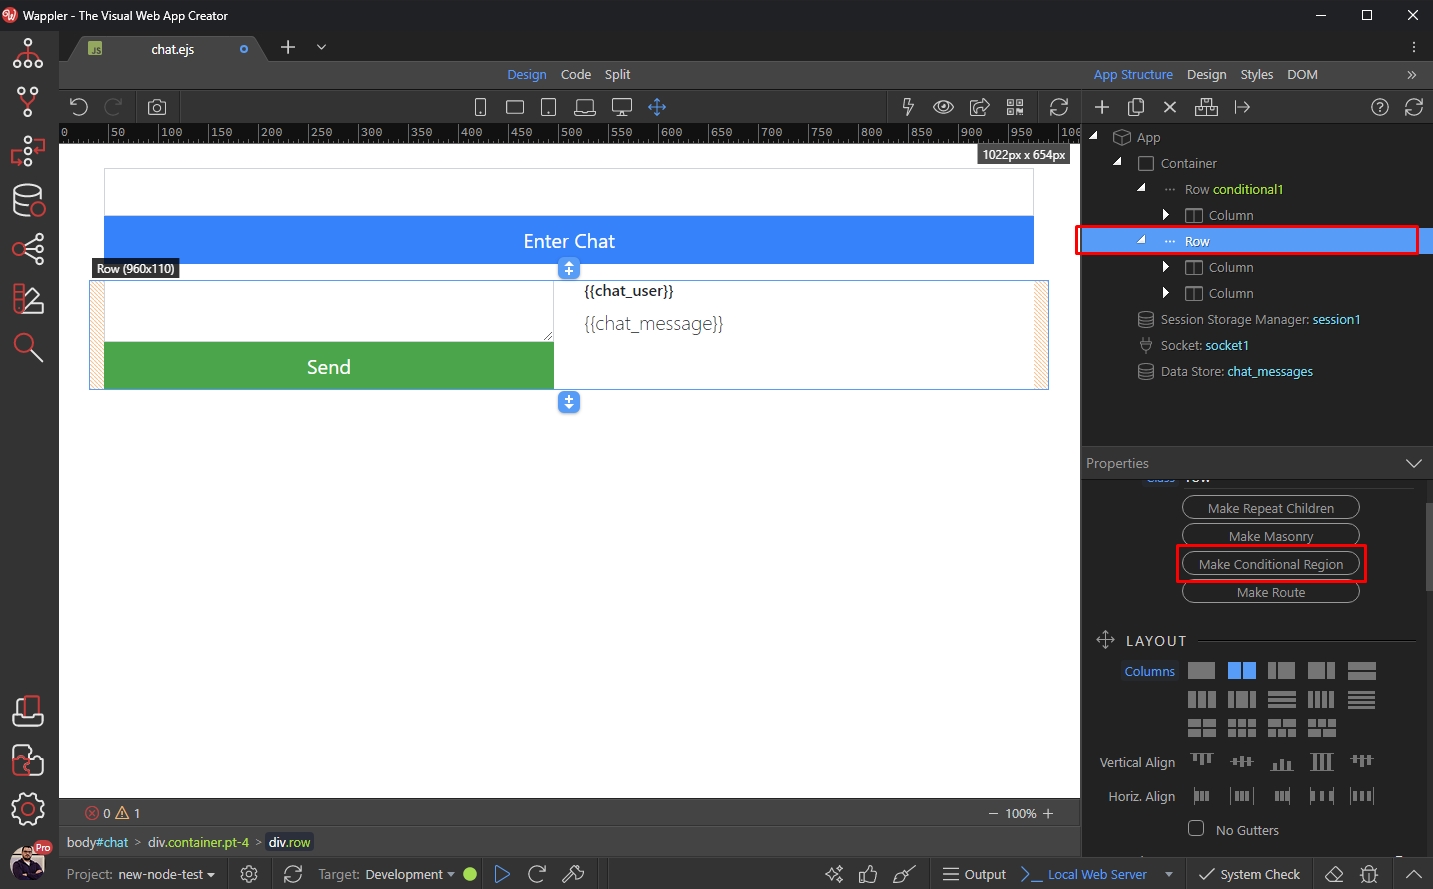
Click the Dynamic Data Picker for the condition:
Section titled “Click the Dynamic Data Picker for the condition:”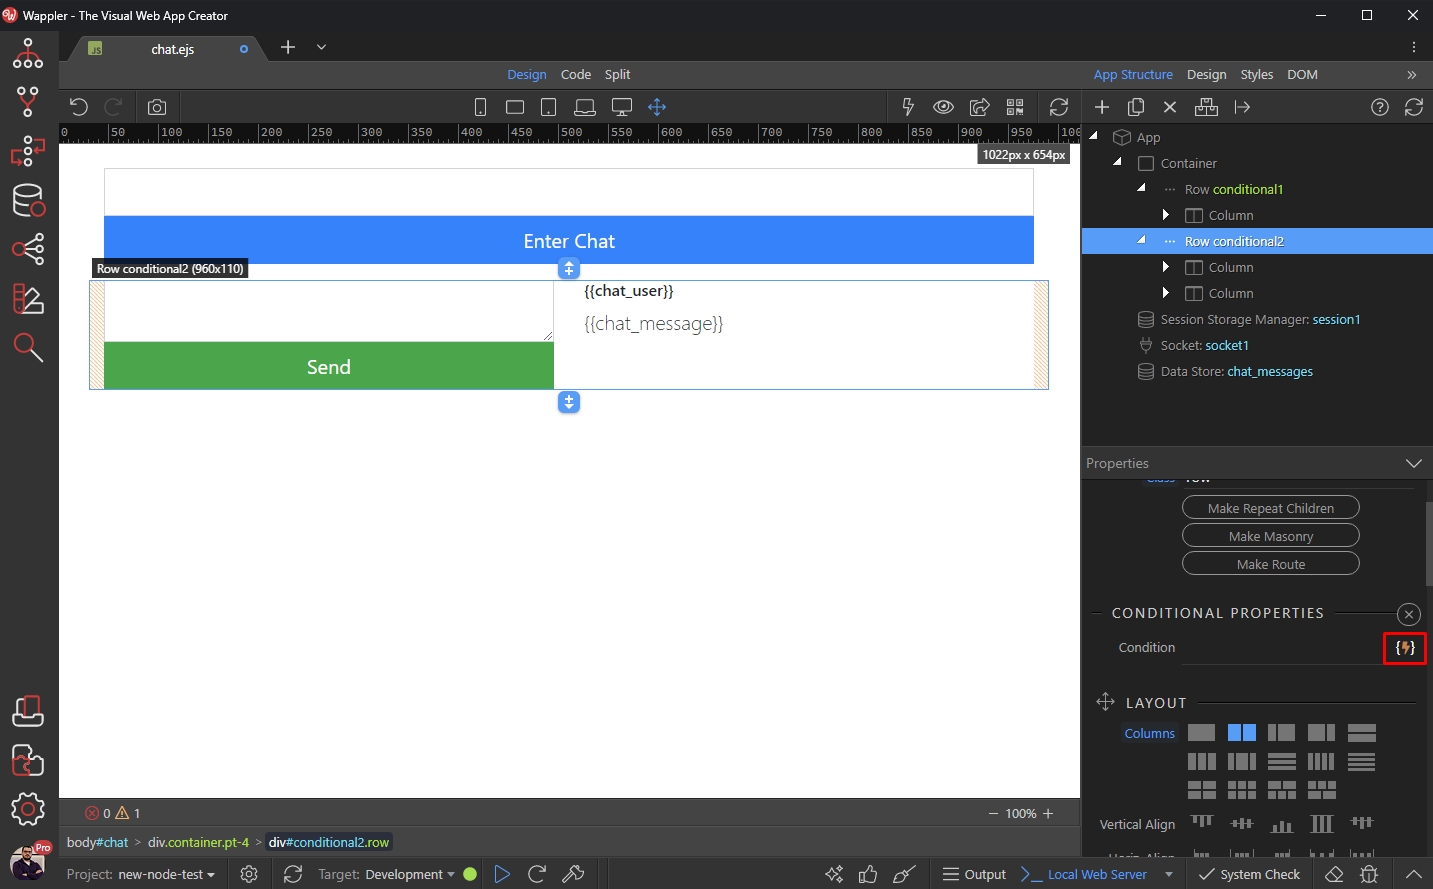
Step 110
Section titled “Step 110”We want to show the username input only when the session variable contains a username. So we select the session variable, where we store our username and click Select:
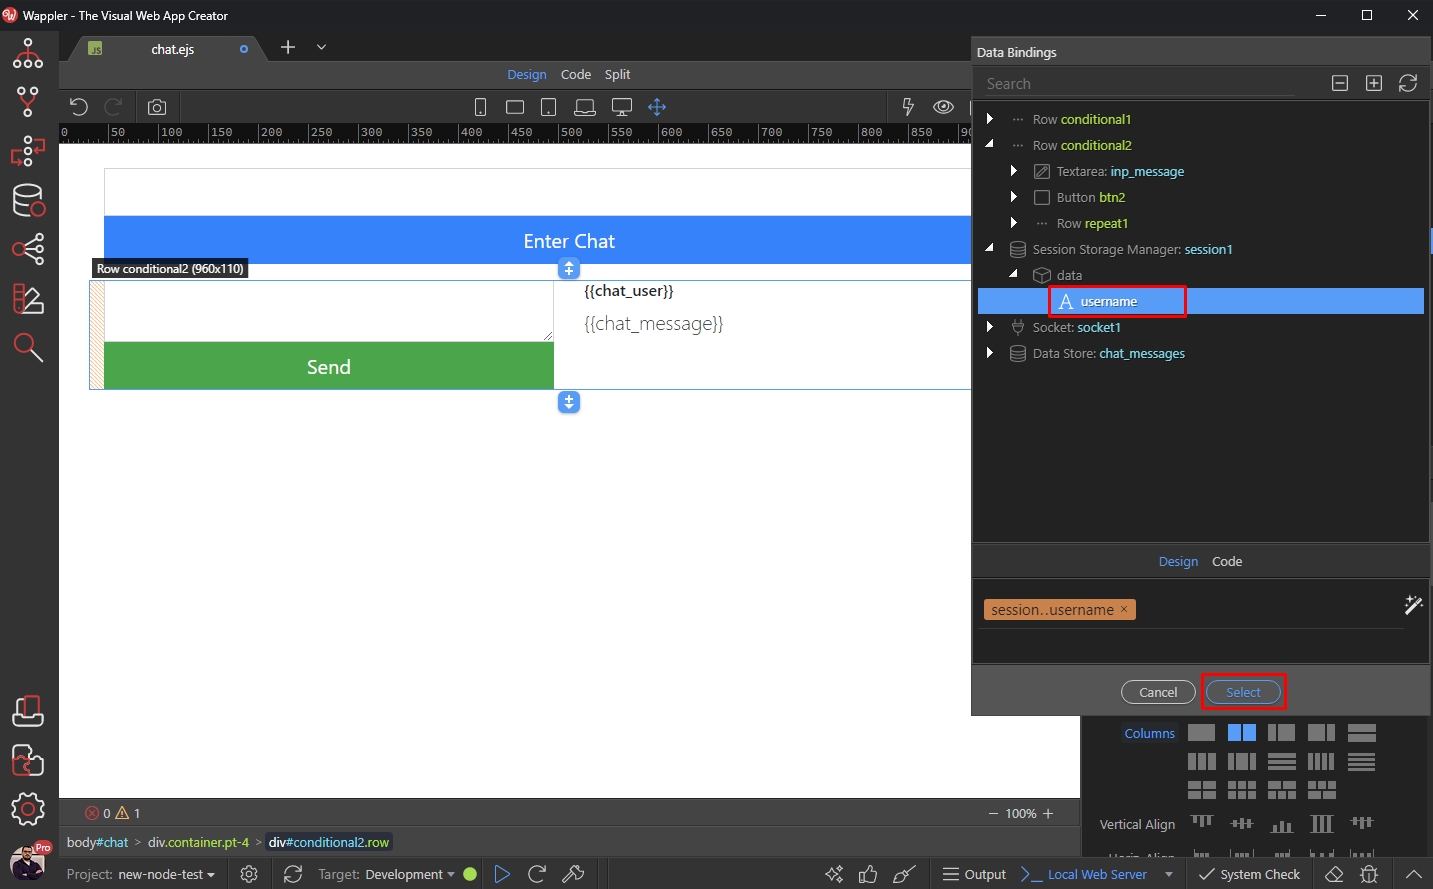
And we are done, so save your page:
Section titled “And we are done, so save your page:”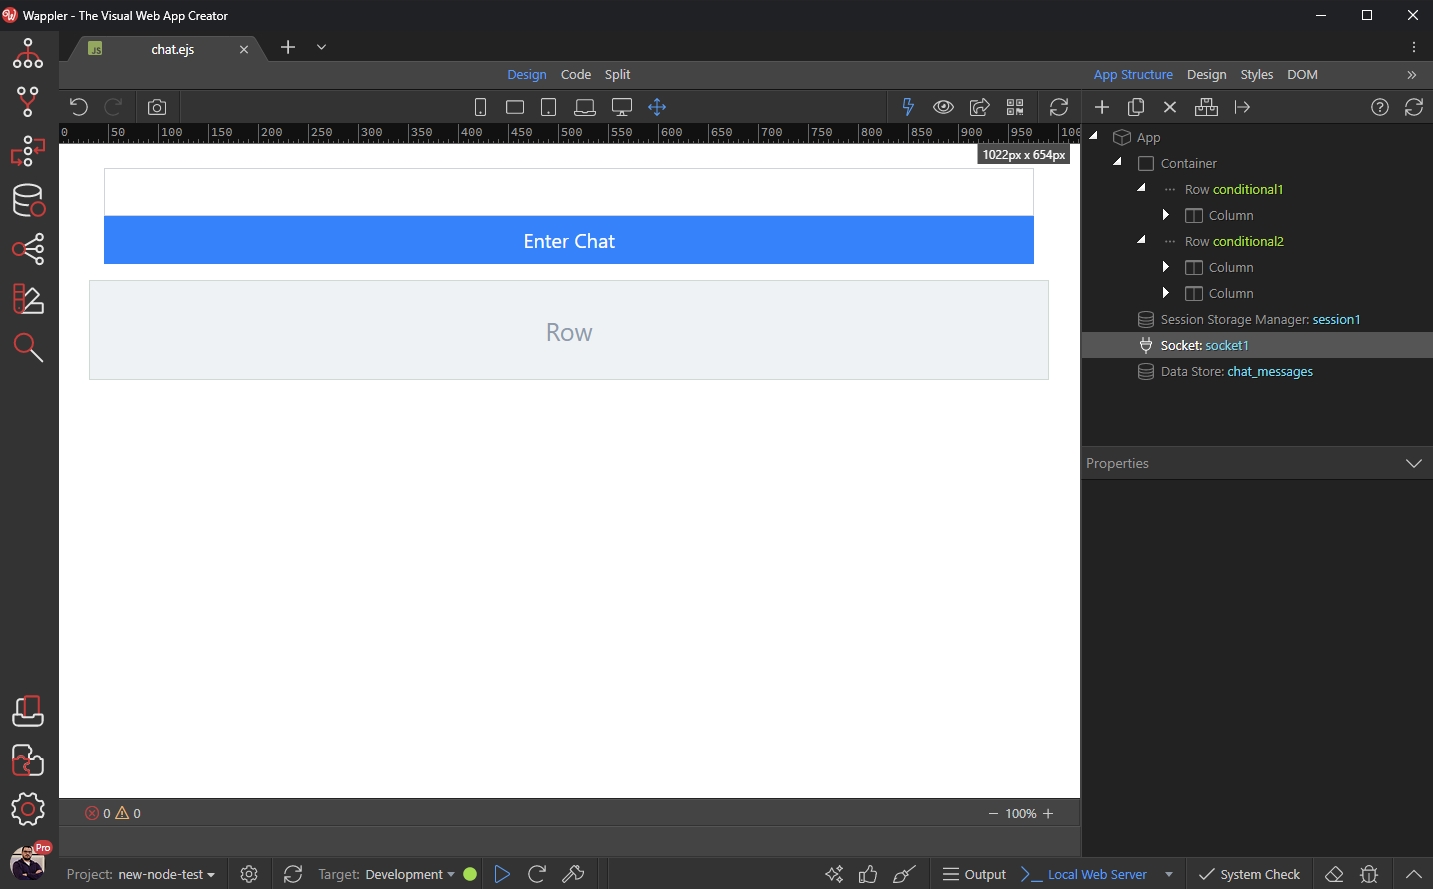
Result
Section titled “Result”You can see the result in our browser below. The user enters a username and then he is taken to the chat area, where he can send messages to the other clients:
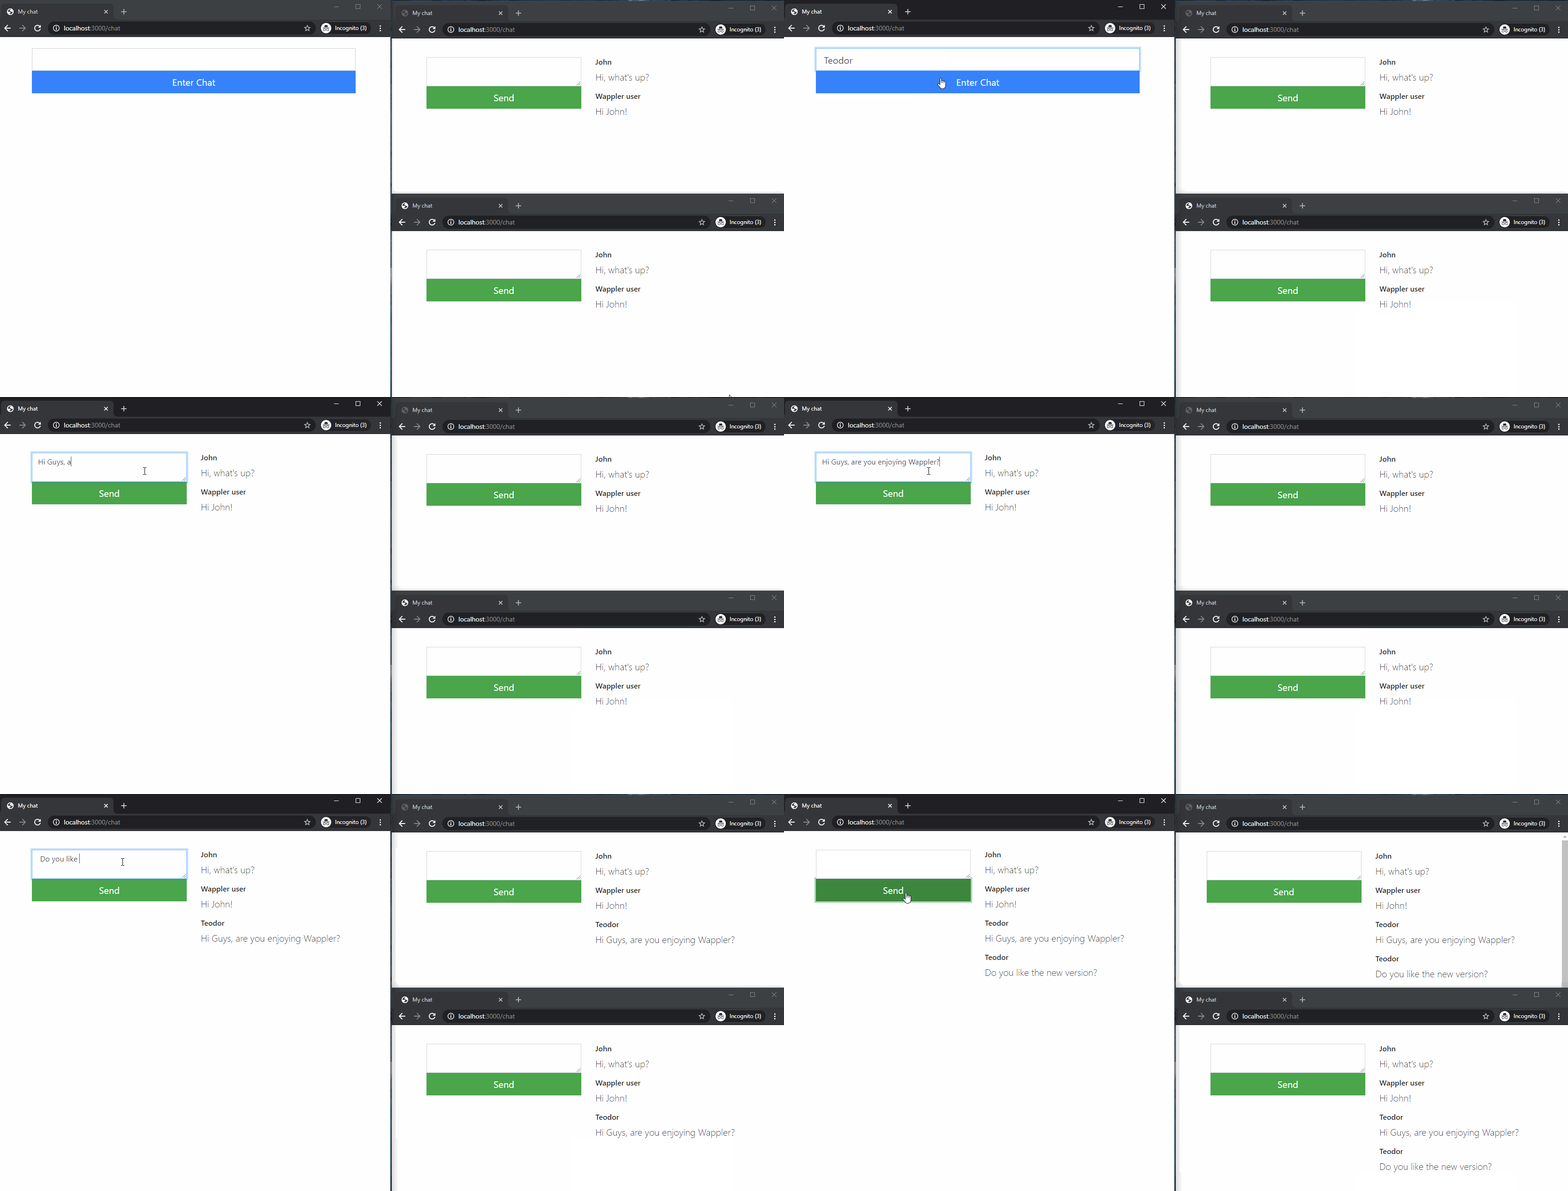
Step 114
Section titled “Step 114”Note: This is a brief example of a real-time chat app, which we believe explains the basics of how the things work. Feel free to extend this if you need a more complex solution.