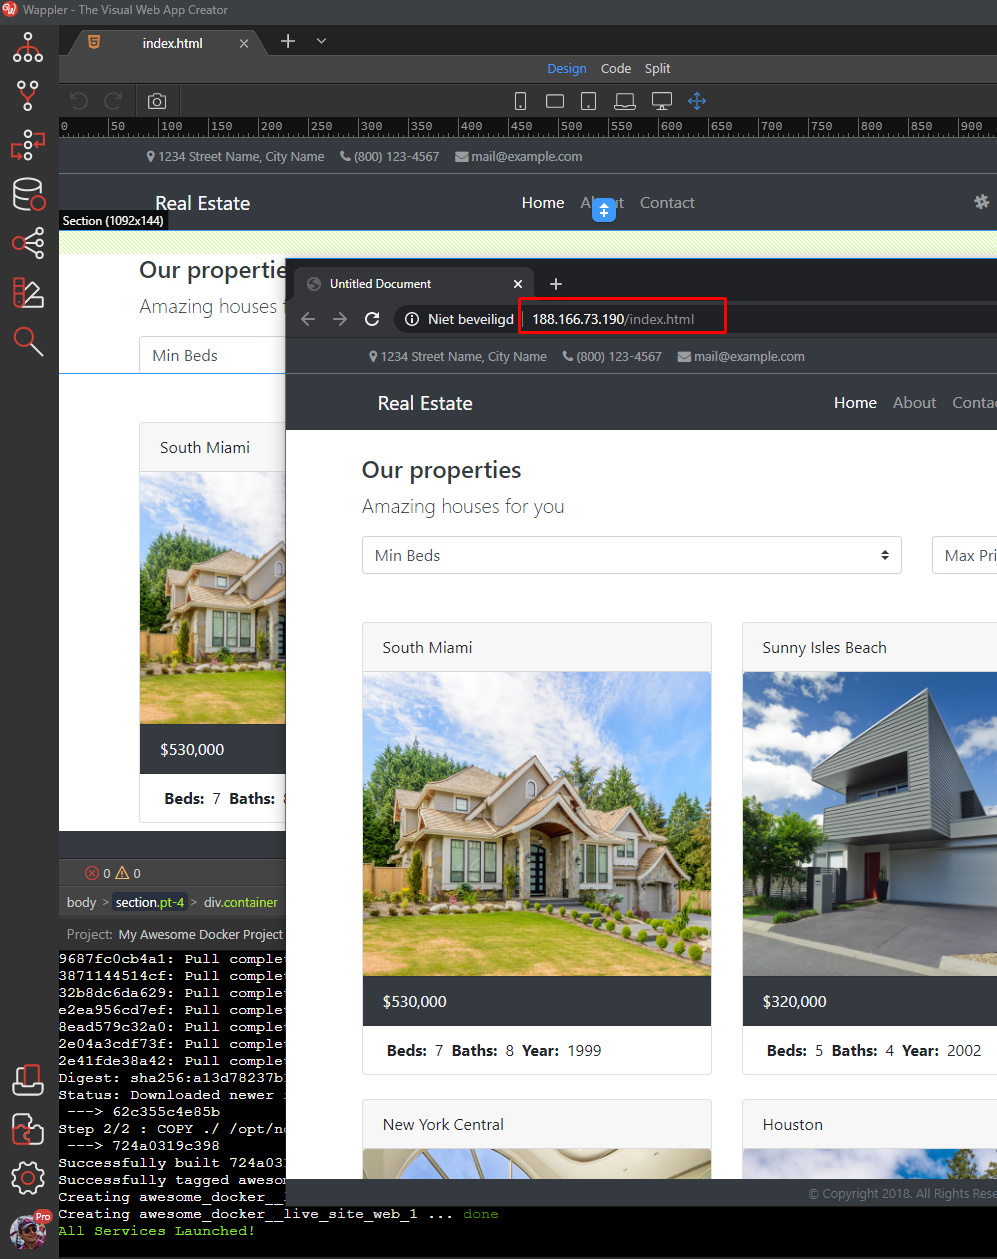
Creating a NodeJS project with Docker
With the new Wappler 3.0 support for NodeJS projects it is realy easy to develop and deploy them with Docker. In this guide we will show you how easy is to setup a NodeJS project with Docker in Wapple
In this guide we will show you how easy is to setup a NodeJS project with Docker in Wappler
Section titled “In this guide we will show you how easy is to setup a NodeJS project with Docker in Wappler”In this guide we will show you how easy is to setup a NodeJS project with Docker in Wappler
Creating NodeJS Project
Section titled “Creating NodeJS Project”Open the Project Manager and choose to create a new project.
Let start with a template so our project isn’t empty. But if you wish you can also choose to start with blank.
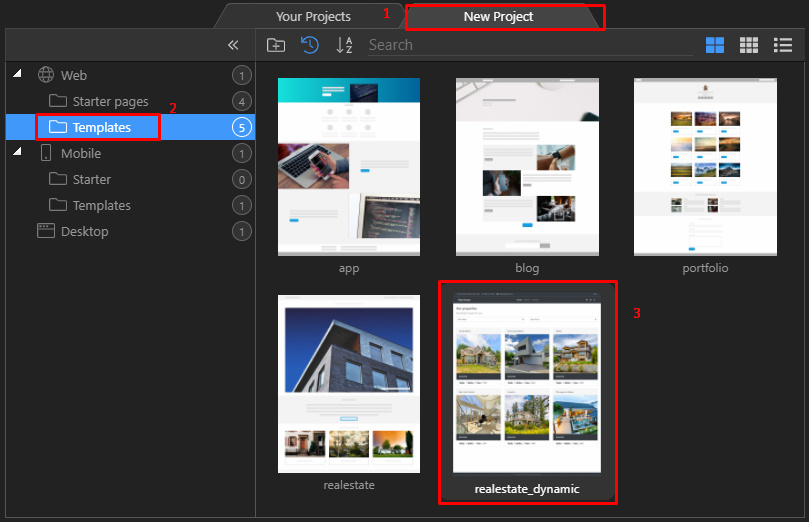
Step 3
Section titled “Step 3”As project options choose a nice project name (1), select a local project folder (2), choose Docker Hosting for using Docker (3) and as Server Model select NodeJS (4)
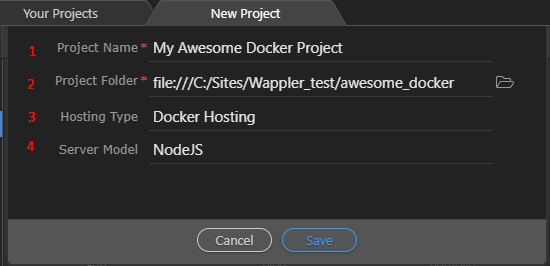
Step 4
Section titled “Step 4”After you click “save” your project will be directly created and you will be asked if you want to launch the docker for it:
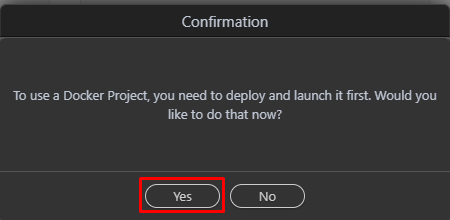
Just choose “yes” and your docker project is up and running!
Section titled “Just choose “yes” and your docker project is up and running!”Just choose “yes” and your docker project is up and running!
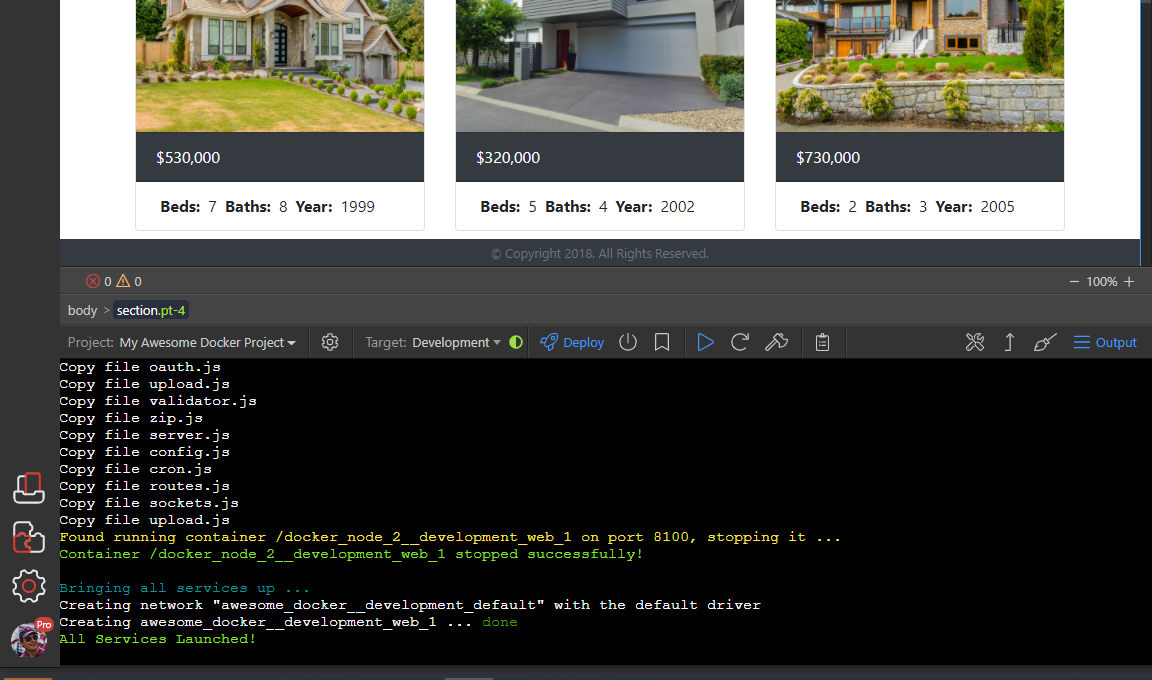
You can press refresh Design View or press F12 to view it live in the browser!
Section titled “You can press refresh Design View or press F12 to view it live in the browser!”Adding Databases
Section titled “Adding Databases”Per default just a web server is added for your NodeJS project in Docker. But you can easily add databases you wish to use.
Just go to the project options and choose targets:
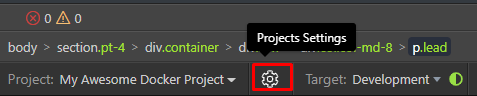
There you can choose the database you want to use:
Section titled “There you can choose the database you want to use:”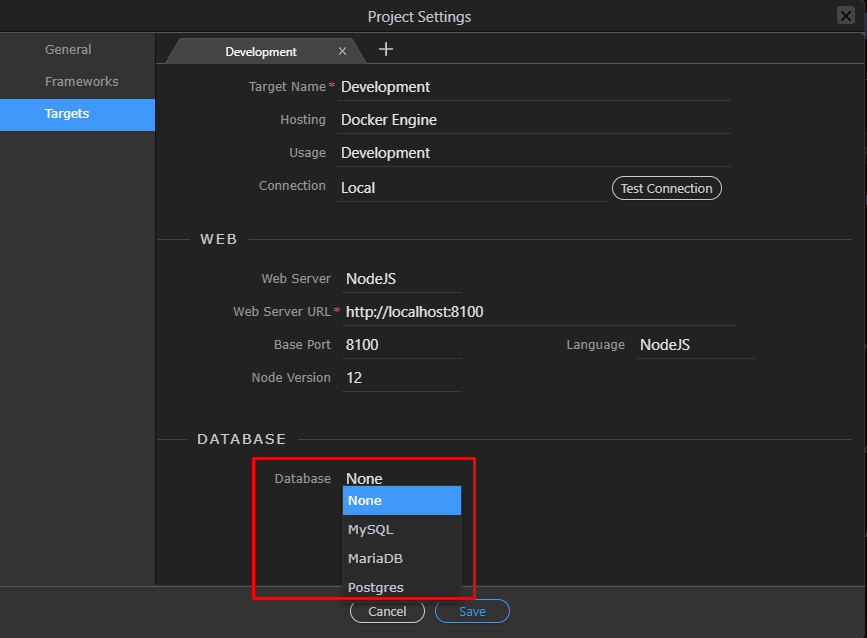
In our example we choose MySQL. Let’s keep the defaults and just save:
Section titled “In our example we choose MySQL. Let’s keep the defaults and just save:”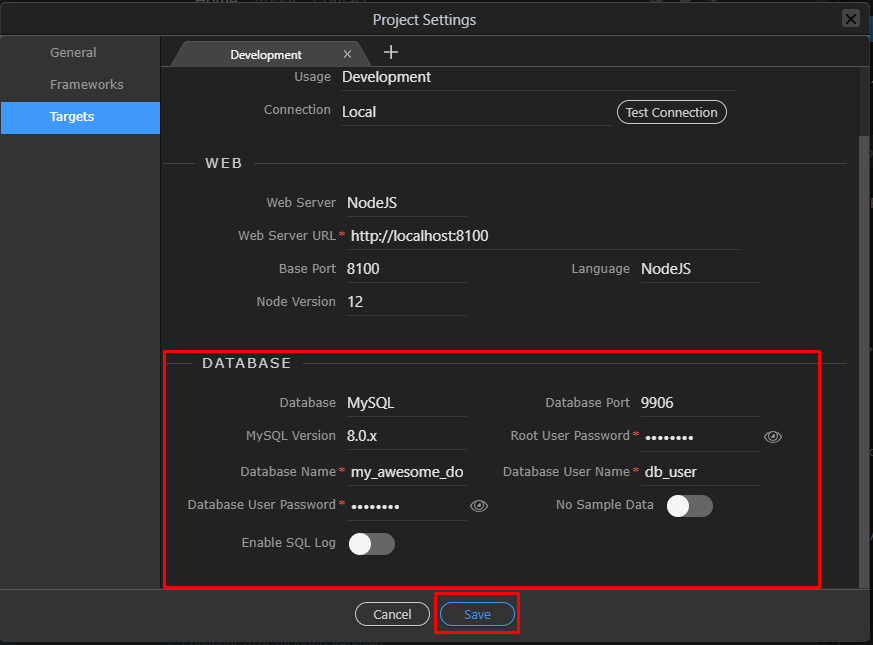
Click on Deploy to activate the new service:
Section titled “Click on Deploy to activate the new service:”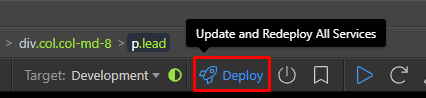
Step 11
Section titled “Step 11”and your database server is launched together with your web server!

Connecting to your Database with the Database Manager
Section titled “Connecting to your Database with the Database Manager”So now that you have a database up and running, you want to connect to it with the Database Manager. So open it:
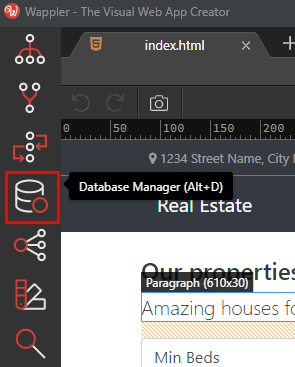
Step 13
Section titled “Step 13”Amazing magic happens! The Database Manager already knows about your database! And it is connected and ready to use:
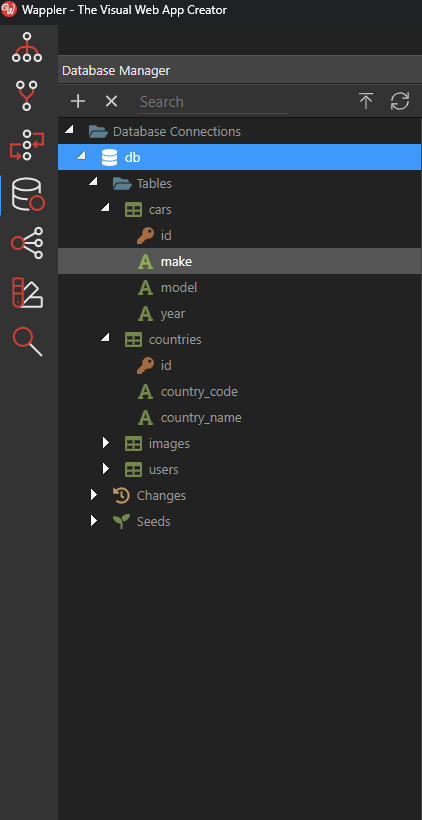
Using the Database in Server Connect
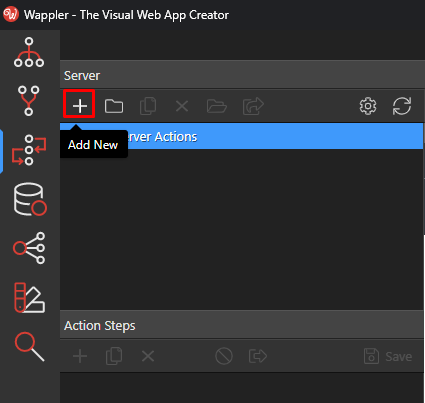
Section titled “Using the Database in Server Connect”Let’s go to Server Connect and make an action to query our database.
Step 16
Section titled “Step 16”Add a new server action:
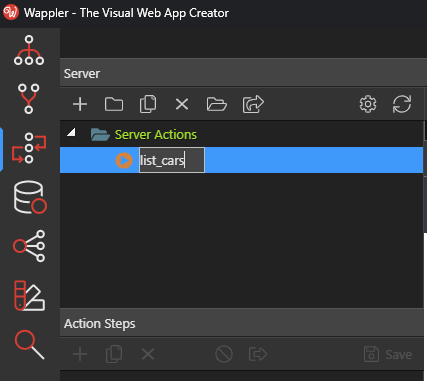
As steps for the action add the database connection first:
Section titled “As steps for the action add the database connection first:”
In its properties - choose the ready to go connection:
Section titled “In its properties - choose the ready to go connection:”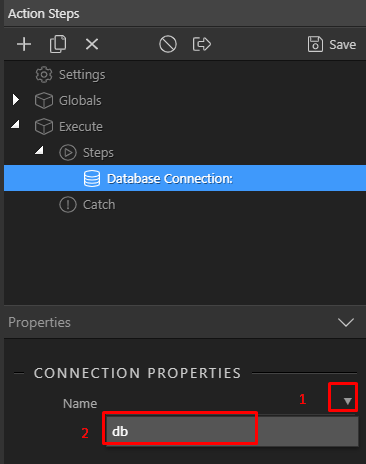
Step 19
Section titled “Step 19”Add a database query step after it
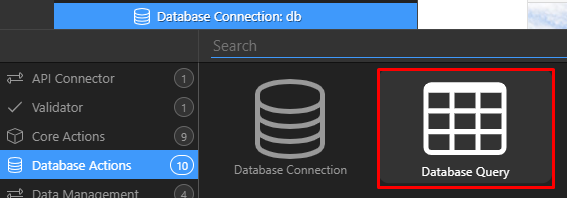
Go to its Query Builder:
Section titled “Go to its Query Builder:”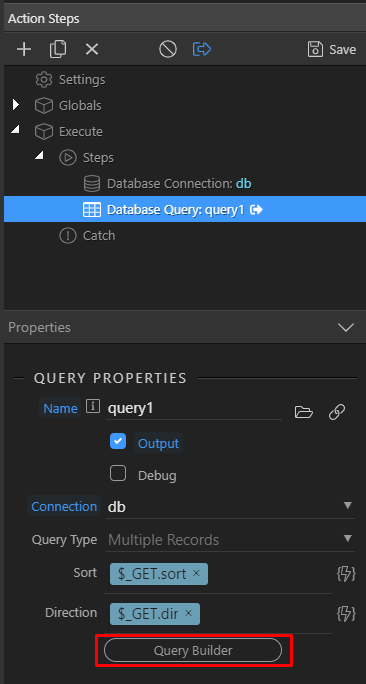
Select the Cars table as this is what we want to display and click save.
Section titled “Select the Cars table as this is what we want to display and click save.”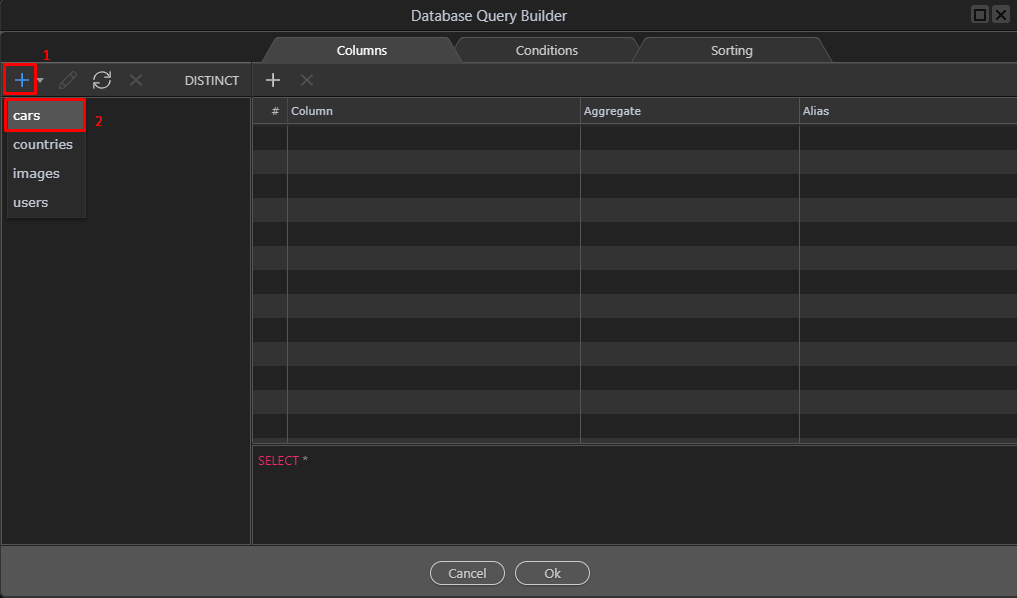
Then save also your server action:
Section titled “Then save also your server action:”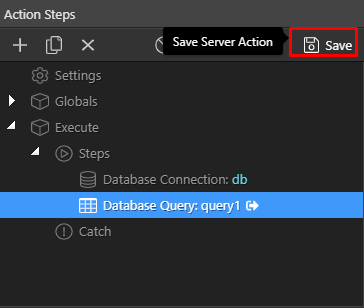
and you are done! You can test you Server Action in the browser:
Section titled “and you are done! You can test you Server Action in the browser:”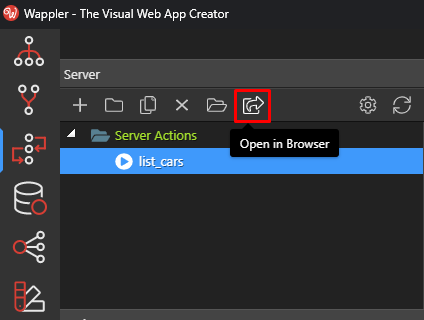
You will see the ourput of the query:
Section titled “You will see the ourput of the query:”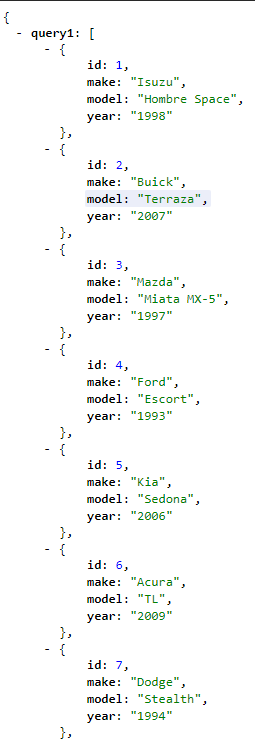
Remote deploy with Docker
Section titled “Remote deploy with Docker”So suppose we are done with our development and want to create a remote server for our Docker deployment.
A great option for this is Digital Ocean. We can do it all from within Wappler.
Create a new “Docker Machine” on Digital Ocean:
Section titled “Create a new “Docker Machine” on Digital Ocean:”Just open the project settings and go to the targets, there click on the [ + ] to add a new target:
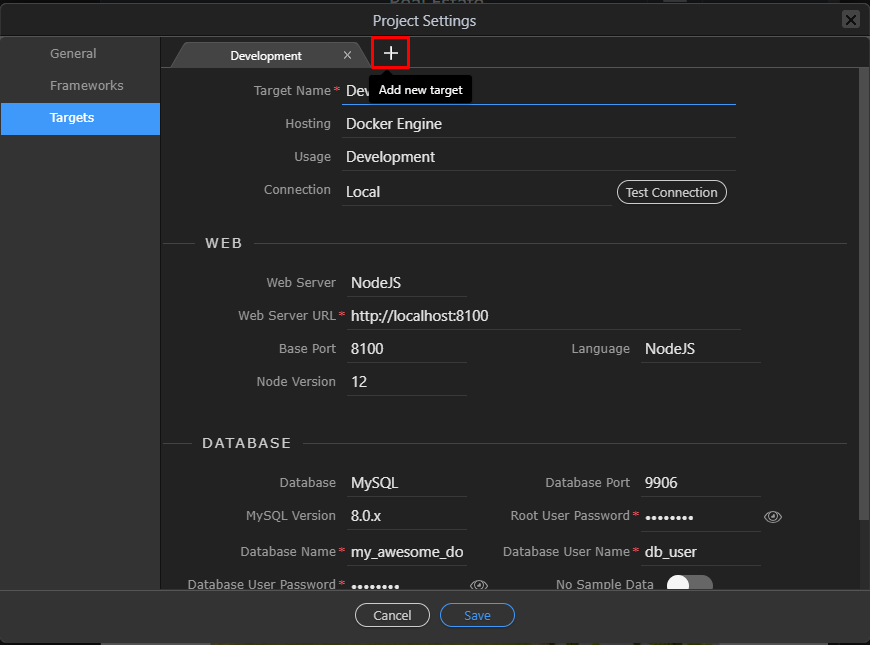
Give it a nice name and choose Connect to be “remote”
Section titled “Give it a nice name and choose Connect to be “remote””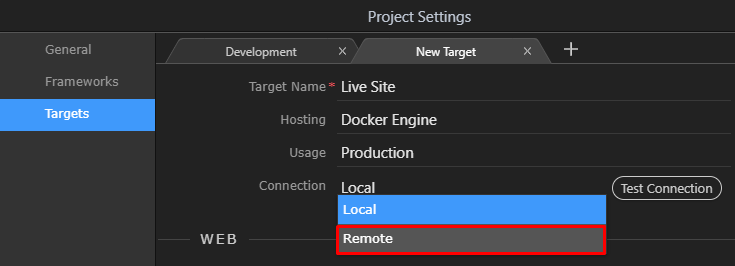
Step 29
Section titled “Step 29”As we don’t yet have a server (a droplet in Digital Ocean terms) - we need to make a new one.
So click on “Manage”
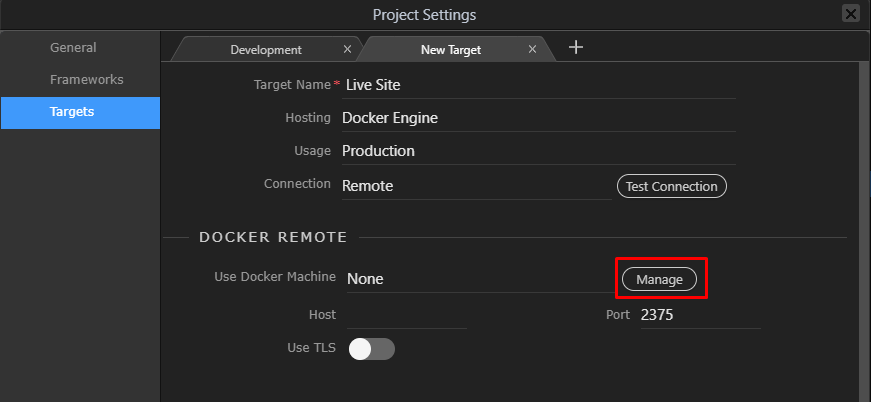
Initially you don’t have any servers as Docker Machines so we want to create a new one.
Section titled “Initially you don’t have any servers as Docker Machines so we want to create a new one.”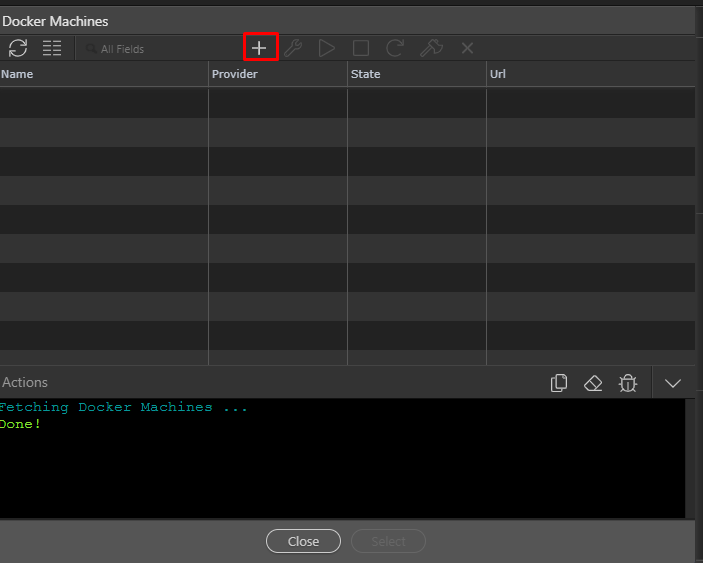
Step 31
Section titled “Step 31”Give it a good name (without spaces) and choose Digital Ocean as provider:
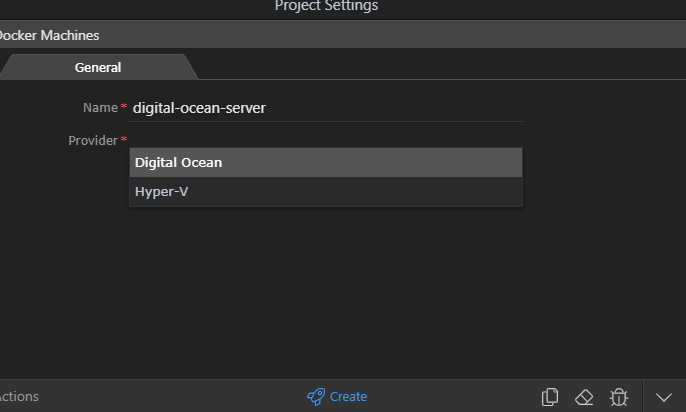
Go to the control panel of Digital Ocean and get yourself an API key,
Section titled “Go to the control panel of Digital Ocean and get yourself an API key,”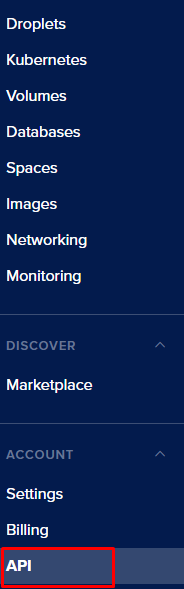
Step 33
Section titled “Step 33”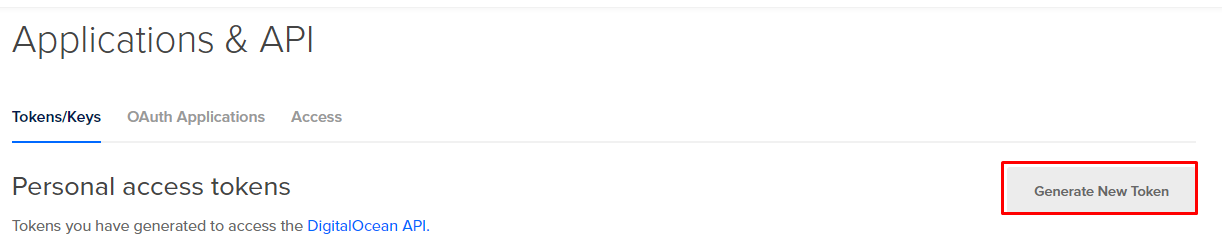
then you can just paste it:
Section titled “then you can just paste it:”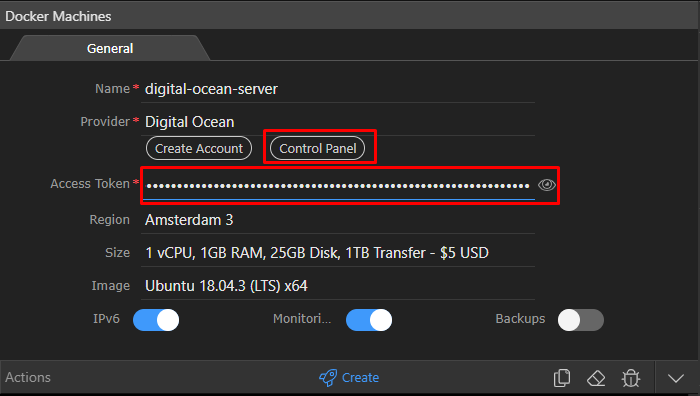
Choose any region for your server and hit “create” , the server creation will kick in:
Section titled “Choose any region for your server and hit “create” , the server creation will kick in:”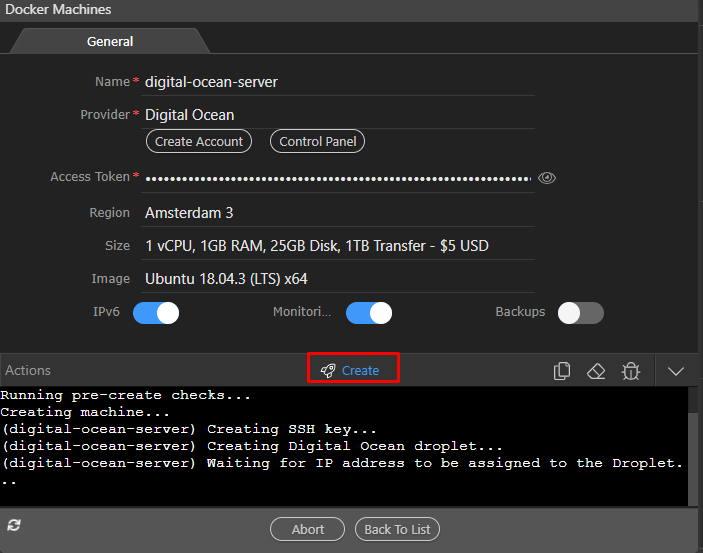
It might take a minite or two to complete:
Section titled “It might take a minite or two to complete:”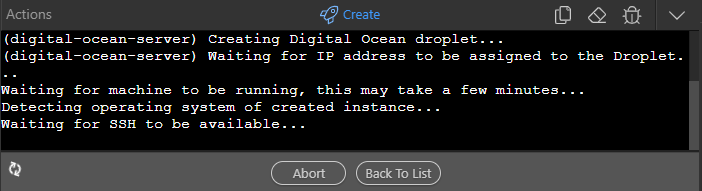
Step 37
Section titled “Step 37”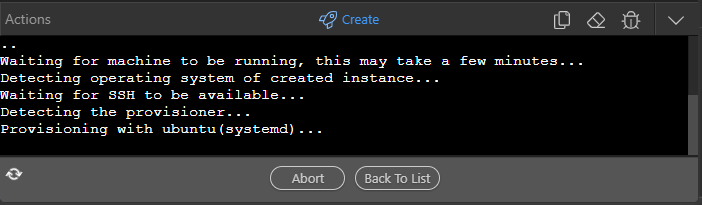
Docker is being fully installed for your on the remote server and everything is getting prepared
Section titled “Docker is being fully installed for your on the remote server and everything is getting prepared”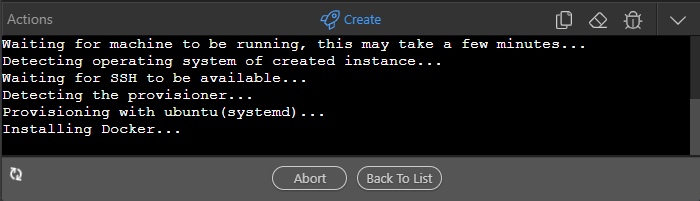
When all done, choose to go back to the list:
Section titled “When all done, choose to go back to the list:”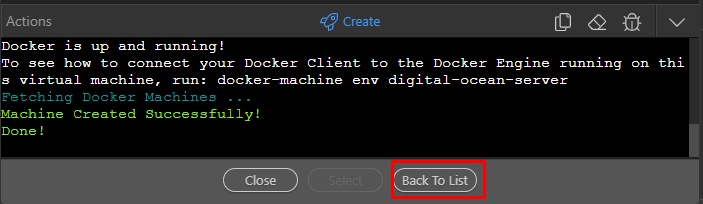
You will see your new server up and running! Just select it (1) and click on the “select” button:
Section titled “You will see your new server up and running! Just select it (1) and click on the “select” button:”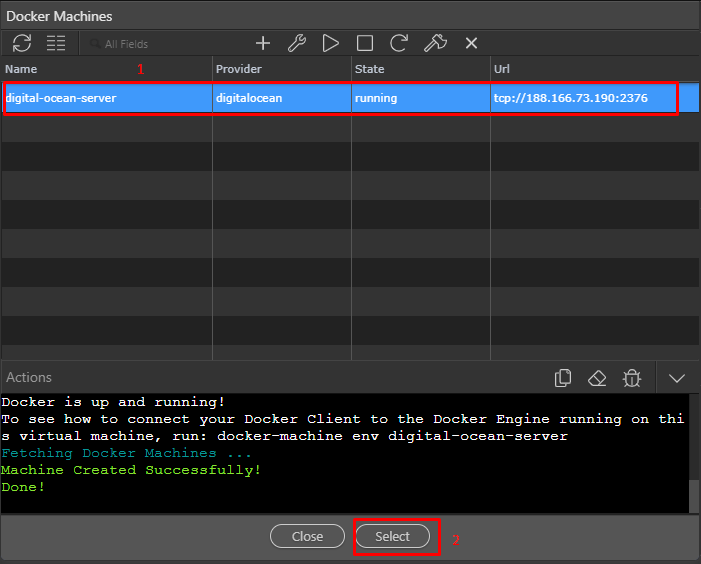
Then the new server is selected as remote docker server for you live target:
Section titled “Then the new server is selected as remote docker server for you live target:”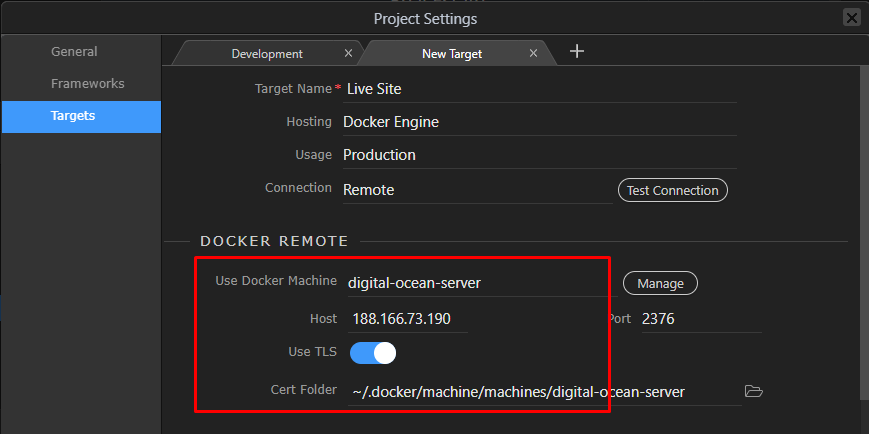
So just save the new target options:
Section titled “So just save the new target options:”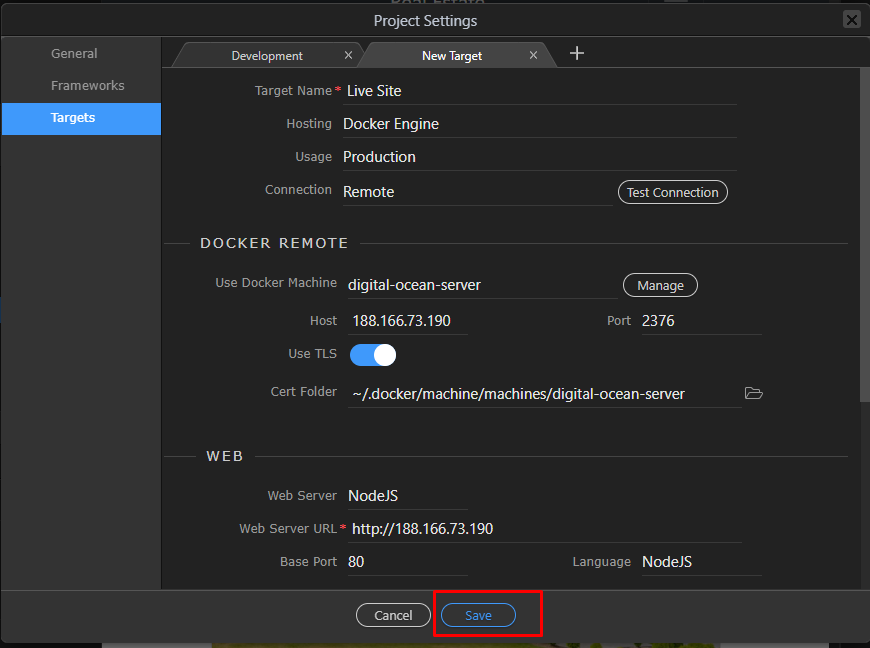
All the new options will be saved and your new Live target will be available. So let’s select it:
Section titled “All the new options will be saved and your new Live target will be available. So let’s select it:”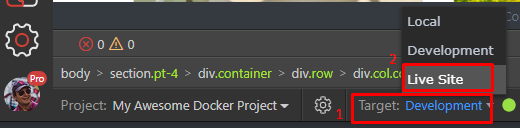
As it your docker site is not deployed yet there - let do so:
Section titled “As it your docker site is not deployed yet there - let do so:”
Step 45
Section titled “Step 45”Asll the needed services will be automatically downloaded and installed. You can expand the bottom panel to see what is going on:
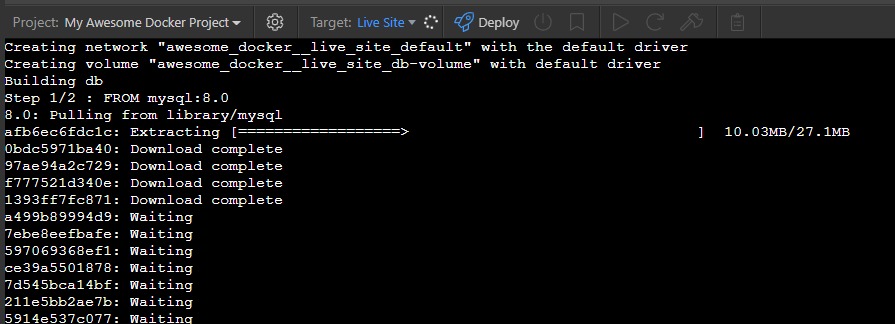
And hooray! Success - your site is fully live!
Section titled “And hooray! Success - your site is fully live!”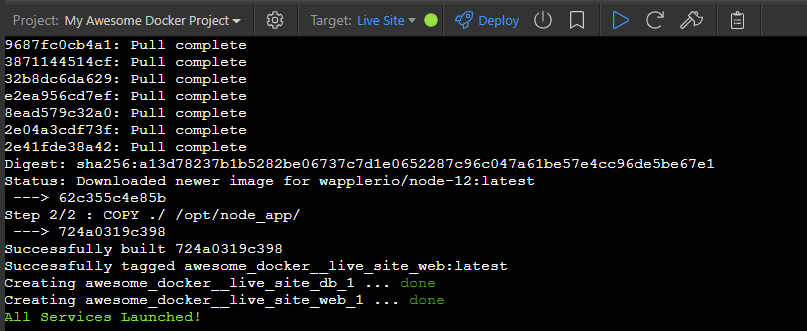
You can just press F12 in design view to open it!
Section titled “You can just press F12 in design view to open it!”and there you go your site is live and kicking!