Deleting Database Records with Confirmation
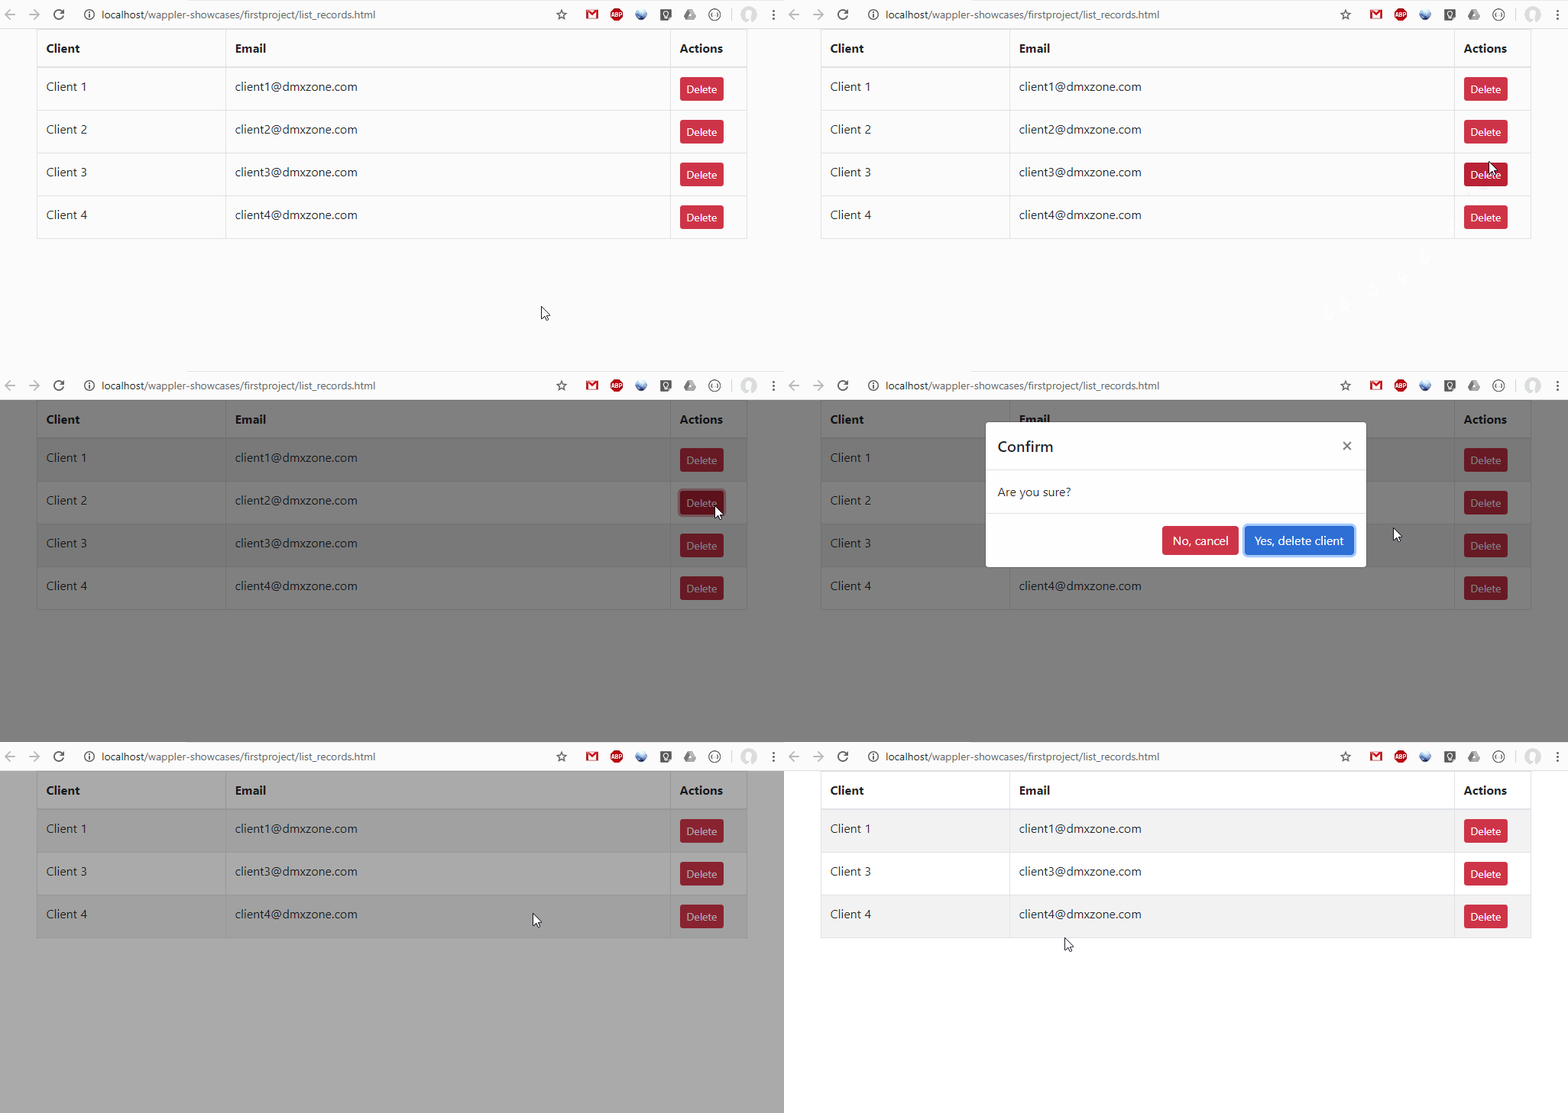
You can add a Bootstrap 4 styled confirm dialog when deleting a database record, using the Flow Component and Bootbox Dialogs integrated in it. This way you can avoid accidentally deleting records. On
Step 1
Section titled “Step 1”On our page we added a dynamic table, listing the records from our database. We added a simple HTML button in one of the table cells, which will be used to delete the selected record.
Setting up Delete Record Server Action
Section titled “Setting up Delete Record Server Action”First we need to create a delete record server action. Open the Server Connect Panel and add new Server Action:
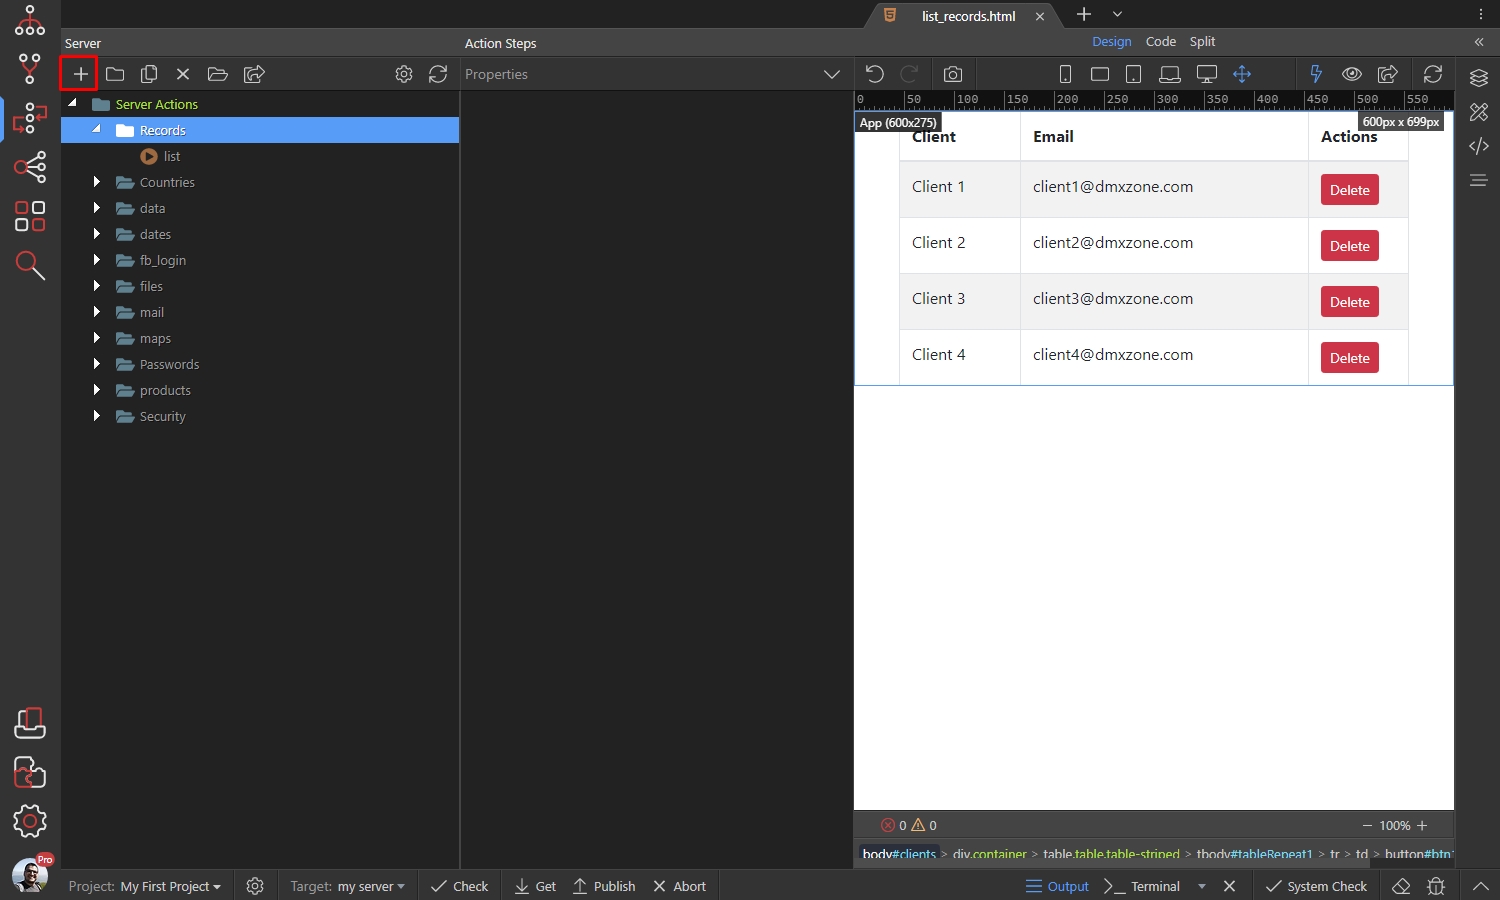
We call it delete. Then open Globals:
Section titled “We call it delete. Then open Globals:”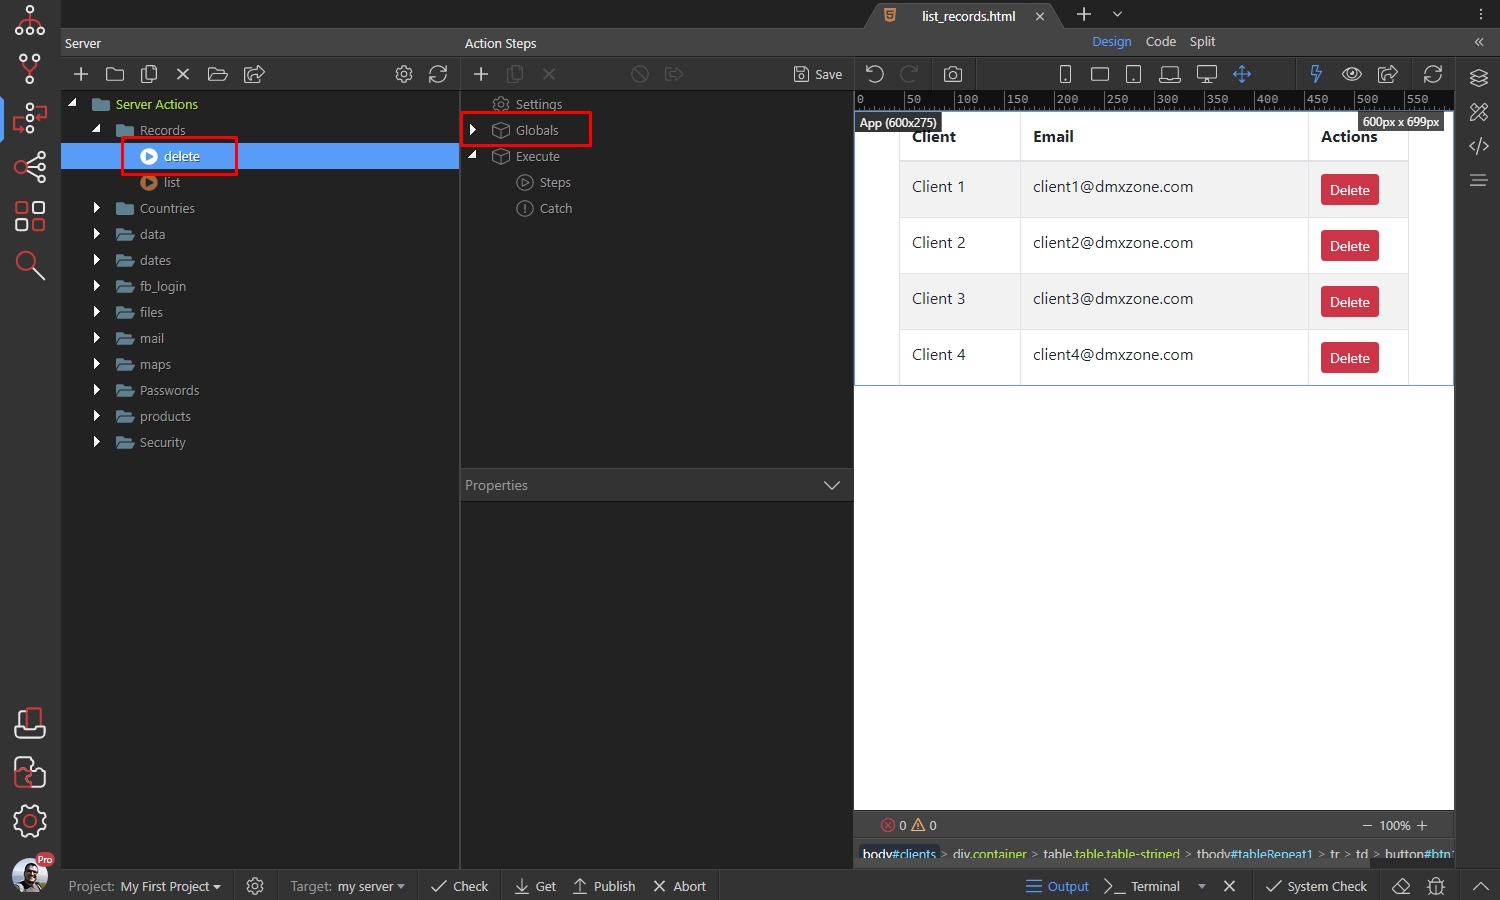
Right click $_GET and add new variable:
Section titled “Right click $_GET and add new variable:”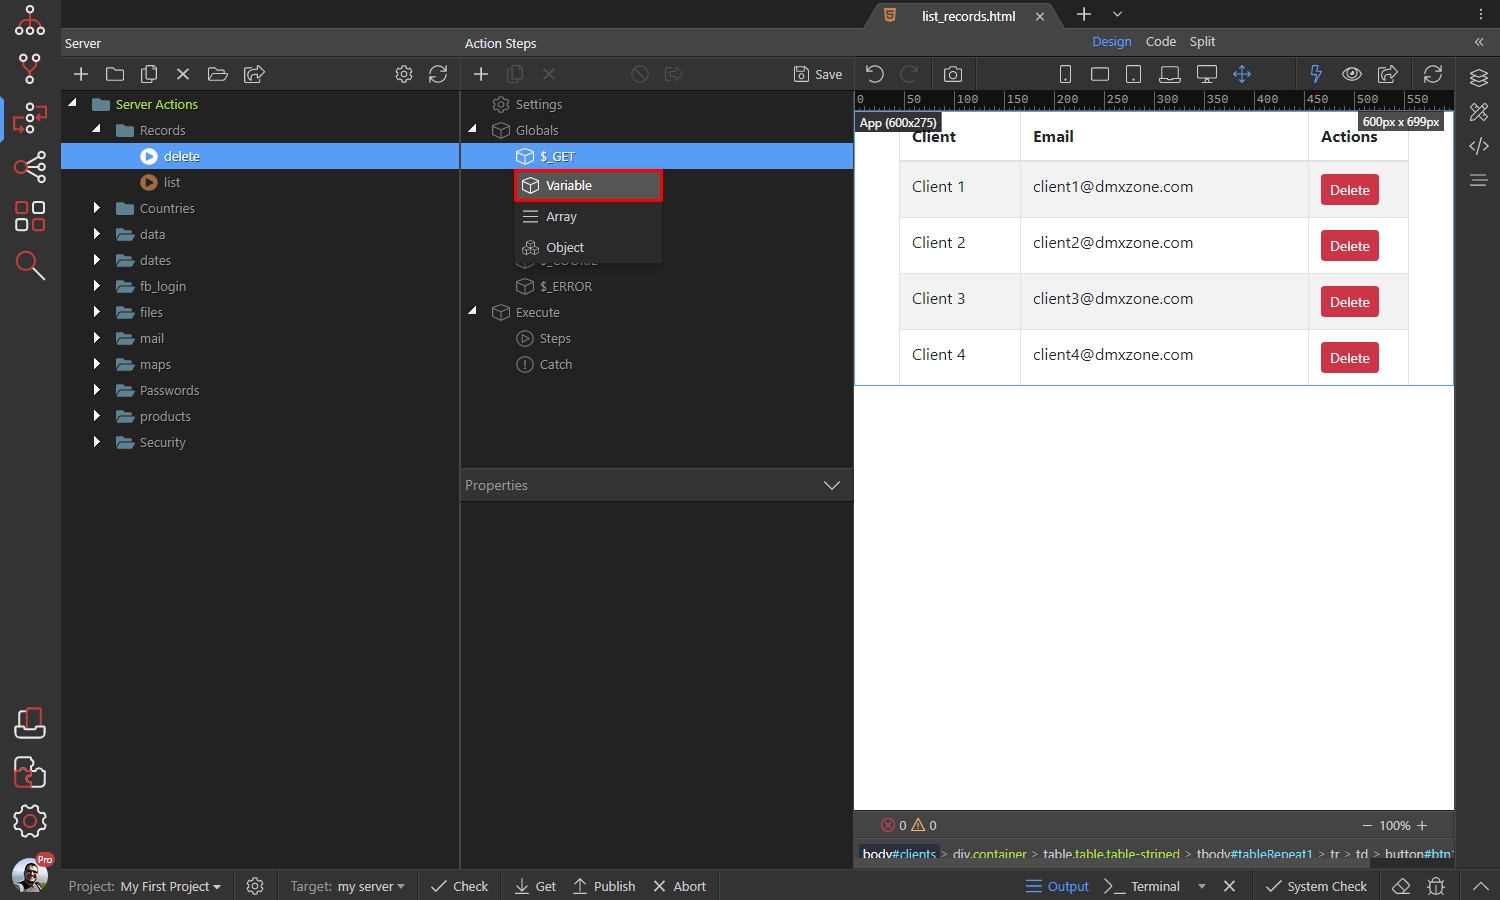
We are going to use this $_GET variable to pass the ID of the record we are deleting. So we call it clientid:
Section titled “We are going to use this $_GET variable to pass the ID of the record we are deleting. So we call it clientid:”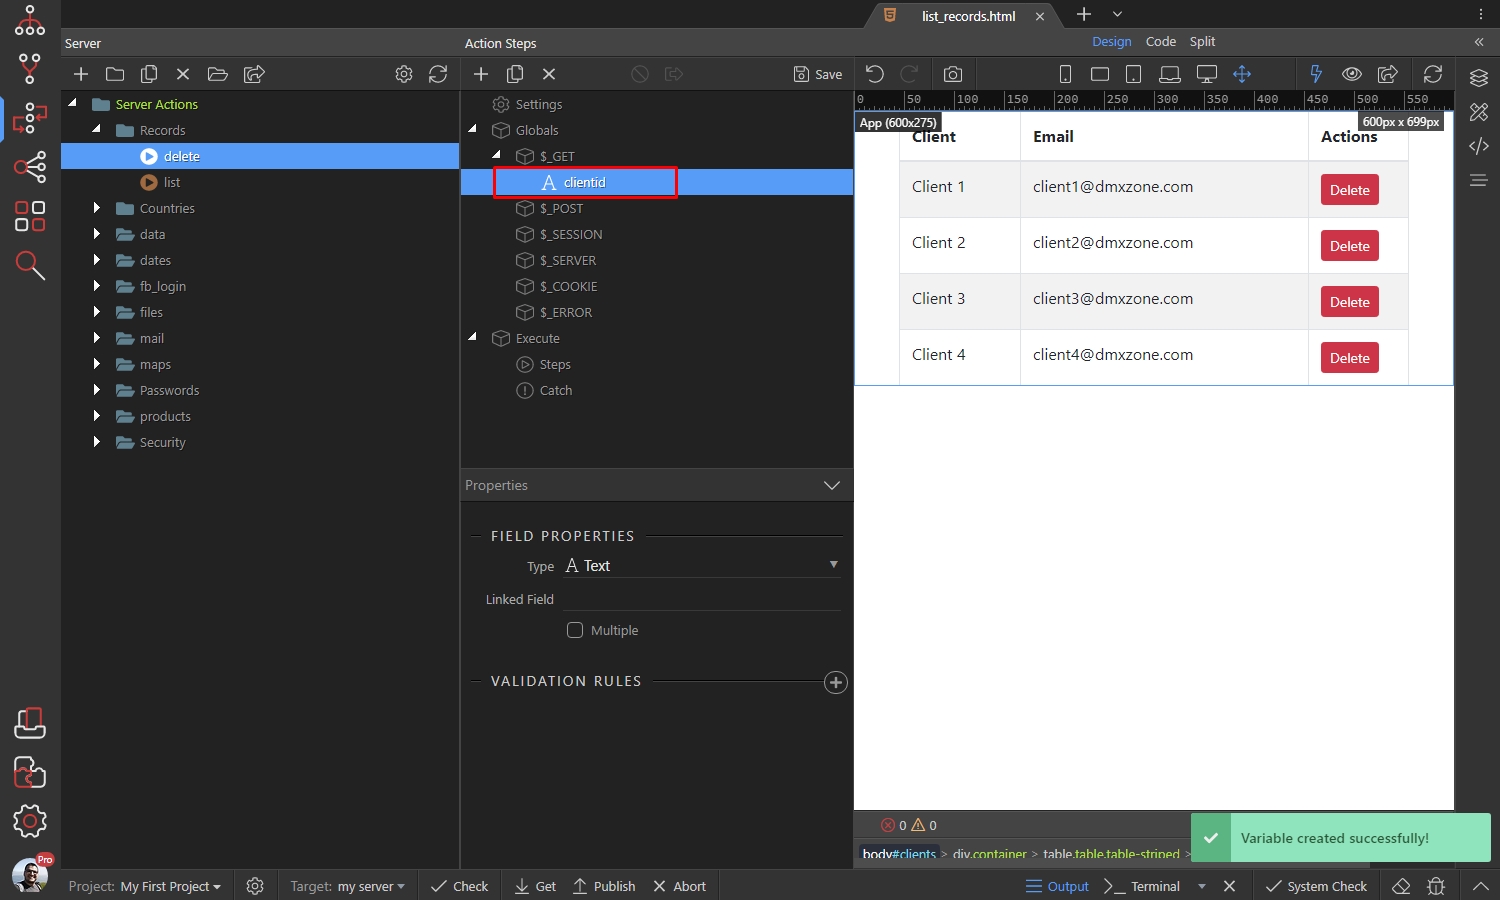
Then right click steps, and add a Database Connection:
Section titled “Then right click steps, and add a Database Connection:”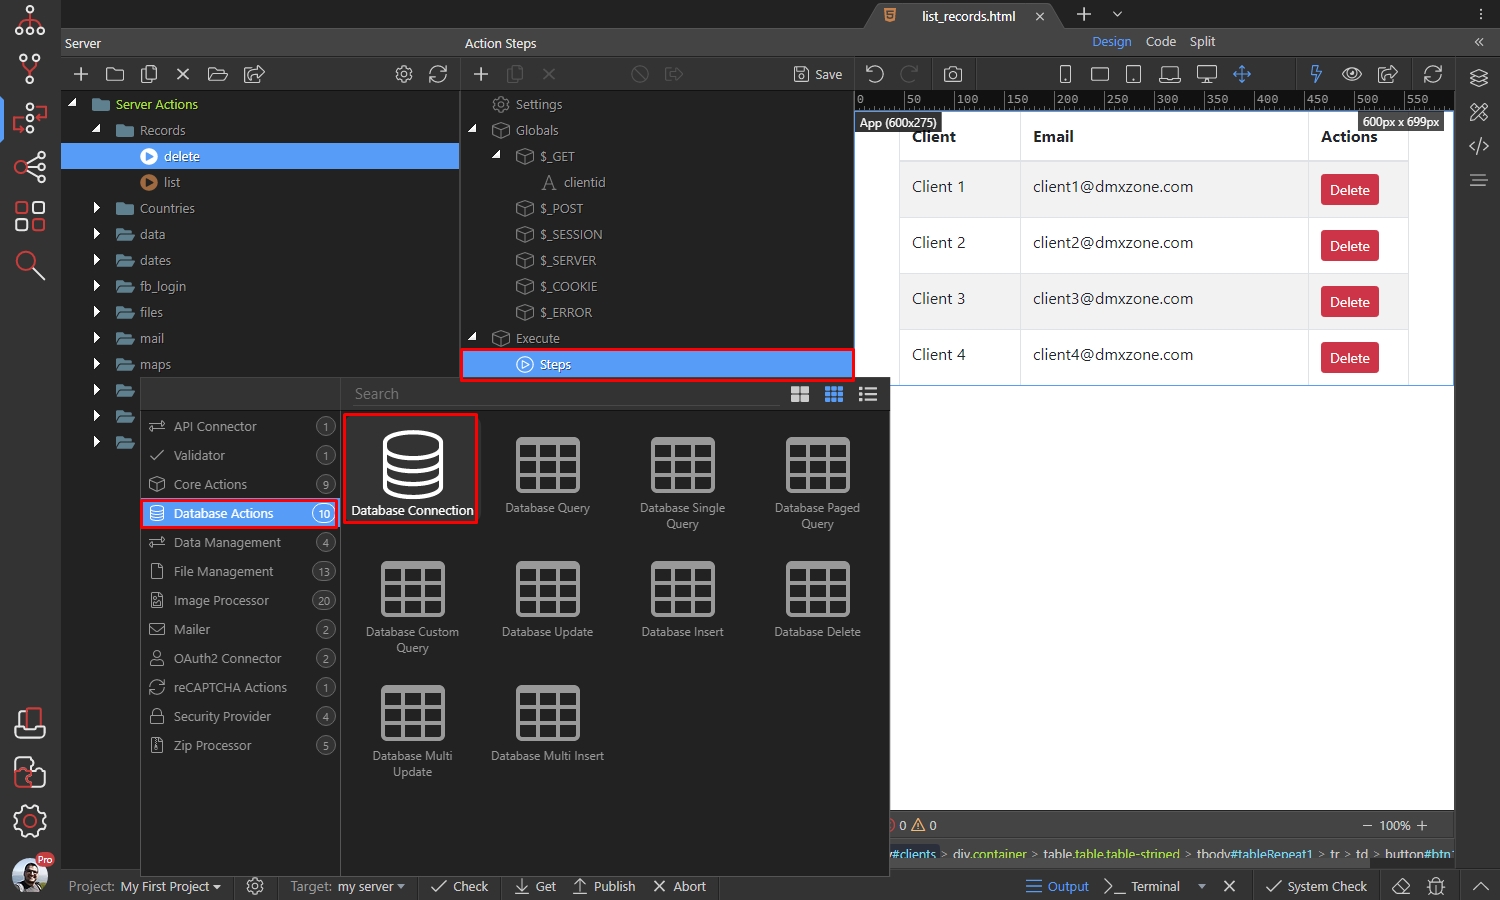
Load an existing connection or setup a new one. Right click the database connection step, when you are done:
Section titled “Load an existing connection or setup a new one. Right click the database connection step, when you are done:”Load an existing connection or setup a new one.
Right click the database connection step, when you are done:
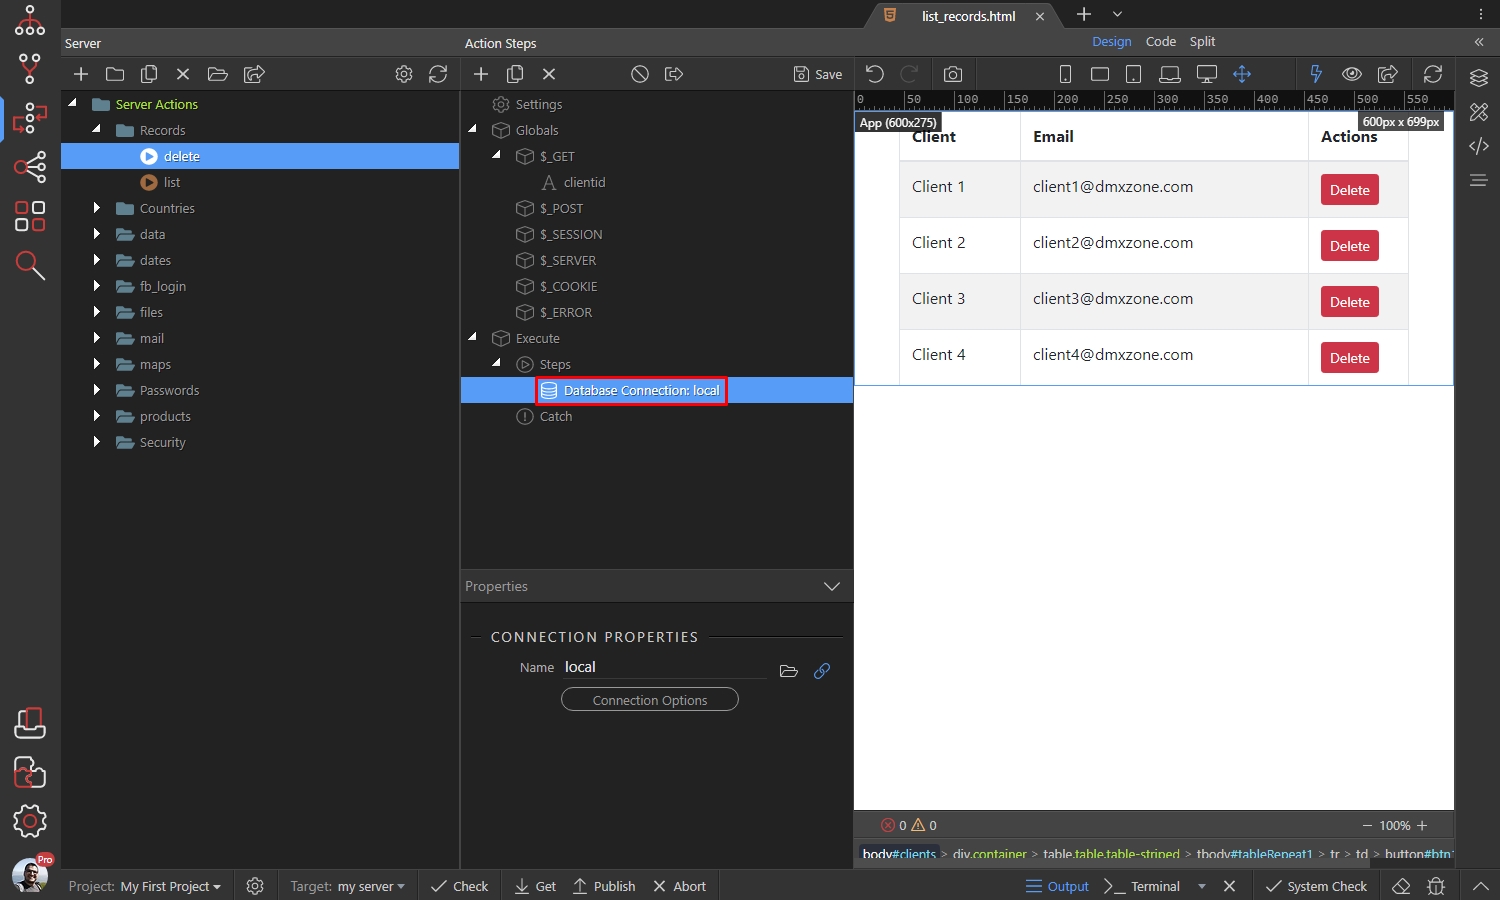
Open Database Actions and select Database Delete:
Section titled “Open Database Actions and select Database Delete:”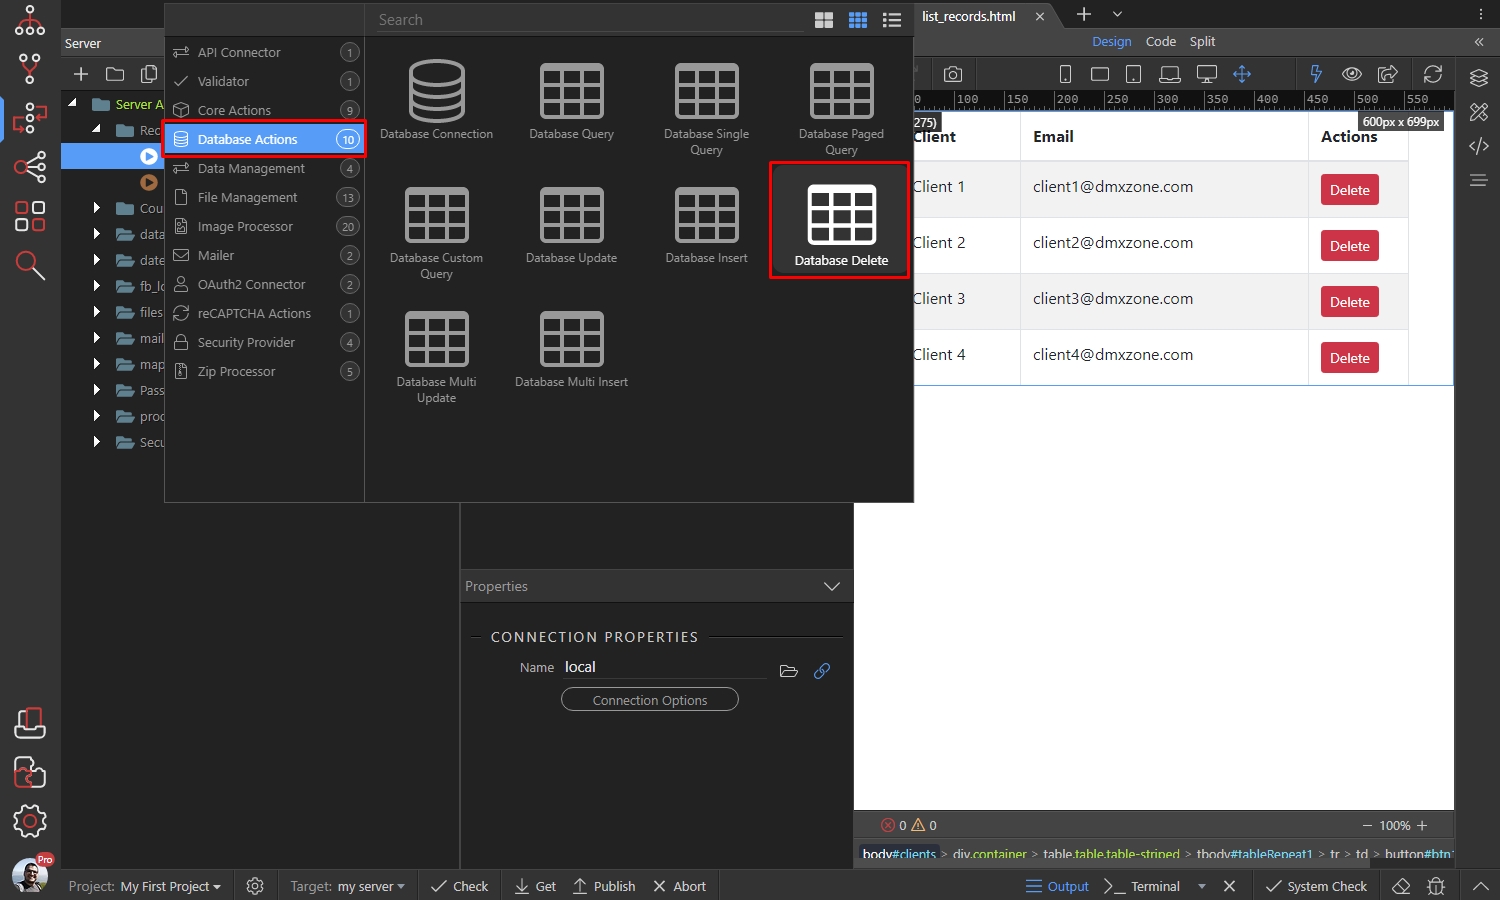
Click the Delete Options button:
Section titled “Click the Delete Options button:”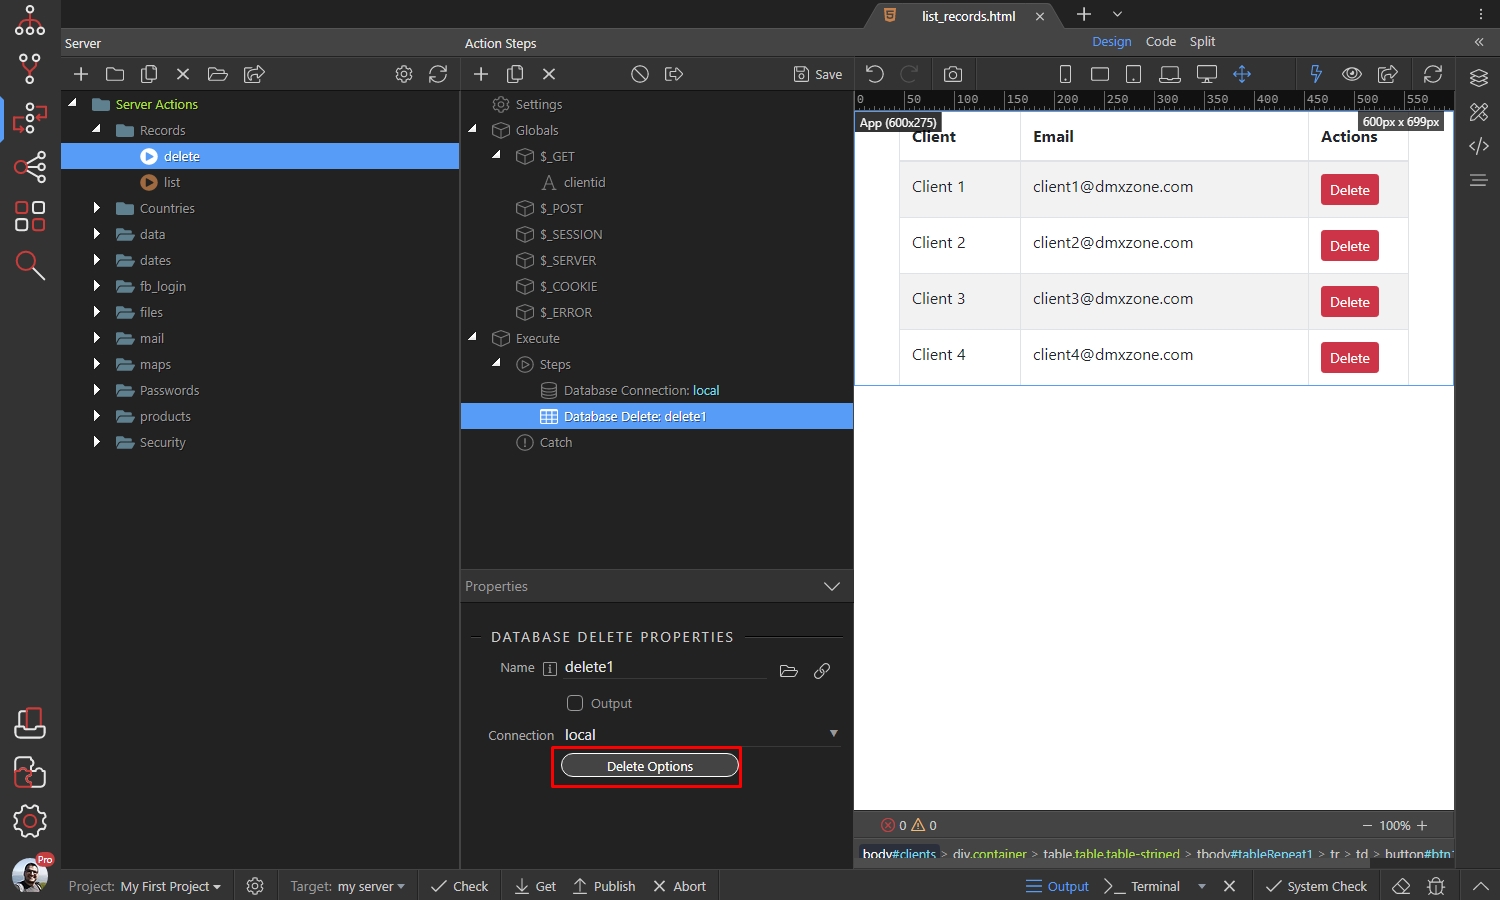
Select the table, which contains your records:
Section titled “Select the table, which contains your records:”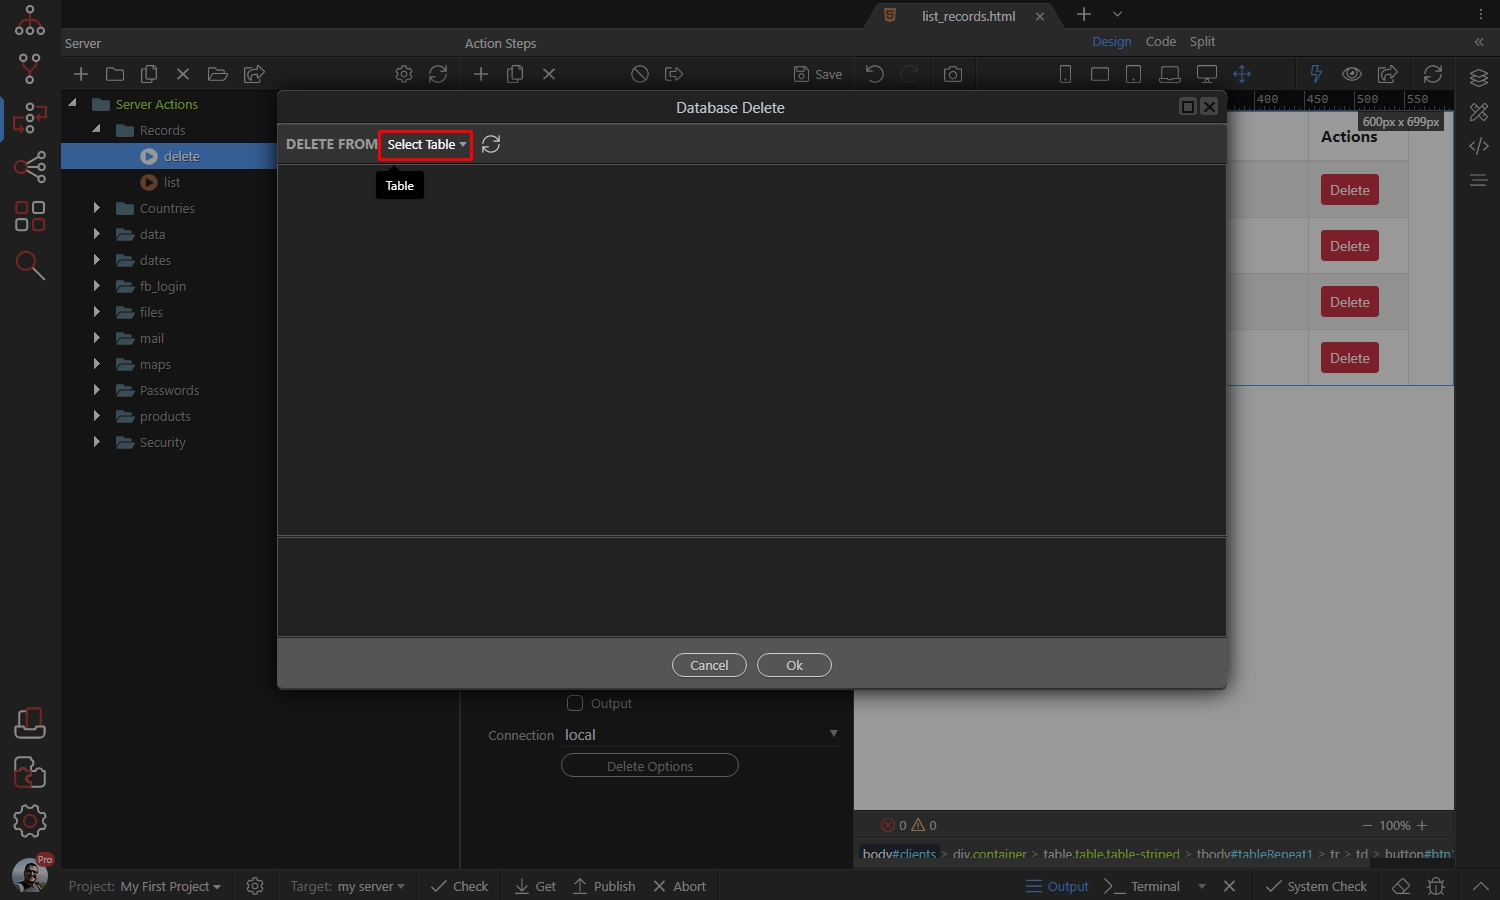
Step 11
Section titled “Step 11”It will automatically add the identity column and assign a $_POST variable to it. We don’t need the $_POST variable in this case, so we click the dynamic data button:
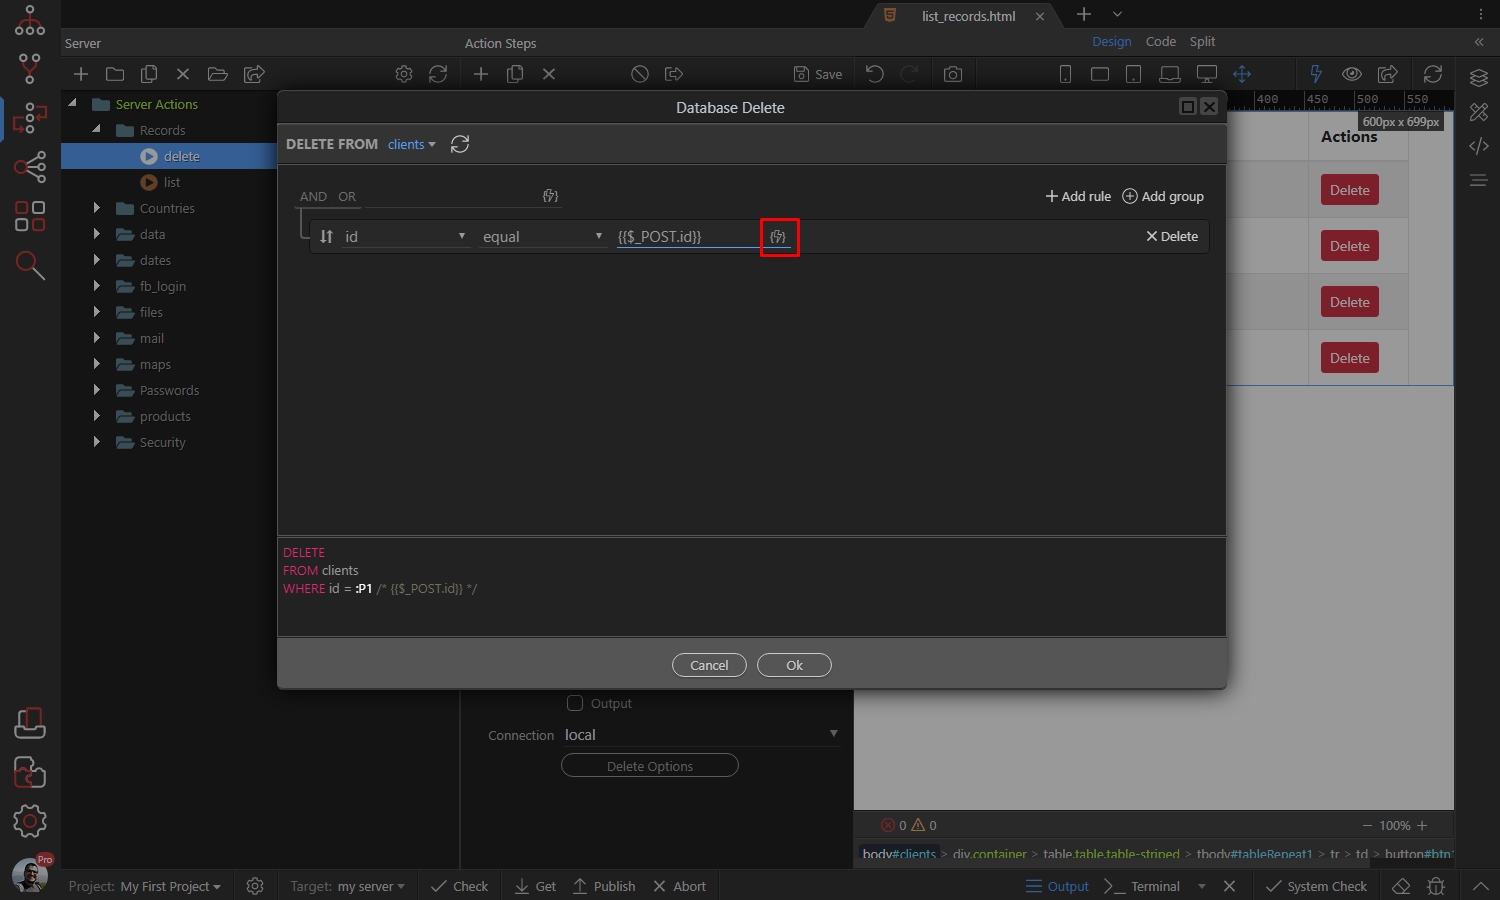
And then we select the $_GET variable, which we created:
Section titled “And then we select the $_GET variable, which we created:”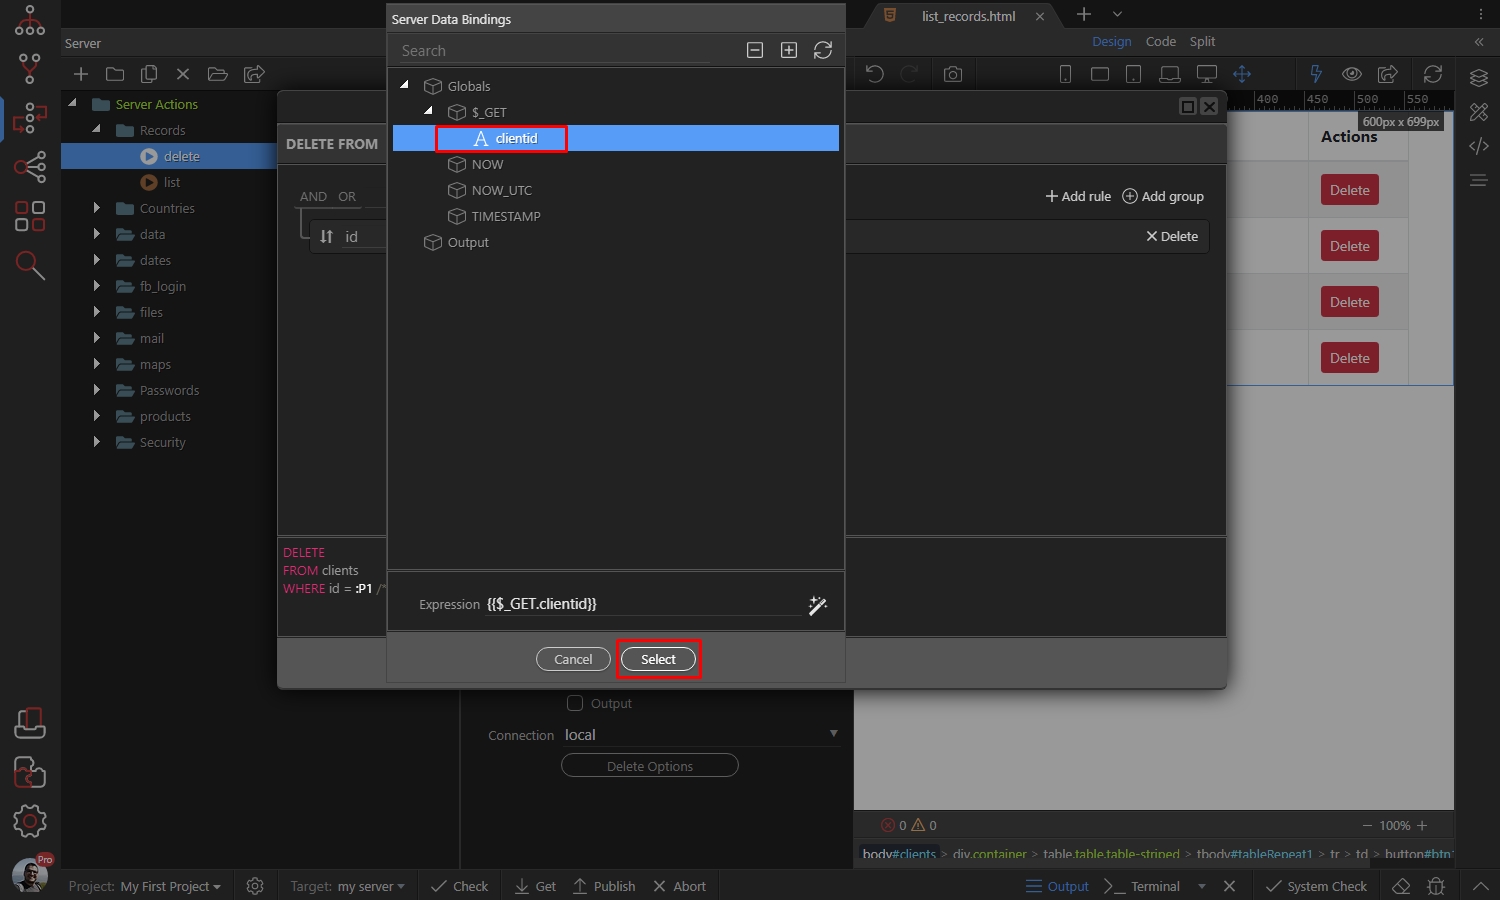
Click OK:
Section titled “Click OK:”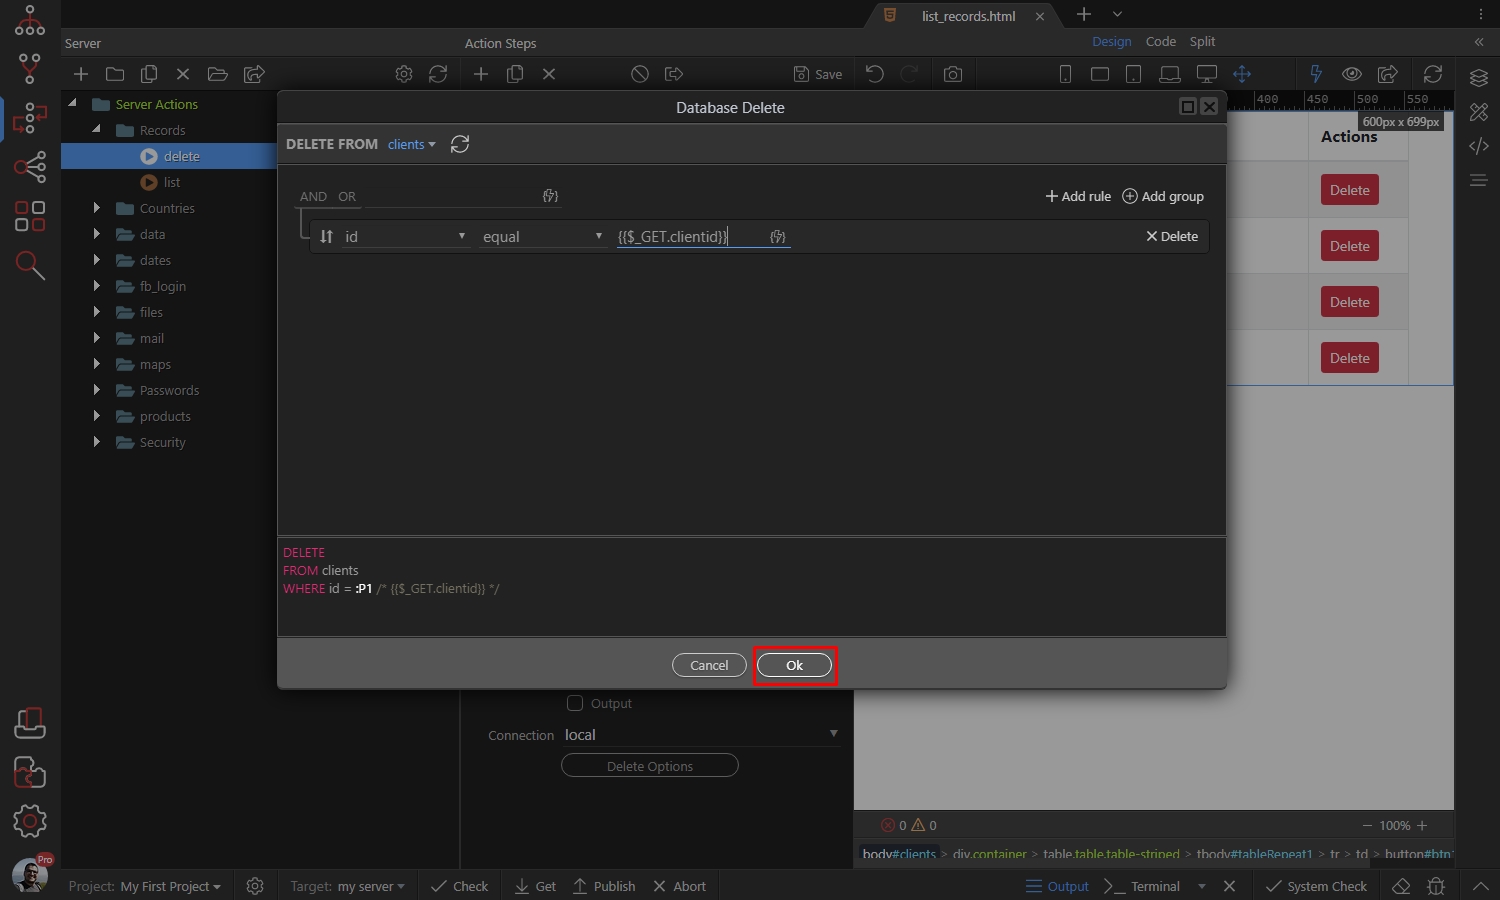
Then save your server action and close the Server Connect panel:
Section titled “Then save your server action and close the Server Connect panel:”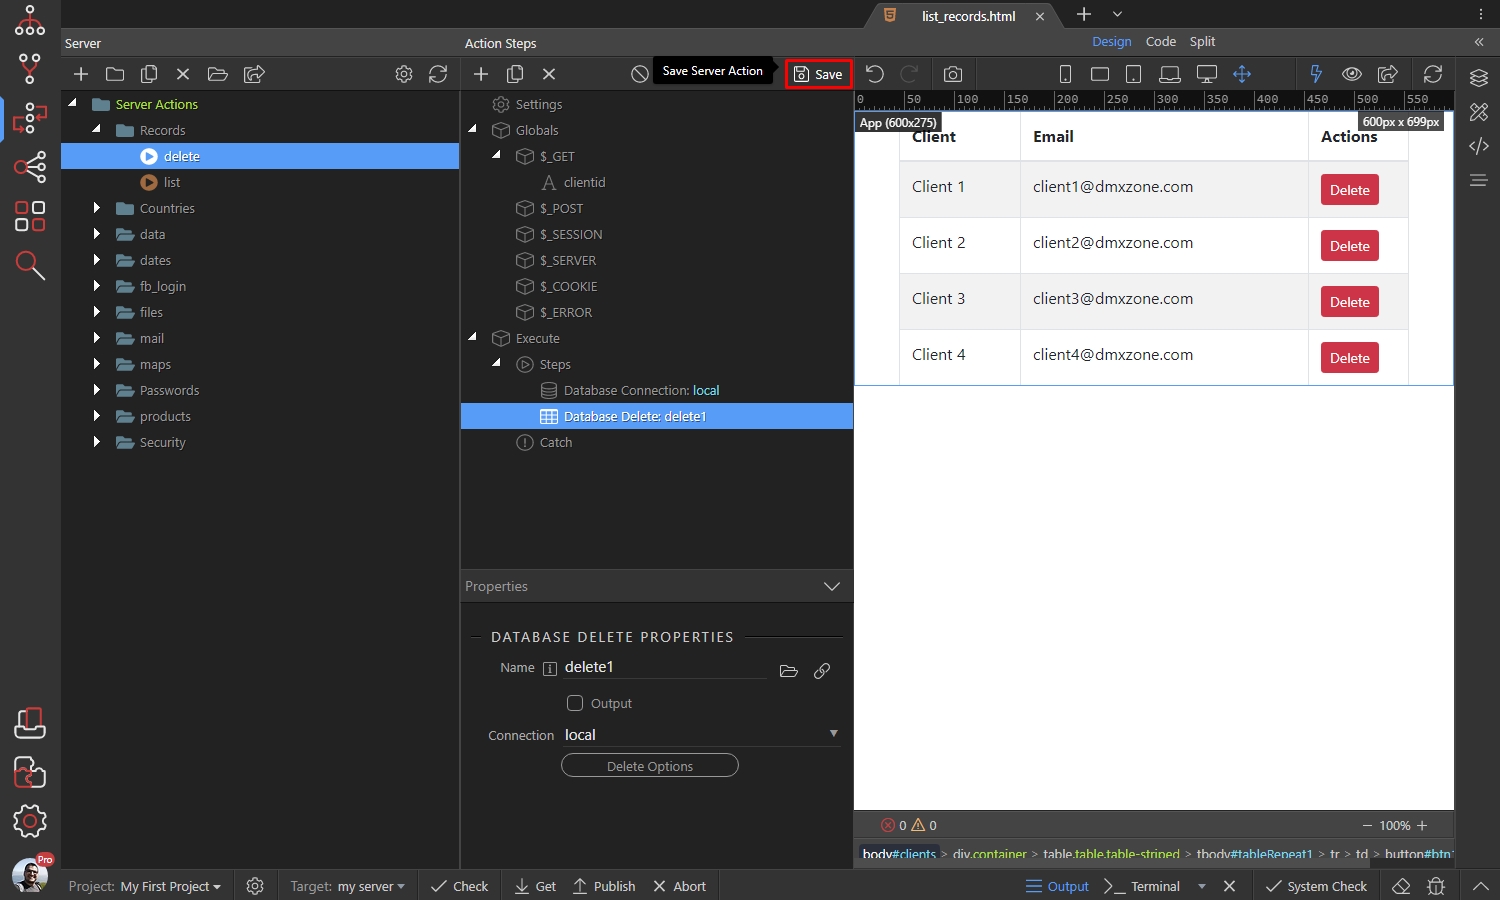
Setting up the Delete Flow
Section titled “Setting up the Delete Flow”Open the App Connect panel. We are going to create a Flow, which shows a confirmation dialog and reloads the records listed on the page, after the delete is completed.
Select App, then add new component:
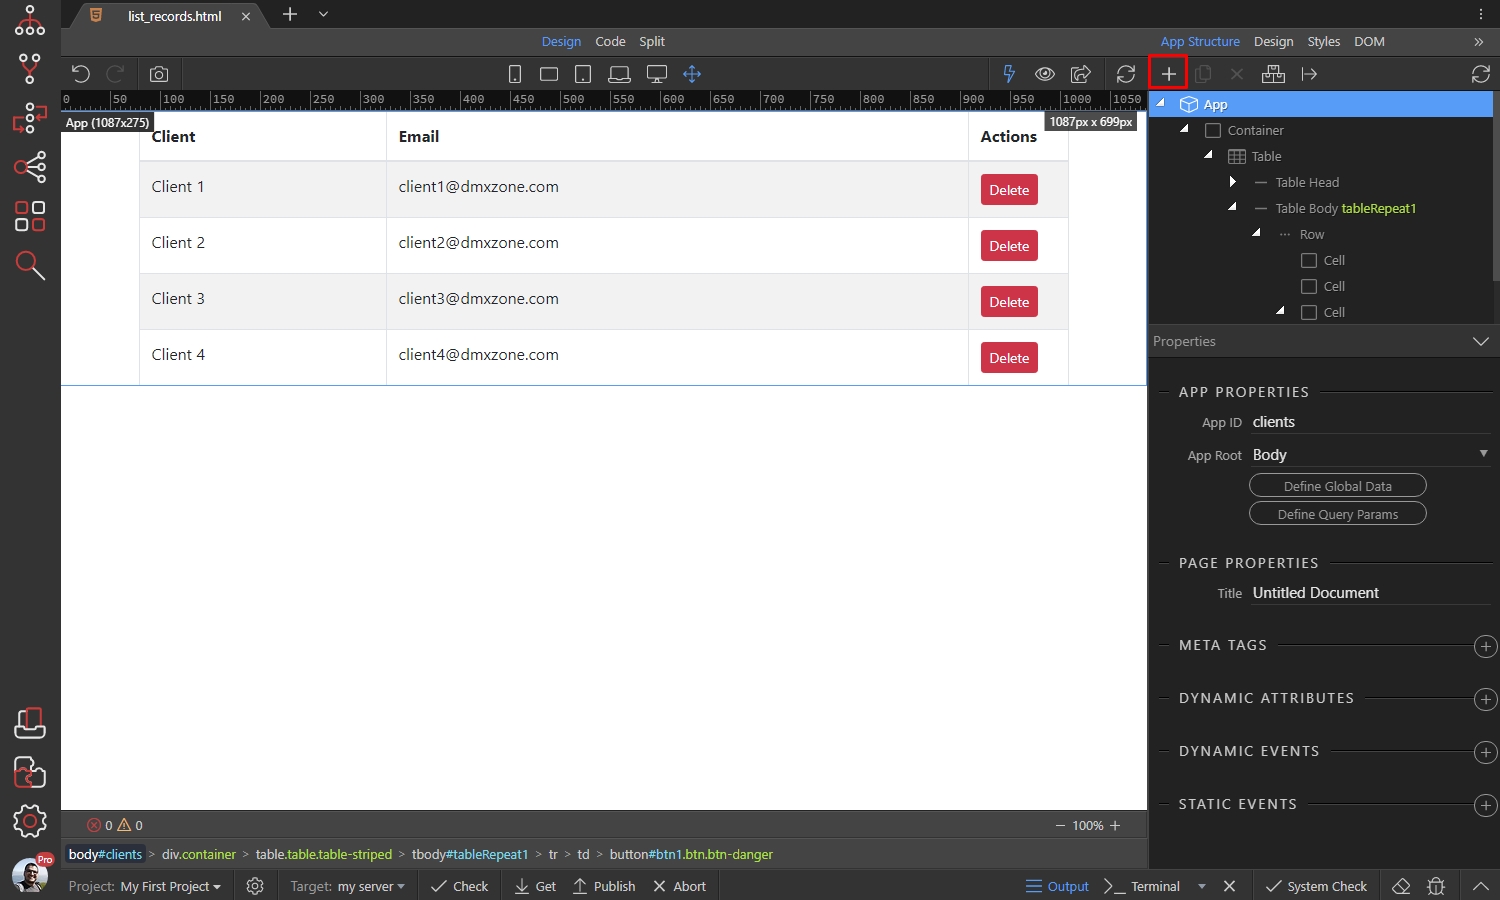
Open Workflows and select Flow:
Section titled “Open Workflows and select Flow:”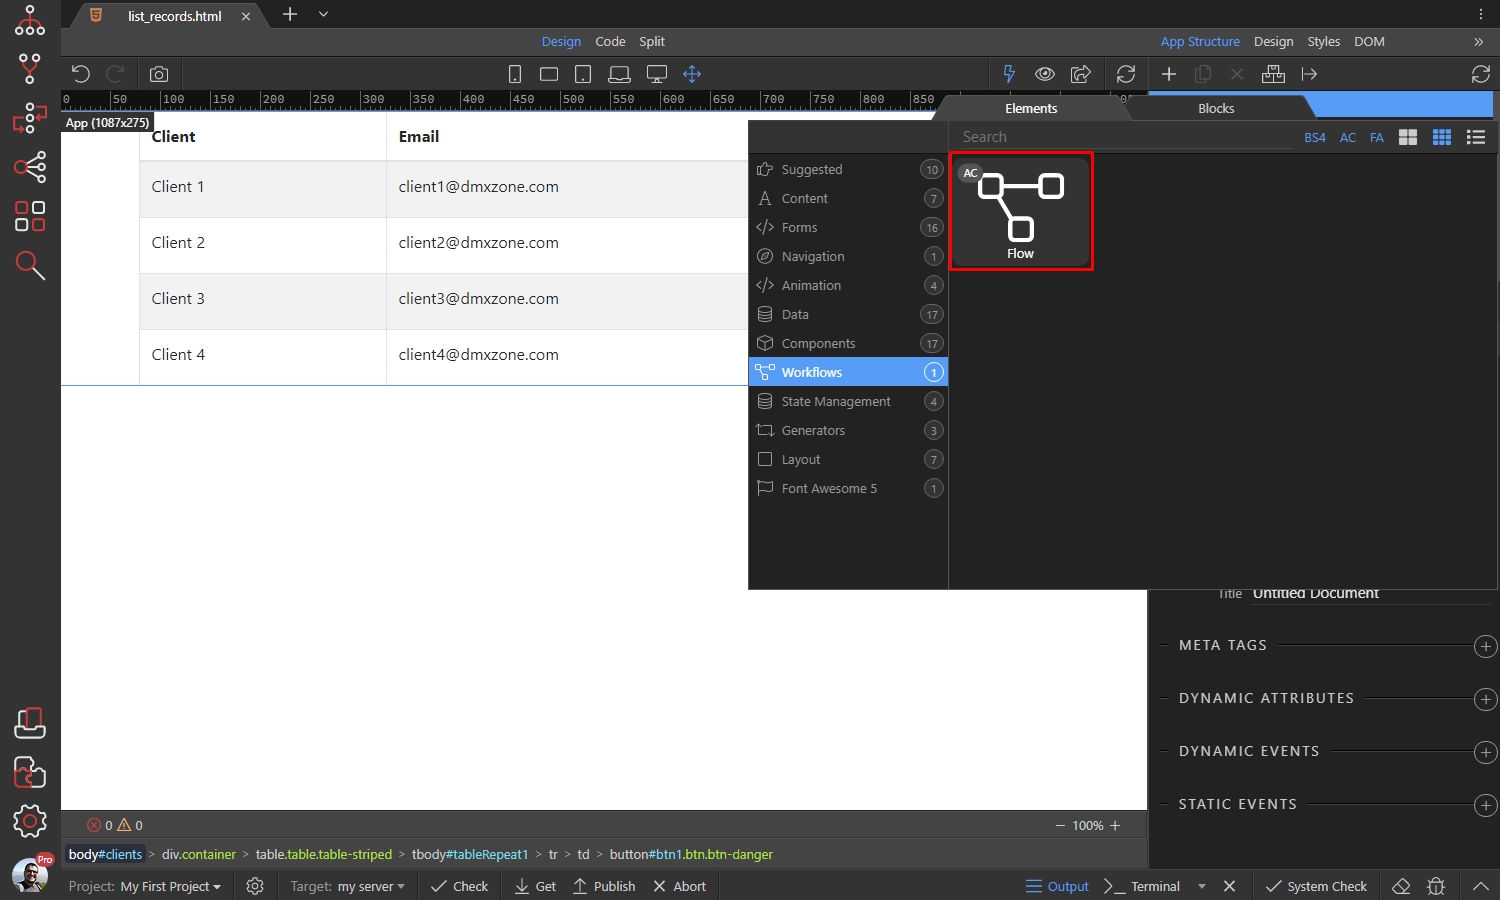
Edit Flow:
Section titled “Edit Flow:”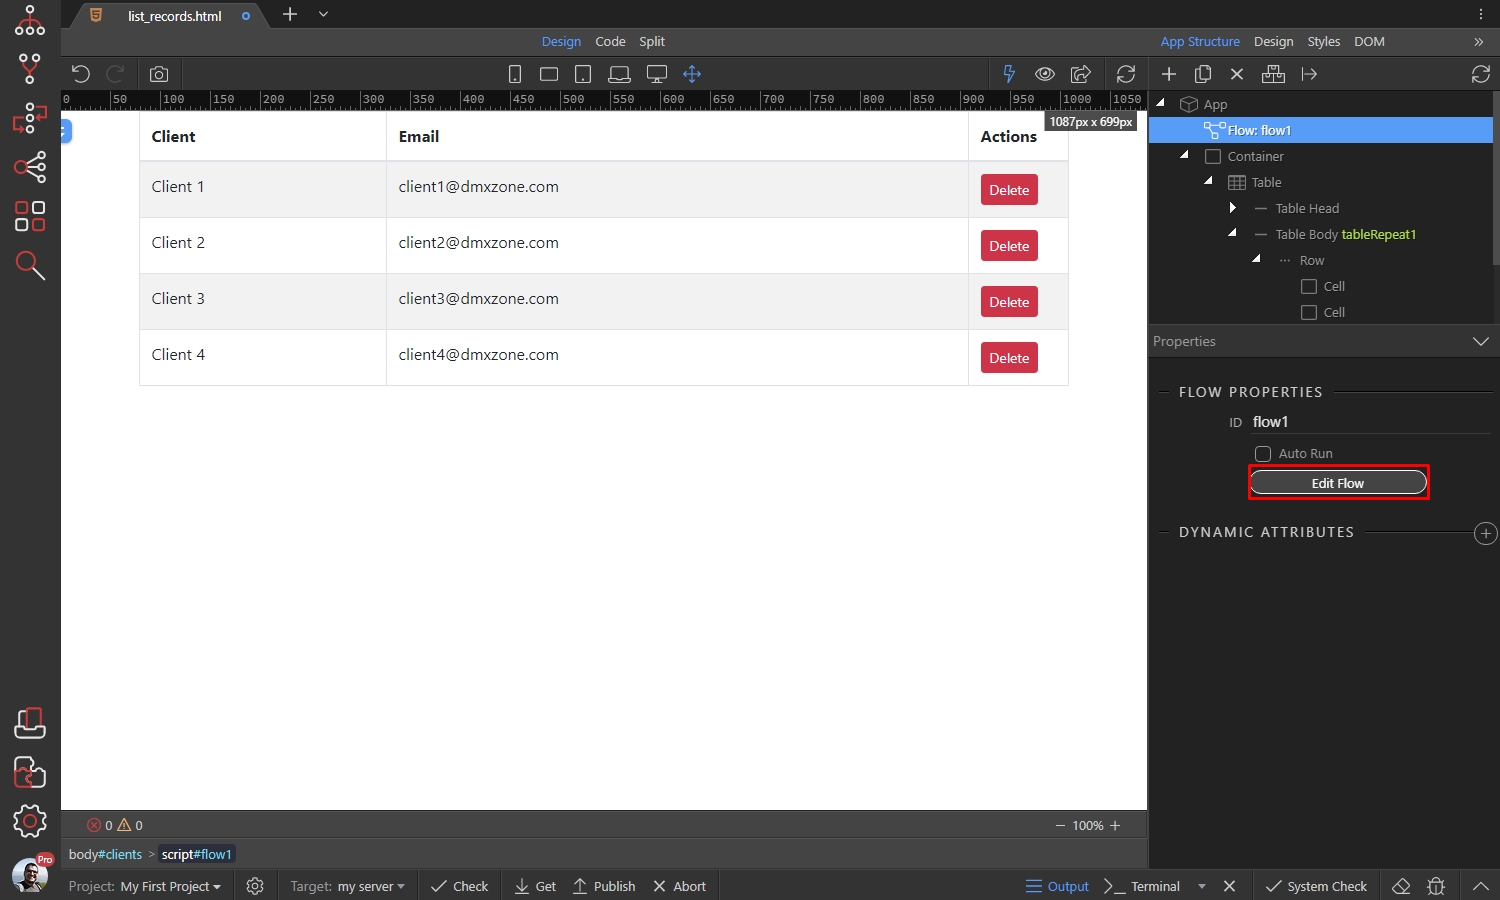
Step 19
Section titled “Step 19”First, we need to add an input parameter which will send the selected record ID to the delete record server action. Right click $params under input and add a Variable:
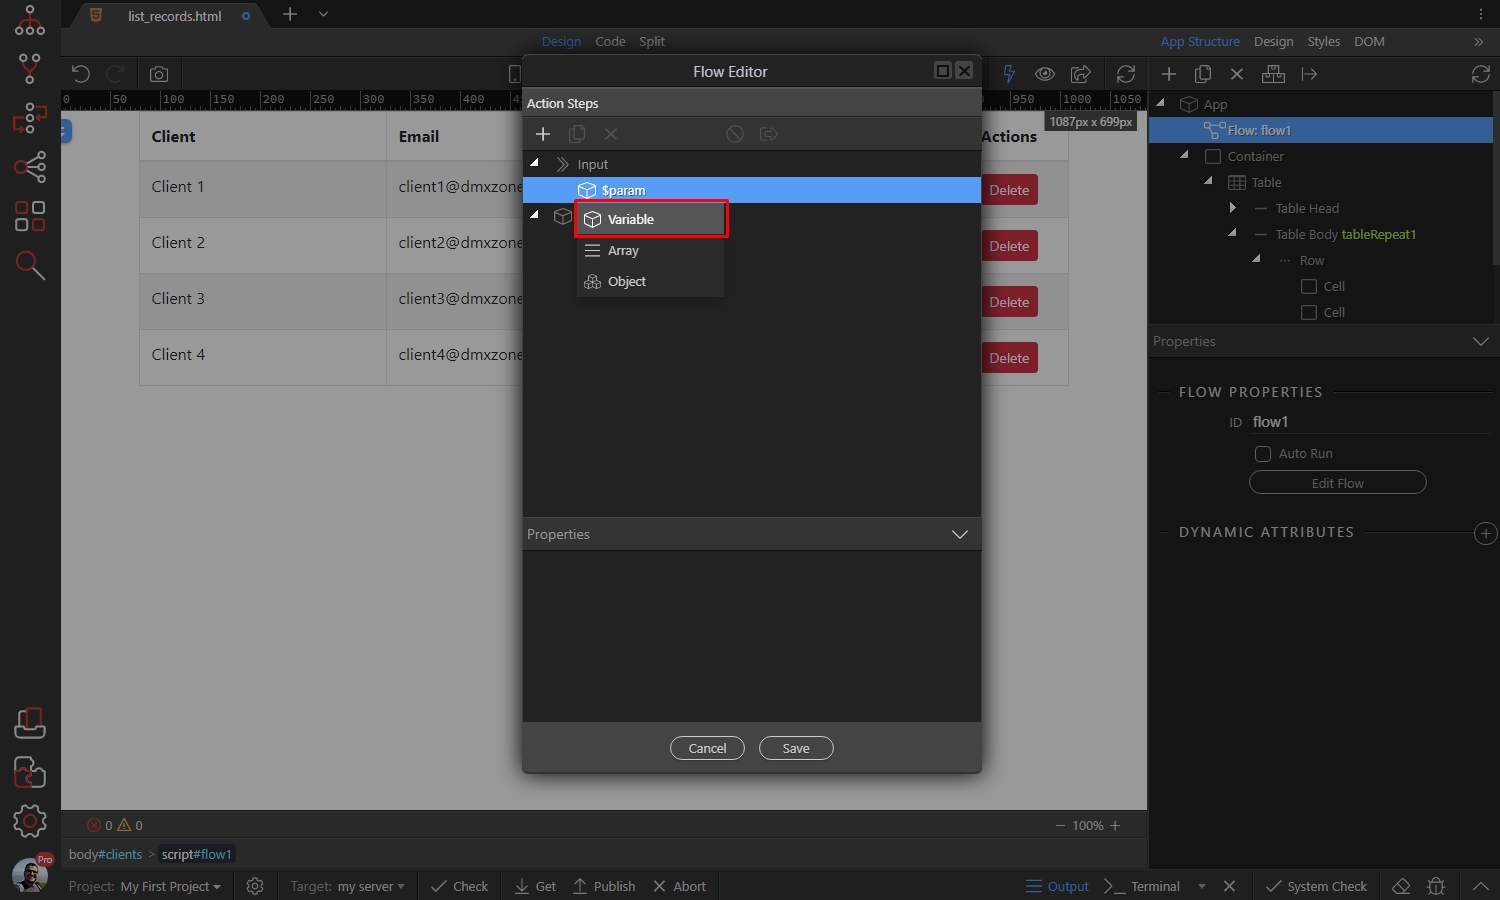
Step 20
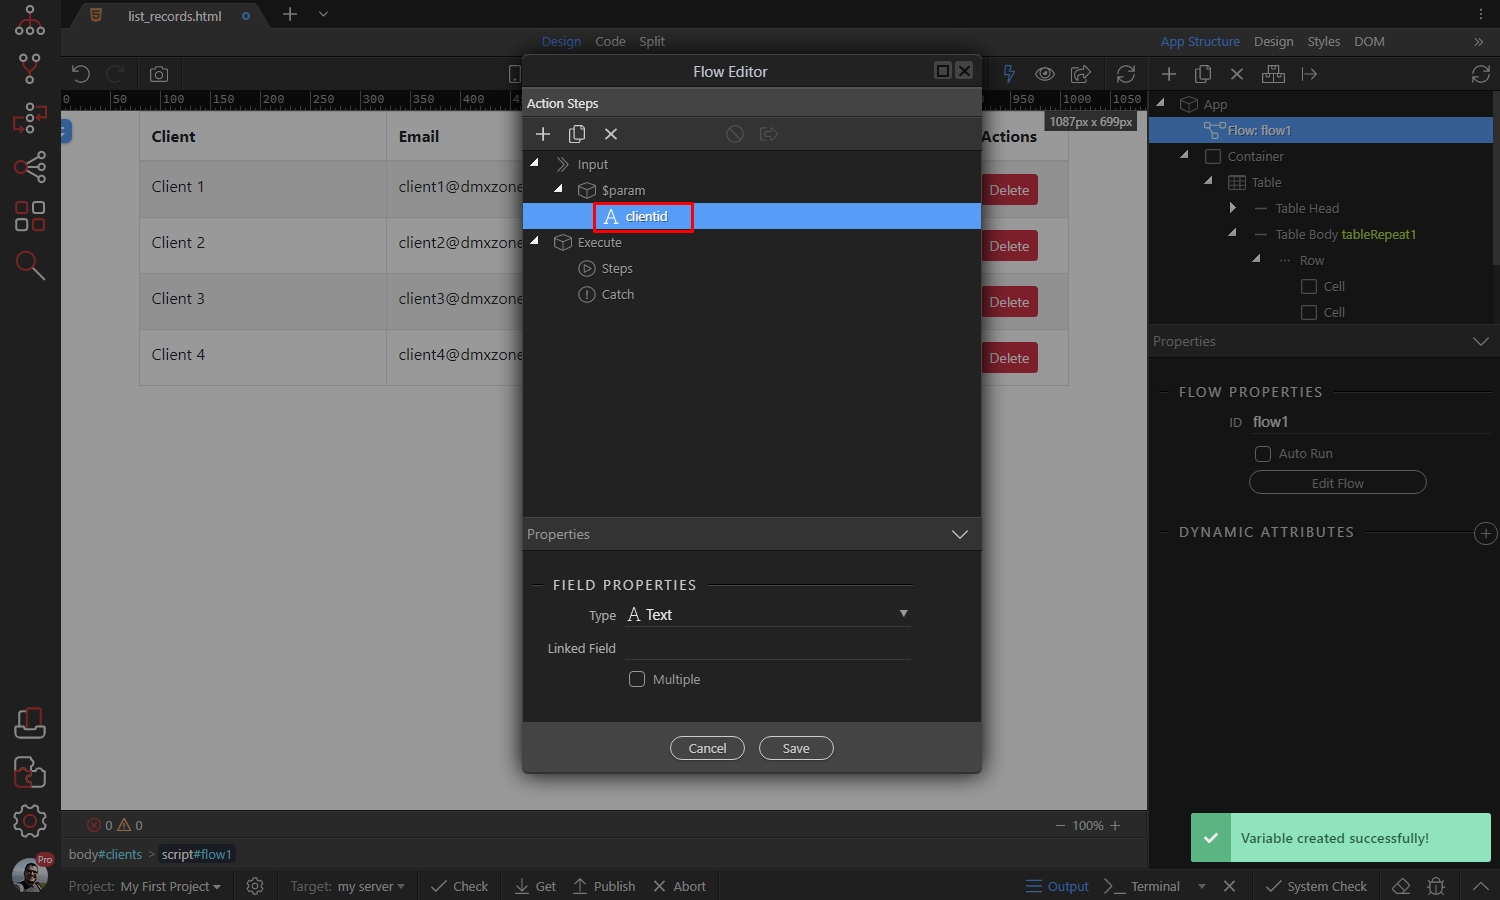
Section titled “Step 20”We call it clientid - same as the Delete Record $_GET variable (it’s not mandatory to be the same) so it’s easier to maintain the flow:
Right click the flow steps, open Bootbox Dialogs and select Confirm:
Section titled “Right click the flow steps, open Bootbox Dialogs and select Confirm:”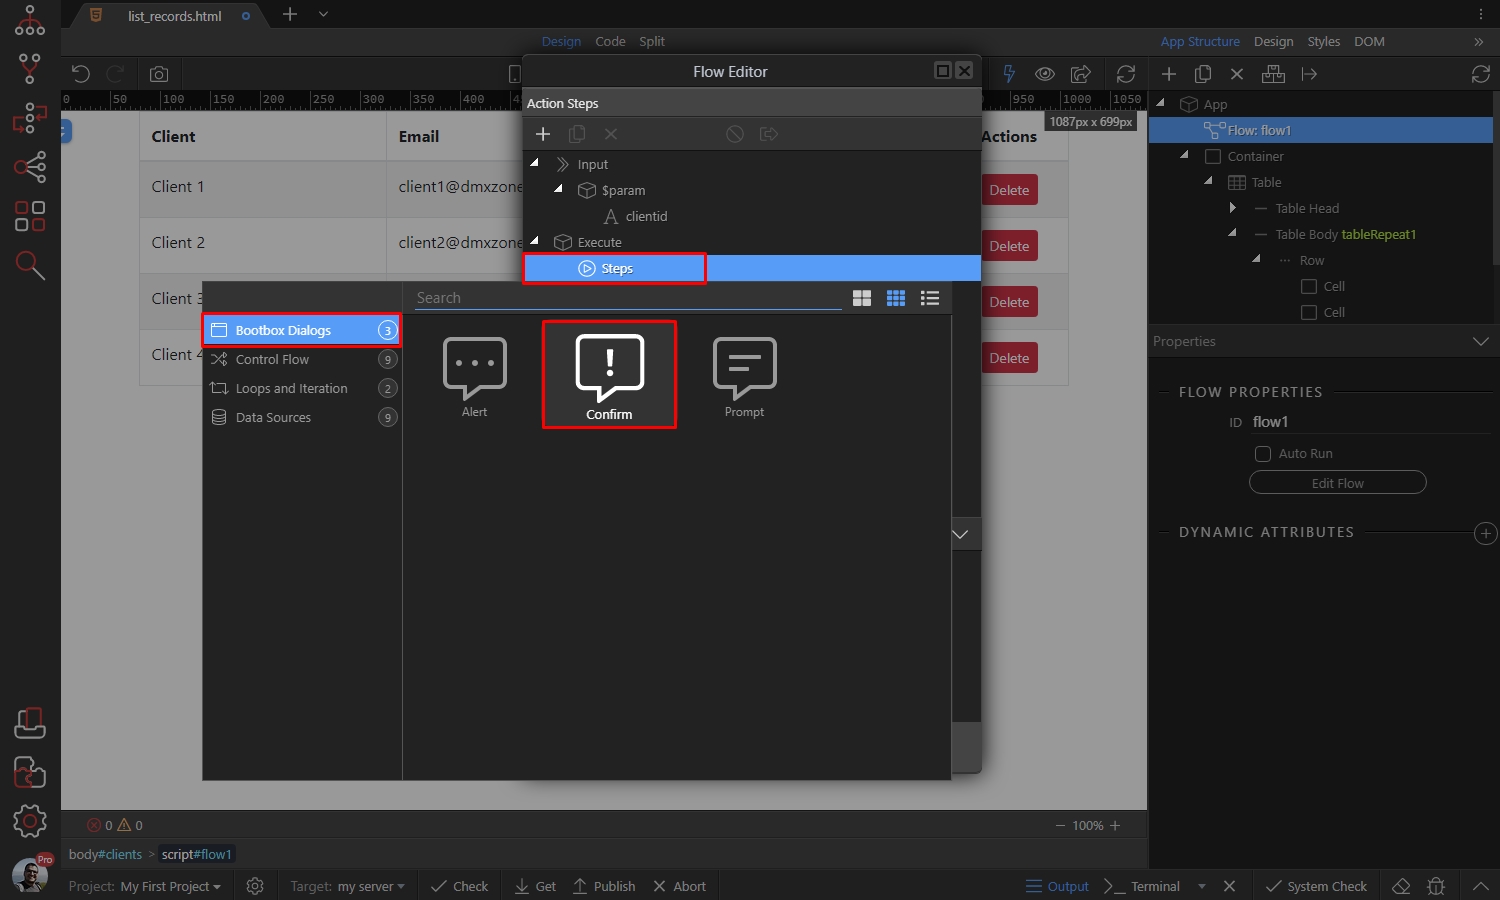
Add a name for your Confirm step:
Section titled “Add a name for your Confirm step:”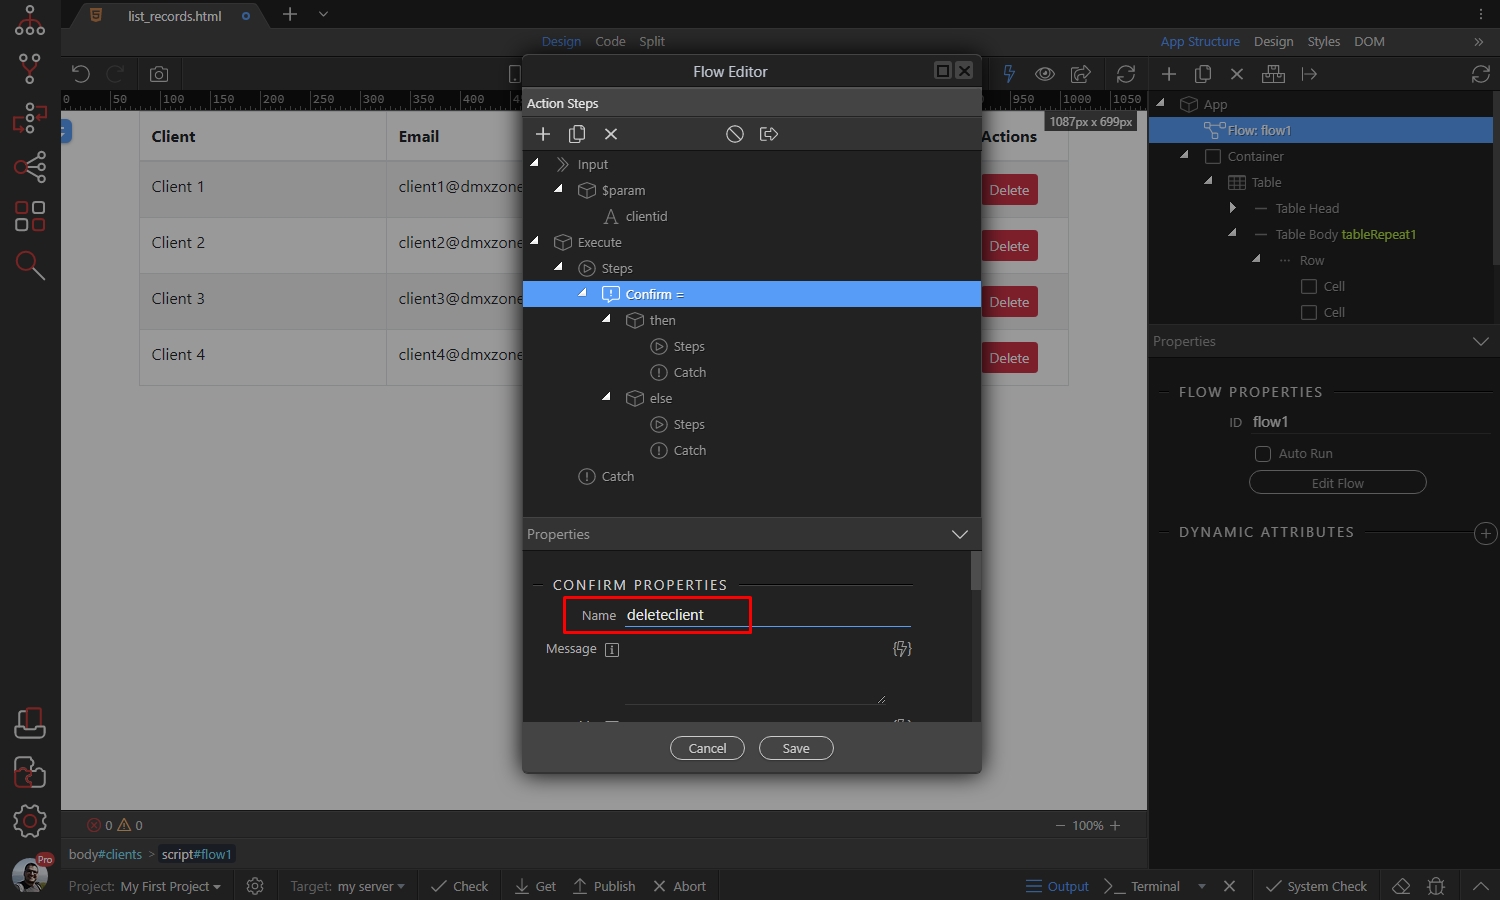
Then add a message, to be displayed when the user clicks the delete button:
Section titled “Then add a message, to be displayed when the user clicks the delete button:”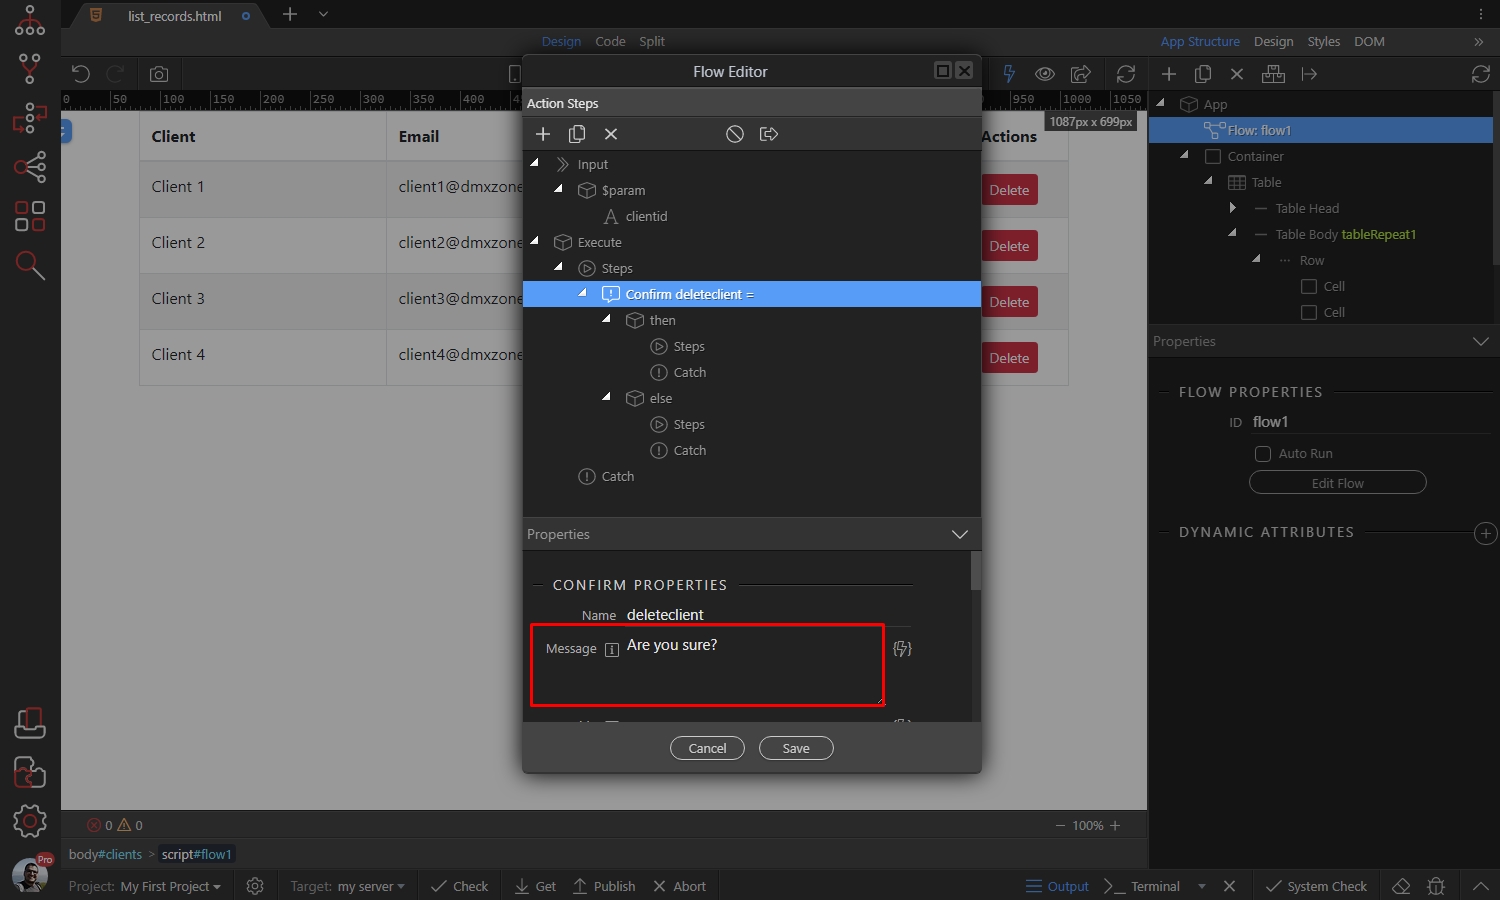
Add a title for the confirmation dialog:
Section titled “Add a title for the confirmation dialog:”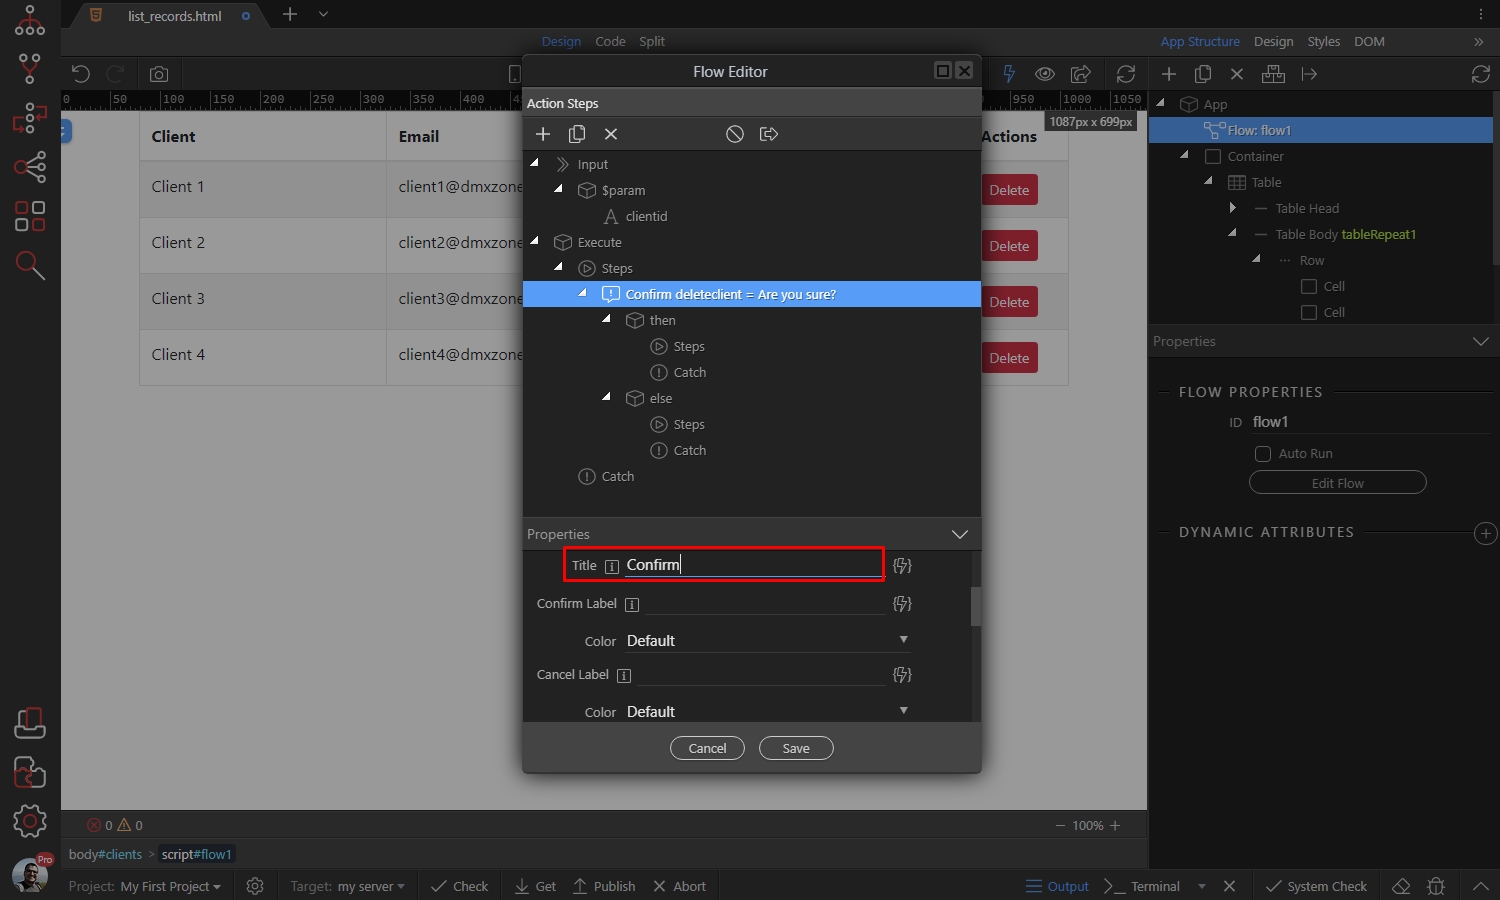
Step 25
Section titled “Step 25”You can customize the text and colors for the Confirm and Cancel buttons of the confirmation dialog. That’s optional, so you can also use the default values and colors if you like:
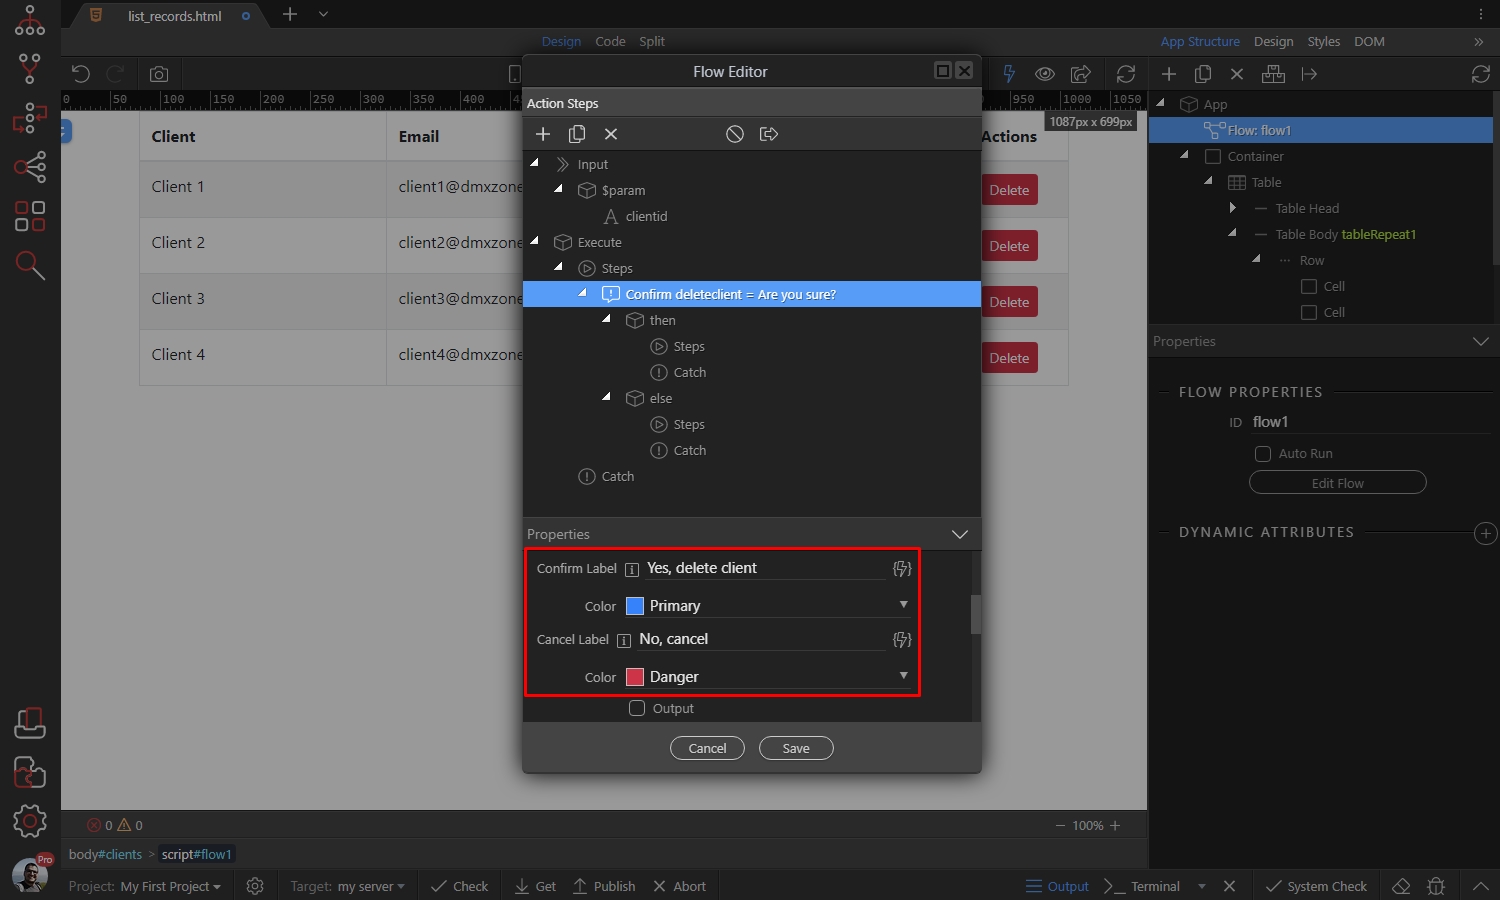
Step 26
Section titled “Step 26”When you are done setting up the dialog, right click steps under then to select what should happen when the user clicks the confirm button:
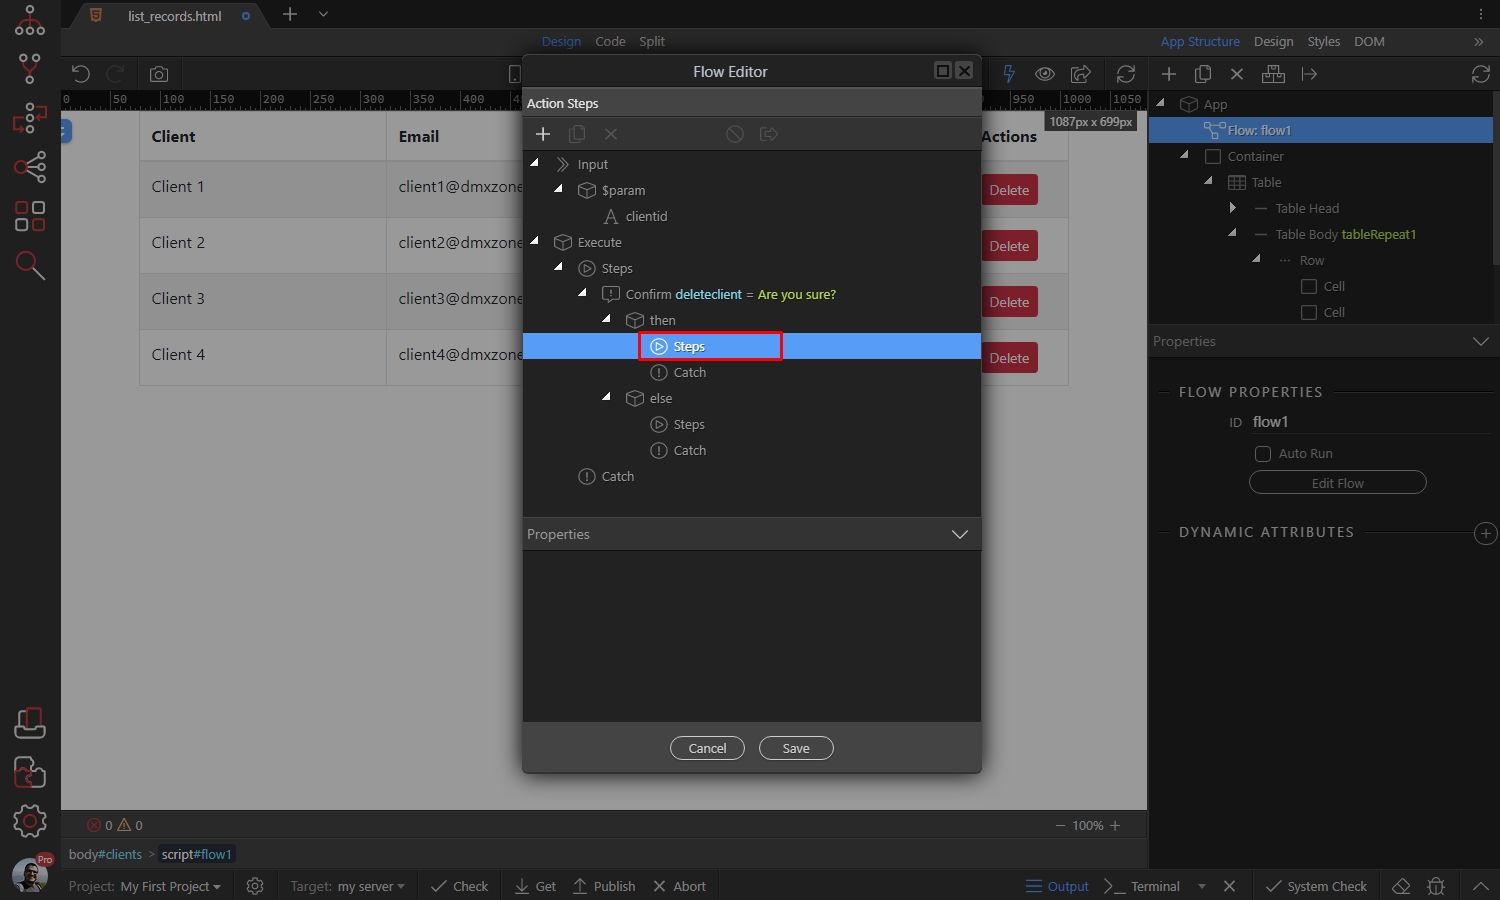
We need to run the delete action of course, so select Data Sources and then click Server Connect:
Section titled “We need to run the delete action of course, so select Data Sources and then click Server Connect:”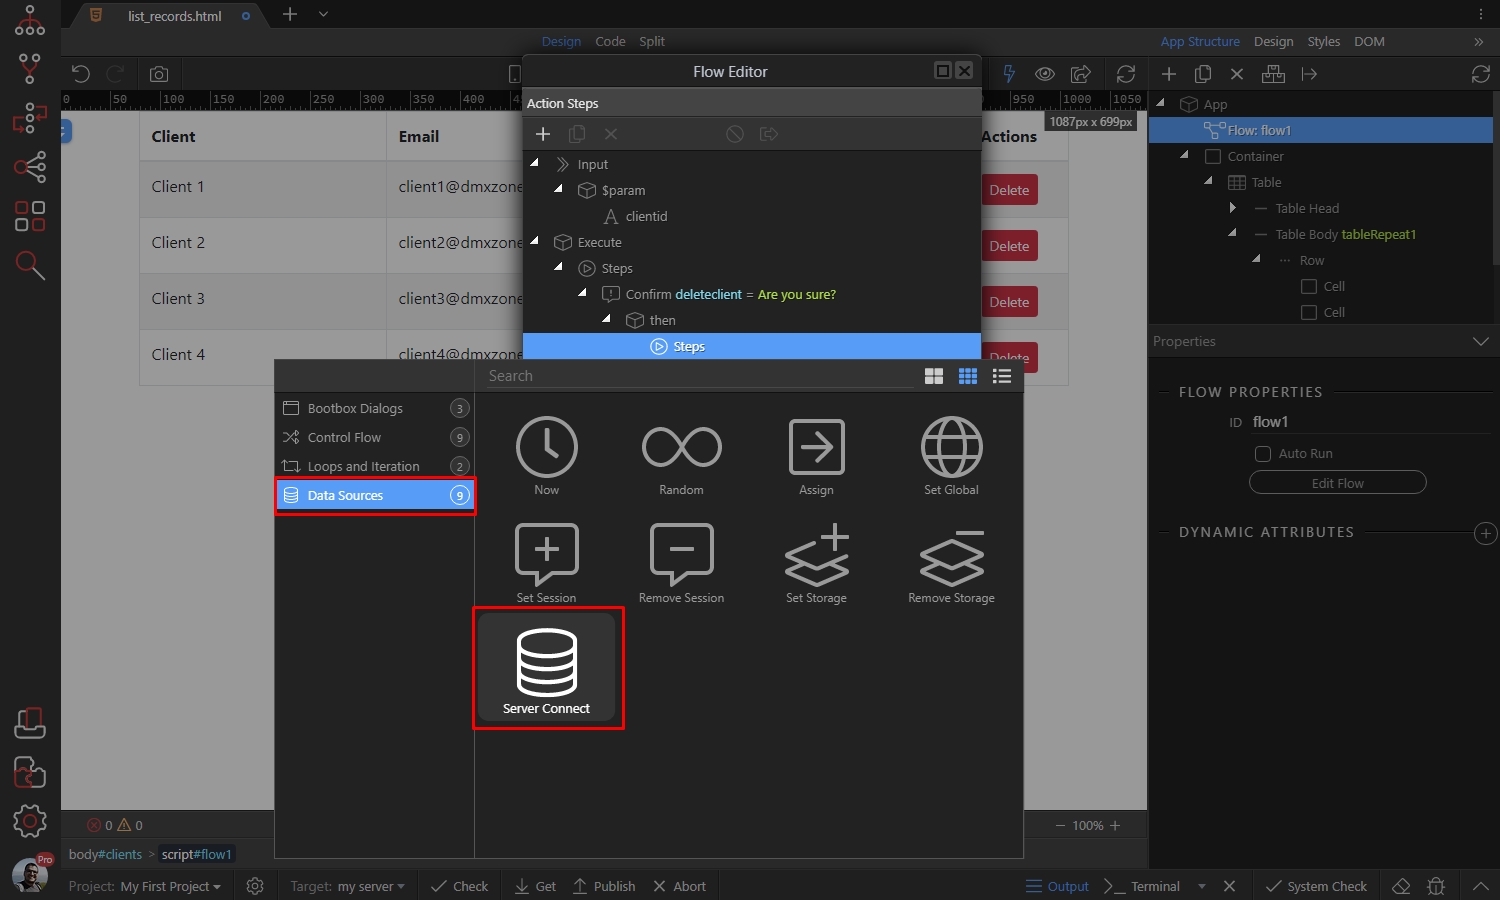
Click the Select Server Action button:
Section titled “Click the Select Server Action button:”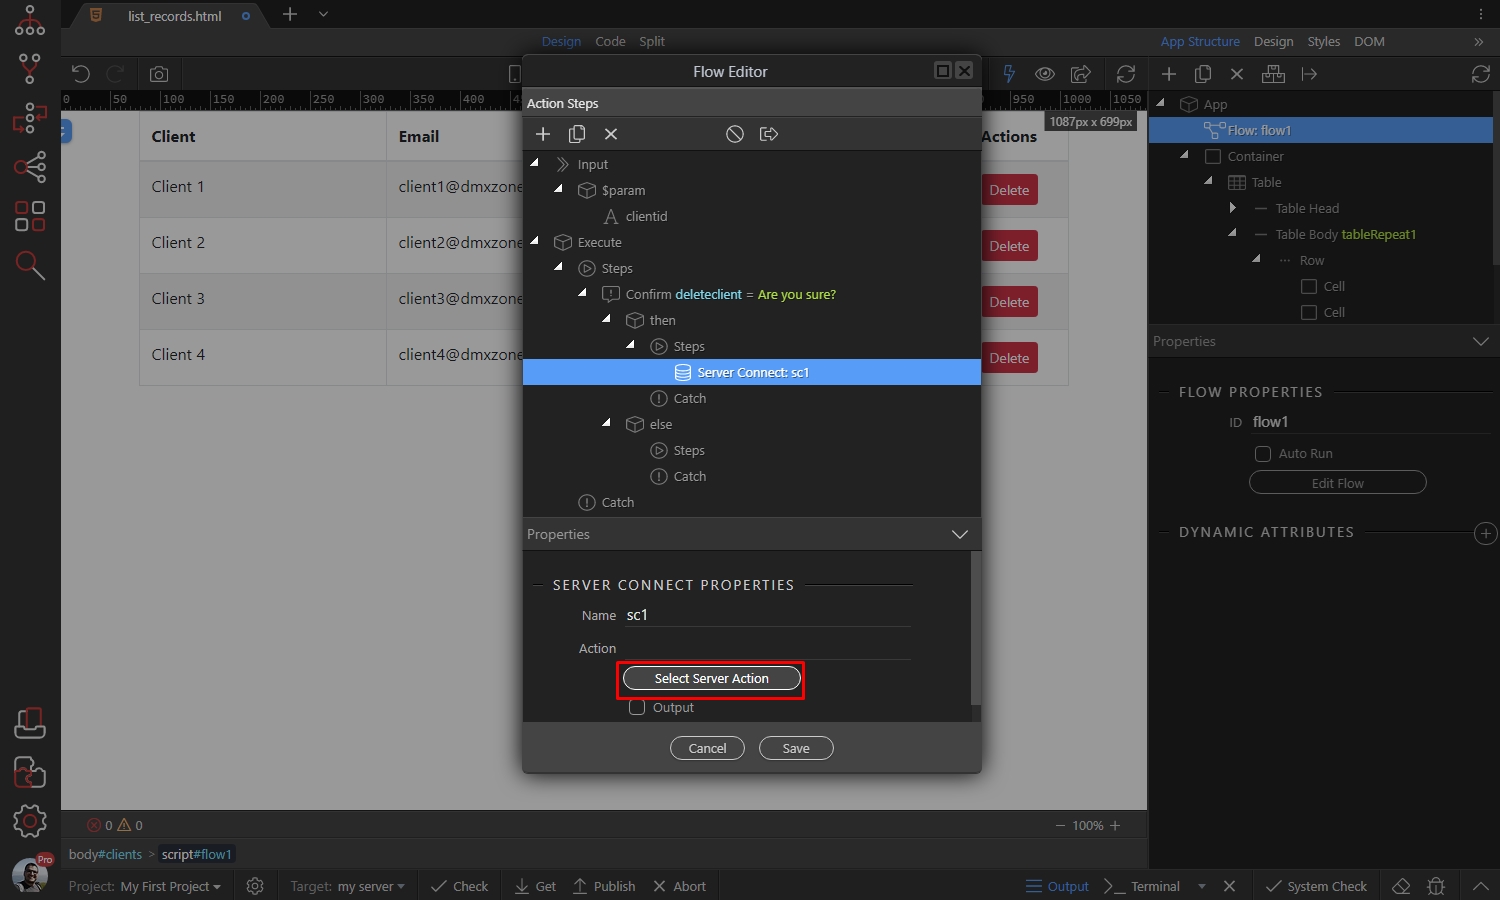
And select the Delete Action which we created:
Section titled “And select the Delete Action which we created:”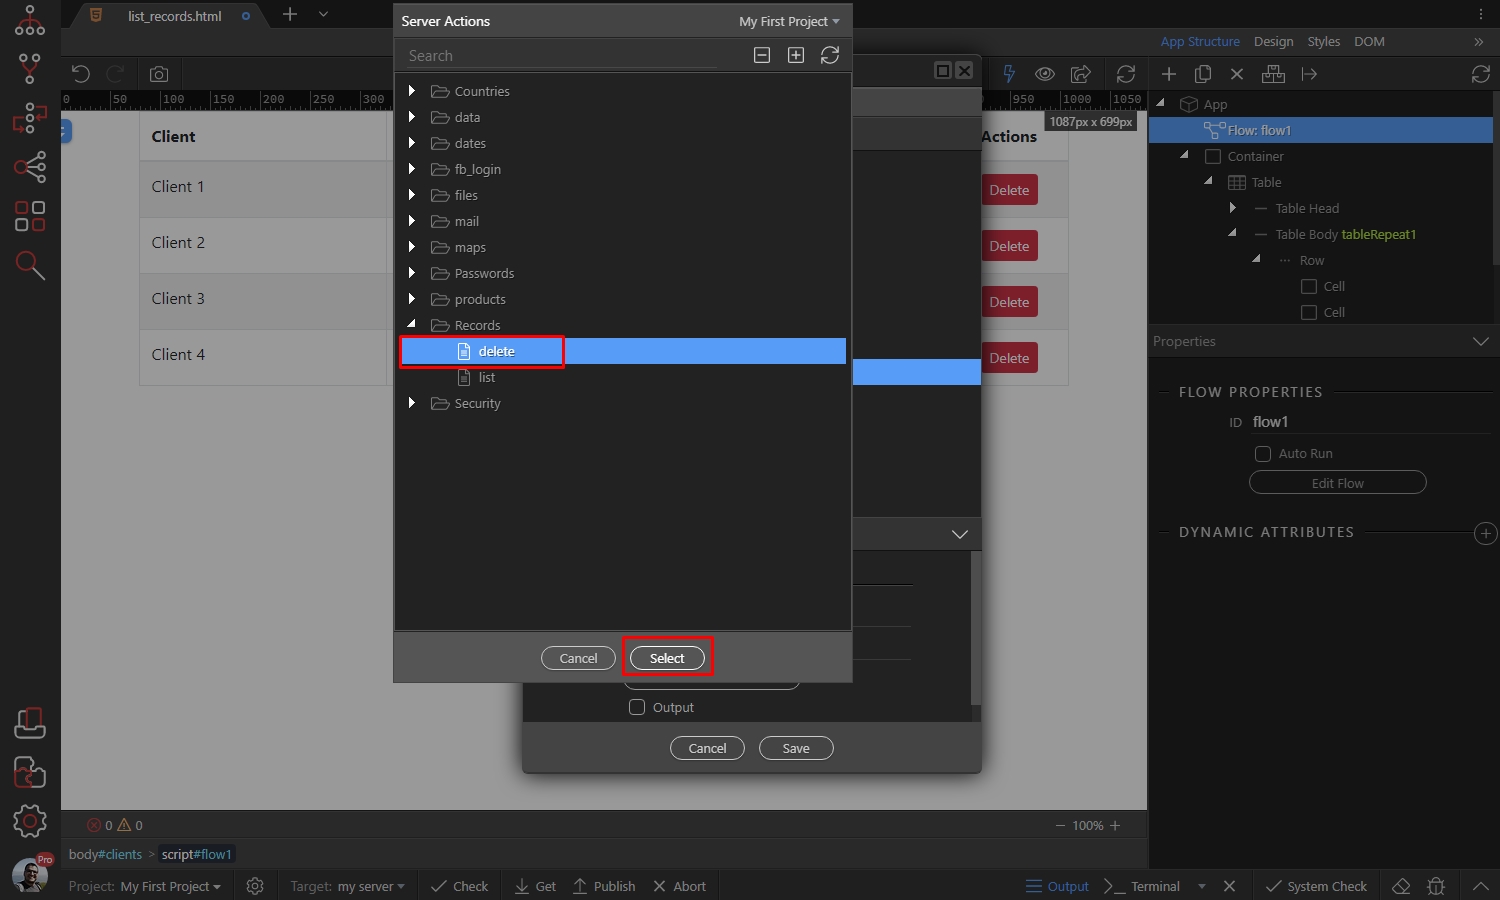
Step 30
Section titled “Step 30”You will see the $_GET parameter which we are using in the Server Action to pass the selected record ID. Select the dynamic data picker button:
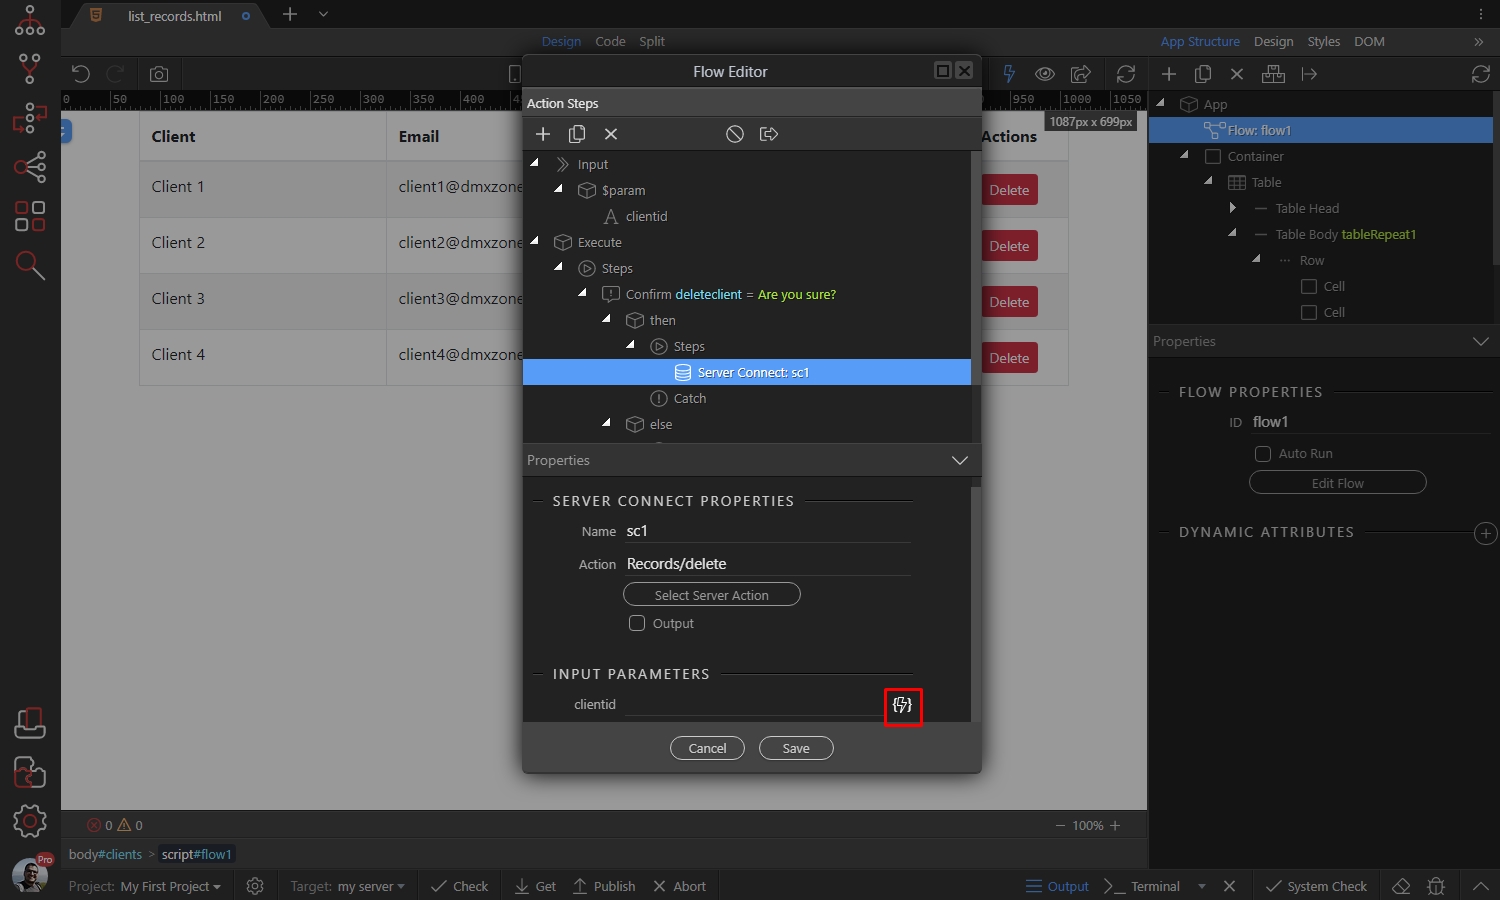
Here we select the clientid parameter which we added under $param in the Flow:
Section titled “Here we select the clientid parameter which we added under $param in the Flow:”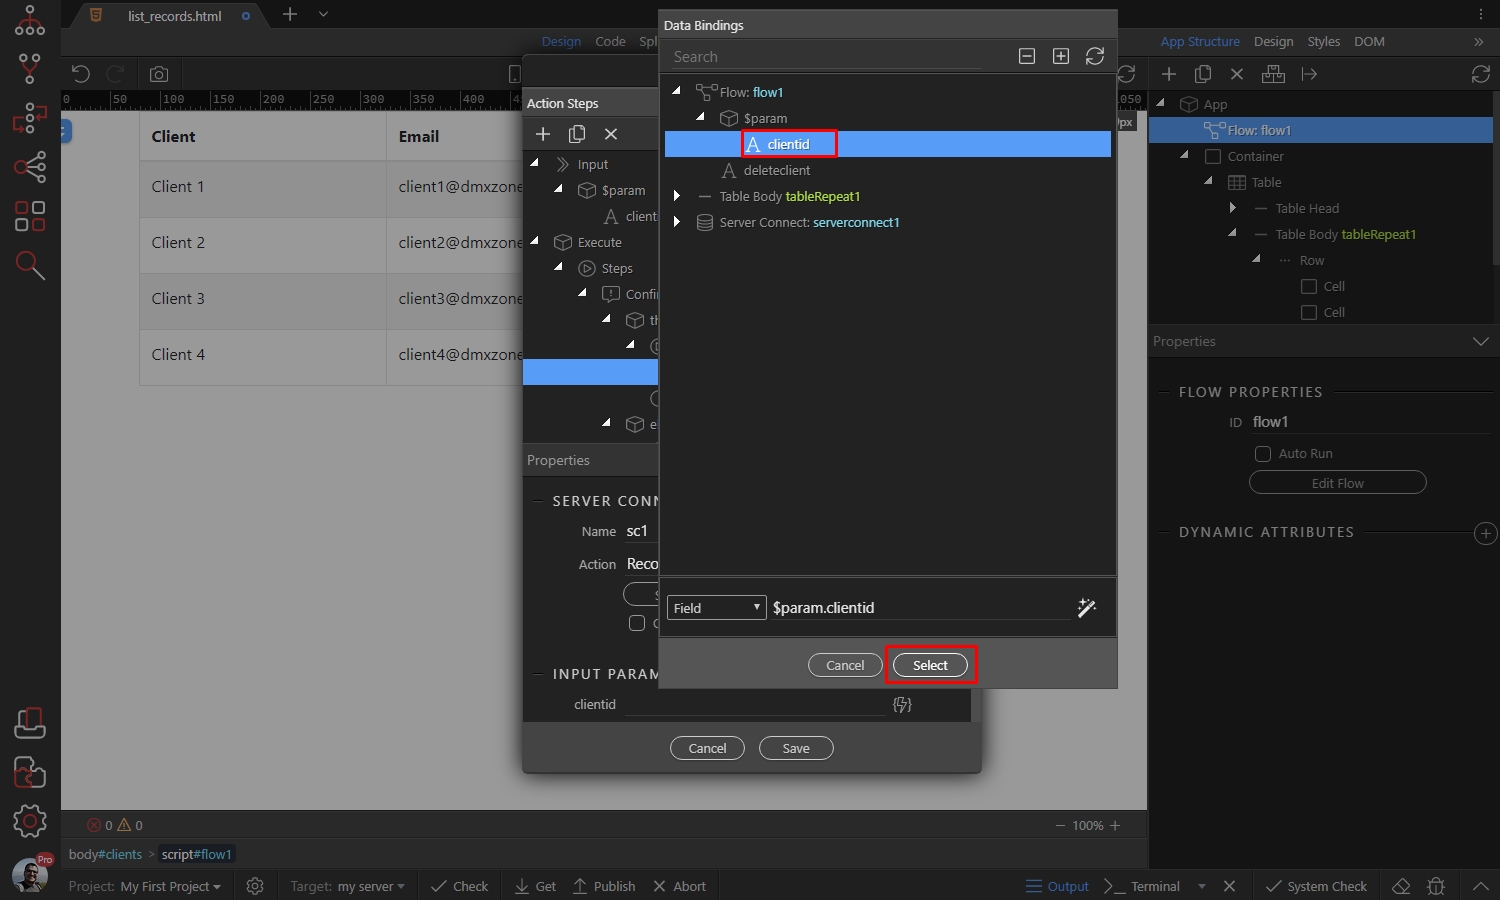
Step 32
Section titled “Step 32”We are done setting up the delete part. Now we want to reload the data on the page, after a record has been deleted. Right click the server connect step which we just set up:
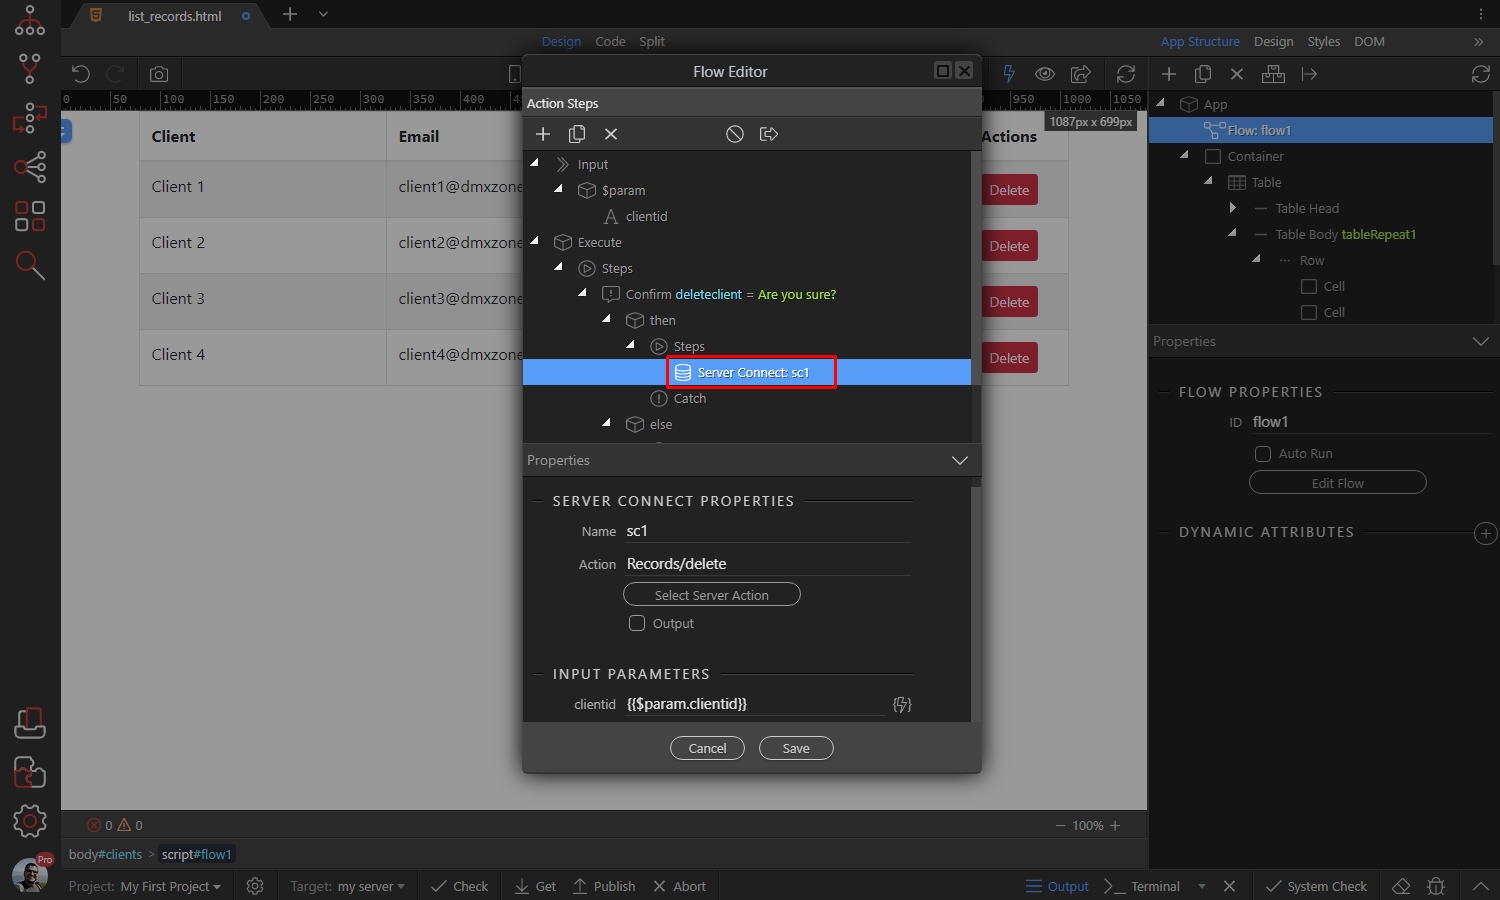
Open Control Flow and select Run:
Section titled “Open Control Flow and select Run:”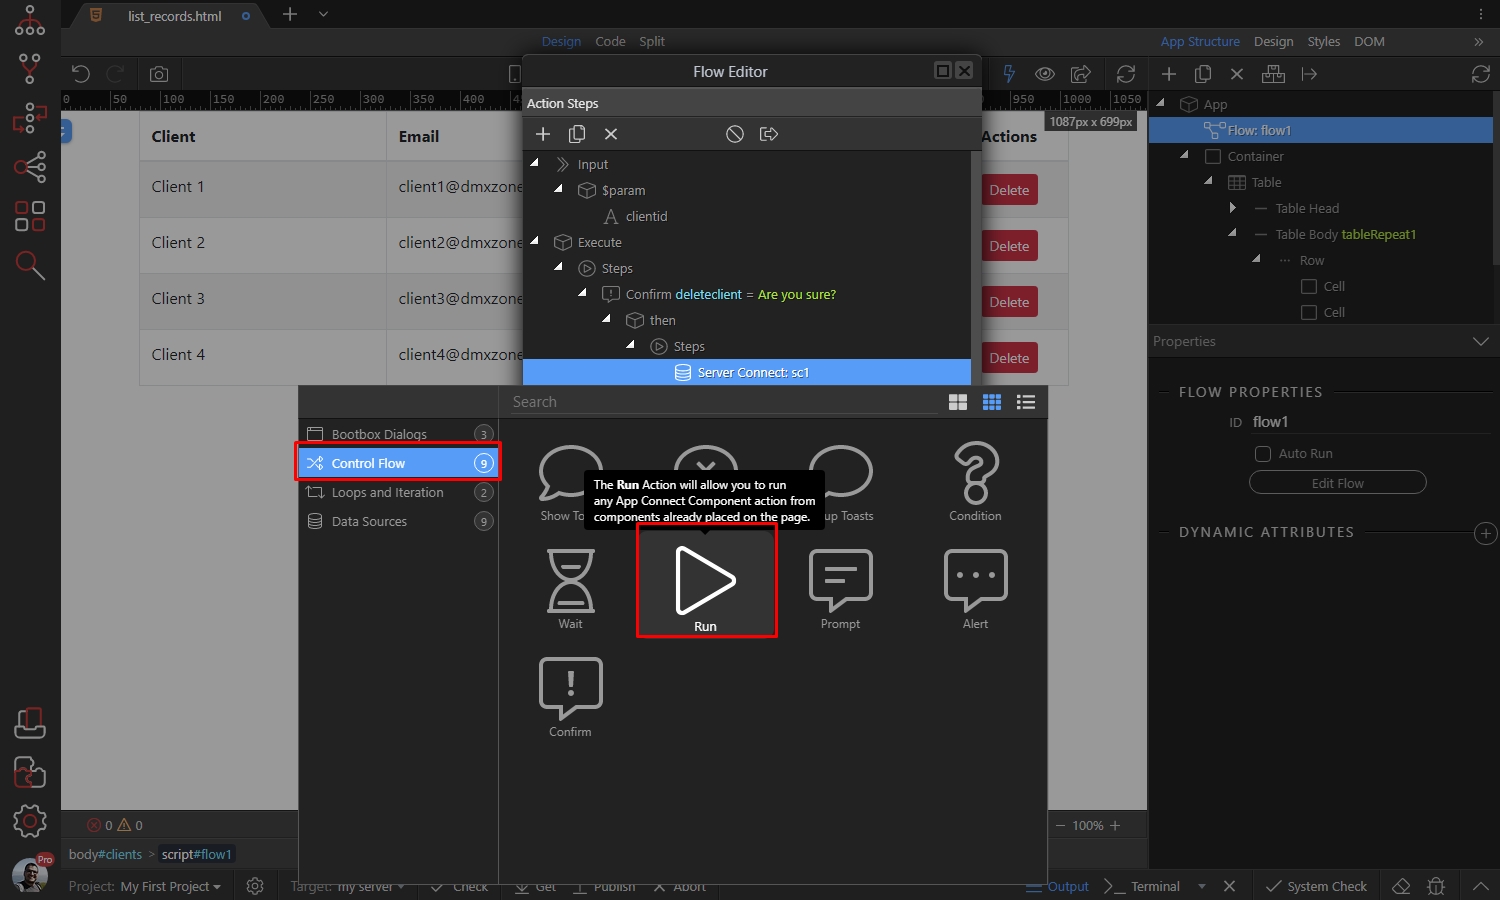
Add a name for this step and select an action to run:
Section titled “Add a name for this step and select an action to run:”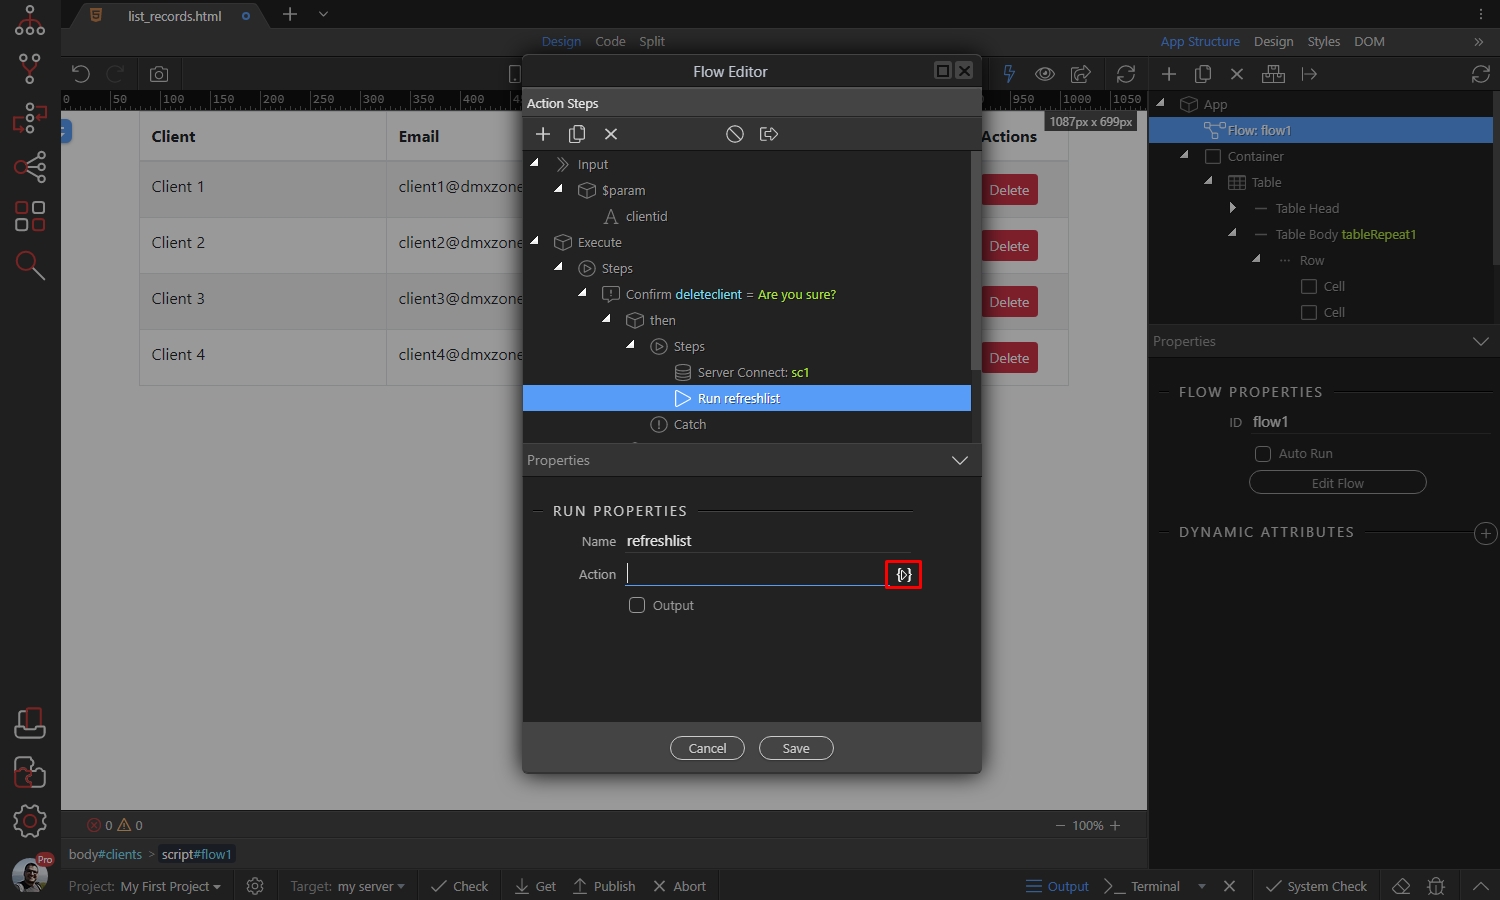
Step 35
Section titled “Step 35”Under the Server Connect, used to list the records on the page, select Load and add it. Click the select button, after you add it:
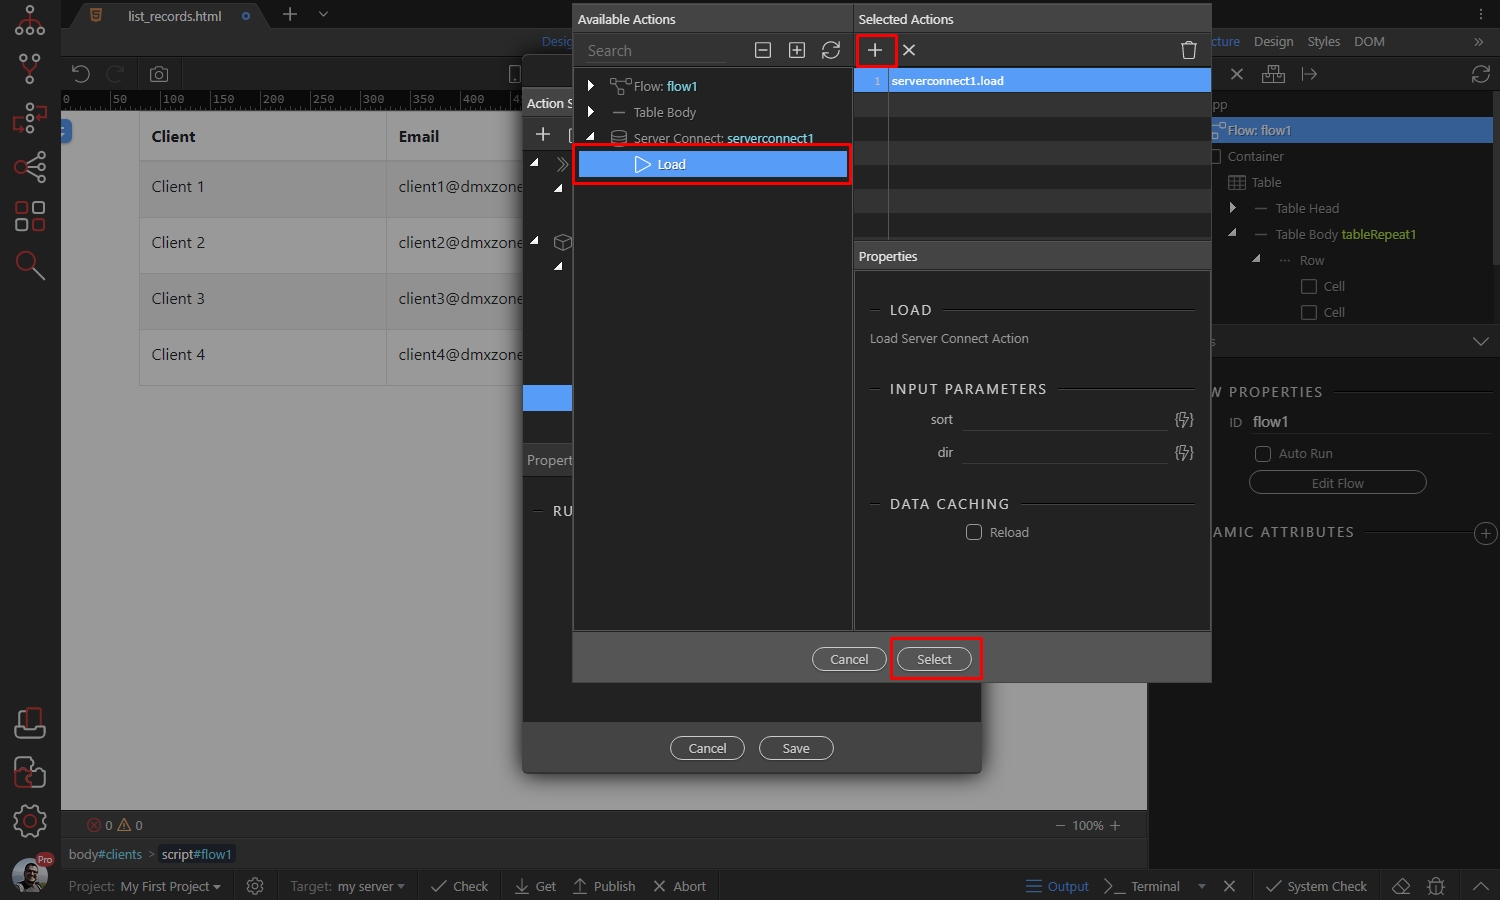
Then click the Save button:
Section titled “Then click the Save button:”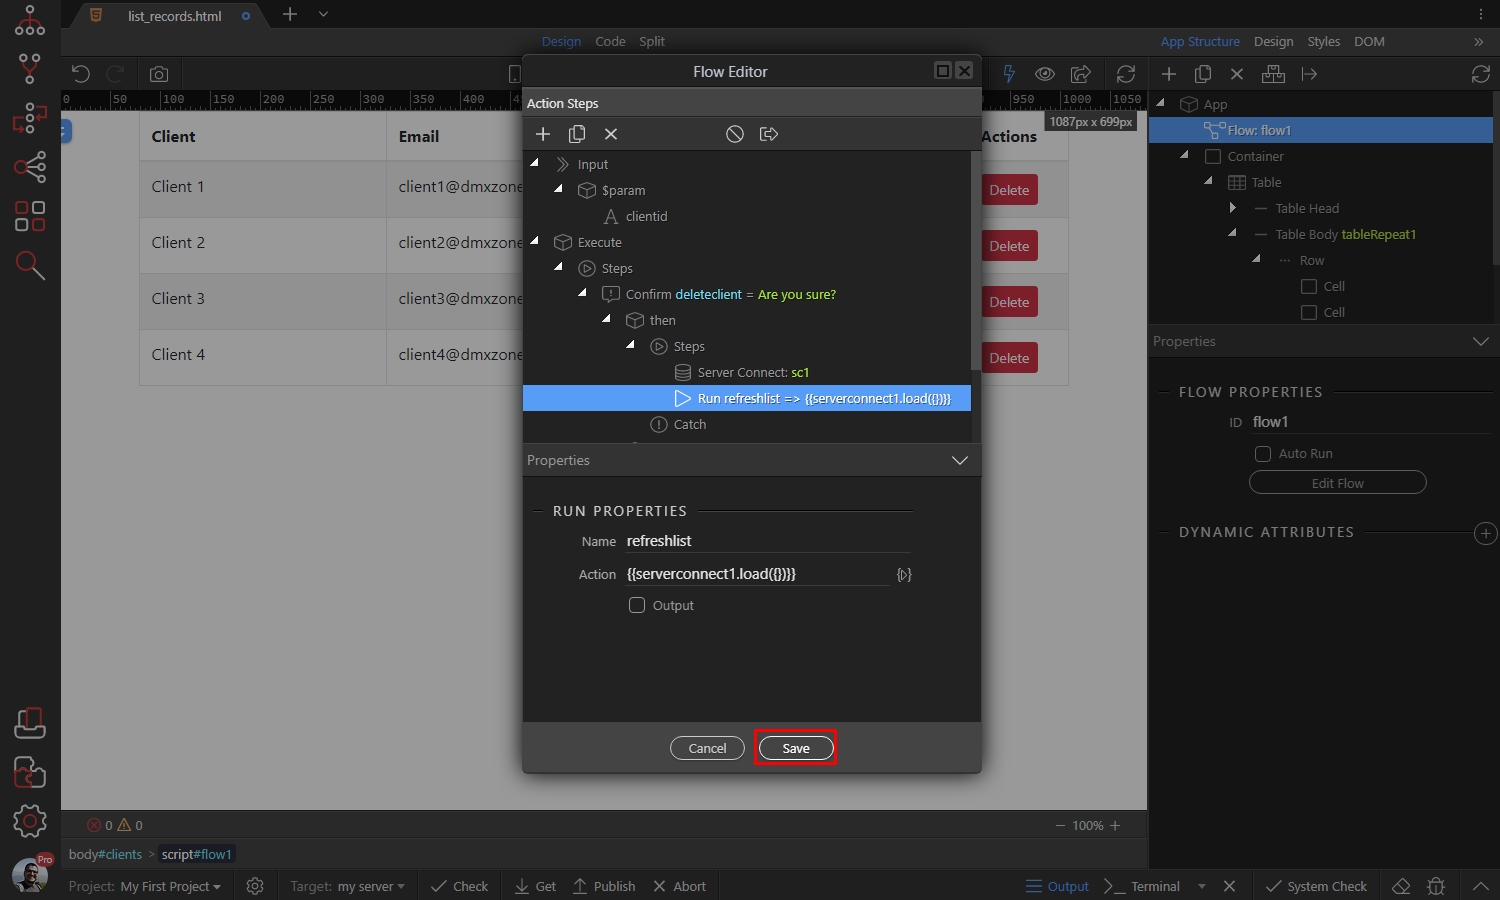
Running the Delete Flow on Click
Section titled “Running the Delete Flow on Click”Our Delete Record flow is ready. Now we need to run it when the Delete button is clicked.
Select the button and add new Dynamic Event:
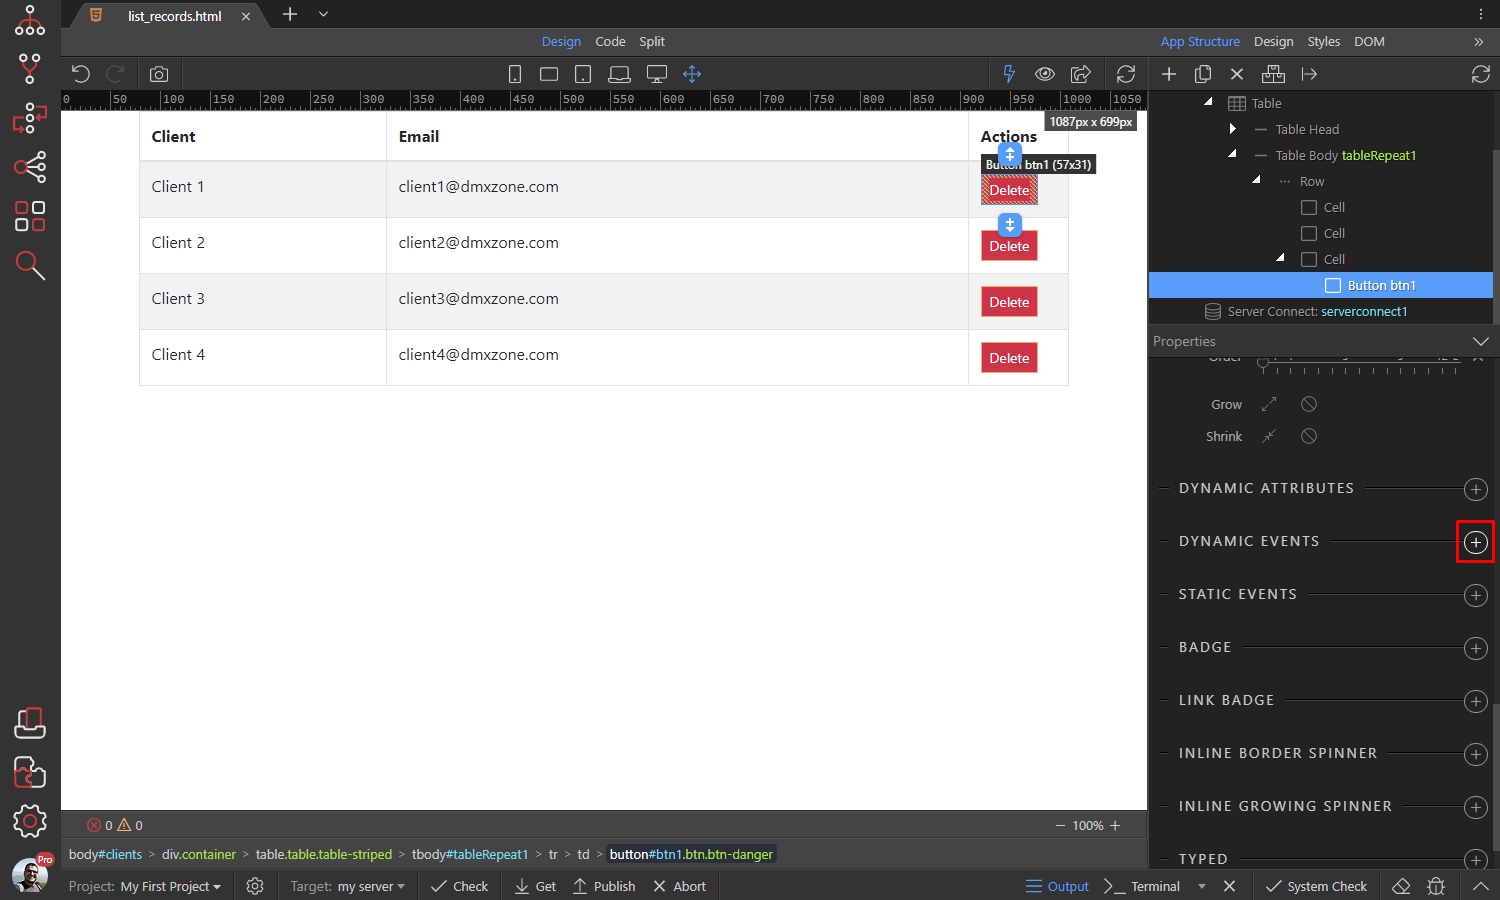
Select Mouse > Click:
Section titled “Select Mouse > Click:”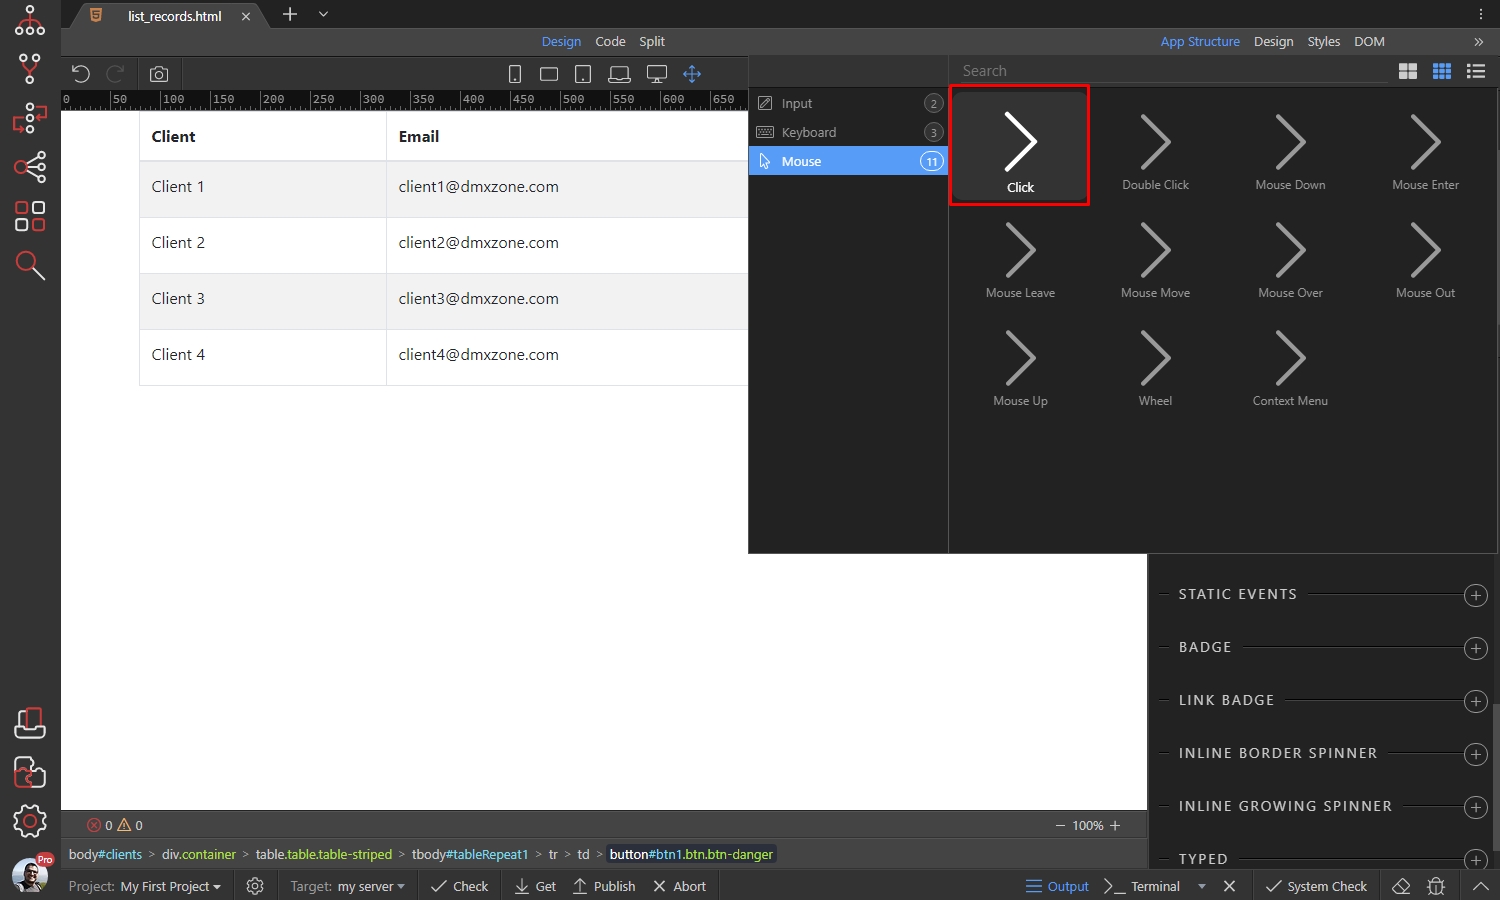
And click the Dynamic Action Picker button:
Section titled “And click the Dynamic Action Picker button:”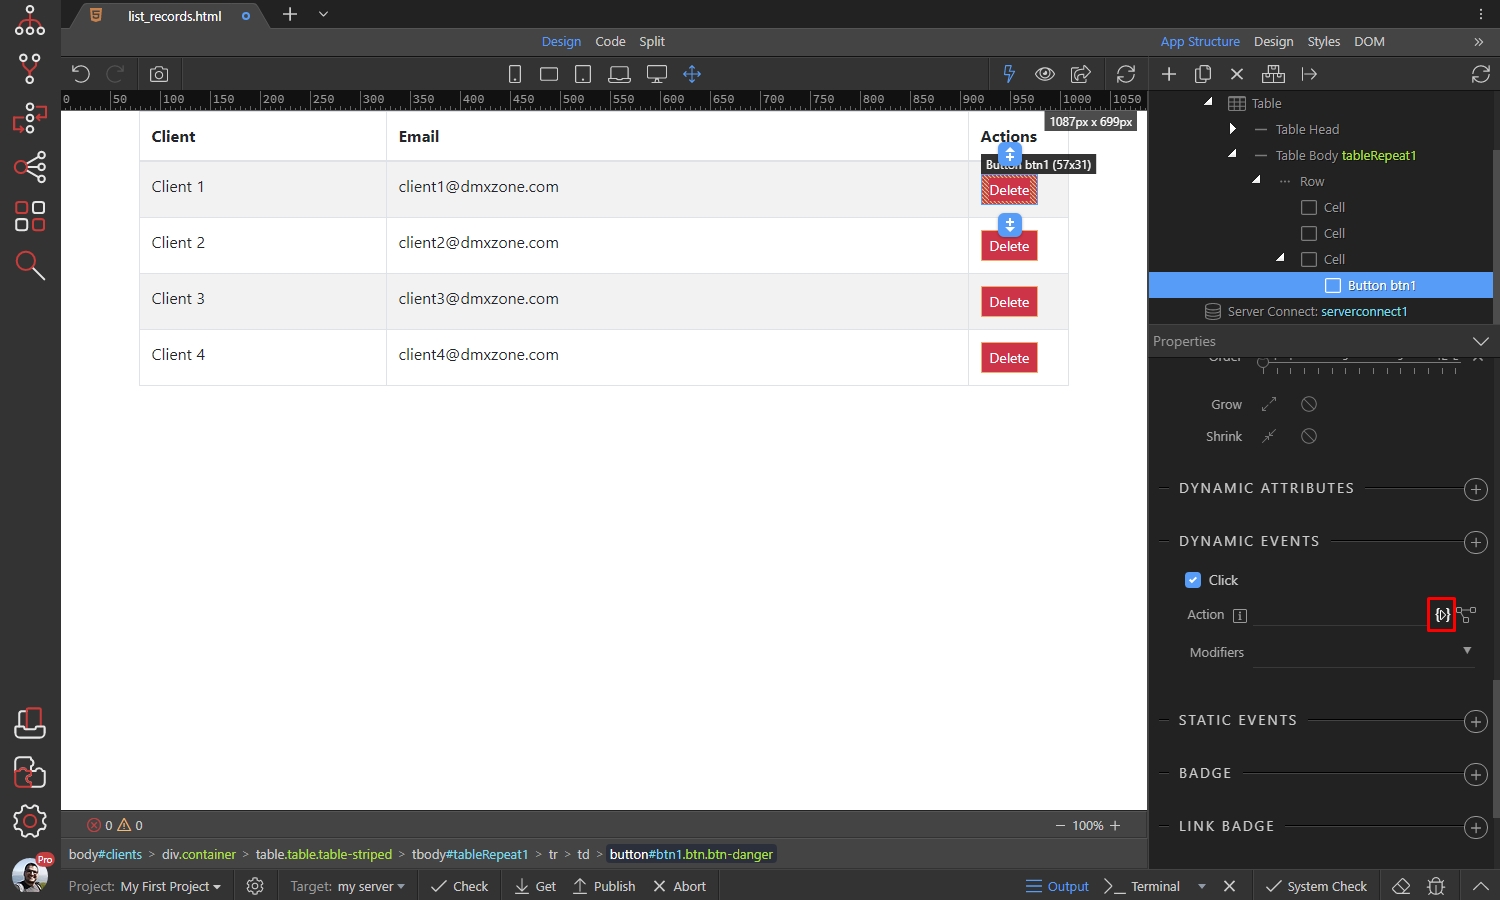
Under the Flow component select Run and add it:
Section titled “Under the Flow component select Run and add it:”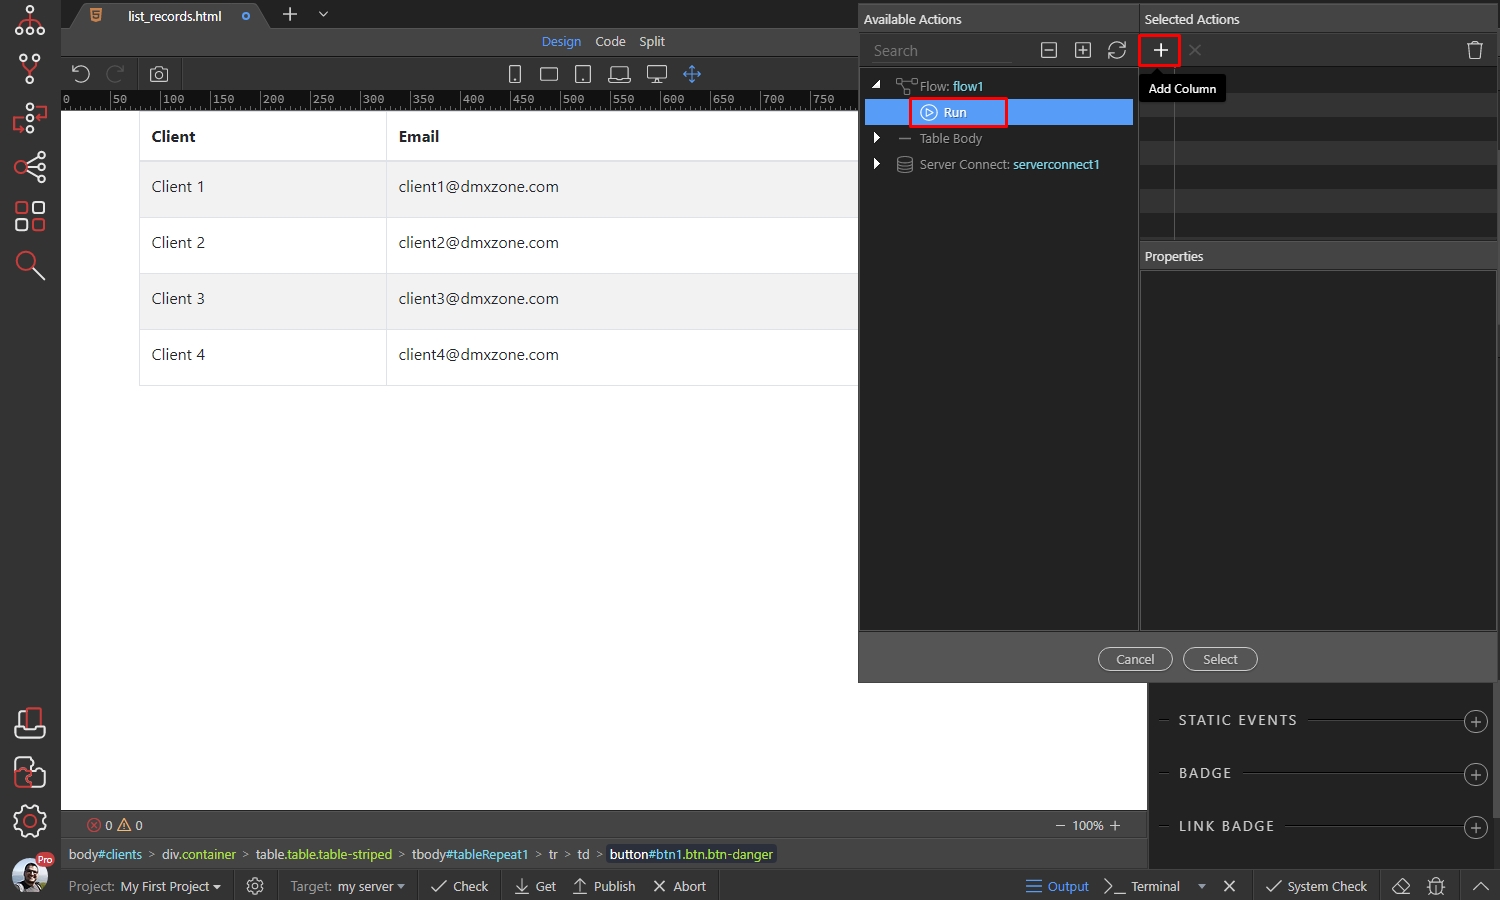
We need to pass the selected record ID to the deleteid Flow Parameter. Click the dynamic data picker button:
Section titled “We need to pass the selected record ID to the deleteid Flow Parameter. Click the dynamic data picker button:”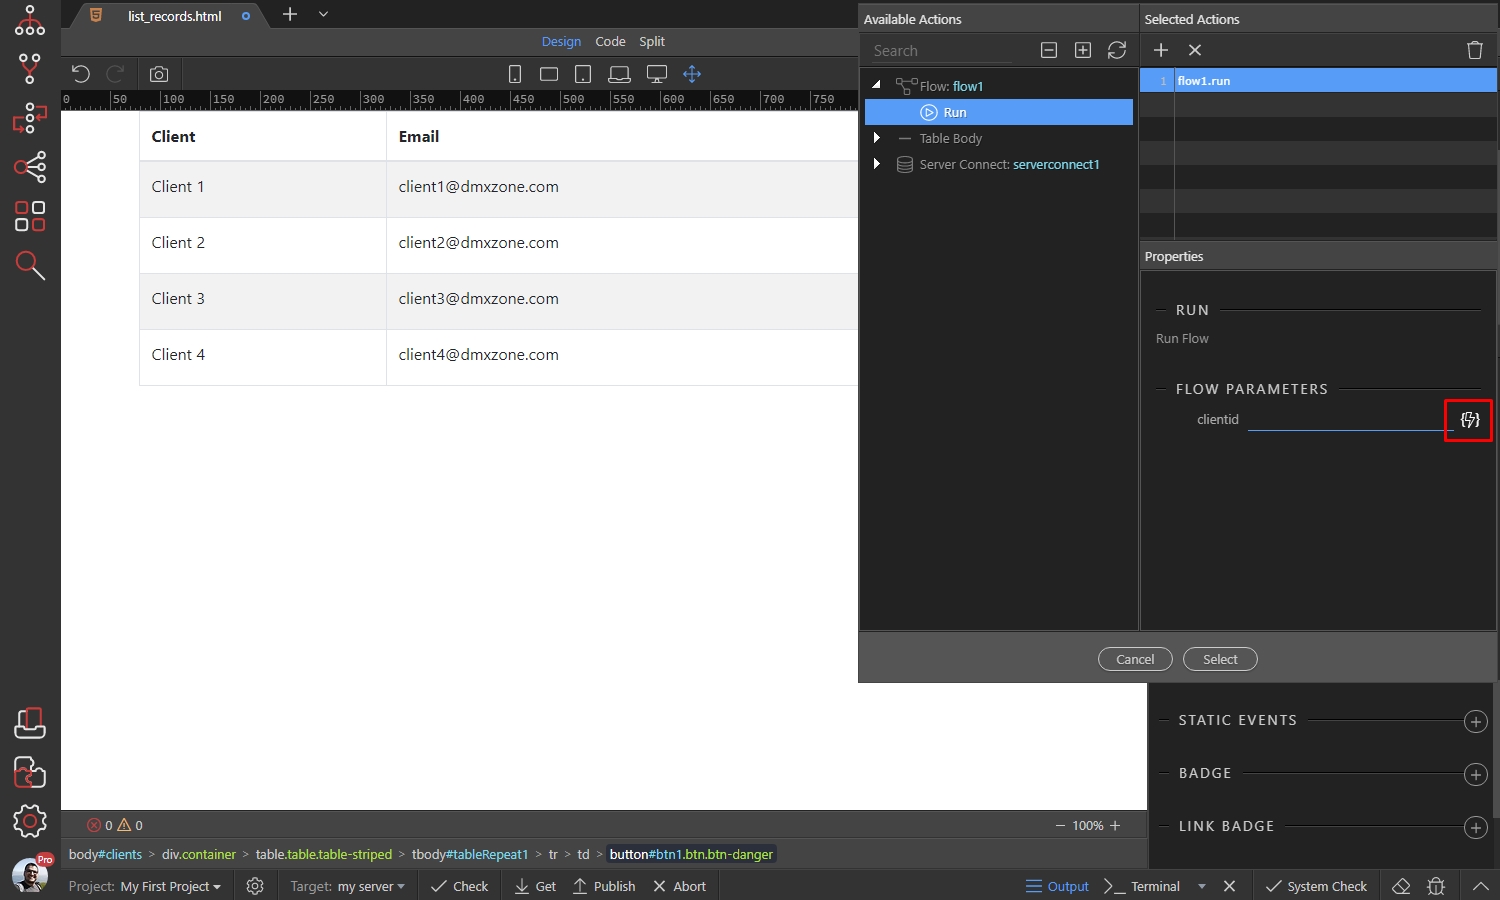
And select the Record ID returned from our repeat region:
Section titled “And select the Record ID returned from our repeat region:”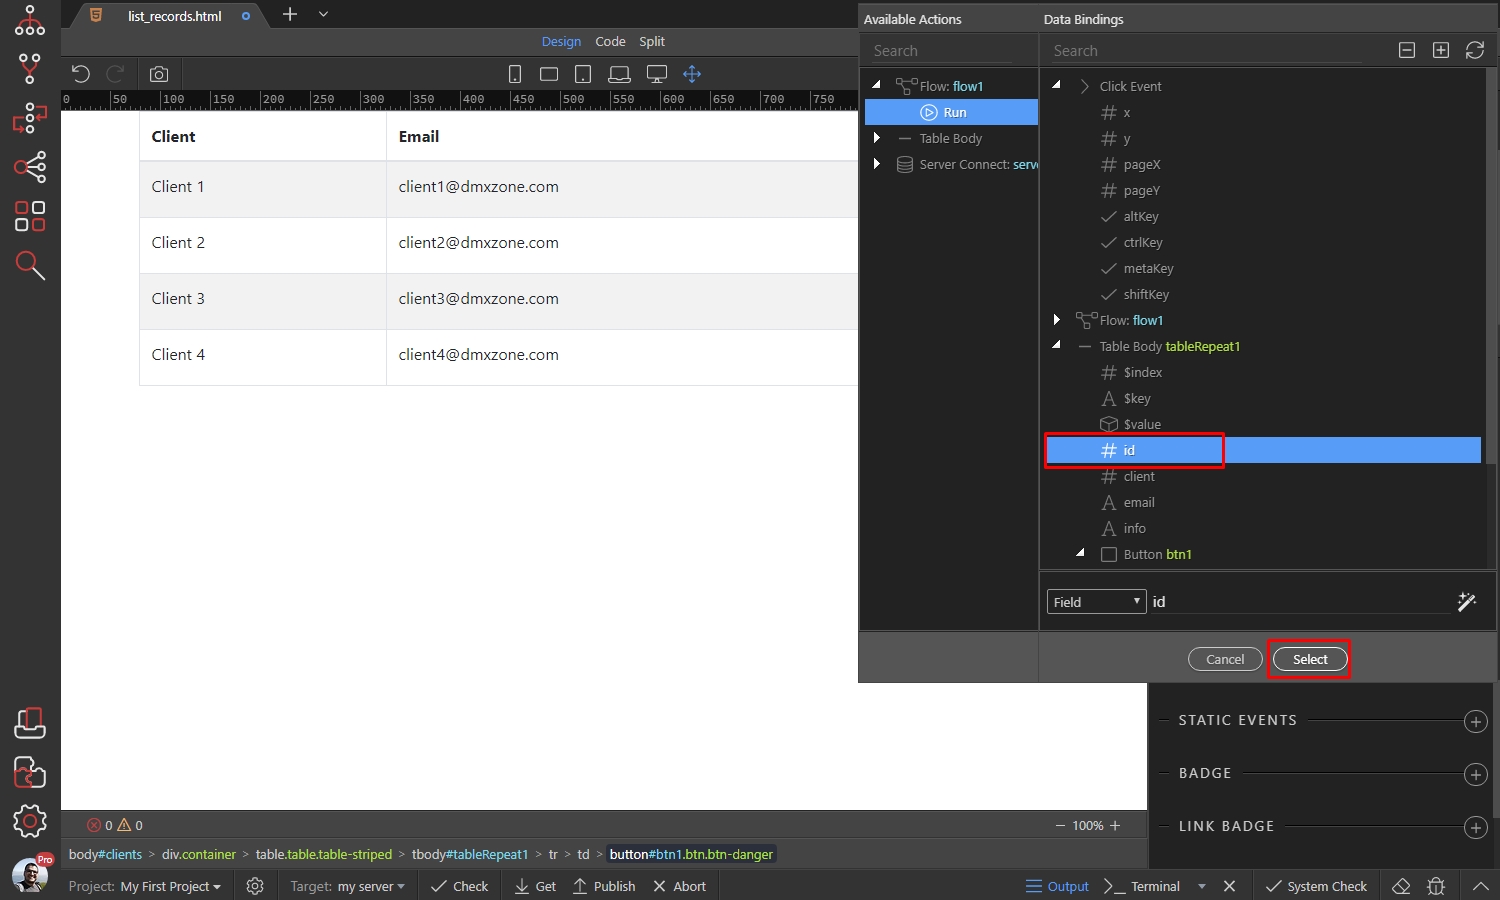
Click Select, then save your page.
Section titled “Click Select, then save your page.”A nice delete confirmation dialog appears and when a record is deleted, the data on the page is refreshed: