Using Bootstrap with Custom Paths
Intro Often, when using custom Bootstrap 4 templates purchased or downloaded from a template provider you need to use custom include paths for the Bootstrap 4 css and js files. Local and CDN options a
Often, when using custom Bootstrap 4 templates purchased or downloaded from a template provider you need to use custom include paths for the Bootstrap 4 css and js files. Local and CDN options available in the Frameworks menu are not suitable in such cases.
Using Custom Bootstrap 4 Paths
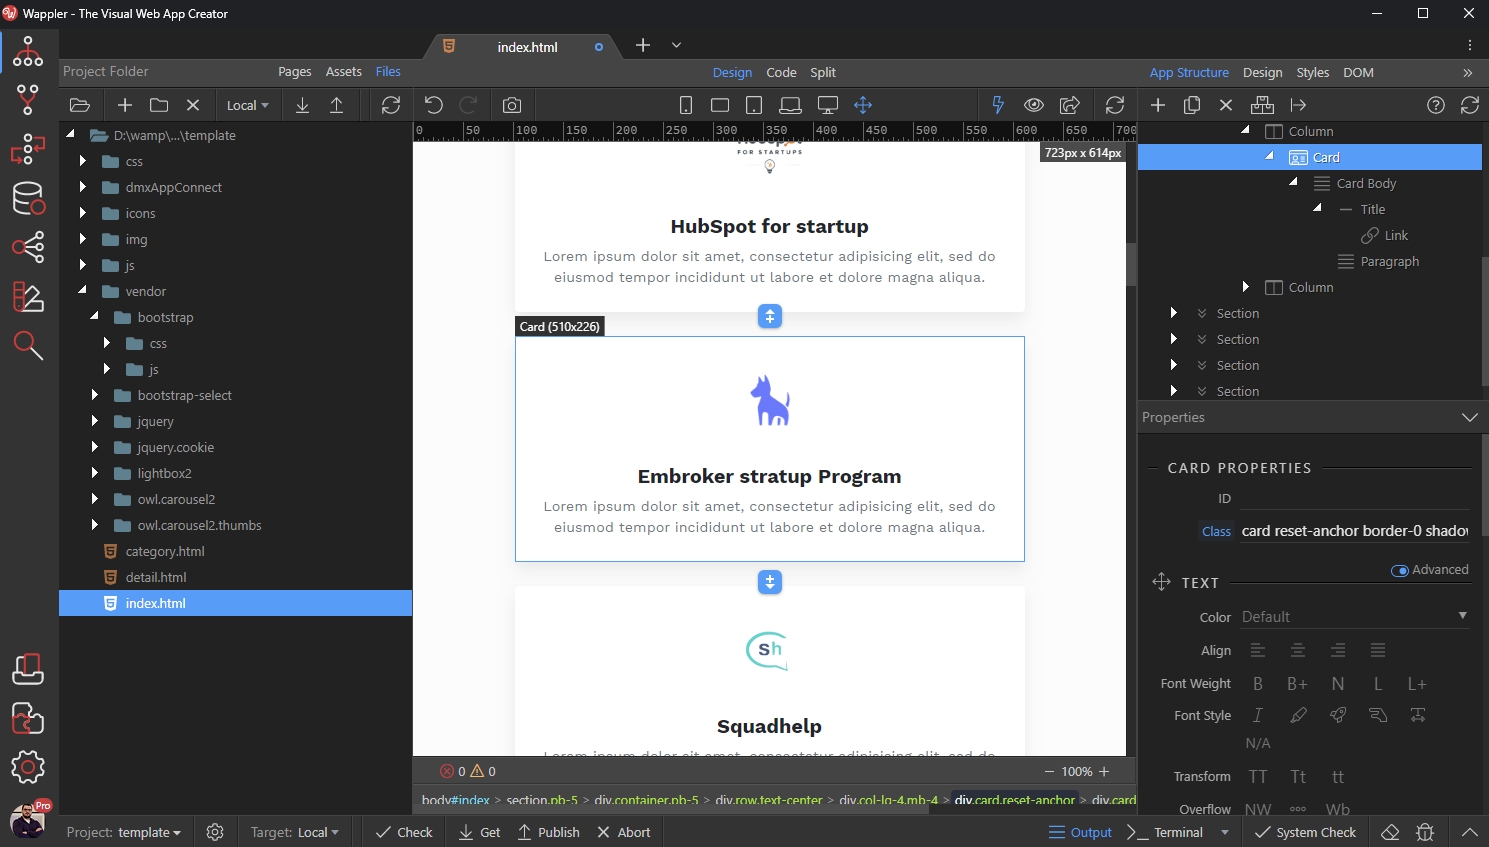
Section titled “Using Custom Bootstrap 4 Paths”First you need to setup your project and place all the template files in the site root. You can see that the Bootstrap files for this specific template are located in a specific vendor folder. Of course, these can be in different folders for different templates you download from the internet:

Then open the Project Settings:
Section titled “Then open the Project Settings:”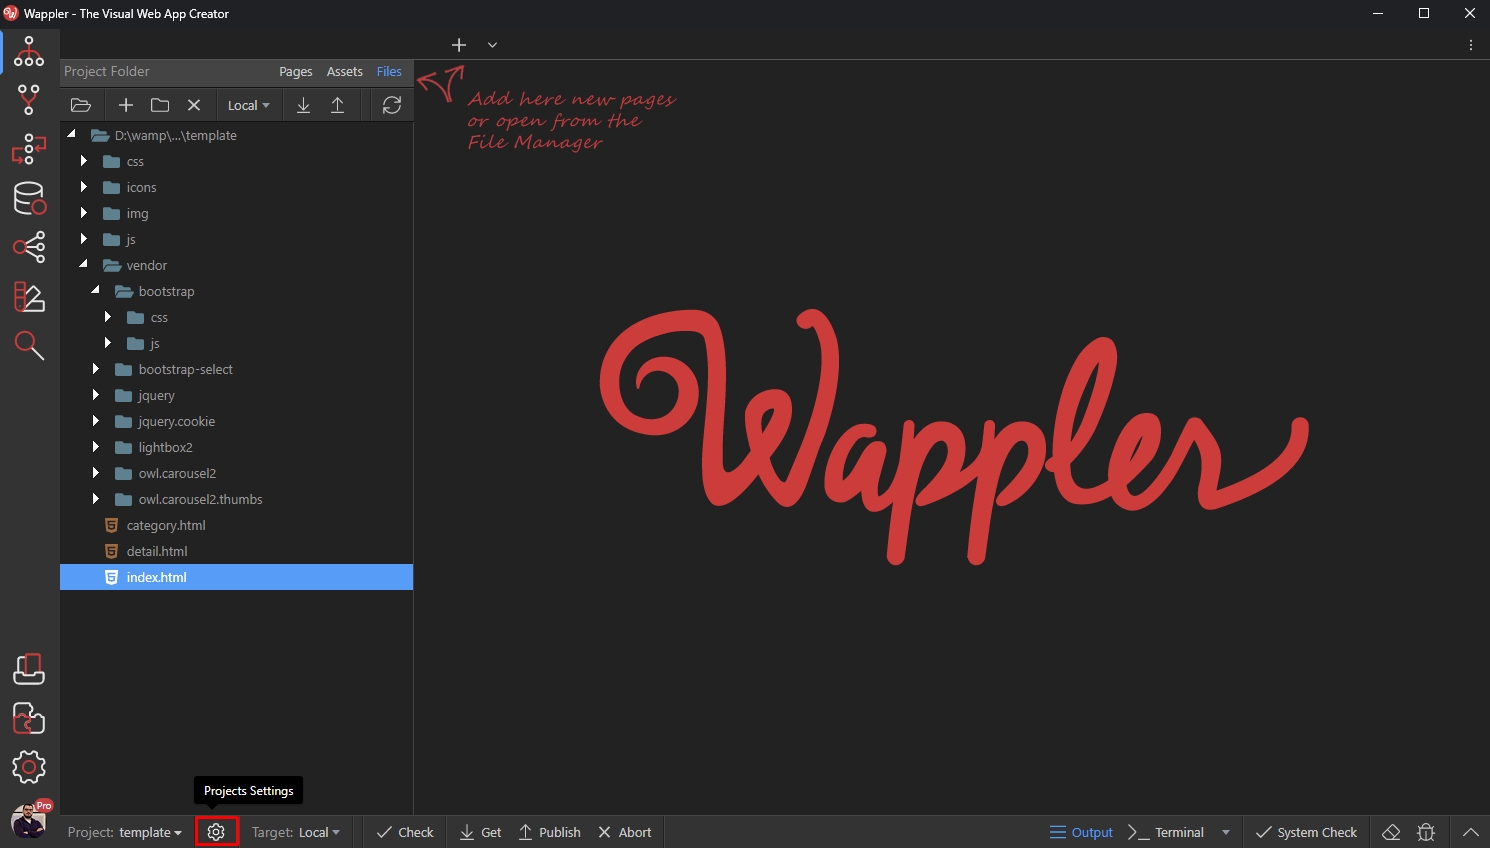
Open the Frameworks menu:
Section titled “Open the Frameworks menu:”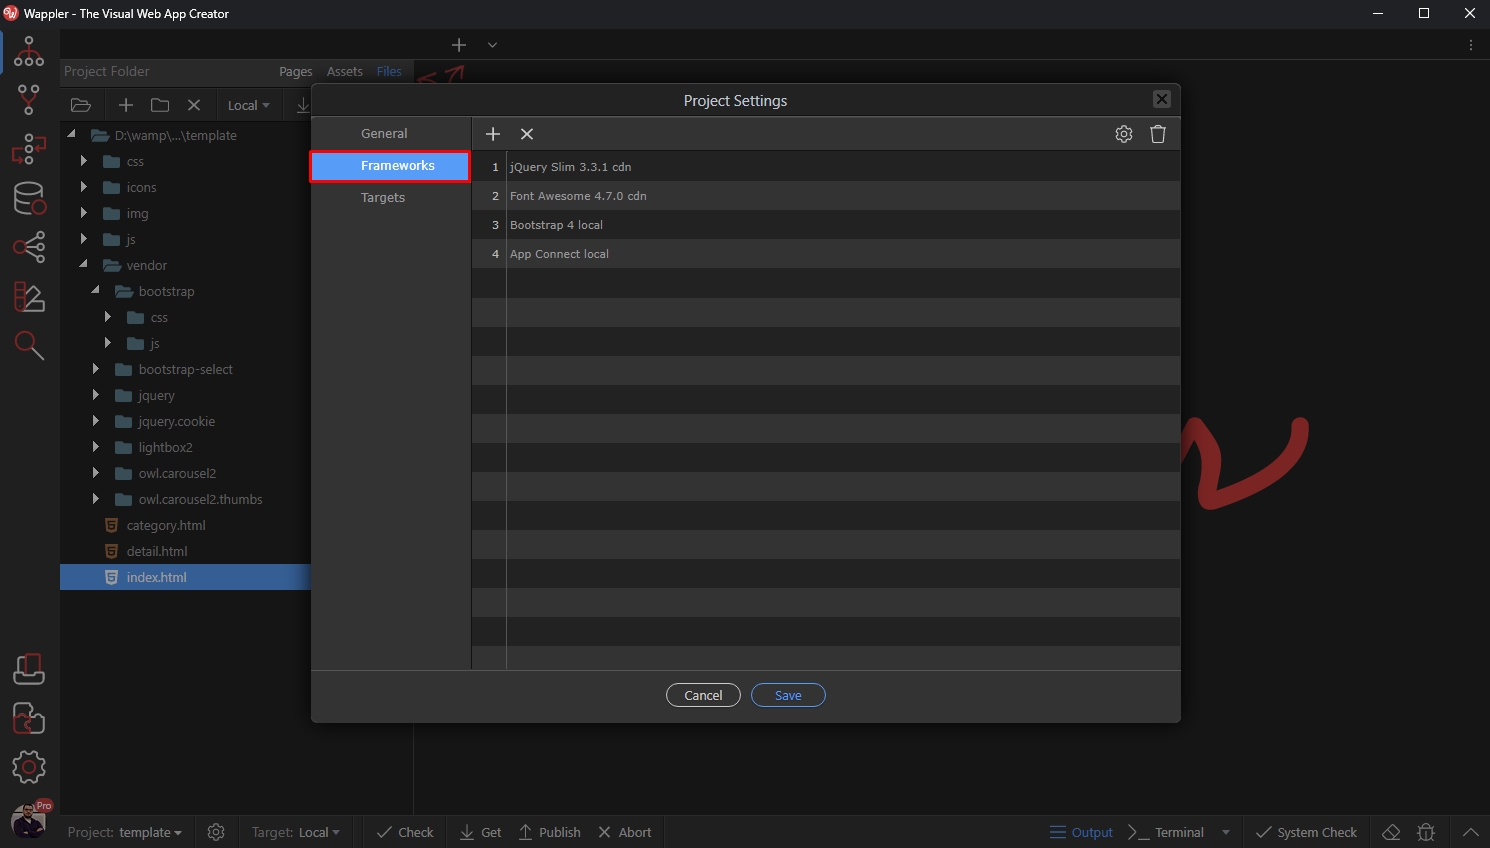
Step 5
Section titled “Step 5”By default Bootstrap 4 local is added to your project, but we want to change this. Click the Add New Framework button:
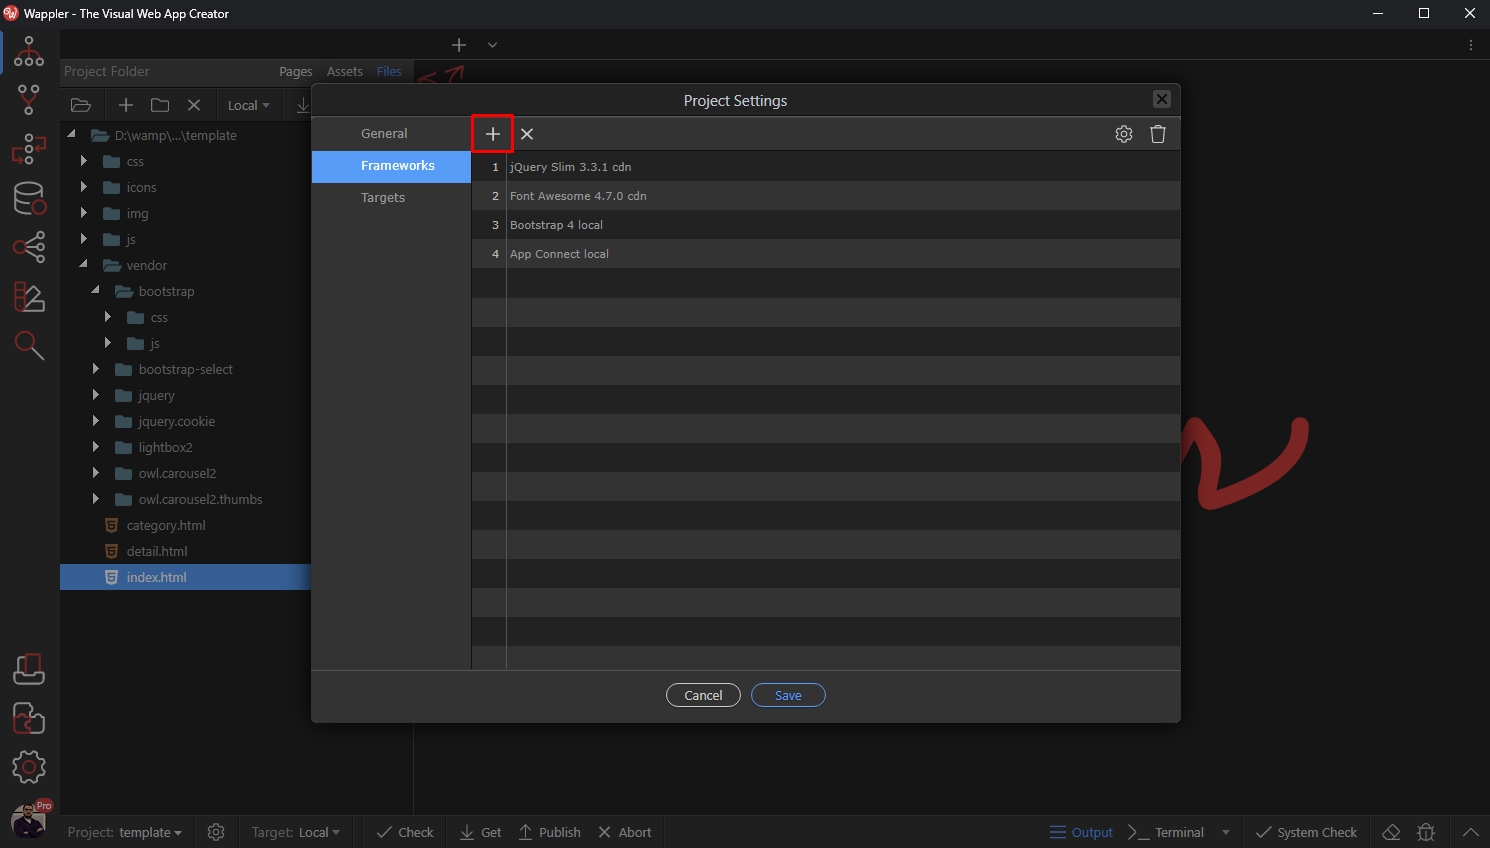
Open the Bootstrap 4 category and select Bootstrap 4 custom:
Section titled “Open the Bootstrap 4 category and select Bootstrap 4 custom:”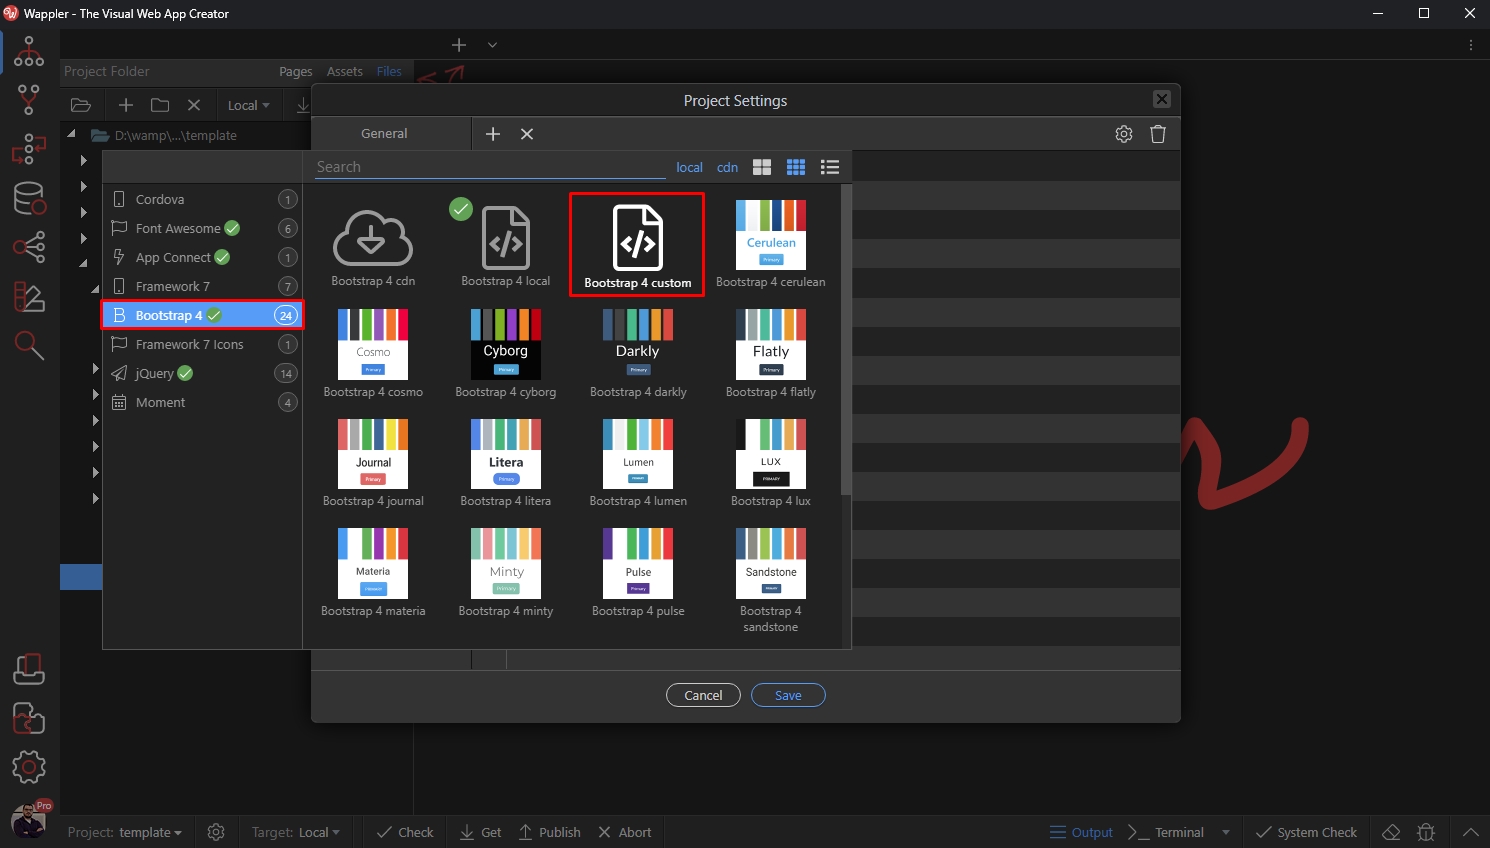
Step 7
Section titled “Step 7”You will see the Bootstrap 4 local include has been replaced with the custom option. Select it and click the Framework Options button:
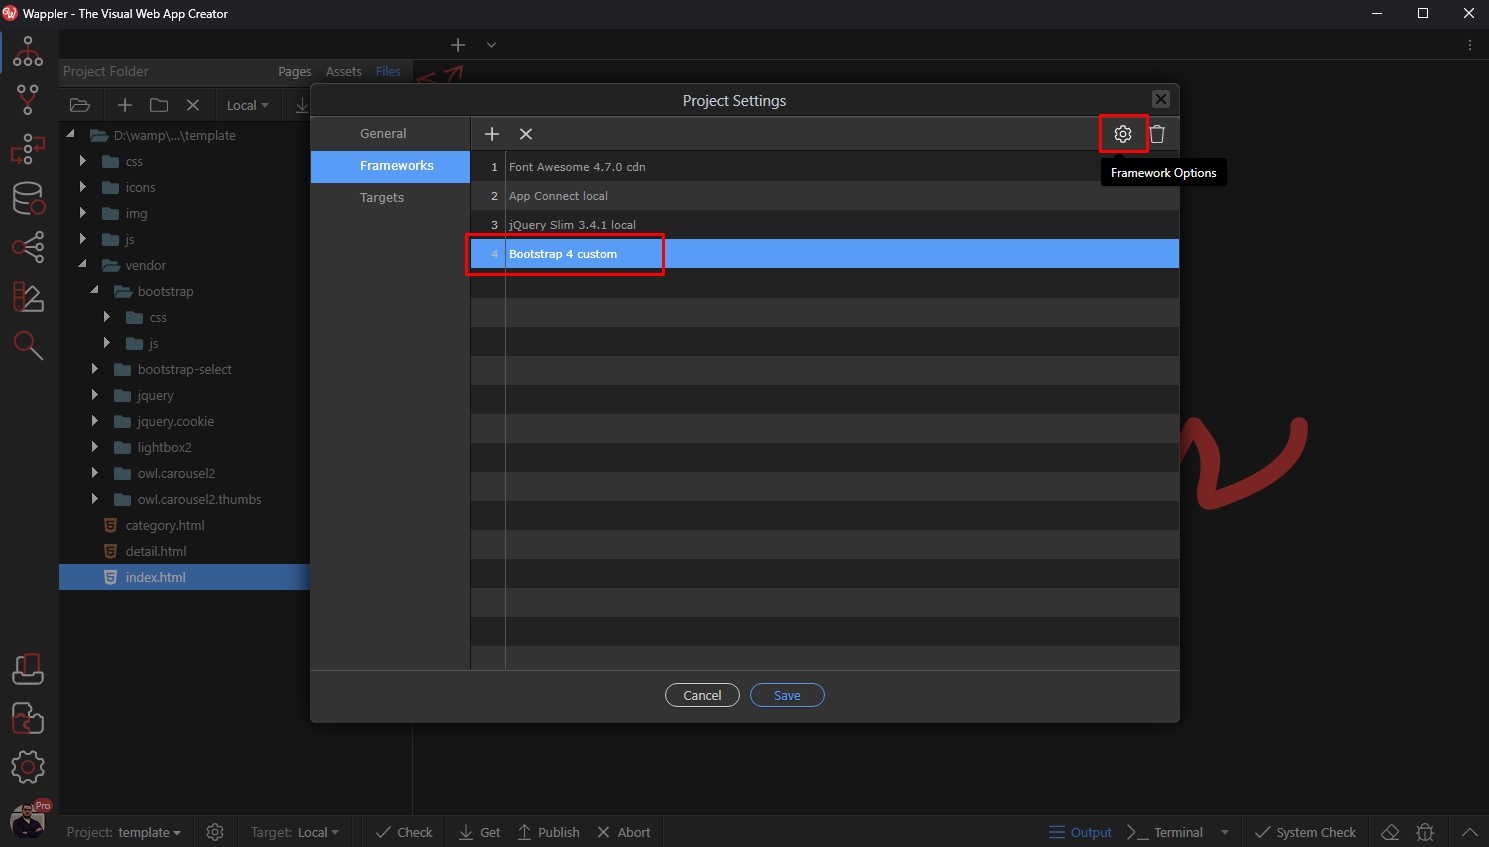
Step 8
Section titled “Step 8”The Framework options dialog appears. Here you can select the paths to the Bootstrap 4 js and css files for your specific template. Click the select path for the js include:
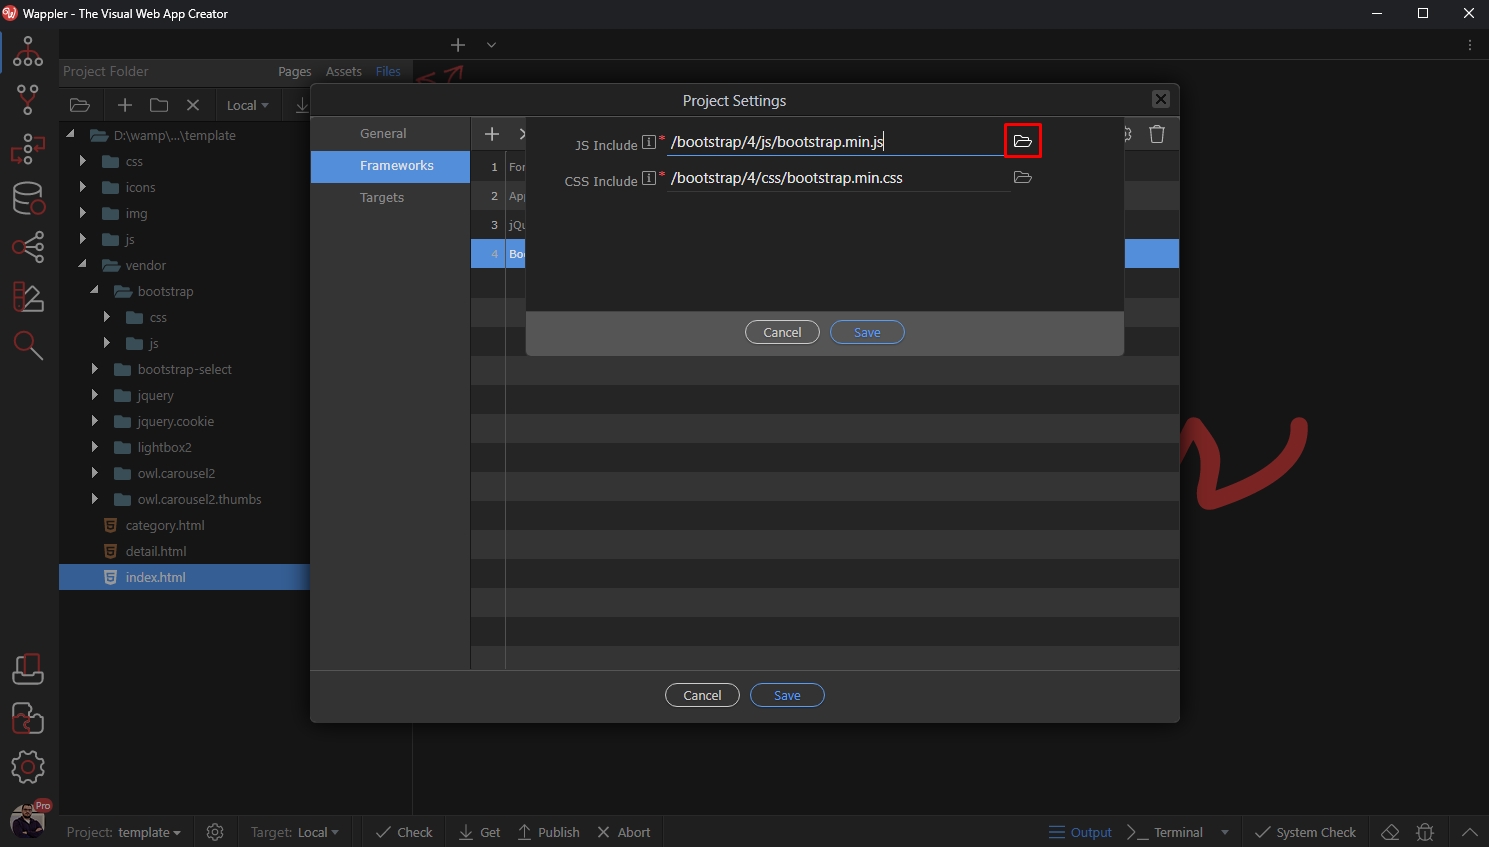
Browse to the custom path and select the js file used for your template:
Section titled “Browse to the custom path and select the js file used for your template:”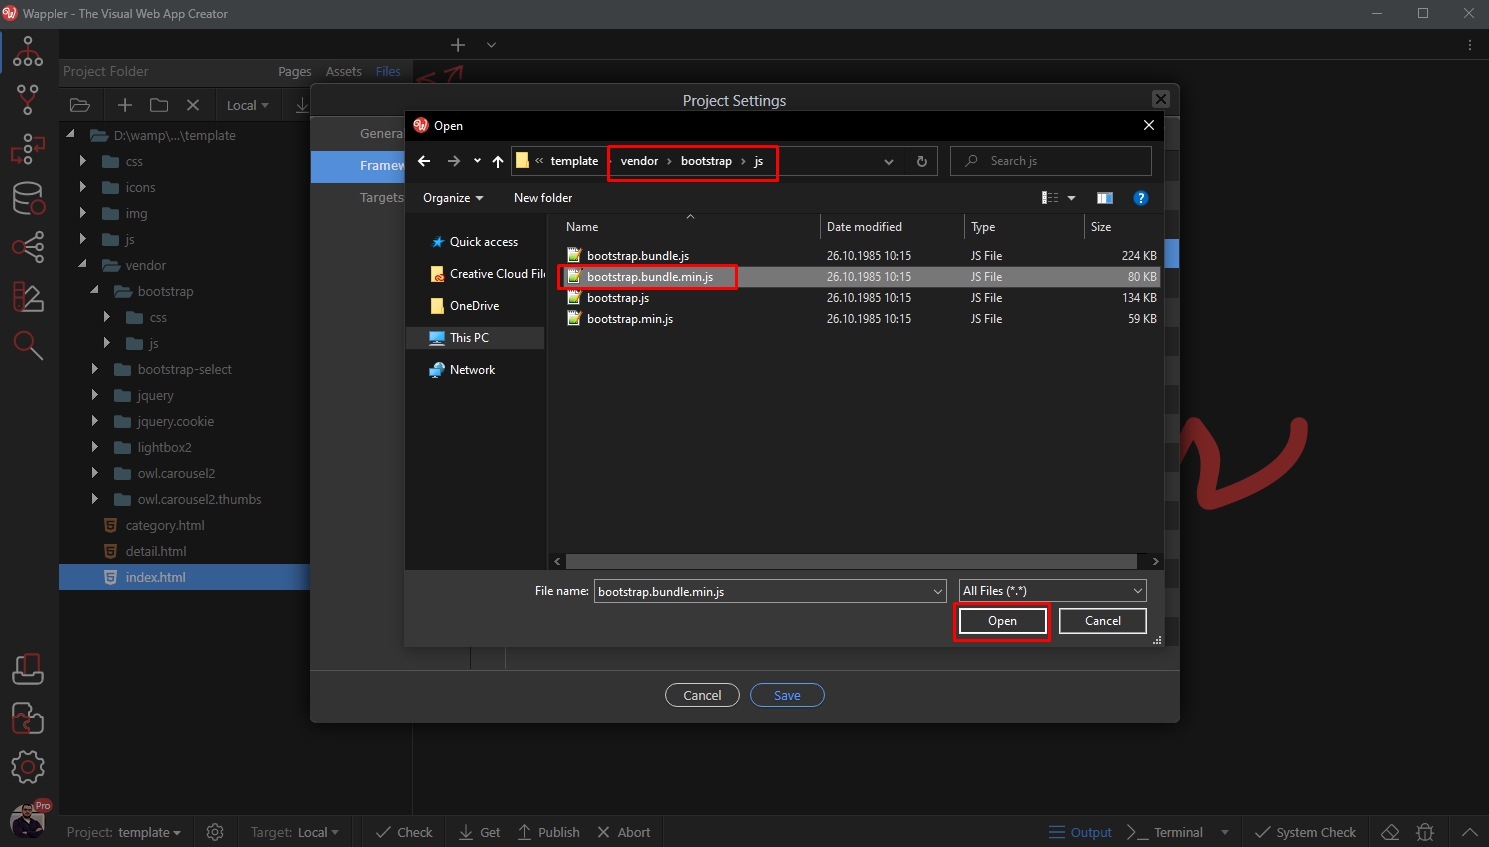
Do the same for the css include:
Section titled “Do the same for the css include:”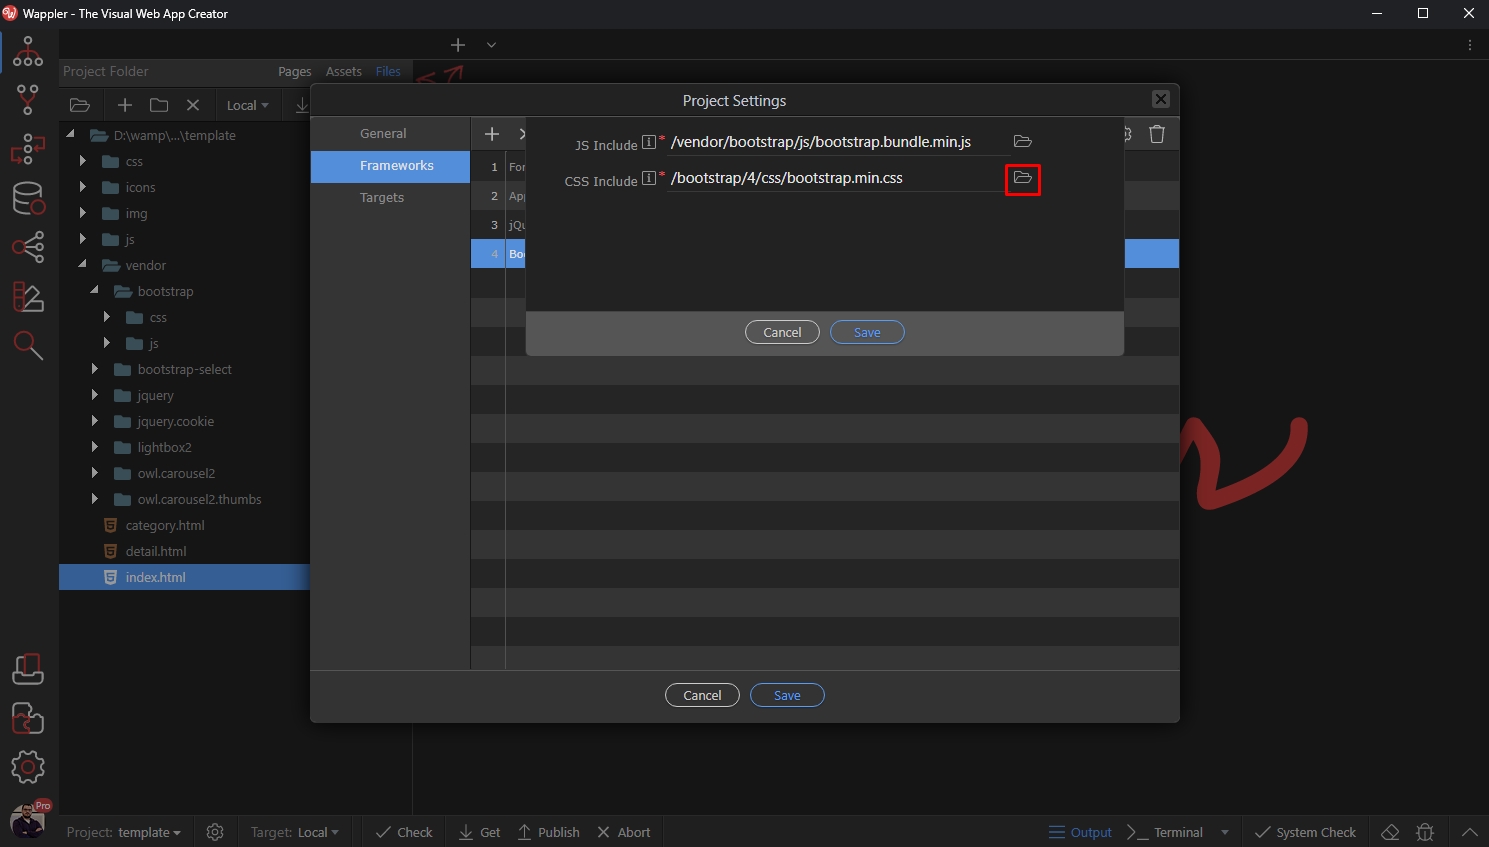
Browse to the custom path and select the css file for your template:
Section titled “Browse to the custom path and select the css file for your template:”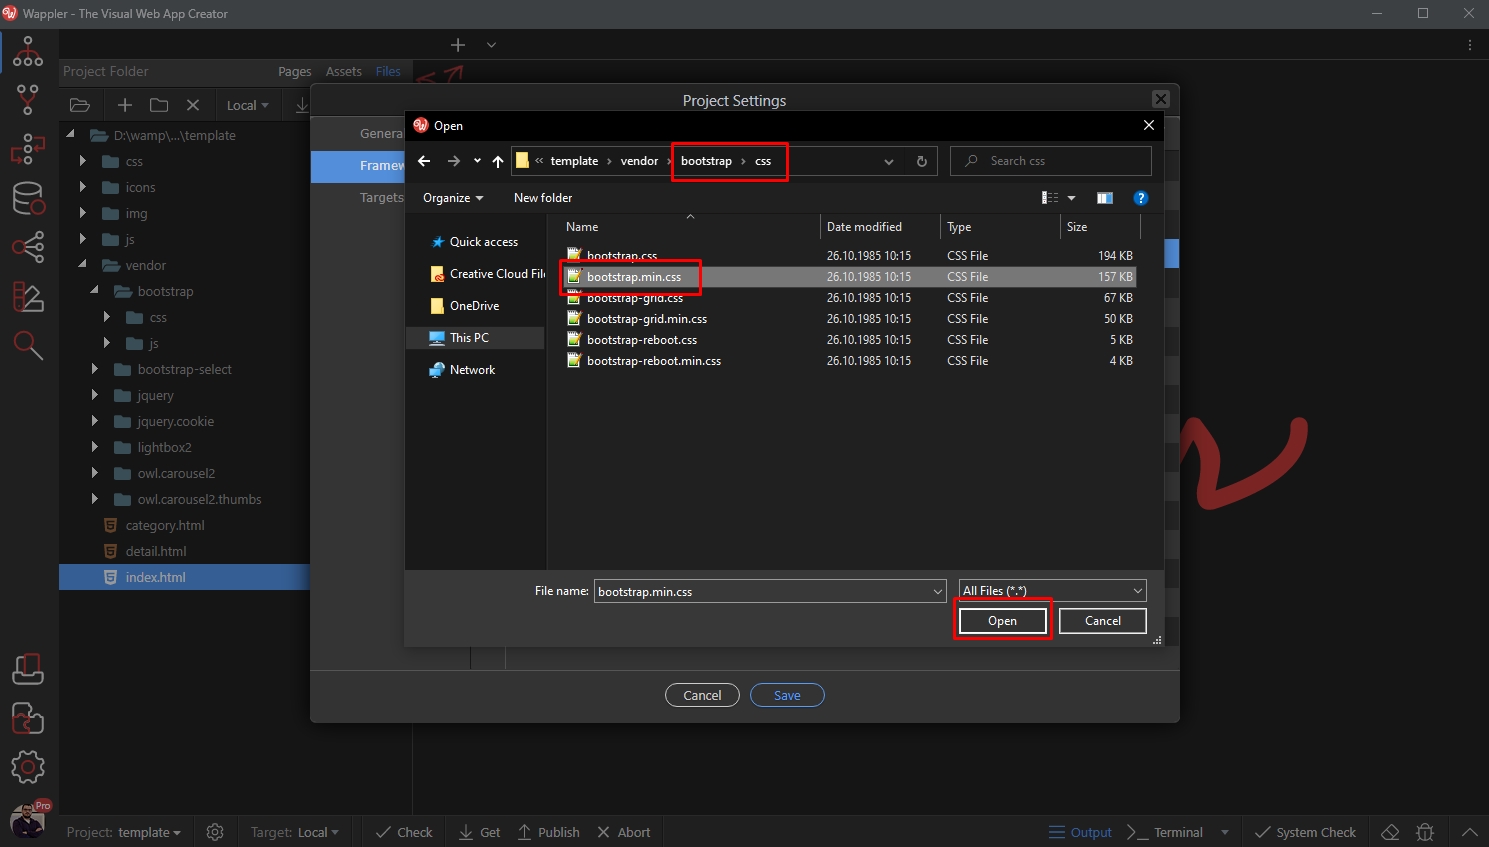
Click Save:
Section titled “Click Save:”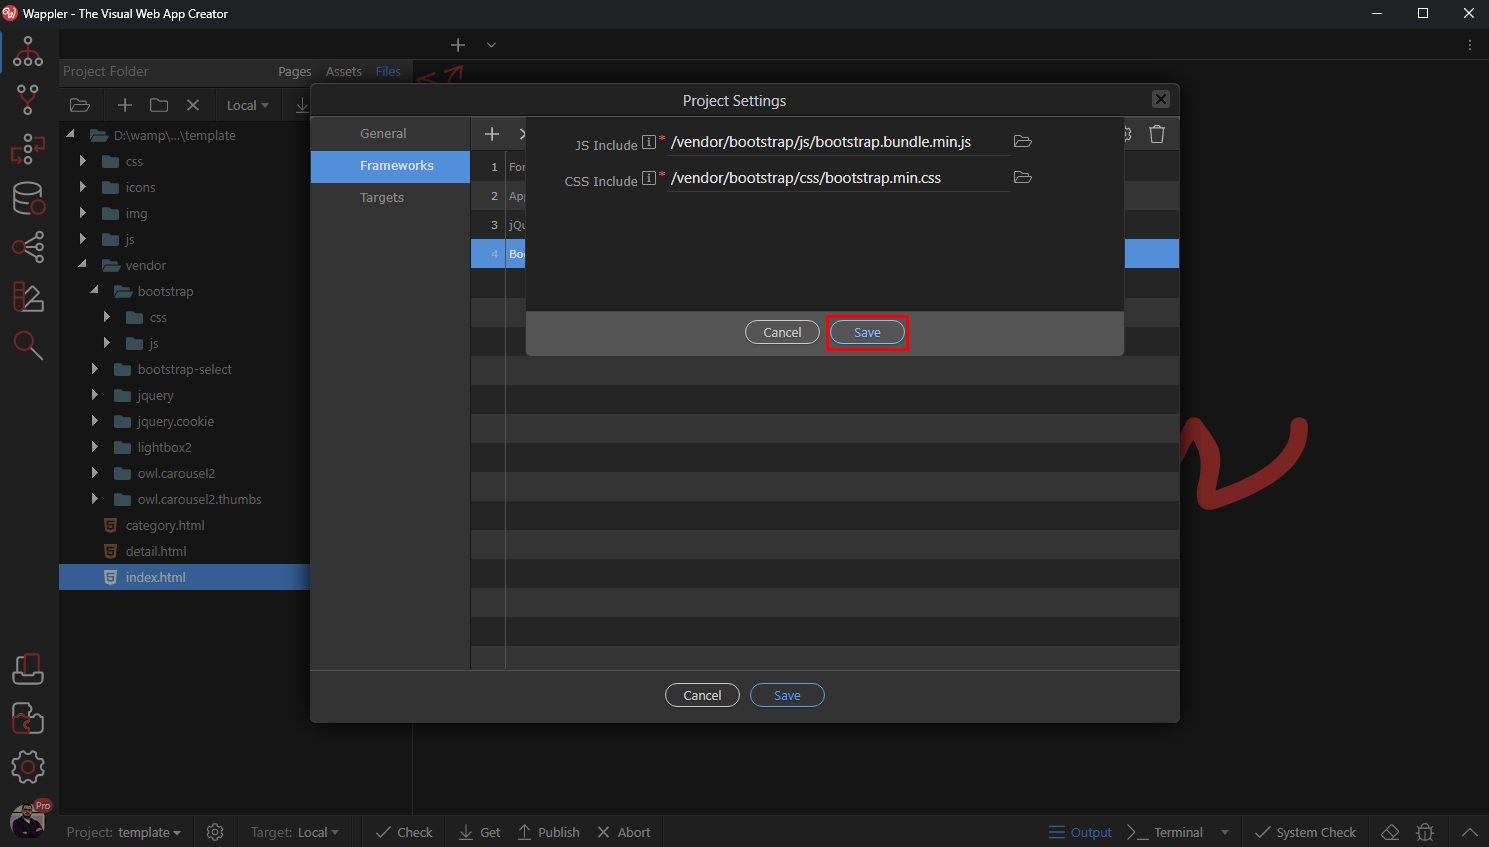
And then Save the Project Settings:
Section titled “And then Save the Project Settings:”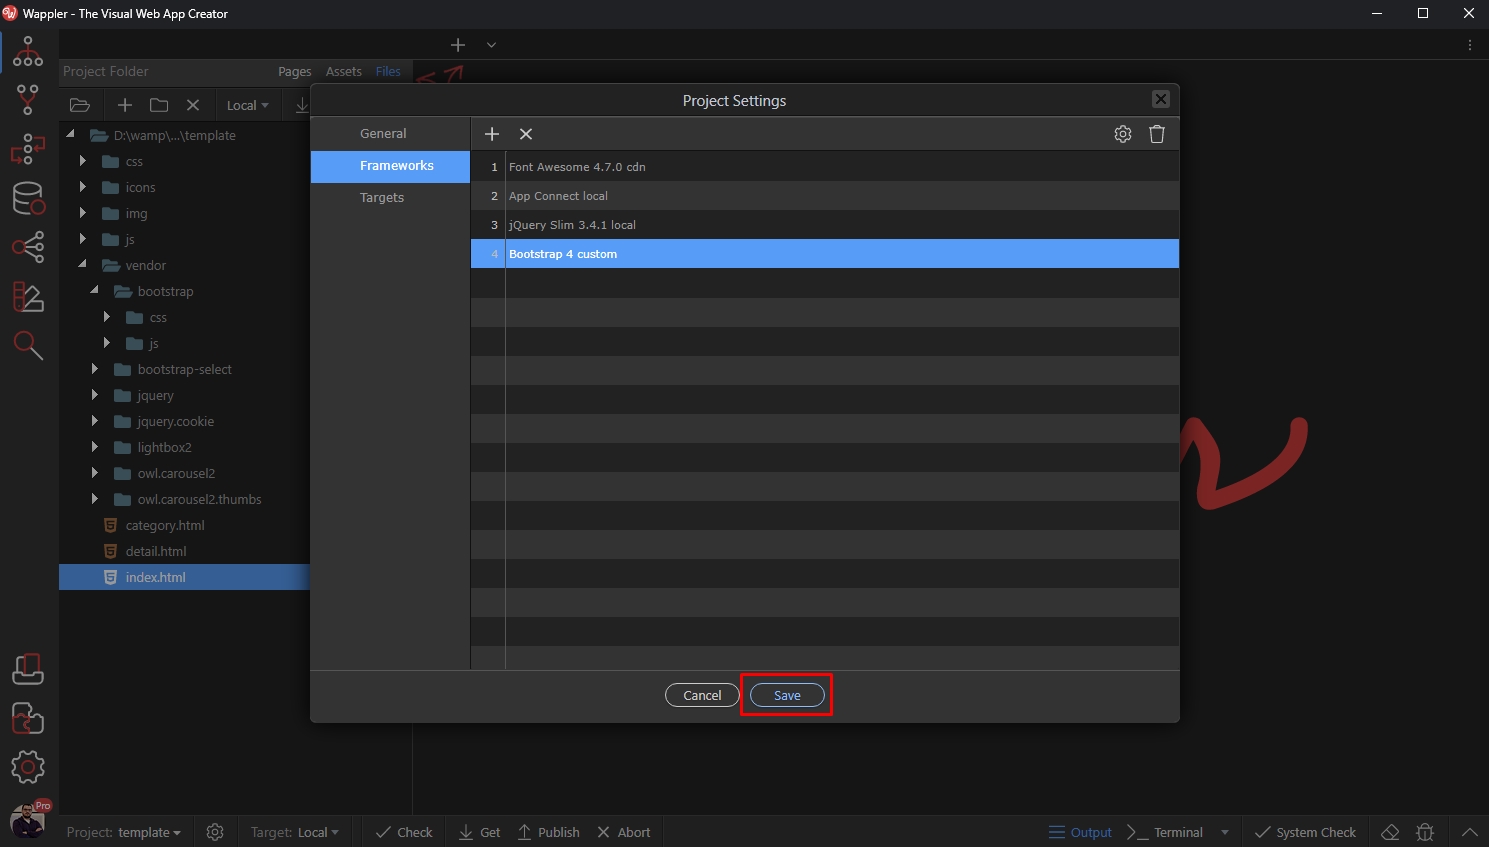
Step 14
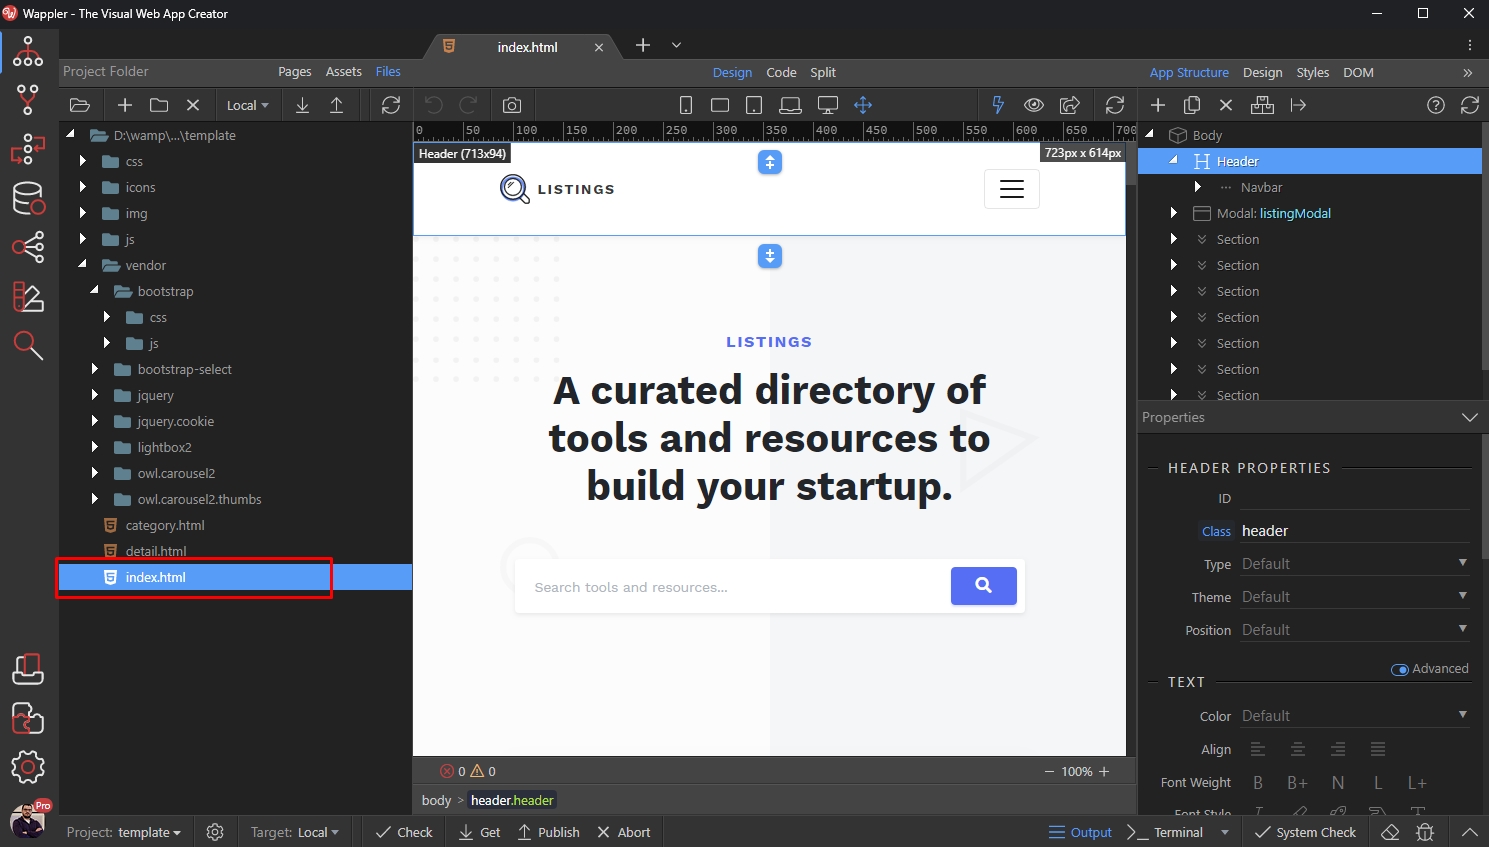
Section titled “Step 14”You can load an HTML page from your project folder and the Bootstrap 4 includes will be recognized by Wappler:
Step 15
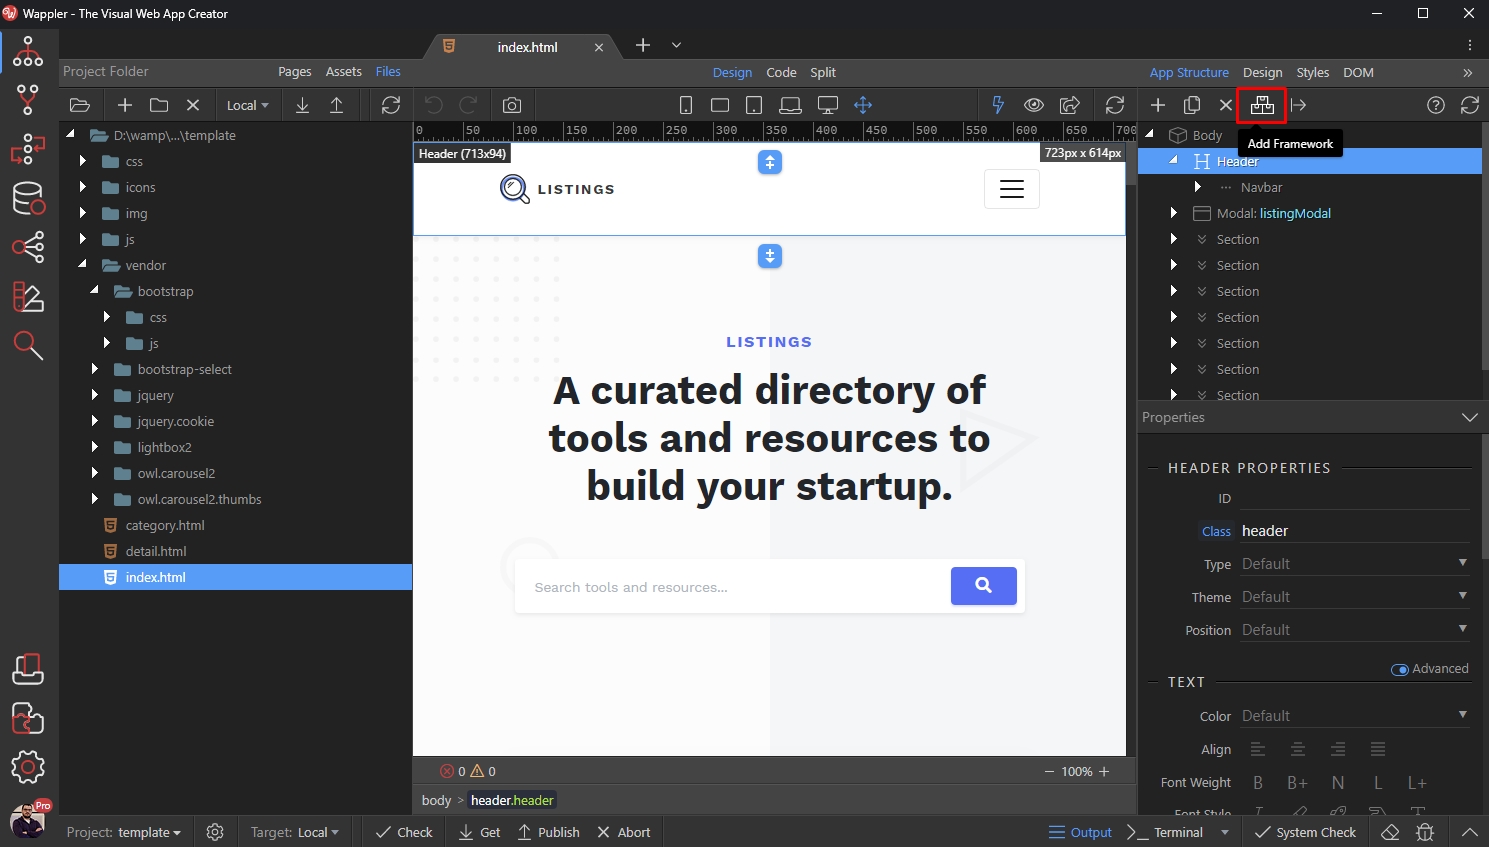
Section titled “Step 15”The only thing left is to add the App Connect framework to the page, so you can enjoy the great features it offers. Click the Add Framework button:
And add App Connect:
Section titled “And add App Connect:”
And you are done. You can use your template and edit it in Wappler:
Section titled “And you are done. You can use your template and edit it in Wappler:”