Working with Server Connect Array Lists
Intro The Server Connect Array List component allows you create and manipulate Array Lists easily with Server Connect actions. You can add items to an array, join multiple sources, remove and set arbi
The Server Connect Array List component allows you create and manipulate Array Lists easily with Server Connect actions. You can add items to an array, join multiple sources, remove and set arbitrary items, keep simple or complex objects or collections in an Array List. It's also easy to use it as a string builder, when you need multi lines strings.
Basics
Section titled “Basics”In order to be able to add items to an array you first need to define the array.
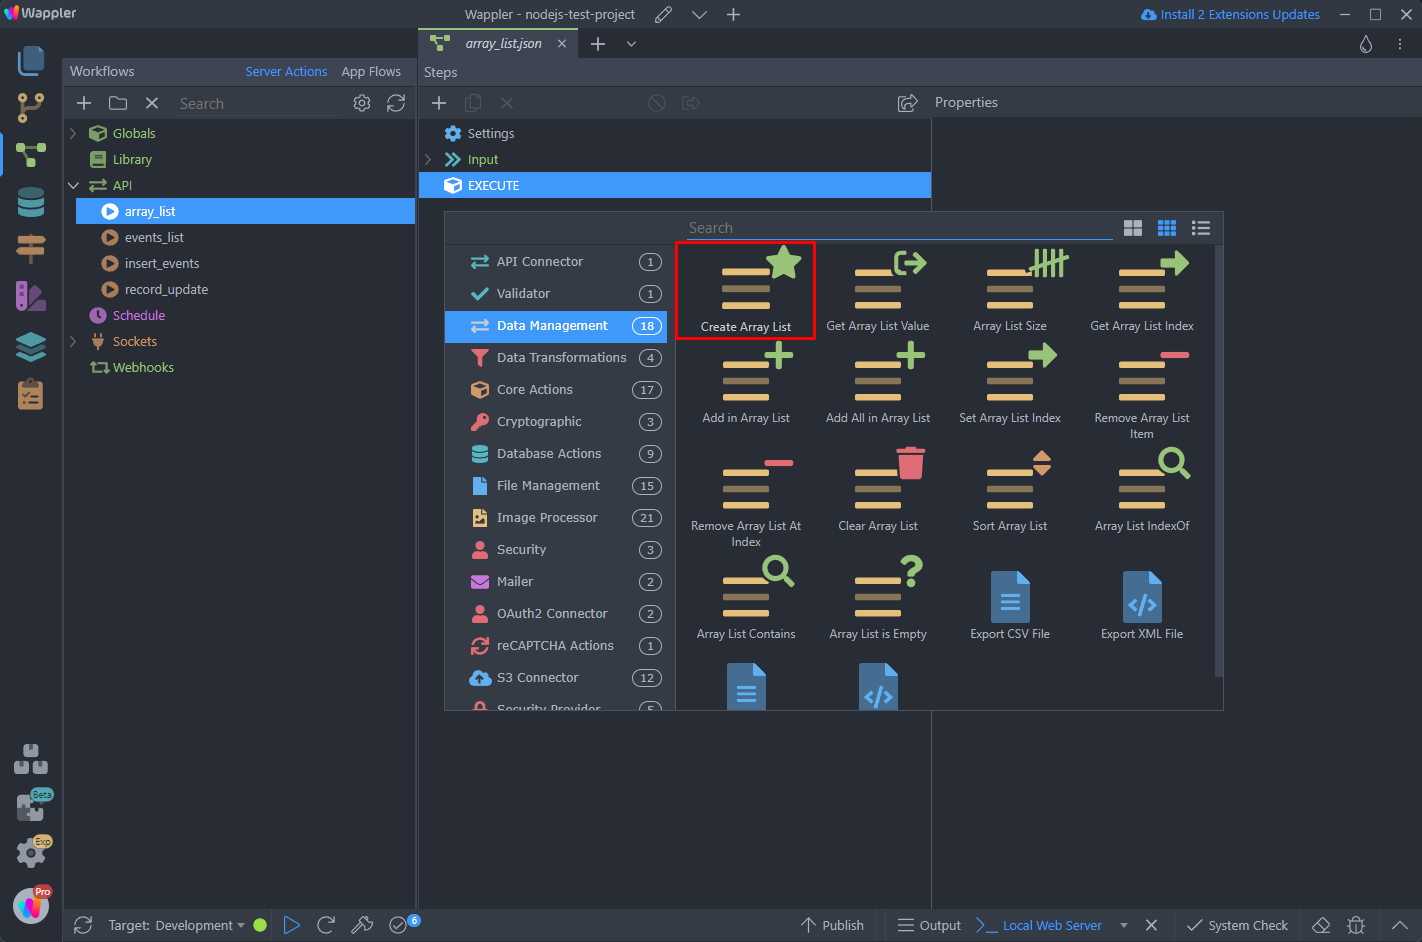
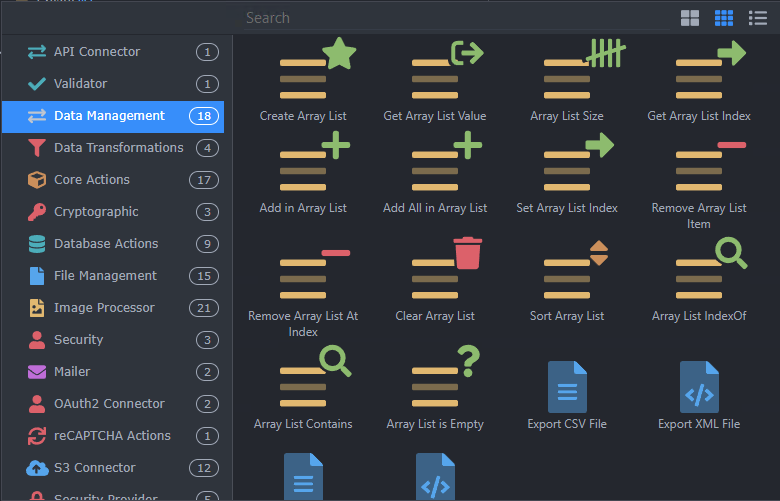
The Array List actions are located in the Data Management section in Server Connect actions picker.
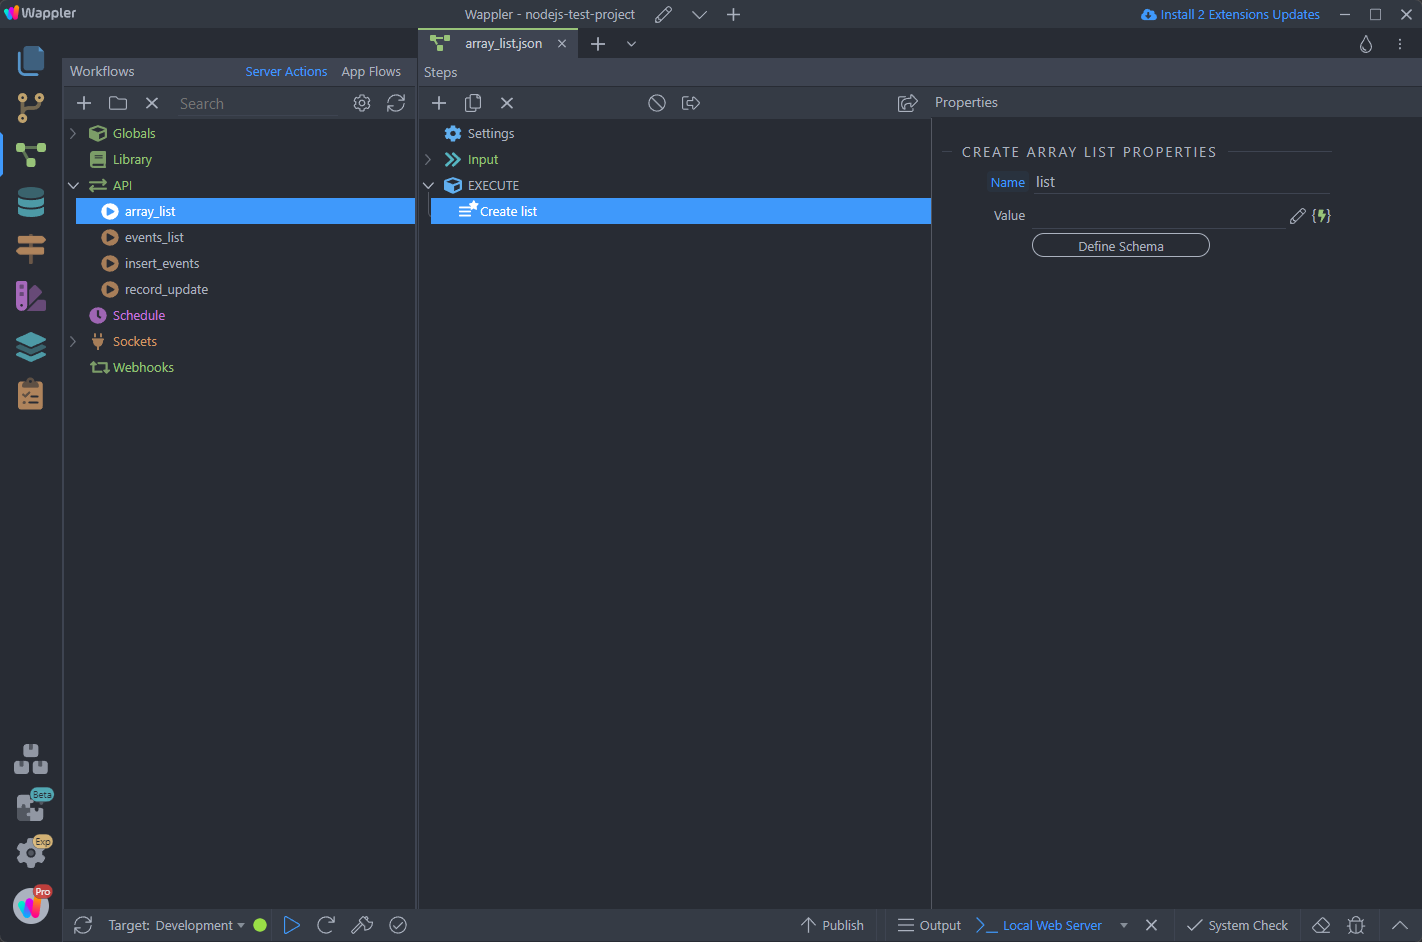
The first step is to create an Array List:
Step 4
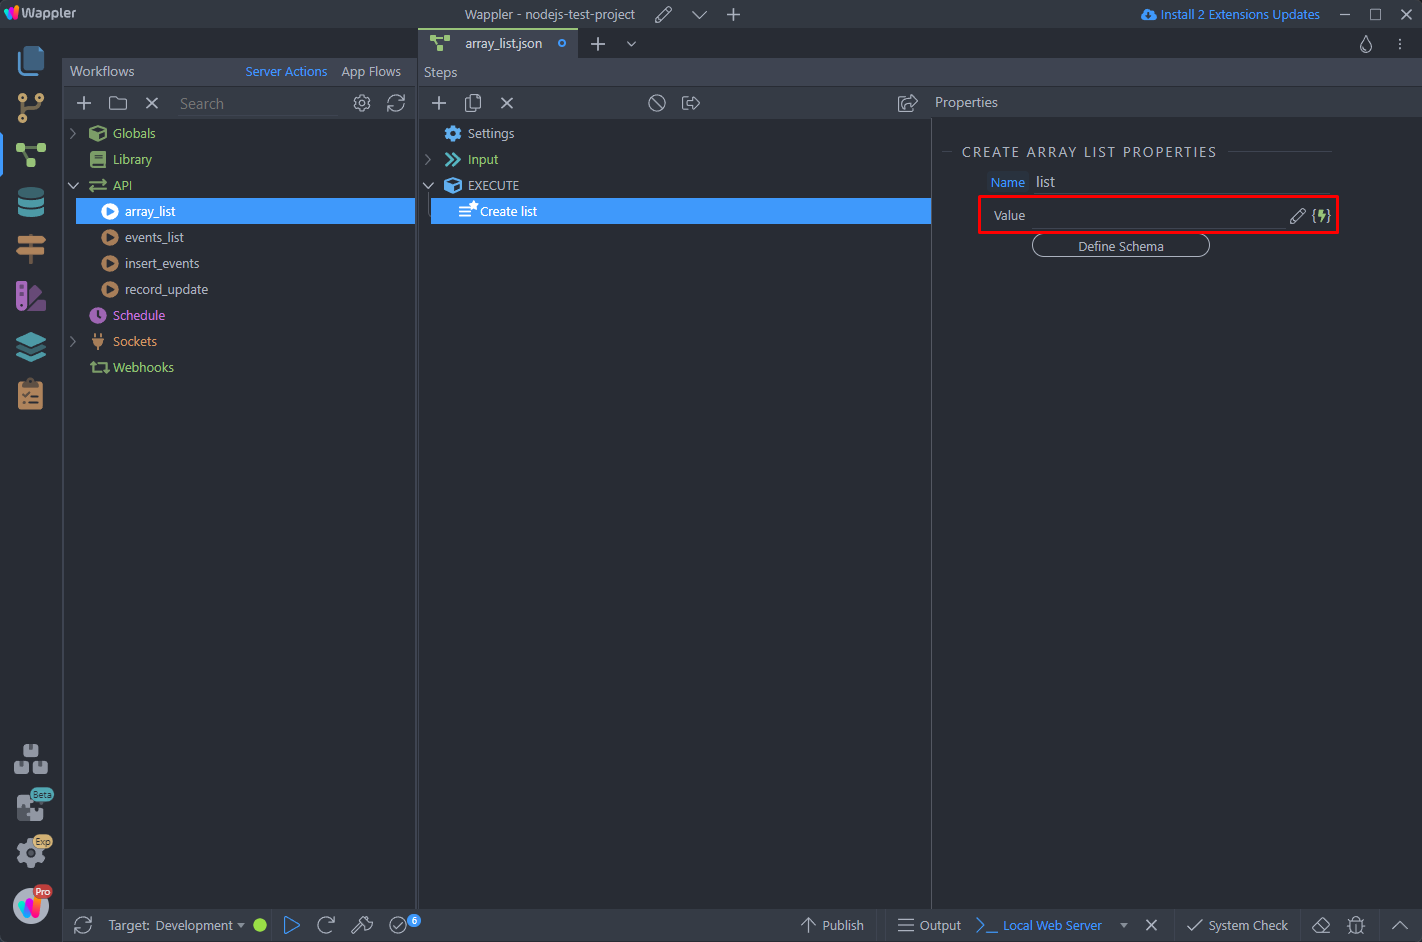
Section titled “Step 4”You can assign a value to the array list, when it's created. This can be any static value, or a dynamic value coming from any dynamic data source in your Server Action - in both cases it needs to be an array. You can also leave this value empty if you plan to add the items to the array at a later step.
Step 5
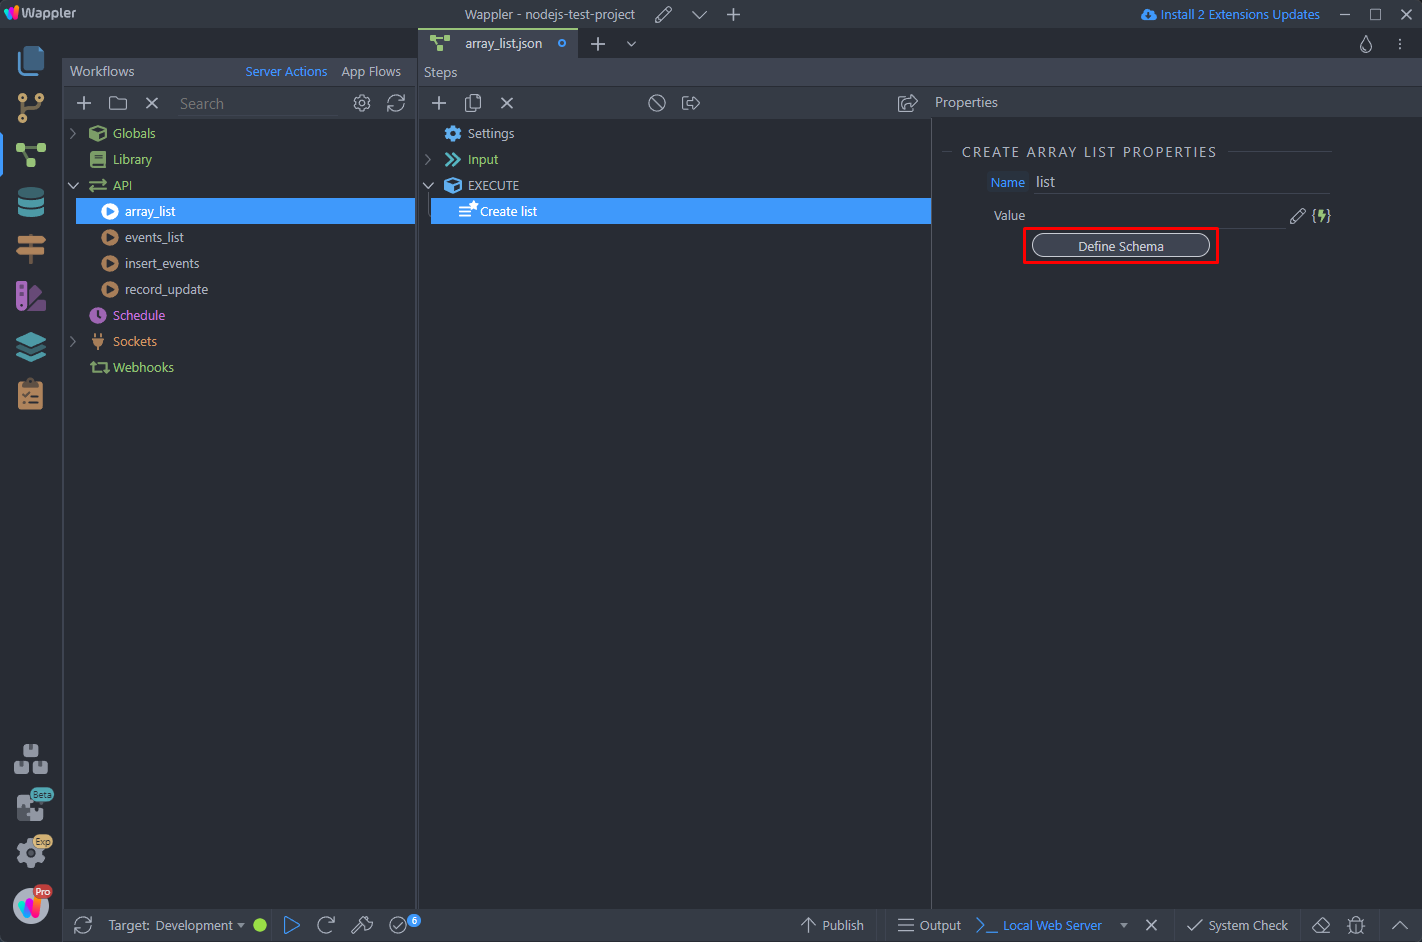
Section titled “Step 5”You can define schema for the array list, if you need. This schema will be used in the data pickers when adding items to the array using the add actions:
{
    "myarray": [
        "San Francisco",
        "Boston",
        "Amsterdam",
        "Paris",
        "Tokyo",
        "Sydney"
    ]
}
Section titled “{ "myarray": [ "San Francisco", "Boston", "Amsterdam", "Paris", "Tokyo", "Sydney" ] }”If you don't want to define a schema, the items will be added to the array as comma separated strings list like:
{
"myarray": [
"San Francisco",
"Boston",
"Amsterdam",
"Paris",
"Tokyo",
"Sydney"
]
}
Components List
Section titled “Components List”There are 14 array components available in Server Connect.
Step 8
Section titled “Step 8”- Create Array List: Defines an array list. Allows initial value to be added to the array list or not.
- Get Array List Value: Outputs the value of an array list.
- Array List Size: Returns the size of an array list, i.e. the number of array list items.
- Get Array List Index: Returns the element with the specified index from the array list.
- Add in Array List: Appends a single item to the array list.
- Add All in Array List: Appends all of the elements from the specified collection to the end of the array list.
- Set Array List Index: Replaces the element at the specified index with the given value.
- Remove Array List Item: Removes the specified element from an array list.
- Remove Array List At Index: Removes the element at the specified index from an array list.
- Clear Array List: Removes all the items from an array list.
- Sort Array List: Sorts an array list by a given property.
- Array List IndexOf: Returns the first index at which the given element can be found in an array list.
- Array List Contains: Checks if the specified element exists in the given array list or not.
- Array List is Empty: Checks if the specified array list is empty or not.
Array List as a String Builder
Section titled “Array List as a String Builder”You can use the Array List component to build a multi line strings list. This is useful, for example, when you want to send an order with a list with products details, to the user's email.
In the example below we will show you how to get an order details from the database, add each item details to the Array List and join them as a string list in the mail body.
For this we will need to define the schema of the Array List:
We just need a single variable here, that will hold our products details:
Section titled “We just need a single variable here, that will hold our products details:”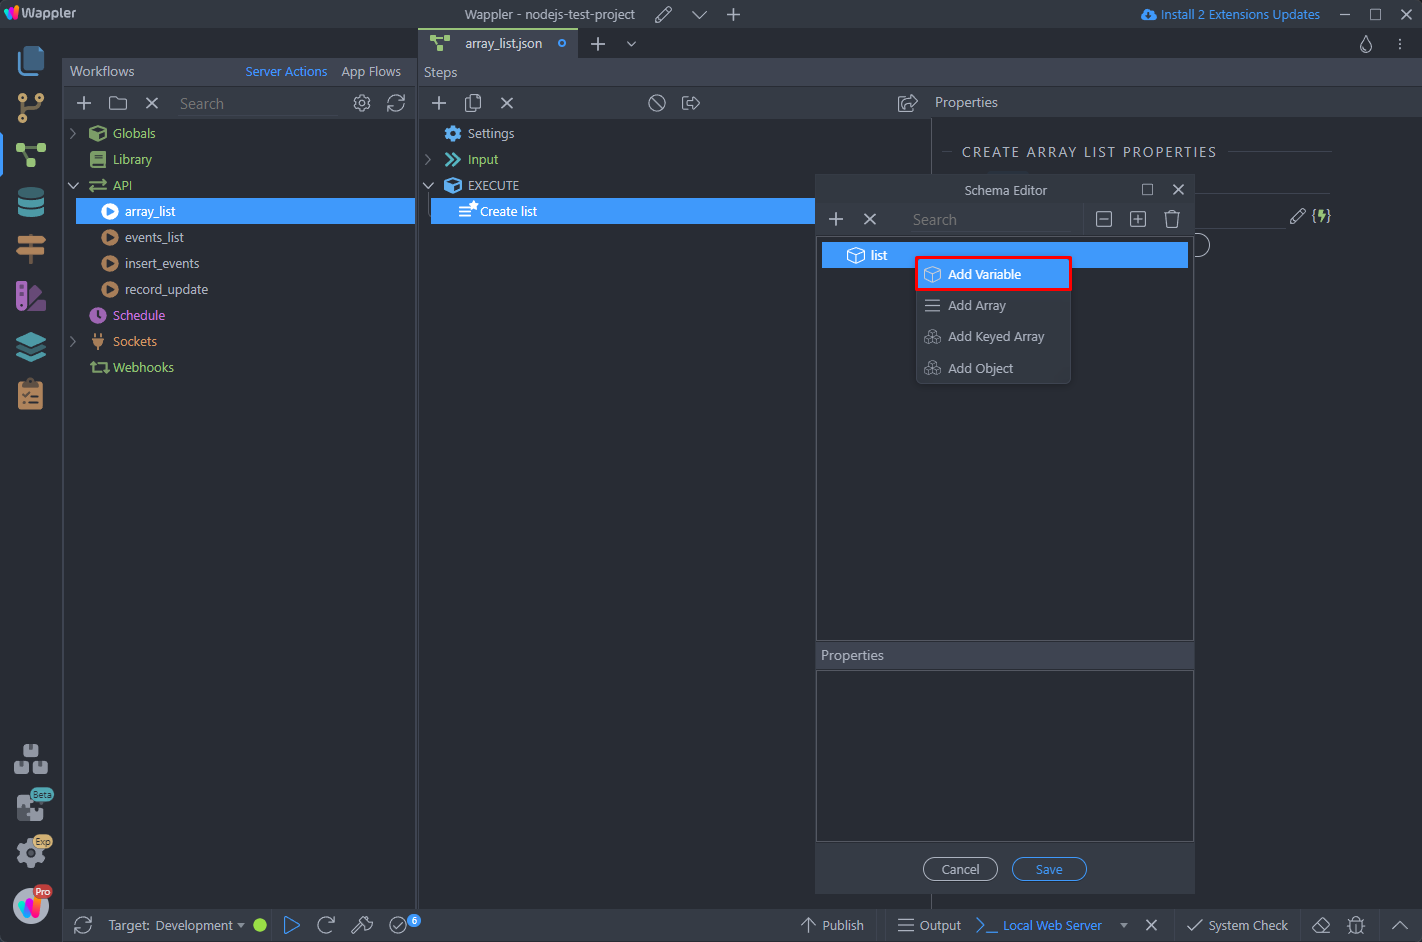
We call it line item:
Section titled “We call it line item:”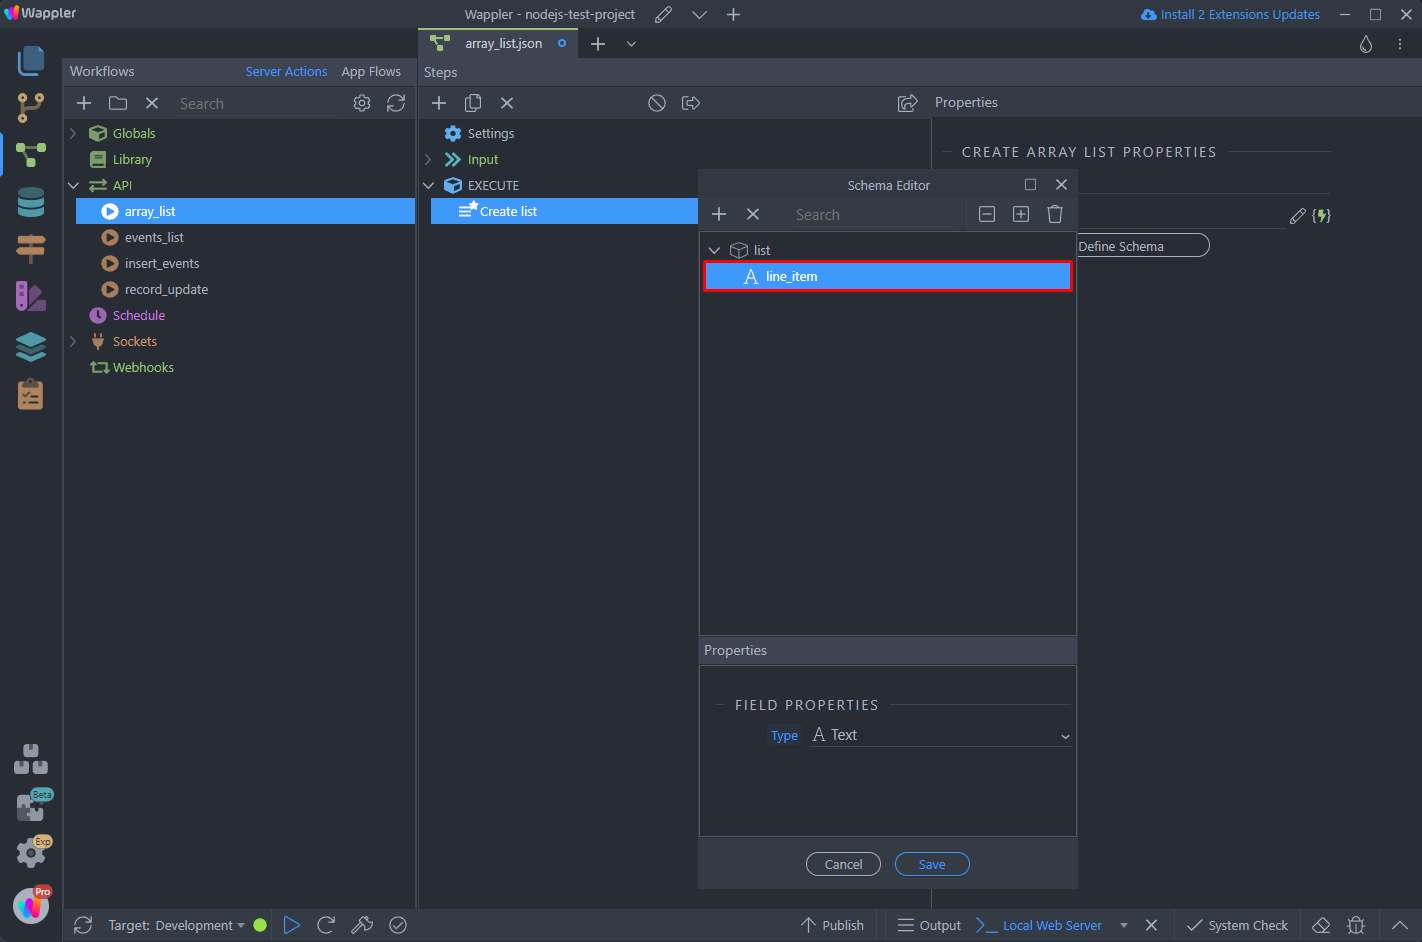
The next step is to create a database query that gets the order details from our database.
Section titled “The next step is to create a database query that gets the order details from our database.”Add new step to the server action:
Select database query:
Section titled “Select database query:”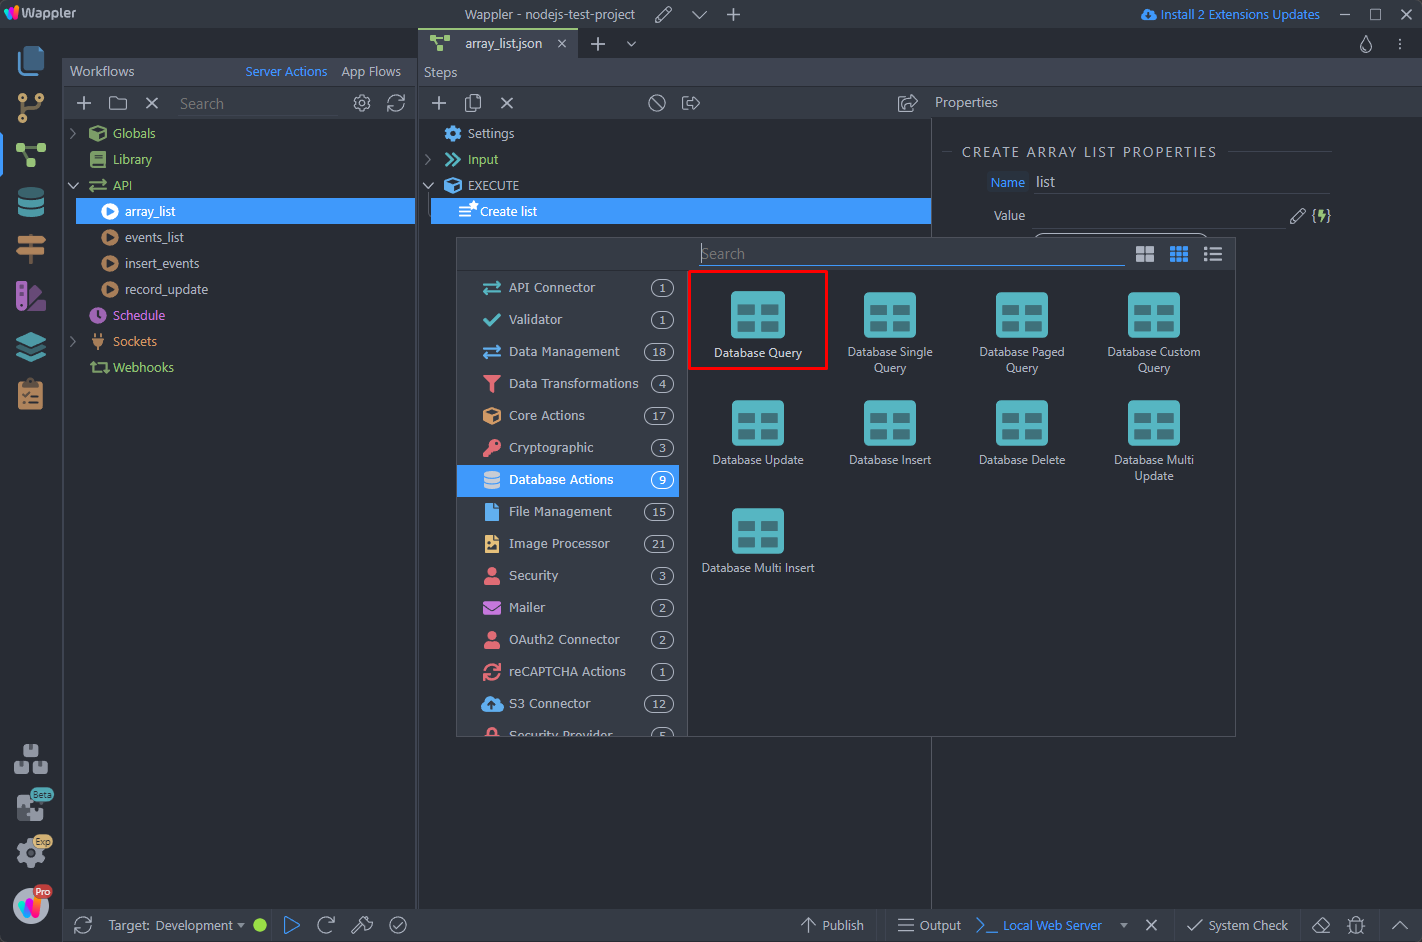
Step 14
Section titled “Step 14”You already know how to setup a database query - select your table, adjust the filters you need and save your database query:
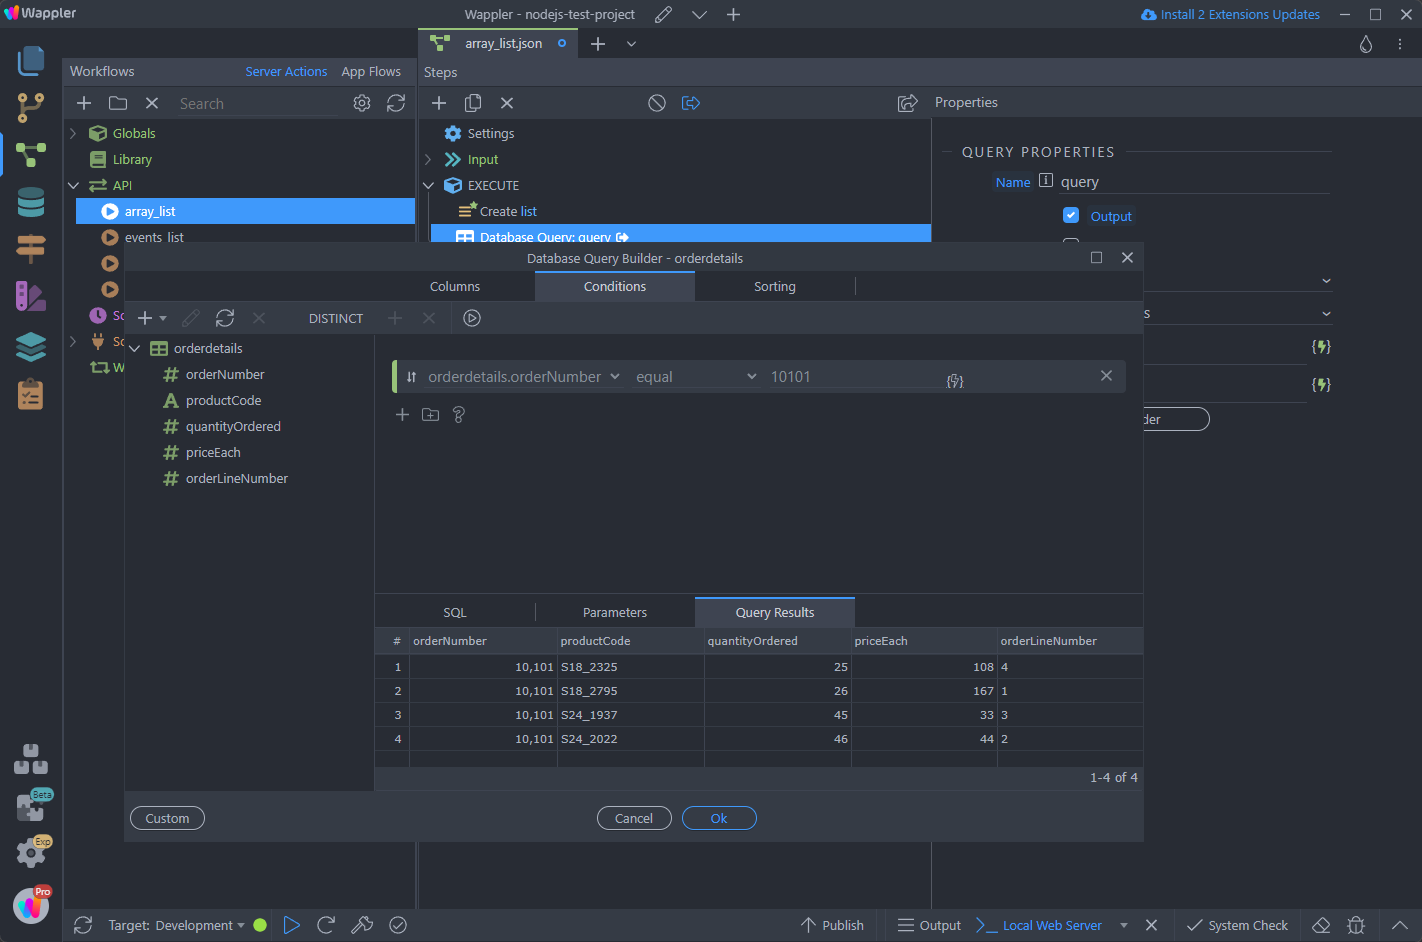
Step 15
Section titled “Step 15”We need to go through the database query items and add them to the array list. For this we need to add a repeater. Add a new step:
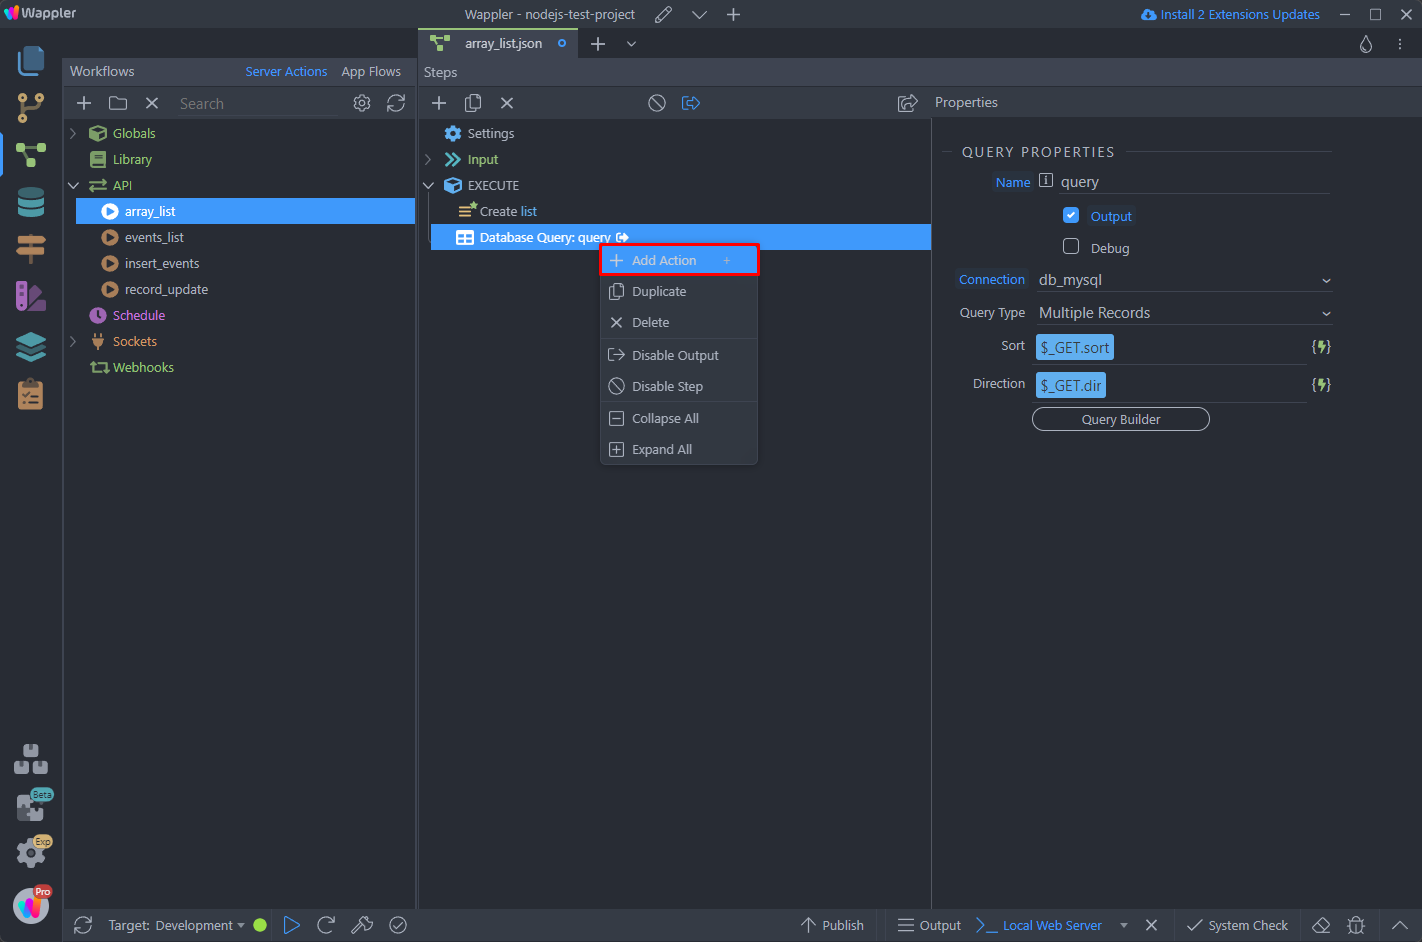
Select Repeat:
Section titled “Select Repeat:”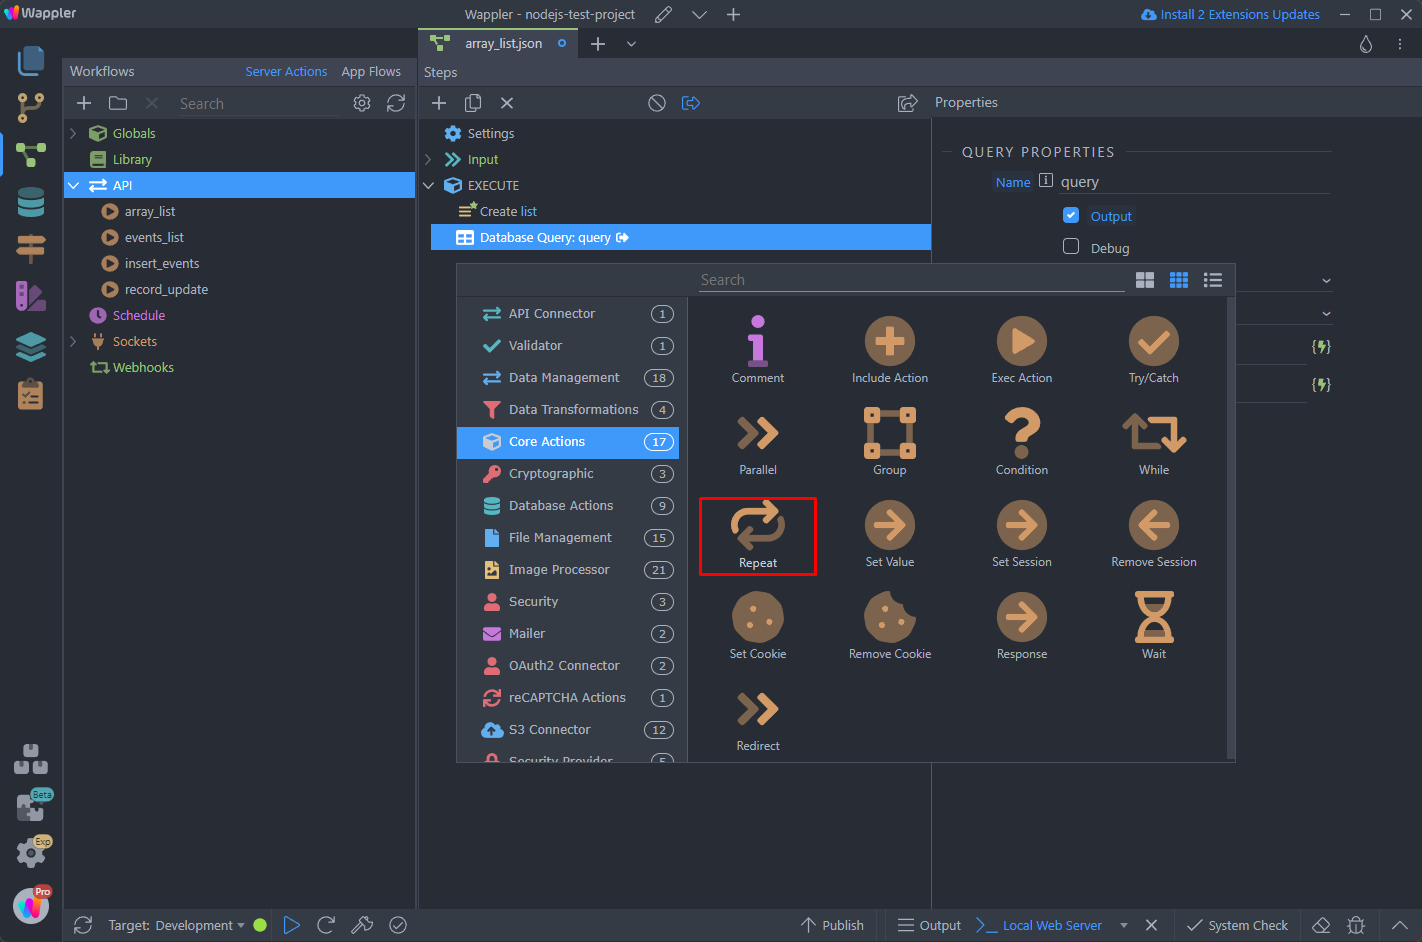
And select your database query as a repeat expression:
Section titled “And select your database query as a repeat expression:”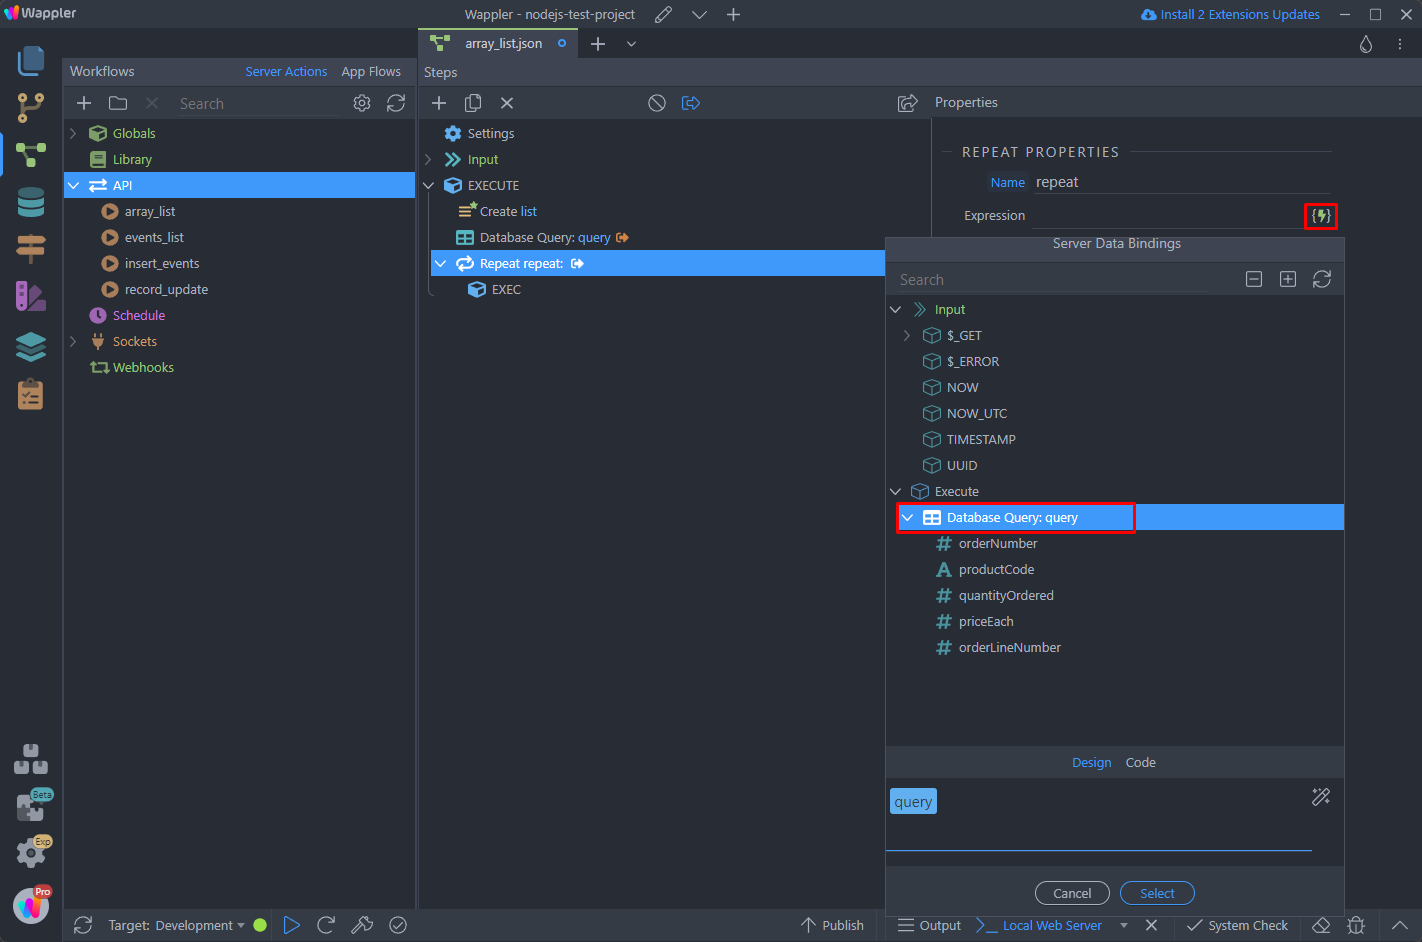
Step 18
Section titled “Step 18”Inside the repeat, add a new step - Add in Array List. This action adds a single item to the Array List, this step will be repeated for each of the query results and they will be appended to the array list:

In the properties panel you can see the line_item that we defined in the Array List schema:
Section titled “In the properties panel you can see the line_item that we defined in the Array List schema:”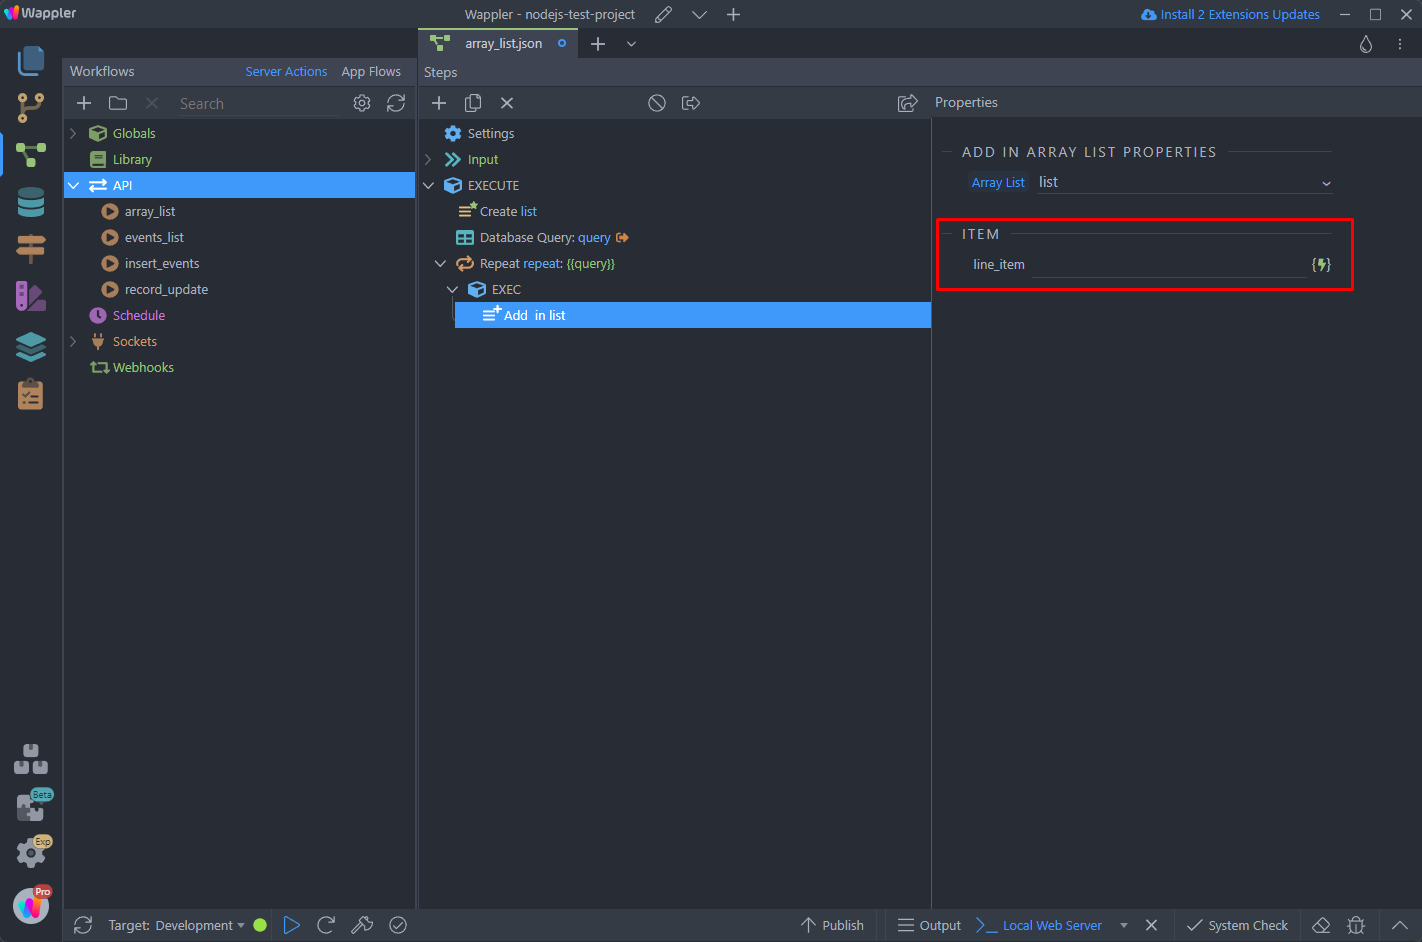
Step 20
Section titled “Step 20”Here you can add any static and/or dynamic data. In our case this will be a mix of static and dynamic data, showing some product info. This info will be later used in the mail body per product:
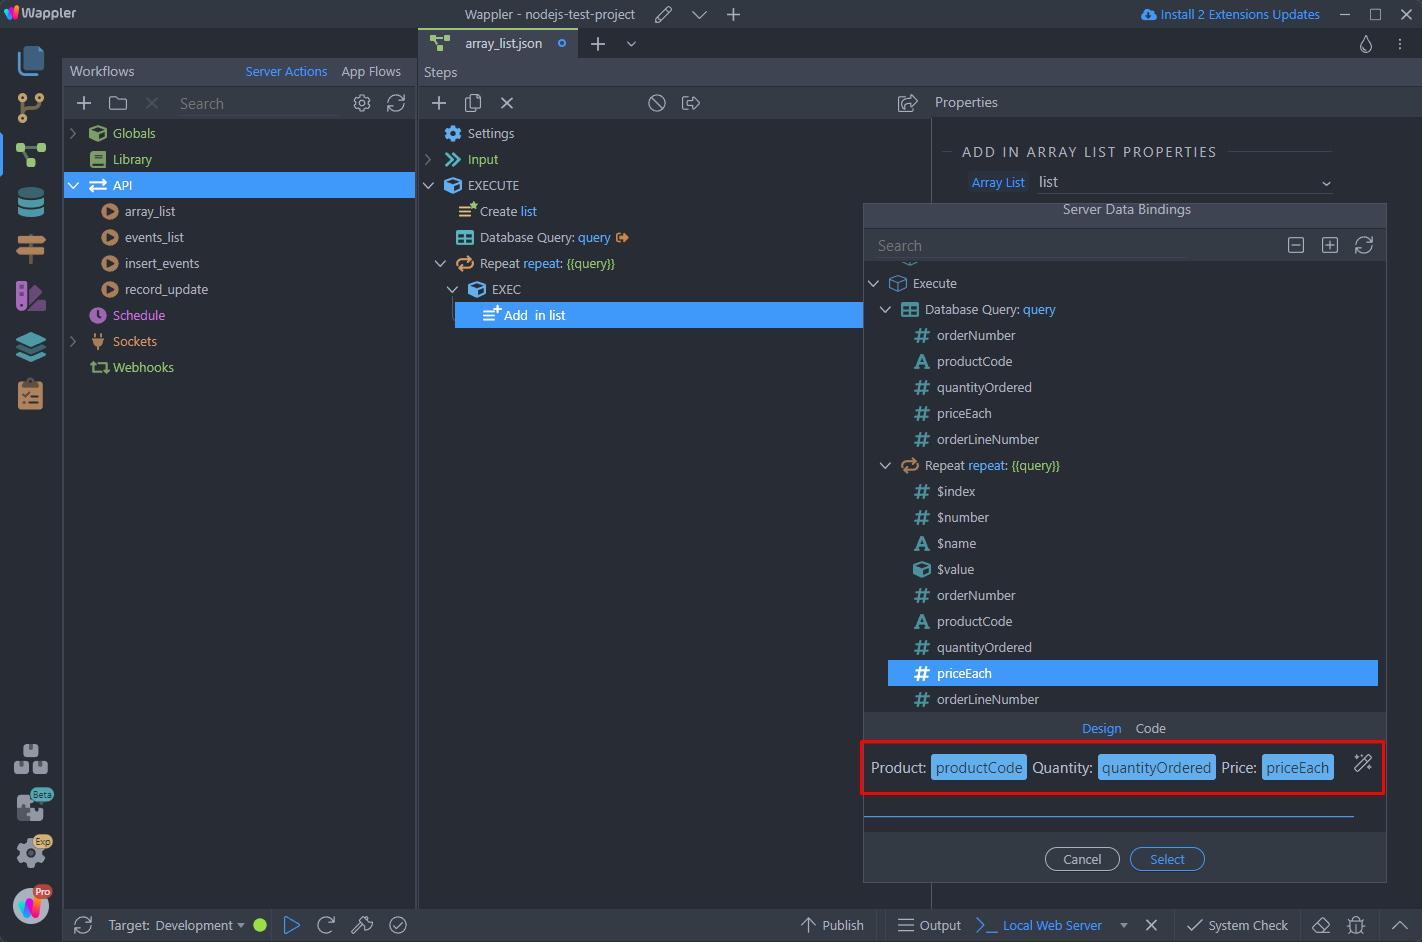
We are done with this step:
Section titled “We are done with this step:”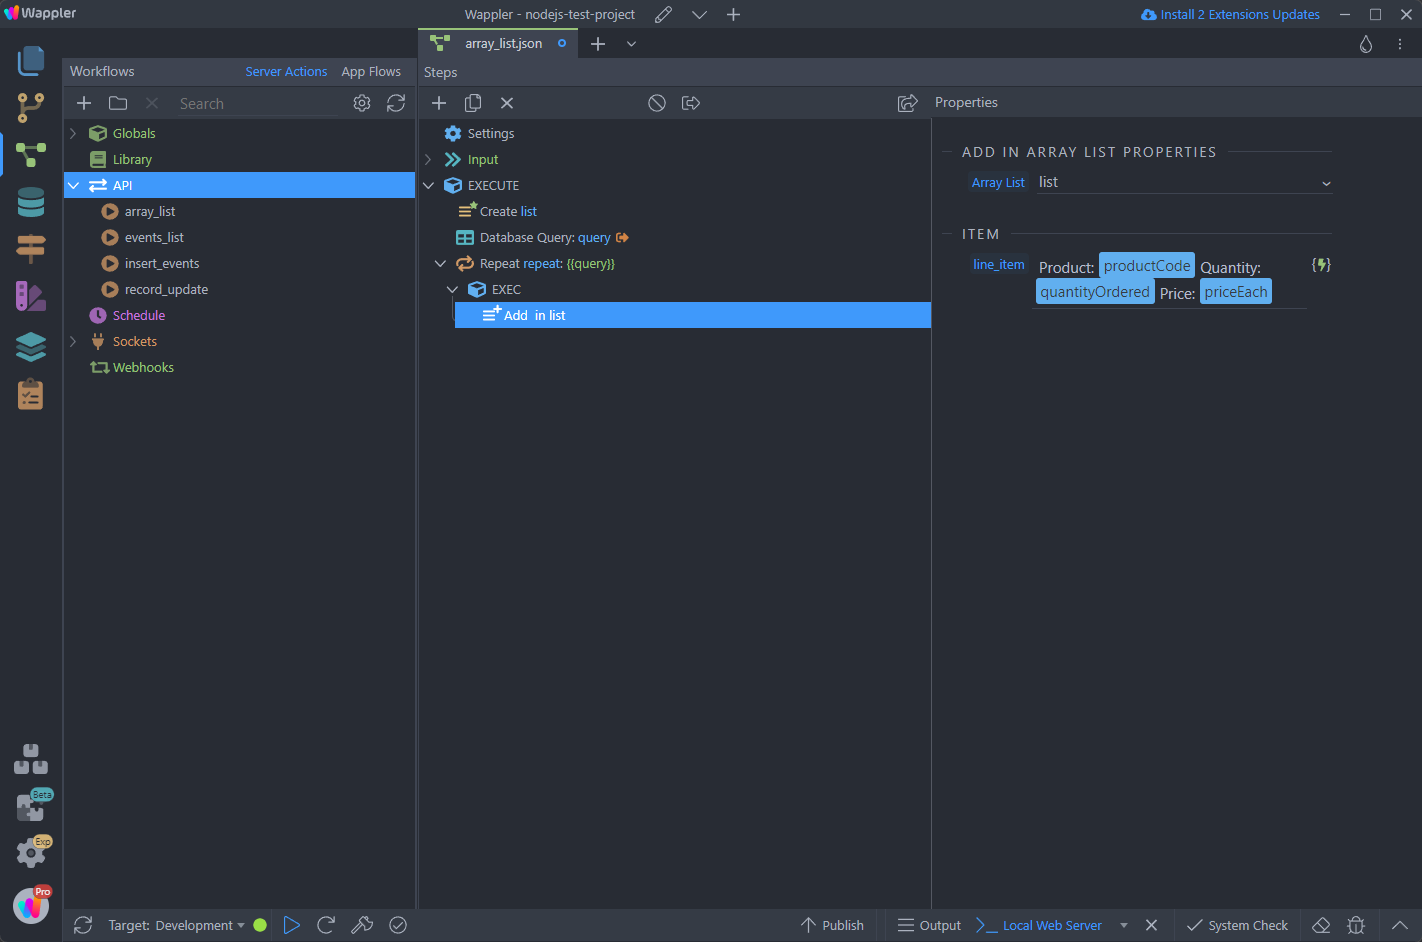
The next thing we need to is to output the array value, so we add a new step after the repeat:
Section titled “The next thing we need to is to output the array value, so we add a new step after the repeat:”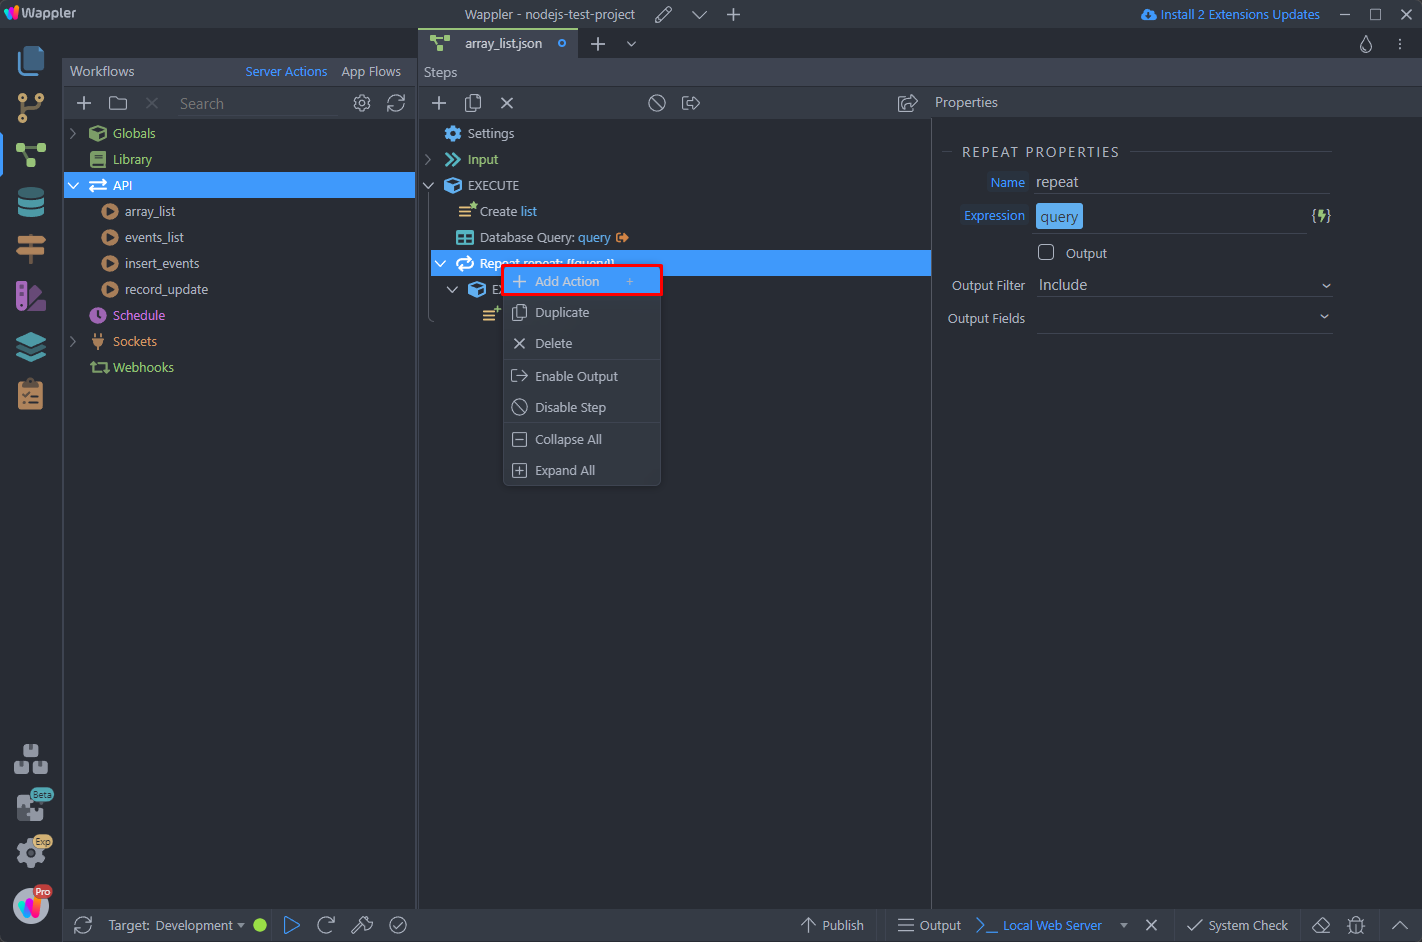
And select Get Array Value:
Section titled “And select Get Array Value:”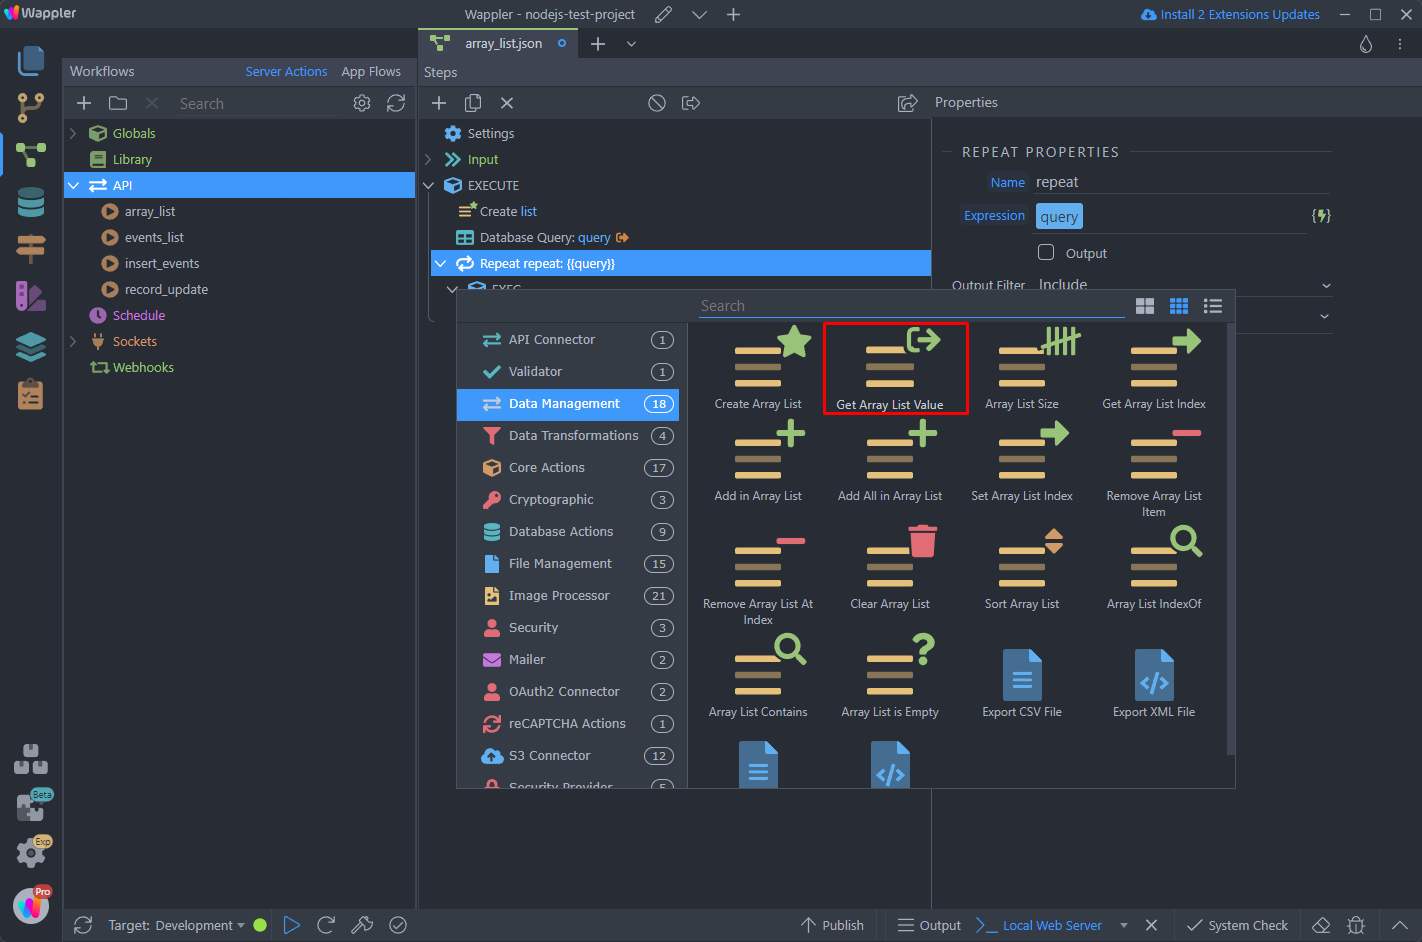
You can add a name for this step and select the array list which value you want to return:
Section titled “You can add a name for this step and select the array list which value you want to return:”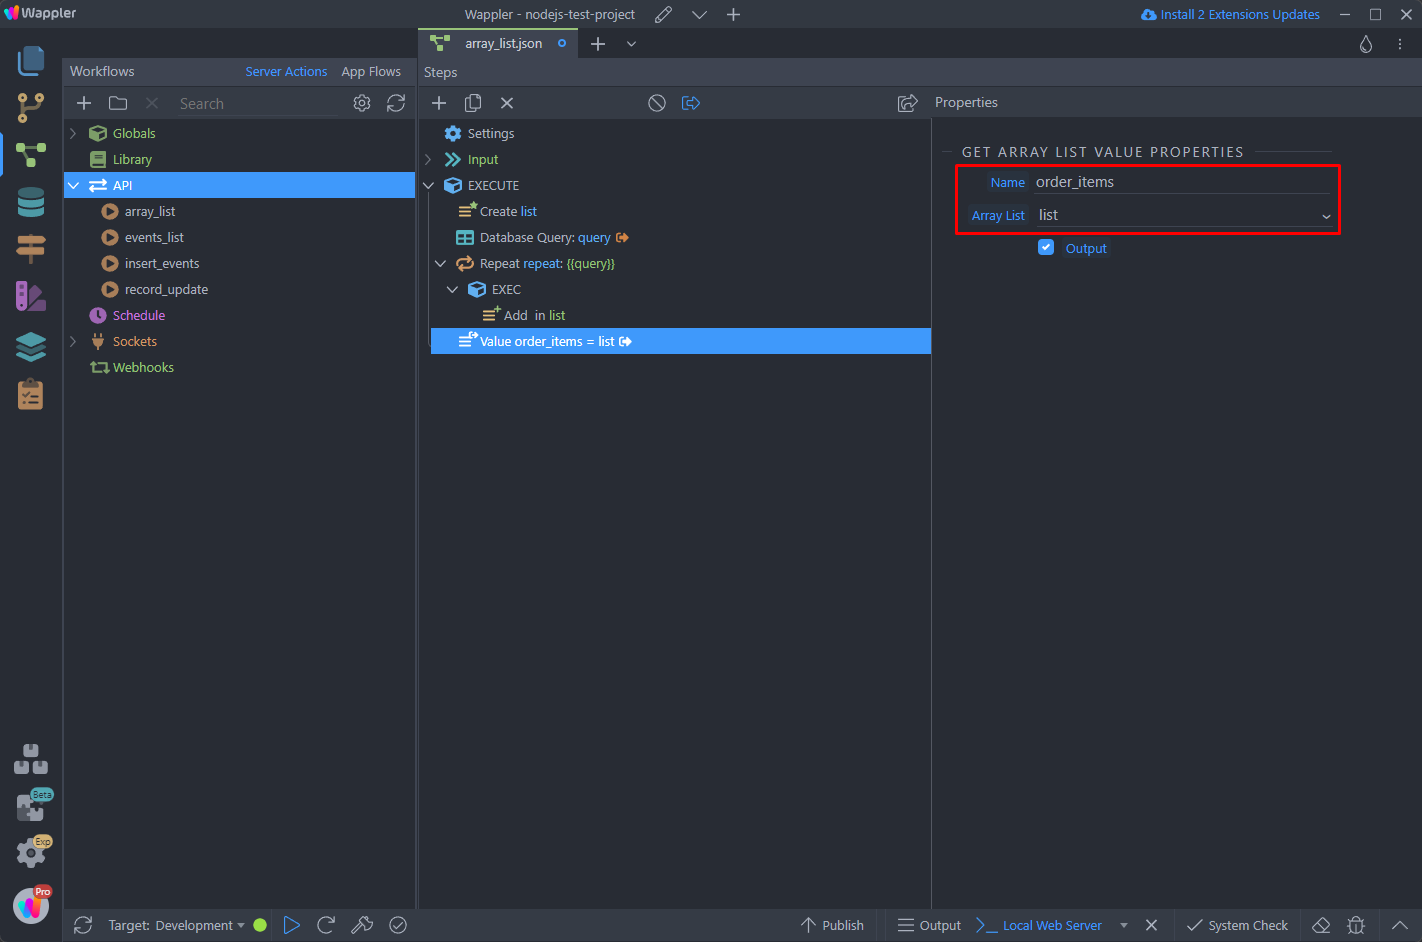
Step 25
Section titled “Step 25”You can preview the server action in a browser and see its response.
Here you can see what the database query returns and the array list items below:

Let's add a send mail step and send the array items in the mail body:
Section titled “Let's add a send mail step and send the array items in the mail body:”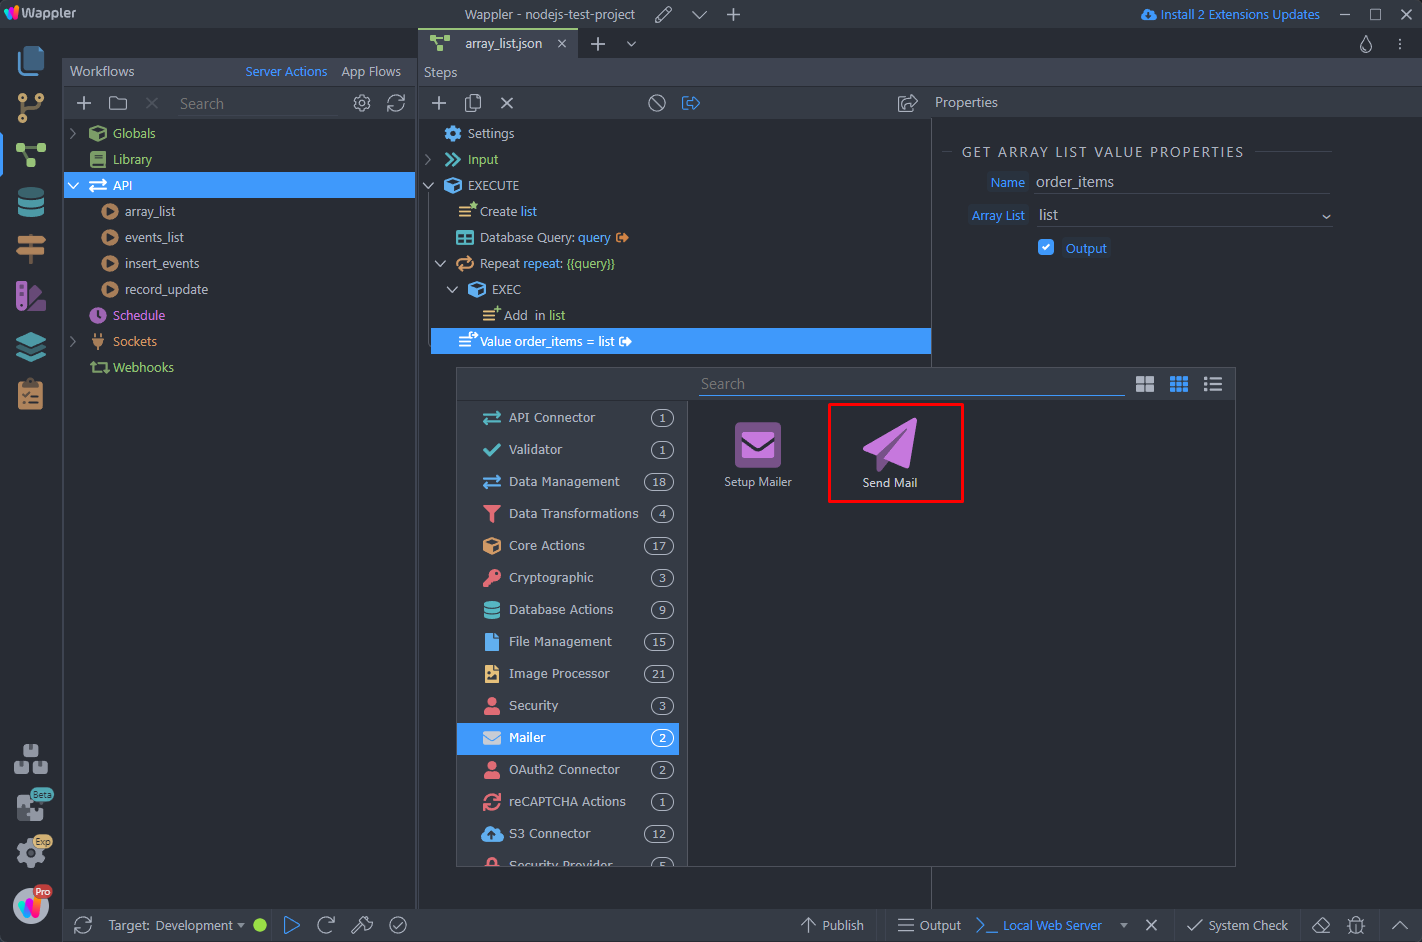
You already know how to setup a mailer and send mail step, so we will skip this. Open the Mail Body editor:
Section titled “You already know how to setup a mailer and send mail step, so we will skip this. Open the Mail Body editor:”
Step 28
Section titled “Step 28”Enter some static text if needed and setup your mail content. Then click where your items list should be displayed in the mail and click the dynamic data picker:
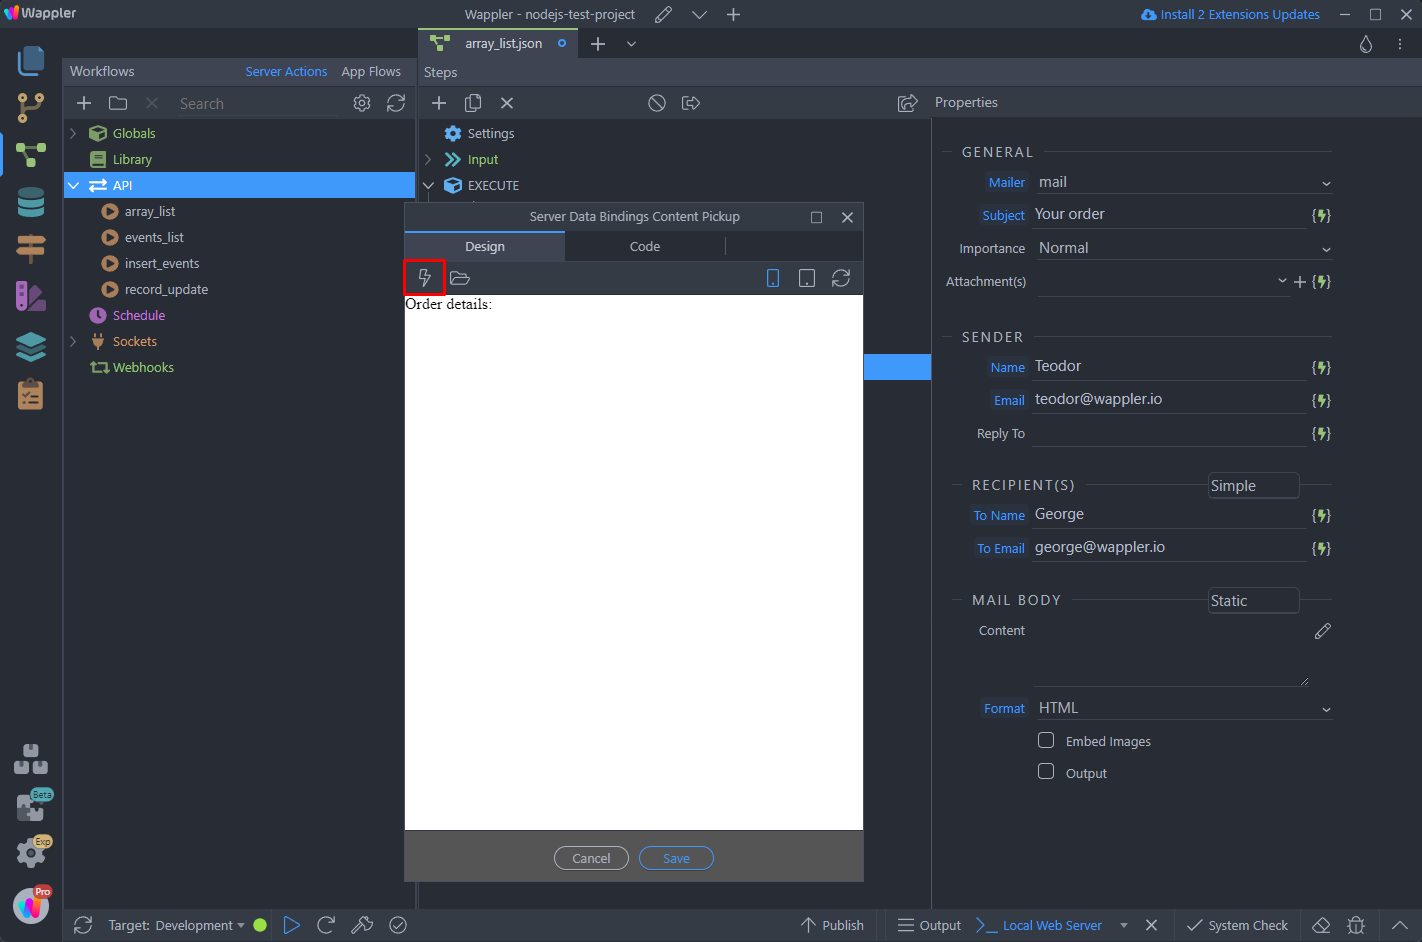
Select the Array List in the data picker and then click the Data Formatter icon:
Section titled “Select the Array List in the data picker and then click the Data Formatter icon:”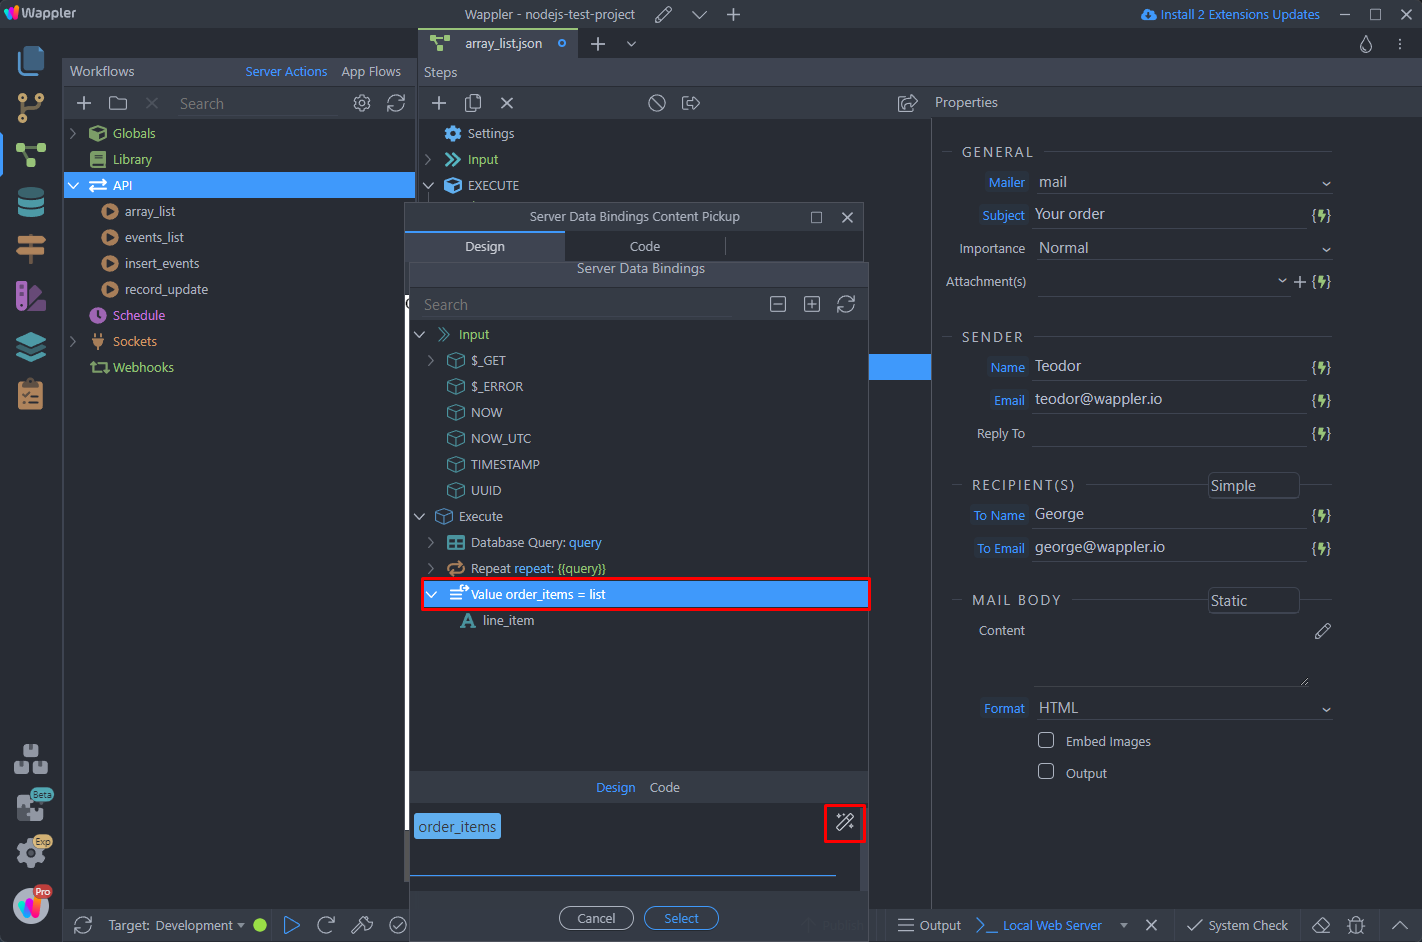
Step 30
Section titled “Step 30”We want to display the Array List as a list of strings on the page, where each item goes to a new line. We will use the join formatter for this:

The character to join the items by should be <br> in this case, so that each of the items goes to a new line:
Section titled “The character to join the items by should be <br> in this case, so that each of the items goes to a new line:”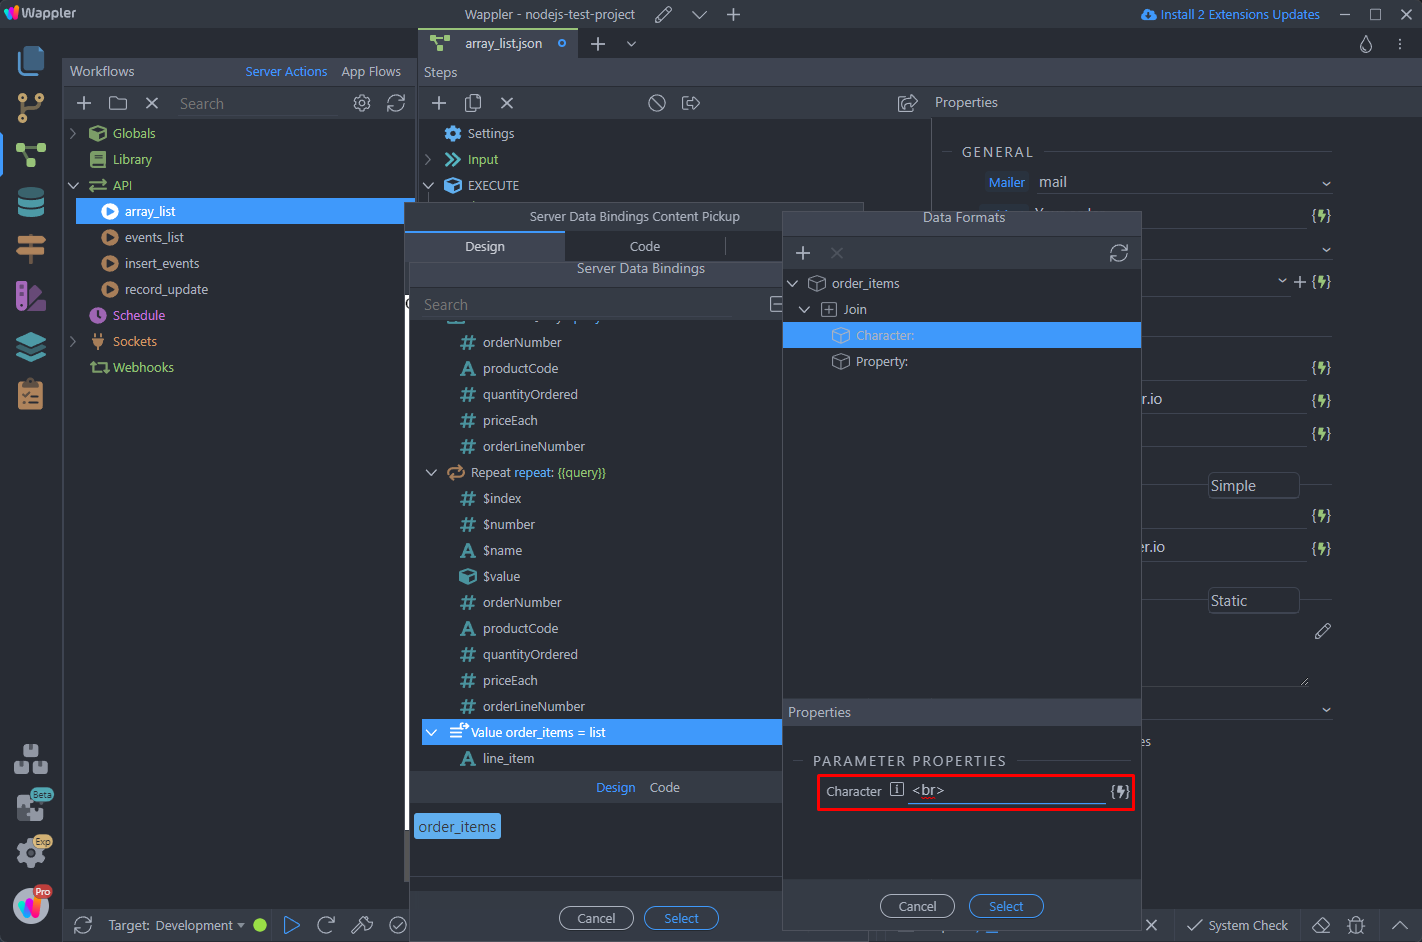
Then select the property:
Section titled “Then select the property:”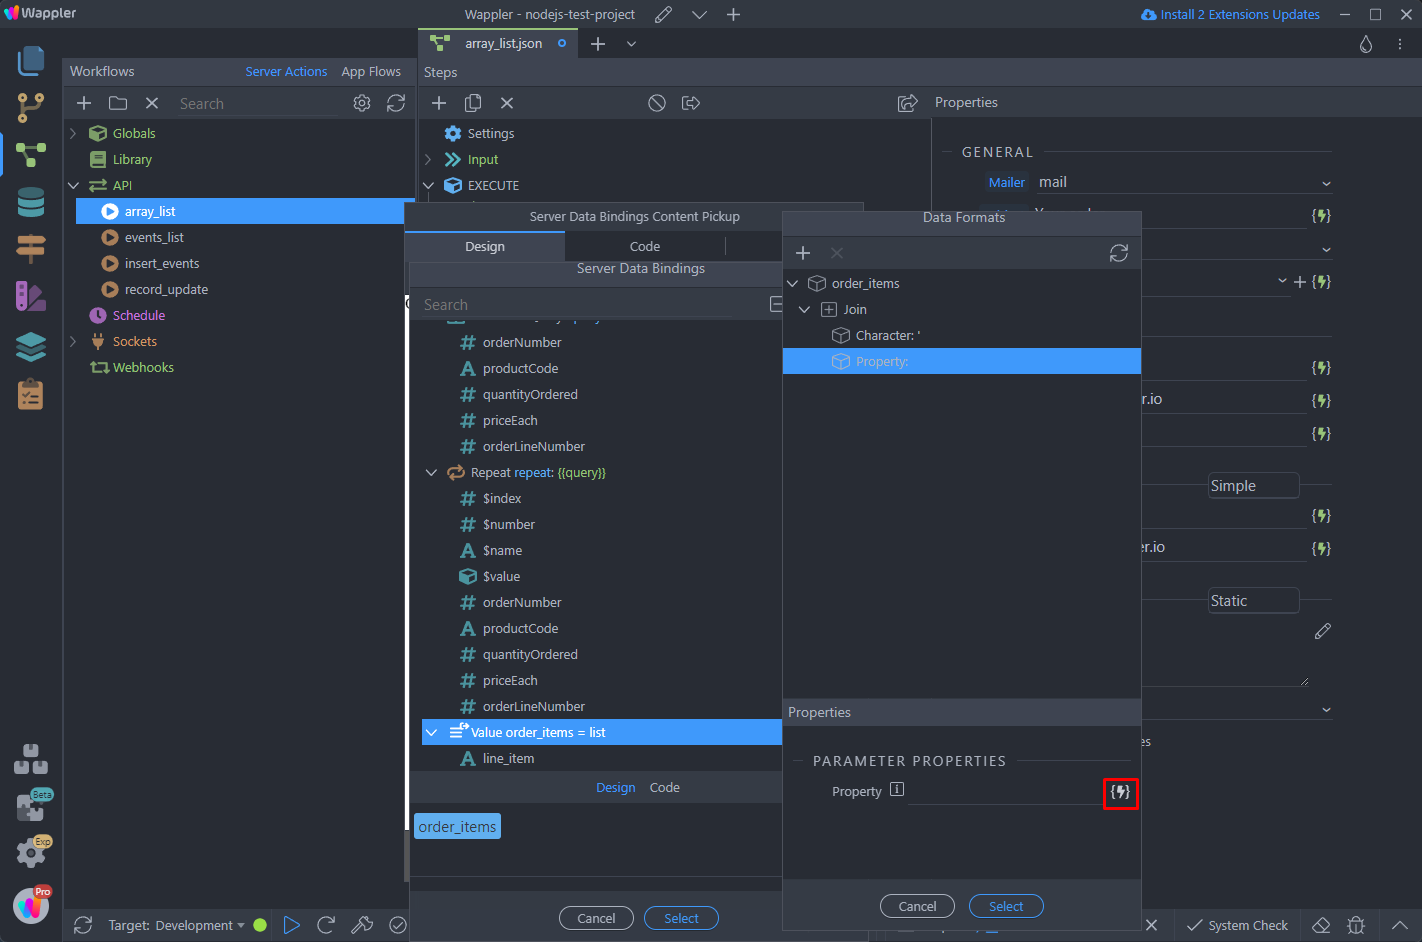
This, of course, is the line_items returned by our Array List:
Section titled “This, of course, is the line_items returned by our Array List:”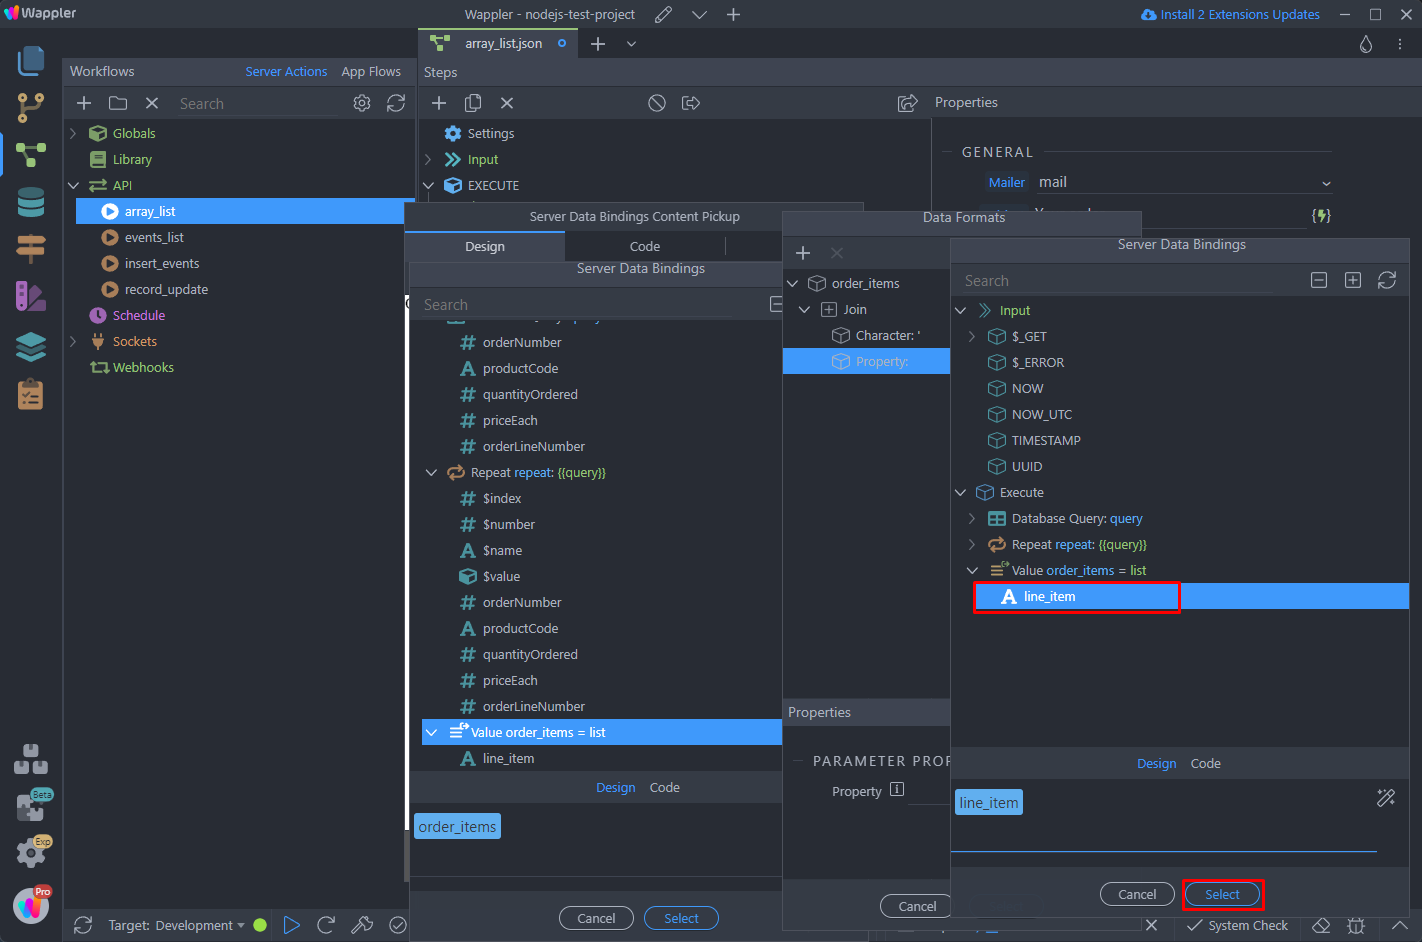
Click Select and you are done:
Section titled “Click Select and you are done:”
You can see the text and dynamic data in the mail body dialog:
Section titled “You can see the text and dynamic data in the mail body dialog:”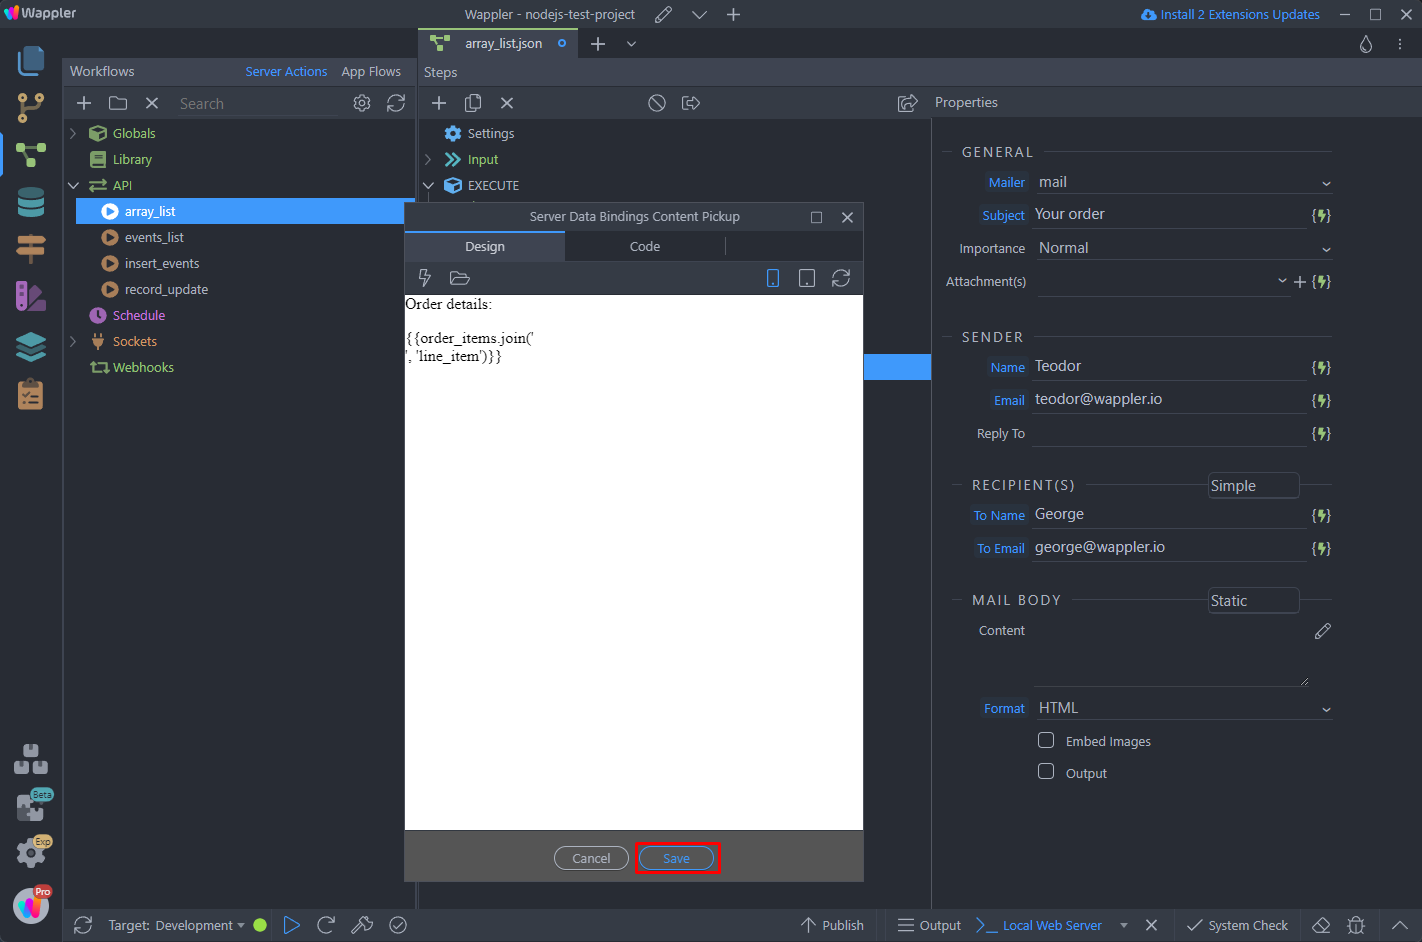
Save your server action and you can preview the results in your browser:
Section titled “Save your server action and you can preview the results in your browser:”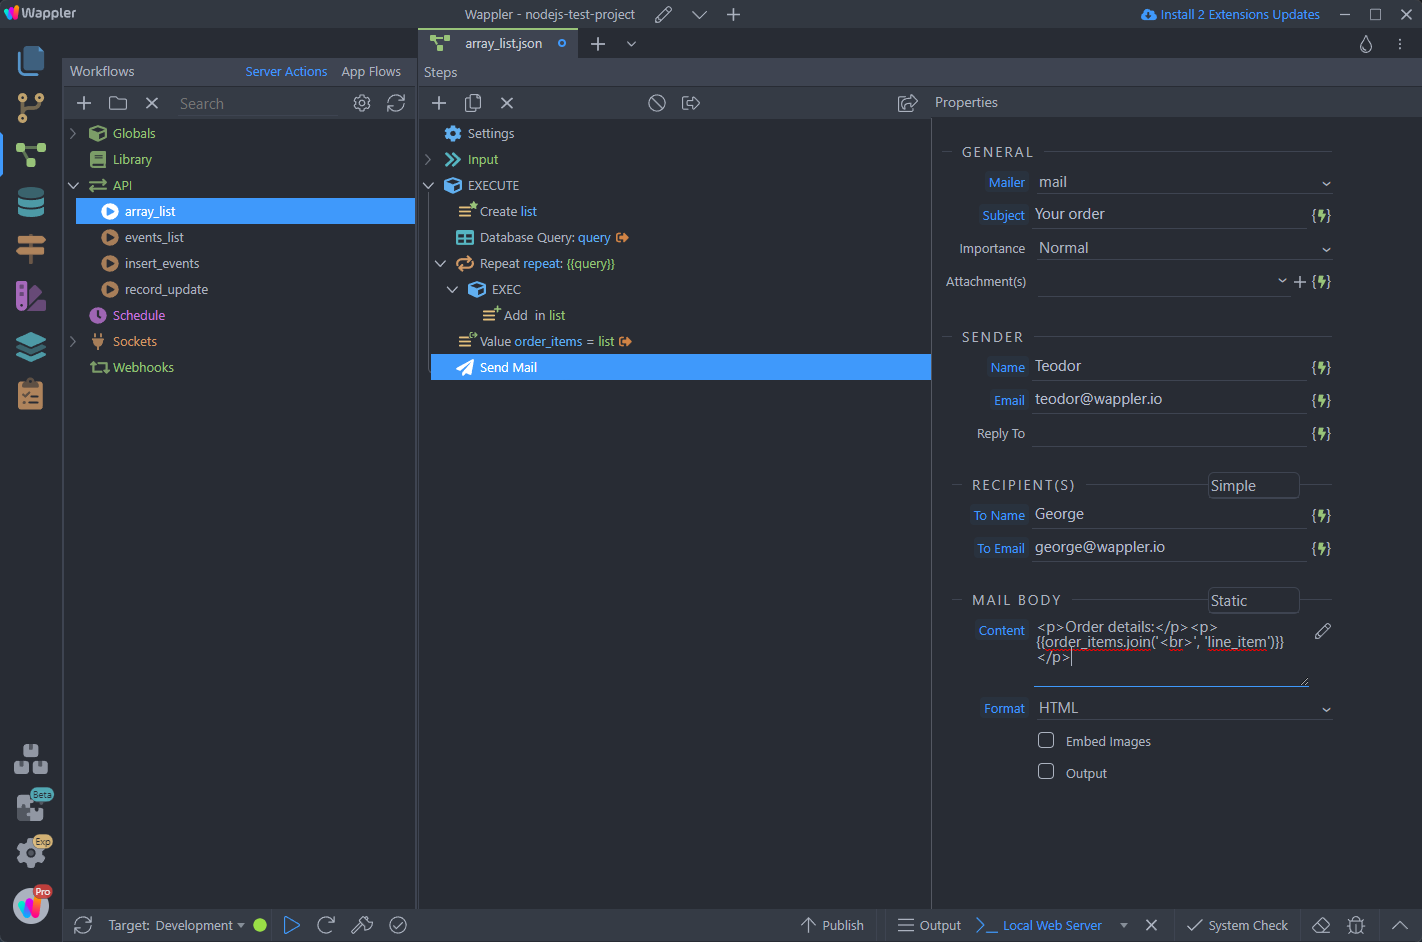
Here's the result in our inbox:
Section titled “Here's the result in our inbox:”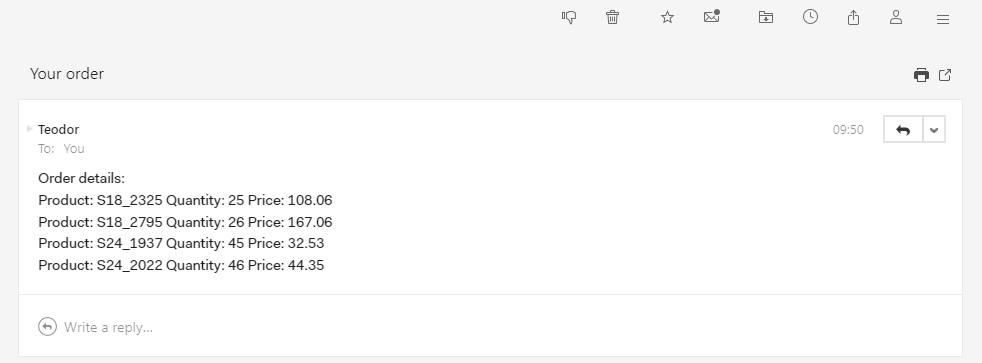
Merging 2 Different API/Query Results
Section titled “Merging 2 Different API/Query Results”You can use the Array List component to also merge 2 or more different query or api action results. For example - you get two different queries from different databases, or you get results from a remote API and from a database query and want to append the results in a single array.
So in our example we have a database query and an API Action that gets its results from an external data API:
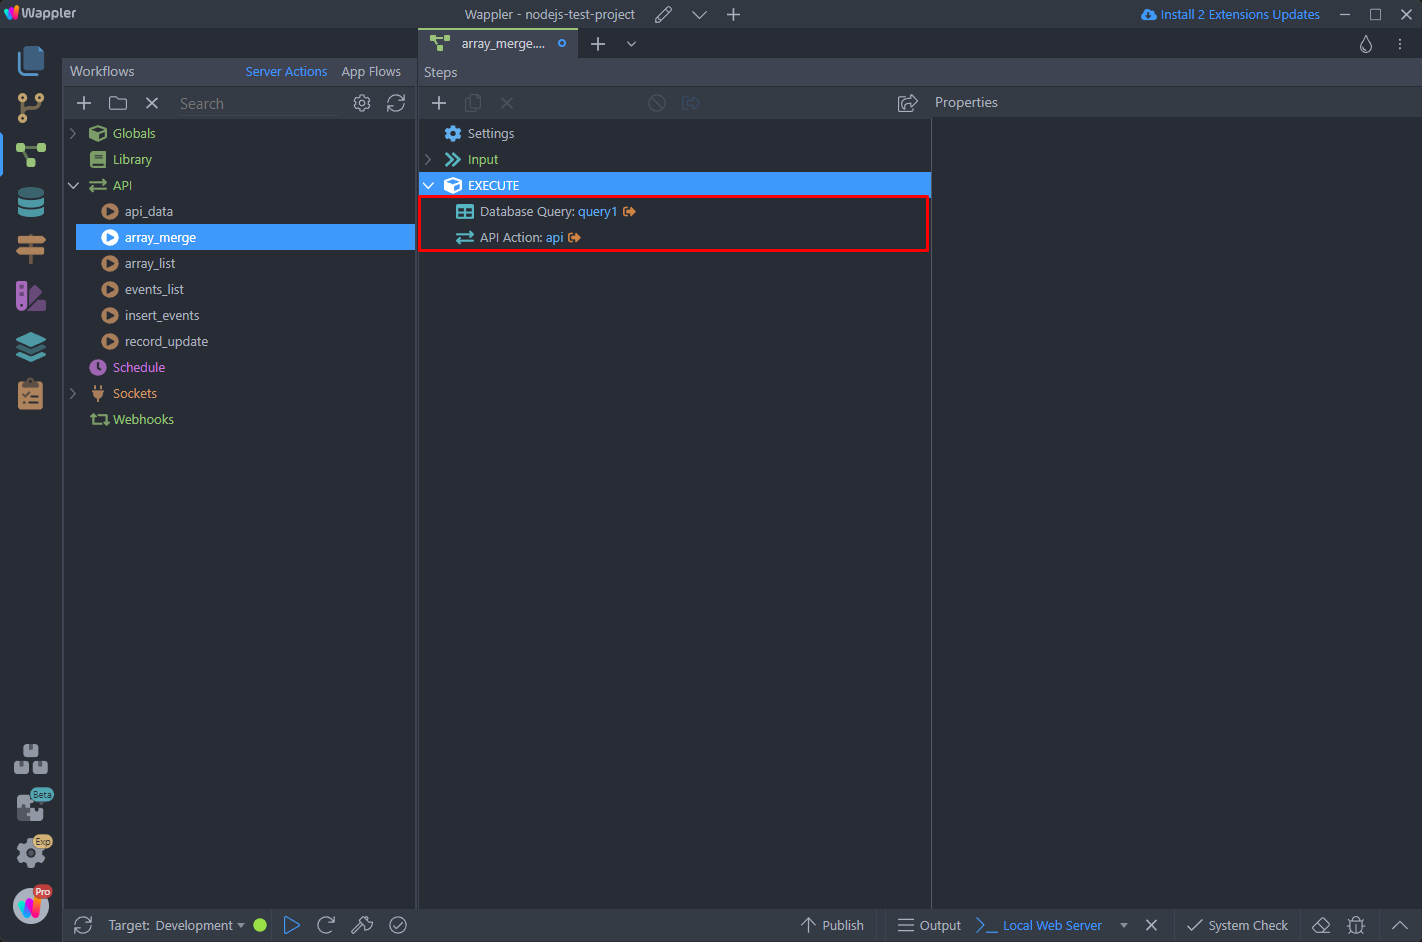
They both return the same structure and we want to merge the two results:
Section titled “They both return the same structure and we want to merge the two results:”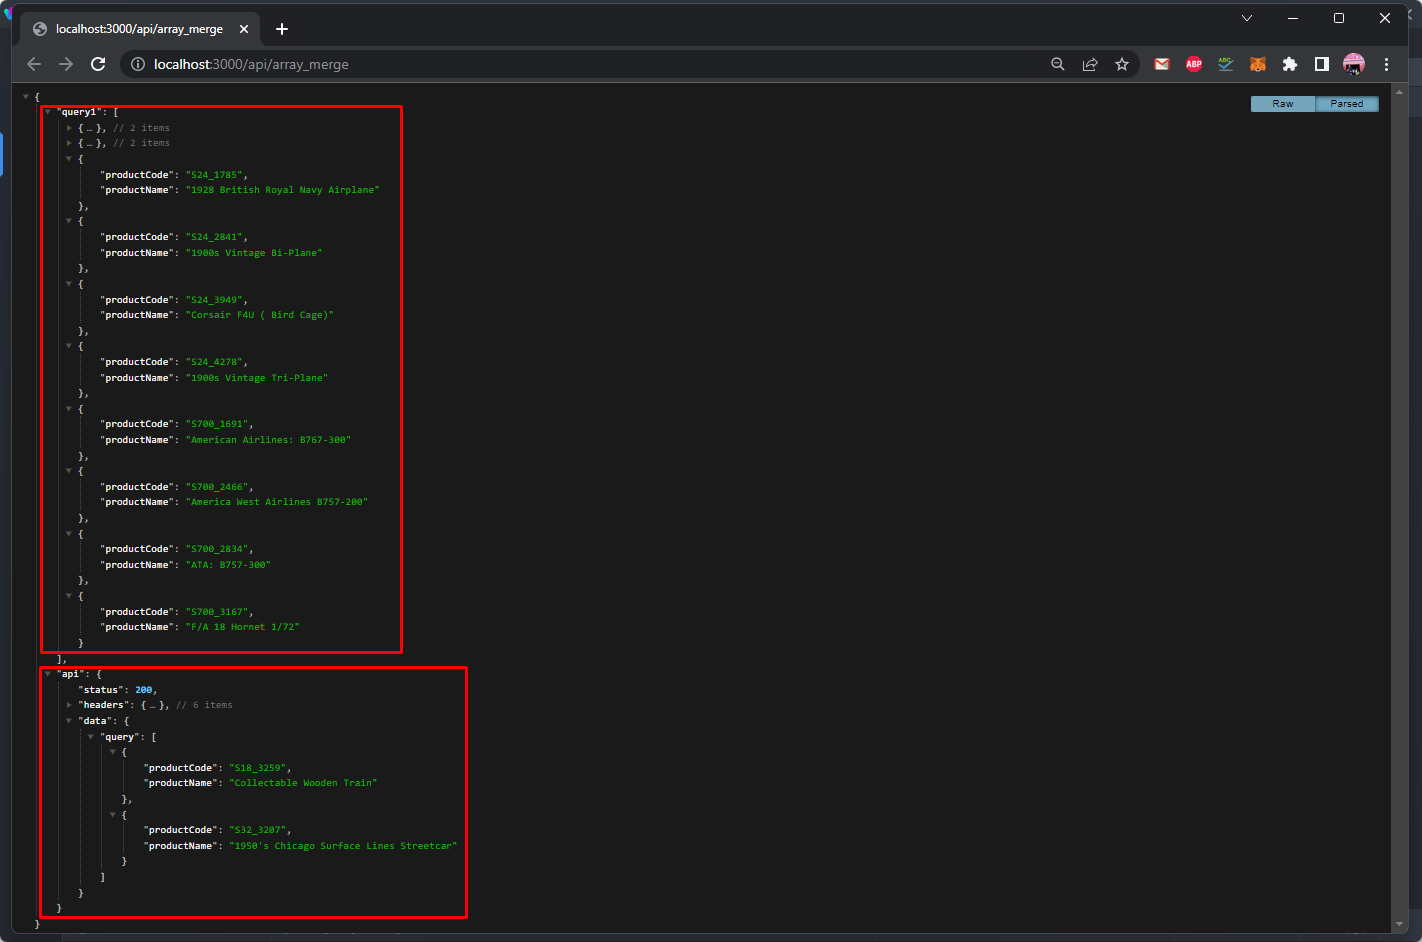
Step 41
Section titled “Step 41”First we need to create our Array List. Right click the first data source/database query in order to add a step after it:

Create an Array List:
Section titled “Create an Array List:”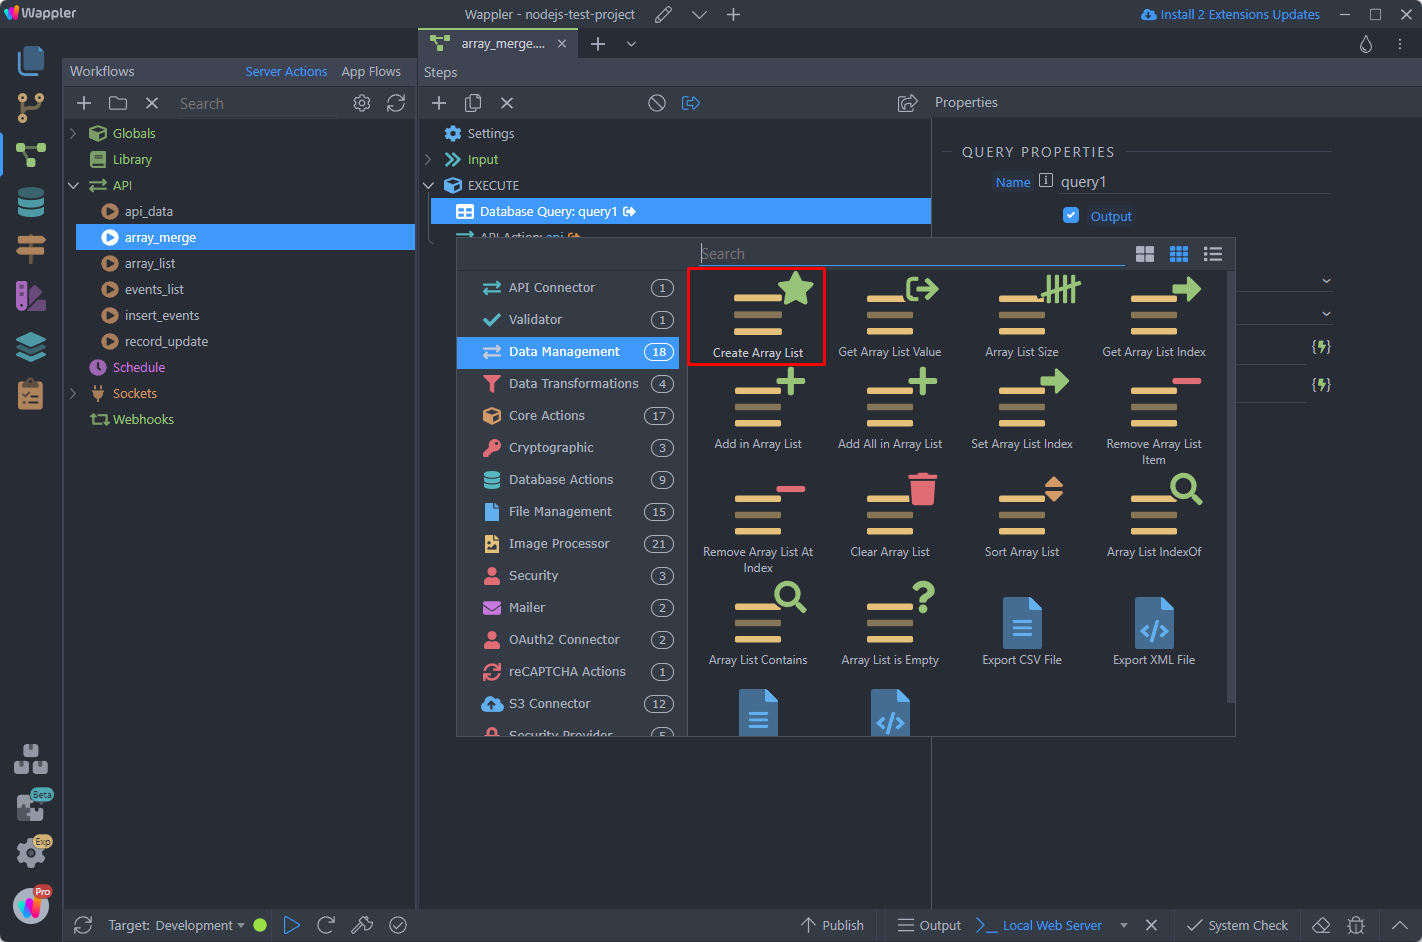
And click the dynamic data picker icon in order to add a value for the Array List:
Section titled “And click the dynamic data picker icon in order to add a value for the Array List:”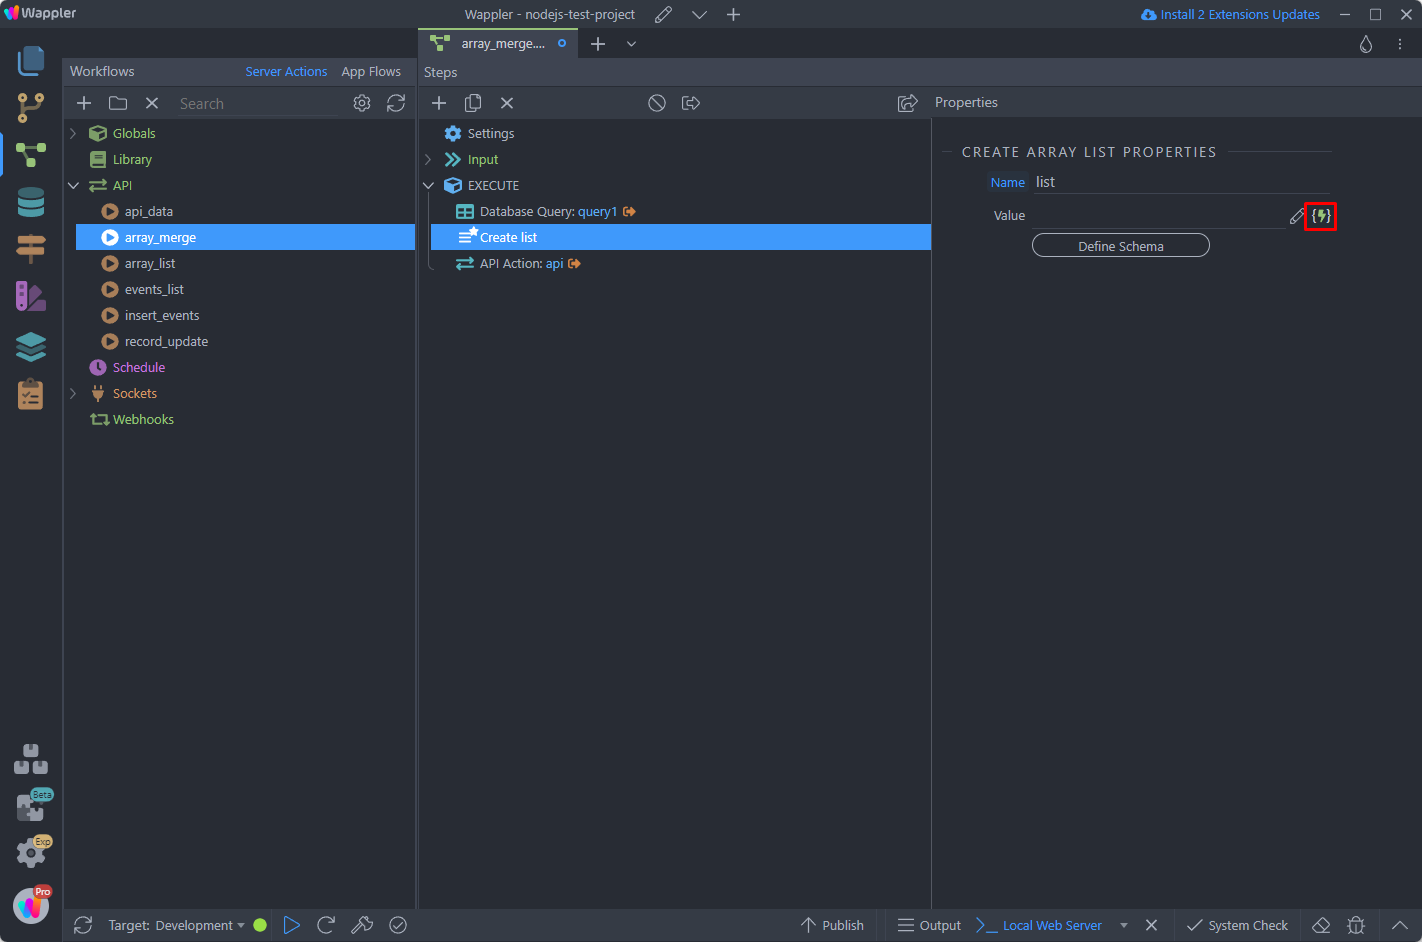
We select our database query. This will add all of the database query results to the array:
Section titled “We select our database query. This will add all of the database query results to the array:”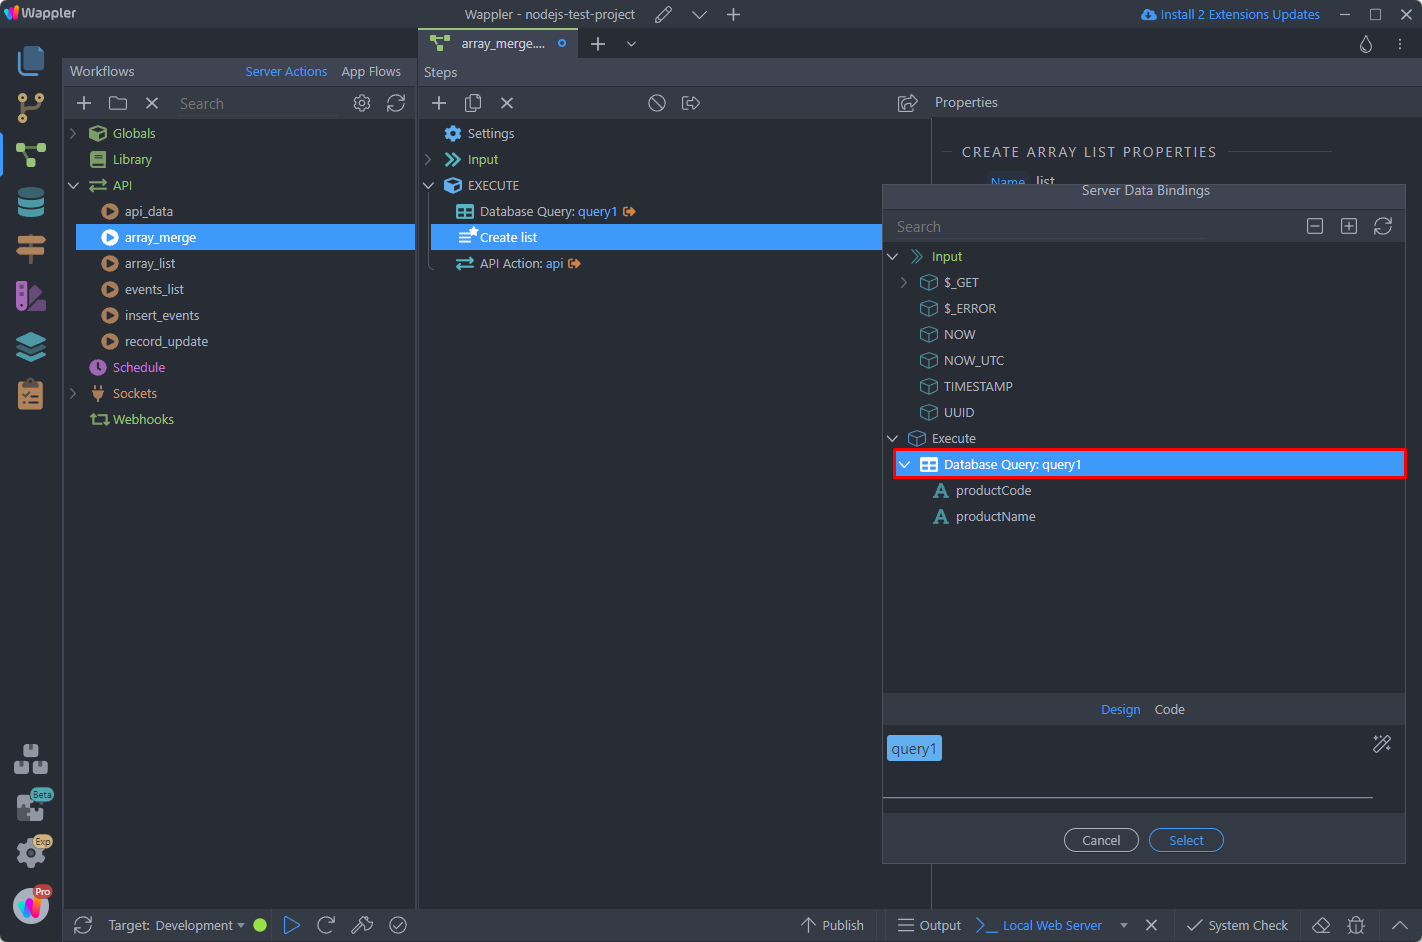
Then add another step, after the second data source, the API action in our case:
Section titled “Then add another step, after the second data source, the API action in our case:”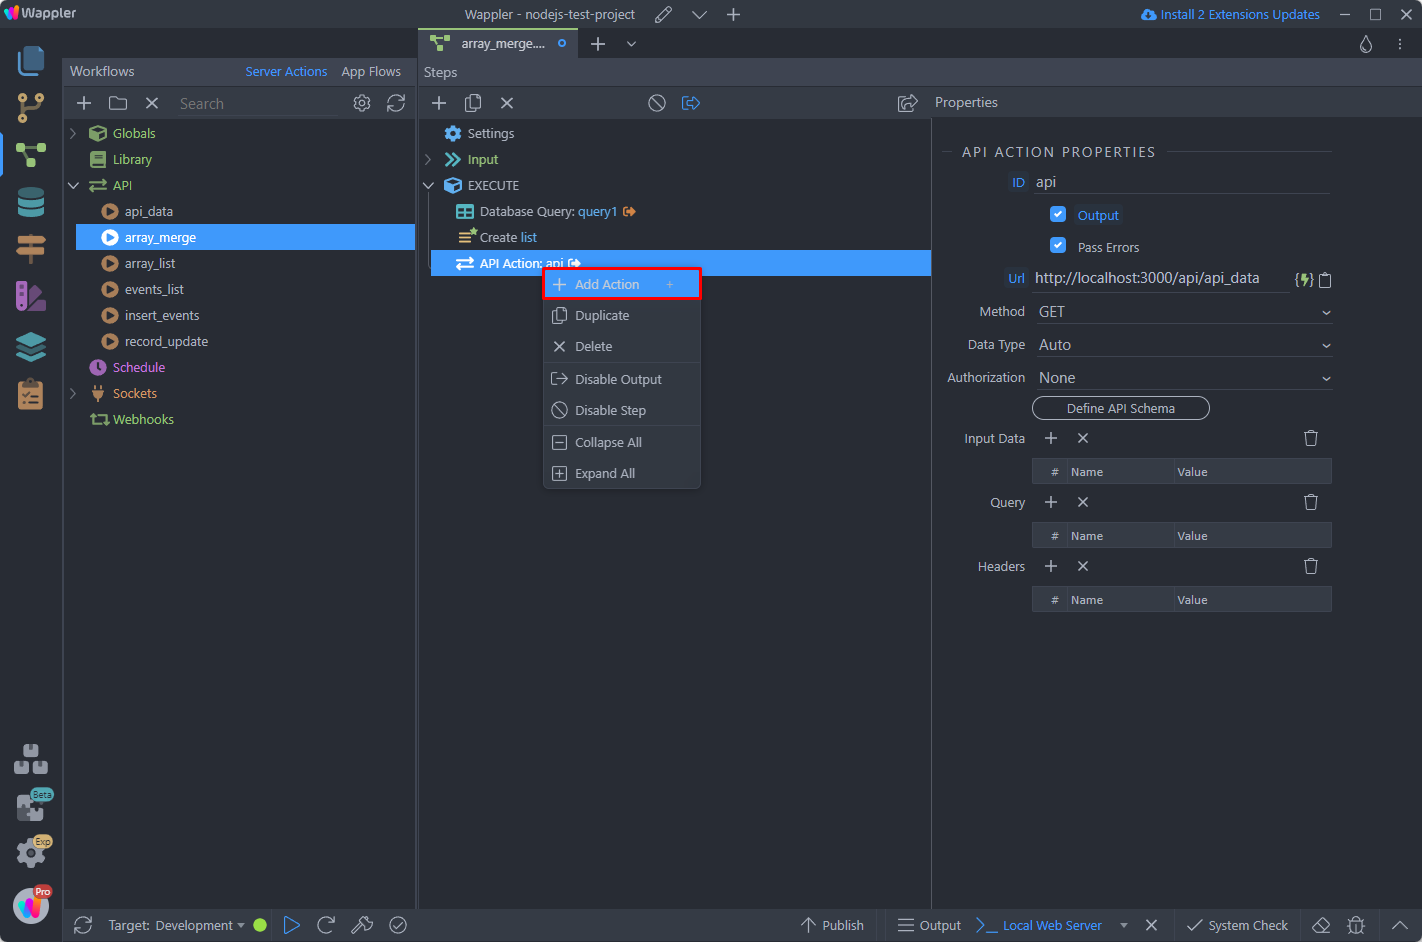
Step 46
Section titled “Step 46”And select Add All in Array List. This step is used in order to add all the items from a data source to the array list:
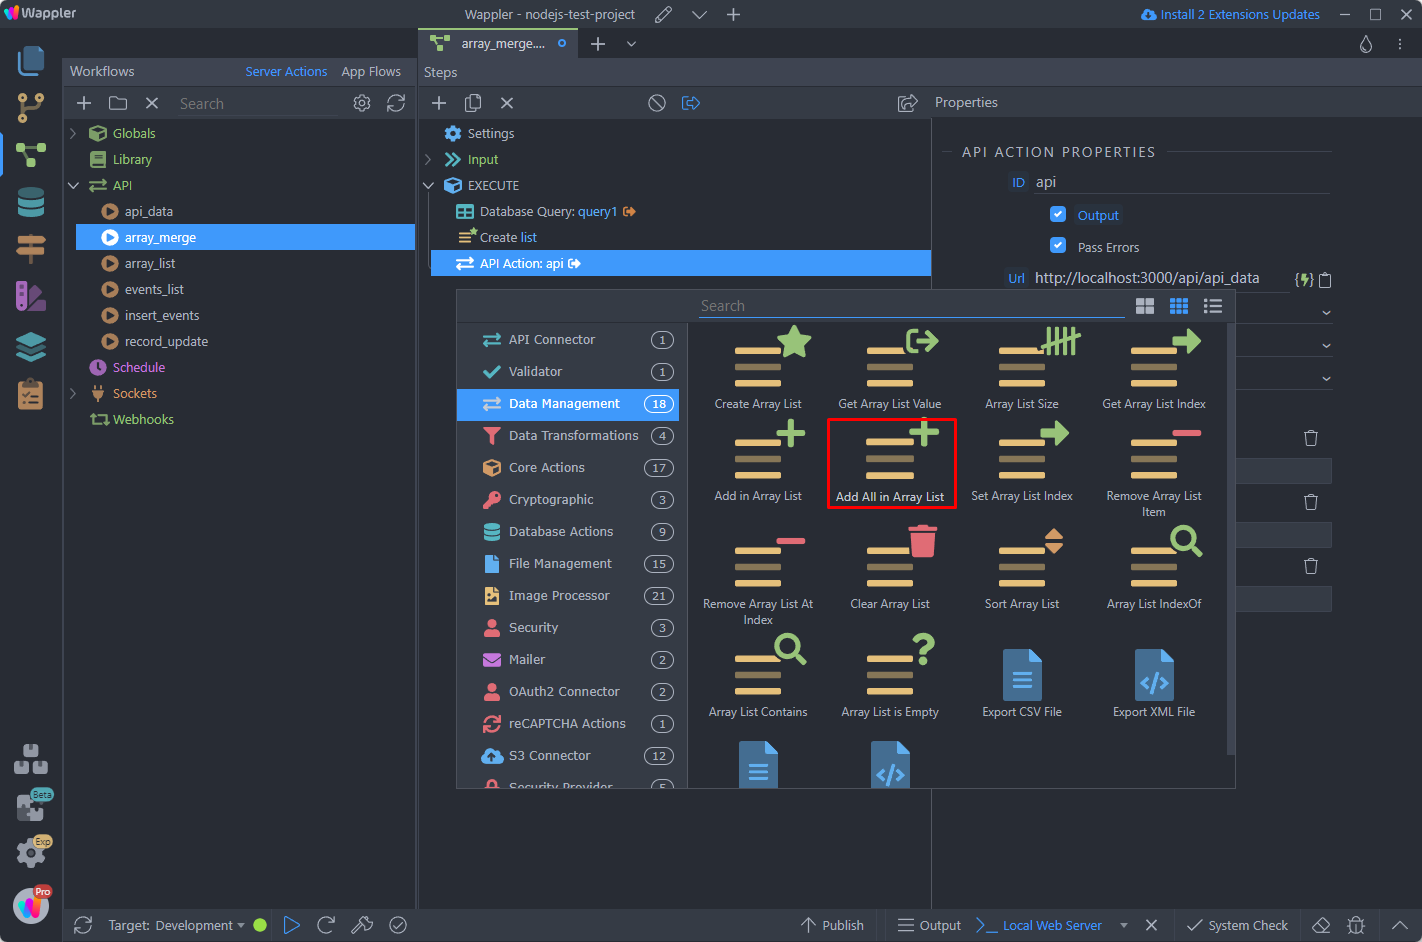
Select the dynamic data picker for the value to add:
Section titled “Select the dynamic data picker for the value to add:”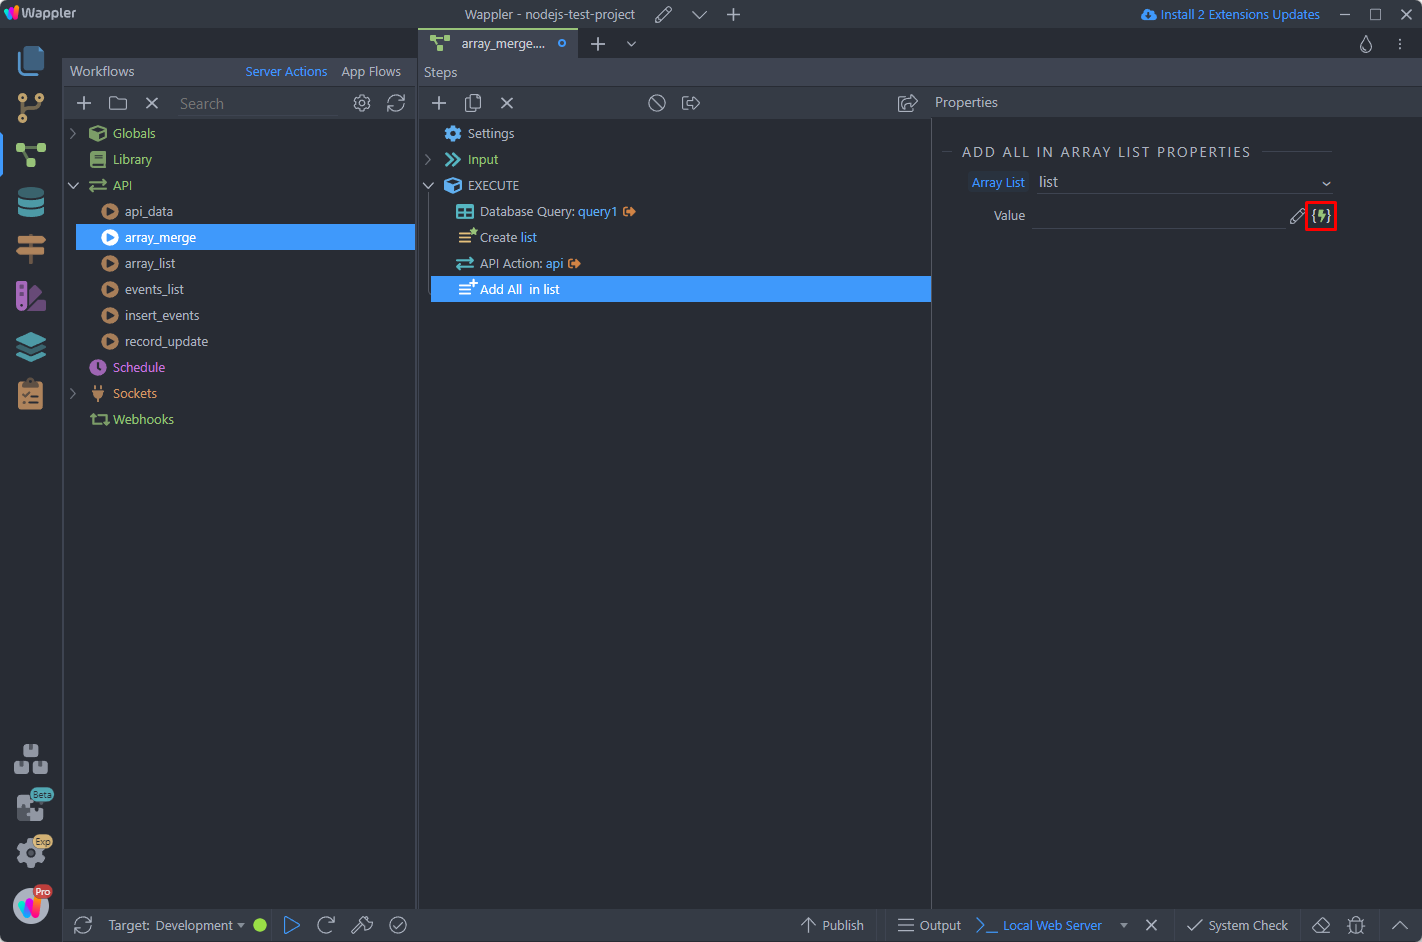
And then we select the data we need from our API data source:
Section titled “And then we select the data we need from our API data source:”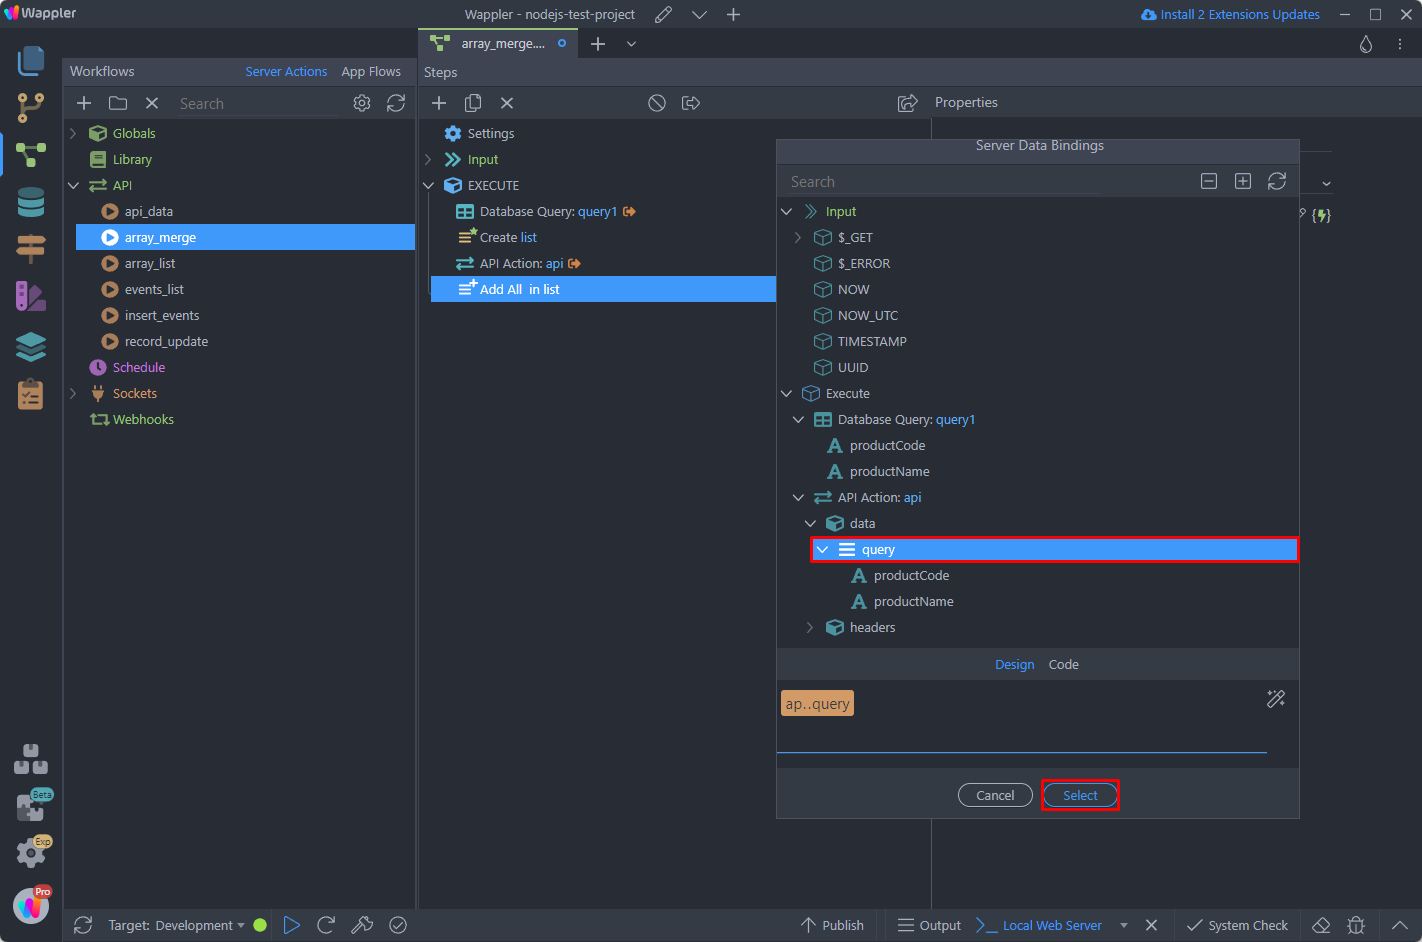
The last step would be to output the merged list value. Add a new step:
Section titled “The last step would be to output the merged list value. Add a new step:”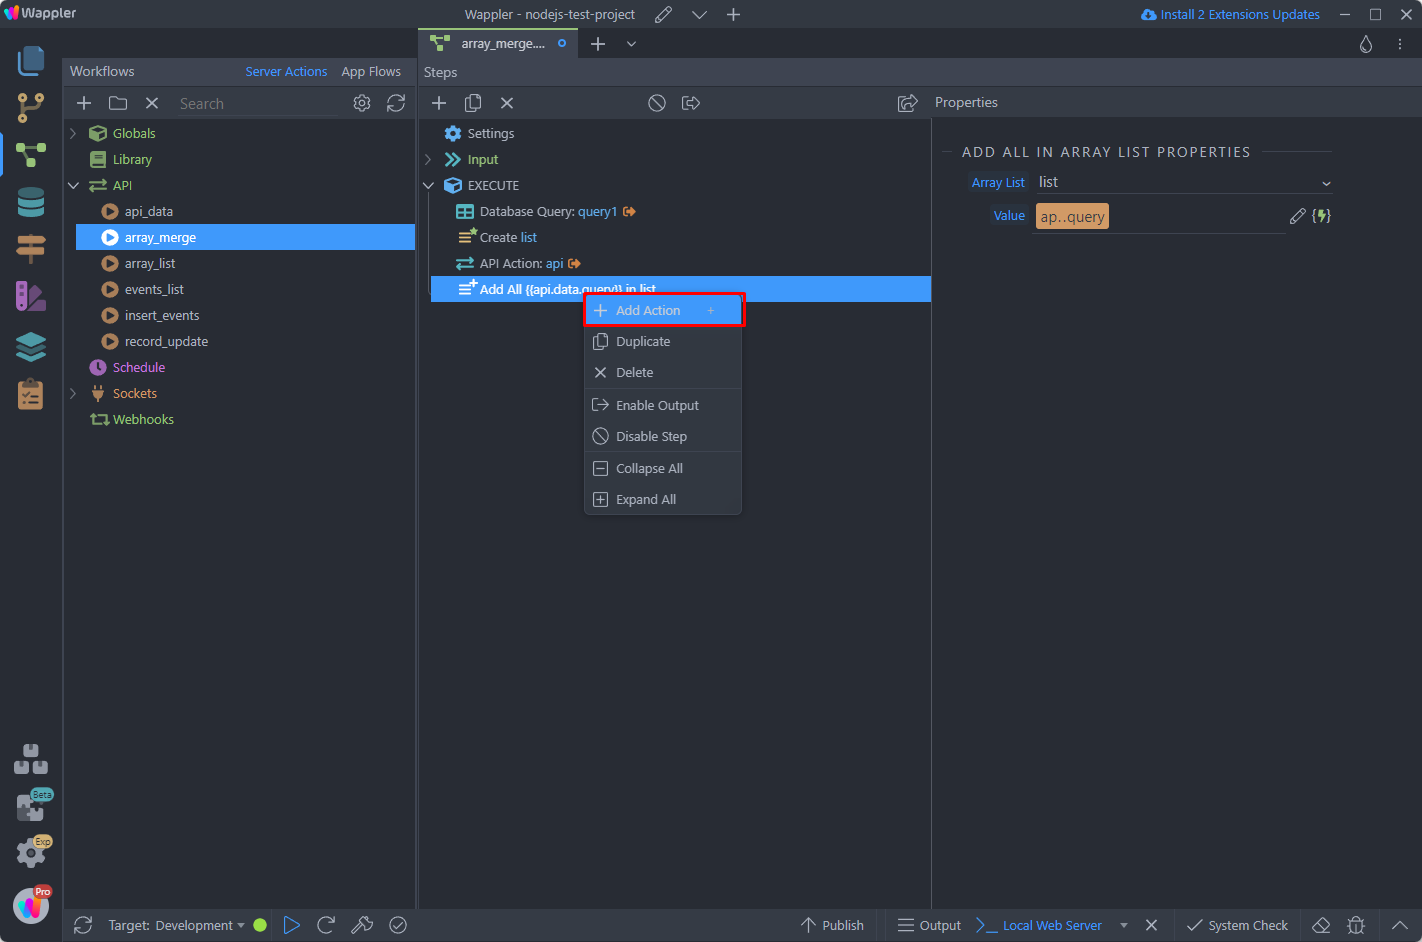
Select Get Array List Value:
Section titled “Select Get Array List Value:”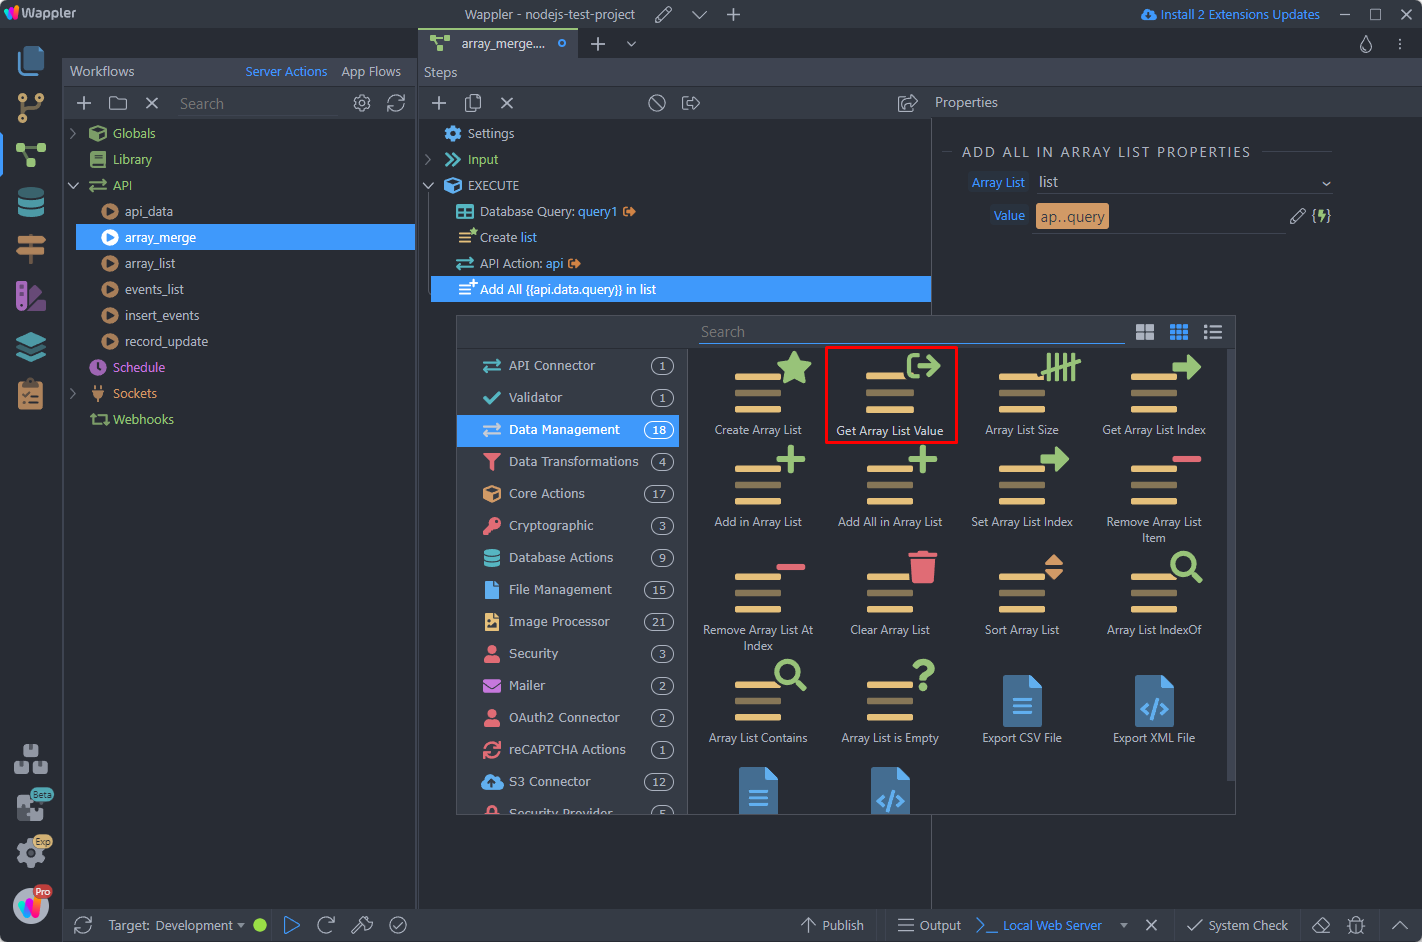
Add a name for this step and select the Array List which value you want to output:
Section titled “Add a name for this step and select the Array List which value you want to output:”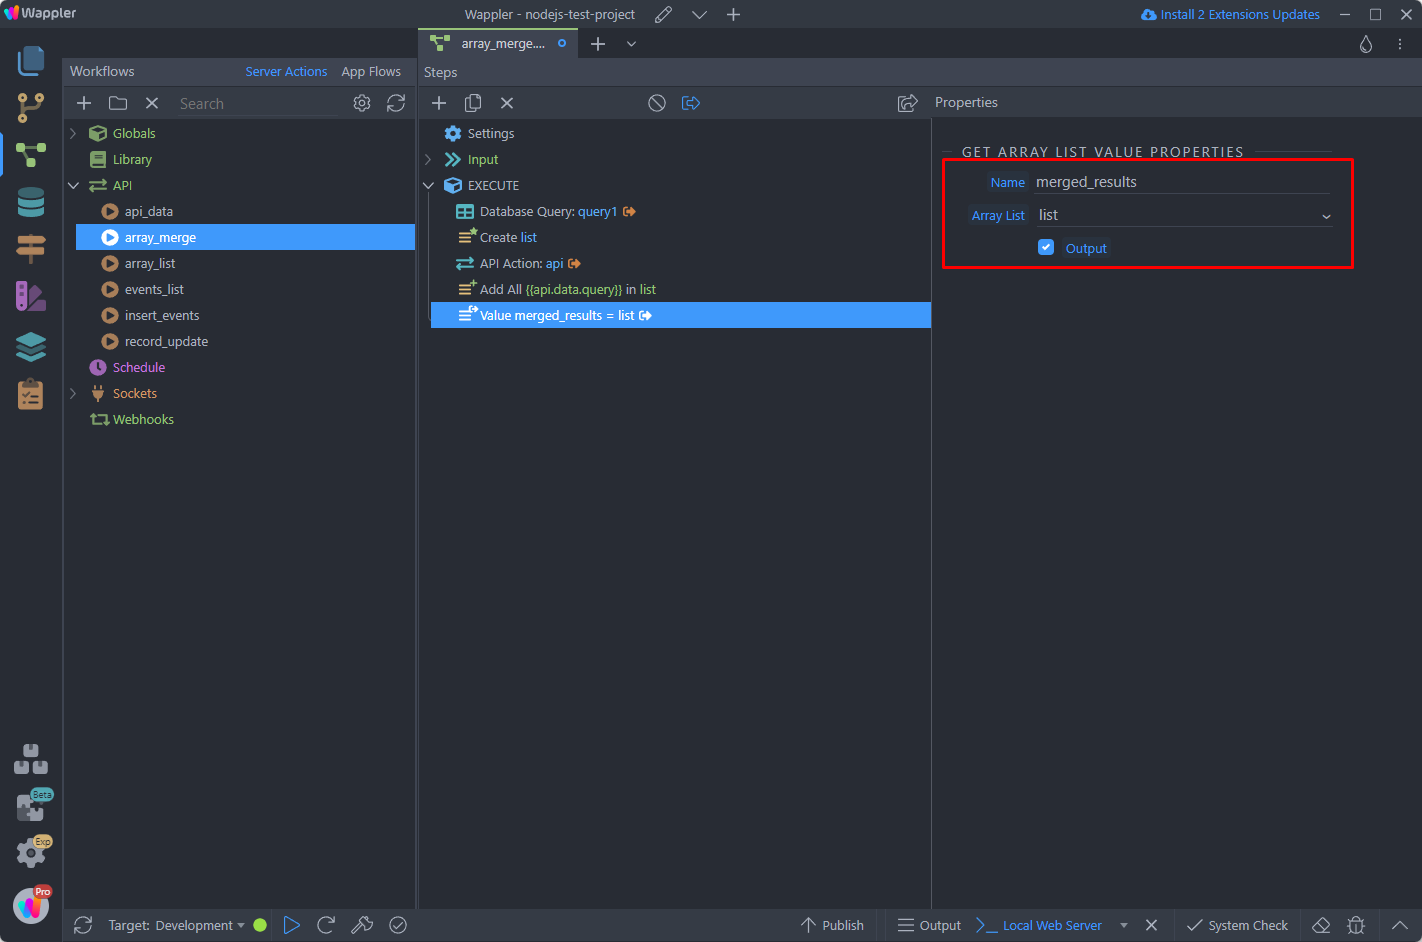
Save your server action and you can preview the results in the browser.
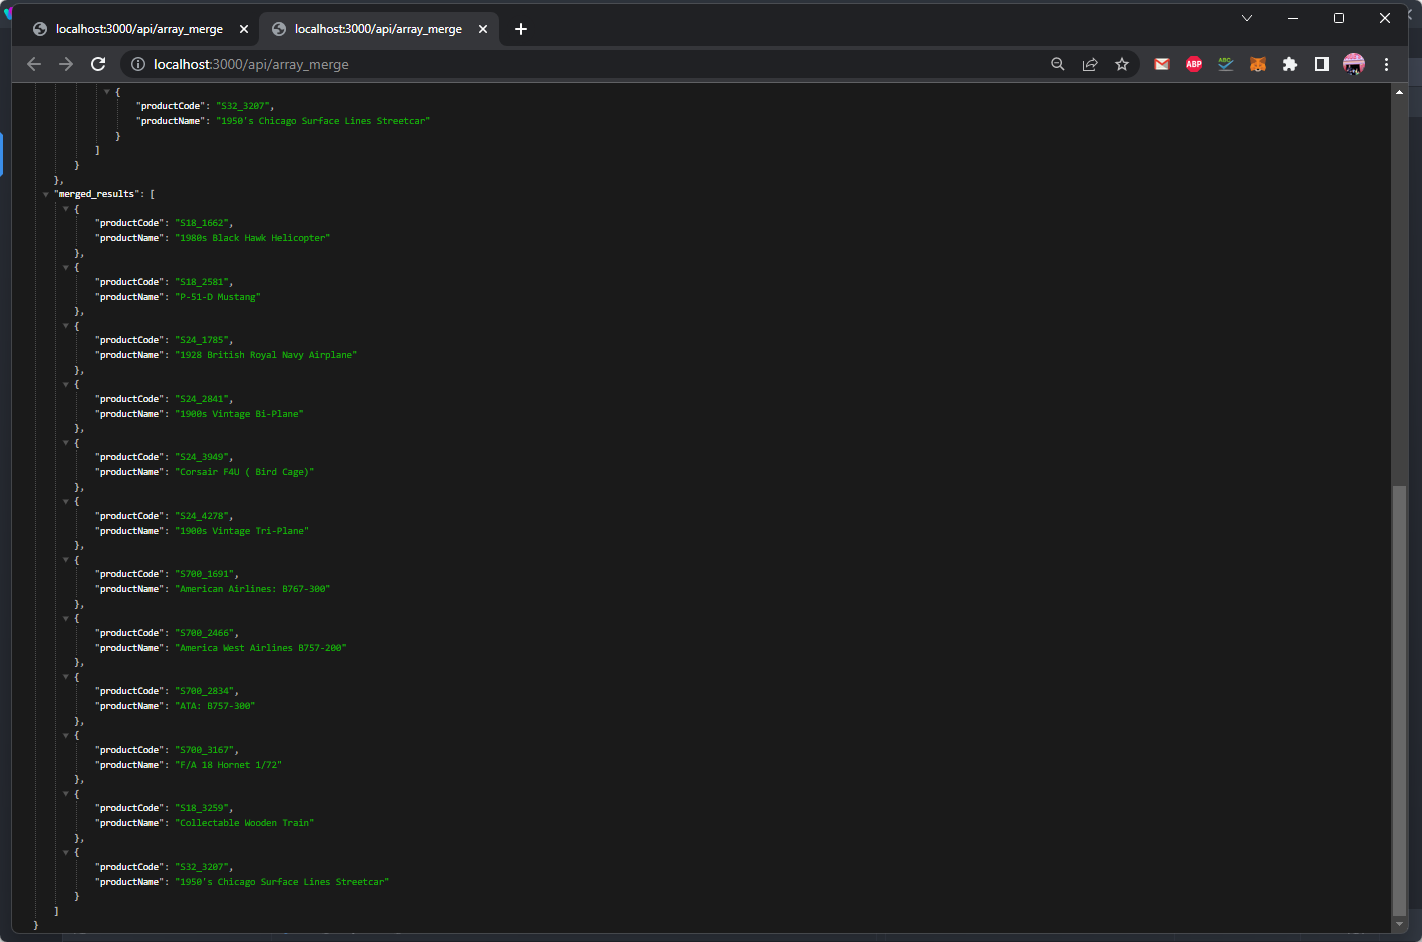
Section titled “Save your server action and you can preview the results in the browser.”You can see the Array List values - the two data source results have been merged: