
Dynamic Attributes
Dynamic attributes in Wappler give you powerful option for dynamically binding attributes like - image sources, href attributes, names, input values etc., as well as show/hide or disable elements on t
Step 1
Section titled “Step 1”Dynamic attributes in Wappler give you powerful option for dynamically binding attributes like - image sources, href attributes, names, input values etc., as well as show/hide or disable elements on the page, based on specific dynamic condition.
Binding dynamic image source
Section titled “Binding dynamic image source”In order to bind a dynamic image source, first you need to add an image on your page. We have a repeat region, which we created from a database query. We right click the element we are repeating:
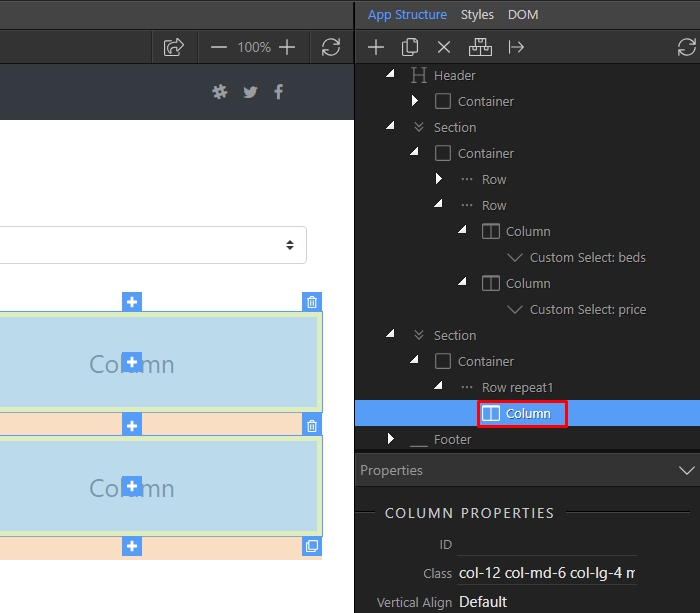
Open Basic:
Section titled “Open Basic:”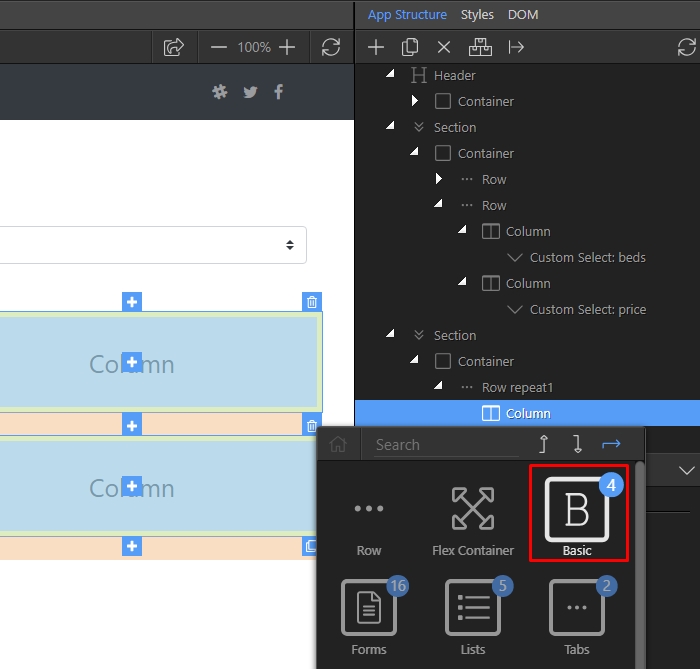
And add an image:
Section titled “And add an image:”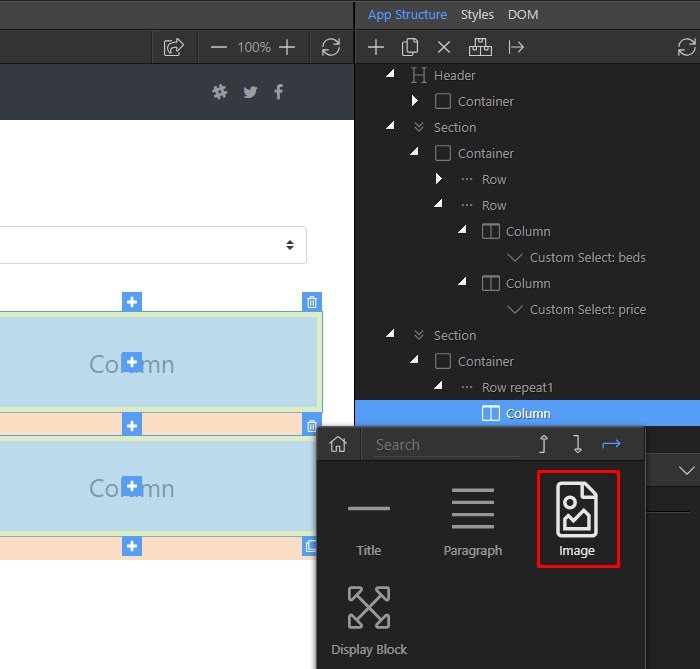
Then select the image and in the properties panel add new dynamic attribute:
Section titled “Then select the image and in the properties panel add new dynamic attribute:”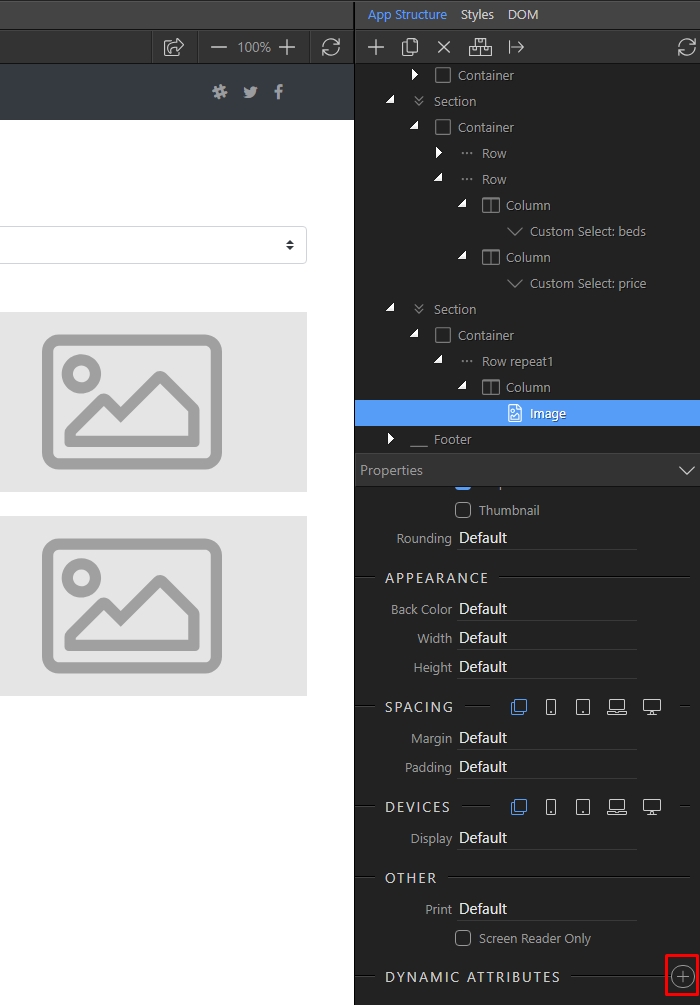
Open Images:
Section titled “Open Images:”
Select Image Source:
Section titled “Select Image Source:”
And then click the dynamic data picker button for the image source:
Section titled “And then click the dynamic data picker button for the image source:”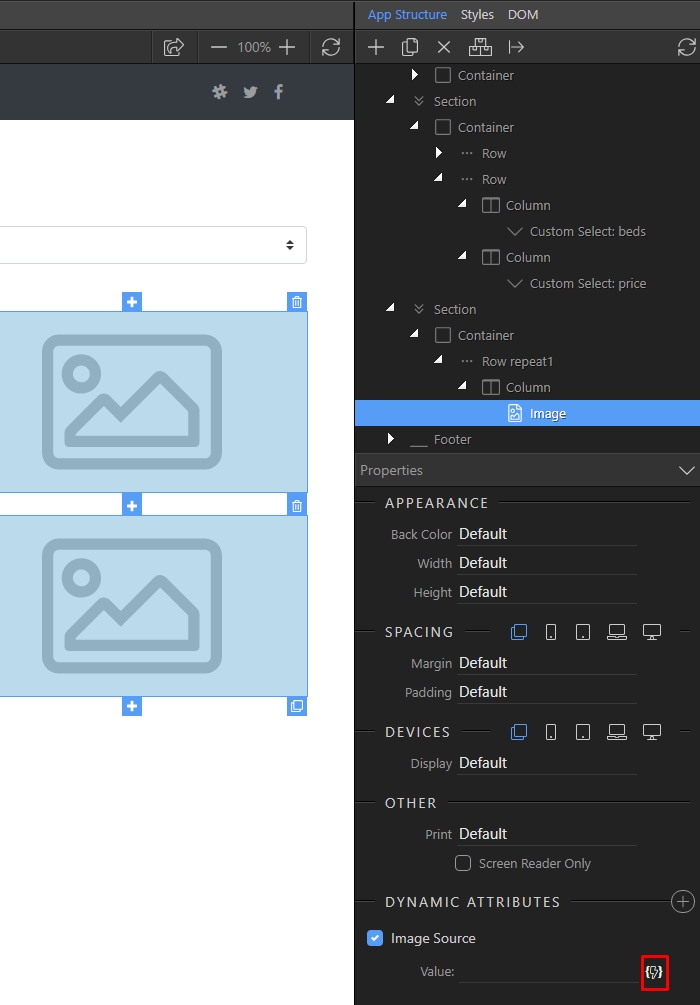
Step 9
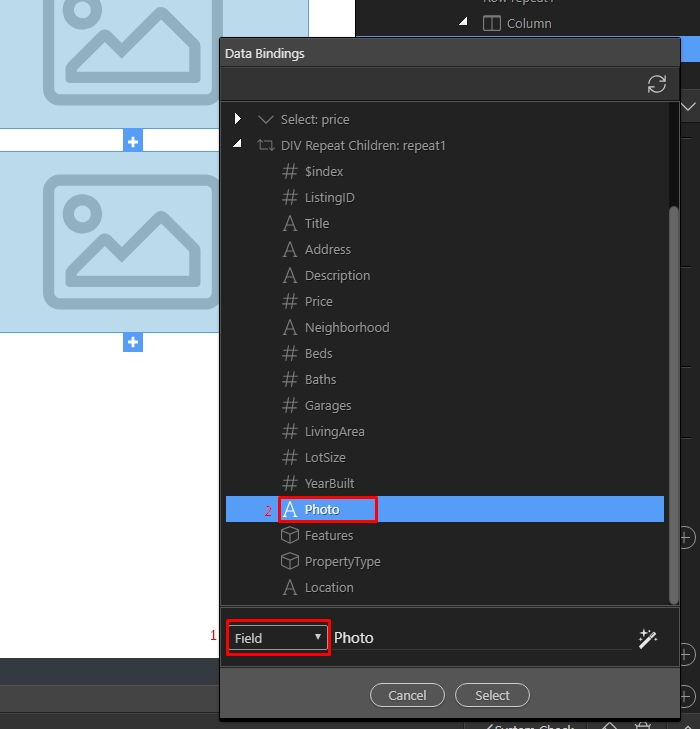
Section titled “Step 9”If in your database you store the path to your image, just select Field(1) and click the binding, which returns your image path(2):
Step 10
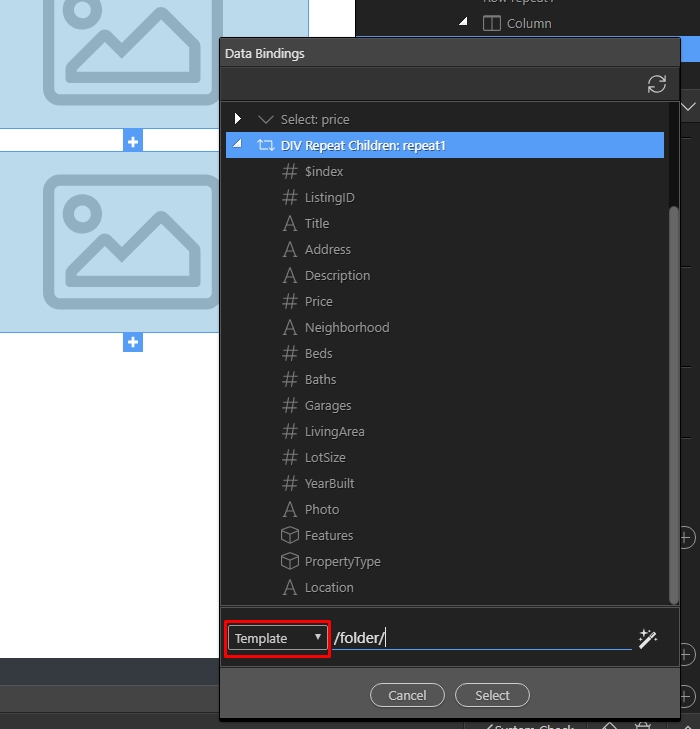
Section titled “Step 10”If in your database you store only the image name and you have to manually enter the path to the image location - select Template and manually enter the path to your images:
Then click after the path you entered, and select the binding which returns your image name:
Section titled “Then click after the path you entered, and select the binding which returns your image name:”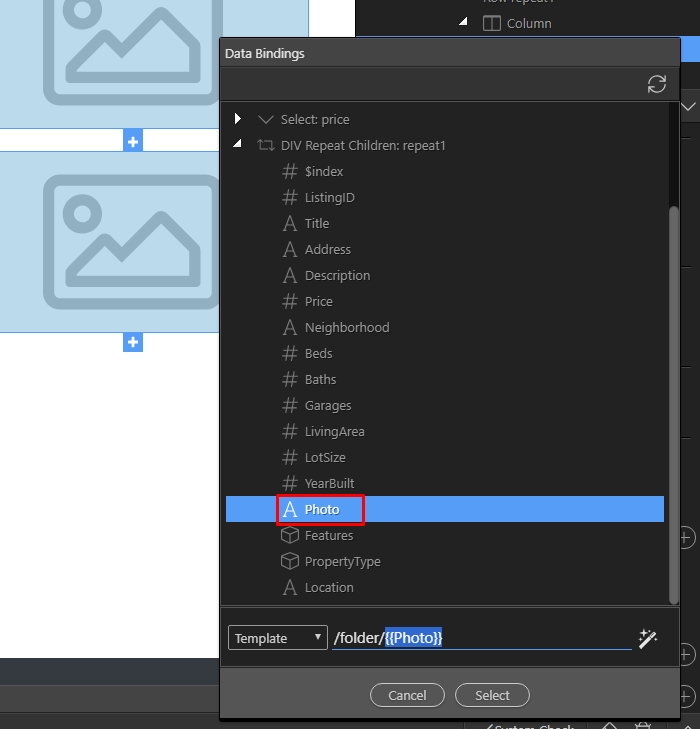
Click select and you are done. You can see your images rendered in Design View:
Section titled “Click select and you are done. You can see your images rendered in Design View:”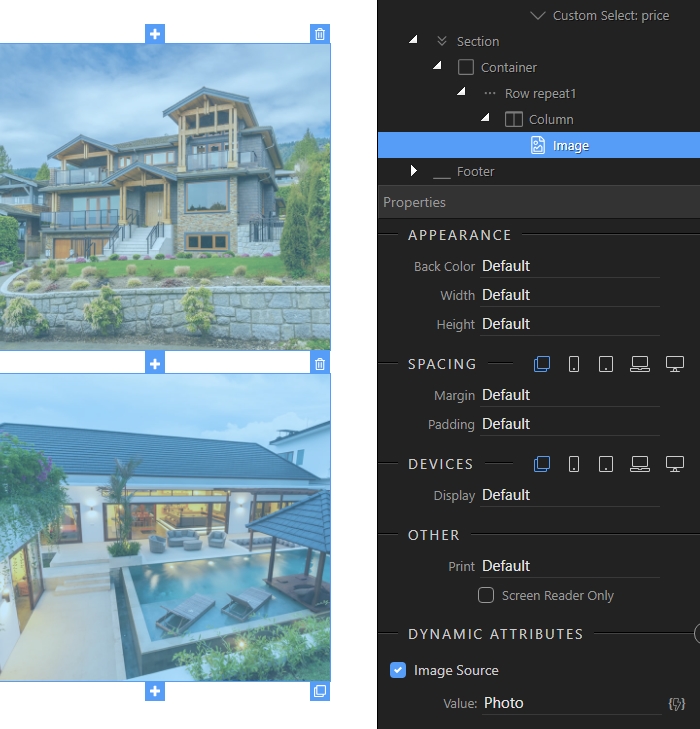
Creating Dynamic Link
Section titled “Creating Dynamic Link”In order to add a dynamic link value you need to select your link/anchor button first, either in design view or in the App Structure:
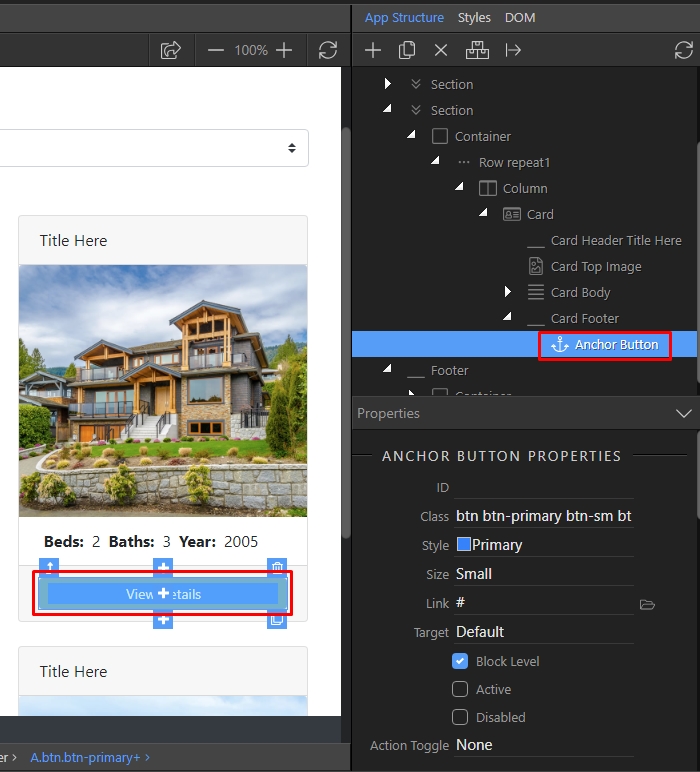
Then add new dynamic attribute:
Section titled “Then add new dynamic attribute:”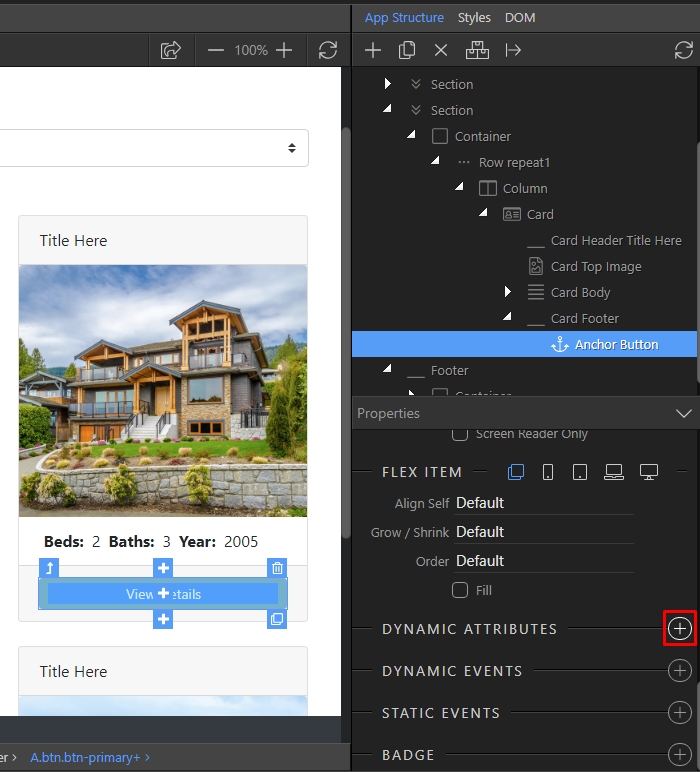
Open Links:
Section titled “Open Links:”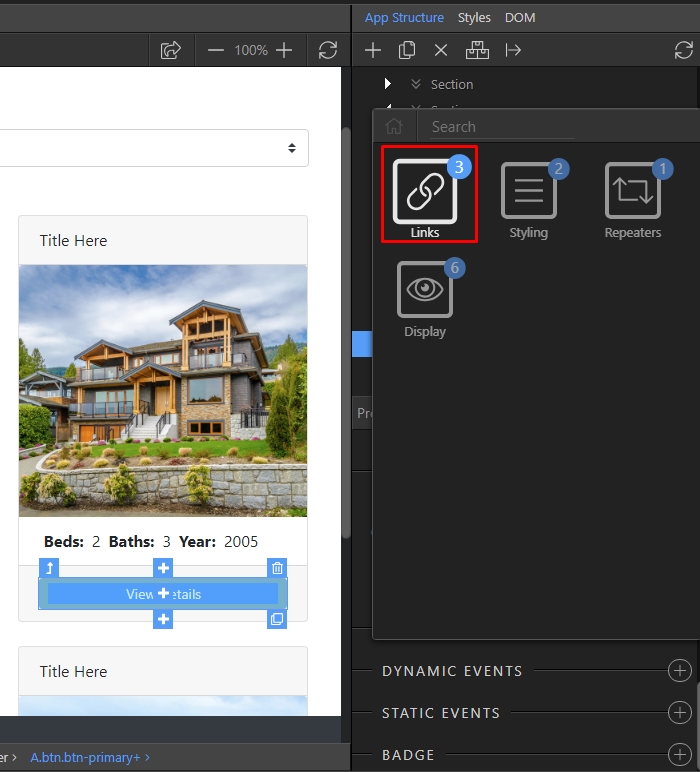
And select Link:
Section titled “And select Link:”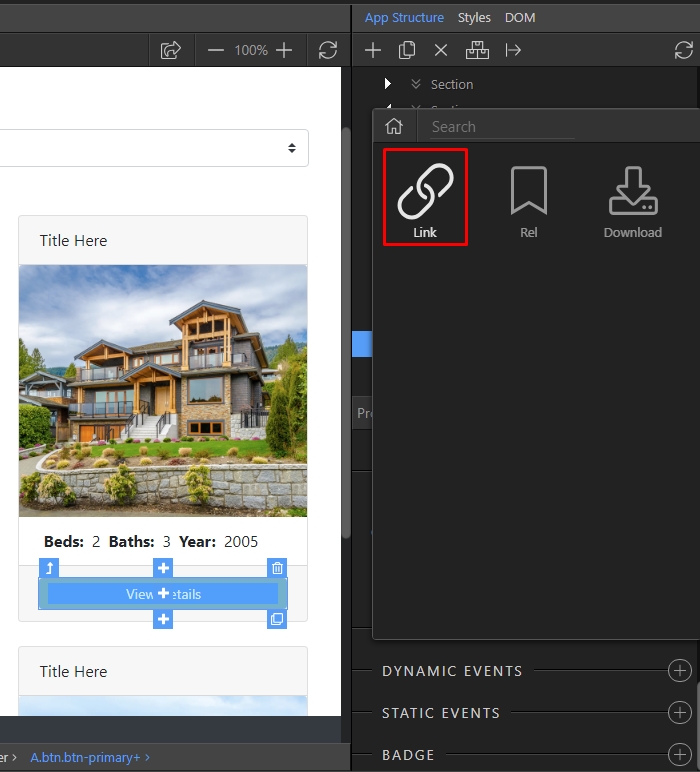
Click the dynamic data picker button for the dynamic link value:
Section titled “Click the dynamic data picker button for the dynamic link value:”
Step 19
Section titled “Step 19”If your dynamic binding returns the whole link, then from the drop-down make sure Field is selected(1) and select your binding:
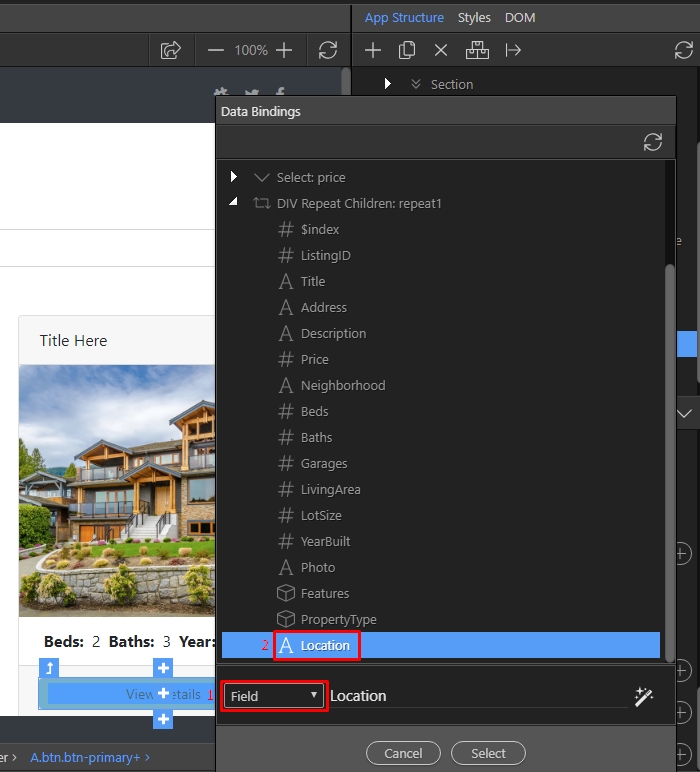
Step 20
Section titled “Step 20”If you need to mix static and dynamic data for the link, i.e. point to a page and pass an URL variable then select Template from the drop-down and enter the static part of your link manually:

Then click after the static link and select your binding:
Section titled “Then click after the static link and select your binding:”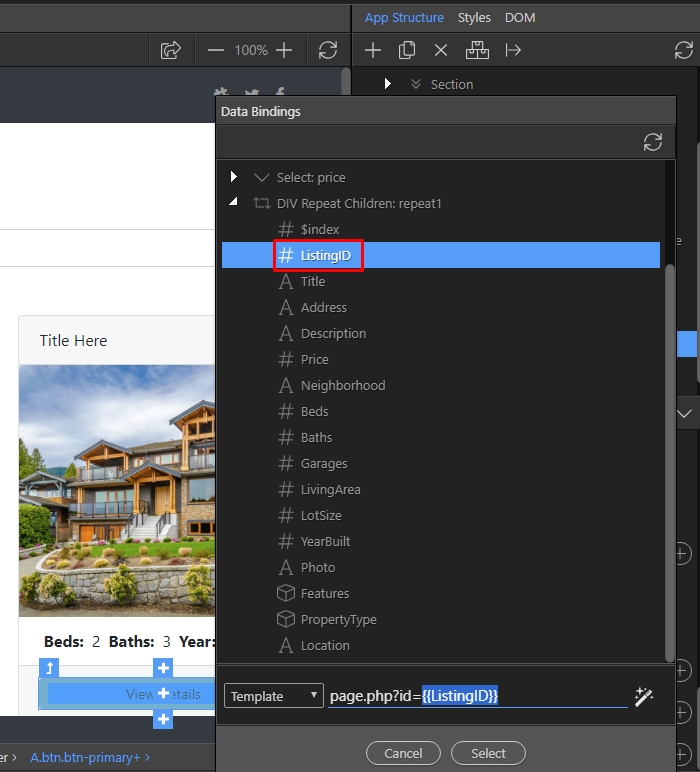
Click the select button:
Section titled “Click the select button:”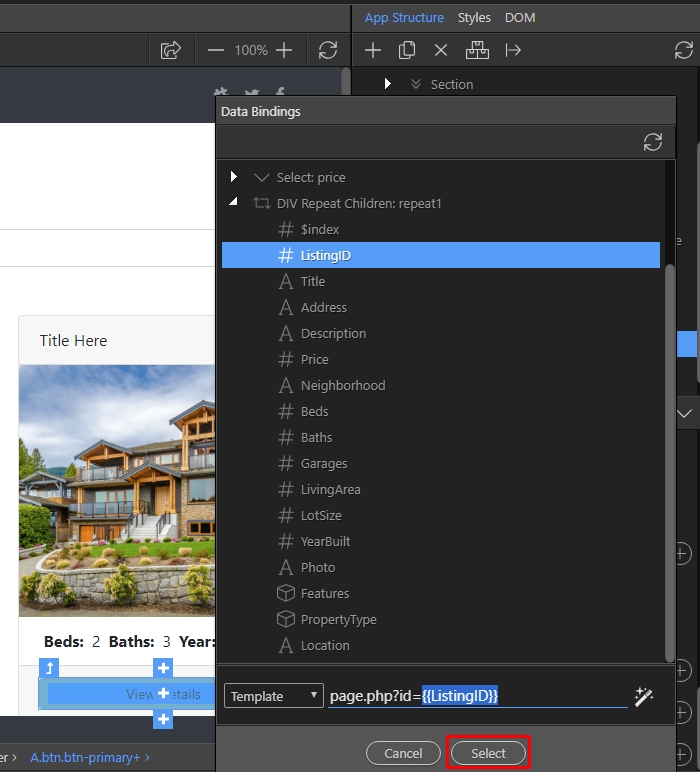
And you are done. Now your links in the repeat region are dynamic, and point to the selected record ID:
Section titled “And you are done. Now your links in the repeat region are dynamic, and point to the selected record ID:”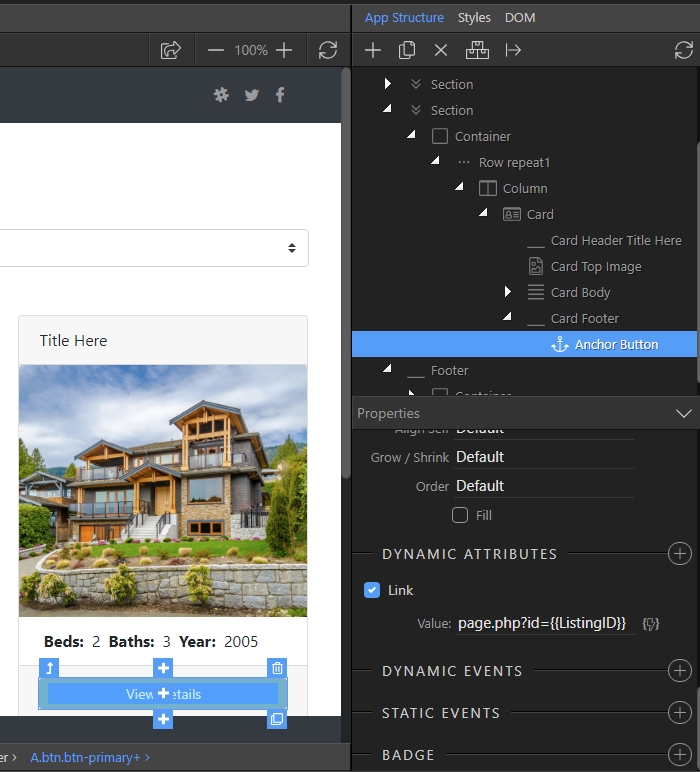
Show/Hide Elements with Dynamic Expressions
Section titled “Show/Hide Elements with Dynamic Expressions”You can show or hide different elements on the page depending different on dynamic expressions. In our case, we want to show the State drop-down only if the selected country is United States:
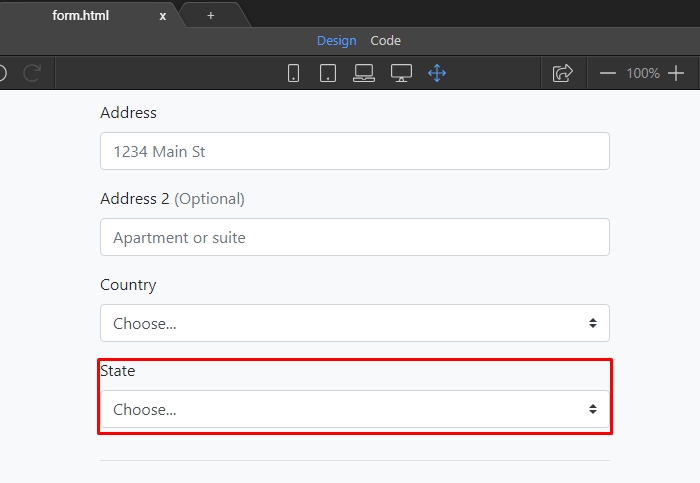
Select the element you want to show/hide(1) and add new dynamic attribute(2):
Section titled “Select the element you want to show/hide(1) and add new dynamic attribute(2):”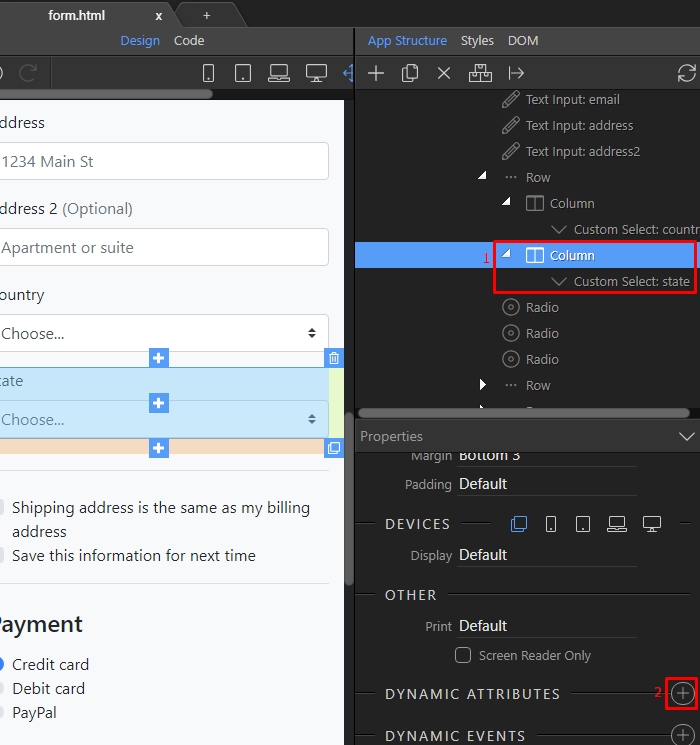
Open Display:
Section titled “Open Display:”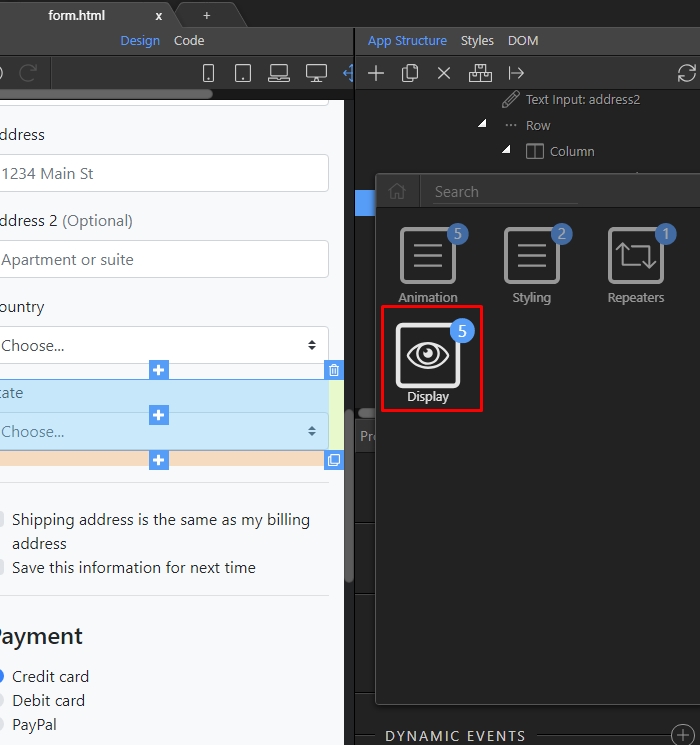
And select Show:
Section titled “And select Show:”
Click the dynamic data picker button, to select when to show the element:
Section titled “Click the dynamic data picker button, to select when to show the element:”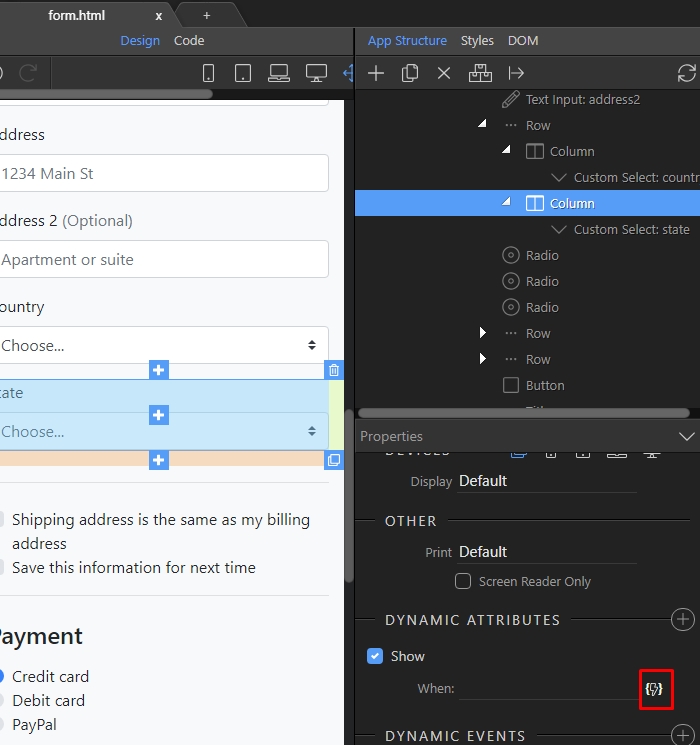
Step 30
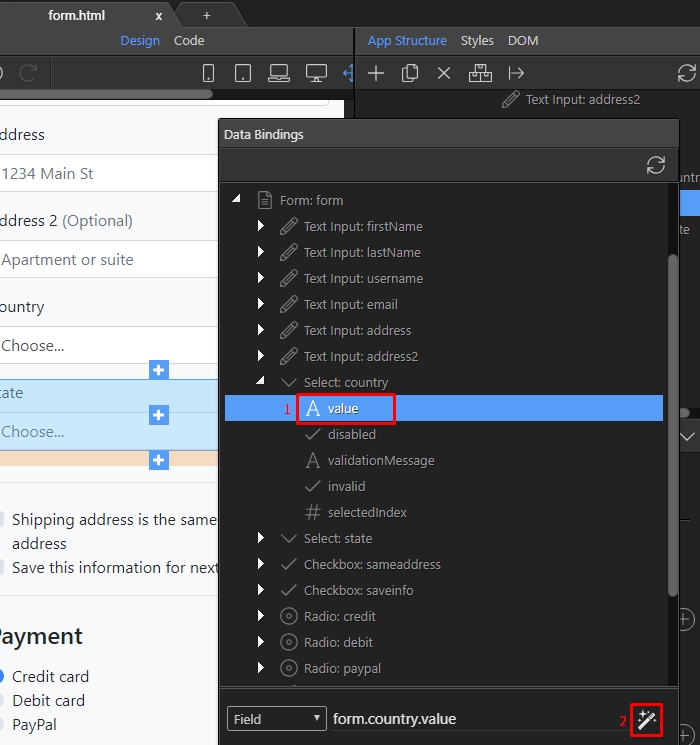
Section titled “Step 30”We want the state drop-down to depend on the country drop-down value, so we select value(1) under the country select and then we click the format data button(2):
Right click the country.value expression and click Operation:
Section titled “Right click the country.value expression and click Operation:”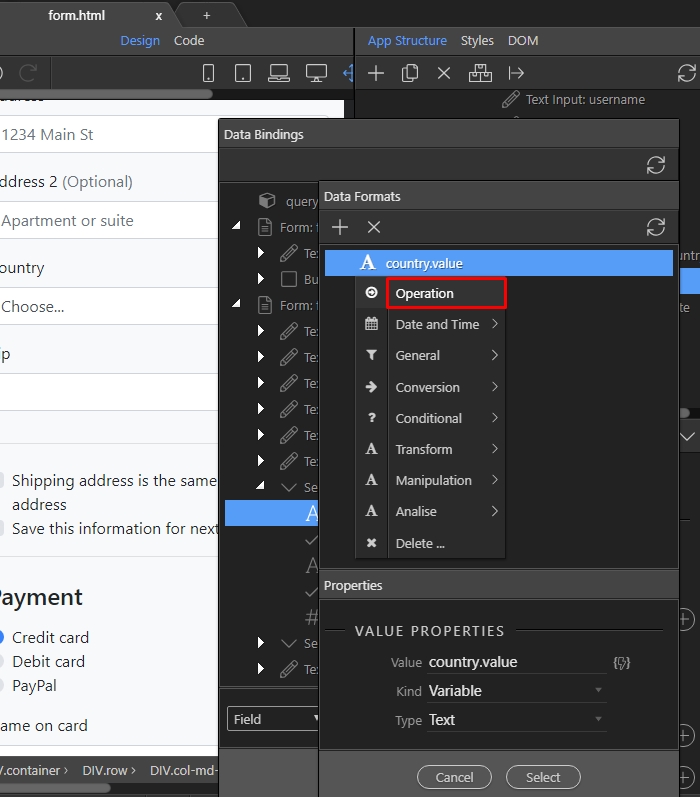
Open the operation drop-down(1) and select == (2):
Section titled “Open the operation drop-down(1) and select == (2):”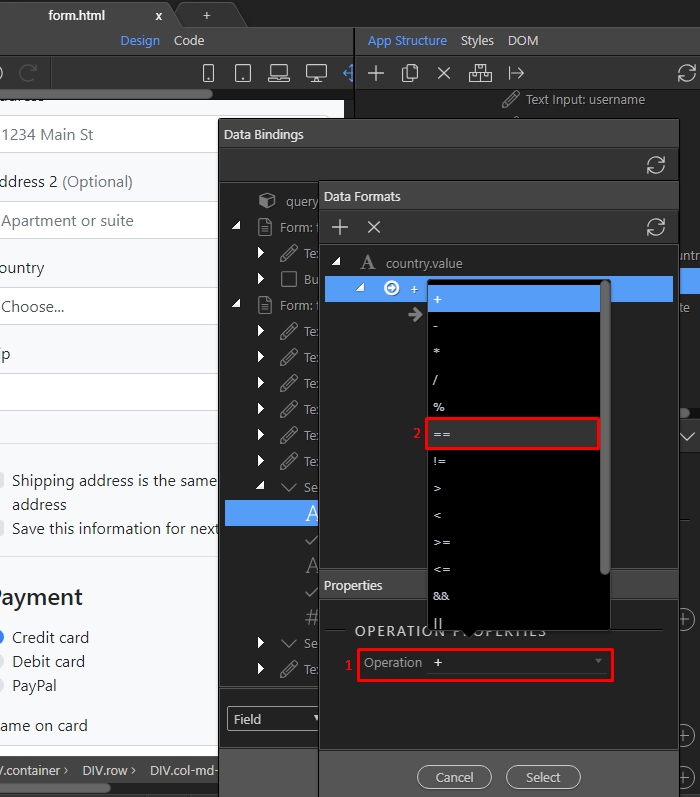
Click the equals to field:
Section titled “Click the equals to field:”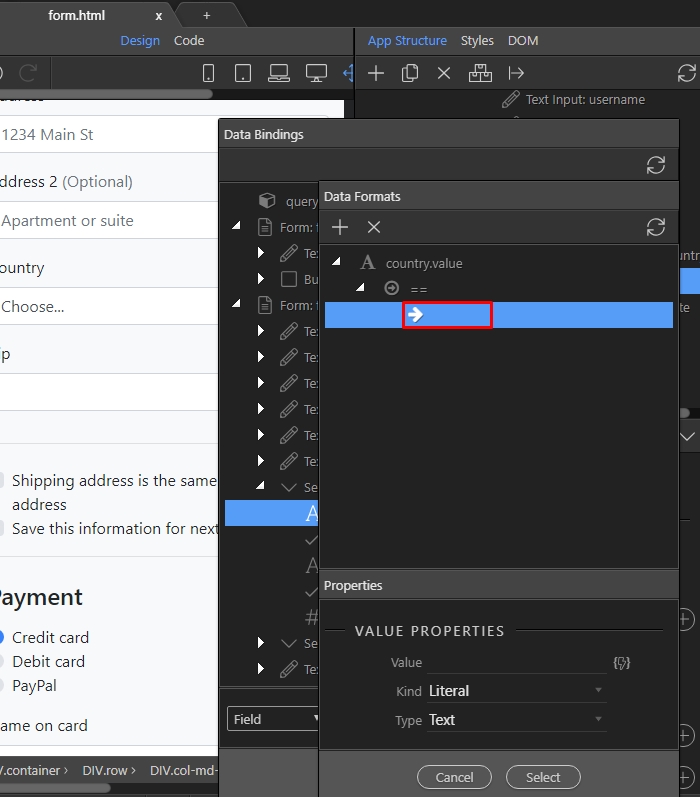
And enter the value, when the state drop-down should be displayed. In our case the value should be - us:
Section titled “And enter the value, when the state drop-down should be displayed. In our case the value should be - us:”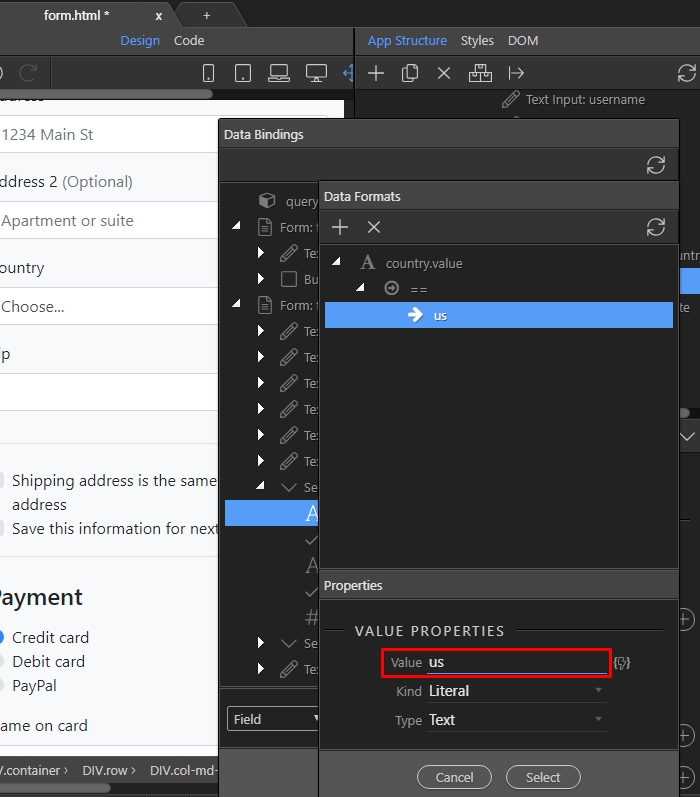
Click Select and you are done:
Section titled “Click Select and you are done:”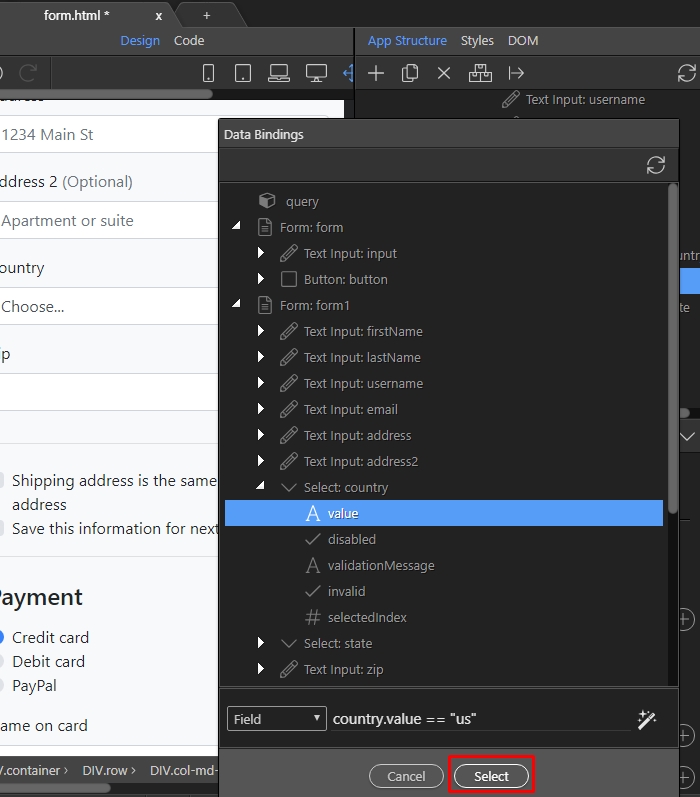
Now the state drop-down will only be displayed, when the country is set to United States:
Section titled “Now the state drop-down will only be displayed, when the country is set to United States:”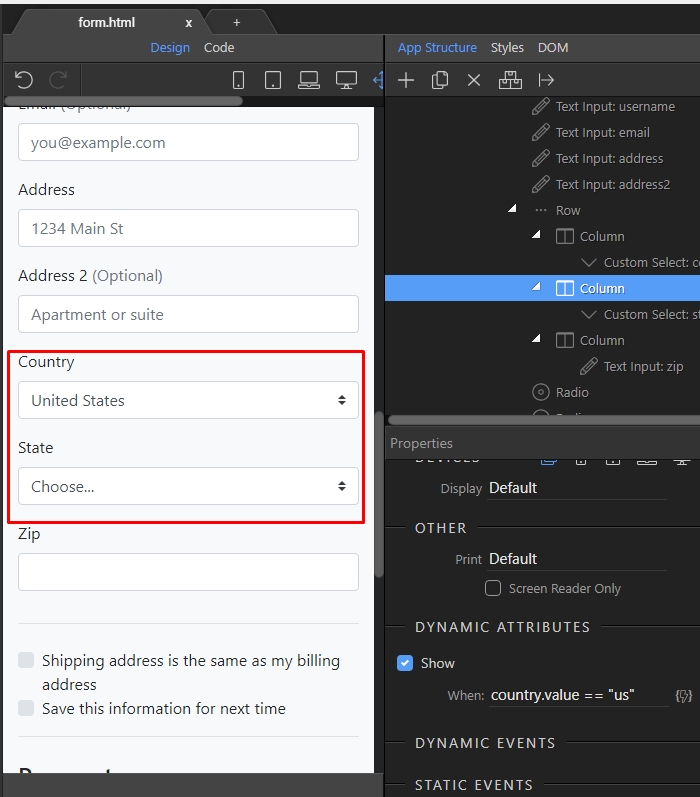
The same way you can show/hide different elements, defining different expressions.
Section titled “The same way you can show/hide different elements, defining different expressions.”Dynamic CSS Class
Section titled “Dynamic CSS Class”You can apply different dynamic CSS Classes to your elements, depending on different conditions. In our example we will apply a custom class if a value returned by our database query is less than 5000.
We have a dynamic table, listing our products:
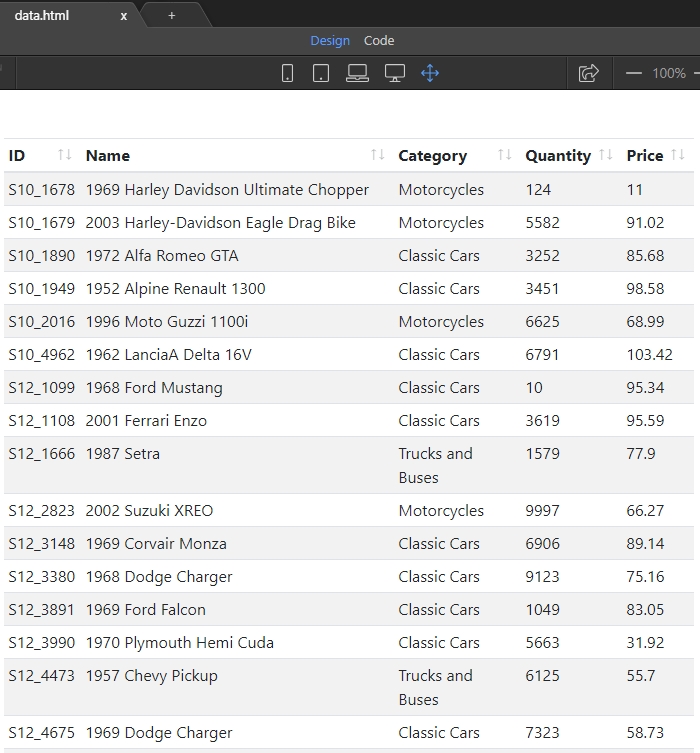
We want to add a custom class to the table row. Select the row:
Section titled “We want to add a custom class to the table row. Select the row:”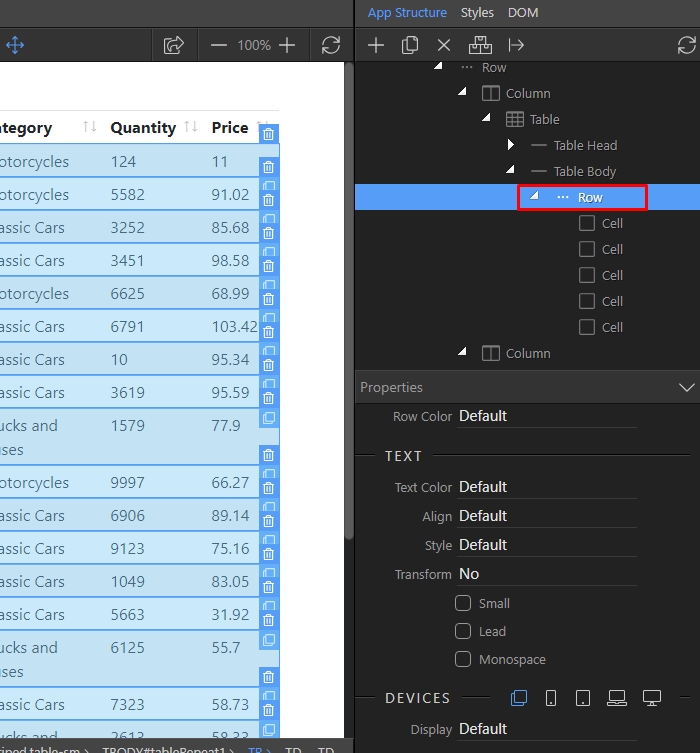
Add new dynamic attribute:
Section titled “Add new dynamic attribute:”
Open Styling:
Section titled “Open Styling:”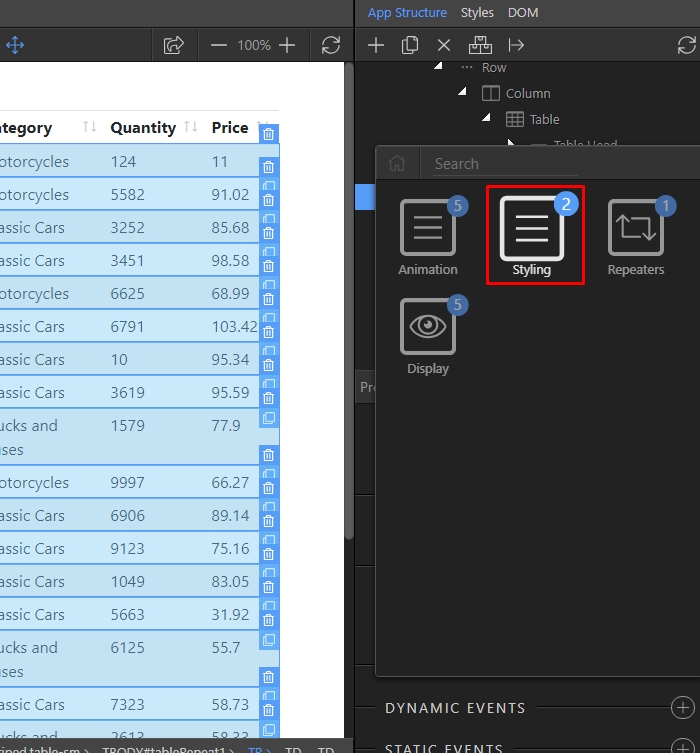
And select Class Toggle:
Section titled “And select Class Toggle:”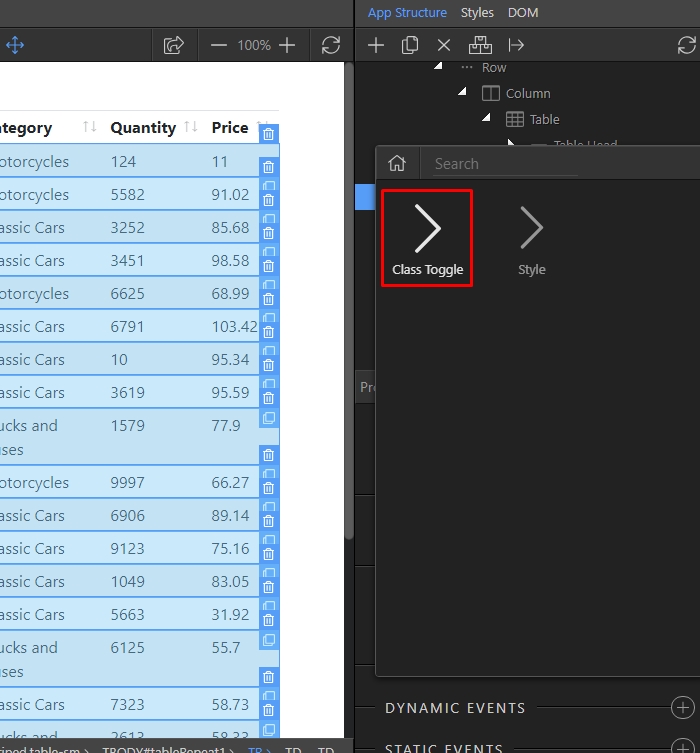
Enter the class name that should be applied:
Section titled “Enter the class name that should be applied:”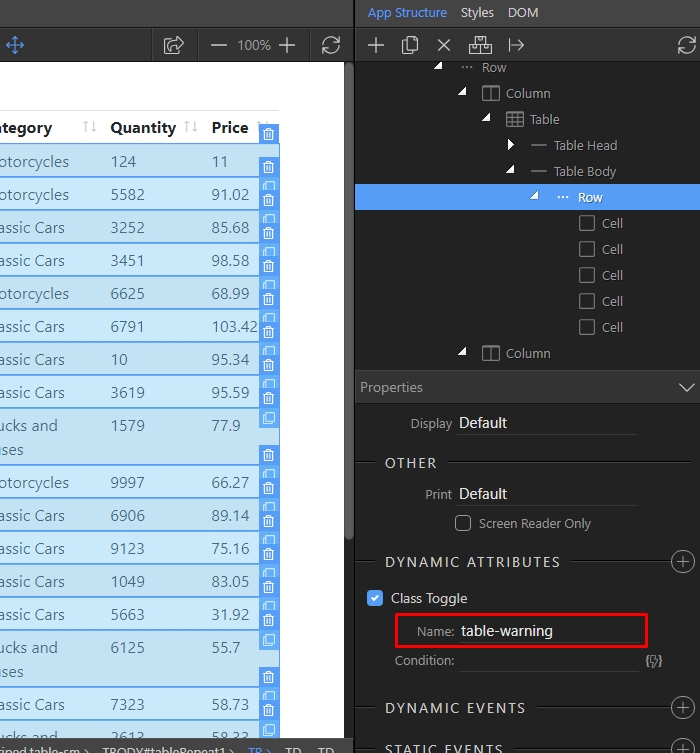
Then click the dynamic data picker button, to setup the condition:
Section titled “Then click the dynamic data picker button, to setup the condition:”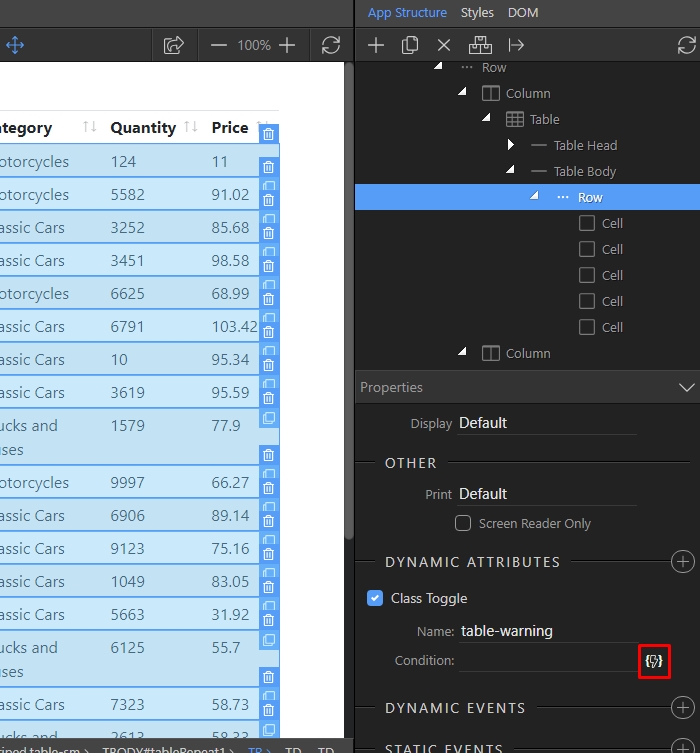
Step 45
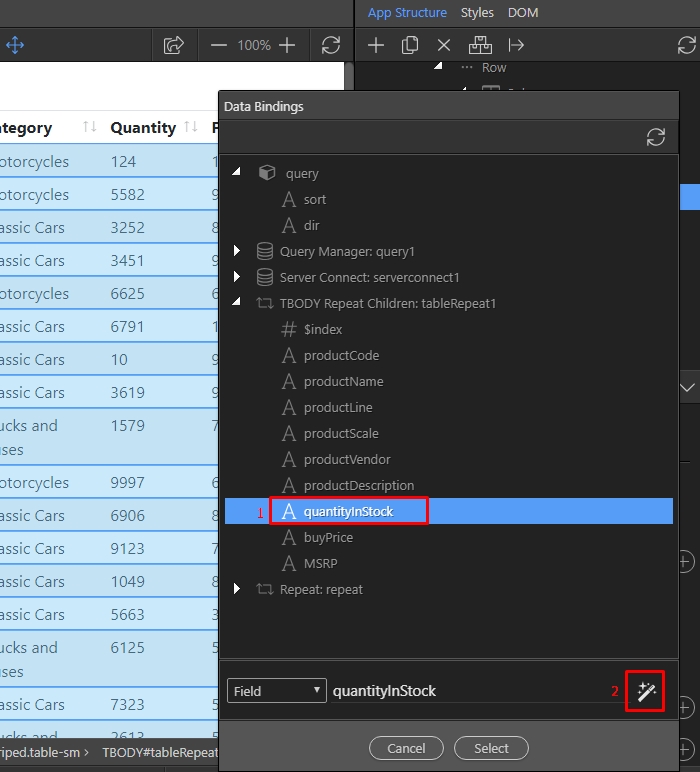
Section titled “Step 45”We select the binding which returns the quantity from our database(1) and then we click the format data button (2):
Right click the expression and select operation:
Section titled “Right click the expression and select operation:”
Open the Operation drop-down and select less than <
Section titled “Open the Operation drop-down and select less than <”
Enter a value to compare with, in our case we want to check if the quantity is less than 5000:
Section titled “Enter a value to compare with, in our case we want to check if the quantity is less than 5000:”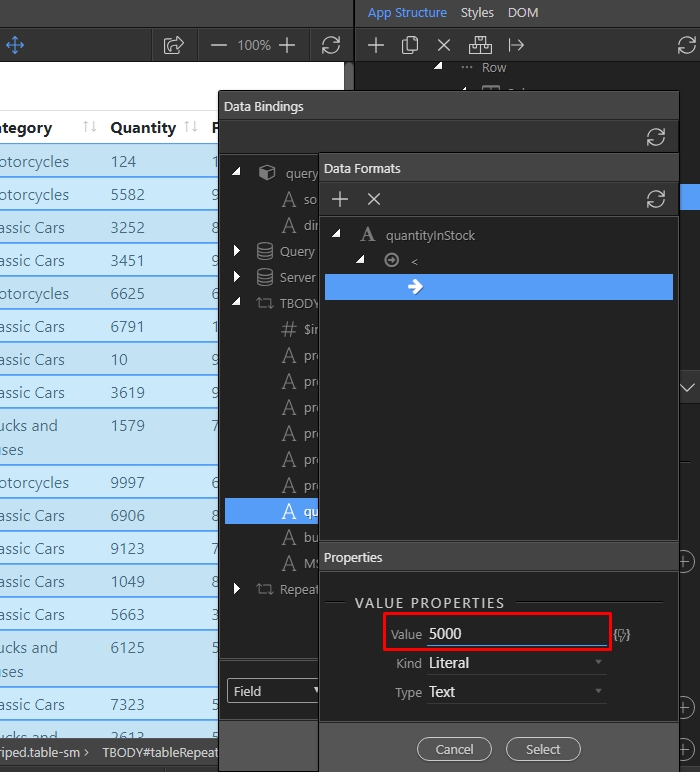
Click Select and you are done:
Section titled “Click Select and you are done:”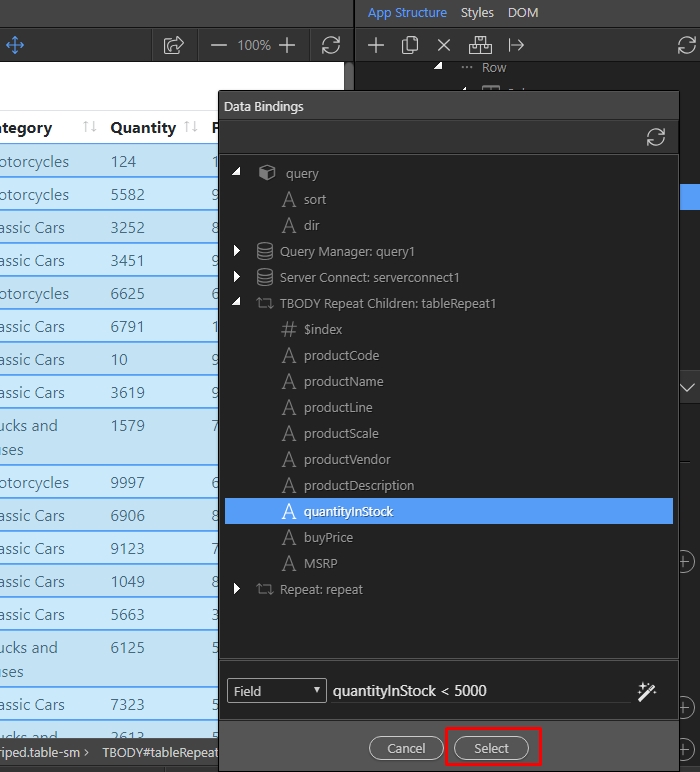
Step 50
Section titled “Step 50”You can see our custom class applied to the table rows based on the condition we set. This way you can apply multiple classes based on multiple conditions.