API Connector components, how to use and connect REST/Curl API's
With the API Connector in Wappler, you have gained a lot of power to directly connect to API's and fetch data or call their actions. The API Connector is based
With the API Connector in Wappler, you have gained a lot of power to directly connect to API's and fetch data or call their actions.
The API Connector is based on three components:
- API Data Source
- API Action
- API Form
In this article you will learn when to use the different API components and how.
API Data Source
Section titled “API Data Source”The API Data Source is the most simple component but powerful API component and gives you a way to fetch data from the API so you can use it on your page as dynamic data.
A basic use case of the API Data Source is explained in Using API Data Source
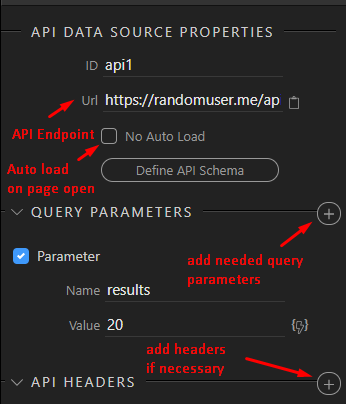
The API Data Source is always executed as an API Fetch with method GET - so it just gets its data.
The primary usage of the API Data Source is accessing public data sources that do not require authentication.
A good list of those public API's can be found on GitHub - toddmotto/public-apis: A collective list of free APIs
API Action
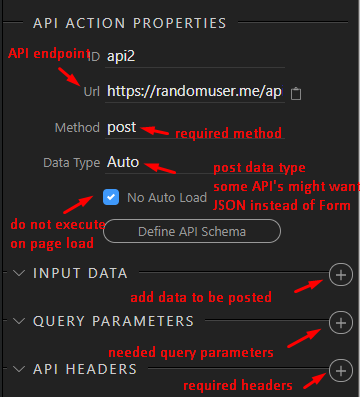
Section titled “API Action”The API Action is similar to the API Data Source, but instead of just fetching data it allows you to also post data to the API, so some Action gets executed. This can very from retrieving specific data, saving data to the API and calling some specific actions.
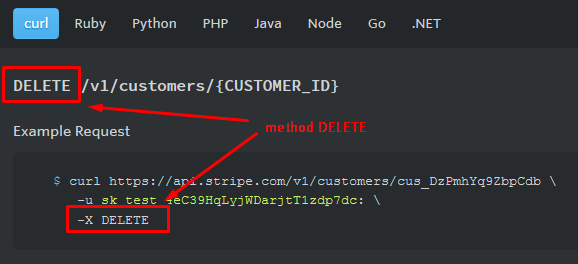
The API Action executes with methods GET, POST, PUT or DELETE
The needed method is usually indicated by the API Docs
Translating CURL usage to API Action
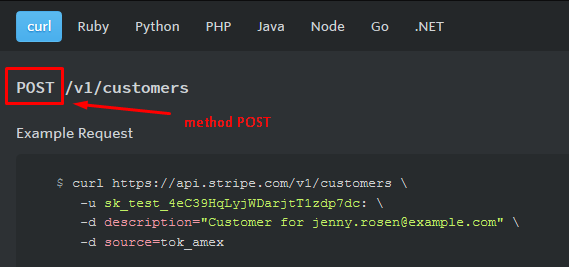
Section titled “Translating CURL usage to API Action”In the most API Docs you will see examples of using with CURL. Those can be easily translated to Wappler.
Determinating the Method:
Section titled “Determinating the Method:”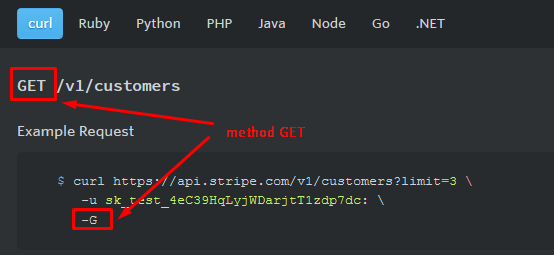
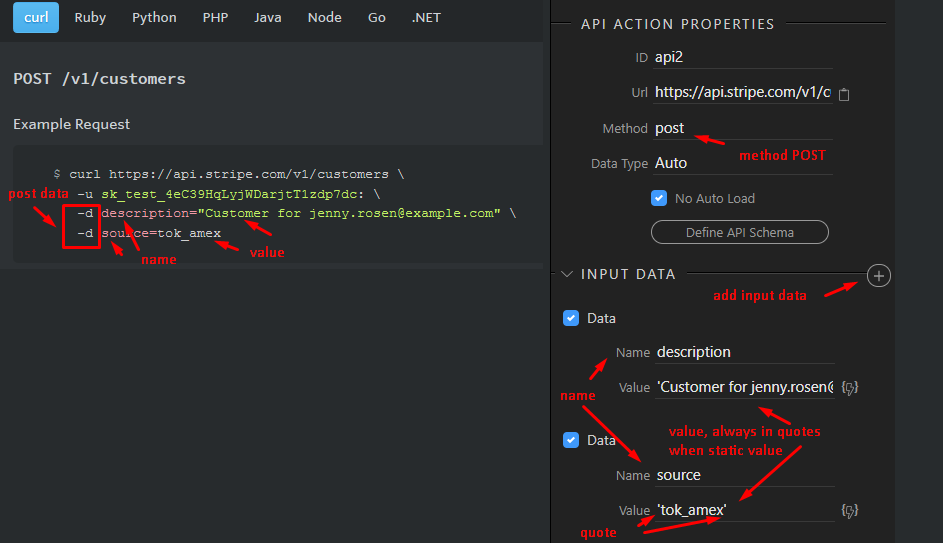
Input Data
Section titled “Input Data”When calling the API Action with method POST, you can also give data to post:
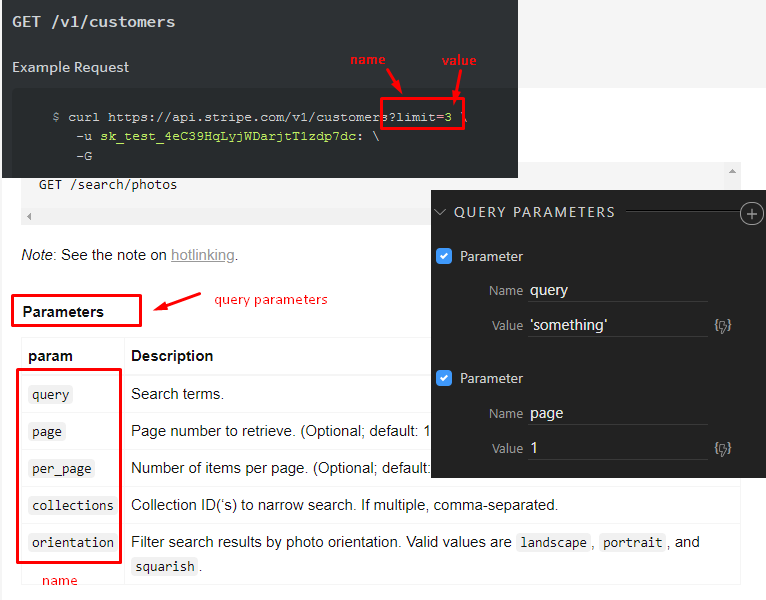
Query Parameters
Section titled “Query Parameters”When calling the API endpoint (url) you have two ways of passing query parameters
- You can directly add them to the url as values only
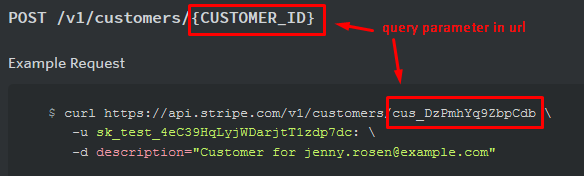
- As named query parameters
Security and authentication
Section titled “Security and authentication”Most of the APIs are public but might require an API key or basic authentication.
WARNING WARNING WARNING: API Connector is client side only and runs in the browser! The API key or Authentication you use will be easily visible to the user! So you should only use limited API keys for public sites or make sure your site is absolutely secured for restricted use only. For example using the Security Provider Enforcer.
The following types of authentication are possible with the API Connector
Basic Authentication with Username and Password.
Section titled “Basic Authentication with Username and Password.”This is the most common authentication that requires username and optional password. Usually the APIs issue an API key that you can use as username without password.
In Curl samples this is indicated with the -u parameter:
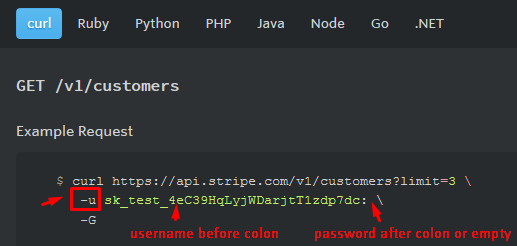
This requires that the username:password value is stored as Base64 value in the authorization header
Not advisable to use, if possible use the other methods below.
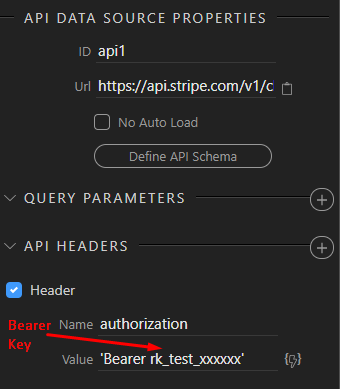
Bearer key/token in header
Section titled “Bearer key/token in header”Many APIs required bearer token as authentication. You can simply put it in the authorization header
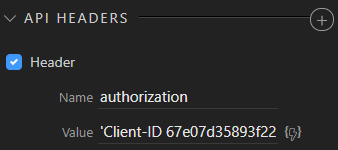
API Key in header
Section titled “API Key in header”Many APIs have special API keys that you need to put in the header fields when calling
API Form
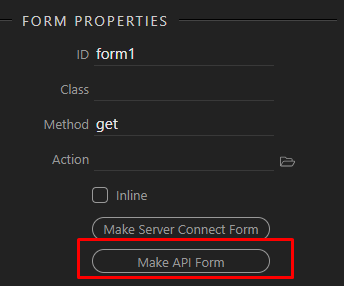
Section titled “API Form”The last API component is the API form component. It is actually identical in options to the API Action, but instead of specifying its input data, you can add to a form so the form is submitted with its data straight to the API endpoint.
This is very useful for login forms or other forms that require the user to enter some input values and then you want to submit them directly to the API.
Another advantage of having an API form is that you can apply form input validation first, before submitting, so that you can make sure the user enters the right input.
You just add the API Data as a separate component or turn any existing Form to API Form:
Explore the API world
Section titled “Explore the API world”That concludes our introduction to the API Connector. Hopefully you understand its rich options now and can make this awesome API connected solutions!
There are many resources to help you with your journey,
a good introduction is:
http://101.apievangelist.com/
https://www.programmableweb.com/
A good list of public APIs
![]()
![]()