Git Branches
Branches are multiple different contexts where work happens. Each feature, bugfix, experiment.
Having them separately and easily switchable will make your workflow flexible and still very controllable.
Check the excelled explanation of Git Branches on the Git Tower Book and why Branching can Change Your Life
The Great World of Git Branches
Git Branches help you develop new features, while retaining a stable master branch. You can work simultaneous on multiple branches and eventually when done, merge them with the master.
Creating a new Branch
Most of the time you will work in your default “Master” branch, but when you are working in a team or you want to make a new isolated feature or other large change in your project you will create a branch.
To do so in Wappler it is ease - just click on the point that you want to copy to a branch and choose from the context menu: Branch from here:
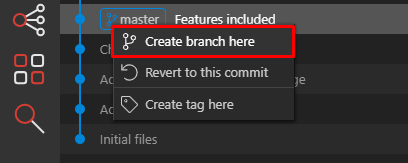
Once created the new branch will become active. You will see it in the menu above and also recognize it on the checkbox in front.
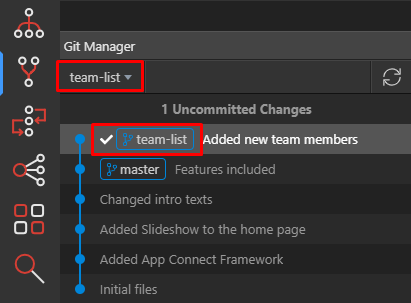
So you are actually copying the work of the previous branch and starting a new one.
You can add new commits to it as you wish.
Committing your work to a branch
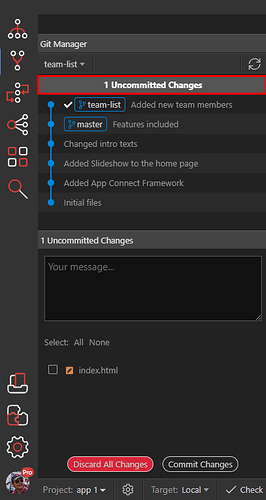
After we have done some changes to our files, you can see that we have Uncommitted files.
The first line shows that and it is clickable so you can go in to commit mode:
You can choose either to commit and give it a nice message or Discard All Changes to revert your chases to the last commit.
Looking up history of previous commits
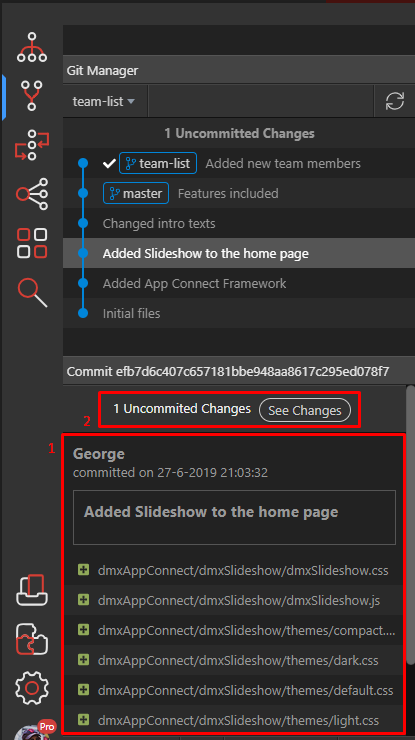
If you want to see what have you committed before, just select one of the previous commits and look below for full details of the committed files and description (1):
If there are still uncommitted files you will see a info message about this (2), so you can quickly switch to commit mode.
Committing more changes to your new branch
When you develop your branch work further, you will be committing more changes there.
You will see however that because the master branch is not changed in the mean time, the new branch and the master follow the same line. The master is just running behind.
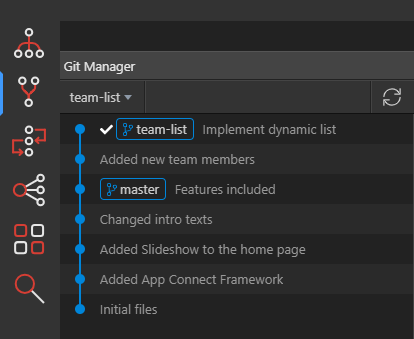
Changing the master
However if we want to do some fixes in the master while we are still working on our new “team-list” feature, we can do that easy.
-
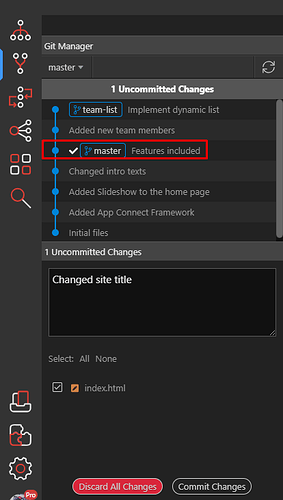
Switch to the master
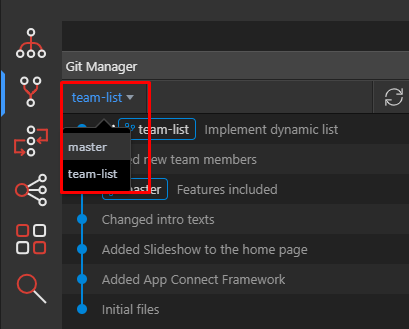
-
Commit your fix
Magic happens - now you suddenly see the different branches because your master is now running in front.
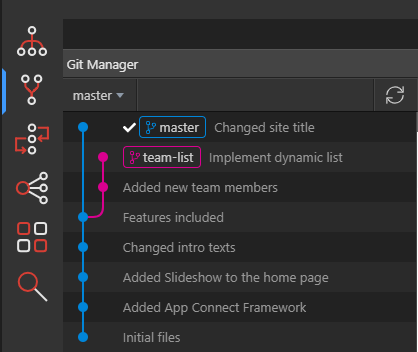
Switching back to branch
As we implemented our fix in the master, we want to continue our work in the “team-list” branch.
So we switch back to it and add some more commits
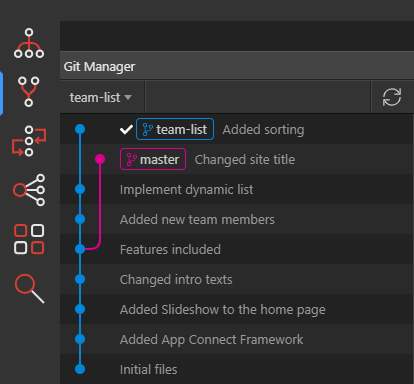
As you can see now the “team-list” branch is on top and is in front of the master branch.
You can even create more branches as you wish.
Merging branch back to master
When you are ready with your branch and you have implemented the feature, you want to merge it to your master. This is easily done with the context menu when you right click on the branch name.
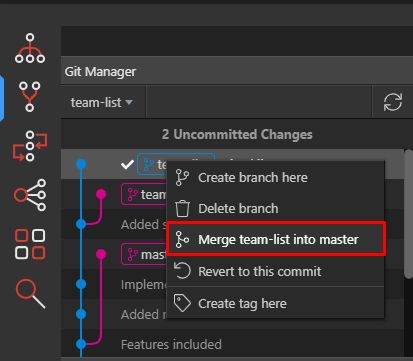
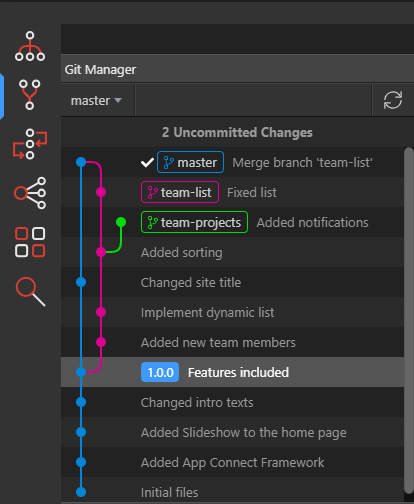
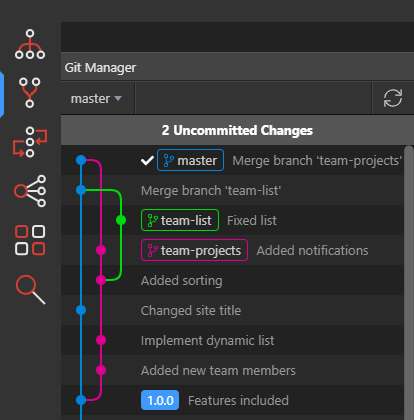
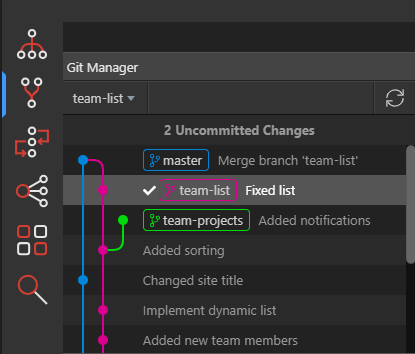
When the merge is completed you will see it nicely in the Git graph and the line goes back to the master.
Working with Tags
Creating Tags
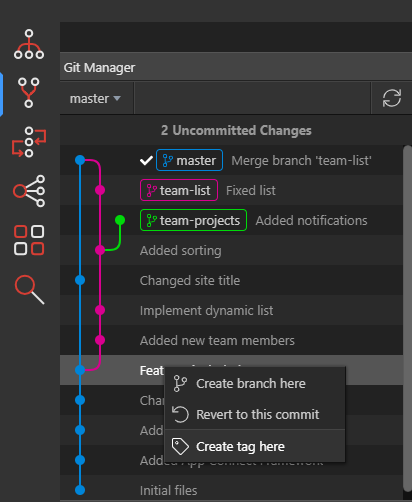
You can annotate your commits with labels, like version numbers or other short descriptions for easier recognition.
To do so you just choose create tag from the context menu.
We have entered a version number “1.0.0” as a tag name so it appears nicely:
Deleting Tags
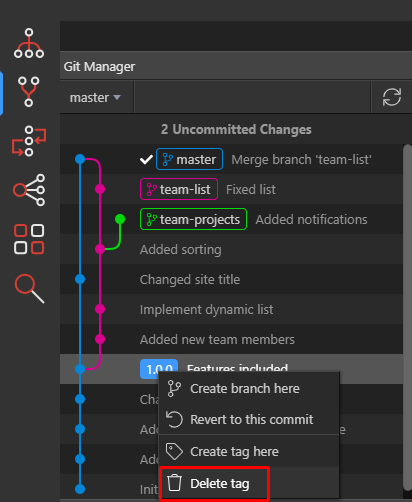
If you want to delete a specific tag, just right click on it and choose “Delete tag” from the context menu:
