
Security - Secure your Server-Side data
Wappler knows how important and sensitive server data can be and provides simple setup to ensure it can not be accessed by unauthorised users Using the security provider tools you can secure your serv
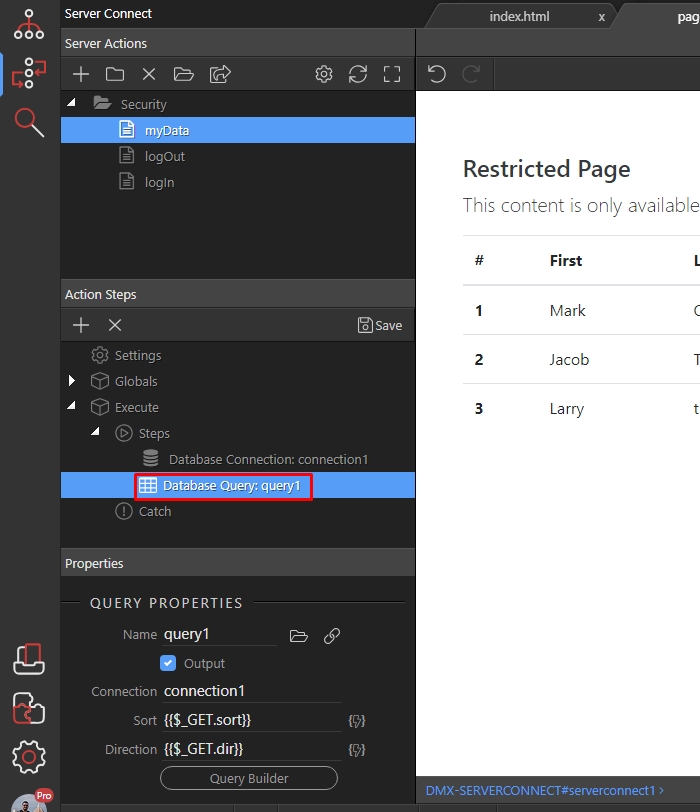
Step 1: Here’s our server action, which contains a database query:
Section titled “Step 1: Here’s our server action, which contains a database query:”Wappler knows how important and sensitive server data can be and provides simple setup to ensure it can not be accessed by unauthorised users
Using the security provider tools you can secure your server actions so that no data will be shown to unauthorised users, if they somehow access the link to your server action.
Step 1: Here’s our server action, which contains a database query:
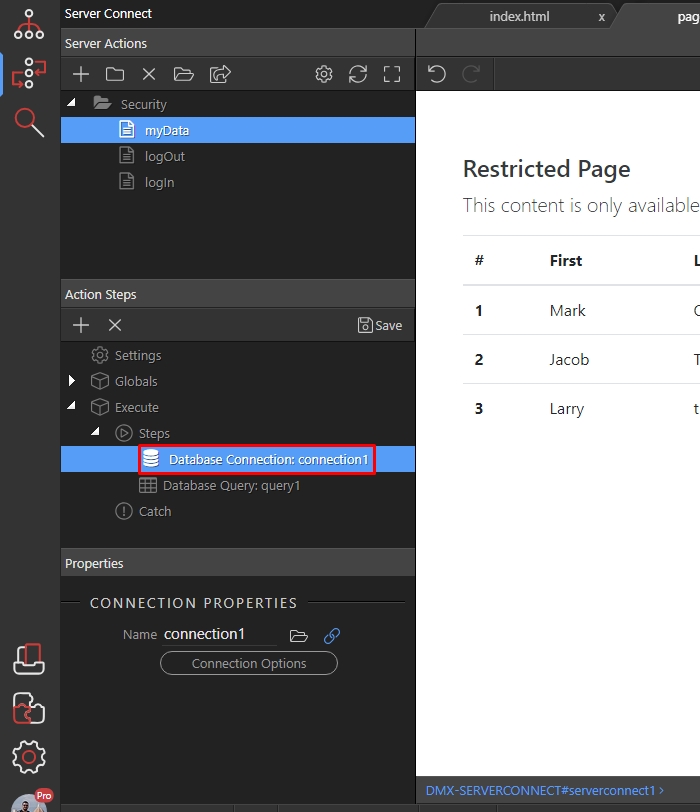
Step 2: Right click the step before the query:
Section titled “Step 2: Right click the step before the query:”
Step 2: Right click the step before the query:
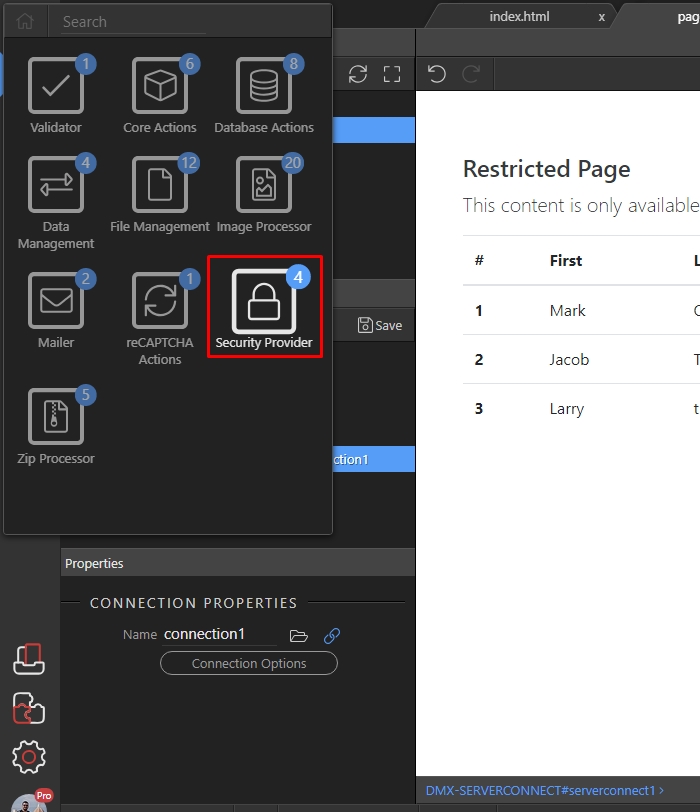
Step 3: Open the “Security Provider” group:
Section titled “Step 3: Open the “Security Provider” group:”
Step 3: Open the “Security Provider” group:
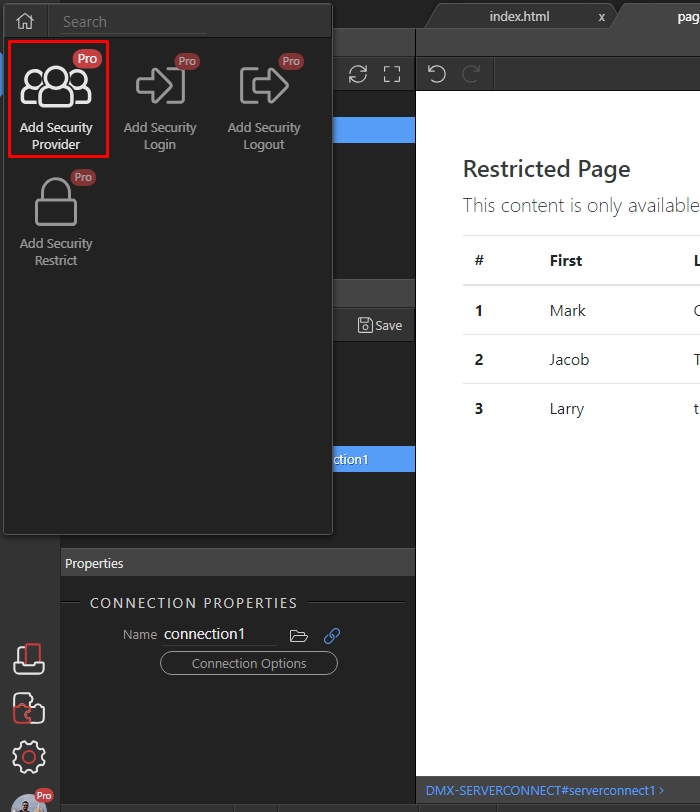
Step 4: And press “Add Security Provider”:
Section titled “Step 4: And press “Add Security Provider”:”
Step 4: And press “Add Security Provider”:
Step 5: Load the same security provider, which you defined for the login action:
Section titled “Step 5: Load the same security provider, which you defined for the login action:”
Step 5: Load the same security provider, which you defined for the login action:
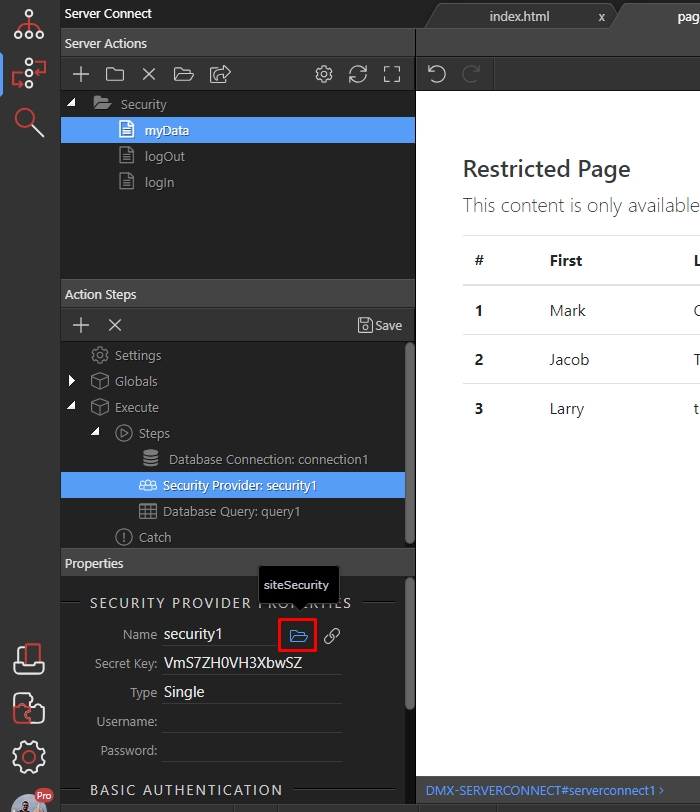
Step 6: Then right click the security provider step:
Section titled “Step 6: Then right click the security provider step:”
Step 6: Then right click the security provider step:

Step 7: Open the “Security Provider” group:
Section titled “Step 7: Open the “Security Provider” group:”
Step 7: Open the “Security Provider” group:
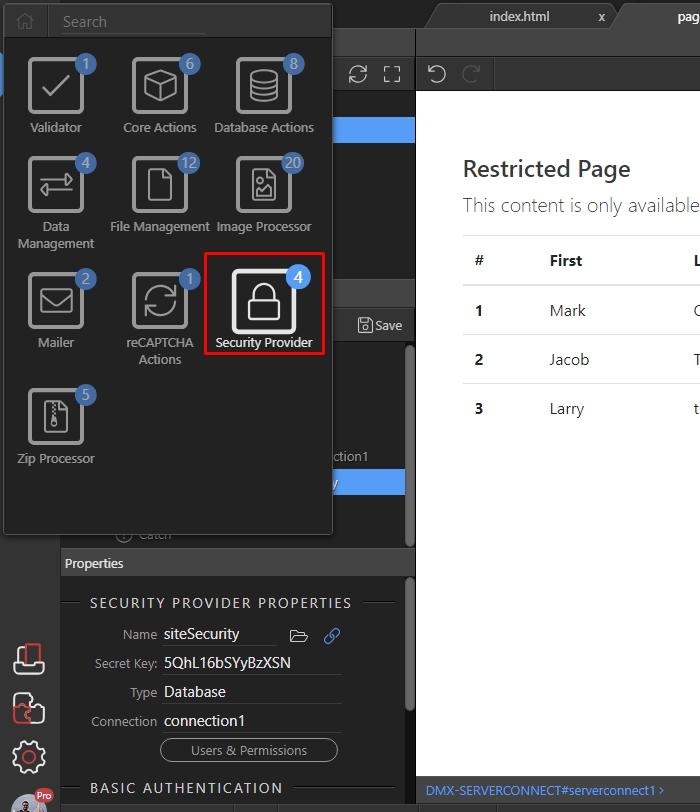
Step 8: And press “Add Security Restrict”:
Section titled “Step 8: And press “Add Security Restrict”:”
Step 8: And press “Add Security Restrict”:
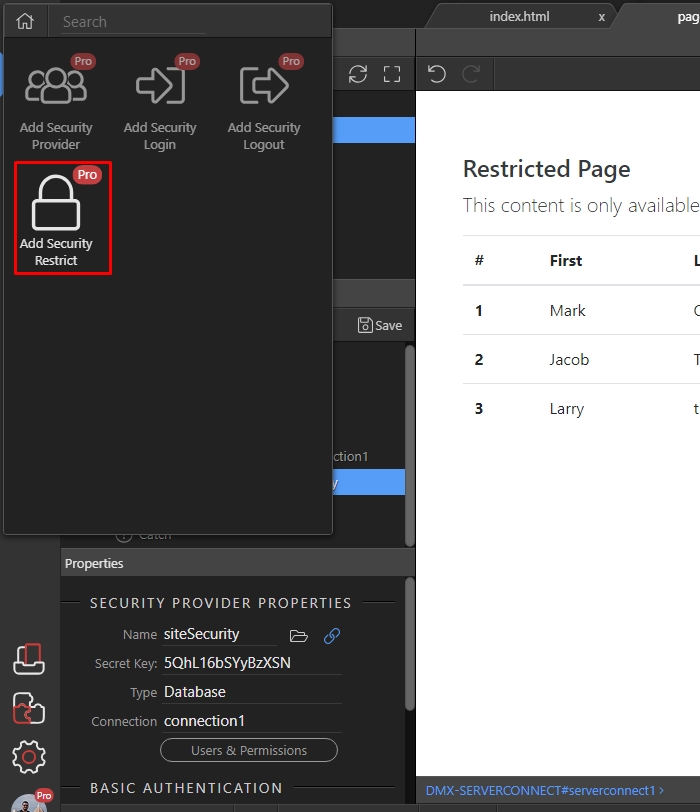
Step 9: Select your security provider from the dropdown:
Section titled “Step 9: Select your security provider from the dropdown:”
Step 9: Select your security provider from the dropdown:
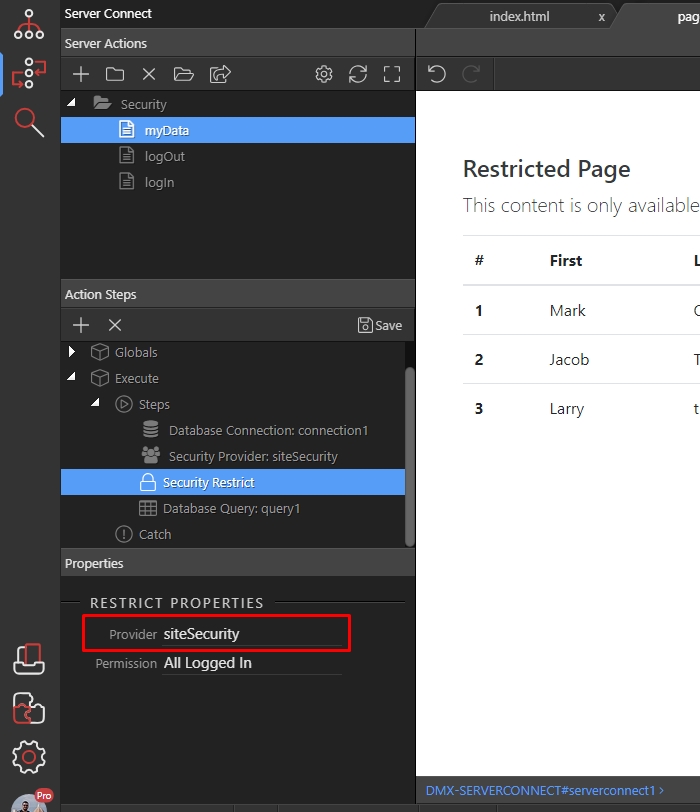
Step 10
Section titled “Step 10”
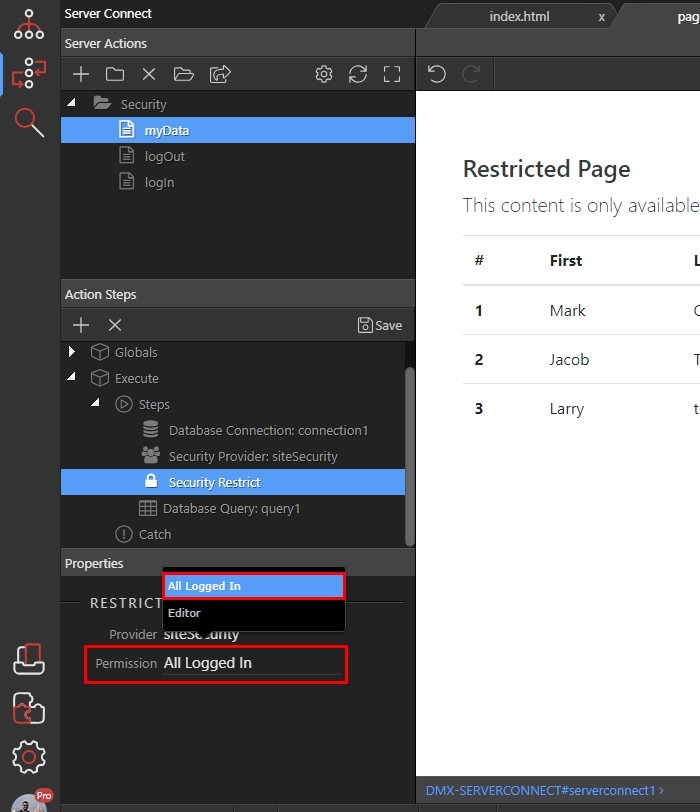
Step 10: And select if this server action requires any specific permissions. In our case it doesn’t require any permissions so we select - “All Logged In”:
Step 11: Save your server action:
Section titled “Step 11: Save your server action:”
Step 11: Save your server action:
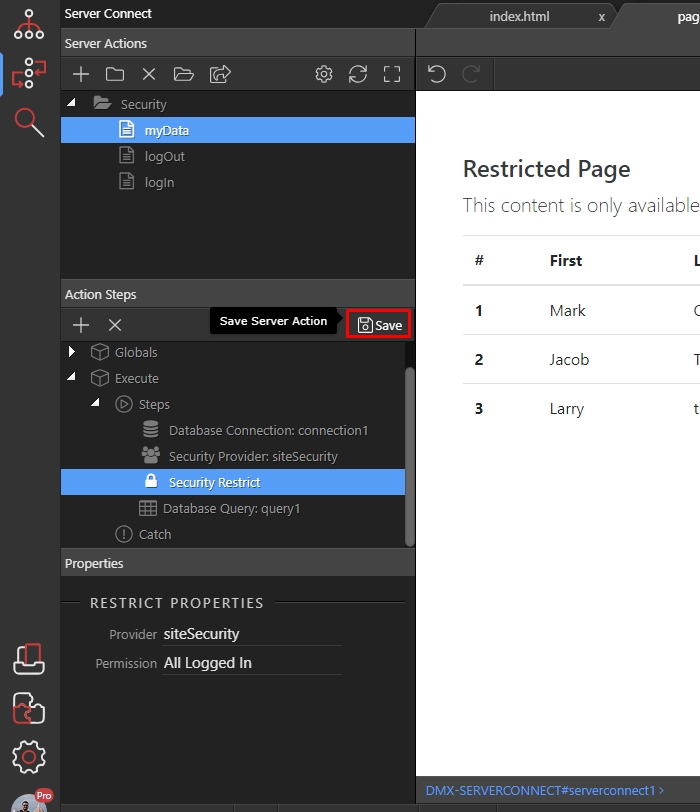
Step 12
Section titled “Step 12”And you are done. You won’t be able to preview the server action results (using the preview in browser button) as you are not logged in.