Migrating Dreamweaver Site Definitions into Wappler
In this short Wappler tutorial we will show you how to export all your site definitions from Dreamweaver so they can be imported directly into Wappler. Your imported Dreamweaver site definitions will
In this short Wappler tutorial we will show you how to export all your site definitions from Dreamweaver so they can be imported directly into Wappler.
Section titled “In this short Wappler tutorial we will show you how to export all your site definitions from Dreamweaver so they can be imported directly into Wappler.”Your imported Dreamweaver site definitions will retain all the targets, usernames and passwords.
Step 1: Export your site definition from within Dreamweaver. Launch Dreamweaver and go to the files panel.
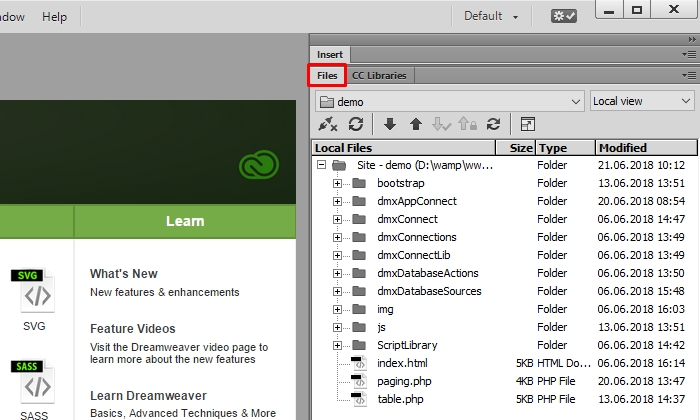
Step 2: Then open the sites drop-down menu highlighted below.
Section titled “Step 2: Then open the sites drop-down menu highlighted below.”
Step 2: Then open the sites drop-down menu highlighted below.

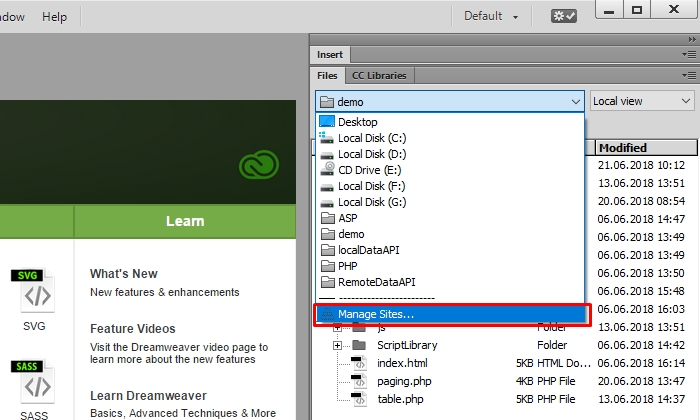
Step 3: And select Manage Sites…
Section titled “Step 3: And select Manage Sites…”
Step 3: And select Manage Sites…
Step 4
Section titled “Step 4”
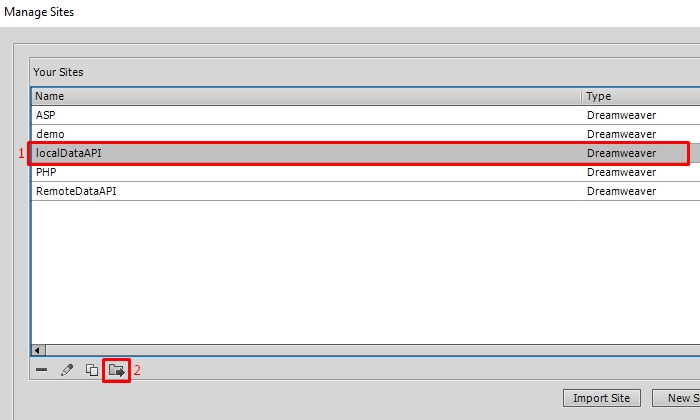
Step 4: In the Manage Sites menu select which site(s) you want to export(1) and then click the export site icon(2).
Step 5
Section titled “Step 5”
Step 5: Select - “Back up my settings…” option. This will export the site including logins, passwords and local paths.

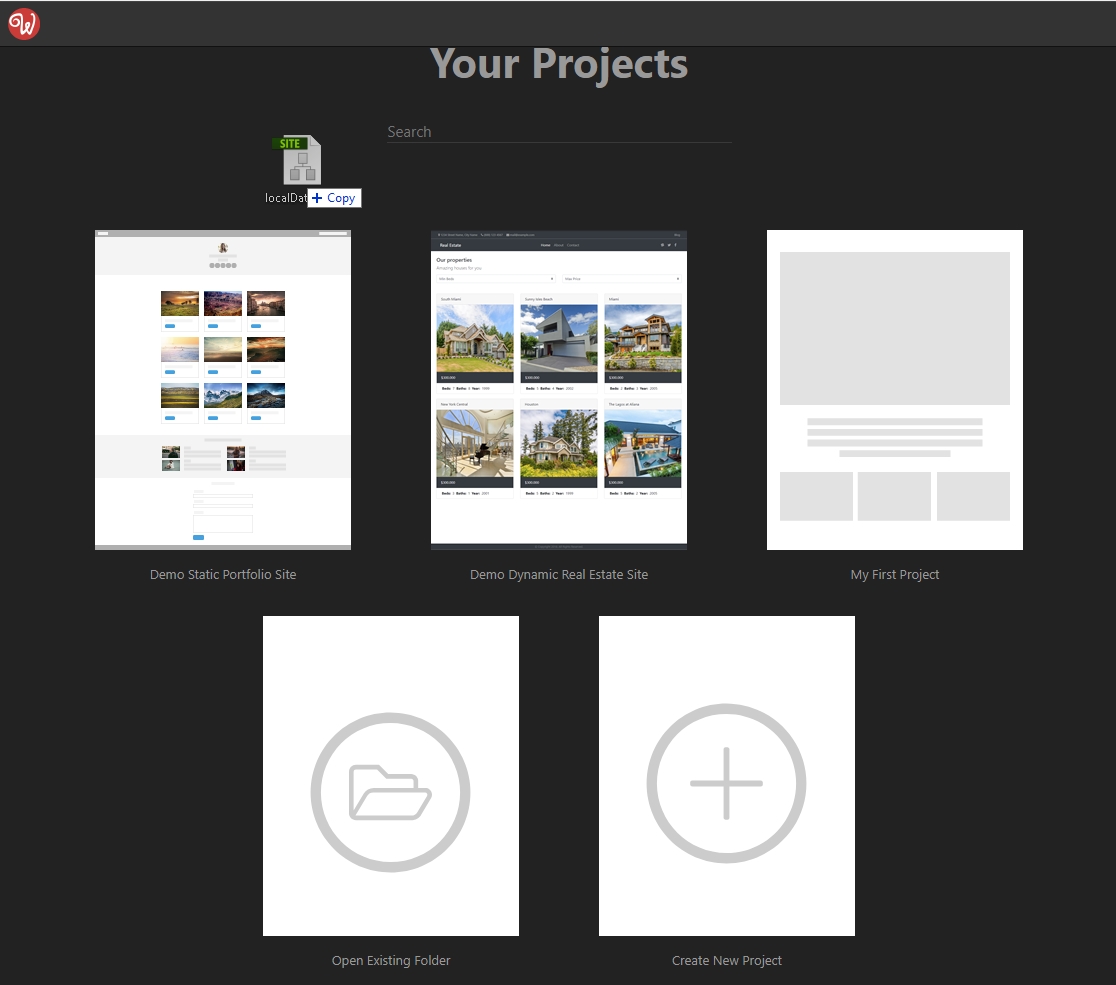
Step 6: Then launch Wappler - open the Projects panel and drag & drop the exported site definition file.
Section titled “Step 6: Then launch Wappler - open the Projects panel and drag & drop the exported site definition file.”
Step 6: Then launch Wappler - open the Projects panel and drag & drop the exported site definition file.
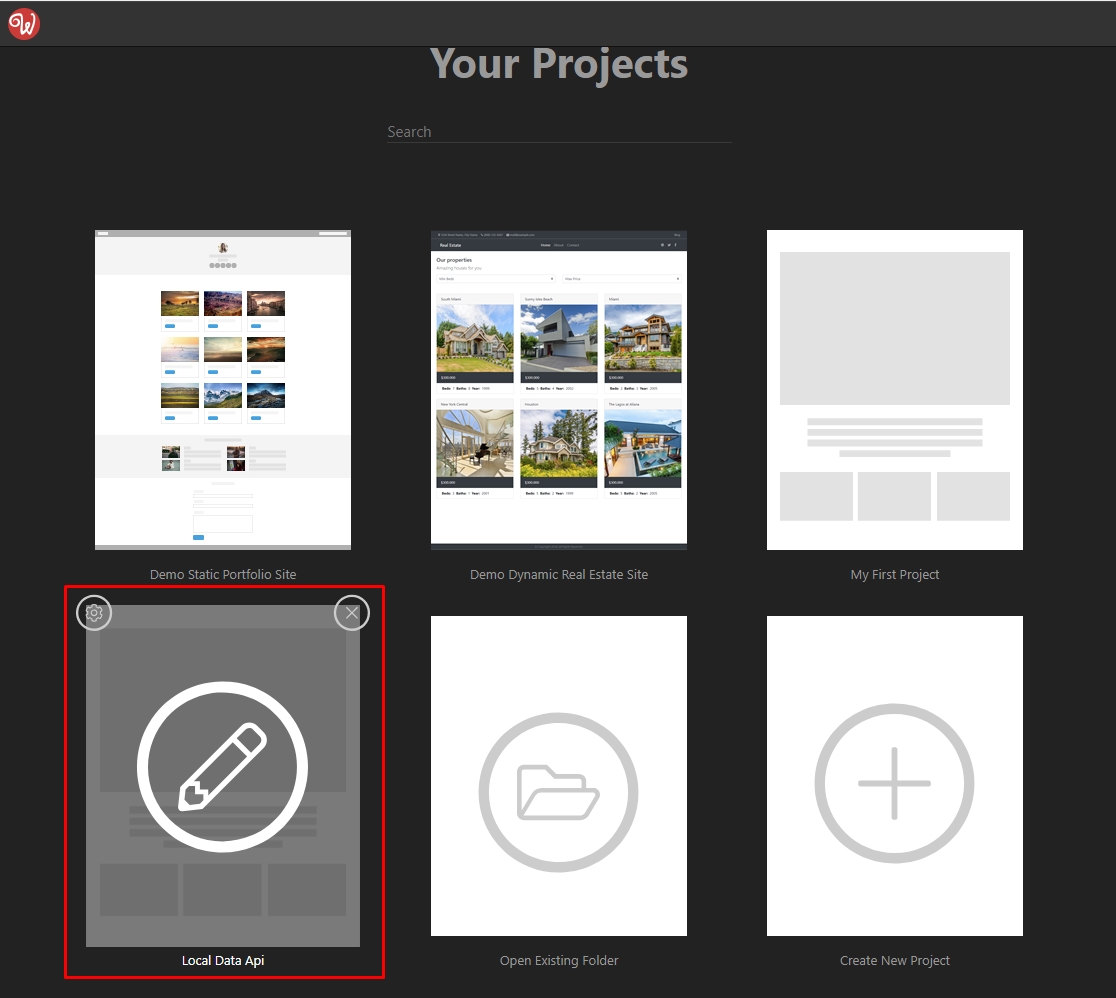
Step 7: Wappler automatically creates a new project, so you can quickly open and work on it.
Section titled “Step 7: Wappler automatically creates a new project, so you can quickly open and work on it.”
Step 7: Wappler automatically creates a new project, so you can quickly open and work on it.
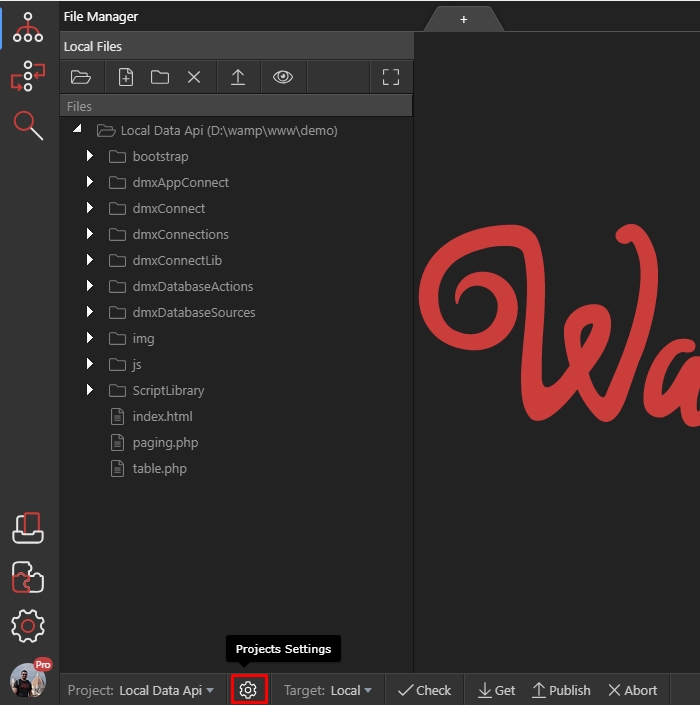
Step 8: Let’s open the project settings from the highlighted gear icon.
Section titled “Step 8: Let’s open the project settings from the highlighted gear icon.”
Step 8: Let’s open the project settings from the highlighted gear icon.
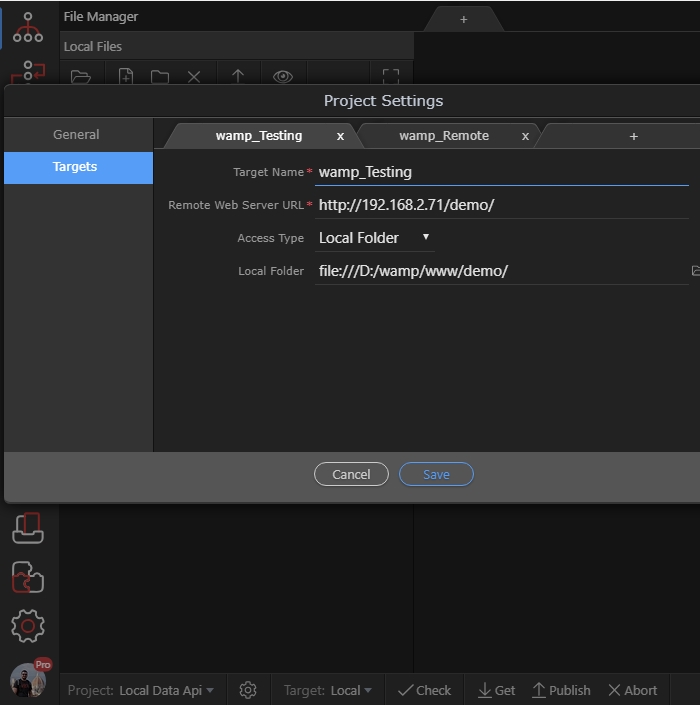
Step 9: You can see all of your targets, paths and login details imported here.
Section titled “Step 9: You can see all of your targets, paths and login details imported here.”
Step 9: You can see all of your targets, paths and login details imported here.