Stripe Integration Part 5 - Adding shipping Details to your checkout
Introduction In Parts 4a and 4b we learned about the basics of sending an order to out checkout and collecting a Stripe Payment. This module will take this furt
Introduction
Section titled “Introduction”In Parts 4a and 4b we learned about the basics of sending an order to out checkout and collecting a Stripe Payment.
This module will take this further and add shipping details to the payment process. This tutorial building on the previous tutorials and assumes you are extending the server action specified within that tutorial. IF you have not completed tutorials 4a and 4b then please read them and ensure you understand the techniques and server action developed in it.
The App Connect Form
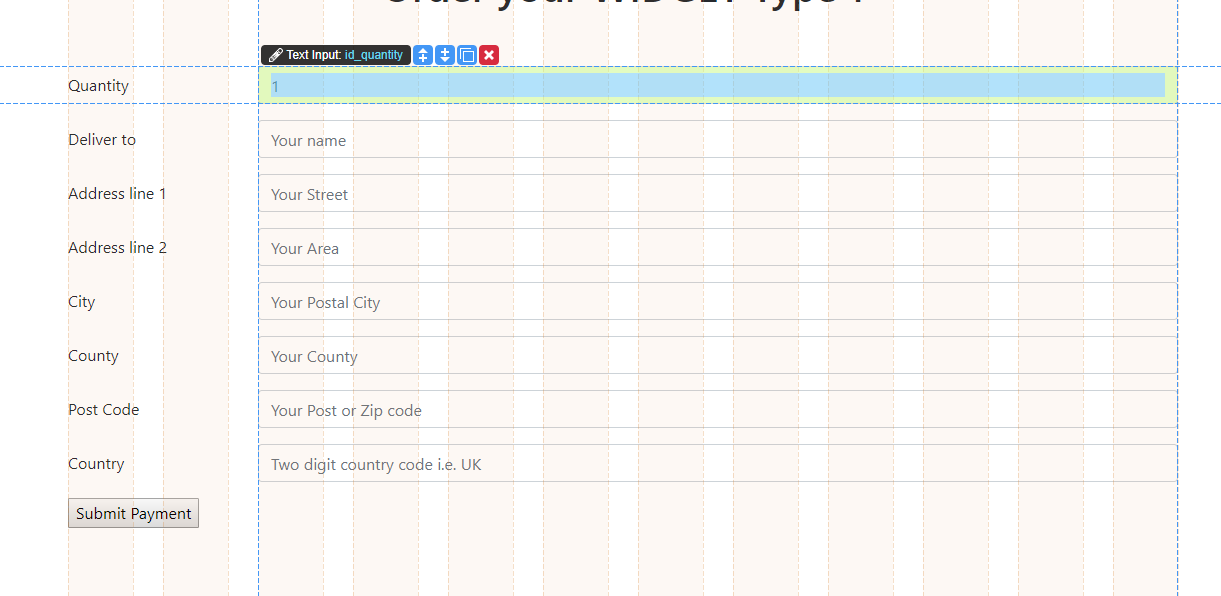
Section titled “The App Connect Form”Firstly we must extend our payment form to include the basic details required for the transaction
Changes to since lesson 4a
Section titled “Changes to since lesson 4a”We still have our original productid hidden input however the quantity field in now a standard “number” input following the quantity of items to be set.
Adding the Shipping Inputs
Section titled “Adding the Shipping Inputs”I have then added the shipping inputs as below
Naming the inputs
Section titled “Naming the inputs”The inputs are named:to correspond as closely as possible to the Stripe API names
Out inputs are
quantity - The quantity of this product
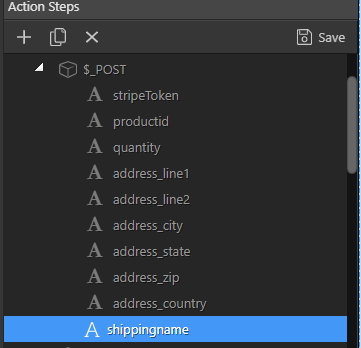
shippingname - This is the name of the recipient, (see note below)
address_line1 - See below
address_line2
address_city
address_state
address_zip
address_country - See below
Important Notes
Section titled “Important Notes”shippingname is mandatory for the stripe API when adding shipping addresses. Failure to send a value will cause the transaction to fail
address_line1 is also mandatory and is the minimum address details that can be supplied. Goods supplied by digital download for instance could send a value such as “e-delivery” to this, object
ISO 3166-1 alpha-2 country codes
Section titled “ISO 3166-1 alpha-2 country codes”address_country requires an ISO 3166-1 alpha-2 country code. In production I would recommend implementing this through a select form element returning the 2 digit code. This could also be used to limit the countries suitable for delivery. In this example I will simply use “UK”
I have deliberately not covered form validations via app connect and the DOM panel as I assume any user performing something such as this is familiar with Wappler validation techniques.
Server Connect Modifications
Section titled “Server Connect Modifications”Setting up the post variables
Section titled “Setting up the post variables”Firstly let us re-import our post variables from the checkout form.
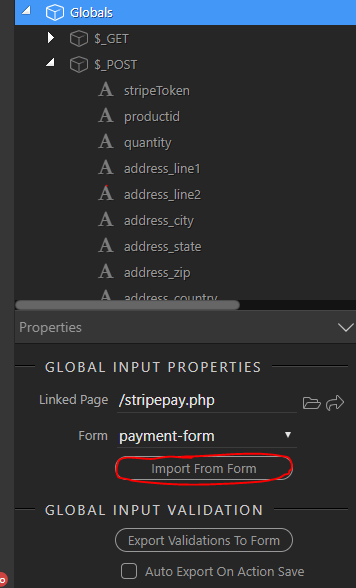
This will create all the necessary POST variables
Changing the API query
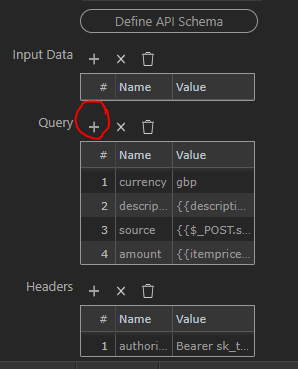
Section titled “Changing the API query”Now we need to add the new data to the API query
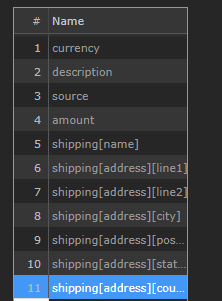
The objects we need to add are
Name : Value
shipping[name] => $_POST.shippingname
shipping[address][line1] => $_POST.address_line1
shipping[address][line2] => $_POST.address_line2
shipping[address][city] => $_POST.address_city
shipping[address][postal_code] => $_POST.address_zip
shipping[address][state] => $_POST.address_state
shipping[address][country] => $_POST.address_country
So select your API stage within the Server Action

Adding the API query parameters
Section titled “Adding the API query parameters”Click “+” and a dd a new query parameter
and enter the above parameters
Adding the query parameter names
Section titled “Adding the query parameter names”![]()
POST values can be selected via the data picker
Adding the query parameter values
Section titled “Adding the query parameter values”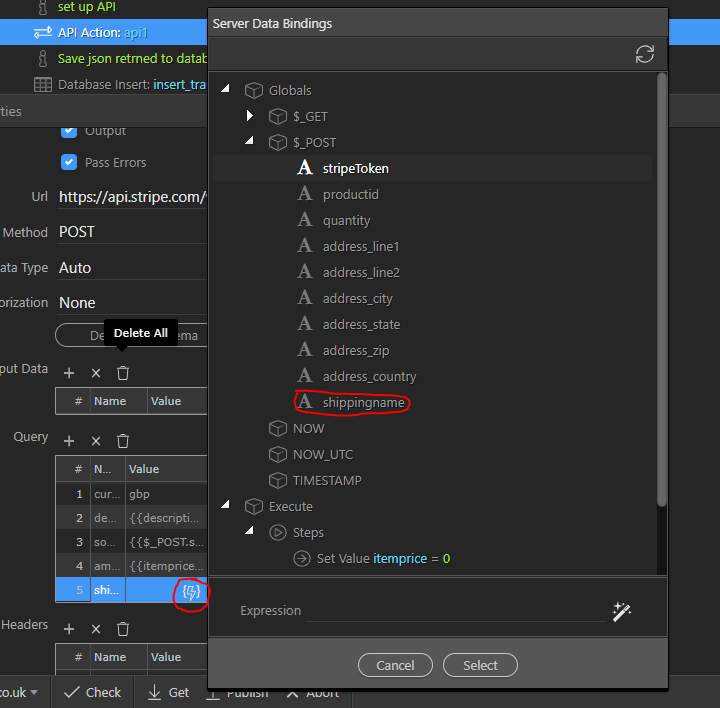
Repeat for each query parameter
Saving the API data to a table
Section titled “Saving the API data to a table”This is an optional stage as the data is already stored in the Stripe PAYMENTINTENT object and is inserted into the table for reference primarily.
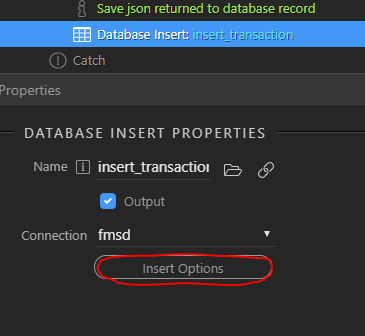
Database Insert
Section titled “Database Insert”Select you database update stage and click Insert Options. Remember this is new transaction, we are not adding shipping to an existing transaction so it is an insert, not an update.
Simply add the POST values to the database table fields below. If using the attached table from lesson 4 these fields should already be in your table
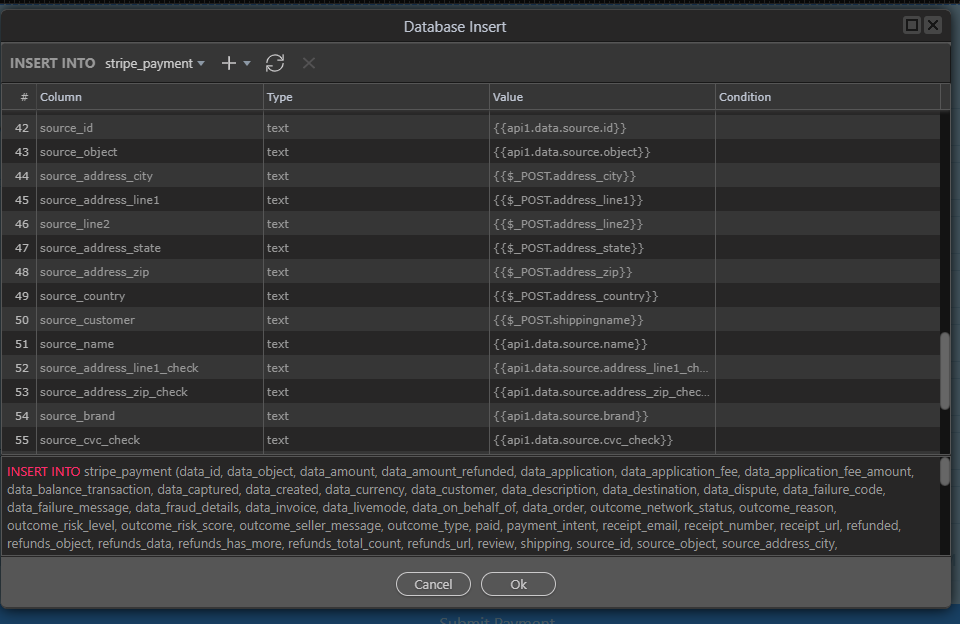
Adding you new POST data to the table
Section titled “Adding you new POST data to the table”Set the new fields to the POST values from your form
Running your new action
Section titled “Running your new action”Launch your page in your browser
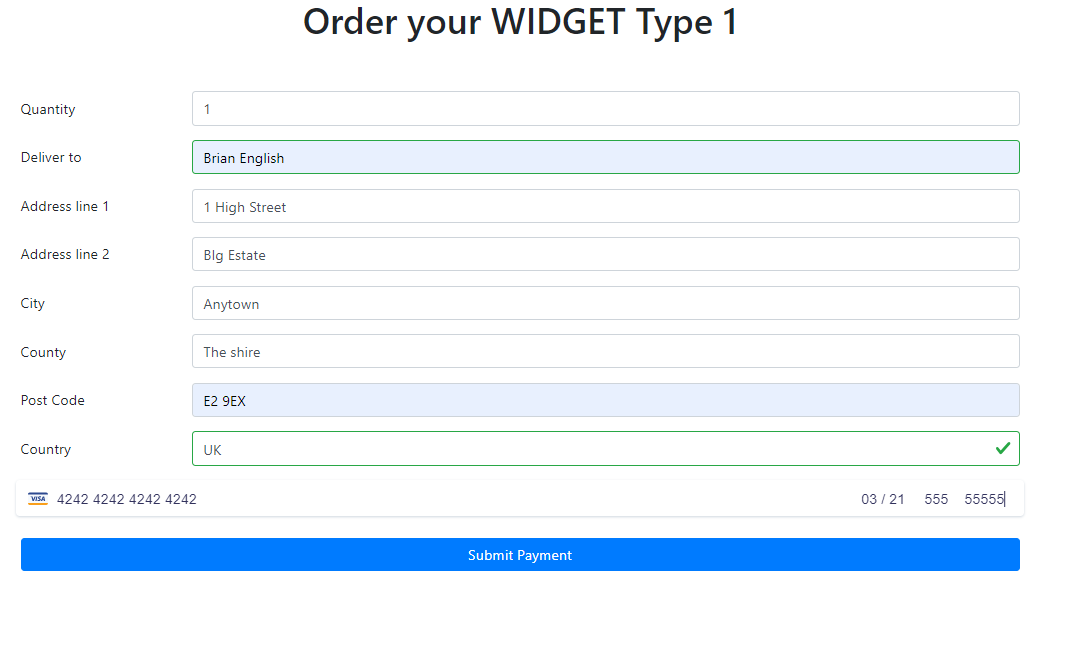
The data is submitted to stripe
Viewing your transaction
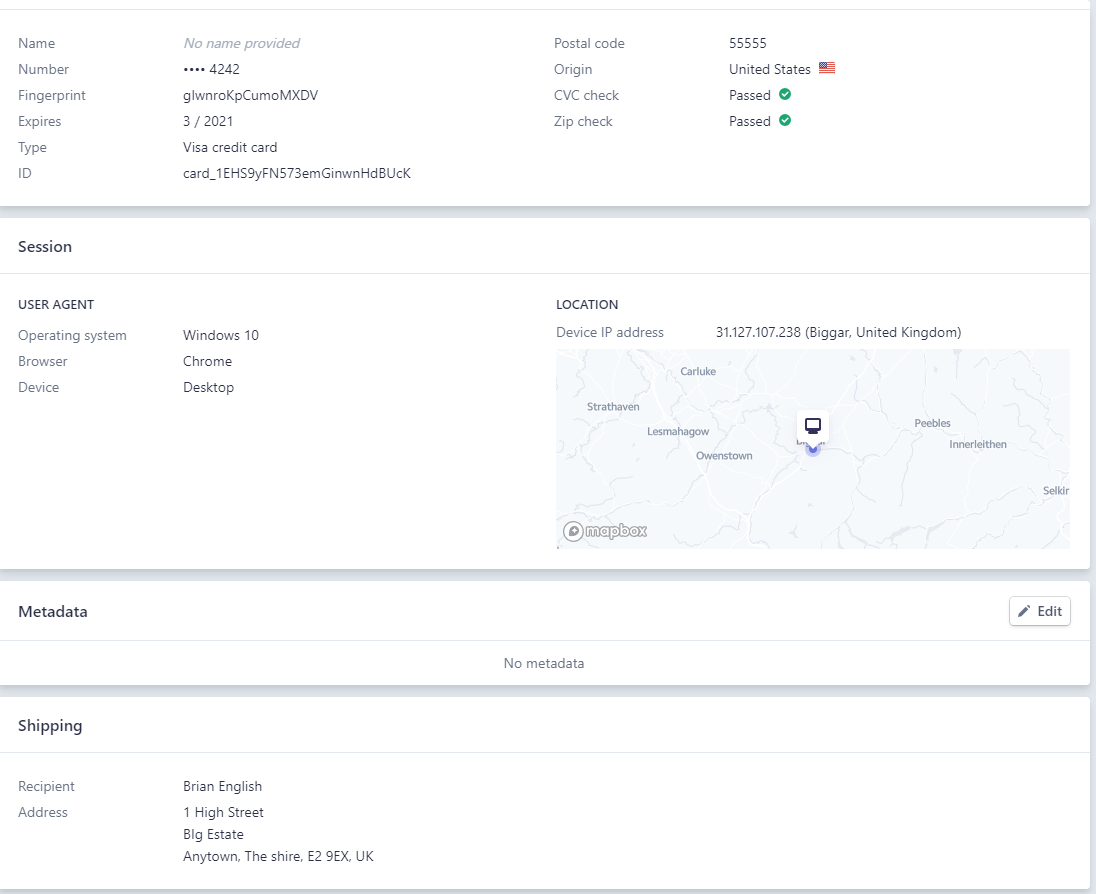
Section titled “Viewing your transaction”Go into your stripe Account and select test data. Click payments
All your payments will be listed

Select you latest transaction and the data is shown in the dashboard
The Database Copy
Section titled “The Database Copy”View your database table in your preferred application so see the data has been added.

Next we will look at linking PAYMENTINTENT transactions with Customers in the CUSTOMER object