Sending Form Data to Email
You can send form data to email thanks to the mailer component integrated in Wappler. This is useful for contact forms, inquiry forms, reservation forms or any
You can send form data to email thanks to the mailer component integrated in Wappler. This is useful for contact forms, inquiry forms, reservation forms or any other form which data needs to be sent to an email.
For a video using Wappler v6 see:

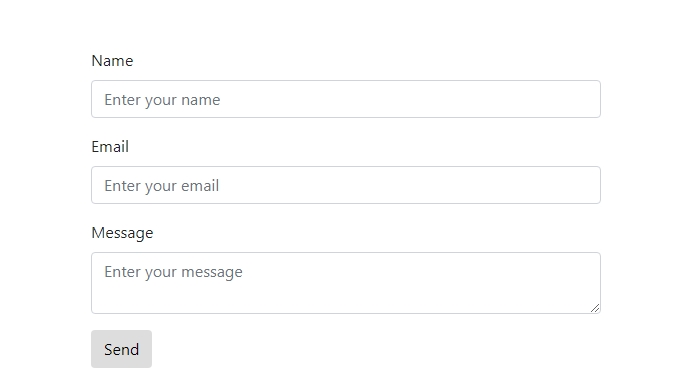
First create your form, the way you need it. We created a really simple form containing two text fields, a text area and a submit button:
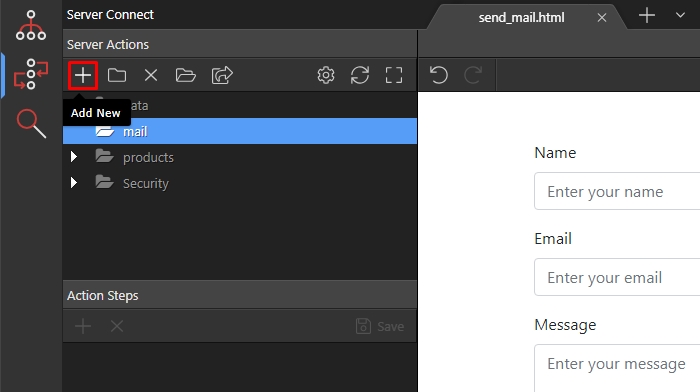
Open the server connect panel and create a new server action:
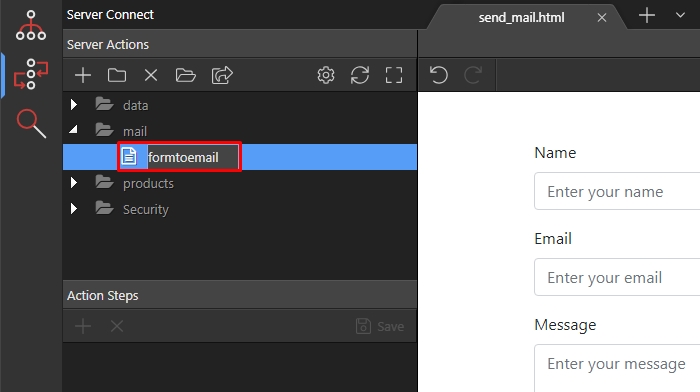
Let's call it formtoemail:
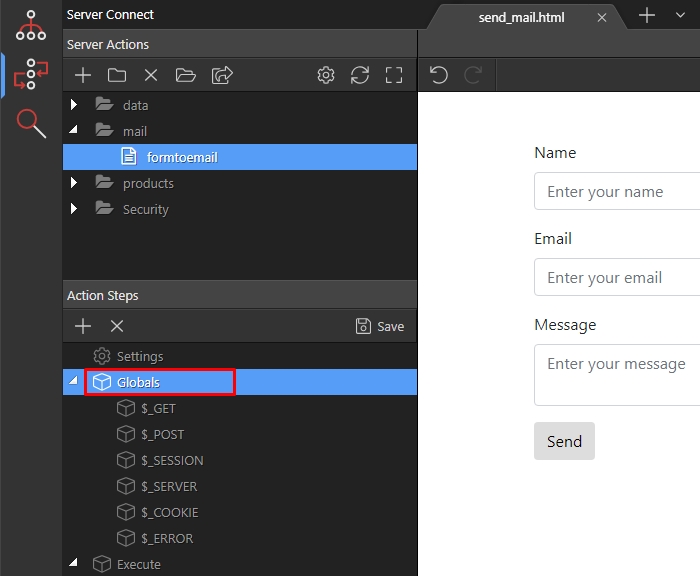
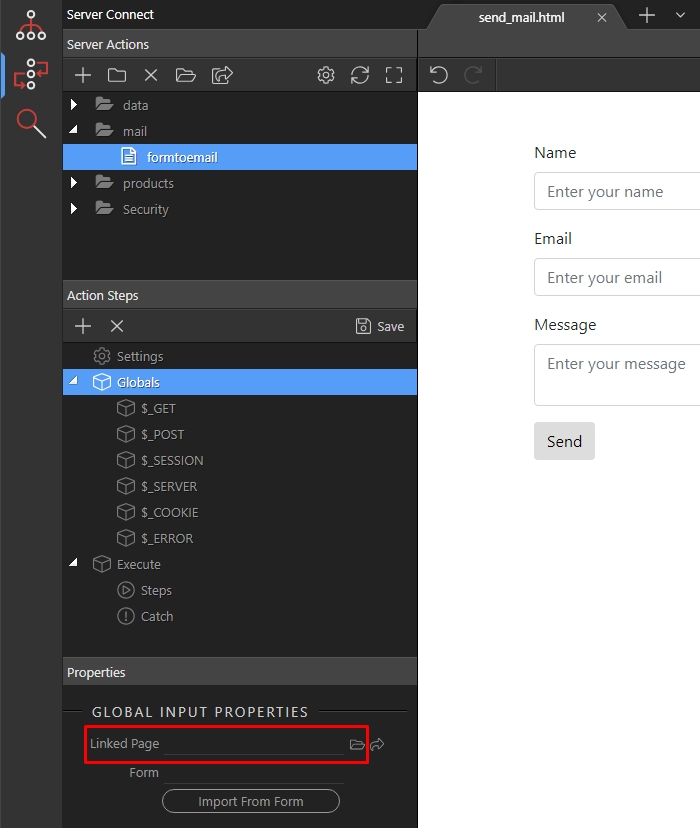
Select Globals under Action Steps:
Then in the properties panel, in the linked page field browse to your page, containing the contact form and select it:
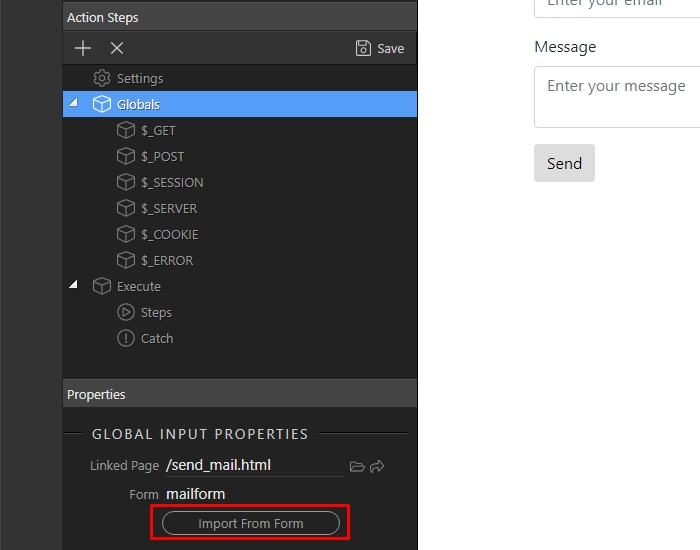
Then, select your form from the Form menu:

Click Import From Form:
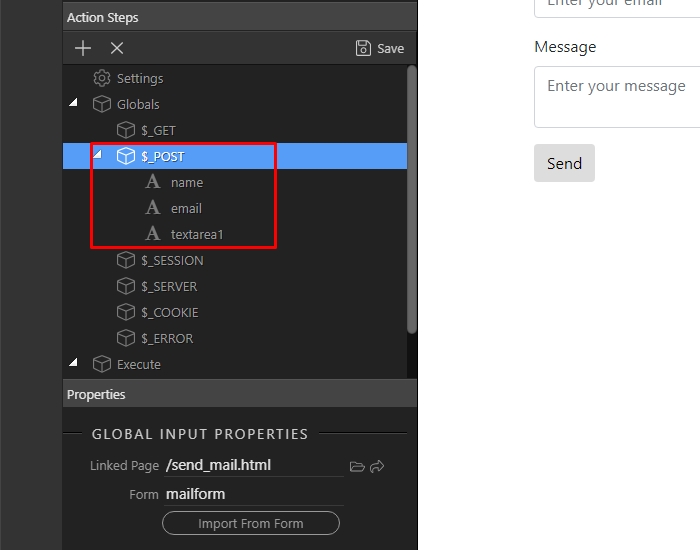
This imports the form fields under the global POST variables, so they are now available for binding:
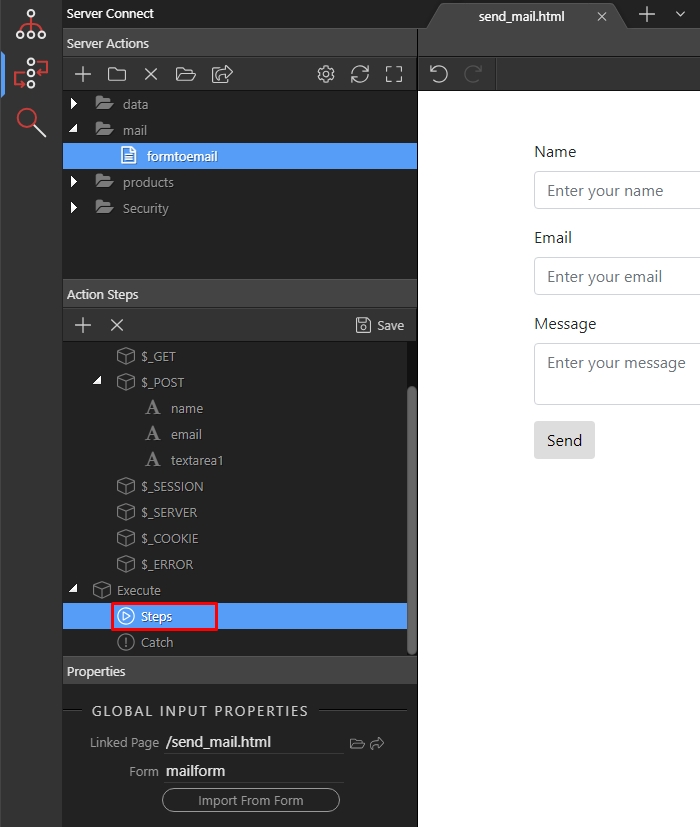
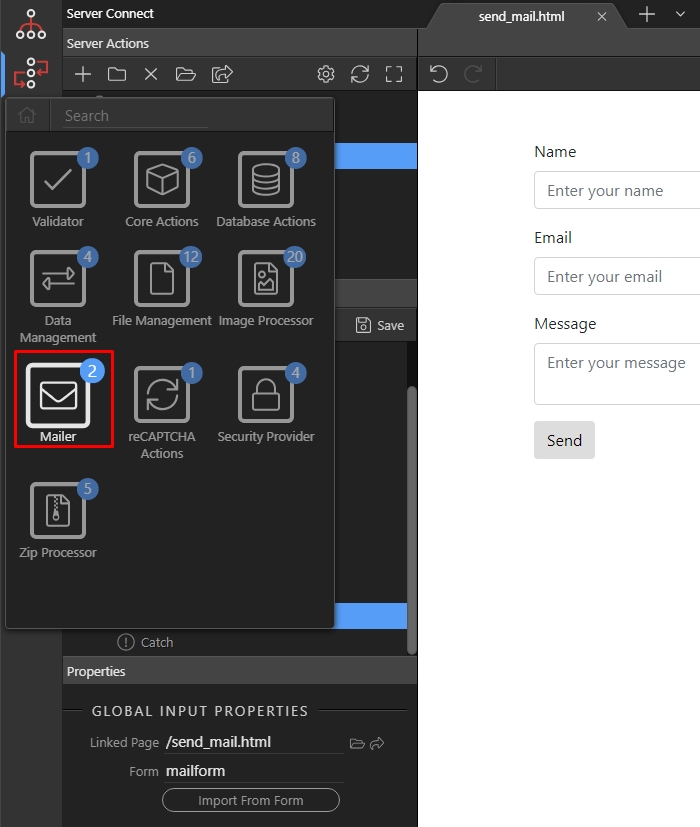
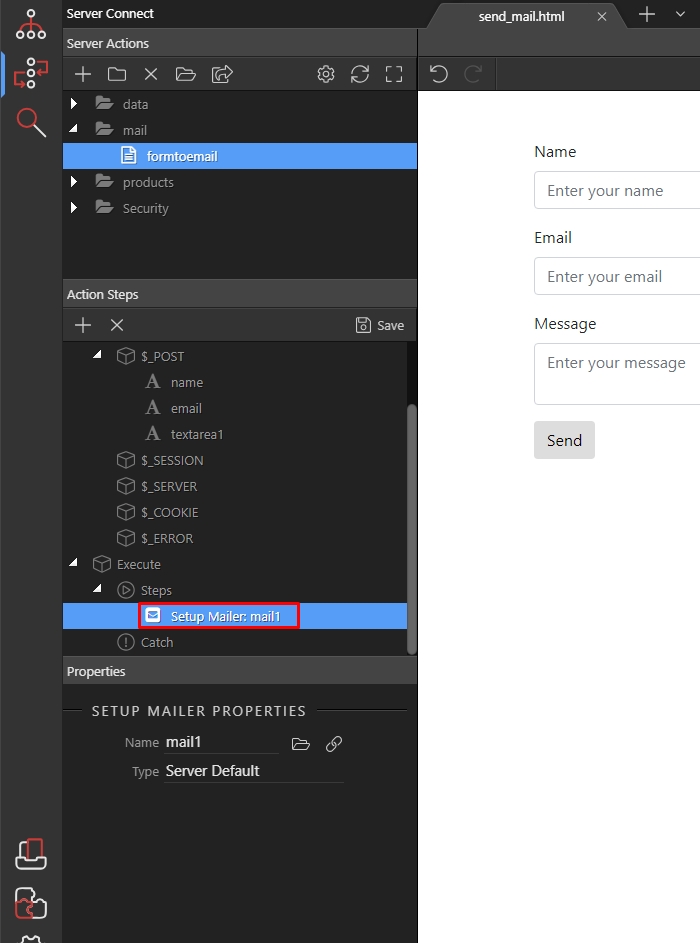
Right click steps:
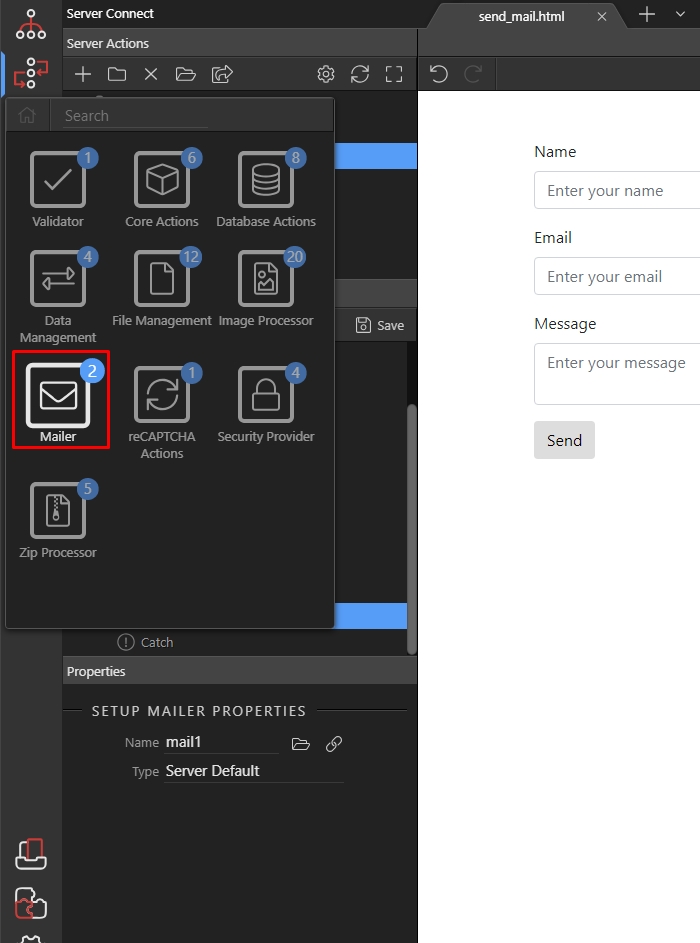
Open the Mailer category:
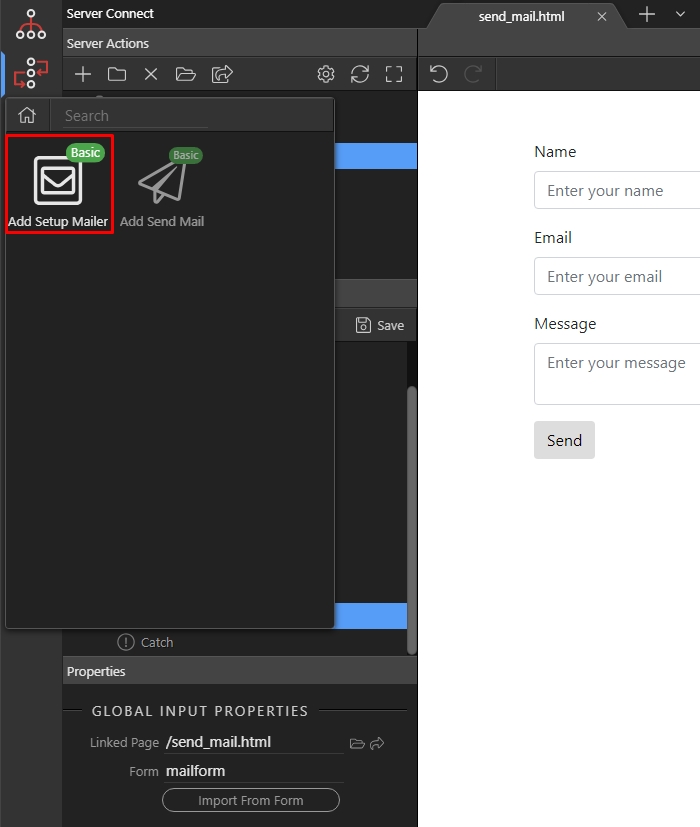
First we need to setup the mail send component:
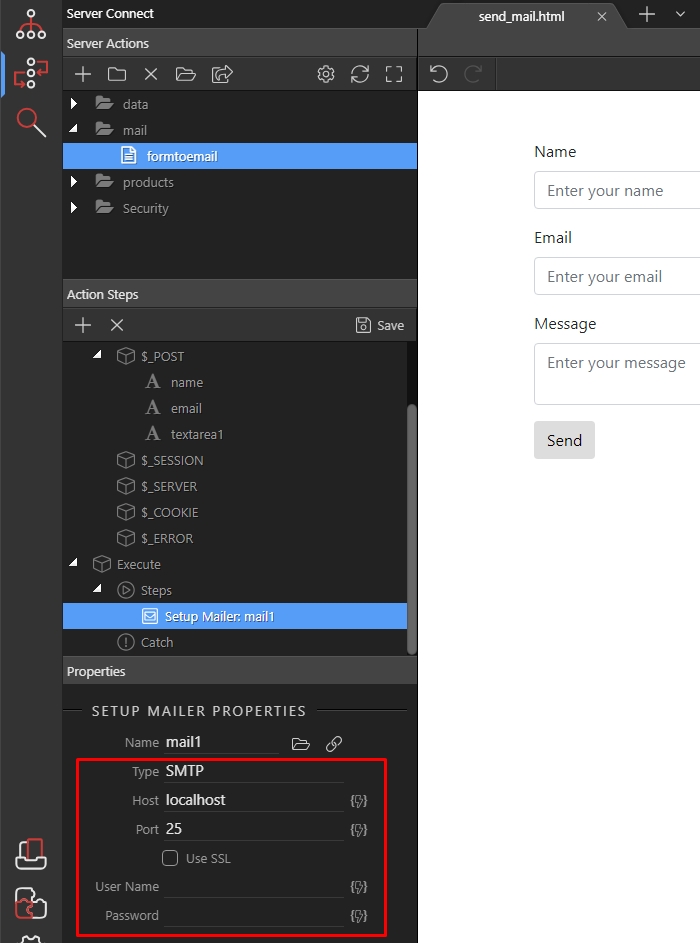
In the type menu select your mail send component. If you are using SMTP server, enter its details - host, port, username and password. These are usually provided by the mail server provider - so if you are not sure what you should use here, just contact your hosting provider/mail service provider:
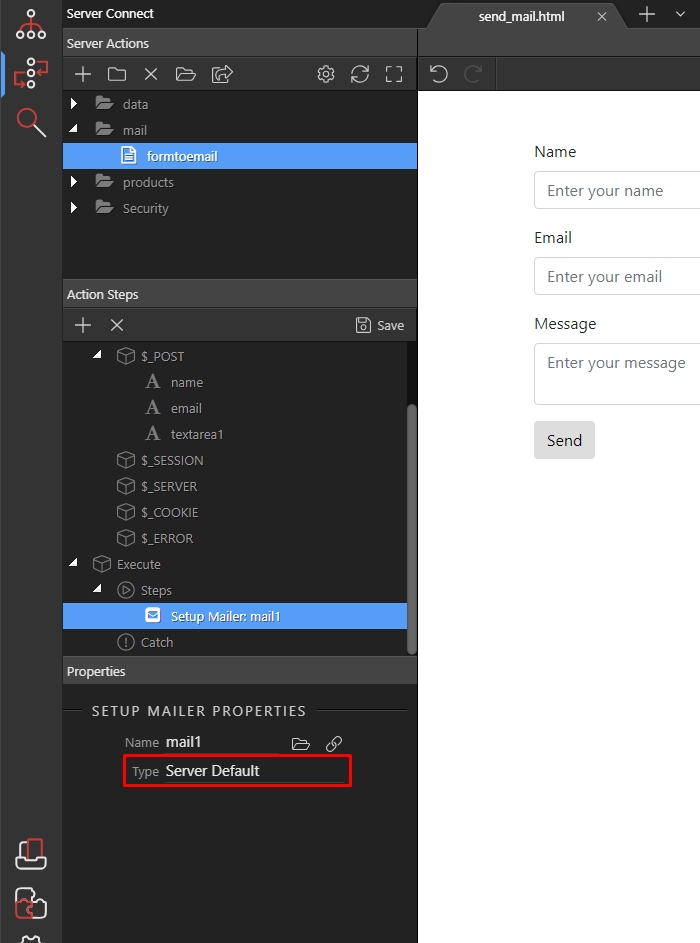
Most of the hosting providers offer a default mail component, which you can use. Just select Server Default from the dropdown and you won't have to handle complicated SMTP setup:
Now, right click the Setup Mailer step:
Open the Mailer category:
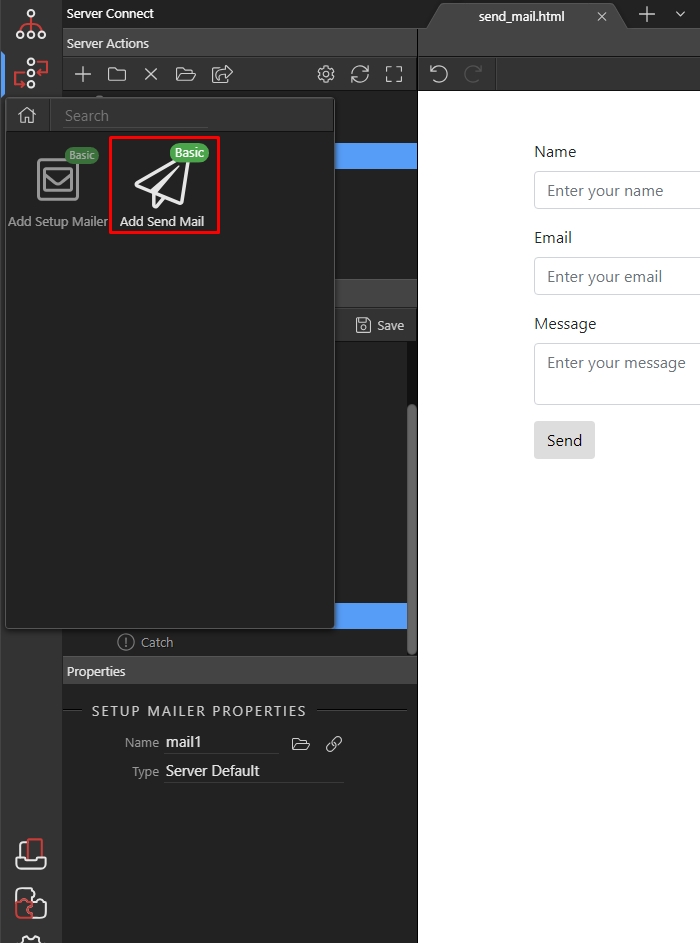
Add Send Mail:
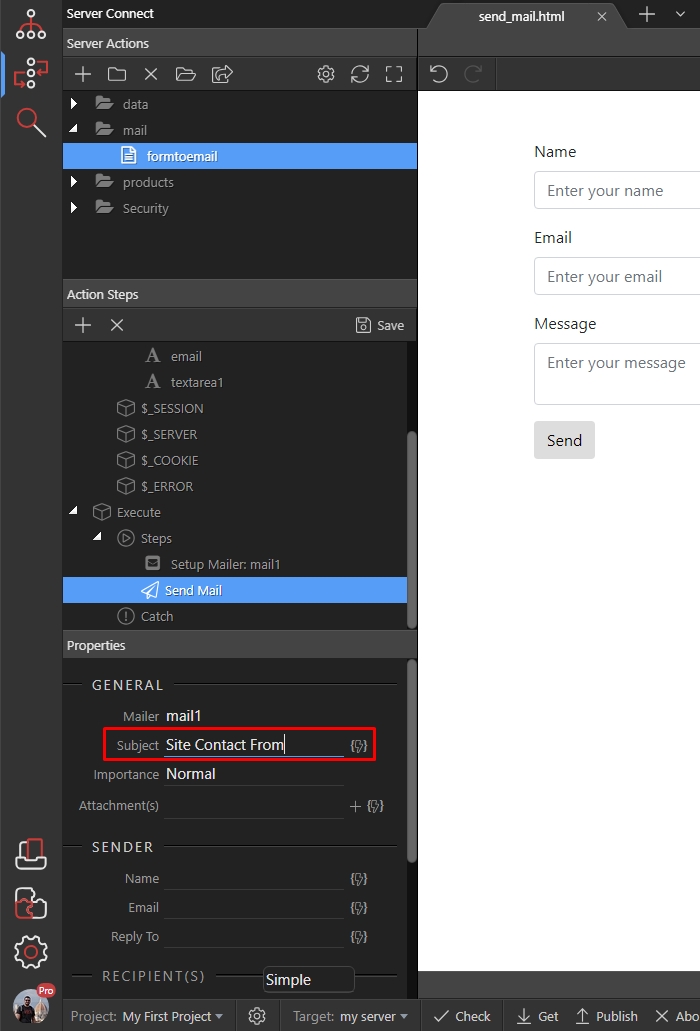
Enter the email subject:
Then scroll down and under sender for the sender name select the dynamic data picker:

We get the sender name from the form name field, so select the name field under POST variables, then click select:

For the sender email select the dynamic data picker:
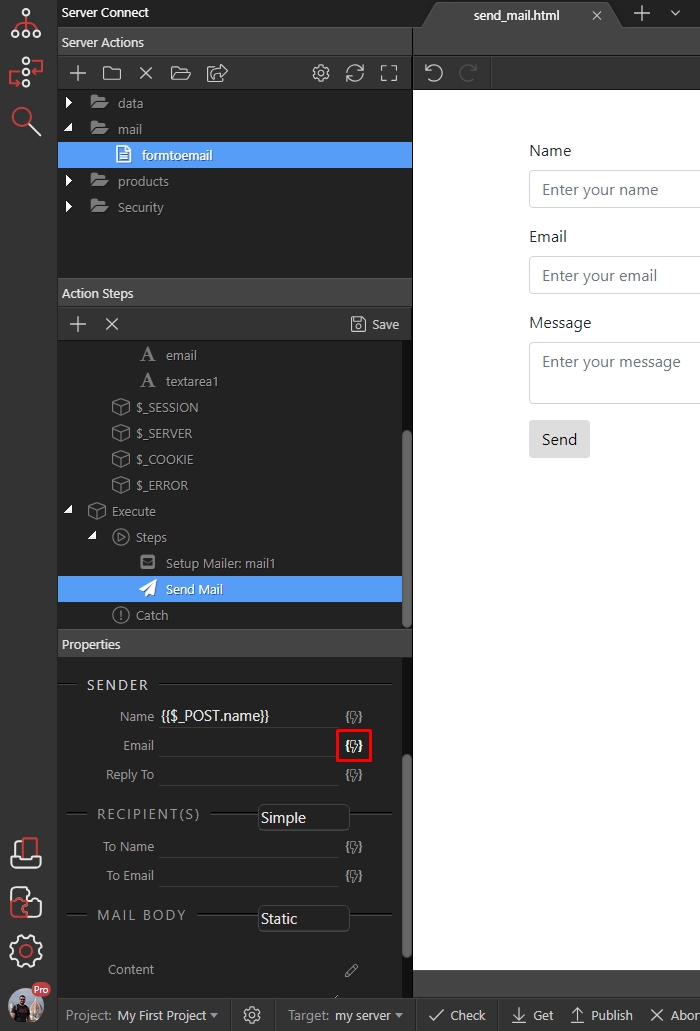
We get the sender email from the form email field, so select the email field under POST variables, then click select:

Enter the recipient name and email:

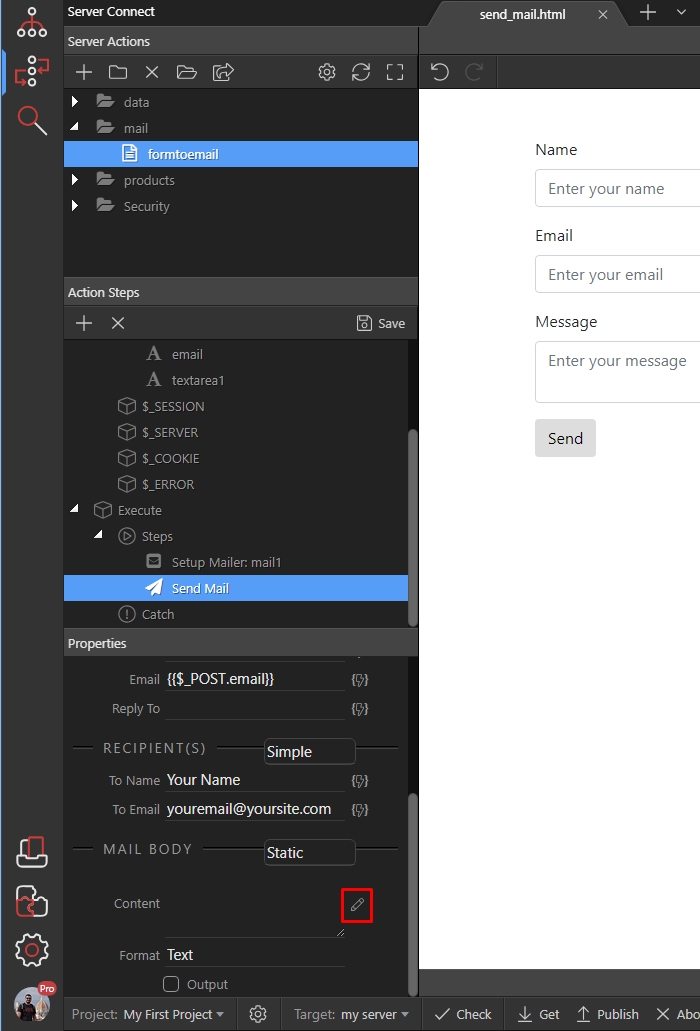
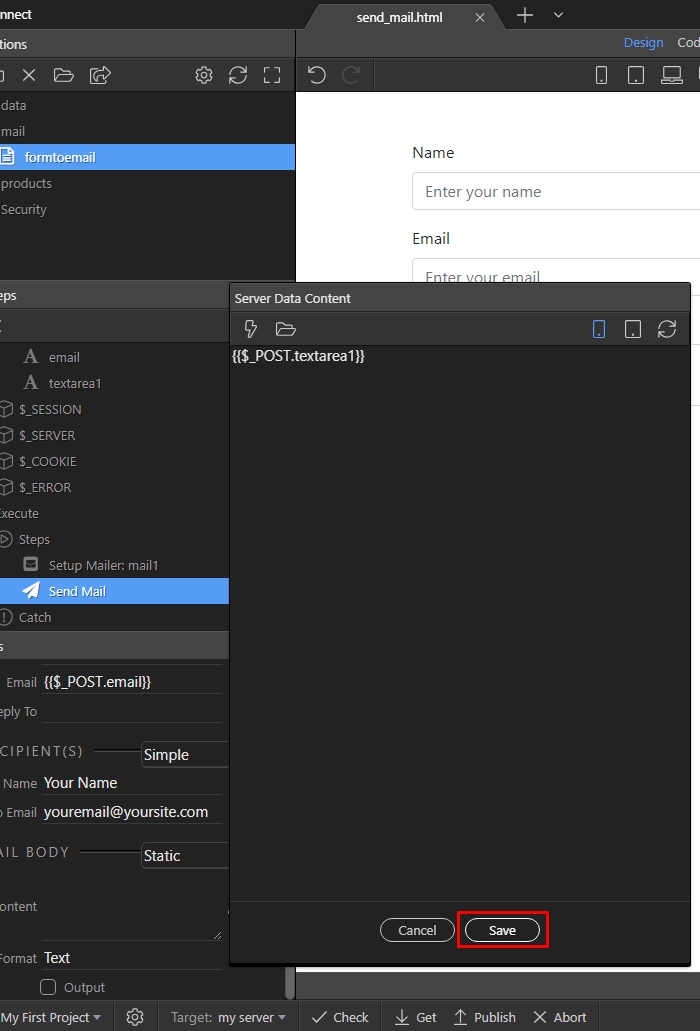
Now lets bind the textarea content to the content of the mail. Click the pencil icon next to the content field:
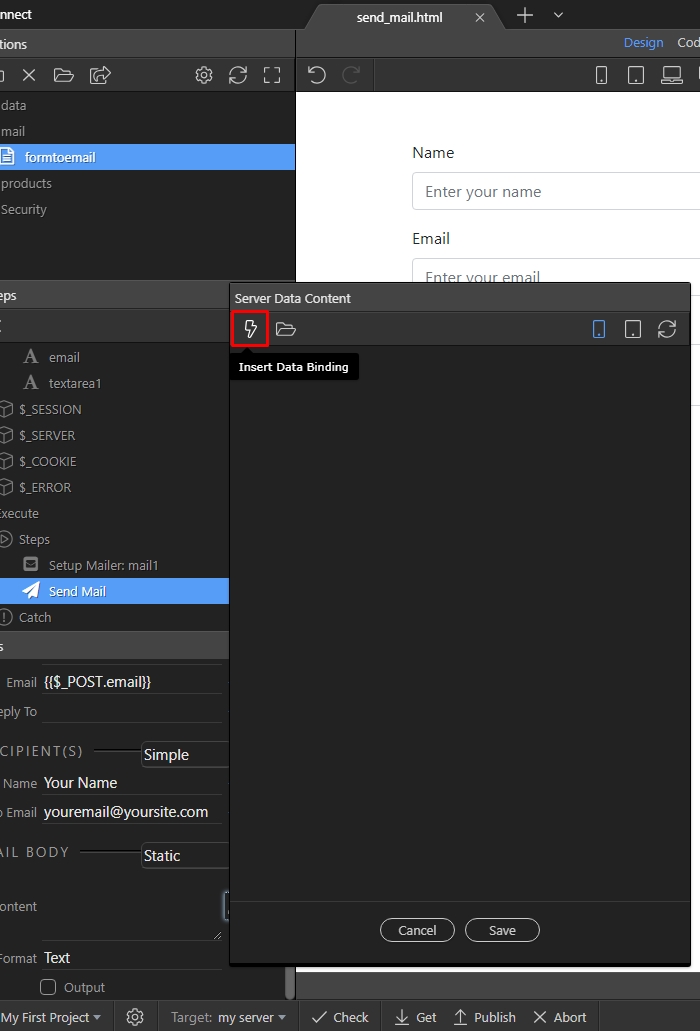
Then select the dynamic data picker:
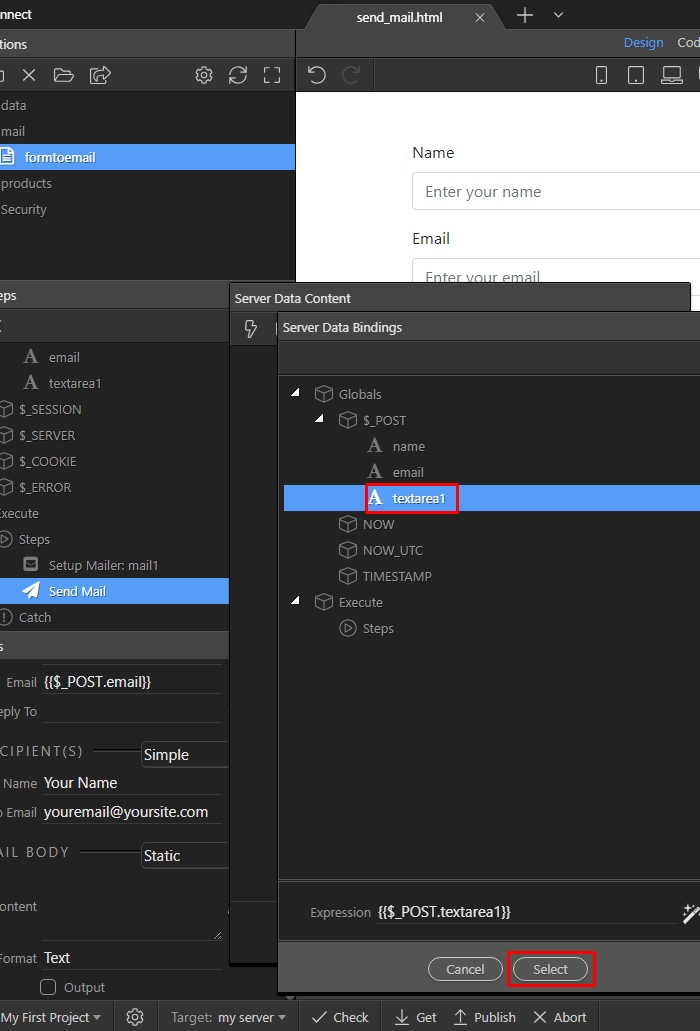
Select the textarea and click the select button:
Click the save button:
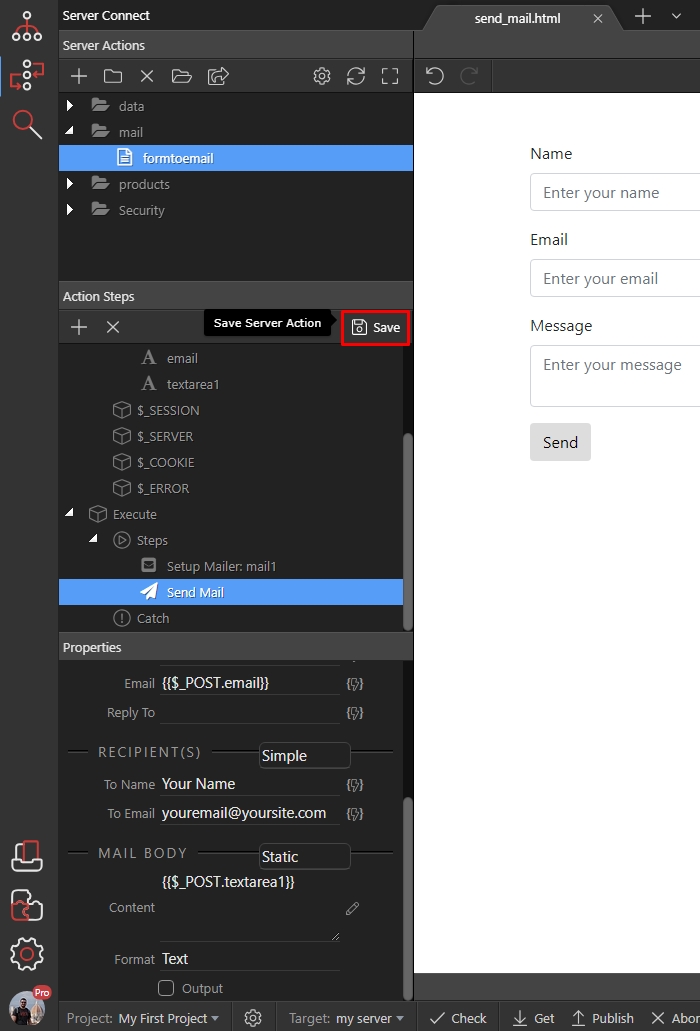
Save your server action:
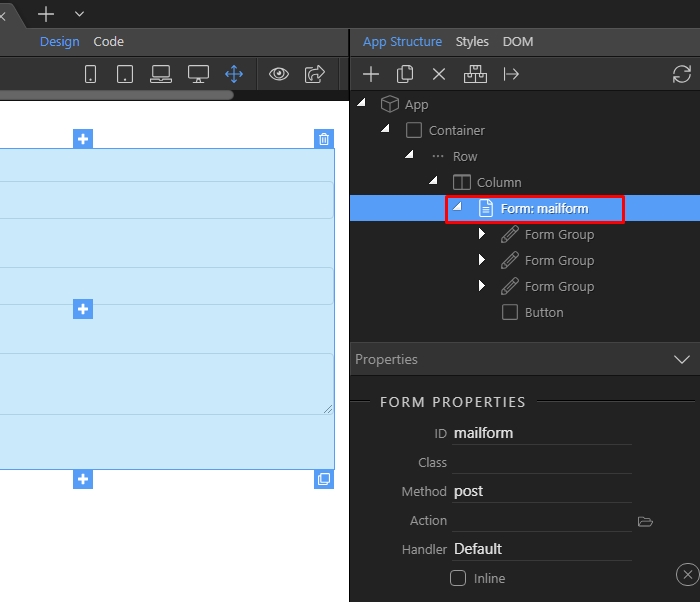
Then in App Structure panel select your form:
Change the handler to DMXzone Server Connect:
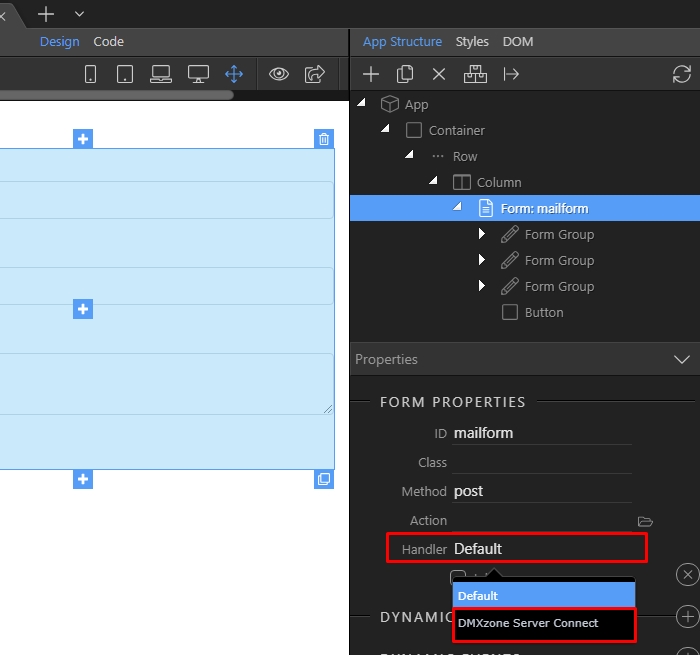
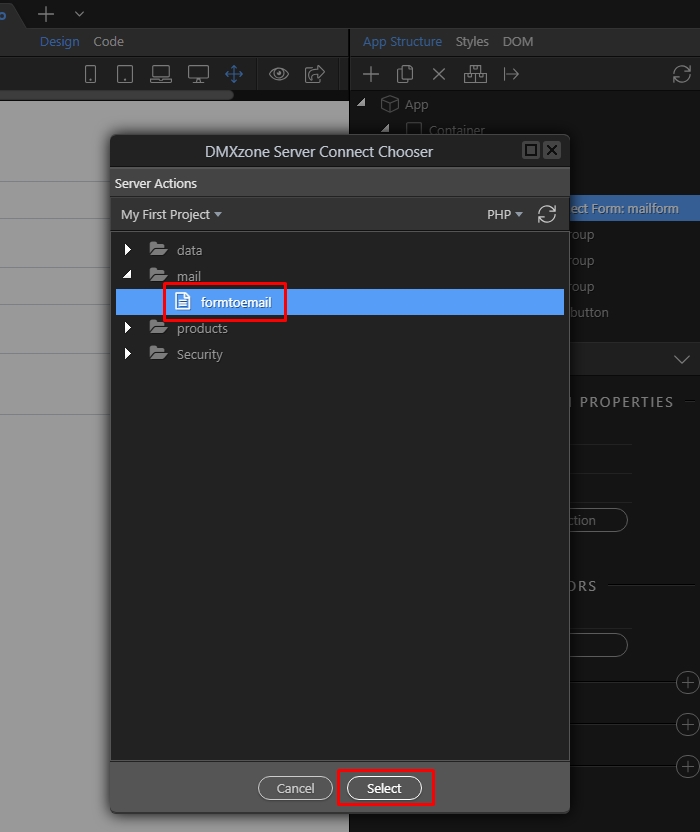
Select a server action for your form:
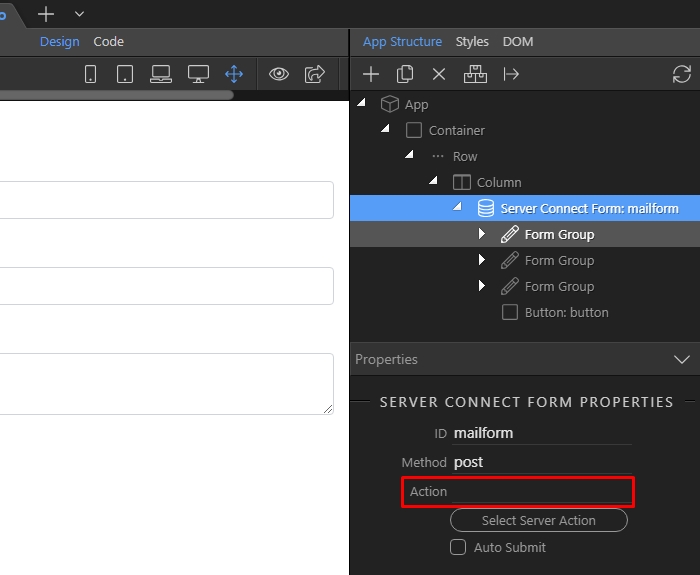
Here select the server action which we just created:
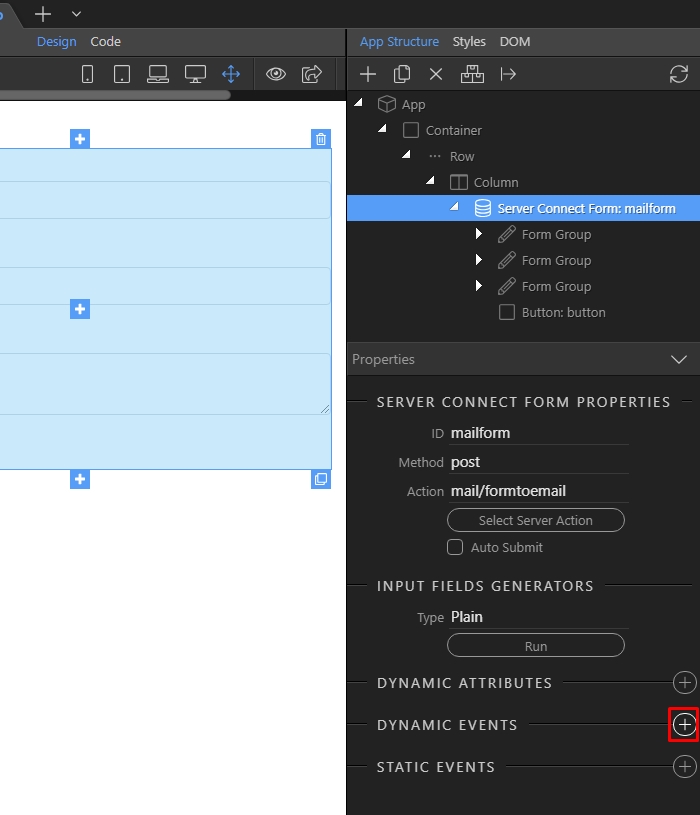
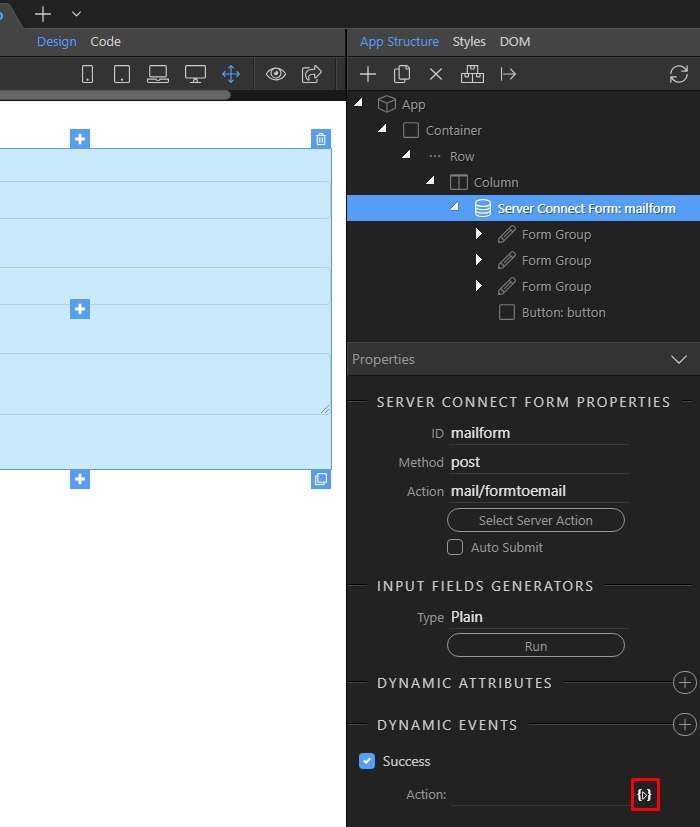
And you are done. Now, additionally you can run some event when the form has been successfully submitted. Add new dynamic event:
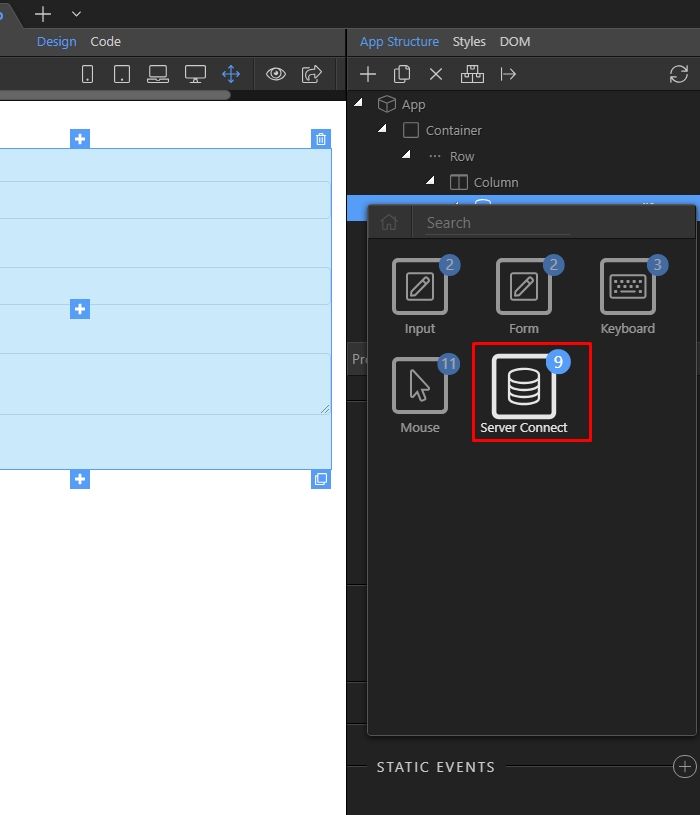
Select server connect:
And select on success:

And click the dynamic action picker icon:
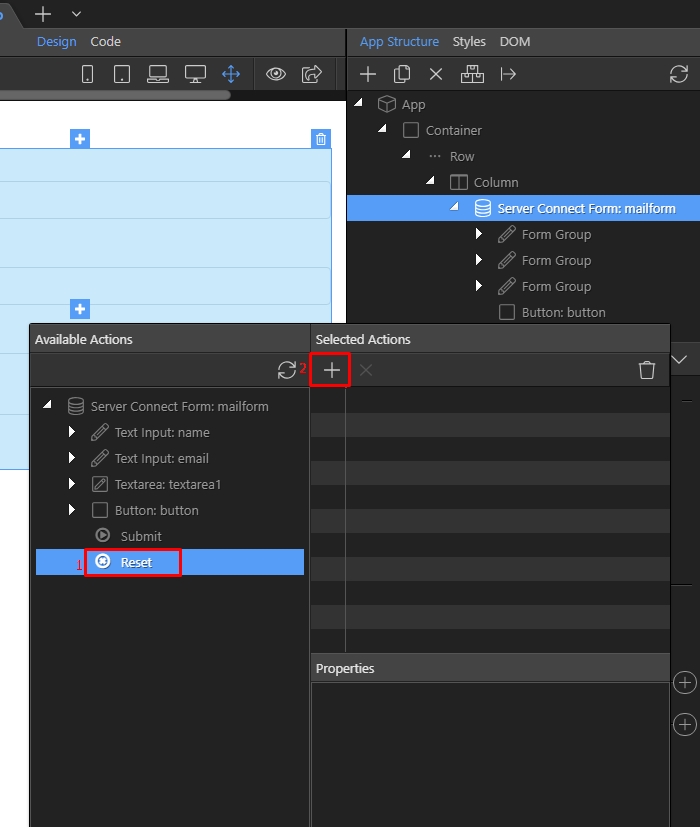
Under Server Connect Form (your email form) select Reset (1) and add this action (2):
Click Select:
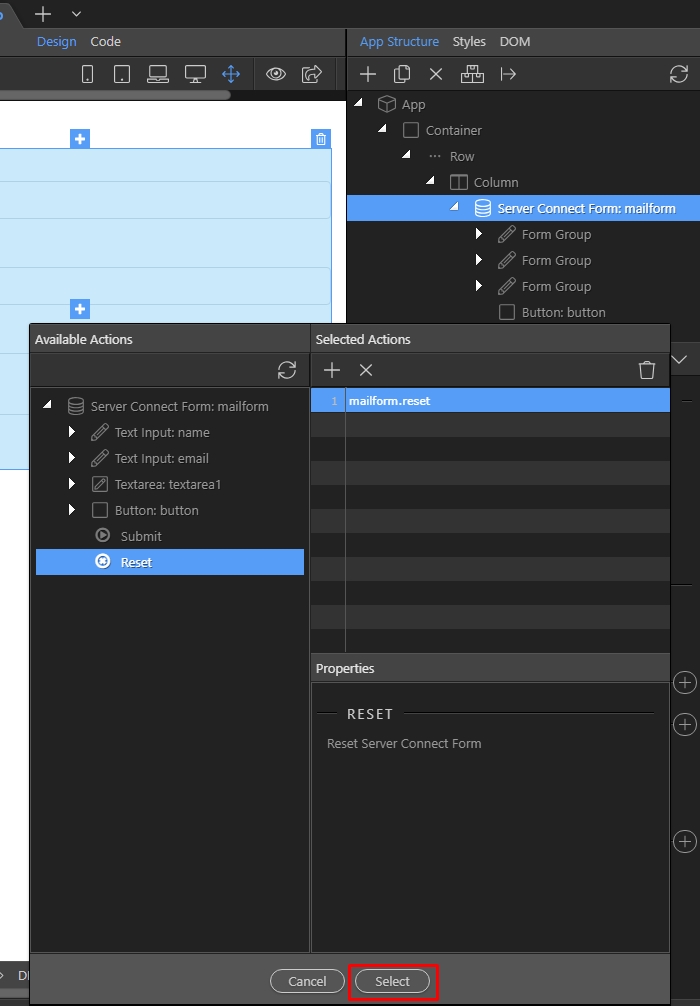
And that's all. Your form will send the email, and the fields will be cleared. You can add as many dynamic events as you like, such as: show an alert, redirect to another page etc.