Creating Multi Steps Forms
Got a long form on your website? Break it up into smaller logical sections and convert it into a multi-step form easily. In this tutorial we will show you a very basic form, but you can extend it as per your requirements adding more inputs, using different layout etc.
Creating a Variable
First we need to add a variable on our page. This variable will control the active step in our form.
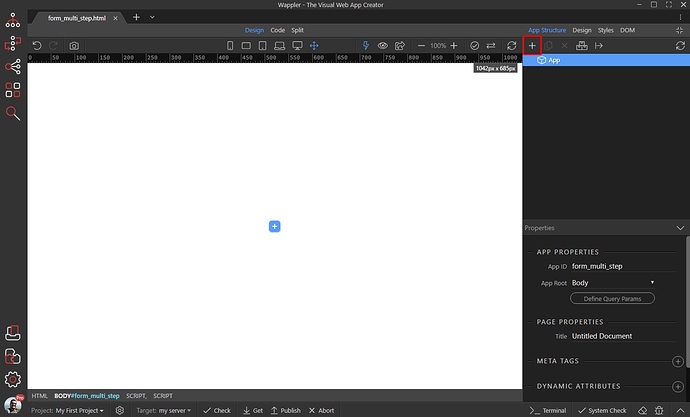
In the App Structure panel, add new component:
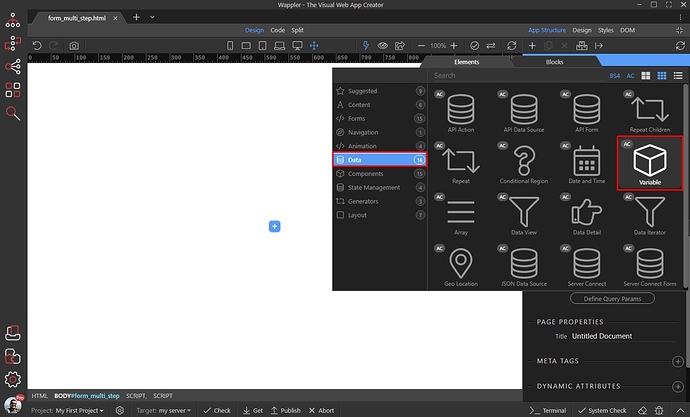
Open the Data menu and select Variable:
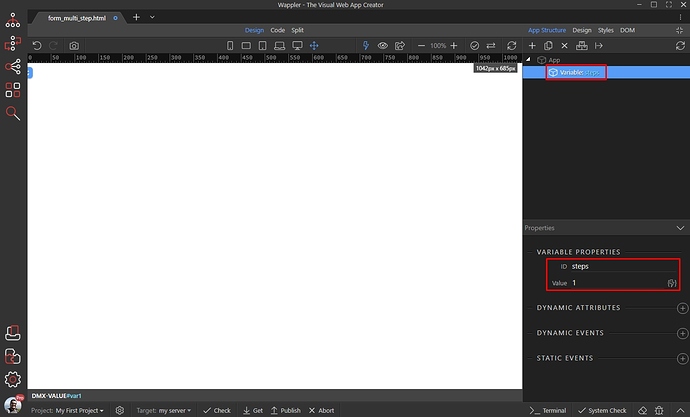
We call the variable steps and set its value to 1. This way the first step will be displayed on page load:
Creating the Form Layout
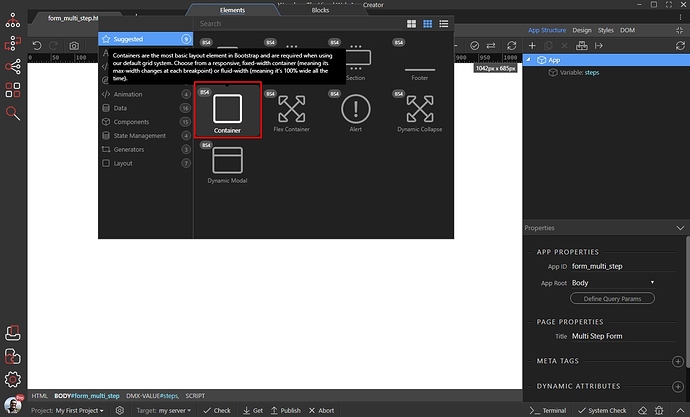
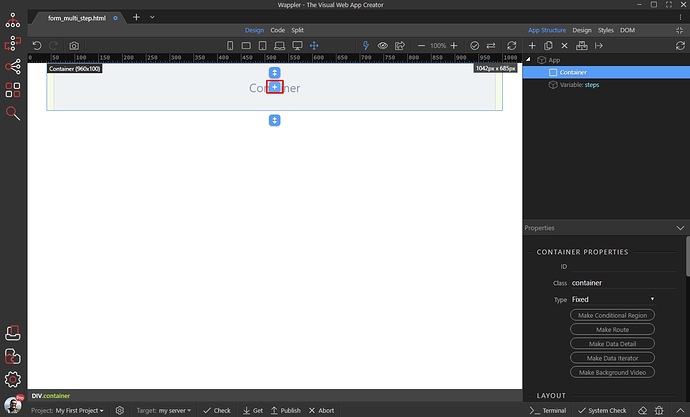
Now, we need to add the form on the page. We will nest the form into a container, but you can use it in whatever element you need. First we add a container on our page:
Then we click the Add Inside button to add the form inside it:
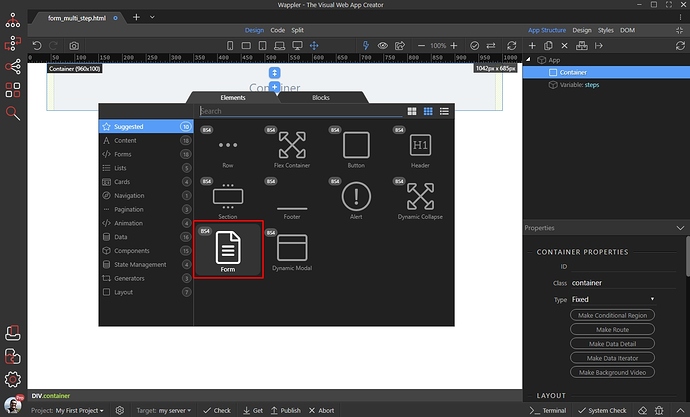
Select Form:
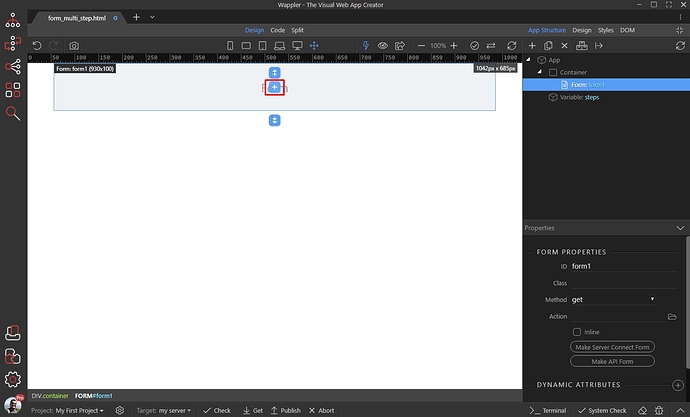
Your form has been added on the page.
Later you can adjust its settings - like method or make it a server connect form if you need to run any server action with it. We already covered this in other tutorials so we won’t show this again.
Now, let’s add the content inside the form. Click the Add Inside button:
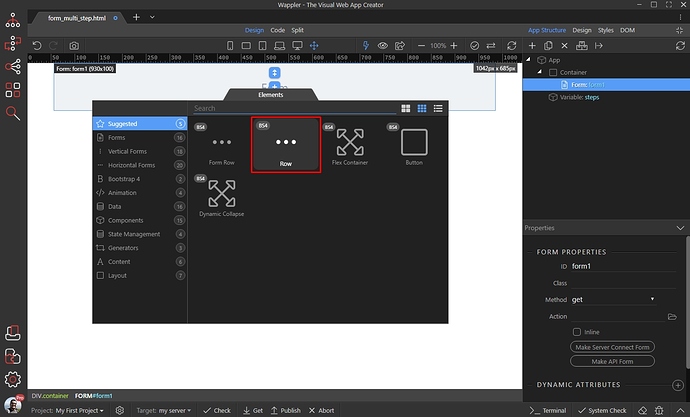
And add a row. Add as many rows, as your steps will be. Every row represents a separate step:
In our case there will be 3 steps, so we added 3 rows:
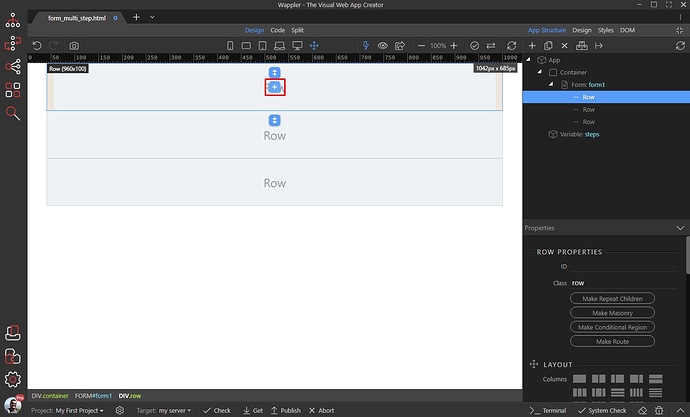
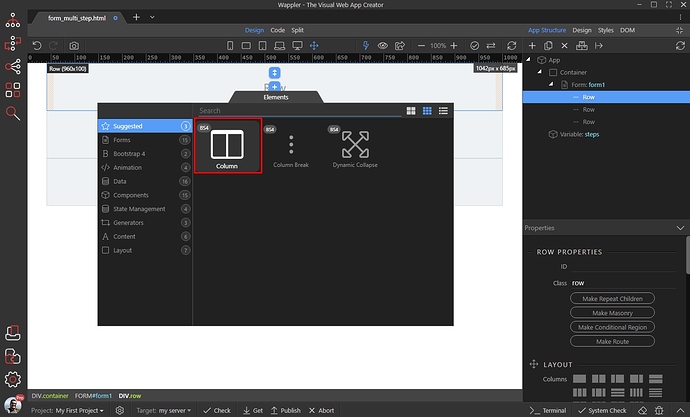
Click the Add Inside button in the first step (row). Add a column there:
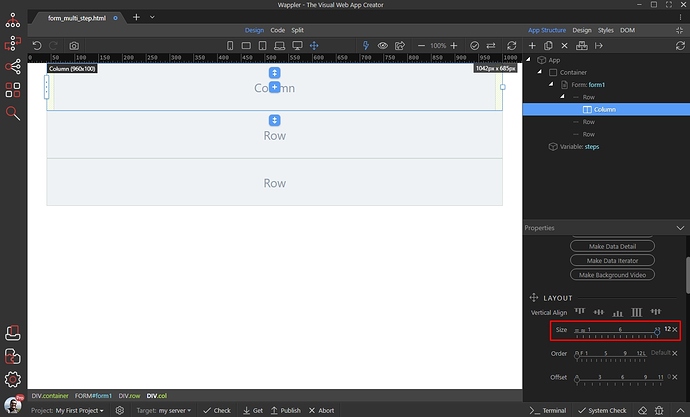
We set the column width to 12:
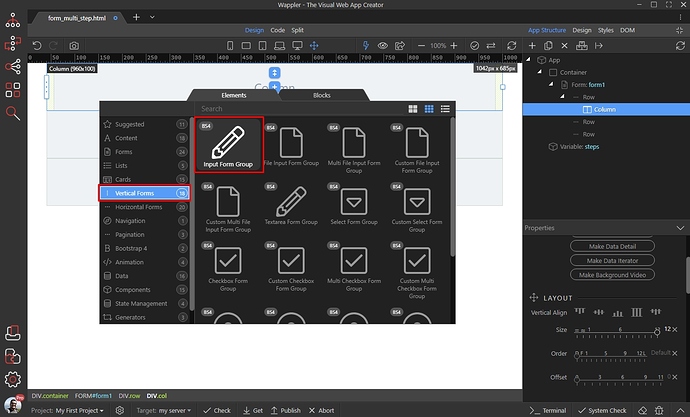
Then inside the column add your inputs, which are required for this step. Choose if you want to add separate fields, or use any of the available form group layouts (horizontal/vertical). We click the Vertical Form group, as we need to use the vertical form group layout. Then we add a text input:
Add as many inputs/form groups here as you need. We only need one input in this step, so we won’t add anymore.
Add the Next Step Buttons
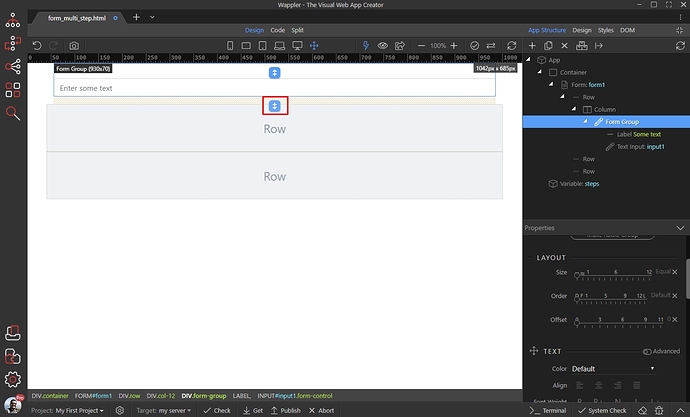
Let’s add and configure the “Next” button for this step. Click the add after button, to add it after your last input in this step:
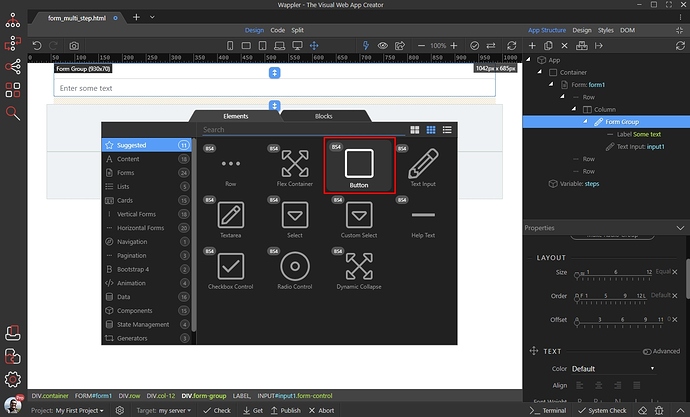
And add Button:
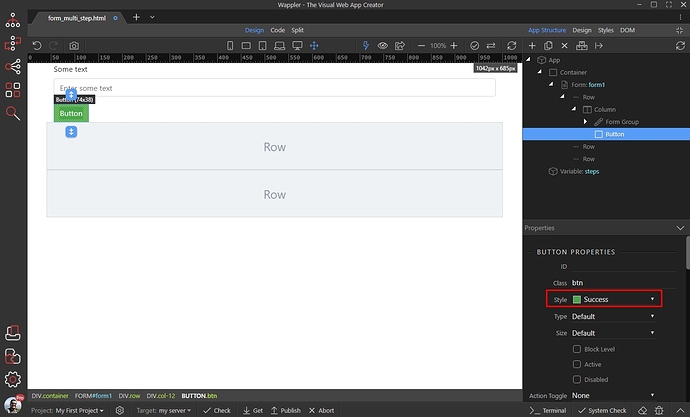
Select a button style, and leave its type to Default:
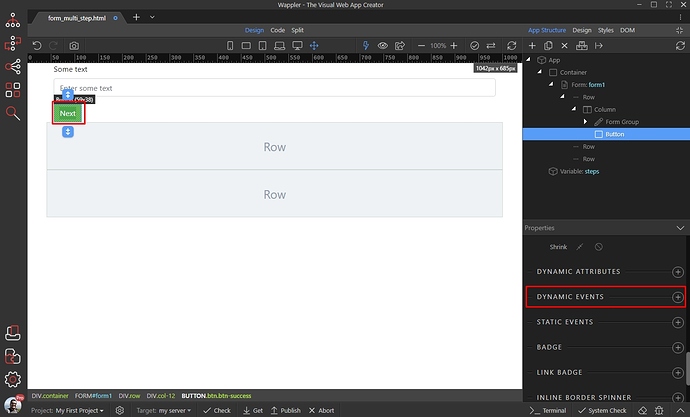
Double click to edit the button text - we added Next. Then with the button still selected, add new dynamic event:
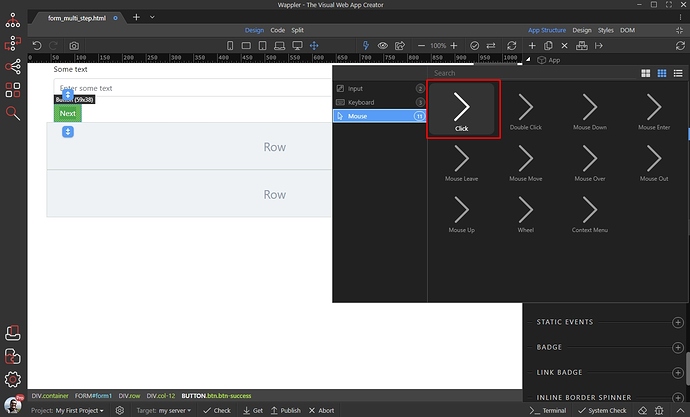
Select Mouse > Click:
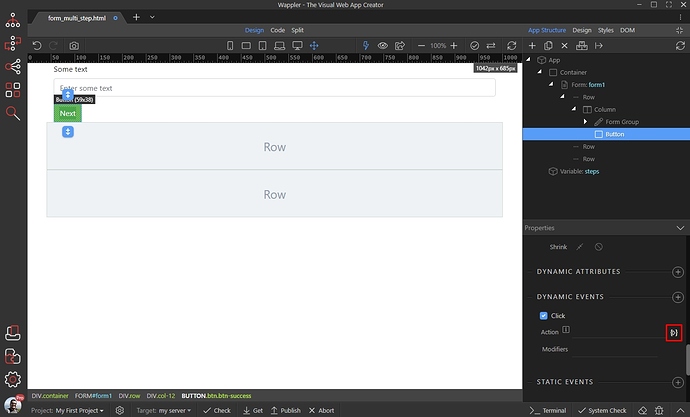
And click the dynamic action picker:
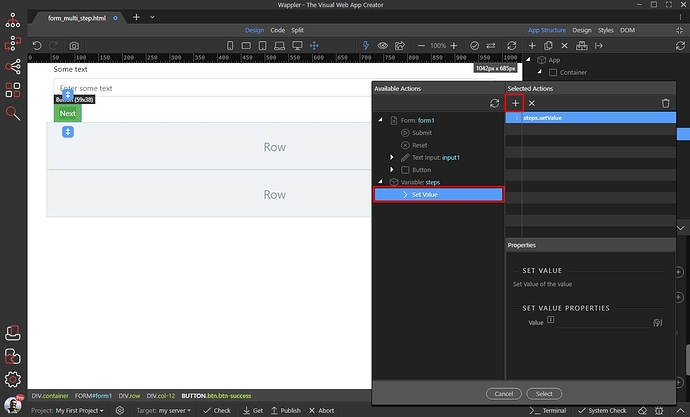
Select the Set Value action, under the steps variable in the data picker, and add it:
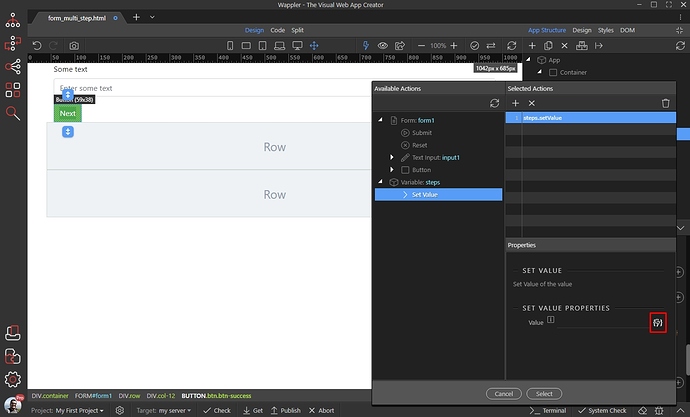
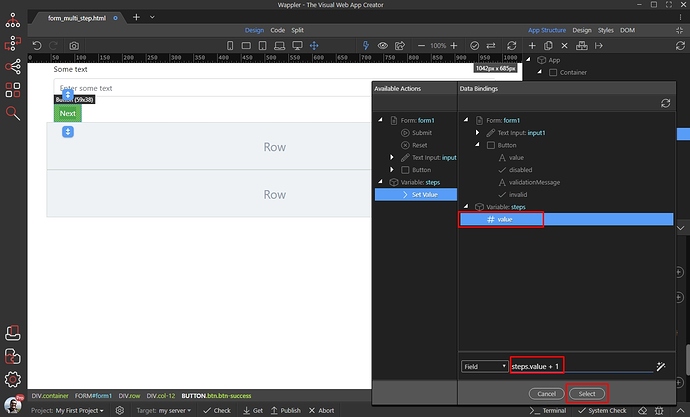
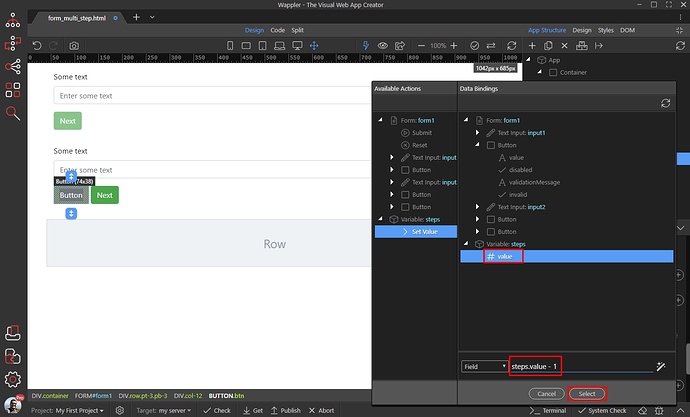
Select the dynamic data picker for the value:
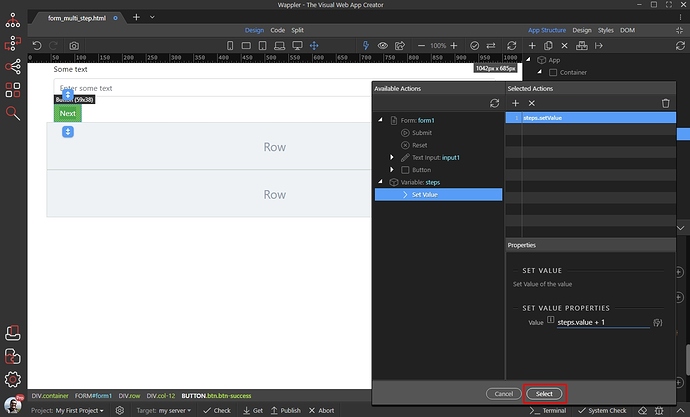
In order to go to the next step, we need to add +1 to the existing variable value. So, select the variable value and add +1 to it:
Click the Select button to apply the dynamic event to the next button:
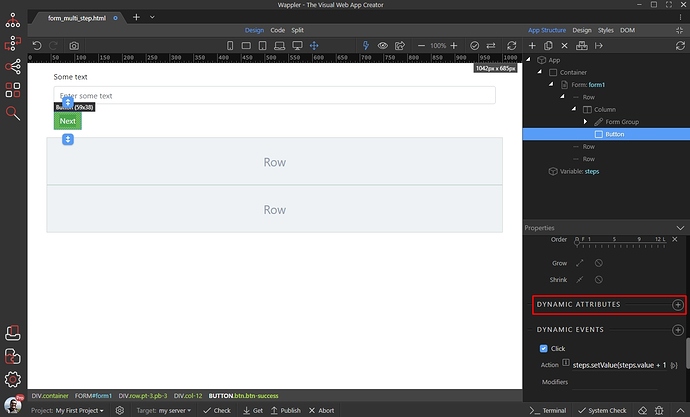
You can disable the next button, if the input is empty. Add new dynamic attribute:
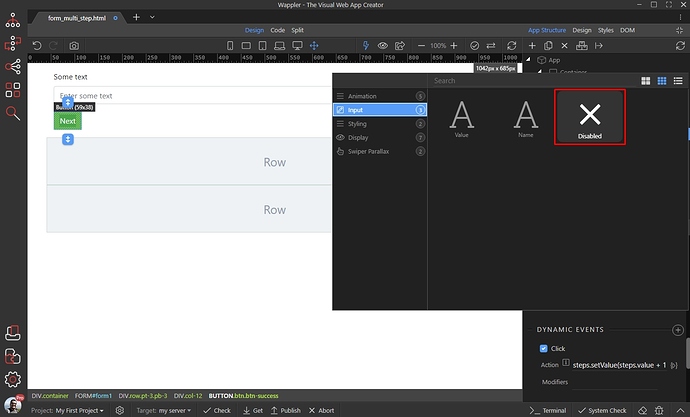
Select Input > Disabled:
Then select when the Button should be disabled.
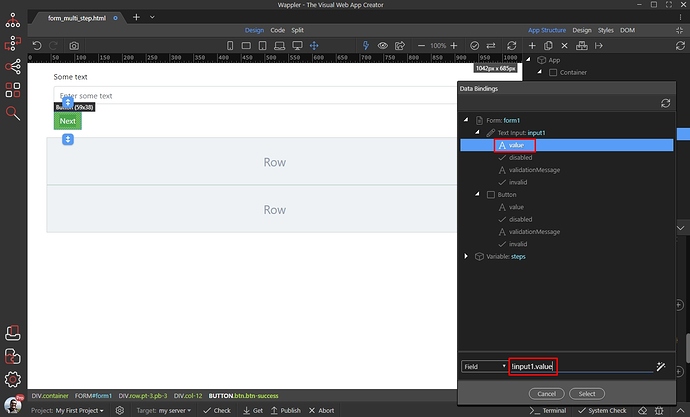
We want it to be disabled, when the text input has no value, so in the dynamic data picker, we select the input value and add a ! in front of it. The expression looks like: !input1.value:
Do the same for all the steps, which require a Next Step button.
NOTE: this example is only showing one input per step. If there are more inputs in your steps and you want to check all of them, you will need to adjust your expression accordingly. A step with 3 inputs will use an expression like: !input1.value && !input2.value && !input3.value to disable the next button.
Add the Previous Step Buttons:
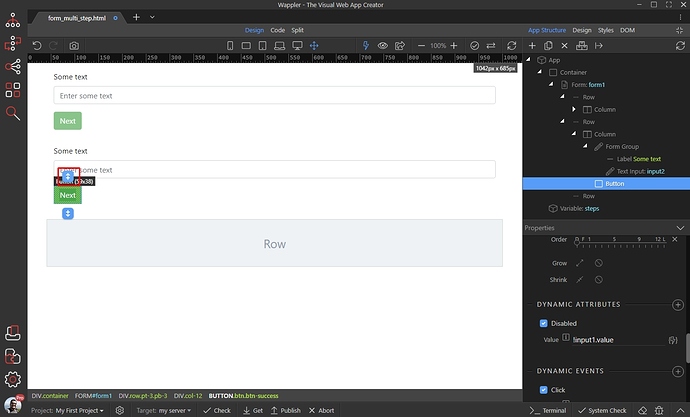
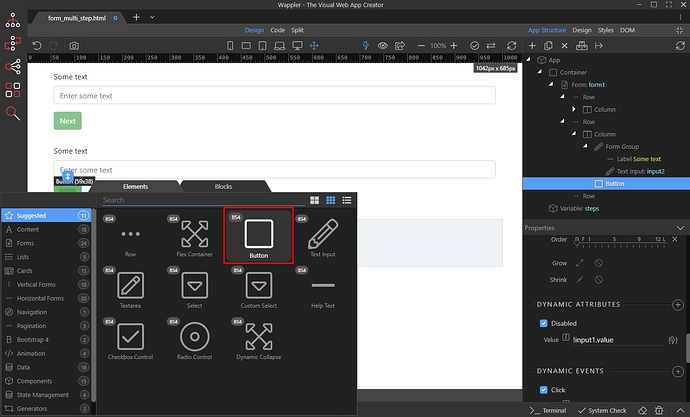
In all the steps, except for the first one we will need a Previous Step button. Assuming that you have followed the steps above and added your steps, with inputs and Next buttons - now select the Next button in the second step. Then click the Add Before icon:
And add a Button:
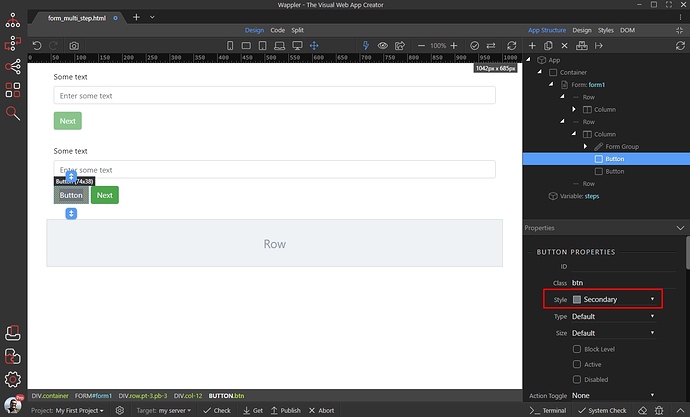
This will be our Previous Step button. We style it differently, and leave its Type to Default:
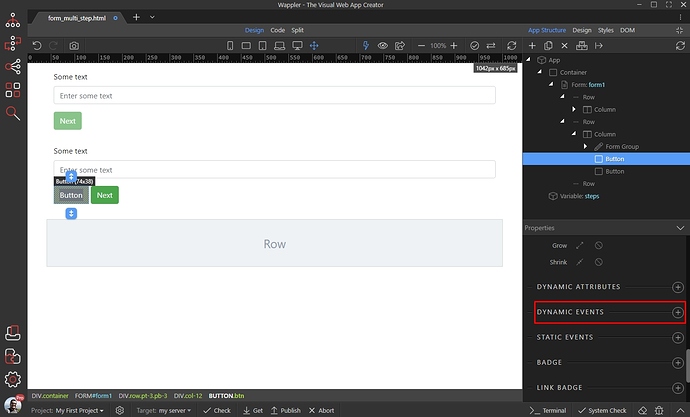
With the Previous Step button still selected, add new dynamic event:
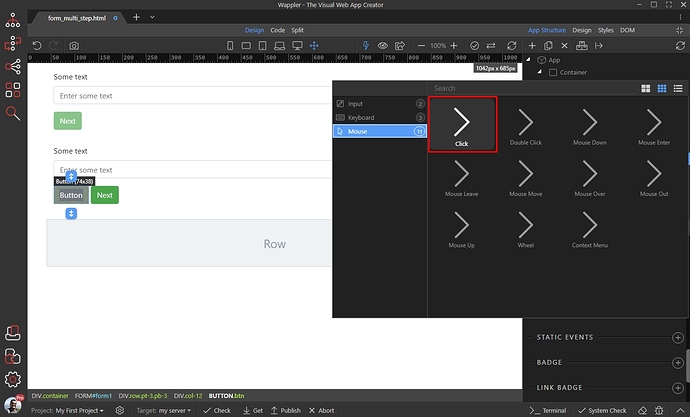
Select Mouse > Click:
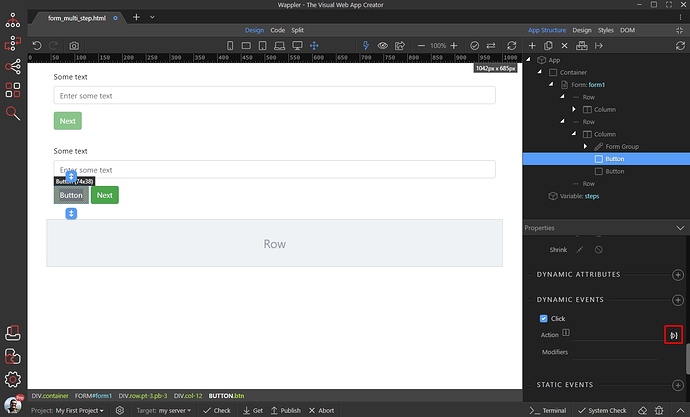
And click the dynamic action picker:
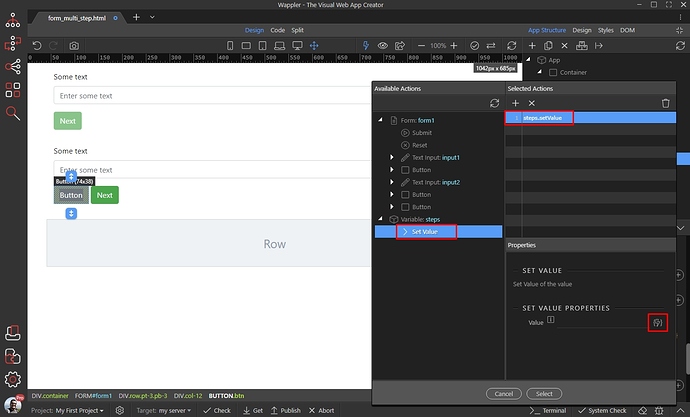
Select Set Value under the steps variable in the data picker and add it:
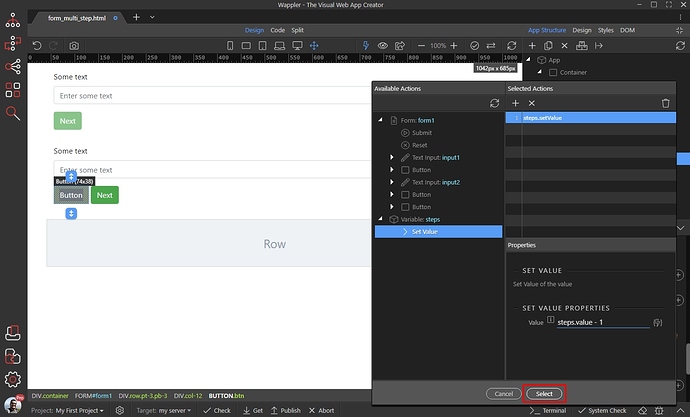
In order to go to the previous step, we need to subtract 1 from the variable value. So we select the variable value and add -1 to it:
Click select to apply the dynamic event to the Previous Step button:
Do the same for the rest of the steps, which need a Previous Step button.
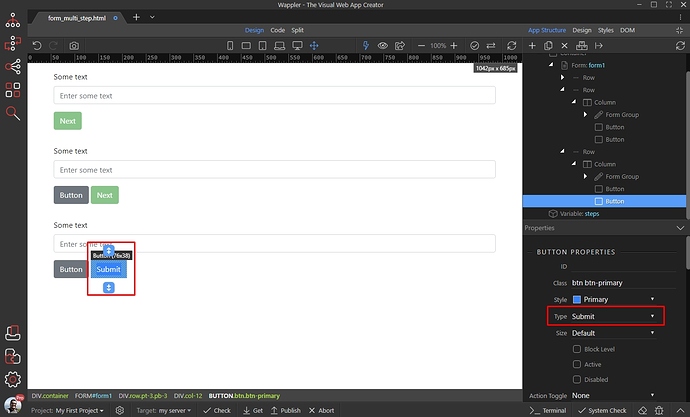
In the last row (step) we add the submit button, which will be used to submit the form:
Converting Form Sections to Steps
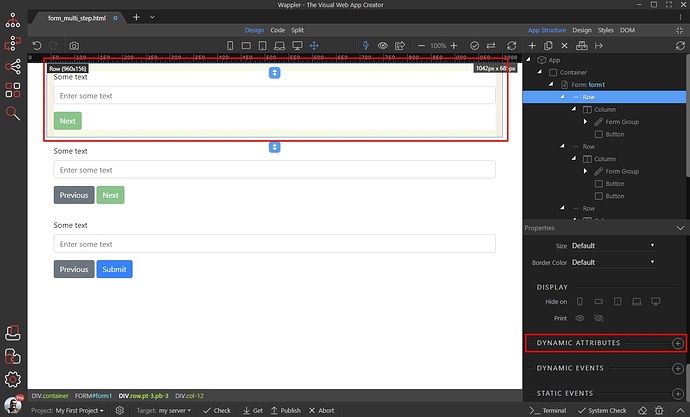
In order to turn a row into a separate step we need to use the dynamic attributes. Select the first row and add new dynamic attribute:
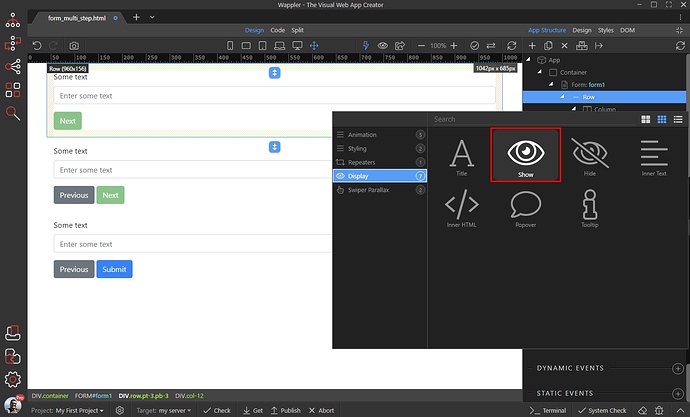
Select Display > Show:
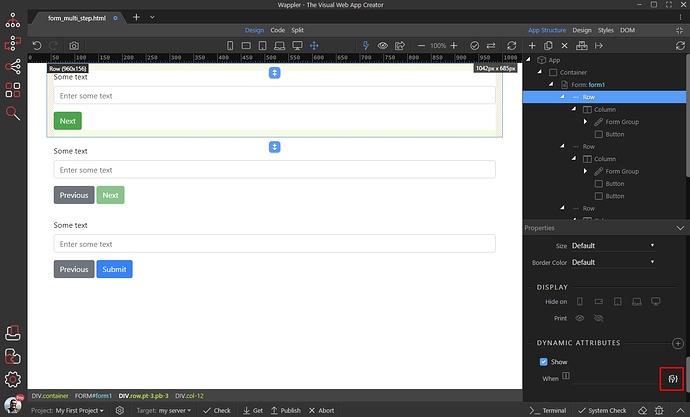
Click the dynamic data picker icon in order to setup when should this step be displayed:
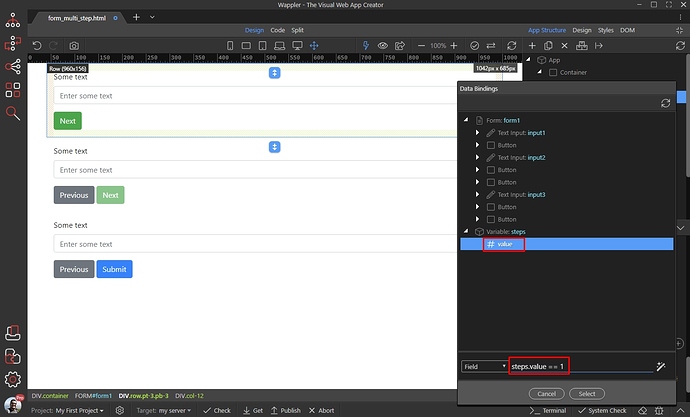
We need to show the first step, when the variable value is equal to 1. Select the variable value and add == 1 after it:
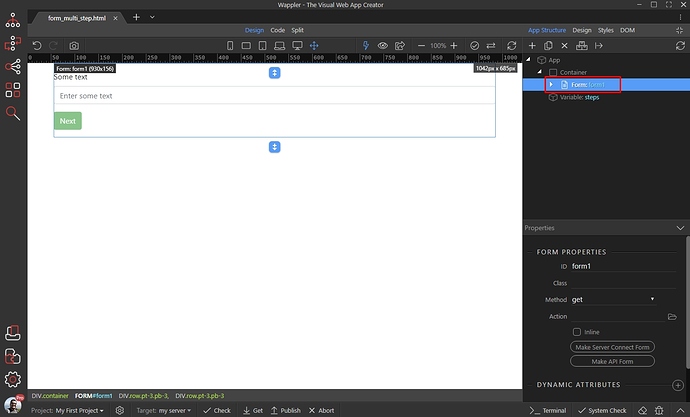
Now our first section will be displayed, when the value equals 1. Do the same for all of your rows (steps) adding the appropriate condition there (== 2 for the second step, == 3 for the third … etc.)
Add Steps Status
You can add text showing the current step below your form. Select the Form and then add new component:
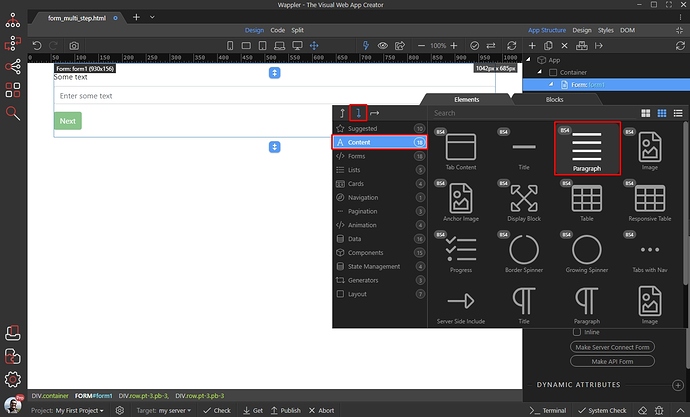
Select Insert After and open the Content menu, then add Paragraph:
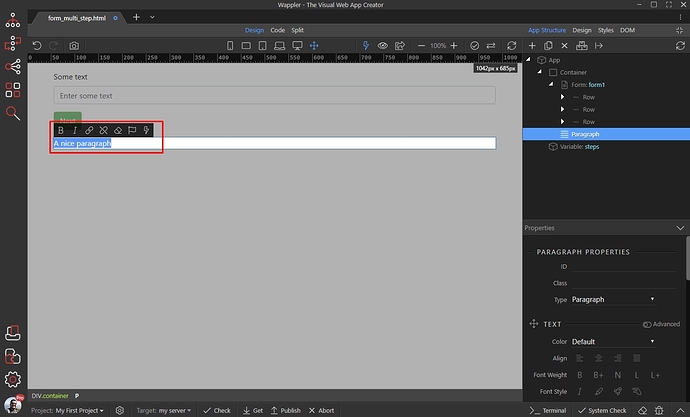
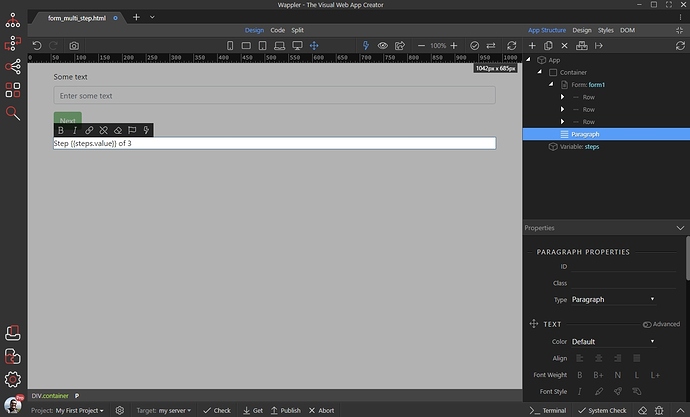
Double click the paragraph in design view, to edit its content:
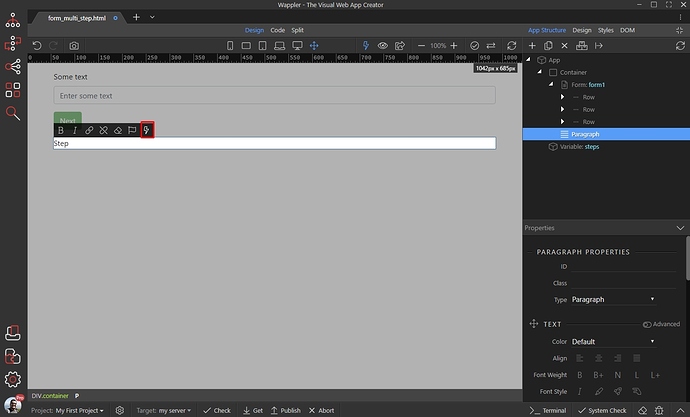
We enter Step and select the dynamic data picker icon:
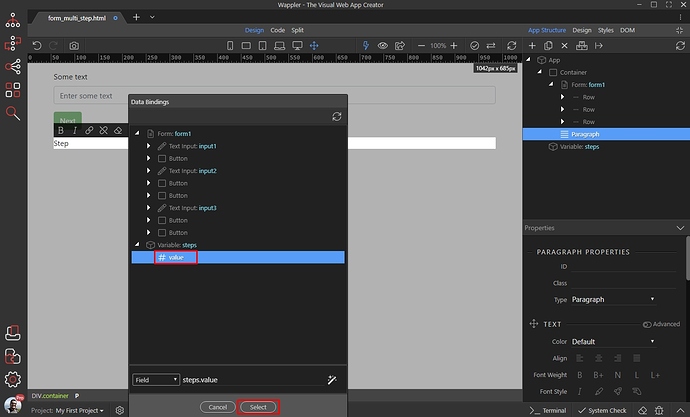
We select the variable value here:
And then we enter the rest of the text:
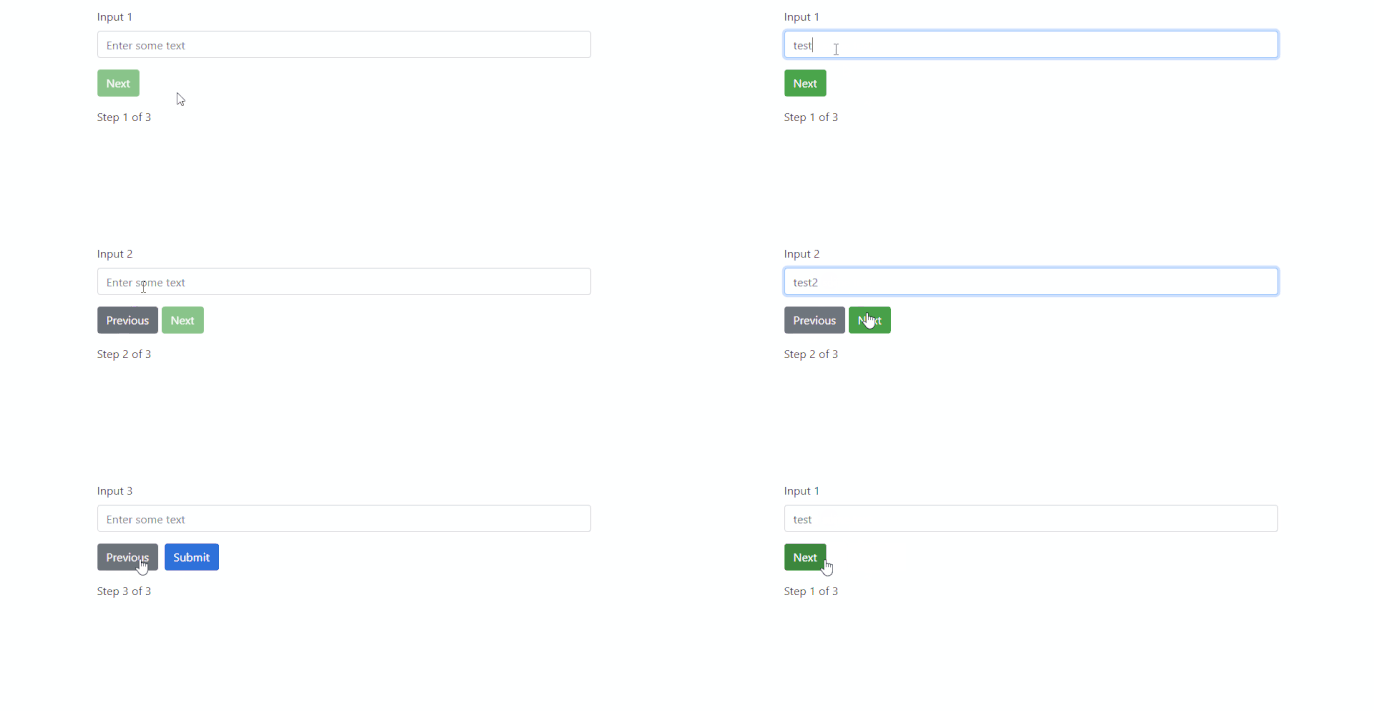
The status will display Page 1 of 3 when we are on the first step.
This is the final result:
You can extend the form as per your needs. You can add as many steps as you wish and also add as many inputs as you need inside the steps.
