Stripe Integration Part 4b - The Basic Payment Action - Server Connect Page
Introduction We have covered the creation of the APP connect based payment page and this tutorial follows on from that to deal with the server connect and API p
Introduction
Section titled “Introduction”We have covered the creation of the APP connect based payment page and this tutorial follows on from that to deal with the server connect and API parts of the process
Before we start, i have made some amendments to the part 4a code relating to the hidden fields
Former App Connect Page Amendments
Section titled “Former App Connect Page Amendments”The hidden field “ProductID” has now been changed to lower case “productid” and i have added another field, quantity so we now have:
      <input type="hidden" name="productid" class="form-control mb-3 StripeElement StripeElement--empty"  value="1">
      <input type="hidden" name="quantity" class="form-control mb-3 StripeElement StripeElement--empty"  value="1">
The Product Order Detail
Section titled “The Product Order Detail”In this case we are selling a quantity of 1 Type 1 Widget (product Id = 1)
This should be priced at 250 currency units, in my case UK pence so total £2.50 ( i have priced the product table in pence, not pounds)

The Server Action
Section titled “The Server Action”So create your sever action, i have called it send_charge.
POST Variables
Section titled “POST Variables”Add your post variables. stripeToken must match this case, productid and quantity must match those in your app connect form in name and case.
Server Action Overview
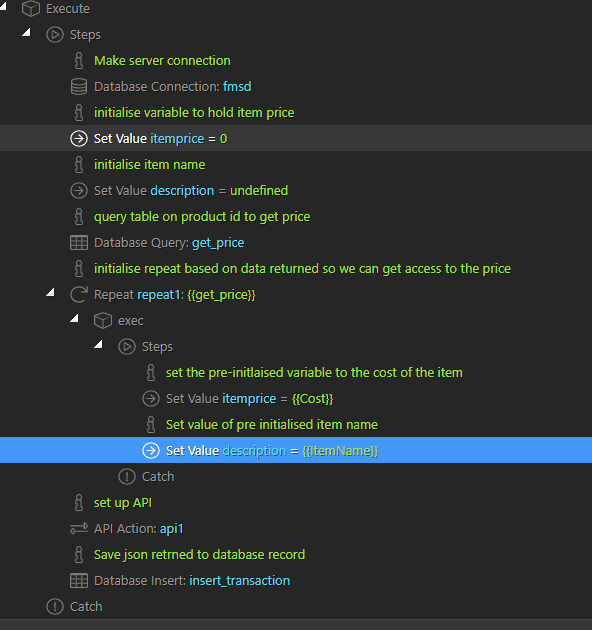
Section titled “Server Action Overview”Now we set up the server action
Initializing The Variables
Section titled “Initializing The Variables”Firstly we make a server connection, this is well documented and i won’t say more
Next we go to Core Actions =>Set Value and declare a variable. It’s value is not important as this is overwritten later. This is initialised purely as it will not be available in the data picker unless initialised outside the repeat
We do the same for the product description which we will also obtain from a data query later
Retrieving the Price and Description via a data query
Section titled “Retrieving the Price and Description via a data query”Next we query our products table using the product id posted to the action and return the price (in the cost column of the table)
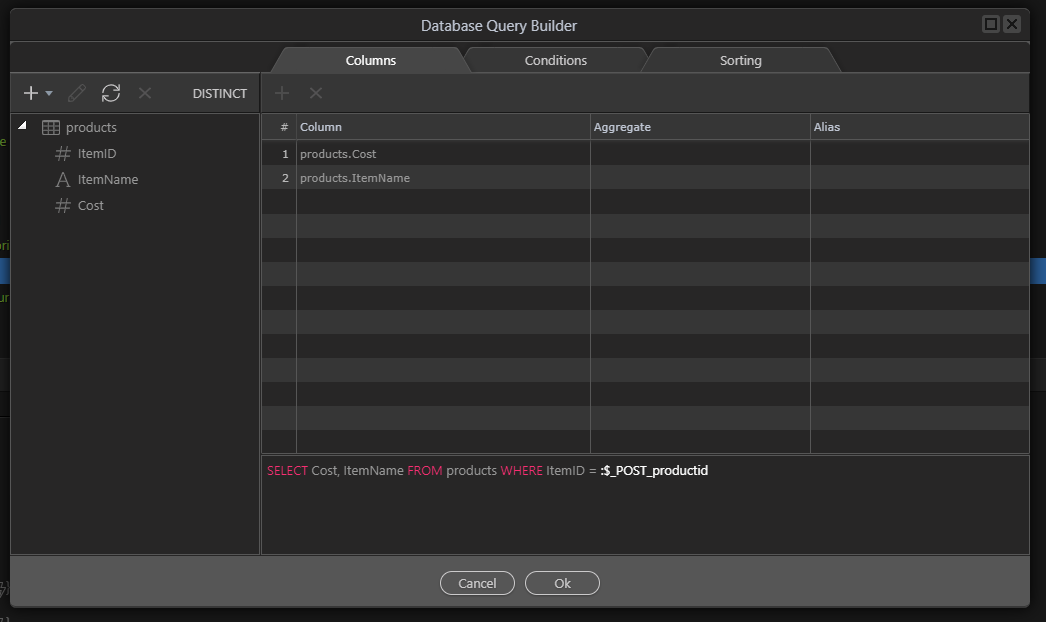

Extracting Price and Description from the data query
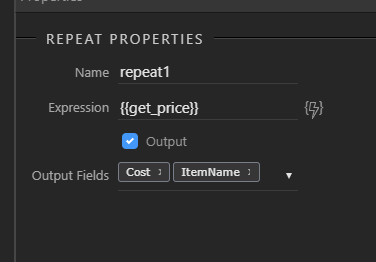
Section titled “Extracting Price and Description from the data query”We now set up a repeat based on that query i have called get_price
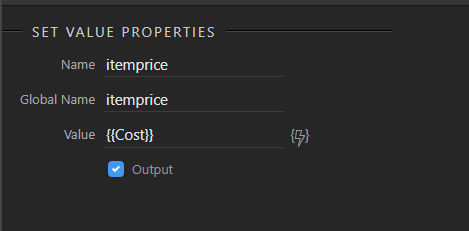
Setting the Price and Description variables
Section titled “Setting the Price and Description variables”Next form within that repeat we redefine the variables itemprice and description to the values returned by the query from the products table.
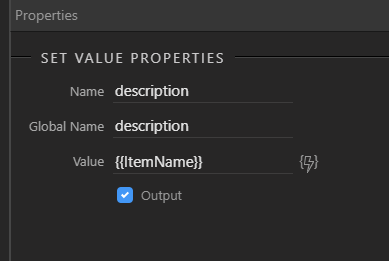
Now we have retrieved the price and description so we can send the payment to Stripe
The API Call
Section titled “The API Call”Add an API Action stage
Our Action will be as below
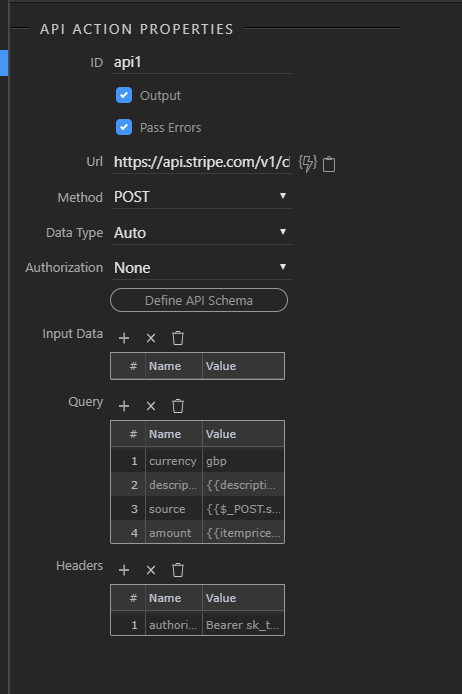
Pass Errors Option
Section titled “Pass Errors Option”Keep “Pass Errors” checked until fully debugged so errors are echoed to the console
The API Call URL and Type
Section titled “The API Call URL and Type”Our API Url is: https://api.stripe.com/v1/charges and Method is POST
The API Header
Section titled “The API Header”In the headers Section add the authorisation string i.e. the word Bearer followed by your secret key as outlined in Parts 1 and 2
The API Query
Section titled “The API Query”In the Query section we add the following:
Currency
Section titled “Currency”currency: in my case gbp
Description
Section titled “Description”Description: This is the value of out variable {{description}}
Source
Section titled “Source”source is our stripeToken {{$_POST.stripeToken}} (which is automatically created at app connect level by the stripe javascript)
Amount
Section titled “Amount”amount is our variable {{itemprice}}
The returned Object for Stripe
Section titled “The returned Object for Stripe”Once posted Stripe returns the object for the newly charged item, the makeup can be viewed via this link
Storing the Results in a Database Table
Section titled “Storing the Results in a Database Table”This can then be stored in a database table using an insert action
What needs to be stored
Section titled “What needs to be stored”As most data can be retrieved via the API (see later) it is not actually necessary to store much more than the transaction ID however in this demo I have stored the entire returned object to illustrate how it works (63 columns)
The API Data Types
Section titled “The API Data Types”The API returns 4 data types
Numeric and string can be stored as is
Boolean can be stored using the expression {{fieldname?1:0}
Stripe also returns arrays for items like metadata (we will discuss this later) At this stage I suggest you ignore these until you understand their function as empty arrays are returned which can cause errors when storing.
###The Data Insert Query
A sample screen for this action is below:

Sample Table in Zipped .sql Format
Section titled “Sample Table in Zipped .sql Format”An empty copy of this table in zipped .sql is attached. stripe_payment.zip (963 Bytes)
Ensure your app connect form has the correct server action set to point to this new server action
The Data Table Contents after the Transaction
Section titled “The Data Table Contents after the Transaction”The data is then stored in the database table (see sample below)
Checking your Stripe Account for Confirmation of the Transaction
Section titled “Checking your Stripe Account for Confirmation of the Transaction”Check your stripe account and you will see the transaction listed in your Dashboard
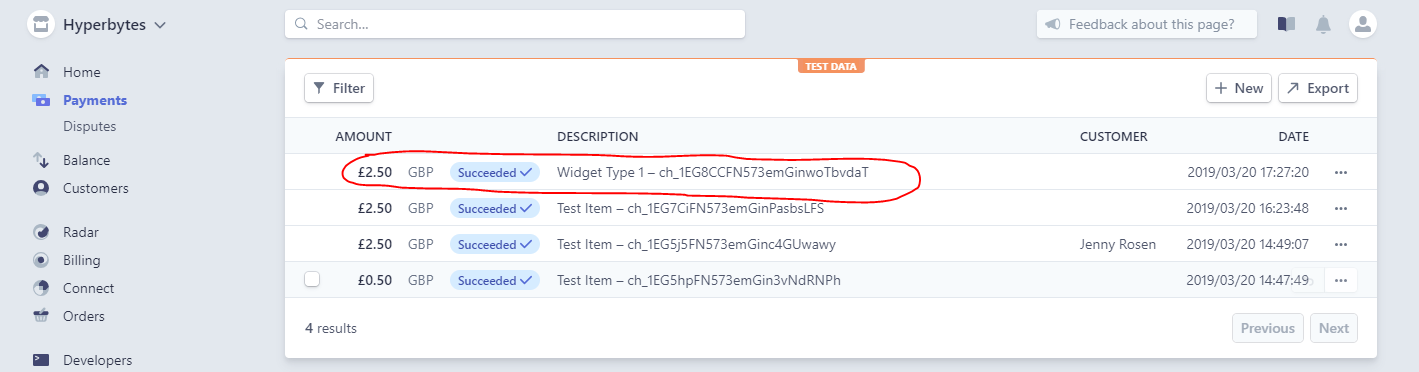
Next we will look at adding shipping details